
I spent months hunting for UV tattoo ideas because I wanted something that reads subtle in daylight but reveals a secret glow under blacklight. I learned the hard way that placement, ink choice, and artist experience make the difference between a crisp hidden design and a blurred regret. These 28 UV tattoo ideas focus on designs that actually heal well and keep their secret glow.
This list focuses on UV tattoos—delicate, hidden-glow accents layered into fine line, neo-traditional, and blackwork styles. These ideas work best on arms, ribs, shoulders, and places you can hide or reveal. From what I've seen, UV tattoos trend toward subtlety in 2026: micro details, constellations, and invisible accents that complement existing pieces.
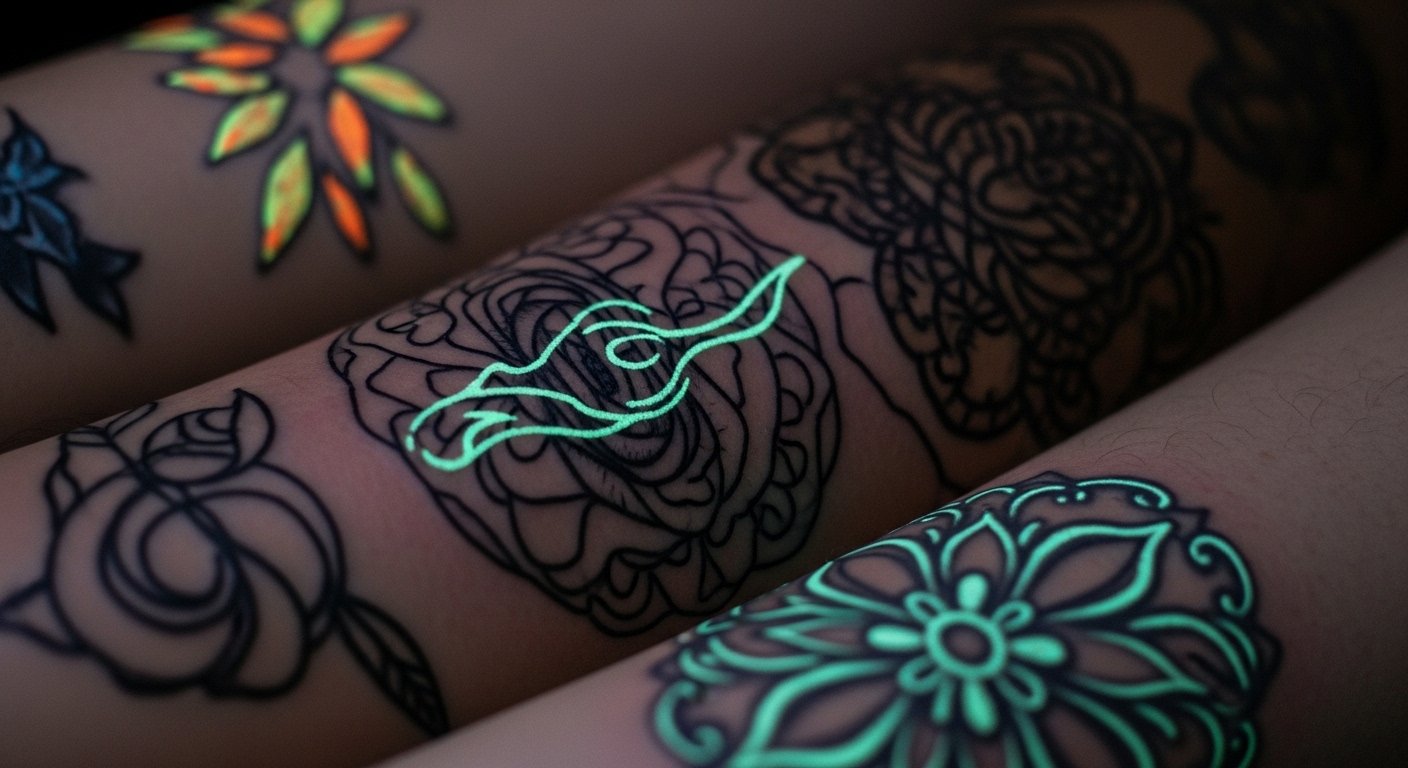
1. Fine Line Floral Accent on Inner Forearm
Style/Technique: Fine Line / UV accent
Pain Level: Medium (3-4/10)
Session Time: 1-2 hours
Best For: First-time UV, visible yet easy to hide
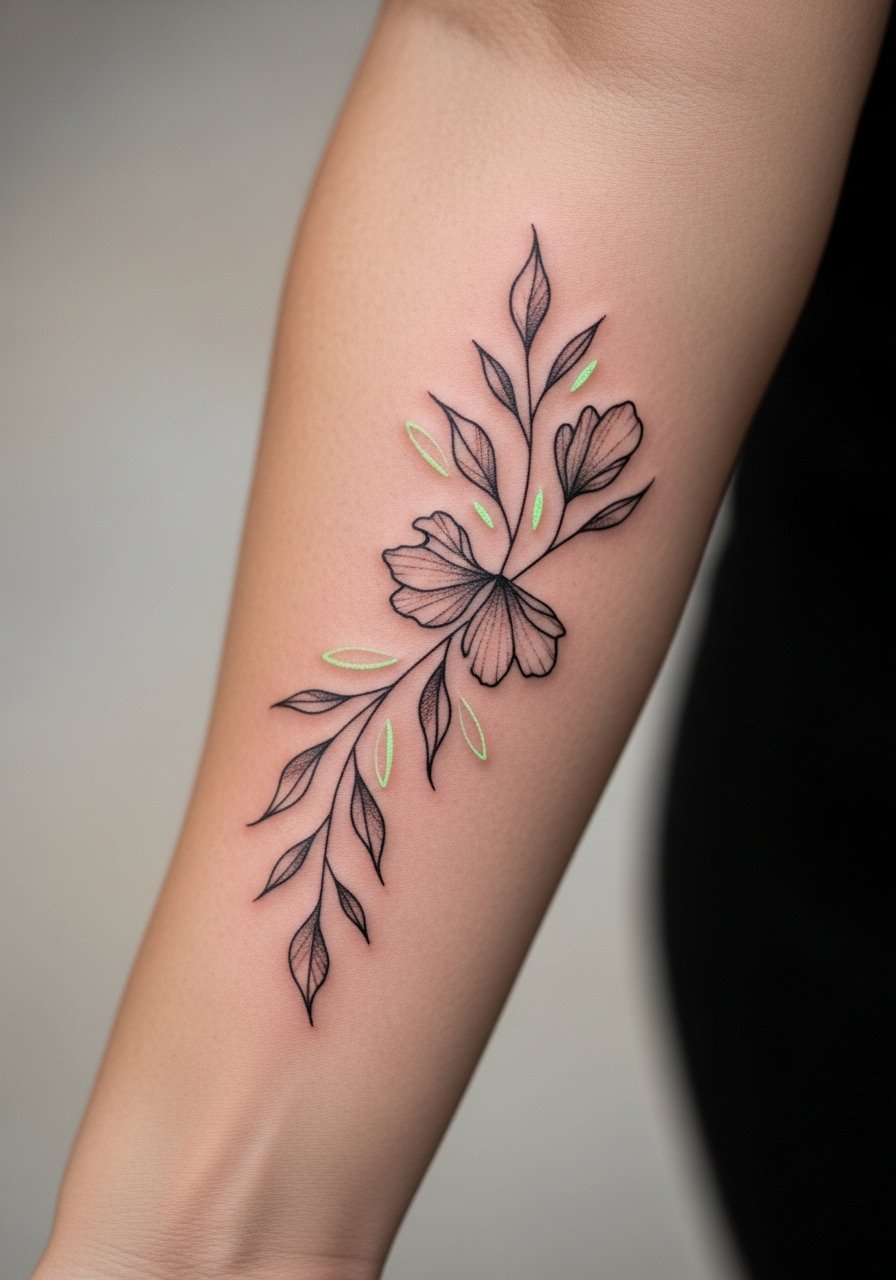
I chose this after seeing artists add UV petals inside a black outline rose. The result is delicate by day and playful under blacklight. Inner forearm pain is moderate—comfortable for most. Healing is straightforward: keep moisturized, avoid heavy friction. UV pigments can fade faster than standard blacks, so ask for saturated application and gentle touch-ups later. A common mistake is overloading UV color where thin lines need subtlety—ask for a test dot and bring examples of healed UV work.
2. Hidden Glow Constellation Behind Ear
Style/Technique: Minimalist / Micro-dots
Pain Level: Low (2/10)
Session Time: 30–60 minutes
Best For: Discreet, meaningful piece
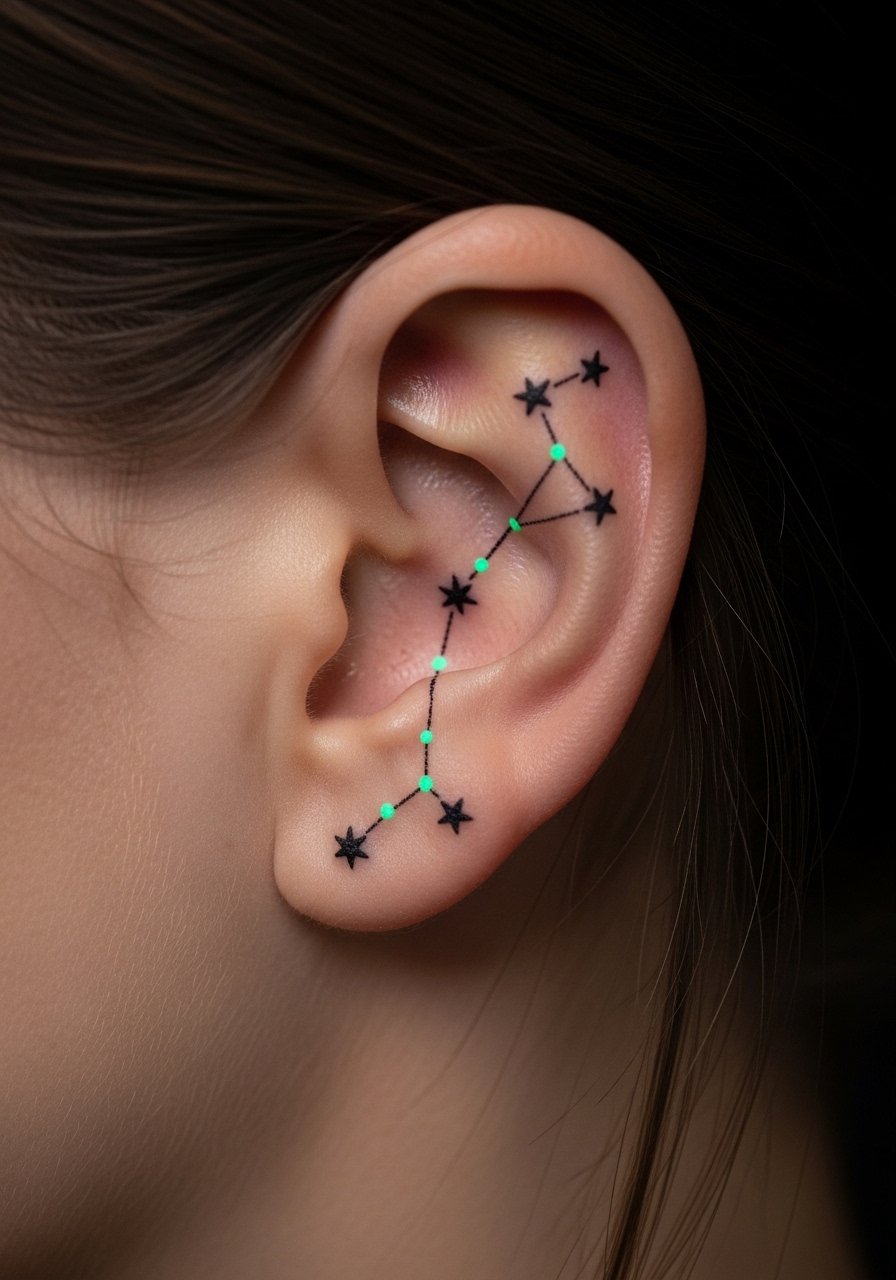
A behind-ear constellation is almost invisible in daylight and magical under a blacklight. Pain is low because the area is small, but expect some sensitivity. Micro-dot work needs an experienced hand—fine line artists who do micro realism are ideal. UV dots age differently; tiny UV points can blur, so slightly enlarging each dot helps longevity. Avoid too-fine UV lines; they often disappear after healing.
3. Neo-Traditional Skull With UV Highlights on Upper Arm
Style/Technique: Neo-Traditional / Color Pop
Pain Level: Low-Medium (3/10)
Session Time: 2-4 hours
Best For: Statement piece with hidden details
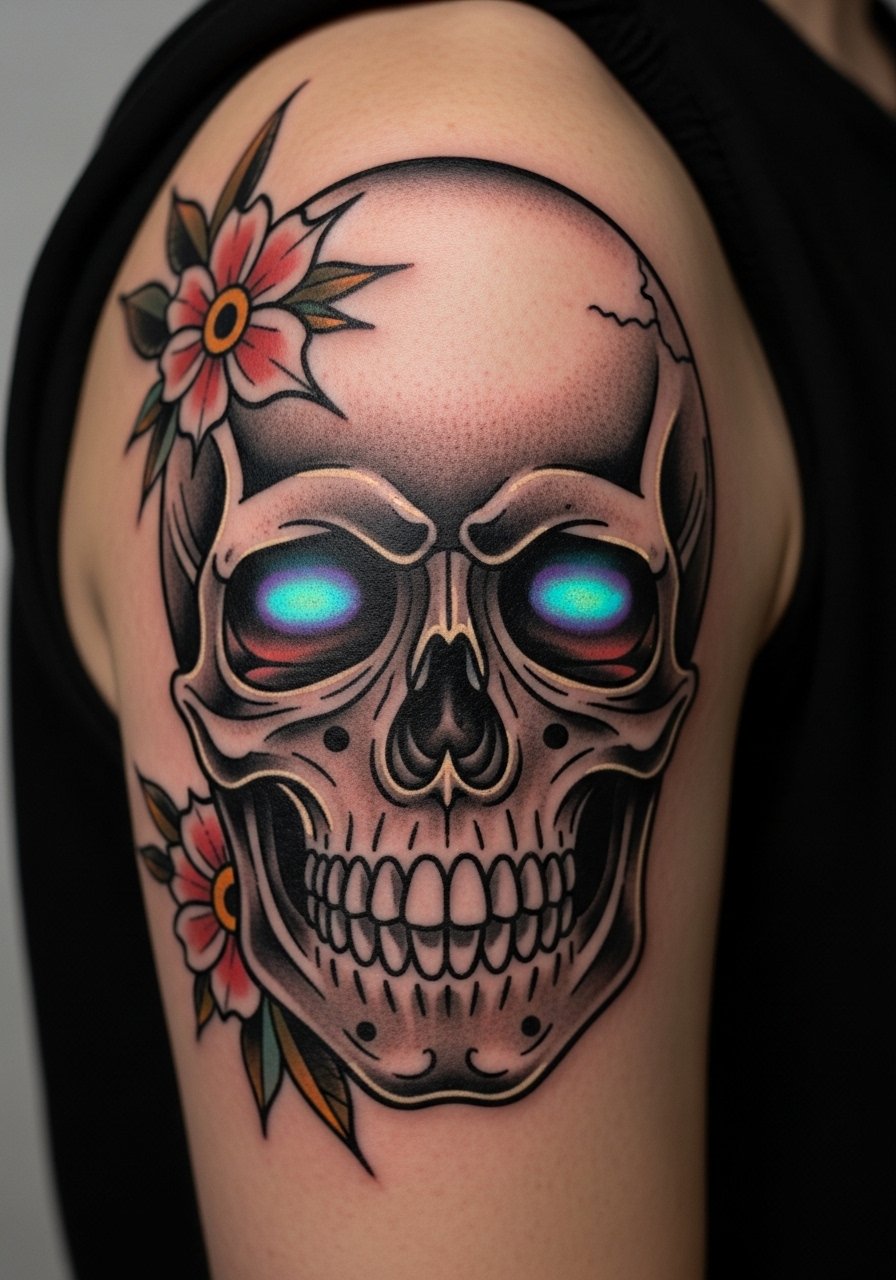
This combines classic bold lines with secret UV highlights in the eye sockets and flowers. Upper arm pain is manageable and heals quickly. UV ink adds depth to neo-traditional shading without overwhelming the design. Artists who work in color realism and understand layer saturation are best. Avoid asking for tiny UV accents in high-motion spots—the ink can migrate and blur.
4. Micro-Realism Pet Portrait With UV Collar on Thigh
Style/Technique: Micro-Realism / UV Accent
Pain Level: Medium (4/10)
Session Time: 3-6 hours
Best For: Statement + sentimental piece

Adding a UV collar or name to a realistic pet portrait keeps the tribute subtle but personal. Thigh placements handle large sessions well with moderate pain. UV lines used sparingly around the portrait preserve realism and reveal a secret when wanted. Artists who photograph their healed micro-realism work are worth consulting. The common mistake is over-UVing the face—keep it in accessories.
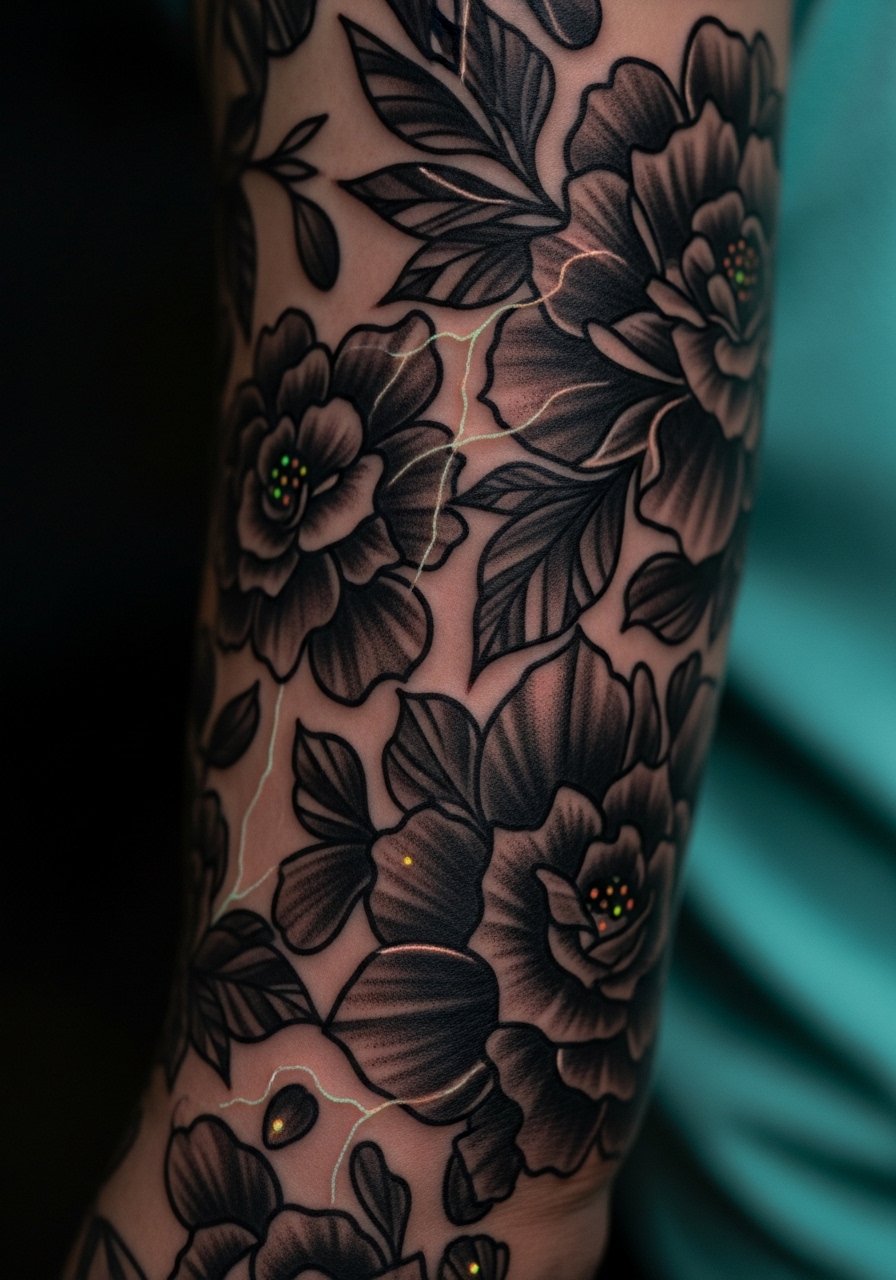
5. Blackwork Geometric Band With UV Inlay on Forearm
Style/Technique: Blackwork / Geometric + UV
Pain Level: Medium (4/10)
Session Time: 2-4 hours
Best For: Bold but hideable design
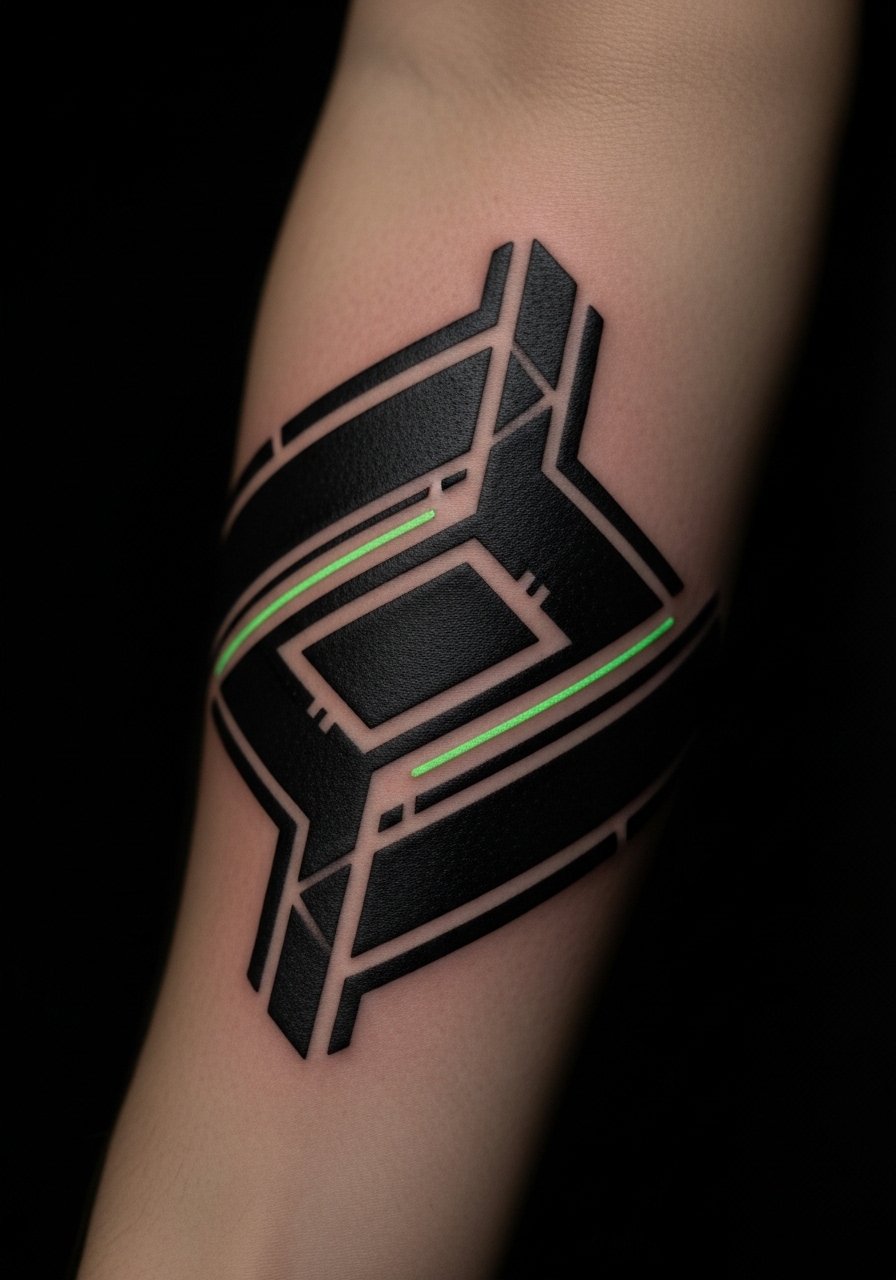
A solid black band with a UV inlay creates contrast—plain by day, intricate by night. Forearm placement balances visibility and concealment. Blackwork holds up exceptionally well; UV inlays should be bold enough not to disappear after healing. Ask the artist for healed photos of similar UV inlays. Avoid razor-thin UV lines inside heavy black—ink settling can hide them.
6. UV Freckles Across Nose Bridge
Style/Technique: Minimalist / Freckle Dots
Pain Level: Low (2-3/10)
Session Time: 30–60 minutes
Best For: Subtle, skin-like effect
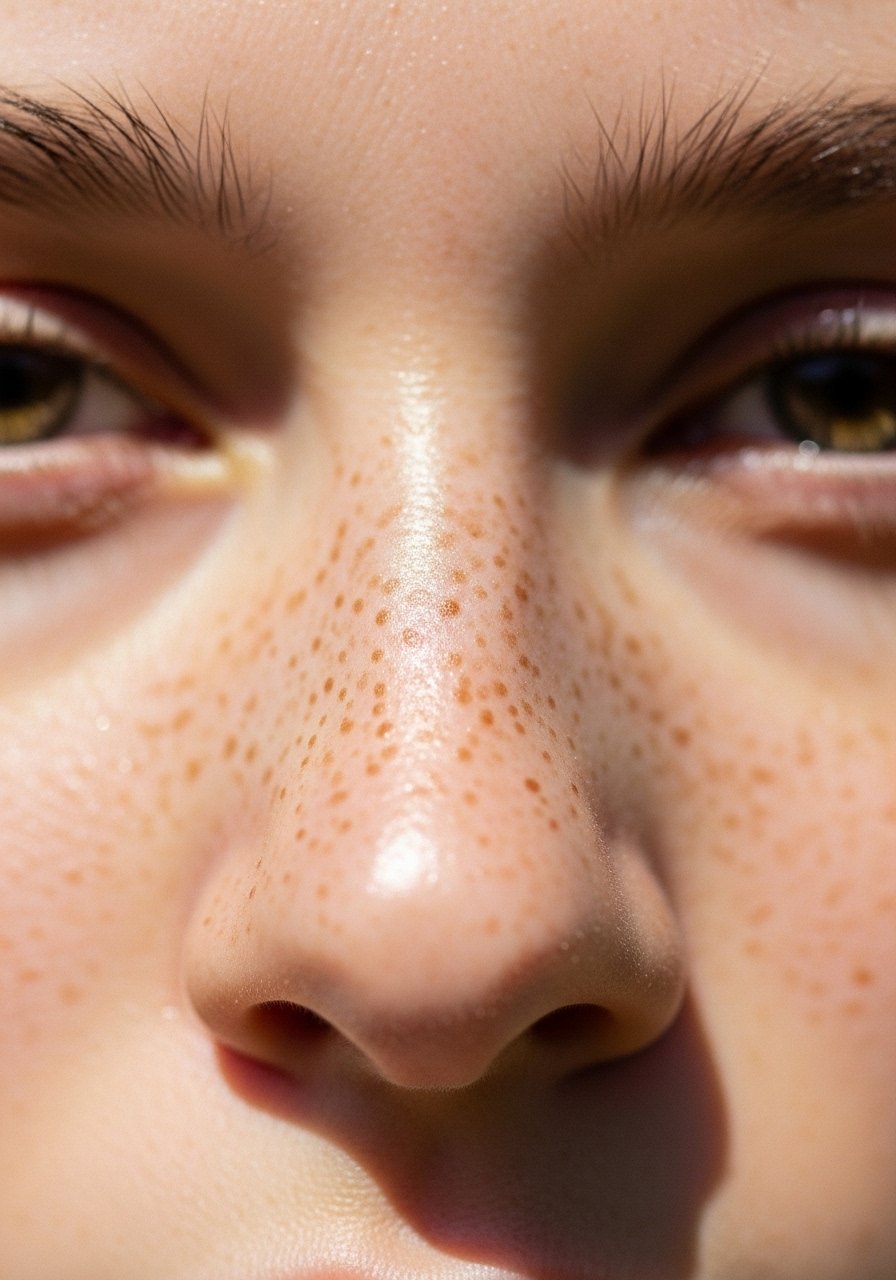
UV freckles give a playful, almost natural effect that’s nearly invisible day-to-day. Facial placement hurts less than many expect but requires a steady hand. Healed freckles look soft if dots are slightly varied in size. Artists who do cosmetic micro tattoos or micro-dots are best. A common error is making dots identical—vary size and spacing for a believable result.
7. Hidden Script on Ribcage (UV Only Underlayer)
Style/Technique: Script / Invisible Underlayer
Pain Level: High (7/10)
Session Time: 1-3 hours
Best For: Intimate, highly personal messaging

Ribcage scripts can be painful but are private. UV underlayer script sits beneath a visible black phrase so the hidden line appears only under blacklight. Healing needs attention—avoid heavy movement and sleeping on the area. UV pigments on ribs can be patchy; choose an artist experienced with layering inks. Don’t place UV-only tiny letters; merge them with visible strokes for durability.
8. Floral Ankle Wrap With UV Veins
Style/Technique: Illustrative / Tiny UV Lines
Pain Level: Medium-High (5-6/10)
Session Time: 1-2 hours
Best For: Feminine, low-visibility piece
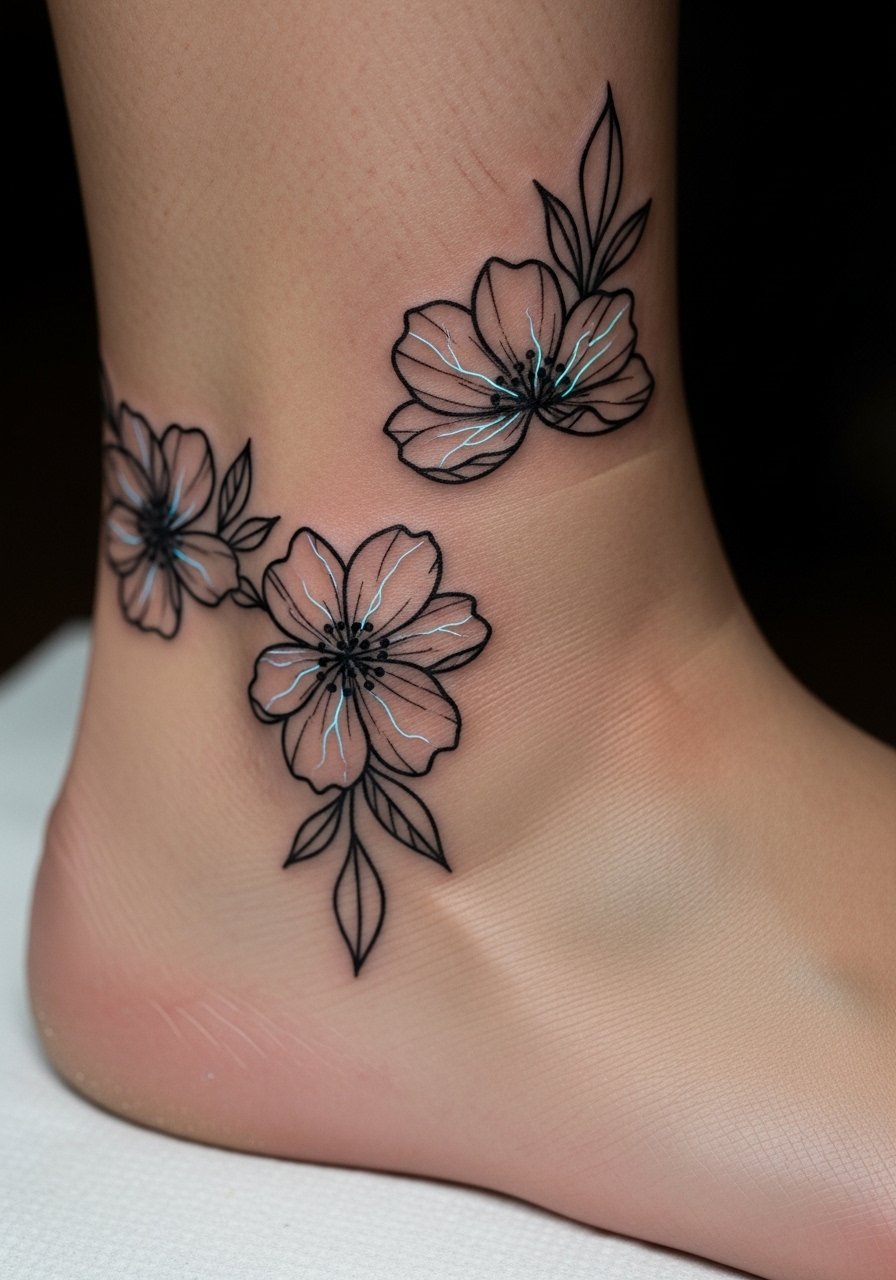
An ankle wrap looks elegant by day and shows hidden vein-like UV accents when revealed. Ankles can be pain-sensitive due to bone proximity. UV veins need slightly thicker lines than you might normally choose to survive healing. Keep footwear loose during healing and moisturize carefully. Ask for healed examples on ankles—UV can blur more here due to friction.
9. Mandala Sternum With UV Dotwork
Style/Technique: Dotwork / Mandala + UV
Pain Level: High (7/10)
Session Time: Multiple sessions
Best For: Centerpiece, controlled reveal
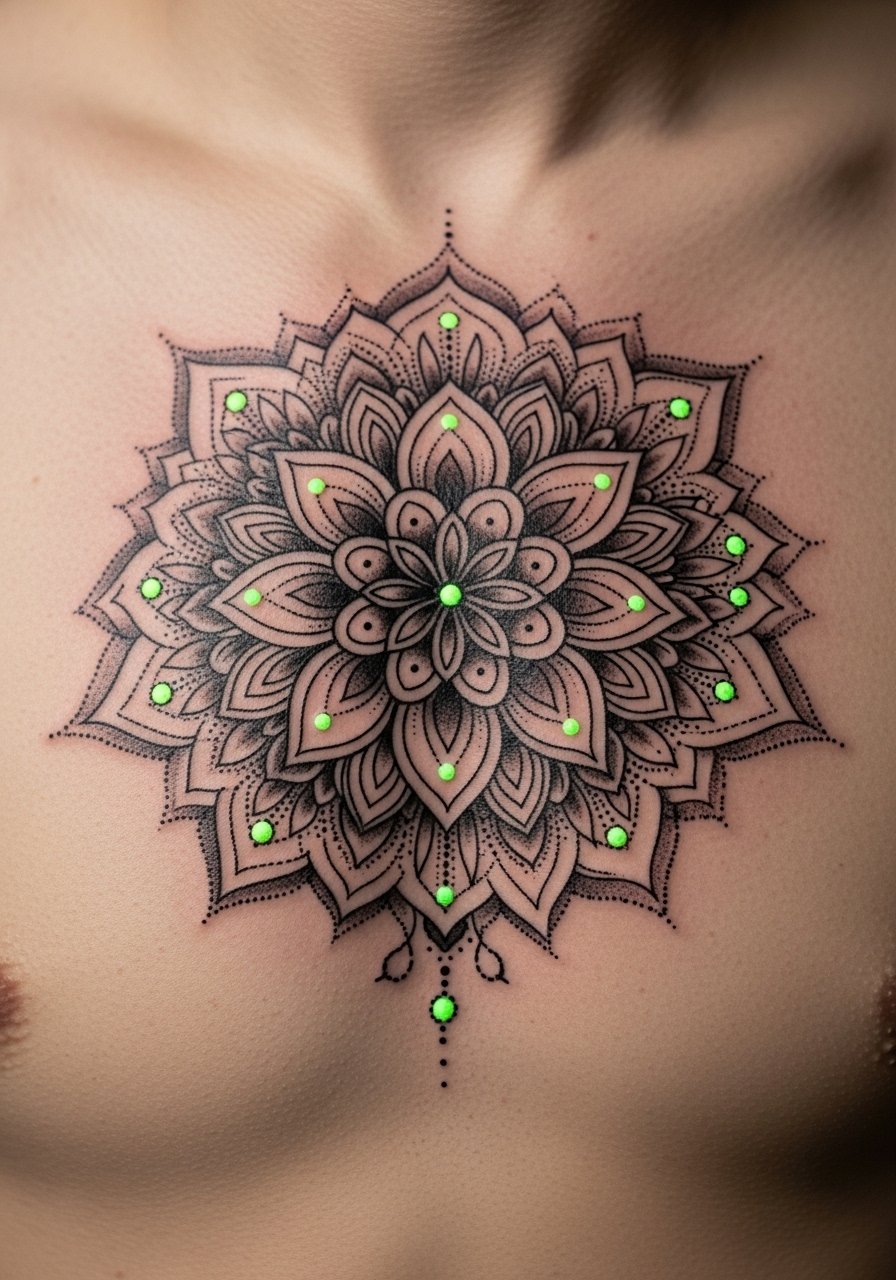
Sternum dotwork with UV accents creates a centerpiece that’s private but dramatic under blacklight. Chest skin is thin—expect higher pain and longer sessions. UV dotwork should be slightly bolder to remain crisp; discuss spacing and density with your artist. Avoid asking for ultra-small UV dots; they tend to fade into the surrounding skin.
10. Watercolor Sleeve Accents With UV Splashes
Style/Technique: Watercolor / Color Splash + UV
Pain Level: Medium-High (5/10)
Session Time: Multiple sessions, 3-6 hours each
Best For: Artistic, colorful statement
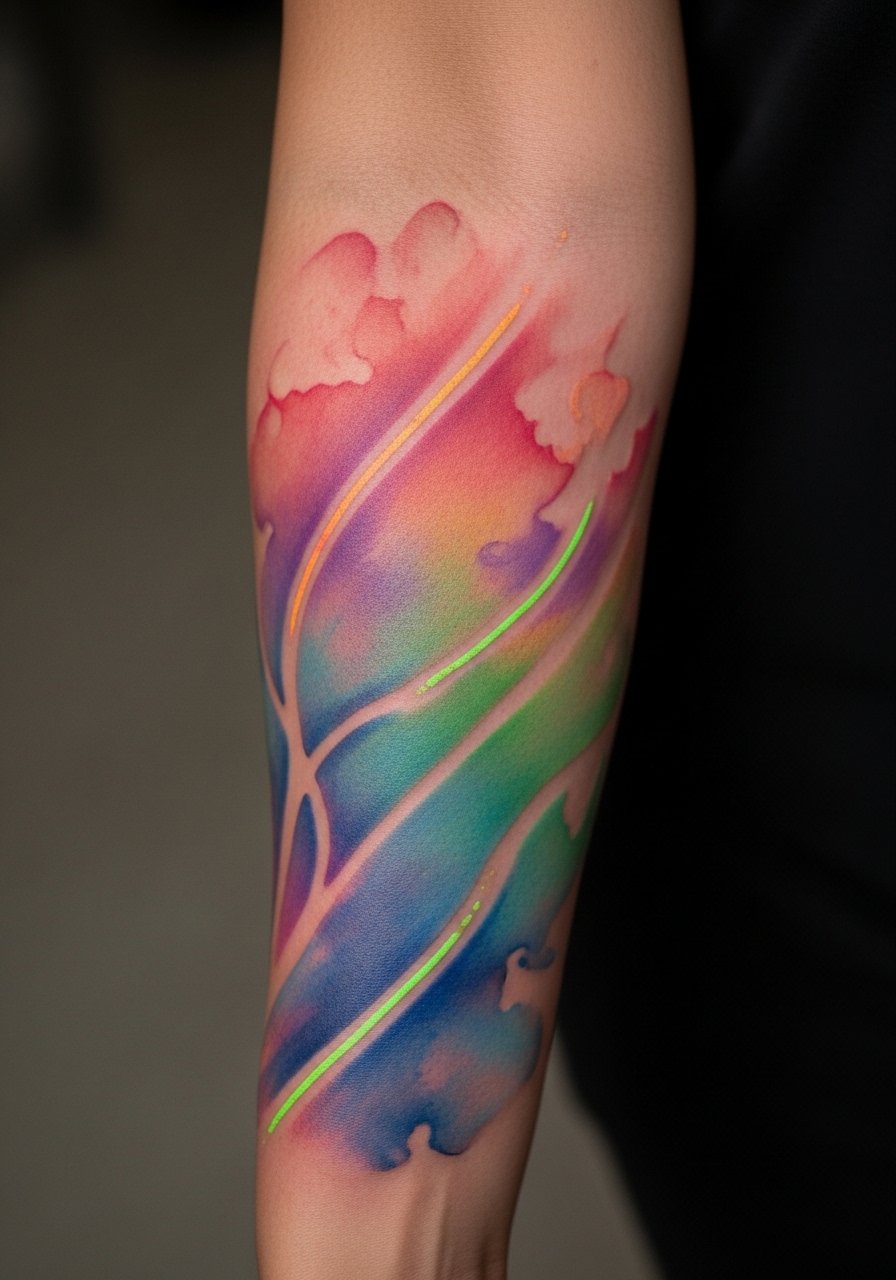
Watercolor sleeves benefit from UV splashes to add a hidden dimension. These look painterly by day and electric in UV. The challenge is stability—watercolor edges can blur, and UV pigments behave differently. Choose a color artist comfortable blending standard and UV inks. Common mistake: overusing UV across the whole sleeve—strategic placement reads better.
11. Micro-Script on Finger With UV Outline
Style/Technique: Minimalist / Micro Script + UV
Pain Level: Medium (5/10)
Session Time: 30–60 minutes
Best For: Tiny, meaningful text
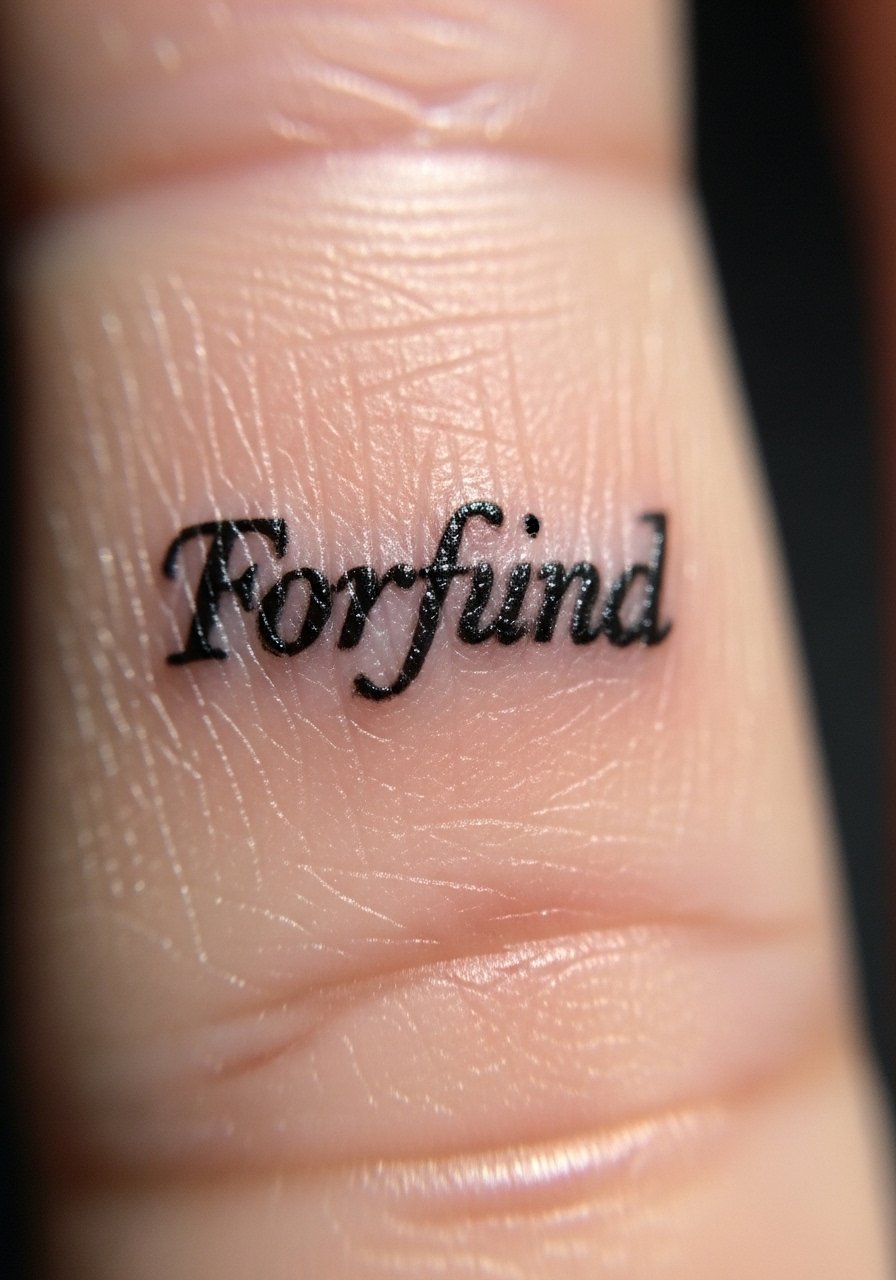
Finger tattoos are bold choices—UV outlines can make micro-script pop under blacklight without dominating daytime look. Fingers age fast; UV pigment here can fade quicker. Expect touch-ups. Artists who do fine finger work and understand fading patterns are essential. Avoid ultra-thin UV lines; slightly thicker outlines survive better.
12. UV Barcode On Back of Neck
Style/Technique: Minimalist / Linear UV
Pain Level: Low-Medium (3/10)
Session Time: 30–90 minutes
Best For: Modern, secret identifiers
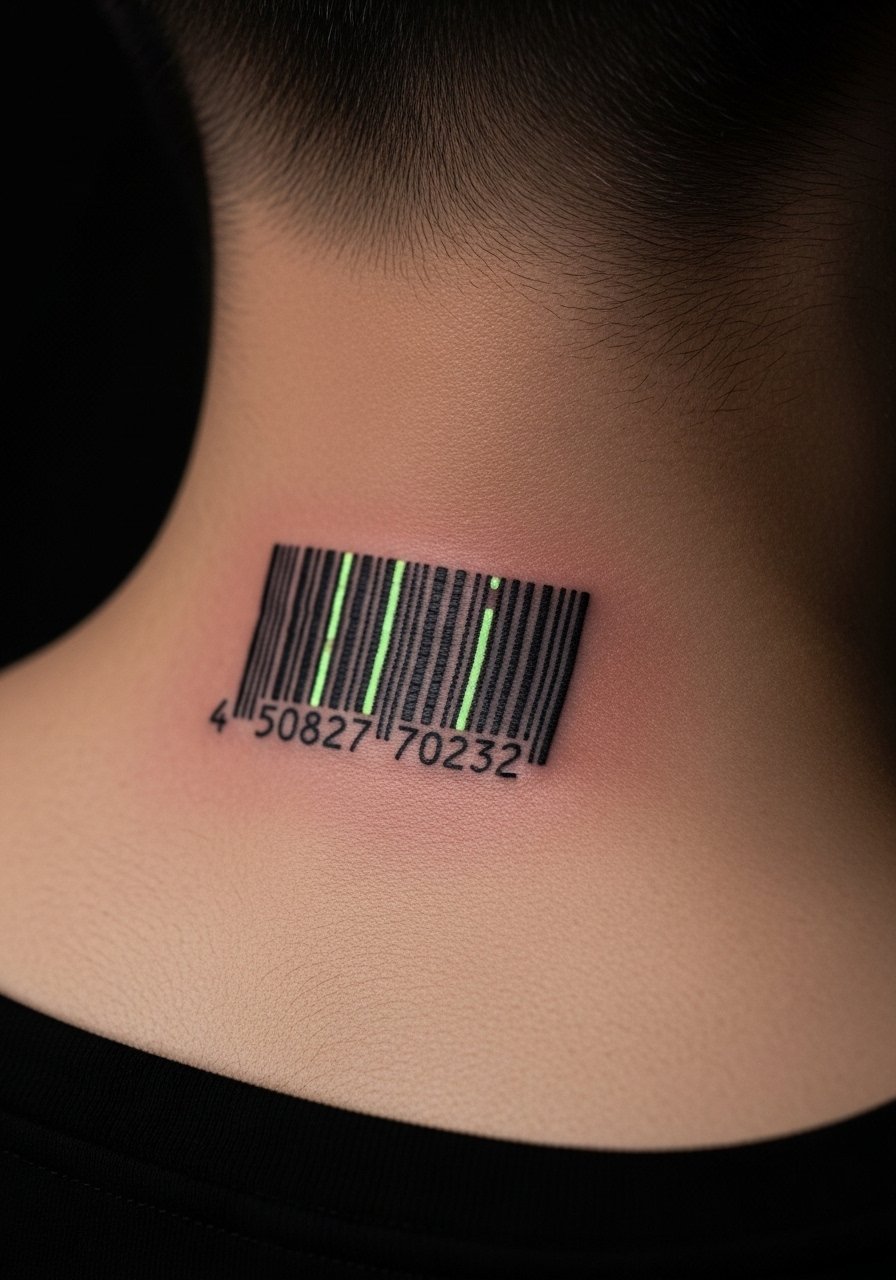
A barcode with UV bars feels modern and clandestine. Neck placements are visible but easily hidden by hair or collars. UV bars should be substantial since thin verticals often blur. Artists who do precise linework are a must. A common mistake is mismatched spacing—bring a stencil and confirm size before inking.
13. Celestial Sleeve With UV Stars and Nebulae
Style/Technique: Neo-Realism / Celestial + UV
Pain Level: Medium (4/10)
Session Time: Multiple sessions
Best For: Dramatic, revealable sleeve
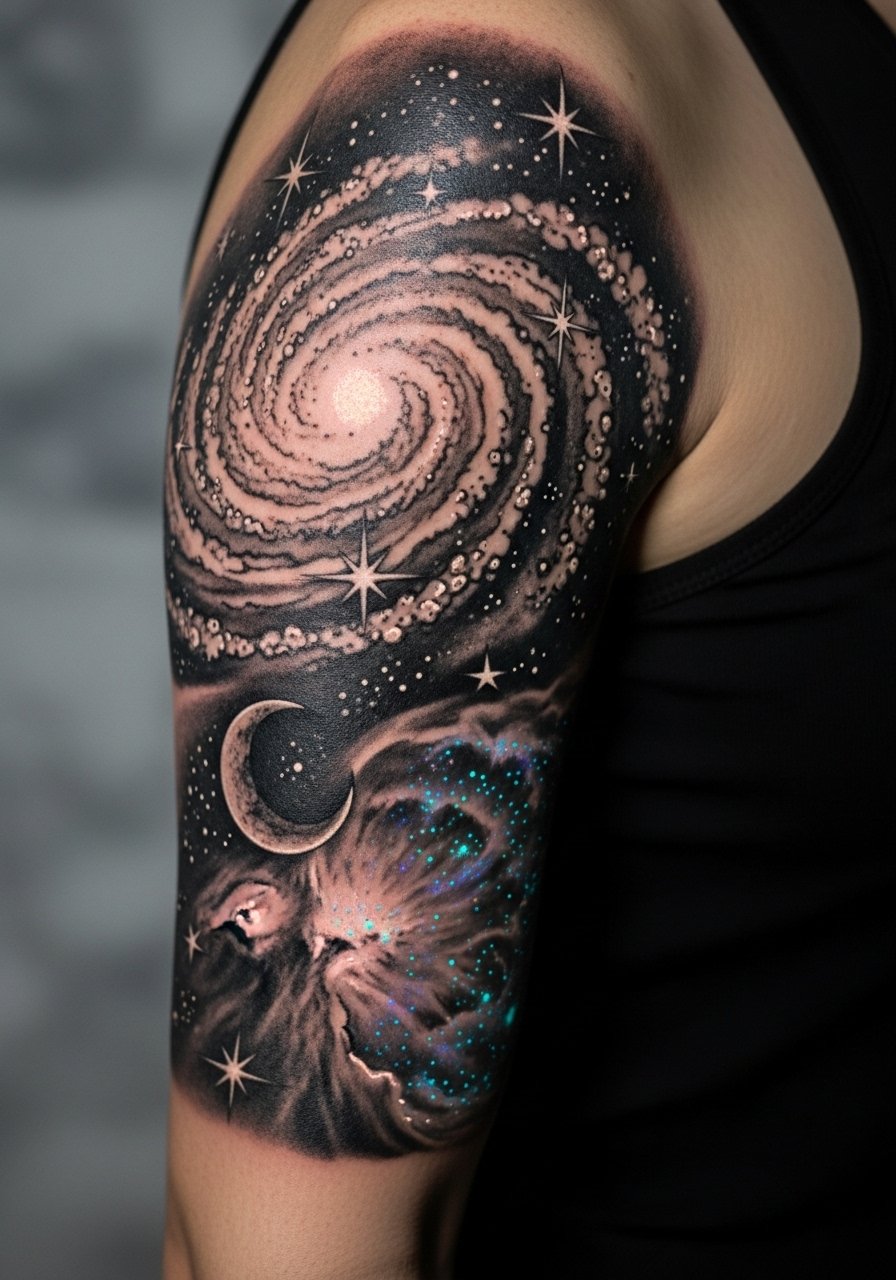
Space sleeves are ideal for UV highlights—tiny stars, comet trails, and nebula veins glow beautifully in dark settings. Large surfaces allow for heavier UV saturation, which lasts longer. Expect multiple sessions and good aftercare to avoid scabbing that can take pigment with it. Avoid packing UV too sparsely—dense, intentional placement reads best in blacklight.
14. UV Wedding Ring Band on Ring Finger
Style/Technique: Minimalist / Band + UV
Pain Level: Medium (4/10)
Session Time: 30–60 minutes
Best For: Symbolic, private symbolism
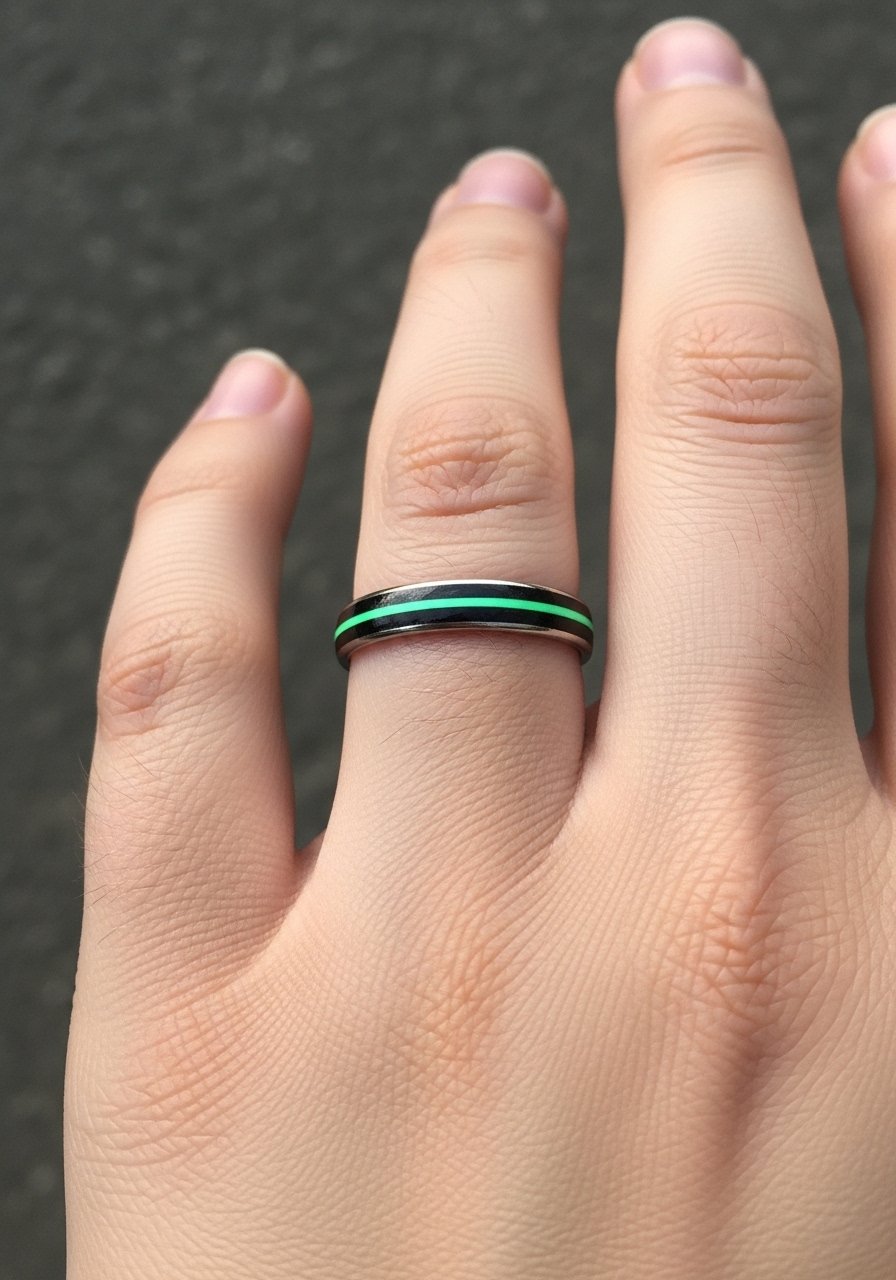
A UV band is a private twist on a classic ring tattoo. Fingers require maintenance—ink fades faster, so expect touch-ups. UV ink in a band works best as an inner or outer accent rather than the entire band. Artists who regularly tattoo fingers and can show healed UV finger work are valuable. Don’t expect perfect permanence; fingers are high-friction zones.
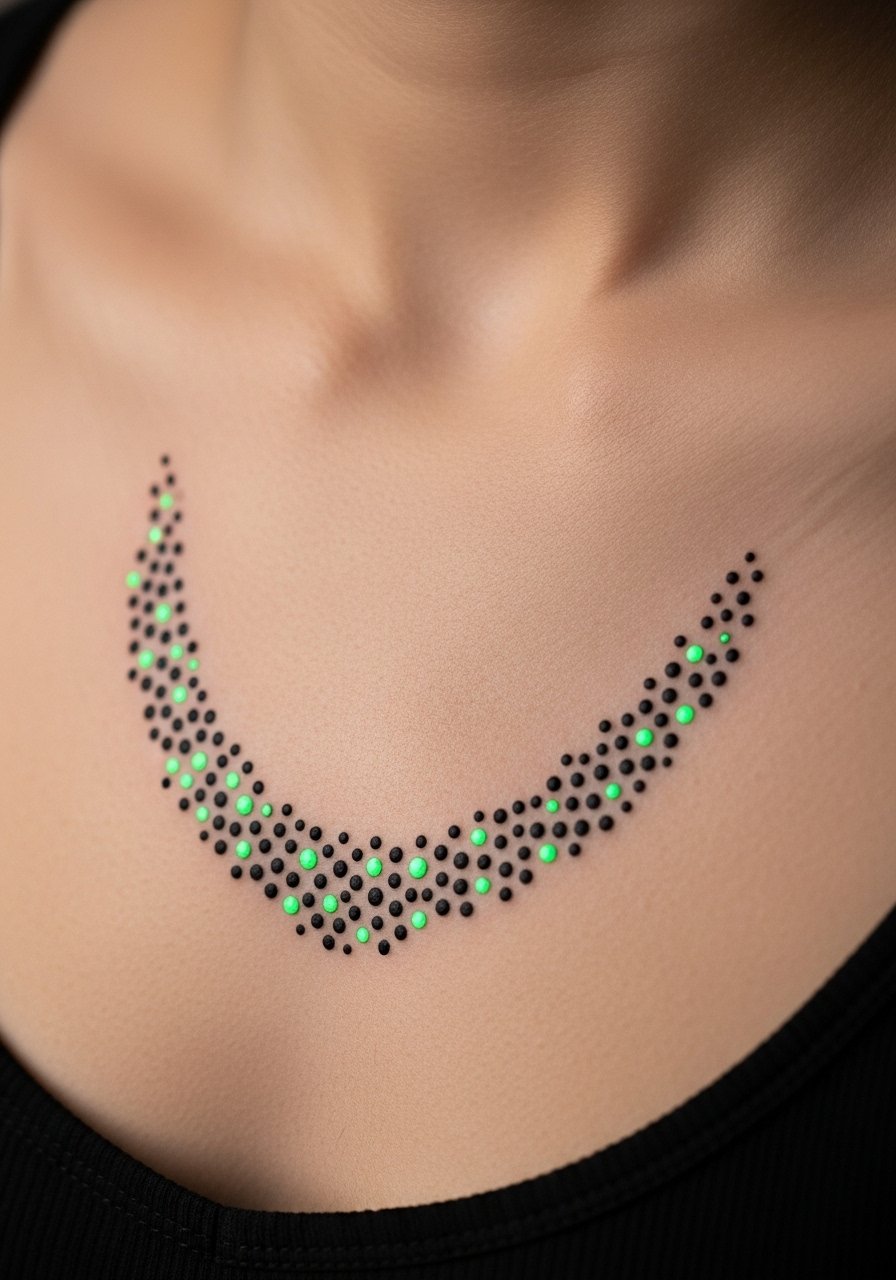
15. Invisible Floral Collarbone Accent
Style/Technique: Fine Line / UV Accent
Pain Level: Medium (4/10)
Session Time: 1-2 hours
Best For: Delicate, peek-a-boo detail
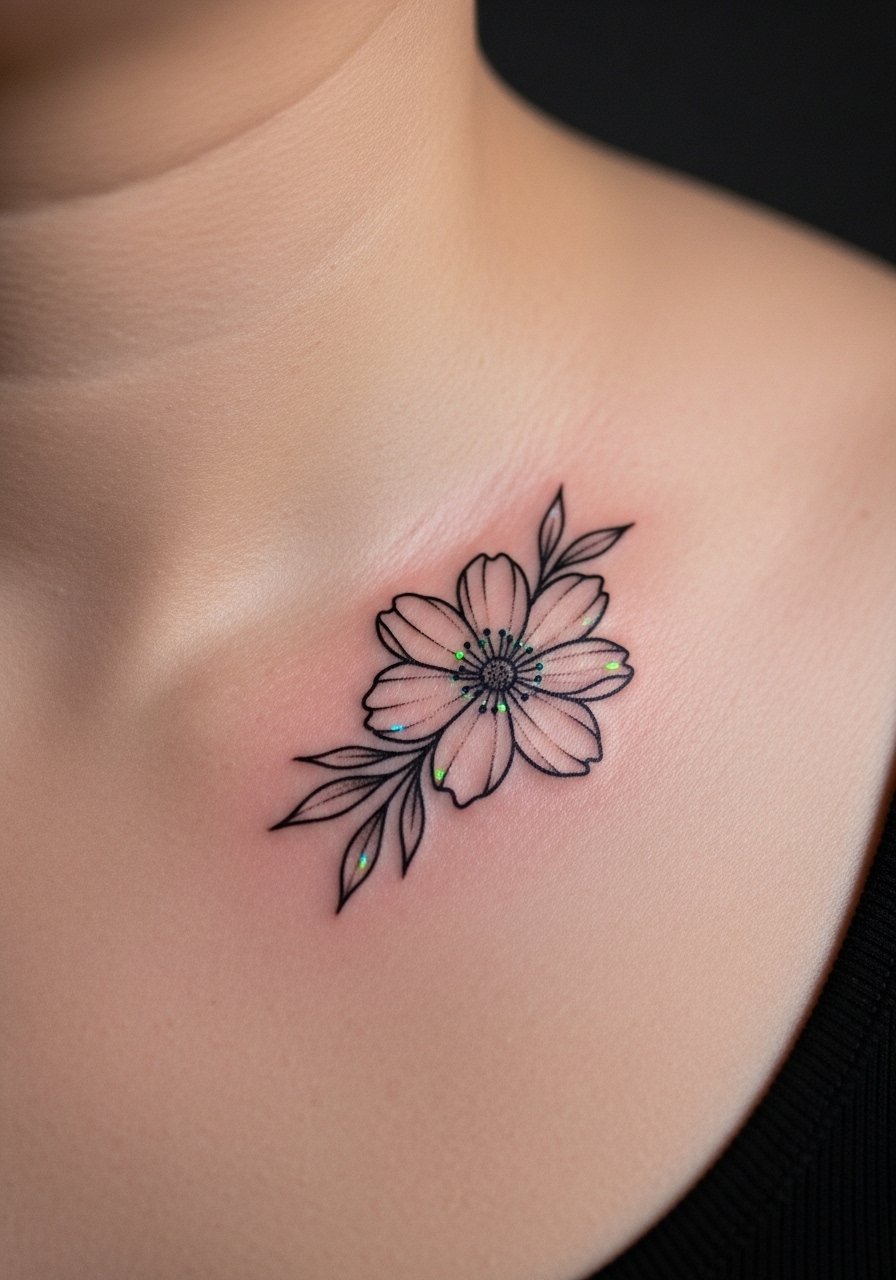
Collarbone accents are flirty and discreet. UV highlights inside petals or leaf veins look like jewelry under blacklight. The area is visible in summer, so protect it during healing. Fine-line artists who do subtle color washes make the best choices. Avoid too many UV elements in a small collarbone piece—simplicity reads cleaner.
16. UV Geometric Sternum Triangle
Style/Technique: Minimalist / Geometric + UV
Pain Level: High (7/10)
Session Time: 1-2 hours
Best For: Centered, symbolic design
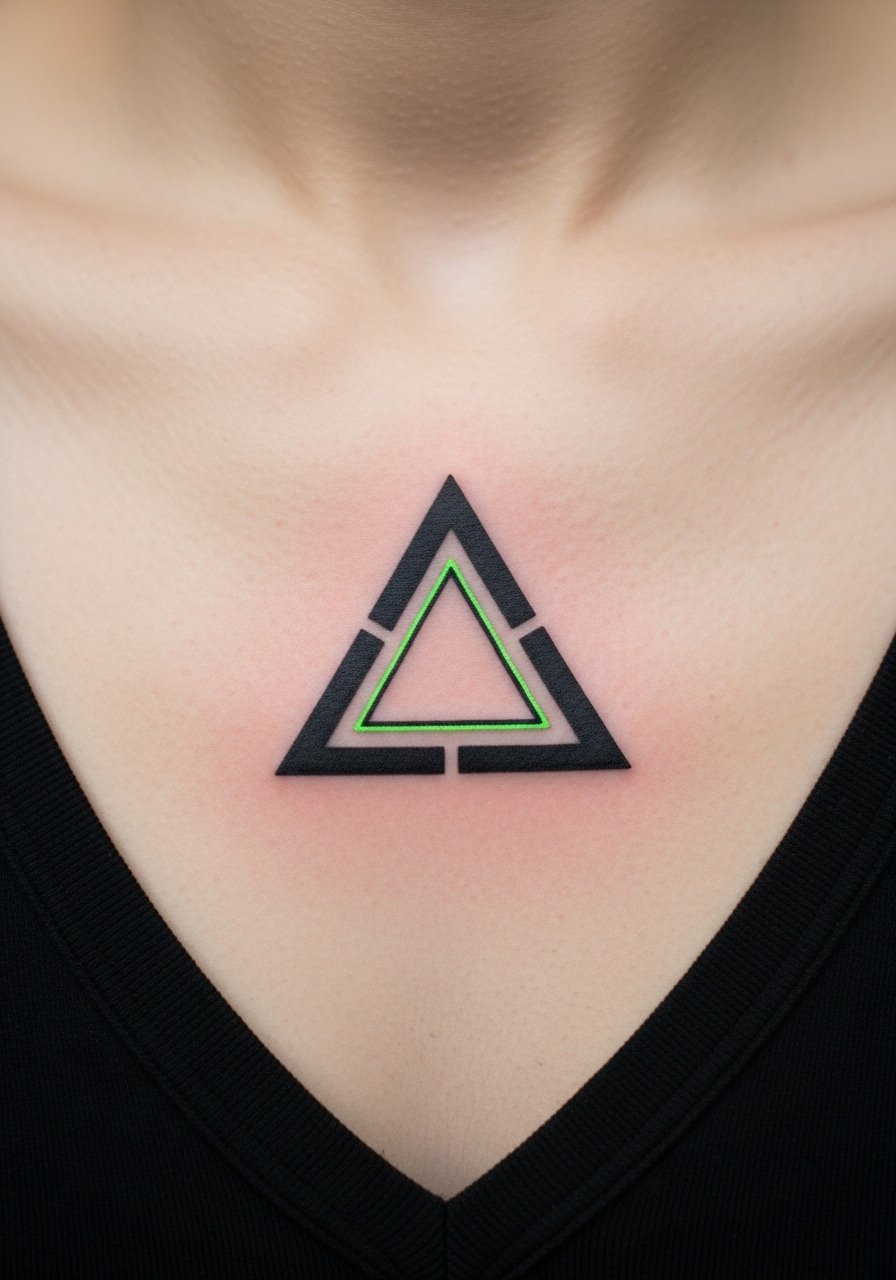
Small geometric pieces on the sternum are intense and private. A UV inner triangle gives a concealed meaning. Sternum healing needs care—no heavy chest pressure. Ensure the UV lines are bold enough to survive healing. Artists specializing in geometric symmetry will get cleaner results.
17. UV Lace Thigh Piece
Style/Technique: Decorative / Lace + UV
Pain Level: Medium (4/10)
Session Time: 2-4 hours
Best For: Intimate, lingerie-inspired art
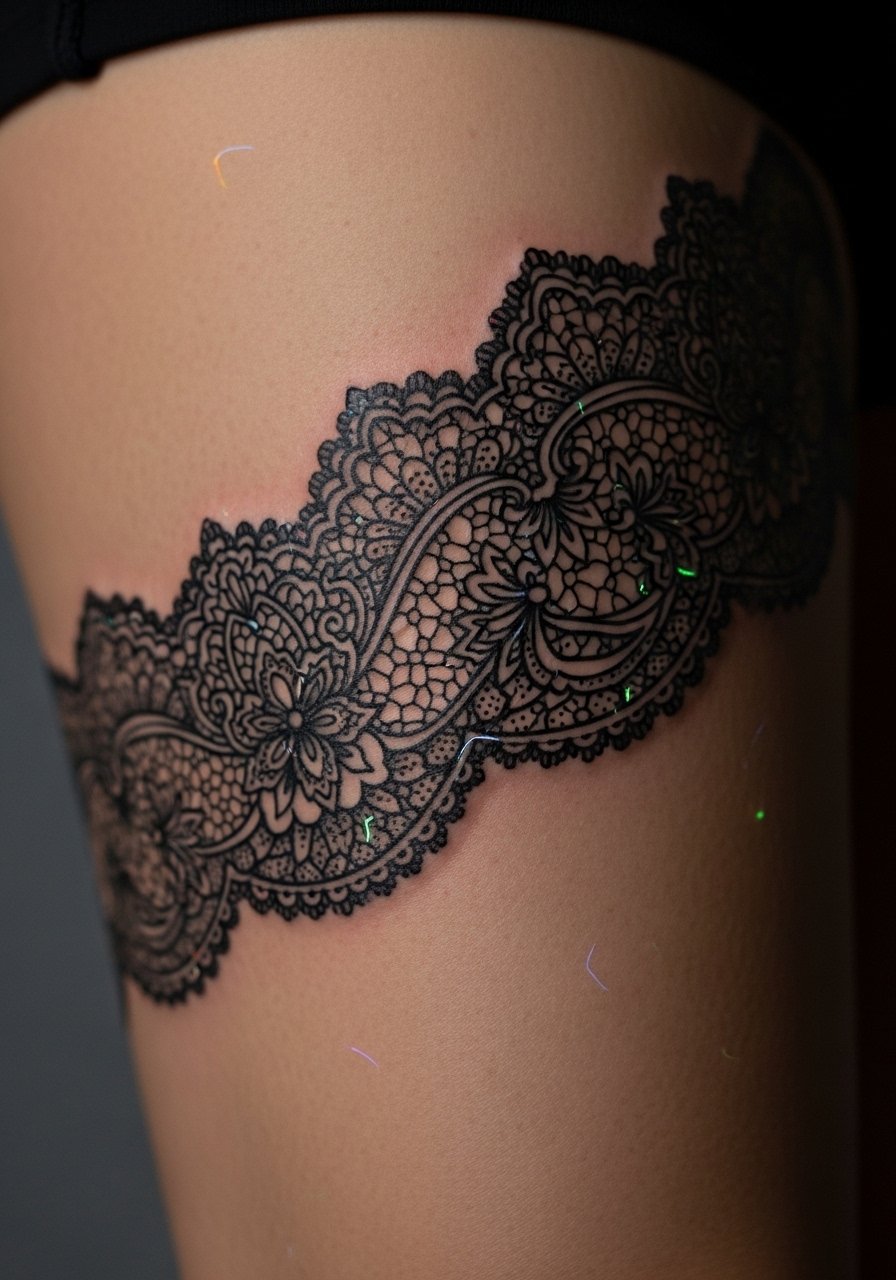
Lace designs on the thigh are sensual by day and reveal hidden shimmer under blacklight. Thigh skin tolerates longer sessions. UV threads should be placed where clothing won't rub heavily during healing. Artists with decorative and ornamental portfolios perform best. Avoid extremely delicate UV filigree in high-friction zones.
18. UV Floral Sleeve Interleaved With Blackwork
Style/Technique: Blackwork / Floral + UV
Pain Level: Medium (4/10)
Session Time: Multiple sessions
Best For: Bold, layered tattoos
Combining blackwork blocks with UV florals creates dramatic contrast. Black holds over time; UV adds the surprise. Sleeve healing is gradual—watch for scabbing that can lift pigment. Artists who layer black and color well are recommended. Avoid scattering UV unevenly; planned placement keeps the glow intentional.
19. UV Longitude/Latitude Coordinates on Ribs
Style/Technique: Minimalist / Numeric + UV
Pain Level: High (7/10)
Session Time: 30–90 minutes
Best For: Personal location-based markers
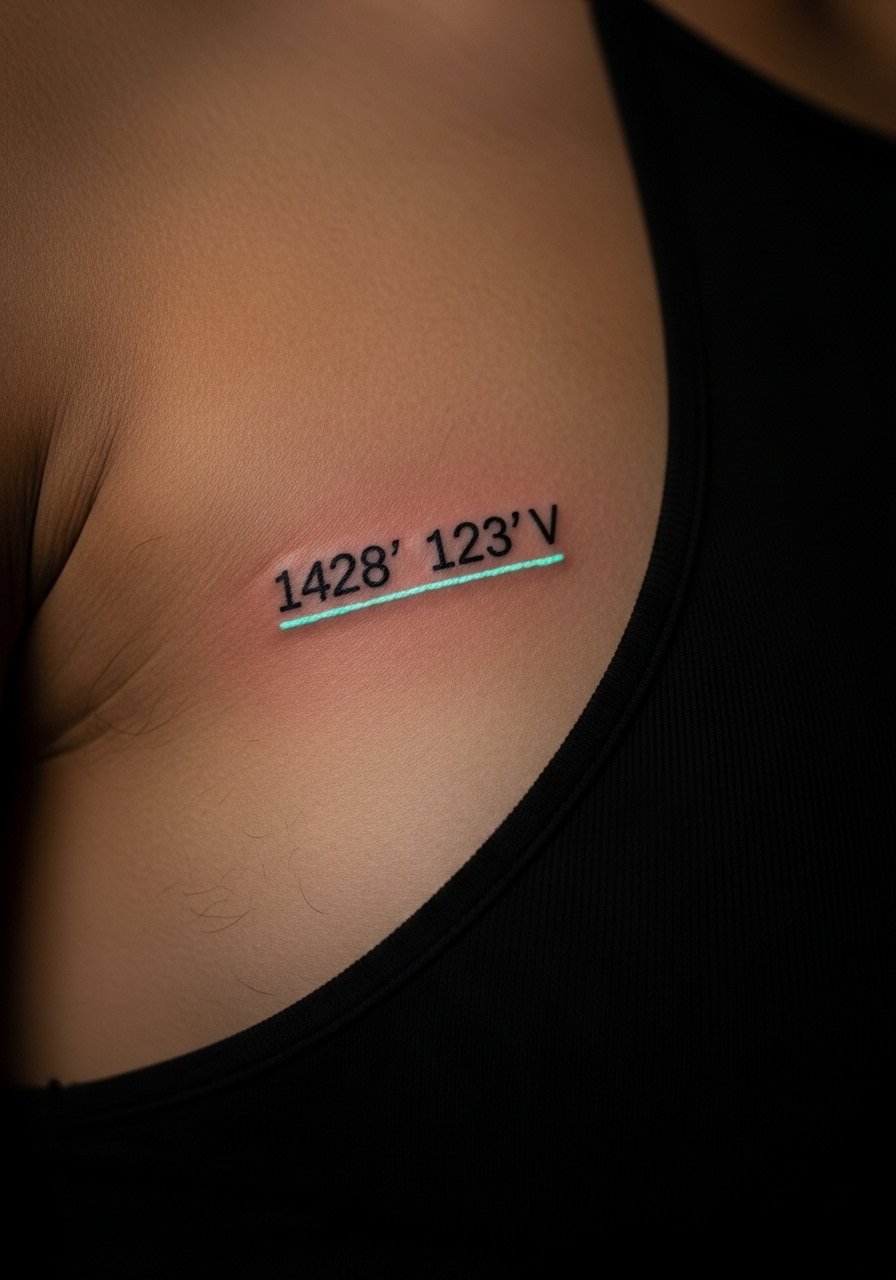
Coordinates on ribs are intimate and meaningful; add a UV underline to make it revealable. Rib pain is significant, so be prepared. UV underlines should be bold enough to survive skin movement. Bring a stencil and ensure spacing is comfortable for your body shape.
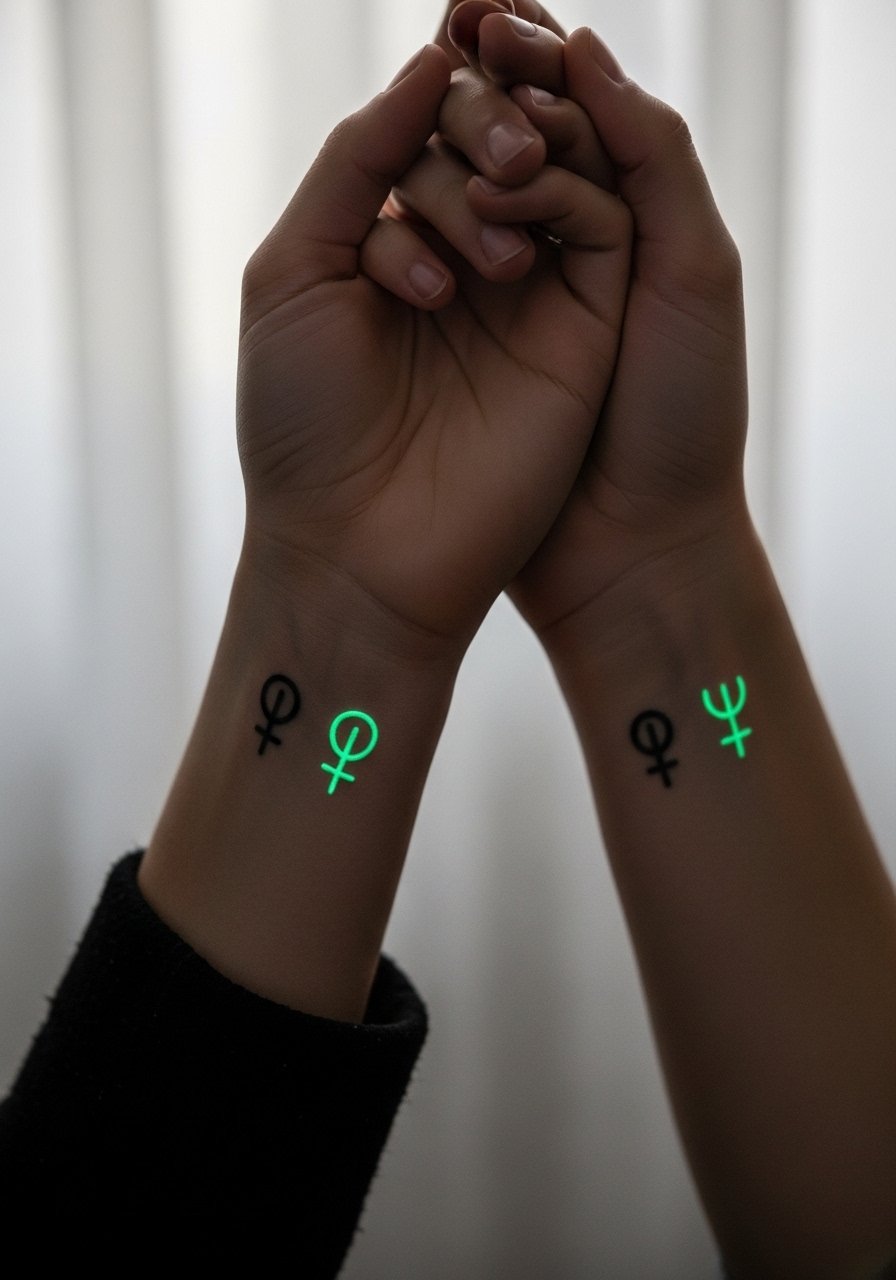
20. UV Astrological Symbol on Inner Wrist
Style/Technique: Minimalist / Symbol + UV
Pain Level: Low (2-3/10)
Session Time: 30–45 minutes
Best For: Personal, everyday piece
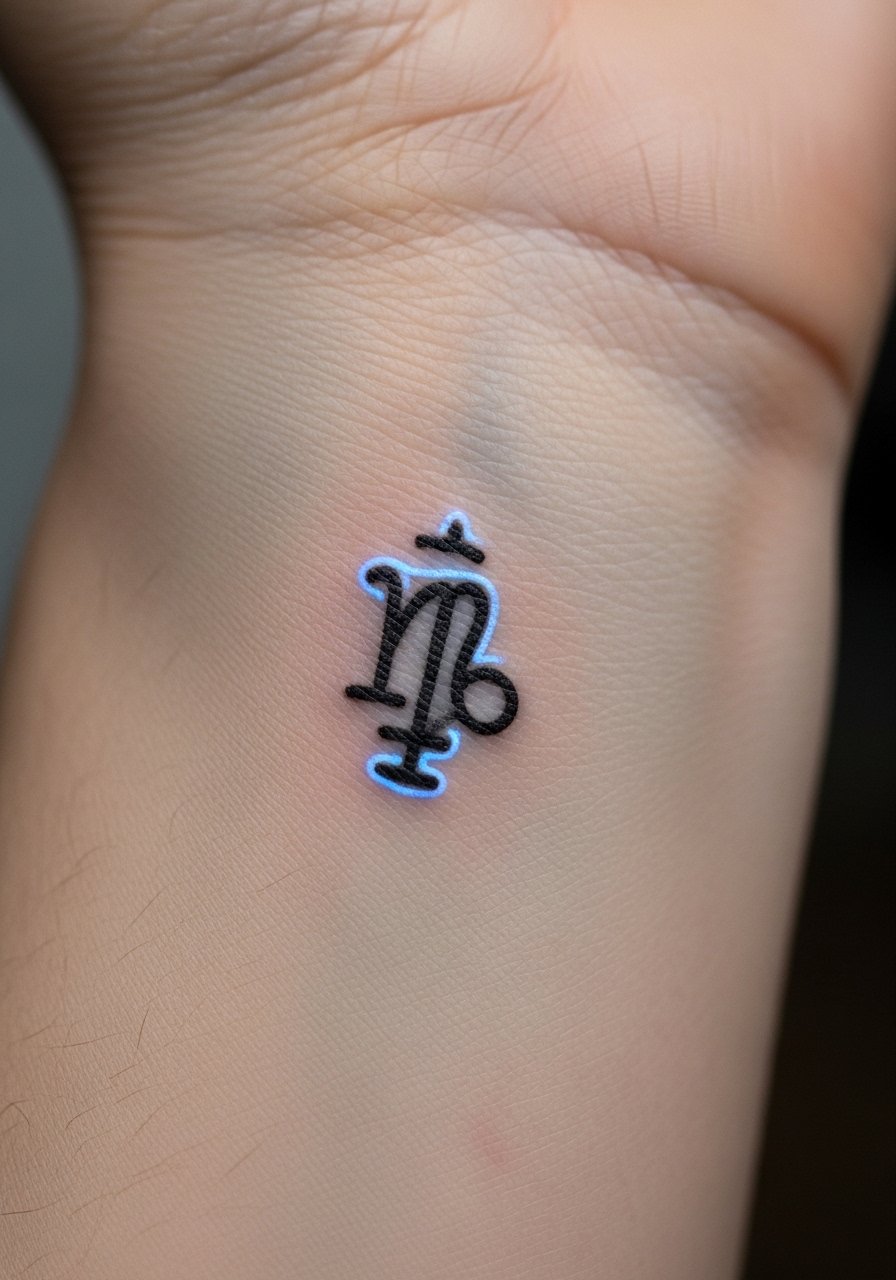
Wrist glyphs are subtle; a UV halo creates a secret aura. Inner wrist is an easy-to-care-for spot but visible often. UV halos should be moderate in thickness because wrists move a lot. Artists comfortable with micro-symbols and healed examples are best. Avoid extremely faint halos; they rarely last.
21. UV Vine Behind Knee
Style/Technique: Illustrative / Vine + UV
Pain Level: Medium-High (5-6/10)
Session Time: 1-2 hours
Best For: Hidden, flirtatious detail
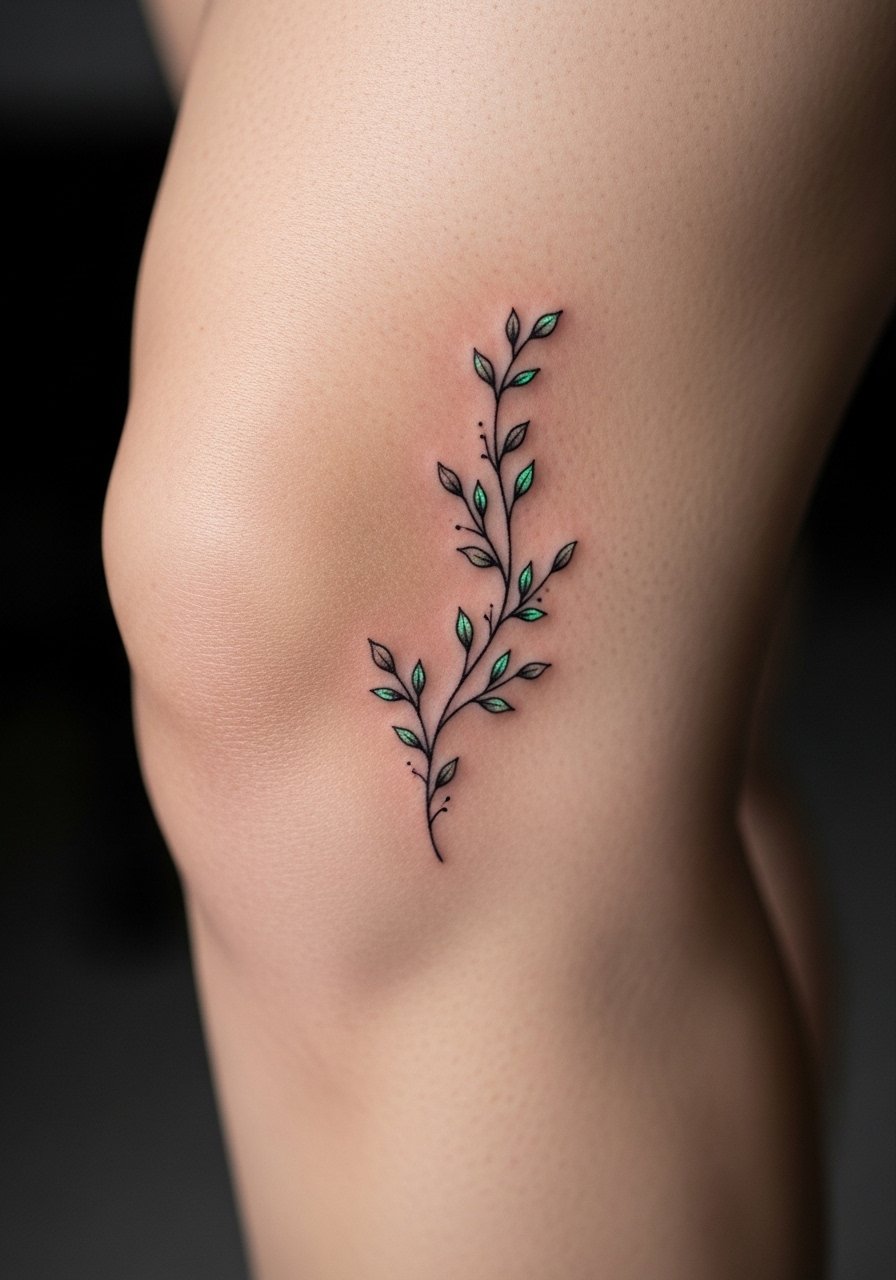
Behind-knee placements hide well and look playful when revealed. This area sees bending, so expect more movement during healing. Keep the UV leaves slightly larger to avoid loss. Artists who tattoo flexible areas often can advise on placement to minimize distortion.
22. UV Dot Halo Around Nipple (Areola-Safe Placement)
Style/Technique: Decorative / Micro-dot + UV
Pain Level: High (8/10)
Session Time: 1-2 hours
Best For: Very private, intimate personal art
Intimate dot halos are deeply personal. Expect higher pain and sensitive skin; hygiene and artist experience matter. UV dots should be spaced and sized for longevity. Only choose an artist comfortable with areola-adjacent work. Avoid dense clustering that can scar.
23. UV Tribal Linework on Upper Back
Style/Technique: Tribal / Linear + UV
Pain Level: Medium (4/10)
Session Time: 1-3 hours
Best For: Bold yet concealable with hair/clothing
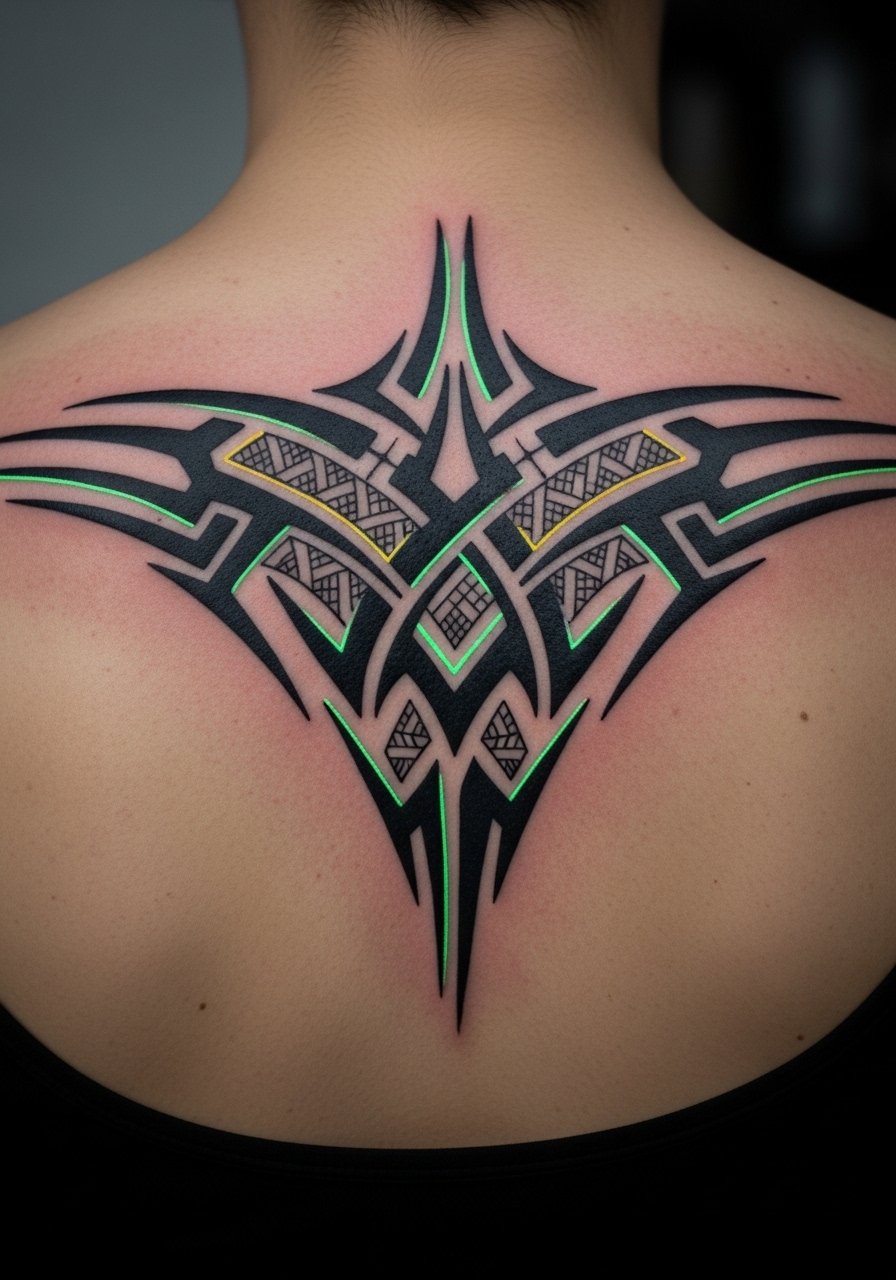
Upper back tribal pieces read strong by day with subtle UV trims beneath. This area heals well and tolerates bold work. UV trims should complement existing black shapes rather than compete. Look for artists experienced in solid blackwork and healed UV photos. Avoid overly thin UV trims inside thick black fields.
24. UV Matching Couple Tattoo Hidden Under Arm
Style/Technique: Minimalist / Matching Symbols + UV
Pain Level: Medium (4/10)
Session Time: 30–60 minutes per person
Best For: Discreet couples' marks
Under-arm placements let couples keep matching marks private. UV companion marks reveal a secret connection. This area tolerates small work; keep hygiene high. Ask artists about healed durability for under-arm UV elements. Don’t choose complicated designs—simple shapes maintain clarity.
25. UV Barcode Wrist Wrap
Style/Technique: Minimalist / Linear Wrap + UV
Pain Level: Medium (4/10)
Session Time: 1-2 hours
Best For: Modern, revealable accessory

A barcode wrap is an edgy accessory that doubles as a hidden glow band. Wrist friction affects longevity—expect touch-ups. UV inner lines are striking under blacklight but need thickness for durability. Artists who do clean, parallel lines are needed. Avoid ultra-narrow bars that vanish.
26. UV Petal Halo On Ear Cartilage
Style/Technique: Tiny Illustrative / UV Accent
Pain Level: Low-Medium (3-4/10)
Session Time: 30–60 minutes
Best For: Tiny, unique ear art
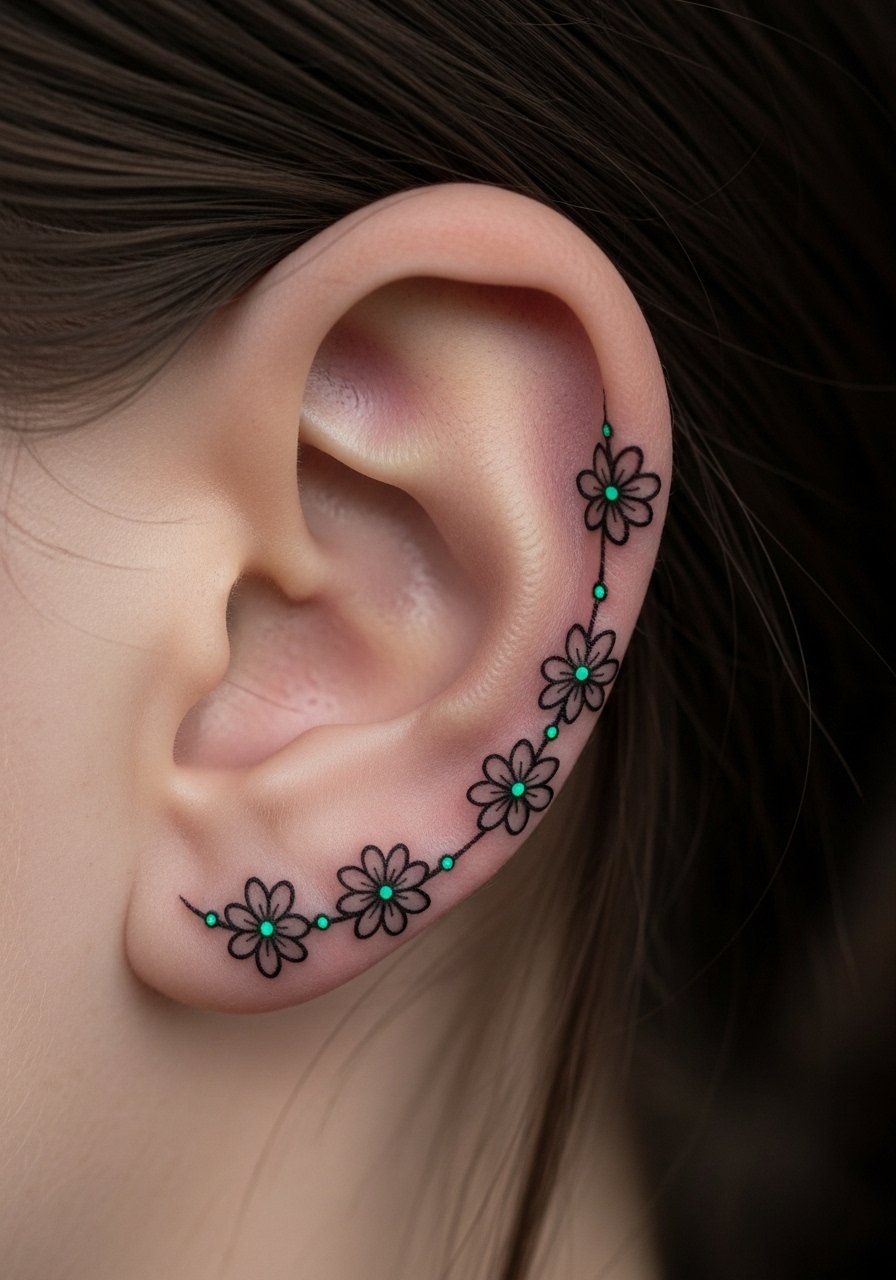
Ear cartilage tattoos are chic; UV petal halos peek in club lighting. Pain is tolerable but healing needs careful sleeping positions. Cartilage can be finicky—choose an artist with ear work in their portfolio. Avoid dense UV clusters; small dots read better here.
27. Scar Camouflage With UV Art Overlay
Style/Technique: Cover-Up / Camouflage + UV
Pain Level: Variable (depends on scar)
Session Time: Varies by scar size
Best For: Concealment with personal reveal
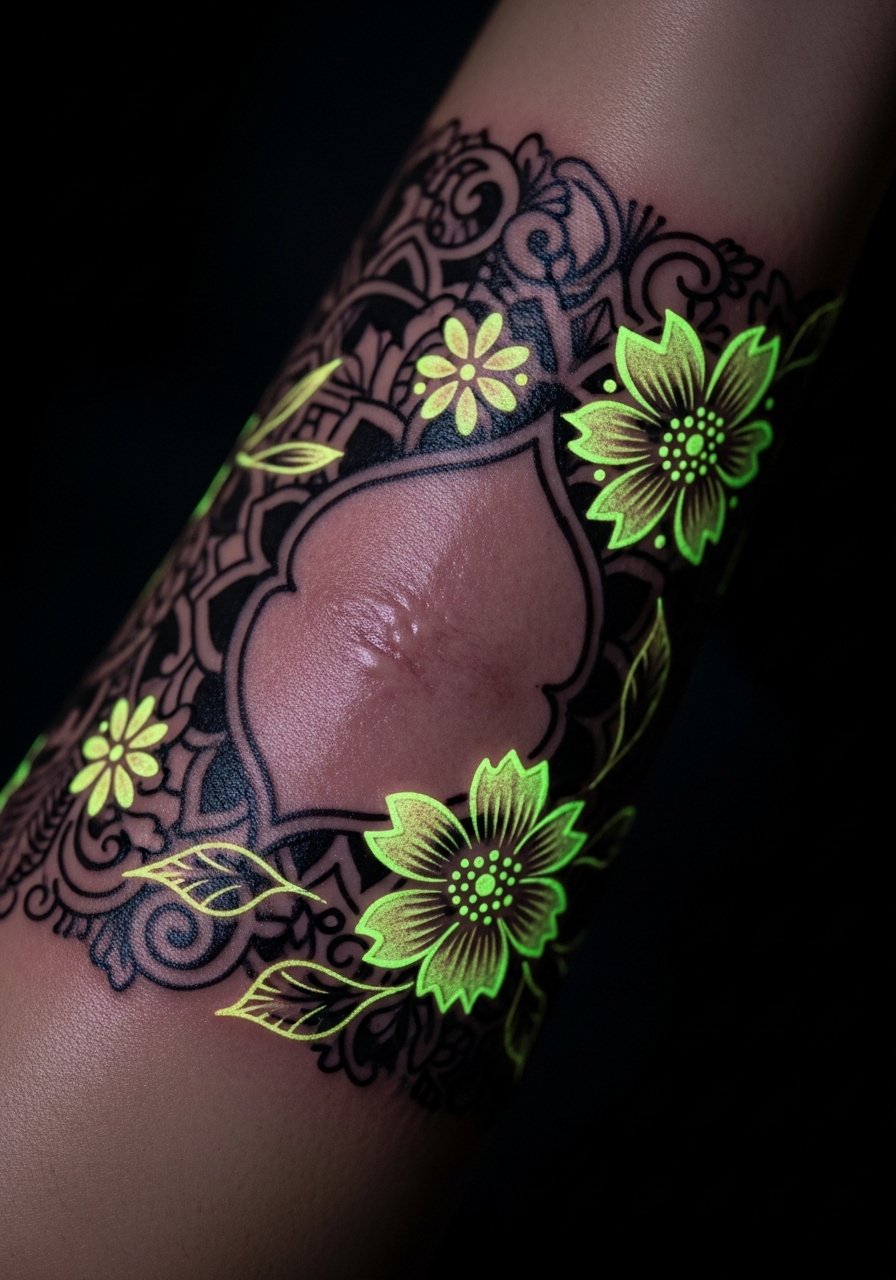
I’ve seen UV overlays turn scar tissue into meaningful art. Scars hold pigment unpredictably—expect extra sessions and gentle technique. UV can add a celebratory layer visible only under blacklight. Work with artists experienced in scar tissue tattooing. Don’t expect immediate symmetry; plan for follow-ups.
28. UV Morse Code Bracelet on Wrist
Style/Technique: Minimalist / Dots & Dashes + UV
Pain Level: Low-Medium (3/10)
Session Time: 30–60 minutes
Best For: Secret messages, subtle daily wear

Morse code bracelets hide messages in plain sight; add UV marks to highlight certain letters only under blacklight. Wrist placement is practical but needs care to avoid friction during healing. Artists who do micro-dots and short lines accurately will achieve the best result. Avoid crowding the code—clarity beats complexity.
Tattoo Prep and Aftercare Essentials
Aftercare Essentials:
- Aquaphor Healing Ointment, 14oz Tube — Use first 3–5 days for open healing
- Saniderm Transparent Adhesive Bandage, 6-Inch Roll — Second-skin option for initial covering
- CeraVe Fragrance-Free Moisturizing Lotion, 12oz — Daily moisturizer after initial days
Before Your Appointment:
- Tattoo Numbing Cream with 5% Lidocaine — Ask your artist first; helpful for sensitive spots
- Disposable Razors for Pre-Shave — Use if artist asks you to shave at home
Cleaning & Healing Tools:
- Dr. Bronner's Unscented Castile Soap, 32oz — Gentle tattoo cleaning
- Hydrocolloid Bandages, Large Pack — For spot protection and peeling prevention
Long-Term Maintenance:
- SPF 50 Sunscreen Stick for Tattoos — Daily use to prevent UV fading
- Mad Rabbit Tattoo Balm, 2oz — Keeps healed tattoos vibrant
- Hustle Butter Deluxe, 3oz — Vegan aftercare alternative artists often recommend
Optional Comfort Items:
- Tattoo Numbing Spray — For touch-ups and sensitive spots
- Cooling Gel Packs (Reusable) — Gentle relief post-session
Frequently Asked Questions
Q: How bad does a UV tattoo hurt compared to regular ink?
A: Pain depends on placement, not the ink type. UV tattoos use similar needles and techniques—expect the same sensations. Ribs and sternum are higher-pain areas; forearm and upper arm are easier. For sensitive spots, consider a numbing cream like tattoo numbing cream with 5% lidocaine after discussing it with your artist.
Q: Will UV ink fade faster than regular tattoo ink?
A: From what I've seen, some UV pigments can lose intensity sooner than black ink, especially in high-friction or sun-exposed areas. Daily sunscreen and occasional touch-ups help. Use an SPF stick designed for tattoos and follow long-term moisturizing routines.
Q: Are UV tattoos safe for my skin?
A: Many people tolerate UV ink well, but sensitivities exist. I recommend patch testing if you have reactive skin and discussing pigments with your artist. Artists who frequently use UV inks can show healed examples and advise on reactiveness.
Q: How do I care for a fresh UV tattoo?
A: Care mirrors standard aftercare: clean gently with a mild soap, apply a thin layer of healing ointment for the first days, then switch to fragrance-free lotion. For the first week avoid soaking and heavy friction. Saniderm or hydrocolloid bandages can help protect detail work.
Q: Can UV tattoos be covered in professional settings?
A: Many UV tattoos are subtle by day—placed as underlayers or small accents—so they're discreet. If visibility is a concern, choose placements like ribs, inner thigh, or behind the ear.
Q: Will UV ink show on darker skin tones?
A: UV effects vary with skin tone. Black and saturated colors always read best across tones. Some UV pigments show more contrast on lighter skin, but artists familiar with darker skin can suggest placements and pigments that reveal well under blacklight.
Q: How long before I can work out after getting a UV tattoo?
A: Wait at least 48–72 hours for light movement; a week for heavier sweating if the area flexes a lot. Sweat can disturb healing and risk infection. Keep the area clean and moisturized while it heals.
Q: Should I test a small UV dot before committing to a larger piece?
A: If you’re worried about skin reaction or how UV ink behaves on your skin, a small test dot is sensible. It also gives you a realistic sense of how the glow reads once healed and whether touch-ups will be needed.
