
I spent eight months diving into tribal tattoo imagery before I understood the real problem. It was not finding designs. It was matching a tribe's visual language to a body and a life that will change. These 28 tribal tattoos are rooted in tradition. They show what holds up healed, what flakes out fast, and what artists keep recommending in 2026.
This list focuses on tribal and neo-tribal styles, from Polynesian blackwork to minimalist Maori motifs. I chose placements that work in real life, like forearms, ribs, and calves. From what I’ve seen, artists are blending traditional patterns with modern negative space to make pieces that still look crisp at two years healed.
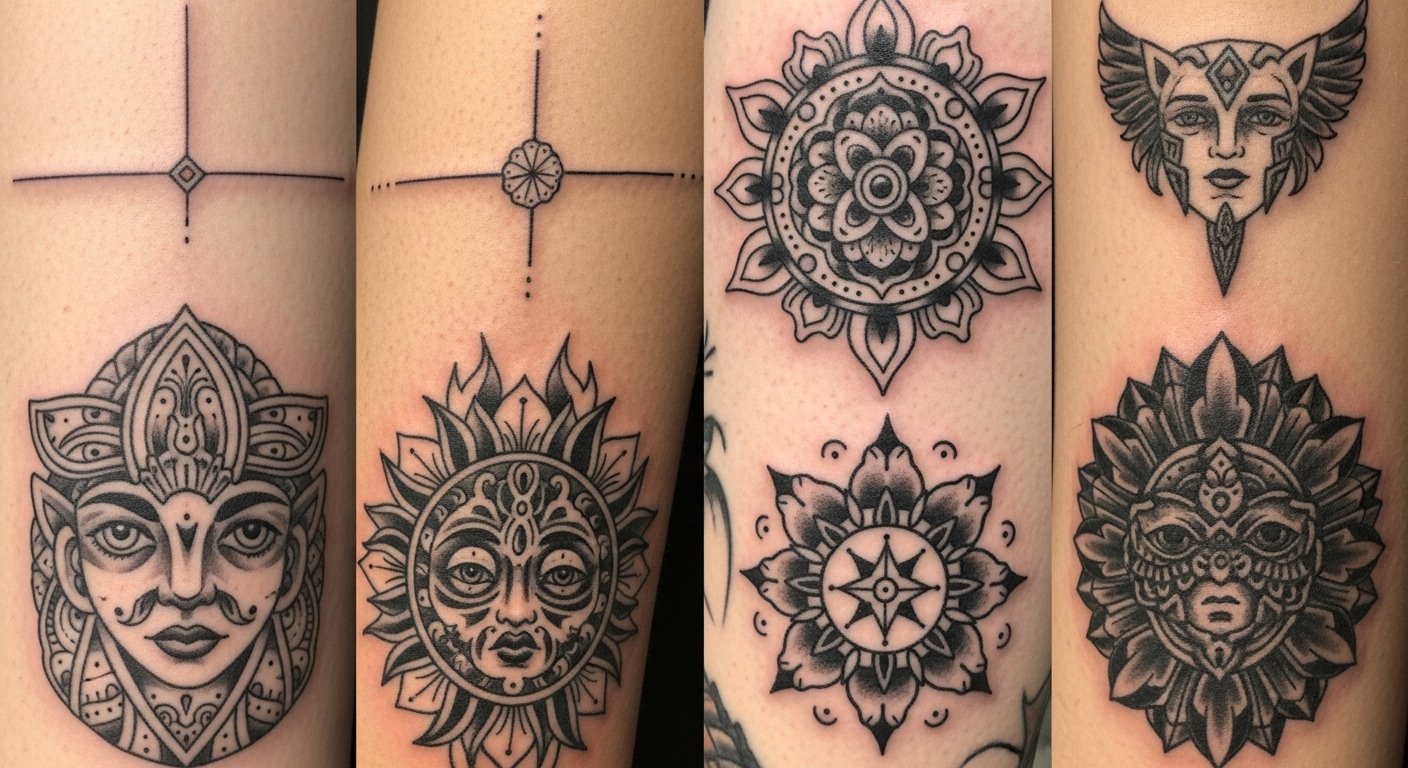
1. Polynesian Half-Sleeve On Upper Arm

I first saw this style on a friend who travels frequently and wanted something that reads well under a shirt sleeve. Expect medium pain in the inner bicep and upper arm, and plan for two to three sessions around two to three hours each. Ask your artist for bold primary motifs and slightly wider line weights. Small dense elements can blur over five years if they are too tight. A common mistake is shrinking traditional symbols to tiny filler pieces. If you want longevity, give the patterns breathing room. I recommend this for collectors who want a statement that still looks clean after sun exposure because bold blackwork holds up better than ultra-fine details.
2. Maori-Inspired Chest Plate In Blackwork
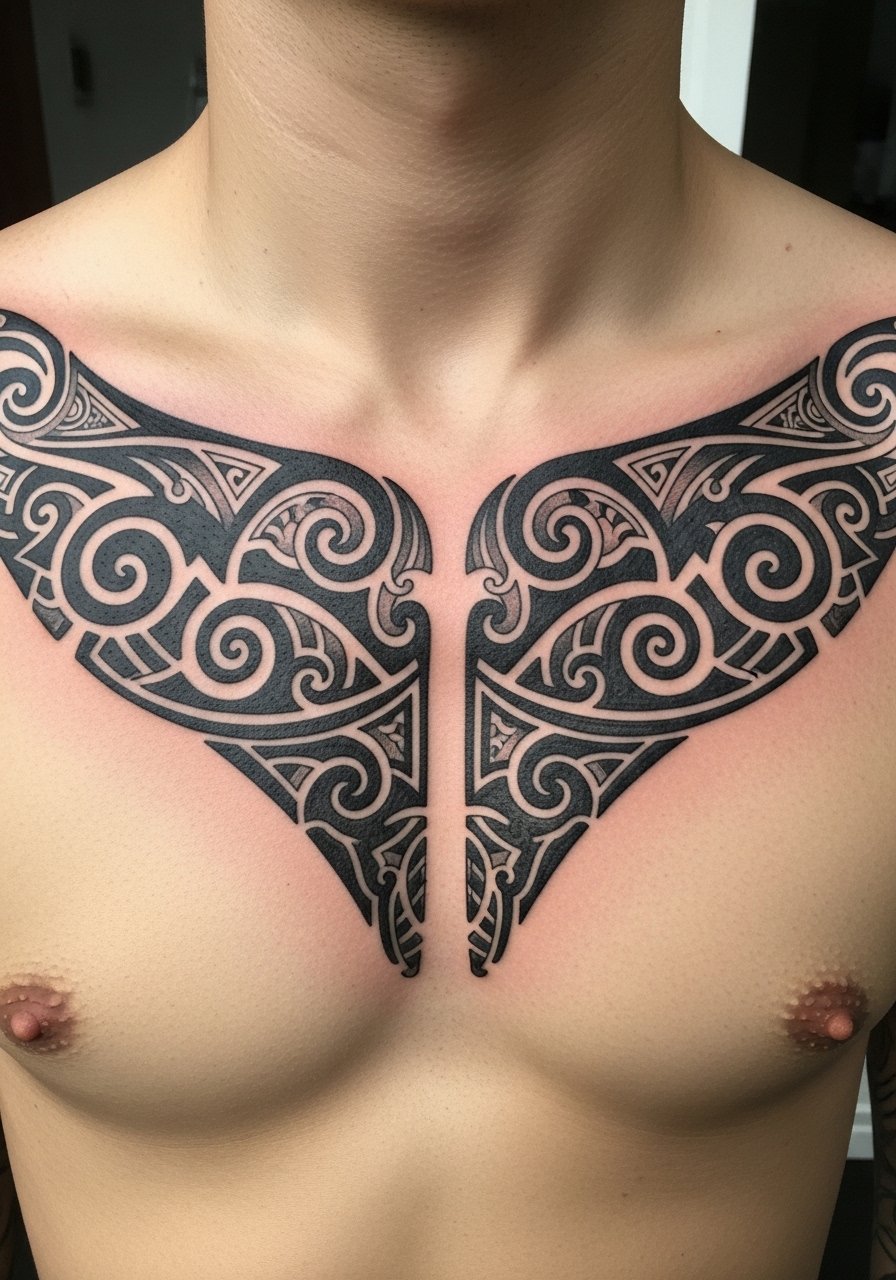
Fair warning, chest pieces sting near the sternum and ribs. I sat through one of these and it felt sharp when shading hit the bone. A typical session is three to four hours. When you consult your artist, bring photos of koru proportions you like and ask them to map the flow with your collarbones. Many people copy textbook motifs without adapting them to the chest curve. That makes the design look awkward as it heals. From what I've gathered, healed chest blackwork reads bold and dramatic. Keep negative space around key spirals to avoid muddying at the two-year mark.
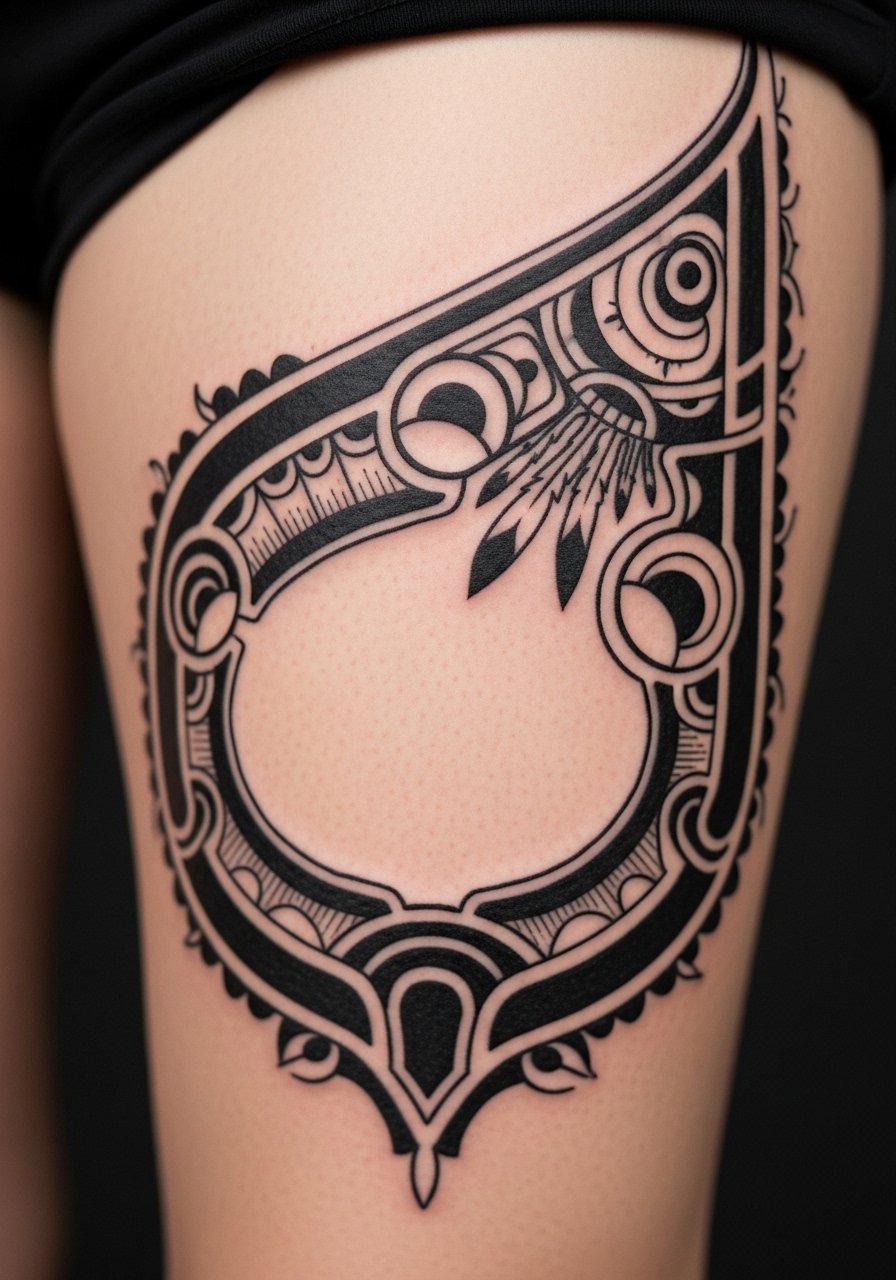
3. Samoan Leg Band On Thigh
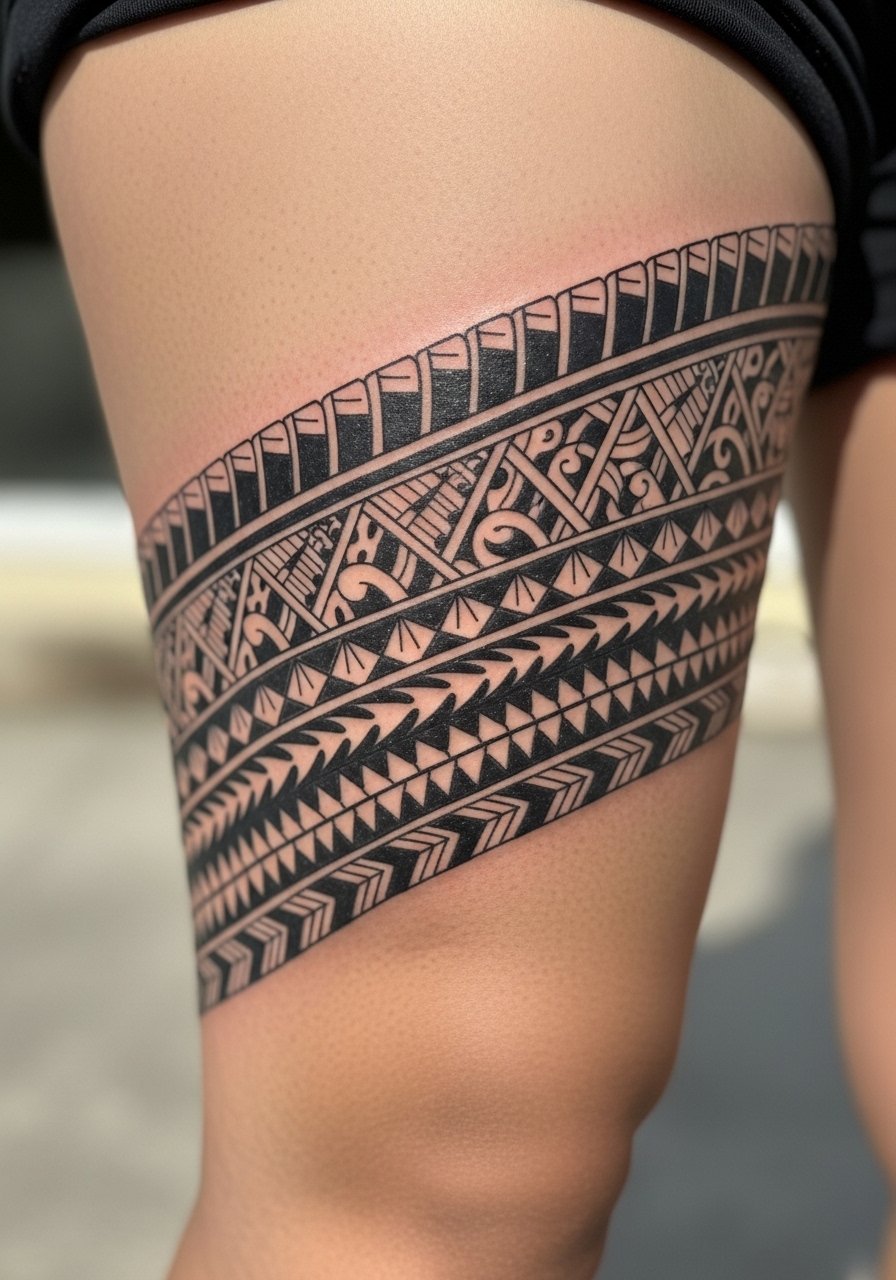
I noticed Samoan bands look best when placed on muscle that changes shape. The thigh is forgiving during weight shifts. Pain is moderate. Sessions can be one long session or two shorter ones. Tell your artist you want the band to follow muscle lines, not sit perfectly horizontal. A frequent mistake is making the band too thin, which makes the pattern fade into a grayish line after a few years. For longevity pick areas with some soft tissue. If you want texture without heavy sessions, ask for a mix of solid black fills and open spacing.
4. Marquesan Small Compass On Inner Forearm
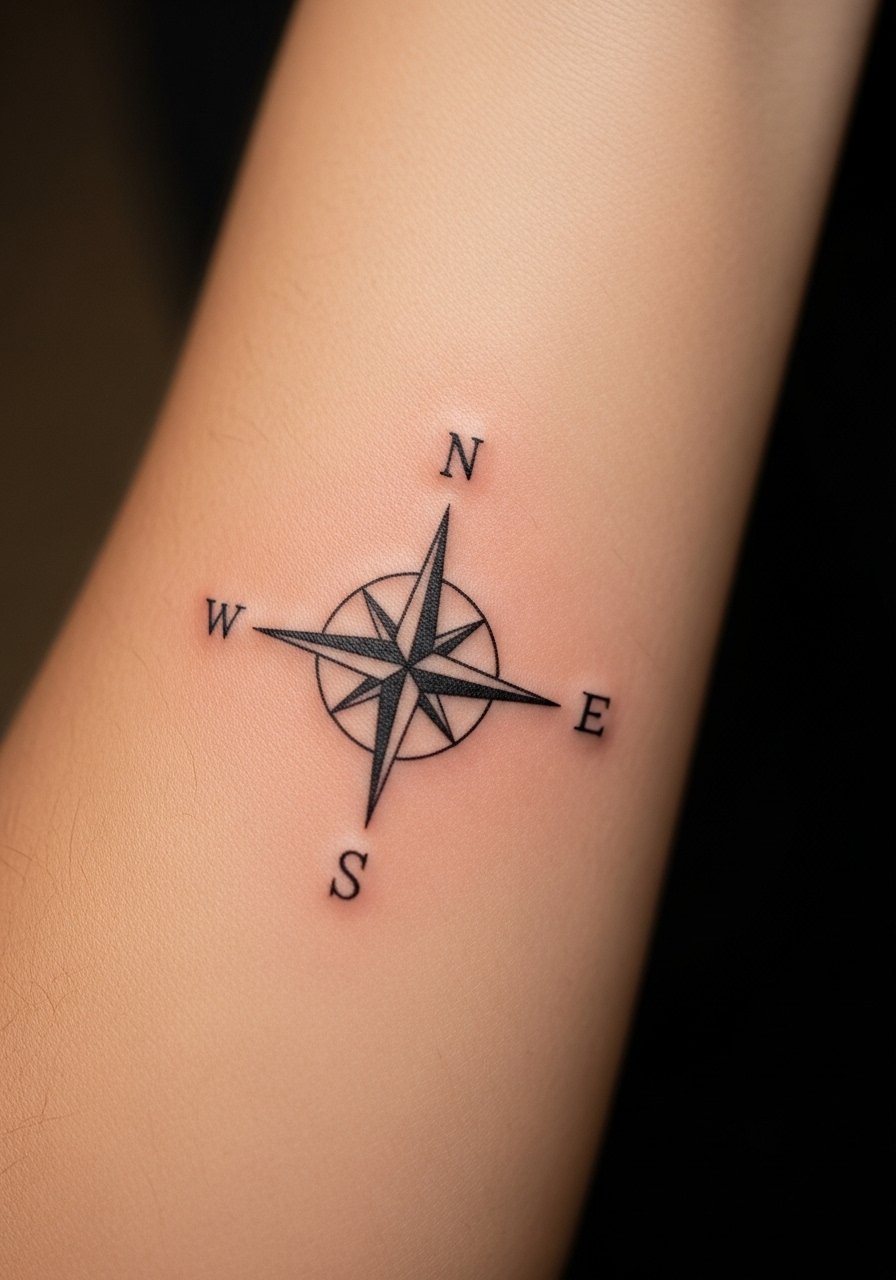
I first copied a Marquesan compass for a travel-themed piece. The inner forearm is low to moderate on pain and shows detail well. A one to two hour session often does the job. Tell your artist you want slightly thicker guide lines so the compass stays legible at two years. The common aging error is over-detailing the interior spokes. They can blur together. If you want a readable travel symbol, choose a bold outline with simplified interior motifs. I find that healed forearm pieces respond well to touch-ups if lines soften.
5. Hawaiian Honu Wave On Calf
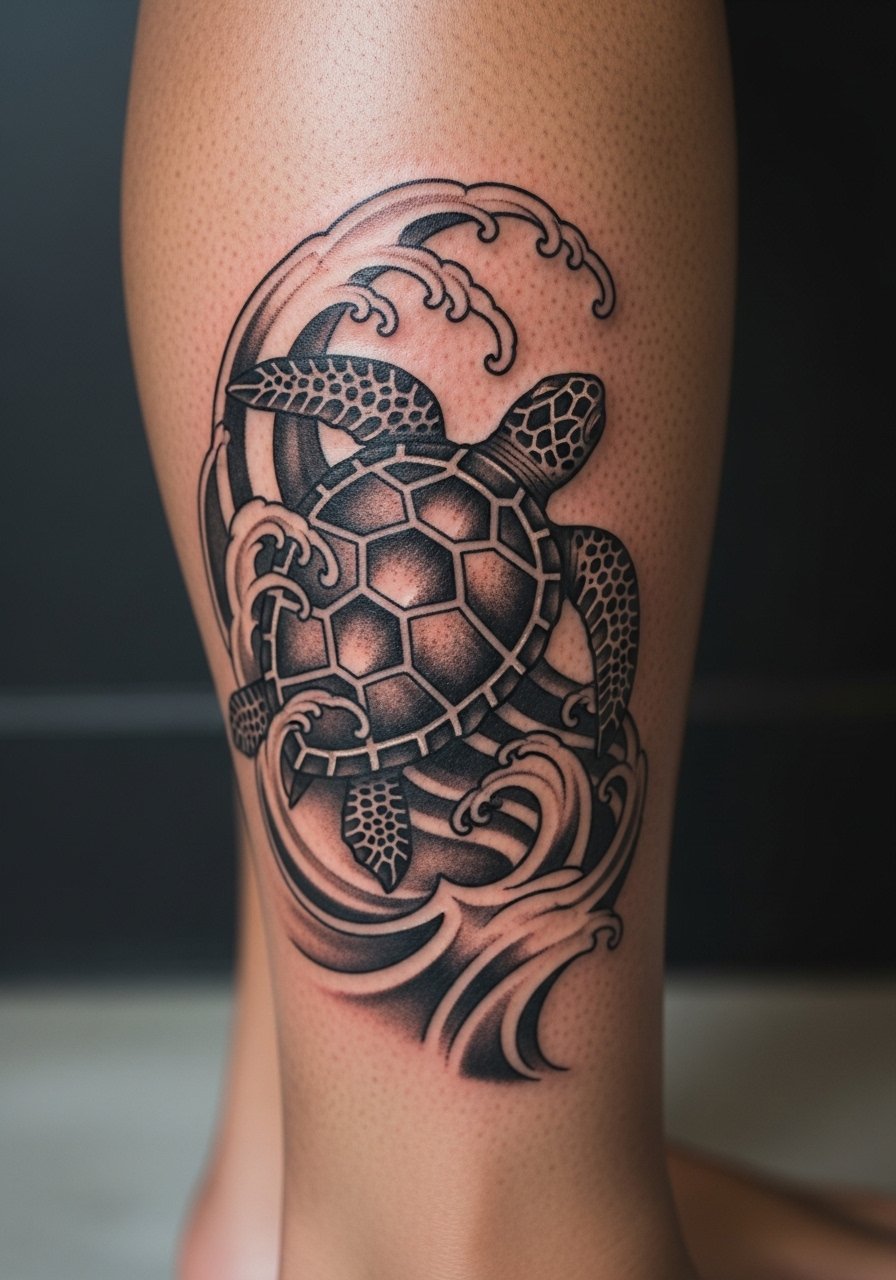
There's a visual calm to turtle and wave motifs on the calf. Pain is low compared to ribs. Expect a one to two hour session. Ask your artist to space the wave patterns to match calf curvature. A common mistake is putting everything too close to the ankle, where movement and boots rub during healing. If you want this to stay crisp, keep the main elements mid-calf and ask for heavier outlines. Over five years, solid black turtles hold better than shaded gray versions on high-movement areas.
6. Navajo-Inspired Geometric Sternum Piece
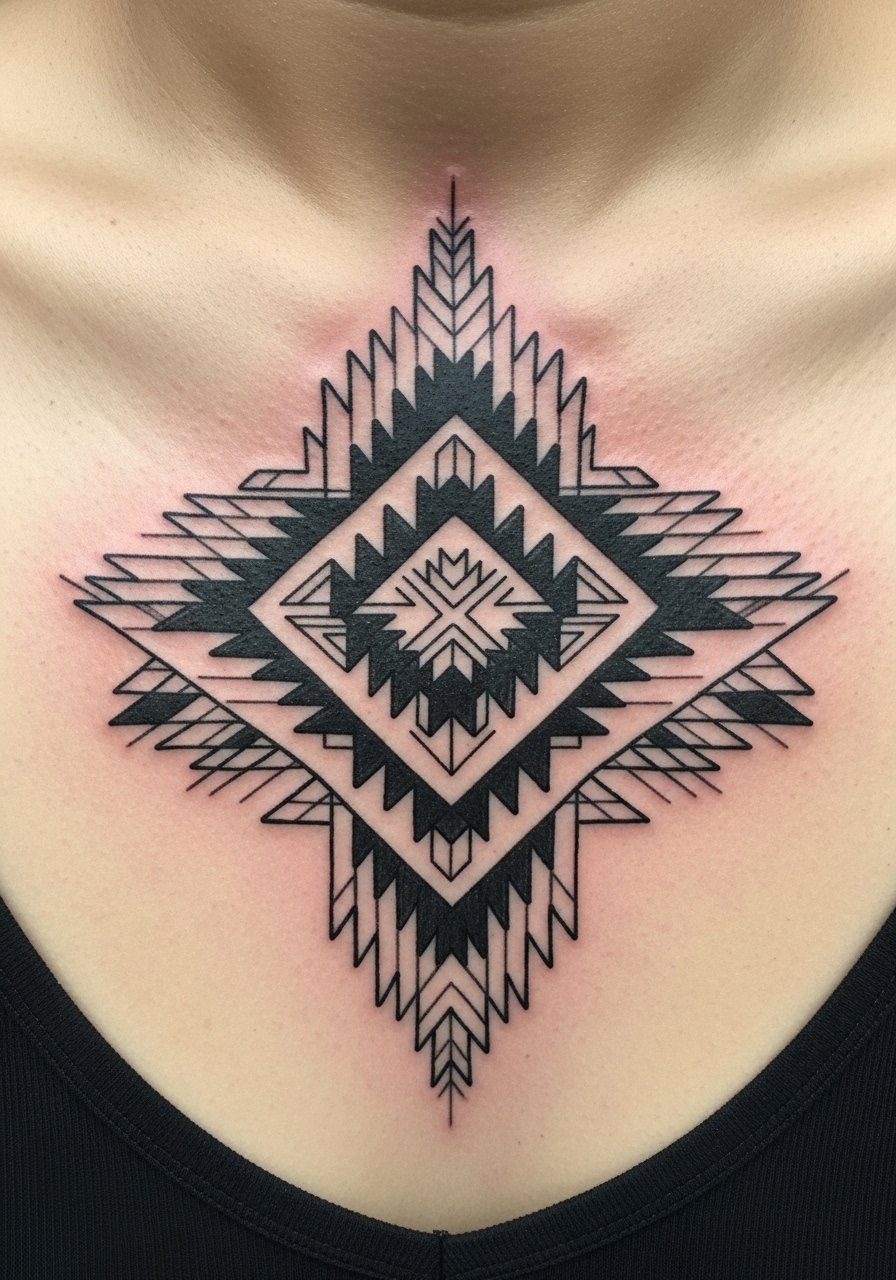
I discovered this look at a convention. The sternum is painful but it creates a central focal point that reads under low necklines. Session length depends on coverage, often two to three hours. Tell your artist to map the geometry across the sternum and avoid tiny inner dots. Those dots tend to spread and look like freckles later. For someone choosing between sternum and rib placement, the sternum holds symmetry better with chest movement. Expect the center lines to soften first. Plan for a touch-up at around 12 months if you want perfect symmetry.
7. Minimalist Tribal Band Behind Ear
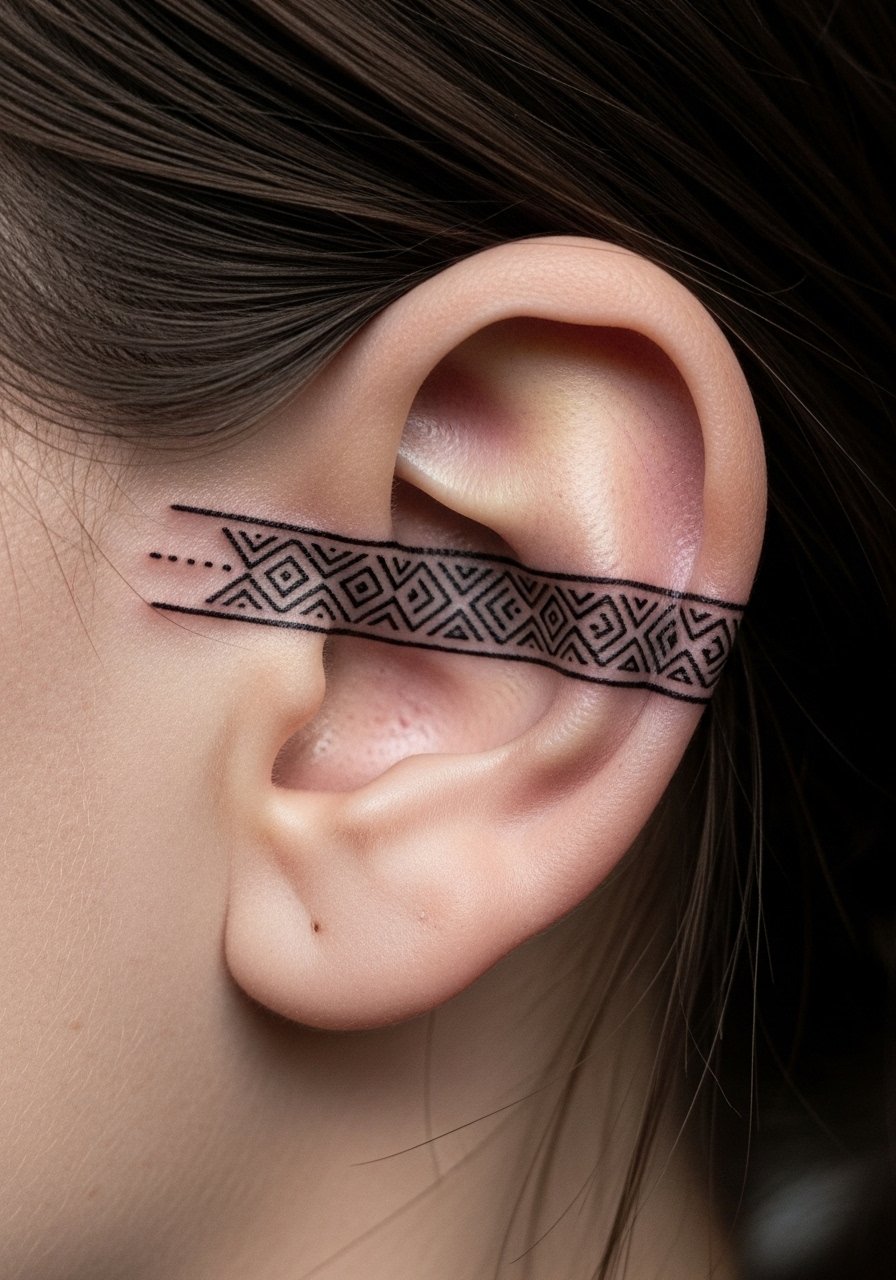
I fell for this after seeing it on a musician who wanted discreet symbolism. Behind the ear is surprisingly sharp pain for a small area. Sessions are short, often under 30 minutes. Ask for slightly thicker lines than you think you want. Tiny, hairline details vanish in under a year. This placement is great for first-timers who want something unobtrusive. Avoid intricate weaving here. The skin is thin and complex patterns age poorly. If you need concealment for work, this placement hides well under hair as it heals.
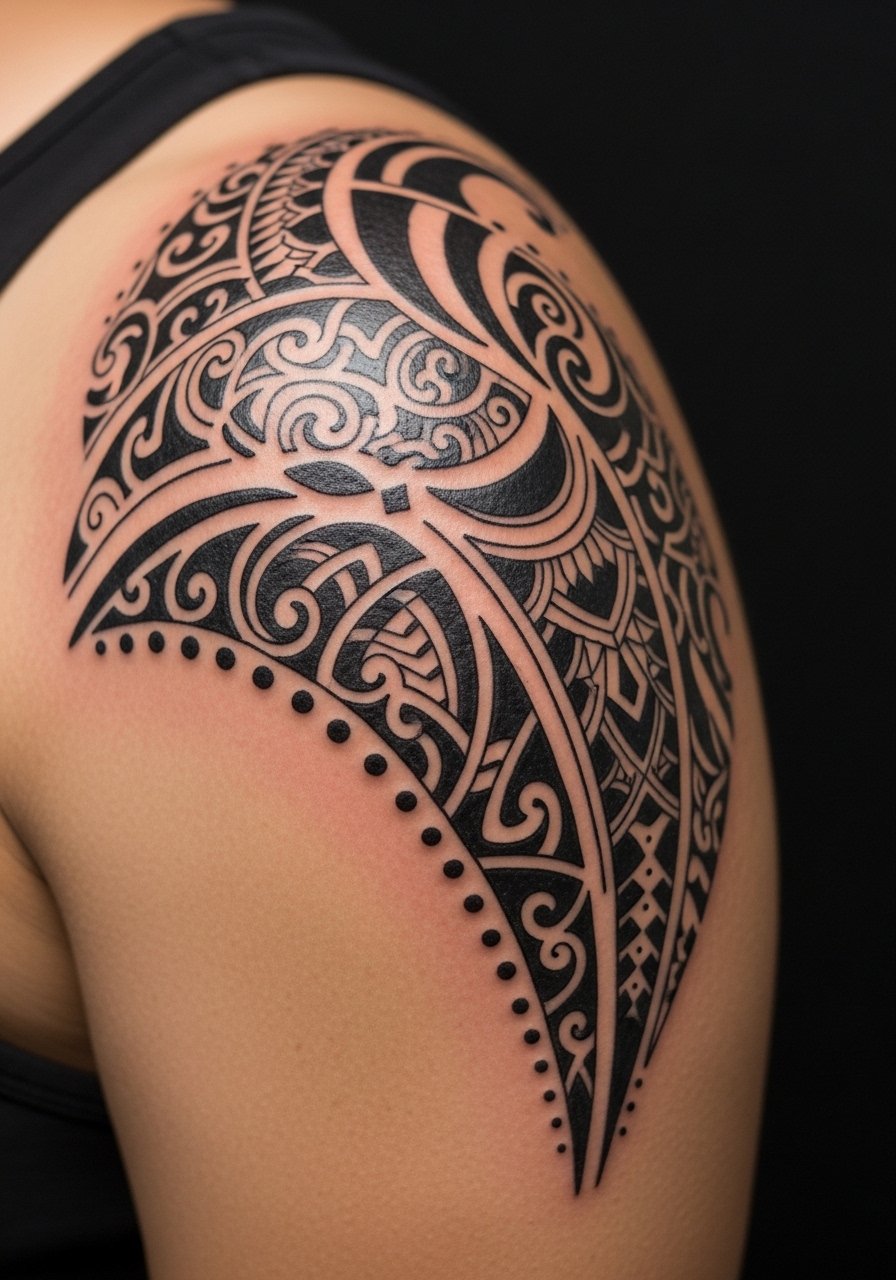
8. Borneo Tribal Collar On Shoulder Cap
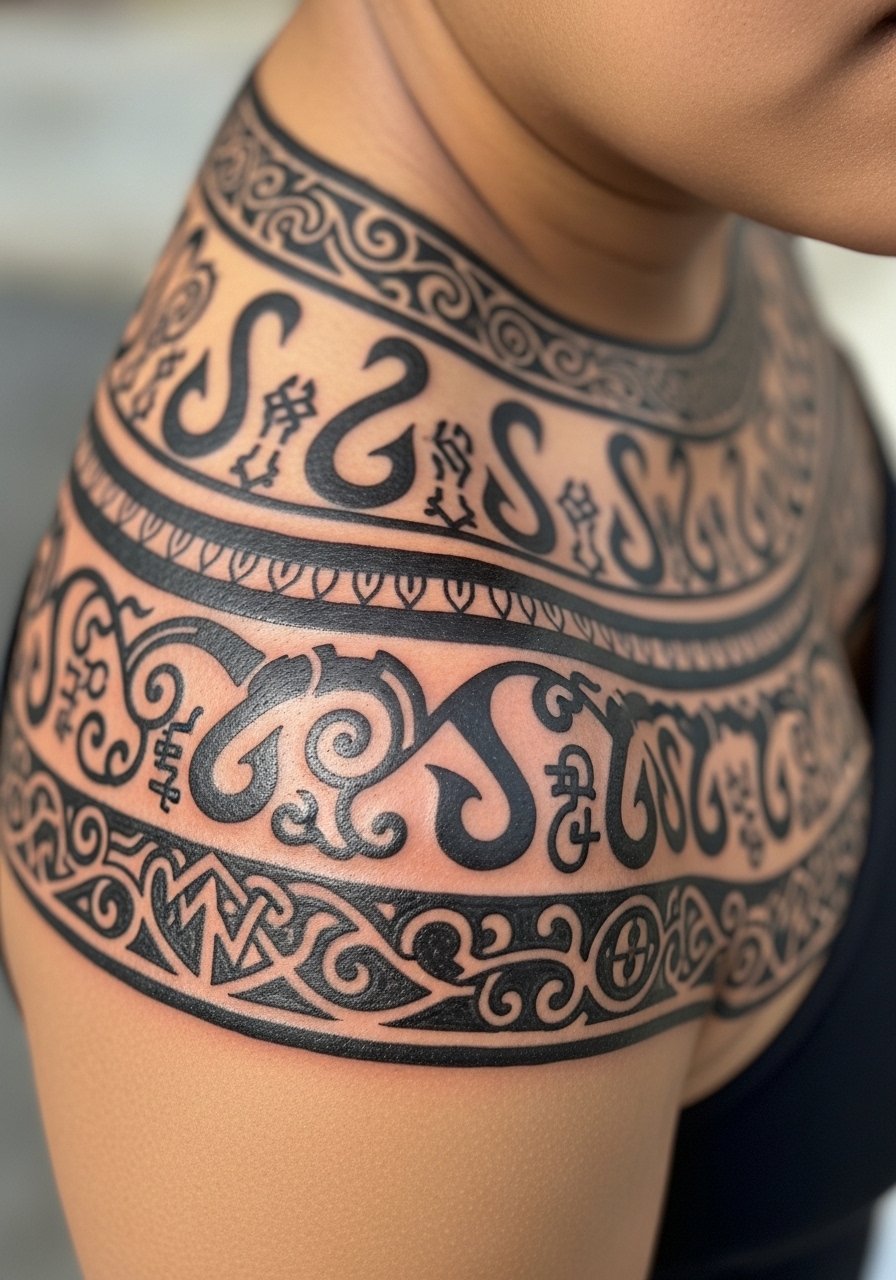
I picked up inspiration from a traveler who had this done after living in Borneo. The shoulder cap tolerates larger blocky motifs and the pain is moderate. Sessions are usually two to three hours. In consultation, request the design to curve with the deltoid. Designers who place straight motifs across a rounded shoulder create odd gaps as muscles move. A mistake I see is using tiny fillers that stain into gray blobs. Keep the main motifs bold. After a couple of years, this style can look as fresh as the day it healed if you keep the black saturated and protect it from the sun.
9. Aztec Sun On Ribcage
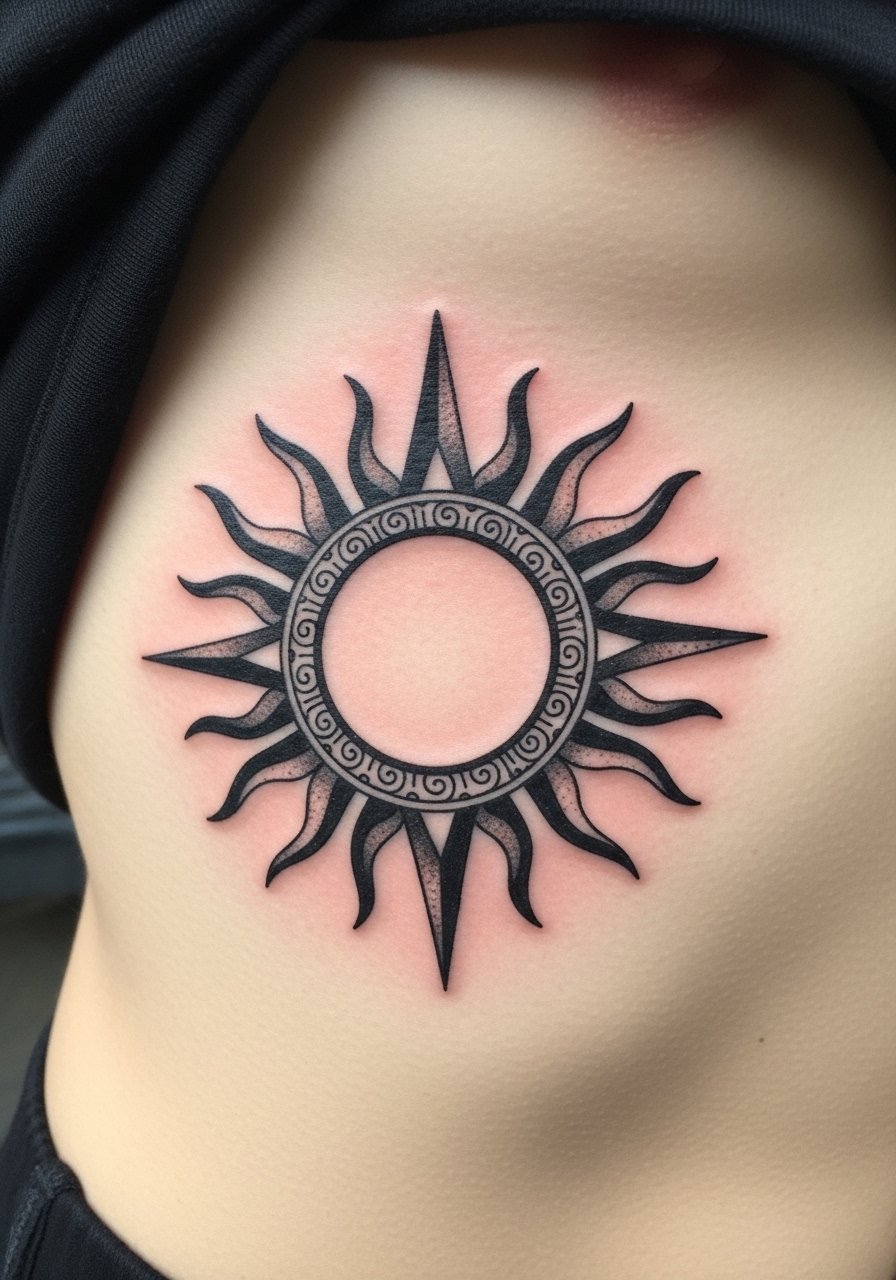
Fair warning, ribs are a high pain zone. It will feel sharp near the bone. I scheduled four short sessions for mine. Tell the artist to keep central detail simple. Overly intricate sun rays can bleed into one another with movement of the ribcage. Many people regret stuffing a ribpiece with tiny geometric fills. If you want drama, choose bold rays and allow negative space. This placement looks spectacular under swimwear. Expect the outer lines to soften first. Healed ribs often need a one-time touch-up after a year to restore crisp edges.
10. Blackwork Turtle On Foot Arch
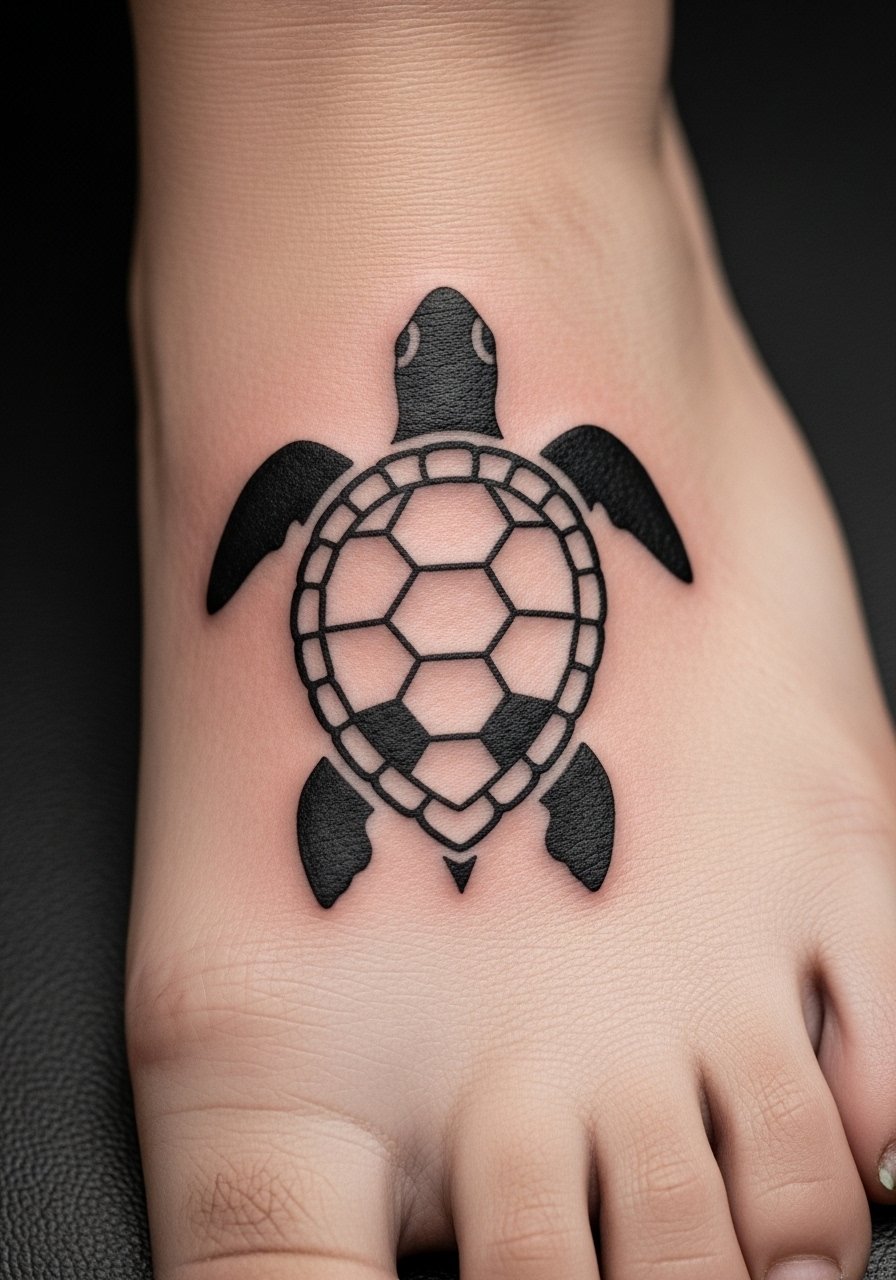
I learned the hard way that feet are tricky. The arch is moderately painful and rubs inside shoes. Sessions should be short, in one sitting if possible. Ask the artist to keep the design away from the very edge of the heel and toes. Designs too close to seams wear out fast. Foot tattoos often fade faster because of friction and skin turnover. If you still want this, prepare for a touch-up at one year. A common mistake is picking heavy shading that migrates into gray over time. Solid black outlines with simple negative space tend to read best on feet.
11. Hawaiian Tribal Anklet In Fine Line
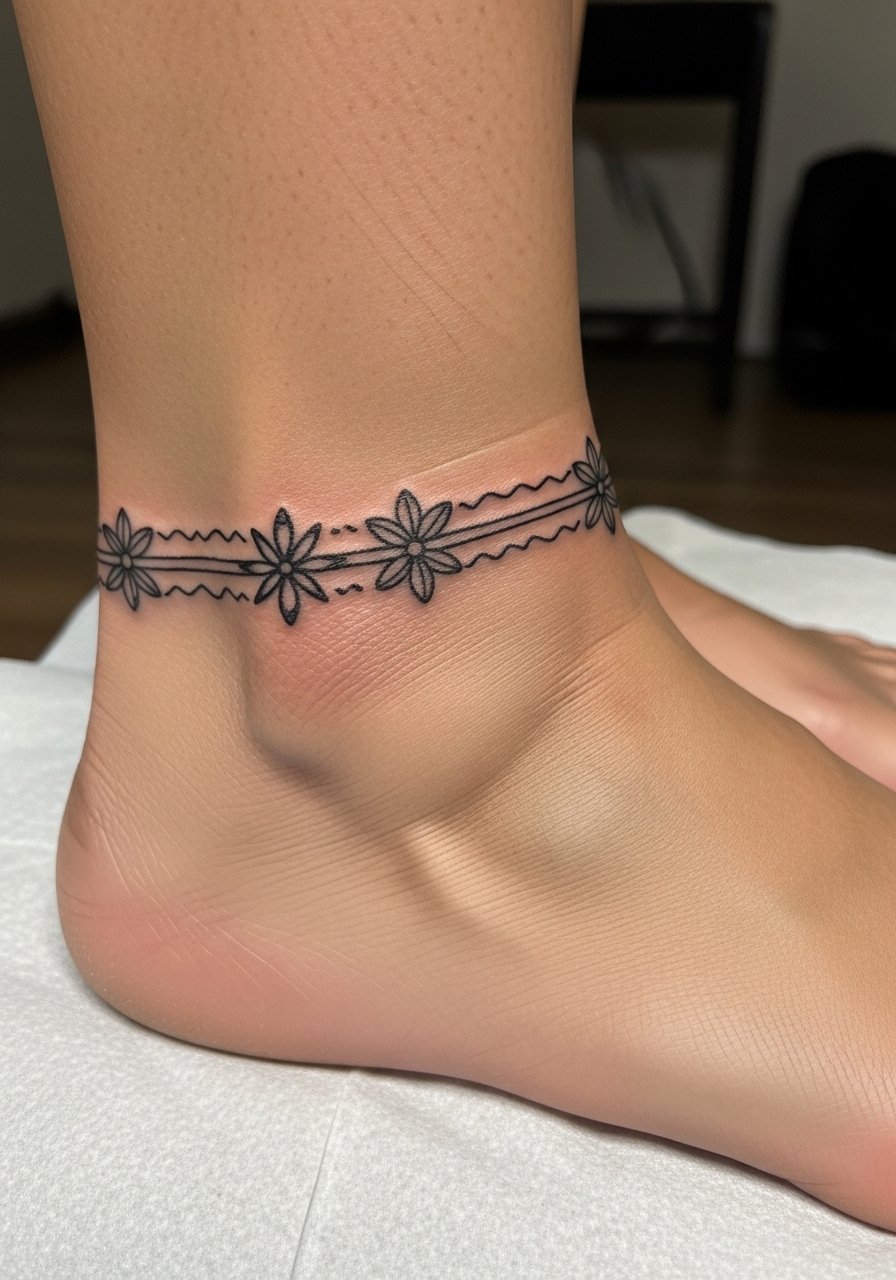
I saw this on a dancer who wanted mobility and grace. Ankles sting, especially near bone. Expect a one-hour session. When you talk to your artist, ask them to account for how anklets sit when you walk. Many people request perfectly circular bands that distort when the leg flexes. If your goal is delicate, pick slightly bolder line weights. Fine-line anklets look elegant fresh but can blur at two years if placed too tightly. Adding tiny gaps in the pattern preserves clarity as the skin stretches.
12. Tahitian Shoulder Blade Motif
I first noticed this on a surfer who wanted something that reads in a swimsuit. Shoulder blade tattoos can be painful near the spine and very doable across the outer blade. Session time varies from one to three hours. Ask the artist to draft the motif with the shoulder blade at rest and slightly extended. A common mistake is centering designs as if the shoulder is always relaxed. The healed piece should look balanced in movement. Bold dots and curved shapes age well here because they resist the blurring that tiny lines suffer over time.
13. Indigenous-Inspired Thigh Panel With Negative Space
I remember seeing a version of this at a gallery show. The thigh gives room to breathe and handles complex panels. Pain is lower on the outer thigh. Sessions often run two to three hours. Tell your artist you want large open fields and defined borders so the pattern does not compress as skin moves. The classic mistake is cramming too many small motifs into the panel. That results in a muddy look at three years. For long-term vibrancy choose bold primary shapes and plan touch-ups every few years if you want them to stay crisp.
14. Micronesian Chest Strip In Solid Black
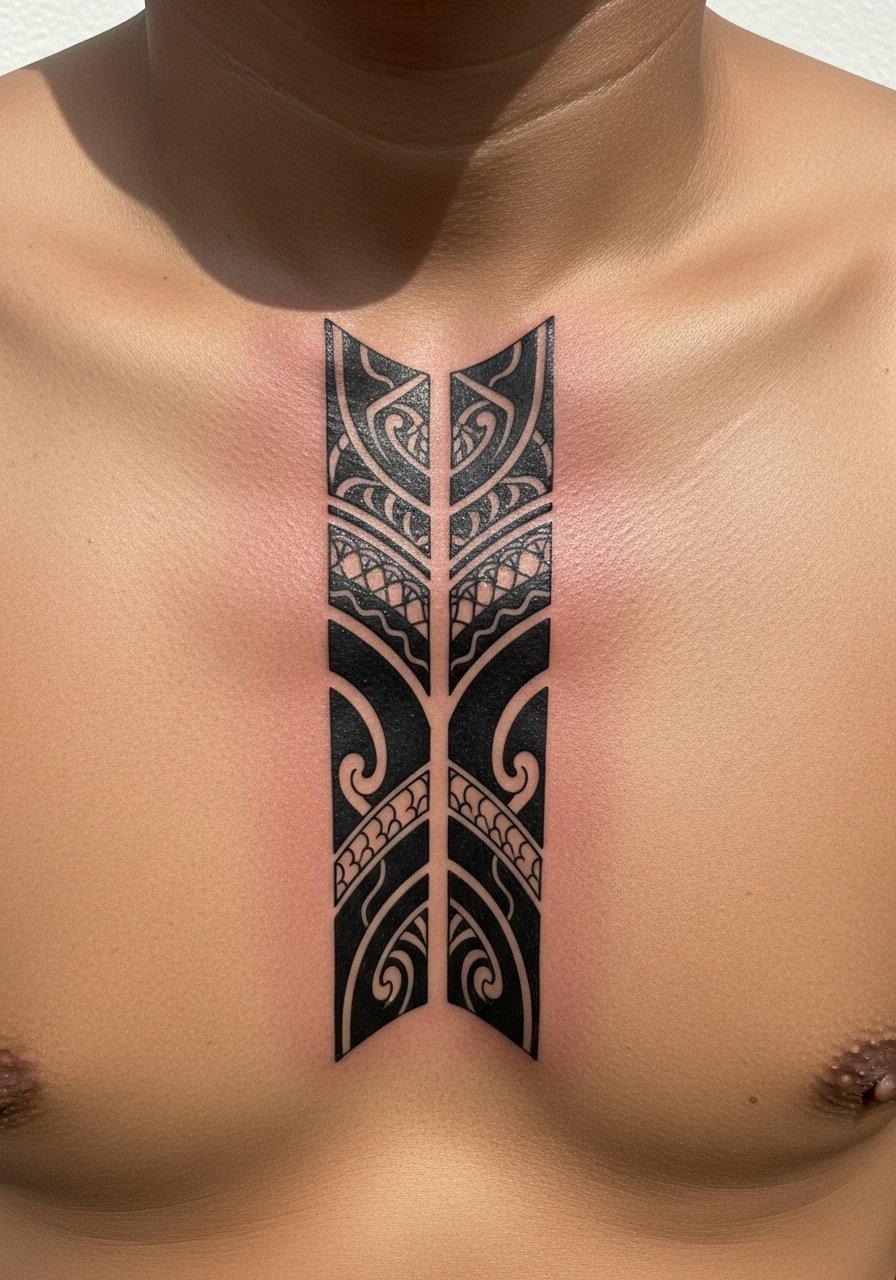
I found this pattern on a friend who serves in the navy. Chest strips carry presence and they hurt where they cross bone. Session lengths vary but plan multiple hours. During consultation, ask the artist to balance strip width with skin tension. Too narrow and the strip will look like a faint line after a while. A common aging issue is fading in the center if the ink is too thin. Solid black counters this. For an active person who spends time outdoors, ask about long-term maintenance and sunscreen for healed work.
15. Minimal Geometric Calf Panel In Fine Line
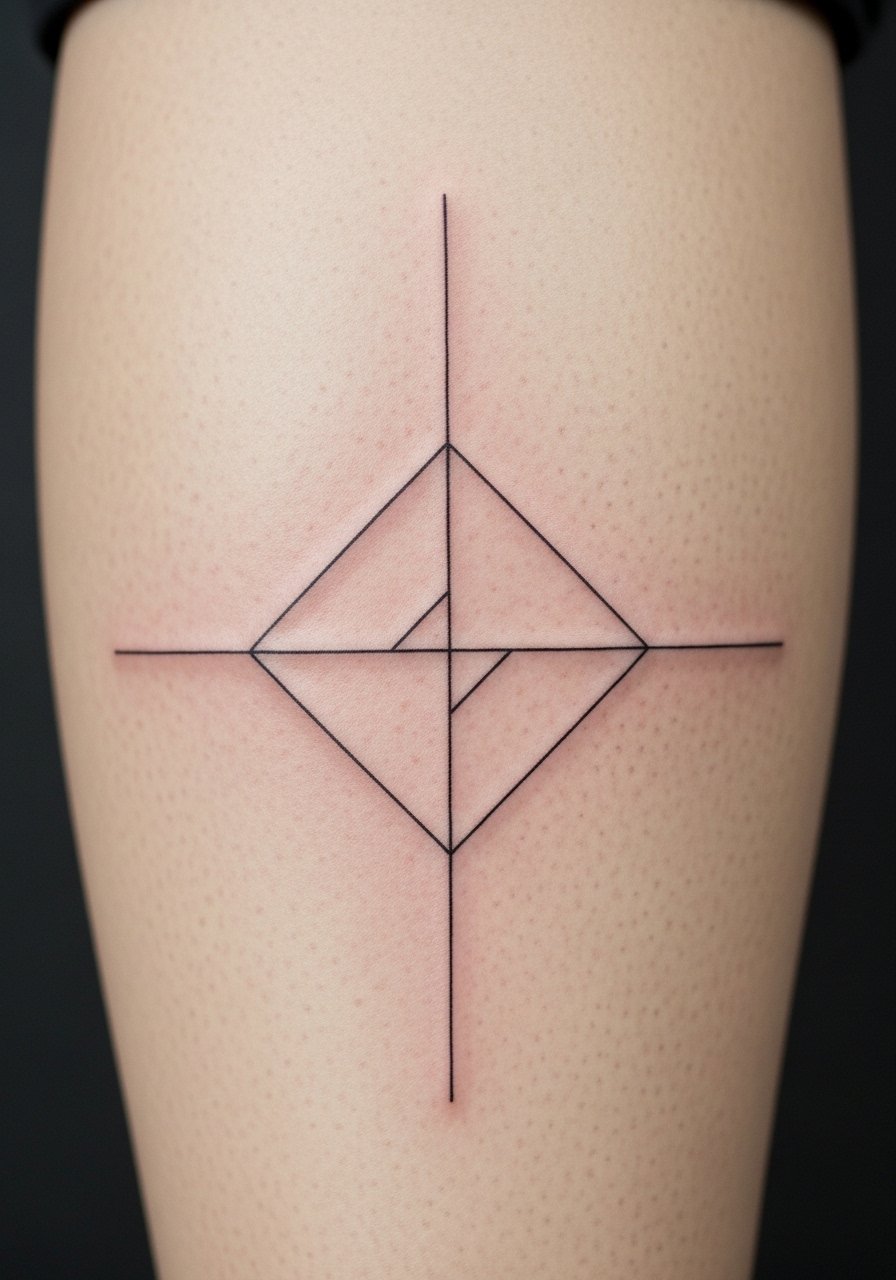
I picked up one of these after a hiking trip. The calf is less painful and great for elongated panels. Expect one to two hour sessions. Tell your artist you want clear spacing between triangles so the geometry does not merge as it heals. Many request ultra-fine lines that look great fresh but become faint within a year. If you like a minimal look, ask for slightly heavier anchor lines and thinner interiors. That keeps the design readable at six months and beyond.
16. Blackwork Spear On Rib Side With Shading
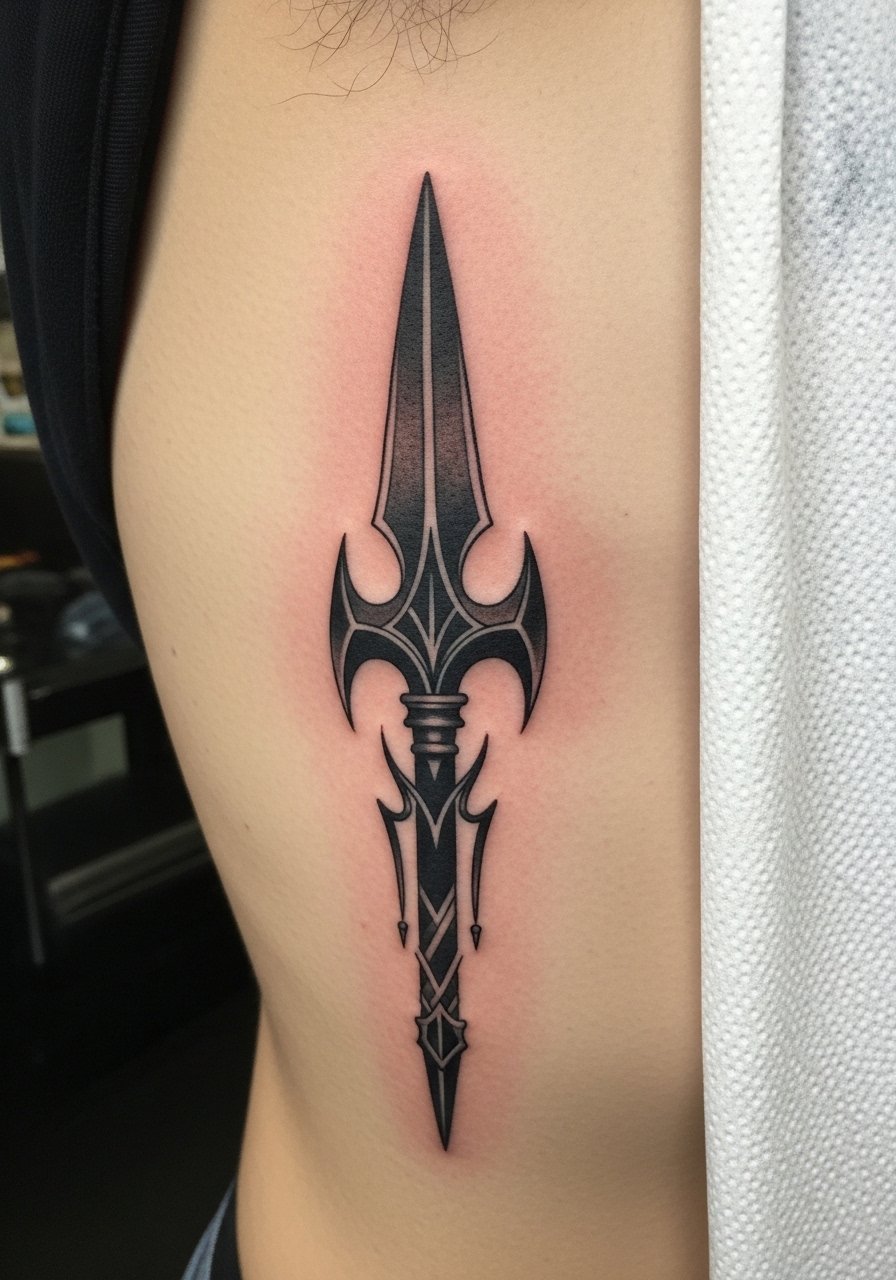
Rib-side spears are dramatic and they hurt, especially near the lower ribs. Sessions often require breaks and can last a few hours. When you book, tell the artist you want the spear to taper naturally with your torso shape. A mistake I see is forcing a symmetric spear across an asymmetric body. Shading can blur badly if too soft in the first session. For longevity ask for crisp edges and wait to add soft shading in a later touch-up. Healed spears read strong and sculptural.
17. Borneo-Inspired Wrist Cuff In Blackwork
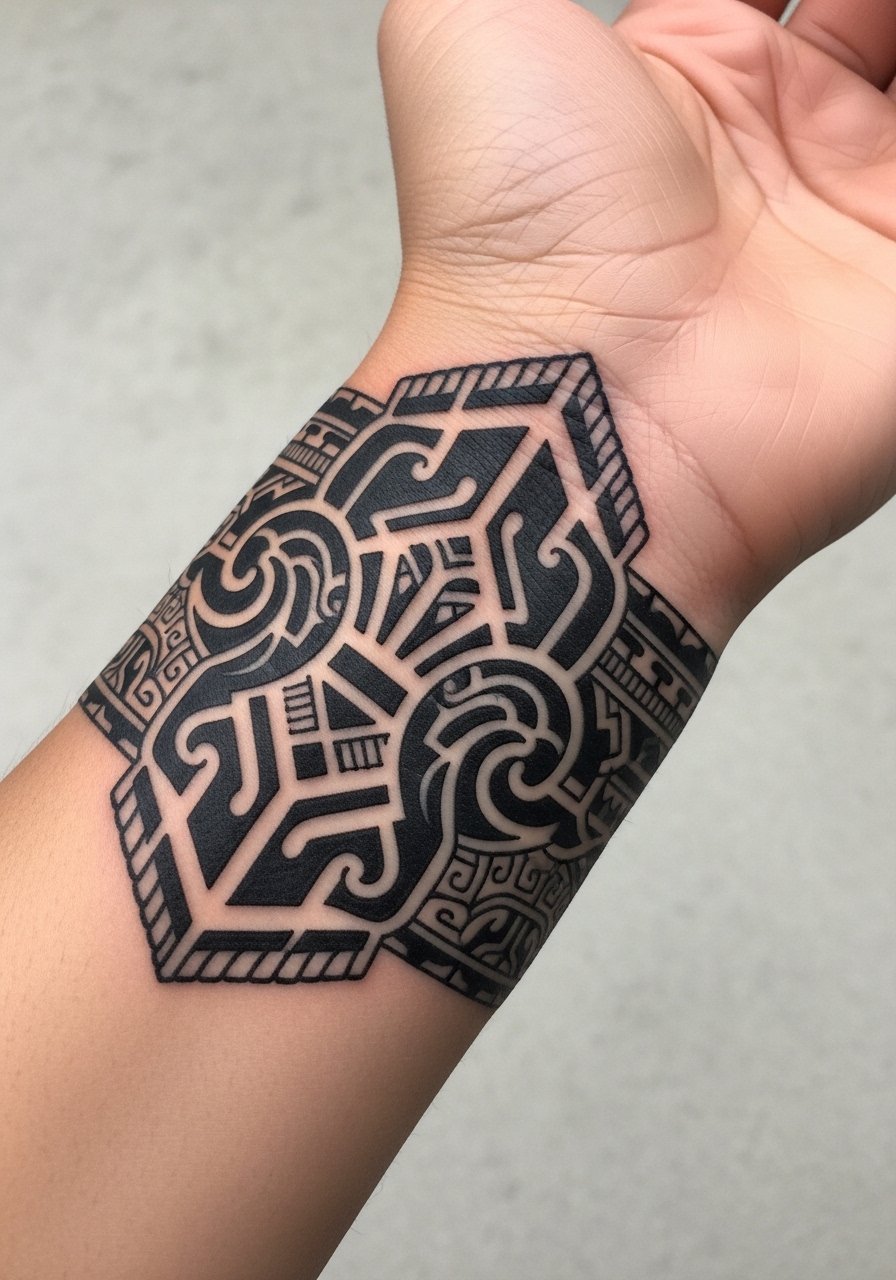
I noticed wrist cuffs look more intentional when they wrap cleanly and avoid the inner wrist crease. The wrist sting is sharp near tendon. Sessions are short, often under an hour. Ask your artist to leave a small gap over the inner wrist to let the cuff breathe as you move. A very common error is making cuff elements too tiny, which results in a fuzzy band later. For a cuff that lasts, request strong outlines and minimal micro-dot work. Healed cuffs with solid anchors stay readable even with regular sun exposure.
18. Tribal Sunburst On Upper Back
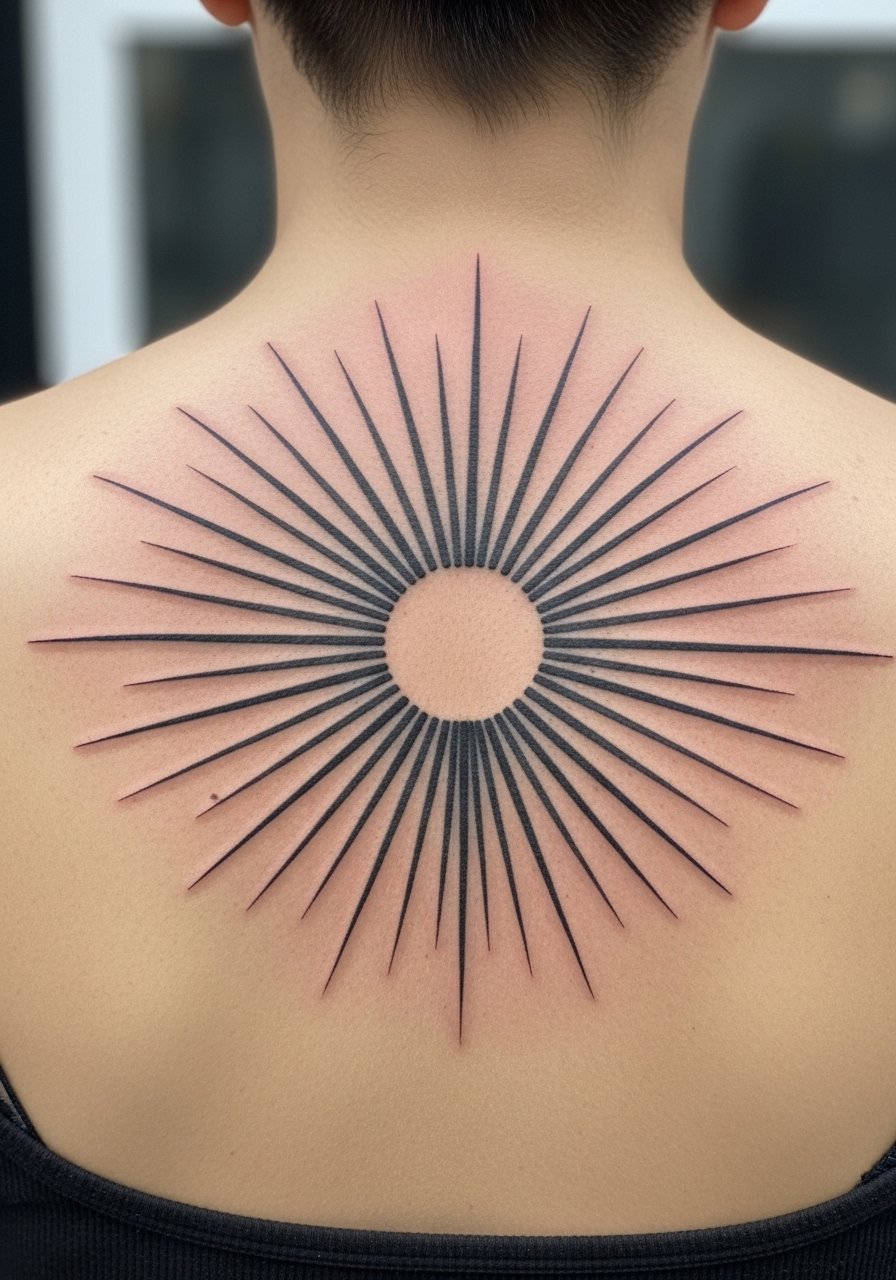
I first spotted this at an outdoor festival. The upper back is moderate on pain and allows dramatic scale. Sessions usually span multiple hours. Tell the artist to plan the burst so it aligns with the spine and shoulder blades. A mistake is sizing the burst too small for the space. Tiny sunbursts look lost at two years. If you want the effect to remain central, go bold with the core and use thinner rays that stop short of the shoulder blades to avoid blurring.
19. Marquesan Wrist Knot In Fine Black Lines
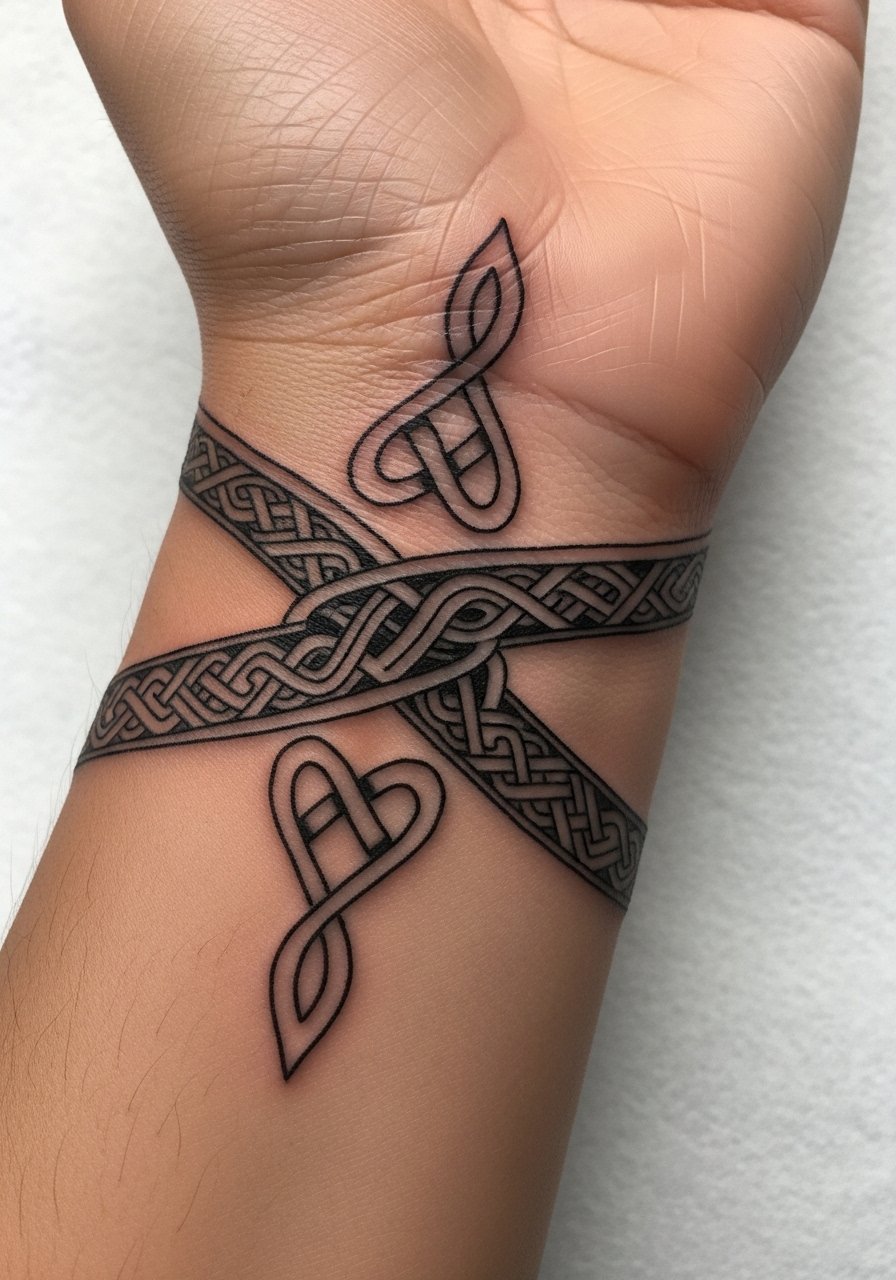
I got a wrist knot after a trip and kept careful notes on healing. The wrist is sensitive and the skin moves a lot. Session time tends to be short. Ask for slightly heavier outer guides. Small inner weaving will soften quickly. The common mistake is insisting on hairline filigree on the wrist. It often becomes faint within months. For a knot that reads well ask for defined anchors and airy negative spaces. Expect a touch-up in under a year if you use your hands a lot.
20. Polynesian Hip Panel With Flowing Lines
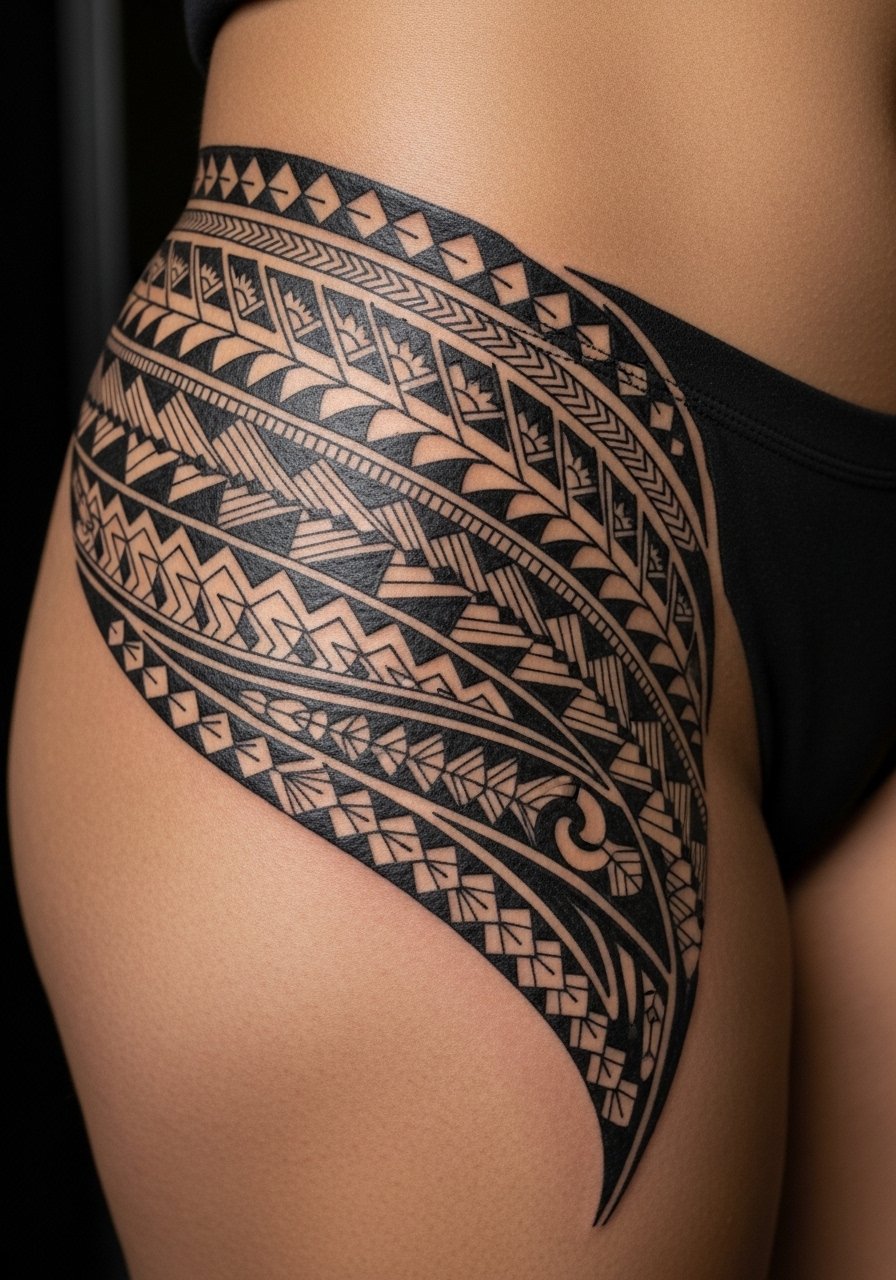
I first noticed this when a dancer wanted a piece that moved with her. Hips can be more sensitive, especially close to the bone. Sessions vary but many artists split these into two visits. Tell your artist how the piece should sit with clothing and movement. A common aging issue is choosing too many tiny interior elements that blur with stretching. If you want something that ages well pick bold anchors and flowing arcs. Healed hip panels often look organic and maintained if you avoid constant friction from low-rise clothing.
21. Inuit-Inspired Forearm Panel In Blackwork
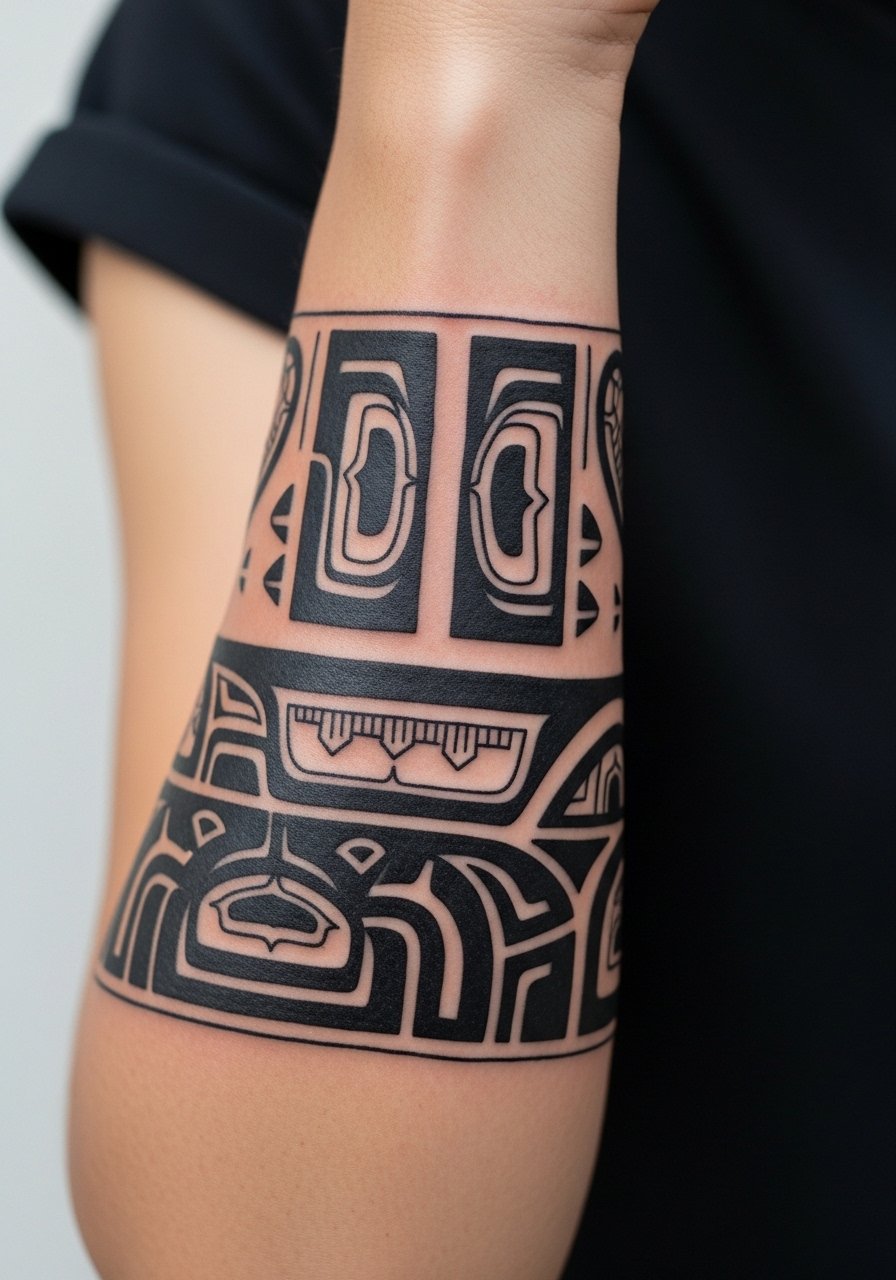
I came across Inuit patterns through a friend who had family ties to the Arctic. The forearm is a forgiving placement with moderate pain. Sessions usually last one to two hours. Tell your artist you want the panel to breathe along the muscle, not across it. Artists sometimes center panels in ways that fight the natural forearm flow. A frequent mistake is over-detailing the middle of the panel. Keep central motifs bold and peripheral details lighter. This placement looks great healed because the forearm shows detail without too much distortion.
22. Tribal Finger Wraps In Micro Blackwork
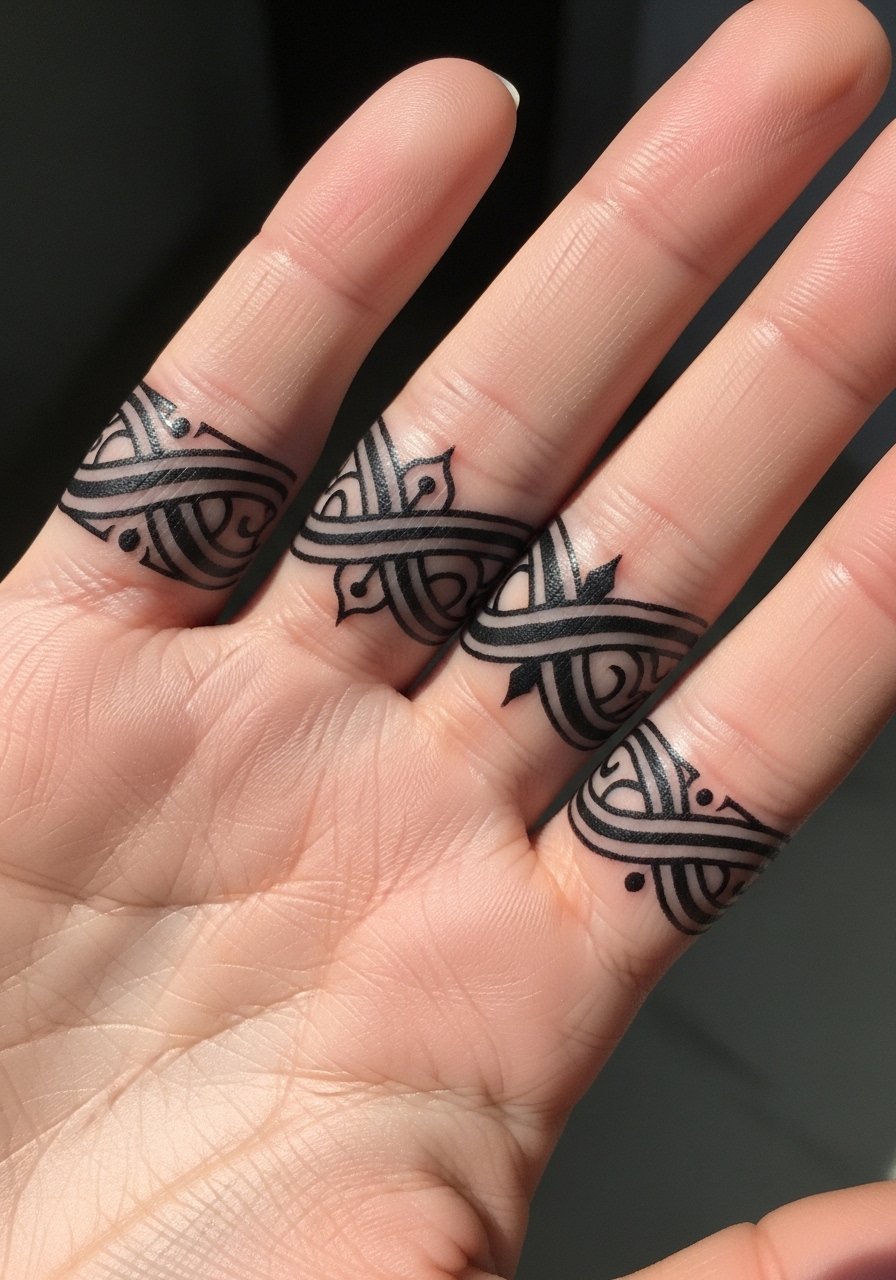
Finger tattoos are notorious for fading. I learned this after getting a tiny wrap that required two touch-ups. Expect high pain and short sessions. Ask your artist to make wraps slightly thicker than you think. Hairline work on fingers disappears quickly because of constant washing and friction. The most common mistake is treating fingers like other skin. If you must have finger wraps, be prepared for yearly touch-ups. For better longevity ask for bolder anchors and minimal inner shading.
23. Maori-Inspired Throat Line In Fine Black
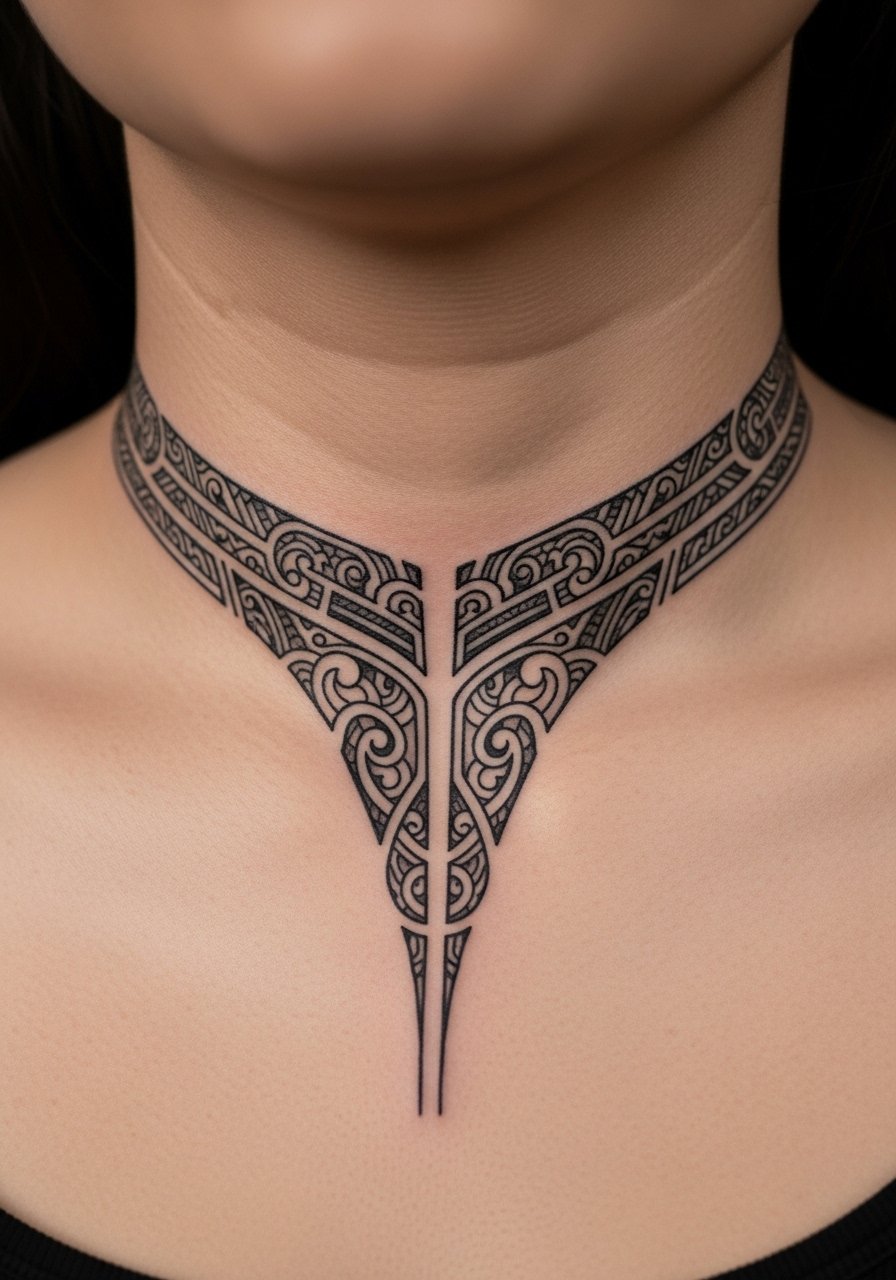
Neck work made me rethink placement priorities. The throat is visible and can hurt a lot near the windpipe. Sessions are usually short but intense. Tell your artist to consider how the piece rests when you tilt your head. Many designs look odd when their tension lines do not follow neck muscles. A common error is using thin script-like details that blur with movement. If you want this placement to last, pick larger motifs and expect touch-ups every couple of years. Healed throat lines can be striking and surprisingly readable when done with bold clarity.
24. Papua New Guinea Arm Panel With Dots
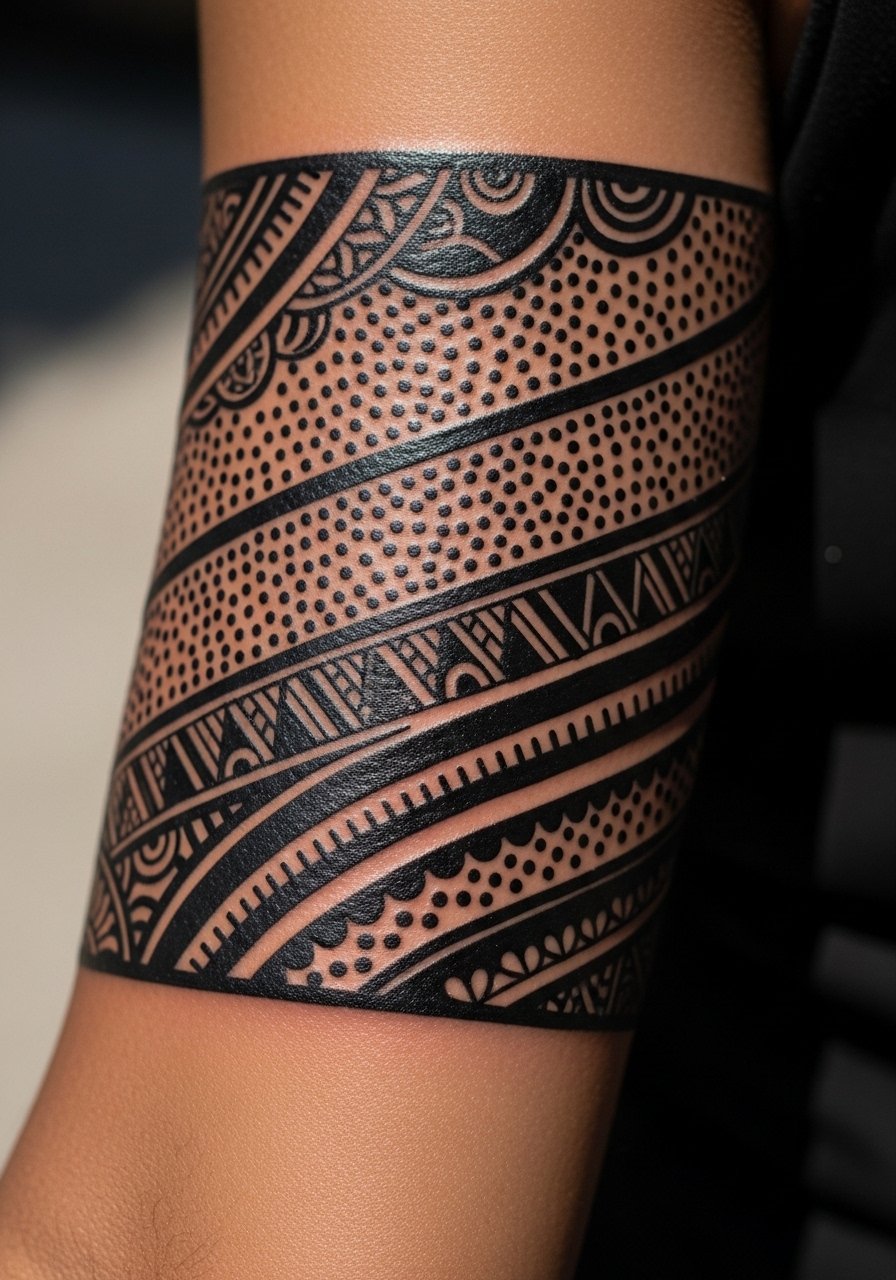
I talked to an artist who uses dotted textures to add depth. The outer arm is low on pain and excellent for panels. Sessions often run two to three hours. Ask the artist to space dot clusters intentionally so they do not merge into a gray patch. Many underestimate how dots behave as skin ages. A common mistake is applying dense dot fields without contrast. For a panel that holds up, pair dots with solid anchors. Healed panels with balanced contrast retain their dimensional look better over time.
25. Andean Chevron On Rib Cage Side
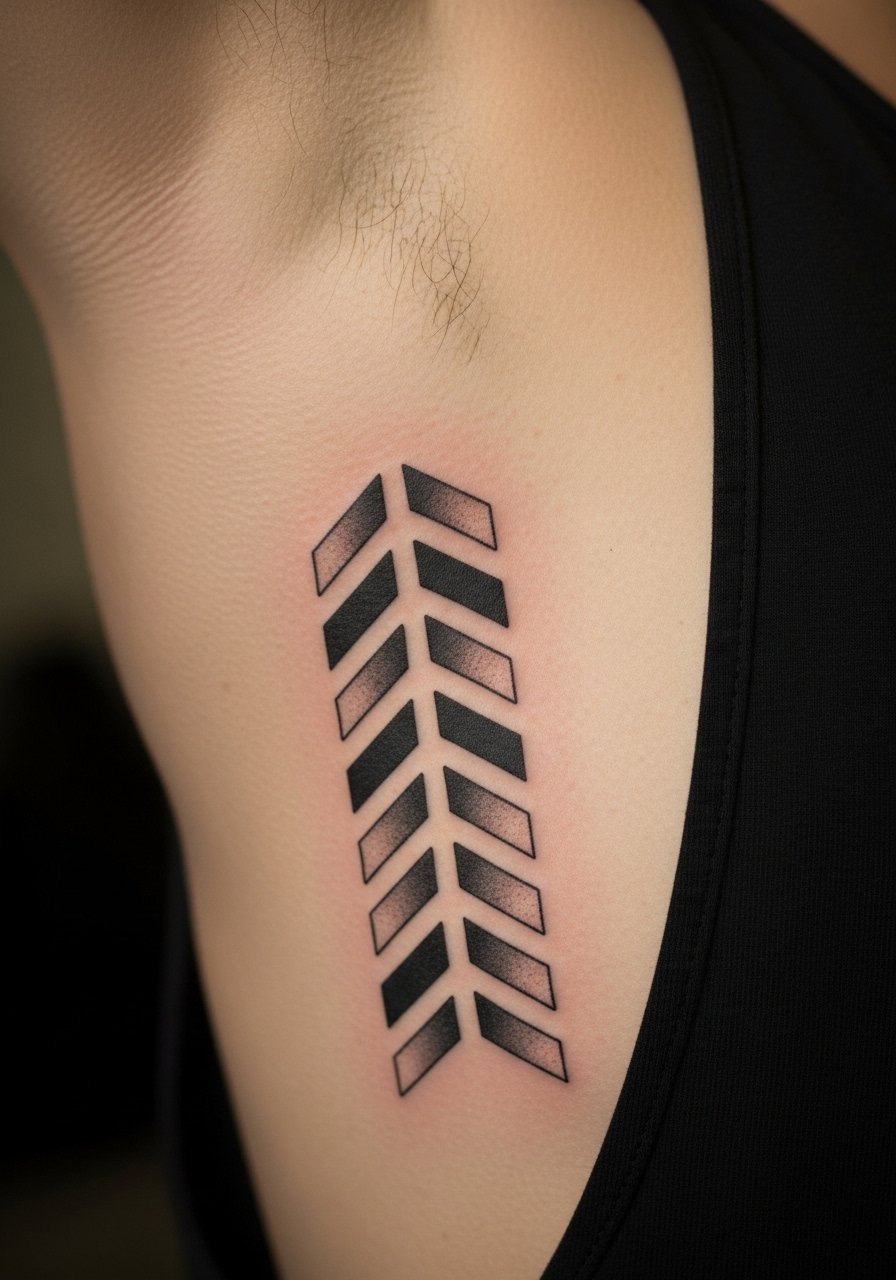
I fell in love with chevrons after seeing them on a climber. The rib side is painful but offers a long vertical canvas. Sessions usually span multiple sittings. When you consult, ask your artist to scale chevrons to the torso length so they do not cut off awkwardly. A mistake I see is tiny chevrons that lose definition. If you want crisp geometry, choose thicker lines and allow negative space. After a year the outer chevrons will soften first, so plan touch-ups if you want perfect symmetry.
26. Polynesian Finger Dot Trail
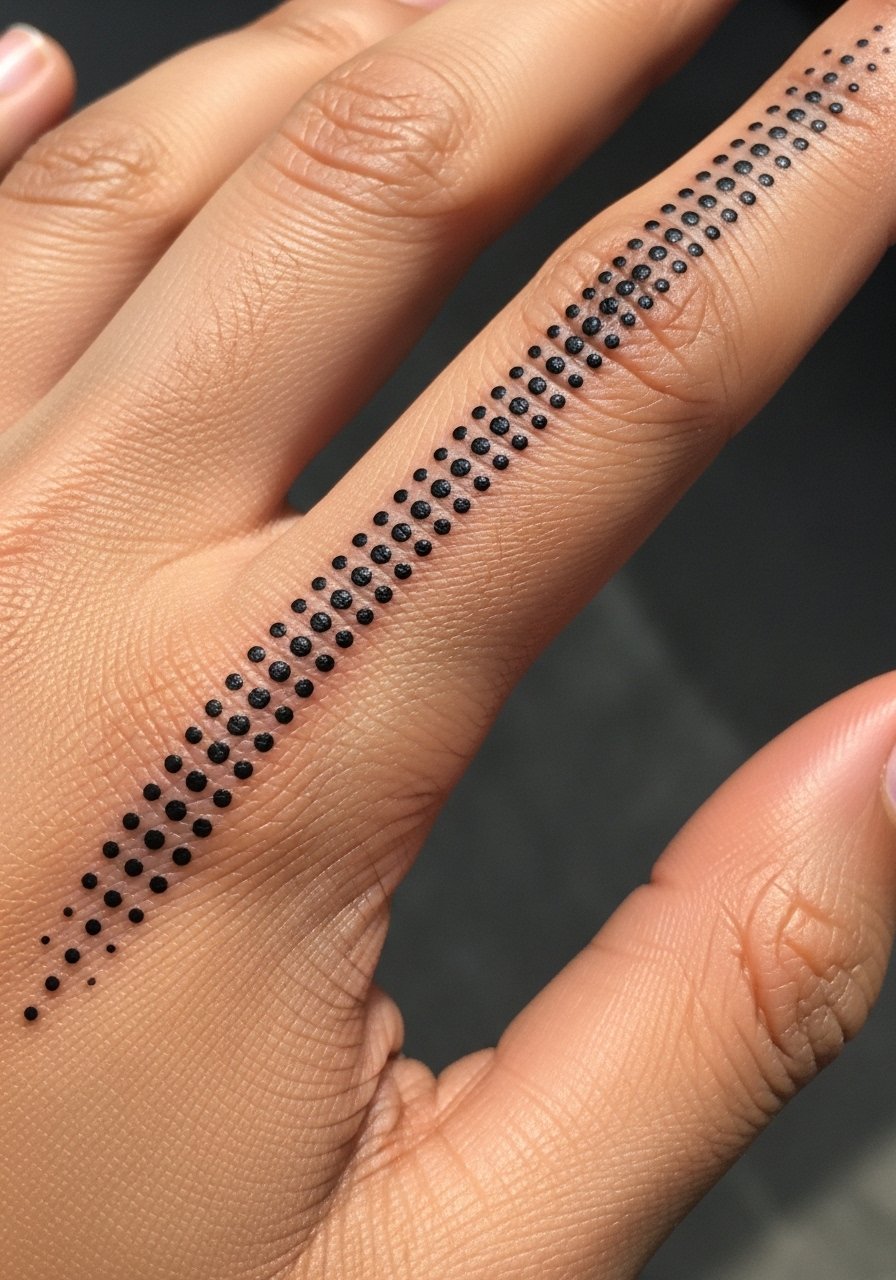
I noticed dot trails look elegant when they curve along tendons. Fingers are high maintenance. Pain is sharp and sessions are brief. Tell your artist you want dots spaced to accommodate frequent hand washing. The common aging issue is dots filling in or turning into a faint gray line. If you love this look, accept that annual touch-ups are likely. For better longevity, ask for slightly larger dots at anchor points and sparser filler dots between them.
27. Neo-Tribal Neck Crescent On Side
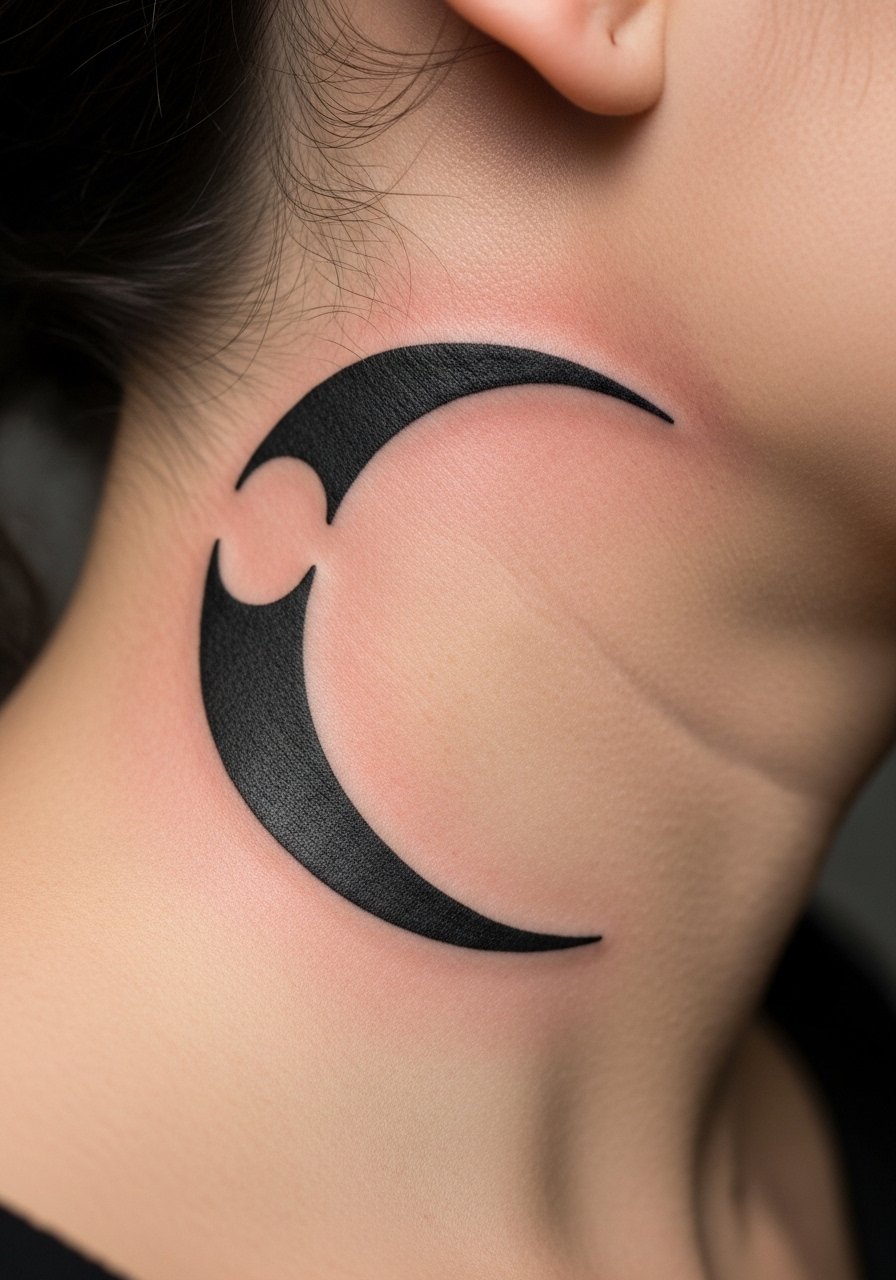
I saw a modern take on this on a model and liked how discreet it was when hair covered it. Side of neck tattoos hurt, especially near the clavicle. Sessions are short but sharp. Tell the artist to orient the crescent so it curves naturally with the jawline. Artists sometimes place crescents too high, where they look awkward as hair grows. A mistake is heavy shading that ages into a smudge. Choose clean outlines and sparse filler if you want the piece to remain defined.
28. Tribal Back Rib Panel With Vertical Flow
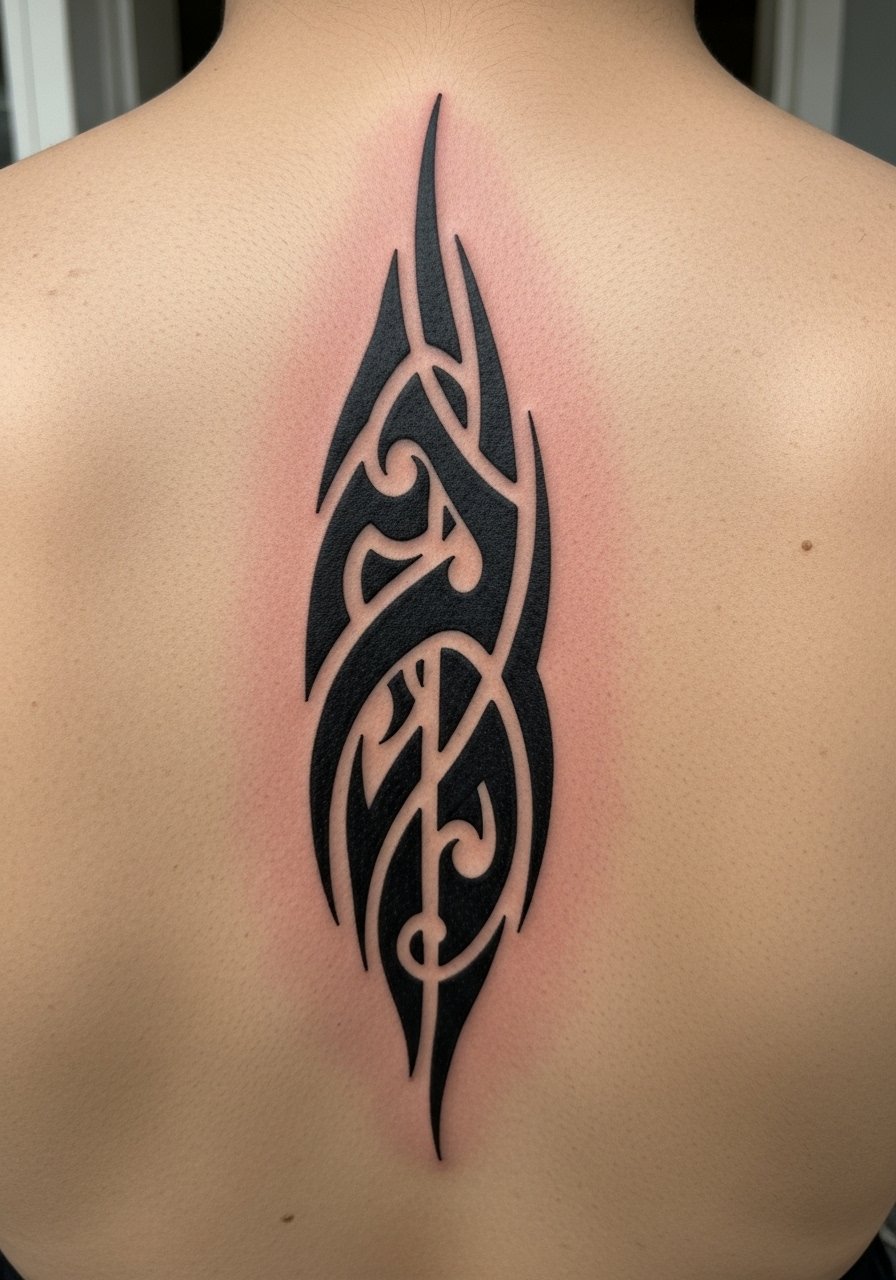
I ended my list with a piece I helped design with a friend. The back rib area is painful where ribs show. Sessions are long for full panels. When you plan this, ask the artist to draft the vertical flow to complement your spine curvature and your posture. The biggest mistake I see is ignoring how panels look when you sit and bend. Over time small internal linework may soften. If you want a panel that holds, aim for bold main lines and schedule a touch-up after the first year.
Tattoo Prep and Aftercare Essentials
Aftercare Essentials:
- Aquaphor Healing Ointment, 14oz tube. Industry standard for first 3-5 days. I use a very thin layer at night
- Saniderm Transparent Adhesive Bandage, 6-inch roll. Second skin healing method. Every artist I've talked to recommends it for the first 24 to 72 hours
- CeraVe Fragrance-Free Moisturizing Lotion, 12 oz pump. Daily moisturizer for days 4 to 14. I prefer the pump bottle for hygiene
- Dr. Bronner's Unscented Castile Soap, 16 oz. Gentle cleanser for rinsing twice a day the first week. Dilute a small drop with water
Before Your Appointment:
- Numbing Cream with 5% Lidocaine, 30g tube. Apply 30 to 45 minutes before your session only if your artist approves. Some artists prefer no numbing
- Tattoo Stencil Transfer Paper, A4 Pack. Useful if you want to test placement at home before your appointment
Long-Term Maintenance:
- SPF 50 Sunscreen Stick for Tattoos, Travel Size. Use on healed tattoos whenever they see sun. I carry one for beach days
- Mad Rabbit Tattoo Balm, 2 oz. Long-term maintenance for vibrancy. Artists I know recommend it for healed pieces
- Hustle Butter Deluxe, 5 oz. Vegan alternative that works during healing and after. Smells better than most aftercare
Optional Comfort Items:
- Tattoo Numbing Spray, 4 oz. Handy for touch-ups or sensitive areas mid-session
- Hydrocolloid Bandages, Large Size. Good alternative to Saniderm for small to medium tattoos
Frequently Asked Questions
Q: Will fine line tribal bands blur if I get a full sleeve of motifs?
A: From what I've seen, fine-line bands blur faster when placed next to dense blackwork in a sleeve. If you want a sleeve with both, tell your artist to alternate line weights and leave deliberate negative space between bands. Asking for slightly stronger anchor lines in the fine-work prevents it from dissolving into gray. I keep Aquaphor on hand for initial healing and the Aquaphor Healing Ointment, 14oz tube helped my fine lines settle.
Q: Do watercolor-style tribal blends need different aftercare than solid blackwork?
A: In my experience watercolor-like shading can be more delicate during initial healing. Use a gentle soap like Dr. Bronner's Unscented Castile Soap, 16 oz and avoid heavy ointments that trap moisture for long stretches. Solid blackwork tolerates a bit more aggressive moisturizing early on. Every artist I've talked to tends to recommend Saniderm for delicate color work so the pigment stays in place.
Q: Can I get a tribal rib tattoo if I bruise easily?
A: Rib tattoos bruise more often, from what I've observed. If you bruise easily, communicate that with your artist so they can pace sessions and avoid heavy shading in the first visit. Plan for multiple short sessions. I also recommend choosing bold shapes rather than dense dotwork. Bold shapes photograph better healed when small bruises have cleared.
Q: How should I brief my artist for a Polynesian shoulder panel to ensure it ages well?
A: Ask them to map the piece on your shoulder with movement in mind. Specifically ask for wider primary motifs and spaced secondary fills. From what I've seen the common error is over-detailing the floats. Request a mock-up on your shoulder so you can see it in different postures. If you plan to sun-expose the area, commit to an SPF 50 stick like SPF 50 Sunscreen Stick for Tattoos, Travel Size for long-term vibrancy.
Q: Are finger tribal wraps worth it for longevity?
A: Finger wraps look great but are high maintenance. I got one and needed a touch-up within a year. If you expect daily hand use, accept yearly refreshes. Ask for larger anchor dots and sparser filler. Using a long-term balm like Mad Rabbit Tattoo Balm, 2 oz after healing helped mine stay readable between touch-ups.
Q: What should I tell my artist about spacing if I want a Maori chest plate to stay crisp?
A: Tell them to emphasize negative space between major spirals and to avoid tiny internal dots. Ask for slightly heavier guide lines than you might prefer visually at first. From what I've gathered, designs that breathe are easier to touch up and hold detail through years of movement. A follow-up touch-up around 10 to 12 months is normal for perfect symmetry.
Q: Is Saniderm safe for large tribal panels like back ribs or sleeves?
A: Yes, many artists I trust recommend Saniderm for large panels during the initial 24 to 72 hours. It reduces scabbing and limits contamination. If you plan to use it, discuss the timing with your artist so they can apply it in-studio. I often use Saniderm for wide blackwork pieces and find the healing looks cleaner. If you need it, here is the commonly recommended option, Saniderm Transparent Adhesive Bandage, 6-inch roll.
