
I spent eight months saving designs and testing how they looked healed on real skin. I learned that the hardest part was not choosing art. It was choosing art that stays readable and delicate over years. These 27 fine line tattoos reflect what I keep seeing on artists' books in 2026, and what I would get again.
This list leans into fine line work, micro-realism, and minimalist script. Most designs work on forearms, ribs, ankles, and behind the ear. From what I’ve gathered, artists favor slightly bolder single lines now, because fully hairline work blurs faster. These picks focus on pieces that read both fresh and healed.
1. Fine Line Botanical Sleeve on Inner Forearm
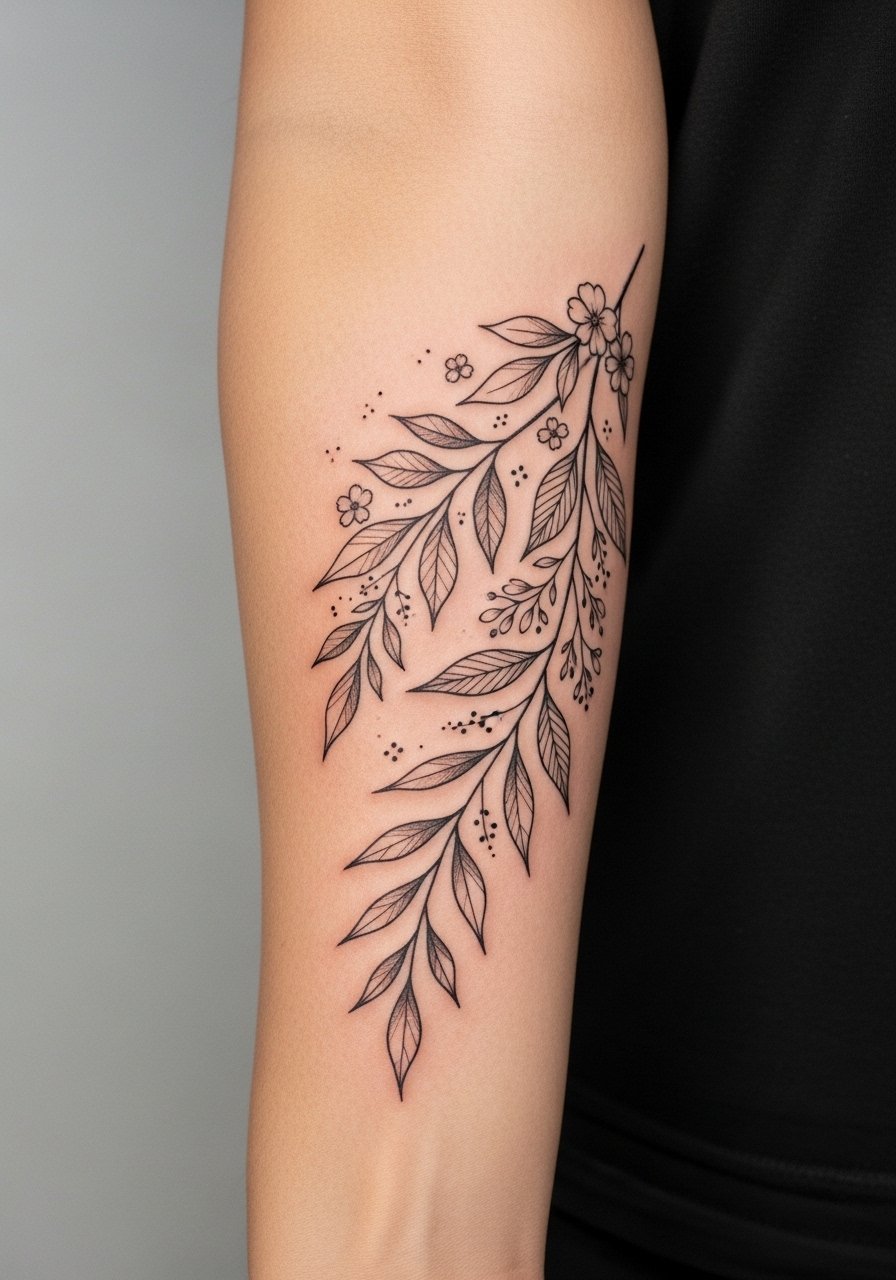
I first saw this on a friend's forearm and couldn't stop staring at the linework. The style uses fine line stems with slightly thicker main branches so the design stays crisp after one year. Expect a 3 to 5 hour session if you want a half sleeve look. Pain is moderate for the inner forearm. Tell your artist you want variable line weight, not uniform hairlines. A common mistake is asking for hair-thin leaves everywhere. That looks fragile healed. At six months the tiny details soften. At two years the thicker anchor lines keep leaves readable. Ask for a small test motif at the start of the session to check settling.
2. Micro-Realism Portrait on Upper Arm
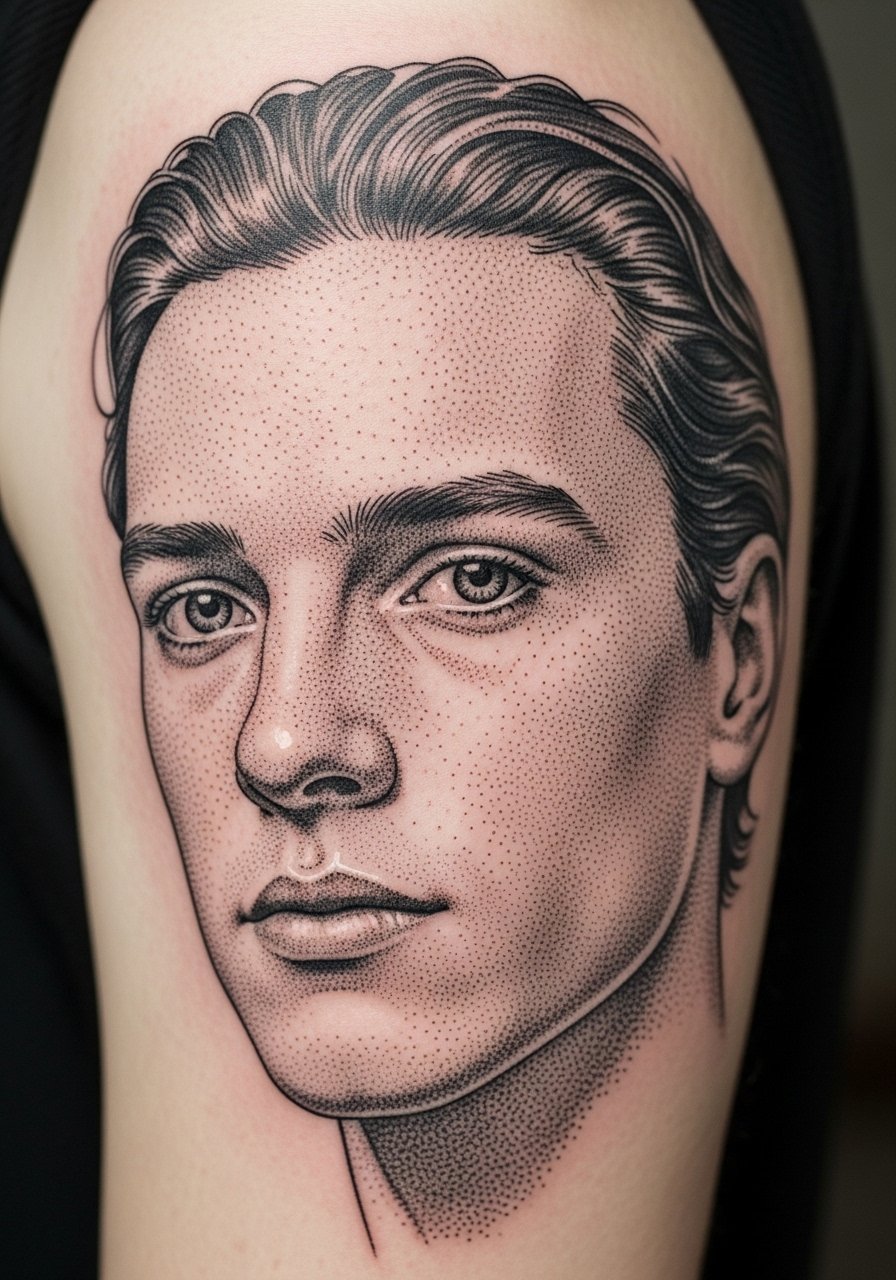
Fair warning, portraits with very thin contour lines can turn muddy if done too small. I recommend a slightly larger fine line portrait on the upper arm. The area has friendly flesh for artists and pain is low. Session time is often multiple hours. When you consult, bring clear photo references and ask the artist to prioritize tonal detail over ultra-thin outlines. A mistake I see is shrinking a portrait for placement. Up close it looks detailed. Healed, details can bleed. At one year the stipple shading softens but the subject remains recognizable if sized correctly.
3. Minimalist Line Art Mountains on Ankle
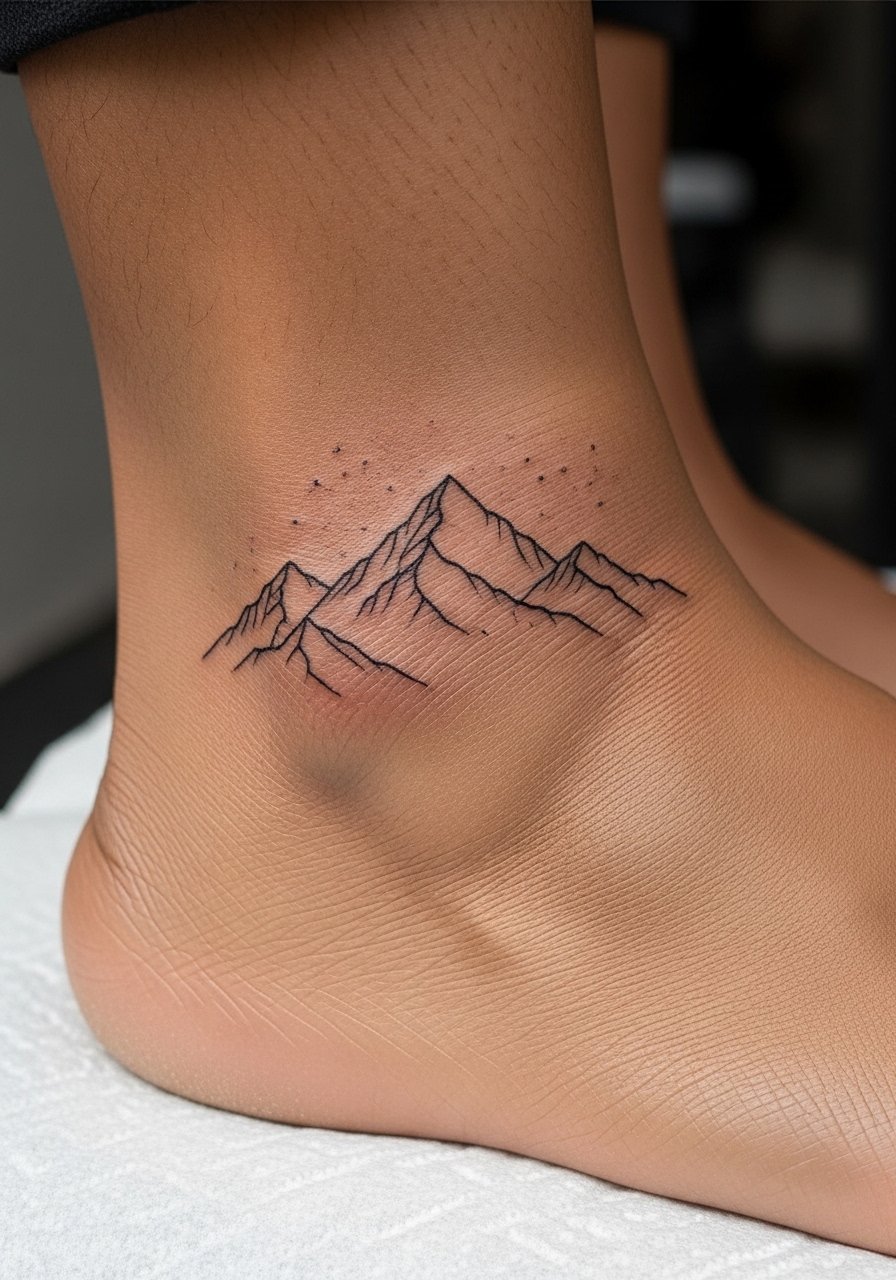
I like this for people who travel a lot and want subtle placement. The ankle is a high-movement spot so expect more touch-ups down the line. Pain is a 5 out of 10 in my experience. Sessions are short, often under 90 minutes. Ask for slightly bolder peaks and intentional gaps so the lines do not blur into a single dark shape after a year. A common aging issue is placing too many tiny details on the ankle. Keep the negative space. At six months the lines will look softer. At two years, if you live in sun, the outline can pale so plan on sunscreen.
4. Blackwork Geometric Mandala on Spine
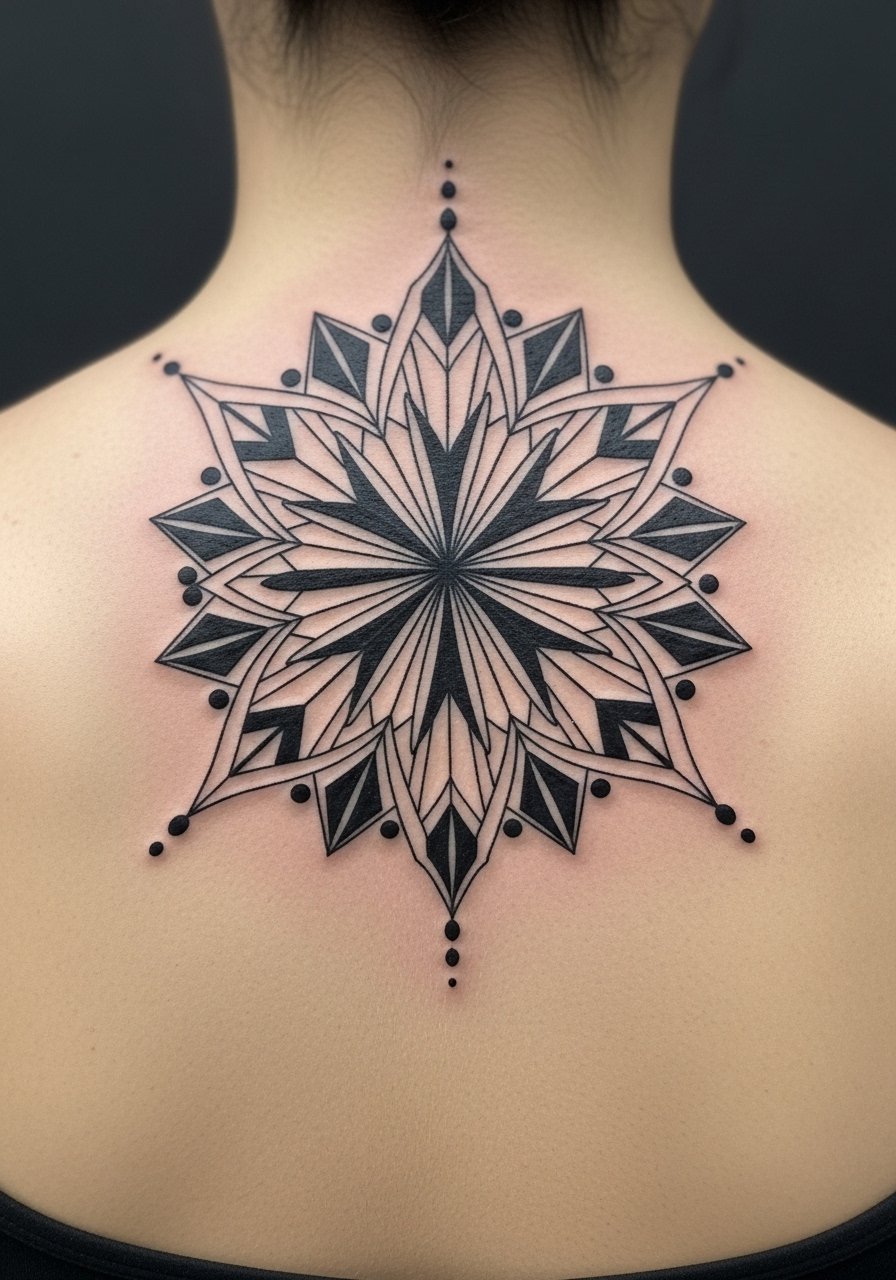
When I first saw this, it read like jewelry on the back. Spine pieces are higher on the pain scale. Sessions may be split. The contrast of solid black anchors and finer radial lines helps the design age well. During consultation ask for stronger central anchors and thinner outer lines. A frequent mistake is making every segment the same tiny width. Small uniform lines blur into a blob. At six months the outer lines soften. At three years the central blacks still read if the artist packed ink well.
5. Tiny Fine Line Constellation Behind Ear
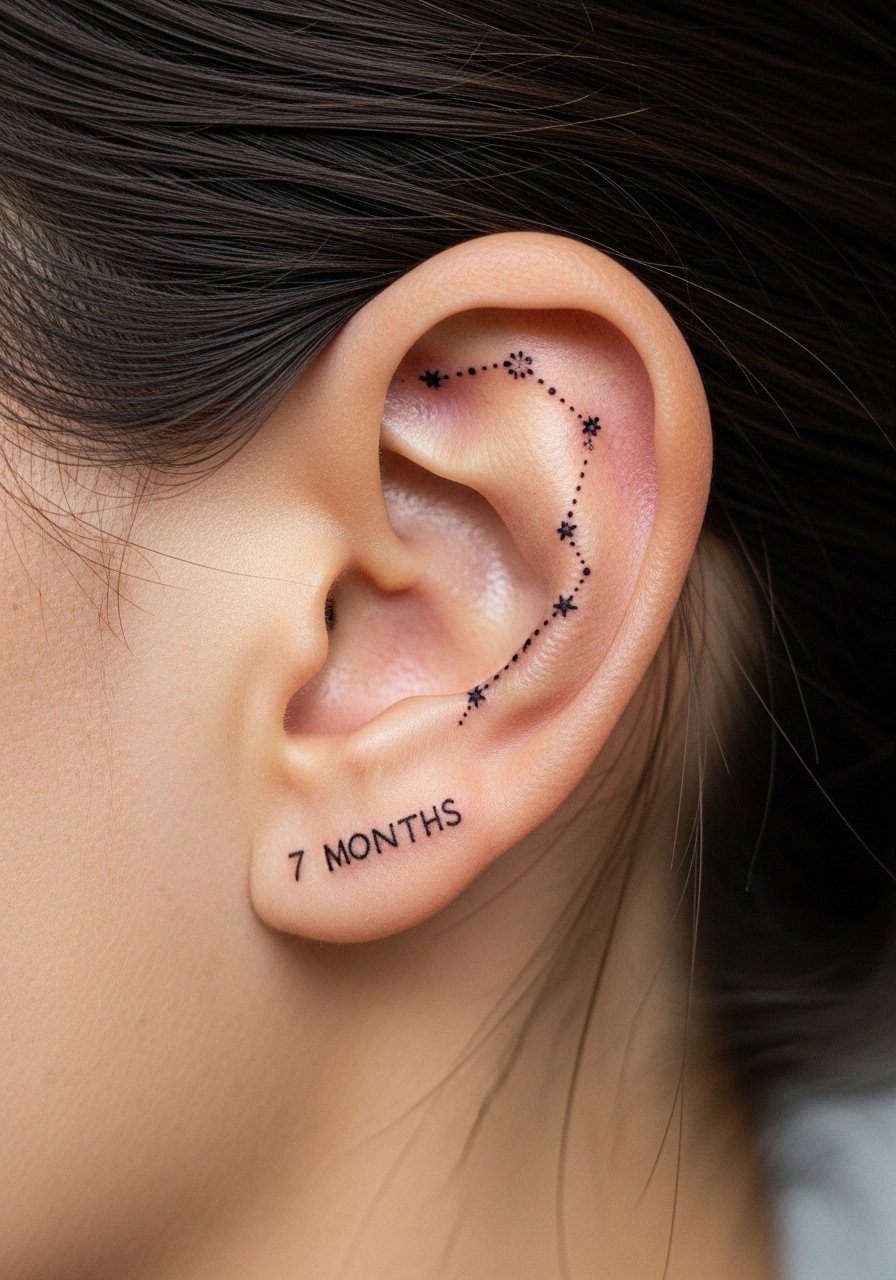
I recommend this for first-timers who want a whisper of ink. The area is sensitive but quick. Sessions are under 30 minutes. Tell the artist to use single-point anchors, not long uninterrupted hairlines. A common mistake is overloading the area with too many stars. Healed, dense dots can merge. At one month the dots look sharp. At 12 months they round out and read softer. If you sleep on one side often, expect minor fading and bring that up with the artist.
6. Minimal Script Name on Inner Wrist

If you want a name, I learned to choose medium-sized script over delicate micro script. The wrist moves a lot so lines can blur. Pain is low to moderate. Sessions are quick. Tell your artist the exact font and ask them to stencil it on while you move your wrist. Avoid asking for ultra-thin strokes. Healed, hairline scripts can break up. At six months letters may thicken visually. Ask for slightly stronger downstrokes for longevity.
7. Fine Line Floral Ribcage Sprig
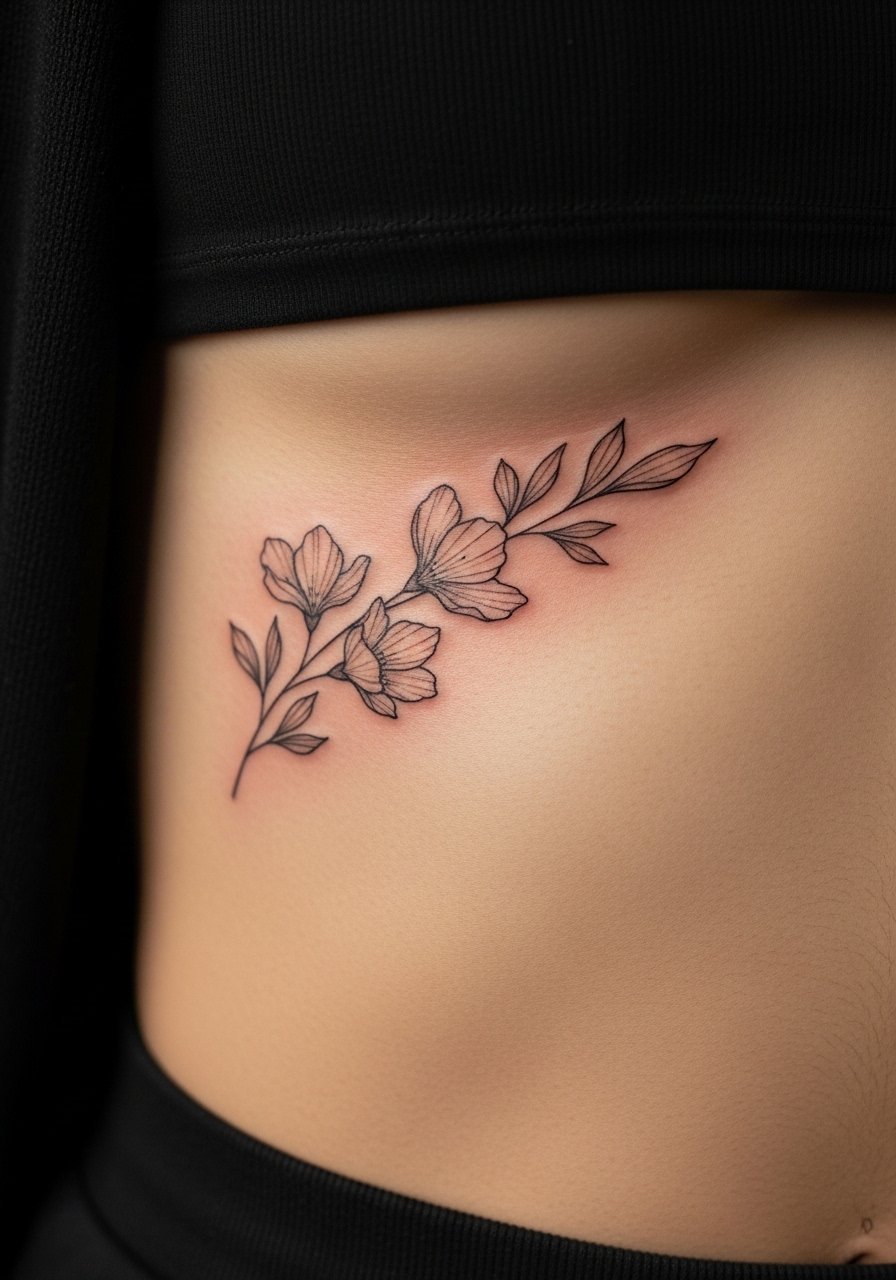
Fair warning, the ribcage stings. I say that because many clients underprepare and tense up. Expect a multi-hour session for a detailed sprig. The placement moves with breathing so ask your artist to position stems to flow with the body. A common mistake is cramming too many small petals into the curvature. At six months the fine petals will smooth. At two years the silhouette survives if artists place slightly thicker base stems.
8. Single-Needle Portrait on Inner Bicep
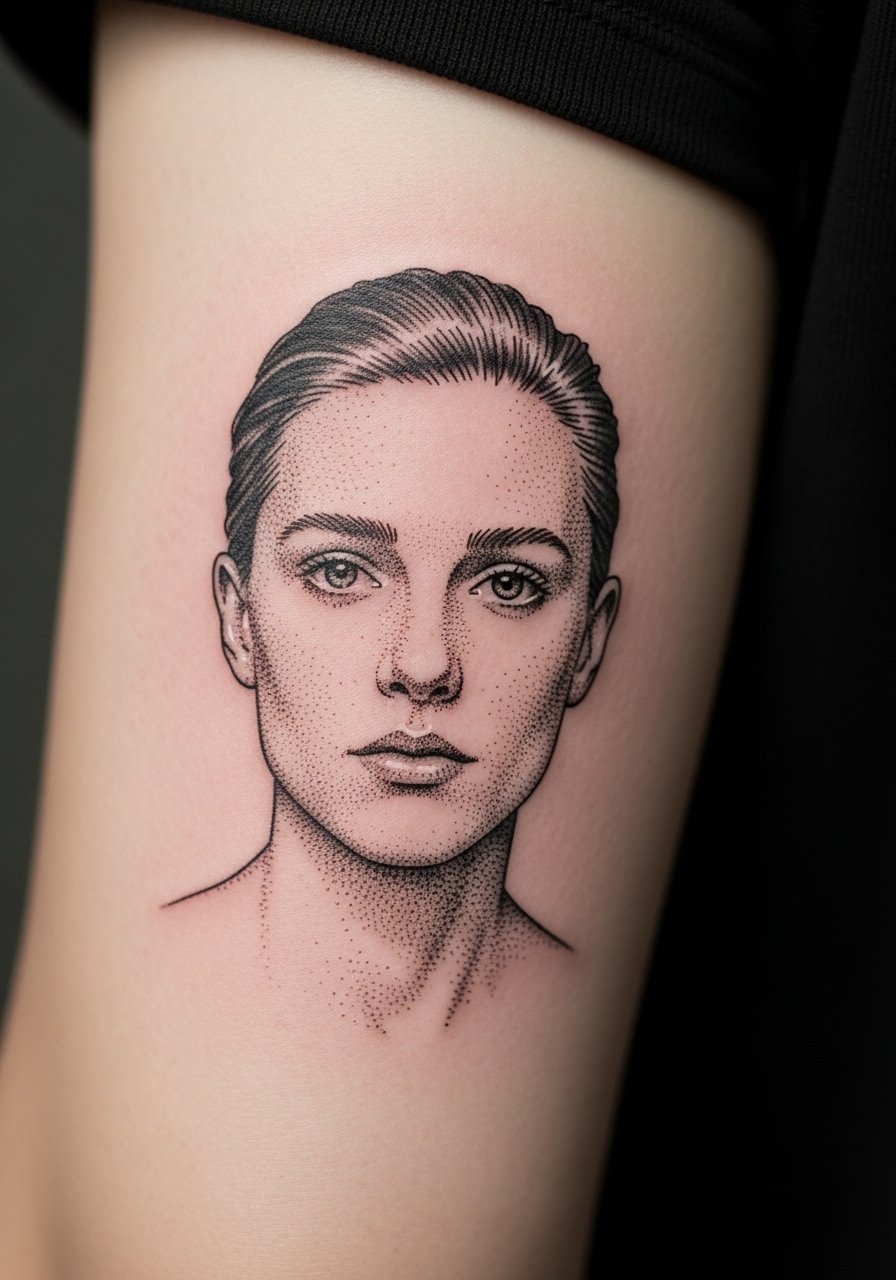
Most single-needle portraits look best when intentionally larger than people assume. I often tell friends to add 20 to 30 percent size. Inner bicep is forgiving for stretch. Pain is medium. Sessions can be long if tonal realism is needed. During consultation ask about stipple shading and if the artist tests needle density. A poor choice is insisting on hairline outlines for faces. Those outlines dissolve. At one year the portrait softens into a realistic wash if sizing and shading are balanced.
9. Fine Line Celestial Arm Band
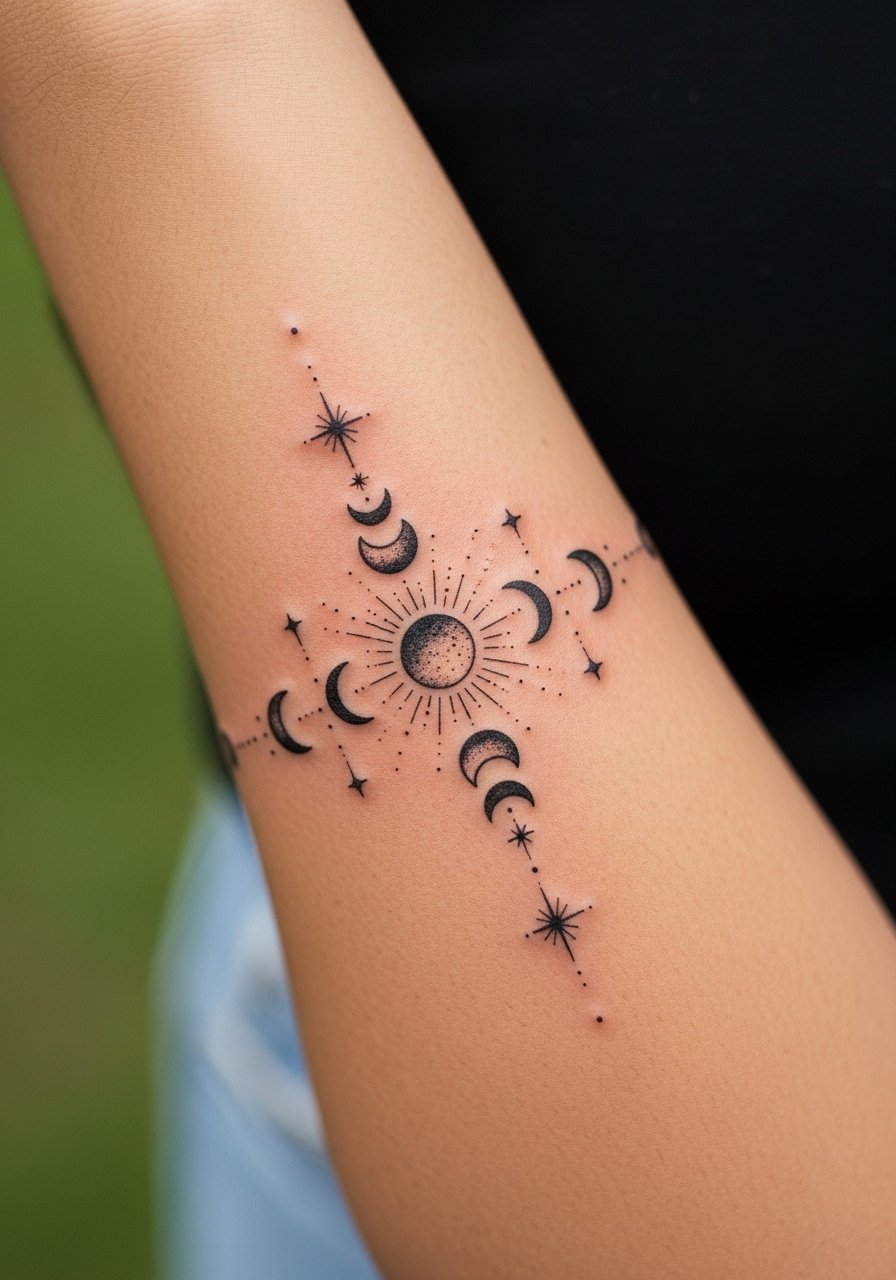
I first loved this because it reads like jewelry without being heavy. An arm band benefits from slightly thicker connectors so the piece stays coherent after a year. Pain on the forearm is mild. Session time varies by complexity, but most finish in under two hours. Tell your artist you want breathing room between symbols. A common mistake is packing the band tight. At six months the thin connectors can fade and make the band look sparse, so plan for bolder connectors.
10. Micro-Realism Insect on Thigh
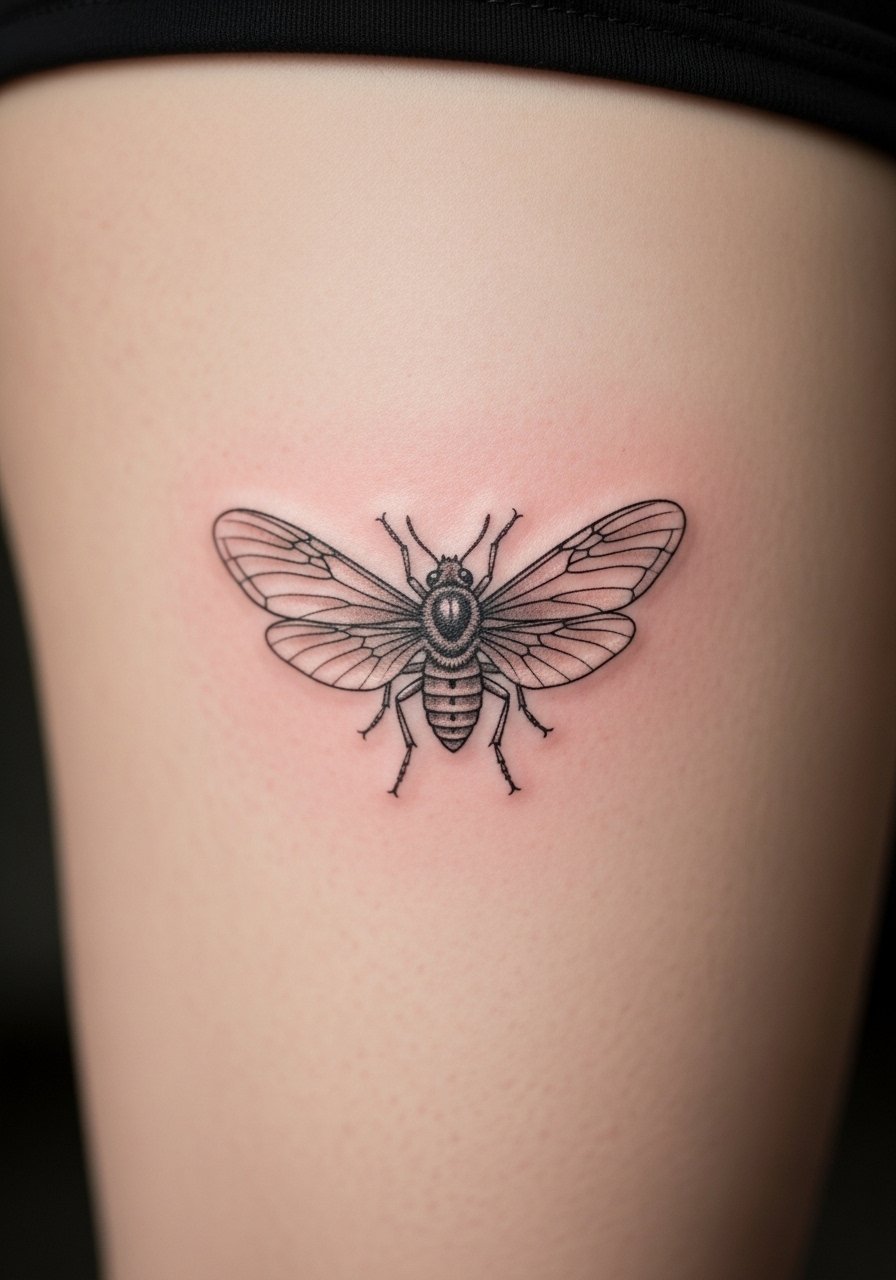
I recommend the thigh for micro insects because the canvas handles detail well and pain is low. Sessions can be long when shading is included. During consult, show close-up macro photos for reference. People often ask for hyper-small wings. Tiny vein work blurs over time. At six months the wing lines look softer, and at two years the overall silhouette should remain if you sized the piece moderately.
11. Fine Line Anchor on Side Rib
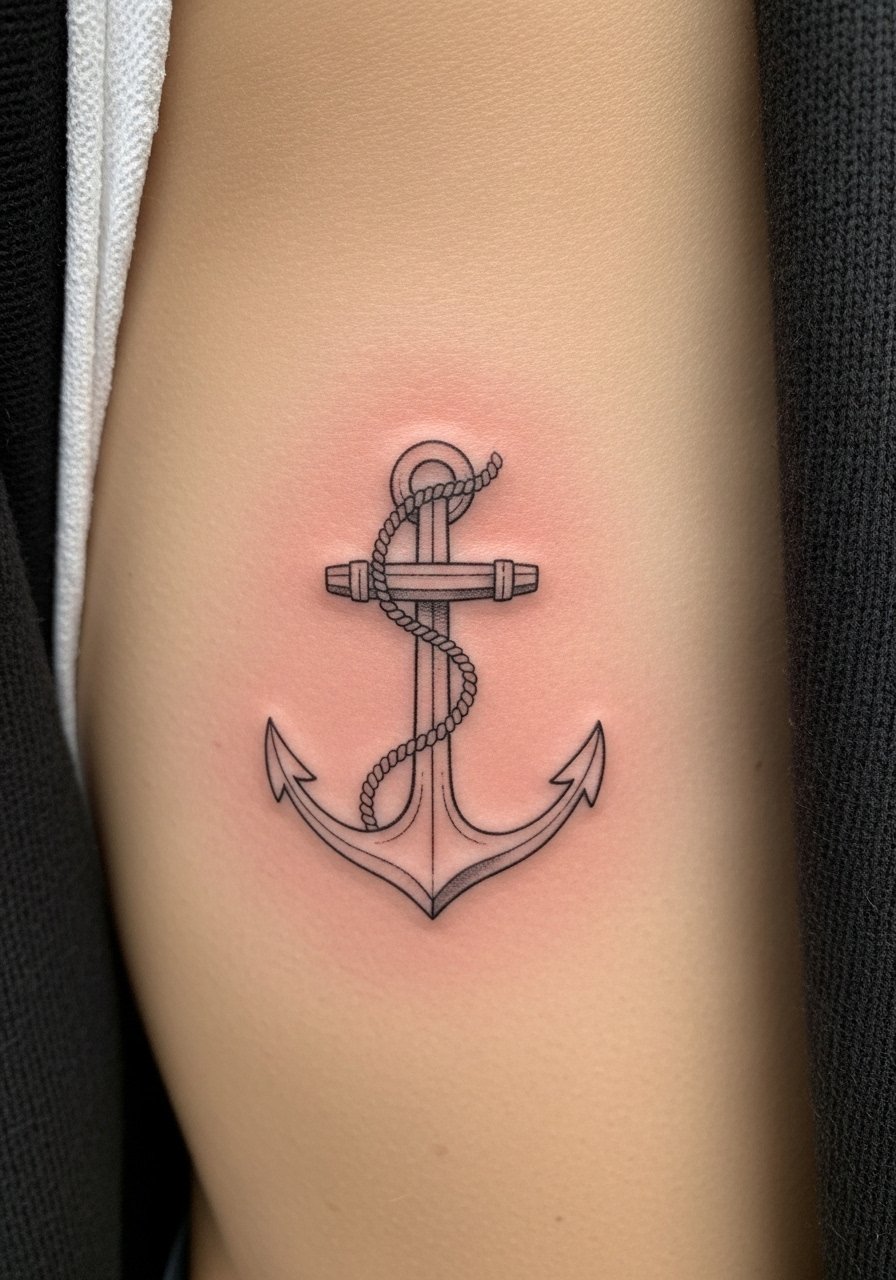
When I got mine, I underestimated how much TOUGHER the rib heals. Pain is higher. Expect a shorter session focused on one motif. Ask the artist to thicken the rope slightly and keep anchor lines simple. A common mistake is asking for super-fine rope twist details. Healed, those details can merge. At 3 months the anchor looks sharp. At 1 to 2 years the thicker strokes continue to define the shape.
12. Delicate Fine Line Butterfly on Collarbone
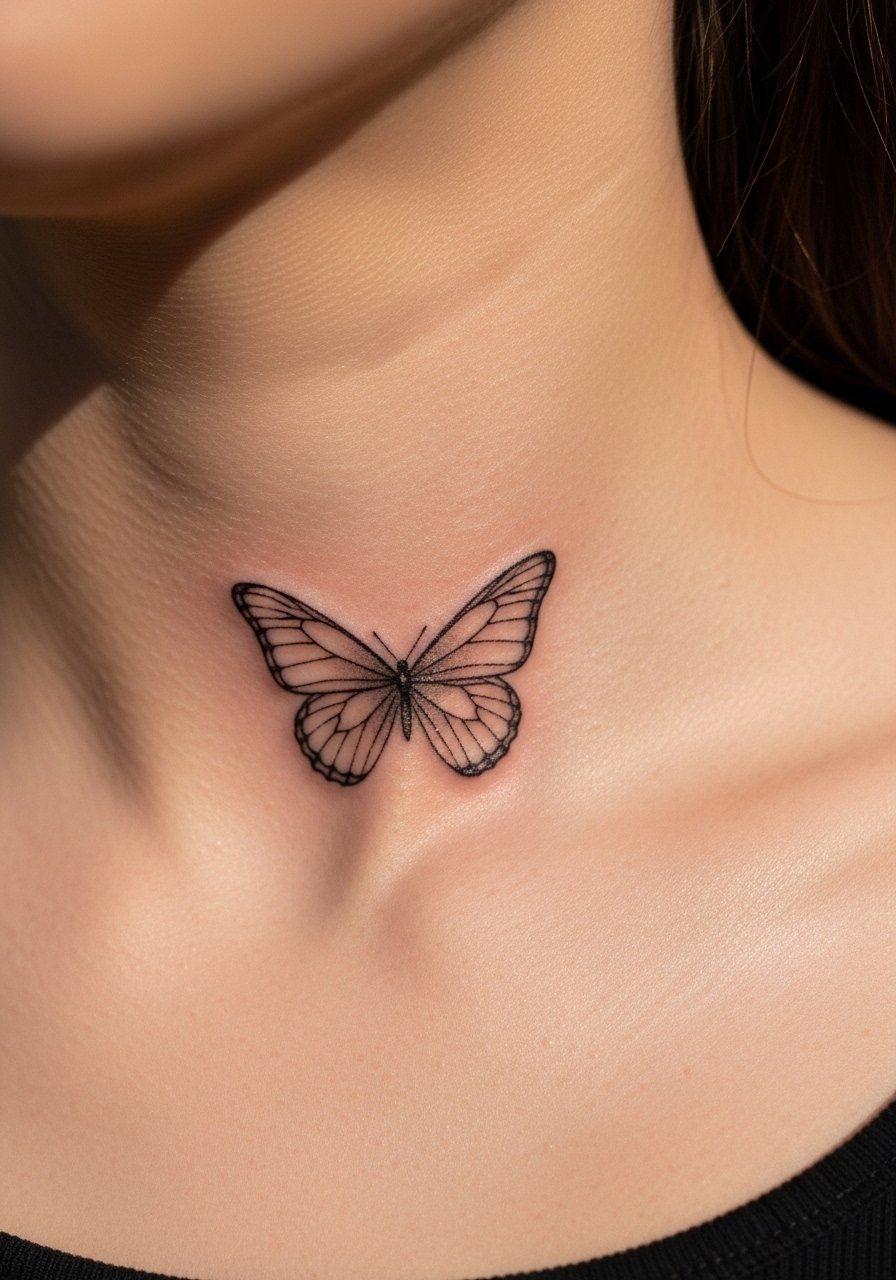
I often point people to the collarbone for small decorative pieces. It shows off under tops and holds detail if you avoid hairline outlines. Pain is moderate. Sessions are short. Tell your artist you want slight interior shading to anchor the wings. A mistake I see is asking for ultra-thin wing veins across the whole span. They can blur and make the wings look filled. At six months the subtle shading reads softer but keeps shape.
13. Fine Line Coordinate Tattoo on Ribcage
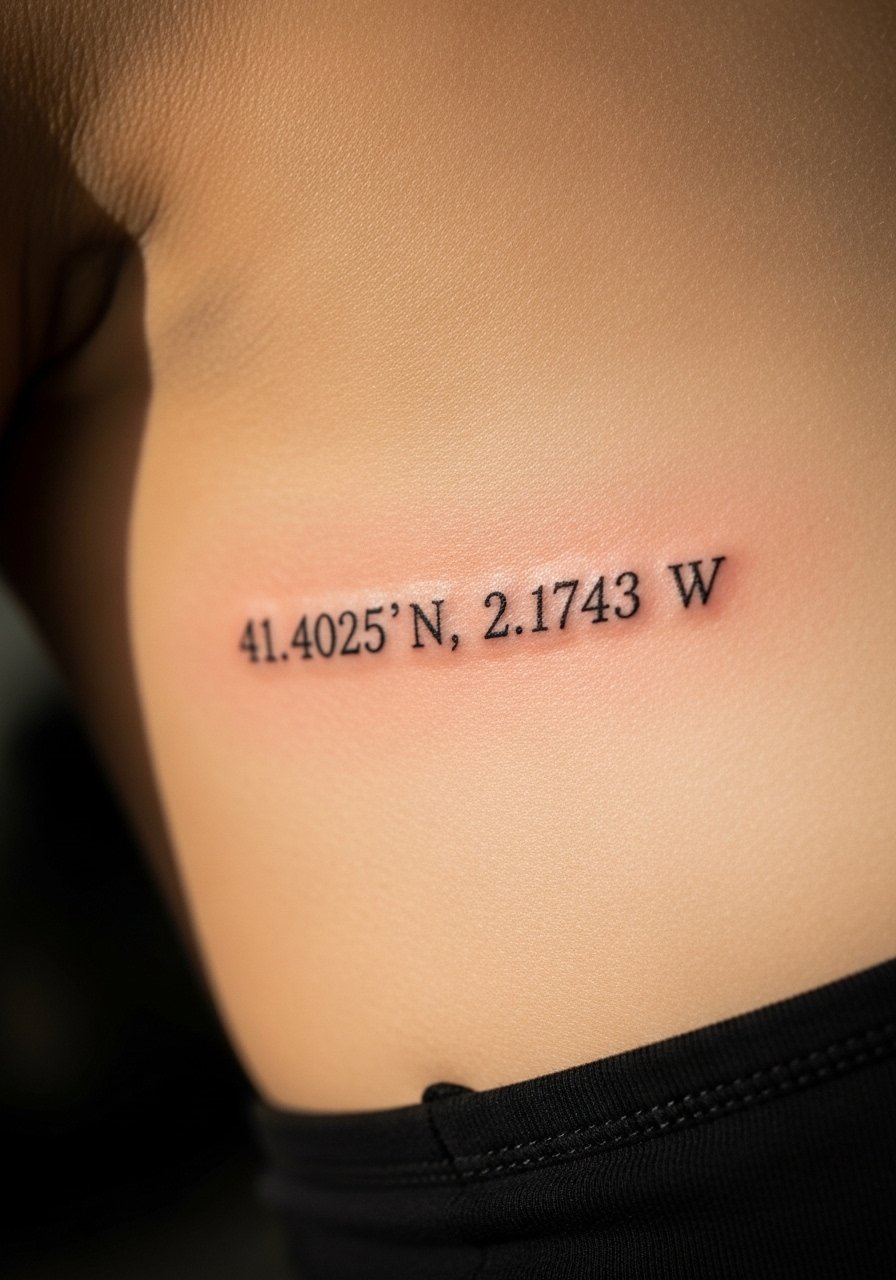
I chose coordinates for a travel memory. Script can smear, so use monospace numerals and slightly bolder dots. Ribcage pain is high. Sessions are quick for text. Tell the artist you want exact spacing and ask for proof of stencil placement while you move. A common mistake is tiny numerals. After a year, very small numbers can lose legibility. Increase size modestly to avoid that.
14. Minimalist Line Art Face on Wrist
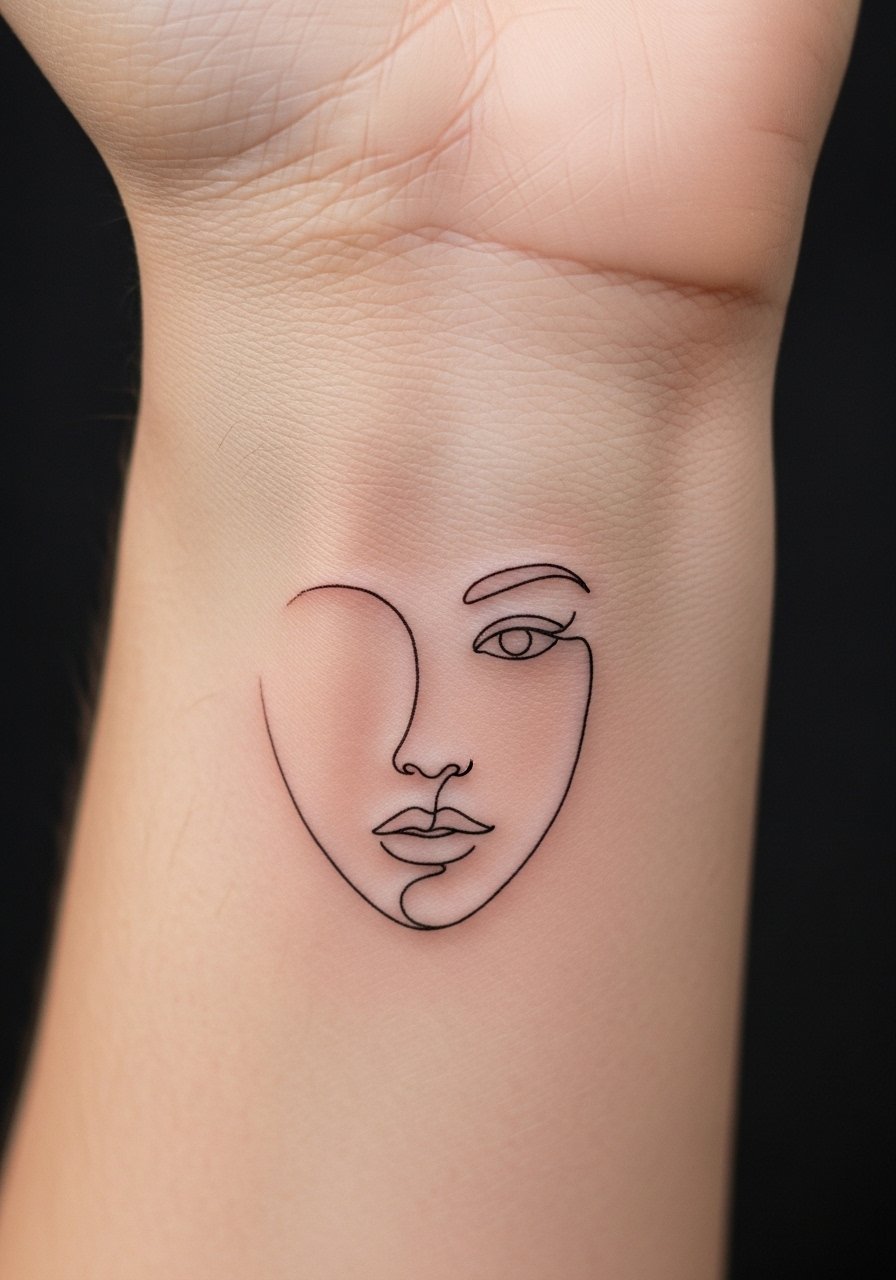
Artists I follow are doing abstract faces with controlled breaks in the line. The wrist moves a lot, so ask for planned interruptions to keep the face readable as the lines settle. Pain is low to moderate. Sessions are short. A typical mistake is demanding an unbroken continuous line at hairline thickness. Healed, it can blur and lose the face. At one year the breaks help the shape read consistently.
15. Fine Line Botanical Ankle Wrap
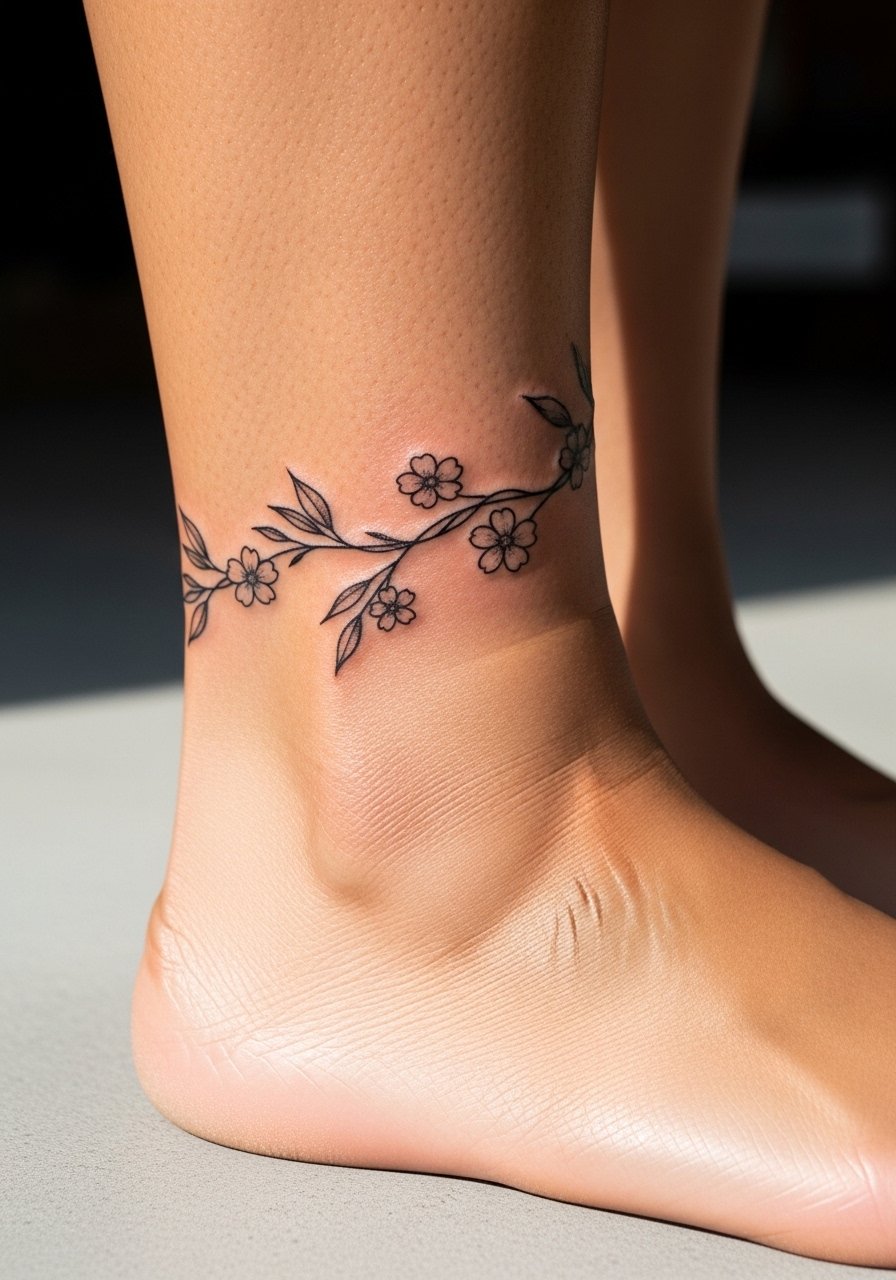
I recommend the ankle wrap when you want something seasonal but visible. The wrapping motion can cause lines to pool if ink density is too high. Pain on the ankle is moderate. Sessions run around 60 to 90 minutes. Discuss with the artist how much negative space to leave. A common mistake is adding too many tiny leaves close together. Healed, those cluster into blurred patches. At two years, if you keep it out of sun, the wrap still reads.
16. Fine Line Compass on Sternum
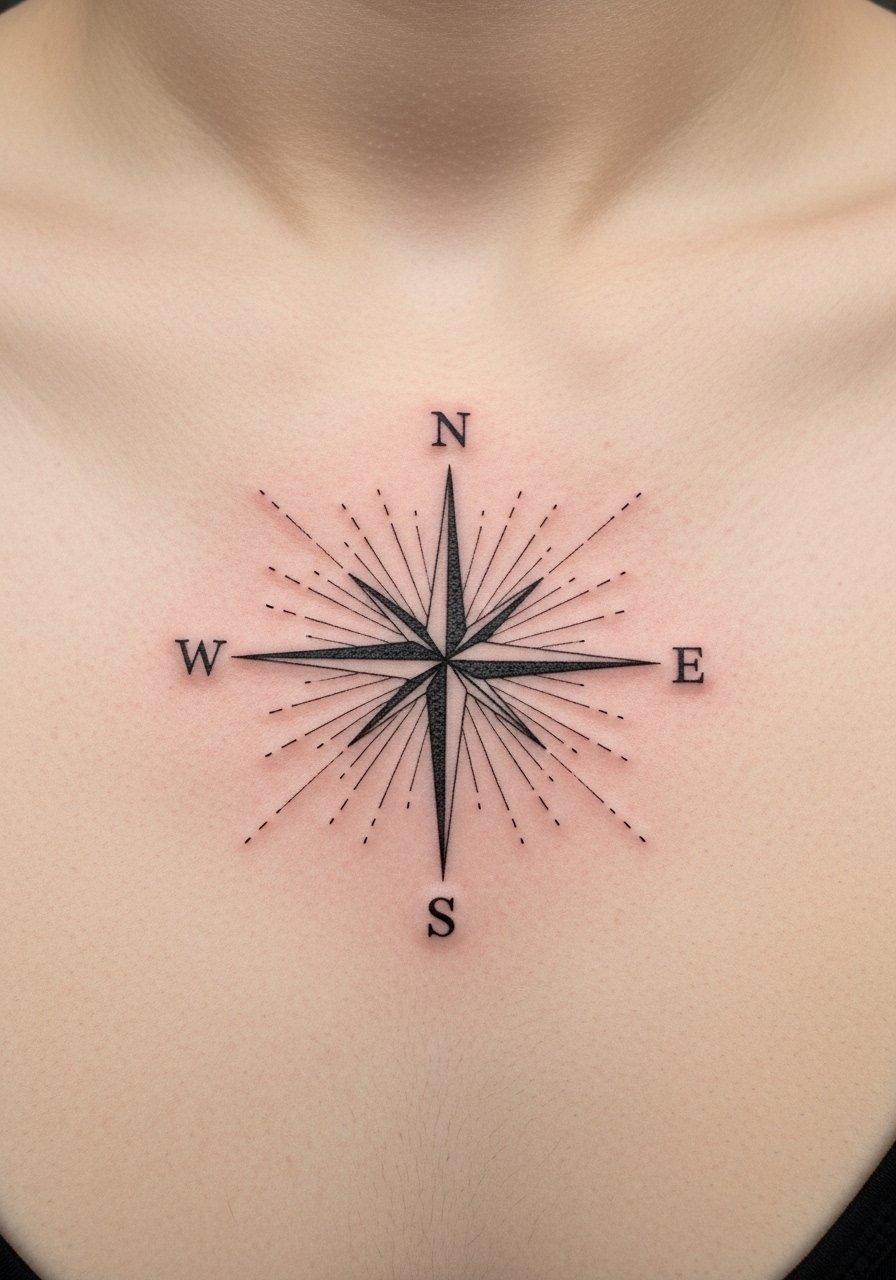
Most artists I know add bolder cardinal points so compasses keep direction visually after healing. Sternum tattoos are painful and often done in short bursts. Expect a higher pain level and a 1 to 2 hour session for a small compass. Tell your artist to strengthen every fourth radial line. A mistake is equalized hairline rays. At six months hairline rays can fade into a gray wash. Stronger anchors maintain the compass identity.
17. Micro Script on Finger

Finger script is charming but notorious for early fading. I tell people to choose slightly larger letters and expect touch-ups. Pain is sharp and quick. Sessions are very short. Ask your artist about fingertip ink techniques and realistic longevity. A common mistake is picking a font with hairline joins. At six months the letters may soften and need reinforcement. I carry a small SPF stick for hands to help longevity.
18. Fine Line Mountain Range on Ribcage
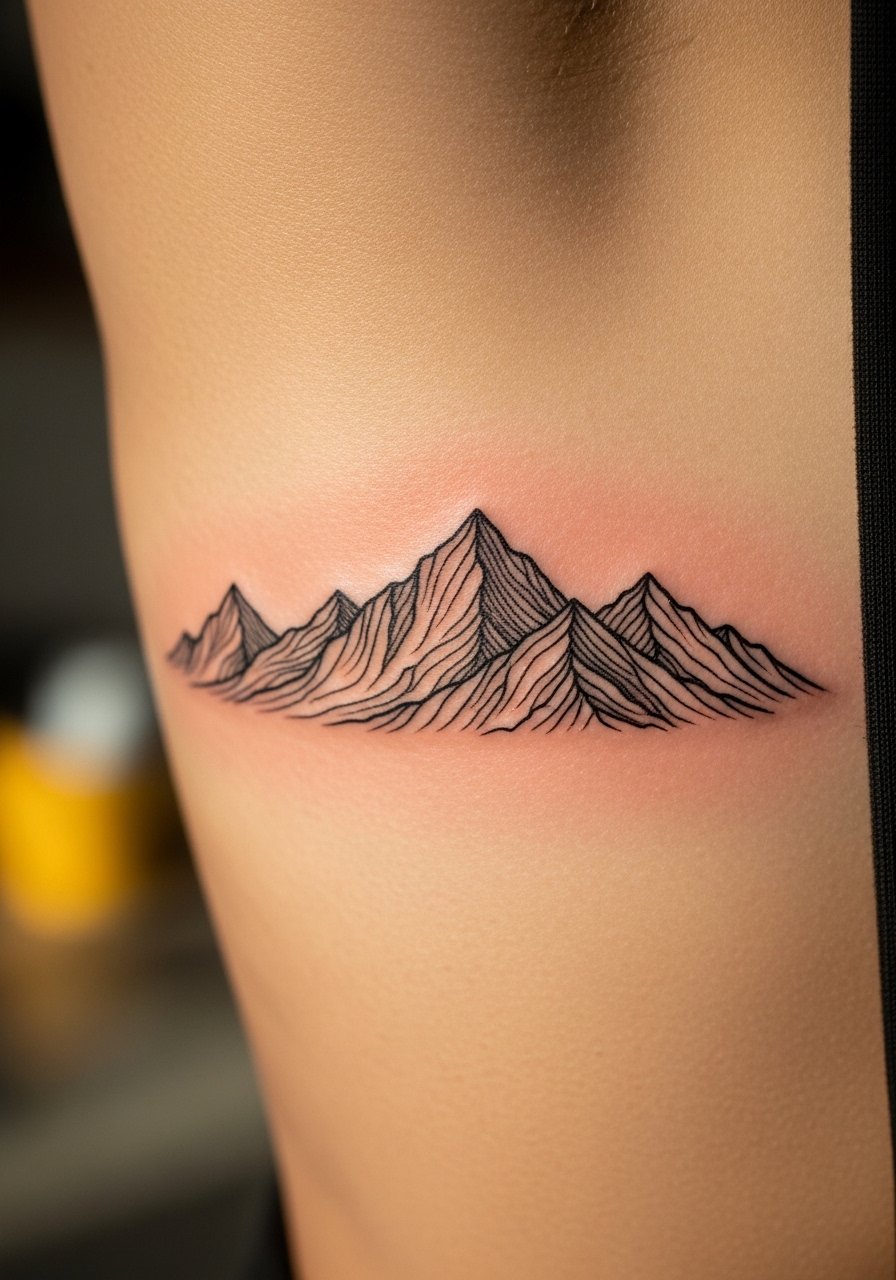
I love mountains as small scenic pieces on the ribs, but I warn friends about pain. Have snacks and breaks. Sessions can be long if you add layers. Tell the artist to build depth with heavier baseline lines and lighter background peaks. People often request equal-weight lines for a delicate look. Healed, that flattens. At one year the darker baselines keep the scene readable.
19. Fine Line Floral Behind Knee
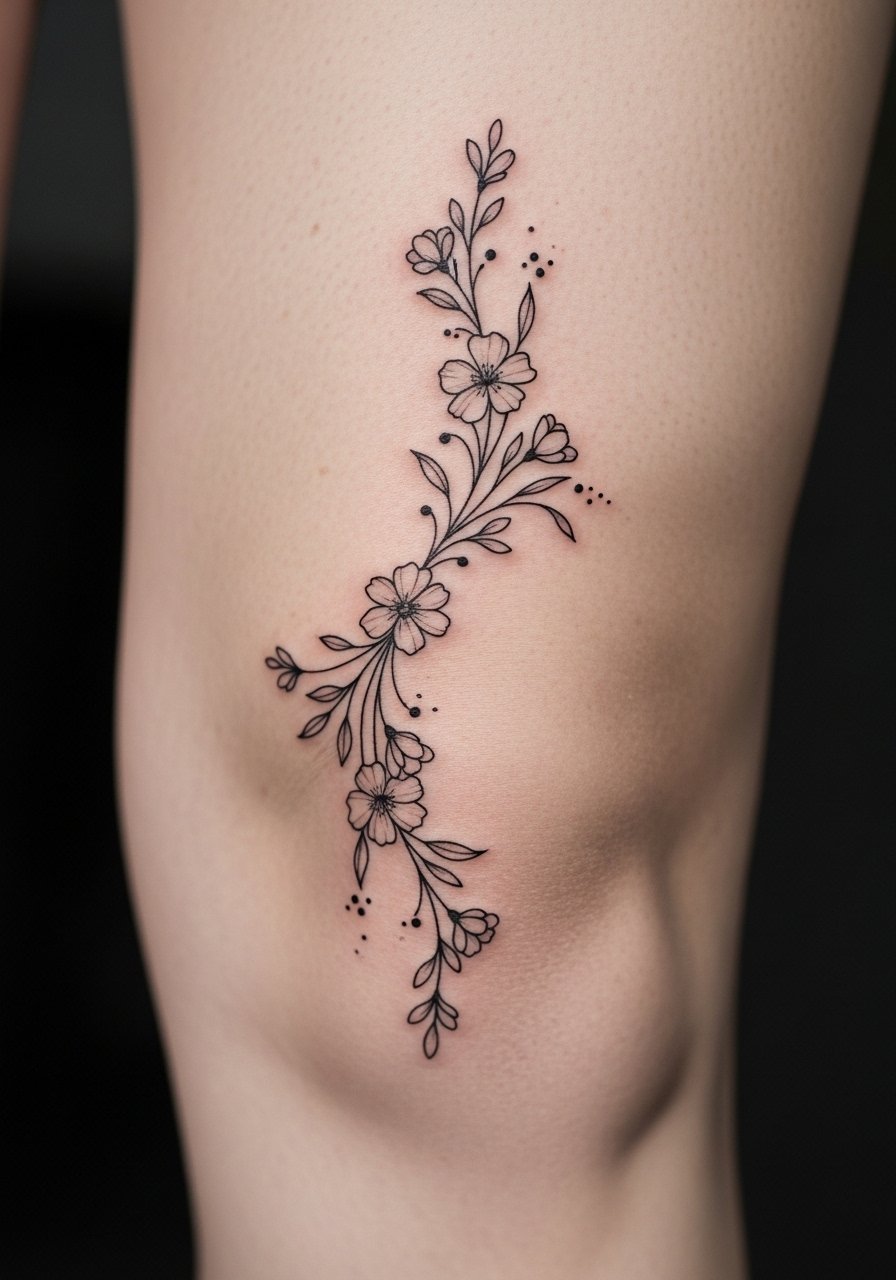
Behind-knee tattoos are underrated. They move a lot and crease during healing. Pain varies. Session times are short. During consult ask about placement while bending and standing so flowers align with the crease. The mistake is placing fine detail directly over the crease. Healed, it can disrupt the motif. At six months the blooms will soften but still read if kept slightly larger.
20. Fine Line Zodiac Symbol on Wrist
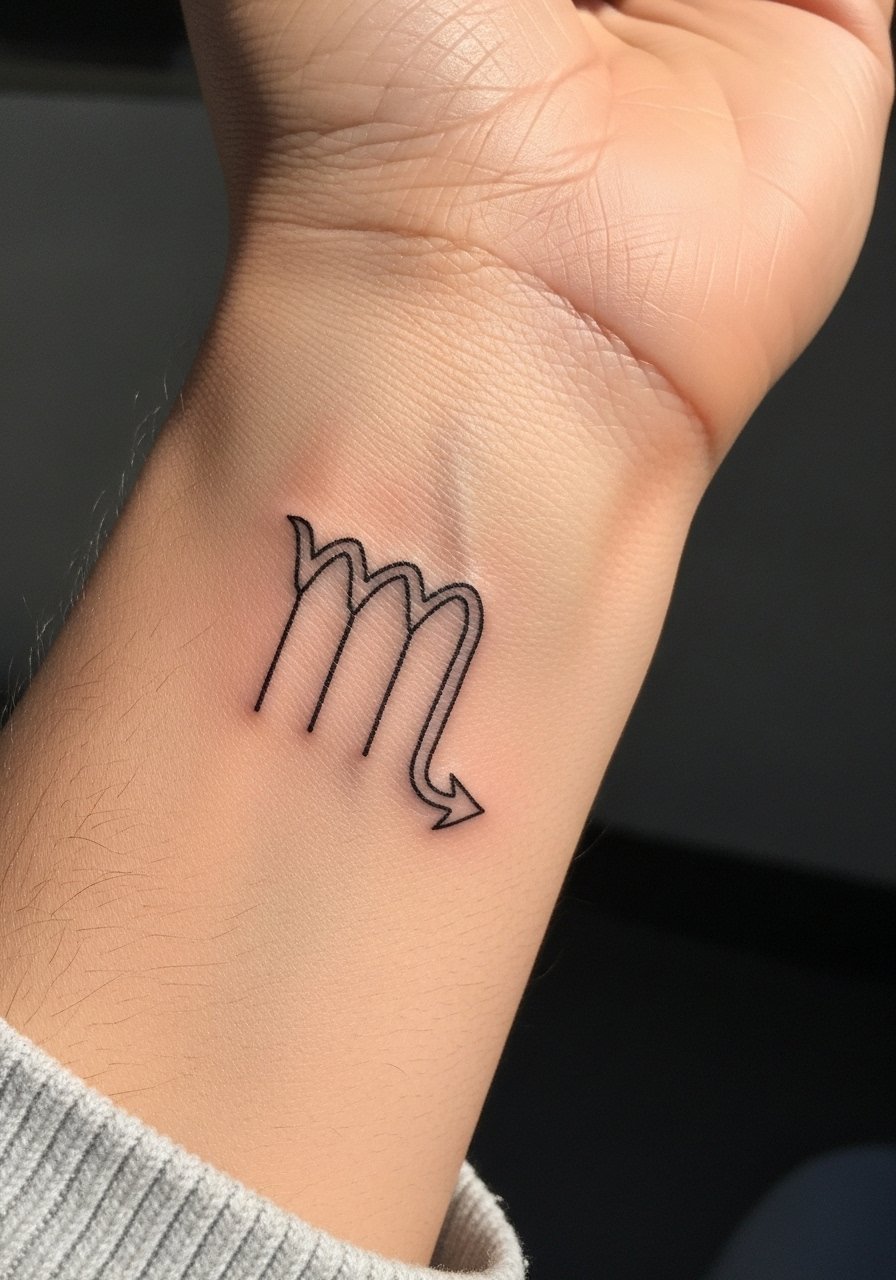
Zodiac glyphs look clean on wrists when sized properly. I tell people to pick the exact glyph version they love and bring a reference. Pain is low. Sessions are quick. A common error is requesting an extremely tiny glyph expecting perfect long-term clarity. At one year those tiny strokes can fade. Ask for modest size and a slightly bolder outline for longevity.
21. Fine Line Leaf Cluster on Behind Ear
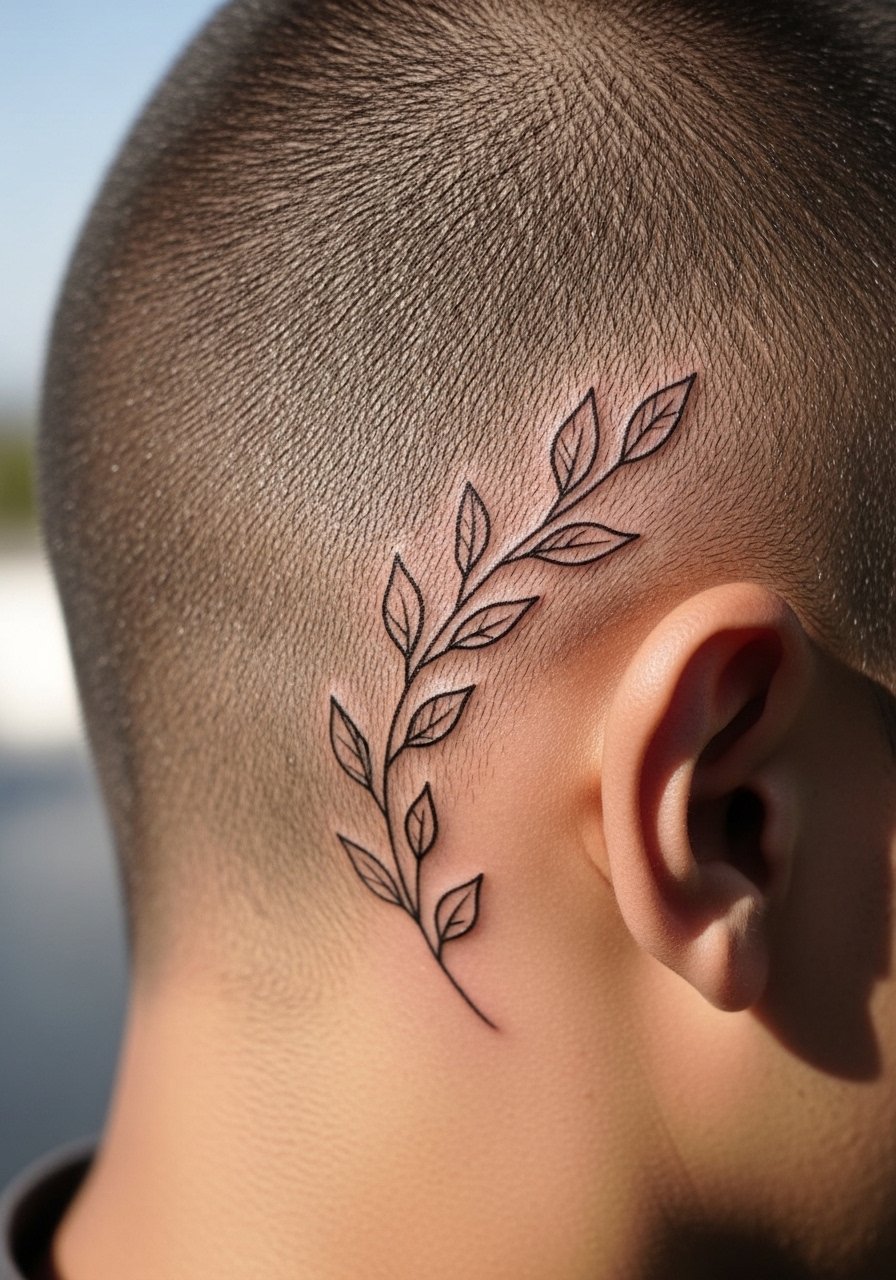
I picked behind the ear for a discreet tiny cluster and I still get compliments. The area is sensitive but session time is short. Tell your artist you want an anchor leaf and lighter secondary leaves. A mistake I see is uniform tiny leaves filling the space. Healed, they can blur together. At six months the anchor leaf keeps the cluster readable and pretty.
22. Micro-Realism Feather on Foot
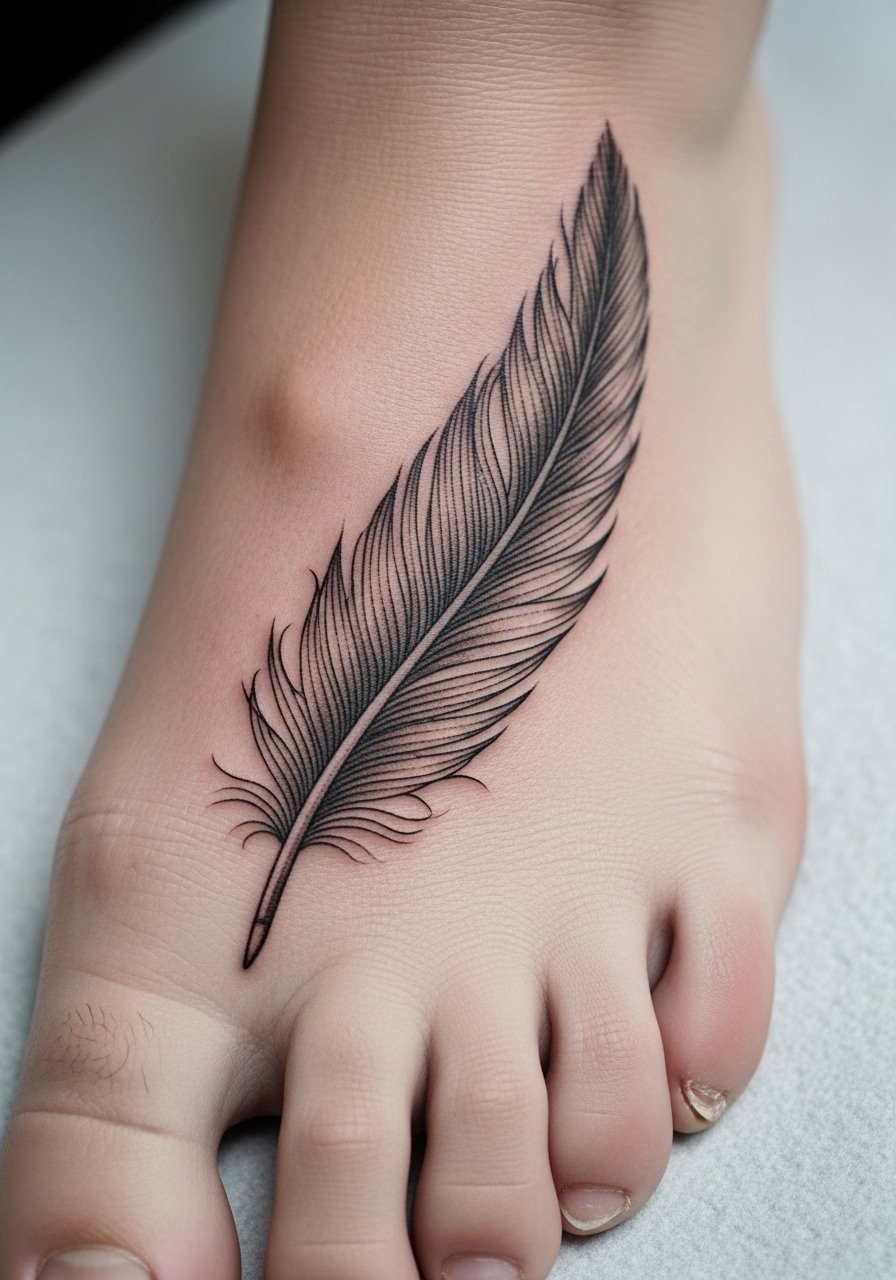
Feet are rougher on tattoos because of movement and shoes rubbing. I recommend slightly thicker quill lines for feathers on the foot. Pain is moderate to high for this spot. Expect a shorter session but possibly more touch-ups. Ask your artist about aftercare for shoes. A common mistake is relying on ultra-fine barbs. After a year, tiny barbs can melt into the skin texture. Thicker quill keeps the shape.
23. Fine Line Wave on Inner Arm
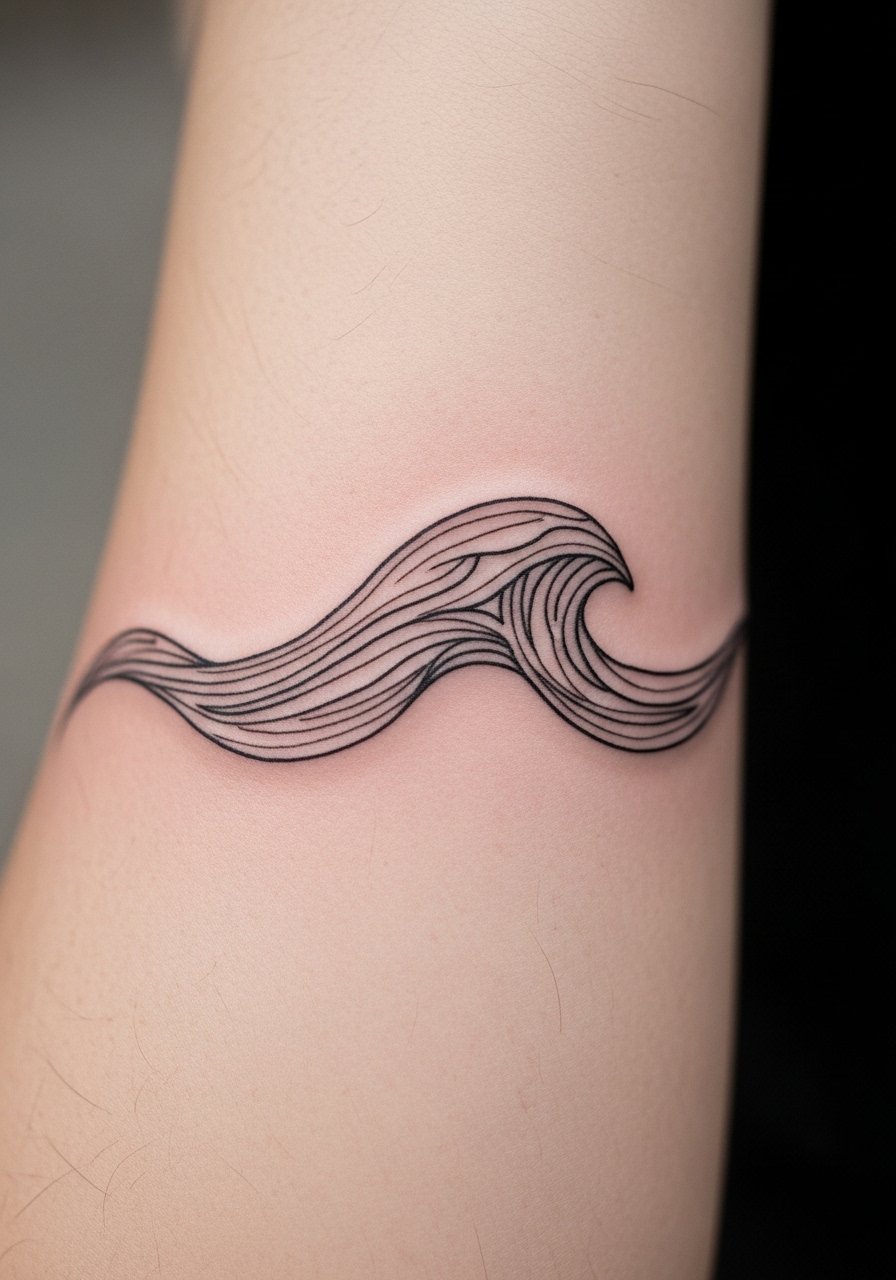
I like this for people who want a simple symbol with motion. Inner arm is forgiving for curves. Pain is low. Sessions are short. Tell your artist to keep the crest line slightly bolder. People often choose perfectly even thin curves. Healed, those can become less defined. At six months a stronger crest reads clearly and maintains the wave energy.
24. Fine Line Floral Neck Nape
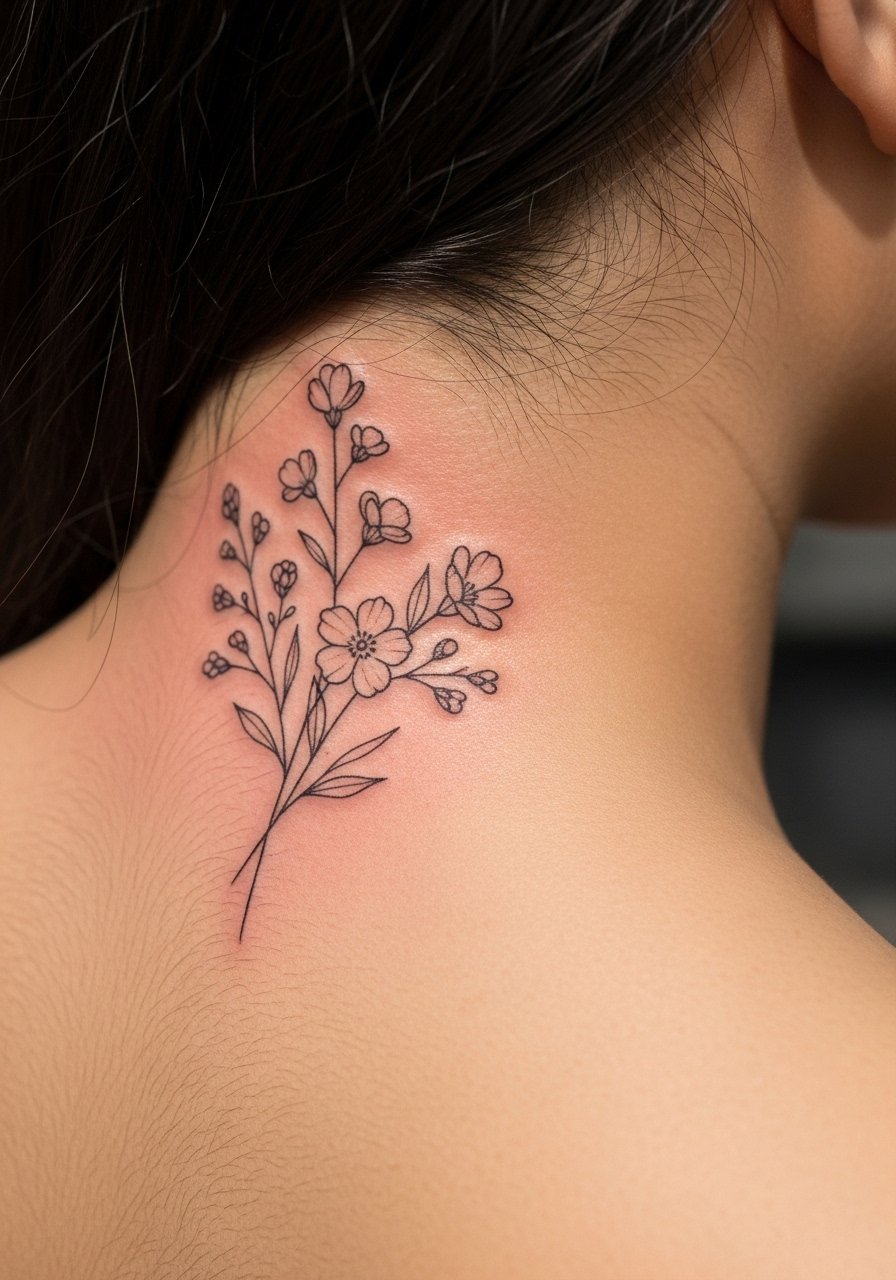
Neck nape tattoos peek out from hair and clothing. Pain is moderate. Session times are brief. When consulting, test with hair up and down to see how the blooms will show. An error I see is placing too many tiny elements expecting constant visibility. Healed, micro details overexposed to sun can fade. Keep a few larger blooms as anchors so the design remains readable.
25. Fine Line Arrow Forearm Tattoo
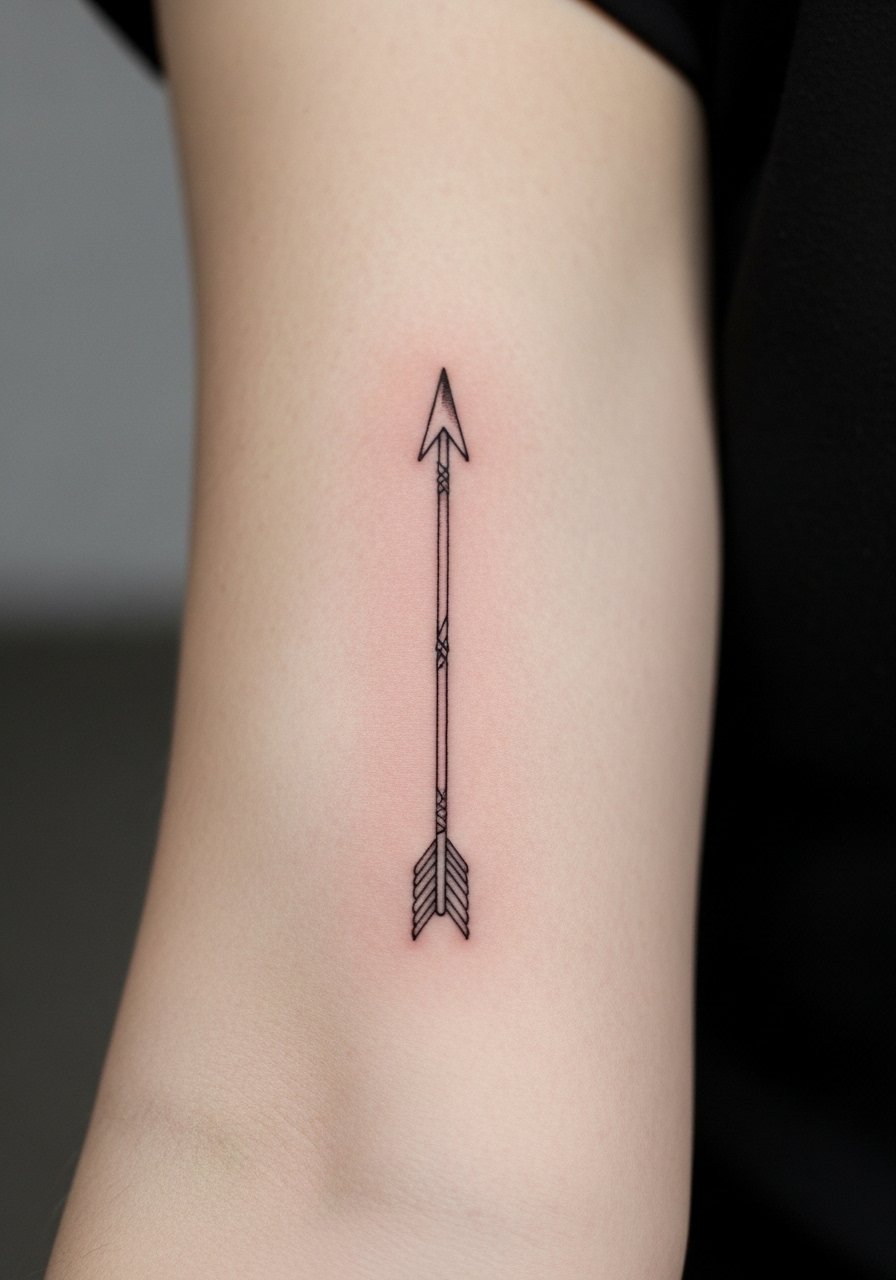
The forearm is my go-to for linear motifs. An arrow reads well if the shaft has slight variance in thickness. Pain is mild. Sessions are quick. Tell the artist you want deliberate weight at the tip and tail. A common mistake is a uniform hairline shaft. Healed, it can look broken. At one year, a tapered shaft keeps the arrow purposeful.
26. Micro Script Behind Collarbone
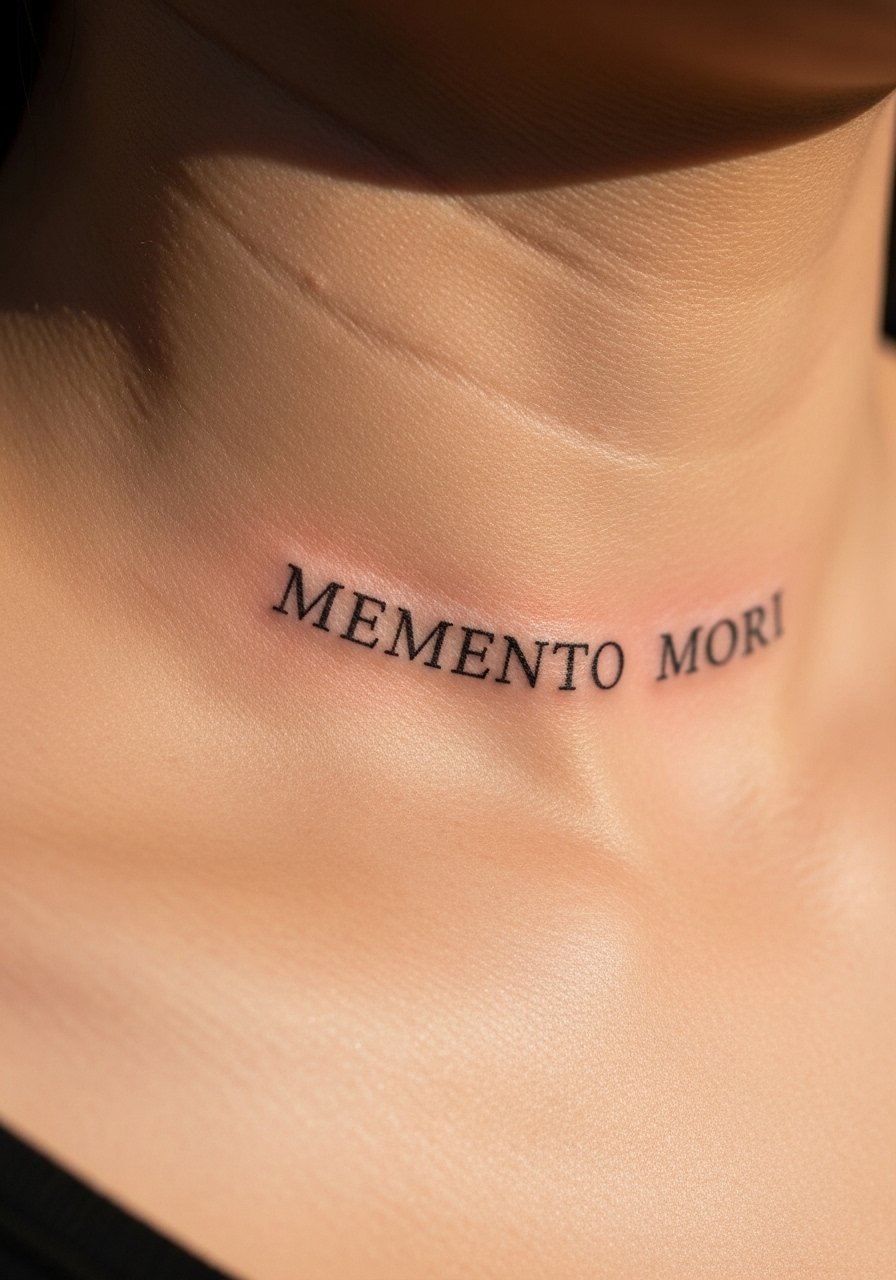
When I wanted a phrase, I placed it behind the collarbone for subtlety. That area wears clothing contact, so choose a font with letter spacing that can survive friction. Pain is moderate. Sessions are short. Avoid ultra-thin fonts. After a year letters with too-fine joins can blur. I ask artists to build slightly bolder serifs so text remains readable over time.
27. Fine Line Lantern on Calf
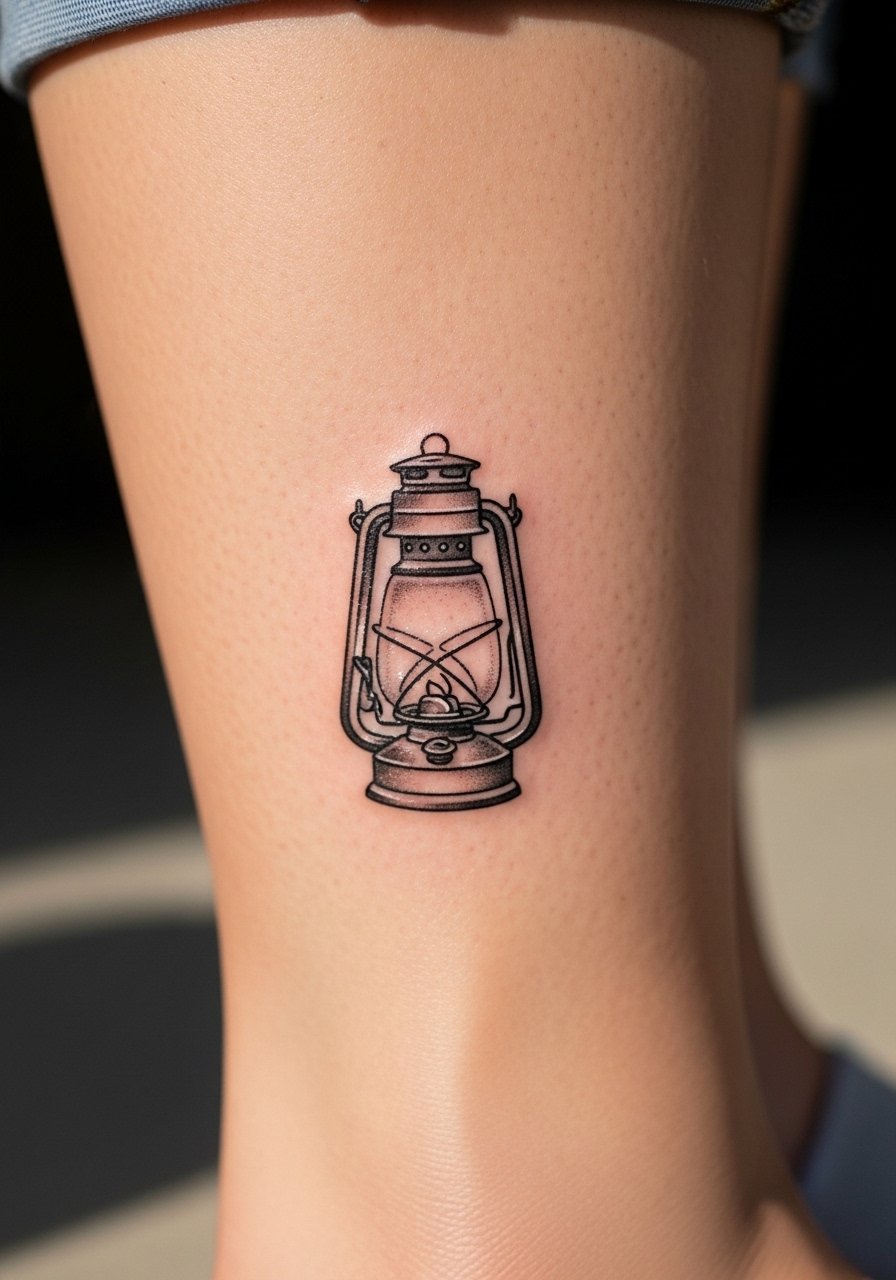
I save calf pieces for motifs I want visible in shorts. The calf heals well and pain is low. Sessions vary with detail. Tell your artist you want a visible anchor, like a thicker base to the lantern. A mistake is crowding the lantern with micro filaments. Healed, those can merge. At two years the lantern silhouette holds if the base line was reinforced.
Tattoo Prep and Aftercare Essentials
Aftercare Essentials.
- Aquaphor Healing Ointment, 14oz tube. Industry standard for the first 3 to 5 days. I use a thin layer at night.
- Saniderm Transparent Adhesive Bandage, 6-inch roll. Second skin healing method. Every artist I know recommends it for the first 24 to 72 hours.
- CeraVe Fragrance-Free Moisturizing Lotion, 12 oz pump. Daily moisturizer for days 4 to 14. I prefer the pump bottle for hygiene.
- Dr. Bronner's Unscented Castile Soap, 32 oz. Gentle cleanser for rinsing twice a day the first week. Dilute a small drop with water.
Before Your Appointment.
- Numbing Cream with 5% Lidocaine, 30g. Apply 30 to 45 minutes before your session only if your artist approves. Some artists prefer no numbing.
- Tattoo Stencil Transfer Paper, A4 Pack. Useful if you want to test placement at home before your appointment.
Long-Term Maintenance.
- SPF 50 Sunscreen Stick for Tattoos, Travel Size. Use on healed tattoos whenever they see sun. I carry one for beach days.
- Mad Rabbit Tattoo Balm, 2 oz. Long-term maintenance for vibrancy. Artists I know recommend it for healed pieces.
- Hustle Butter Deluxe, 5 oz. Vegan alternative that works during healing and after. Smells better than most aftercare.
Optional Comfort Items.
- Tattoo Numbing Spray, 4 oz. Handy for touch-ups or sensitive areas mid-session.
- Hydrocolloid Bandages, Large Size Pack. Good alternative to Saniderm for small to medium tattoos.
I've included items I actually use and those most artists I talk to recommend. Size notes reflect what I buy for single sessions versus long-term care.
Frequently Asked Questions
Q: Will fine line tattoos blur into each other if I get a full sleeve?
A: From what I've seen, fine line sleeves need planned weight distribution. Ask your artist to place anchor lines and slightly thicker stems or edges. That prevents neighboring motifs from merging after a year. Also bring references that show how lines age on similar skin tones. For touch-up care, I keep Mad Rabbit Tattoo Balm, 2 oz on hand for monthly maintenance.
Q: Do watercolor-style tattoos need different aftercare than traditional ones?
A: In my experience, watercolor-style work often has softer edges that rely on careful healing. Use a gentle cleanser like Dr. Bronner's Unscented Castile Soap, 32 oz and avoid heavy ointments that can saturate color. I follow the same Saniderm protocol for the first 48 to 72 hours. After that, apply a thin layer of a recommended balm and sunscreen once healed.
Q: Will script on fingers last or do I need touch-ups?
A: Finger script almost always needs touch-ups. I've noticed fingers lose crispness faster due to washing and friction. Ask for a slightly larger size and plan for reinforcement at 6 to 12 months if you want longevity. Carry a small SPF 50 Sunscreen Stick for sun days, because UV speeds fading.
Q: How should I prepare for a ribcage fine line piece to manage pain and healing?
A: I tell friends to hydrate, eat beforehand, and wear loose clothing. The rib area is sensitive and benefits from short breaks. Afterward, use a clean, breathable cover if your artist recommends it, and switch to Aquaphor Healing Ointment, 14oz tube sparingly at night for the first few days. Expect tenderness for a week and avoid heavy workouts for at least 48 hours.
Q: Are single-needle portraits a bad idea on the ankle or wrist?
A: From what I've learned, very fine single-needle portraits on high-movement areas like the ankle or wrist are risky. Those areas can cause faster blur. If you want micro-realism there, increase the size slightly and ask the artist to add subtle anchors or bolder contrasts. I once recommended a slightly larger inner arm placement and the piece aged much better.
Q: What should I tell my artist when I want a fine line botanical sleeve to age well?
A: Ask for variable line weight and clear anchors at stems. Tell the artist you prefer slightly thicker primary stems and lighter secondary veins. Request a small test area to check settling. I also ask artists to avoid ultra-fine leaf veins unless they plan for touch-ups, because dense tiny lines often merge over time.
Q: How long until I can use sunscreen and moisturize normally on a new tattoo?
A: In my experience, most artists agree you can moisturize daily with a fragrance-free lotion like CeraVe Fragrance-Free Moisturizing Lotion, 12 oz pump after the initial peeling phase, often around day 4 to 7. Sunscreen goes on healed skin only. I wait at least two weeks and make sure the skin is fully closed before applying SPF to protect long-term vibrancy.
