
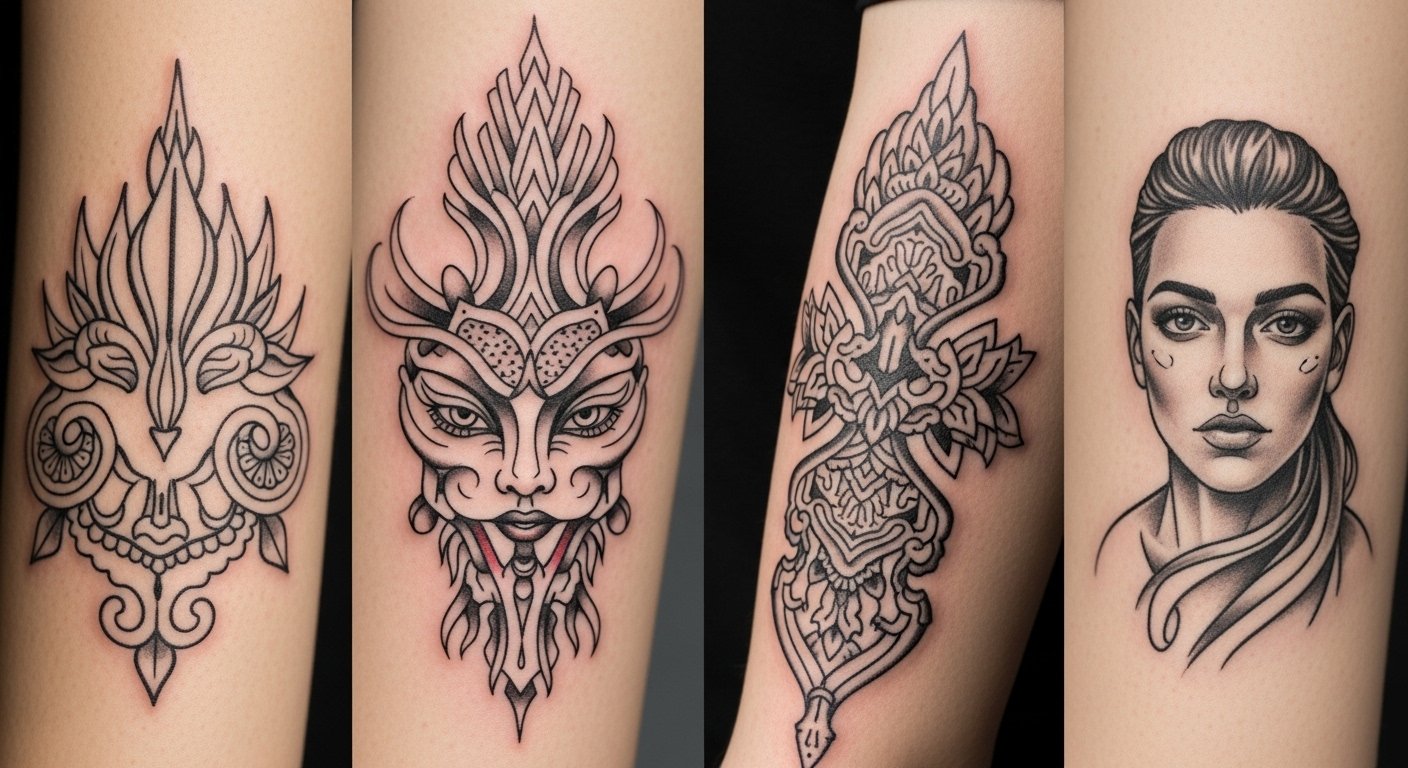
I spent almost a year saving reference photos and talking to artists before committing to my first tiny tattoo. The real blocker for me was not the design. It was choosing a style that would still read after two years. These 19 small tattoos are the ones I keep recommending now, the ones that tend to hold up and still feel fresh after healing.
This list leans into fine line, micro-realism, and small blackwork. Most of these ideas work on wrists, ankles, behind the ear, collarbones, and ribs. From what I've seen, artists in 2026 are pushing tiny pieces that respect skin movement and avoid overly tight detail.
1. Fine Line Botanical Wrist
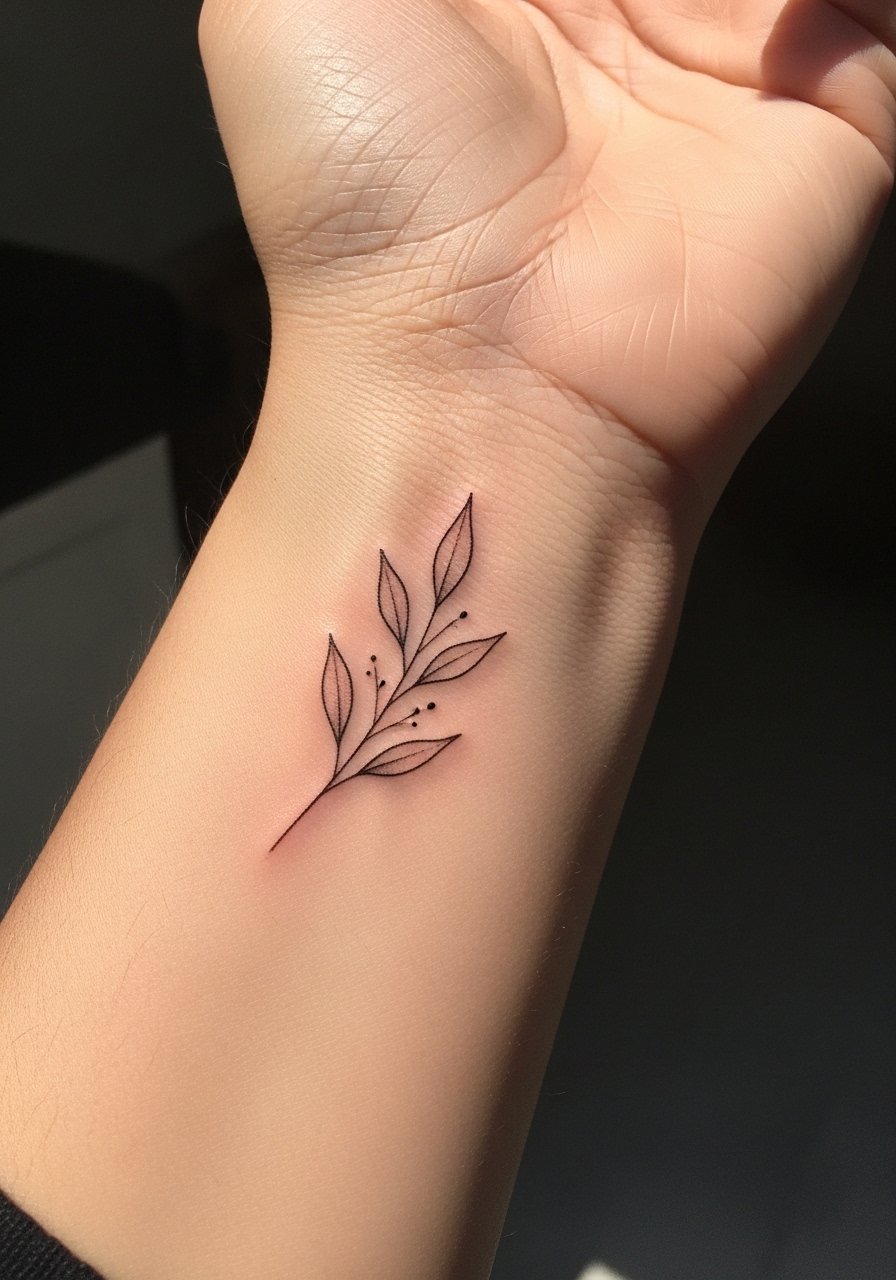
I first saw this on a friend who wanted something discreet yet meaningful. Fine line botanicals look delicate when fresh. Expect low to moderate pain on the inner wrist. Sessions are short, often under 30 minutes. Tell your artist you want variable line weight so leaves hold up, not a single static line. From what I've noticed, the common mistake is asking for hair-thin detail too close together. Those lines blur into a gray in two years. Ask for slightly bolder main stems and feathered shading. Heals in about two weeks, but full settling takes six months. Use light sunscreen on healed work to avoid premature fading.
2. Micro-Realism Portrait Behind Ear
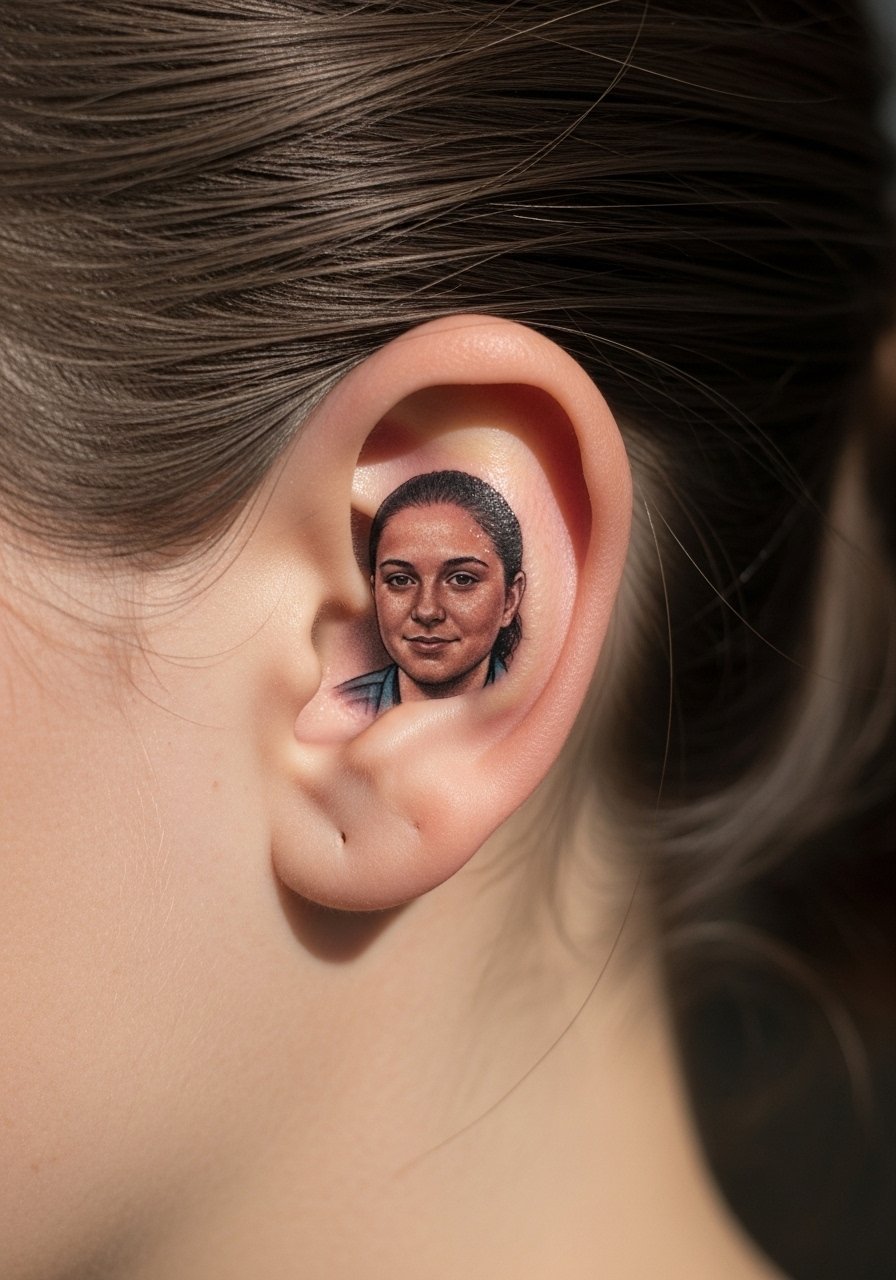
Fair warning, behind the ear is tender. I had a session there and felt sharp stinging but it was very short. Micro-realism portraits here read intimate and personal. Pick a simple pose and high-contrast reference photo. Tell the artist you want larger tonal blocks rather than packing in every eyelash. A frequent error is forcing too much facial detail into a 1-inch piece. That looks okay fresh and then turns muddy. Expect a single short appointment, maybe 30 to 45 minutes. Heals slower because of hair and sweat, plan for careful washing and light balm. After a year, you might need a touch-up to restore contrast.
3. Minimalist Line Art Mountains on Ankle

I love mountains for people who travel a lot. The ankle is breezy and shows well with boots or sandals. Pain is moderate. Sessions are under 30 minutes. Tell your artist you want negative space between peaks and not stacked micro-hatching. A common mistake is asking for hatch-filled shading that clumps when the skin flexes. For longevity ask for slightly thicker outer lines. At six months the peaks soften but still read, by two years expect some line blur. If you want the same look on the forearm it will age better, but the ankle placement has more personality.
4. Blackwork Geometric Mandala On Nape
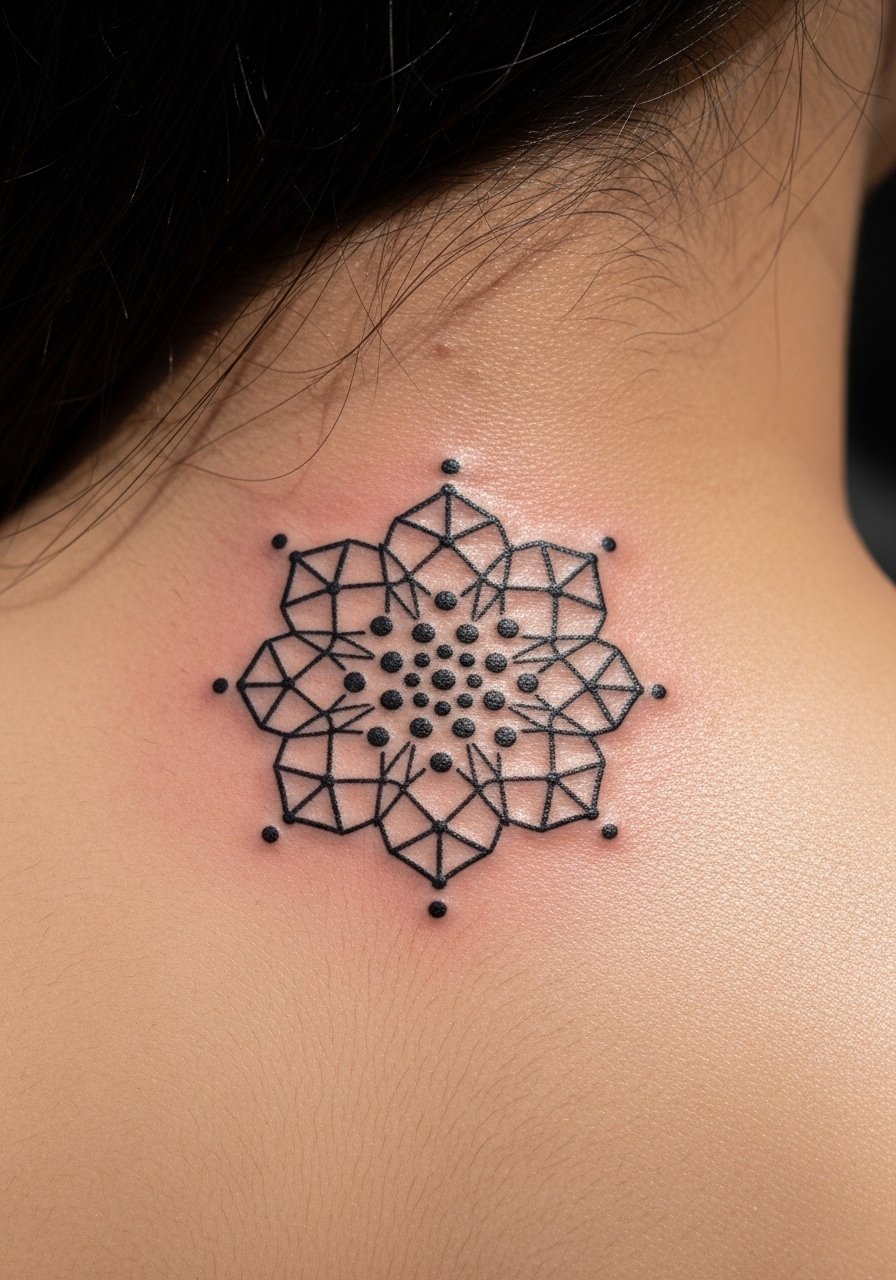
There's something about a compact mandala at the nape that feels like jewelry. I saw this on someone with short hair and it framed the neckline. Pain is low to moderate. Sessions can be 30 to 60 minutes depending on dotwork. Tell the artist you want bold outer rings and simplified inner detail. The biggest mistake is packing too many spokes into a tiny circle. That washes out. When healed, blackwork holds better than thin single lines, but dots in the center can bleed over time. For longevity ask for slightly stronger outer contrast and expect touch-ups in two to three years if you want crisp geometry.
5. Tiny Traditional Sparrow Collarbone
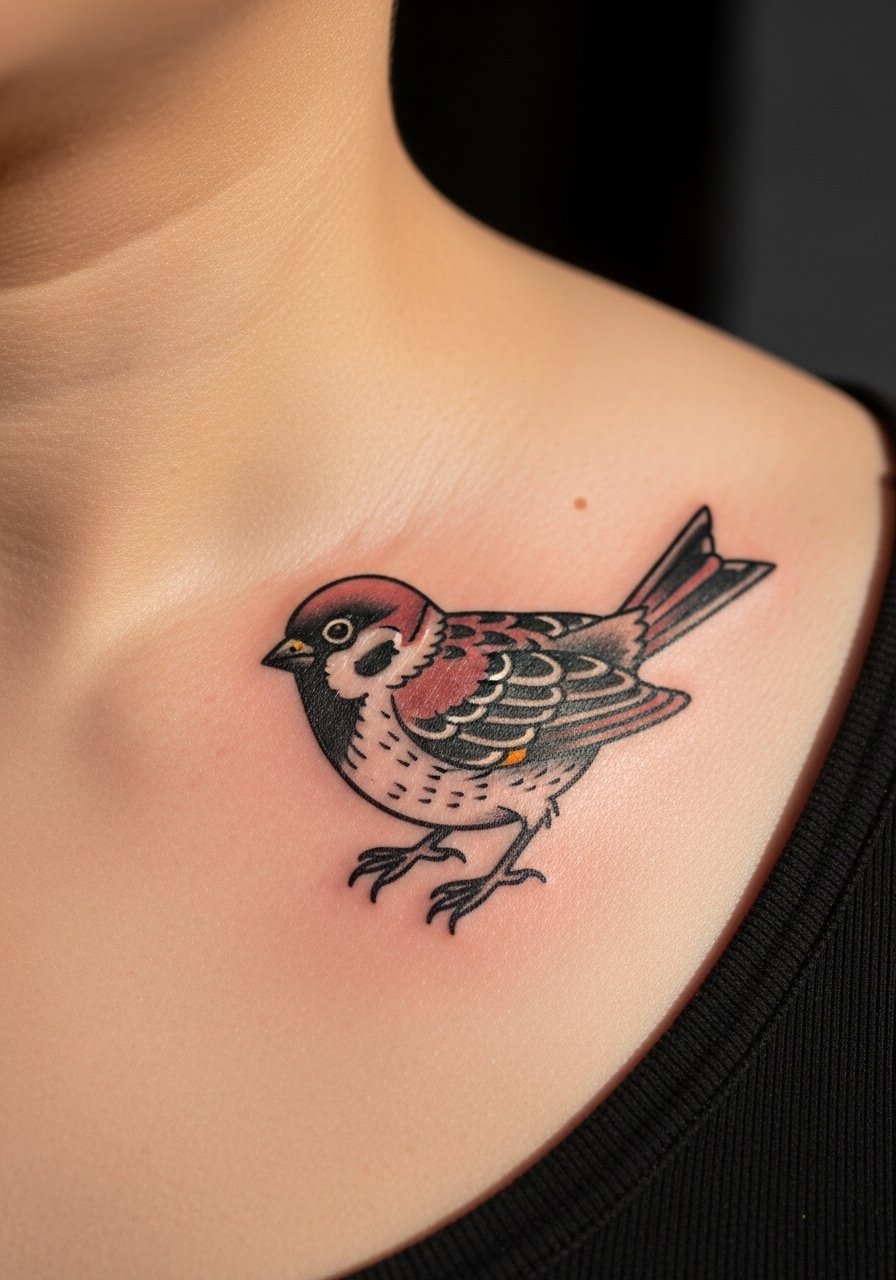
I grew up seeing sparrows in classic flash and one artist adapted it to a tiny collarbone piece. It reads bold from a distance. Expect moderate pain on the collarbone. Session time is typically 30 minutes. Ask for traditional bold outlines and solid color fills rather than gradient color. A common mistake is asking for watercolor fills inside a traditional outline. That transition often heals patchy. Traditional lines stay readable longer, especially on collarbone where sun exposure varies. Keep sunscreen on the healed tattoo and plan for a touch-up if the reds soften.
6. Single Needle Script Inner Wrist "Breathe"
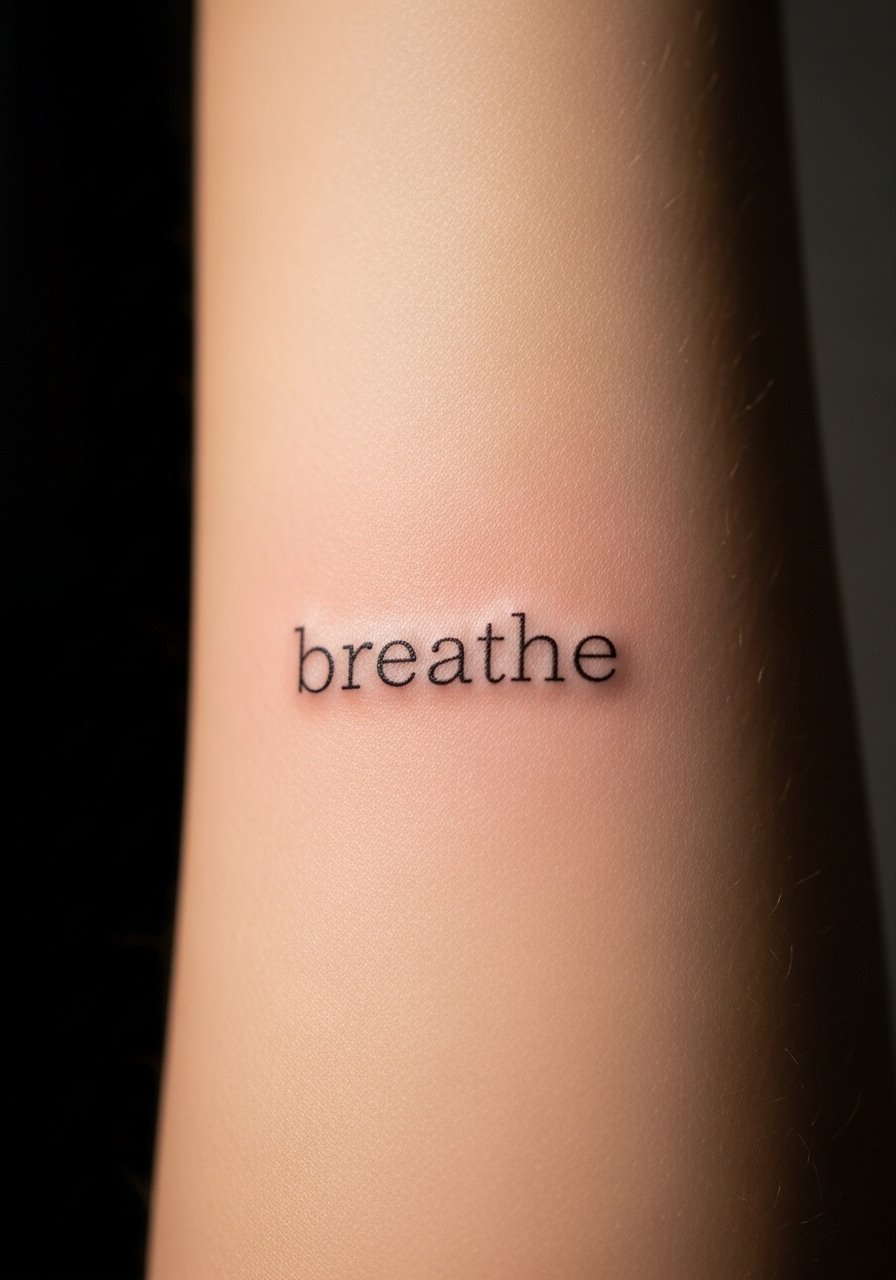
I picked up this script idea after seeing it used as a daily reminder. Inner wrist scripts are visible and meaningful. Pain is moderate. Sessions run 15 to 30 minutes. Tell your artist to space letters slightly and choose a mid-weight line for longevity. Small, tightly spaced cursive will blur together. I notice that lowercase, airy lettering reads better long-term than dense calligraphy. After six months letters may appear a touch fuzzier, but the word stays legible. Ask for healed reference samples from the artist so you can see how their script settles on skin similar to yours.
7. Micro Watercolor Poppy On Ribcage
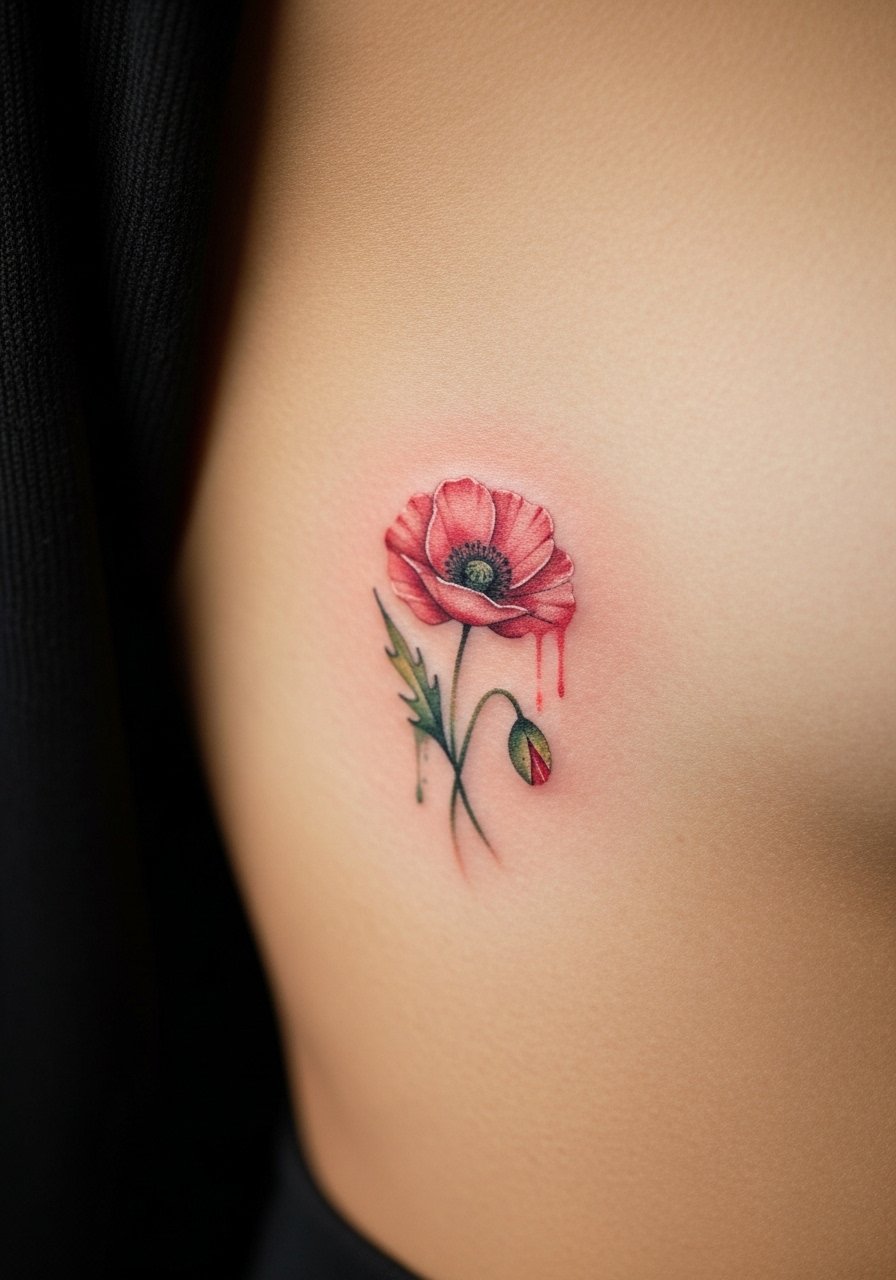
Ribcage pain is high, but the visual payoff can be intimate. I had a friend who endured a longer session there for a piece this size. Watercolor effects look lively fresh but can soften into a soft wash as they heal. Tell your artist you want defined line anchors or small solid elements so the design holds. The common mistake is full watercolor with no anchor on thin skin. Expect one longer session, sometimes with a short break. Heals in two to four weeks. Over time vibrant pigments can fade faster than black. Plan for sunscreen and a maintenance balm like Mad Rabbit Tattoo Balm, 2 oz to keep color lively.
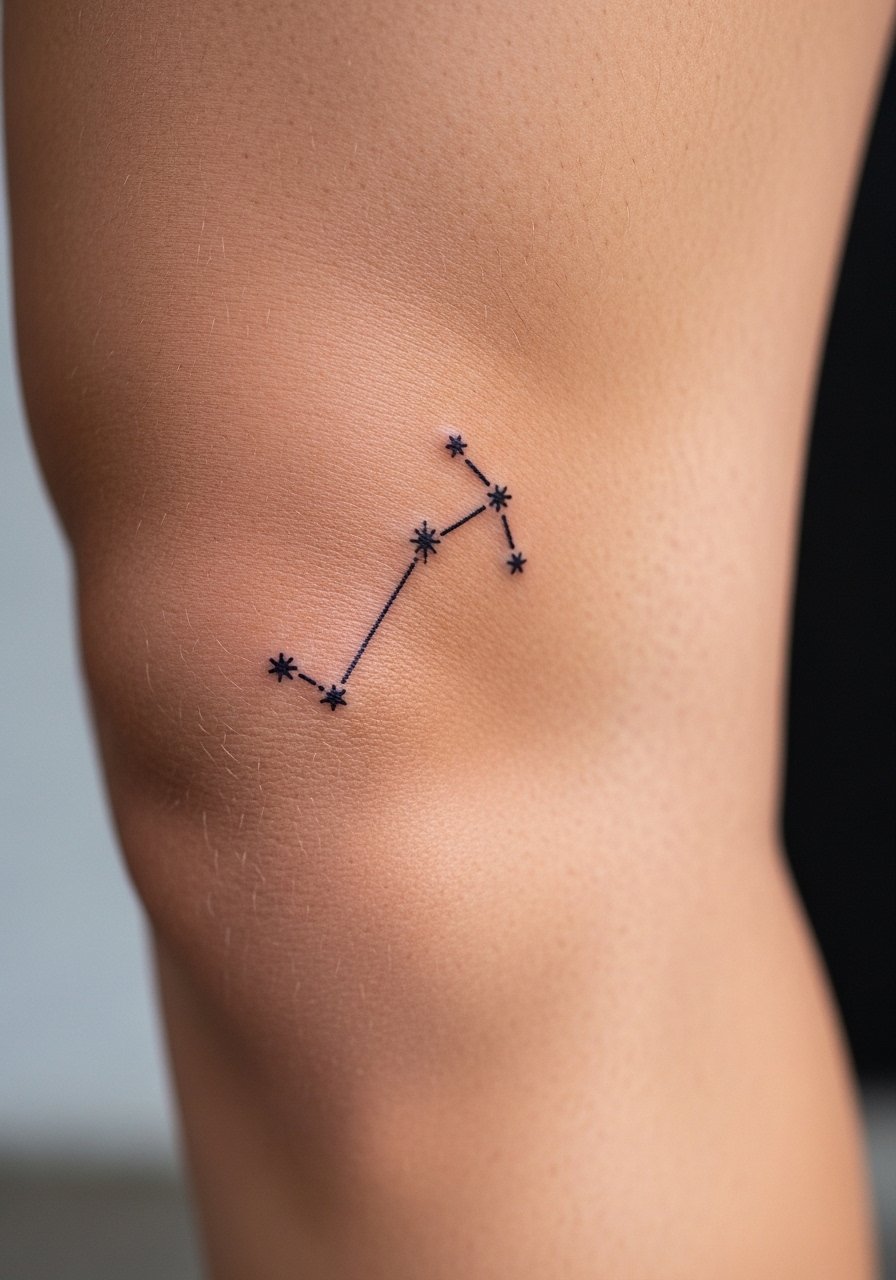
8. Minimal Dotwork Constellation Shoulder Blade
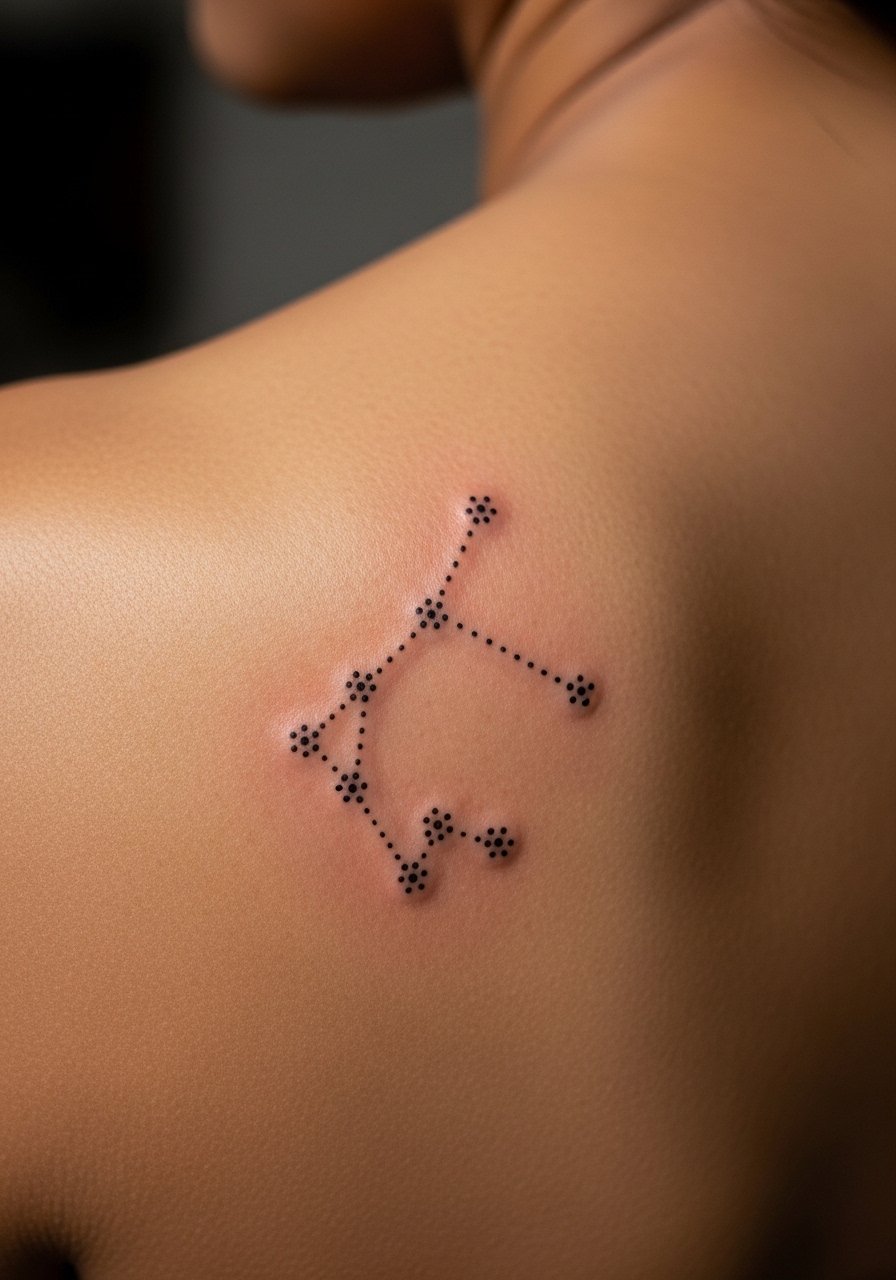
I recommend this for someone who wants discreet astronomy symbolism. Shoulder blade is low-pain and easy to cover. Sessions are usually under 30 minutes. Ask your artist for slightly larger dots and modest spacing so the stars remain distinct after settling. A mistake is choosing pin-sized dots packed tight. They tend to merge into smudges. At six months dots have softened but patterns still read. If you want added sparkle ask for a tiny white ink highlight, but be aware white can fade faster. This style is great for people who want subtle meaning without big silhouettes.
9. Tiny Negative-Space Triangle On Finger
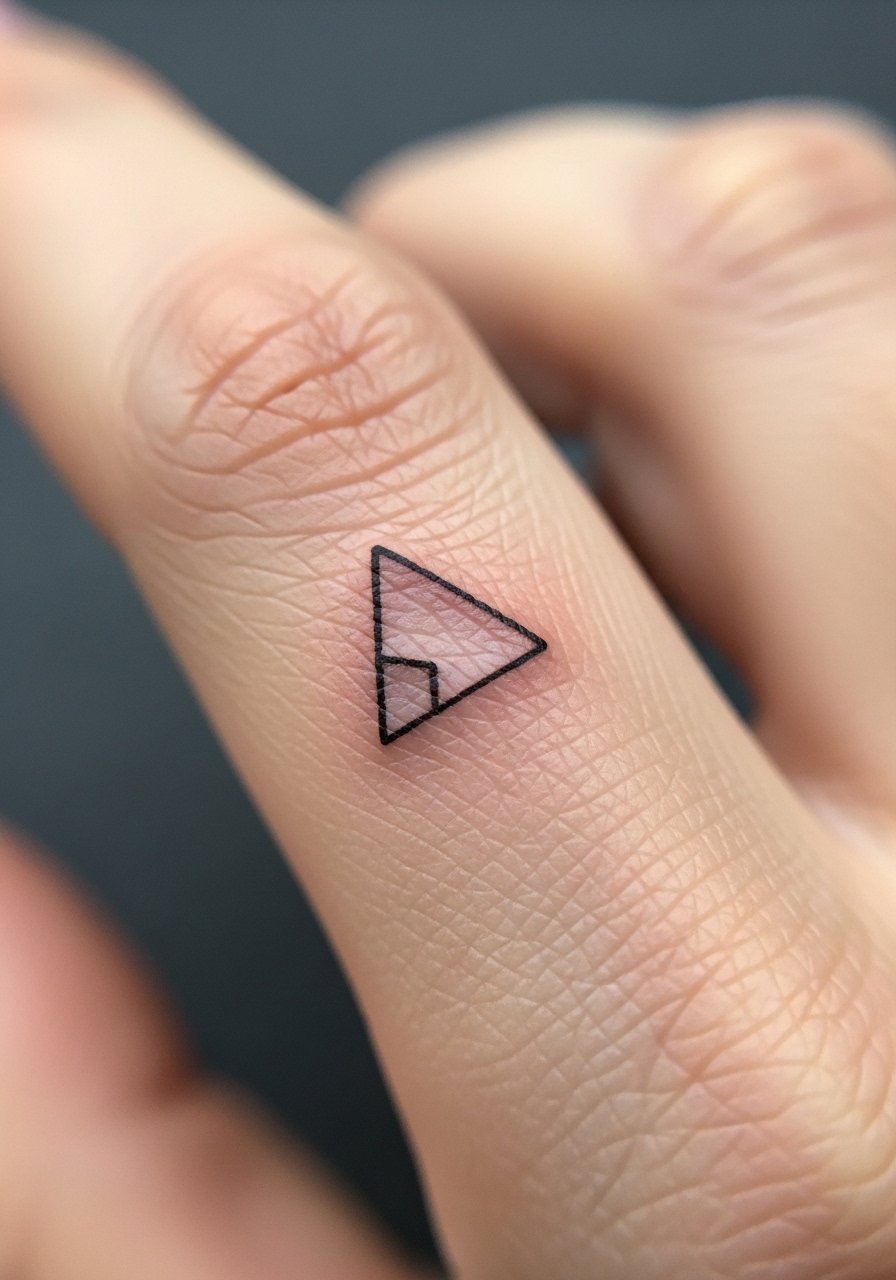
I saw this on a barista who wanted a minimalist ring replacement. Finger tattoos are notorious for faster fading. Pain is moderate to high depending on the exact spot. Sessions are under 30 minutes. If you want this to last tell your artist to carve the triangle with surrounding bold black rather than only an outline. The common error is using only thin lines on fingers. Those lines blur and spread quickly. Negative-space filled by bold surrounding ink tends to keep shape longer. Expect touch-ups within a year. For finger placements consider placement on the side rather than the top, it sees less sun and friction.
10. Micro-Realism Fox On Ankle
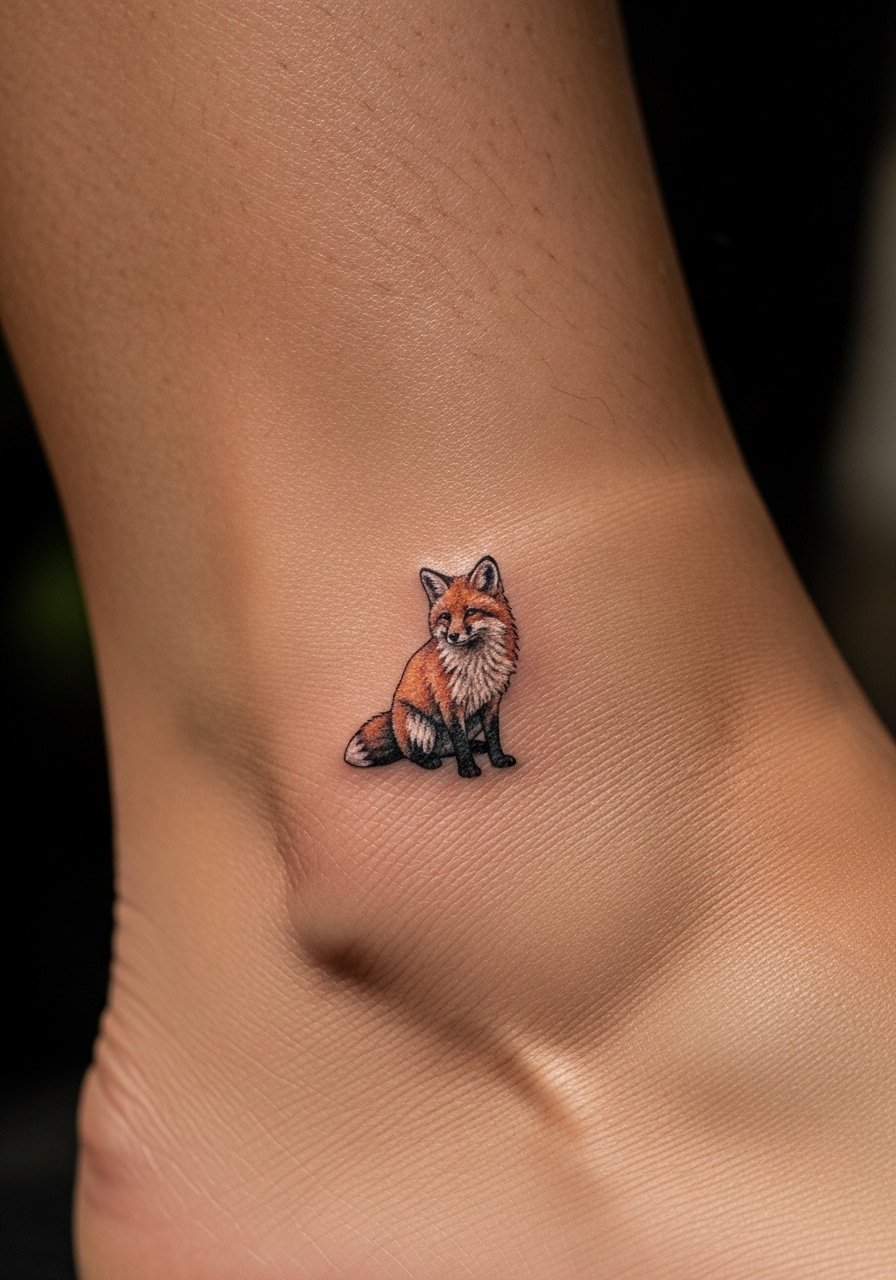
I recommend a micro-fox for people who want a characterful small piece. The ankle offers a cute display spot and moderate pain. Session time runs 30 to 45 minutes. When consulting, bring clear high-contrast photo references and ask the artist to prioritize shape and shadow rather than tiny whisker lines. A common mistake is squeezing too much hair detail into a 1-inch space. That detail melts into gray. Healed at six months the fox still reads as an animal rather than a blot. If you want it on the forearm instead, the skin there will hold micro-shading better long term.
11. Fine Line Geometric Skull On Finger
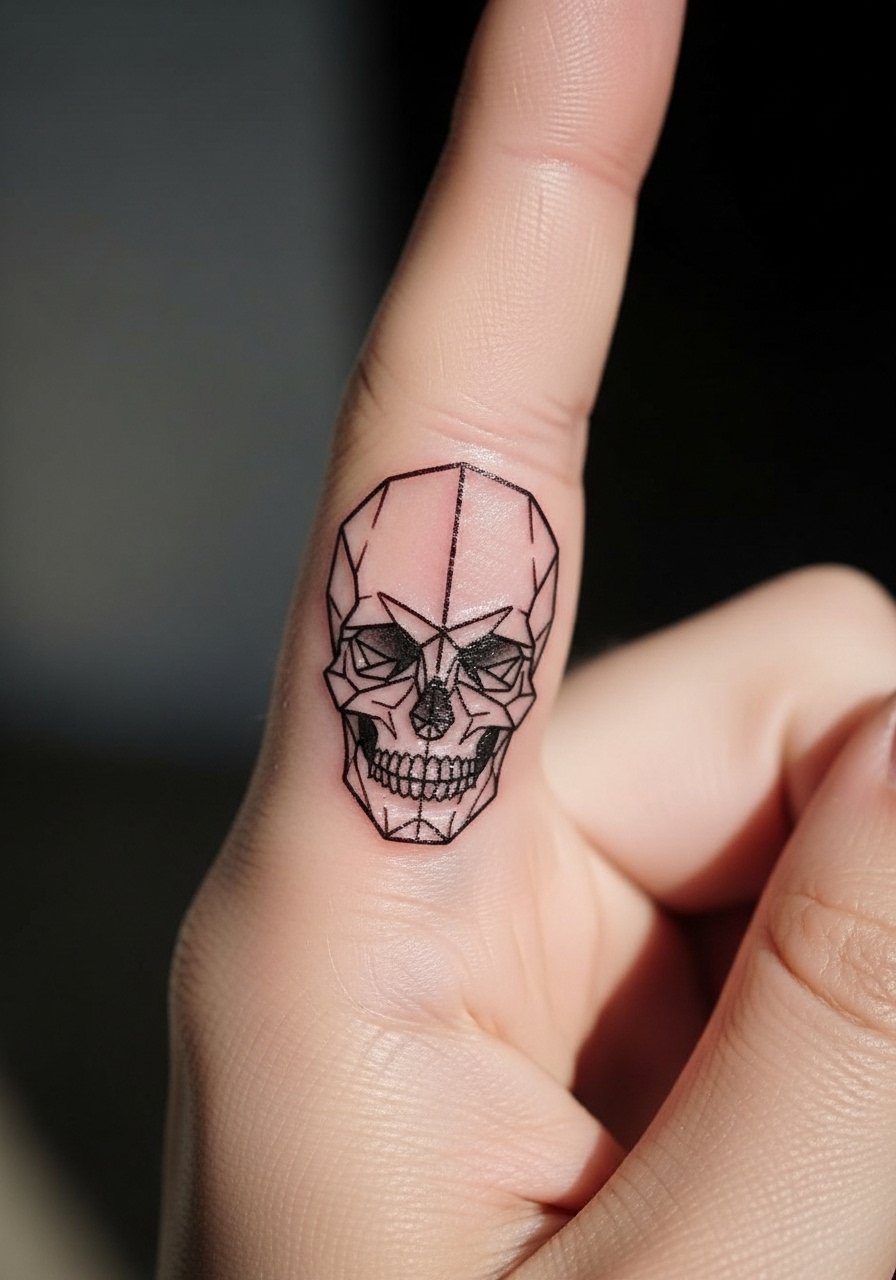
I noticed a trend of tiny skulls mixed with geometry for people who like edgier minimalism. Finger placement means faster fading and more painful sessions. Keep sessions short. Ask your artist to simplify the skull into a few key planes and avoid micro crosshatching. The mistake I see is trying to cram teeth and shading into a tiny canvas. That ends up as a gray patch. Healed, the geometric planes maintain the skull shape better than detailed shading. If you want more longevity move the piece to the side of the hand or near the wrist.
12. Fine Line Coordinates On Inner Forearm "41.40338 N, 2.17403 E"
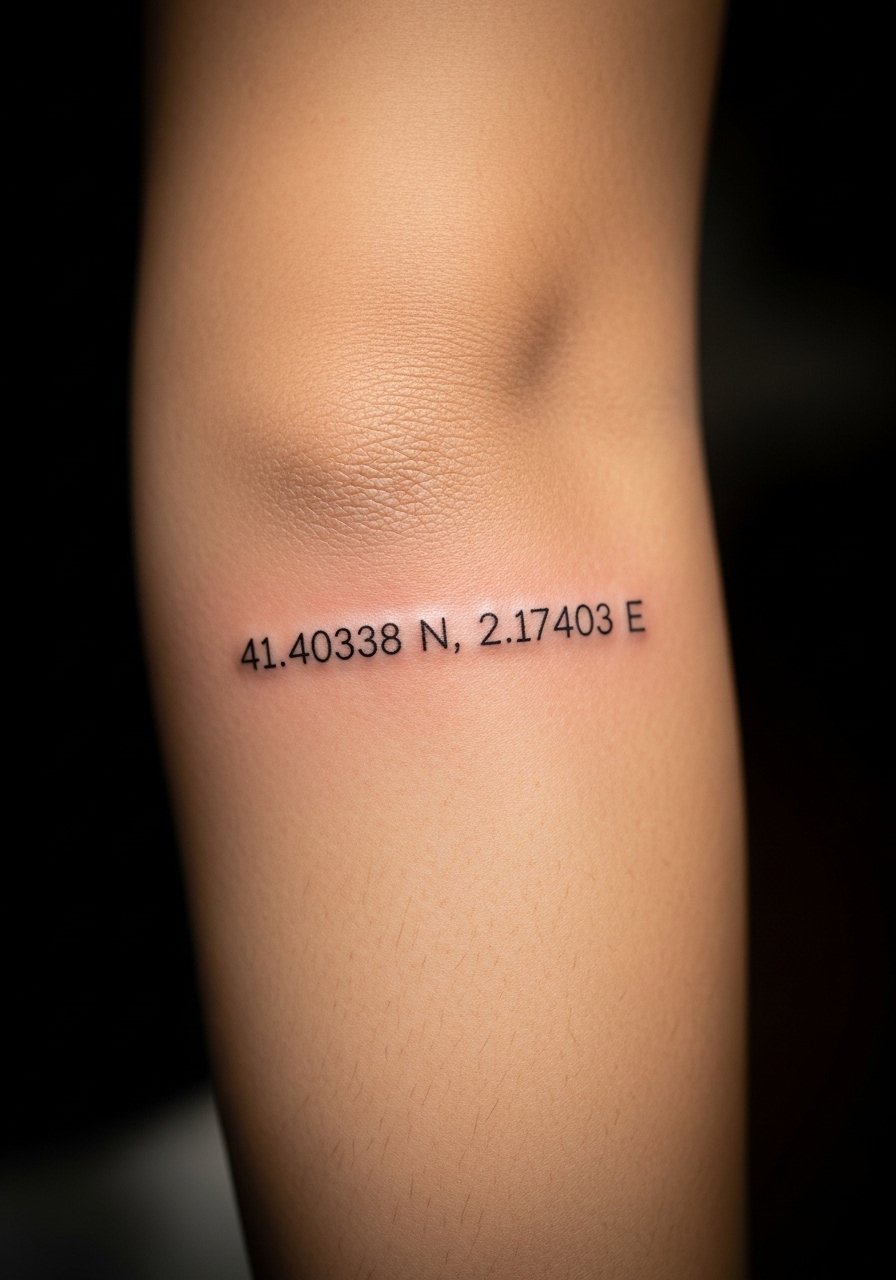
I saw coordinates used for wedding venues and meaningful places. Inner forearm is low pain and highly visible. Sessions take 15 to 20 minutes. Specify the exact digits and font during consult so the artist can stencil it precisely. A common mistake is tiny condensed fonts. Those blur and become unreadable. From what I've seen, a clear monospace or thin serif in slightly larger size ages best. Healed, the numbers soften but remain legible for years. If you want an extra layer of meaning ask the artist to pair coordinates with a tiny map dot.
13. Small Abstract Brushstroke Upper Arm
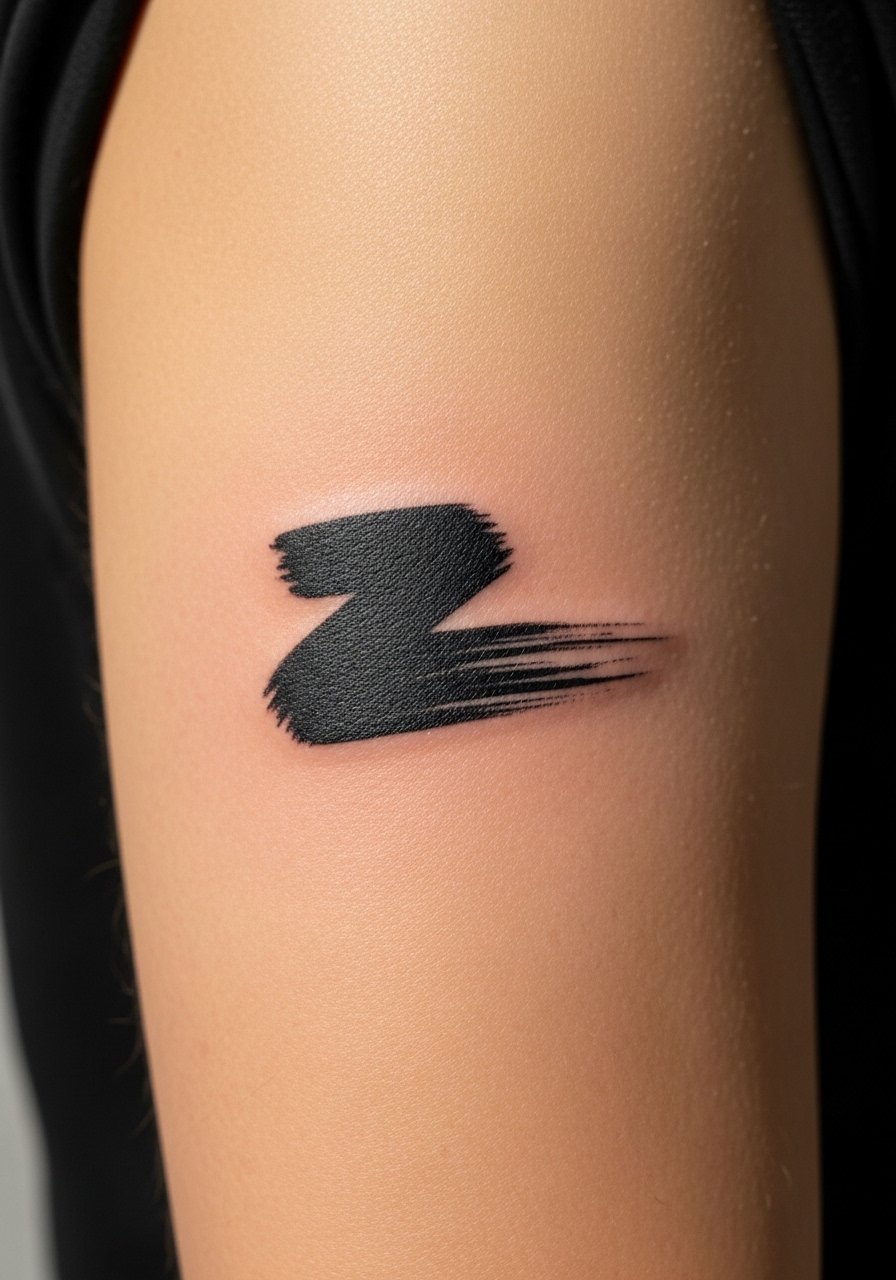
I find brushstroke pieces feel intentional without being literal. The outer upper arm is low pain and forgiving. Session time is short. Tell the artist you want visible brush edges and a tapered tail rather than a uniform band. The common error is asking for a band that is too thin. It loses its character when it heals. Over time the edges will feather slightly, but the abstract shape remains readable. This is a good option for someone who wants a bold gestural mark without color or heavy detail.
14. Tiny Blackwork Anchor On Ankle

I recommend traditional anchors for people tied to maritime memories. The ankle placement is moderate pain. Sessions are brief. Ask your artist for solid black fills and a simple silhouette rather than decorative linework. The mistake I see is over-detailing the anchor with tiny rope textures. Those get lost fast. Bold black silhouettes hold up, but black can soften at the edges over time. Touch-ups can dramatically refresh these pieces yearly if you want crisp edges.
15. Micro Floral Ring On Finger
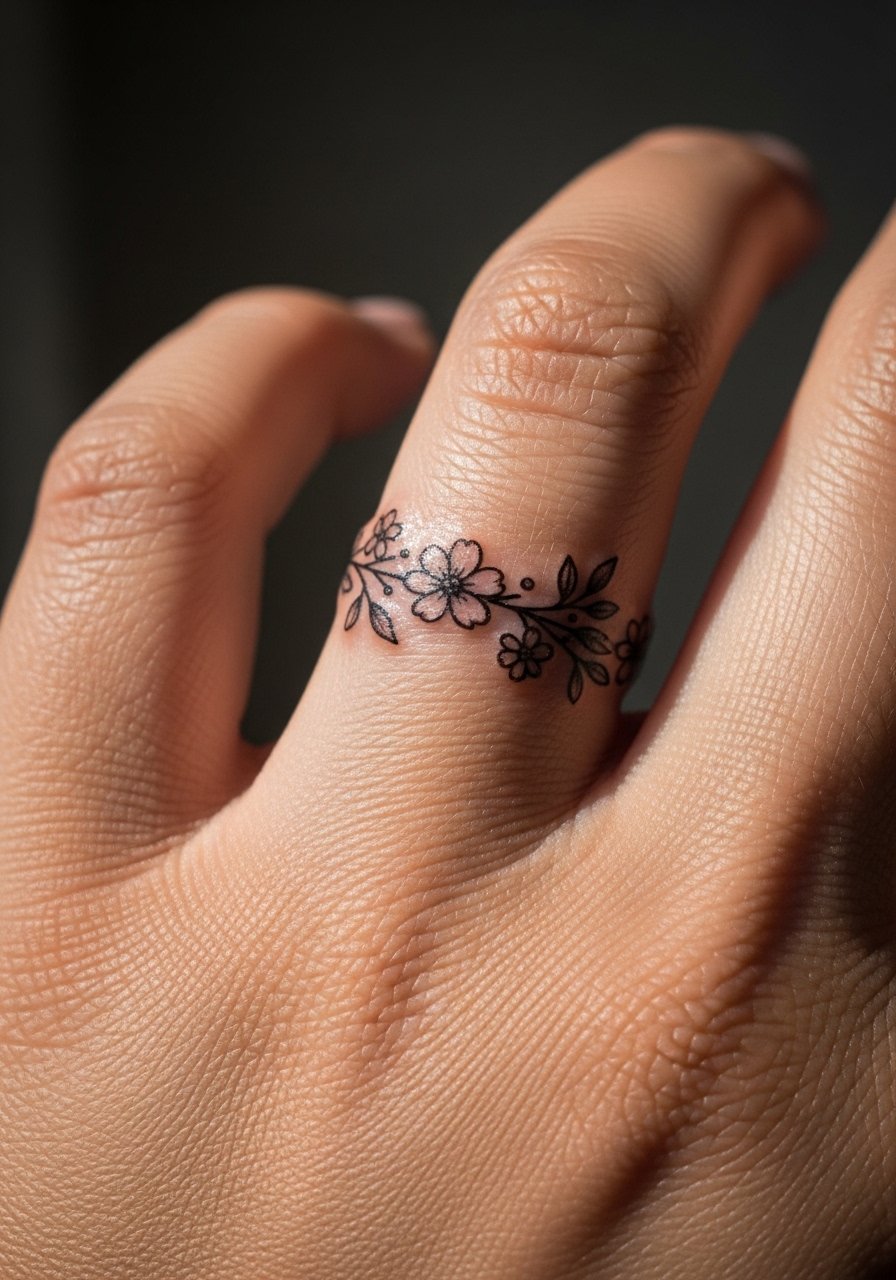
I recommend floral finger rings for couples or self-symbolism. Pain is higher on fingers and healing is tricky because of hand use. Sessions are short. Ask for intermittent gaps in the floral band so each bloom can breathe. I often see full continuous bands done too tight. They blur into an indistinct ring. For longer life choose slightly larger petals and leave spacing. Expect touch-ups; rings on fingers rarely stay untouched for more than a year unless you accept gradual softening.
16. Miniature Line Art Camera On Collarbone
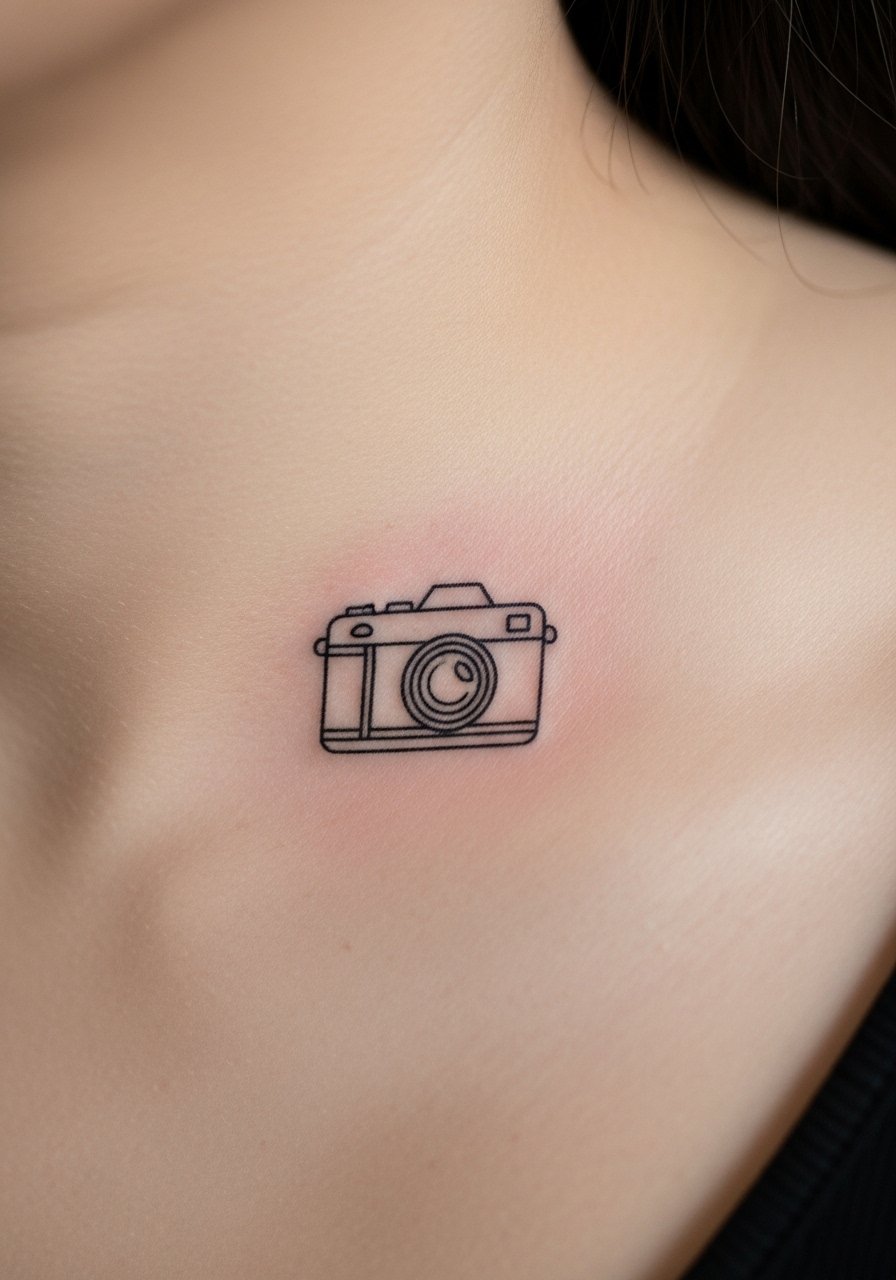
I first saw this on a photographer who wanted a subtle nod to their craft. Collarbone offers a flat canvas and moderate pain. Sessions are usually 20 to 30 minutes. Tell your artist you want the shutter and lens implied with simple circles and not tiny mechanical parts. A common mistake is squeezing in gears and tiny screws. That looks good fresh and then becomes a gray smudge. Healed, clear circles hold the camera silhouette. If you want it more visible, place it slightly higher near the shoulder.
17. UV Ink Constellation Behind Knee
This is an angle I did not see much of five years ago. Under regular light it is discreet. Pain behind the knee is moderate. Sessions tend to be a bit experimental because UV pigments behave differently while healing. Tell your artist you want UV as a subtle accent over a black anchor. The mistake is using only UV ink for the whole piece. That can be nearly invisible in daylight and risk uneven healing. I recommend a small black version with UV highlights for events or night visibility. Healed, UV often requires careful maintenance and is not as long-lasting as black ink.
18. Tiny Barcode Number On Side Rib "1978"
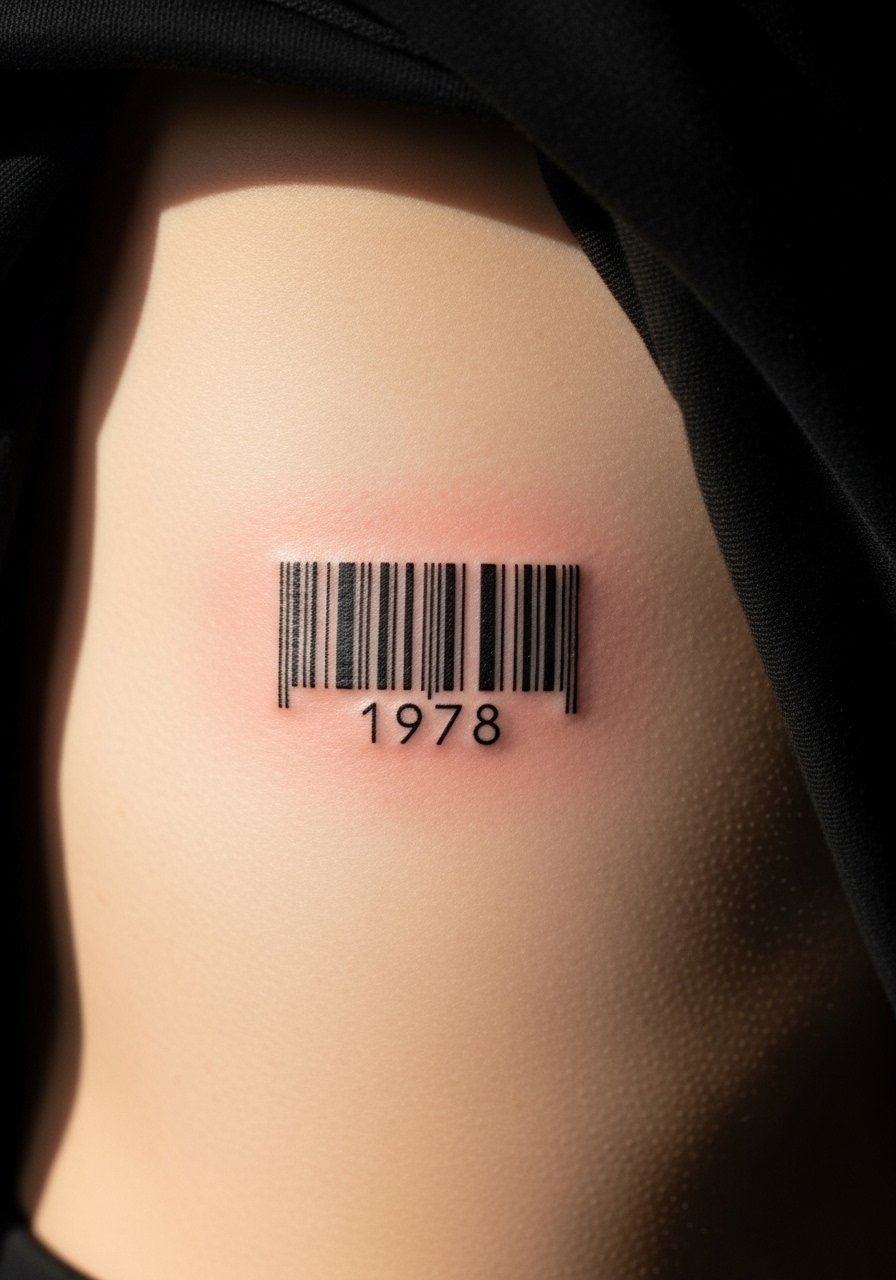
I saw this as a minimalist memorial option. The side rib is high-pain and a great place for hidden pieces. Sessions are short but intense. Ask your artist to space the bars generously and keep the digits clear below. The common error is cramming bars too tight to mimic a real barcode. On skin that detail merges and looks like a smudge. Wider bars with clear spaces and bold digits age cleaner. Heals in a couple of weeks, but movement in the area can slightly distort bar edges over time.
19. Negative-Space Crescent Moon Behind Ear
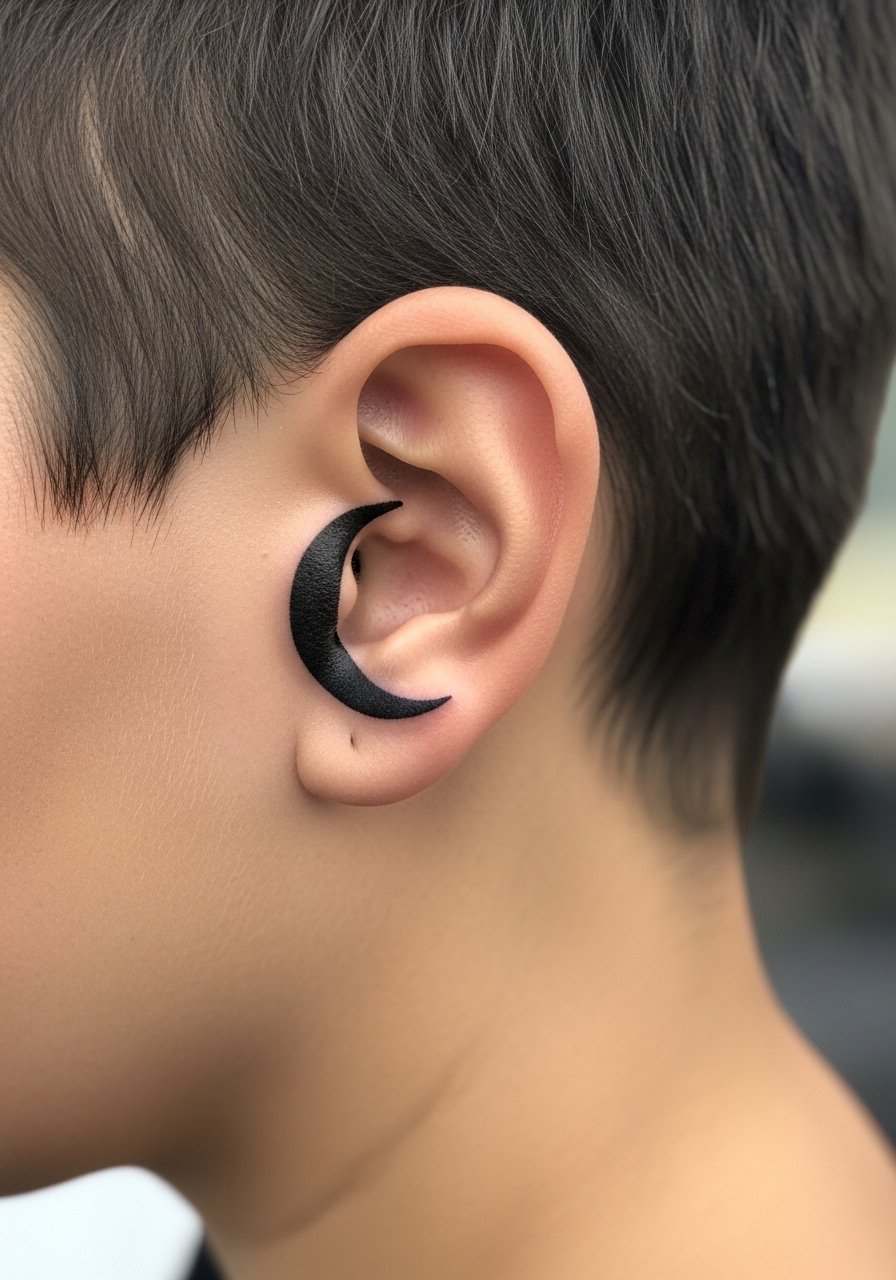
I recommend this for people who want a tiny emblem with a moon motif. Behind the ear is tender but brief. Sessions are short. Tell your artist you prefer negative-space carving using solid surrounding ink to define the crescent. The frequent mistake is outlining the crescent with a single thin line. That outline often blurs and loses definition. Negative-space with solid backing keeps the moon crisp longer. After healing expect slight softening but the crescent silhouette will remain apparent for years.
Tattoo Prep and Aftercare Essentials
Aftercare is where tiny tattoos either thrive or fade. From what I've gathered, artists emphasize hygiene and moisture balance. Below are essentials grouped by use. All links include my tag so you can check product details.
Aftercare Essentials
- Aquaphor Healing Ointment, 14oz tube. Industry standard for first 3-5 days. I use a thin layer at night
- Saniderm Transparent Adhesive Bandage, 6-inch roll. Second skin healing method. Every artist I've talked to recommends it for the first 24 to 72 hours
- CeraVe Fragrance-Free Moisturizing Lotion, 12 oz pump. Daily moisturizer for days 4 to 14. I prefer the pump bottle for hygiene
- Dr. Bronner's Unscented Castile Soap, 32 oz. Gentle cleanser for rinsing twice a day the first week. Dilute a small drop with water
Before Your Appointment
- Numbing Cream with 5% Lidocaine, 30g tube. Apply 30 to 45 minutes before your session only if your artist approves. Some artists prefer no numbing
- Tattoo Stencil Transfer Paper, A4 Pack. Useful if you want to test placement at home before your appointment
Long-Term Maintenance
- SPF 50 Sunscreen Stick for Sensitive Skin, Travel Size. Use on healed tattoos whenever they see sun. I carry one for beach days
- Mad Rabbit Tattoo Balm, 2 oz. Long-term maintenance for vibrancy. Artists I know recommend it for healed pieces
- Hustle Butter Deluxe, 5 oz. Vegan alternative that works during healing and after. Smells better than most aftercare
Optional Comfort Items
- Tattoo Numbing Spray, 4 oz. Handy for touch-ups or sensitive areas mid-session
- Hydrocolloid Bandages, Large Size Pack. Good alternative to Saniderm for small to medium tattoos
Frequently Asked Questions
Q: Will fine line wrist scripts blur if I get a full sleeve later?
A: From what I've seen, fine line scripts on wrists can blur faster than thicker work when stacked into a sleeve. If you plan a sleeve later tell your artist during the consult that the wrist needs slightly bolder anchor lines. Another option is to place scripts on the inner forearm where skin stretches less. For daily care keep the area moisturized with CeraVe Fragrance-Free Moisturizing Lotion, 12 oz pump.
Q: Do watercolor-style ribs need different aftercare than traditional blackwork?
A: Yes. From my experience watercolor pieces, especially on thin skin like ribs, benefit from keeping texture intact. Ask your artist to give you a healing plan and avoid heavy ointments that sit on the surface for too long. I use Aquaphor Healing Ointment, 14oz tube sparingly in the first days and then switch to a lighter balm like Mad Rabbit Tattoo Balm, 2 oz for weeks two and three.
Q: Can UV ink tattoos be used for subtle accents on tiny pieces?
A: In my experience UV ink works best as an accent over a standard black anchor. Using only UV for the main shape often leaves the piece nearly invisible in daylight and vulnerable during healing. If you want a night-time pop get a black outline or small solid and request UV highlights. Artists I know will discuss UV pigment behavior and maintenance before inking.
Q: How do I tell an artist to design a micro-realism portrait so it ages well?
A: Bring a high-contrast reference and ask the artist to prioritize tonal blocks rather than micro-detail. During the consult say you want simplified shadows and slightly larger highlights. From what I've seen, a portrait with clear light and dark planes retains identity better than one packed with tiny strokes. Expect a touch-up option after the first year.
Q: Are finger floral rings a bad idea for long-term wear?
A: Finger florals are beautiful but high-maintenance. I have one and it needed a touch-up in under a year. The best approach is to ask for spaced petals and bolder outlines. Consider placement on the base of the finger rather than the top where daily friction is heavier. For care I use gentle soap like Dr. Bronner's Unscented Castile Soap, 32 oz during the initial wash phase.
Q: How should I prep for a tiny tattoo behind the ear or on the nape?
A: Get a good night's sleep and wear clothing that gives your artist clear access. For behind the ear avoid heavy jewelry. If you plan to use numbing check with your artist first and consider Numbing Cream with 5% Lidocaine, 30g tube only if they approve. After the session follow the artist's cleaning routine and keep hair away while the piece heals.
Q: Will negative-space small designs hold up longer than thin outlines?
A: From what I've noticed negative-space carving with solid surrounding ink often holds shape longer than thin outlines. Thin outlines can blur into a soft gray, while negative-space preserves the silhouette as long as the surrounding black stays saturated. If longevity matters ask the artist to design with intentional negative shapes rather than tiny outline-only elements.
