
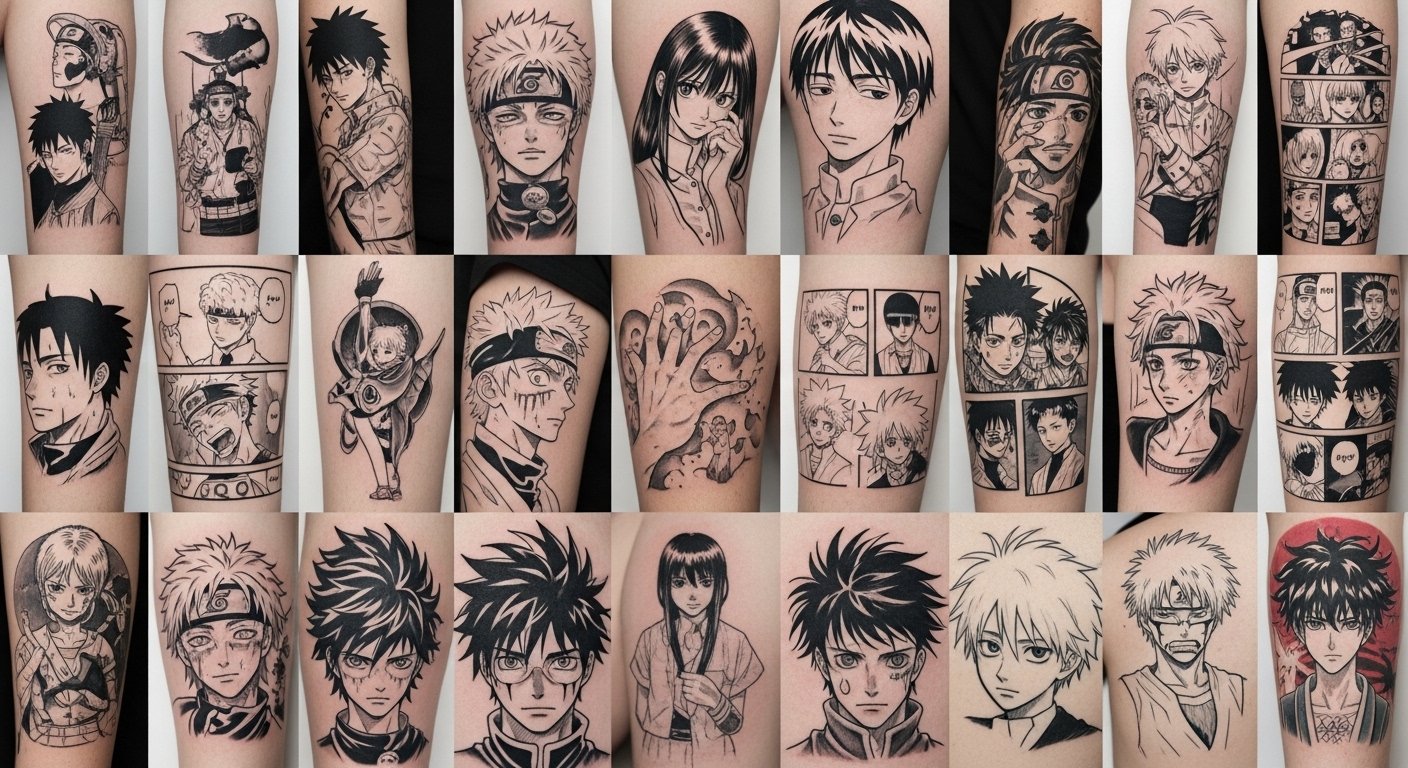
I spent months staring at manga panels before I realized the trick: crisp linework and smart placement are what make manga tattoos read like comics years later — not just on fresh skin. These 22 styles focus on sharp detail, halftone texture, and layouts that heal clean.
This list focuses on manga-inspired linework, halftone/screentone textures, and panel-style layouts. Most designs work well on arms, ribs, thighs, and calves. From what I've seen in 2026 trends, crisp black lines and negative space are what hold up best.
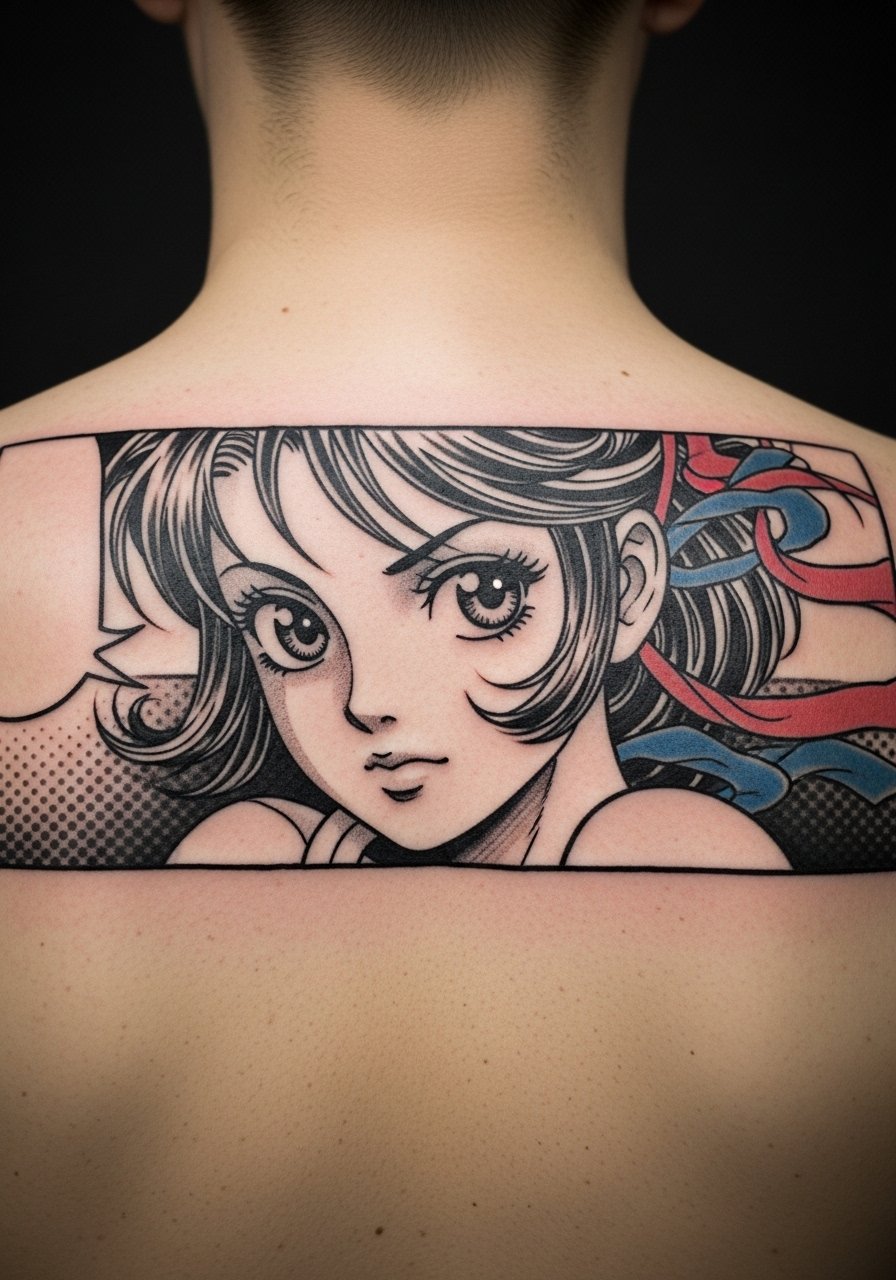
1. Fine Line Manga Portrait on Outer Forearm
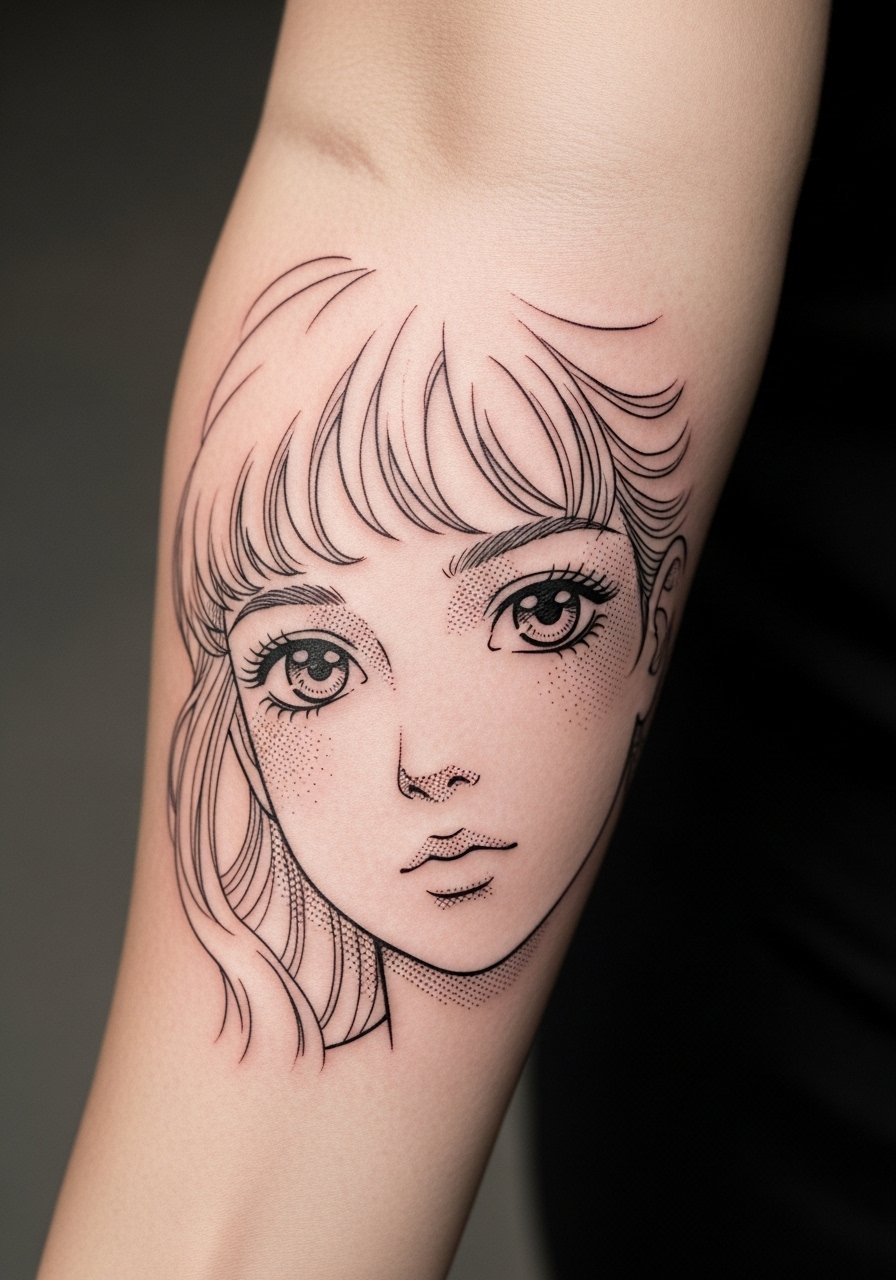
Style/Technique: Fine Line / Screentone
Pain Level: Low-Medium (3/10)
Session Time: 1-2 hours
Best For: First tattoo, visible statement
I like this for delicate anime faces and soft expressions. It reads like a manga panel on your arm. Expect light tenderness during the session and surface healing in 2–3 weeks. Fine lines blur faster if placed on high-motion skin. Ask for slightly bolder line anchors so the portrait stays crisp as it heals.
2. High-Contrast Blackwork Oni Mask on Calf
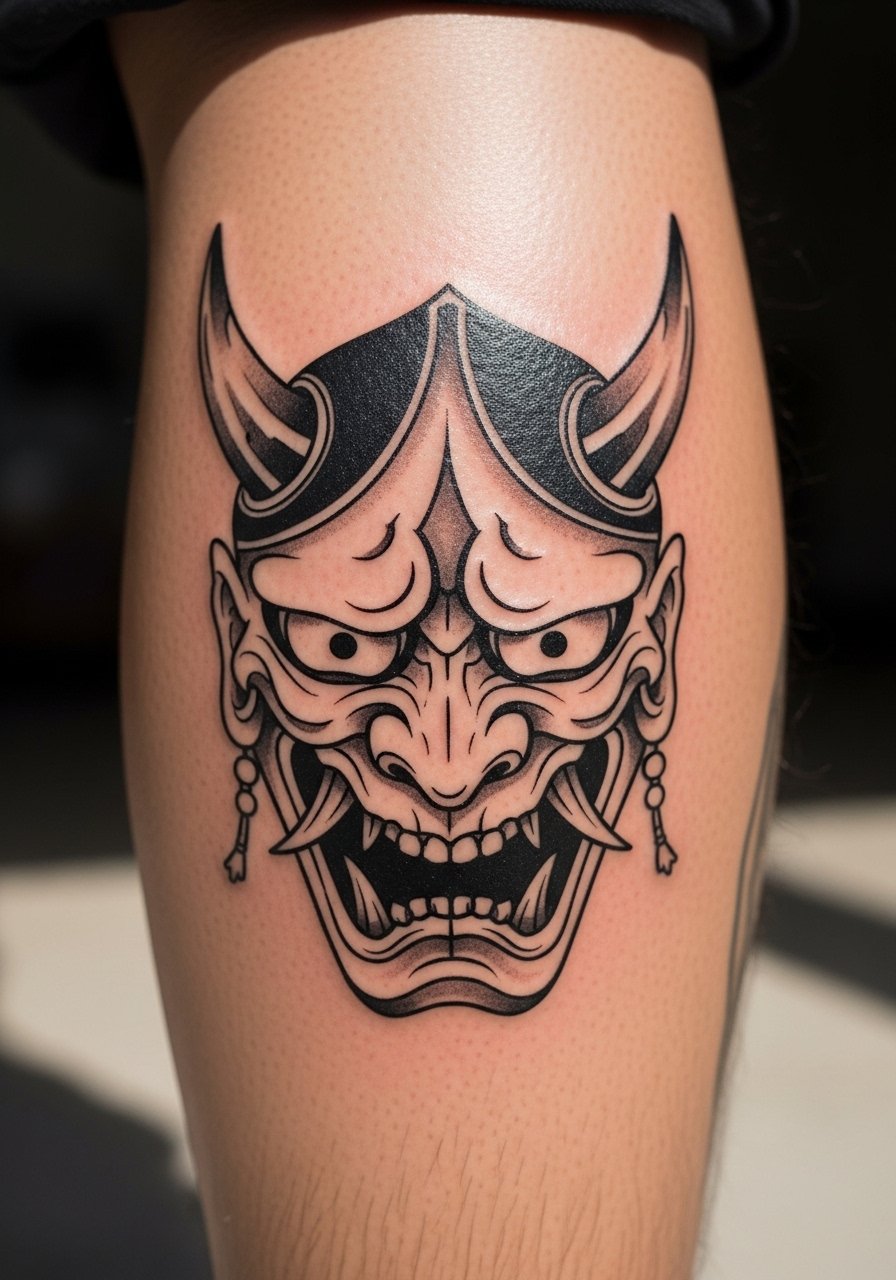
Style/Technique: Blackwork / Neo-Traditional
Pain Level: Medium (4/10)
Session Time: 2-4 hours
Best For: Bold statement, long-lasting contrast
Heavy blacks hold up well on the calf. The manga vibe comes from dramatic shadows and sharp teeth lines. Expect more soreness but reliable aging; big black areas fade gracefully. Avoid overly tiny detail inside solid blacks—those can mush during healing. Look for an artist known for crisp silhouettes.
3. Panel Layout Sleeve Accent on Inner Forearm
Style/Technique: Graphic / Panel Layout
Pain Level: Medium (3-5/10)
Session Time: Multiple short sessions
Best For: Narrative pieces, collectors
Panels let you tell a short story. I’ve seen these age well when artists use balanced negative space and strong panel borders. Movement and flexing can slightly blur tiny cross-hatching—keep hatching thicker than you think. Ask for mockups to test placement flow when your arm moves.
4. Shojo Eyes With Halftone Cheek Shading Behind Ear
Style/Technique: Fine Line / Halftone
Pain Level: High (6-7/10)
Session Time: 1 hour
Best For: Hidden, delicate detail
Behind the ear is sensitive but subtle. The large eyes and halftone blush make a recognizable manga aesthetic. Expect sharp initial lines; halftone dots can soften over time. Don’t squeeze too many dots into a tiny area—dots can merge during healing. This placement is discreet and personal.
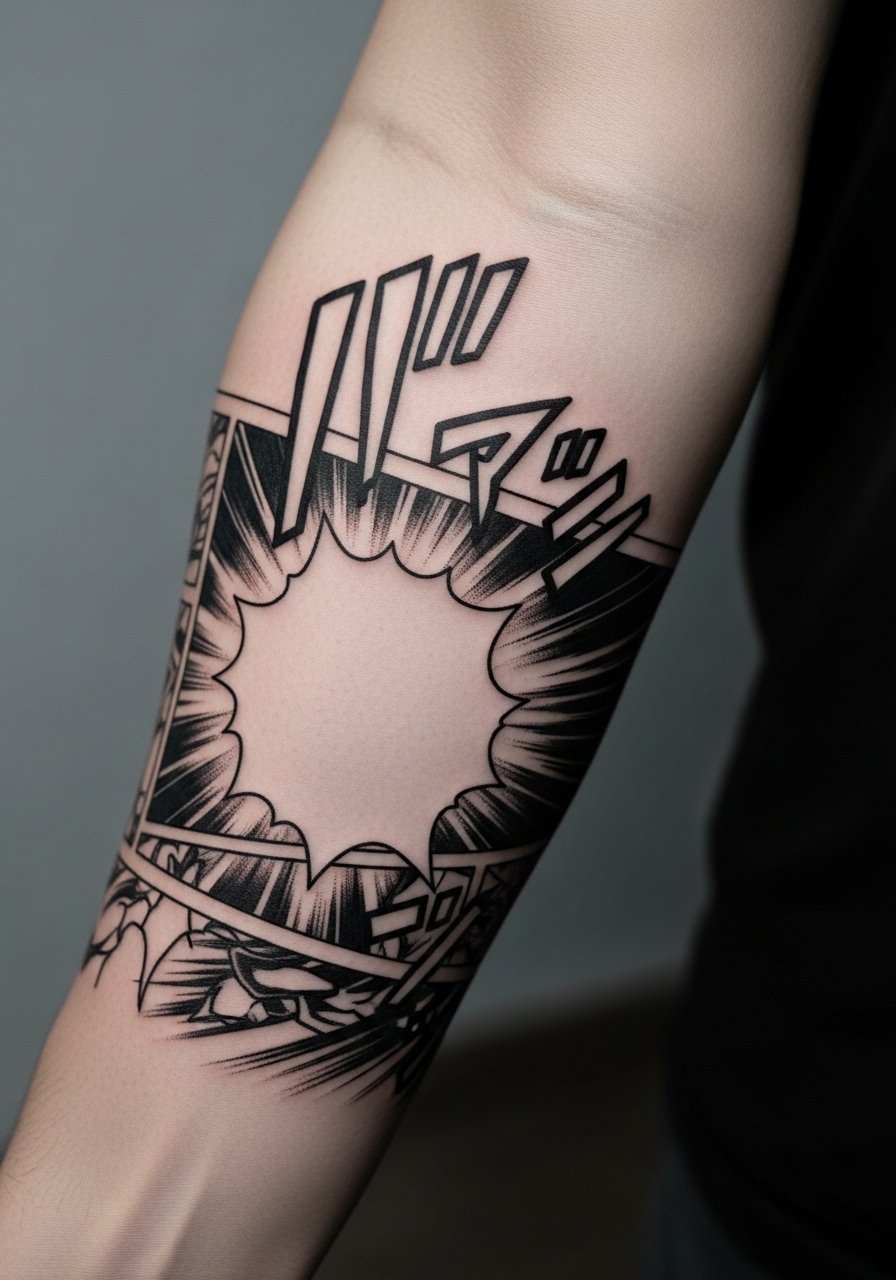
5. Speed Line Motion Piece on Outer Bicep

Style/Technique: Graphic Linework
Pain Level: Low-Medium (3/10)
Session Time: 1-2 hours
Best For: Motion-focused accents
Speed lines translate perfectly to the bicep. They’re easy to place and age predictably. Keep lines clean and avoid micro tapering that disappears. Ask for confident, consistent stroke weight so the motion remains readable years later.
6. Chibi Character on Upper Thigh
Style/Technique: Neo-Traditional / Cartoon
Pain Level: Low (2-3/10)
Session Time: 1 hour
Best For: Playful, easy-to-hide design
Thigh skin takes ink well and is forgiving while healing. Chibi proportions keep lines simple, which helps longevity. Avoid excessive tiny details in faces—bold expression lines read better after healing. This is a great test piece if you want playful manga vibes.
7. Full-Color Shonen Scene on Chest (Partial)
Style/Technique: Color / Shonen Illustration
Pain Level: High (6-8/10)
Session Time: Multiple sessions
Best For: Dramatic, large display
Chest pieces let you include action scenes and color fills. Bright colors pop but can fade faster—black outlines help preserve contrast. Chest can be tender and takes longer to settle. Avoid tiny color gradients that’ll lose punch; ask the artist for solid color blocks and strong linework.
8. Minimalist Manga Symbol on Inner Wrist
Style/Technique: Minimalist / Line Art
Pain Level: Medium (4/10)
Session Time: 30–60 minutes
Best For: First small visible piece
Wrists show every line. Minimal manga symbols work if the lines are slightly thicker than drawn art. I’ve seen tiny lines fade; so ask for reinforcement. Healing is quick, but avoid constant friction from watches or sleeves for the first month.
9. Micro-Realism Manga Pet Portrait on Upper Arm
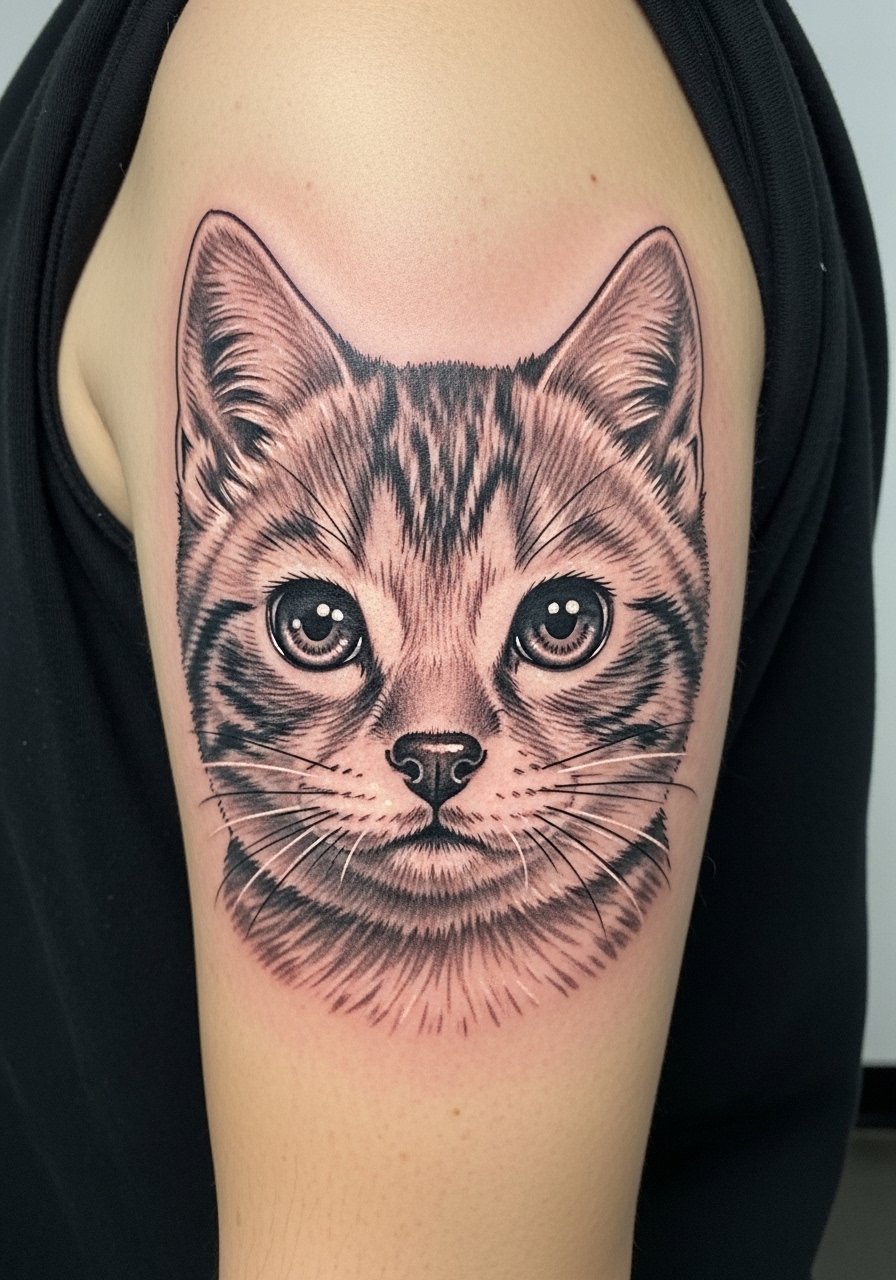
Style/Technique: Micro-Realism / Illustrative
Pain Level: Low-Medium (3/10)
Session Time: 2-4 hours
Best For: Meaningful, visible portrait
Combining micro-realism with manga eye styling gives emotional punch. Upper arm skin holds detail well. Expect longer sessions but steady healing. Common mistake: asking for too much micro detail in a small size—scale it up for longevity.
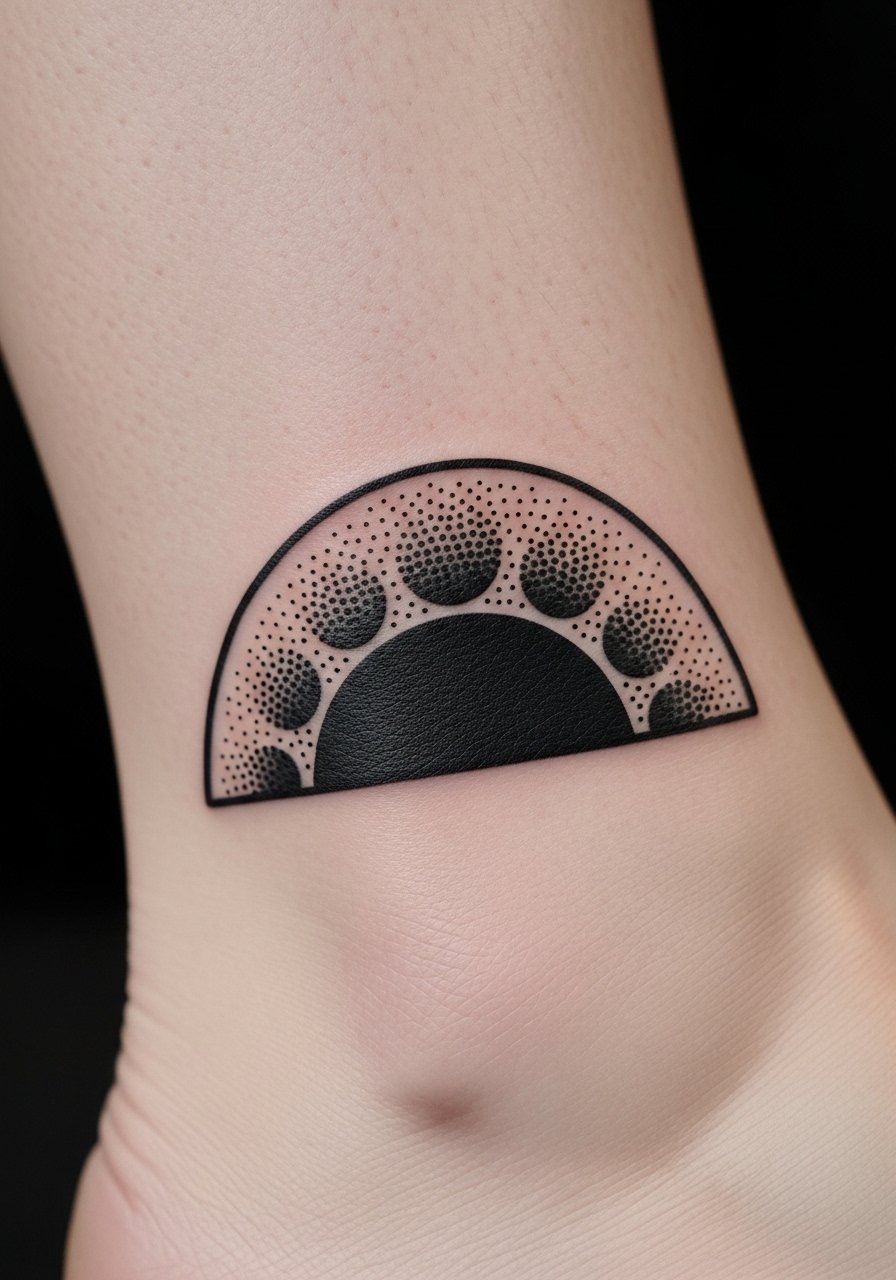
10. Halftone Wave Pattern Along Ribcage
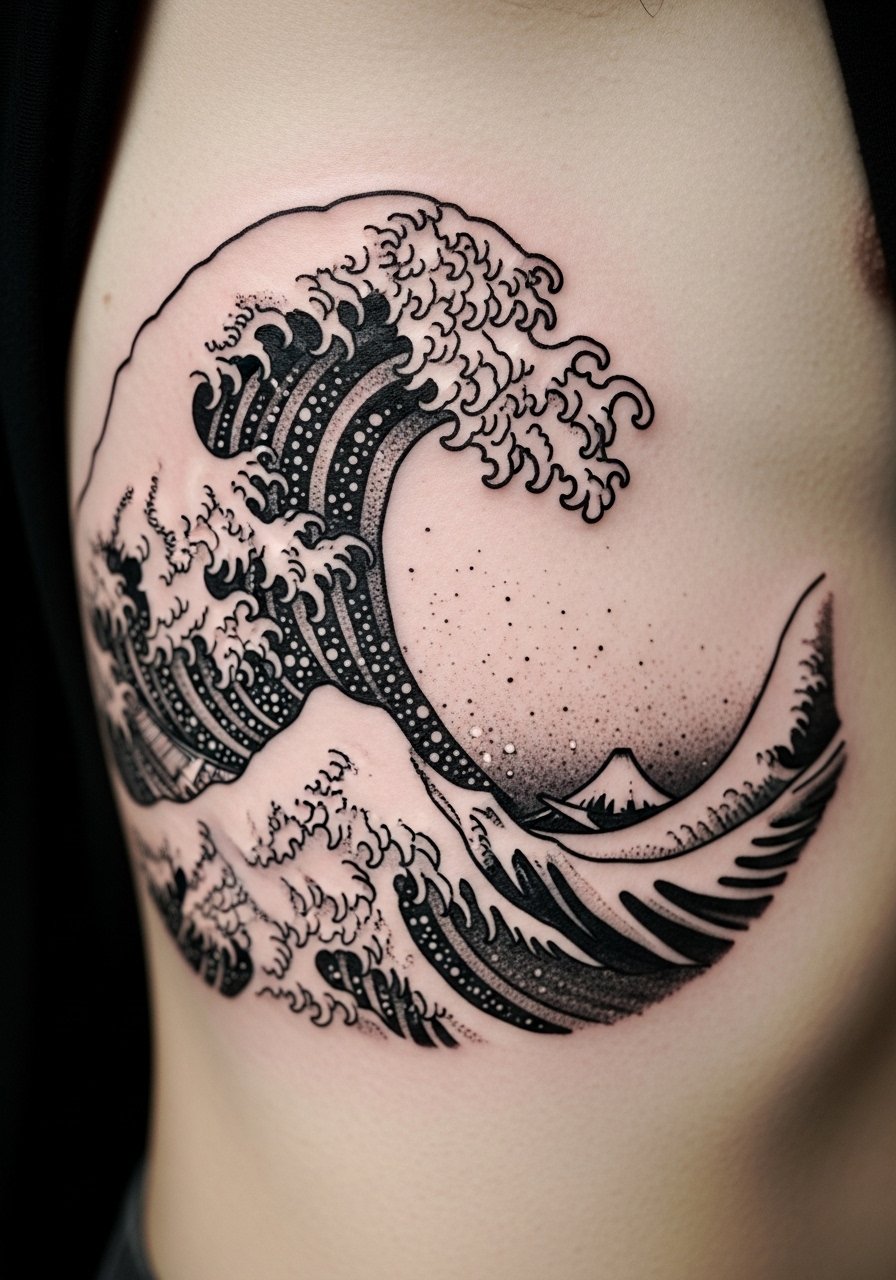
Style/Technique: Halftone / Graphic
Pain Level: High (7-8/10)
Session Time: 1–3 hours
Best For: Statement, hidden when needed
Ribcage is sensitive but dramatic for halftone shading. Dot work can look crisp if dots are spaced properly. I’ve seen dot clusters blur if placed too close. Plan for slower sessions and expect tenderness during healing.
11. Black Line Katana With Speed Lines on Forearm
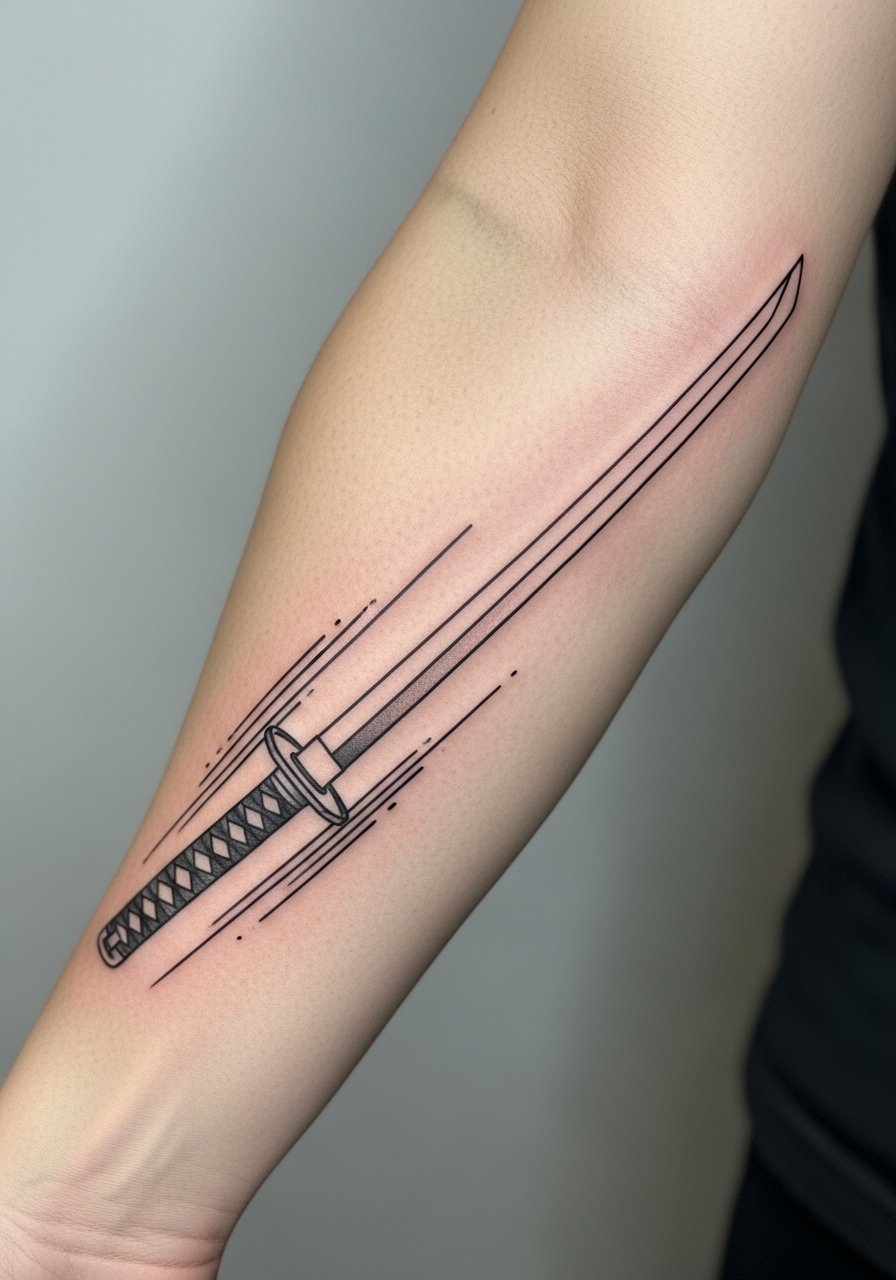
Style/Technique: Fine Line / Graphic
Pain Level: Medium (4/10)
Session Time: 1 hour
Best For: Bold, clean imagery
A katana with speed lines is classic shonen energy. Forearm placement reads well and ages predictably. Keep secondary lines bolder than sketch-level detail. Avoid overly thin parry lines—they’re the first to blur.
12. Monochrome Yokai Bust on Upper Back
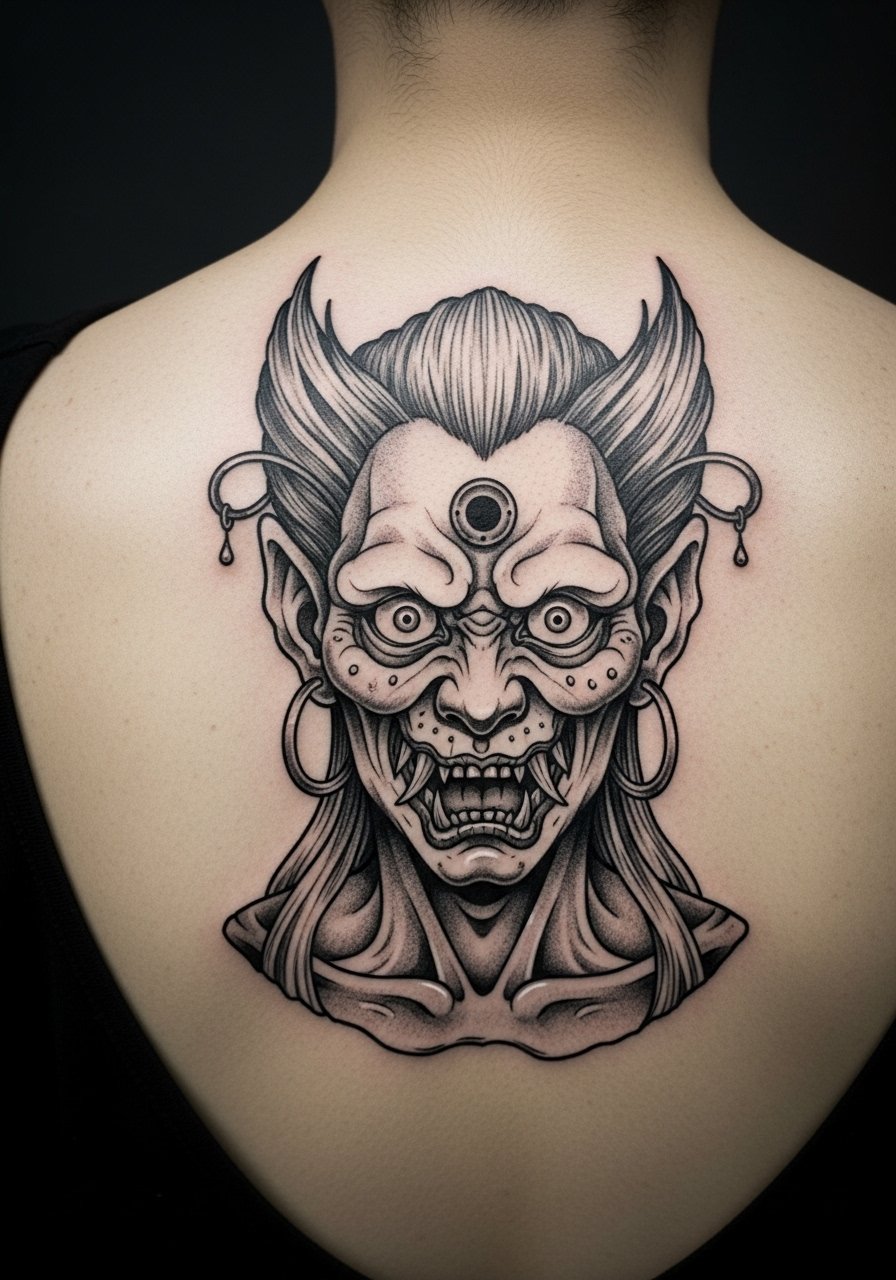
Style/Technique: Black & Gray / Illustrative
Pain Level: Medium (4-6/10)
Session Time: 2–4 hours
Best For: Mythic, collector pieces
Upper back gives space for dramatic faces and texture. Monochrome holds detail longer than tiny color gradients. Watch out for too-fine stippling that merges; request heavier anchors in focal areas so the character keeps presence.
13. Screentone Gradient Sunset on Ankle
Style/Technique: Screentone / Minimal Color
Pain Level: High (6/10)
Session Time: 1–2 hours
Best For: Small, stylized accents
Ankle movement can blur tiny dot gradients. Screentone looks fantastic if dots are sized for skin texture. I recommend slightly larger halftone dots and solid border lines so the scene remains legible after healing.
14. Manga Weapon Cluster on Thigh
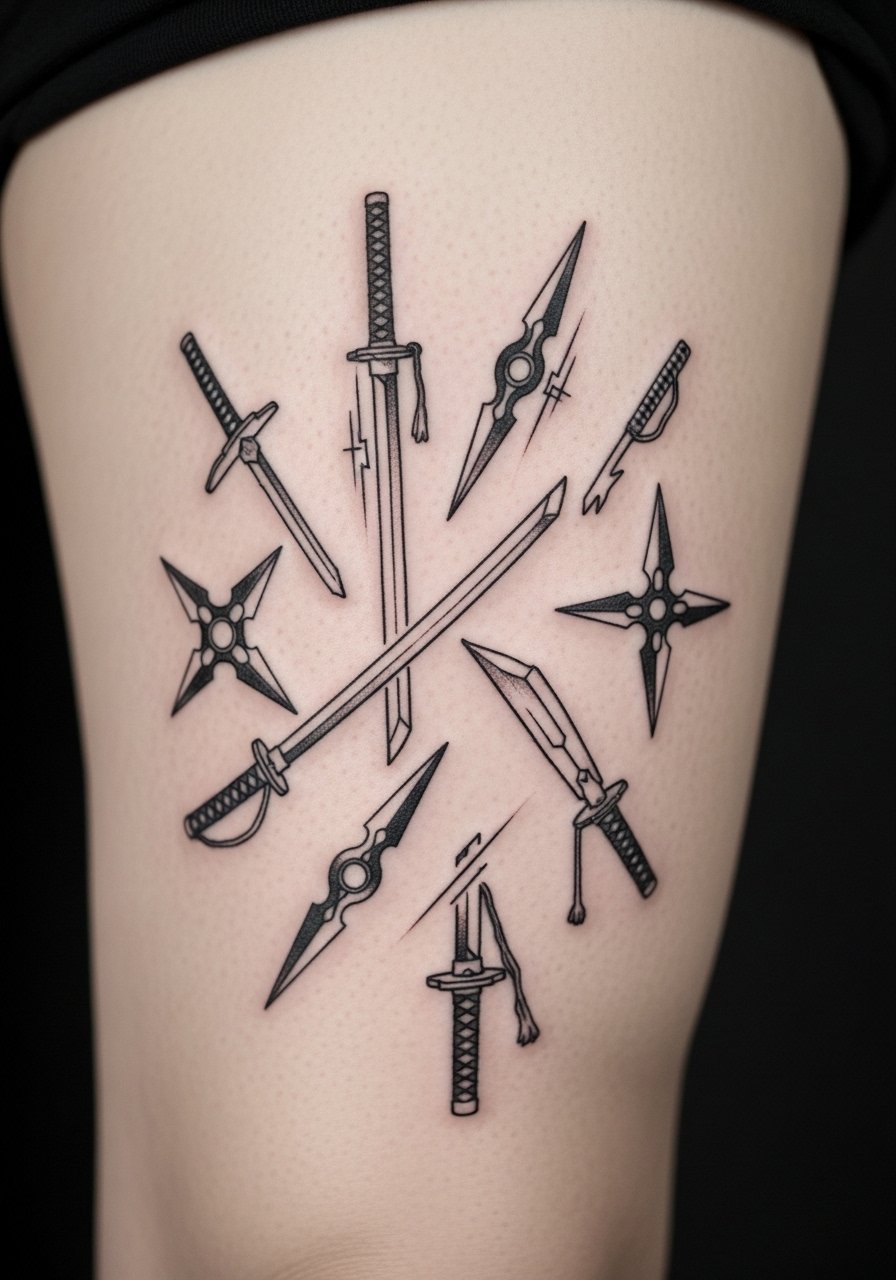
Style/Technique: Blackwork / Silhouette
Pain Level: Low (2-3/10)
Session Time: 1–2 hours
Best For: Concealable, bold graphic
Thighs are forgiving and keep black saturation. Silhouettes read well over time. Avoid tiny inner details that can muddy; bold shapes age cleaner. Great if you want a story element without constant visibility.
15. Neo-Traditional Manga Femme on Upper Arm
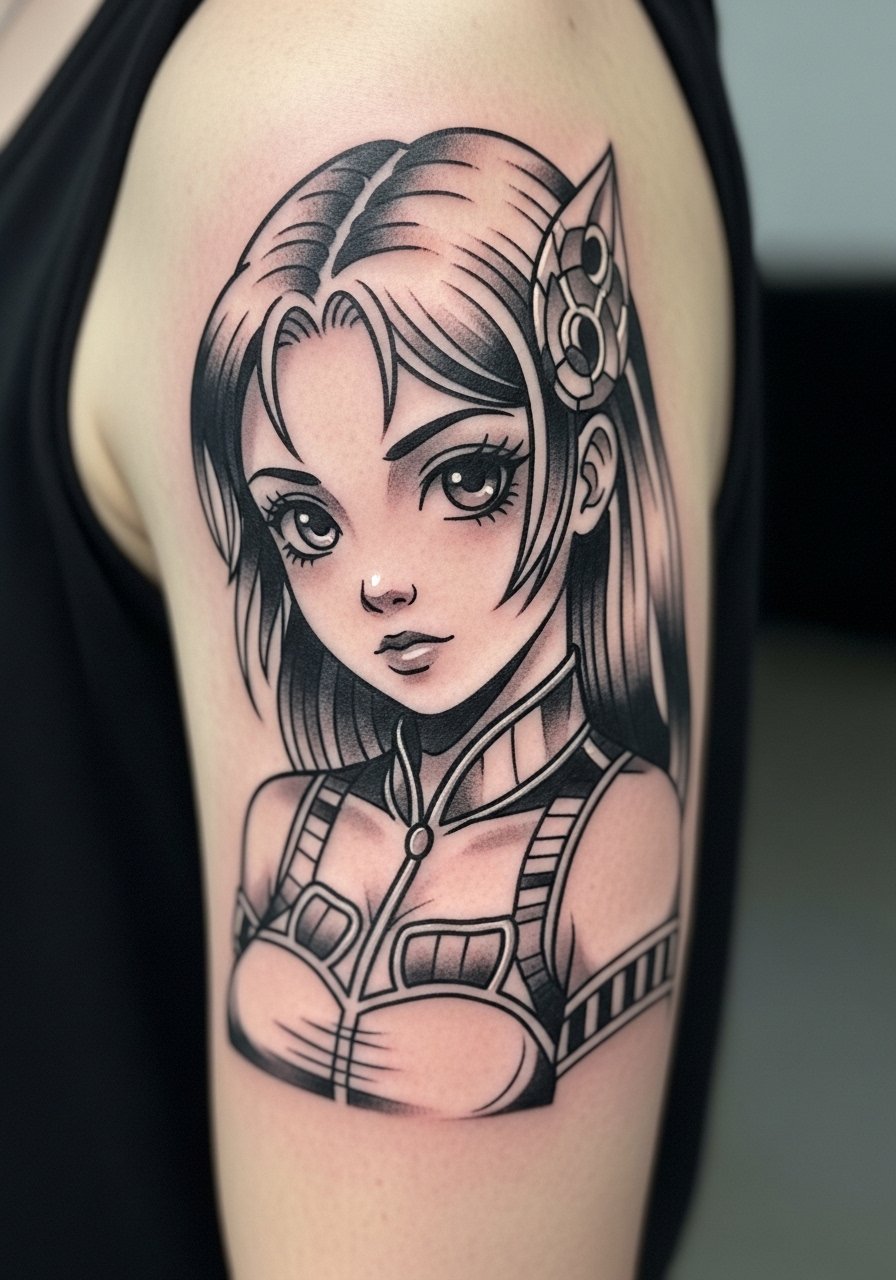
Style/Technique: Neo-Traditional / Color
Pain Level: Low-Medium (3-4/10)
Session Time: 2–3 hours
Best For: Timeless, visible art
Combining neo-traditional weight with manga facial cues creates a timeless look. Upper arm is forgiving. Keep color saturation even and outline weights consistent to avoid patchy aging. Ask the artist for healed examples of similar work.
16. Small Panel Comic Strip on Side Rib
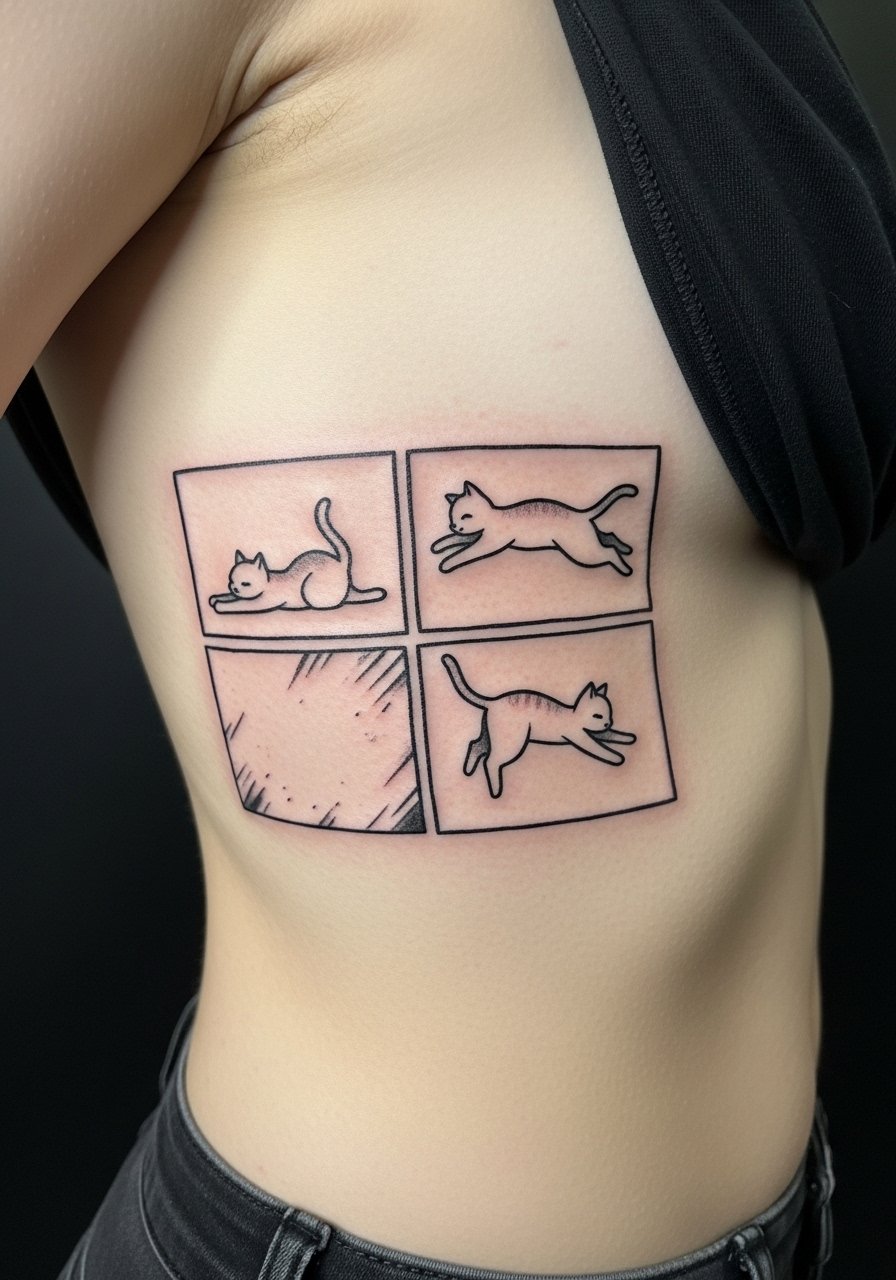
Style/Technique: Panel Layout / Narrative
Pain Level: High (7-8/10)
Session Time: Multiple short sessions
Best For: Storytelling, intimate pieces
Rib panels make a mini-story. Panel borders must be bold or they’ll fade into skin texture. Expect soreness; schedule sessions with healing time between. Avoid cramming too many speech balloons—text can blur.
17. Manga Floral Wreath Behind Shoulder

Style/Technique: Fine Line / Illustrative
Pain Level: Medium (4/10)
Session Time: 1–2 hours
Best For: Feminine, versatile placement
A wreath blends natural motifs with manga line clarity. Shoulder placement sees moderate movement and heals reliably. Tiny veins and hairs in petals are often overdone—simpler linework keeps the wreath readable over years.
18. Eye of Power Vertical Spine Piece
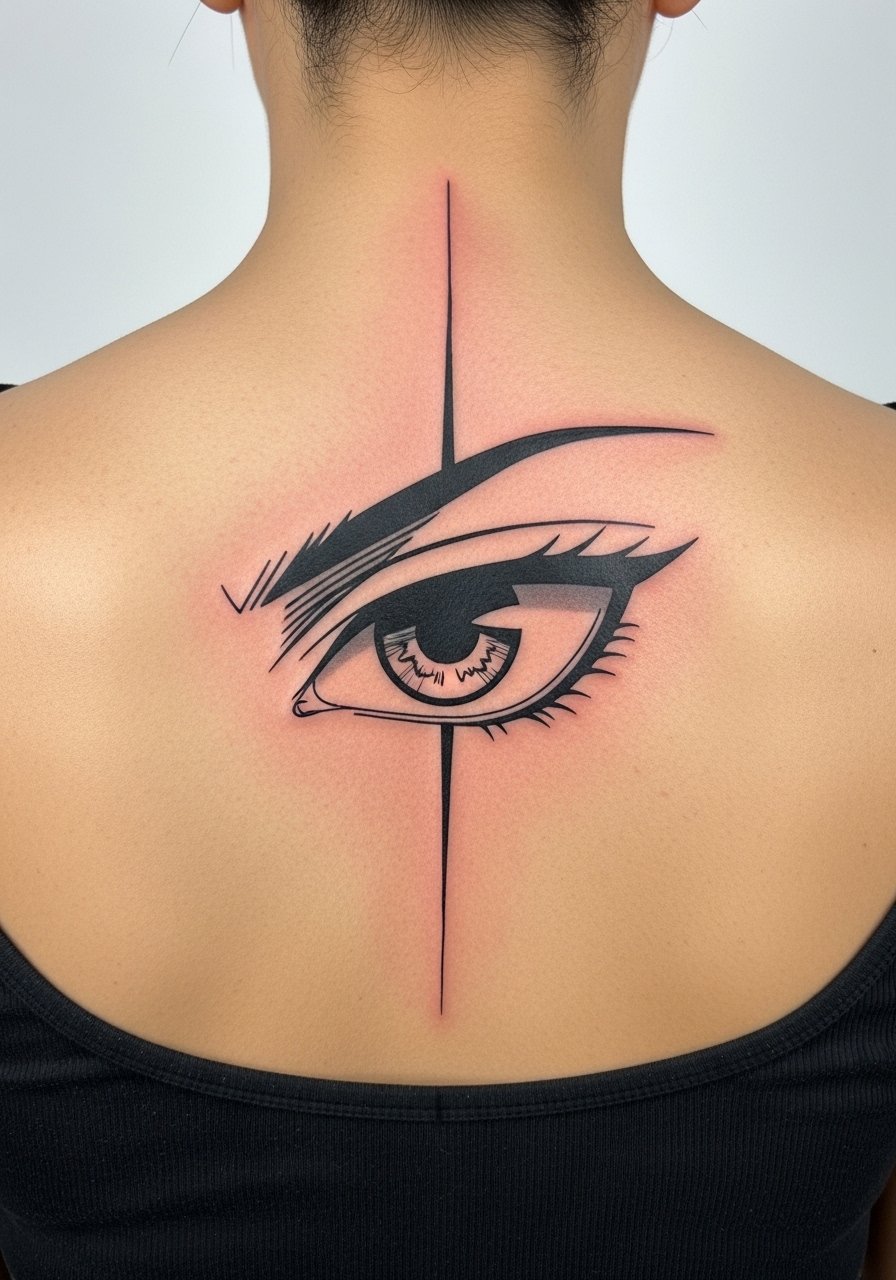
Style/Technique: Graphic / Vertical Composition
Pain Level: High (8/10)
Session Time: 2–3 hours
Best For: Centered statement, symbolic
Spine pieces look dramatic but are sensitive. Thin lines can go faint if the artist doesn’t overscale. From what I’ve noticed, symmetry and bold anchors help retention. Plan for slower healing and careful aftercare.
19. Manga Sound Effect Onomatopoeia on Collarbone
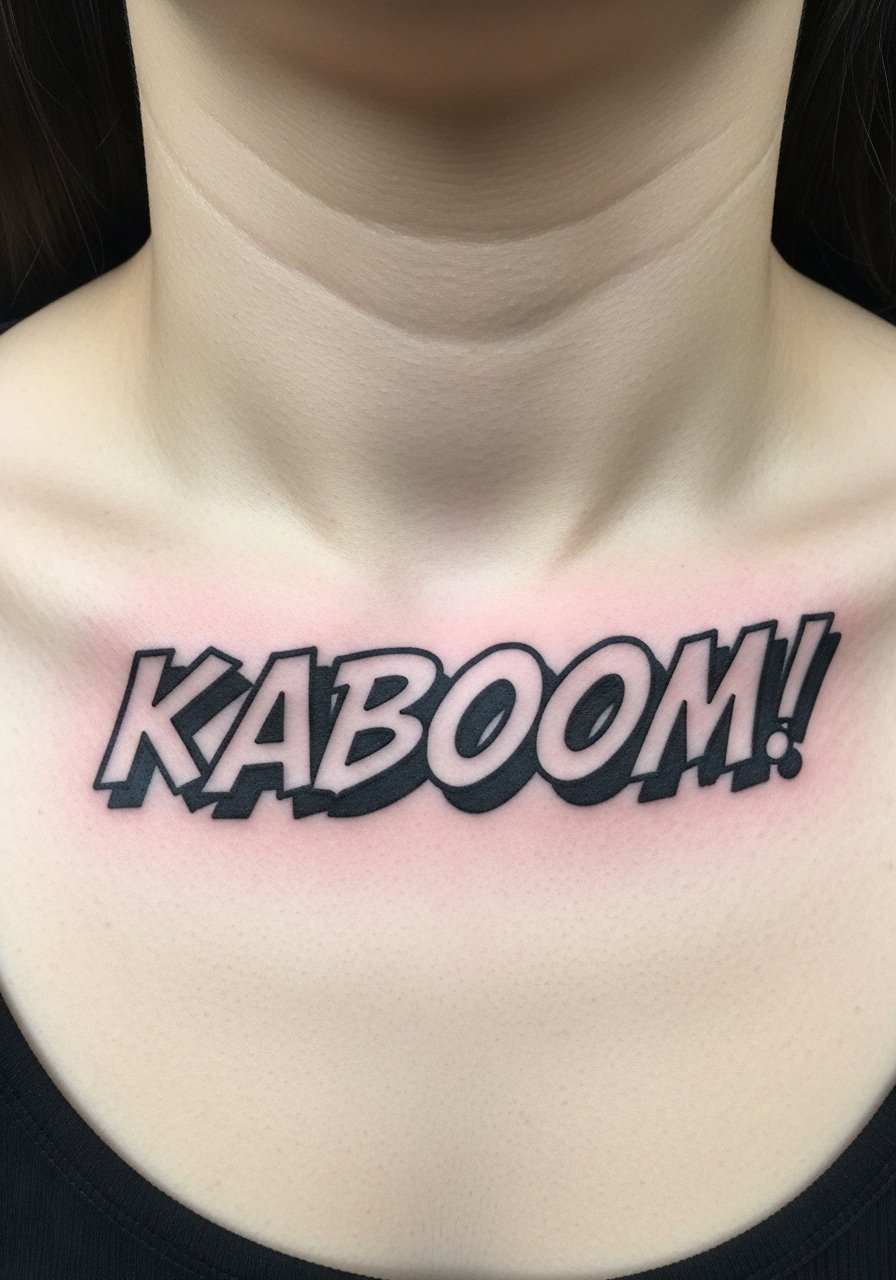
Style/Technique: Lettering / Graphic
Pain Level: Medium-High (5-7/10)
Session Time: 30–90 minutes
Best For: Expressive, visible text
Collarbone is painful but eye-catching. Lettering should have thick strokes to avoid thinning with movement. Avoid overly thin serifs or delicate shading inside letters; they lose clarity quickly.
20. Split-Face Manga vs. Realism Half-Sleeve
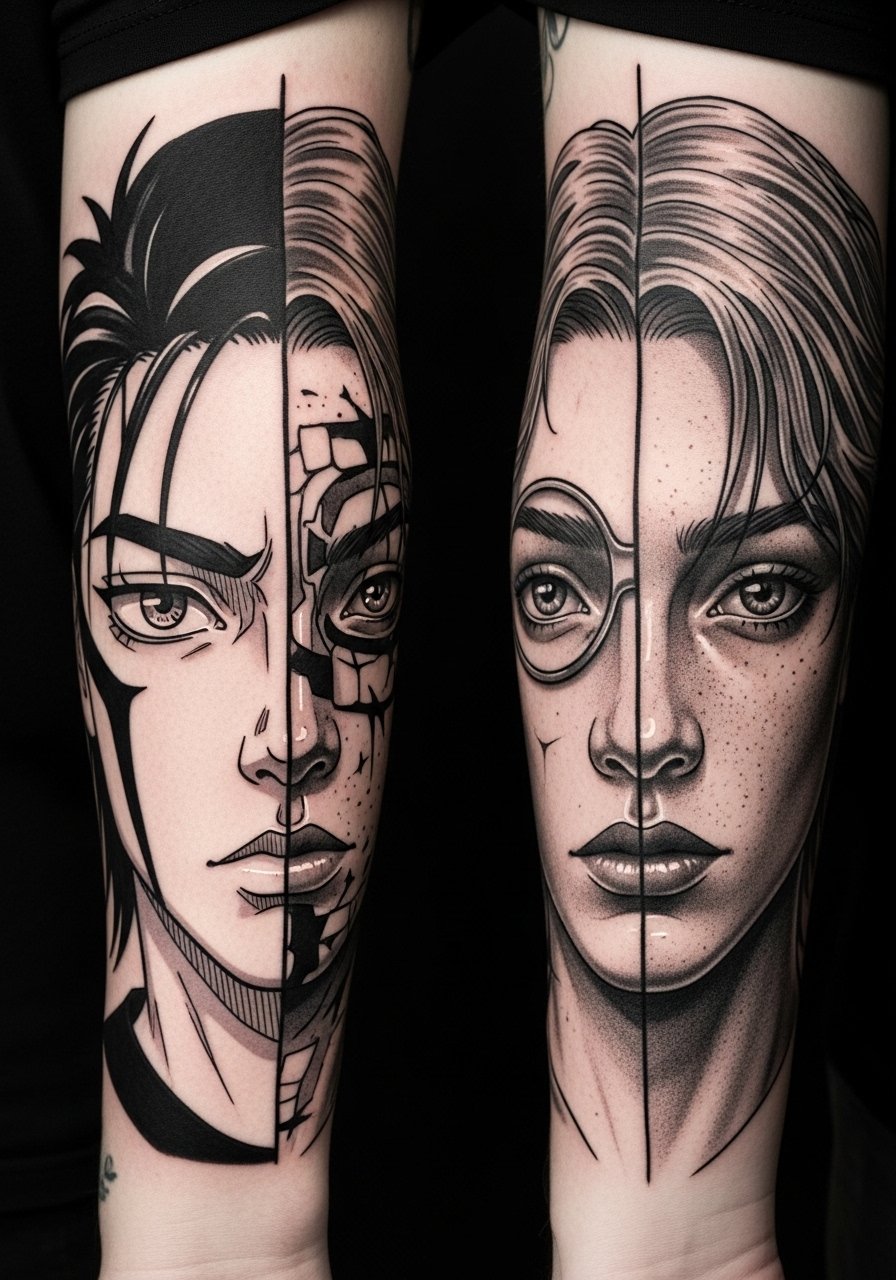
Style/Technique: Split-Style / Mixed Technique
Pain Level: Medium (4-6/10)
Session Time: Multiple sessions
Best For: Contrast lovers, collectors
Mixing styles shows off versatility. The manga half needs strong outlines to balance realism shading. I’ve seen imbalance where the realistic half dominates—request test prints to judge scale and contrast.
21. Floating Speech Bubble Minimal on Upper Arm
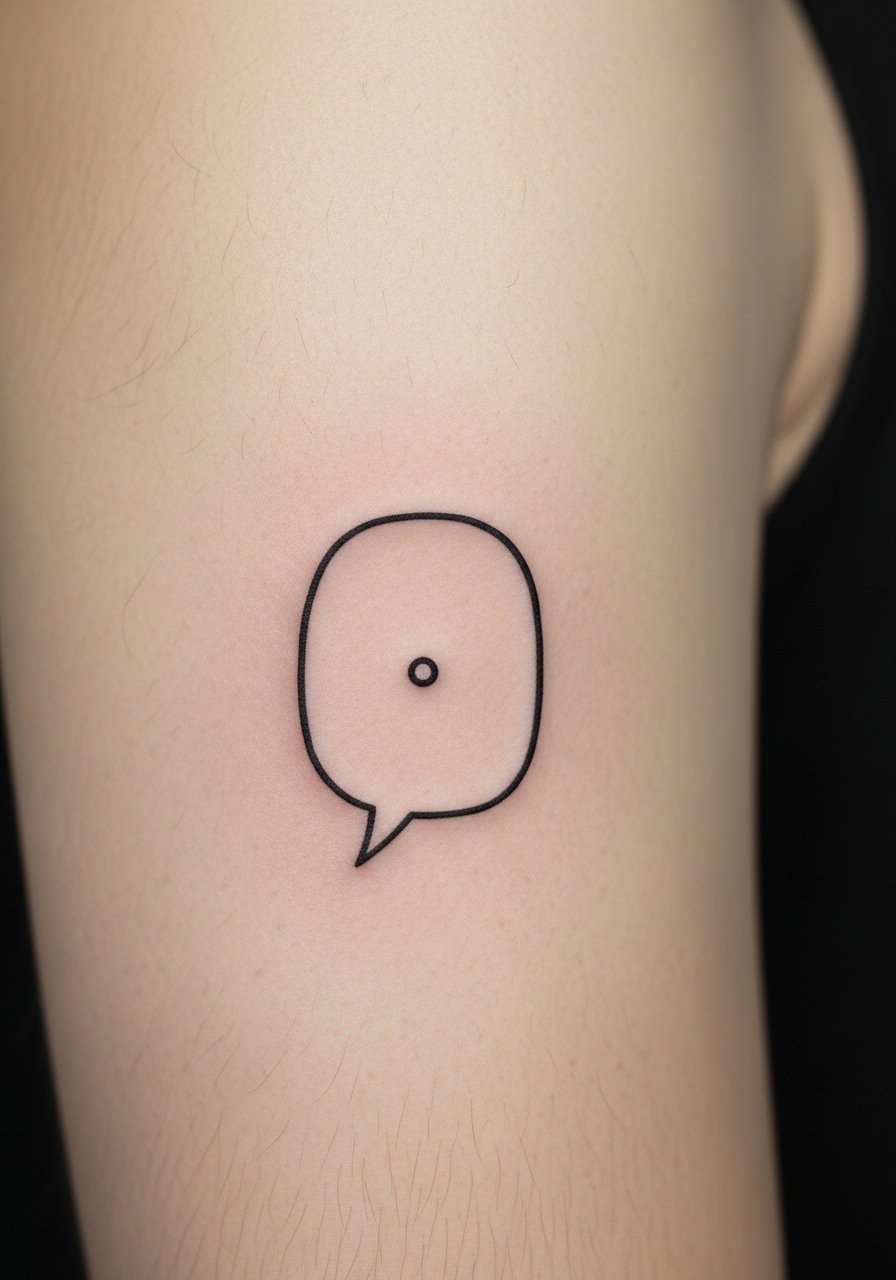
Style/Technique: Minimalist / Iconic
Pain Level: Low (2-3/10)
Session Time: 20–40 minutes
Best For: Subtle nods, beginners
Simple icons are low commitment and heal fast. Speech bubbles can become less crisp if outlines are too thin. Bold the outline slightly and keep the bubble size moderate for longevity.
22. Retro Manga Poster Back Piece (Partial)
Style/Technique: Retro / Poster Illustration
Pain Level: High (7-8/10)
Session Time: Multiple long sessions
Best For: Large display, collector piece
Poster-style backs demand composition and strong anchors. Retro halftone and heavy outlines age well together. Expect long sessions and layered healing; avoid tiny ornamental elements that will soften.
Tattoo Prep and Aftercare Essentials
Aftercare Essentials:
- Aquaphor Healing Ointment, 14oz tube — Use first 3–5 days for scabs and comfort
- Saniderm Transparent Adhesive Bandage, 6-inch roll — Second-skin healing option for busy areas
- CeraVe Fragrance-Free Moisturizing Lotion — Daily moisturizer during weeks 2–6
- Dr. Bronner's Unscented Castile Soap, 32 oz — Gentle cleaning for the first two weeks
Before Your Appointment:
- Tattoo Numbing Cream with 5% Lidocaine — Ask your artist before use
- Tattoo Stencil Transfer Paper — If you’re refining layout at home
Long-Term Maintenance:
- SPF 50 Sunscreen Stick for Tattoos — Daily protection to slow fading
- Mad Rabbit Tattoo Balm, 1.25 oz — Keeps healed ink lively
- Hustle Butter Deluxe, 8oz — Vegan option for long-term care
Optional Comfort Items:
- Tattoo Numbing Spray — For touch-ups or very sensitive areas
- Hydrocolloid Bandages Large — For small spot protection during the first week
Artists I’ve talked to recommend Aquaphor or Saniderm for the immediate phase, then fragrance-free lotion and sunscreen for maintenance. Avoid heavy fragrances and exfoliants around healing skin.
Frequently Asked Questions
Q: How bad does a manga-style tattoo hurt?
A: Pain depends on placement. Outer arm or thigh = low (2–4/10). Ribs, spine, ankle = high (7–8/10). Manga detail itself doesn’t change pain—placement does. For sensitive spots, consider discussing a numbing cream with lidocaine with your artist.
Q: How long until manga linework looks how I expect?
A: Surface healing 2–3 weeks; true look at 2–3 months. Lines soften a bit while skin rebuilds. I always tell people healed photos six months out are the best judge.
Q: Will screentone dots blur?
A: Tiny dots can merge if packed too densely or placed on high-motion areas. I’ve seen best retention when artists scale dots for skin texture and keep bold anchor lines around gradients.
Q: Can I workout after getting a manga tattoo?
A: Wait 48–72 hours minimum and avoid heavy sweating on the area for a week. If it’s on the inner thigh or shoulder, give it more time. Use gentle cleaning with Dr. Bronner’s Unscented Castile Soap.
Q: What’s the best way to prevent fading?
A: From what I’ve seen, daily SPF and keeping skin moisturized are non-negotiable. Use an SPF 50 sunscreen stick and a fragrance-free lotion to maintain contrast.
Q: I’m worried I’ll regret the design — what then?
A: Sit with the idea for months. Start with smaller placements if you’re unsure. Tattoos can be altered, covered, or removed, but planning ahead saves trouble. If visibility is a concern, choose an easily covered spot like the thigh or upper back.
Q: Do manga tattoos look different on darker skin tones?
A: Yes. Bold black lines and contrast translate best across skin tones. Bright pastels may read differently, so ask to see healed examples on skin tones similar to yours. White ink is usually not reliable for contrast on deeper tones.
Q: How should I adjust detail for aging?
A: I recommend slightly thicker line anchors and scaled halftone dots. Tiny cross-hatching and micro details often soften; bold anchors keep the image readable over time.
