
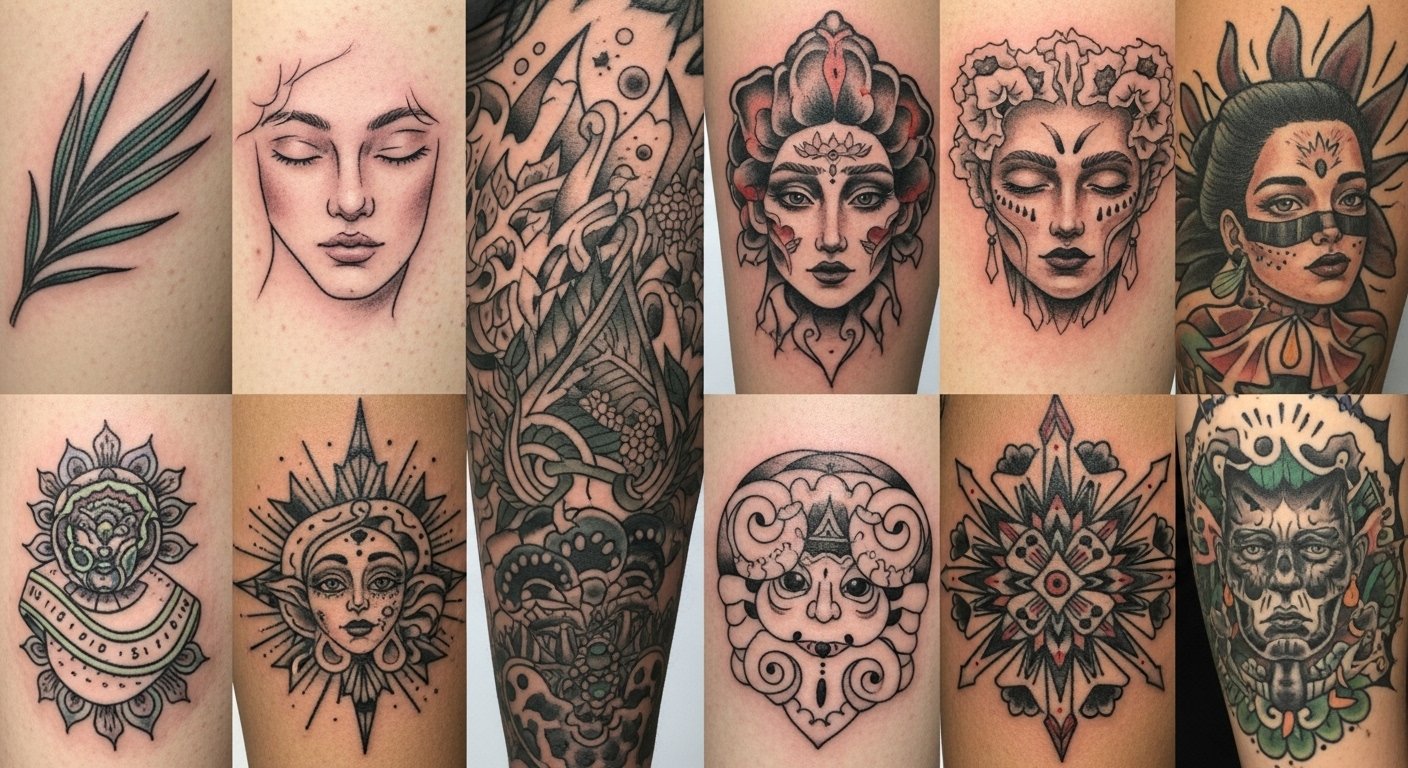
I spent months bookmarking lyric tattoos before I actually committed to one. The real snag wasn't picking a line — it was choosing a style and placement that would still feel personal after years. These 28 lyric tattoo ideas are what I keep coming back to in 2026: styles that read well healed, placements that suit moods, and small design choices that stop a meaningful line from becoming a regret.
This list focuses on script-forward ideas across fine line, micro script, and mixed-media looks. They work for wrists, ribs, forearms, and places you can hide or show. From what I've seen, micro script and soundwave tattoos are trending now, but the designs that age best are simple, bold, and placed where friction is low.
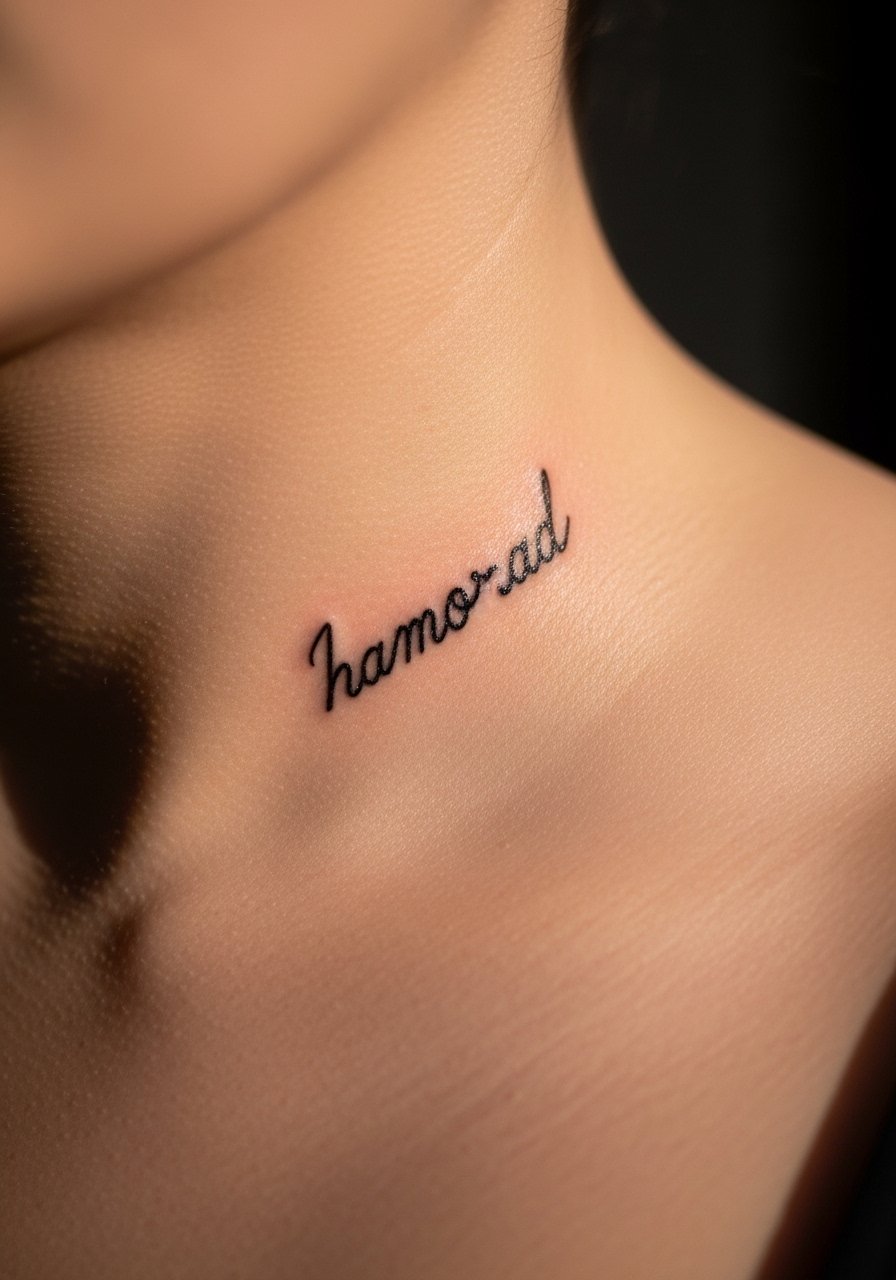
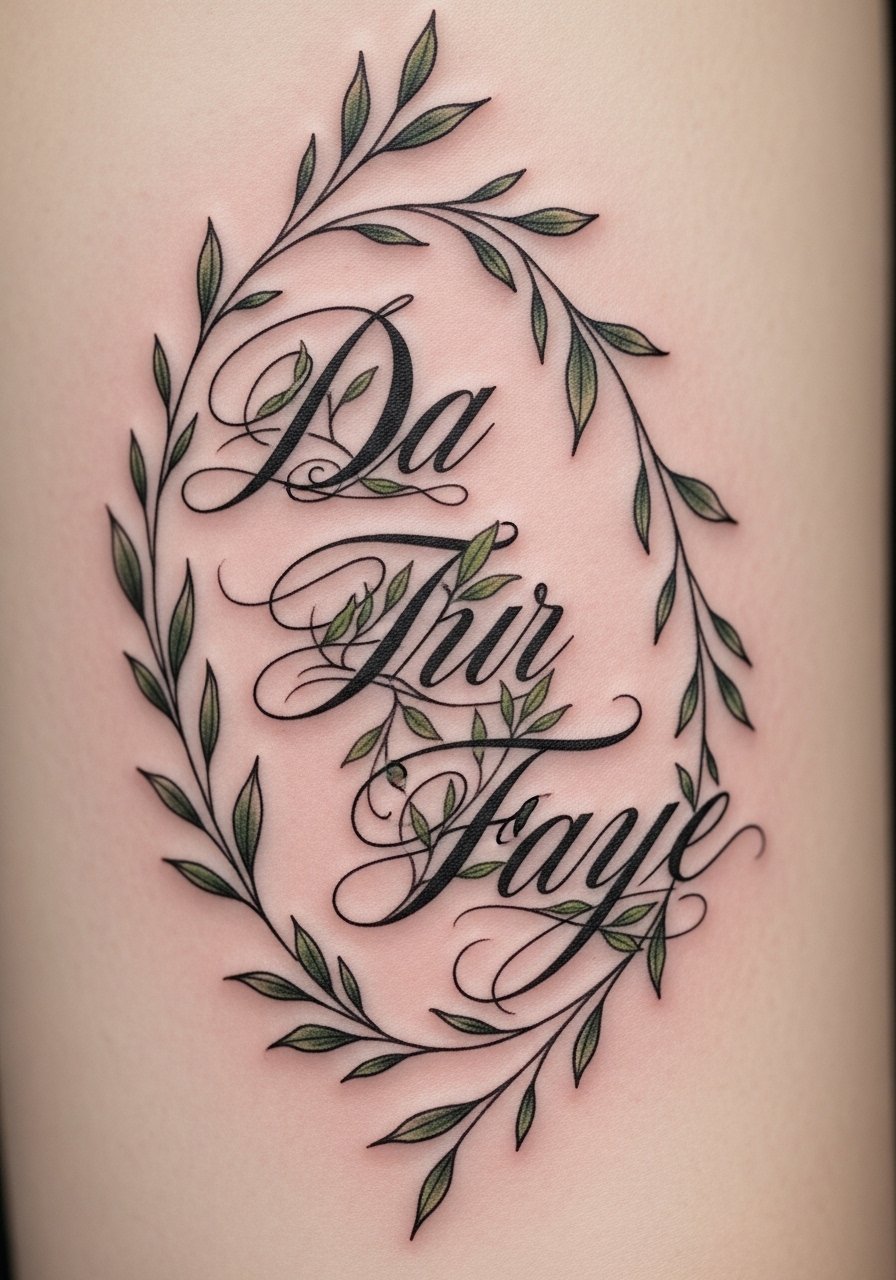
1. Fine Line Script On Inner Wrist
Style/Technique: Fine Line / Script
Pain Level: Low-Medium (3/10)
Session Time: 30–90 minutes
Best For: First tattoo, daily reminder, visible but easy to cover
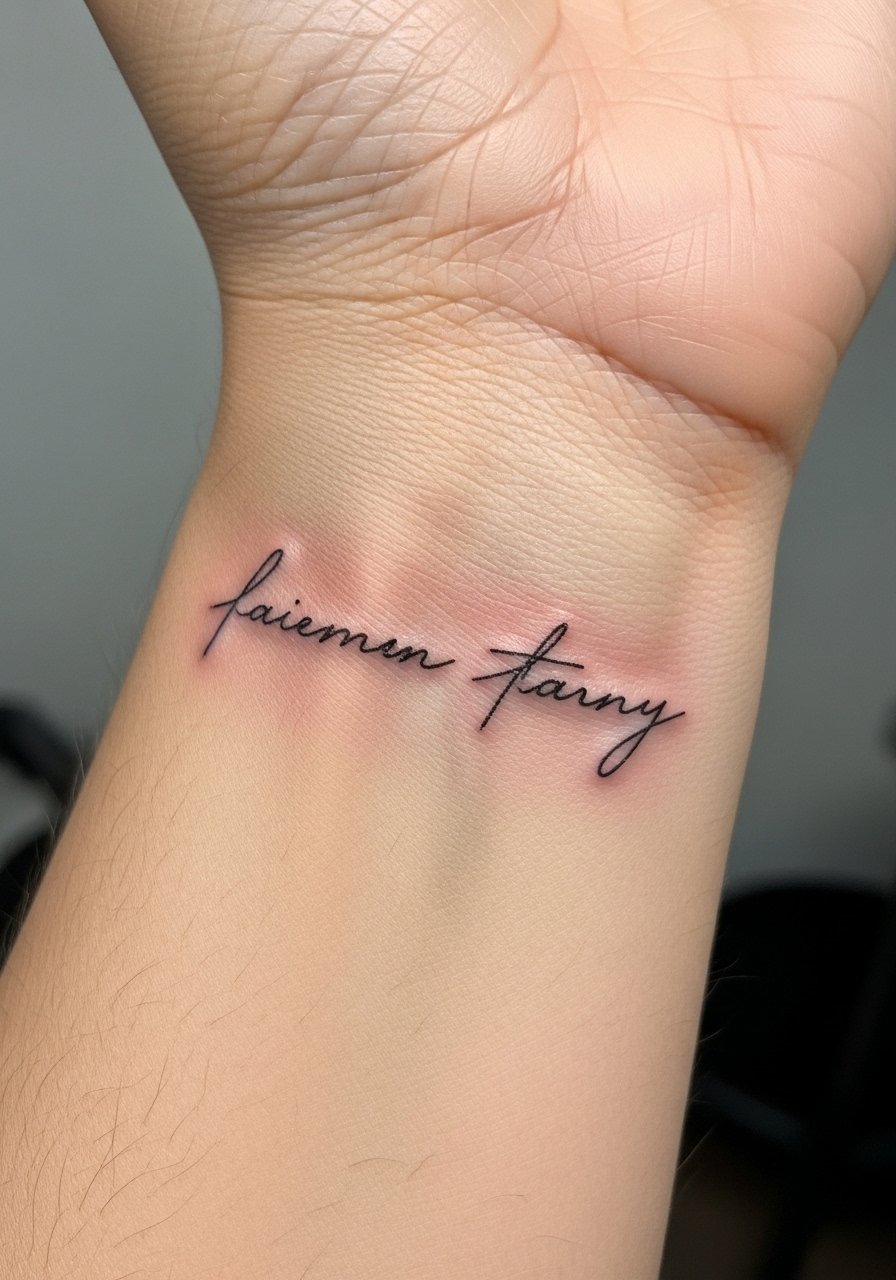
I picked this as my second tattoo because it's intimate and readable. Fine line script looks delicate fresh, and healed lines settle into a soft, wearable look. Inner wrist is great for short lyric fragments or a single phrase. Expect tingly discomfort rather than sharp pain. Healing is quick—surface healed in about two weeks for me—but keep motion limited for the first few days so lines don't blur. Artists I follow recommend slightly thicker strokes for wrists; truly paper-thin lines can fade or feather. A common mistake is choosing too many words: short phrases read better on this small canvas. Ask your artist for letter spacing and healed examples so the script doesn't run together.
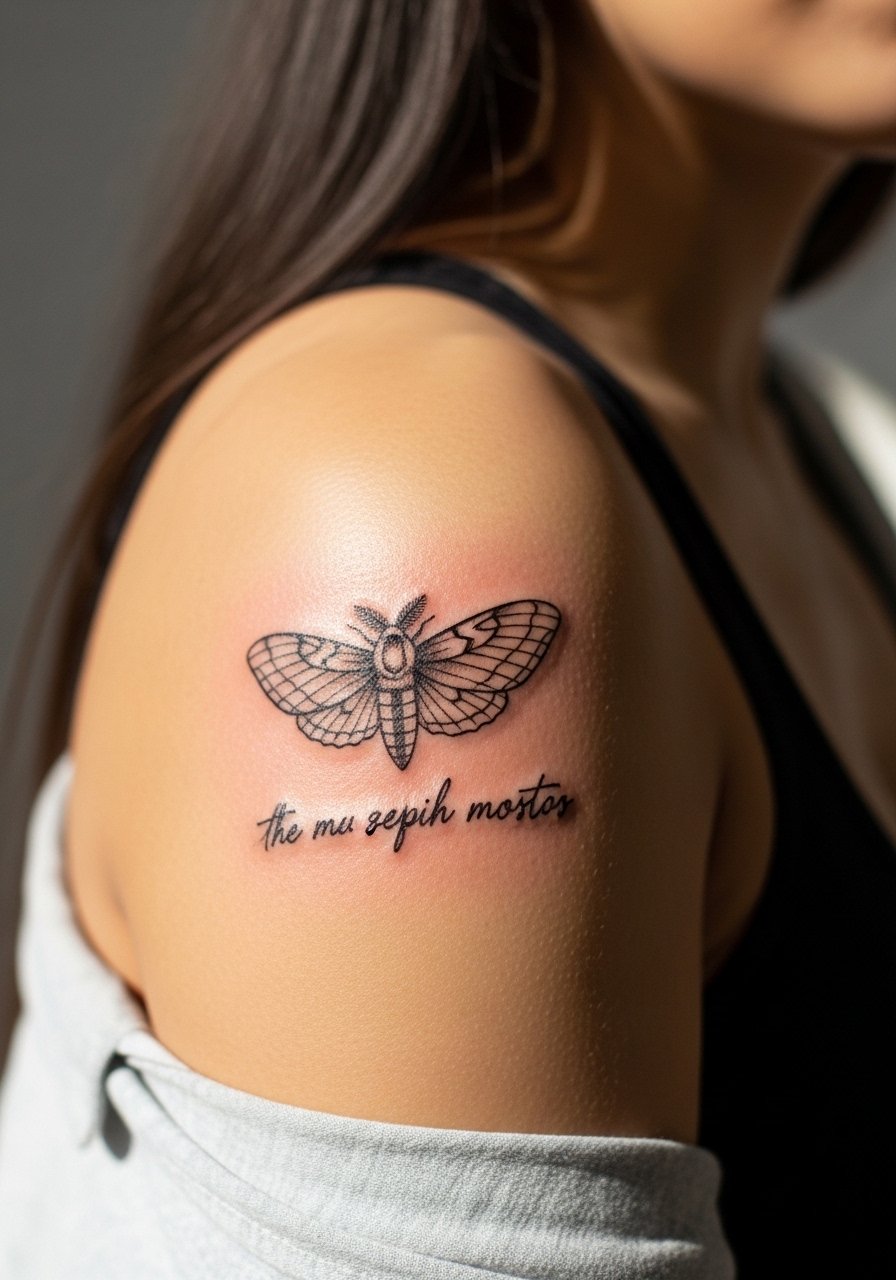
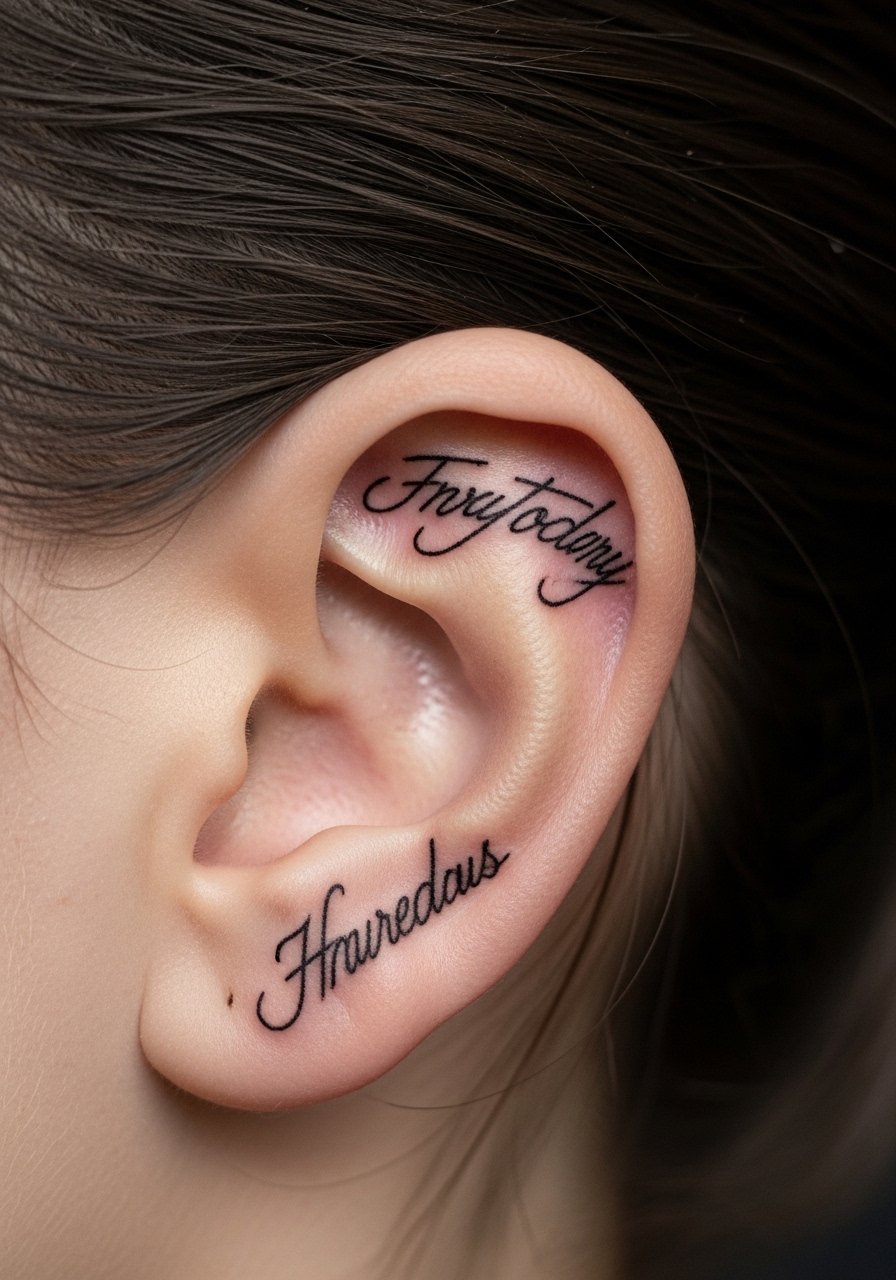
2. Micro Script Behind Ear
Style/Technique: Micro Script / Minimalist
Pain Level: High (6-7/10)
Session Time: 20–40 minutes
Best For: Hidden, discreet lyric, personal keepsake

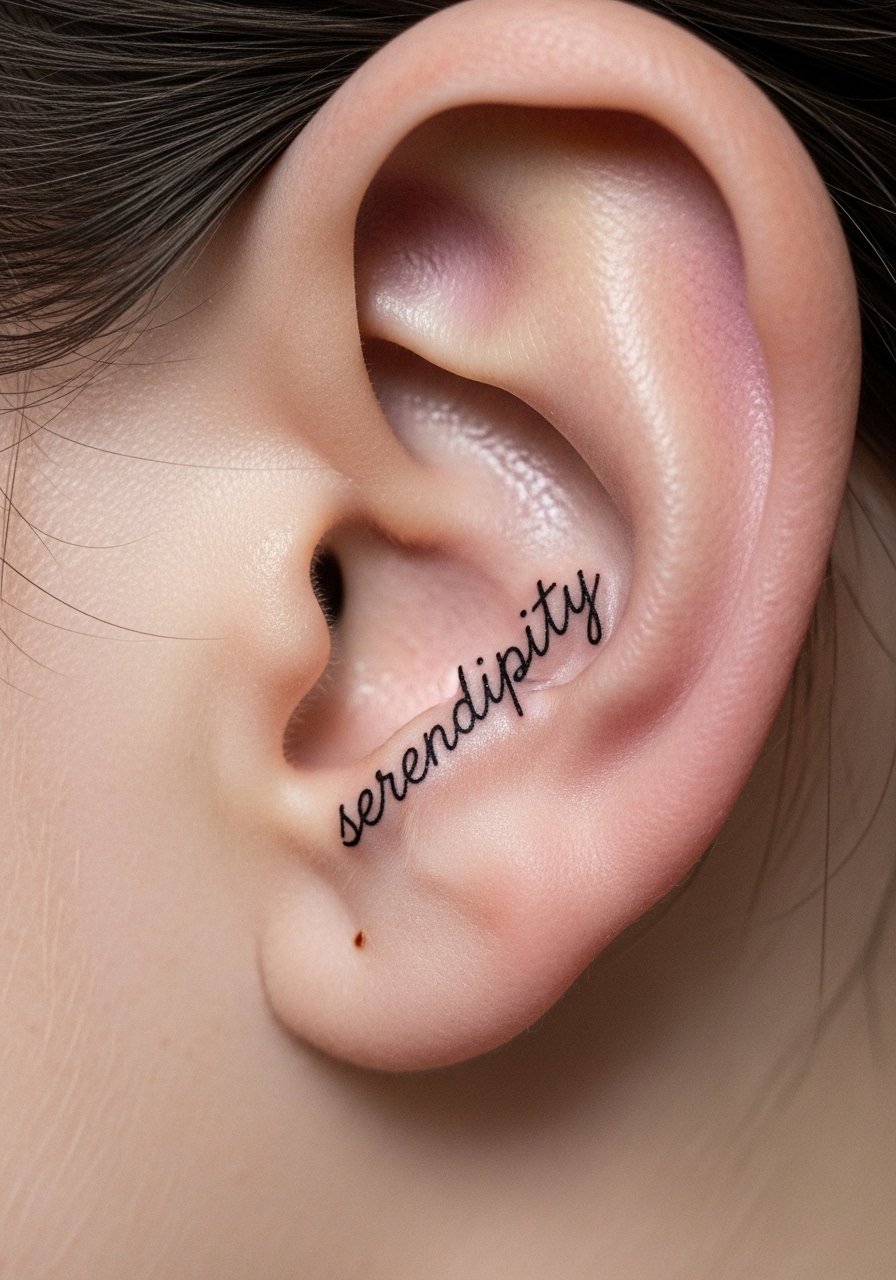
I love behind-ear lyrics for private lines you don't want shouting. The area is bony and sensitive, so pain is sharper than the forearm. Session time is short. Healing can be tricky because hair and sweat irritate the spot—expect slower turnover. Micro script works if you pick a bold-enough font; ultra-fine lettering often loses clarity as it heals. From what I've observed, artists who do excellent facial and ear pieces recommend testing letter size on a stencil and asking to thicken downstrokes just a touch. Keep it short: two to five words. Avoid bulky designs around the ear that rub on clothing or pillows during sleep.
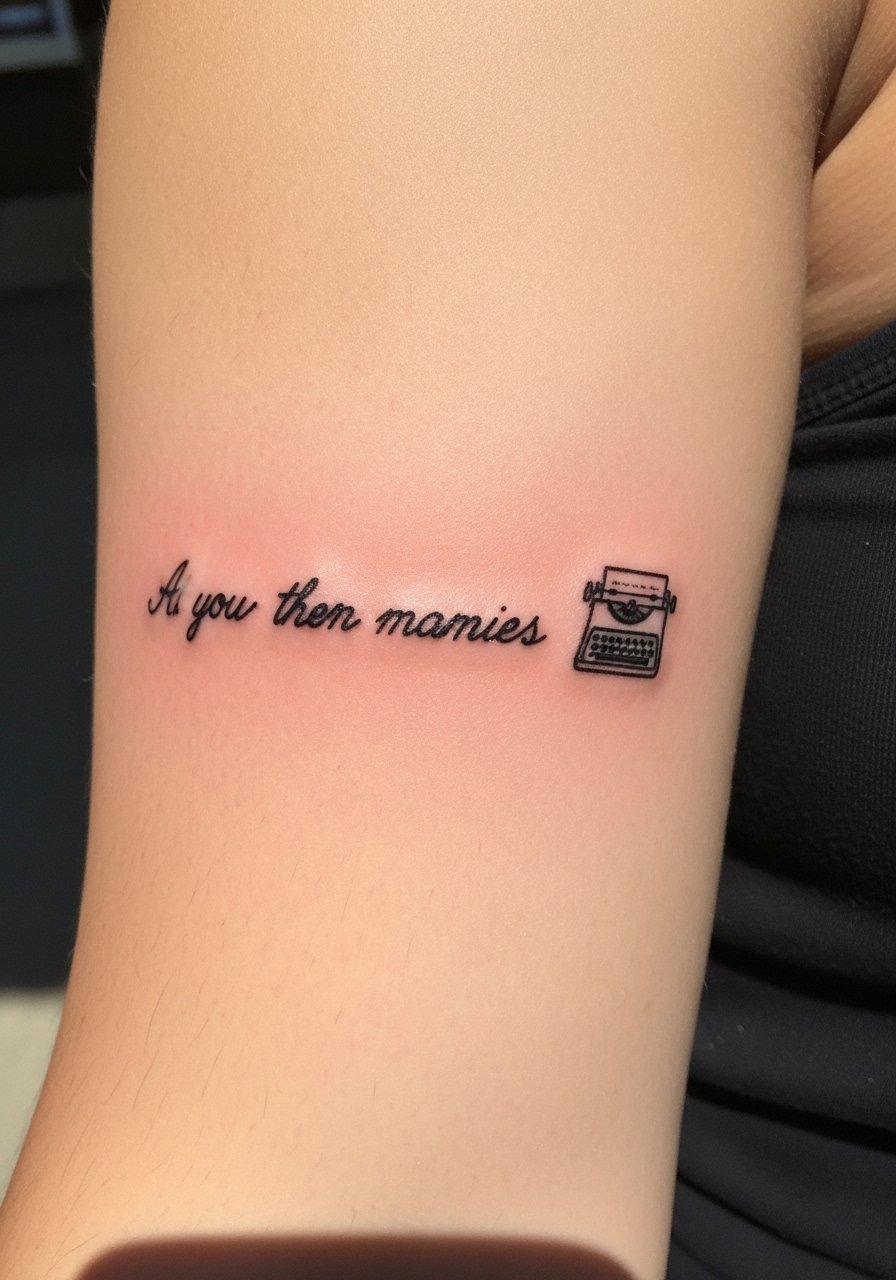
3. Typewriter Font On Ribcage
Style/Technique: Typewriter / Monospaced Script
Pain Level: High (7-8/10)
Session Time: 1–3 hours
Best For: Storyline phrases, hidden statement, dramatic placement
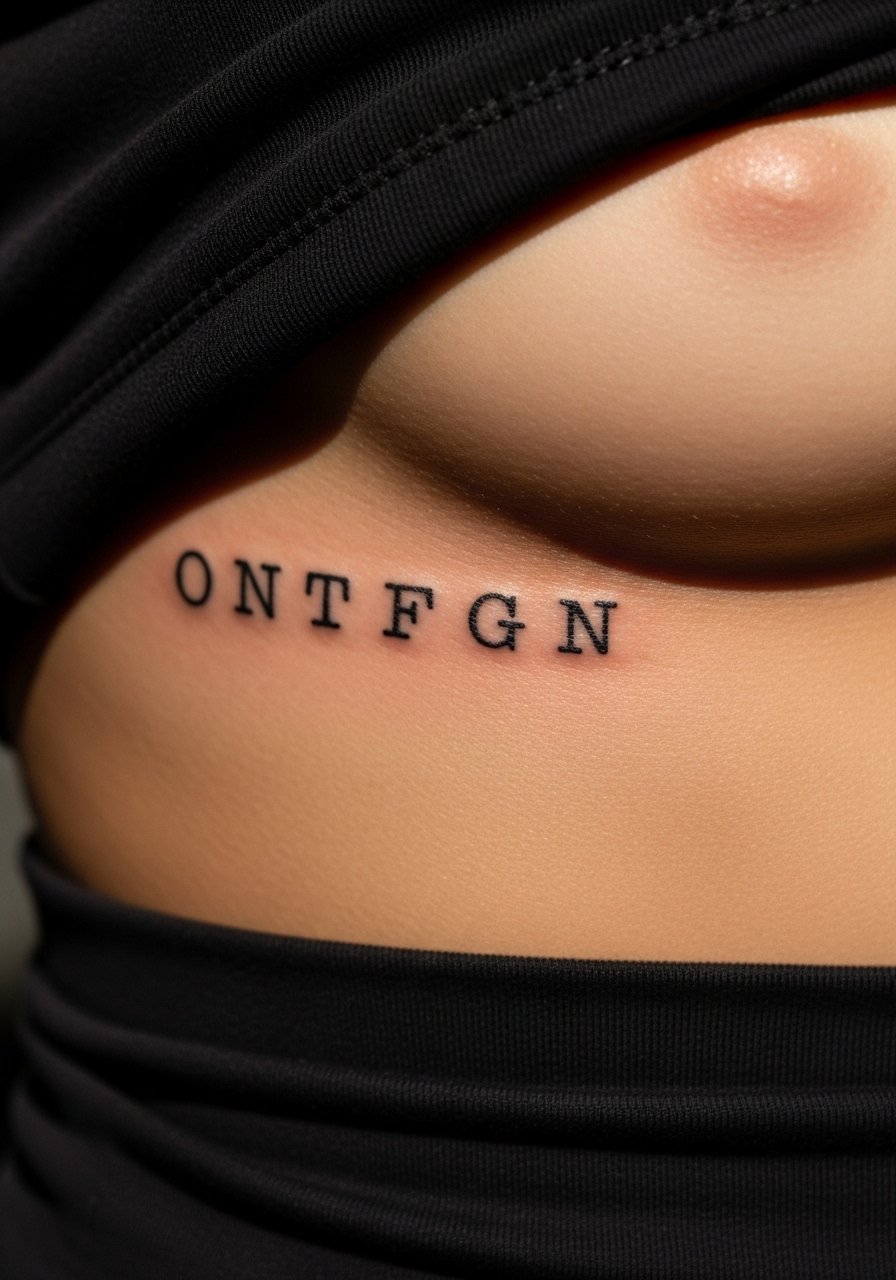
Ribcage lyrics feel like lines from your life stitched into your body. This area hurts more due to thin skin and bone proximity—expect long, memorable sessions. Typewriter font gives a nostalgic, literary vibe that reads well healed because the letters are blocky. Healing requires extra care: sleeping positions and tight waistbands can irritate the scab. I learned not to pick a tiny font for ribs; letters need weight to avoid blurring into a gray smudge later. One mistake I see is people cramming long verses across ribs; break the line or choose a few powerful words. Ask your artist for healed rib samples in the same font and size.

4. Soundwave With Tiny Script On Forearm
Style/Technique: Soundwave + Micro Script / Modern
Pain Level: Low-Medium (3-4/10)
Session Time: 1–2 hours
Best For: Lyric + audio memory, readable and graphic
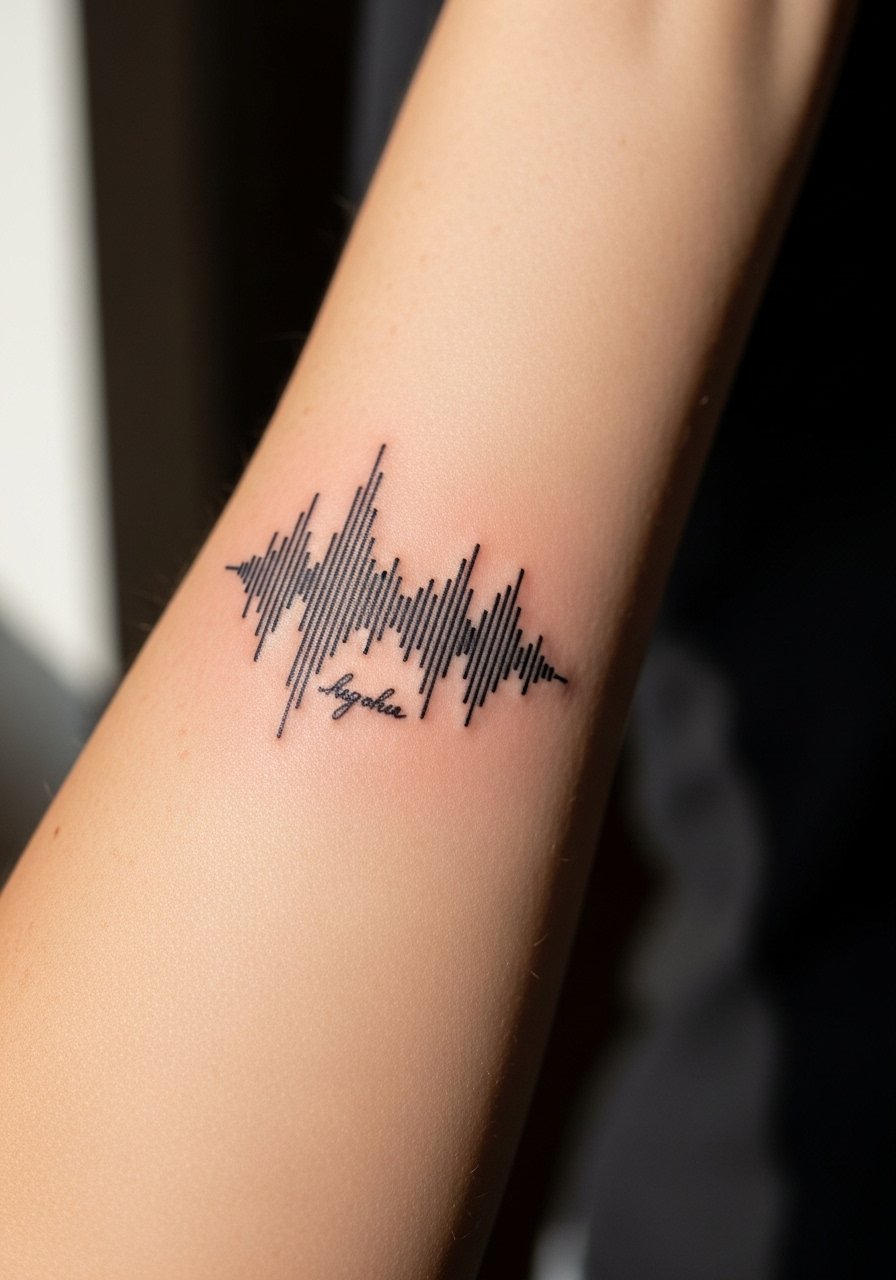
I got a soundwave tattoo once and it still sparks conversations. The graphic waveform reads as art up close and can playback in audio apps. Pairing it with a tiny script line grounds the concept—put the lyric below or above the wave. Forearm placement eases pain and heals fast. A key tip: vectors matter. Give your artist a clear waveform file and proof it against healed skin photos. Common mistakes: scaling the waveform too thin or choosing a script so small it vanishes after healing. From what I've seen, blackwork holds best for waveforms; color fades faster with these narrow bars.
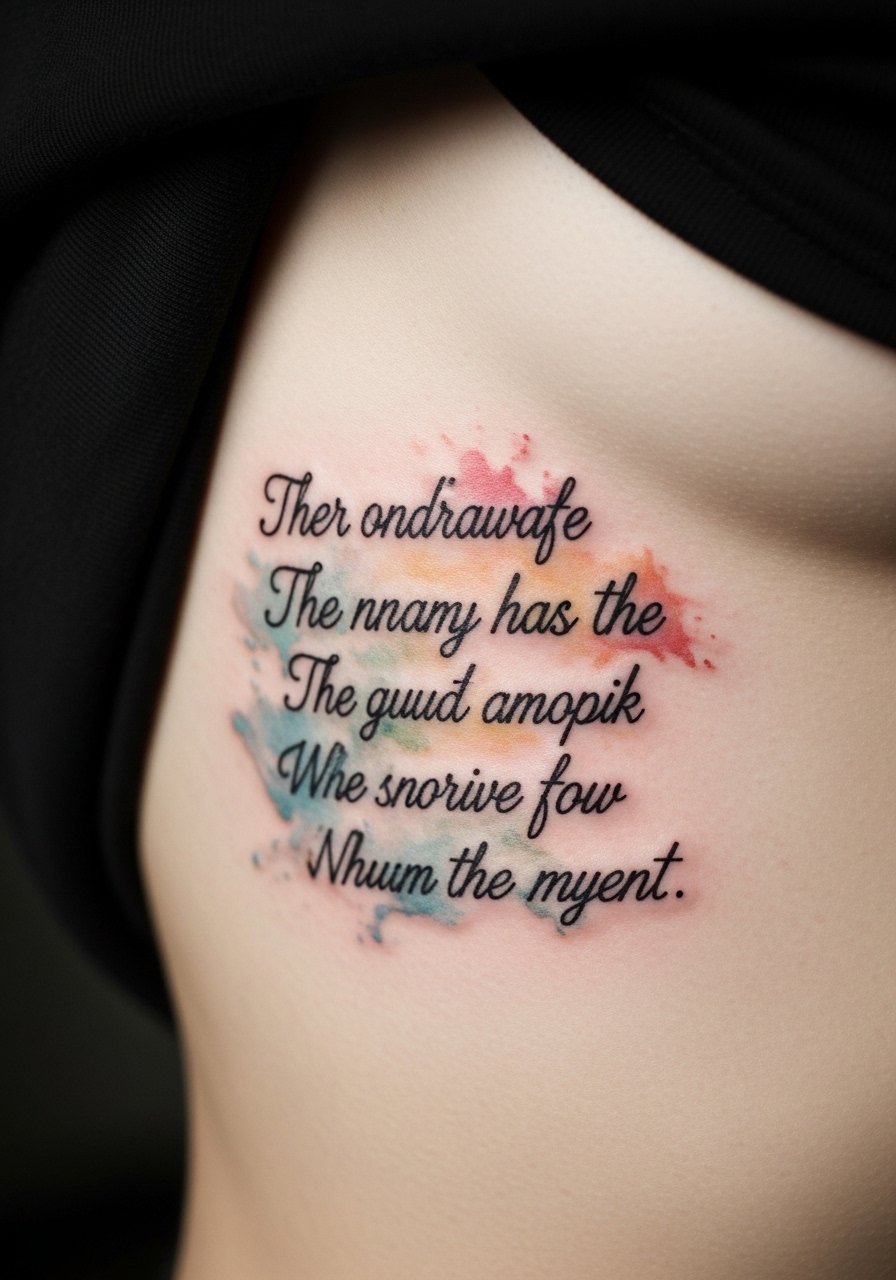
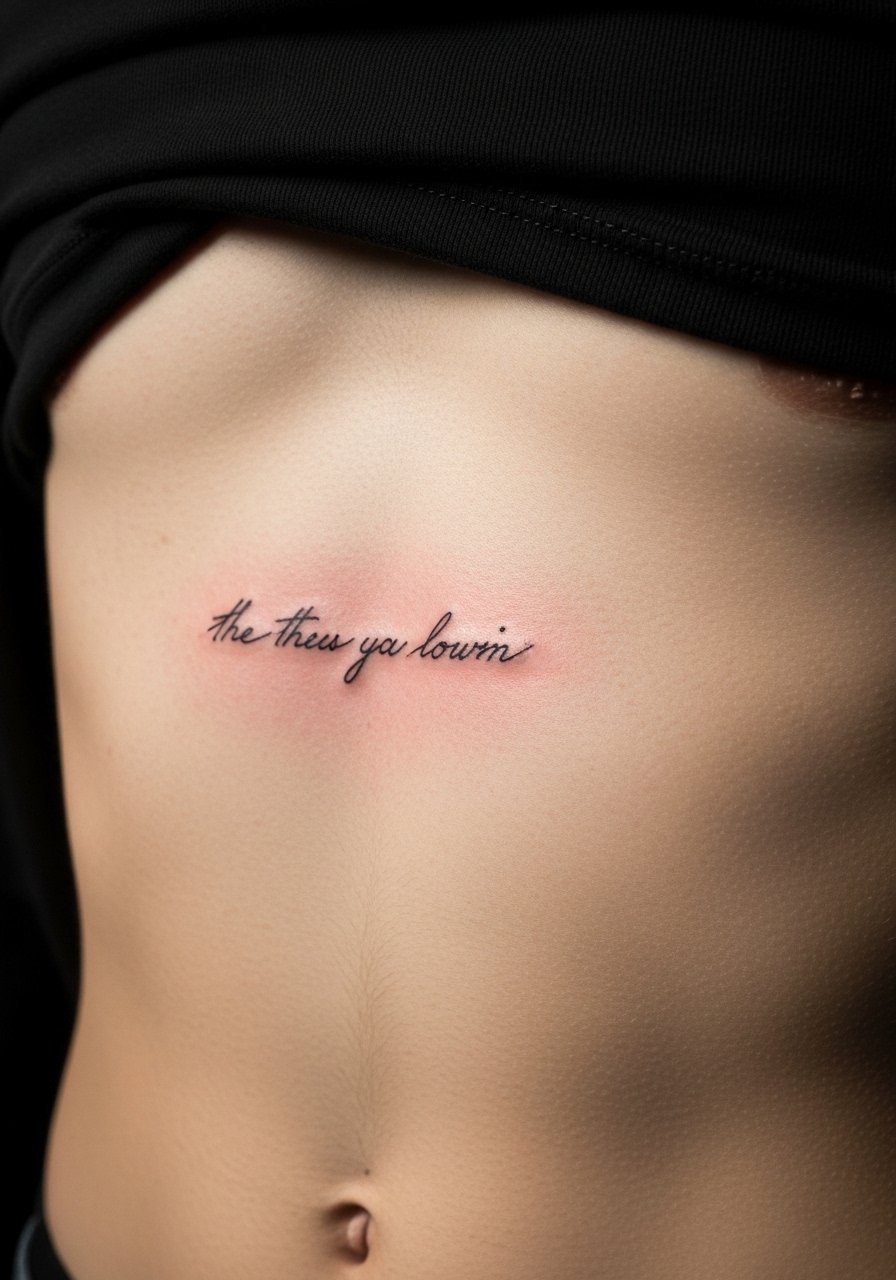
5. Watercolor Phrase Along Ribcage
Style/Technique: Watercolor / Painterly Script
Pain Level: High (7-8/10)
Session Time: 2–4 hours
Best For: Emotional lines, artistic statement
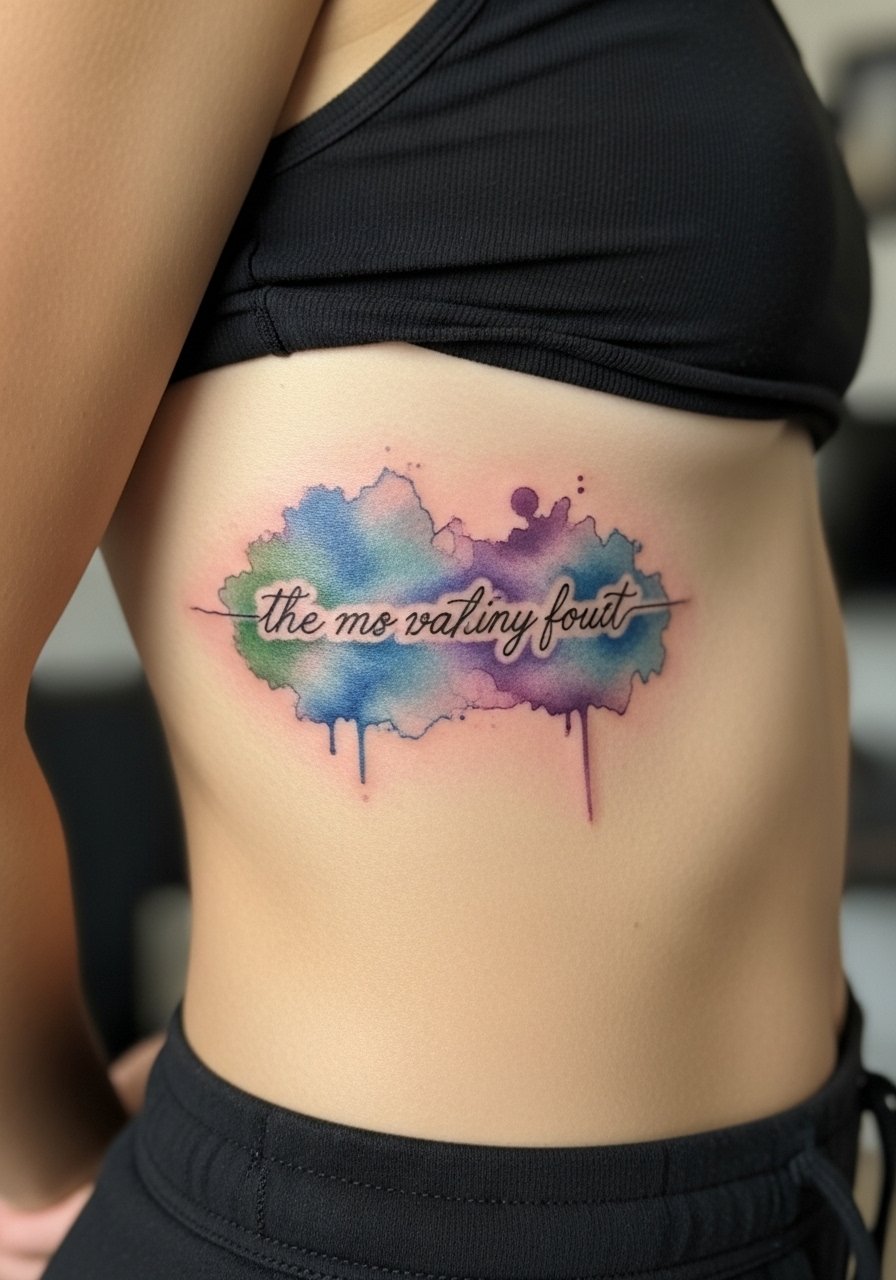
Watercolor lyrics feel like a memory painted on the skin. I love this when a phrase needs an atmospheric backdrop. Ribcage amplification is dramatic but more painful and sensitive. Watercolor techniques can look dreamy fresh but tend to soften more than black ink when healed. Expect touch-ups. Artists I follow say to stick with darker ink for the lettering and use washes sparingly—color is beautiful but loses saturation faster. A frequent mistake is relying on watercolor alone for legibility; pair it with a solid script base. Plan for longer sessions and take care to avoid friction from clothing during healing.
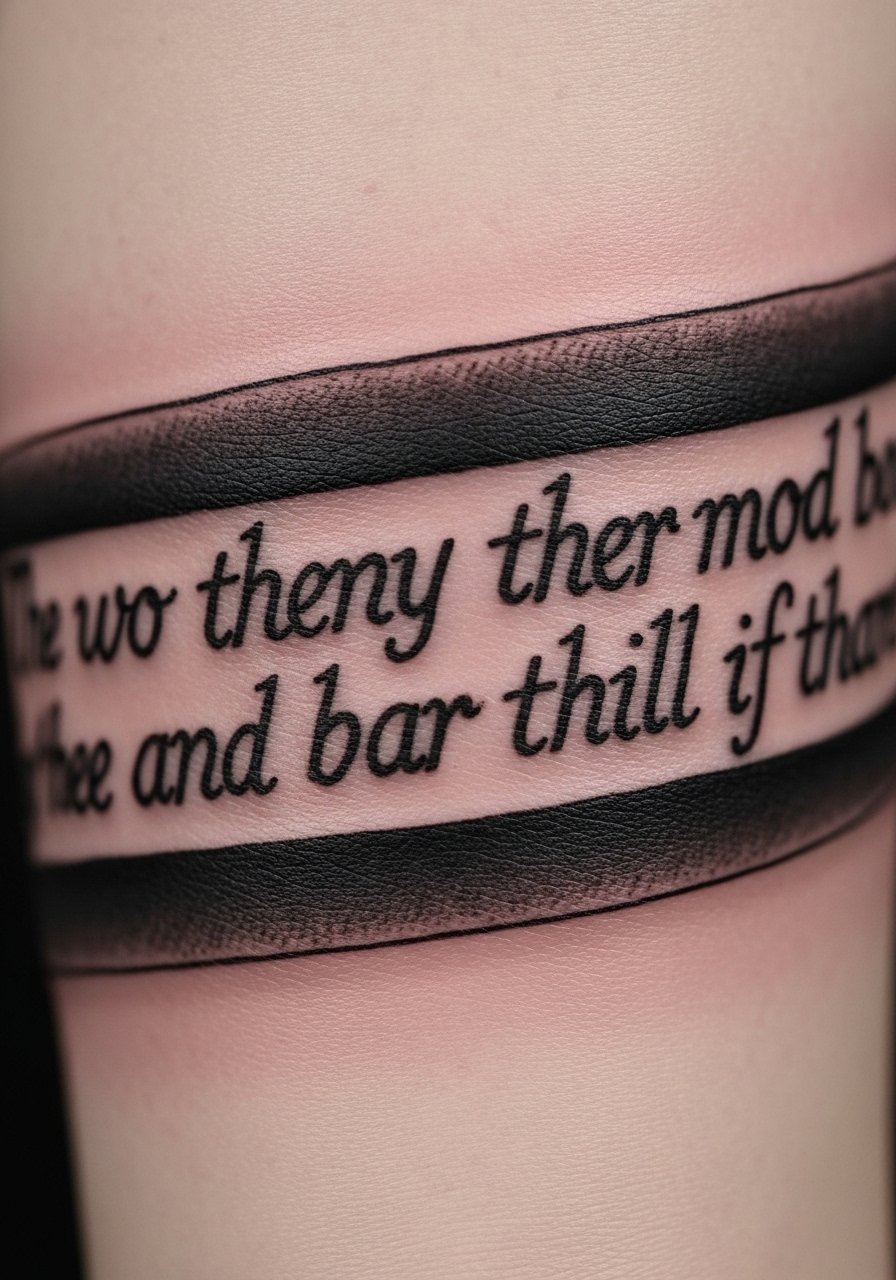
6. Blackwork Lyric Band On Bicep
Style/Technique: Blackwork / Bold Script Band
Pain Level: Low (3/10)
Session Time: 1–2 hours
Best For: Statement piece, durable, holds well over time
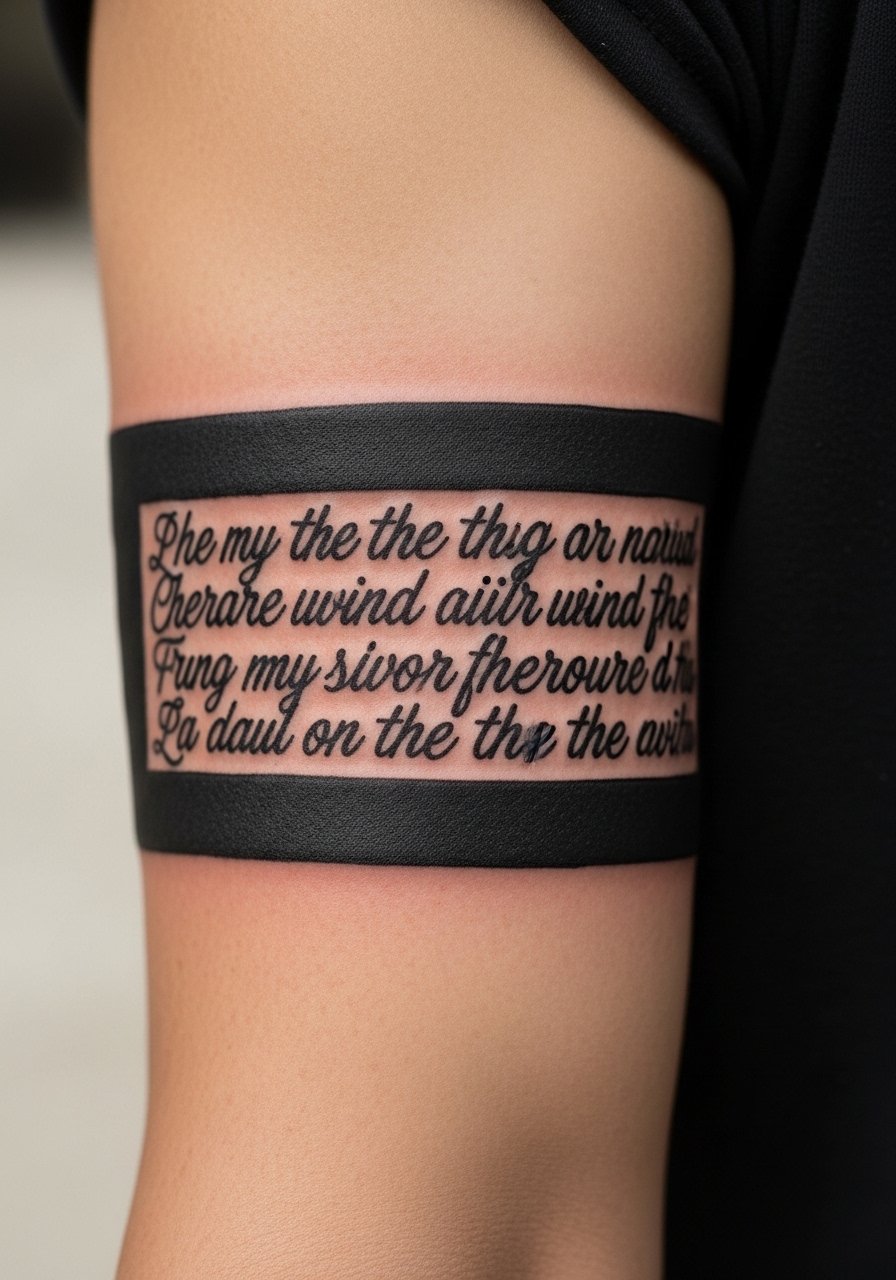
A bold black band with a lyric inset reads strong and ages predictably. I saw several music fans use this to anchor a chorus or refrain. Upper bicep has lower sensitivity and the lines hold well against abrasion. Blackwork is forgiving: if you want longevity without frequent touch-ups, this is a smart route. Don’t overcomplicate the script; keep lettering thick enough to survive years of wear. Artists I know who specialize in blackwork suggest solid fills and clean negative space to prevent the piece from looking muddy later. Avoid tiny serifs or super delicate cursive here.
7. Minimalist Single Word On Collarbone
Style/Technique: Minimalist / Single Word Script
Pain Level: Medium (4/10)
Session Time: 20–45 minutes
Best For: Subtle statements, meaningful one-word tattoos
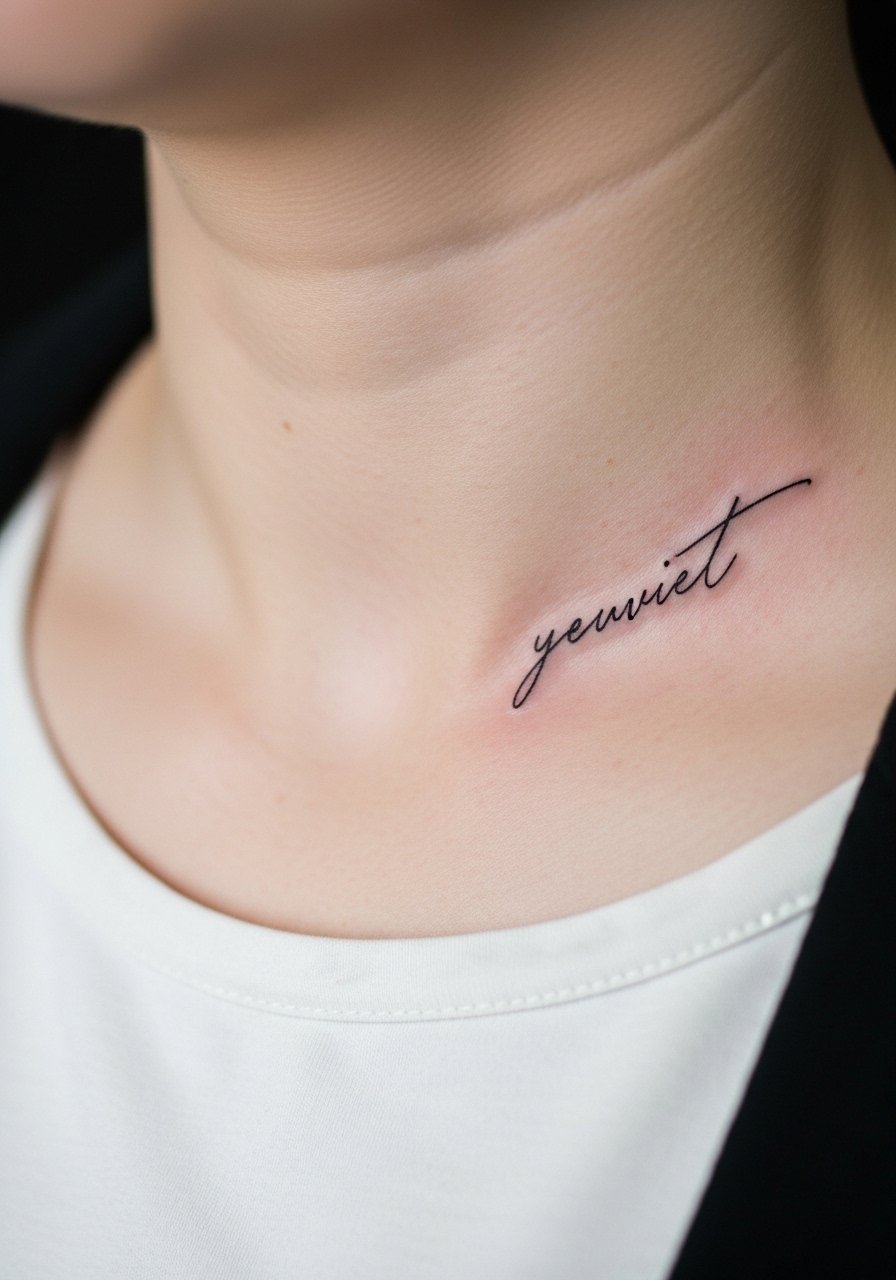
Single-word lyric tattoos can say everything without crowding space. Collarbone placement looks elegant and can be shown off or covered. I picked this location for a one-word reminder and found healing quick but the area is exposed so sunscreen later is essential. Minimalist scripts need a steady hand; ask for slightly thicker strokes to survive healed movement. A common misstep is choosing trendy fonts that age poorly—pick classic lettering. Artists often advise checking healed samples on collarbones because skin stretches and shifts here.
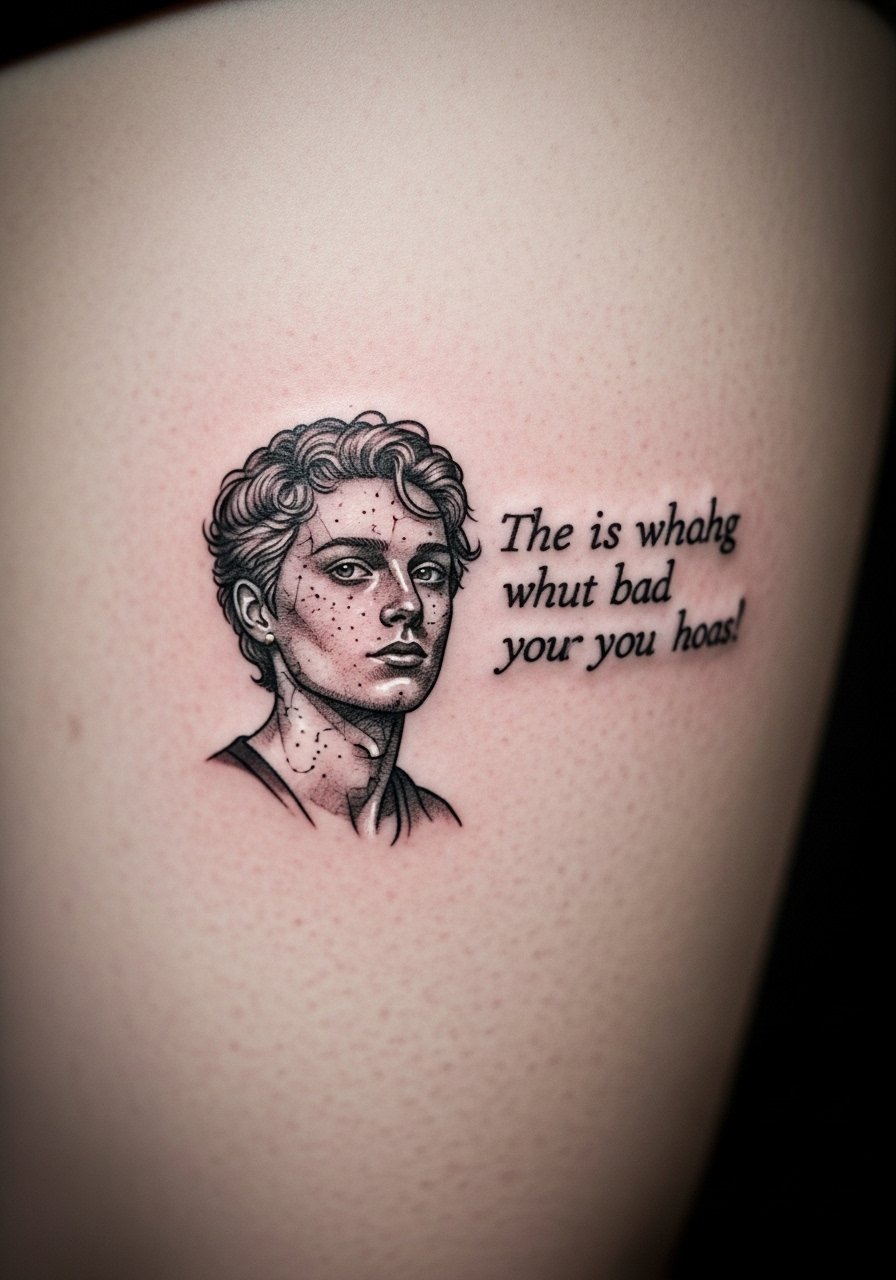
8. Micro-Realism Portrait With Lyric On Thigh
Style/Technique: Micro-Realism + Script
Pain Level: Medium (4-5/10)
Session Time: Multiple sessions, 3–6 hours
Best For: Tribute tattoos, deeply personal lines
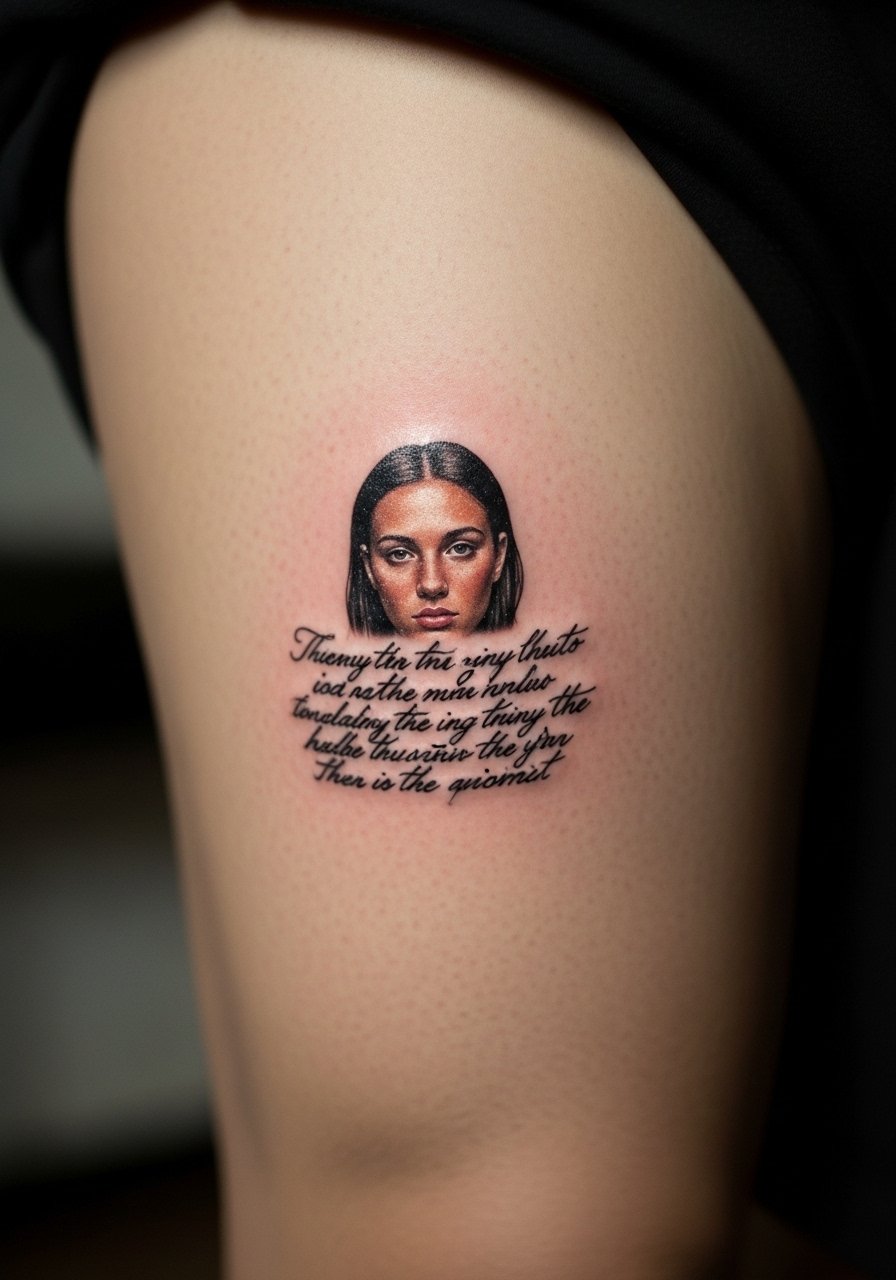
Combining a micro-realism portrait with a lyric line makes a narrative piece—perfect for songs tied to a person or moment. Thigh placement offers a wide canvas and is less painful than ribs. Realistic detail demands an artist skilled in portraits; the same person should do the script so scale and tone match. Healing on the thigh is straightforward, but larger portraits often need touch-ups to keep contrast. A mistake I’ve seen is pairing overly tiny script with dense portrait shading; it disappears. Discuss letter weight and spacing during consults.
9. Neo-Traditional Banner On Upper Arm
Style/Technique: Neo-Traditional / Banner Script
Pain Level: Low (2-3/10)
Session Time: 2–4 hours
Best For: Bold lyric banners, visual storytelling
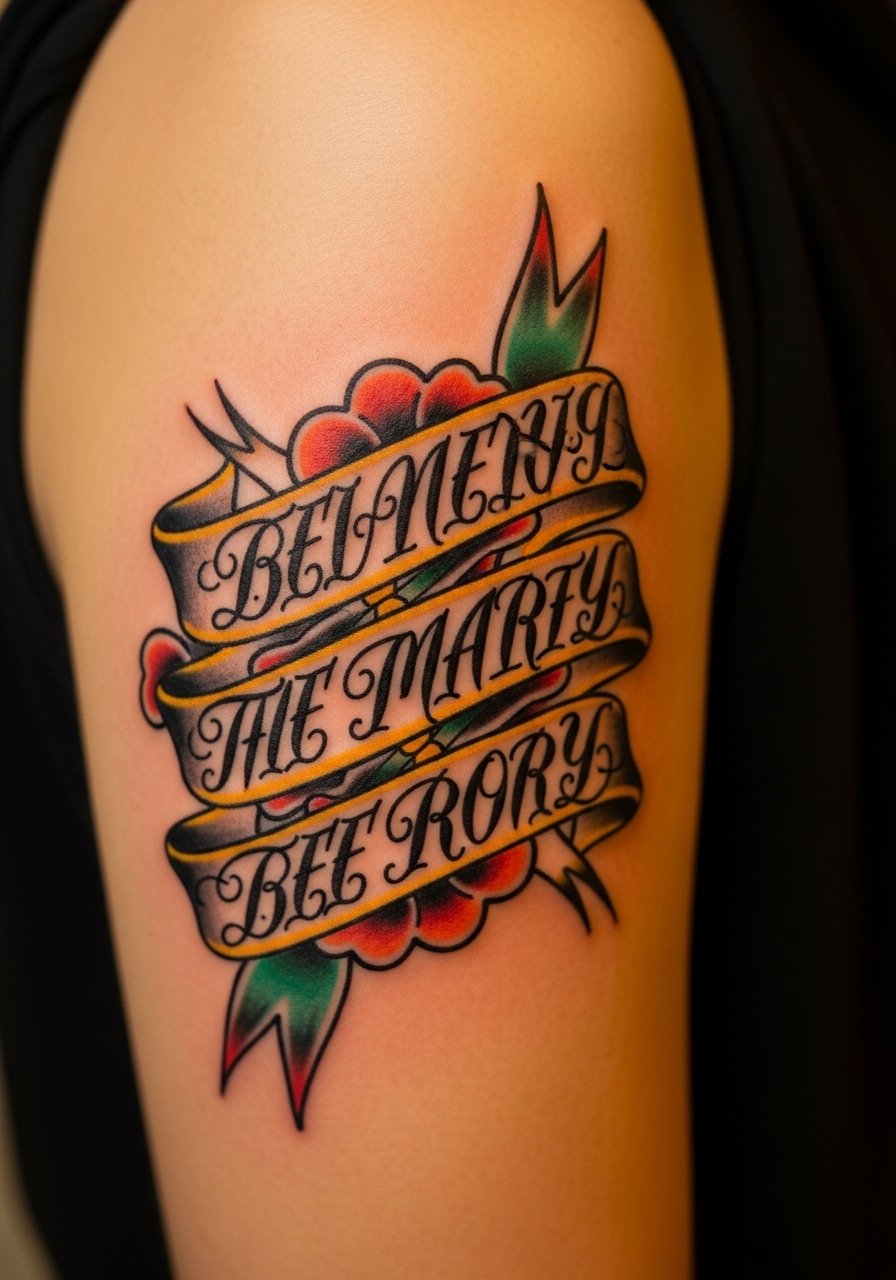
I love the classic feel of a neo-traditional banner wrapping a lyric. Upper arm is forgiving and shows off color and linework. The style adds illustrative elements—flowers, daggers, or portraits—that tell the lyric’s story. Pain is minimal and healing is reliable. Artists who do neo-traditional work recommend strong outlines and saturated color for longevity. Watch out for overly ornate scripts that compete with the illustration. Ask to see healed banners—they tend to soften but keep shape when lines are bold.

10. Delicate Script Around Ankle
Style/Technique: Delicate Script / Circular Placement
Pain Level: High (6/7/10)
Session Time: 45–90 minutes
Best For: Subtle bands, hidden lines that peek with shoes
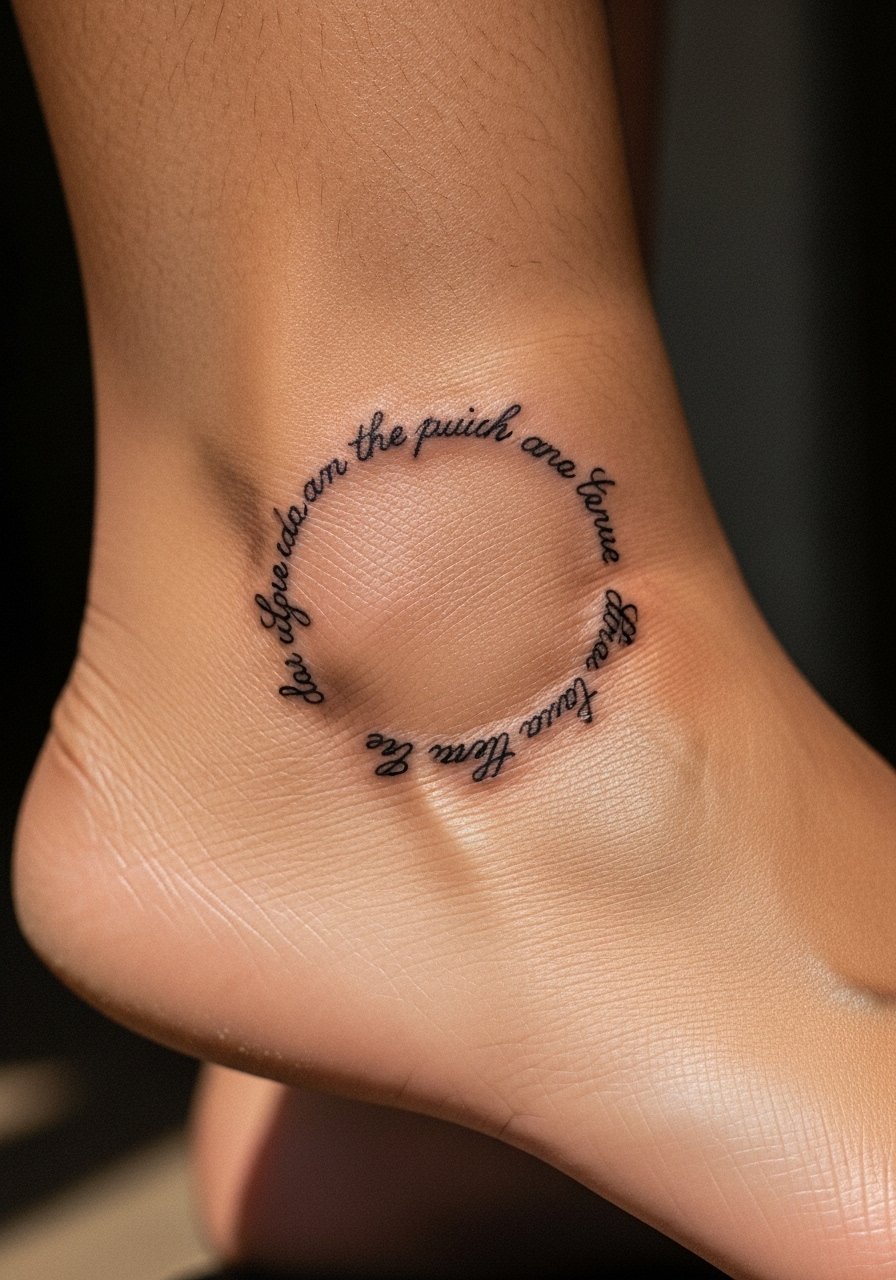
Ankle scripts read like secret notes. The area is thin-skinned and bony, so pain is jolting during tattooing. Delicate scripts can look charming but often blur if letters are too thin. From what I've seen, artists recommend slightly bolder lines and space between letters for circular placements. Healing takes care with socks and shoes—friction can rub scabs off early and cause ink loss. Avoid choosing a long line; short phrases or single words work best.
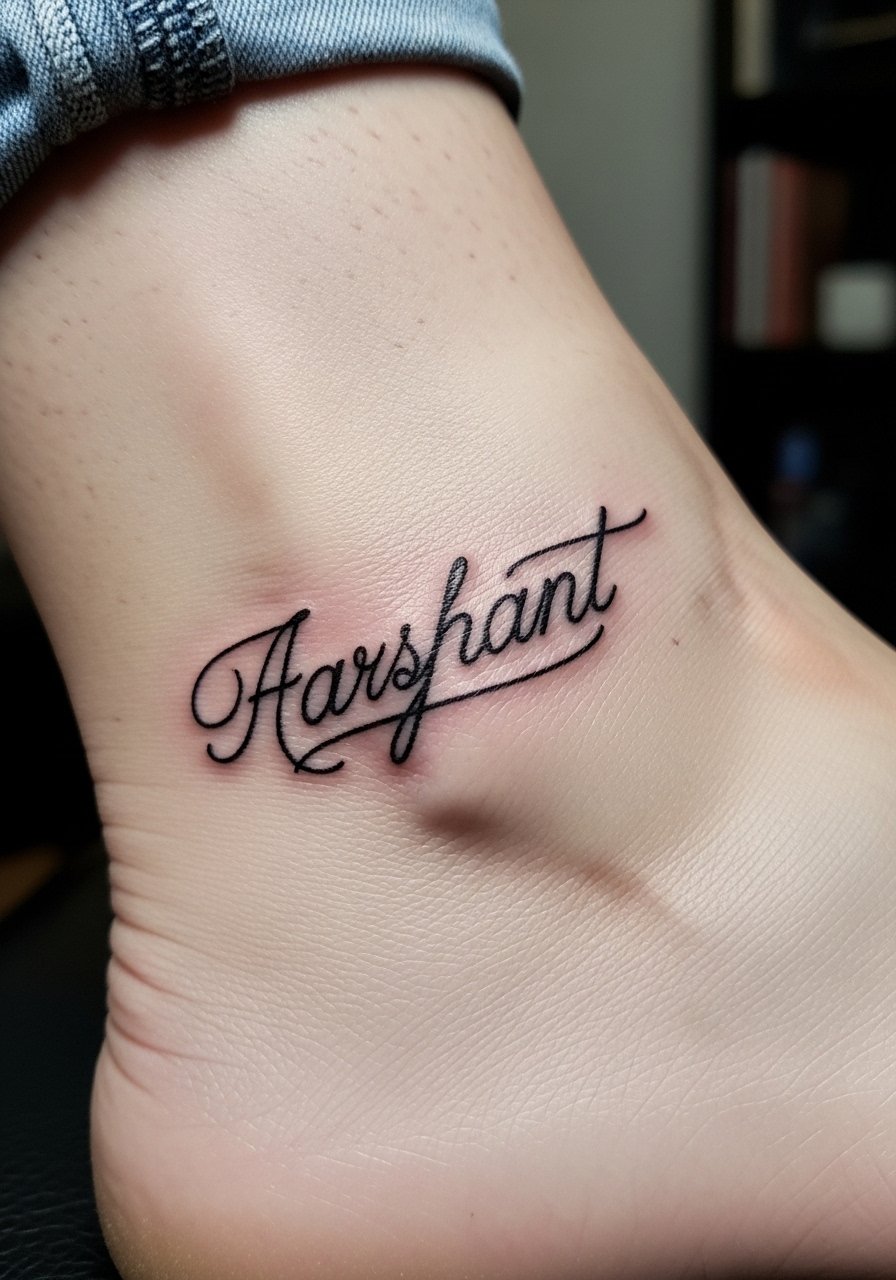
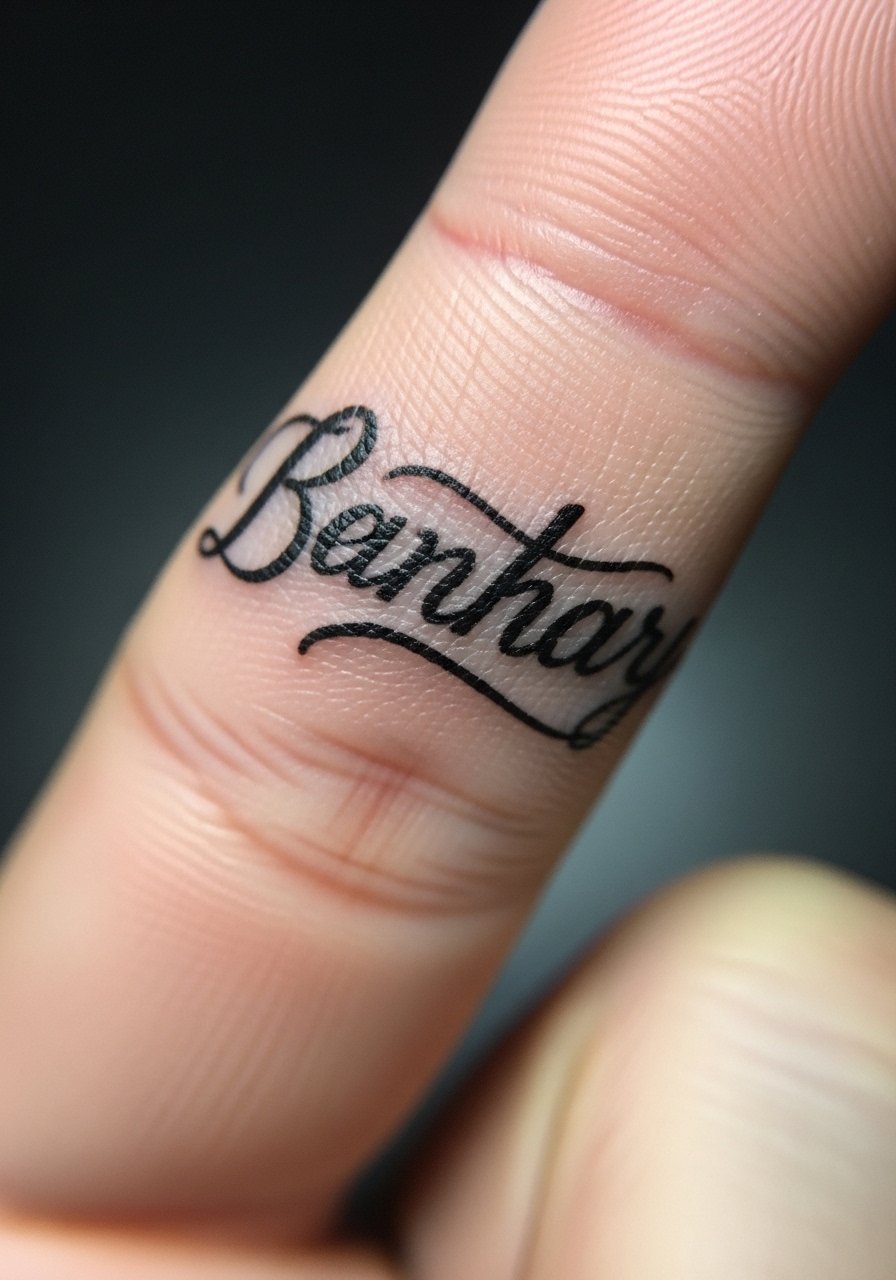
11. Script Wrapped Around Finger
Style/Technique: Micro Script / Finger Band
Pain Level: High (7-8/10)
Session Time: 20–45 minutes, touch-ups likely
Best For: Commitment lines, ring-alternative tattoos
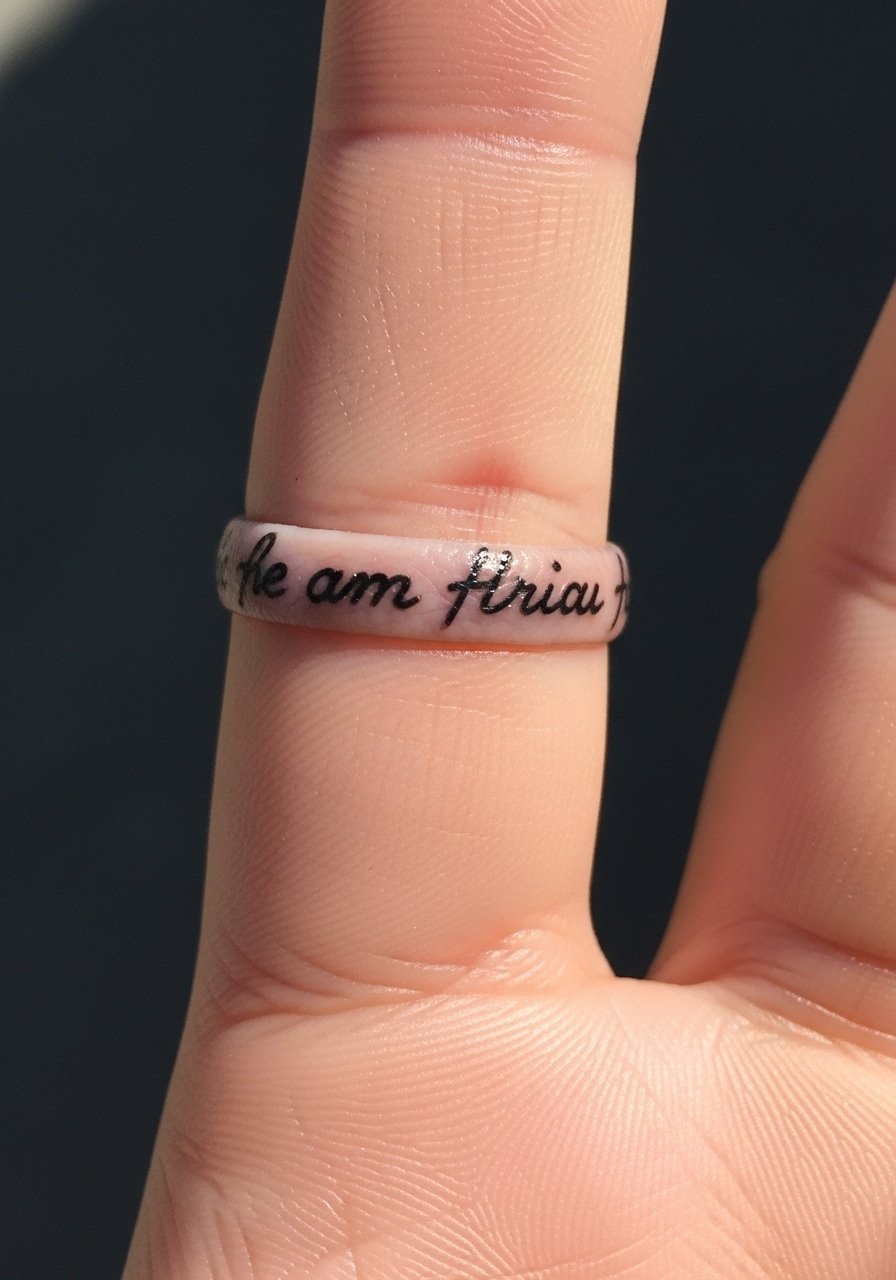
Finger tattoos are intimate but needy. I’ve had friends regret thin fonts here because fingers see constant abrasion and touch-ups are common. The pain is sharp and healing can be rough. If you want a lyric band, choose bold, simple characters instead of cursive and accept eventual refreshes. Many artists suggest inner finger placement or thicker lettering to prolong life. Avoid long phrases and pick a short, meaningful word instead.
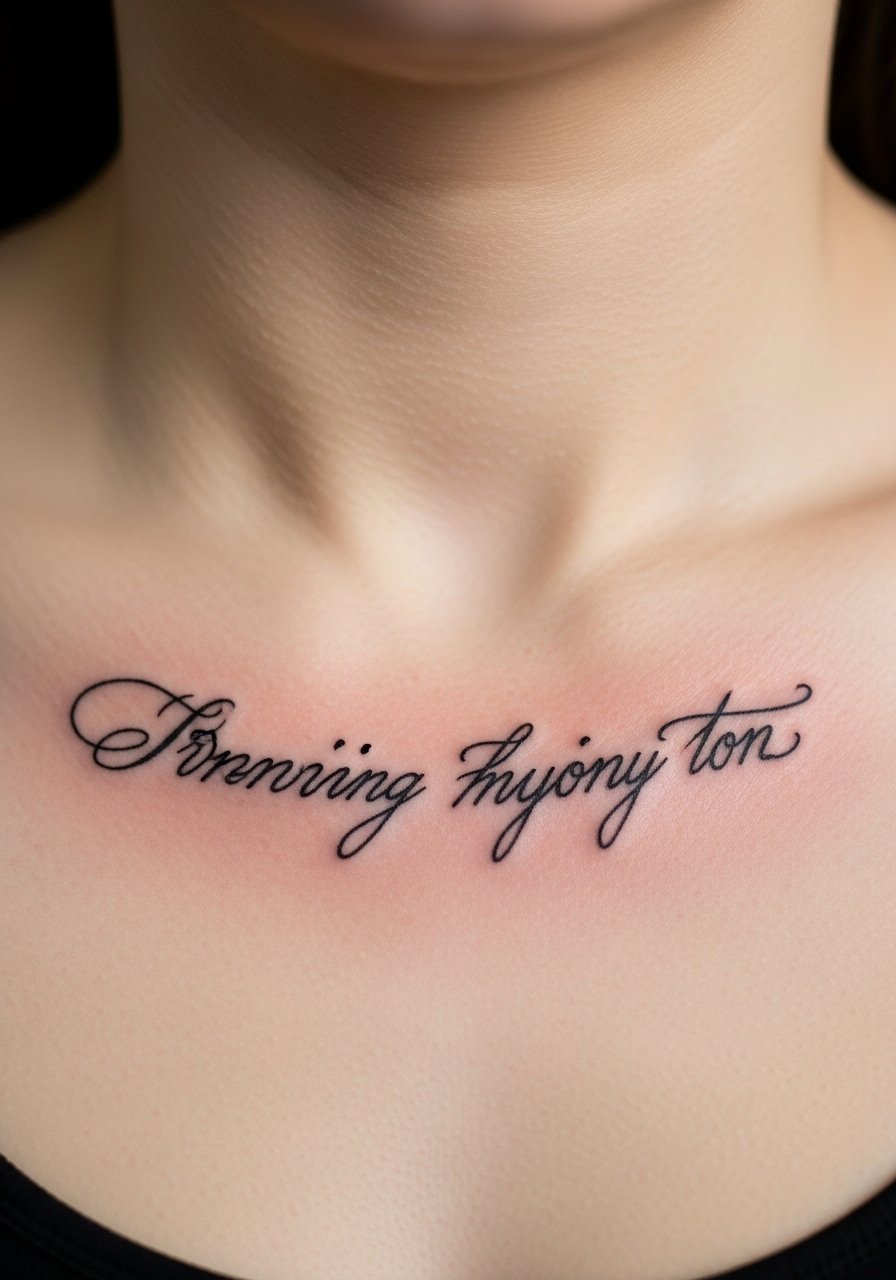
12. Personal Handwriting Sternum Line
Style/Technique: Handwriting Replica / Sternum
Pain Level: Medium-High (6/10)
Session Time: 1–2 hours
Best For: Deeply personal quotes, memorial lines
I converted a loved one's handwriting into a sternum lyric and it still feels private. Handwriting tattoos carry intimate weight because they’re literally unique. Sternum placement is sensitive but manageable. Expect tenderness and slower healing near chest movement. Artists I spoke with caution against over-detailing handwriting; simplify small flourishes so they read as the ink settles. A common mistake is scanning tiny handwriting and not resizing for skin stretch—ask for a mockup at actual scale.
13. Morse Code Lyric On Collarbone
Style/Technique: Morse Code / Dot-Dash Script
Pain Level: Low (3/10)
Session Time: 20–45 minutes
Best For: Secret messages, stylistic minimalism
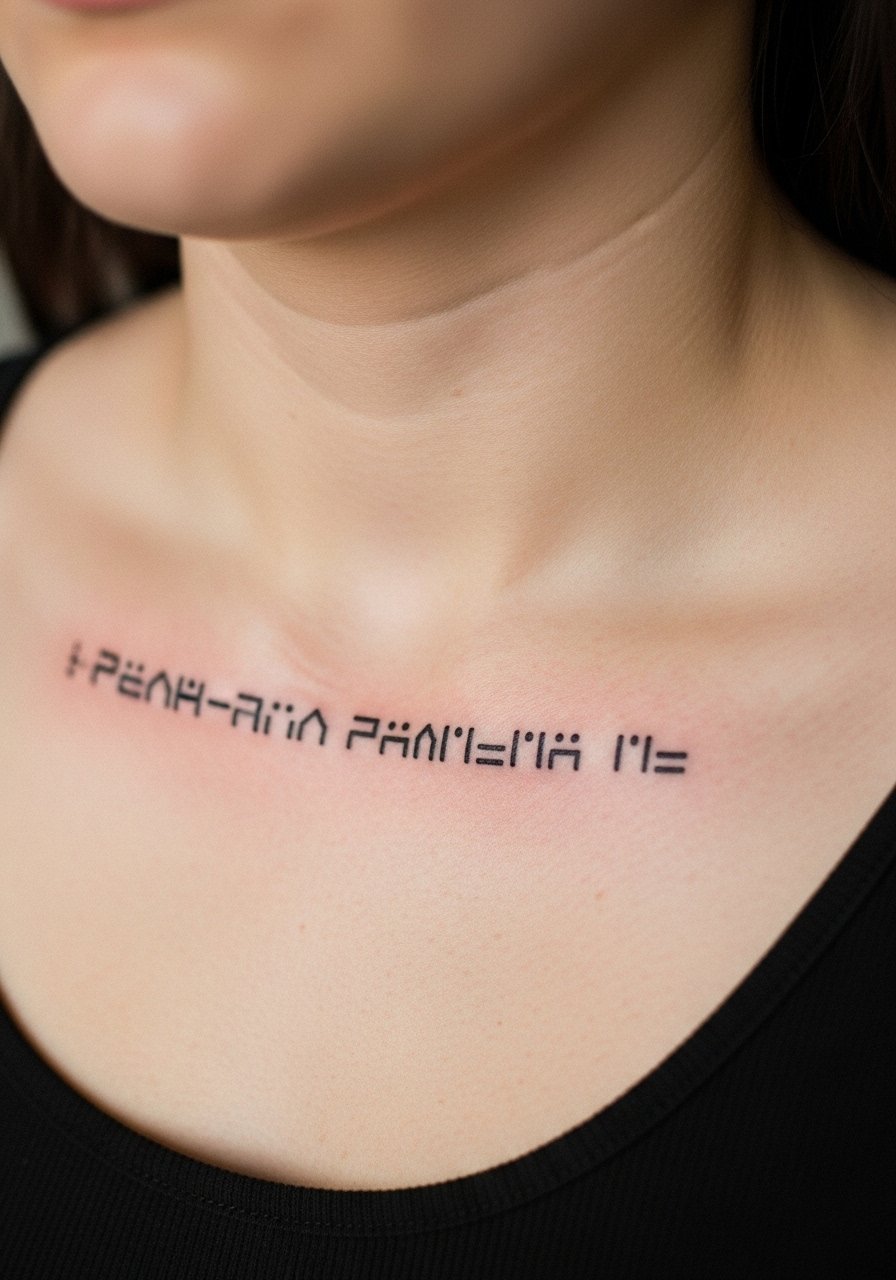
I love Morse code for lyrics you want hidden in plain sight. A string of dots and dashes reads like jewelry but holds deep meaning. Collarbone works well visually and keeps pain moderate. Dots and dashes need consistent spacing; otherwise they can look messy as the skin shifts. One error is making the dots too small—thicker dots and slightly longer dashes help maintain clarity over time. Ask your artist to mockup the code and verify translation accuracy.
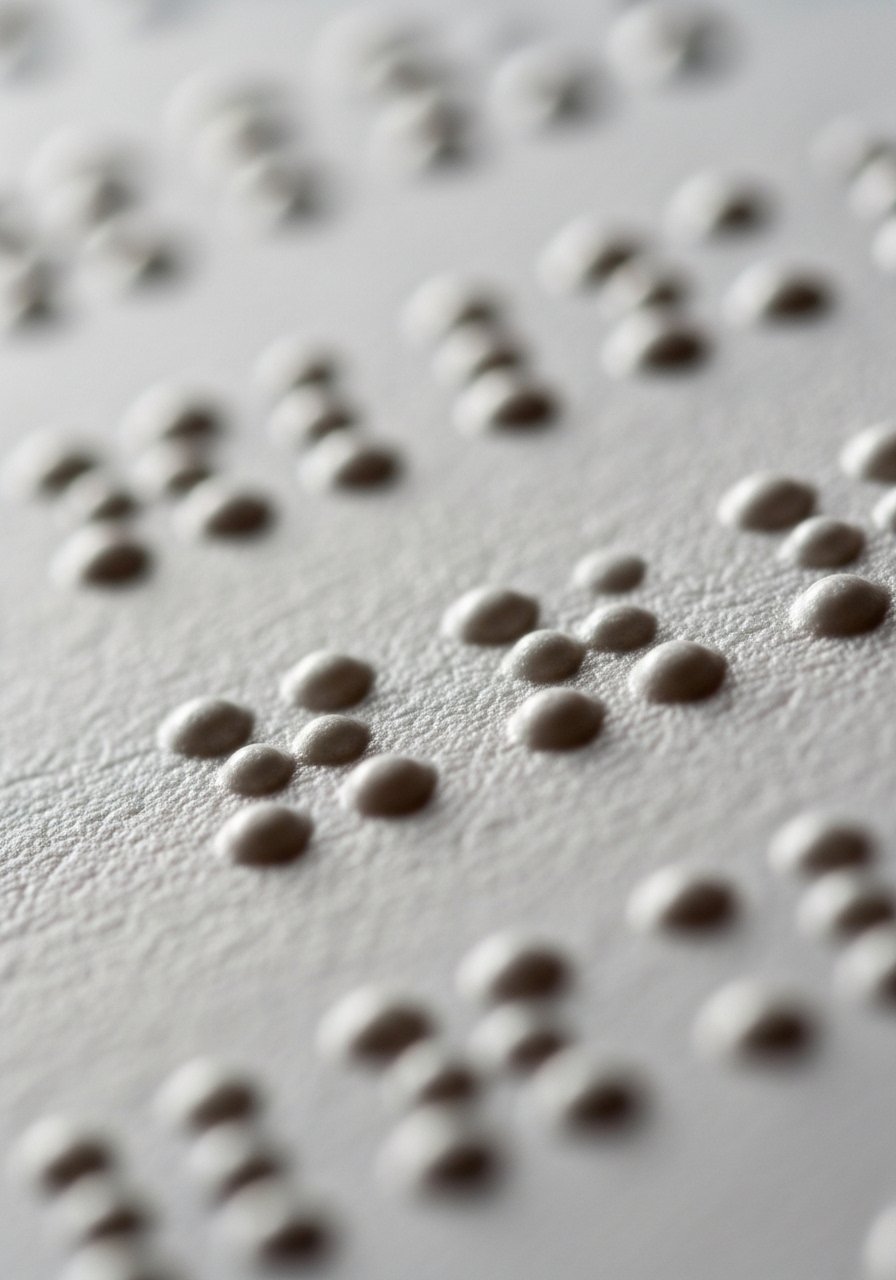
14. Braille Lyric On Upper Back
Style/Technique: Braille Dots / Tactile Script
Pain Level: Medium (4/10)
Session Time: 45–90 minutes
Best For: Tactile art, tactile storytelling, unique conversation piece
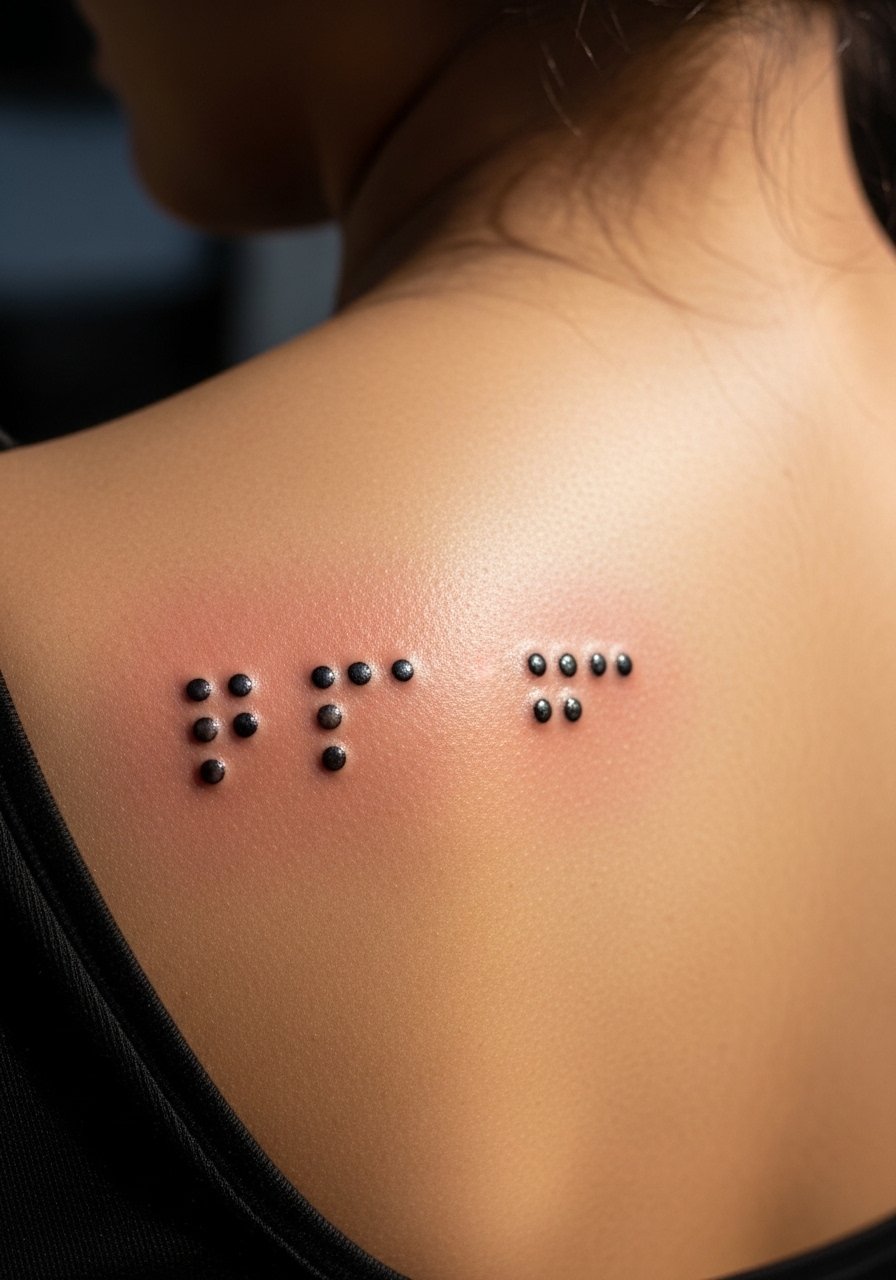
Braille-inspired lyric tattoos are an under-covered angle I see sparingly. They make a statement about language and accessibility while being visually striking. Upper back gives space and low friction. Precision is crucial: dot size and spacing must be exact or the clusters read incorrectly. From what I've gathered, this design ages well if dots are slightly larger than actual braille to account for softening. The biggest mistake is trying to make the dots too tiny for aesthetic reasons—the result becomes a gray texture later.
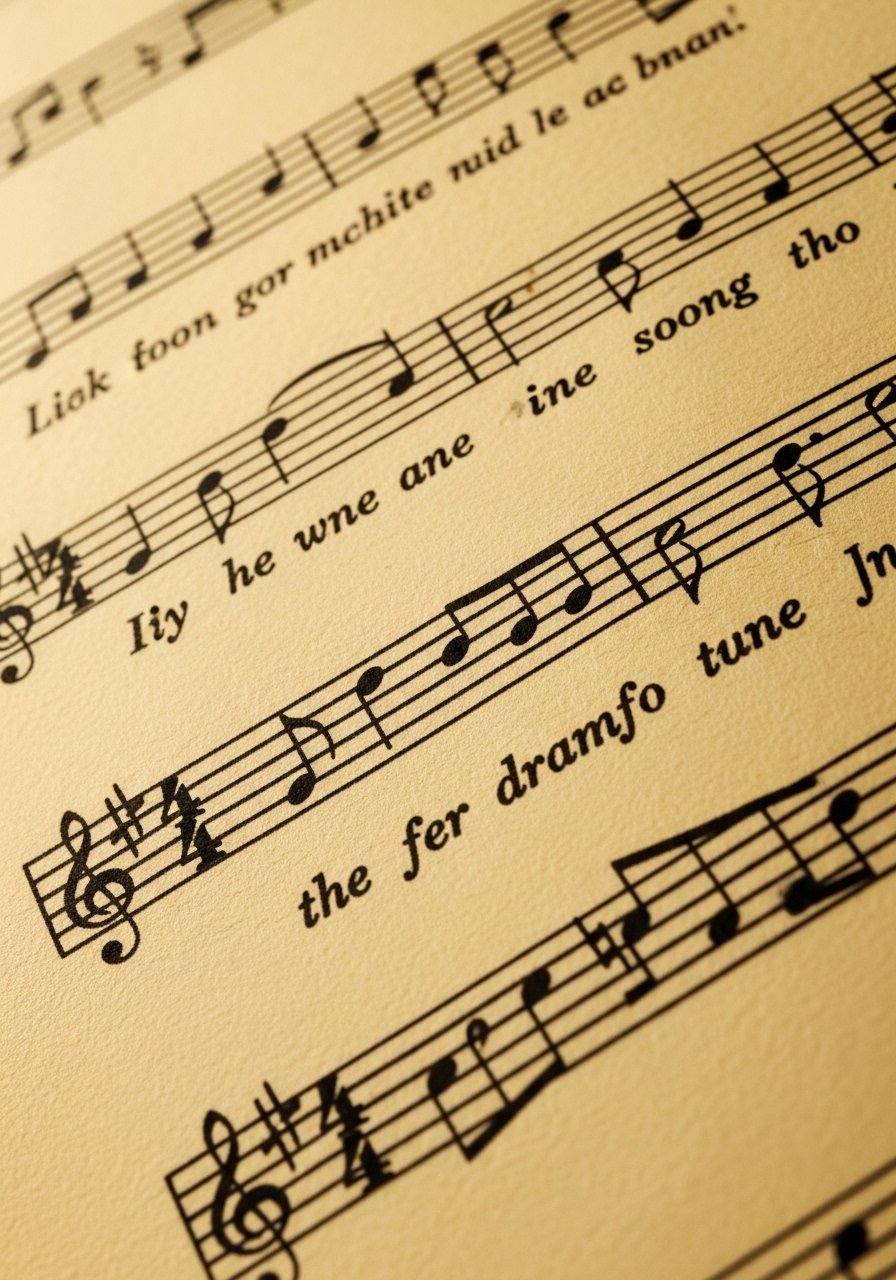
15. Music Staff Notation With Lyric On Forearm
Style/Technique: Staff Notation / Script
Pain Level: Low (3-4/10)
Session Time: 1–2 hours
Best For: Musicians, lyric+melody combo
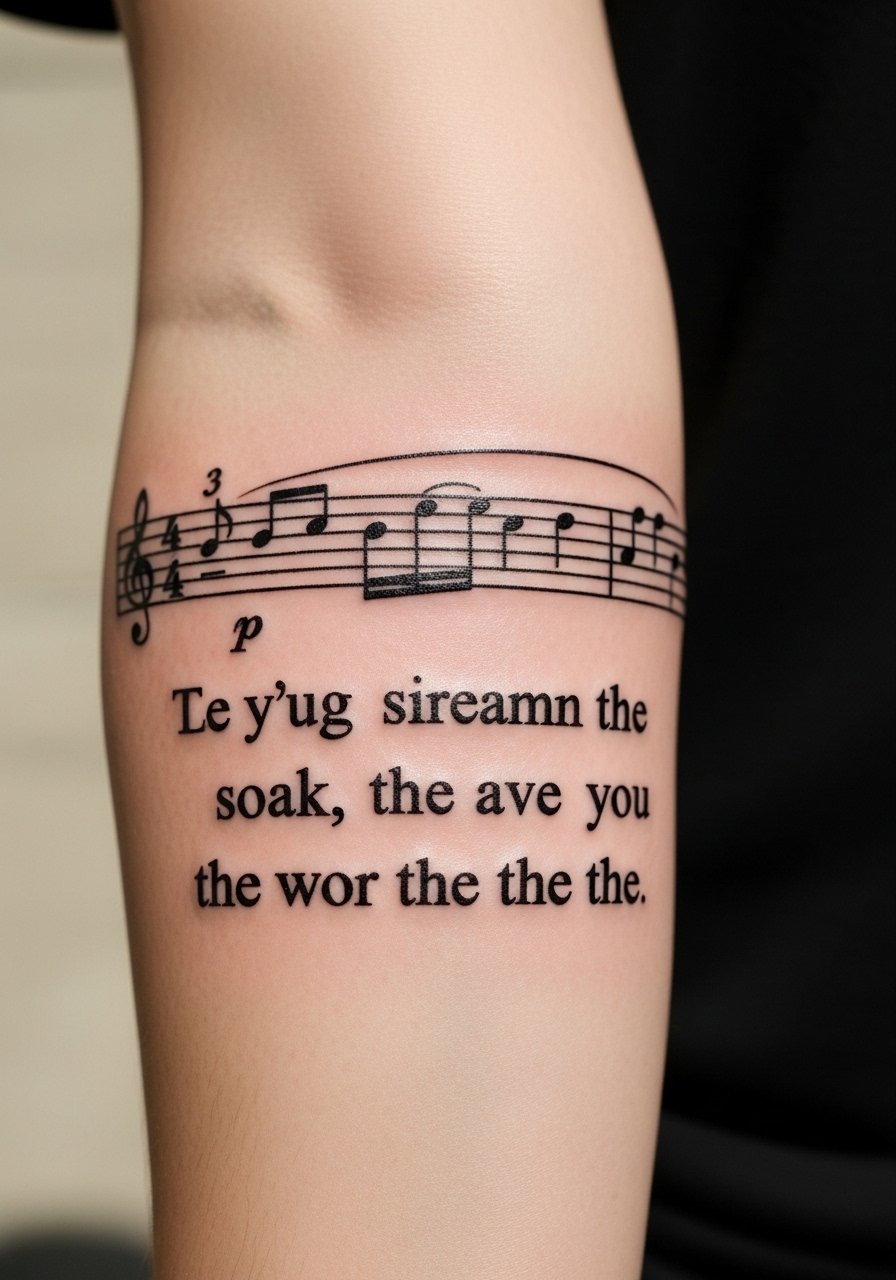
Putting melody and lyric together gives a fuller story. A forearm staff reads easily and looks like sheet music when viewed at a glance. Pain is milder and healing is straightforward. Keep the staff lines bold enough; thin parallel lines can blur together if ink is too faint. I’ve seen artists balance fine notes with a darker lyric script to preserve readability. A common oversight is trying to fit an entire chorus into a tiny staff—pick a motif or refrain instead.
16. Vinyl Record With Lyric On Calf
Style/Technique: Illustration + Script / Neo-Graphic
Pain Level: Low-Medium (3-4/10)
Session Time: 1–2 hours
Best For: Music lovers, nostalgic statements
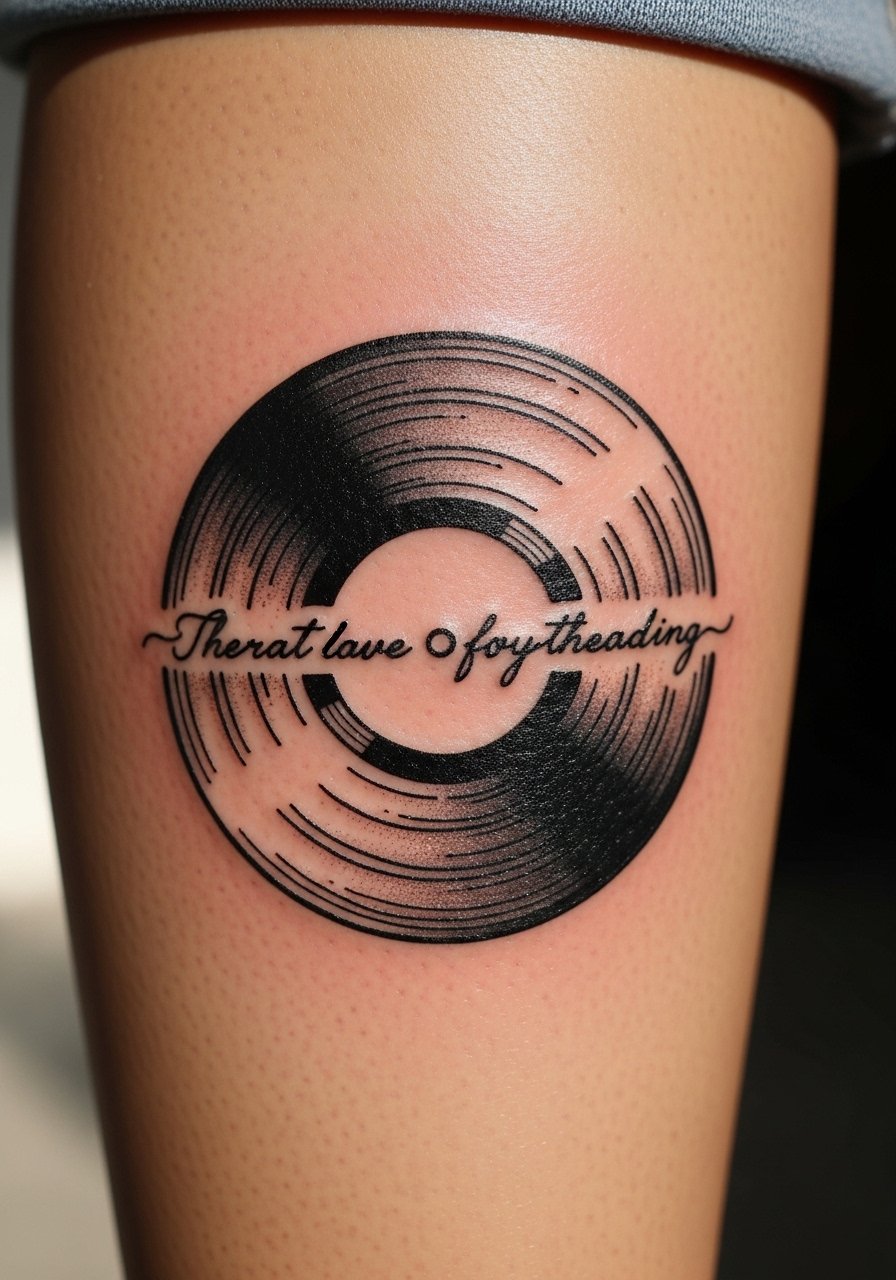
A vinyl plus lyric pairs visual symbolism with words. Calf placement gives room for a clean circle and script that reads from different angles. Pain is milder and heals well. For longevity, choose black-centered vinyl with a crisp label script rather than faint color fills that fade. Artists I follow suggest bold outlines and a solid center to prevent the circular shape from losing definition. Avoid squeezing text into the grooves—give the label area breathing room.
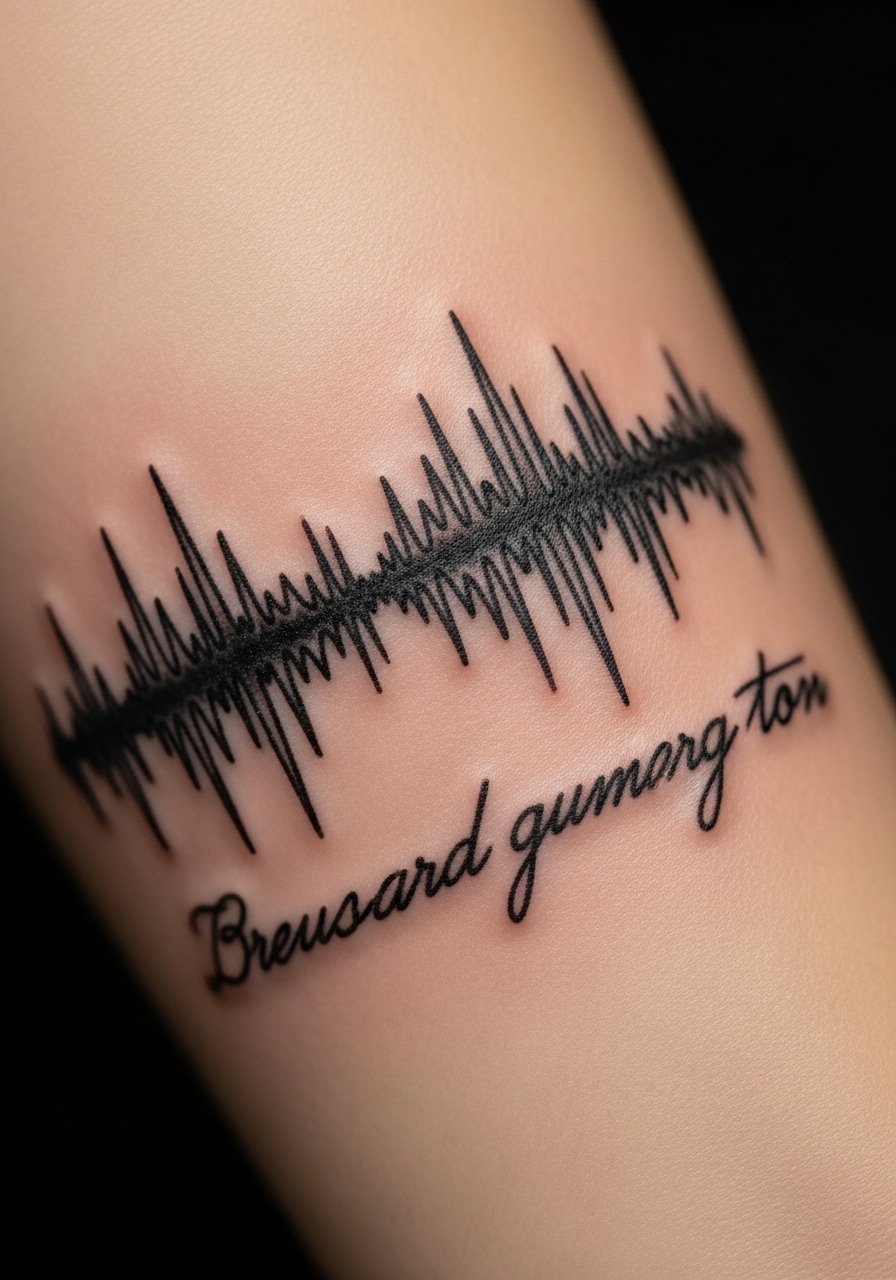
17. Soundwave Ribcage With Playback Icon
Style/Technique: Soundwave + Icon / Combined Visual
Pain Level: High (7-8/10)
Session Time: 1–3 hours
Best For: Dramatic lines that pair audio with imagery
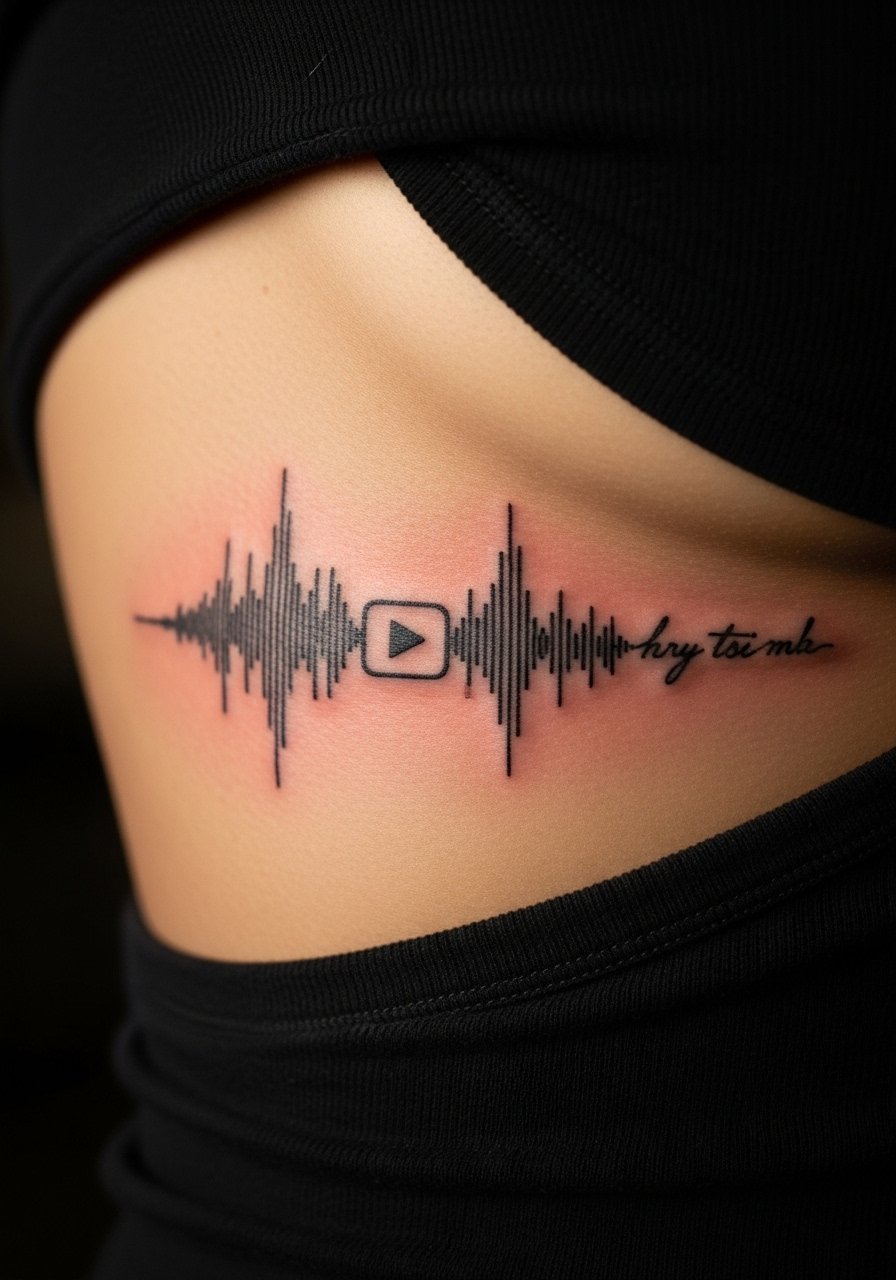
I like adding a small play icon to a ribcage soundwave. It turns a waveform into a narrative device—play the memory in your head. Ribcage amplifies the drama but brings higher pain and slower healing. Precision in the waveform is vital; shaky lines make scanning or playback less accurate. Healed appearance depends on how bold the bars are; thin bars blur. From conversations with artists, keep contrast high and pairing script short. Don’t expect long verses here—pick a signature line.
18. Lyric In Foreign Script Along Spine
Style/Technique: Foreign Script / Vertical Spine Placement
Pain Level: High (6-7/10)
Session Time: 1–3 hours
Best For: Aesthetic lines, translated meaning
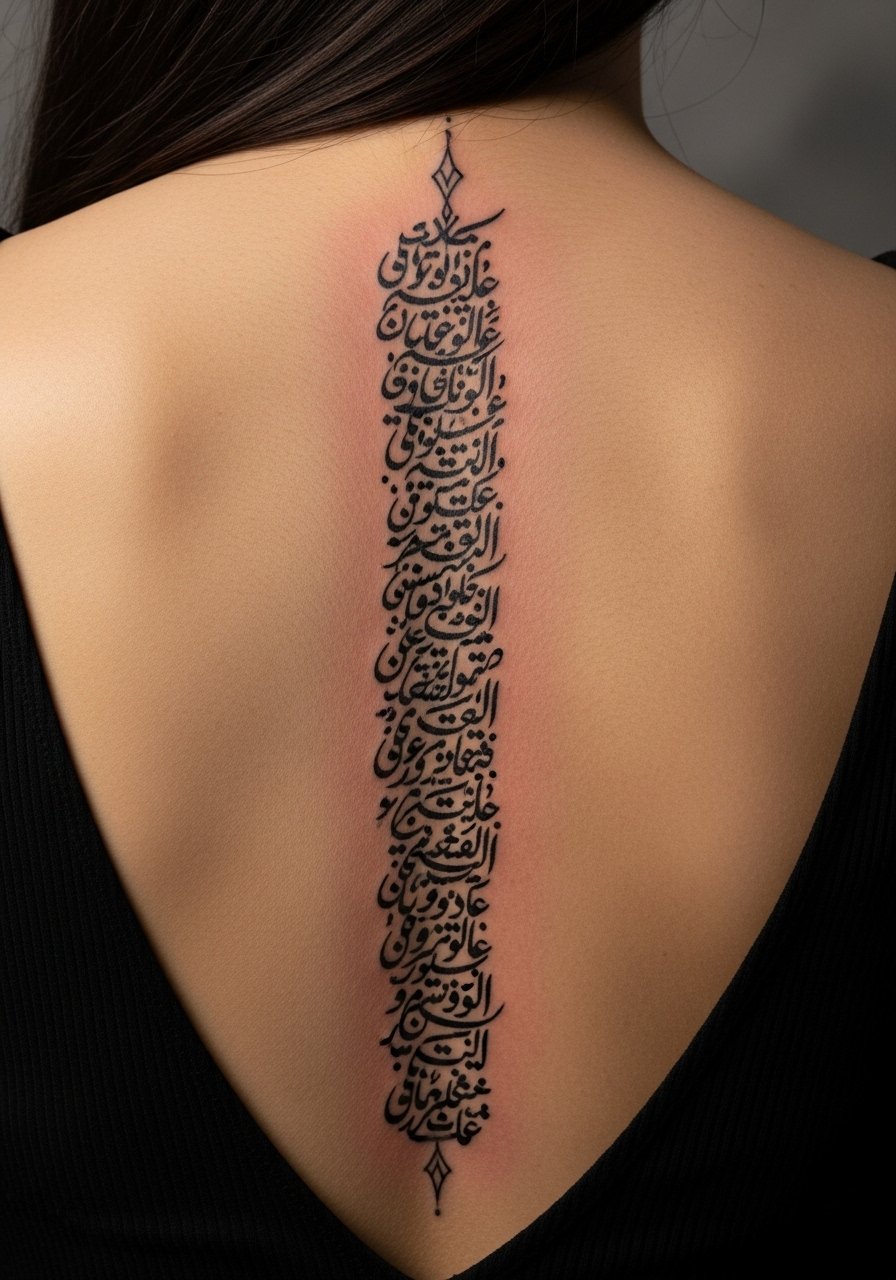
Translated lyrics can carry double meaning and an elegant look when inked vertically along the spine. Spine tattoos are sensitive but visually arresting. My rule of thumb: be 100% sure of translation and cultural context—get multiple native-speaker confirmations. Spine movement affects script spacing, so plan for proper font weight to survive stretching. Artists I trust suggest slightly thicker strokes and periodic check-ins during sessions to keep vertical alignment. Mistakes: using automatic translators or picking fonts that don’t fit the chosen script.
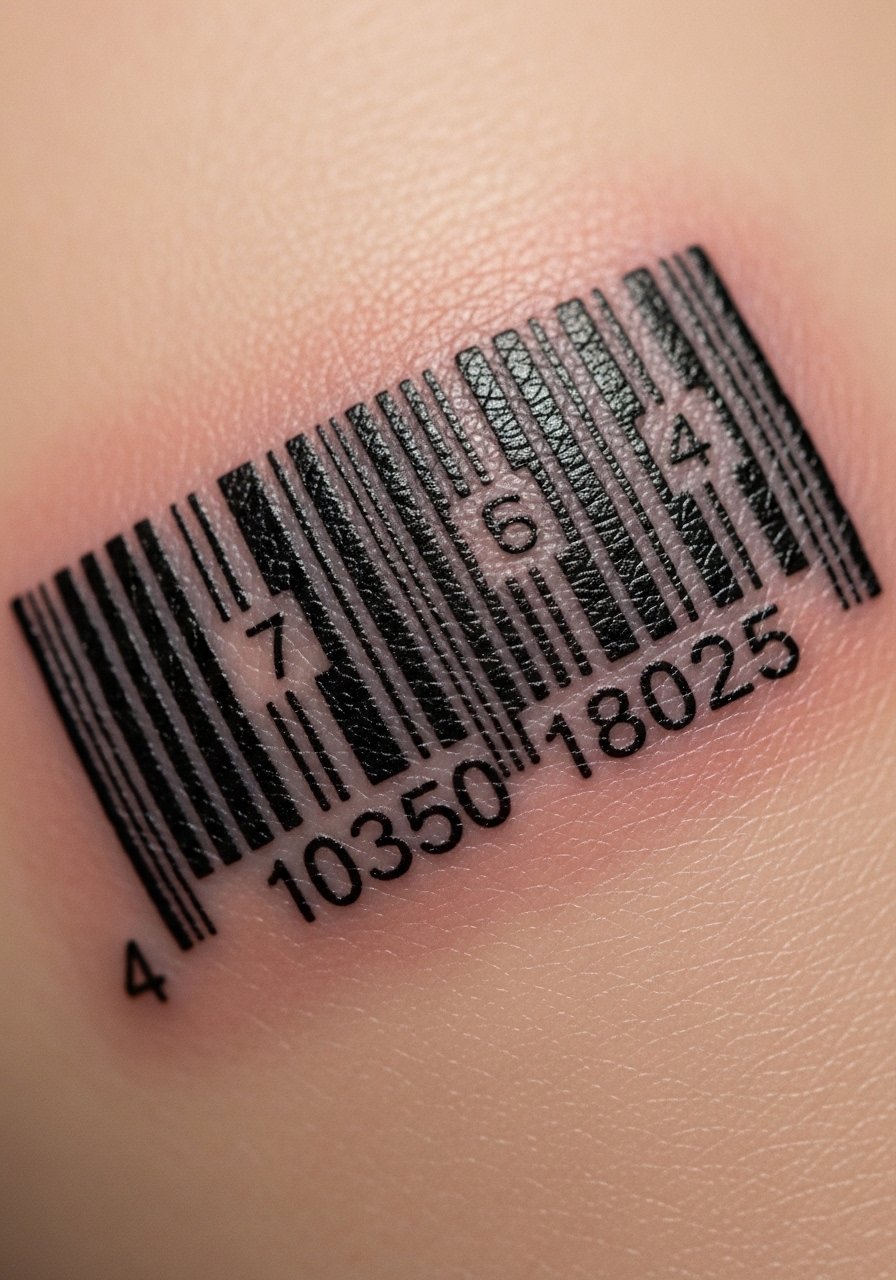
19. Barcode Or QR Lyric On Ribcage
Style/Technique: Barcode/QR + Micro Script / Conceptual
Pain Level: High (7/8/10)
Session Time: 1–2 hours
Best For: Hidden content, interactive tattoos

Barcodes or QR code tattoos that link to a lyric or audio clip are a clever modern twist. Ribcage placement keeps the techy look private. Precision is critical: scanning depends on crisp edges and spacing. Expect touch-ups if the code loses scannability. From my experience, artists warn that skin elasticity can distort barcodes; choose a larger scale and thicker lines. Avoid placing codes across highly mobile or curved areas that warp the pattern.
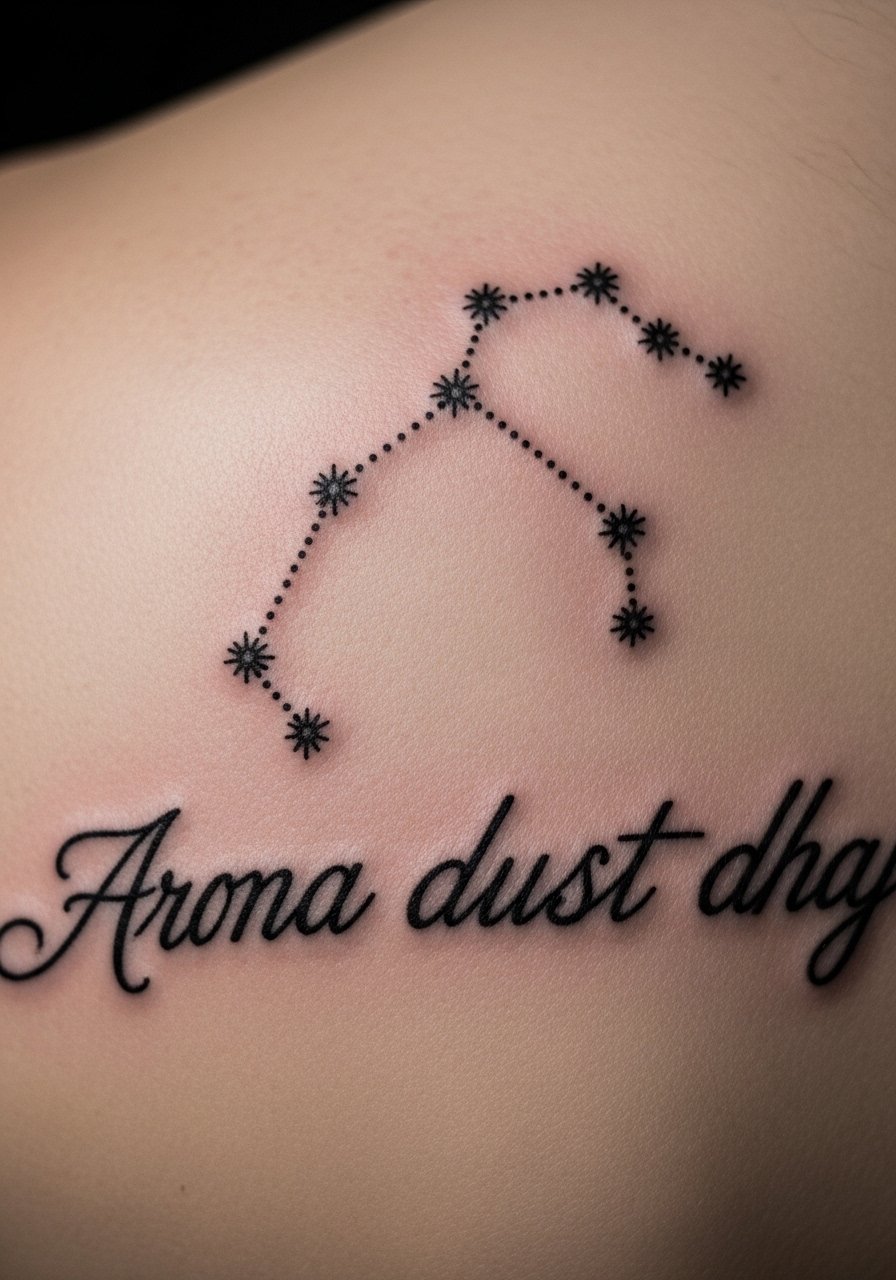
20. Constellation Lyric On Shoulder Blade
Style/Technique: Dotwork Constellation + Script
Pain Level: Medium (4/10)
Session Time: 1–2 hours
Best For: Celestial motifs, subtle storytelling
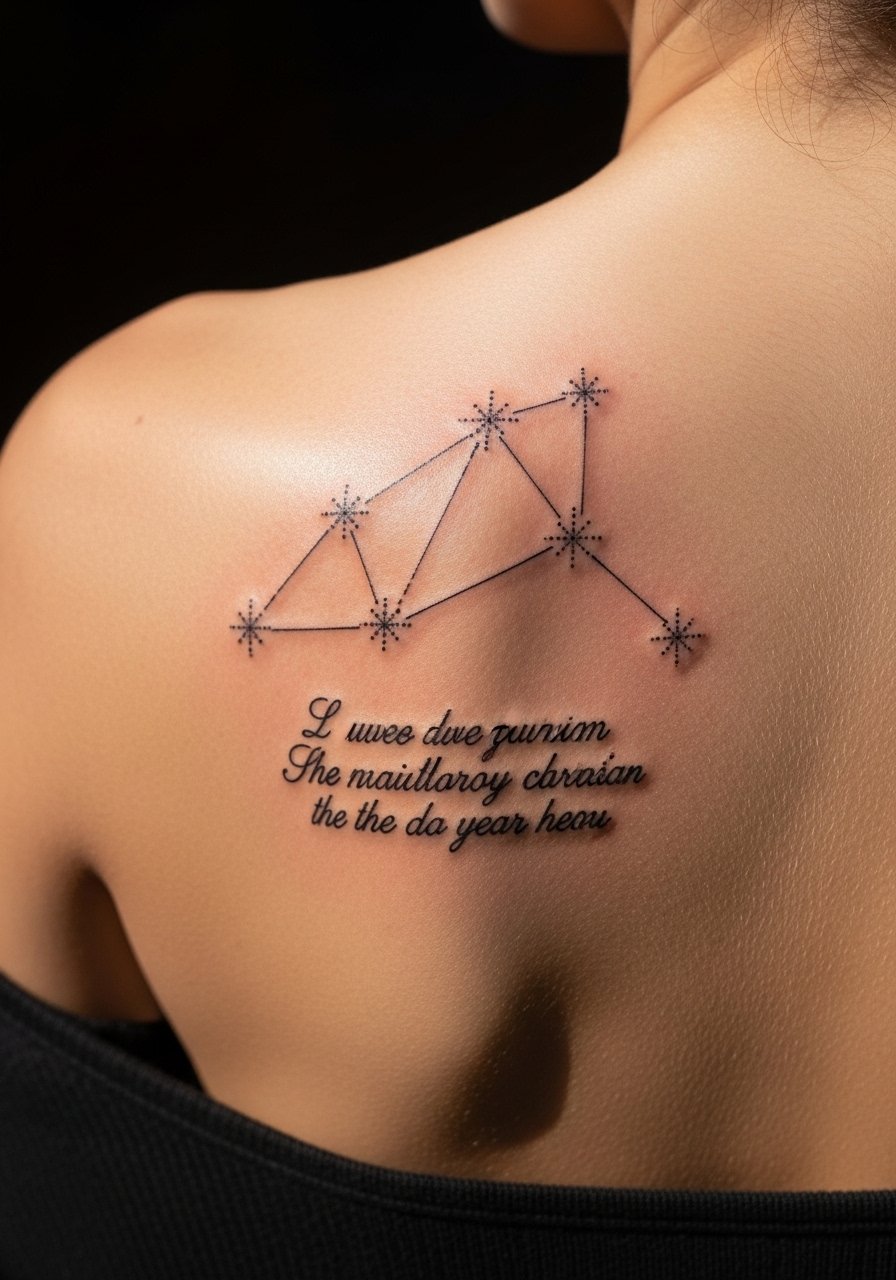
Pairing a lyric with a constellation ties a line to night-sky imagery. Shoulder blade offers a flat plane that heals predictably and remains low-friction under clothing. Dotwork stars age gently, and short script beneath anchors the design. Artists who specialize in dotwork recommend slightly bolder anchor stars so the pattern doesn’t fade into texture. Avoid overloading with small dots that blur into a patch.
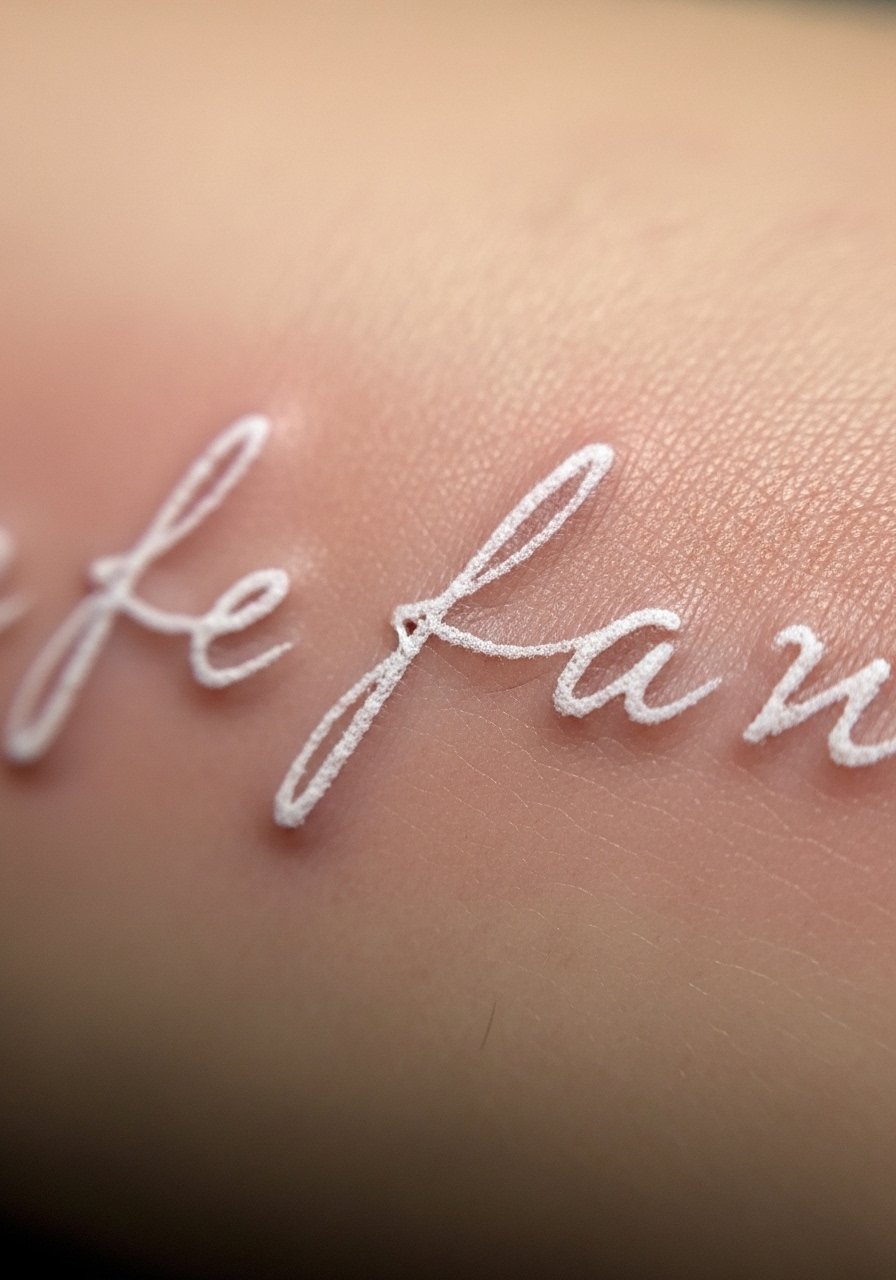
21. White Ink Minimalist On Inner Arm
Style/Technique: White Ink / Minimalist Script
Pain Level: Low (3/10)
Session Time: 30–60 minutes
Best For: Subtle lines, low-visibility statements
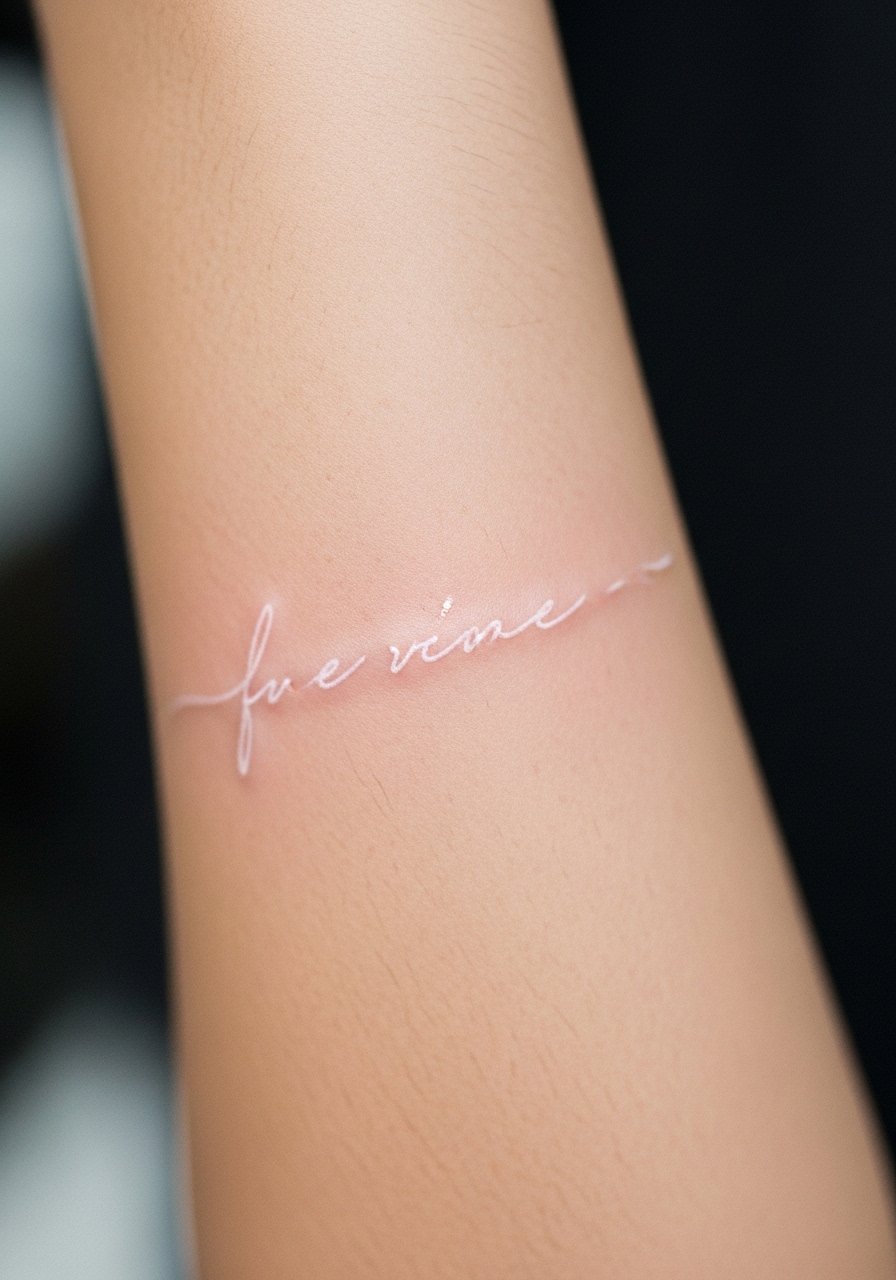
White ink lyrics can read like a secret on paler skin or as a raised texture on darker tones. I experimented with white ink and found it subtle but fickle—visibility varies by skin tone and fades differently than black. Inner arm is a steady place for it. Artists often caution that white ink may yellow or disappear in some skin types; test a small patch if you’re unsure. A common mistake is relying on white alone for legibility; consider layering with faint gray for contrast.
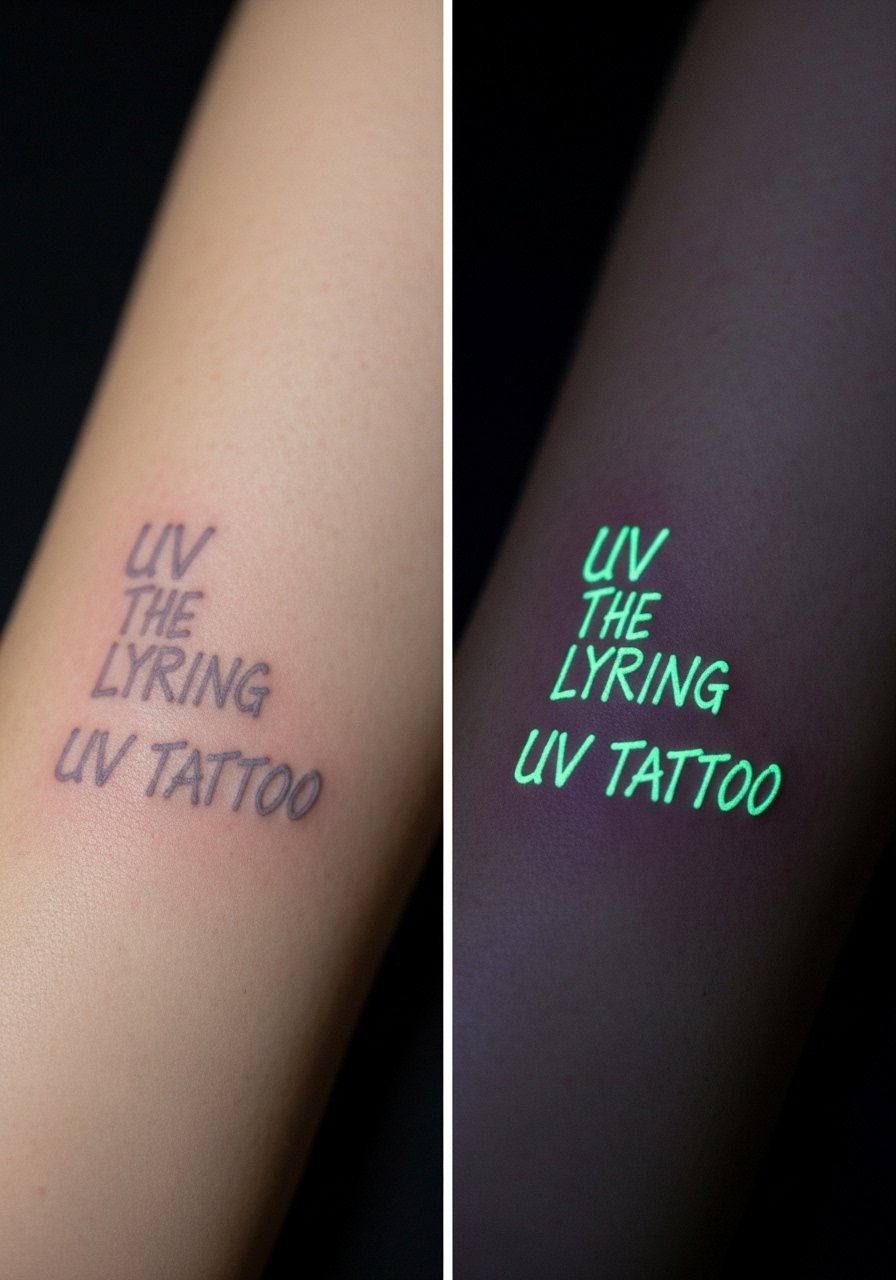
22. Invisible UV Lyric On Shoulder
Style/Technique: UV Ink / Hidden Script
Pain Level: Low-Medium (3-4/10)
Session Time: 30–60 minutes
Best For: Nightlife, secret messaging, novelty
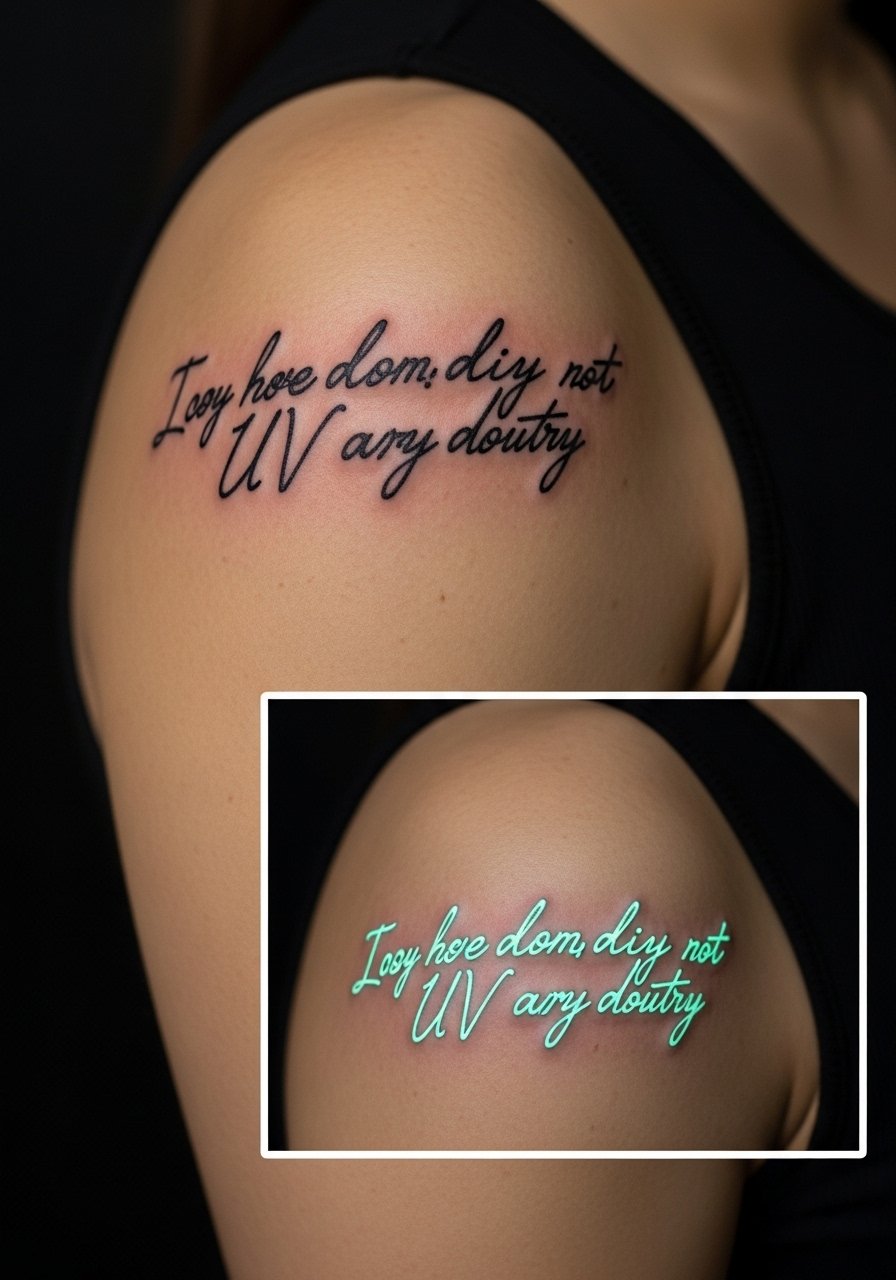
UV-reactive ink means your lyric shows only under blacklight. I’ve seen this in club-goers and performance artists. Shoulder placement is low hassle for healing, but UV ink needs an experienced artist and sometimes fades differently. Many artists I talk to say UV should be supplemental—not the only ink—if you want longevity. Also, confirm the ink brand and patch-test for reactions. The main pitfall is expecting the same durability as black ink; UV tends to require re-inking.
23. One-Line Continuous Script Across Sternum
Style/Technique: Single-Line Script / Continuous Flow
Pain Level: Medium-High (6/10)
Session Time: 1–2 hours
Best For: Poetic lines that bind a phrase together
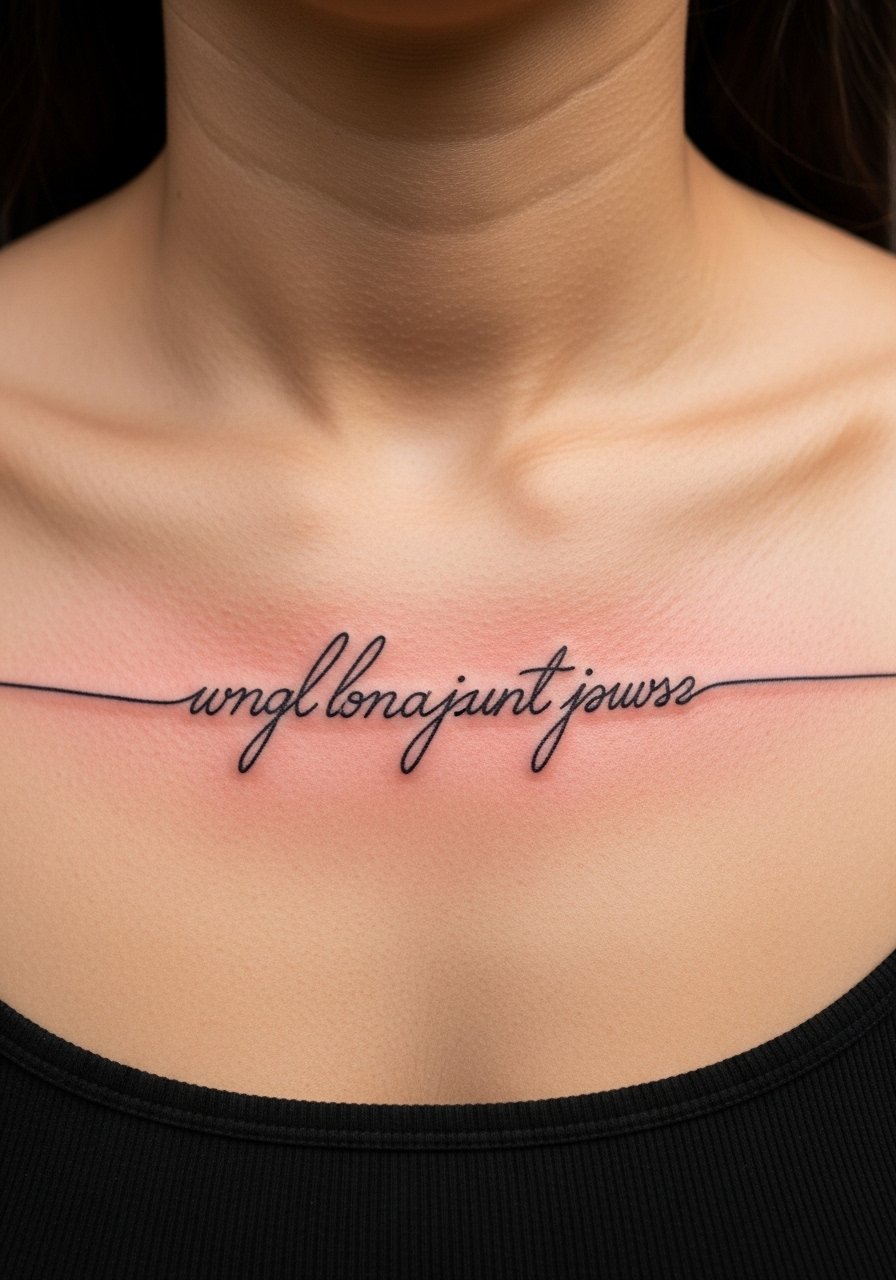
A one-line continuous script is poetic—perfect for a lyric that reads like a mantra. Sternum placement shows off the flow, but chest movement makes spacing critical. I saw a friend pick this and realized the continuity needs consistent pressure to avoid thick/thin irregularities. Healed, these pieces look cohesive if the artist paces the line evenly. Avoid complex flourishes that can tangle in a single stroke. Ask to see continuous-line examples from your artist.
24. Botanical Script Sleeve On Inner Forearm
Style/Technique: Fine Line Botanical + Script
Pain Level: Medium (4/10)
Session Time: Multiple sessions, 3–6 hours total
Best For: Story tattoos combining lyric and imagery
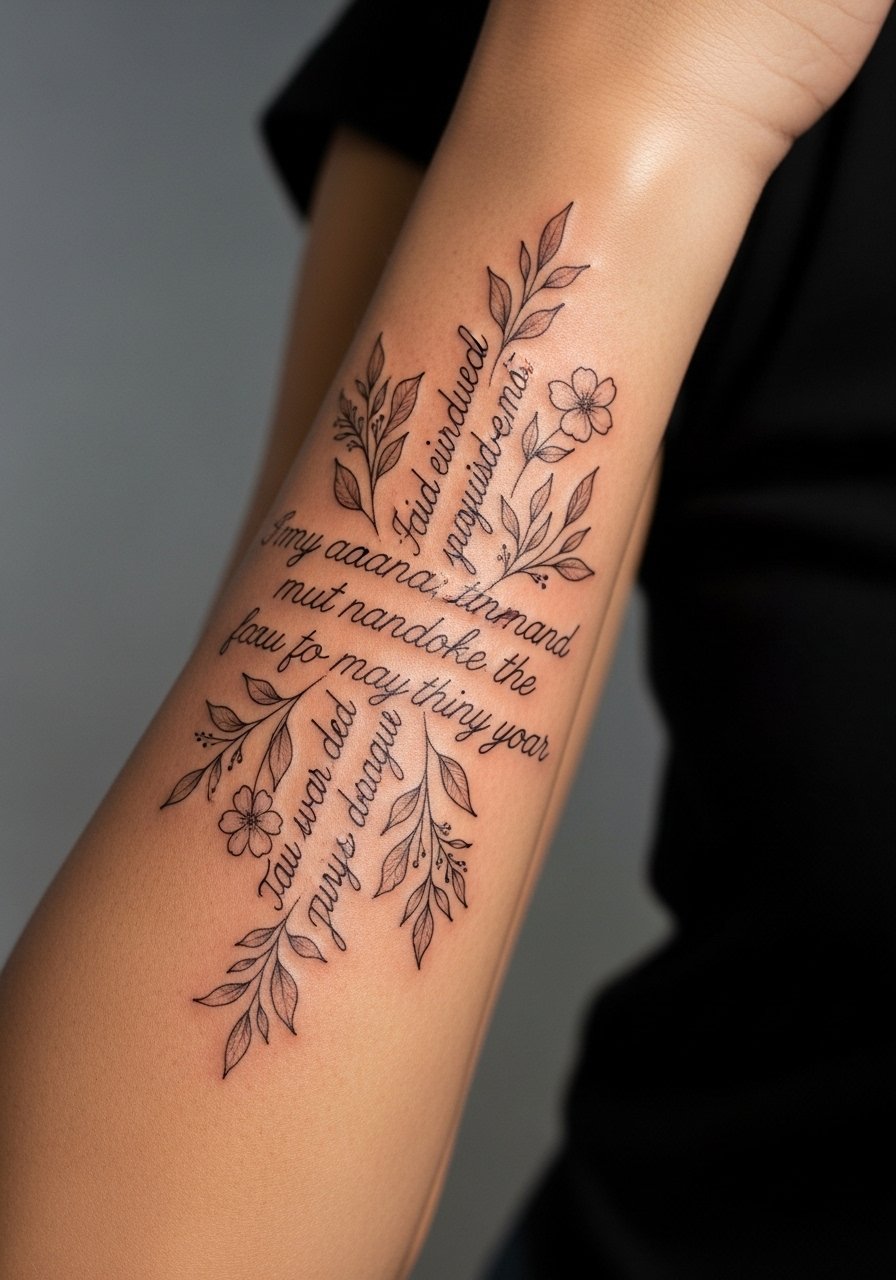
Mixing lyrics with botanical illustration turns a line into a living story. Inner forearm is visible and forgiving; the artwork gives text a home and longevity. I like this for longer lines that would otherwise crowd a small script-only placement. Healing is steady, but keep friction in mind with sleeves and watches. Artists I’ve followed recommend balancing negative space so the tattoo breathes and letters don’t hide in leaves. The typical misstep is over-detailing plants around tiny script—keep sizes compatible.
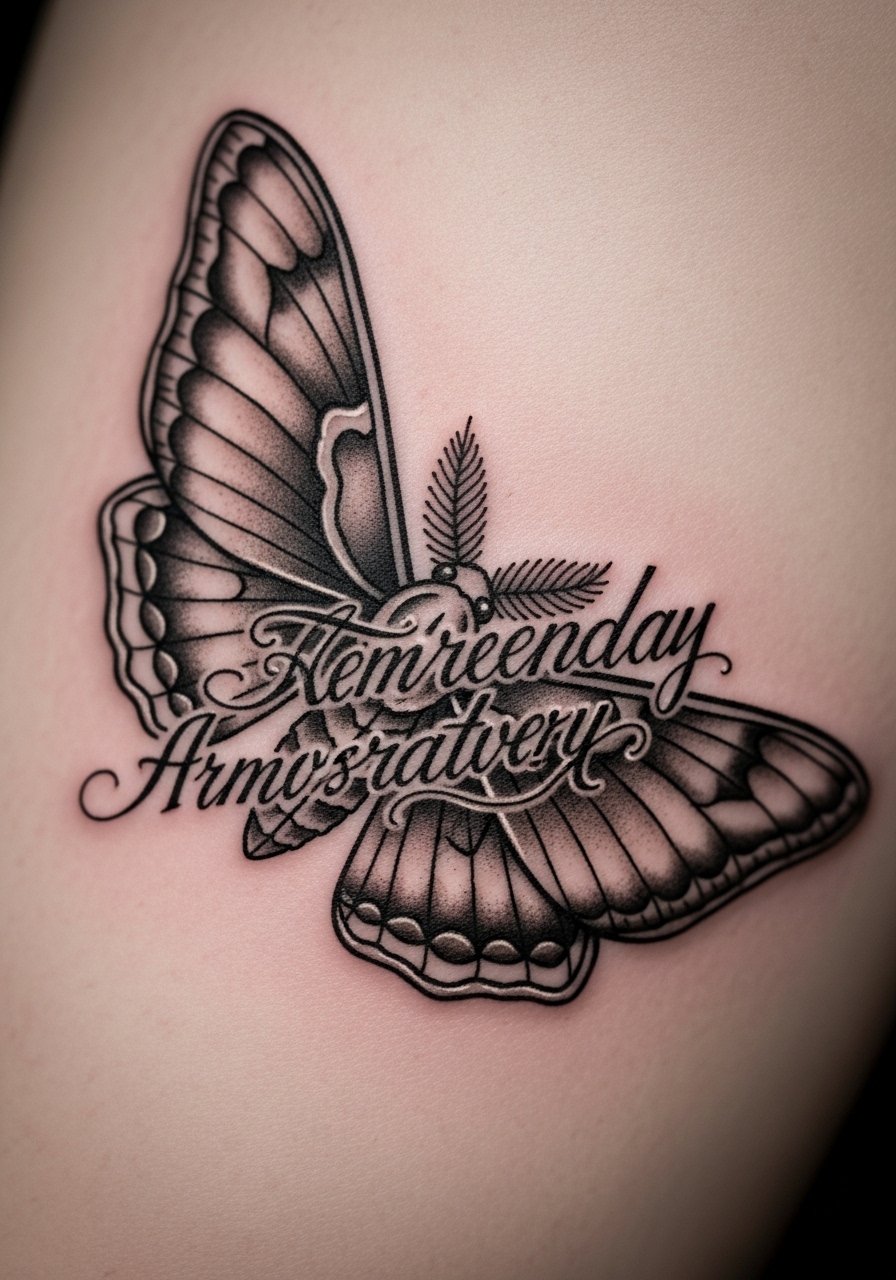
25. Lyric With Moth Or Butterfly On Shoulder
Style/Technique: Neo-Nature / Script + Insect
Pain Level: Low-Medium (3-4/10)
Session Time: 1–2 hours
Best For: Transformation themes, memorial lines
Moths and butterflies pair naturally with lyrics about change. Shoulder placement gives the insect room and makes the script a caption. This combo heals well and photographs beautifully. I’ve seen moth wings rendered in micro-detail that hold up if shaded properly. Avoid tiny text tucked into wing veins—better to give the lyric clear spacing beneath the insect. Ask your artist for healed insect tattoo photos; texture is key.
26. Handwritten Lyric With Typewriter Stamp On Upper Arm
Style/Technique: Handwriting + Stamp / Hybrid
Pain Level: Low (3/10)
Session Time: 1–2 hours
Best For: Vintage feel, personal-record style tattoos
This hybrid pairs handwriting authenticity with a stamped typeface for a worn, archival look. Upper arm is classic and low pain. The contrast between personal script and rigid stamp reads like an old letter. I’ve noticed this style ages nicely if the stamp stays bold and the handwriting is slightly softened. Common mistakes include making the stamp too fine—lose too much detail and it looks blotchy. Discuss line weight balance with your artist.
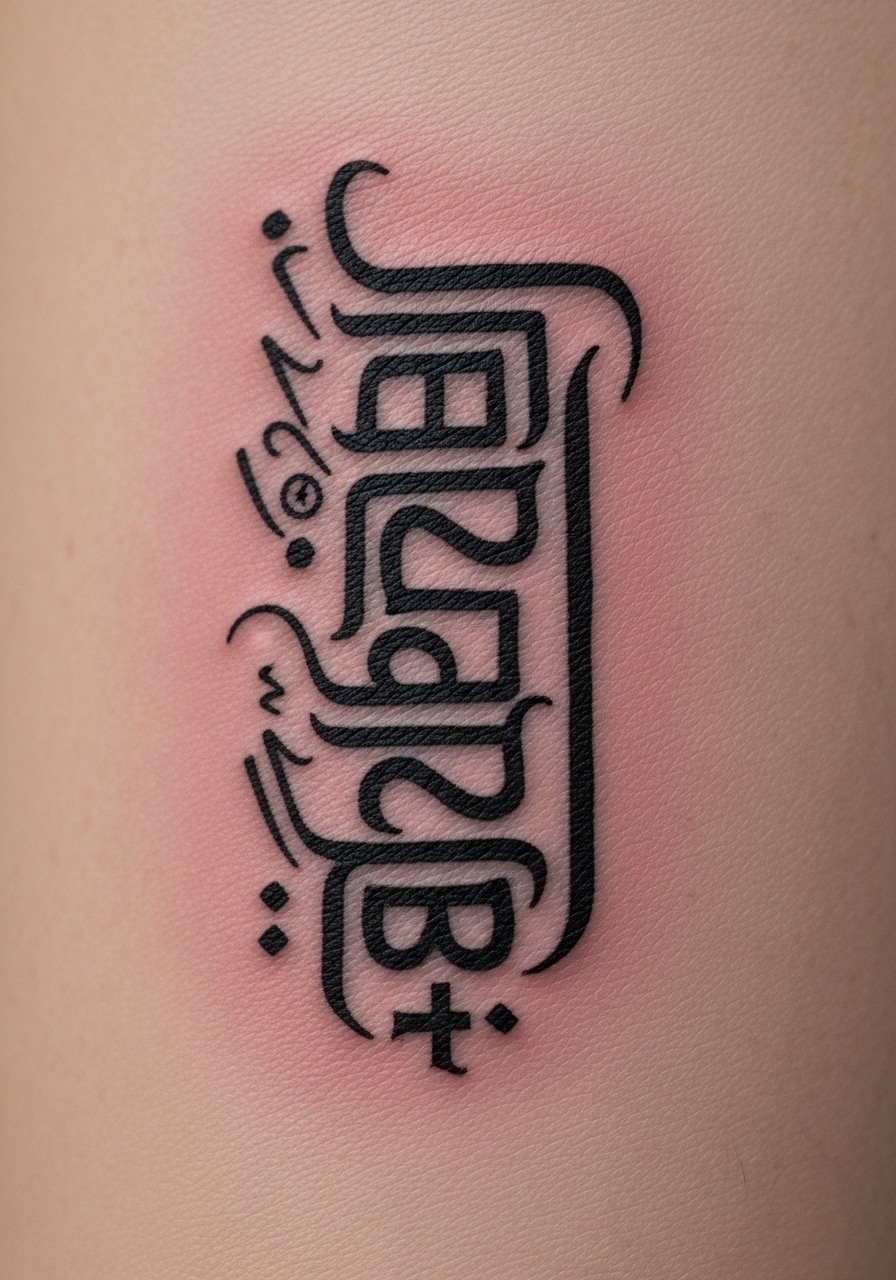
27. Lyric In Native Language Behind Ear
Style/Technique: Script In Native Language / Micro Placement
Pain Level: High (6-7/10)
Session Time: 20–40 minutes
Best For: Cultural lines, deeply personal translations

I’ve recommended behind-ear native language tattoos to friends who want a quiet cultural nod. It’s intimate and often hidden unless you tuck your hair. Pain is higher than the forearm; healing needs care around hair and headphones. Make sure translations are vetted by fluent speakers—cultural missteps happen. Choose a font that suits the script; some scripts require more stroke weight to read well once healed.
28. Mirrored Phrase On Both Wrists
Style/Technique: Symmetrical Script / Matching Placement
Pain Level: Low-Medium (3-4/10)
Session Time: 30–60 minutes each wrist
Best For: Dual narratives, couple or self-affirming phrases
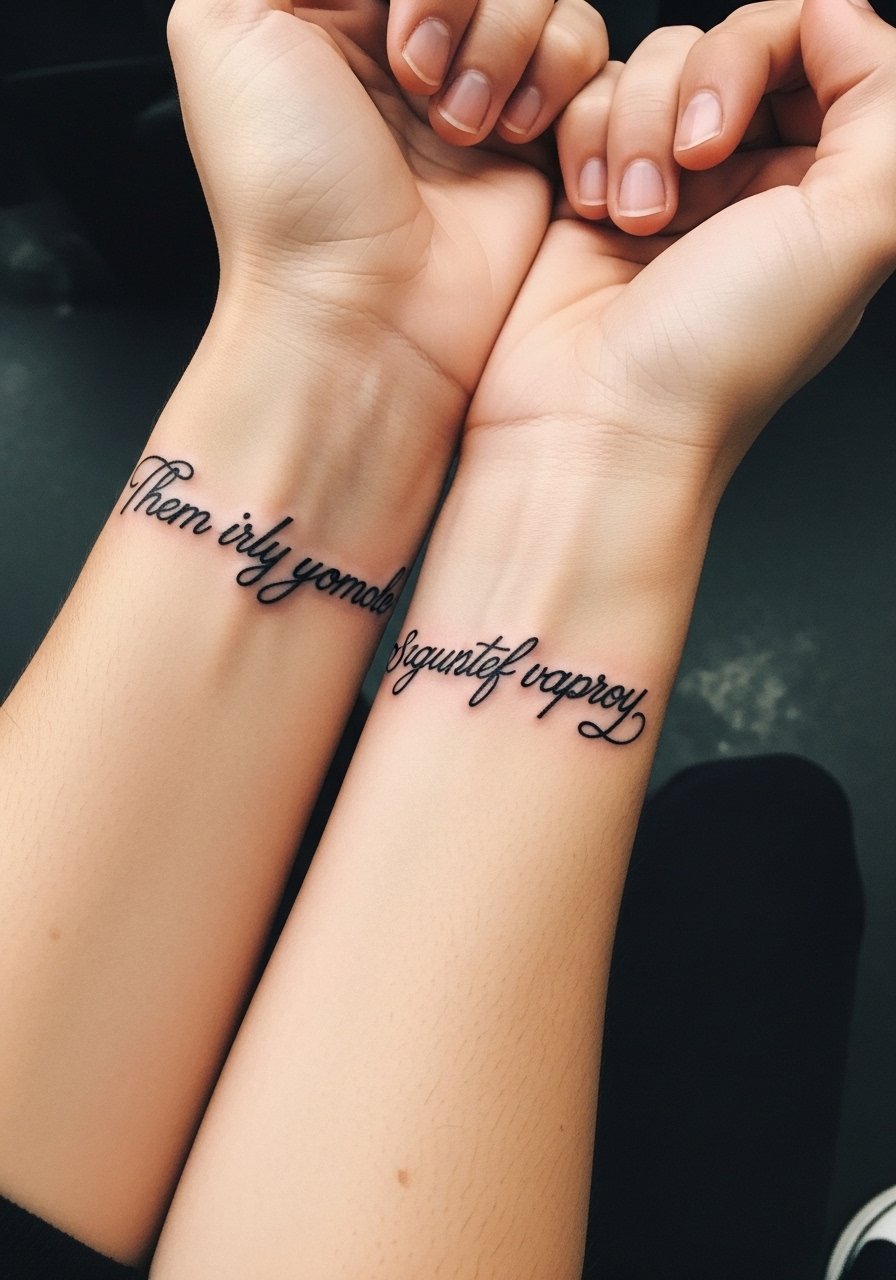
Matching phrases across both wrists read like a conversation with yourself. I did mirrored words that complete each other when I bring my hands together. Symmetry is key—get both stencils and compare placement carefully. Wrists see frequent washing and friction, so pick bolder lettering to avoid rapid softening. A common mistake is inconsistent spacing or angle between wrists; a good artist will stencil and let you check alignment before inking.
Tattoo Prep and Aftercare Essentials
Aftercare Essentials:
- Aquaphor Healing Ointment, 14oz tube — Great first 3–5 days for scab protection.
- Saniderm Transparent Adhesive Bandage, 6-inch roll — Second-skin healing method artists recommend.
- CeraVe Fragrance-Free Moisturizing Lotion — Daily moisturizer after initial healing.
- Dr. Bronner's Unscented Castile Soap, 8oz — Gentle cleanser for the first week.
- Hydrocolloid Bandages (Variety Pack) — Small-area protection alternative to Saniderm.
Before Your Appointment:
- Numbing Cream With 5% Lidocaine, 2oz — Ask your artist before use; helps sensitive spots.
- Tattoo Stencil Transfer Paper (Pack) — Handy if you test layouts at home.
- Disposable Razors For Prep — Use only when instructed and with care.
Long-Term Maintenance:
- SPF 50 Sunscreen Stick For Tattoos — Non-negotiable for keeping lyrics crisp.
- Mad Rabbit Tattoo Balm, 2oz — Artist-recommended for healed-tattoo maintenance.
- Hustle Butter Deluxe, 2oz — Vegan aftercare alternative for long-term skin health.
- SPF 50+ Broad Spectrum Lotion (Travel Size) — For larger areas and daily use.
Optional Comfort Items:
- Tattoo Numbing Spray — For touch-ups or extremely sensitive spots.
- Tattoo Aftercare Kit (Complete) — Ready-made selection of essentials.
Frequently Asked Questions
Q: How bad does a tattoo actually hurt?
A: Pain depends on placement and tolerance. Outer forearm and upper arm are usually around 2–4/10. Ribs, spine, and fingers can sit at 7–8/10. It’s often more of a prolonged scratching or burning than a sharp stab. For sensitive placements try numbing cream with lidocaine, but ask your artist first.
Q: What if I regret the lyric later?
A: I waited months before committing to scripts. Sit with the line for 6+ months and test it in different fonts and sizes. If regret happens, cover-ups or removal are options—but they’re a process. Choosing hidden placements (ribcage, thigh, upper arm) buys flexibility.
Q: How do I keep my lyric from fading?
A: From my experience, sun exposure is the main culprit. Use an SPF 50 sunscreen stick daily on exposed ink. Moisturize with a fragrance-free lotion like CeraVe to keep the skin healthy—hydrated skin holds pigment better.
Q: Can I work out after getting a lyric tattoo?
A: Wait at least 48–72 hours; longer for high-movement areas. Sweating on fresh ink raises infection risk and can pull scabs. If your tattoo is near a flex point (elbow, knee), give it extra rest and keep it covered as your artist recommends.
Q: Should I get a tiny lyric first to test my pain tolerance?
A: Only if you actually want a small tattoo. Size doesn’t equal pain—tiny wrist pieces sometimes hurt more than roomy thigh pieces. Consider a small, meaningful line where you’d enjoy it rather than as a test.
Q: How long does a lyric tattoo take to heal?
A: Surface healing usually happens in 2–3 weeks. Full healing takes 2–3 months. The first week is most critical—keep it clean with Dr. Bronner’s castile soap and protected with Saniderm or light ointment. Don’t pick peeling skin.
Q: Do lyrics look different on different skin tones?
A: Yes. Black and gray scripts show well across tones. Bright colors and very fine white ink can behave differently—white is subtle on deeper skin. I always look at healed examples on similar skin tones and ask the artist for those photos.
