
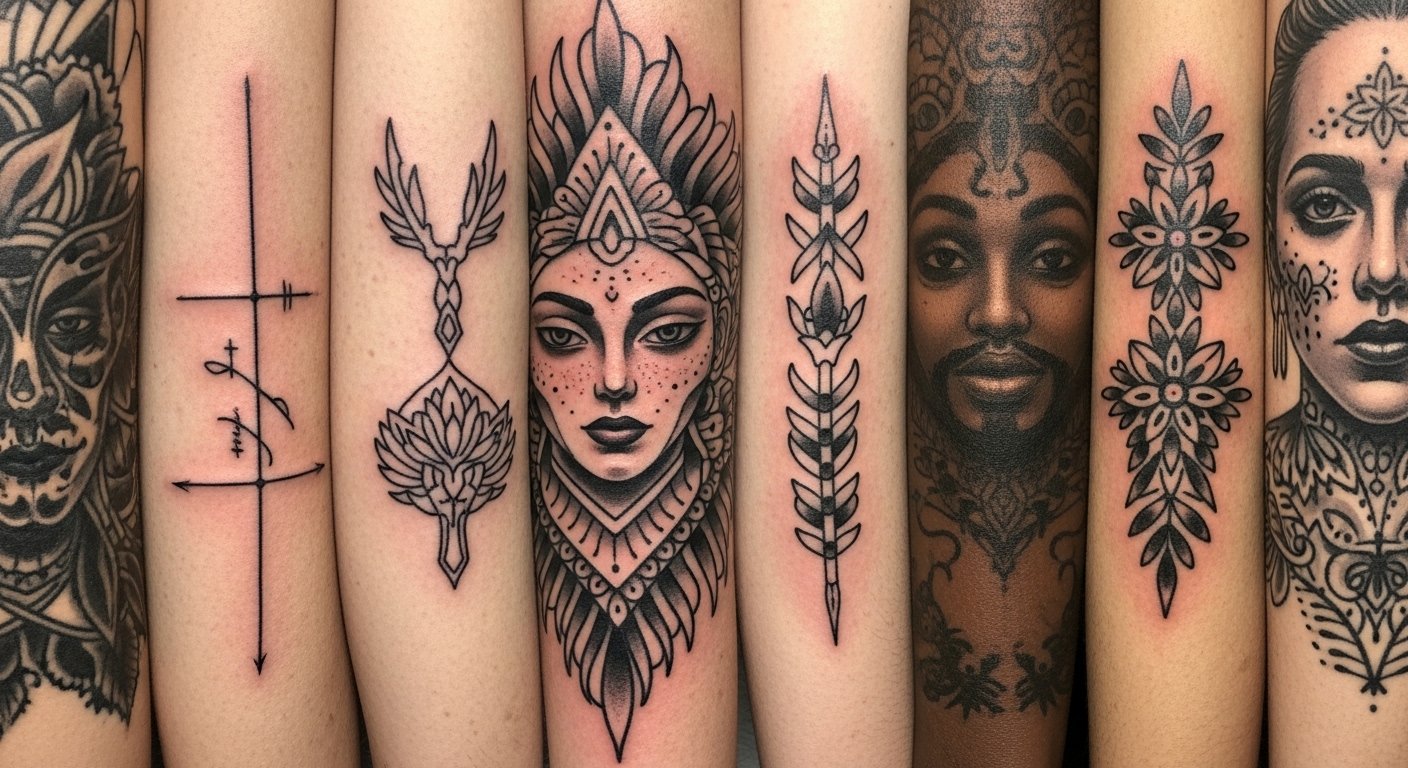
I spent months sketching birth year ideas before I realized the real challenge: picking a style that still looks intentional five, ten, or twenty years from now. Clean, simple numerals can read timeless or tired depending on line weight, placement, and how they heal. These 22 designs focus on clarity and longevity—styles artists are still recommending in 2026 and variations that actually age well.
This list focuses on minimal, fine line, and classic styles that suit visible areas and hidden spots alike. Most designs work well on forearms, ribs, collarbones, and ankles. From what I've seen in tattoo communities, simple, well-spaced numerals and thoughtful negative space hold up best healed.
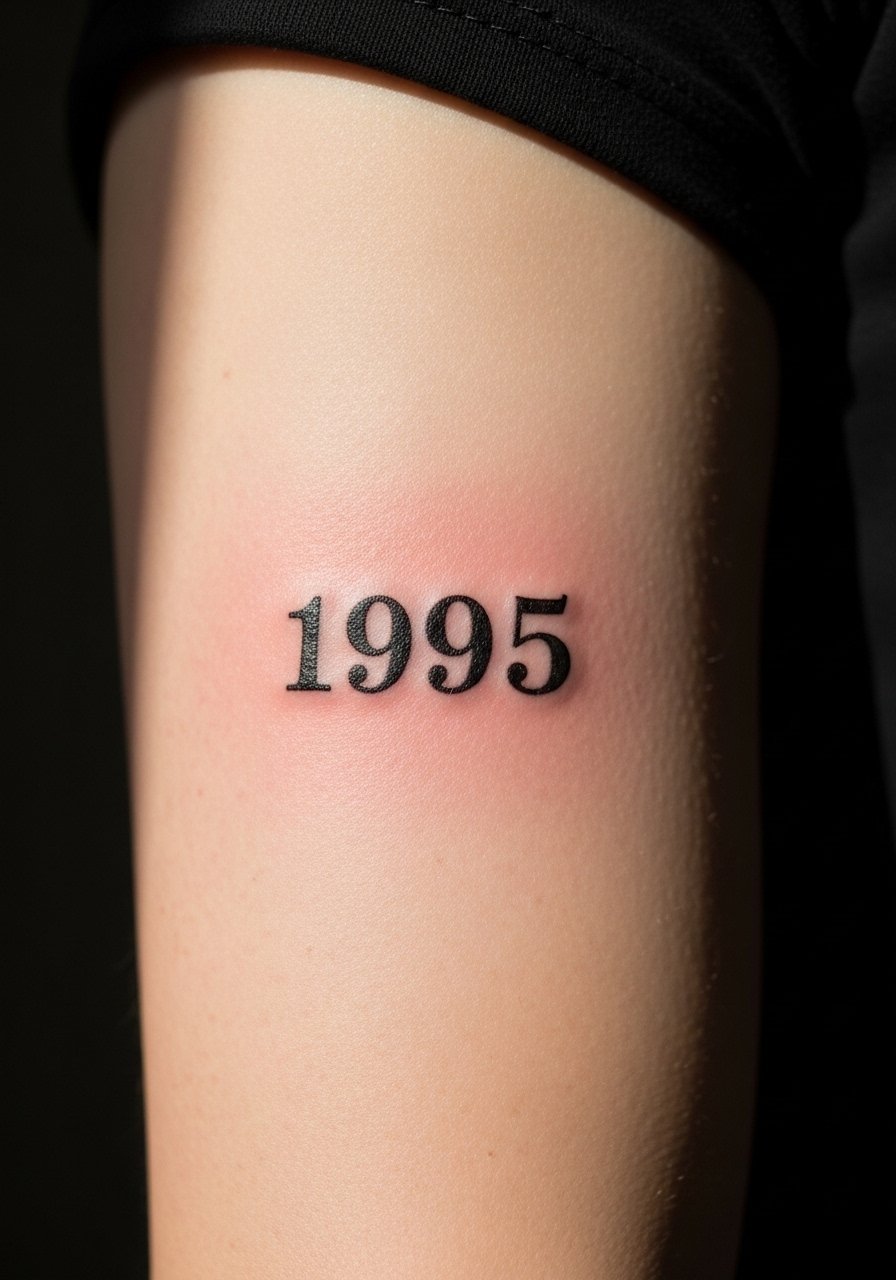
1. Fine Line Birth Year Band On Inner Forearm
Style/Technique: Fine Line / Minimalist
Pain Level: Medium (3-4/10)
Session Time: 1-2 hours
Best For: First tattoo, visible but easy to cover with sleeves
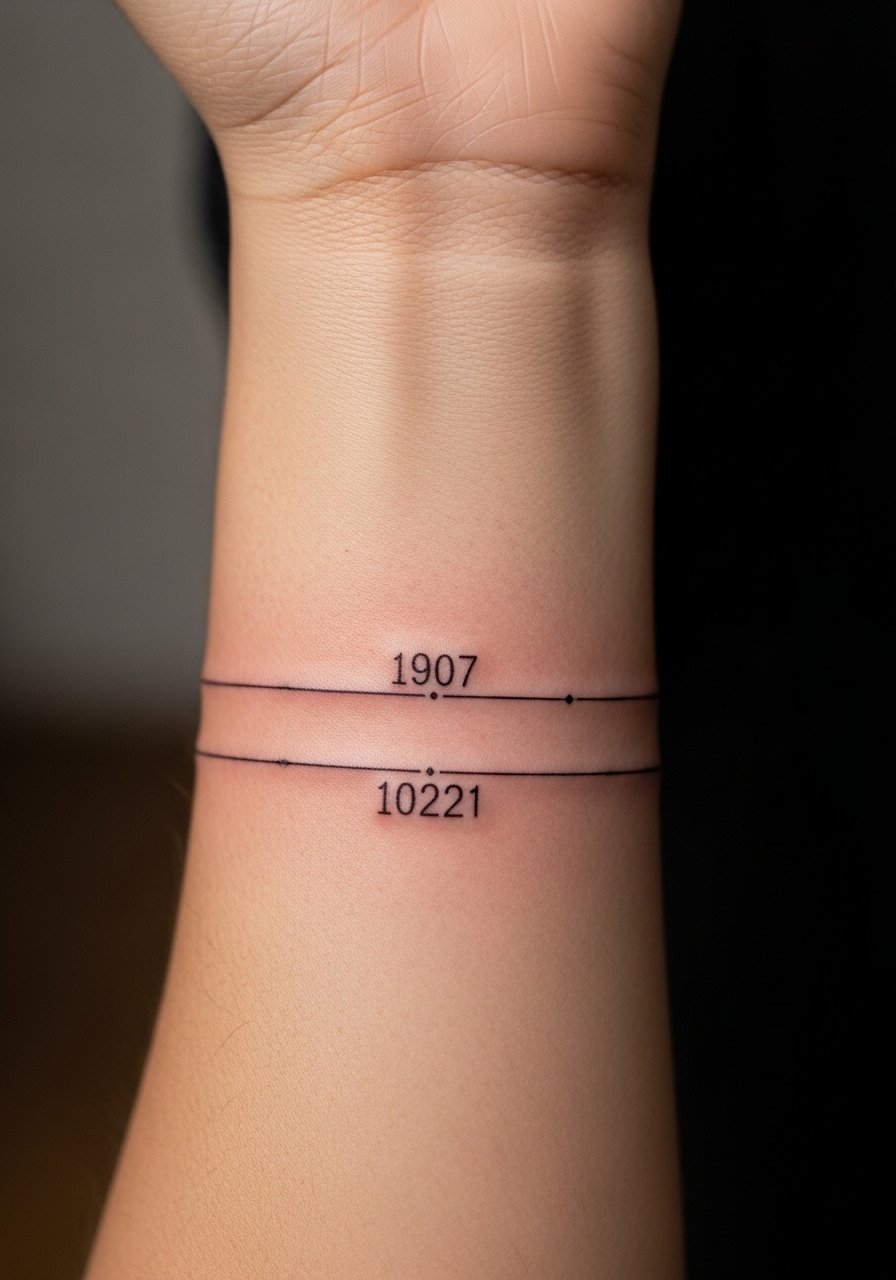
I love this approach because the forearm gives enough real estate for clean spacing. Fine line numerals read understated and modern, and when healed they sit softly against the skin. Expect mild soreness for a day or two; the inner forearm is forgiving. Healing usually looks scabby for a few days, then softens—moisturize and avoid tight sleeves while the skin flakes. Lines this thin need a steady hand; ask your artist about slightly thicker hairlines if you want longevity. From what I've seen, extremely thin single-line numerals can blur over years, so balance delicacy with a touch of boldness. Common mistake: crowding digits or choosing a too-fine typeface. Ask for healed photos of similar fine-line work during your consult.
2. Minimalist Stacked Numerals On Ribcage
Style/Technique: Minimalist / Single-Needle
Pain Level: High (7-8/10)
Session Time: 1-3 hours
Best For: Private placement, meaningful piece
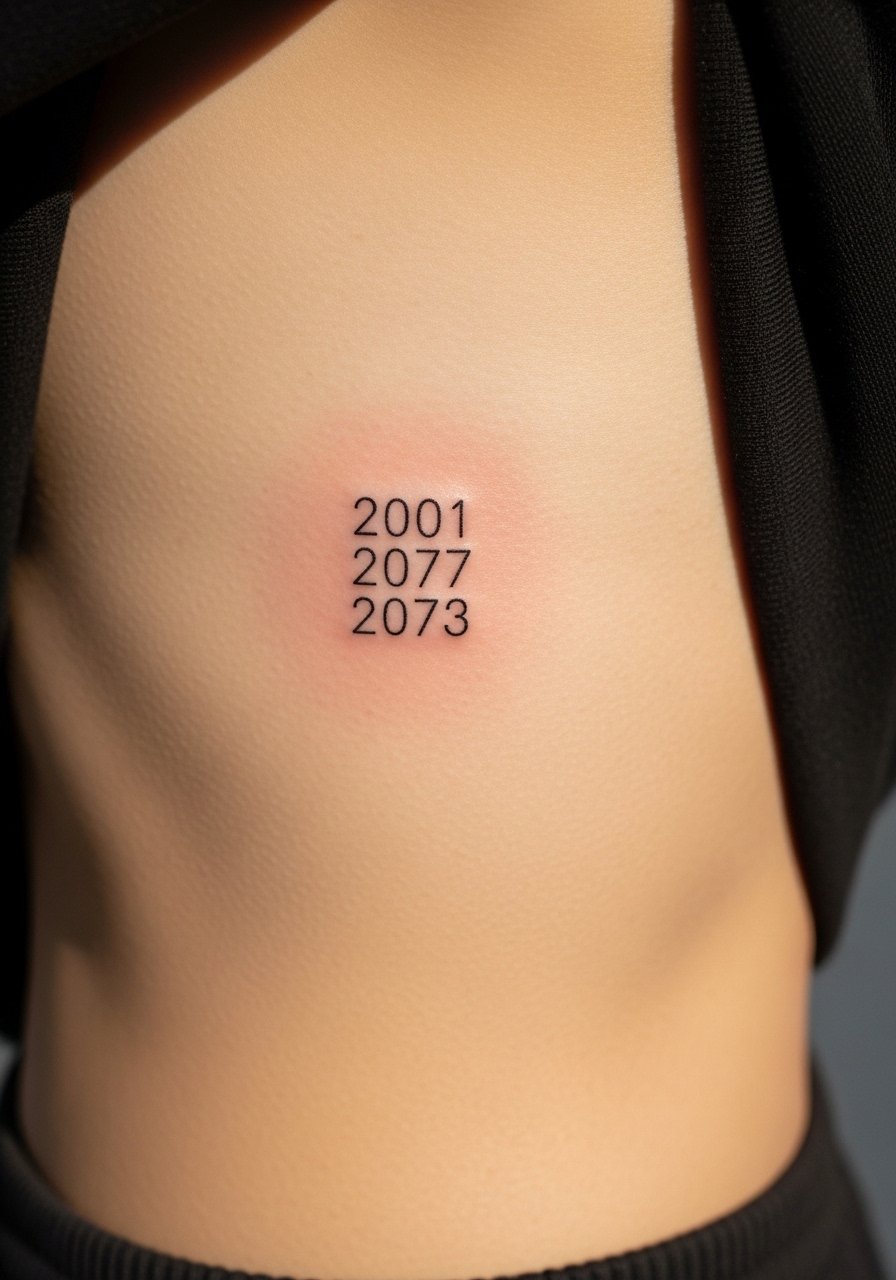
A vertical stack along the ribcage reads intimate and discreet. This placement feels timeless because it’s personal—easy to hide under clothing. Pain is real on the ribs; expect sharp, biting sensations and brief numbing between breaks. Healing takes longer because the skin stretches with breathing; keep movement gentle for the first week. Minimalist numerals here should have slightly more spacing than wrist work to avoid blurring. From my experience, ink settles differently across the ribs—ask to see healed examples on similar skin. A typical mistake is picking a font that’s too ornate; rib skin favors clean, blocky numbers or simple serif that hold up. Plan for one session and touch-ups if lines soften after healing.
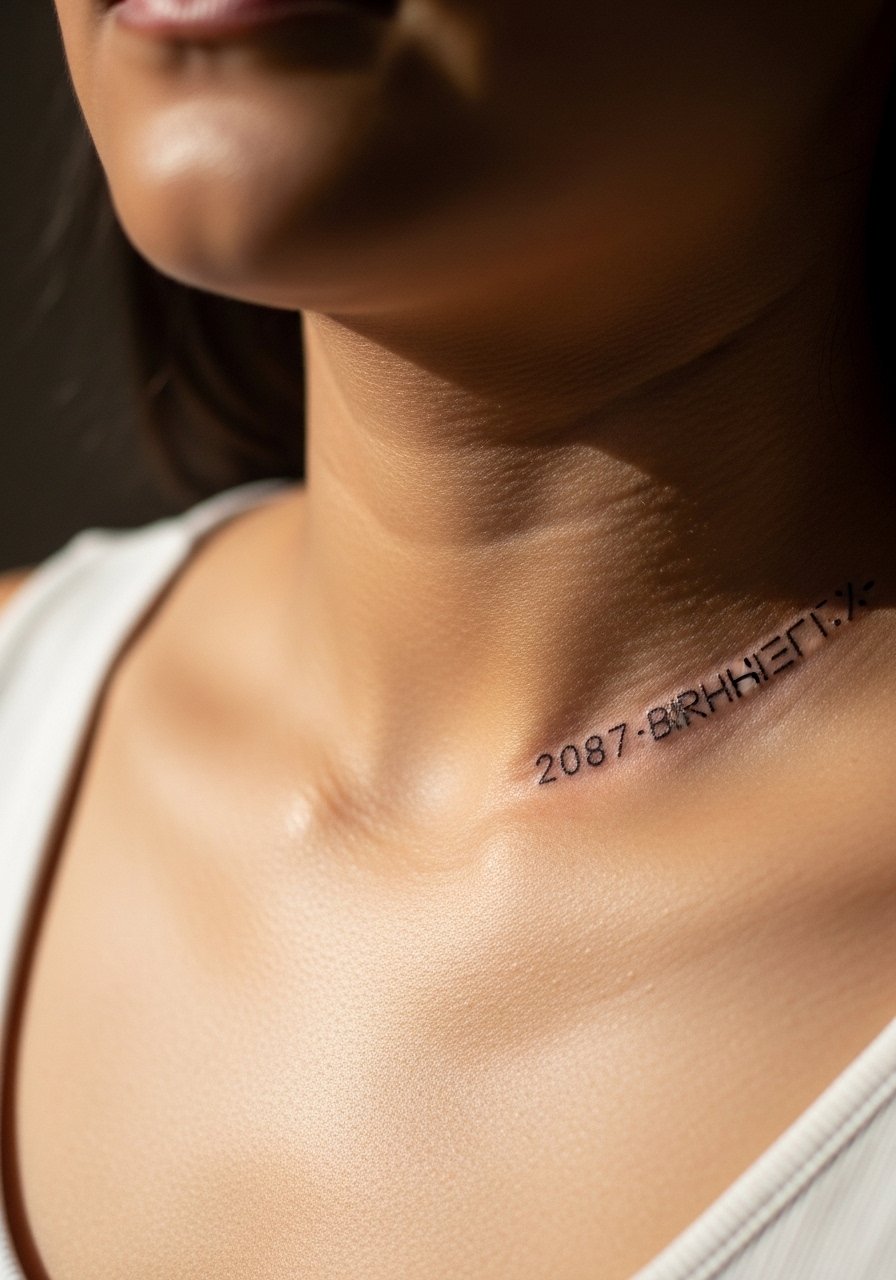
3. Roman Numeral Year On Collarbone
Style/Technique: Classic / Serif Roman
Pain Level: Medium (4-5/10)
Session Time: 1-2 hours
Best For: Visible, elegant placement
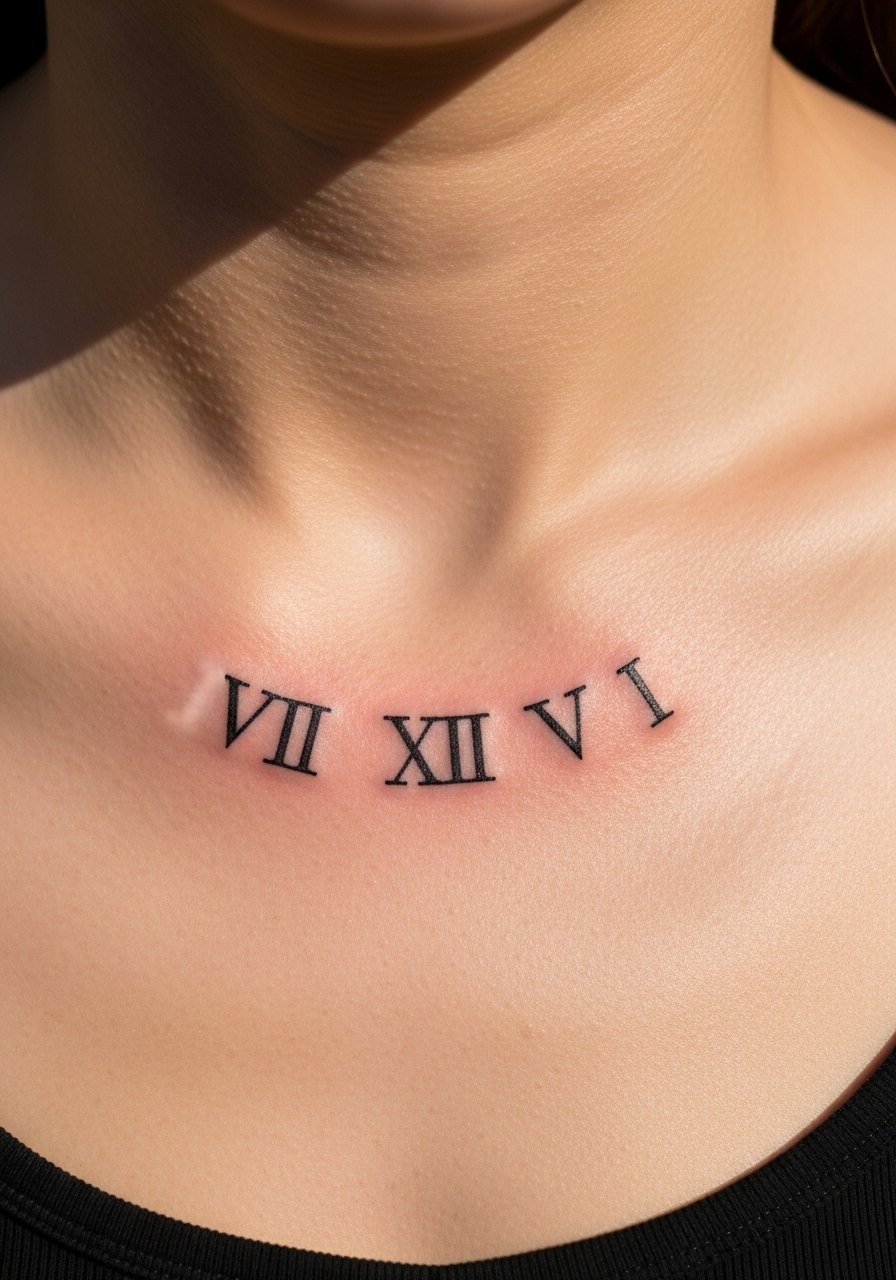
Roman numerals feel intentionally timeless—there’s a gravity to them that plain digits sometimes lack. The collarbone offers a flattering, visible canvas that pairs well with necklaces. Expect pinching over bone; it’s not unbearable but more intense than fleshy areas. Healing is straightforward but keep clothing from rubbing the area. I recommend medium-weight lines rather than ultra-thin to avoid future softening. Artists who do fine lettering or script handle Roman numerals well—ask for line-weight options. A common mistake is placing numerals too close to the shoulder or neck curvature where they distort; put the design on a flat plane of skin for consistent healing and readability.
4. Micro-Realism Pocket Watch With Year On Chest
Style/Technique: Micro-Realism / Micro-Detail
Pain Level: Medium-High (5-7/10)
Session Time: 2-4 hours
Best For: Statement piece with detail
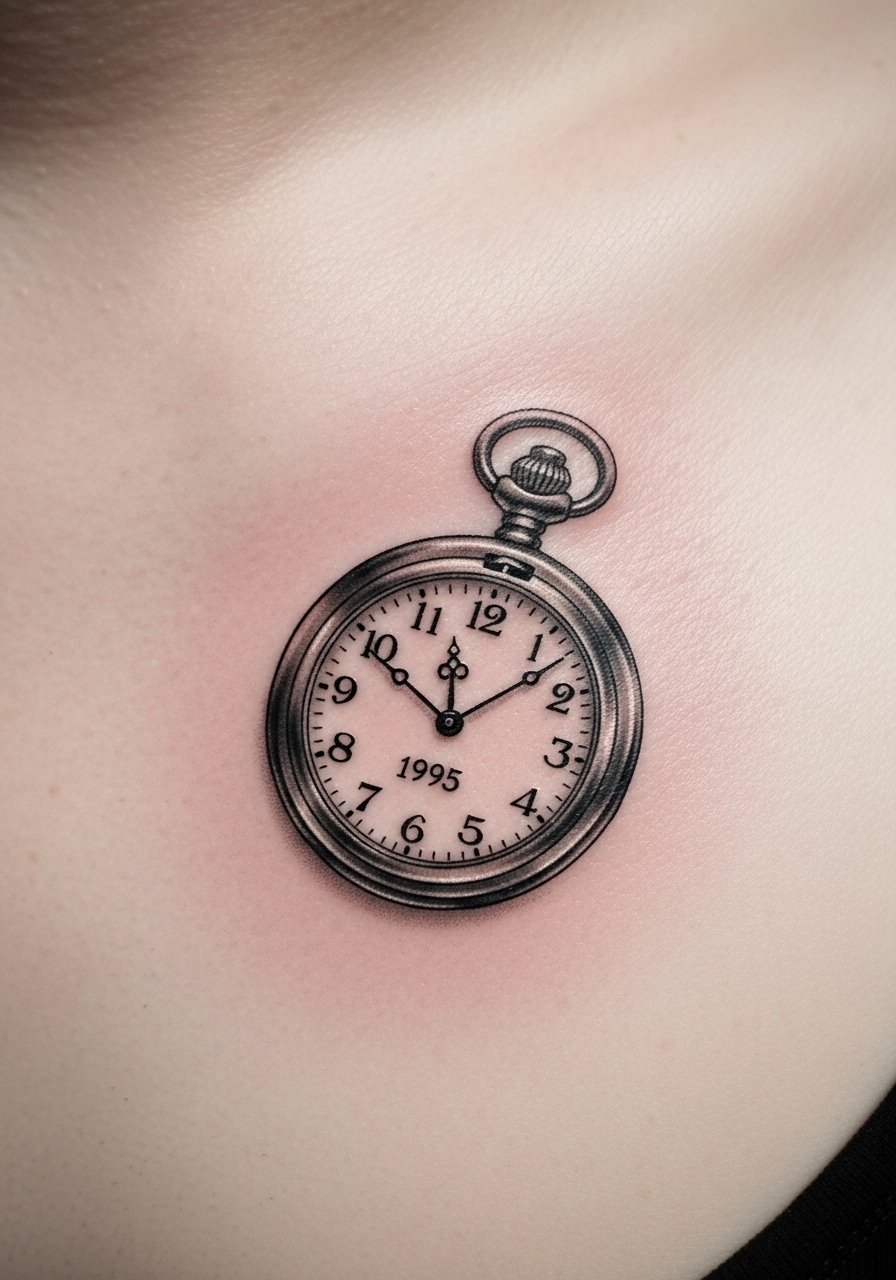
This is a small narrative piece—your birth year sits inside a tiny pocket watch or compass face. Micro-realism gives depth without loud color and reads like a keepsake. Chest skin tolerates moderate sessions, but shading near bone can sting. Healed detail depends on dot density and the artist’s precision; I recommend someone experienced in tiny realism. Aftercare should be meticulous—moisturize and avoid chest compression from tight clothes. Over time, micro-shading can soften; plan for a touch-up after a year if you want lines to stay crisp. Don’t skimp on artist selection here; ask for healed micro-realism photos and inquire about needle grouping for fine detail.
5. Bold Traditional Numerals With Banner On Upper Arm
Style/Technique: Traditional / American Traditional
Pain Level: Low-Medium (2-3/10)
Session Time: 1-3 hours
Best For: Durable, classic look
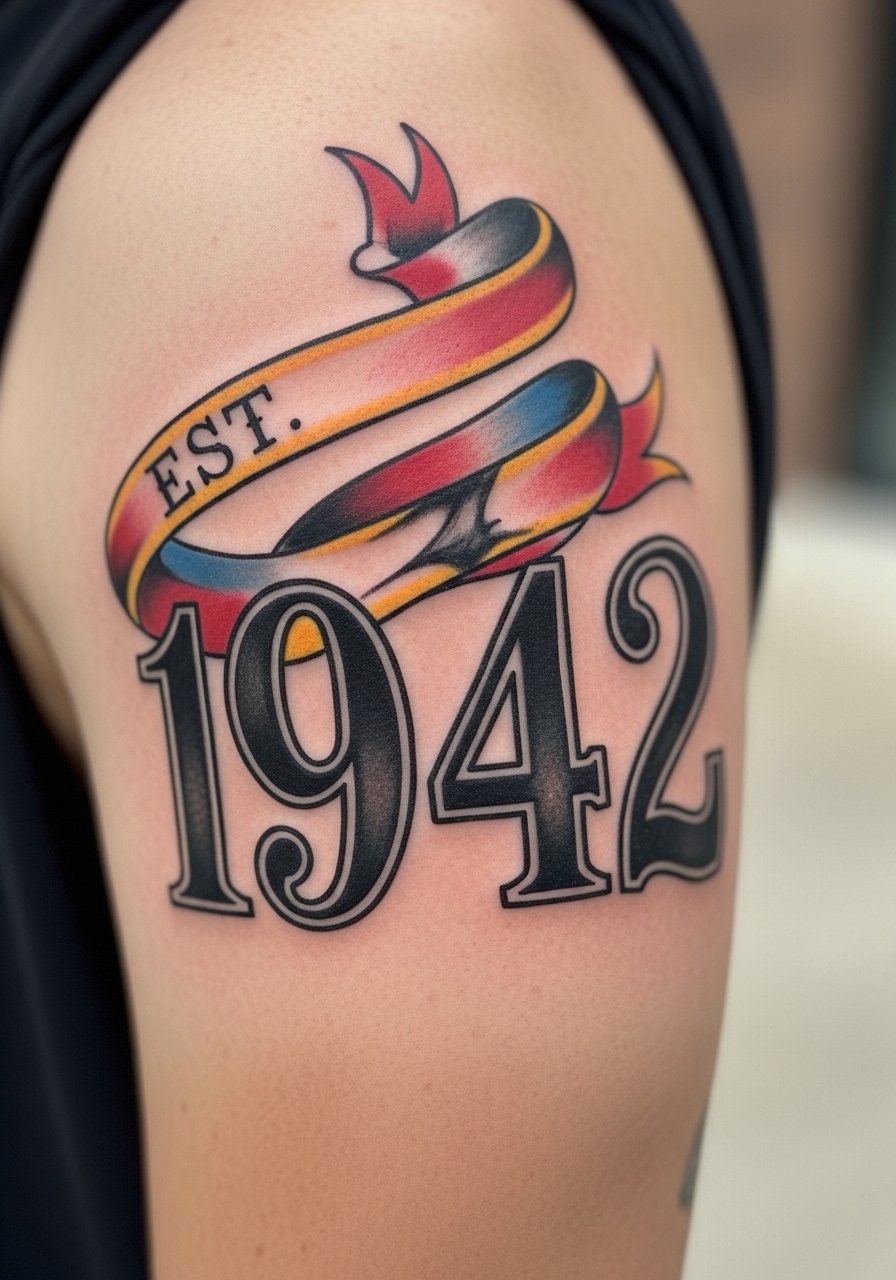
Traditional numerals in a banner give a classic, graphic look that ages predictably. Thick outlines and saturated black help the year stay legible over decades. The upper arm is one of the least painful spots, and traditional shading tends to hold up well. Expect a solid session with bold lines that look good fresh and heal into a readable, slightly softened piece. Common mistake: too small a banner or thin script—traditional work needs room to breathe. If you want color, stick to tried palettes—reds and greens fade slower than pastels. Ask for clear references of healed traditional numeral banners to see long-term appearance.
6. Blackwork Negative-Space Year On Back Of Neck
Style/Technique: Blackwork / Negative Space
Pain Level: Medium (4-5/10)
Session Time: 1-2 hours
Best For: Bold, hidden/peeking placement
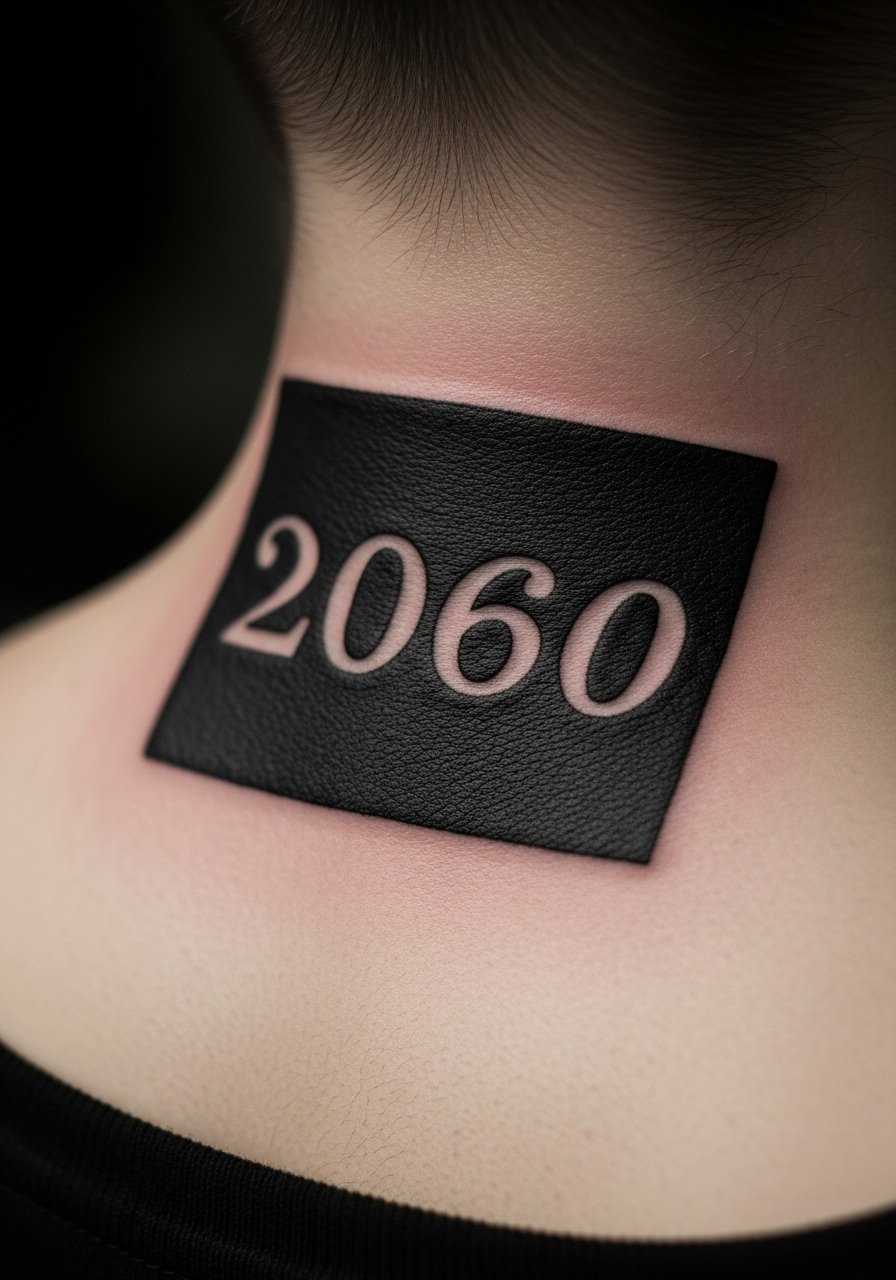
I like negative-space numbers on the nape because the contrast is striking without relying on thin lines. A solid black rectangle or shape with the year left un-inked looks modern and intentional. The nape can be tingly during tattooing but heals cleanly if you avoid irritation from collars. Blackwork ages well when saturation is even—ask your artist about solid fill technique. A common misstep is sloppy edges around the negative numerals; make sure your artist has experience with crisp negative-space work. This style reads timeless because it's graphic and simple; touch-ups are rare if initial saturation is strong.
7. Tiny Hidden Year Behind Ear
Style/Technique: Micro / Minimalist
Pain Level: Low-Medium (3-5/10)
Session Time: 20-40 minutes
Best For: Subtle, intimate placement
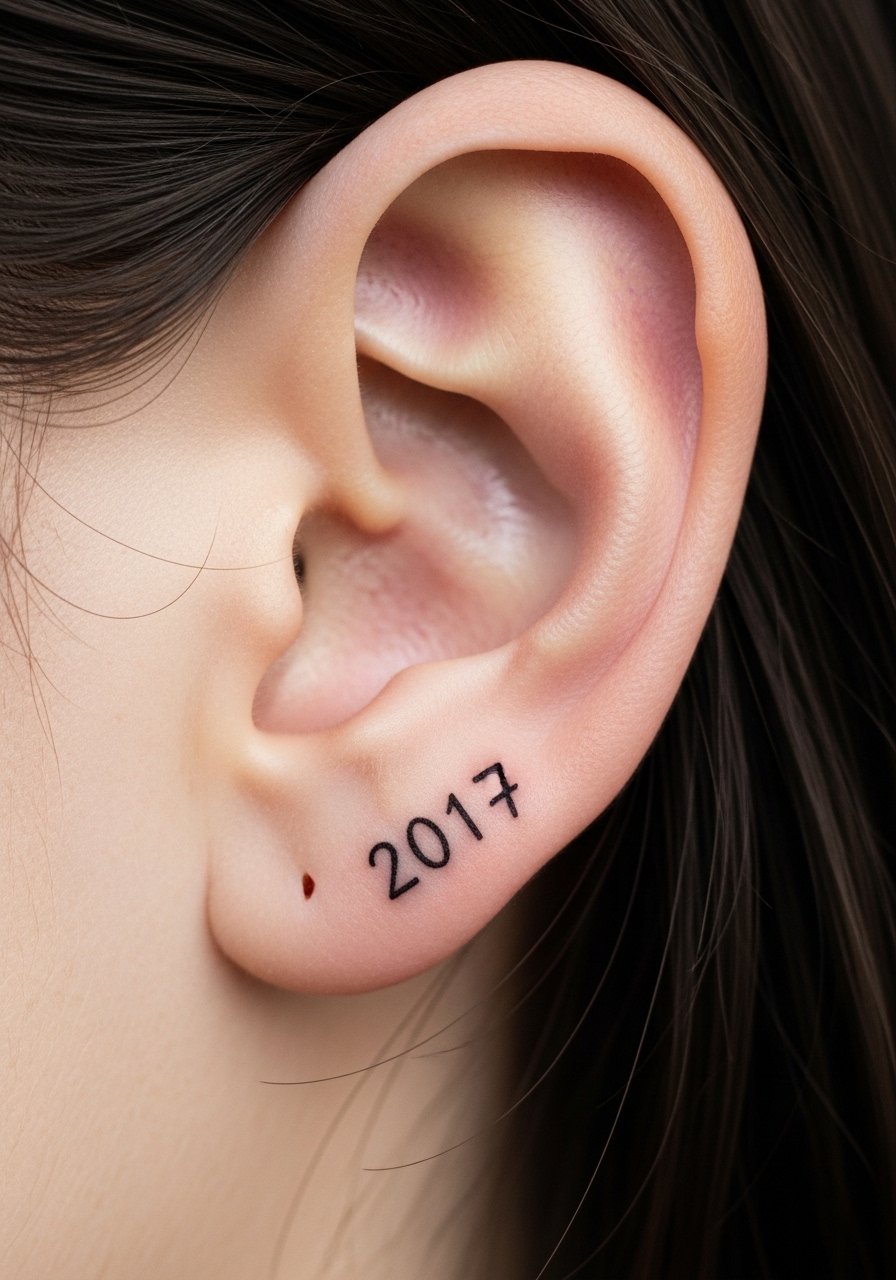
Behind-the-ear year tattoos are my go-to recommendation for people who want something private but photogenic in portraits. Sessions are quick and pain is short-lived—sharp, like a pinch. Because the area is small, choose simple digits or tiny Roman numerals rather than ornate fonts. Healing is tidy if you avoid sleeping on that side and keep hair away while the skin seals. From what I've observed, tiny ink here can soften more quickly than forearm work, so thicker single-stroke numerals are a safer bet than ultra-fine ones. Avoid elaborate shading—this spot works best with clarity and restraint.
8. Barcode Birth Year On Side Forearm
Style/Technique: Graphic / Barcode-Style
Pain Level: Medium (4/5)
Session Time: 1-2 hours
Best For: Modern, edgy placement
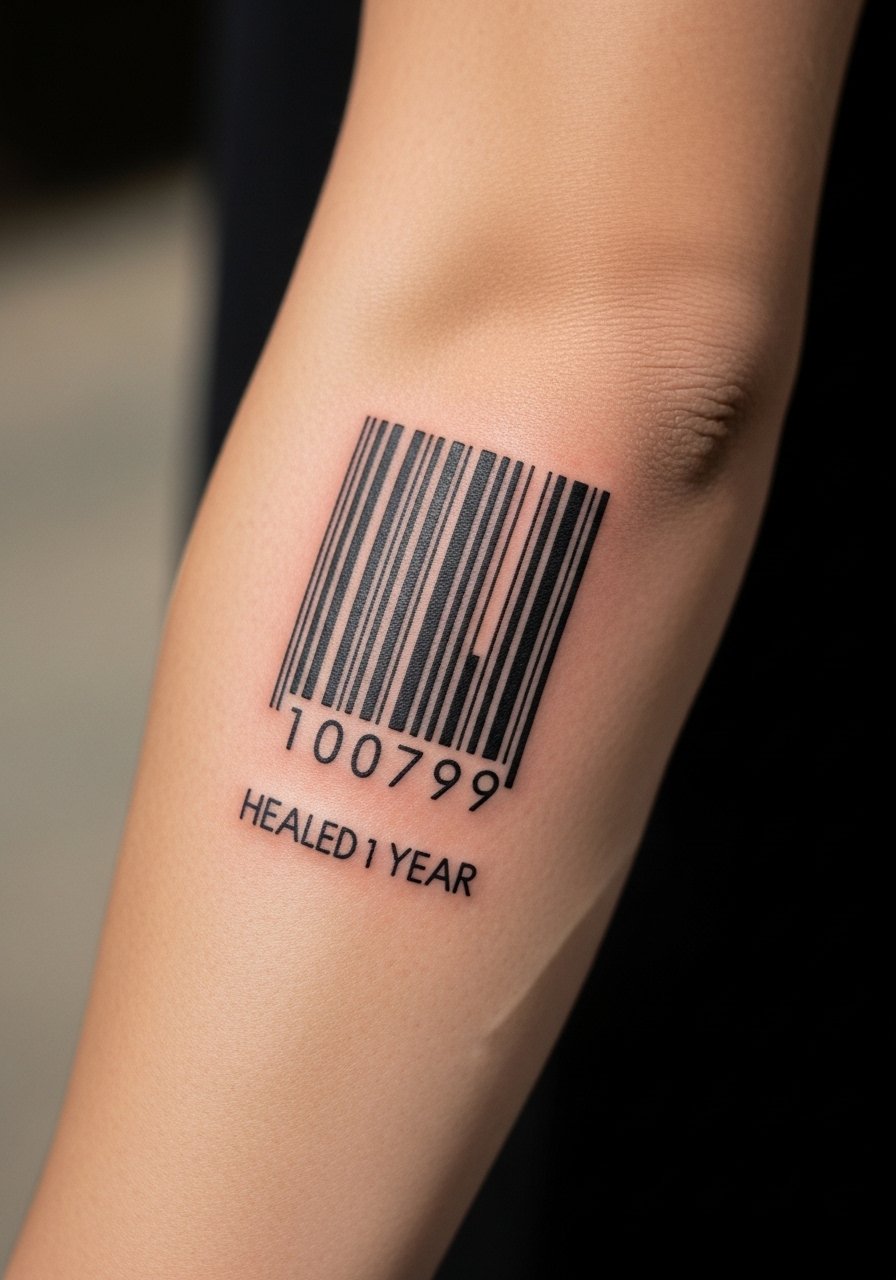
Turning a birth year into barcode bars is a fresh take that reads symbolic and minimal. The barcode motif benefits from strong, clean blacks; poor line work ruins the effect. Forearm placement keeps it visible and flat for crisp lines. Pain is moderate, and healing is typically smooth if you avoid tight clothing rubbing the area. Keep in mind barcodes rely on straight edges—ask your artist for a ruler guide and healed references. A common mistake is trying to include too many tiny bars or details; simpler is stronger. Over time, slight softening can blur the thinnest bars, so ask for slightly thicker weights for longevity.
9. Geometric Year In Circle On Sternum
Style/Technique: Geometric / Minimalist
Pain Level: High (6-8/10)
Session Time: 1-3 hours
Best For: Centered, symmetrical statement
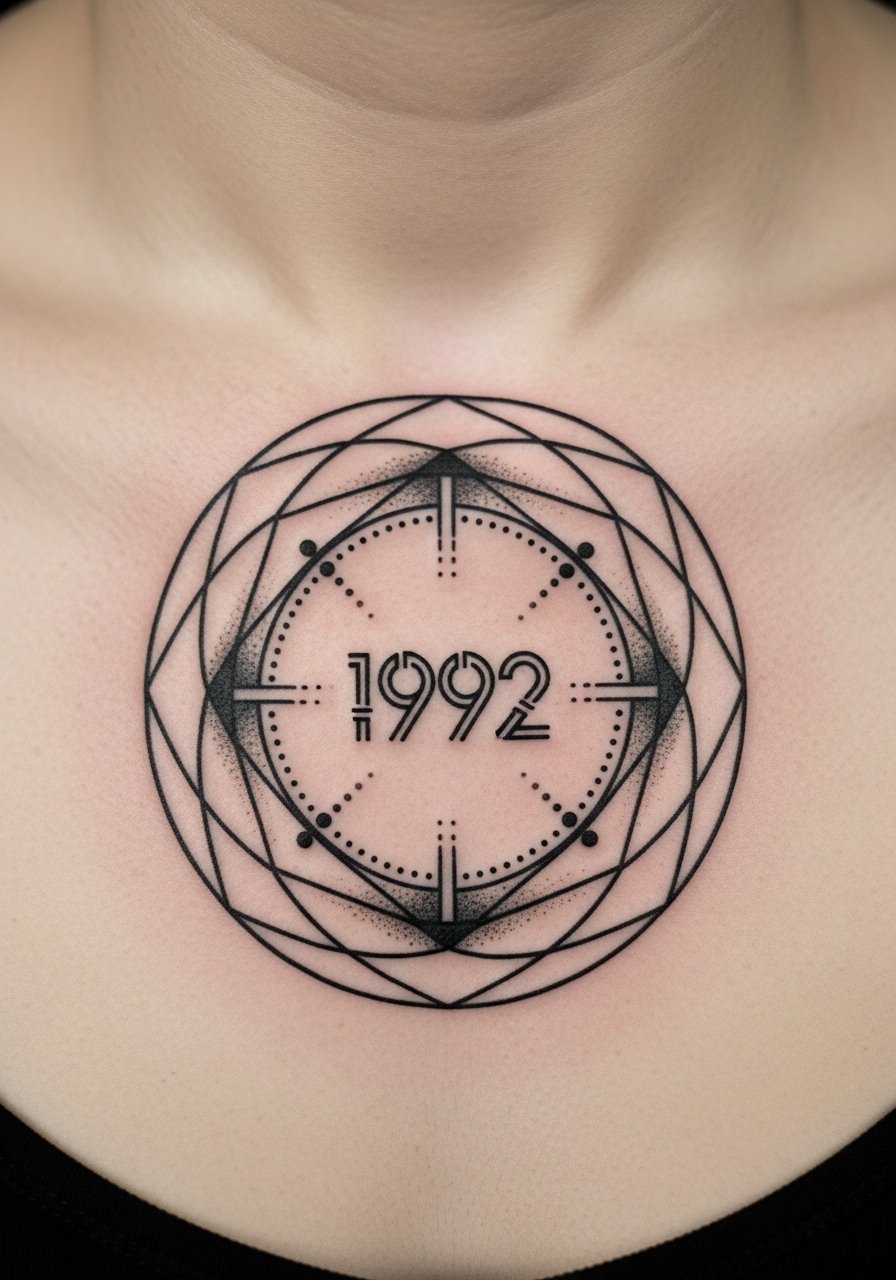
The sternum is dramatic—placing a circular geometric frame with the year inside makes the piece feel like a symbol rather than just digits. Pain is higher near the breastbone, and breathing can make sessions tricky. Healing requires care with clothing and movement, but the result is a highly personal focal point. Geometric elements help disguise small fading because the eye reads the whole shape, not just digits. Avoid overly intricate numerals that clutter the circle; bold, simple numbers read best. From my experience, dotwork accents help texture without risking heavy blur. Ask for healed geometric examples from your artist.
10. Delicate Script Year On Inner Wrist
Style/Technique: Script / Hand-Lettered
Pain Level: Low (2-4/10)
Session Time: 30-60 minutes
Best For: Everyday visibility, tasteful
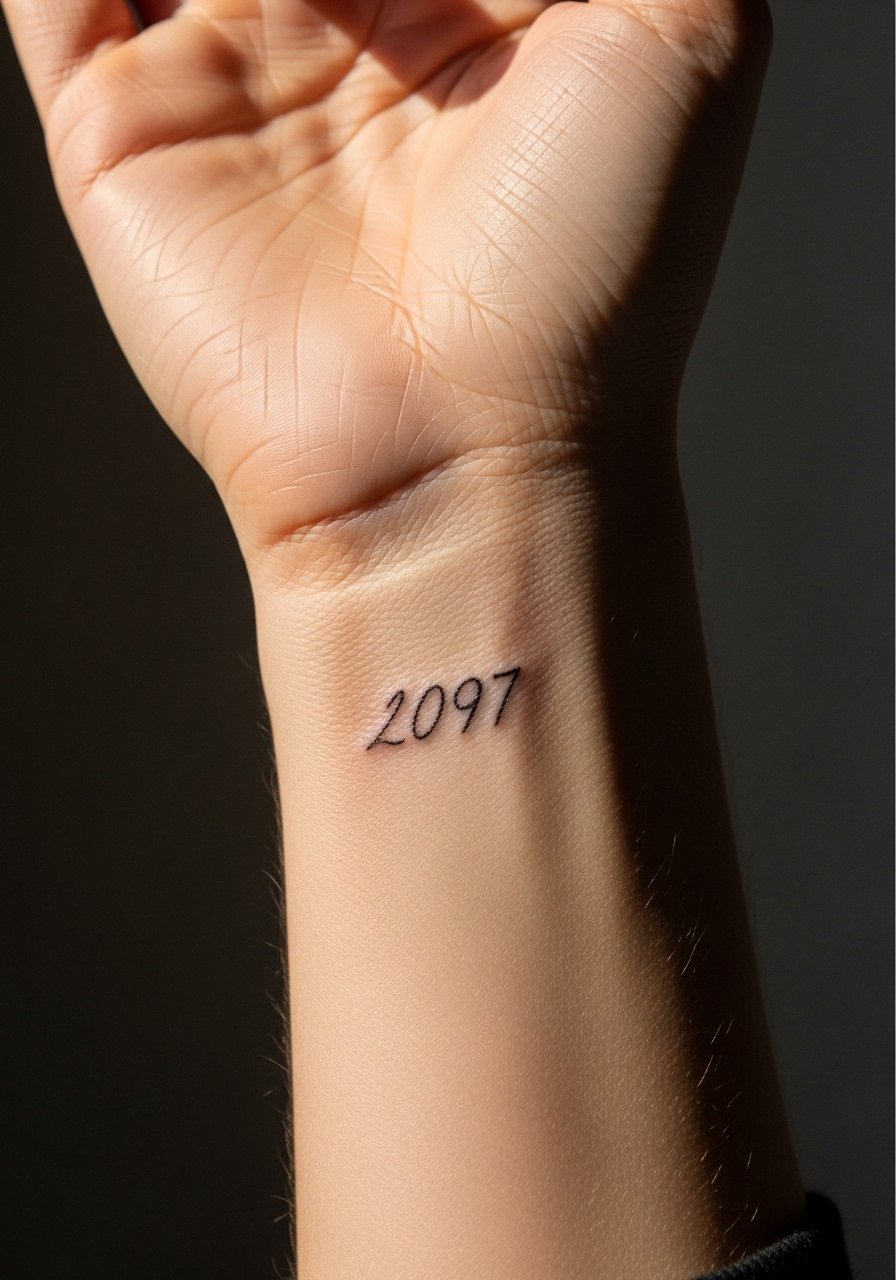
An inner-wrist year in delicate script reads personal and wearable. It's visible during daily life and photographs well. Expect light soreness that subsides quickly; wrist skin is thin but manageable. Healing needs attention because wrist movement and washing can irritate fresh ink—gentle cleaning and moisturize are key. Script styles can blur if letters are too close or flourished; choose a clean hand-lettered font or a designer who does lettering well. I've noticed simple, slightly bolder script holds better over time than tiny, ornate flourishes. Ask for spacing tests and see healed wrist scripts from your artist.
11. Single-Line Continuous Year On Finger Band
Style/Technique: Monoline / Continuous-Line
Pain Level: Medium (4-6/10)
Session Time: 30-60 minutes
Best For: Symbolic band, subtle visibility
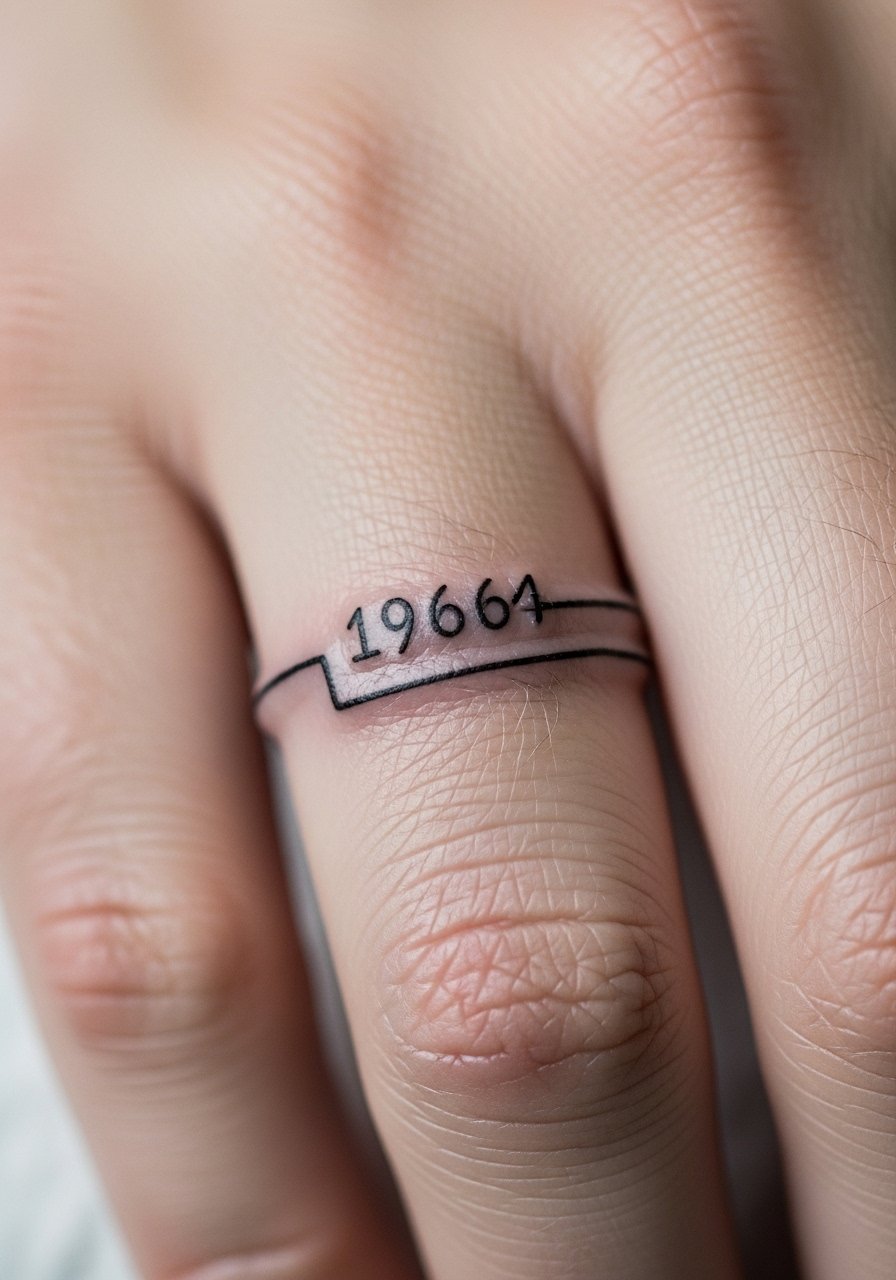
A continuous single-line year wrapped around a finger reads like a ring—personal and discreet. Fingers are tricky: they heal quickly but fade faster due to frequent washing and friction. Pain is sharper but brief. Expect touch-ups down the line; finger tattoos commonly need refreshing. Keep the line weight a touch bolder than you think to account for eventual softening. A common error is placing too many tiny details on a finger; simple numerals or roman formats work best. Ask your artist if they offer a "fade-friendly" line width for fingers based on their experience.
12. Dotwork/Braille Birth Year On Ankle
Style/Technique: Dotwork / Braille-Inspired
Pain Level: Low-Medium (3-5/10)
Session Time: 30-90 minutes
Best For: Unique, tactile-looking minimal piece
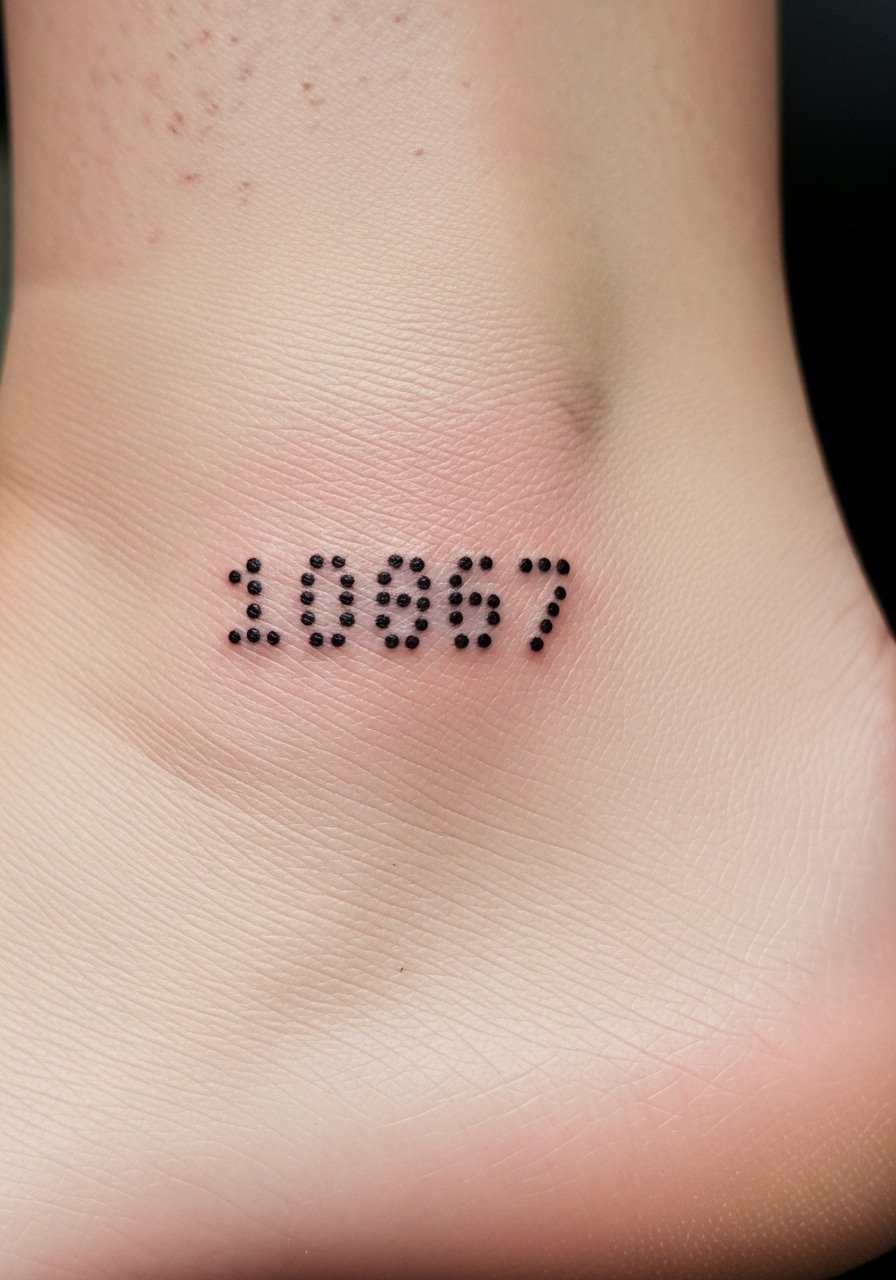
Braille-style dot tattoos convert your birth year into raised-looking dots that read abstractly. On the ankle it's subtle and modern. Dotwork can be forgiving—small dots age into a textured look rather than smeared lines. Pain is moderate on the ankle but not extreme. Healing is usually smooth if you avoid tight socks and boots while the dots knit. One mistake is placing dots too close; give each point breathing space. I’ve seen artists who specialize in dotwork achieve beautiful healed texture—ask to see healed dot pieces rather than fresh photos, since fresh dots look very different from healed results.
13. Binary Birth Year Row On Inner Arm
Style/Technique: Minimalist / Binary Code
Pain Level: Low (2-4/10)
Session Time: 30-60 minutes
Best For: Techy, subtle conversation starter
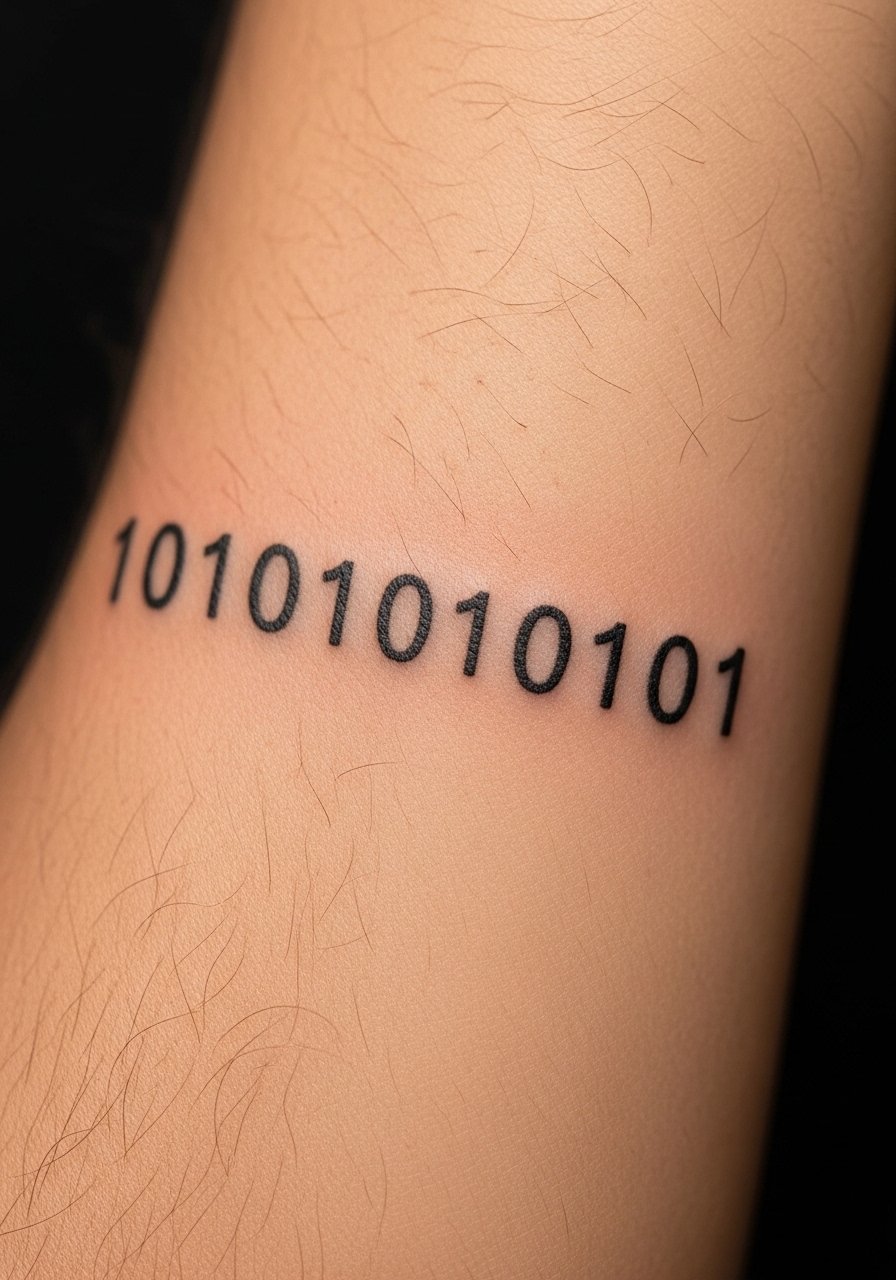
Encoding your birth year in binary is a low-key, nerdy approach that reads like a texture until someone knows to decode it. The inner arm keeps lines straight and flat for clean work. Pain is minimal, and the area heals reliably. Keep spacing even—poorly aligned bits make the piece look messy when healed. Binary ages well because the pattern relies on contrast, not delicate lines. Avoid tiny binary clusters that blur into dots; maintain a comfortable scale. Ask your artist to stencil the alignment on your arm to check spacing before inking.
14. Soundwave Year On Calf (Spoken Year Waveform)
Style/Technique: Graphic / Soundwave
Pain Level: Medium (4-5/10)
Session Time: 1-2 hours
Best For: Personal, modern visual
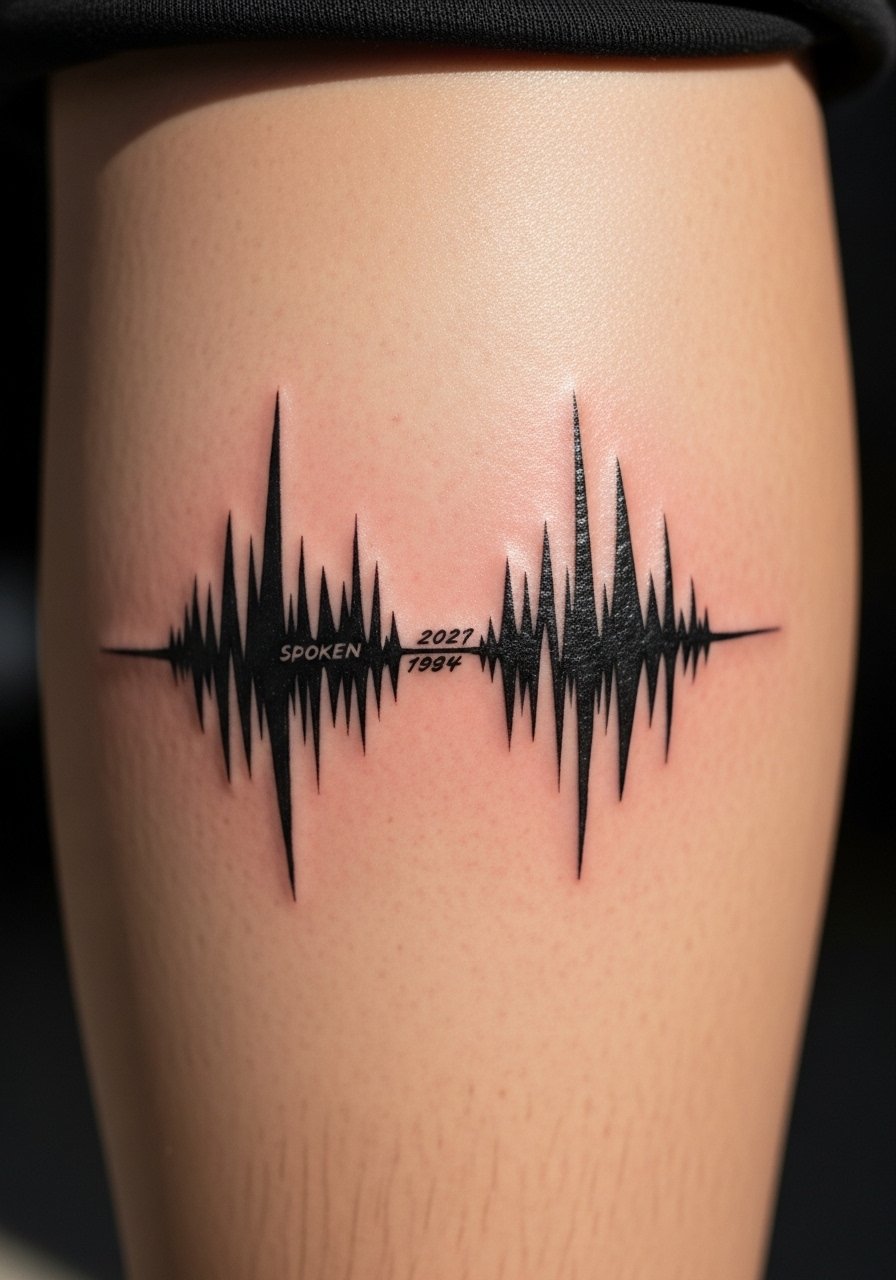
Turning a spoken "one nine eight four" into a soundwave is poetic and unexpected. The calf works well for horizontal waveform length and is less painful than ribs. Waveforms are graphic, so crisp lines matter; healed contrast depends on initial saturation. This reads timeless because it’s personal and abstract rather than a plain date. Avoid overly thin waveform spikes; they can fade into skin texture. Ask your artist about vector-based stencils to keep the waveform proportionate. From what I've seen, soundwave tattoos still look strong healed when done with solid black lines and modest detail.
15. Neo-Traditional Year Framed With Flowers On Thigh
Style/Technique: Neo-Traditional / Illustrated
Pain Level: Medium (4-6/10)
Session Time: 2-4 hours
Best For: Feminine statement, larger canvas

Pairing the year with neo-traditional florals turns digits into a keepsake. The thigh offers space for color, shading, and a composition that breathes. Pain is moderate and sessions are comfortable because the thigh is fleshy. Healed colors may mellow, so expect the piece to soften in tone over time—black outlines keep things readable. A common mistake is overcrowding the numerals; let the date sit clearly within the florals. I suggest asking artists who specialize in neo-traditional florals for healed examples to ensure color placement and saturation age well.
16. Ambigram Birth Year On Upper Back
Style/Technique: Ambigram / Typographic
Pain Level: Medium (4-6/10)
Session Time: 1-3 hours
Best For: Clever, hidden symmetry
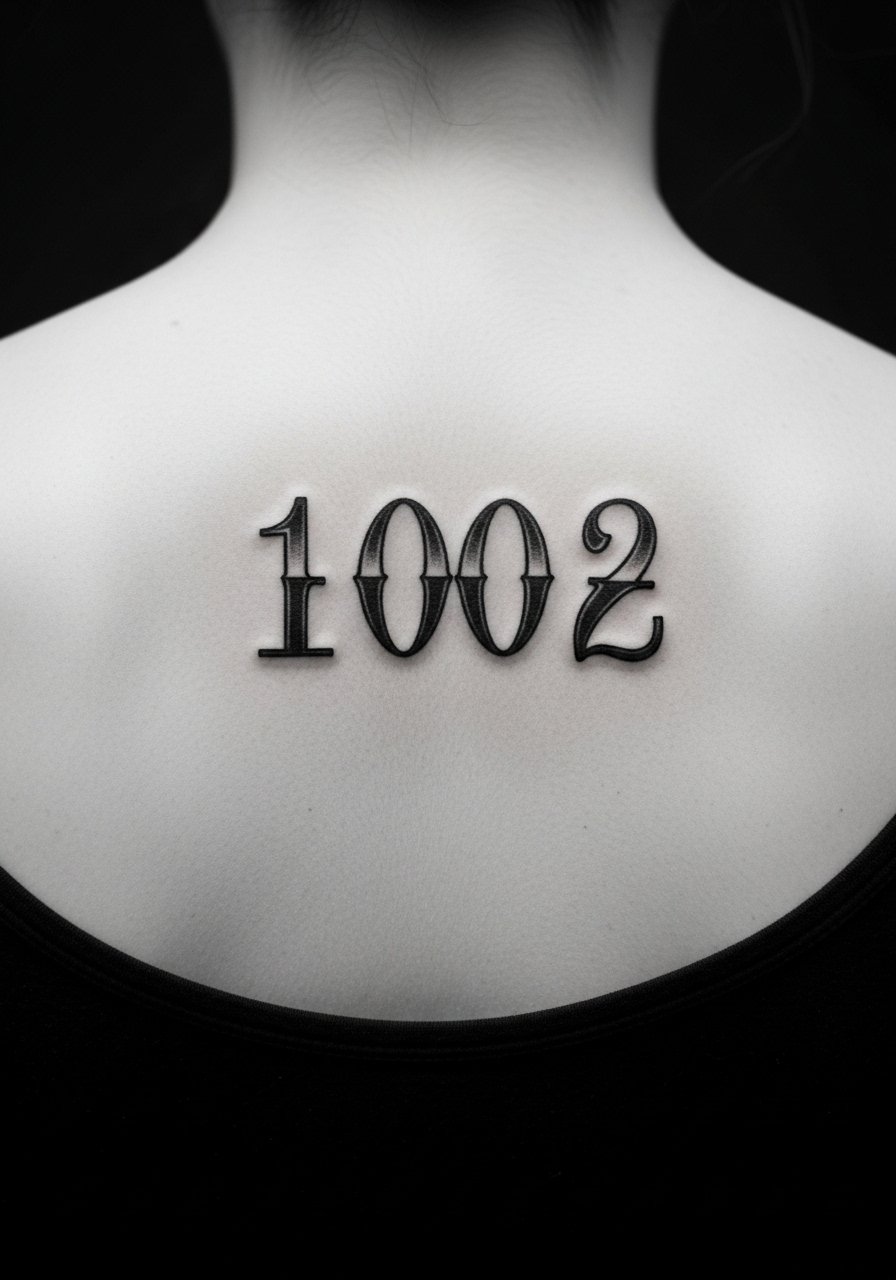
An ambigram is a typographic trick that reads the same (or a meaningful variant) when flipped. For a birth year, that can create a clever mirrored effect across the upper back. Upper-back skin is forgiving and sessions are moderate in pain. Ambigrams demand a designer with lettering chops—don’t use a generic flash. Healed clarity depends on precise spacing and balanced strokes; small inconsistencies ruin the flip. From my experience, ambigrams look best slightly larger so the mirrored shapes remain legible. Bring multiple sketches to your consult and ask the artist to print the flip version to preview on your skin.
17. Typewriter-Style Year On Inner Bicep
Style/Technique: Vintage / Typewriter Font
Pain Level: Low-Medium (3-4/10)
Session Time: 30-90 minutes
Best For: Retro vibe, readable placement
A typewriter font gives a nostalgic, document-like feel. Inner bicep placement keeps it private but accessible when you want to show it. Pain is manageable and healing is straightforward if you avoid heavy arm movement initially. Typewriter numerals should have a bit of spacing and moderate line weight to handle natural skin texture. I've noticed many people like the slightly imperfect stamped look—ask for a stencil that mirrors this if you prefer a crisp or a worn appearance. Avoid tiny typewriter fonts; they can blur into a single smudge over time.
18. Morse Code Birth Year Along Collarbone
Style/Technique: Minimalist / Morse Code Dots & Dashes
Pain Level: Medium (4-5/10)
Session Time: 30-60 minutes
Best For: Subtle, symbolic placement
Morse code is a discreet way to encode your birth year—dots and dashes form a rhythmic visual along the collarbone. The area is great for horizontal lines and pairs well with necklaces. Pain is moderate and healing is simple if you avoid chain abrasion. Morse tends to age well because each element is an isolated mark, so slight softening doesn't distort meaning. Common mistake: placing dots too close together; give each symbol space. Ask your artist to show alignment on your collarbone before inking to ensure the sequence reads smoothly with body contours.
19. Mountain Silhouette Year On Ankle
Style/Technique: Minimal / Silhouette Integration
Pain Level: Low-Medium (3-4/10)
Session Time: 30-90 minutes
Best For: Outdoor lovers, subtle placement
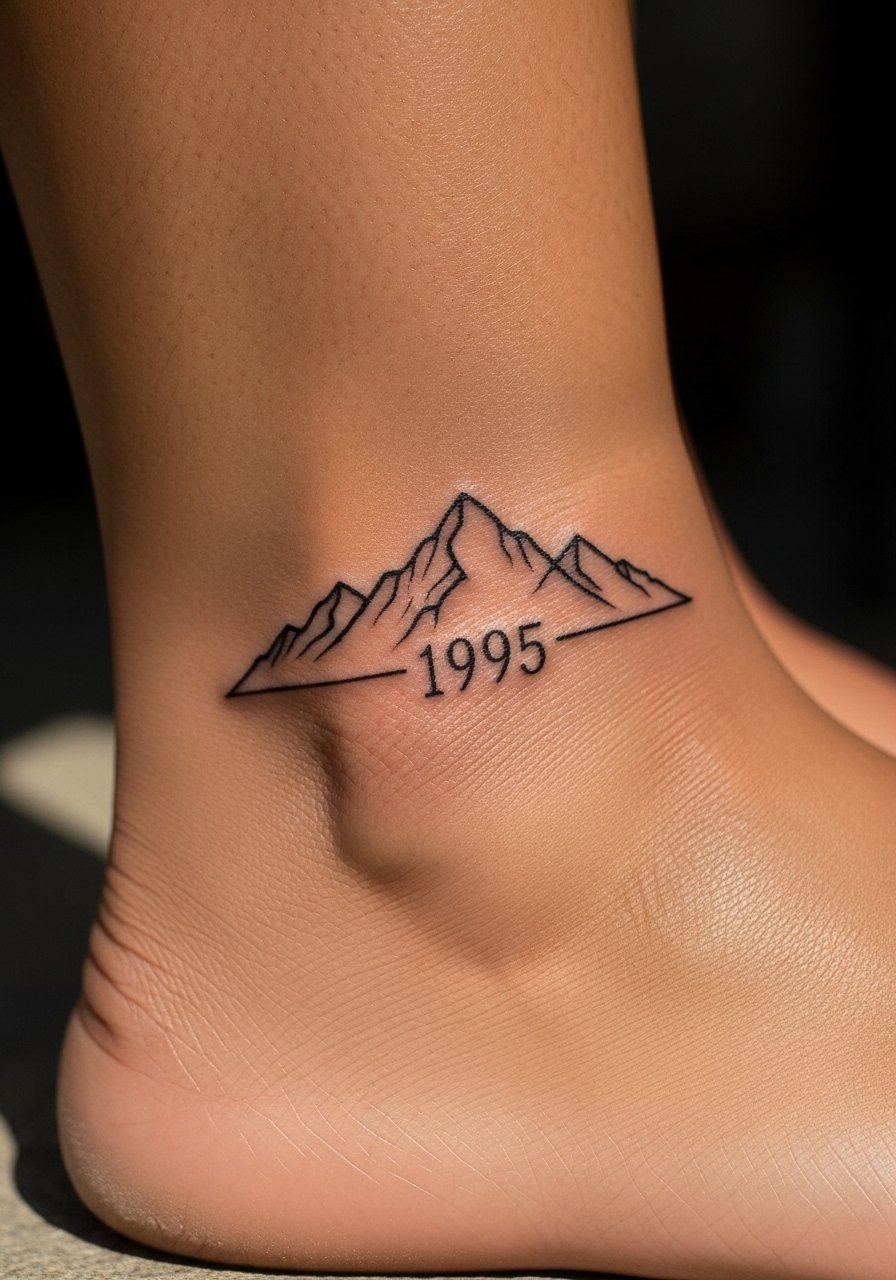
If your birth year ties to a place or season, integrating numerals into a tiny mountain silhouette creates a layered meaning. The ankle gives a compact horizontal canvas; pain is manageable. The design ages well because the silhouette is a bold shape rather than tiny lines. Avoid tiny numerals tucked into busy detail—keep integration clean so the year remains legible. I've seen this style look beautifully intentional when the numerals are part of the negative space within the range rather than forced on top. Request healed examples of similar silhouette integrations.
20. Ouroboros Circle With Year On Forearm
Style/Technique: Symbolic / Circular Composition
Pain Level: Medium (3-5/10)
Session Time: 1-2 hours
Best For: Symbolic, wrap-around placement
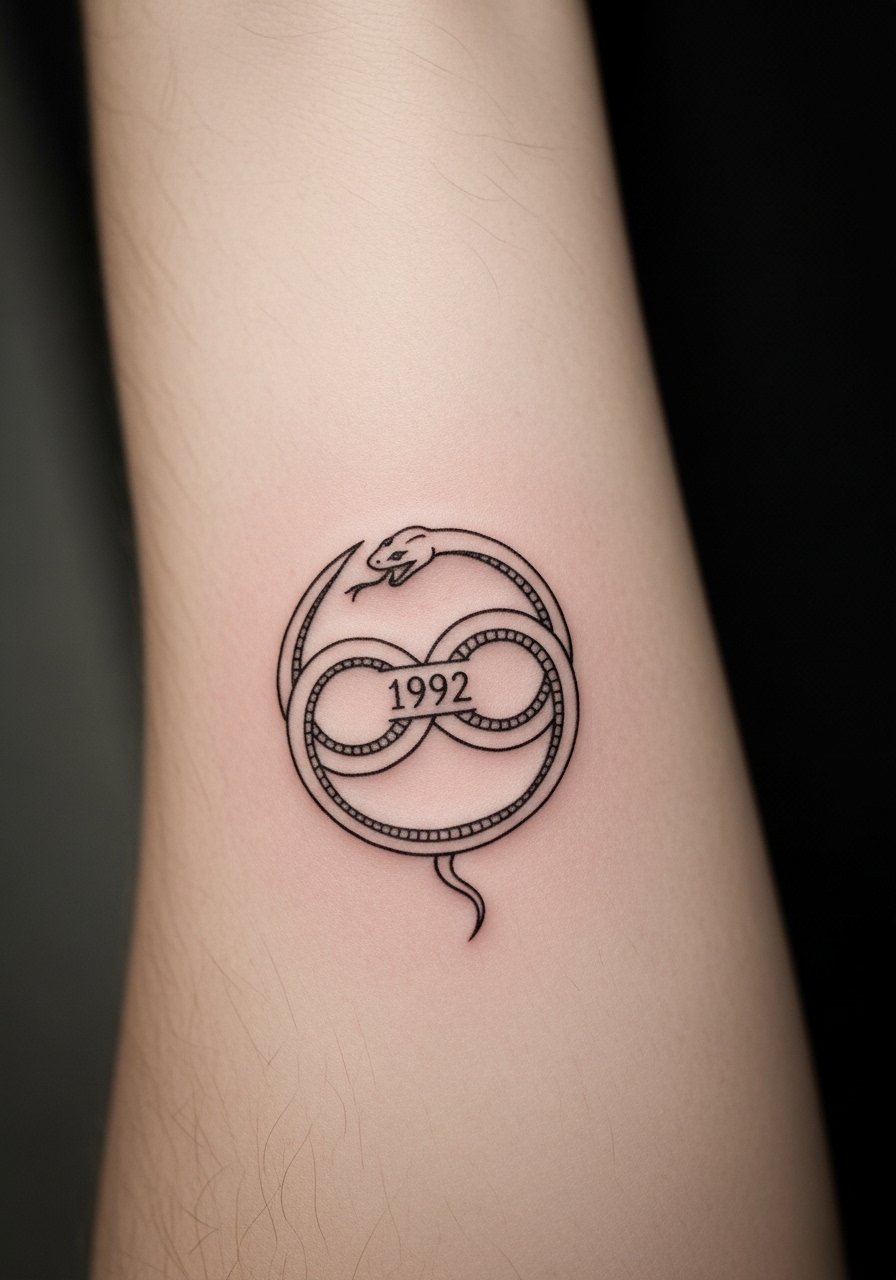
An ouroboros or circular motif encasing your birth year gives a sense of continuity and timelessness. The forearm provides a flat area for a neat circular composition. Pain is modest; healing is straightforward. Circles disguise slight aging because the eye sees the whole shape. Avoid cramming too many decorative elements into the ring—simplicity keeps the year readable. I recommend a balance of line weight so the circle retains shape as it matures. Ask your artist about symmetry and healed examples of circular script or numerals.
21. Signature-Style Cursive Year On Shoulder Blade
Style/Technique: Cursive / Signature
Pain Level: Low (2-4/10)
Session Time: 30-60 minutes
Best For: Personal, elegant placement
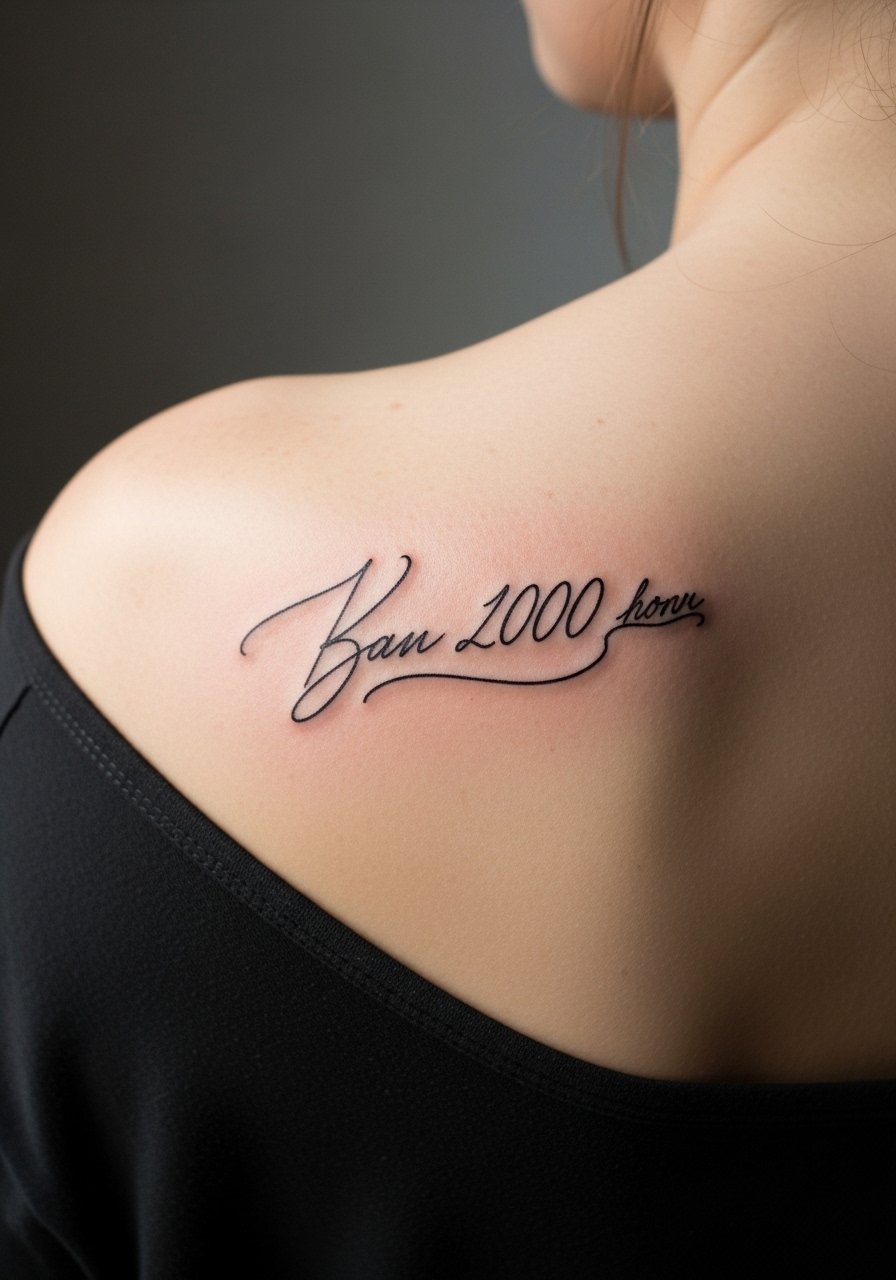
Treat your birth year like a signature—elegant, personal, and easily stylized. The shoulder blade offers a smooth surface and looks great in photos. Pain is low and sessions are quick. Cursive needs moderate line thickness to avoid decay into a smudge over time; thin flourishes fade faster. I encourage asking your artist to sketch a few handwritten variations and to show how each looks healed. A common misstep is over-flourishing; keep the script readable and let the flourish be small and intentional.
22. Tiny Classic Year On Upper Thigh
Style/Technique: Minimal Classic / Small Numerals
Pain Level: Low (3/4)
Session Time: 20-40 minutes
Best For: Private, easy-to-hide placement
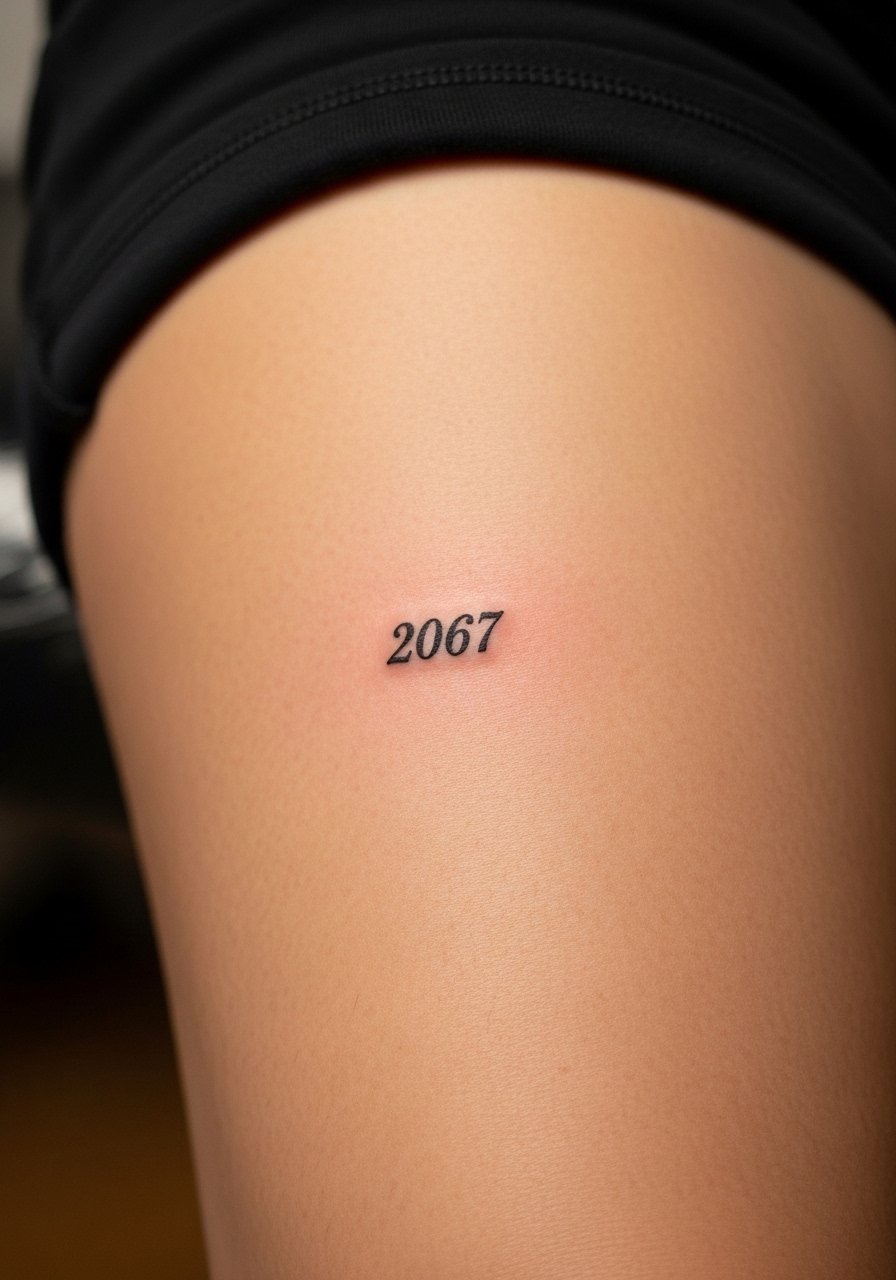
The upper thigh is one of the easiest areas for a discreet, timeless number. It’s private, heals predictably, and is forgiving for small lines. Pain is mild and sessions are short. Keep the numerals simple—classic sans or slightly serifed digits work best. Thigh skin is forgiving, so thin lines can succeed here more than on hands or feet. Note that bright colors may settle differently on thigh flesh; I usually recommend black or muted tones for longevity. Common mistake: placing tiny digits too close to stretch lines; position the tattoo on a flat, less mobile area of the thigh for cleaner aging.
Tattoo Prep and Aftercare Essentials
Aftercare Essentials:
- Aquaphor Healing Ointment, 14oz tube — Industry standard for the first 3-5 days; gentle barrier care.
- Saniderm Transparent Adhesive Bandage, 6-inch roll — Second-skin option many artists recommend for the first 24-72 hours.
- CeraVe Fragrance-Free Moisturizing Lotion — Lightweight, non-irritating for days 4-14 when moisturizing.
Before Your Appointment:
- Tattoo Numbing Cream With 5% Lidocaine — Use only if your artist approves; apply 30-45 minutes before.
- Tattoo Stencil Transfer Paper — Handy if you’re testing placement or bringing a home layout.
Long-Term Maintenance:
- SPF 50 Sunscreen Stick For Tattoos — Daily sun protection keeps ink vivid.
- Mad Rabbit Tattoo Balm — Artist-recommended for keeping healed tattoos soft and vibrant.
- Hustle Butter Deluxe — Popular vegan aftercare alternative for long-term moisture.
Optional Comfort Items:
- Tattoo Numbing Spray — For touch-ups or sensitive spots (use sparingly).
- Hydrocolloid Bandages For Small Tattoos — Good for spot protection after initial seal.
- Dr. Bronner's Unscented Castile Soap, 16oz — Gentle cleanser for the first week.
I've included items artists I follow often recommend and a couple of alternatives that are more natural or hypoallergenic. Use Saniderm or Aquaphor in the early days, switch to a fragrance-free lotion, and commit to SPF forever—I've noticed sunscreen prevents the fastest fading.
Frequently Asked Questions
Q: How bad does a tattoo actually hurt?
A: Pain depends on placement and your tolerance. Forearm and upper arm are usually a 2-4/10. Ribs, sternum, and ankle feel more like 7-8/10. It's often more of a burning or scratching sensation than sharp pain. For sensitive spots, ask about numbing cream with 5% lidocaine—I've used it for small rib sessions and it took the edge off.
Q: What if I regret it?
A: Sit on a design for months before committing and choose placements you can hide if unsure (thigh, upper arm). I’ve seen people add complementary art around a year mark to make it feel intentional rather than regretful. Laser removal exists but it's a long process; better to plan thoughtfully up front.
Q: How do I keep my birth year from fading?
A: Sunscreen is non-negotiable. From what I've seen, UV exposure is the biggest ink killer. Use an SPF 50 sunscreen stick on exposed tattoos every day. Also keep skin moisturized with CeraVe Fragrance-Free Lotion to maintain tone and contrast.
Q: Can I work out after getting a tattoo?
A: Wait at least 48-72 hours before intense workouts, longer if the tattoo is in a flex area like the elbow or knee. Sweating on fresh ink increases infection risk and can cause ink to weep. I skip heavy cardio for a week and follow my artist's cleaning routine.
Q: Should I get a small tattoo first to test pain?
A: Only if you genuinely want a small design. Pain varies by placement not just size—a tiny wrist tattoo can hurt more than a larger piece on the thigh. If nervous, choose an outer arm or thigh first; they’re forgiving and heal reliably.
Q: How long does a tattoo take to heal?
A: Surface healing is usually 2-3 weeks; full internal healing can be 2-3 months. The first week matters most—keep it clean, use Aquaphor or Saniderm depending on your artist's advice, and don't pick scabs. Colors often look dull while healing and brighten as skin regenerates.
Q: Do tattoos look different on different skin tones?
A: Yes. Black and gray work shows beautifully across skin tones. Bright colors may read differently on deeper skin, and white ink can be subtle. I've learned to ask artists for healed examples on skin tones like mine so I know what to expect.
