

I spent months collecting Bible verse tattoo examples because I wanted art that would mean something long after the ink settled. The real challenge I found wasn't picking a verse—it was choosing a style and placement that would age well and still feel personal in ten years.
1. Fine Line Jeremiah 29:11 on Inner Forearm
Style/Technique: Fine Line / Minimalist
Pain Level: Low-Medium (3-4/10)
Session Time: 1 session, 1-2 hours
Best For: First Bible verse tattoo, readable everyday reminder
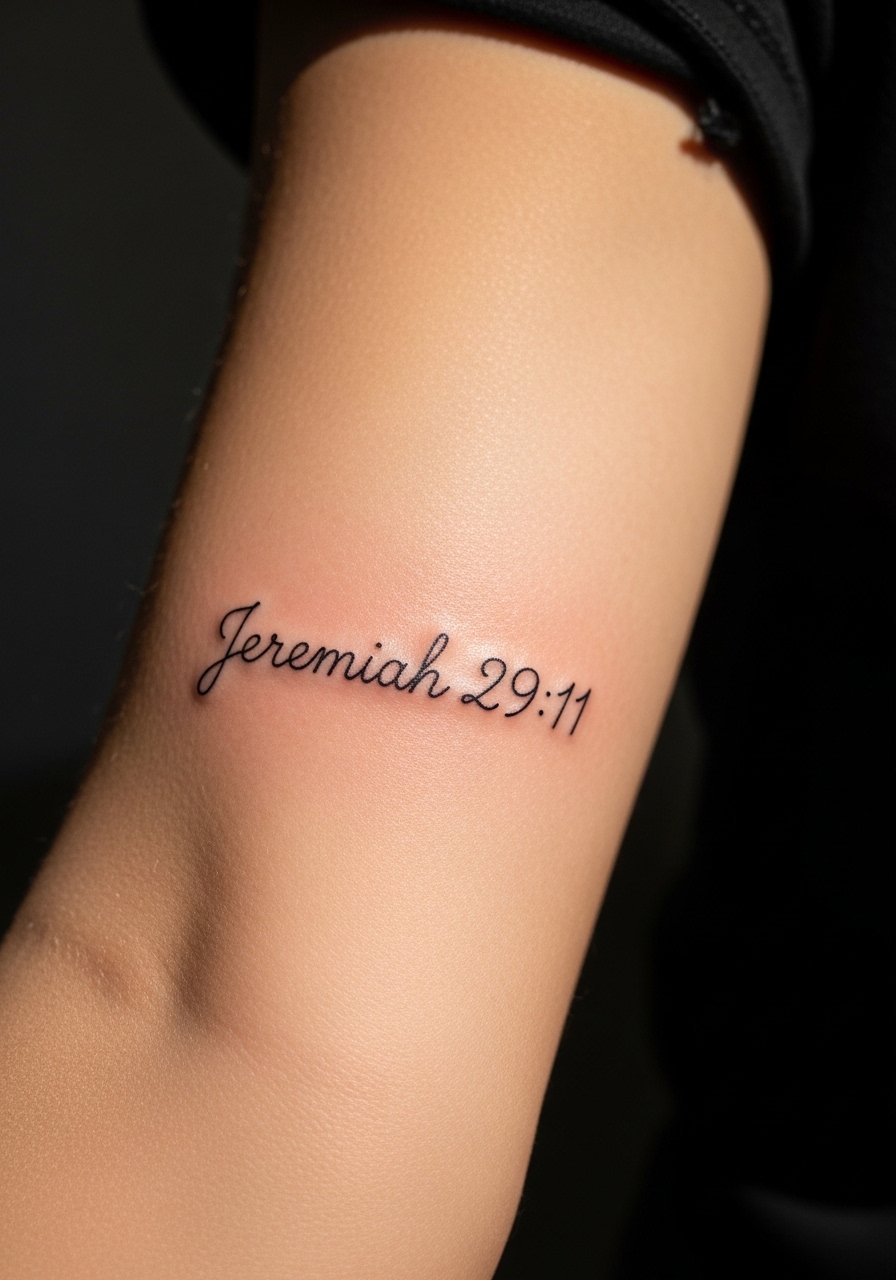
I picked this layout for a friend once—clean script sits along the inner forearm like a private note. Fine line script feels delicate and personal, but from what I've seen it needs readable fonts so letters don't blur. Expect a week of surface peeling and 4–8 weeks for full settling. Ask for slightly thicker downstrokes than you think you need; the common mistake is choosing a too-fine script that looks shaky healed.
2. Bold Joshua 1:9 on Forearm
Style/Technique: Bold Type / Traditional
Pain Level: Low (2-3/10)
Session Time: 1 session, 1–3 hours
Best For: Motivational, high-visibility verse

I love bold lettering for strength verses—it's simple and ages well. This style reads from a distance and holds up against fading better than ultra-fine scripts. Placement on the outer forearm keeps it visible without being intrusive. Avoid overly ornate fonts; readability beats flair for long-term clarity.
3. Watercolor Joshua 24:15 on Ribcage
Style/Technique: Watercolor Accent / Script
Pain Level: High (7-8/10)
Session Time: 1–2 sessions
Best For: Family-centered verses, artistic statement
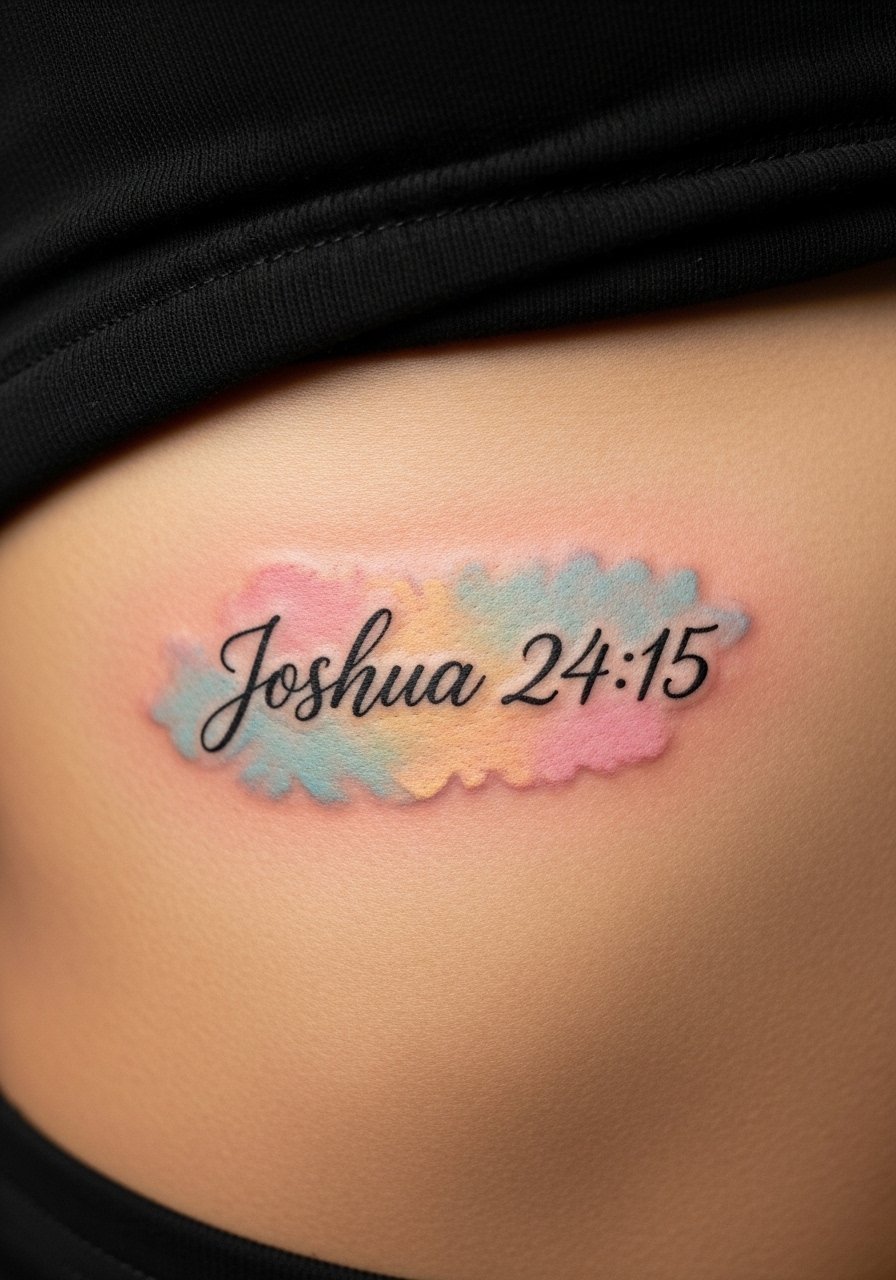
Watercolor adds emotion—soft blues and pinks can highlight a verse about family or choosing faith. Ribs are painful but private, and watercolor needs touch-ups over time since pigments can fade faster. I recommend keeping the script bold where it overlaps color so letters remain legible as the pigments soften.
4. Cross + Proverbs 3:5 on Chest
Style/Technique: Traditional / Symbolic Combo
Pain Level: Medium (4-5/10)
Session Time: 1–2 sessions
Best For: Symbolic faith display, chest or bicep
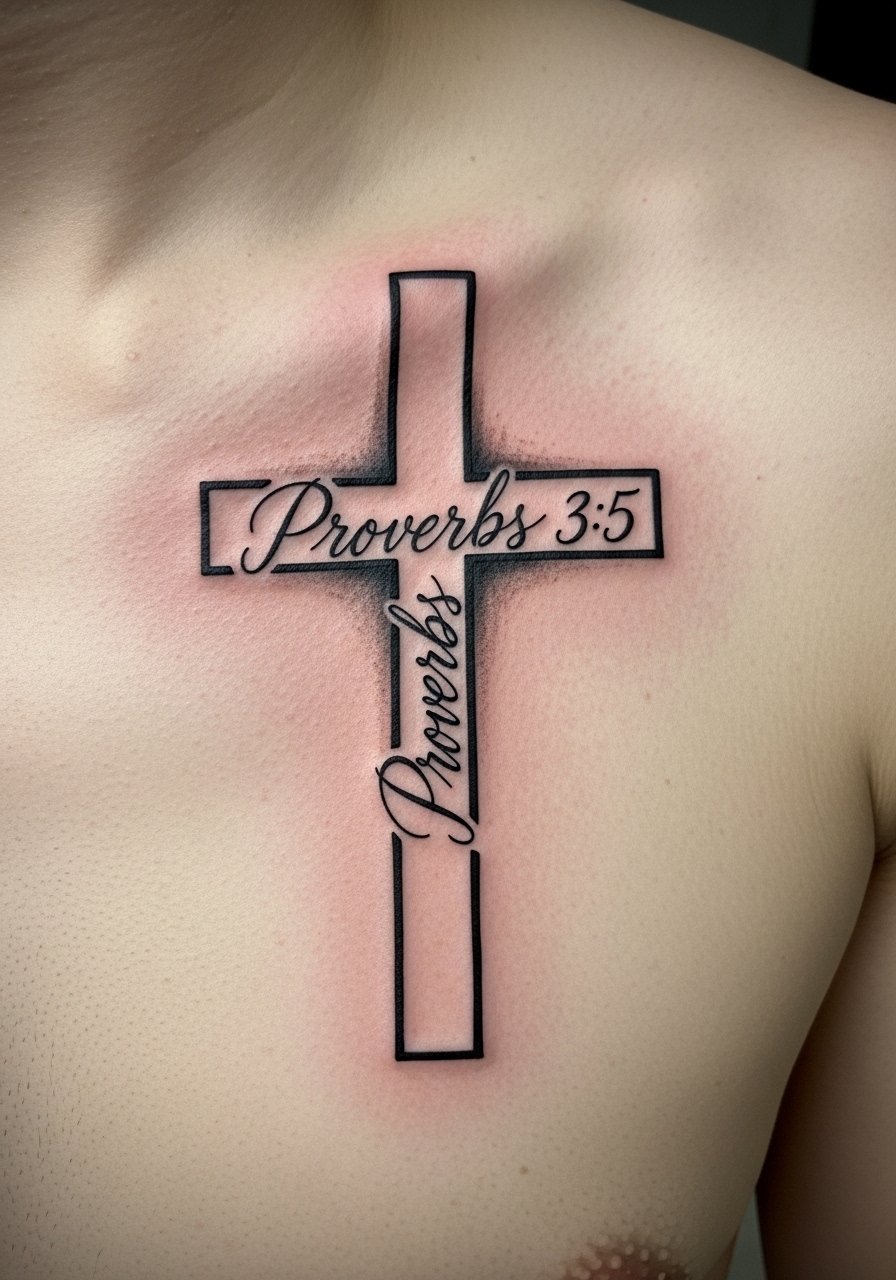
Combining a cross with Proverbs 3:5 creates a strong visual anchor. On the chest the verse curves with body movement, so ask an artist to map the flow. I’ve seen this age well when the lettering is medium-weight—too thin and the script fades into skin texture.
5. Dove + Philippians 4:13 on Wrist
Style/Technique: Illustrative / Minimalist
Pain Level: Low (2-3/10)
Session Time: 1 session, under 2 hours
Best For: Small Bible verse tattoos, daily reminder
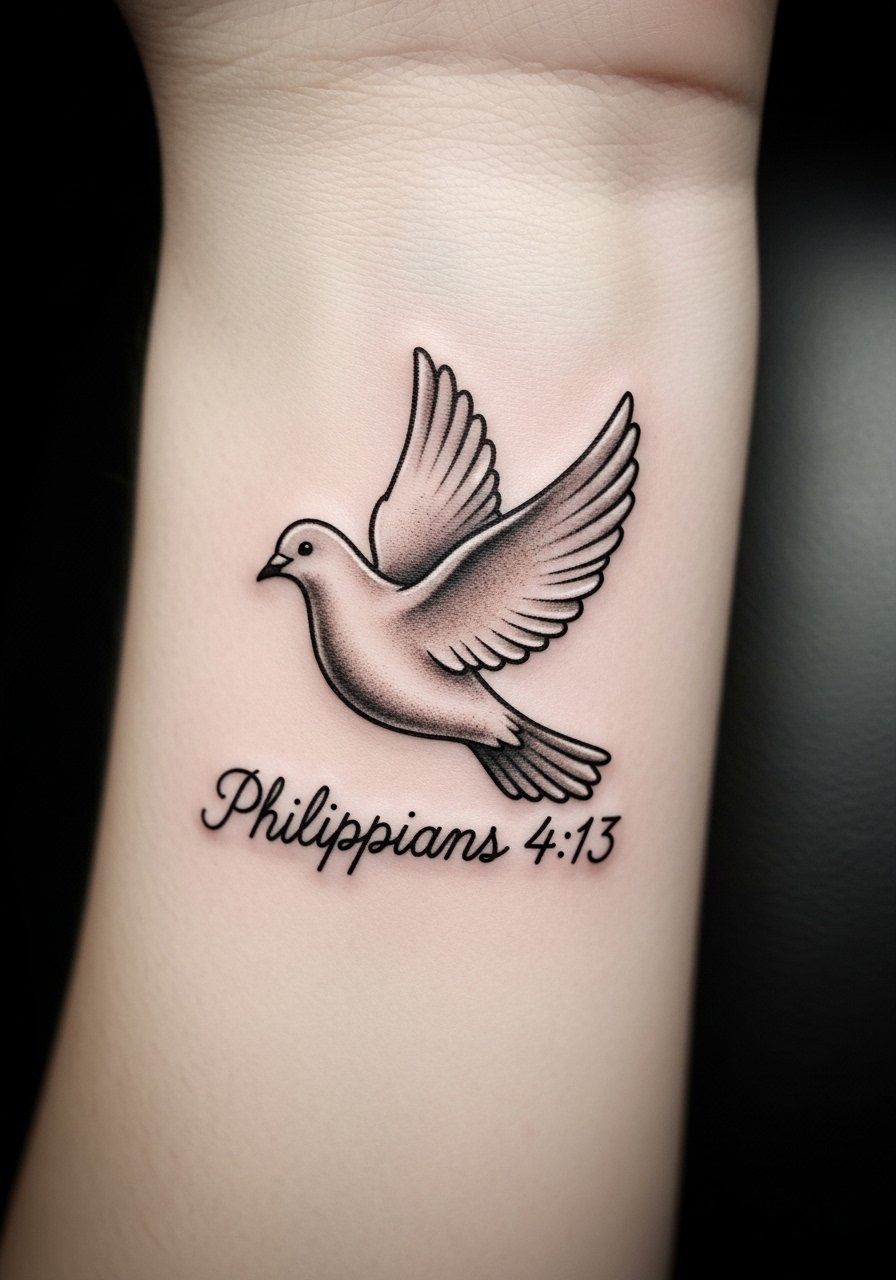
A small dove paired with Philippians 4:13 is compact and meaningful. Wrist tattoos are easy to see but get lots of sun—plan on sunscreen for longevity. The wrist can be surprisingly tender; a short session or numbing pad helps if you’re nervous.
6. Psalm 91:4 Feather on Ankle
Style/Technique: Fine Line / Organic Accent
Pain Level: Medium (4-5/10)
Session Time: 1 session
Best For: Hidden or subtle faith tattoos

Feather imagery feels protective with that verse. Ankles are tricky for healing—socks and shoes rub—so expect extra care in the first two weeks. I advise simple fonts and single-needle artists experienced with script on curved areas.
7. Minimalist Romans 8:28 on Collarbone
Style/Technique: Minimalist Cursive / Fine Line
Pain Level: Medium (4/10)
Session Time: 1 session, under 2 hours
Best For: Personal, elegant placement
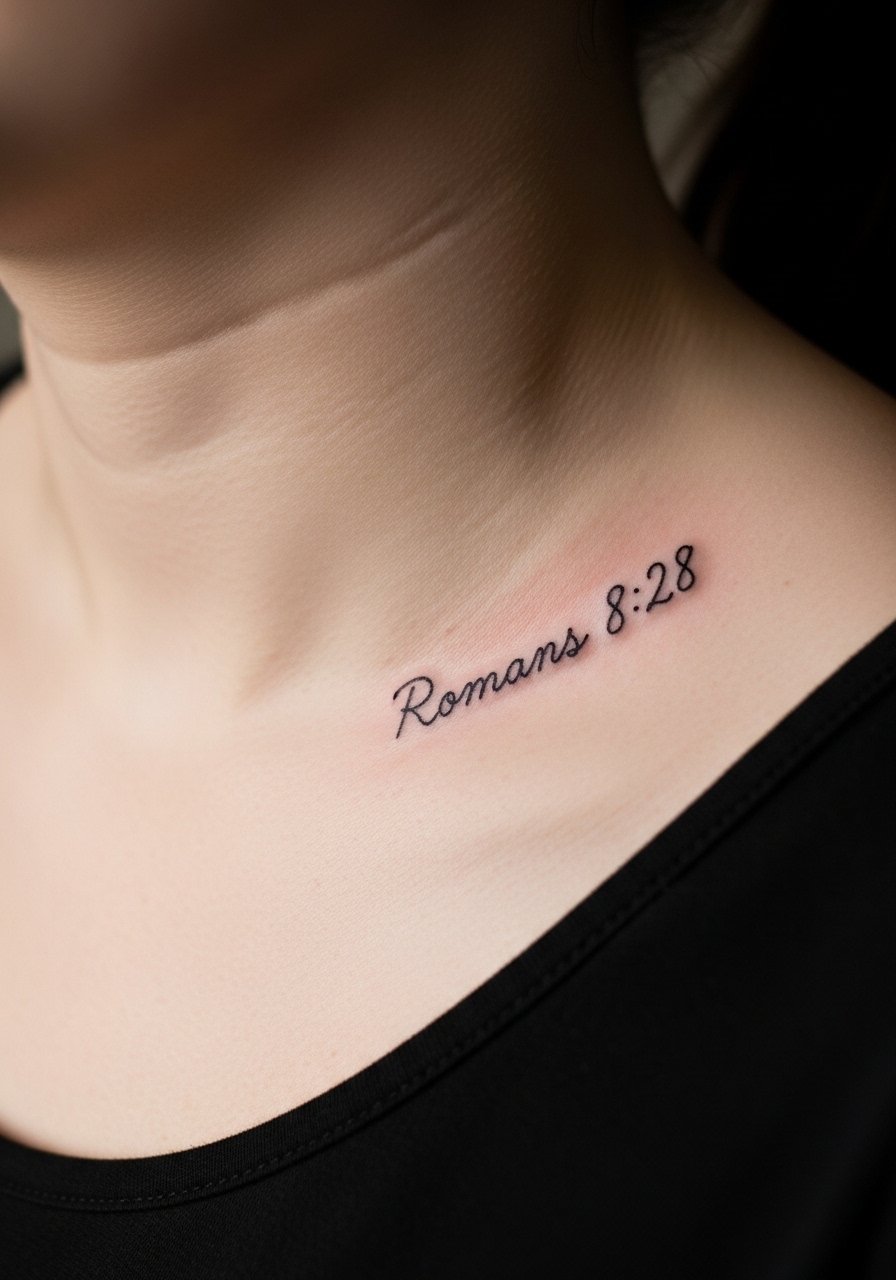
The collarbone is visible and graceful for hopeful verses. Pain is moderate and healing requires avoiding tight necklaces. I’ve seen cursive here look timeless when artists use slightly bolder strokes to prevent eventual blurring.
8. Elegant Cursive Proverbs 3:5-6 on Ribcage
Style/Technique: Script / Fine Line
Pain Level: High (7-8/10)
Session Time: 1 session
Best For: Deeply personal scripture, private placement
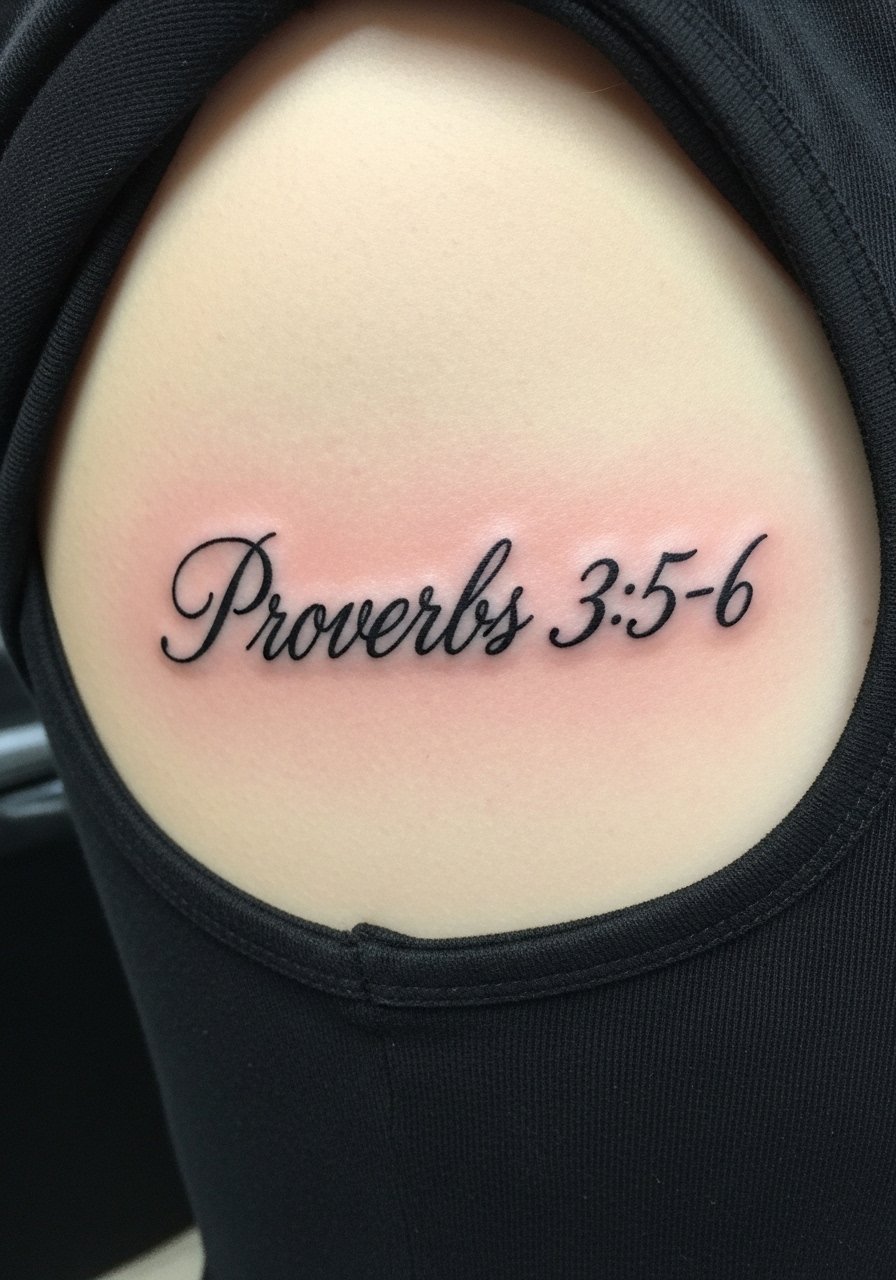
Cursive reads intimate but ribs are high-pain. If you choose this, split long phrases into two sessions if needed. From what I’ve gathered, ribcage scripts need slightly larger lettering so letters don't blur together as the skin stretches.
9. Bold Calf Joshua 1:9 Block Lettering
Style/Technique: Bold / Block Script
Pain Level: Low (2-3/10)
Session Time: 1 session, 2–3 hours
Best For: Statement verse, decent hiding options with pants
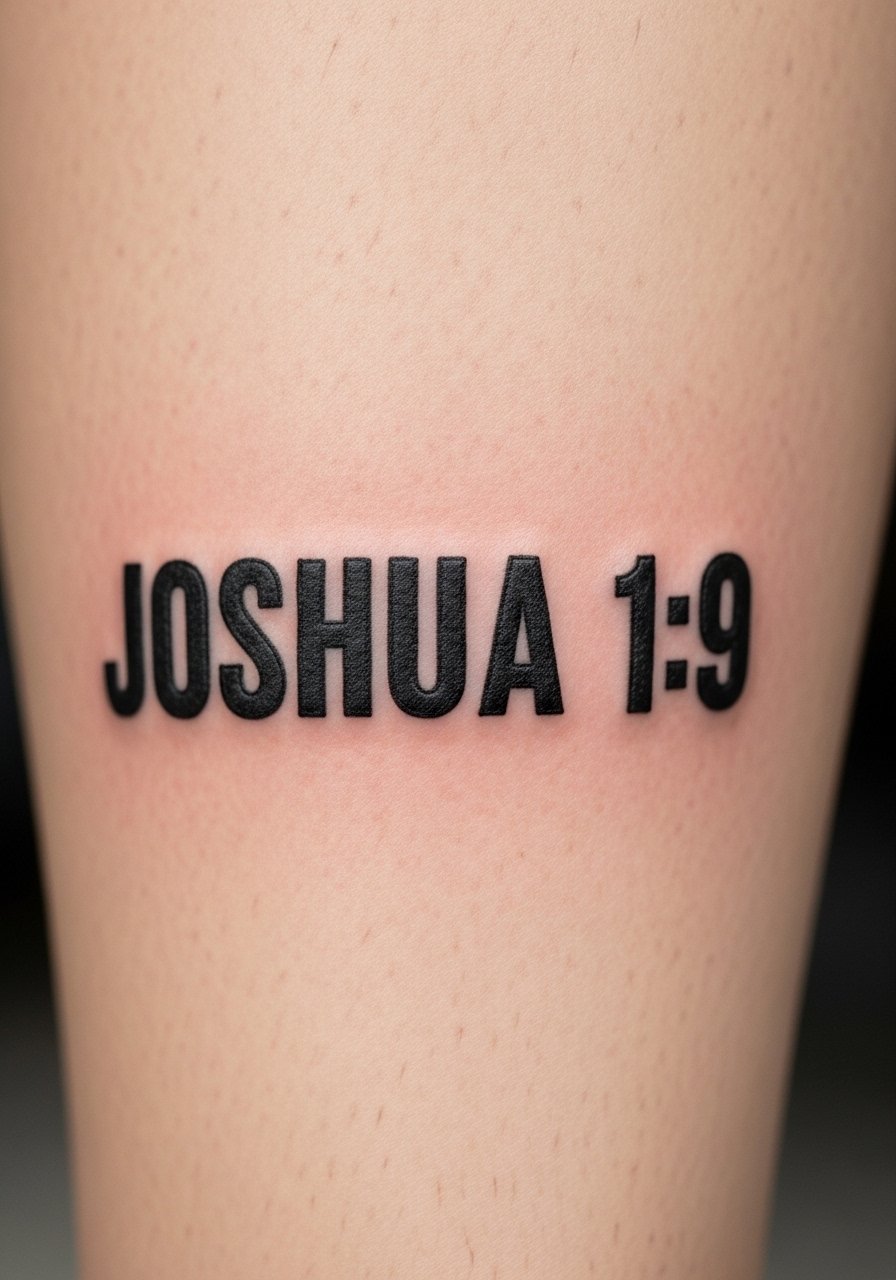
Calf tattoos are forgiving and heal well. Big bold letters read clearly and last, so this is a good option if you worry about regret—boldness keeps the verse legible longer than thin scripts.
10. Neo-Traditional Isaiah 40:31 with Eagle on Upper Arm
Style/Technique: Neo-Traditional / Illustrative
Pain Level: Low-Medium (3-4/10)
Session Time: 2 sessions
Best For: Symbolic strength pieces
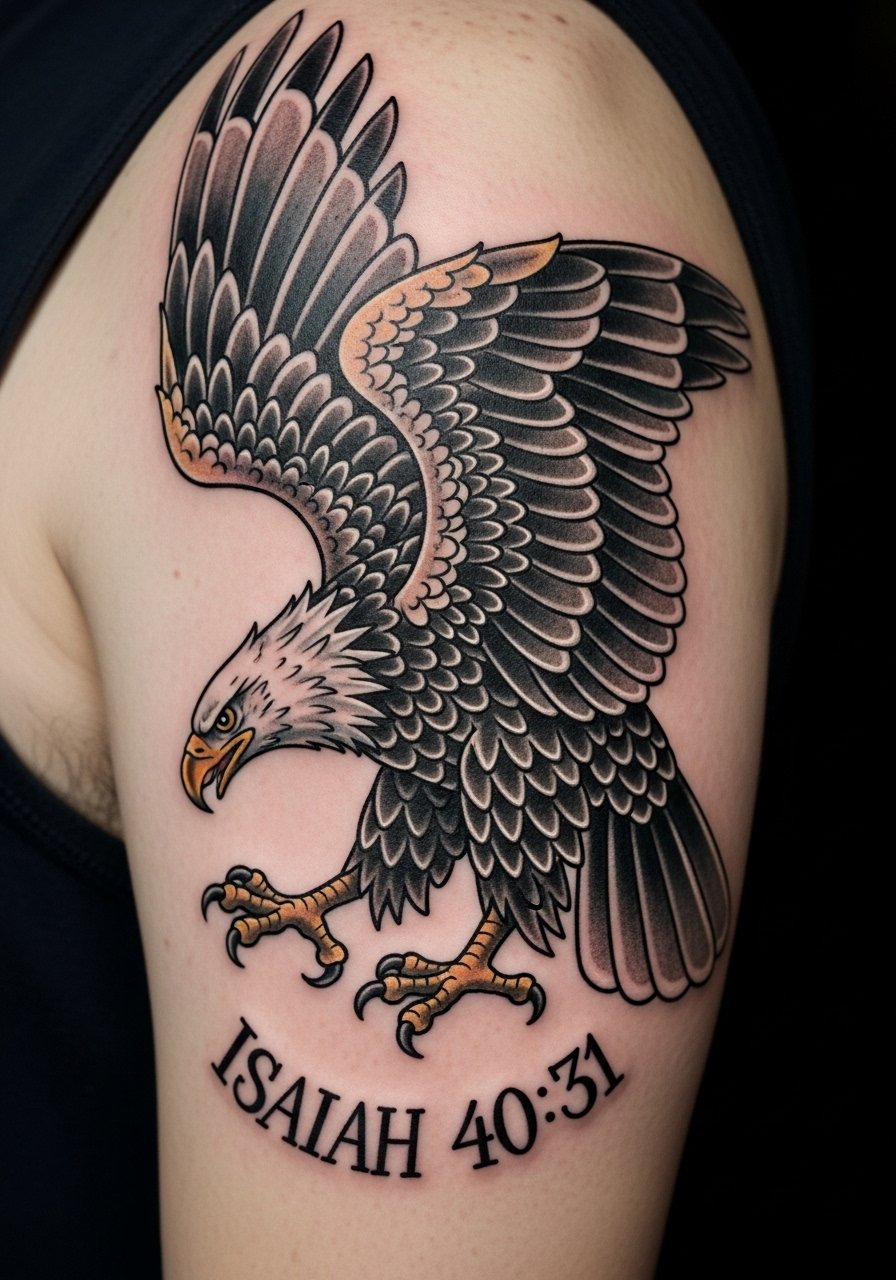
An eagle motif lifts the verse visually. Upper arm placement gives space for detail and ages gracefully. Artists who do neo-traditional work can balance line weight so the script remains stable next to illustrative elements.
11. Micro Script John 1:16 Behind Ear
Style/Technique: Micro Script / Minimalist
Pain Level: Medium-High (5-7/10)
Session Time: 1 short session
Best For: Hidden, tiny faith reminders
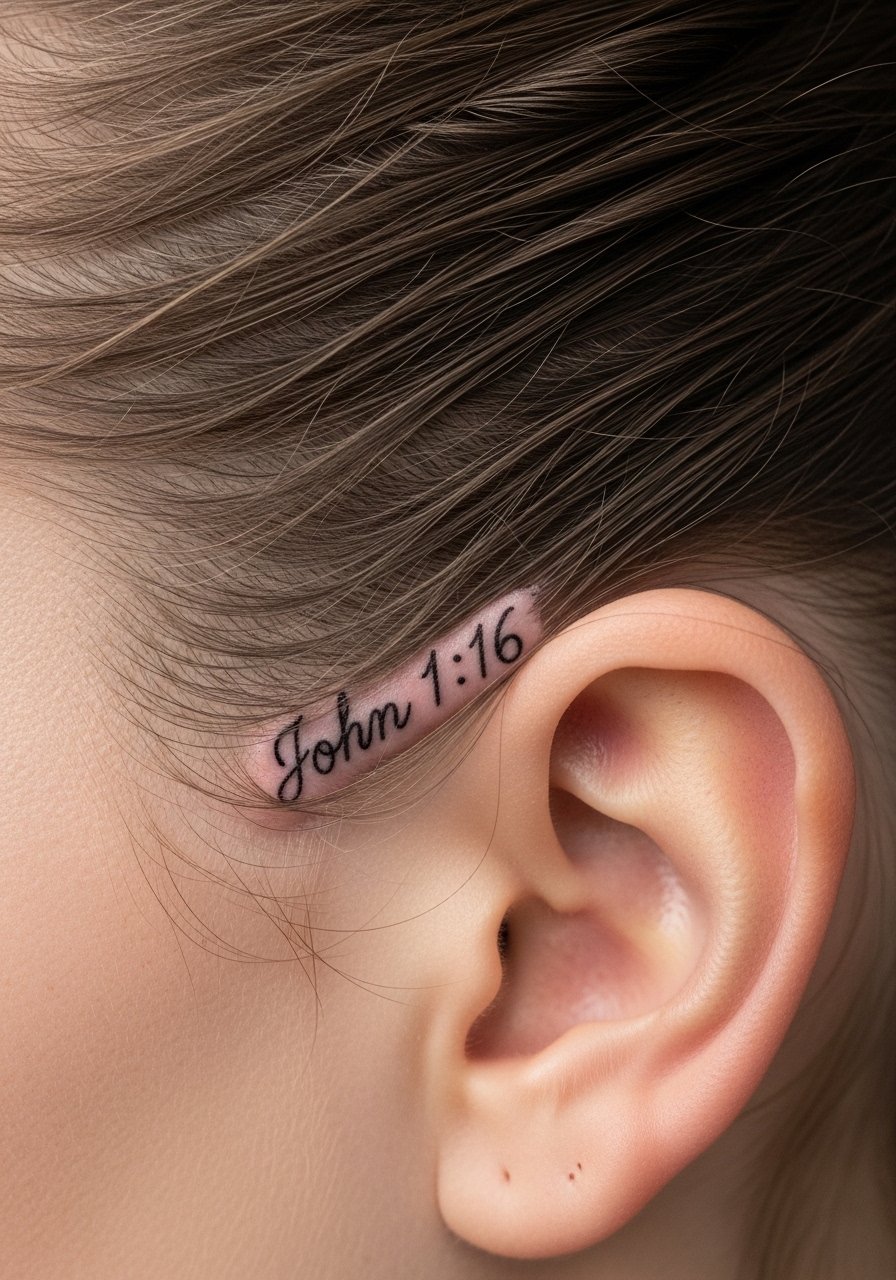
Behind-the-ear tattoos look intimate but are tricky—audible pain and limited space. Micro script can blur faster; ask for slightly larger characters than you think. This area suits people wanting a private "grace" reminder.
12. Illustrative Proverbs 31:25 with Florals on Shoulder
Style/Technique: Illustrative / Floral Accent
Pain Level: Low (2-3/10)
Session Time: 1–2 sessions
Best For: Empowerment pieces, feminine designs
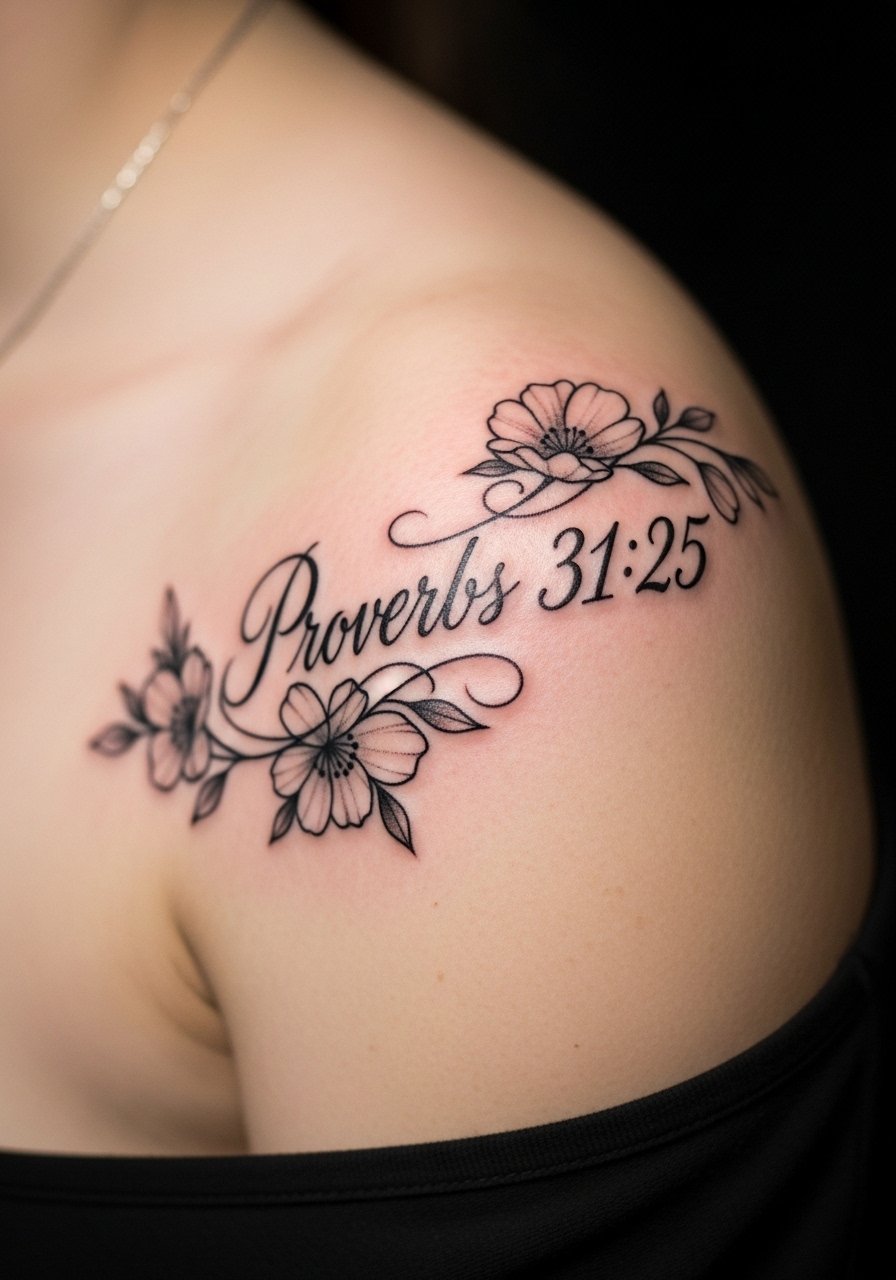
Pairing a strength verse with flowers softens the message and flows well on a rounded shoulder. Shoulders heal nicely and tolerate detail; make sure the script follows the shoulder curve to read naturally.
13. Minimal Back Script Romans Phrase Near Spine
Style/Technique: Minimalist / Vertical Script
Pain Level: Medium-High (5-7/10)
Session Time: 1–2 sessions
Best For: Centered, dramatic placements
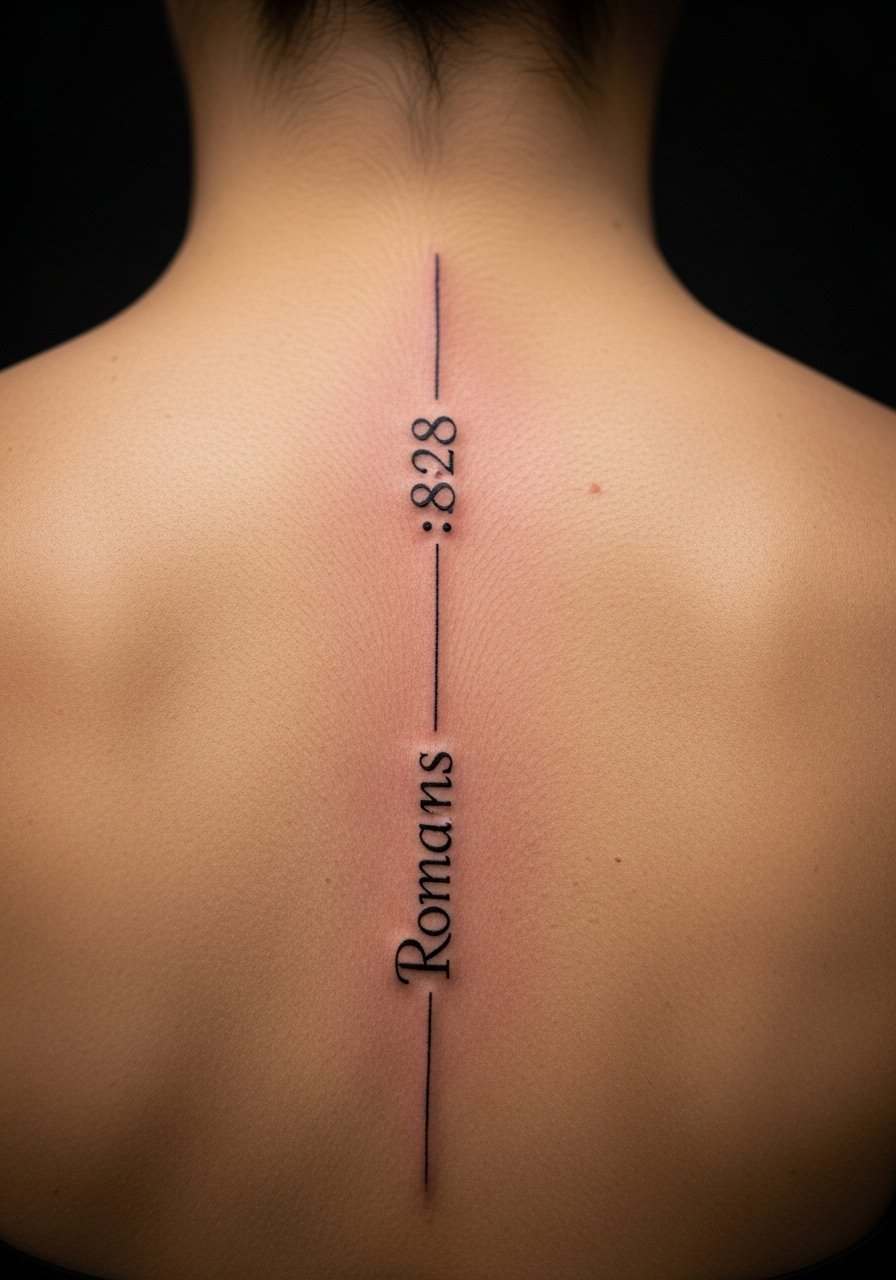
Spine placement is dramatic and personal. Vertical orientation echoes the body's line, but be mindful: the spine is sensitive and movement affects healing. I recommend spacing letters to account for natural skin shifts.
14. Small Thigh Jeremiah Milestone Quote
Style/Technique: Fine Line / Personalized Verse
Pain Level: Low (2-3/10)
Session Time: 1 session
Best For: Milestone-specific verses (births, marriages)
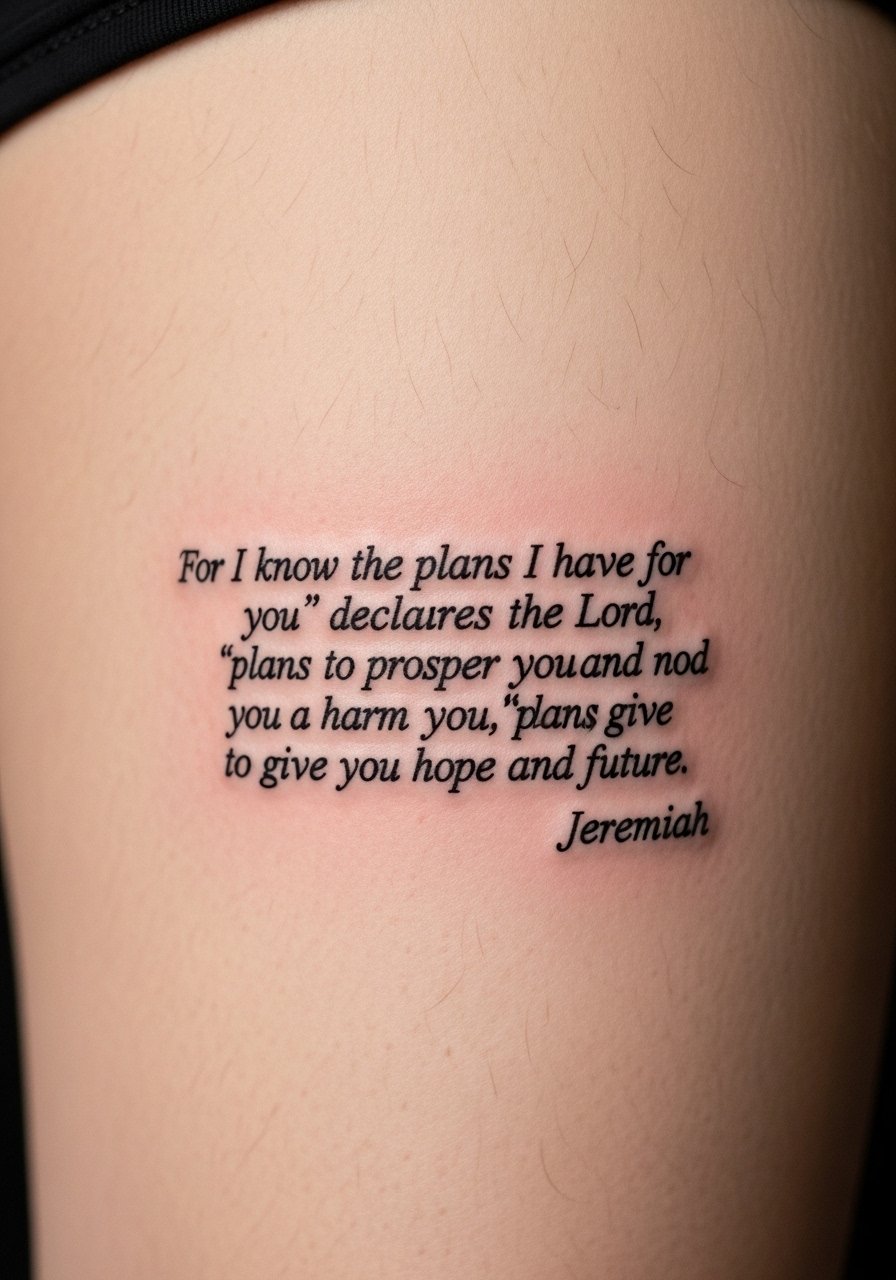
I adore thesis tattoos for milestones—birth dates or marriage verses tucked on the thigh feel private but meaningful. Thigh skin is forgiving; lines stay crisp if the script isn't too tiny. This is one of the unique personal ideas I hadn't seen much elsewhere.
15. Scripted Sleeve Start Philippians 4:13 with Dove
Style/Technique: Traditional Illustrative / Combo
Pain Level: Medium (4-5/10)
Session Time: Multiple sessions
Best For: Sleeve foundations, strength themes
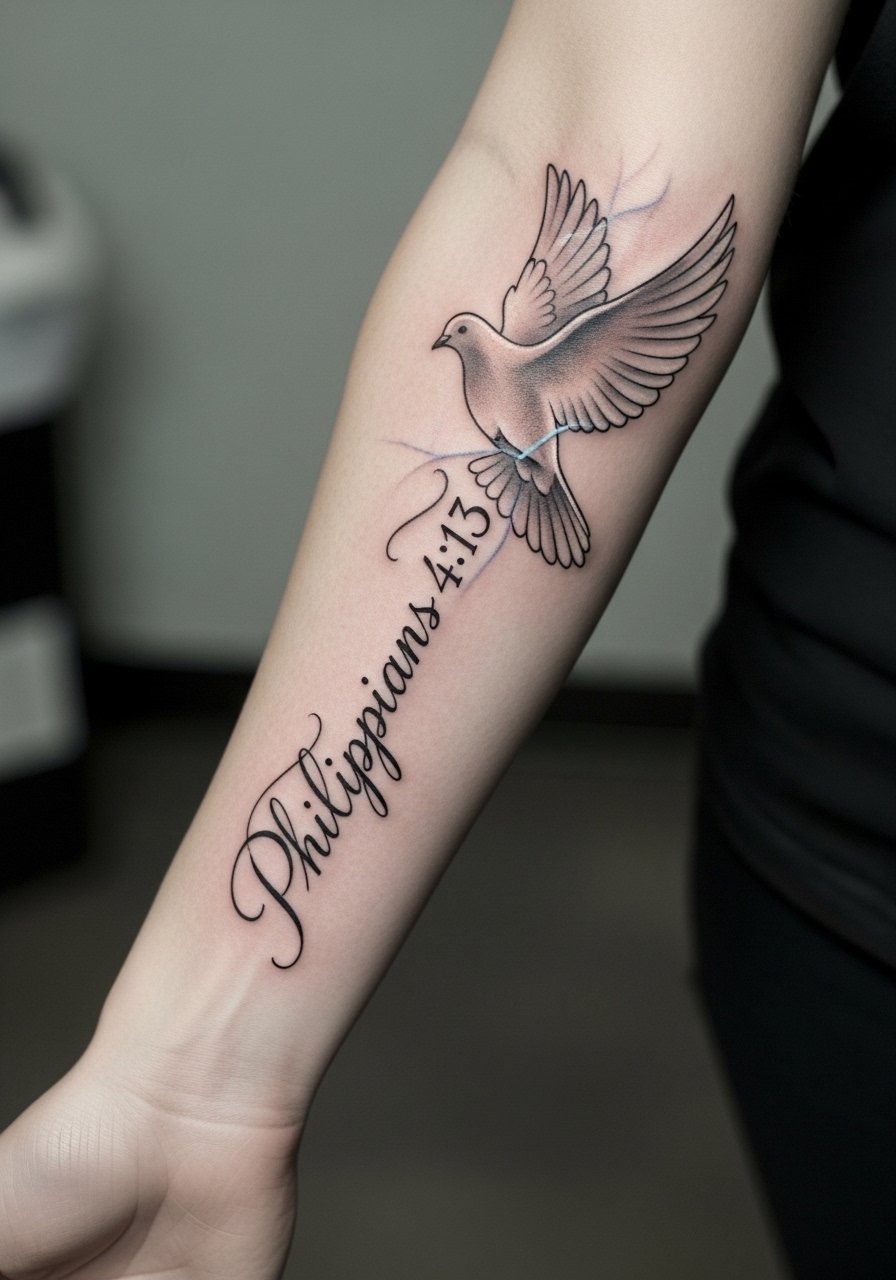
This works as a sleeve anchor—verse plus dove gives movement. Multiple sessions let the artist balance script with imagery. I've seen this pairing age well when the script lines are medium-weight and integrated into the art flow.
16. Leviticus 19:28 Irony Wrist Script
Style/Technique: Bold Script / Statement
Pain Level: Low (2-3/10)
Session Time: 1 session
Best For: Reflective or ironic faith statements
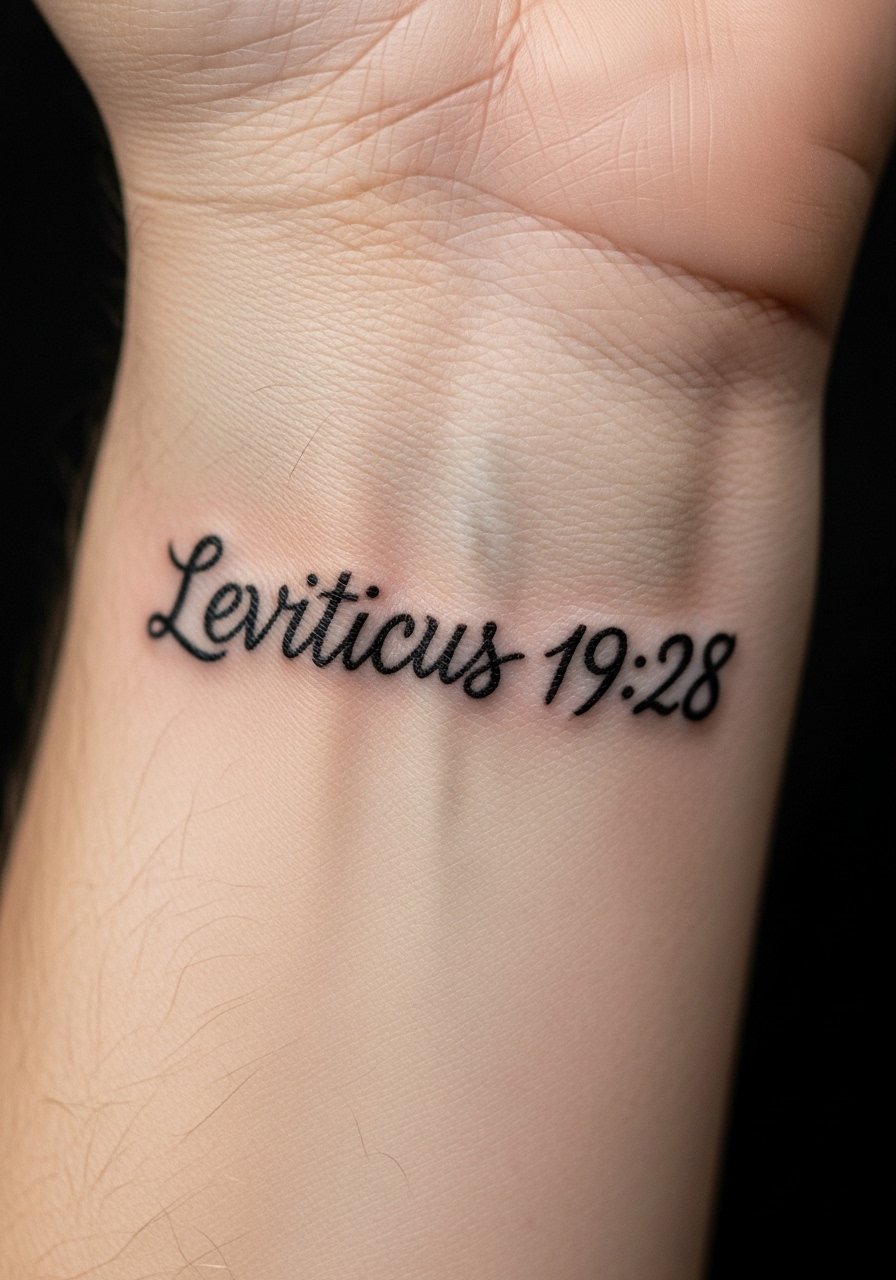
This is a tongue-in-cheek choice for people reflecting on faith and body art debates. Keep fonts readable; ironically, delicate fonts muddle the message. Wrist visibility makes the statement clear and intentionally provocative.
17. Grace Script John 1:16 on Collarbone
Style/Technique: Minimalist Cursive / Fine Line
Pain Level: Medium (4/10)
Session Time: 1 session
Best For: Subtle grace reminders
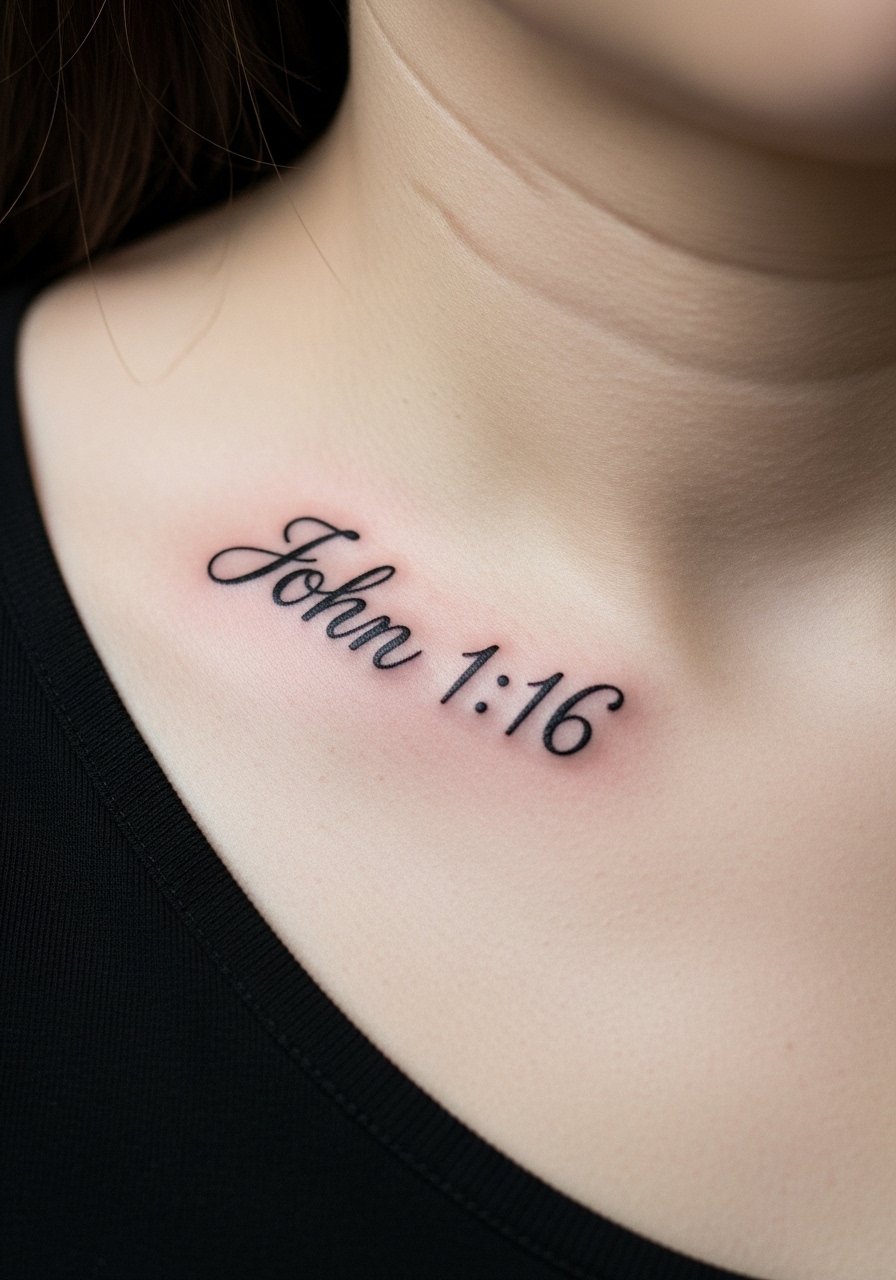
Grace-focused verses feel perfect on the collarbone—visible yet elegant. I’ve noticed collarbone scripts look best with slightly thicker downstrokes to hold up over time.
18. Psalm Fragment in Typewriter Font on Wrist
Style/Technique: Typewriter / Minimalist
Pain Level: Low (2-3/10)
Session Time: 1 session
Best For: Vintage vibe, small Bible verse tattoos
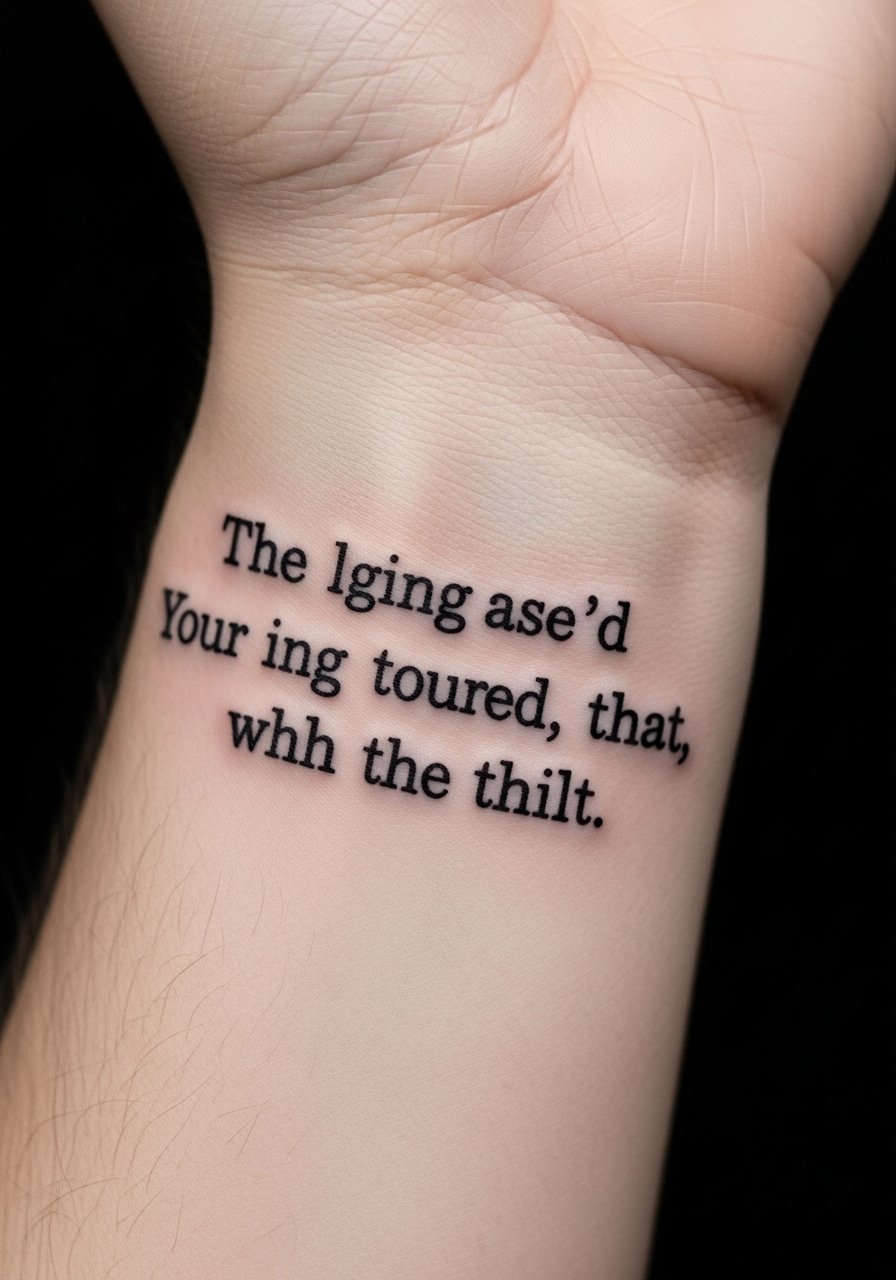
Typewriter fonts give a timeless, personal note—like a page from a journal. They remain legible if the letters aren’t too small. I often tell people to test spacing; tight typewriter letters blur more quickly.
19. Vertical Script on Ribcage—Milestone Verse
Style/Technique: Script / Vertical Layout
Pain Level: High (7-8/10)
Session Time: 1–2 sessions
Best For: Personal milestone verses, discreet placement
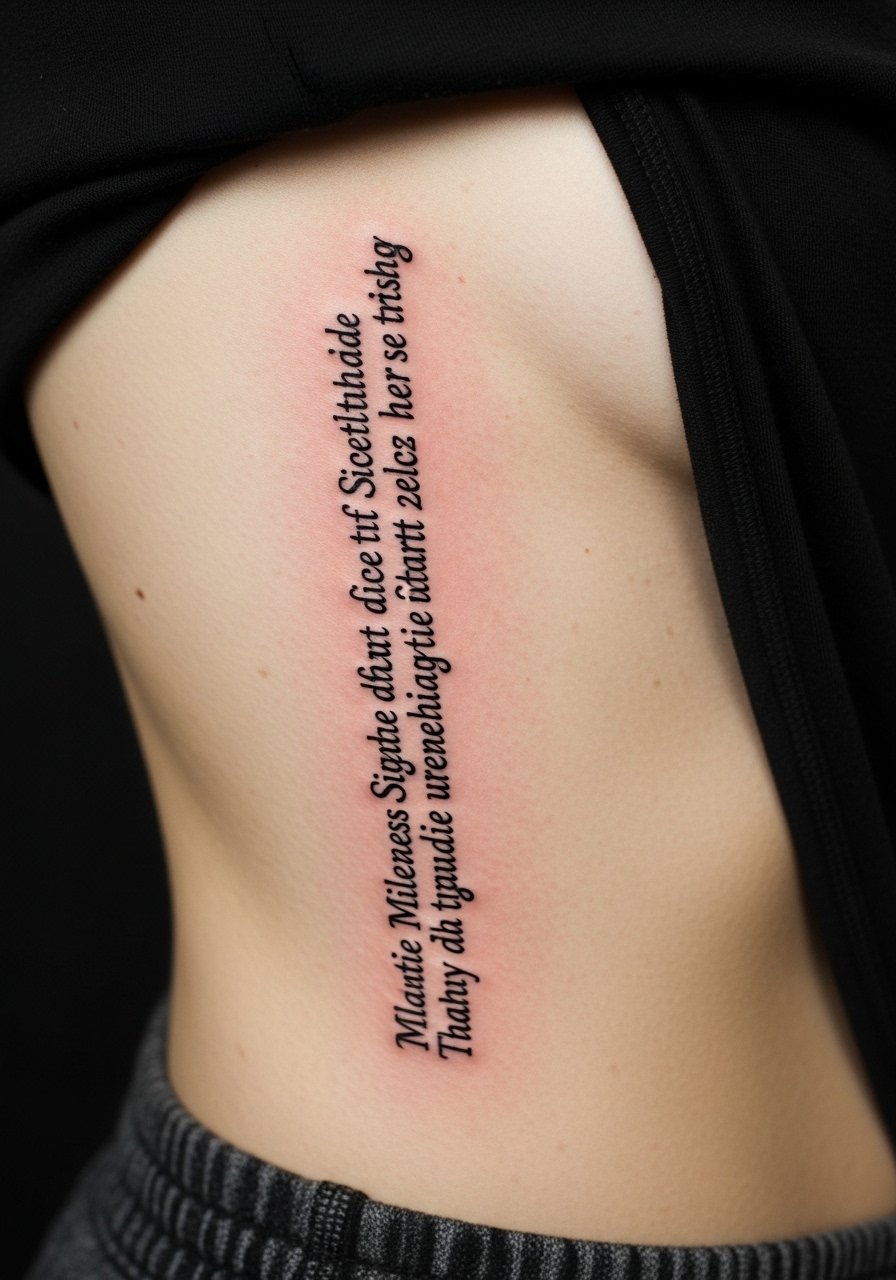
Vertical rib scripts look elegant but are painful and need font choices that withstand stretching. This is another milestone-specific idea I recommend for private meaning rather than public display.
20. Small Back-of-Neck Cross + Short Verse
Style/Technique: Minimalist / Symbolic Combo
Pain Level: Medium (4-5/10)
Session Time: 1 session
Best For: Discreet faith symbols, easy to hide
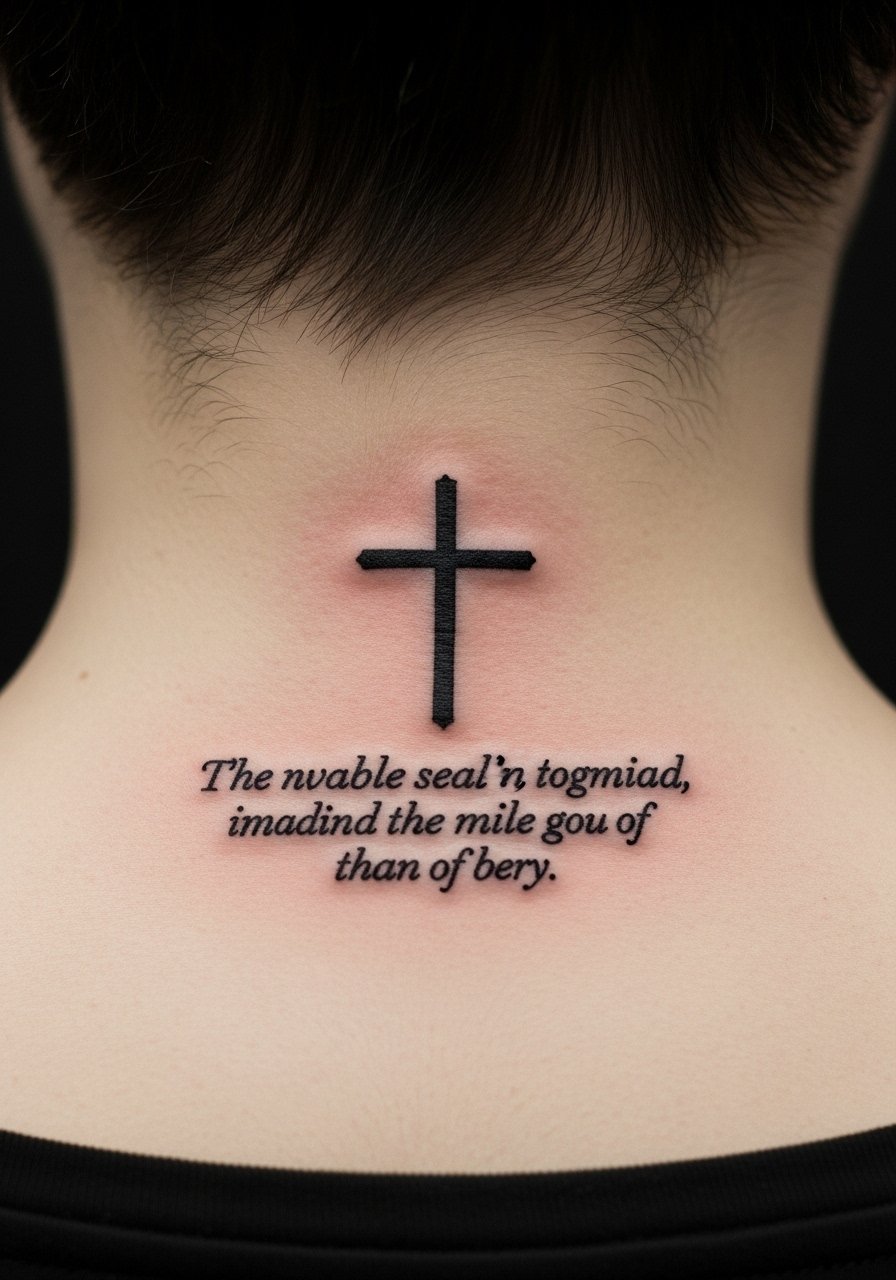
The back of the neck is subtle and suits short lines. Hair growth and sun exposure matter—keep this one moisturized and covered when needed. Artists often suggest a thicker cross outline so the symbol remains visible as hairlines shift.
21. Scripted Inner Bicep Proverbs Line
Style/Technique: Fine Line / Script
Pain Level: Medium (4-5/10)
Session Time: 1 session
Best For: Private display, easy to show/hide
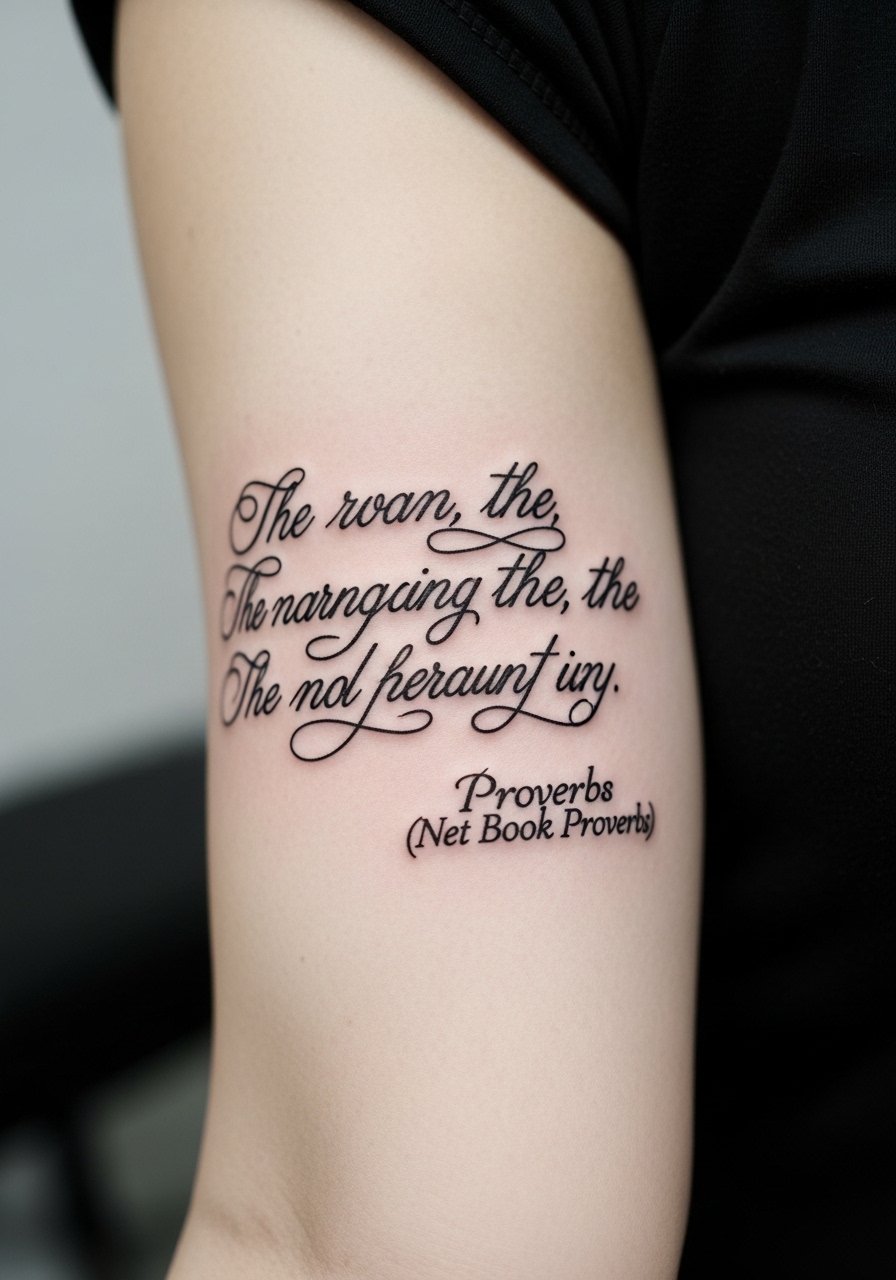
Inner bicep tattoos are intimate and simple to conceal. The skin is softer; lines settle smoothly. I’ve found script here holds nicely if the font isn’t too ornate.
22. Watercolor Cross with Short Verse on Thigh
Style/Technique: Watercolor / Illustrative
Pain Level: Low-Medium (3-4/10)
Session Time: 1–2 sessions
Best For: Color-loving, private statement pieces
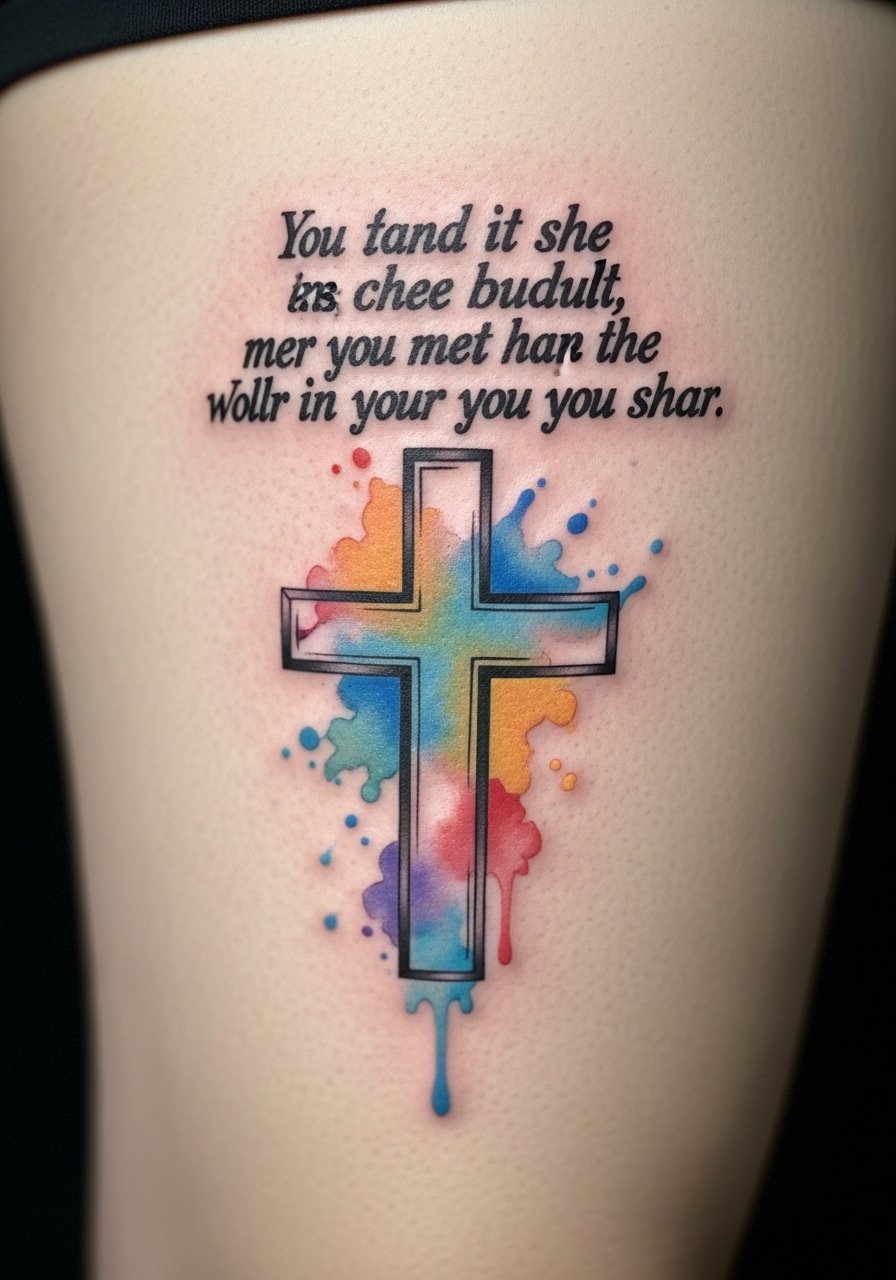
Watercolor plus a short verse makes a gentle, emotional piece for the thigh. Colors can fade faster than black, so expect softer tones healed. I recommend keeping the verse bold against the wash to preserve legibility.
Tattoo Prep and Aftercare Essentials
Aftercare Essentials:
- Aquaphor Healing Ointment, 14oz tube — Artists often recommend for first 3–5 days
- Saniderm Transparent Adhesive Bandage, 6-inch roll — Second-skin healing method some artists use
- CeraVe Fragrance-Free Moisturizing Lotion — Daily moisturizer after initial healing
- Dr. Bronner's Unscented Castile Soap — Gentle cleaning in first week
Before Your Appointment:
- Tattoo Numbing Cream with 5% Lidocaine — Use only if your artist approves
- Tattoo Stencil Transfer Paper — For mockups if you design at home
Long-Term Maintenance:
- SPF 50 Sunscreen Stick for Tattoos — Daily protection keeps text crisp
- Mad Rabbit Tattoo Balm — Maintenance balm for healed ink
- Hustle Butter Deluxe — Vegan aftercare option
Optional Comfort Items:
- Tattoo Numbing Spray — For touch-ups or sensitive spots
- Hydrocolloid Bandages (large) — For spot protection during healing
Frequently Asked Questions
Q: How bad does a tattoo actually hurt?
A: Pain varies by placement and your tolerance. Outer arm or calf feels like a 2–3/10 to most people; ribs or spine feel closer to 7–8/10. It's more annoying than unbearable. For sensitive areas, talk to your artist about approved numbing cream.
Q: What if I regret the verse later?
A: I always suggest sitting with a verse for months and choosing placements you can hide. If you're unsure, pick a discreet spot like the thigh or ribcage. Remember that touch-ups or cover-ups are possible, but they change the original piece.
Q: How do I keep a Bible verse tattoo from fading?
A: From what I've seen, sunscreen is the non-negotiable step. Use an SPF 50+ stick on exposed tattoos daily. Also keep skin moisturized with a fragrance-free lotion to preserve ink contrast.
Q: Can I work out after getting a tattoo?
A: Wait at least 48–72 hours and avoid heavy sweating on the fresh area for a week. Sweat can irritate and introduce bacteria. If the tattoo's in a flex area, give it extra time to avoid stretching the healing skin.
Q: Should I get a small Bible verse first to test pain?
A: Only if you genuinely want a small verse. Pain is about placement more than size. A tiny wrist piece can hurt more than a larger outer arm design. Pick what you'll cherish—not just a test.
Q: How long does a verse tattoo take to heal?
A: Surface healing is usually 2–3 weeks; full healing can take 2–3 months. The first week matters most—keep it clean with gentle soap and moisturize with recommended products like Aquaphor or a tattoo balm.
