
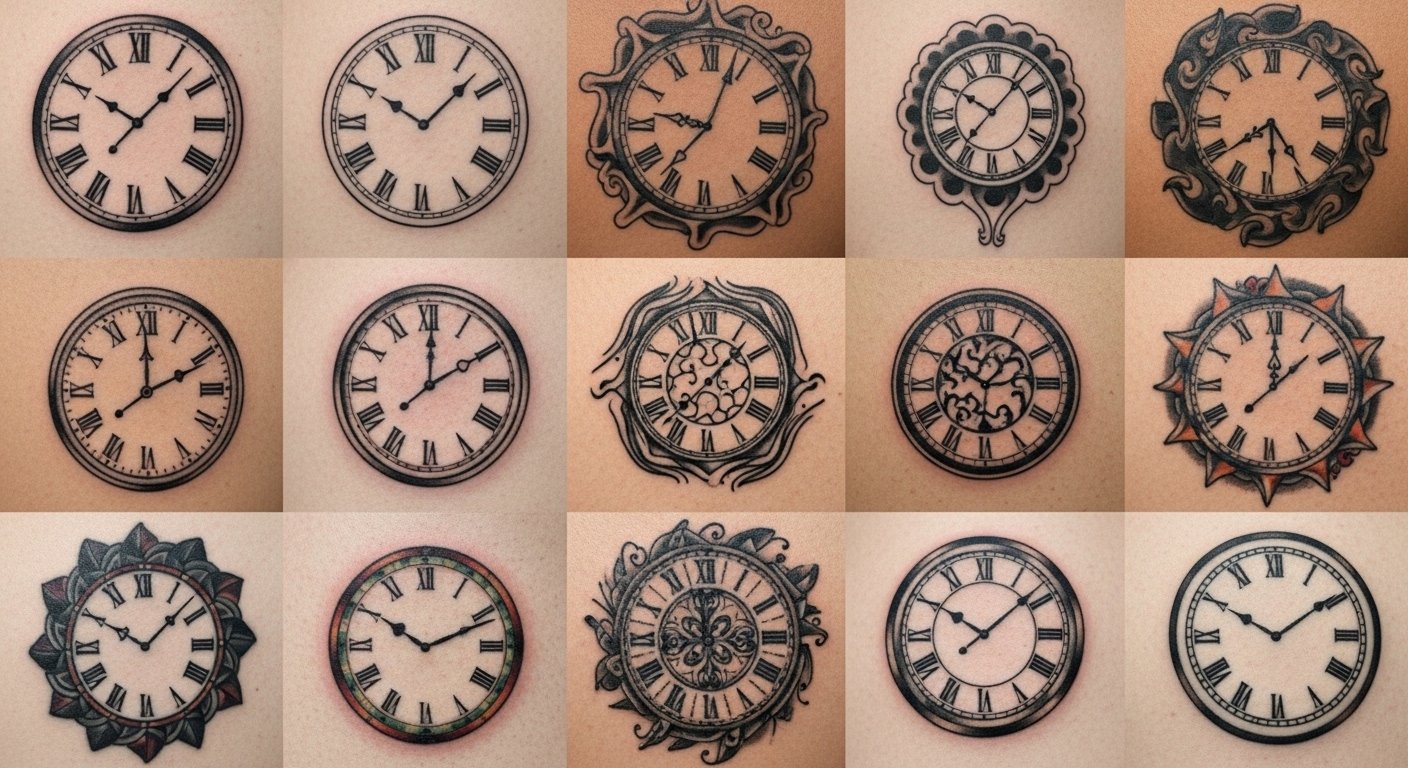
I spent months bookmarking clock tattoos before I realized the real decision was less about the motif and more about how a clock ages on your skin. I wanted designs that hold meaning and still look crisp years later. Below are 25 clock tattoo ideas I’ve tracked in artist feeds and seen healed in person—each one notes placement, pain, healing, and common pitfalls so you can pick a design that lasts.
This list focuses on realism, neo‑traditional, and minimalist clock tattoo designs that work across forearms, chests, ribs, and calves. I’ve noticed artists pushing timeless clock tattoos and minimalist small clock tattoo options in 2026—the ones that age best are bold-lined or black & gray.
1. Fine Line Pocket Watch on Inner Forearm
Style/Technique: Fine Line / Illustrative
Pain Level: Medium (3-4/10)
Session Time: 1-2 hours
Best For: Personalized piece, easy to show or hide
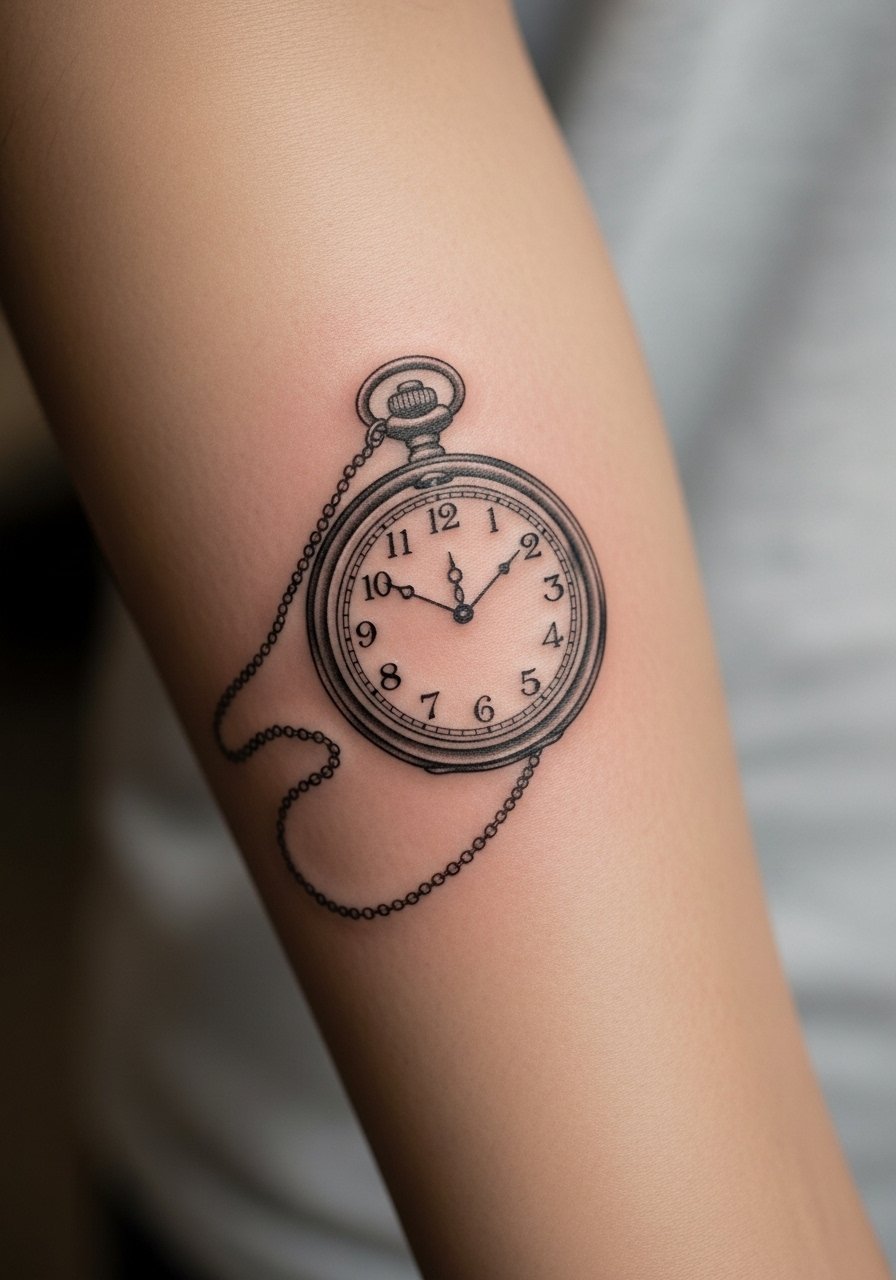
I got one similar to this as my first meaningful clock tattoo. Fine line pocket watches read as intimate and personal—great for including a small date or initials. Inner forearm gives good visibility without extreme pain. Expect light scabbing the first week; healing usually finishes surface-level in 2–3 weeks. From what I’ve seen, fine lines blur faster, so ask your artist to thicken critical numerals slightly. A common mistake is packing too many tiny gears into a small area; keep detail balanced or place larger on the bicep. If you want a subtle memorial, this is one of the best clock tattoo placements for readable numbers over time.
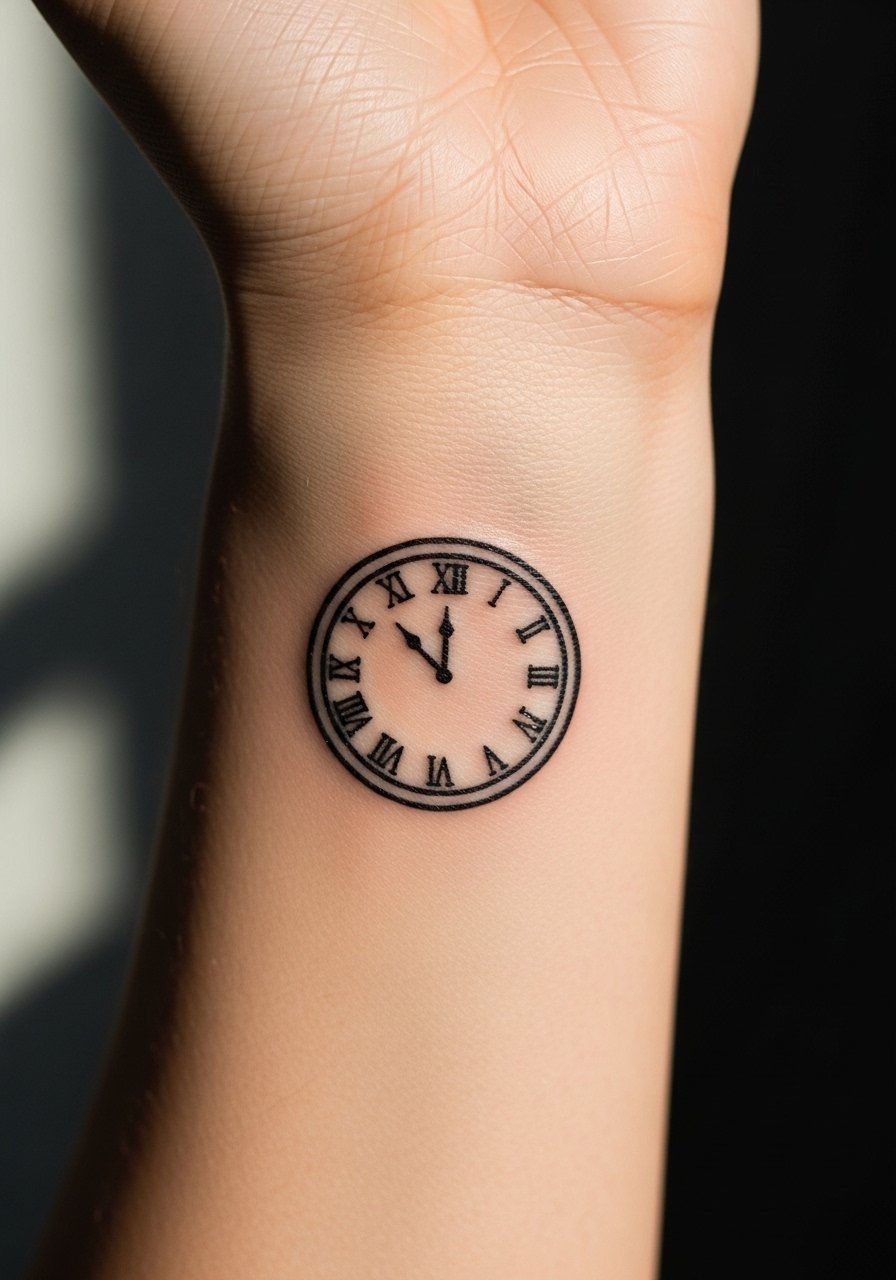
2. Keyhole Clock on Inner Wrist
Style/Technique: Illustrative / Surrealist
Pain Level: High (6-7/10)
Session Time: 1 hour
Best For: Small clock tattoo, symbolic keepsake
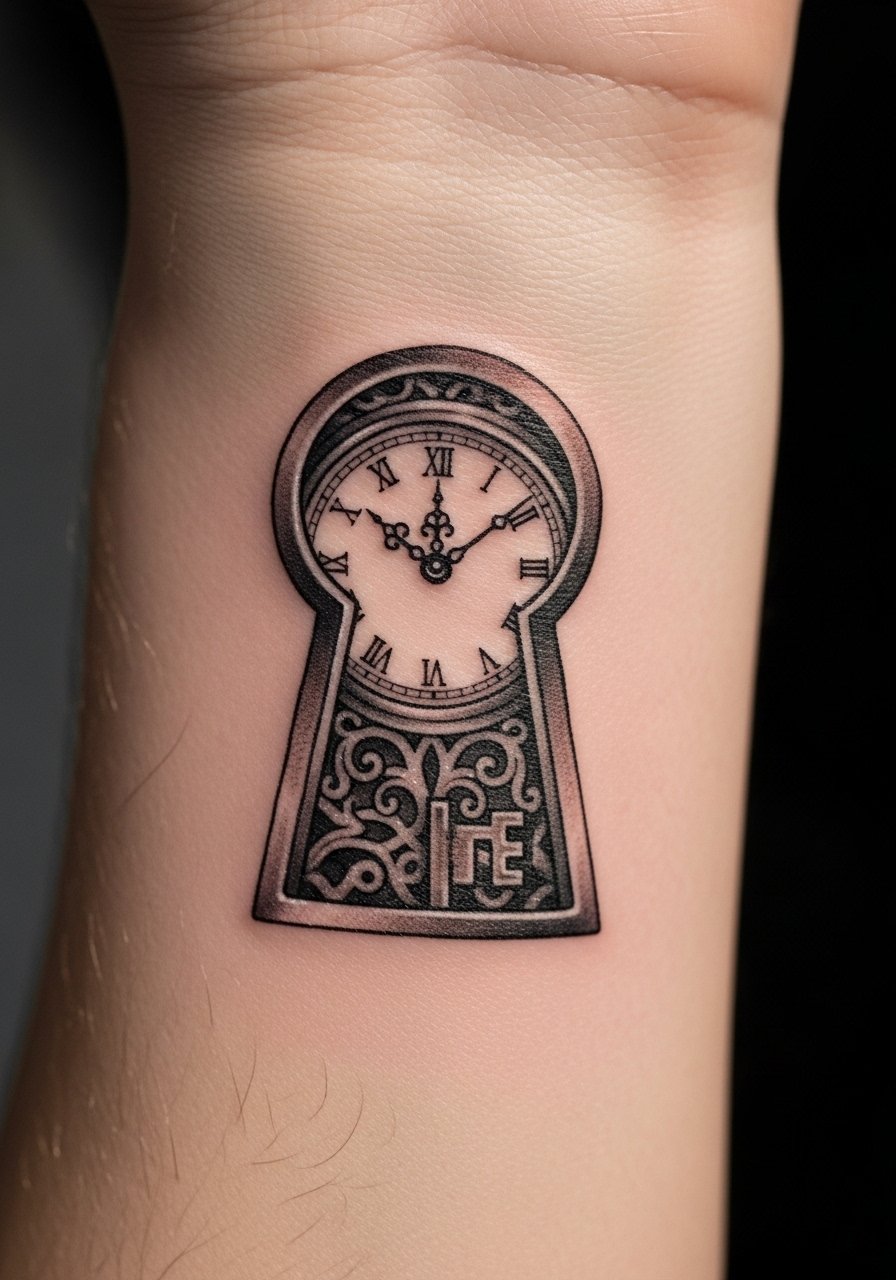
I’ve seen this design used as a charm-like reminder—almost like unlocking a memory. The inner wrist is visible and meaningful but sits over bone and can sting. Keep it small: a tiny keyhole clock reads well and is an easy small clock tattoo to hide under a watch. Expect faster fading here due to sun and friction; sunscreen is a must. One tip artists repeat: bold outlines help numerals stay legible. If you want a miniature, ask for a simplified face (no tiny roman numerals) to avoid blurring.
3. Realism Pocket Watch on Outer Bicep
Style/Technique: Realism / Black & Gray
Pain Level: Low-Medium (3/10)
Session Time: Multiple hours, single or two sessions
Best For: Statement realism tattoo that ages well
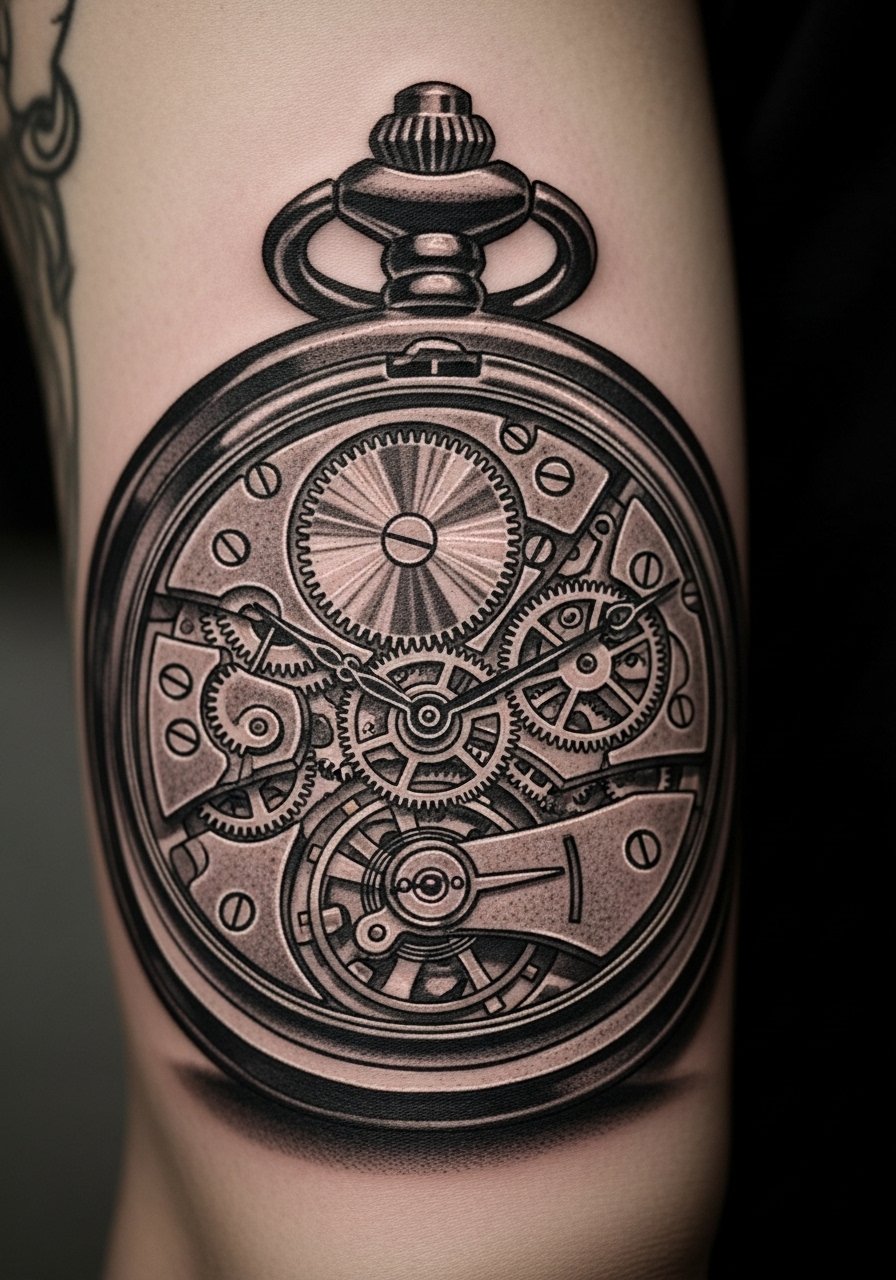
Realism pocket watches are a staple for clock tattoo designs. On the bicep you get enough canvas for crisp gears and shadowing. I’ve spoken with artists who prefer thicker transitions between tones for longevity—fine stippling can blur. Pain on the bicep is forgiving, and healed pictures I’ve seen keep great depth if the artist uses solid blackwork under gradients. Common mistake: trying to cram too many tiny gear details into a medium piece. Pick one focal gear and let it breathe.
4. Broken Clock Fragment on Inner Arm
Style/Technique: Minimalist / Traditional Cross‑over
Pain Level: Medium (4/10)
Session Time: 1–2 hours
Best For: Symbolic pieces about resilience and change
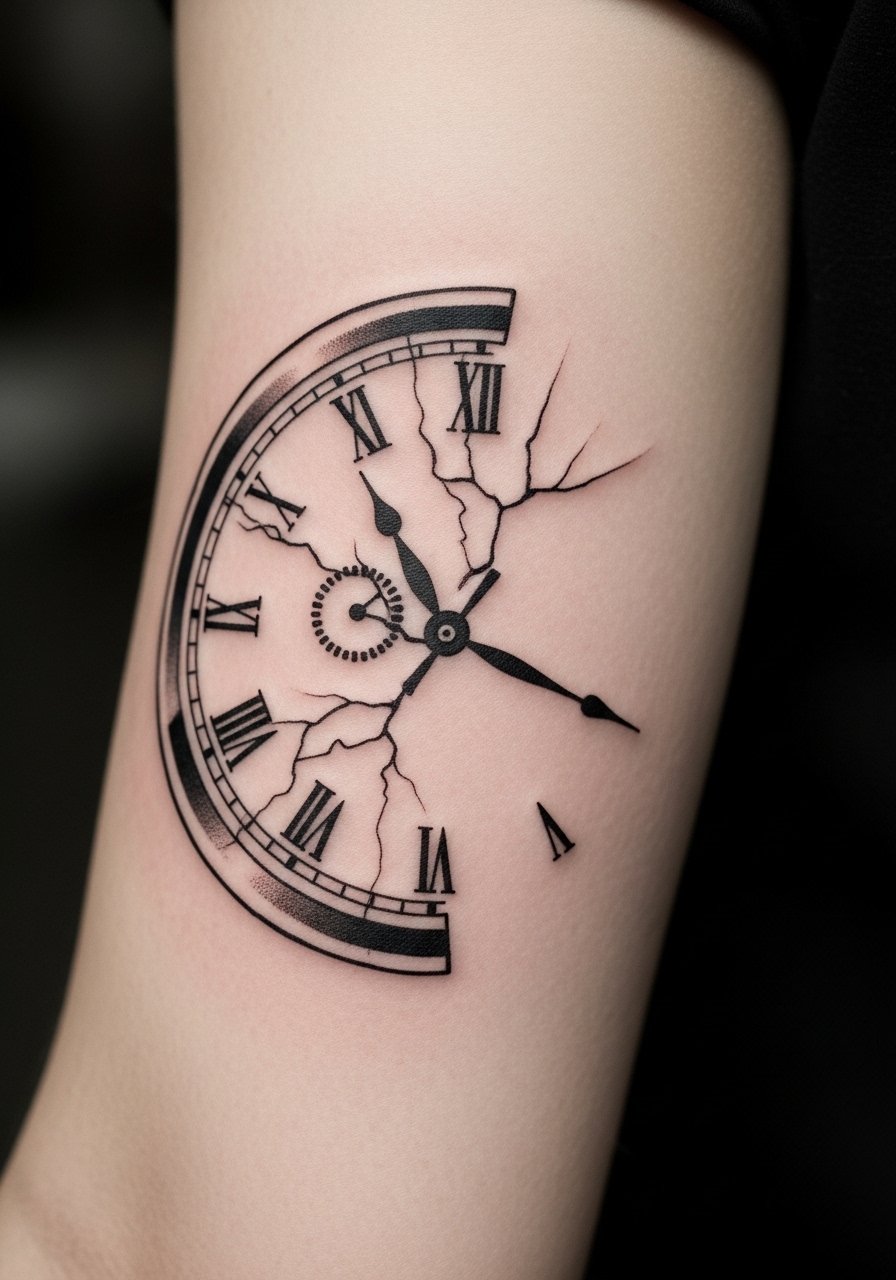
Broken clock tattoos carry a strong clock tattoo meaning—resilience after disruption. The inner arm lets you display it privately. I’ve seen this design look best when the cracks are bold, not obsessively fine; too many tiny hairline cracks blur into a gray mess. Pain is moderate here. Healed photos usually show the black outline holds up better than micro-shading in the cracks. If this design speaks to you, consider adding a small date or rose to anchor personal meaning.
5. Serpent‑Wrapped Clock on Thigh
Style/Technique: Neo‑Traditional / Color & Blackwork
Pain Level: Medium-High (5-6/10)
Session Time: Multiple sessions for color and shading
Best For: Large, symbolic statement—eternity and transformation
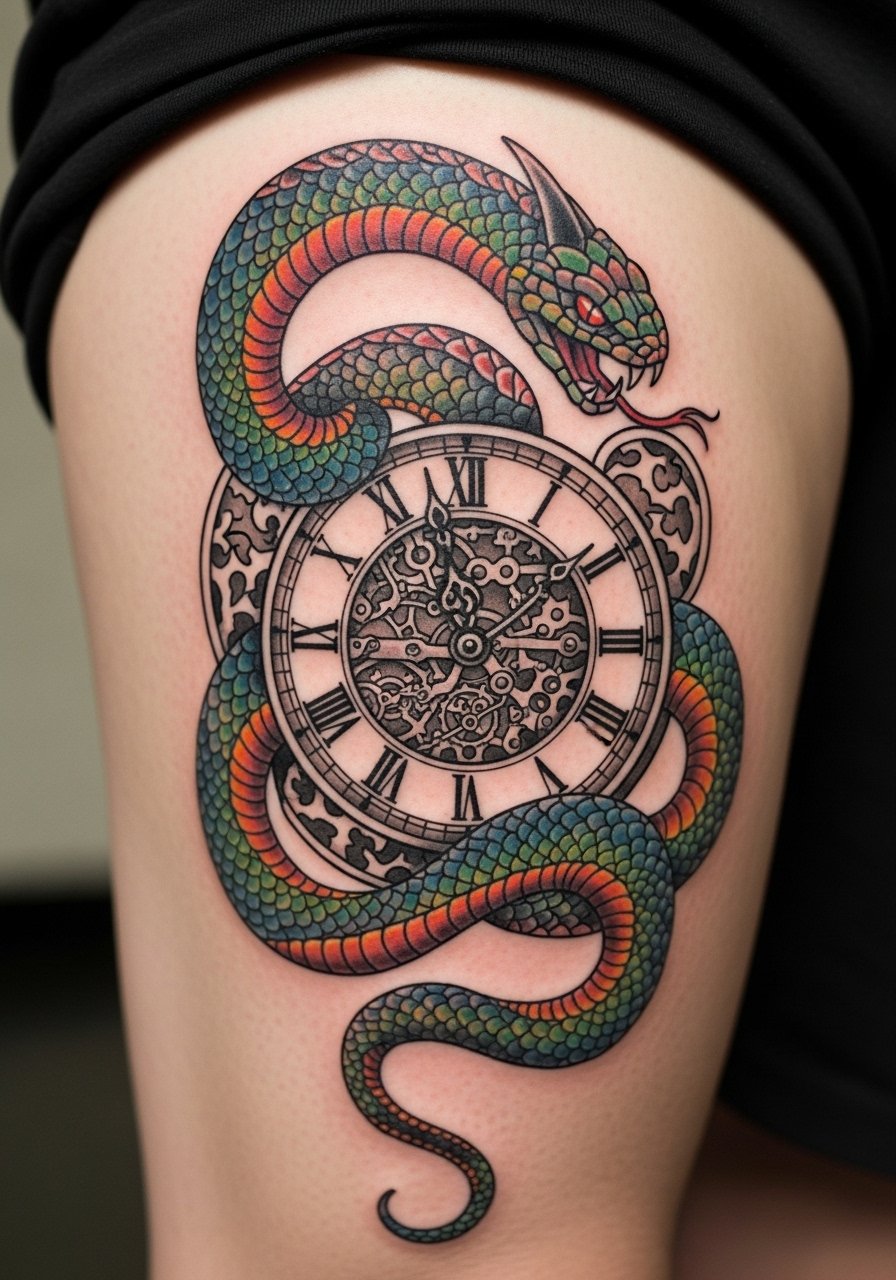
Serpent-wrapped clocks are dramatic and timeless. The thigh is forgiving for longer sessions and detailed color. From what I’ve observed, artists layer saturated color for serpents and reserve black & gray for the clock face to ensure longevity. Pain is lower on the fleshy thigh, and healed images often keep color well when properly moisturized. Avoid tiny, intricate scales that won’t age; ask for bold scale definition and solid lines around the clock.
6. Map and Clock Forearm Sleeve
Style/Technique: Illustrative / Geometric
Pain Level: Medium (4/10)
Session Time: Multiple sessions for sleeve work
Best For: Travelers and life‑journey tattoos
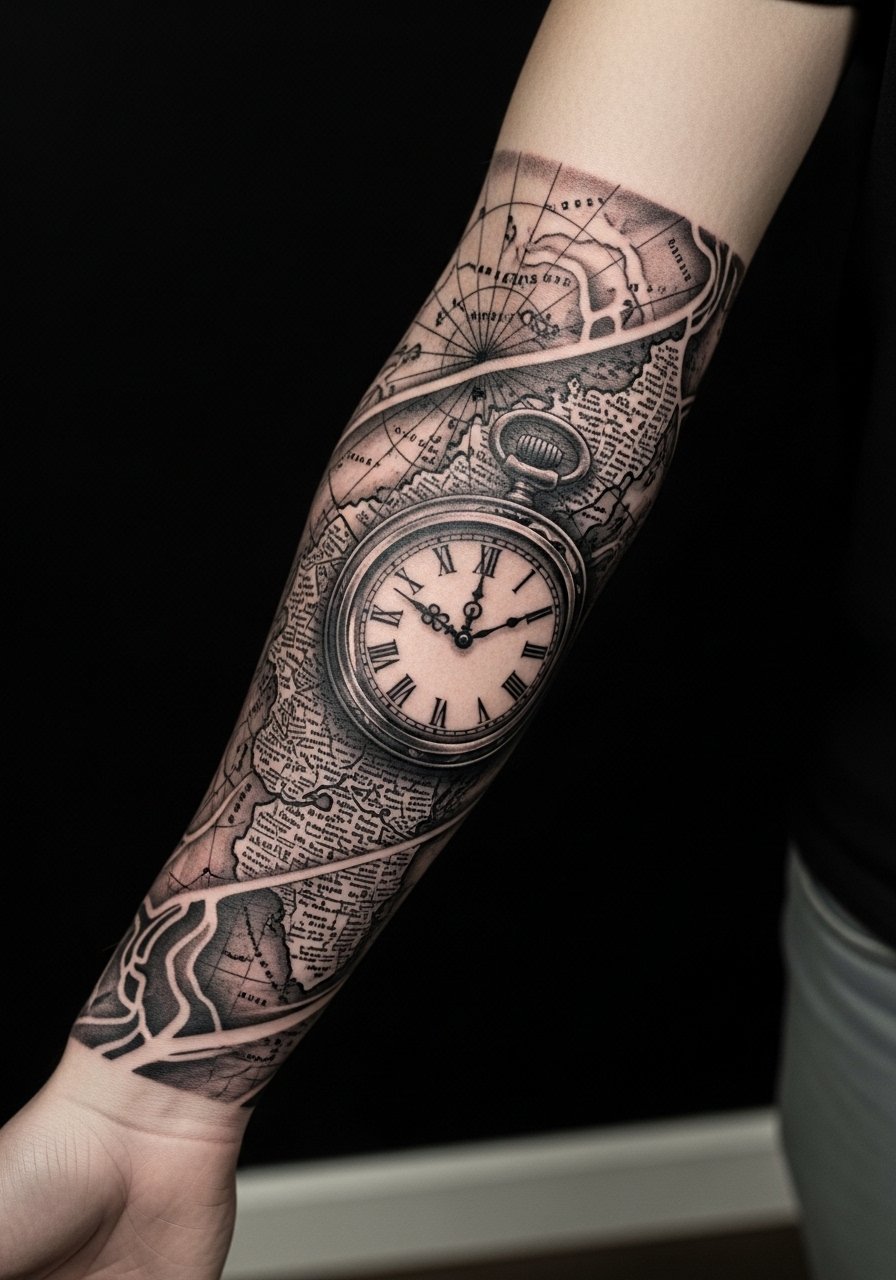
I’ve recommended map + clock combos to travel friends—they combine place and passage of time elegantly. Forearm sleeves give artists room for map lines, compass points, and a clock face with readable numerals. Expect several sessions and staged healing. A frequent error is overloading the sleeve with tiny map text; larger, simplified lines read better long-term. Artists I follow suggest bold clock outlines and muted map shading so the clock remains focal as the skin ages.
7. Ghostly Clock Ribcage Piece
Style/Technique: Blackwork / Surreal
Pain Level: High (7-8/10)
Session Time: 1–3 hours depending on size
Best For: Private, moody symbolism about memory and loss
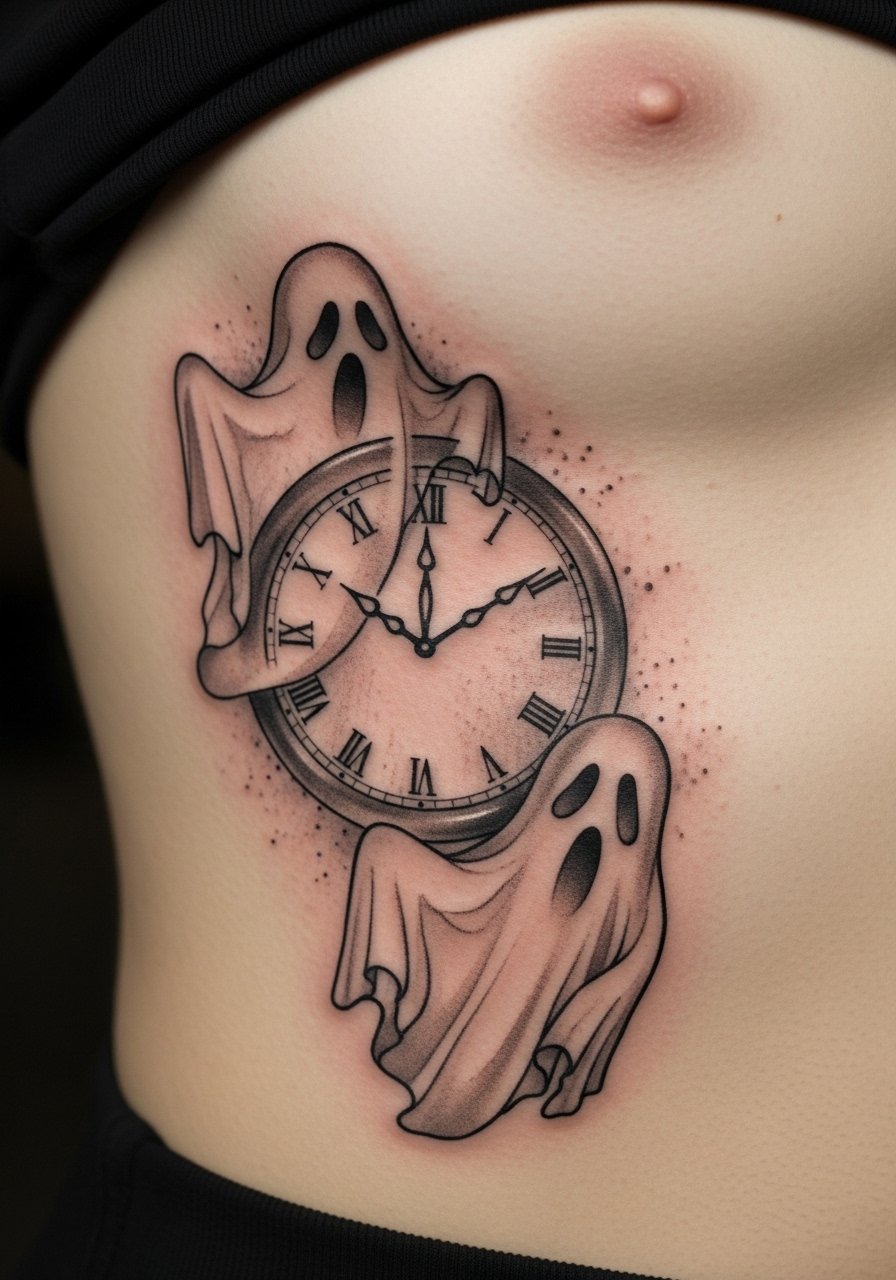
Ribcage clocks read as intimate and haunting. I’ve seen ghost motifs drift into the clock face to suggest lingering memories. Pain here is high; plan for slower, controlled sessions. Healed photos often look softer because the skin stretches and shading settles. Avoid extremely fine gray wash near ribs—ask your artist for stronger contrasts to keep shapes readable. If you want a private memorial, this placement pairs well with a discreet date.
8. Handless Vintage Clock on Wrist
Style/Technique: Minimalist / Vintage Outline
Pain Level: High (6-7/10)
Session Time: 30–60 minutes
Best For: Protest against time’s control, subtle symbolism
A handless clock is a bold conceptual move—timelessness or freedom from schedules. Wrist placement is very visible and often painful. From my experience, the simpler the face, the better it holds up here. Fine numerals fade; bold Roman numerals or no numerals work best. Expect touch-ups down the line. Many people regret tiny details on the wrist because daily sun and friction chew at ink; I’d keep shapes bold and minimal.
9. Melting Surreal Clock on Ankle
Style/Technique: Surrealist / Blackwork
Pain Level: Medium (4-5/10)
Session Time: 1–2 hours
Best For: Avant‑garde statement, symbolic escape from structure
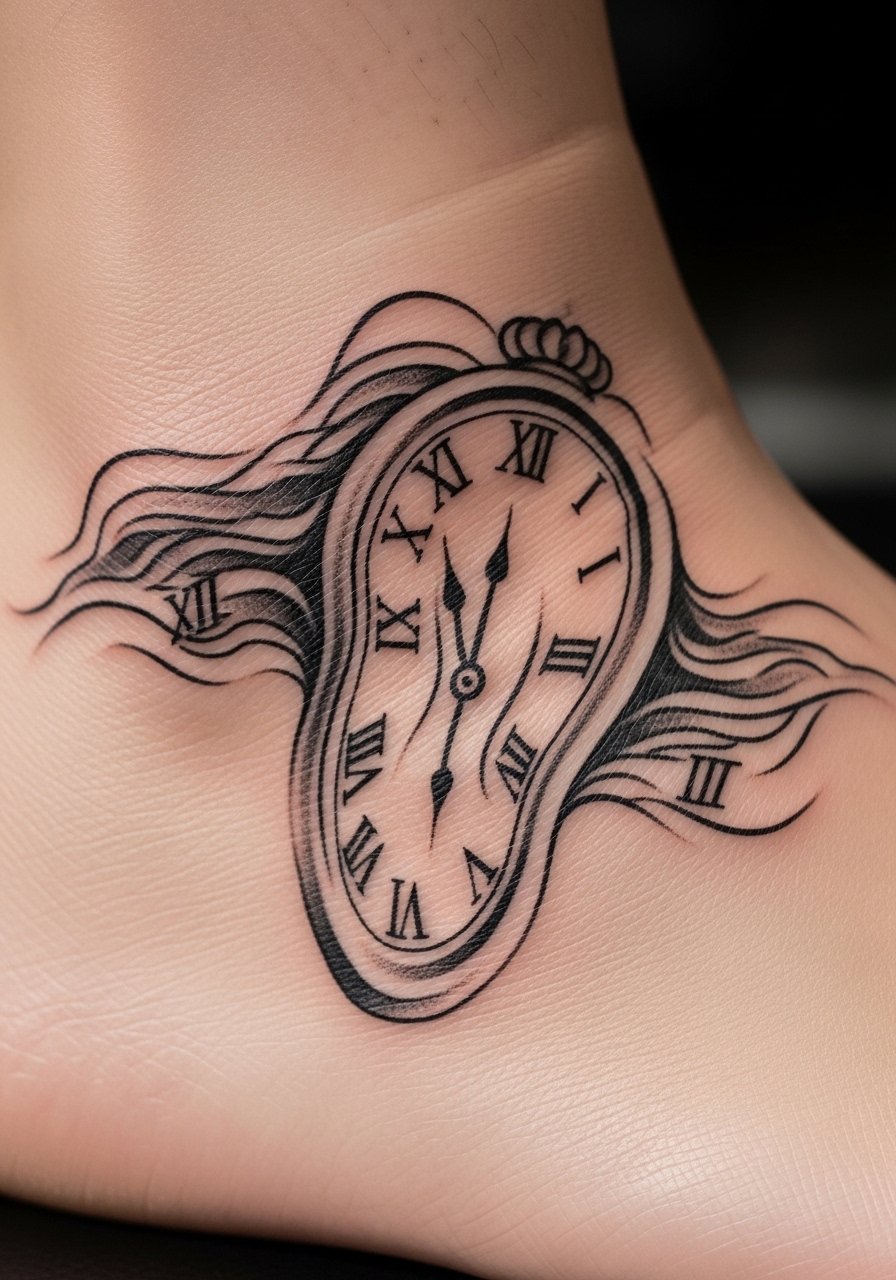
Melting clocks make a strong visual about time’s fluidity. The ankle is a common spot but watch for rubbing from socks and shoes—this speeds fading. I’ve seen melted edges blur if lines are too thin, so ask for defined negative space and thicker shadow lines. Pain is mid-range around the ankle bone. For long-term clarity, plan on simple hands and avoid tiny gear work in melted sections.
10. Grandfather Clock on Calf or Shoulder Blade
Style/Technique: Realism / Vintage Illustration
Pain Level: Low-Medium (3-4/10)
Session Time: Multiple sessions for large detail
Best For: Heritage pieces and family ties
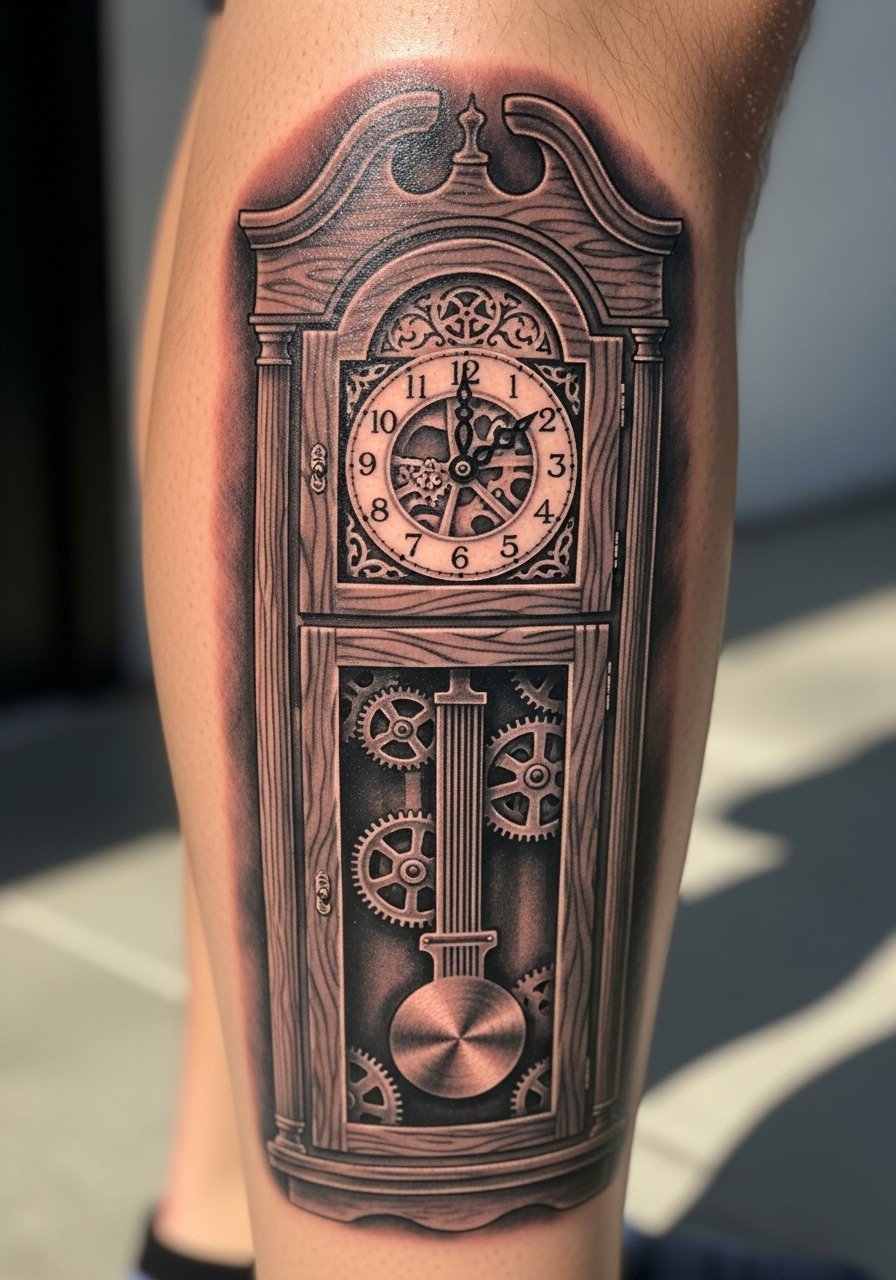
A grandfather clock reads as family history or legacy. I’ve seen these work beautifully on the calf or shoulder blade where vertical flow suits the silhouette. Expect longer sessions; the large surface lets artists keep gear detail big enough to hold over time. A tip I picked up: ask for simplified wood grain and defined shadow edges so the piece doesn’t turn into a gray block as it ages. This is one of the best clock tattoo placements for a heritage vibe.
11. Clock with Rose on Collarbone
Style/Technique: Traditional / Floral Integration
Pain Level: Medium-High (5-6/10)
Session Time: 1–2 hours
Best For: Romantic memorials and feminine designs
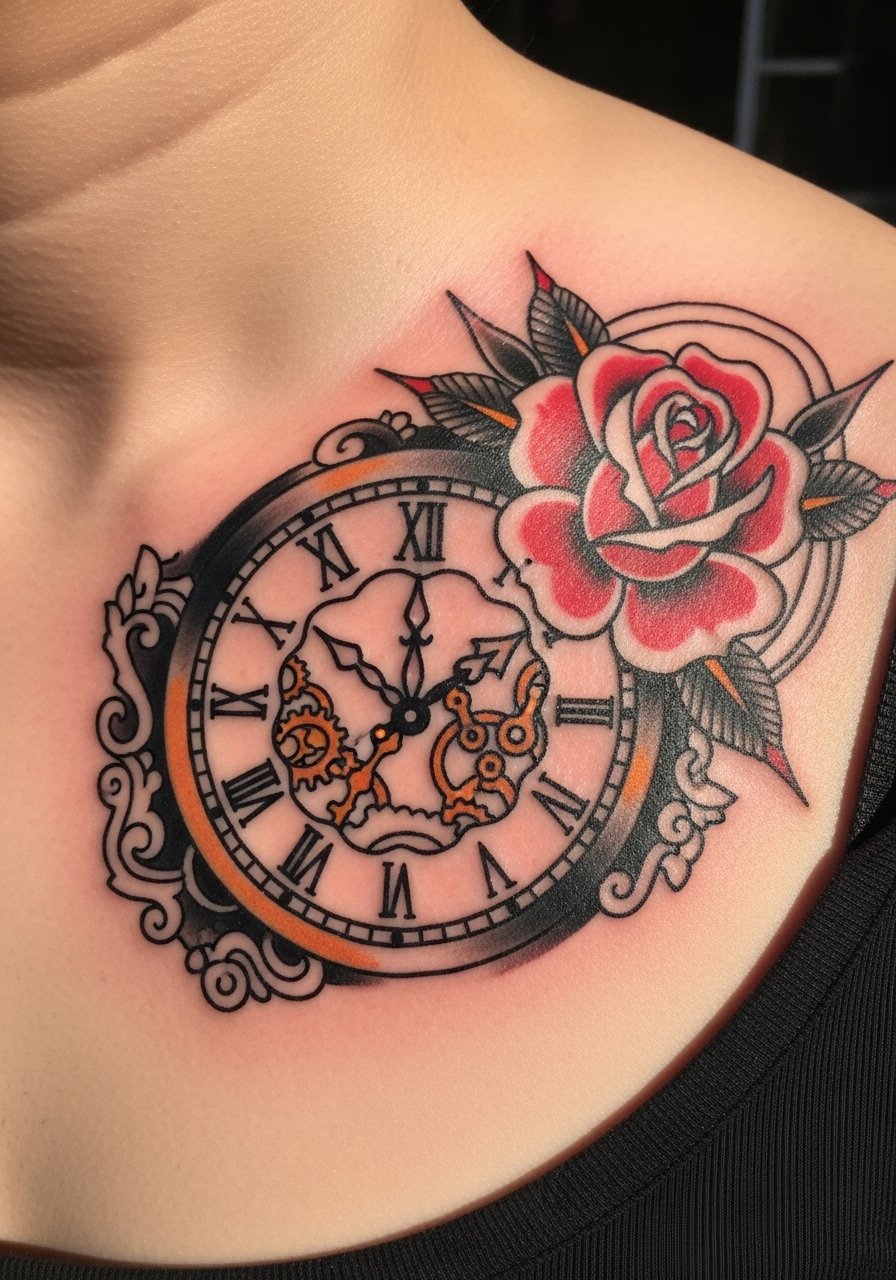
Clocks paired with roses are a classic for marking love and life’s transience. Collarbone placement gives a graceful, visible sweep but can be sharp to get inked. I’ve noticed the red holds better when applied with saturated pigment and solid black outlines. Avoid tiny petal details that become a blur; traditional bold petals age more predictably. If you want an eternal love motif, ask about putting a small date inside the clock face for personalization.
12. Clock with Skull on Chest
Style/Technique: Blackwork / Traditional Hybrid
Pain Level: High (6-7/10)
Session Time: 2–4 hours
Best For: Mortality themes and bold statement pieces
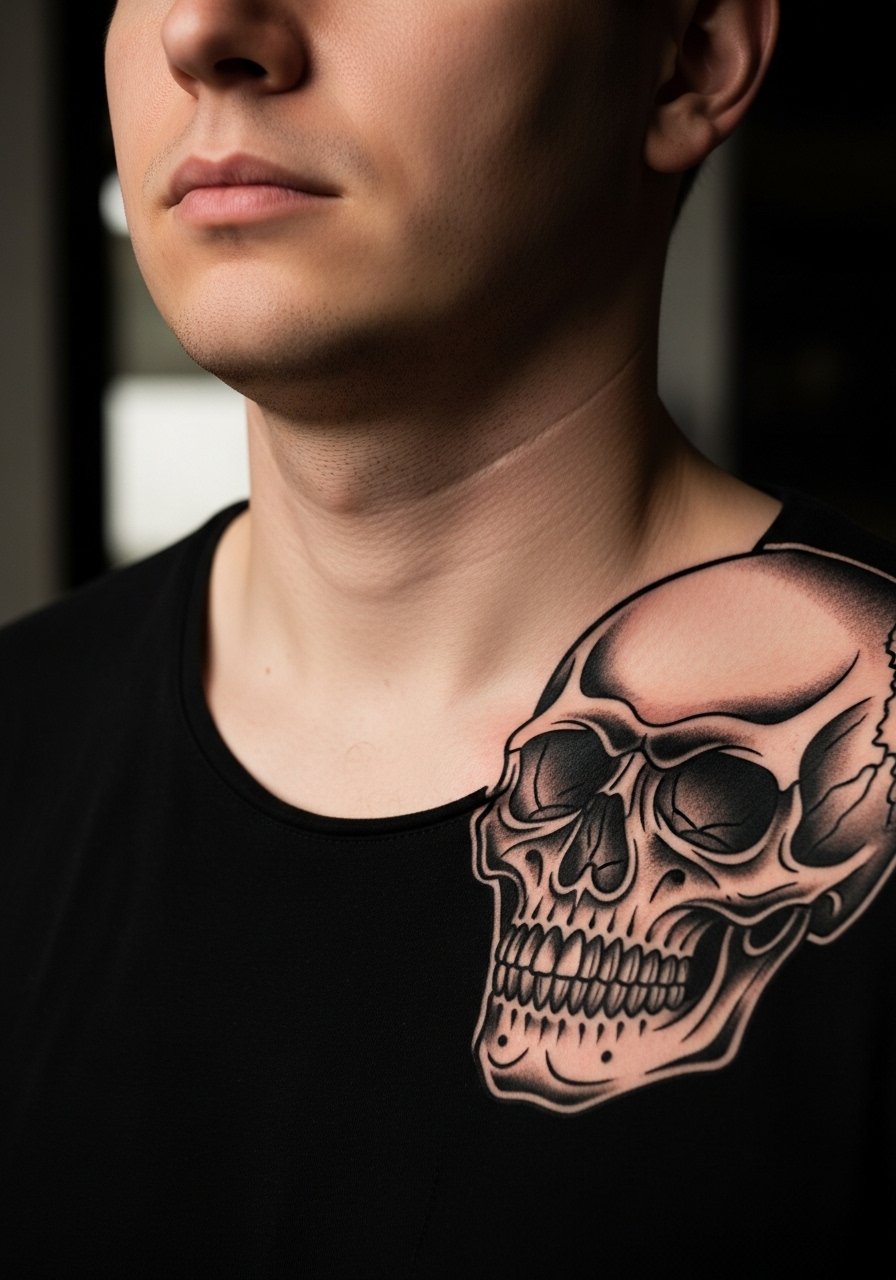
Clock+skull tattoos are direct about mortality and life’s limits. Chest placement can be painful near the sternum but allows a larger, dramatic composition. I’ve seen the best results with bold blackwork around the skull and subtle clock numerals so the skull remains the focal point as the skin ages. One common misstep: trying pastel color blends in chest blackwork; black & gray holds stronger over time.
13. Tiny Clock with Heart on Finger or Inner Wrist
Style/Technique: Minimalist / Romantic
Pain Level: High on fingers (7/10), Medium on wrist (4/10)
Session Time: 30–45 minutes
Best For: Small clock tattoo and subtle romantic reminders

I love recommending this as a first tiny clock tattoo—especially the inner wrist option if you want less finger pain. Fingers are notoriously tricky: lines can spread and fade fast. If you choose a finger, expect touch-ups. A small wrist placement will age better. From what I’ve seen, the red heart color holds differently on various skin tones, so discuss saturation with your artist. Keep the clock face simplified—no tiny roman numerals.
14. Clock Tower Travel Scene on Upper Arm
Style/Technique: Illustrative / Scenic Realism
Pain Level: Low-Medium (3-4/10)
Session Time: 2–4 hours
Best For: Travel lovers and landmark memories
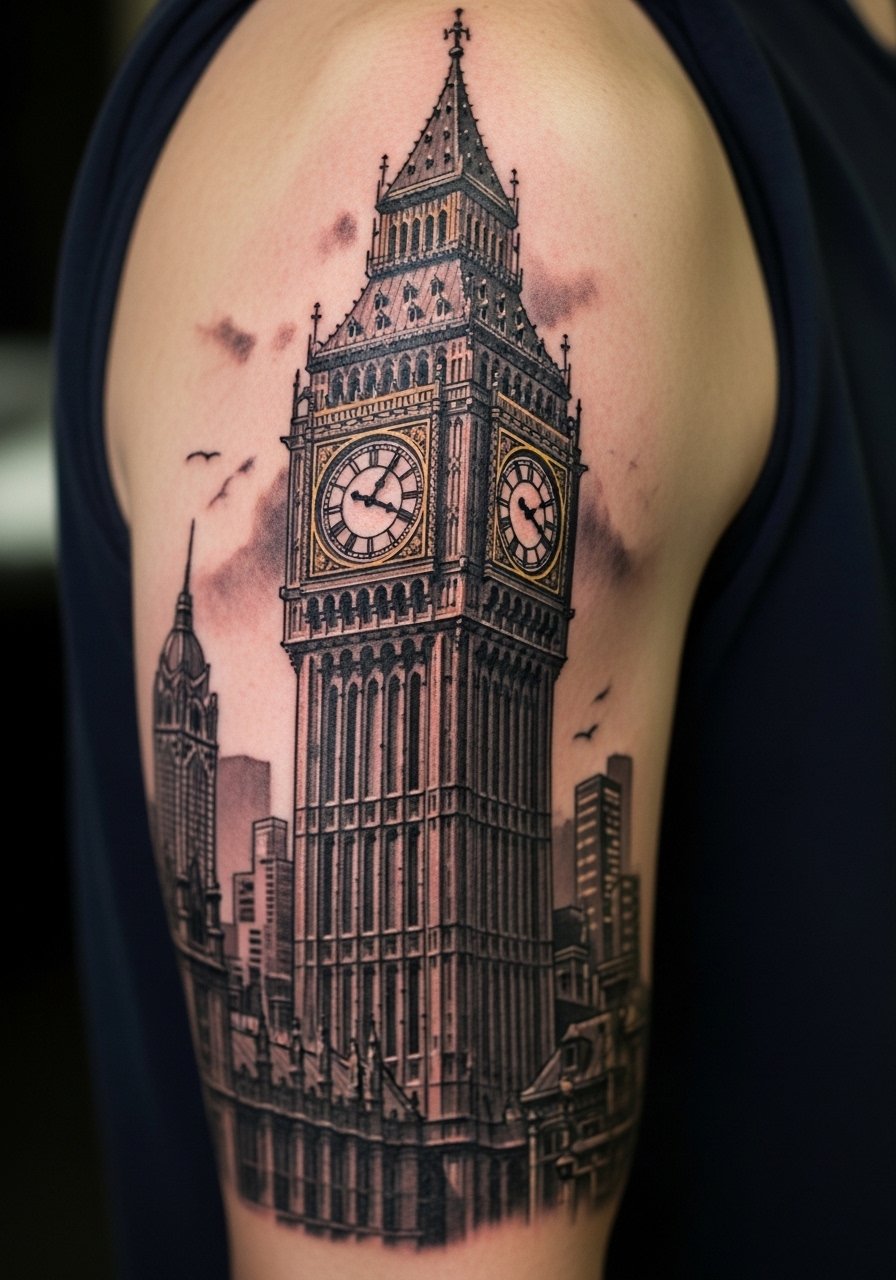
A clock tower ties time to place—think Big Ben or a local bell tower. Upper arm placement is forgiving and visible when you want it to be. I’ve seen travel collectors use this to mark a life-changing trip. For longevity, artists suggest bold tower lines and simplified background details so distance fades without losing the tower’s shape. If you want the clock to show a specific time, get the numbers simplified for clarity years later.
15. Clock with Eye on Nape or Behind Ear
Style/Technique: Surreal / Charm‑like
Pain Level: High behind ear (7/10), Medium on nape (4-5/10)
Session Time: 1–2 hours
Best For: Spiritual protection motifs and subtle symbolism
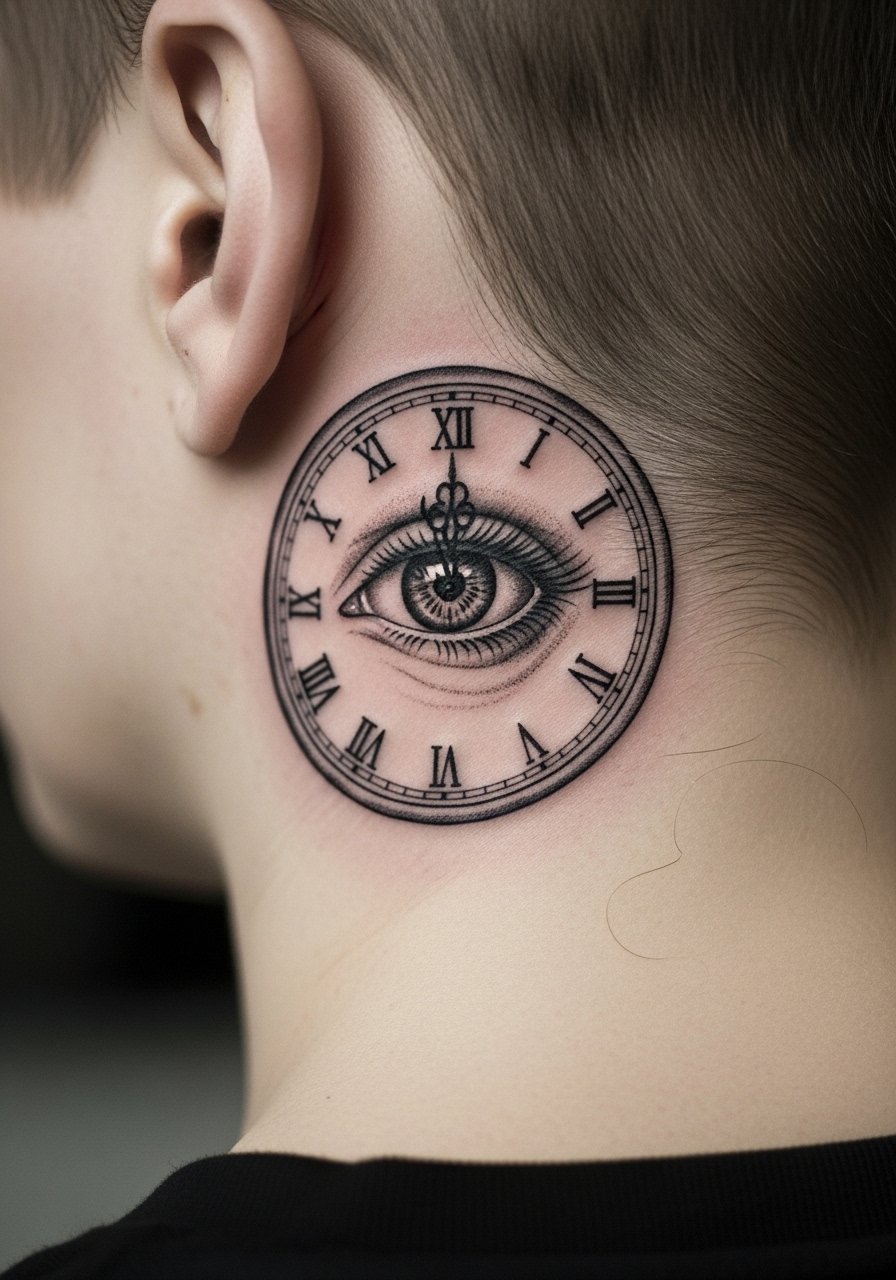
This is one of those under-covered clock tattoo ideas I didn’t see often until recently. The eye in the clock adds a vigilance or intuition layer to the passage of time. Behind the ear is very visible only when you tuck hair; it’s also painful. For these tiny placements, clear bold lines are essential. Artists I follow recommend avoiding tiny eyelash-esque details that blur—simpler shapes read better as they settle.
16. Sunflower Clock on Shoulder Cap
Style/Technique: Illustrative / Positive Motif
Pain Level: Low-Medium (3-4/10)
Session Time: 1–2 hours
Best For: Uplifting, life-affirming clock designs
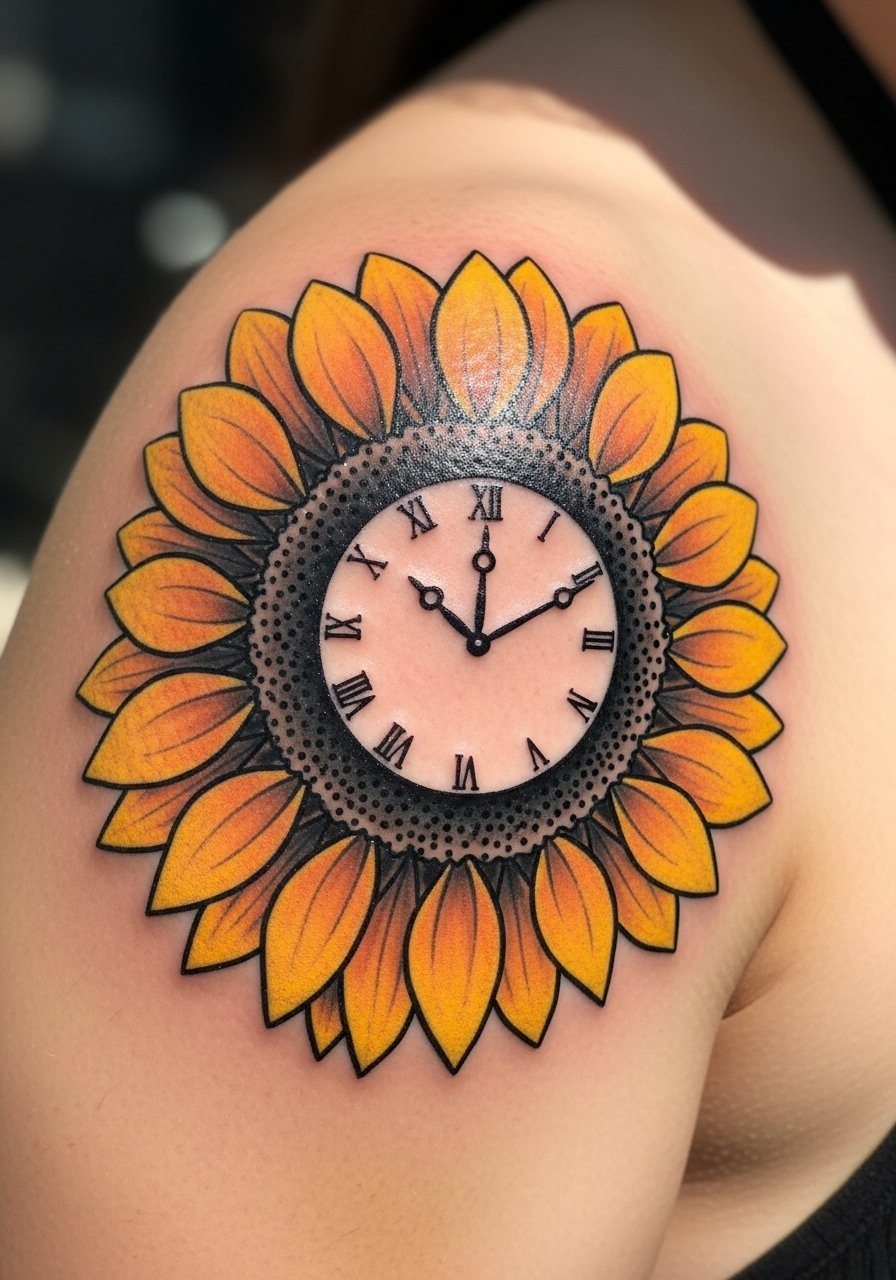
I like the sunflower clock as a fresh, positive spin on clock tattoo meaning. Instead of mortality, it celebrates growth and bright days. The shoulder cap is an easy spot for color and low to medium pain. I’ve seen them age well if color saturation is solid and outlines are strong. A common design mistake is tiny petal linework—go with bold petal shapes that keep their form over years.
17. Lion‑Wrapped Clock on Chest or Back
Style/Technique: Neo‑Traditional / Motivational
Pain Level: Medium-High (5-7/10)
Session Time: Multiple sessions for large pieces
Best For: Fortitude and leadership themes
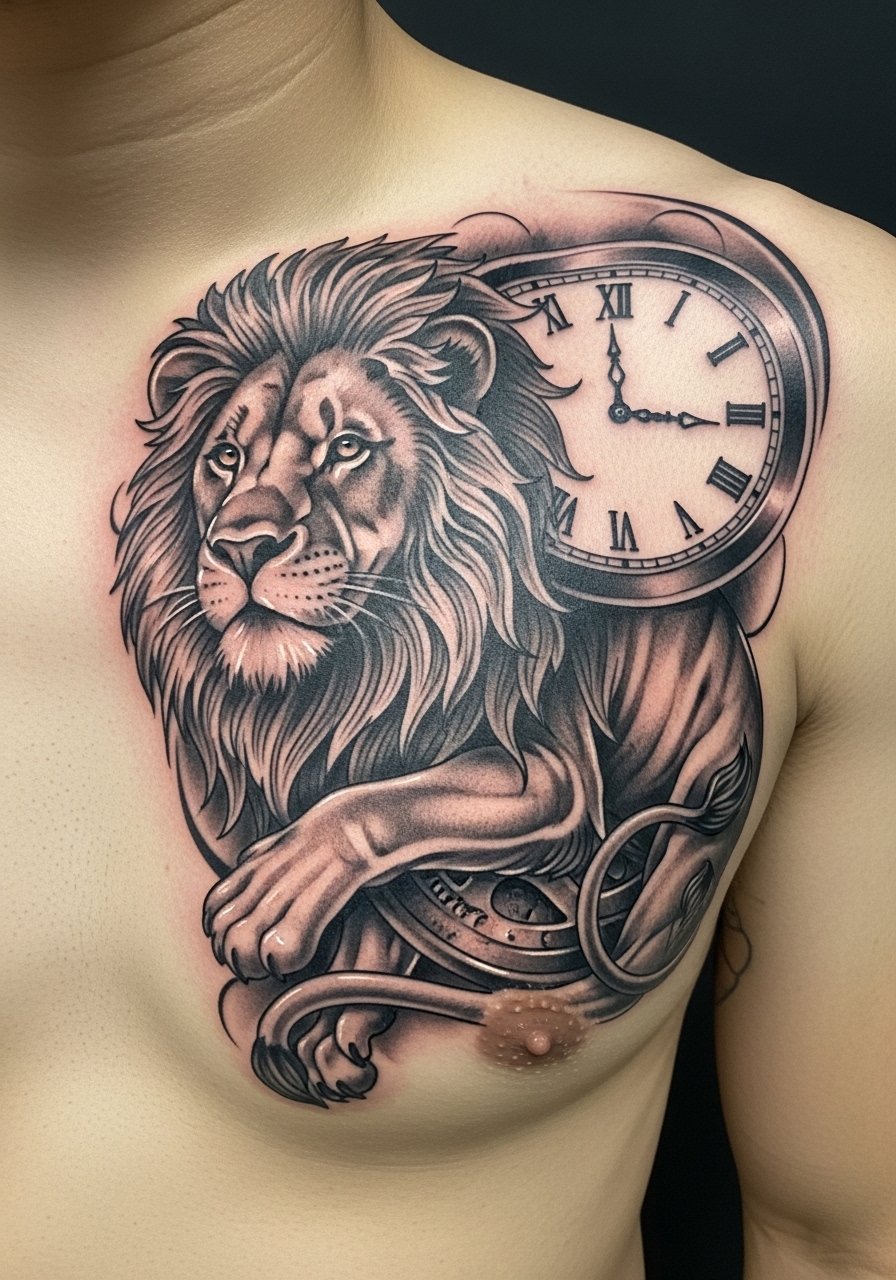
A lion-wrapped clock is a less-seen but powerful motif for strength over time. Large chest or upper back pieces let the lion’s mane and clock face breathe. From what I’ve noticed, strong contrast in the mane helps keep the design readable as hair and movement affect the skin. Avoid too many tiny whisker lines; bold texture ages far better. This is a statement piece—consider how it sits with body movement.
18. Geometric Clock Mandala Down Spine
Style/Technique: Blackwork / Geometric
Pain Level: High on spine (7-8/10)
Session Time: Multiple short sessions
Best For: Meditative, symmetrical pieces with flow
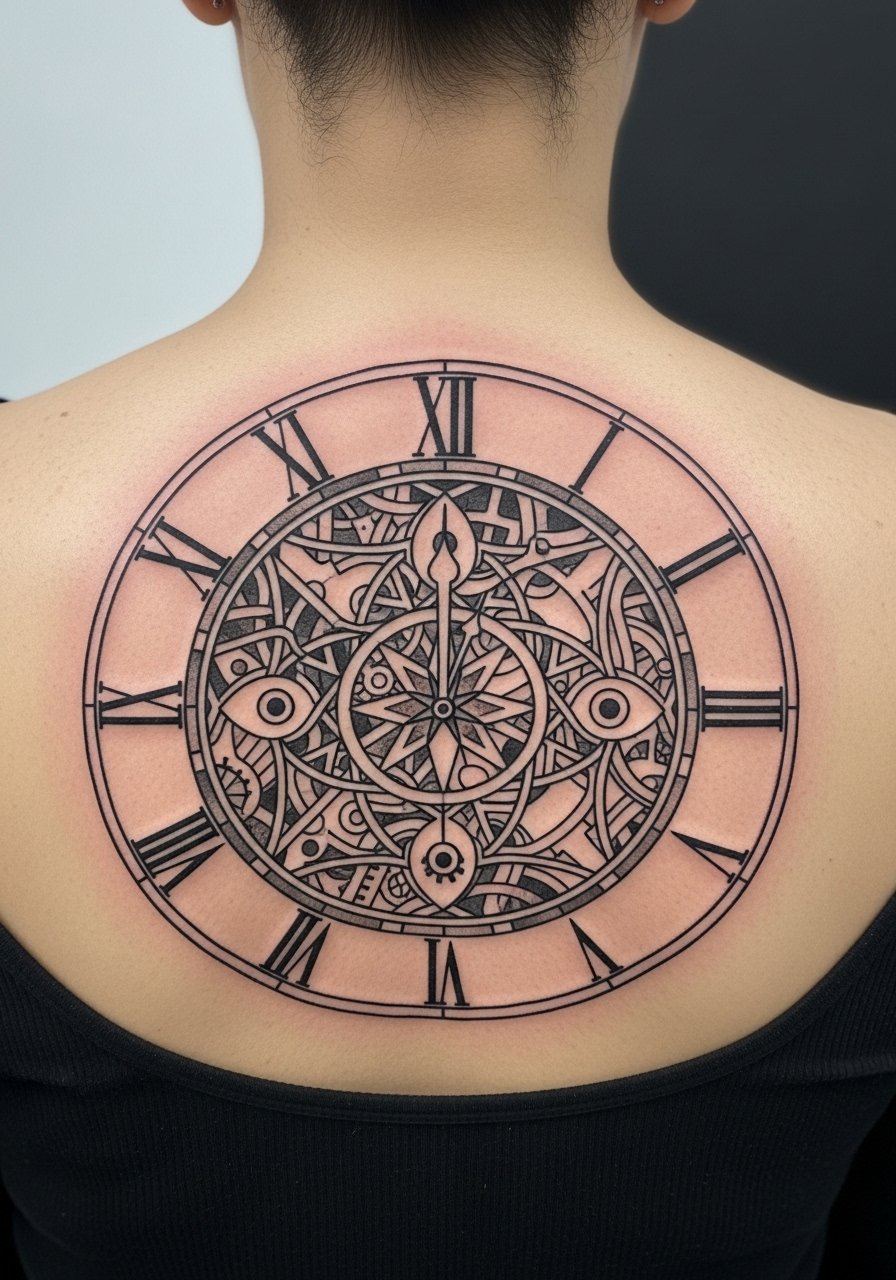
Clock mandalas combine time with order. The spine is dramatic but painful; sessions are often split. I’ve seen mandalas keep their visual impact when lines are slightly thicker and spacing generous—tiny lattice can smudge into texture over time. Ask artists to plan negative space to maintain the mandala’s geometry as the skin stretches. This is a great spot for someone who wants a central, meaningful backpiece.
19. Compass + Clock on Forearm (Journey Theme)
Style/Technique: Illustrative / Nautical
Pain Level: Medium (4/10)
Session Time: 1–2 hours
Best For: Direction and life journey symbolism
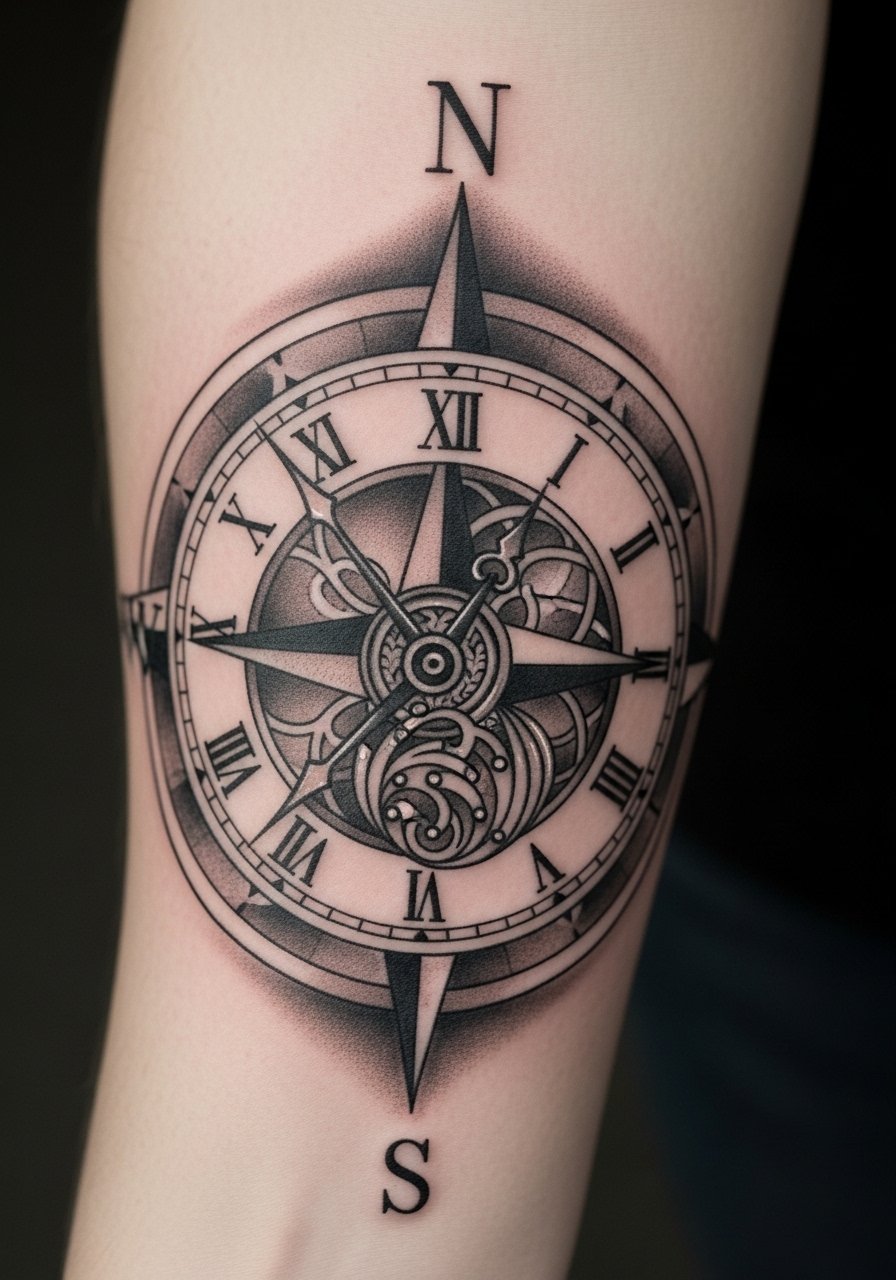
I see compass + clock combos for people who want both direction and timing in a single design. Forearm placement fits well for visibility and readability. From my experience, keeping the compass points bold and the clock numerals simplified avoids future blur. This design works as a forearm statement and is one of the best clock tattoo placements if you want daily reminders of direction and timing.
20. Exposed Gears and Broken Face on Upper Back
Style/Technique: Industrial Realism / Black & Gray
Pain Level: Medium (4-5/10)
Session Time: Multiple sessions for depth
Best For: Mechanical lovers and layered symbolism
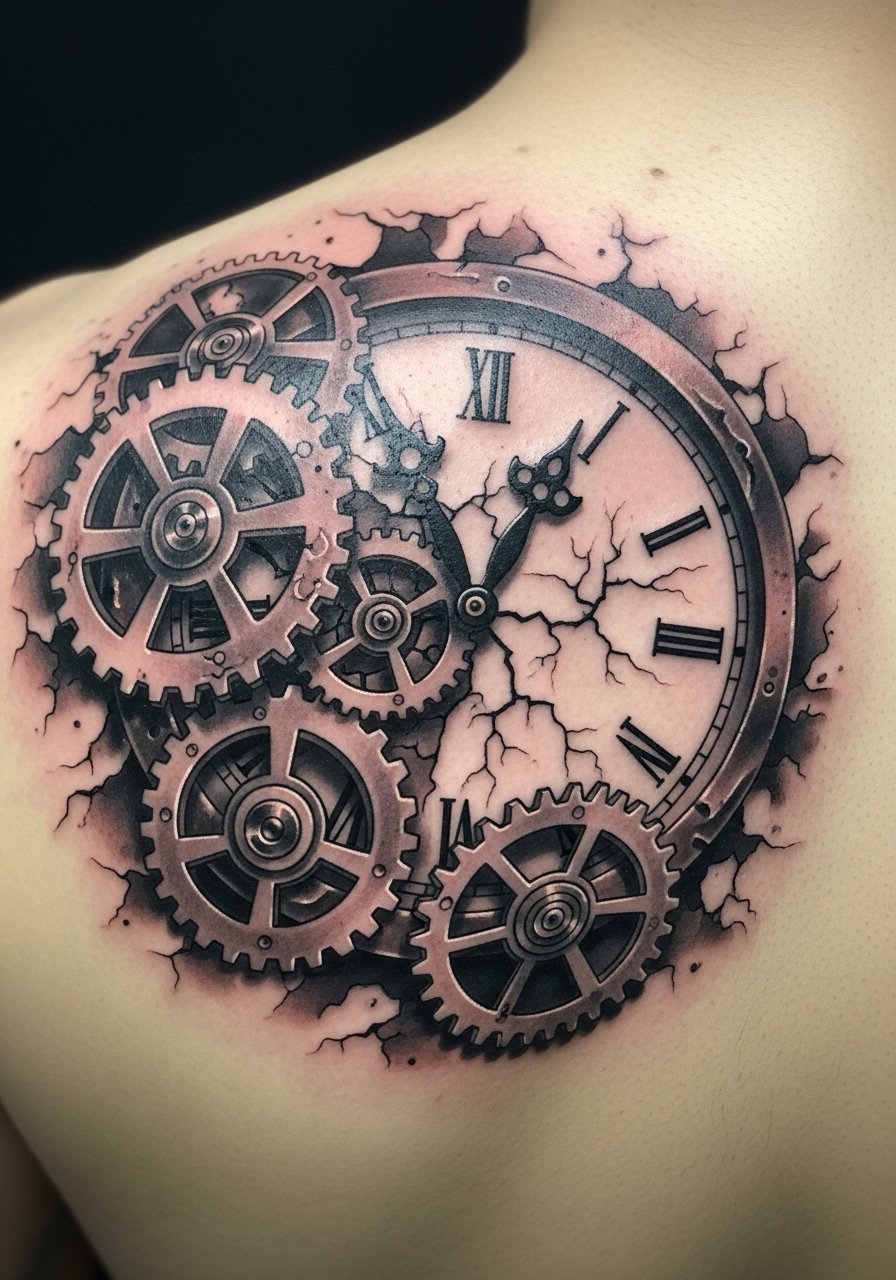
An exposed gears tattoo leans into the mechanical beauty of clocks. Upper back area gives space to render deep shadows and scale the gears large enough to hold over time. I’ve seen this age well when primary gear outlines are bold and interior textures are simplified. Watch the temptation to over-detail the teeth; larger, clear shapes read better in healed photos.
21. Roman Numeral Memorial Clock on Ribcage
Style/Technique: Minimalist / Memorial
Pain Level: High (7-8/10)
Session Time: 1–2 hours
Best For: Personalized dates and memorial pieces
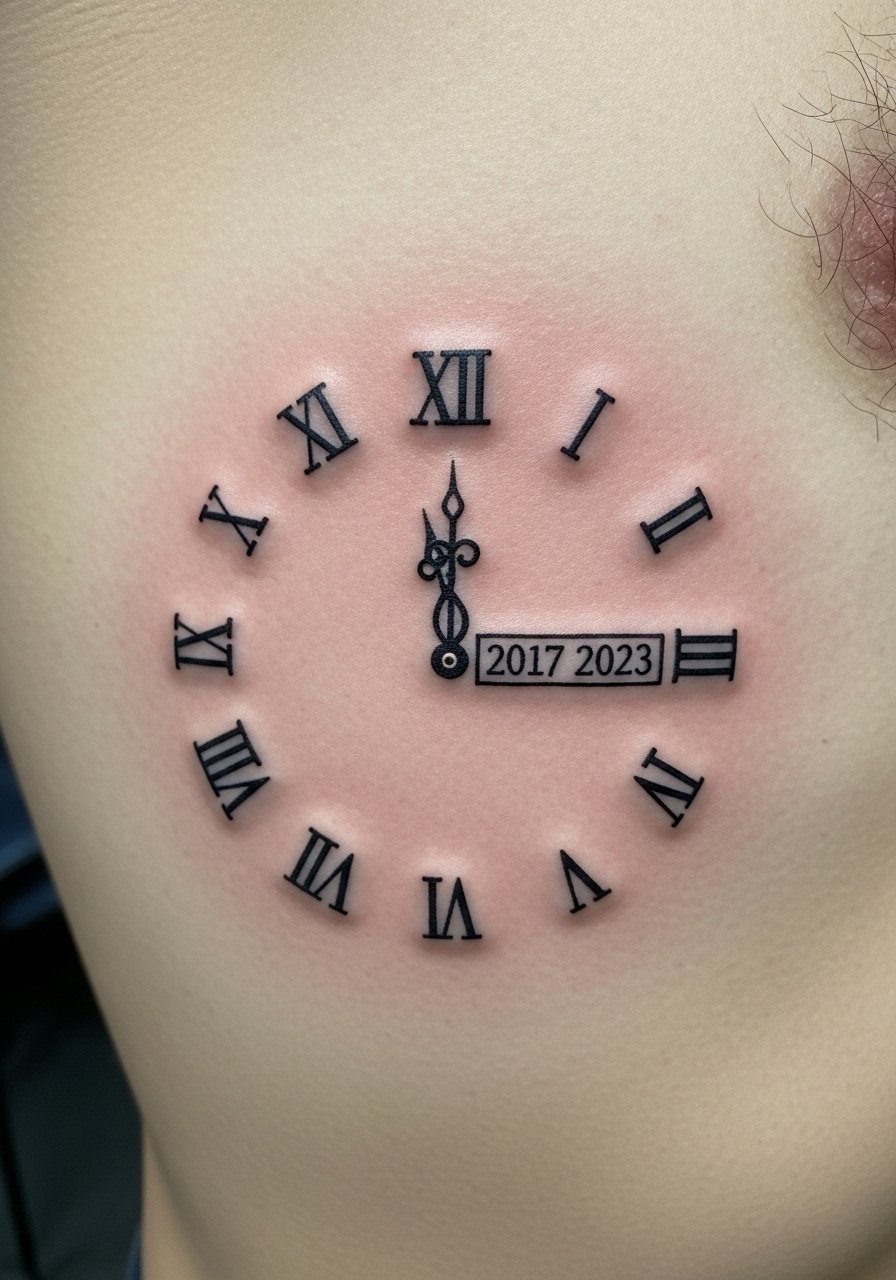
Memorial clocks with a single roman numeral highlighted are powerful. I’ve recommended ribcage placement for privacy, though it’s one of the more painful spots. Clarity is key: use bold numerals and mark the specific date clearly. From what I’ve learned, small text next to numerals can blur, so consider initials or a short year rather than a long sentence.
22. Minimalist Line Clock on Ankle or Wrist
Style/Technique: Minimalist / Fine Line
Pain Level: Medium on ankle (4-5/10), High on wrist (6-7/10)
Session Time: 30–60 minutes
Best For: First tattoo or subtle small clock tattoo
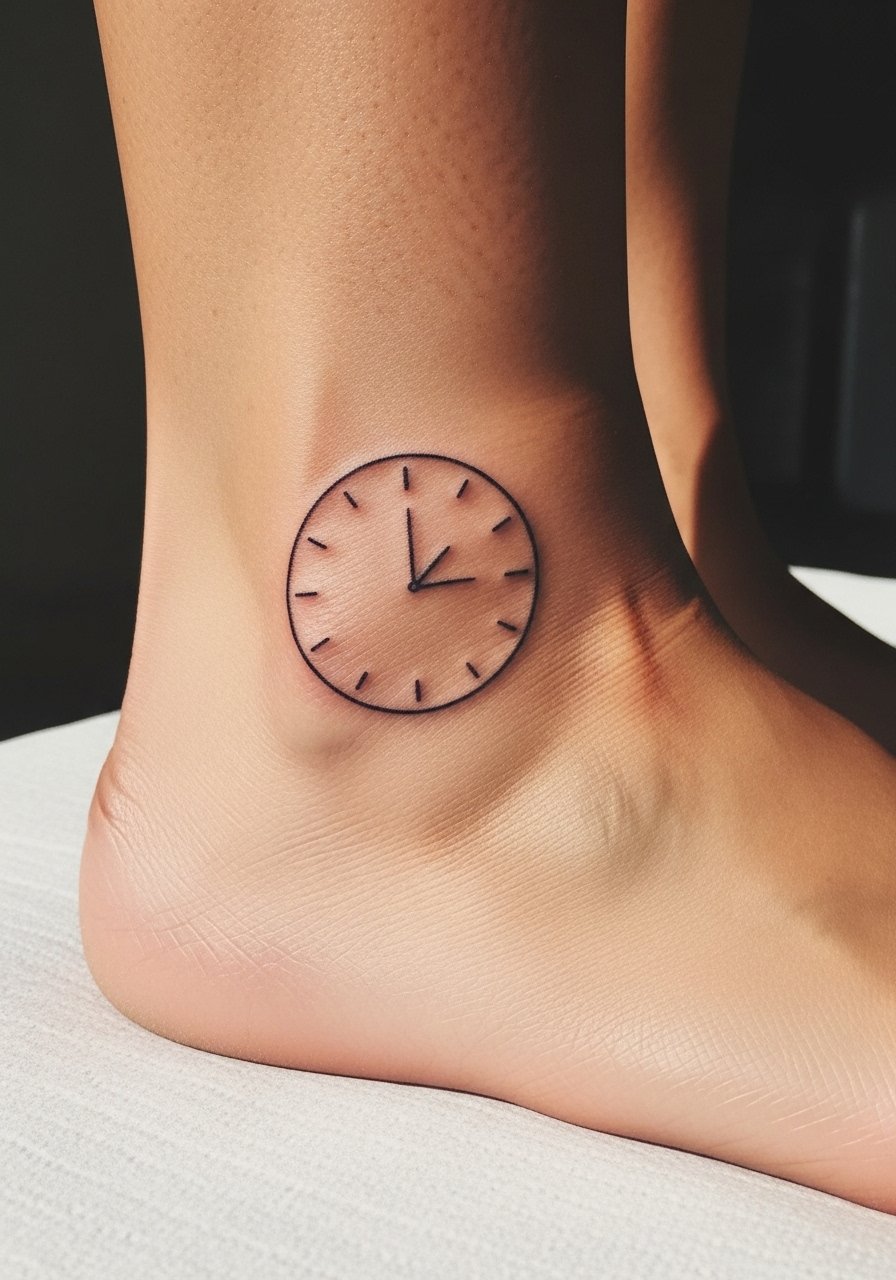
Minimalist clocks are why I recommend starting small. Ankle and wrist placements are common and discreet. I’ve noticed minimalist pieces look clean fresh but can soften with time—ask for slightly thicker line weight to reduce spreading. Avoid cramming numerals; a plain face or small marks read better. This is an ideal “first tattoo” option if you’re testing your commitment.
23. Watercolor Eclipse Clock on Thigh
Style/Technique: Watercolor / Illustrative (use caution)
Pain Level: Low-Medium (3-4/10)
Session Time: Multiple sessions for color saturation
Best For: Bold, colorful thigh pieces (but watch longevity)

I love the look of watercolor clocks, but I’ve also seen many fade unevenly. The thigh is a forgiving placement for color. If you want watercolor, ask your artist about layering and solid black anchors so the piece reads even as pigments mellow. Many artists now favor black & gray with watercolor accents to maintain clarity. If long-term vibrancy matters, plan on occasional color refreshes.
24. Clock with Hourglass on Rib or Side
Style/Technique: Illustrative / Symbolic Pairing
Pain Level: High (7-8/10 on ribs)
Session Time: 1–3 hours
Best For: Visual statement about passage of time
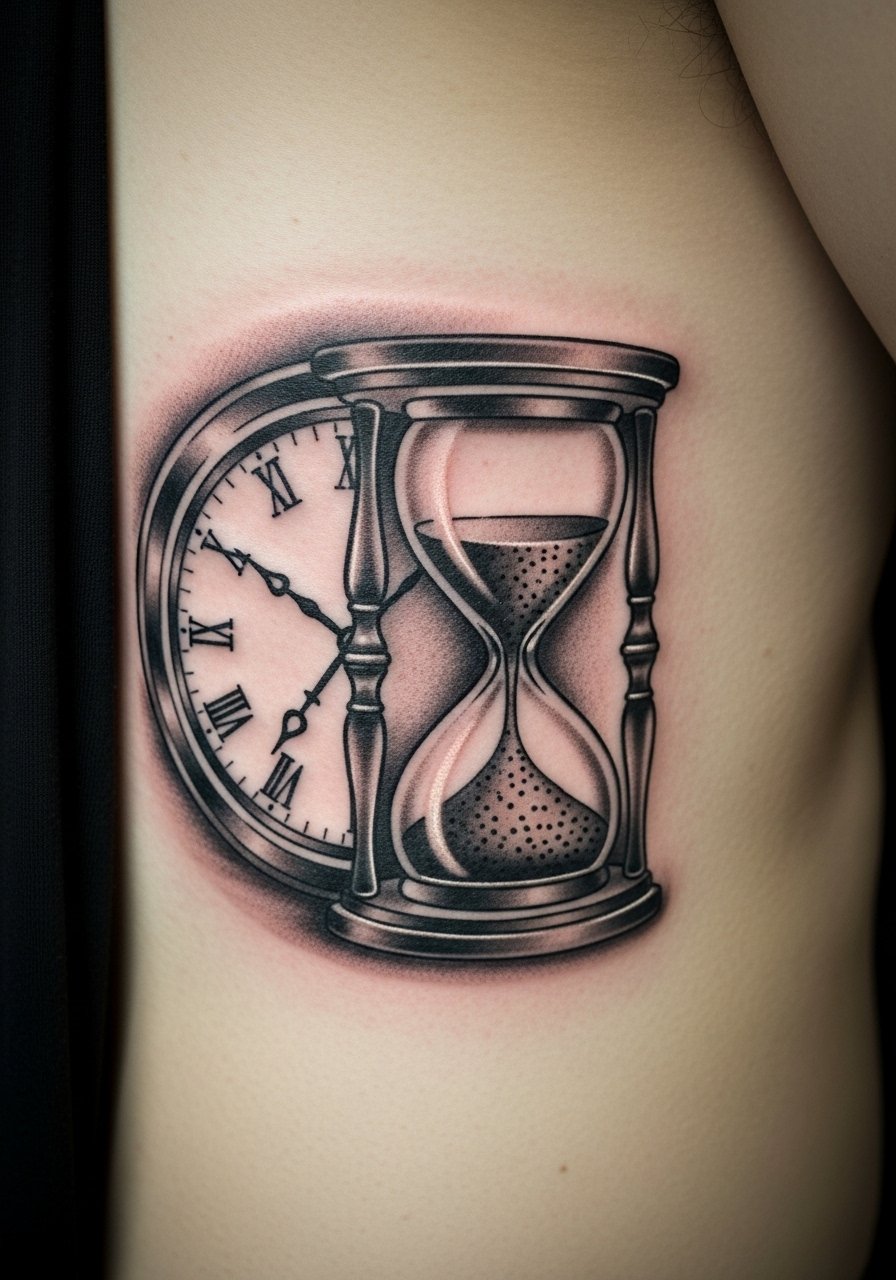
Pairing a clock with an hourglass doubles the passage-of-time symbolism. Ribs make for a cinematic vertical composition. From what I’ve gathered, strong silhouette shapes and bold outlines keep both elements distinct as shading softens in healing. Avoid over-detailed sand textures in small hourglasses; block shading reads better over time.
25. Prison Release Date Clock on Inner Forearm
Style/Technique: Minimalist / Narrative
Pain Level: Medium (4/10)
Session Time: 1–2 hours
Best For: Recovery milestones and symbolic fresh starts
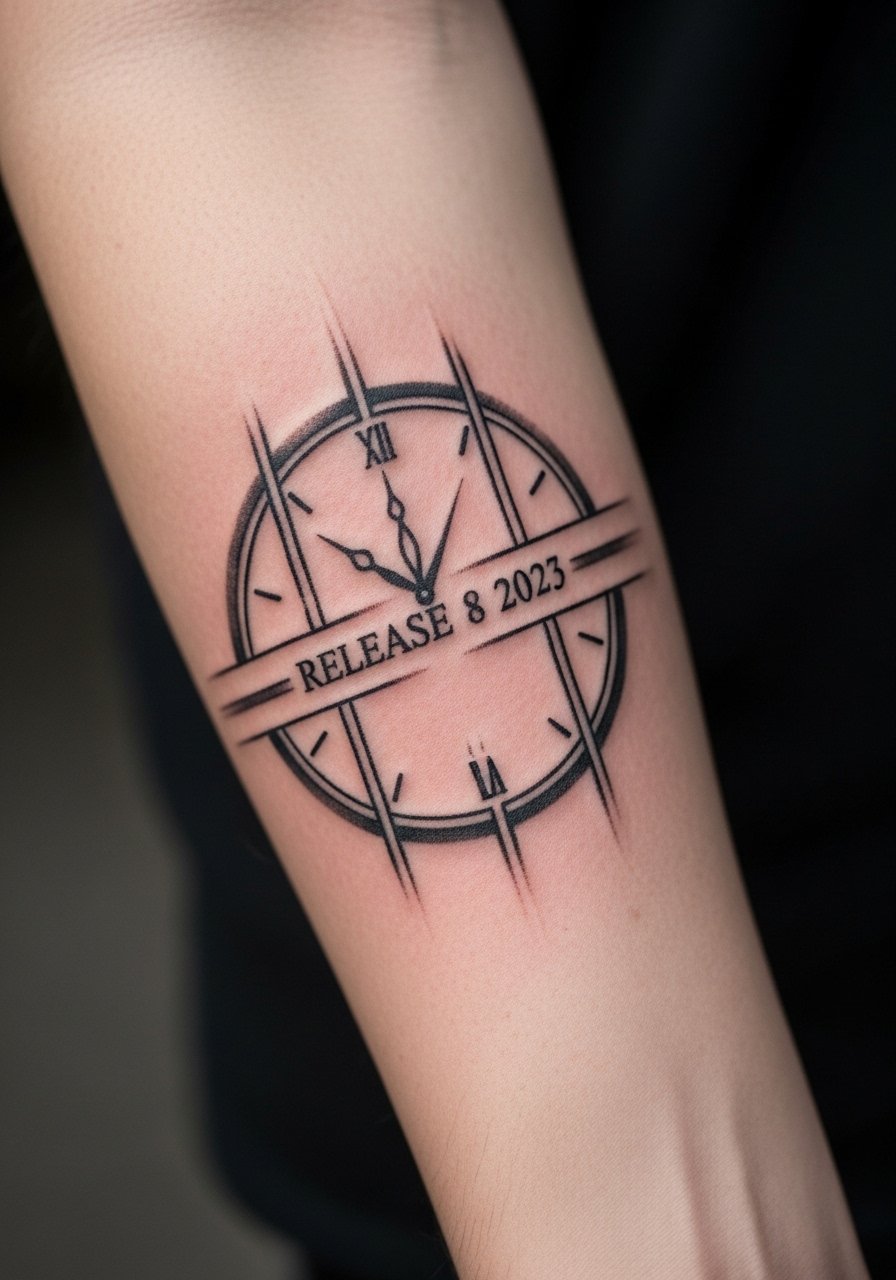
This is a niche, meaningful idea I’ve only seen occasionally: a clock integrated with subtle bar motifs and a date that marks release or recovery. Inner forearm placement keeps it readable and personal. I’d treat this like a memorial: keep numerals bold and avoid tiny script that will fade. Ask your tattooer to design bars as negative space rather than thin lines, so they remain visible as skin shifts.
Tattoo Prep and Aftercare Essentials
Aftercare Essentials:
- Aquaphor Healing Ointment, 14oz tube — Recommended first 3–5 days for dry areas
- Saniderm Transparent Adhesive Bandage, 6-inch roll — Second skin method for first 24–72 hours
- CeraVe Fragrance-Free Moisturizing Lotion, 12oz — Daily moisturizer after initial healing
Before Your Appointment:
- Tattoo Numbing Cream with 5% Lidocaine — Use only if your artist okays it; apply 30–45 min prior
- Tattoo Stencil Transfer Paper, 8.5x11in pack — If you’re testing placement at home
Long-Term Maintenance:
- SPF 50 Sunscreen Stick for Tattoos — Daily sun protection keeps ink sharp
- Mad Rabbit Tattoo Balm, 2oz — For healed tattoo upkeep
- Hustle Butter Deluxe, 8oz — Vegan aftercare option I’ve seen artists recommend
Optional Comfort & Healing Tools:
- Dr. Bronner's Unscented Castile Soap, 32oz — Gentle cleaning during early healing
- Hydrocolloid Bandages, Large Pack — For spot protection on scabs or blisters
- Tattoo Aftercare Travel Kit (Multi‑Item) — Good to keep in your gym bag or travel pack
Every artist I’ve talked to stresses sunscreen, gentle cleaning, and resisting the urge to pick at peeling skin.
Frequently Asked Questions
Q: How bad does a tattoo actually hurt?
A: Pain depends on placement and your tolerance. Outer forearm or bicep tends to feel like a steady scratching (3/10). Ribs, ankle bone, and behind-the-ear areas can be sharp and intense (7–8/10). It’s more a nagging burn than explosive pain. For very sensitive spots try a tattoo numbing cream with 5% lidocaine if your artist approves.
Q: What if I regret the clock symbolism later?
A: I always tell friends to personalize clocks with dates, initials, or paired motifs (rose, heart, skull) so it stays meaningful. Sit with the design for several months. If you want hidden options, pick placements like upper thigh, ribcage, or shoulder blade where it’s easy to cover.
Q: How do I keep my clock tattoo from blurring?
A: From what I’ve seen, UV exposure and too-fine linework are the biggest culprits. Use daily SPF 50 sunscreen, choose bold outlines where possible, and avoid cramming tiny numerals into small spaces. Expect to plan touch-ups over the years.
Q: Can I work out after getting inked?
A: Wait at least 48–72 hours before sweating heavily. Sweat can irritate a fresh tattoo and introduce bacteria. For areas that flex a lot (shoulder, knee), give it an extra few days. Use gentle cleaning with a mild soap like Dr. Bronner's Unscented Castile Soap and keep it moisturized.
Q: Should I get a small clock tattoo first to test my reaction?
A: Only if you genuinely want a small piece. Don’t get something you don’t love just to test pain. Small tattoos still require aftercare and can behave differently by placement—fingers fade fast, wrists see more friction.
Q: How long does a clock tattoo take to heal?
A: Surface healing is usually 2–3 weeks; full skin regeneration can take 2–3 months. The first week is key—clean gently, keep it lightly moisturized, and consider a second-skin like Saniderm if your artist recommends it.
Q: Do clock tattoos look different on darker skin tones?
A: Yes. Black & gray and bold linework translate best across skin tones. Bright yellows and pale whites can read muted on deeper skin, so discuss color saturation and healed examples with an artist experienced in your skin tone.
Q: How do I pick between realism and minimalist clock tattoo designs?
A: Think long-term. Realism needs more space to keep detail, so place it on the bicep, calf, or back. Minimalist small clock tattoos suit wrists and ankles but ask for slightly thicker lines to avoid early blur. Ask to see healed work in similar placements before you commit.
