
I spent months collecting tiger tattoos across Instagram, studio portfolios, and conventions before I realized the real challenge: picking a design that actually feels fearless and will still look solid healed. I wrote this list from that research and from tattoos I’ve lived with—these 26 tiger designs show different vibes, placements, and what to expect when the bandage comes off.
This list focuses on traditional tiger tattoos, Japanese Irezumi, and black-and-gray realism. I picked placements that work for first-timers through collectors—forearm, bicep, chest, knee, and full sleeves. From what I’ve seen in 2026 trends, Irezumi backgrounds and white-tiger portraits keep coming up, and black-and-gray work tends to age more gracefully.
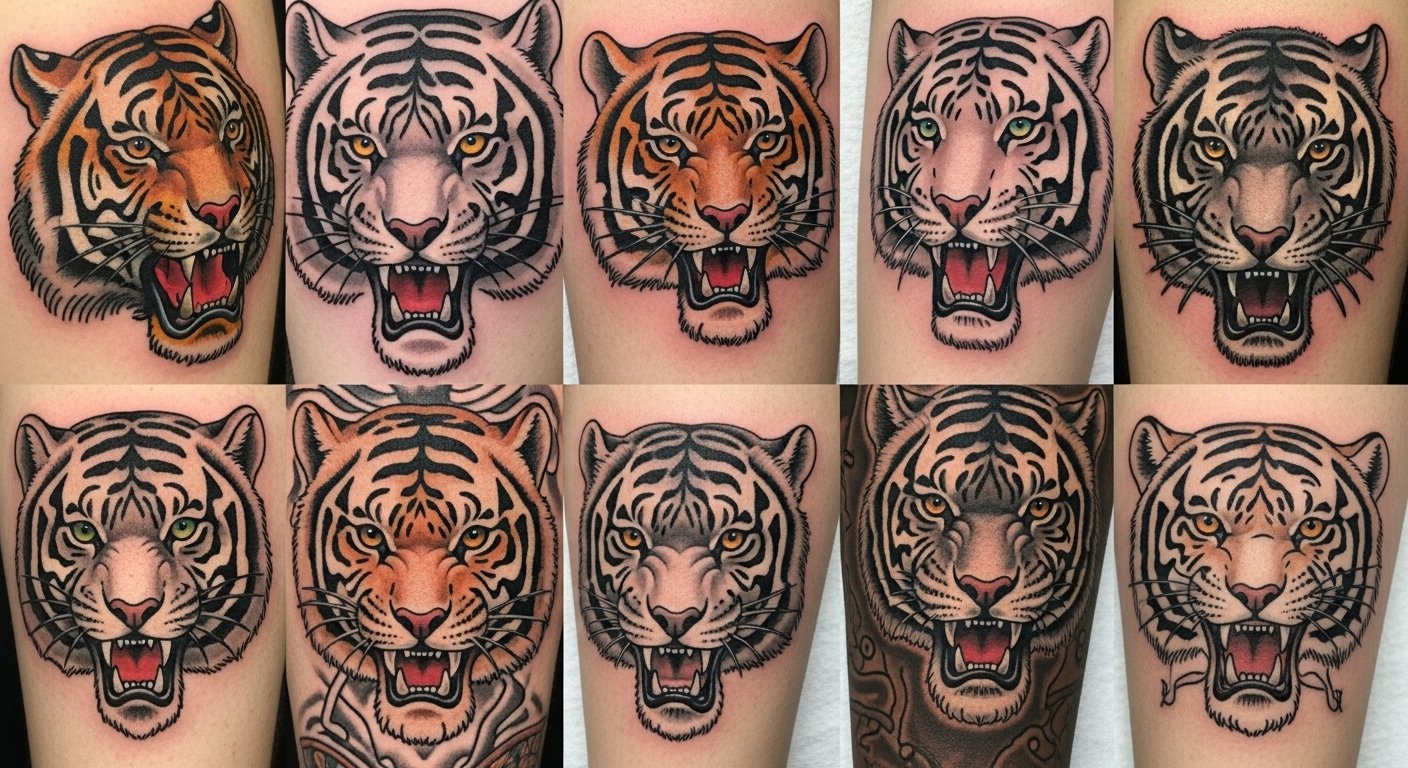
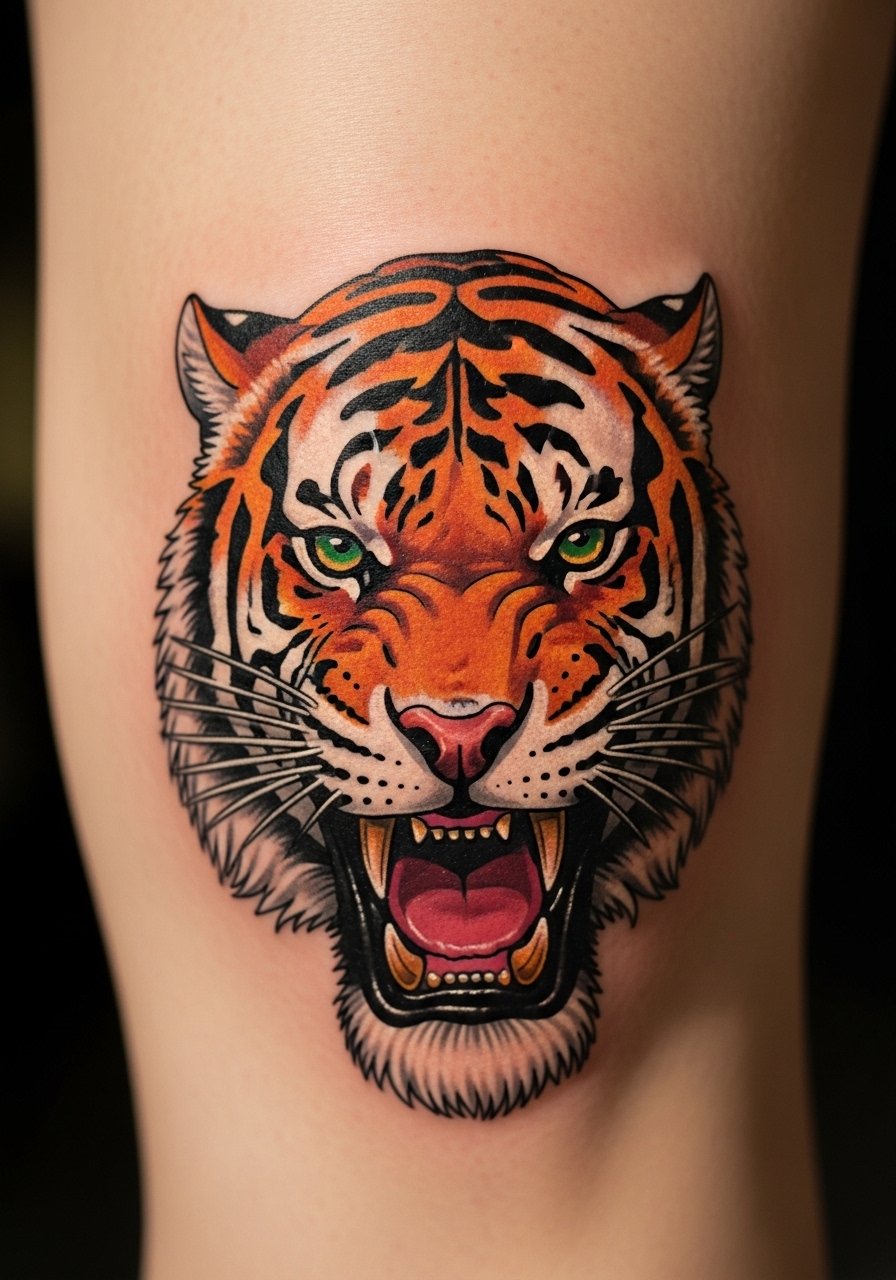
1. Bold Traditional Tiger Head on Outer Bicep
Style/Technique: Traditional / American Traditional
Pain Level: Low-Medium (3/10)
Session Time: 2-4 hours, usually one session
Best For: First tattoo, visible statement
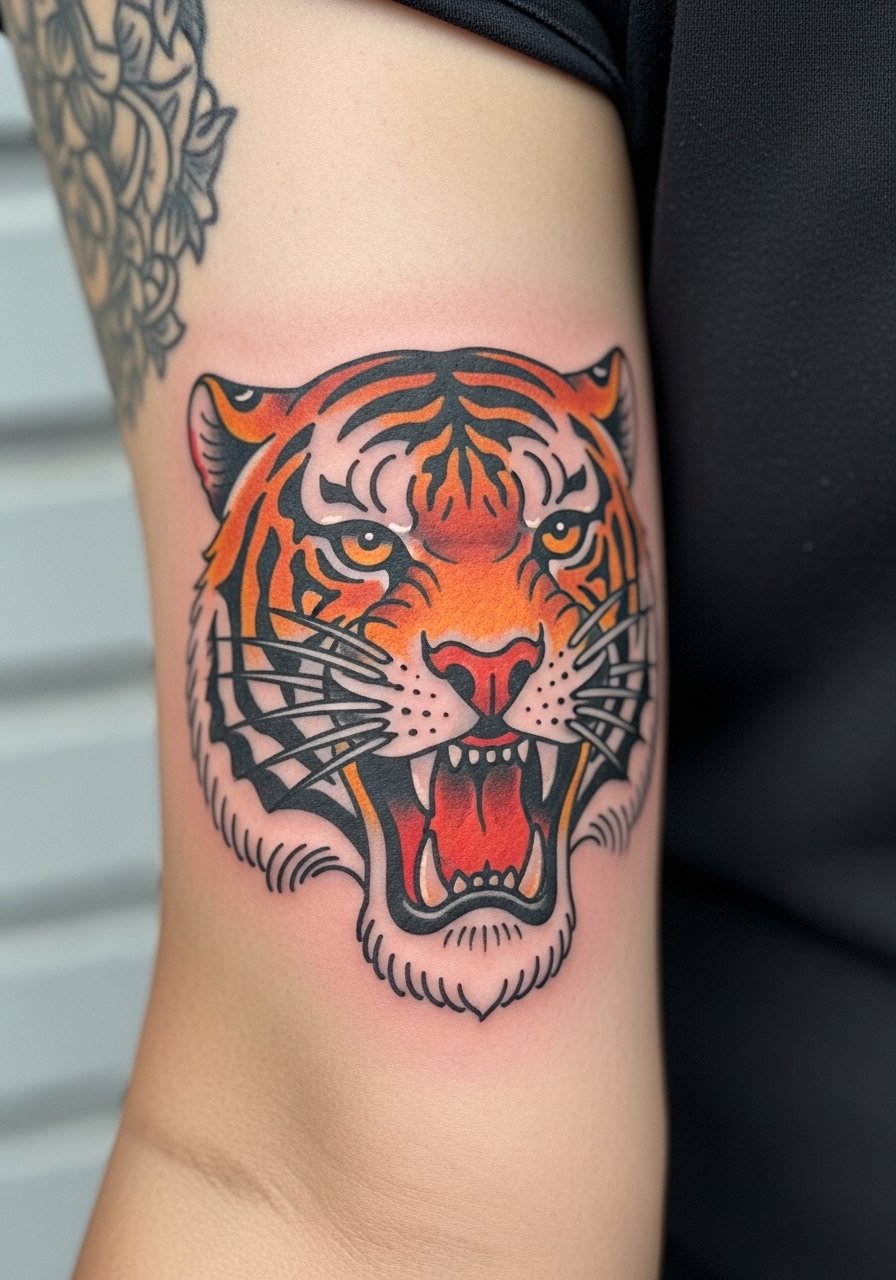
A classic traditional tiger head is all about striking black outlines and that familiar orange-black palette. I keep seeing this as a go-to when people want "raw power" in a compact image that reads across clothing. Outer bicep is forgiving for pain and shows well when you flex. Expect surface healing in a couple weeks; the color will soften a bit but the bold lines stay readable. Common mistake: tiny, intricate details in a traditional design—keep the face bold, not overly detailed. Ask your artist for strong line weight and contrast; artists who do traditional tiger heads well (I’ve seen great work at Holistic Ink) know how to balance stripes with negative space.
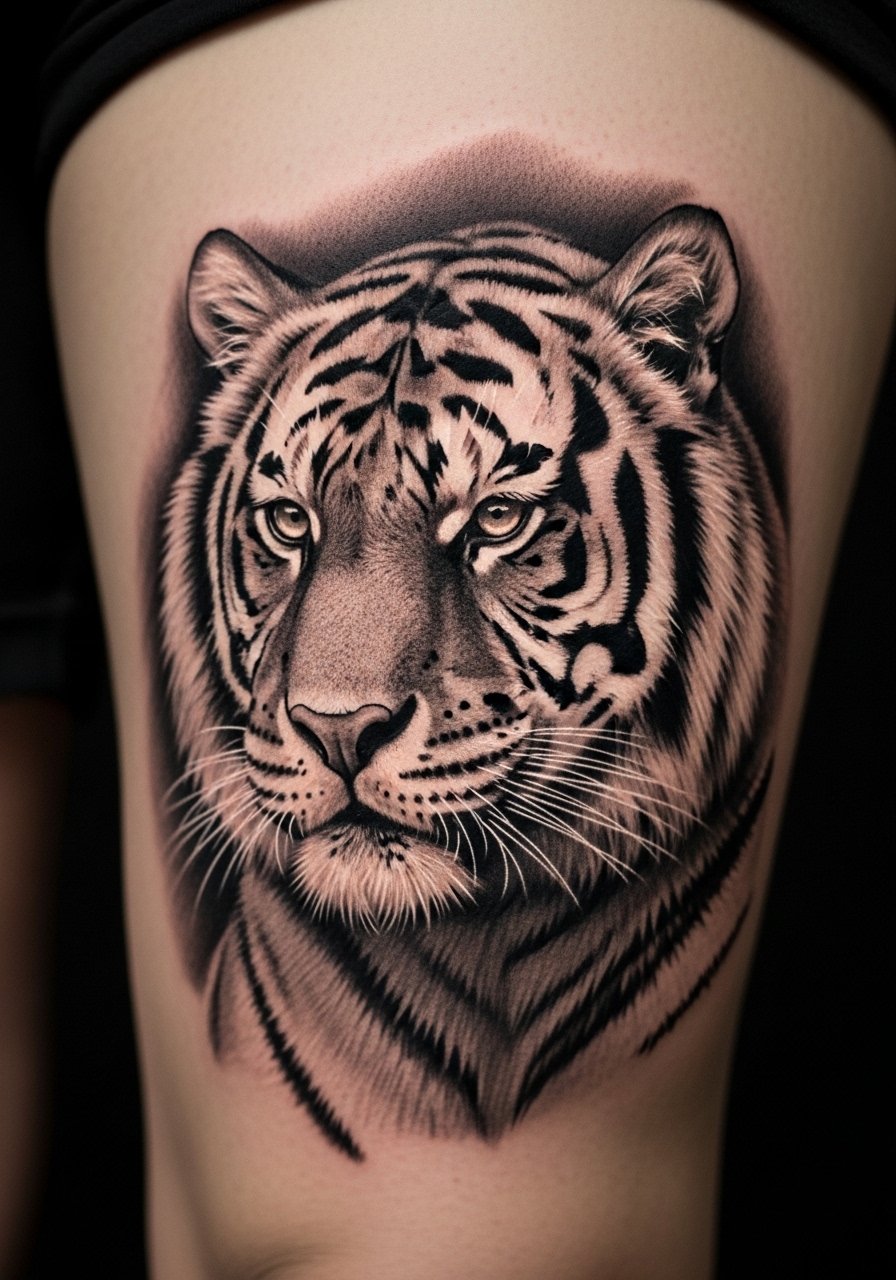
2. White Tiger Portrait on Shoulder Blade
Style/Technique: Realism / Illustrative
Pain Level: Medium (4/10)
Session Time: 2-3 sessions, 3-5 hours each
Best For: Mystical, spiritual pieces
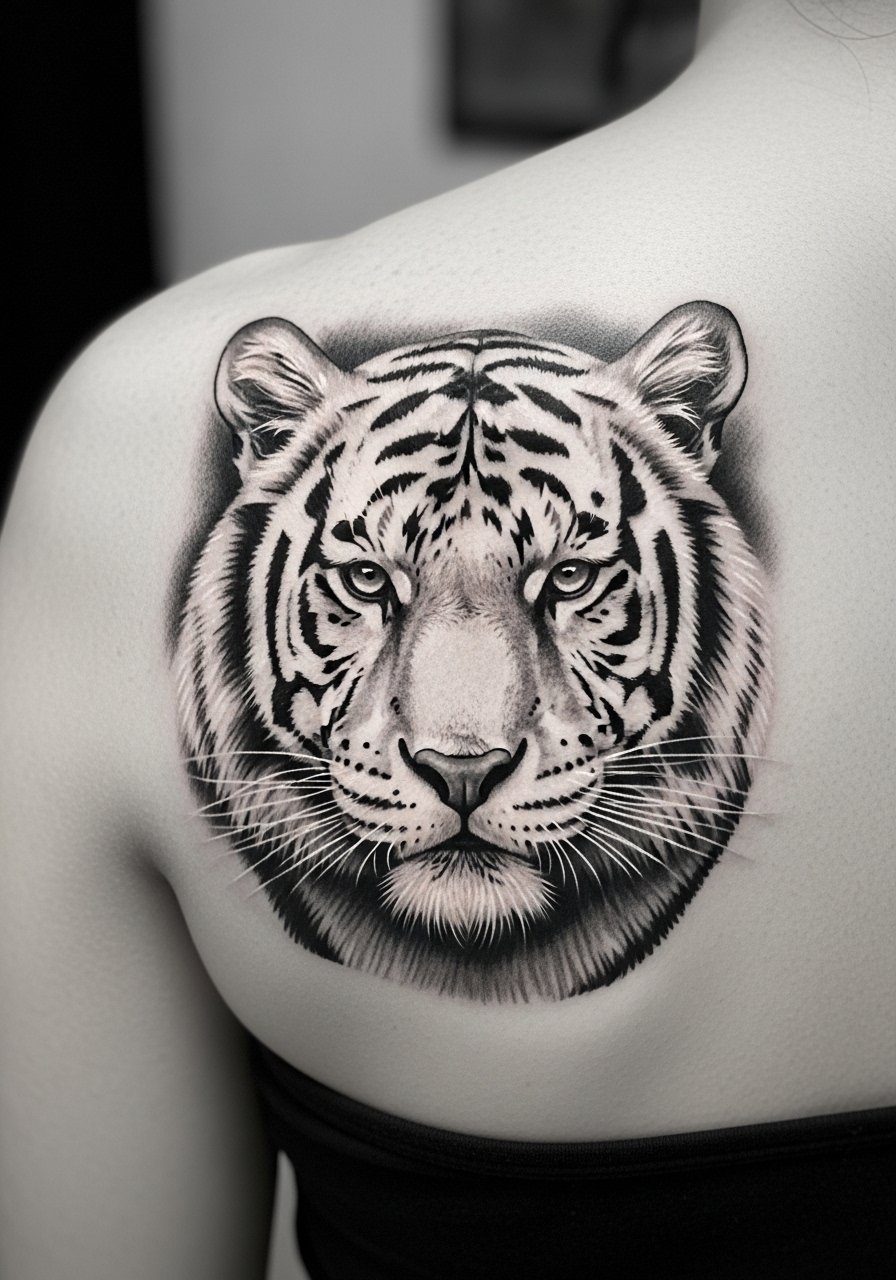
A white tiger portrait reads rare and spiritual. I’ve seen people pick this when they want something that says “otherworldly insight” rather than pure aggression. Shoulder blade gives a flat canvas for realistic fur and eyes, and heals well with minimal stretching. Pain is moderate but manageable. Black-and-gray realism holds up better over years than fragile color highlights. Common mistake: overusing white ink to “pop” features—on healed skin that can disappear. Ask for clear reference photos and an artist experienced in portrait realism; they’ll plan contrast so the gaze stays fierce after healing.
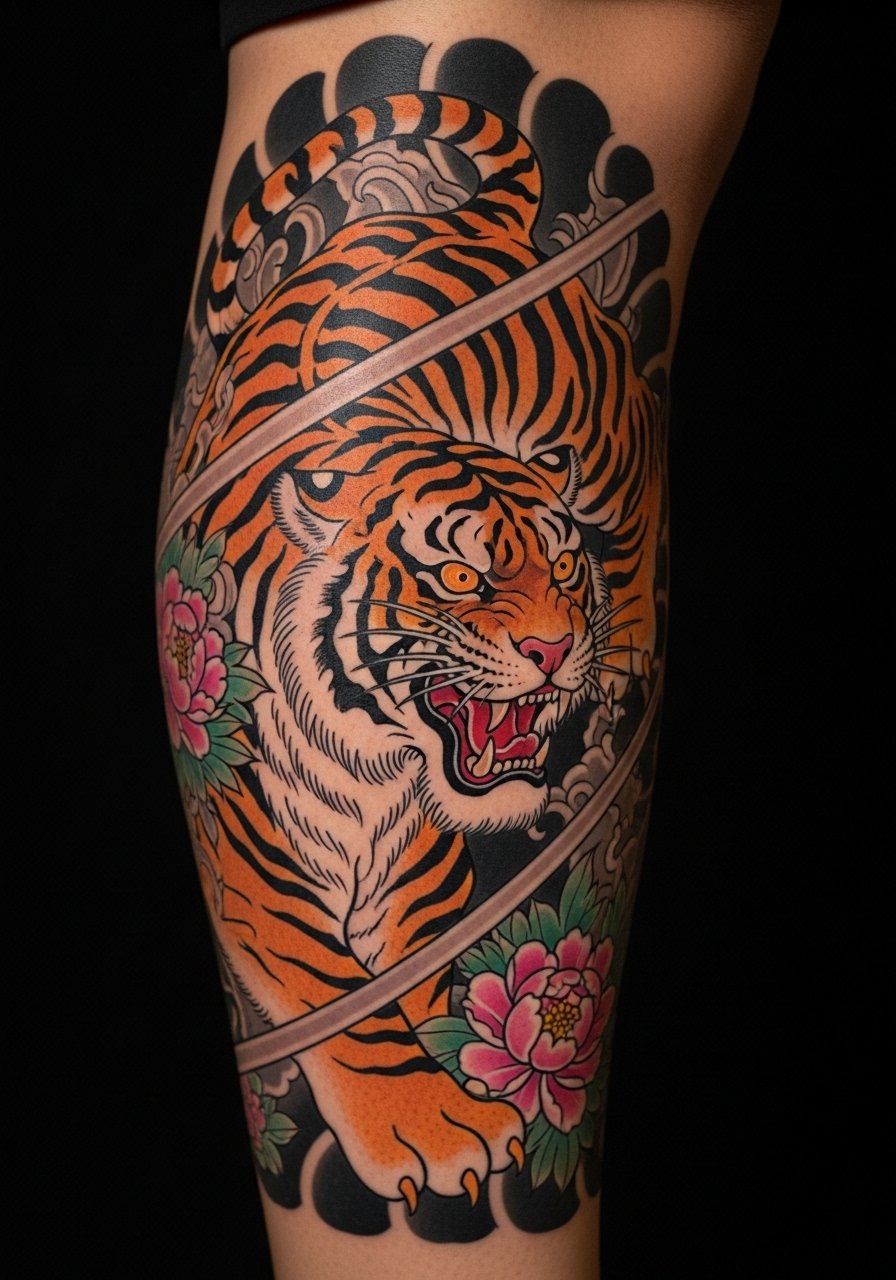
3. Japanese Irezumi Tiger With Wind-and-Wave Background (Full Back)
Style/Technique: Japanese Irezumi
Pain Level: High (6-8/10)
Session Time: Multiple sessions over months
Best For: Full-back statement, spiritual guardian
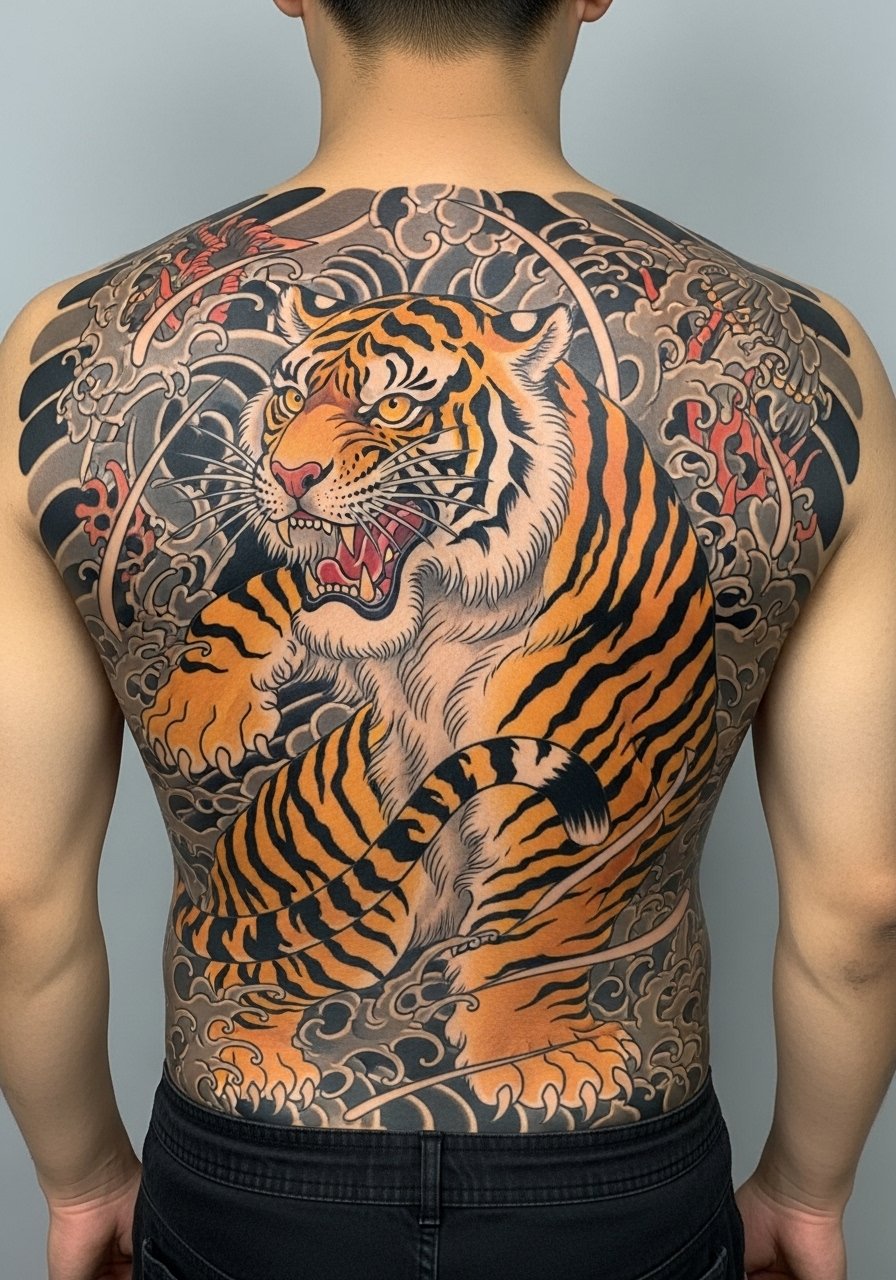
A full Japanese tiger is about protection and motion—the tiger paired with wind and water backgrounds feels like a guardian moving through storm. Irezumi calls for thoughtful composition: the tiger’s flow must match body curves. Pain and time commitment are real; sessions are long but each one builds the piece slowly. From what I’ve gathered, these hold visual weight well because of the solid black and layered colors. Common mistake: treating a Japanese tiger like a standalone flash—the background needs to breathe. Look for artists following Irezumi principles (IrezumiEmpire-style references are useful) who plan negative space and background rhythm.
4. Tiger and Dragon Sleeve (Yin-Yang Harmony) on Full Arm
Style/Technique: Japanese / Neo-Traditional Sleeve
Pain Level: High (6-8/10)
Session Time: Multiple sessions across months
Best For: Sleeve commitment, symbolism-heavy collectors

A tiger-dragon sleeve is literally balance—earthly ferocity vs. celestial force. I’ve seen this popular on TikTok as a yin-yang sleeve idea. The sleeve format lets you weave peonies, clouds, and wind bars that frame the tiger. Expect many sessions and a strong directional flow so the tiger and dragon interact naturally. Common mistake: mismatched styles—pairing a hyper-realistic tiger with cel-shaded dragon art looks disjointed. Ask artists to show cohesive sleeve mockups (Kings Avenue Tattoo portfolios are a good place to spot these).
5. Roaring Tiger Hand Blast (Bold Traditional)
Style/Technique: Traditional / Hand Tattoo
Pain Level: High (7-9/10)
Session Time: 1 session, shorter but intense
Best For: Compact visibility, raw statement
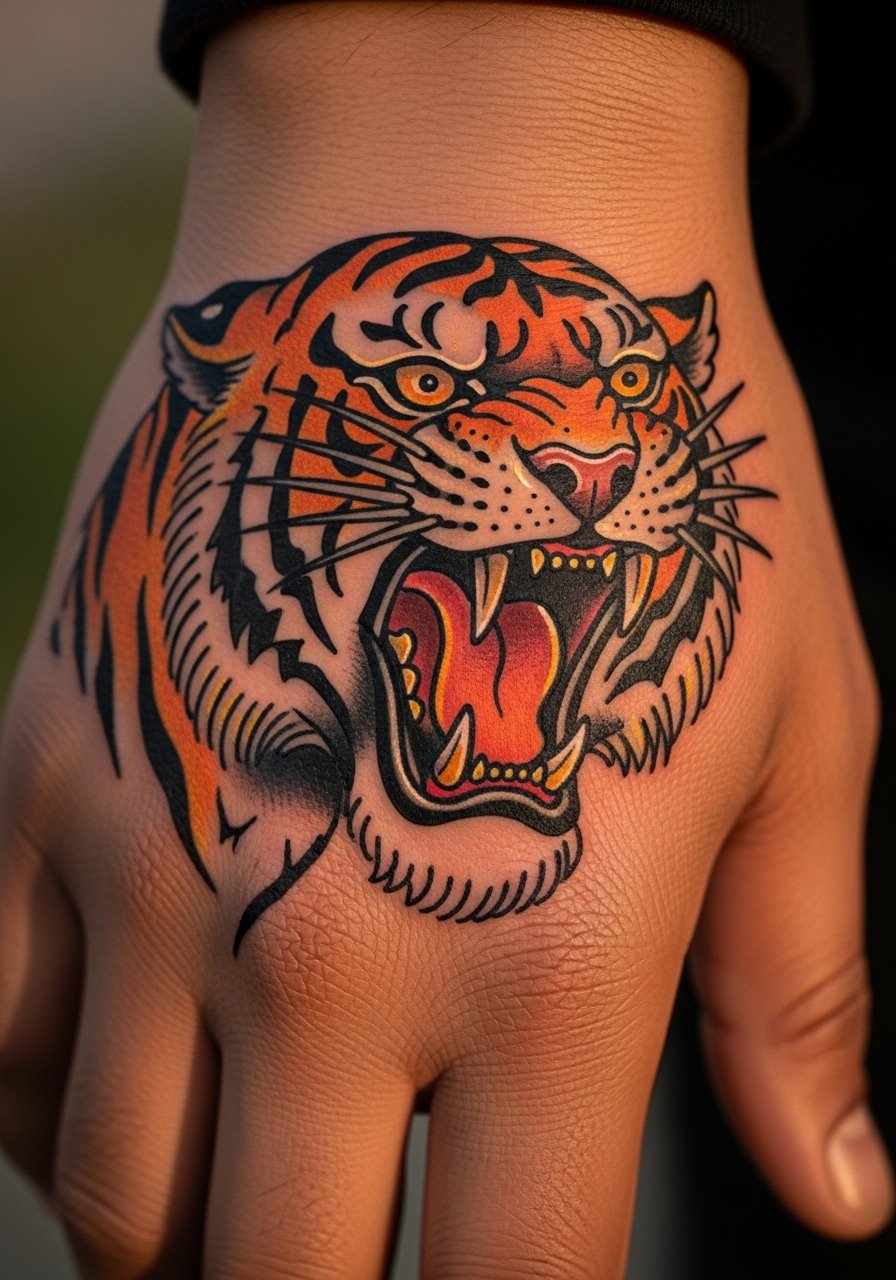
Hand tattoos age uniquely and hurt more because of thin skin and bone. A small, roaring tiger head on the hand reads instantly as “fearless.” I’ve talked to artists who warn that hands fade faster—touch-ups may be needed. This is a great choice if you want a raw-power vibe and don’t mind visibility. Common mistake: tiny details that blur—hands need bold, graphic work. If you go for this, find an artist experienced with hand healing and realistic expectations (Holistic Ink has strong examples).
6. Black-and-Gray Realistic Tiger on Thigh
Style/Technique: Black-and-Gray Realism
Pain Level: Low-Medium (3-4/10)
Session Time: 2-4 sessions
Best For: Detailed realism, hidden statement
Black-and-gray realism gives a mysterious authority. Thigh placement is forgiving for size and pain, and it’s easy to hide for work. I’ve noticed black-and-gray ages well because it relies on shading more than bright pigments. Expect several sessions for deep shading and eye detail. Common mistake: asking for too-small realism—photorealism needs space to breathe. Look for realism-focused artists (search for Mike the Master-style portfolios) and show them clear photo references.
7. Fierce Stalking Tiger on Upper Bicep (American Traditional)
Style/Technique: American Traditional / Bicep Piece
Pain Level: Low (2-3/10)
Session Time: 1-2 sessions
Best For: Personal growth symbolism, visible but hideable
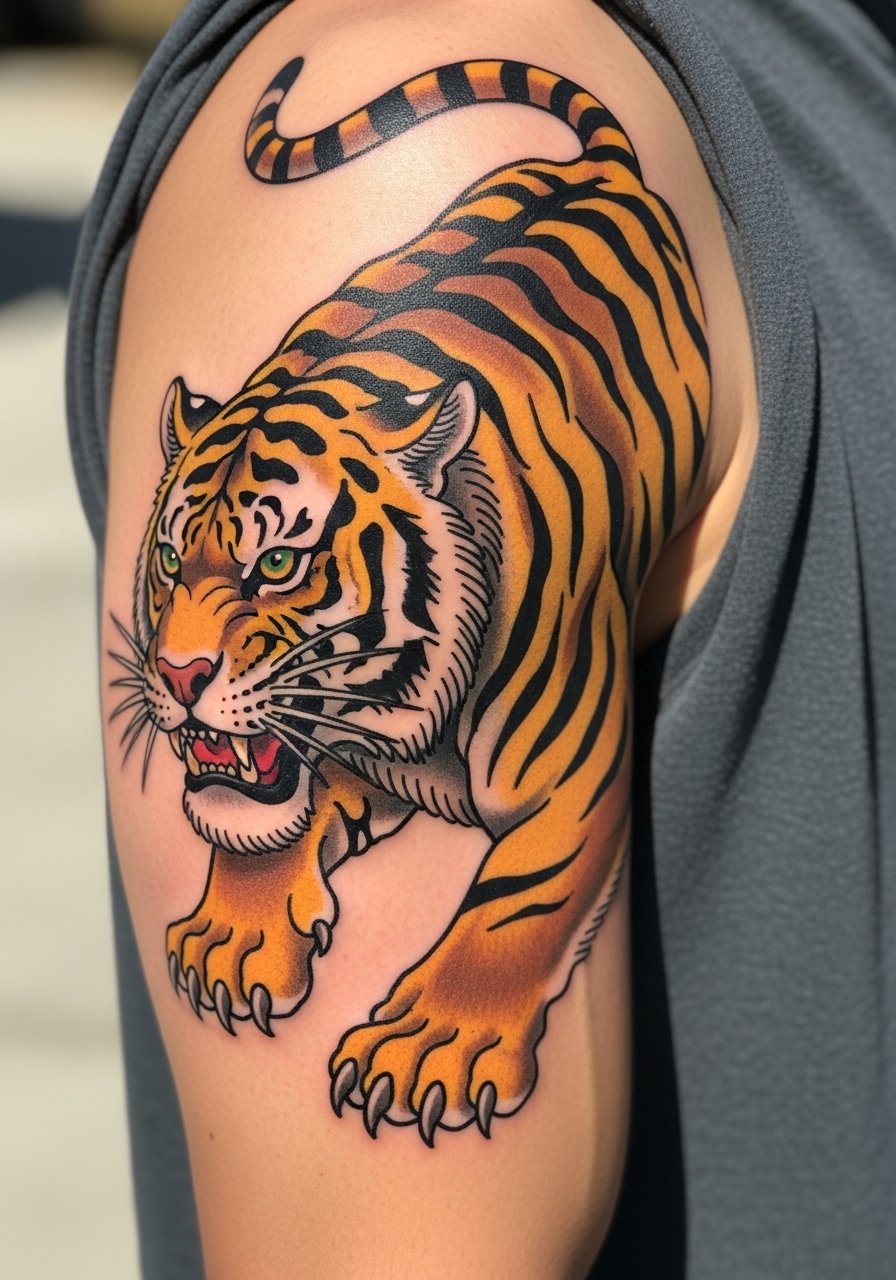
A stalking tiger on the bicep reads resilience and forward motion. The bicep’s shape fits the tiger’s body posture, making the design dynamic when you move. Pain is mild and healing is straightforward. From what I’ve seen, this is a favorite for people who want a “growth” narrative without huge commitment. Common mistake: placing too many small background elements—keep the tiger dominant. Ask for bold linework that ages well.
8. Full-Body Tiger Sleeve Wrapping Forearm to Shoulder
Style/Technique: Black-and-Gray or Traditional Sleeve
Pain Level: High (6-8/10)
Session Time: Multiple sessions over months
Best For: Large-scale collectors, continuity seekers
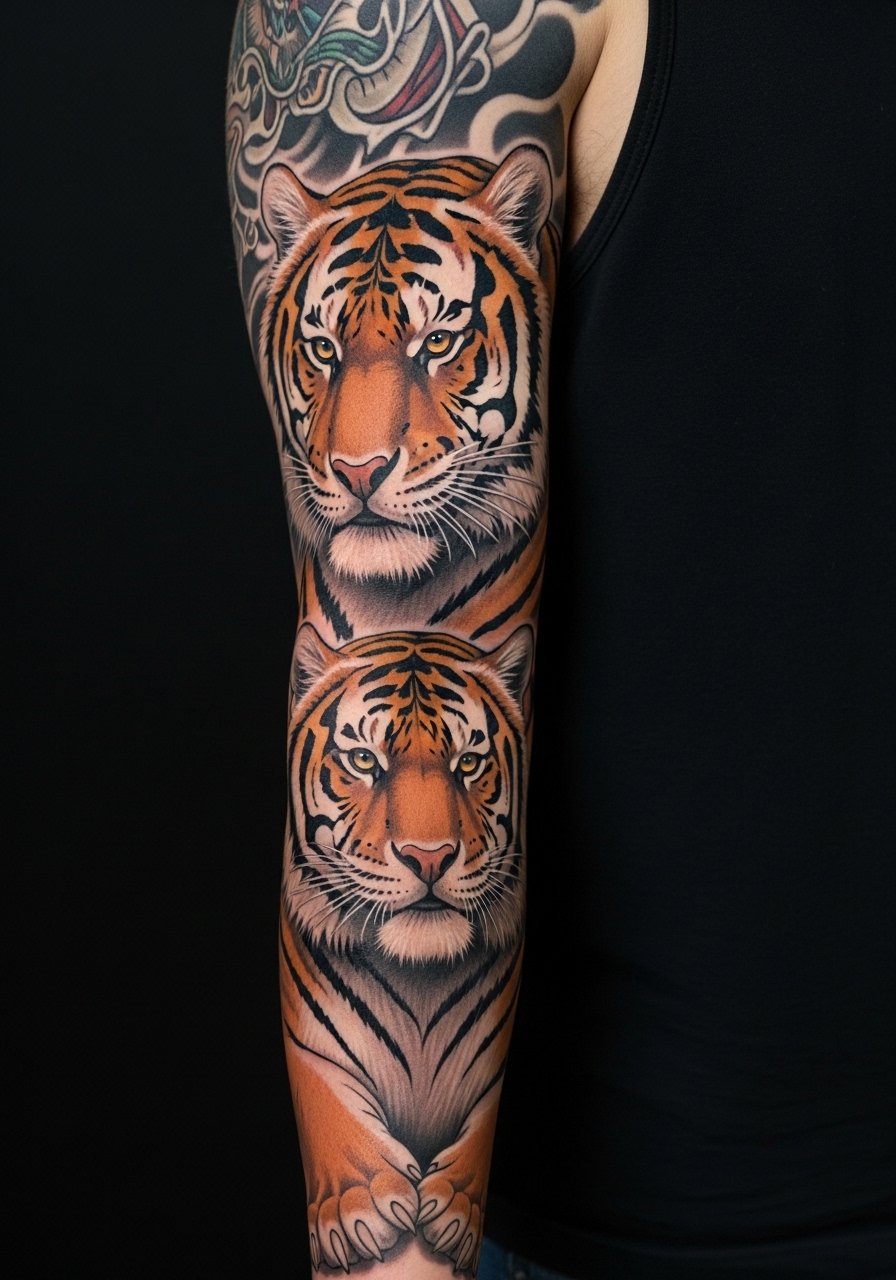
A full tiger sleeve is versatile—you can choose realism or traditional swagger. The sleeve allows flora, daggers, and backgrounds to support the tiger’s motion. I’ve seen these turn into personal narratives about independence and ferocity. Expect long sessions and planning so the tiger reads from different angles. Common mistake: ignoring elbow and wrist flow—make sure the artist maps the tiger’s anatomy to your arm curves.
9. Tiger With Bamboo Forearm Piece (Adaptability Theme)
Style/Technique: Neo-Traditional / Japanese Influence
Pain Level: Low-Medium (3-4/10)
Session Time: 1-2 sessions
Best For: Symbolic resilience, medium visibility
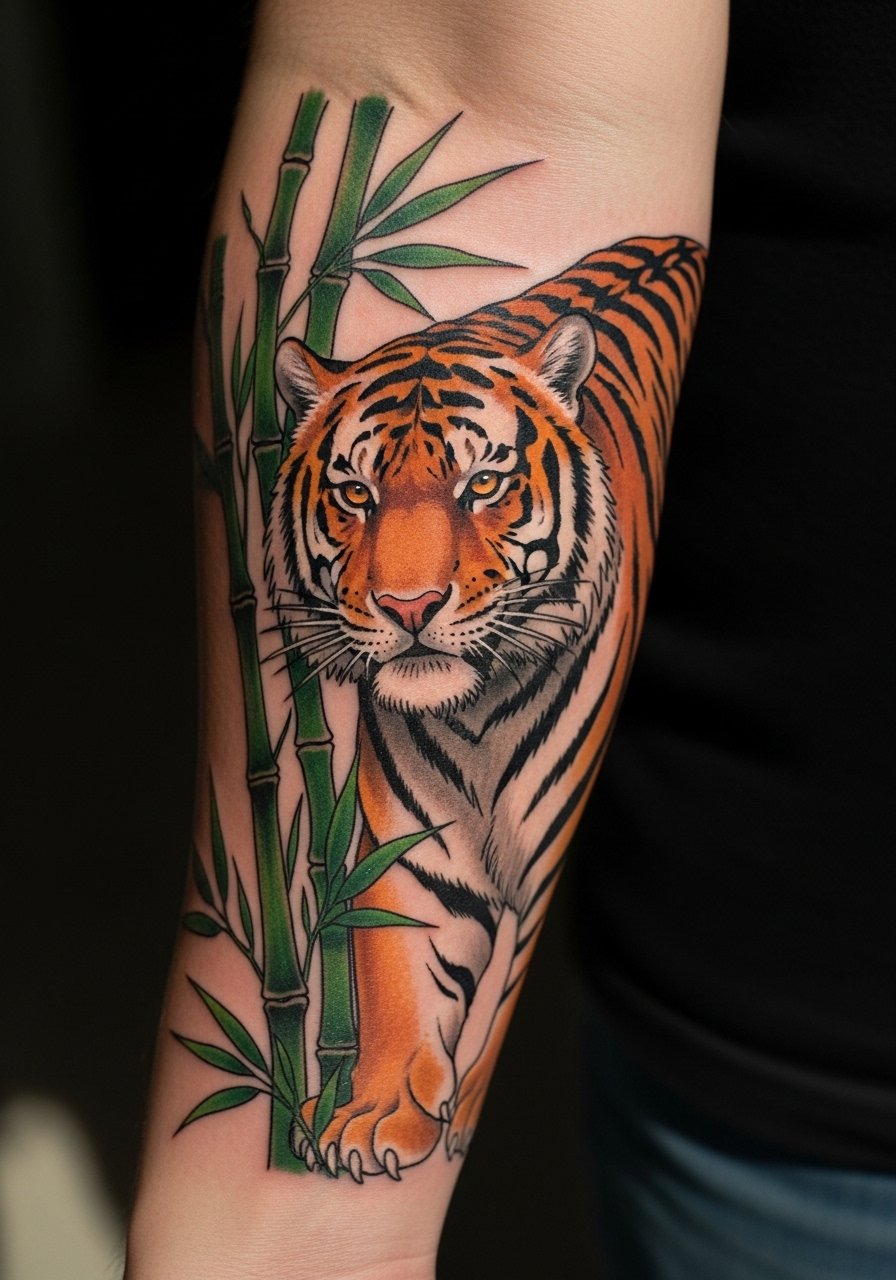
I love tiger + bamboo because it balances raw power with flexibility—bamboo symbolizes adaptability. Forearm is ideal for this narrative: the bamboo’s vertical lines complement forearm length. Healing is straightforward; color accents may soften with time. Common mistake: clashing color palettes—ask your artist to limit colors for longevity. This is one of those under-covered but meaningful combos I keep seeing in studio sketches.
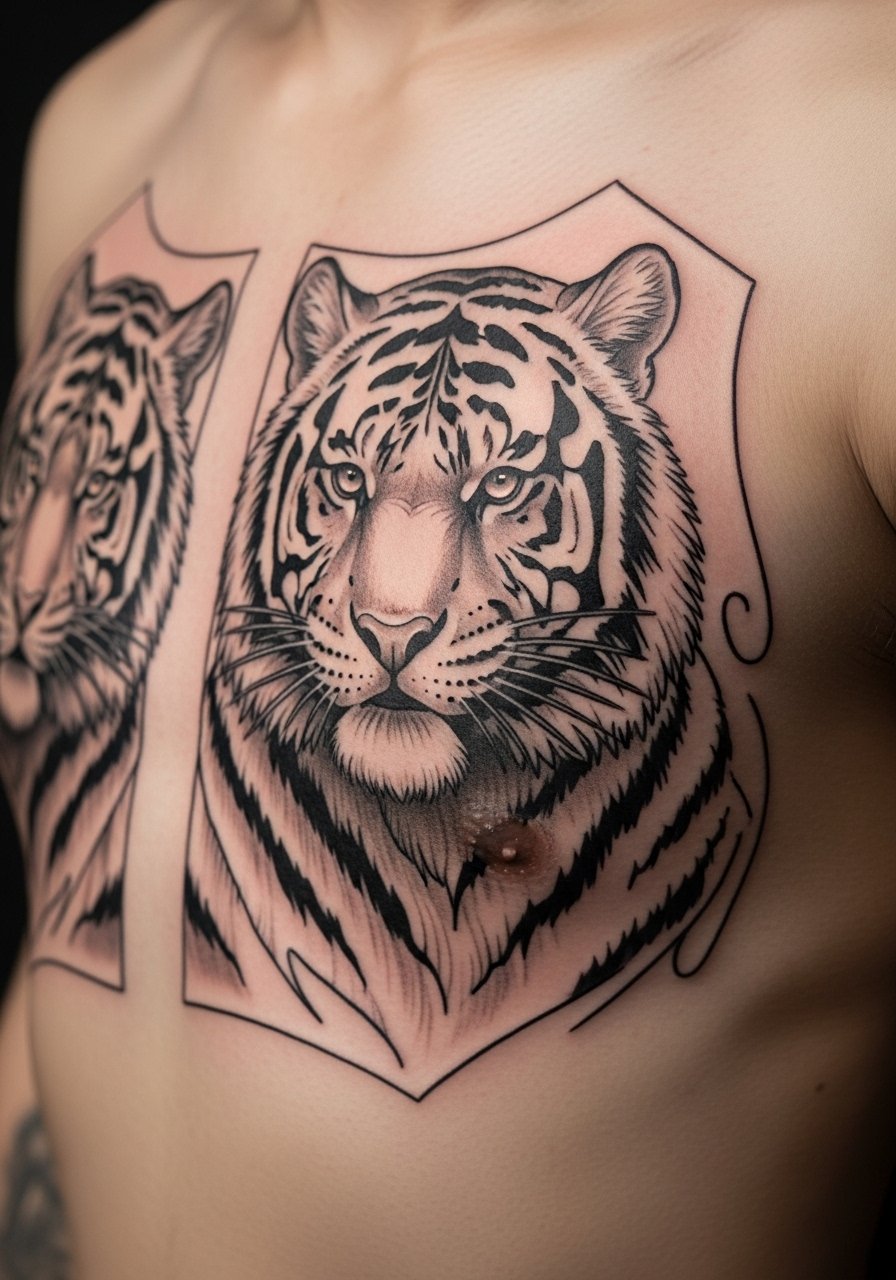
10. White Tiger Mandala Chest Piece (Ornamental Blackwork)
Style/Technique: Ornamental / Blackwork / Mandala
Pain Level: Medium (4-6/10)
Session Time: 2-3 sessions
Best For: Meditative, center-chest focal piece
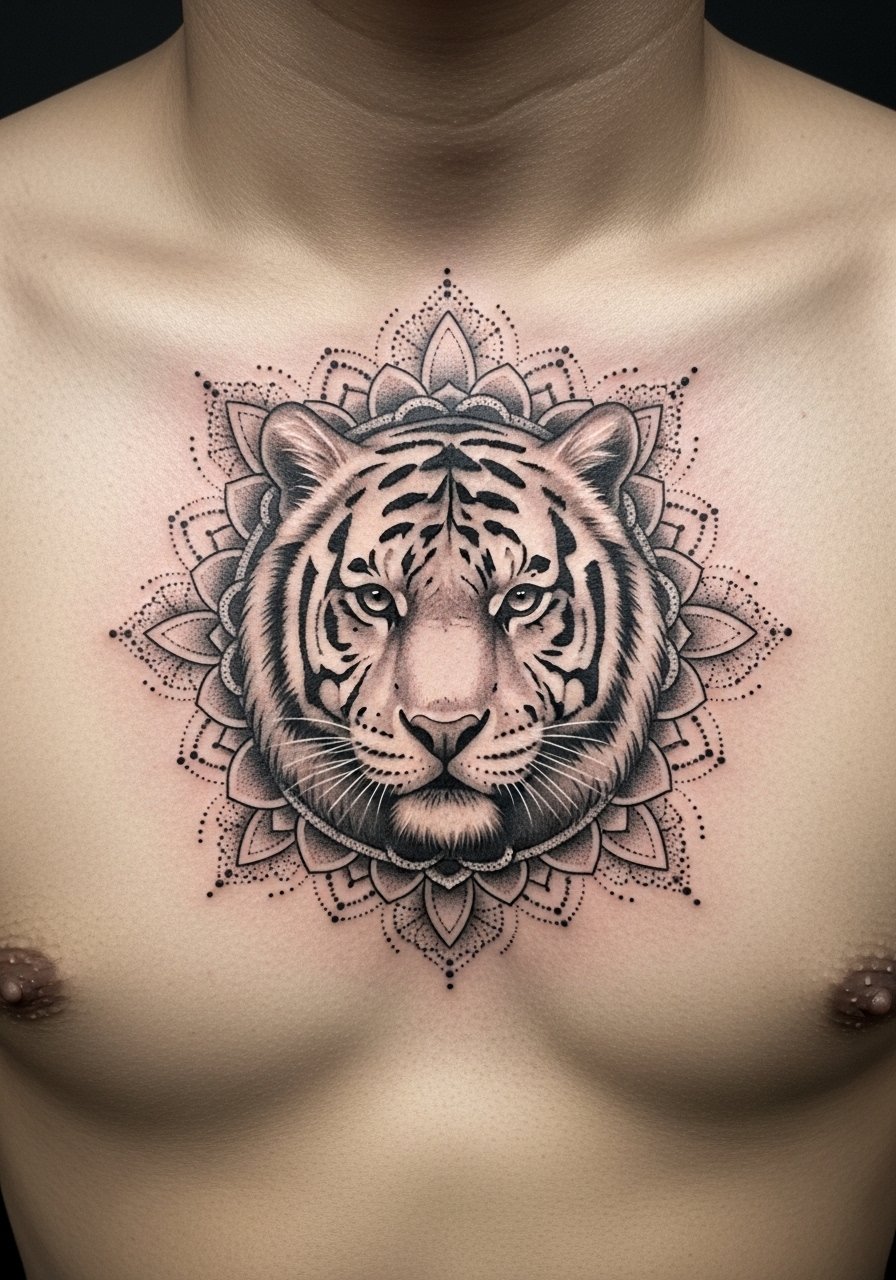
A white-tiger mandala strikes a meditative chord—pure, spiritual, centered. Chest placement lets symmetry shine. I’ve seen this chosen by people who want inner strength and quiet power. Blackwork and dotwork age predictably, though chest skin can stretch with movement. Common mistake: tiny dotwork too close together—space it out to avoid blotching as it heals. Ask your artist for healed examples on chest placements.
11. Kneecap Tiger Blast (Compact Impact)
Style/Technique: Traditional / Spot Tattoo
Pain Level: High (7-9/10)
Session Time: 1 session, quick but sharp
Best For: Bold compact statement, sporty placements
Knee tattoos are unforgiving in pain but high-impact visually. A kneecap tiger blast reads fierce and proud. Expect sharp sensations during the session and tender healing while you avoid bending too much. From what I’ve experienced, bold traditional lines work best here; intricate shading can blur with movement. Common mistake: placing overly detailed realism on a joint—keep the design graphic and bold.
12. Minimalist Tiger Outline on Inner Wrist
Style/Technique: Minimalist / Fine Line
Pain Level: Medium (4/10)
Session Time: 30-60 minutes
Best For: Subtle resilience, first-timers
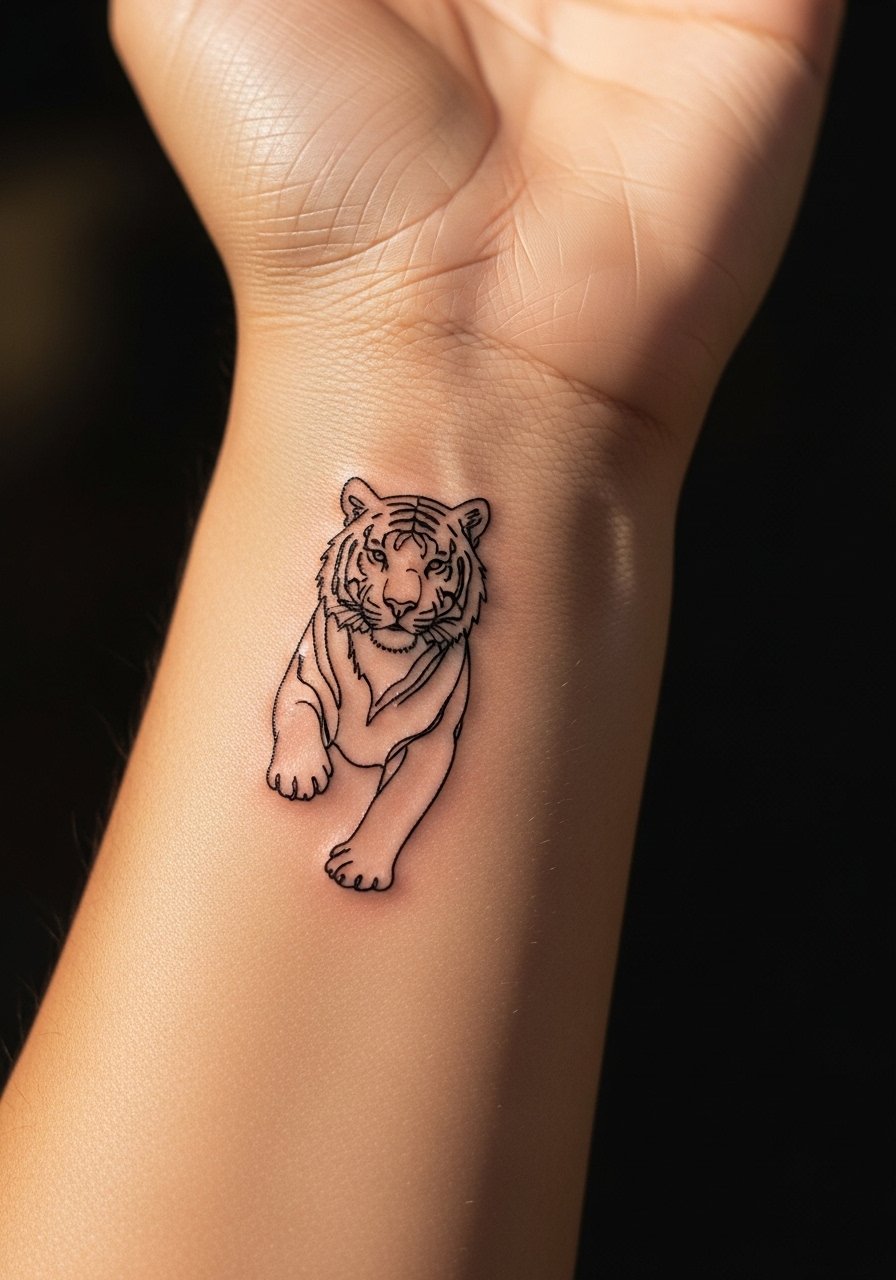
A minimalist tiger outline is quietly defiant—perfect if you want a personal reminder without shouting. Inner wrist is visible and intimate; expect a quick session and sensitive healing. Fine lines can blur over time, so I’ve seen artists suggest slightly bolder single-stroke lines than ultra-micro ones. Common mistake: requesting ultra-thin lines that vanish after healing—discuss line thickness with your artist.
13. Patchwork Tiger With Flowers on Forearm (Neo-Traditional)
Style/Technique: Neo-Traditional / Patchwork
Pain Level: Low-Medium (3-4/10)
Session Time: 2 sessions
Best For: Transformation symbolism, colorful forearm piece
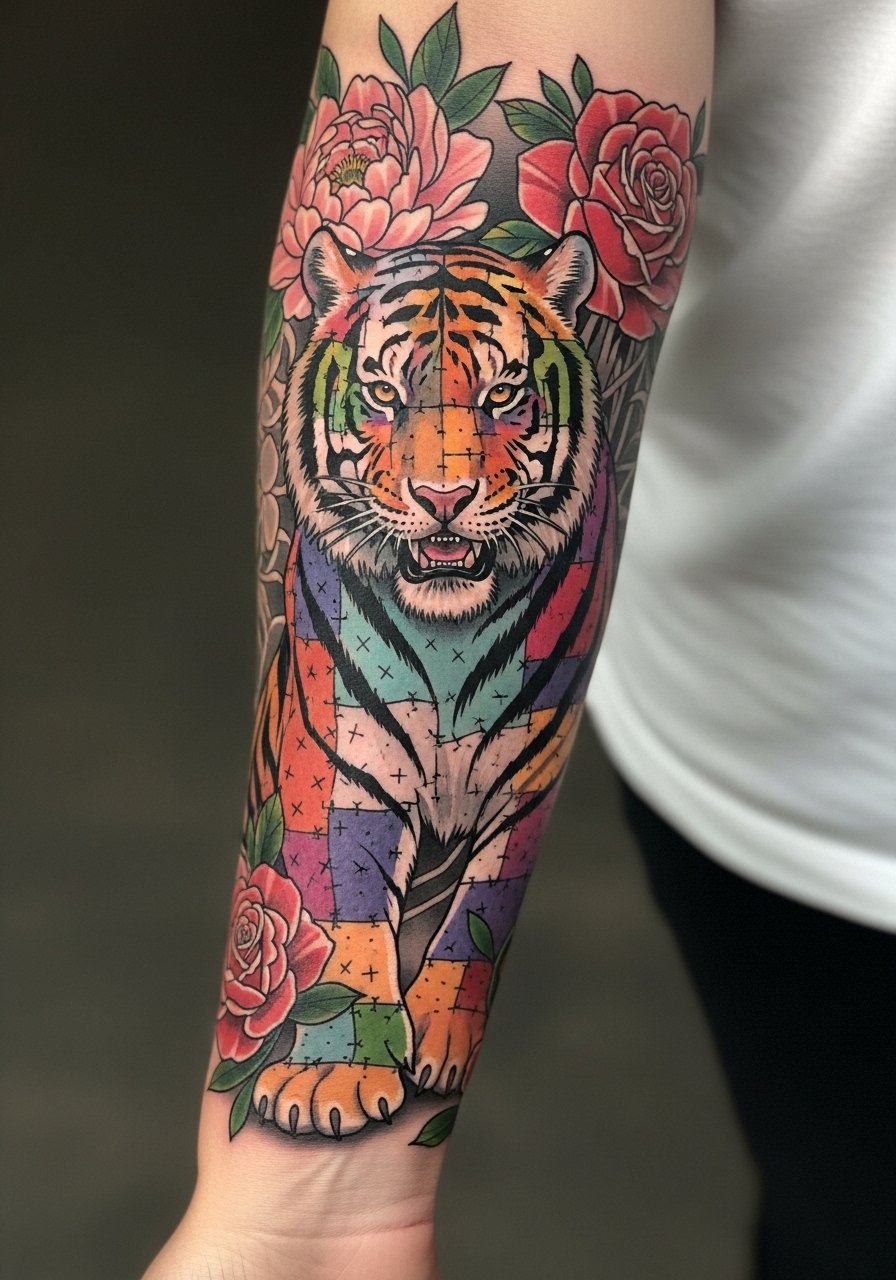
Patchwork tigers mix ferocity with beauty—flowers soften the edge and add transformation symbolism. Forearm placement makes the narrative visible and wearable. I’ve noticed patchwork ages well because the black base anchors color accents. Common mistake: cramming too many motifs—let the tiger remain the focal point. Look for neo-traditional artists who handle floral accents without overwhelming the tiger motif.
14. Micro-Realism Tiger Eye on Ankle
Style/Technique: Micro-Realism / Small Detail
Pain Level: High (6-7/10)
Session Time: 1-2 hours
Best For: Tiny focal realism, subtle but intense
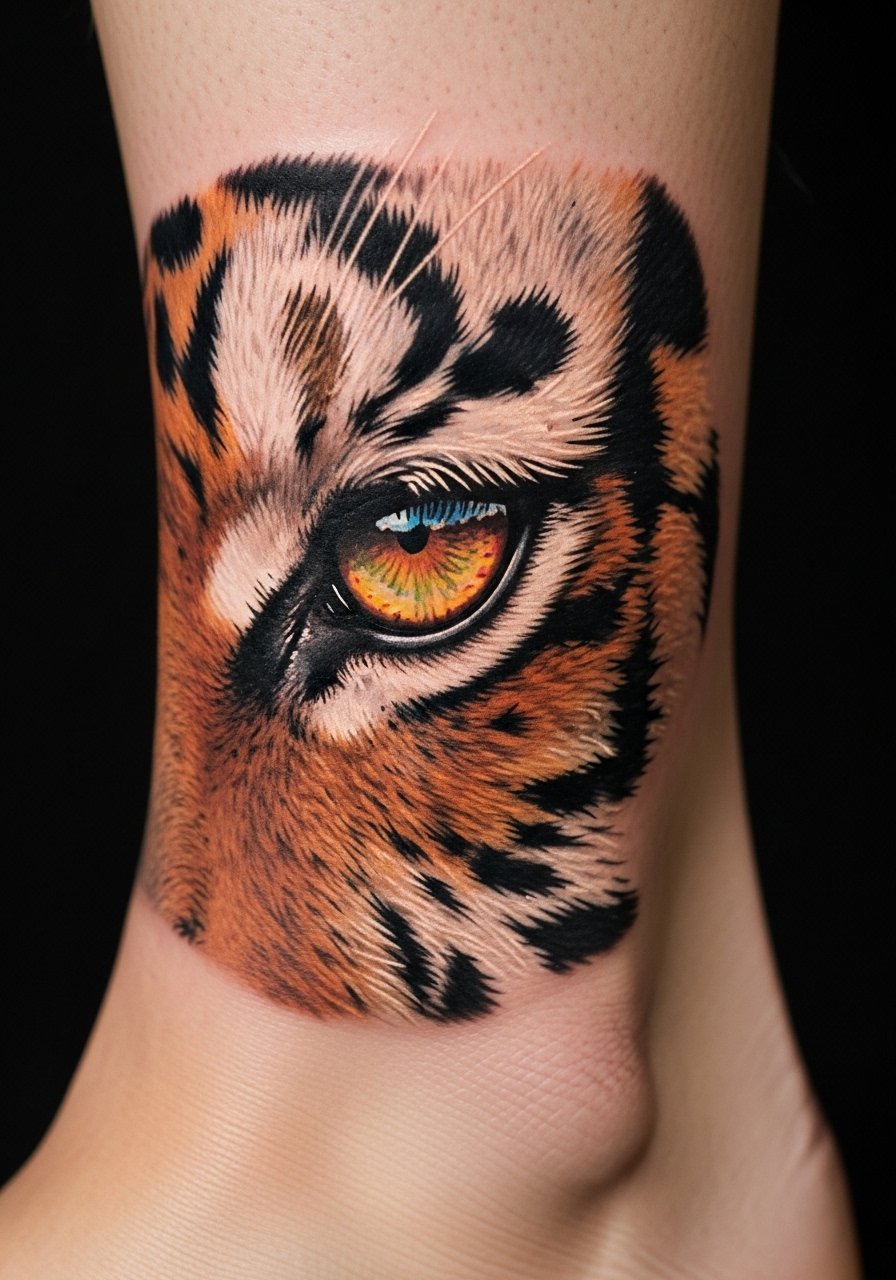
A micro-realism eye can be haunting—small but full of life. Ankles can be bony and painful, and micro realism demands steady shading. I’ve found small realism looks amazing fresh but needs careful placement and touch-ups later. Common mistake: scaling realism too small—give the artist enough room to render texture. Ask for healed photos of similar-sized micro pieces.
15. Geometric Tiger Blackwork on Ribcage
Style/Technique: Blackwork / Geometric
Pain Level: High (7-8/10)
Session Time: 2-3 sessions
Best For: Modern aesthetic, hideable art
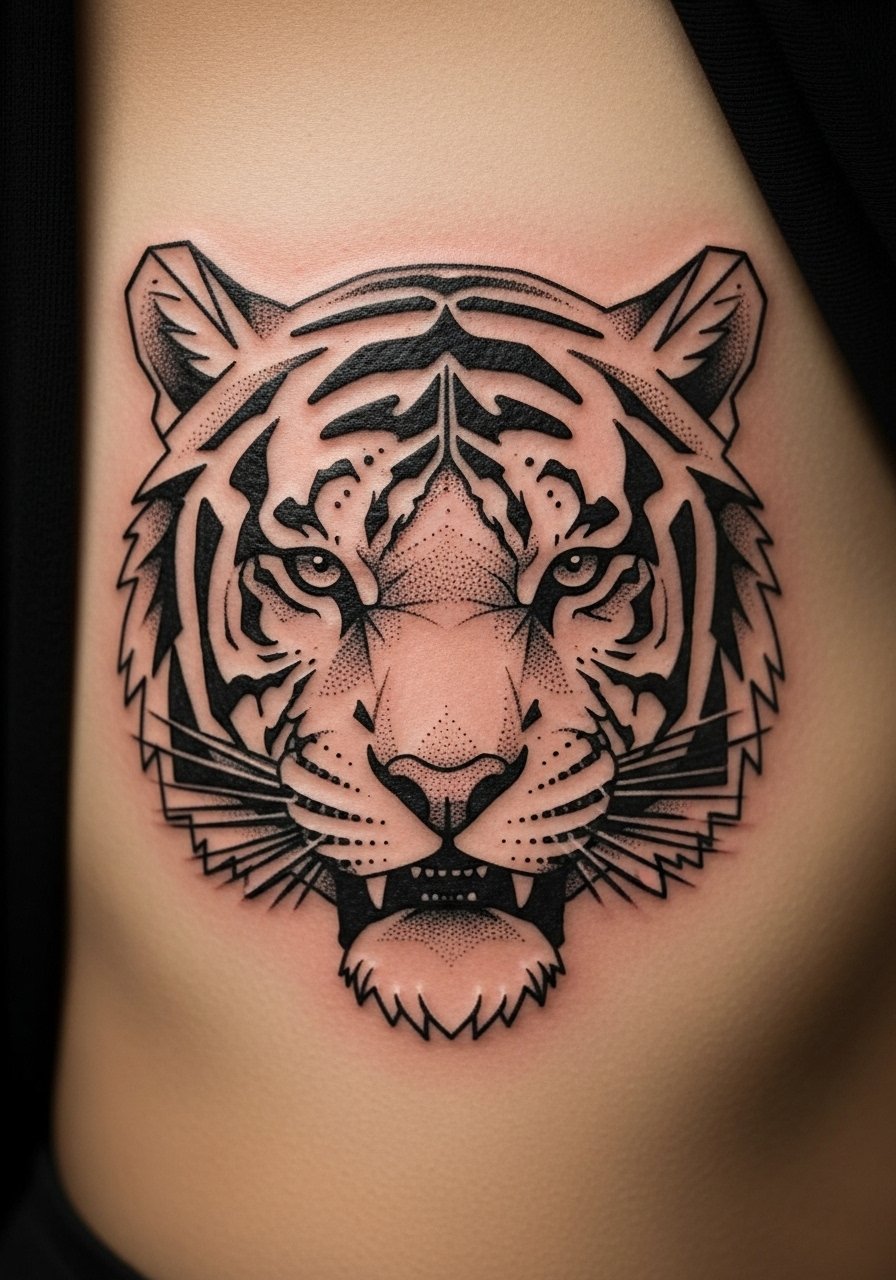
Ribcage is one of the more painful spots, but it creates a private canvas. A geometric blackwork tiger is modern and deliberate; the shapes add a layer of symbolism about structure and discipline. From what I’ve seen, blackwork maintains contrast longer than soft color blends. Common mistake: overcomplicating geometry—keep it balanced. Ask for healed ribcage examples; artists experienced with torso shading know how to handle movement and breath.
16. Watercolor Tiger Splash on Thigh
Style/Technique: Watercolor / Illustrative
Pain Level: Low-Medium (3-4/10)
Session Time: 1-2 sessions
Best For: Painterly look, colorful statement
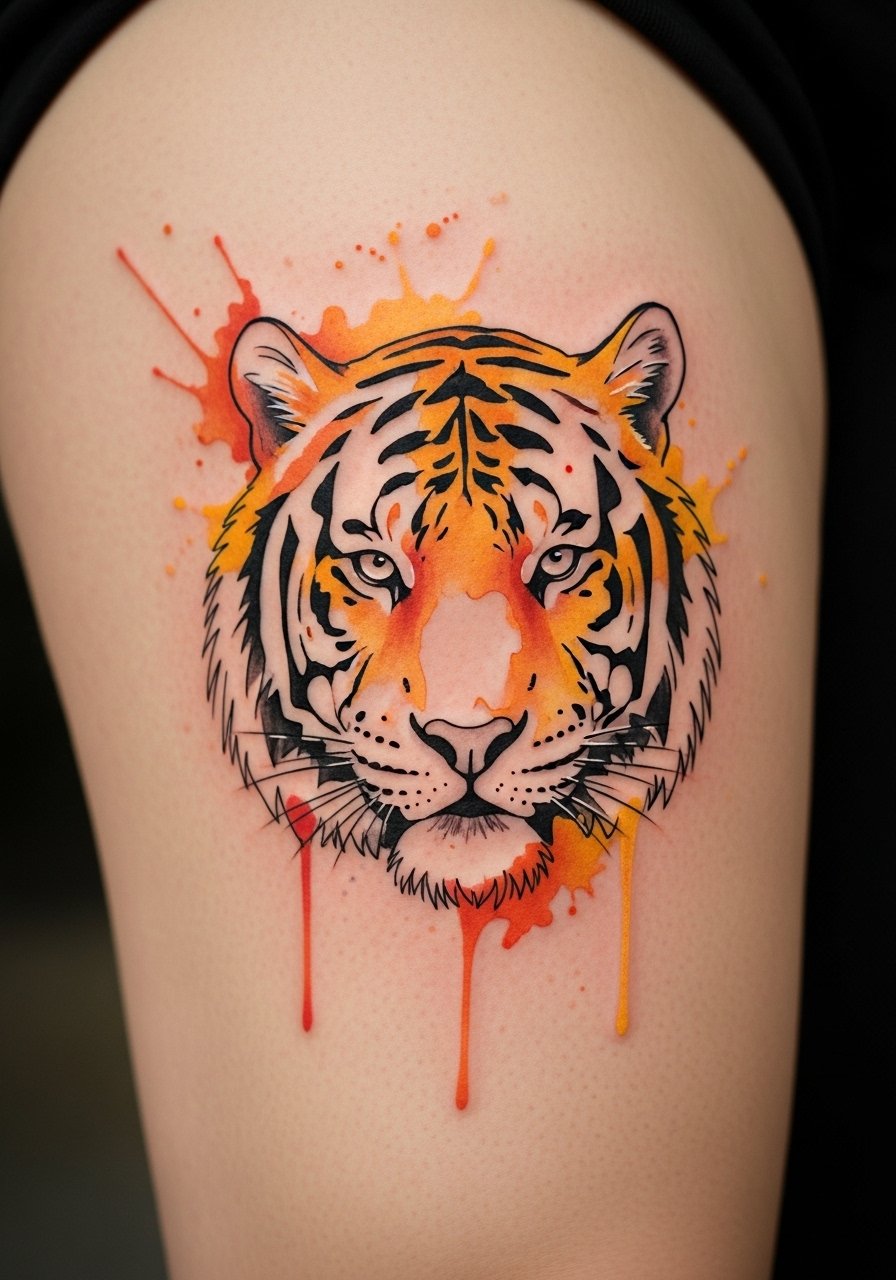
Watercolor tigers feel fluid and energetic. Thigh placement lets colors breathe and heal under less friction than hands or feet. I’ve seen watercolor chips fade faster, so artists often anchor the design with crisp black outlines to preserve form. Common mistake: relying solely on diluted color—request a strong outline or black anchoring. Discuss long-term color maintenance with your artist.
17. Neo-Japanese Tora Guardian on Calf
Style/Technique: Japanese Tora / Calf Piece
Pain Level: Medium (4-5/10)
Session Time: 2-3 sessions
Best For: Protection symbolism, vertical canvas
Tora guardian pieces on the calf are great for protection themes—they translate the “spiritual guardian” energy well. The calf’s curve frames a vertical pose and breathes with muscle. I’ve noticed this style resonates with people wanting cultural depth and thunder-like strength. Common mistake: stripping out traditional motifs; ask for measured backgrounds (wind, waves) that enhance protection symbolism.
18. Sleeve Fragment: Tiger Paw Crushing Chains on Forearm
Style/Technique: Neo-Traditional / Forearm Panel
Pain Level: Low-Medium (3-4/10)
Session Time: 1-2 sessions
Best For: Resilience stories, visible narrative
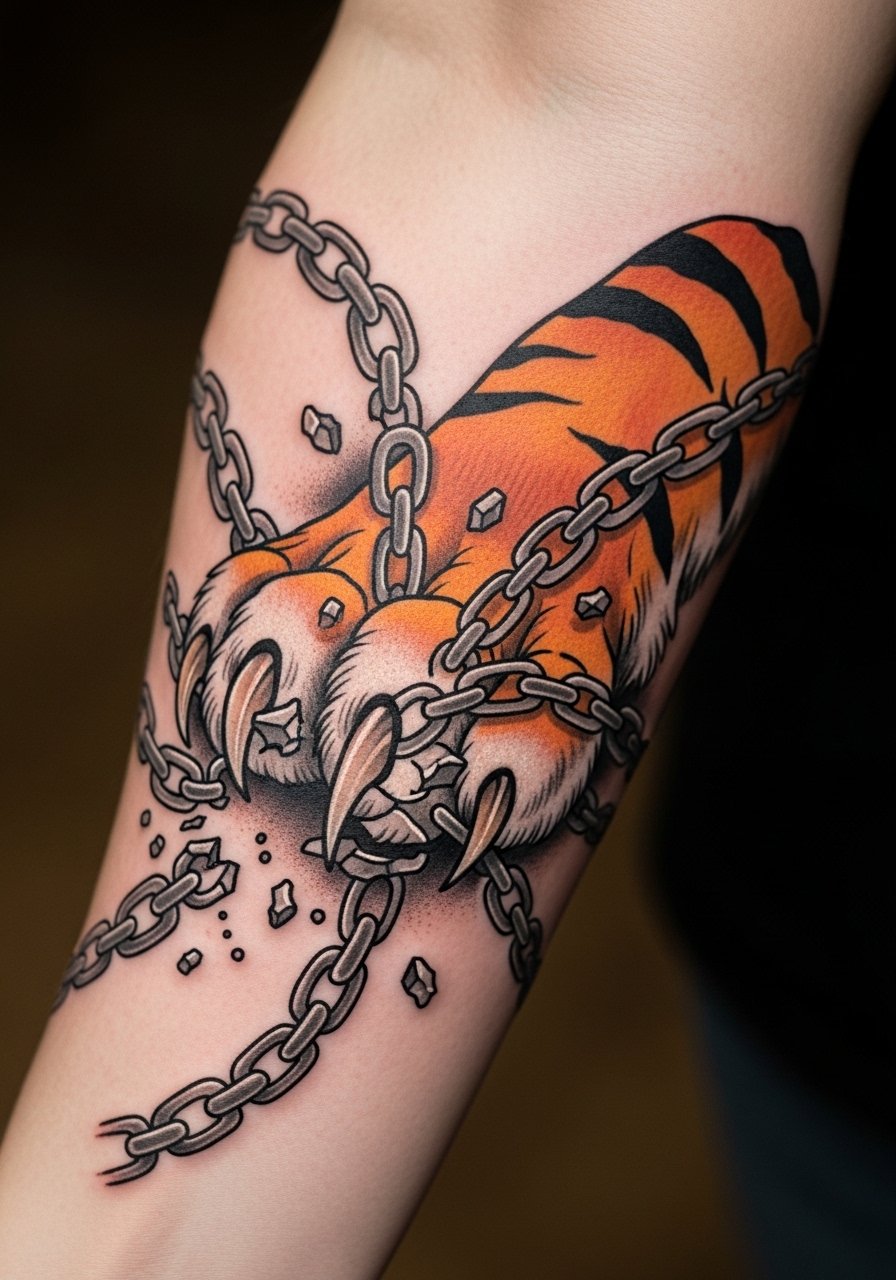
A tiger paw breaking chains is literal resilience. I’ve seen clients pick this when they want a personal “overcame” symbol. Forearm placement keeps it visible, and a panel approach lets you add other panels later if you want a sleeve. Common mistake: too much tiny lettering or filler—let the visual metaphor do the storytelling. Ask your artist how the piece will age with skin movement.
19. Minimalist Tiger Silhouette Behind Ear
Style/Technique: Minimalist / Tiny Silhouette
Pain Level: High (6-7/10)
Session Time: 30-60 minutes
Best For: Discreet symbolism, first small piece
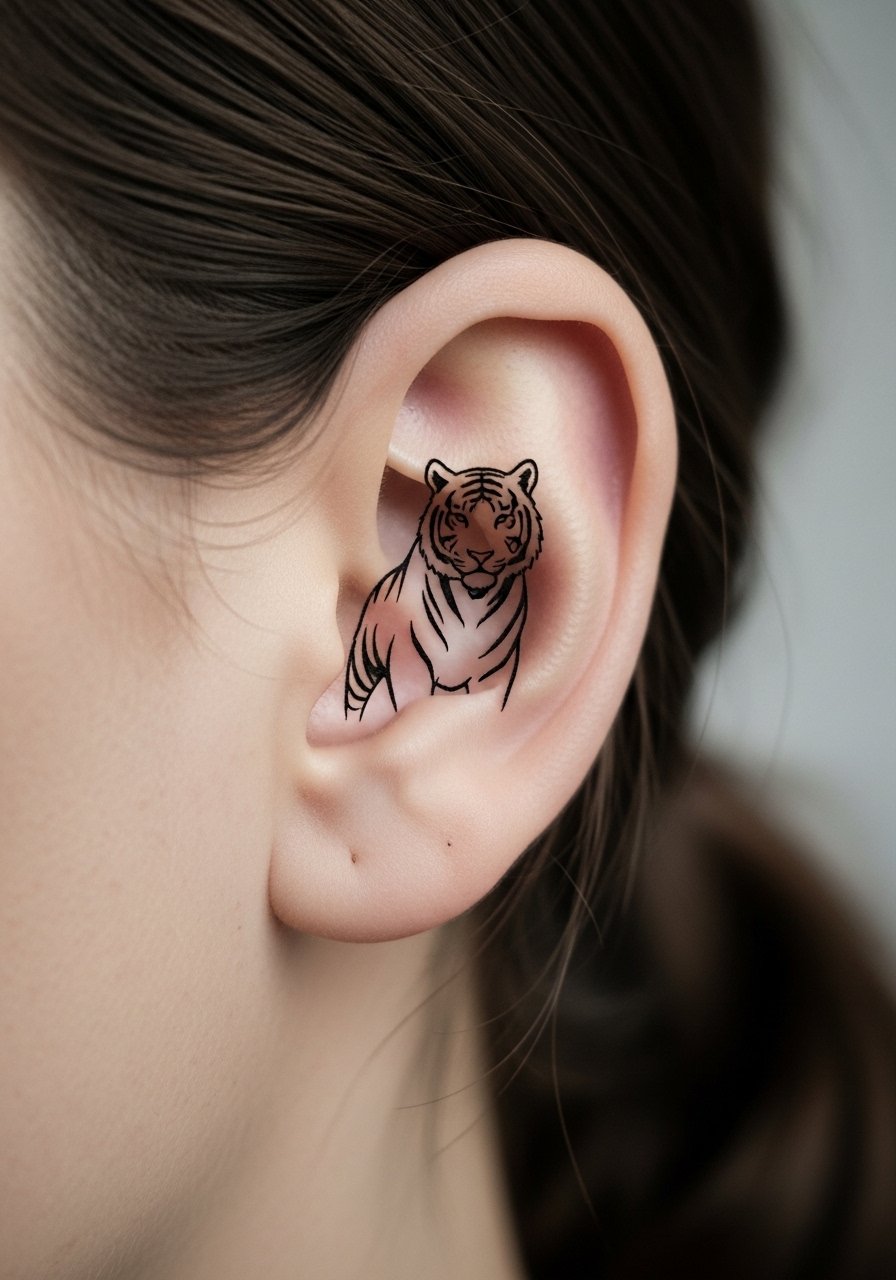
Behind-ear placements are subtle and sensitive. A tiny silhouette of a tiger reads personal and controlled—“inner strength” without a big reveal. I’ve noticed small black shapes persist best here; colored micro work can be spotty. Common mistake: expecting high detail in a very small area—embrace bold, simple shapes for longevity.
20. Tribal-Inspired Tiger Lines on Upper Chest
Style/Technique: Tribal / Linework
Pain Level: Medium (4-5/10)
Session Time: 1-2 sessions
Best For: Cultural motifs, broad chest placement
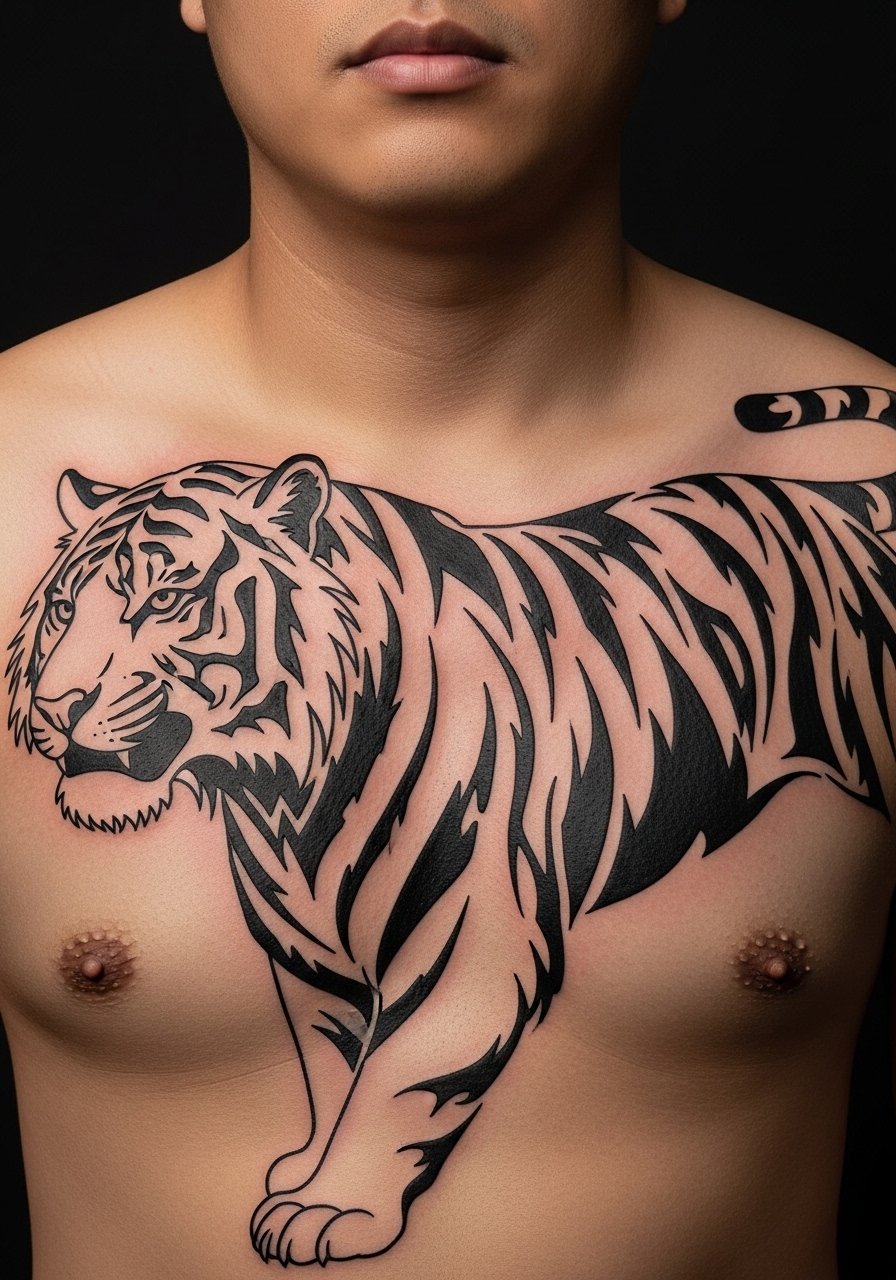
Tribal linework uses bold shapes to convey instinctual strength. Chest placement lets the design expand symmetrically. I’ve seen these chosen for ancestral or cultural connections—talk about meaning with your artist. Common mistake: borrowing tribal patterns without understanding origin—be thoughtful and ask your artist about respectful design choices.
21. Hidden-Edge Tiger Collarbone Accent
Style/Technique: Fine Line / Accent Piece
Pain Level: Medium (4-6/10)
Session Time: 1-2 hours
Best For: Subtle edge, delicate placement
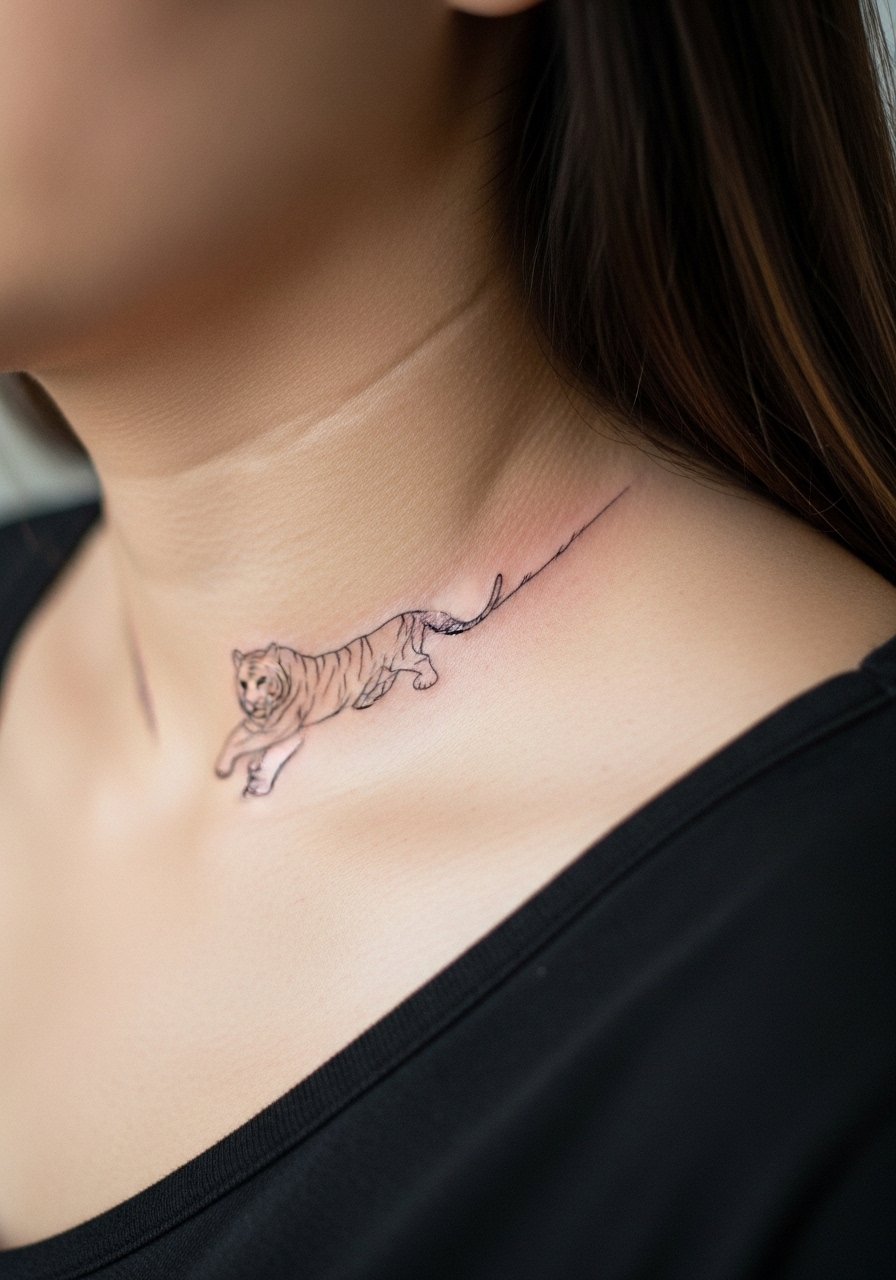
A collarbone tiger accent reads elegant and sharp. It’s visible when you want it and easy to hide under shirts. I’ve noticed collarbone skin can thin linework slightly; ask for slightly bolder fine lines than microtattoo levels. Common mistake: picking ultra-intricate shading for a small collarbone piece—simplicity keeps it crisp.
22. Half-Sleeve Tiger Breaking Through Leaves
Style/Technique: Neo-Traditional Half-Sleeve
Pain Level: High (6-7/10)
Session Time: Multiple sessions
Best For: Motion-focused sleeve, nature interplay
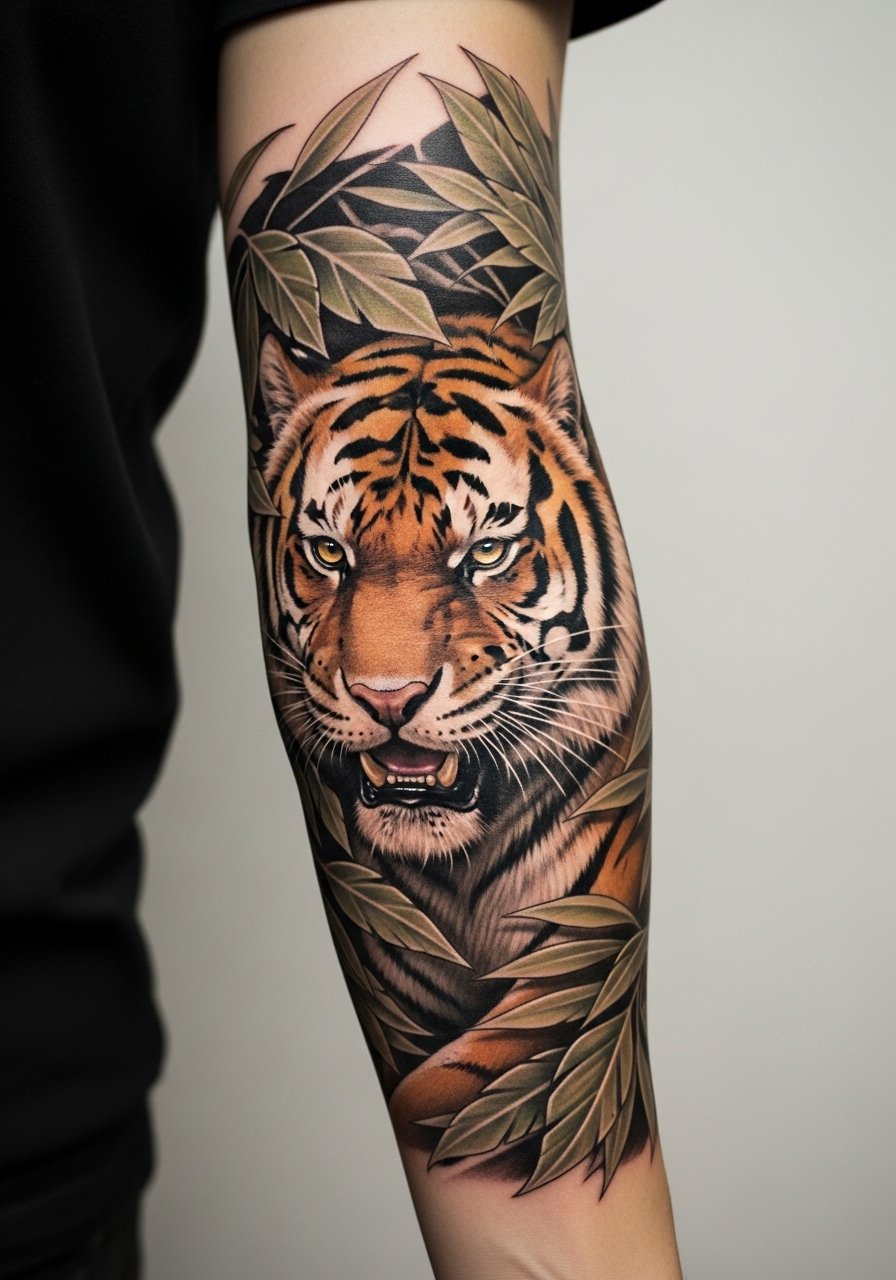
A half-sleeve that shows the tiger emerging from foliage has momentum and drama. I love how leaves give negative space and texture without flattening the tiger. From experience, half-sleeves allow for bold storytelling without the full commitment of a full sleeve. Common mistake: overcrowding—leave breathing room so the tiger’s expression reads clearly.
23. Anatomical Tiger Rib Panel (Edge of Sternum)
Style/Technique: Illustrative / Anatomical Panel
Pain Level: High (8/10)
Session Time: 2-3 sessions
Best For: Intense personal symbolism, intimate canvas
Rib panels are intense but intimate. An anatomical-style tiger pressed to the ribs can feel like a personal creed—unseen by many but meaningful to you. I’ve seen rib tattoos chosen for their private narrative. Common mistake: trying to over-detail in a tight rib arc—let the design follow bone and breath.
24. Retro Neo-Traditional Tiger With Dagger on Forearm
Style/Technique: Neo-Traditional / Forearm
Pain Level: Low-Medium (3-4/10)
Session Time: 1-2 sessions
Best For: Classic motifs with edge
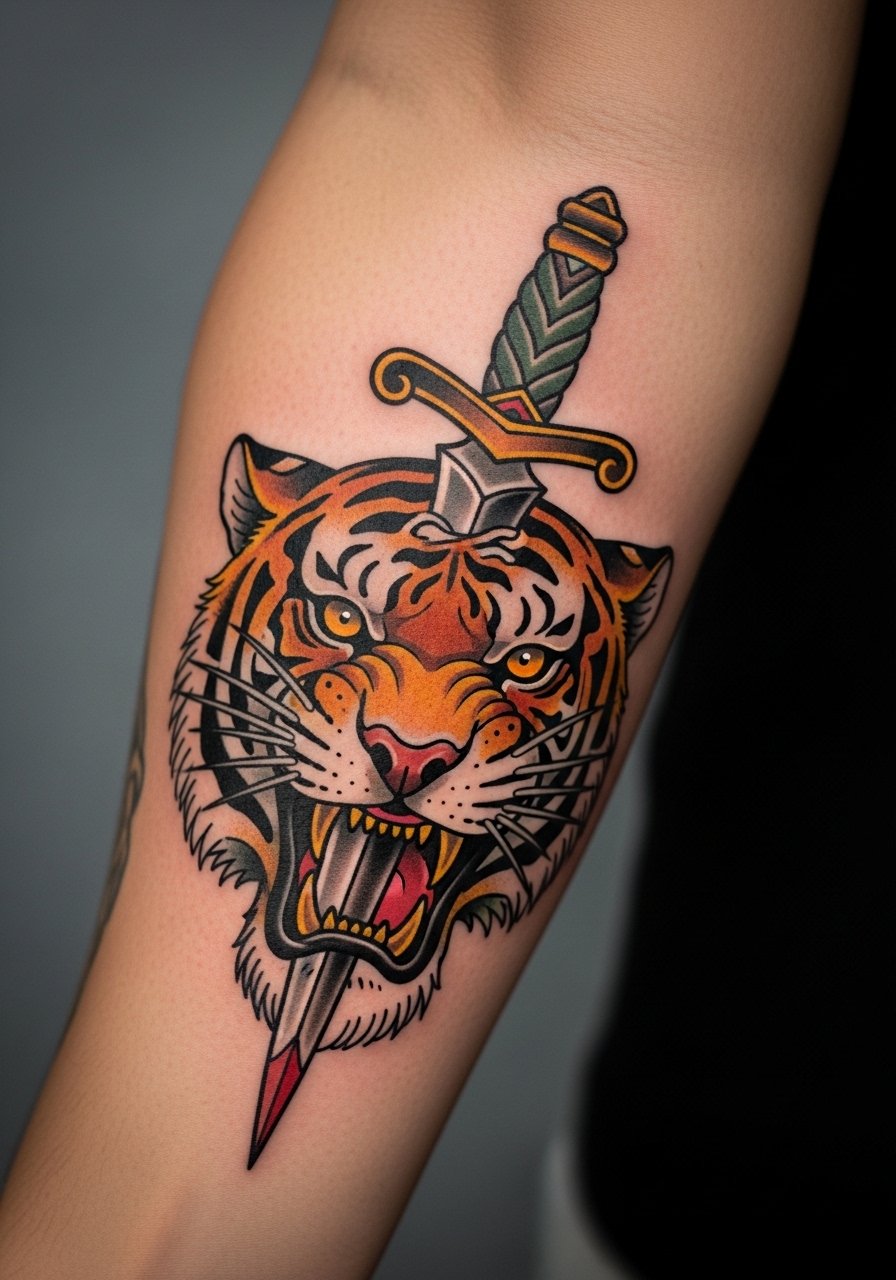
Tigers with daggers are classic motifs that read both fierce and narrative—often used to symbolize sacrifice or past battles. Forearm placement keeps it visible while still being easy to cover. I’ve noticed that muted palettes hold nuance without screaming color. Common mistake: overcomplicating symbolism—pick one narrative and stick to it.
25. Temple Guardian Tora on Upper Leg (Samurai Influence)
Style/Technique: Japanese Tora / Upper Leg
Pain Level: Medium (4-5/10)
Session Time: 2-3 sessions
Best For: Cultural guardian themes, larger leg canvas
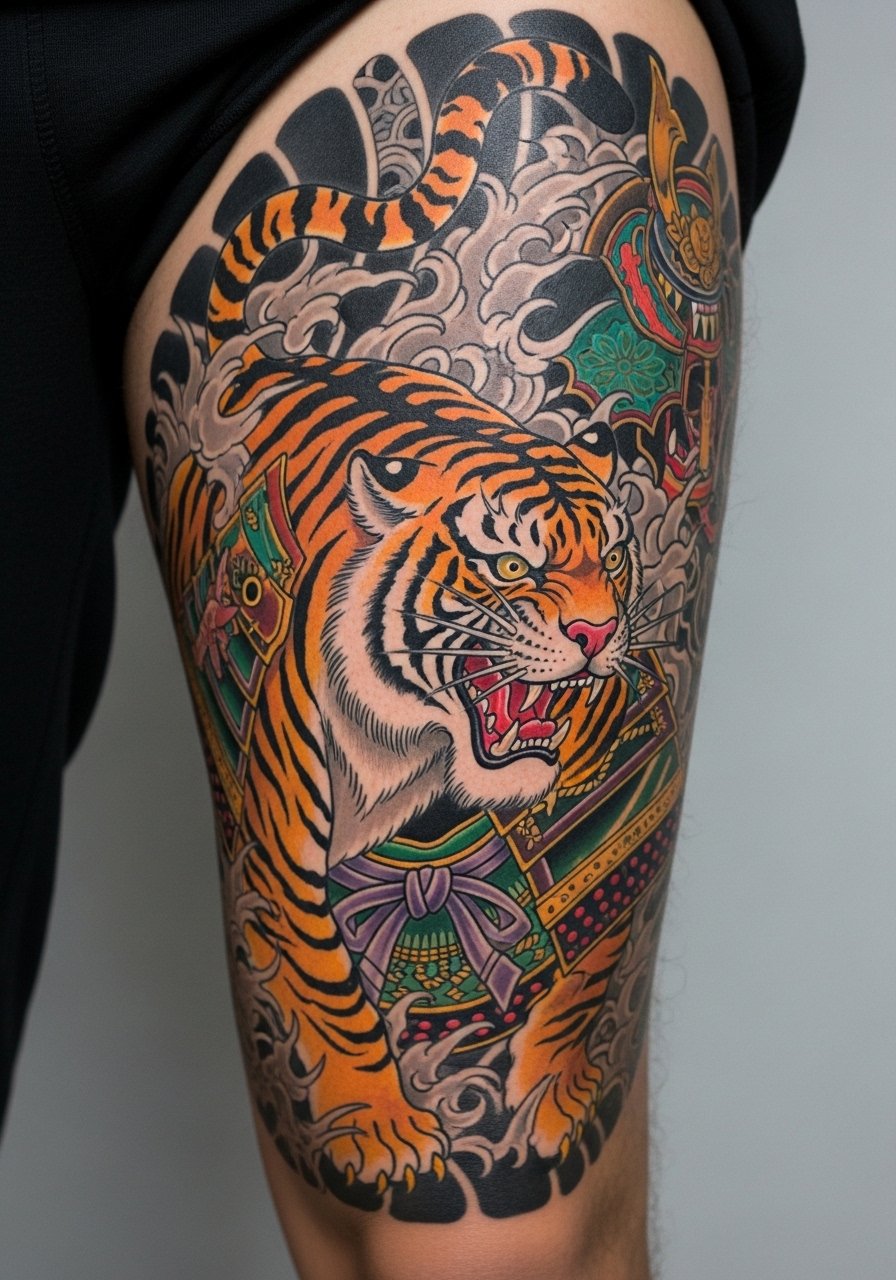
A temple-guardian Tora on the thigh reads like a protector—rooted in samurai imagery and shrine guardians. I’ve seen this chosen by people wanting cultural protection symbolism. Leg placement gives room for background waves and wind. Common mistake: removing cultural context—if you want authentic meaning, study motifs and discuss respectfully with your artist.
26. Quiet Self-Mastery Minimal Tiger on Rib Side (Fine Line)
Style/Technique: Minimalist / Fine Line
Pain Level: High (7/10)
Session Time: 1 hour
Best For: Inner strength markers, discreet placement
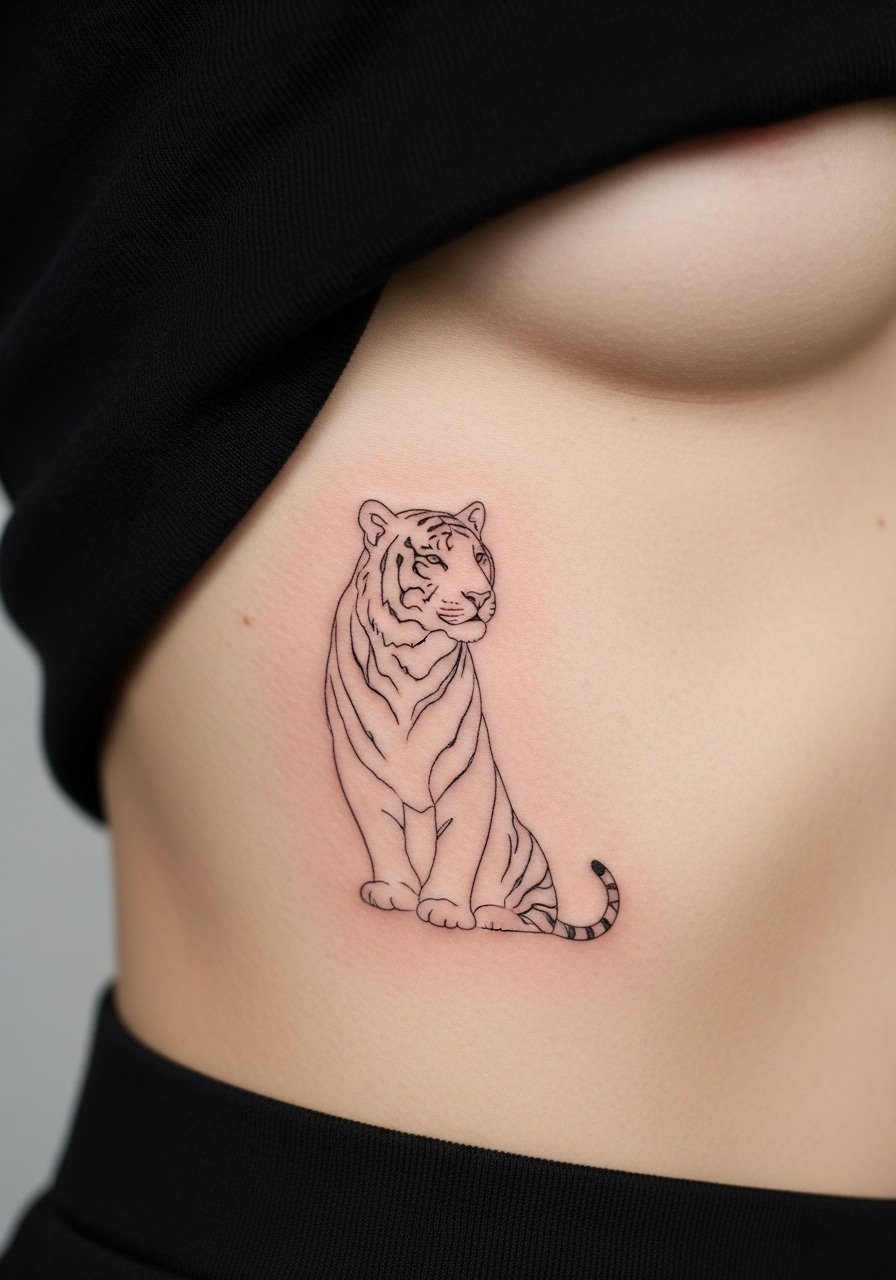
A minimal tiger on the rib side feels like a secret—quiet self-mastery rather than roar. Fine-line work here reads intimate and deliberate. I’ve noticed that minimal rib pieces can blur if lines are too thin, so ask for a slightly sturdier single-line approach. Common mistake: choosing micro detail over a strong silhouette—simplicity keeps the meaning intact and legible as it heals.
Tattoo Prep and Aftercare Essentials
Aftercare Essentials:
- Aquaphor Healing Ointment, 14oz tube — great for the first 3-5 days to protect fresh ink
- Saniderm Transparent Adhesive Bandage, 6-inch roll — second-skin healing for the first 48-72 hours
- CeraVe Fragrance-Free Moisturizing Lotion, 12oz — daily moisturizer during weeks 2-6
- Dr. Bronner's Unscented Castile Soap, 32oz — gentle cleaning for first few weeks
Before Your Appointment:
- Tattoo Numbing Cream with 5% Lidocaine — apply 30-45 minutes before if your artist approves
- Tattoo Stencil Transfer Paper, Medium Pack — useful if you’re testing placement at home
Long-Term Maintenance:
- SPF 50 Sunscreen Stick for Tattoos — daily sunscreen keeps colors vivid
- Mad Rabbit Tattoo Balm, 2oz — long-term moisturizer for healed ink
- Hustle Butter Deluxe, 2oz — vegan alternative many artists recommend
Optional Comfort & Supplies:
- Tattoo Numbing Spray — for sensitive spots or touch-ups
- Hydrocolloid Bandages (large) — spot coverage for small tattoos during first week
What artists actually recommend vs. hype: I’ve found most experienced artists push gentle soap, Saniderm/Aquaphor early, and SPF later. Numbing products help on sensitive areas but always check with your shop first.
Frequently Asked Questions
Q: How bad does a tiger tattoo actually hurt?
A: Pain varies by placement and your tolerance. Outer bicep and thigh are among the lowest in my experience (2-4/10). Hands, knees, ribs and sternum run highest (7-9/10). It’s more persistent burning than sharp stabbing for most placements. For sensitive areas, discuss numbing cream with 5% lidocaine with your artist beforehand.
Q: Will a colorful tiger fade faster than black-and-gray?
A: From what I’ve seen, bright colors—especially yellows and oranges—soften faster than black. Black-and-gray realism and strong black outlines tend to keep contrast longer. Sunscreen use and proper moisturization are what really preserve vibrancy; use an SPF 50 sunscreen stick on exposed tattoos.
Q: I’m worried about regretting a visible tiger. Any advice?
A: Sit with a design for months, choose symbolism that actually matters to you, and consider starting with a smaller, hideable placement like the upper arm or thigh. If you want visibility later, you can expand into a sleeve.
Q: How long do tiger tattoos take to heal?
A: Surface healing usually happens in 2-3 weeks; full internal healing can take 2-3 months. The first week is crucial—clean gently with unscented soap and keep it protected with recommended ointment like Aquaphor or Saniderm.
Q: Do tattoos look different on darker skin tones?
A: Yes. I’ve seen black-and-gray work beautifully across tones; bright colors can appear muted on deeper tones and white ink may disappear. Ask to see healed examples from your artist on skin similar to yours.
Q: Should I get a small tiger first to test my pain tolerance?
A: Only if you actually want a small tiger. Pain is about placement more than size. A tiny wrist tiger might hurt more than a medium forearm piece. If you’re nervous, choose a less painful area like outer upper arm or thigh.
Q: What’s the biggest mistake people make when choosing a tiger design?
A: Trying to cram too much detail into too small a space or copying cultural motifs without understanding them. From my experience, personal meaning and correct scale are way more important than following trends.
Q: Any quick aftercare product you recommend for the first week?
A: Keep it simple: gentle cleansing with castile soap, a light layer of Aquaphor for the first few days, then switch to a fragrance-free lotion like CeraVe. Avoid heavy scrubs and sun exposure while healing.
