
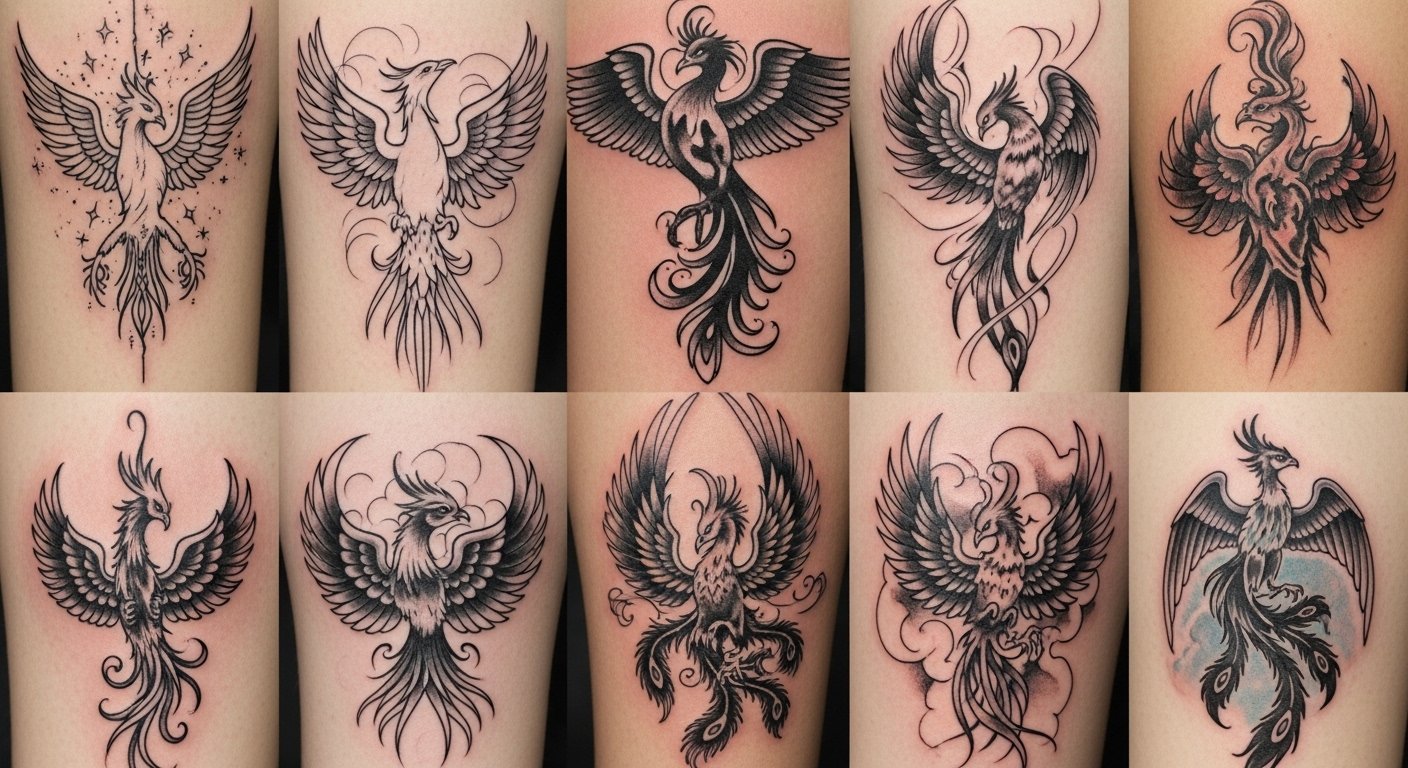
I spent months stalking tattoo feeds and talking to artists before I finally committed to my first phoenix. The problem I kept hitting wasn't finding pretty art—it was picking a style that actually ages well and matches my story of rising through hard times. These 30 phoenix tattoo ideas focus on fire, wings, and rebirth—styles I keep seeing in 2026 and the ones that hold up healed.
This list focuses on phoenix tattoo ideas with fiery elements, from fine line open wings to full-back traditional flames. These designs work across back, forearm, ribcage, and shoulder placements. From what I've seen, fine line and black-and-grey realism are trending, but bold flame work still reads strongest on darker skin when done with heavy outlines.
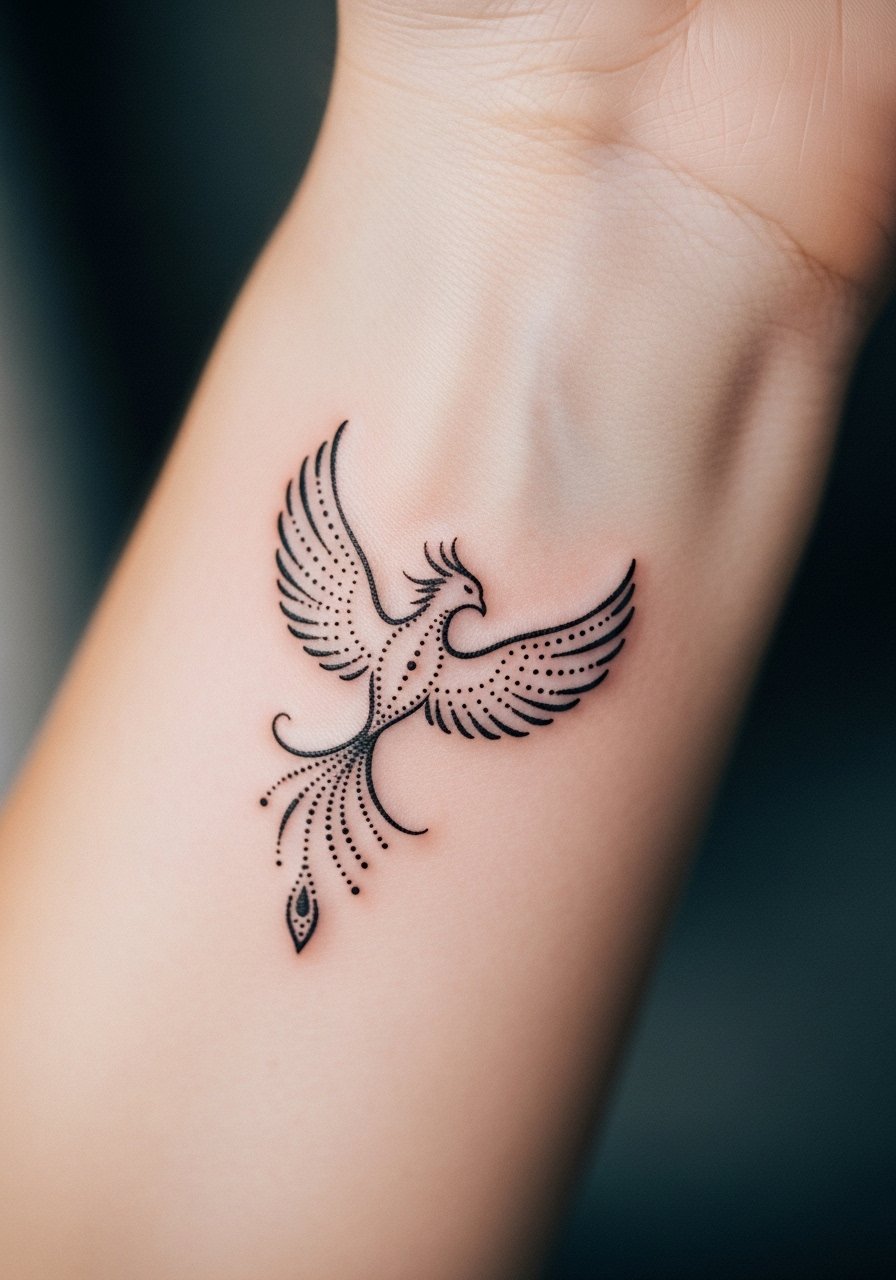
1. Fine Line Phoenix With Open Wings On Inner Forearm
Style/Technique: Fine Line / Illustrative
Pain Level: Low-Medium (3-4/10)
Session Time: 1–2 sessions, 1–3 hours
Best For: First phoenix tattoo, personal meaning
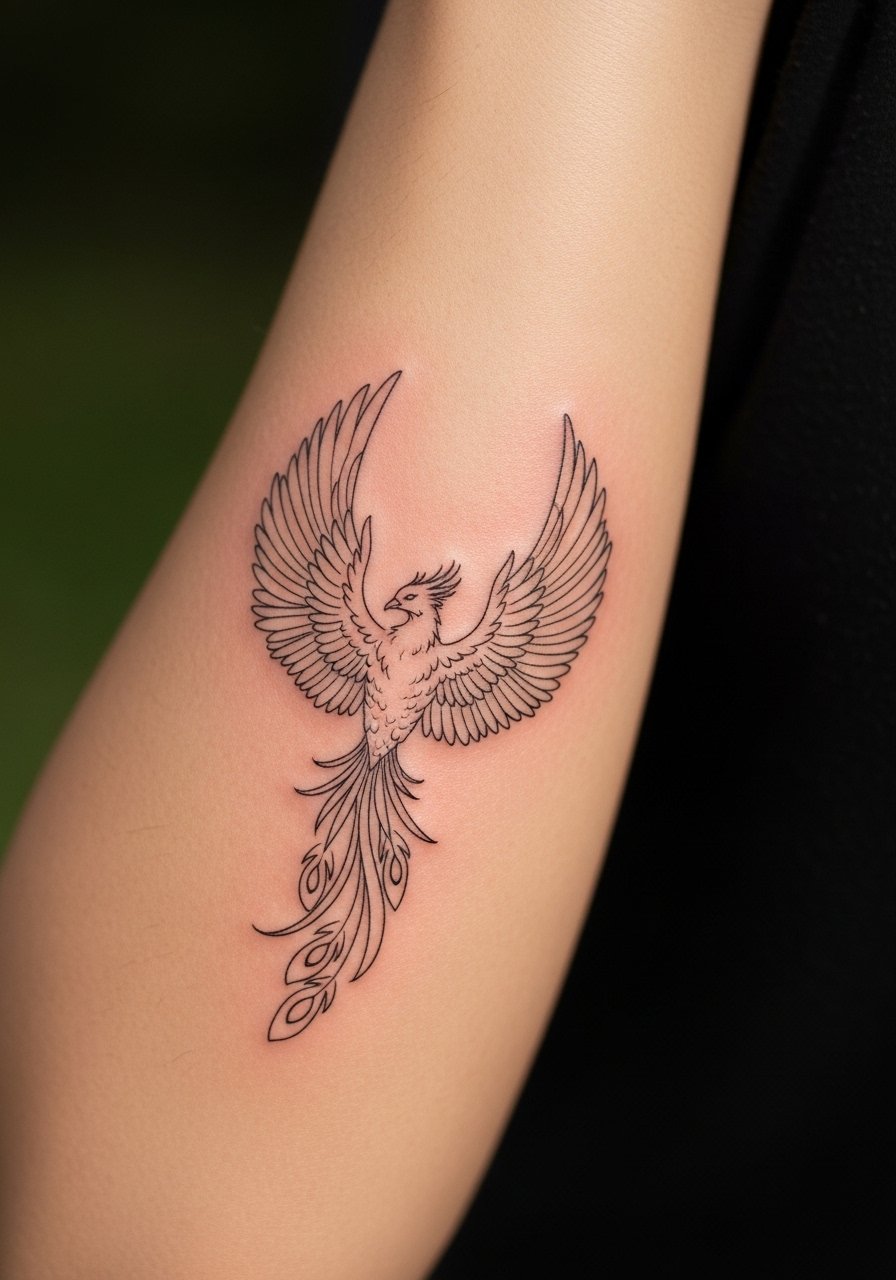
I like this for a subtle rebirth statement. Fine line phoenix tattoos read intimate and personal. The inner forearm gives a place to read the wings when you flex. Pain is manageable for most people. Healing is quick, but thin lines can blur if the artist overworks the area. From my conversations with artists, ask for slightly bolder primary lines so the small feather details age better. Avoid watercolor fills here—fine line plus strong black outline ages best. Use this if you want a "phoenix tattoo meaning" that's quiet but clear.
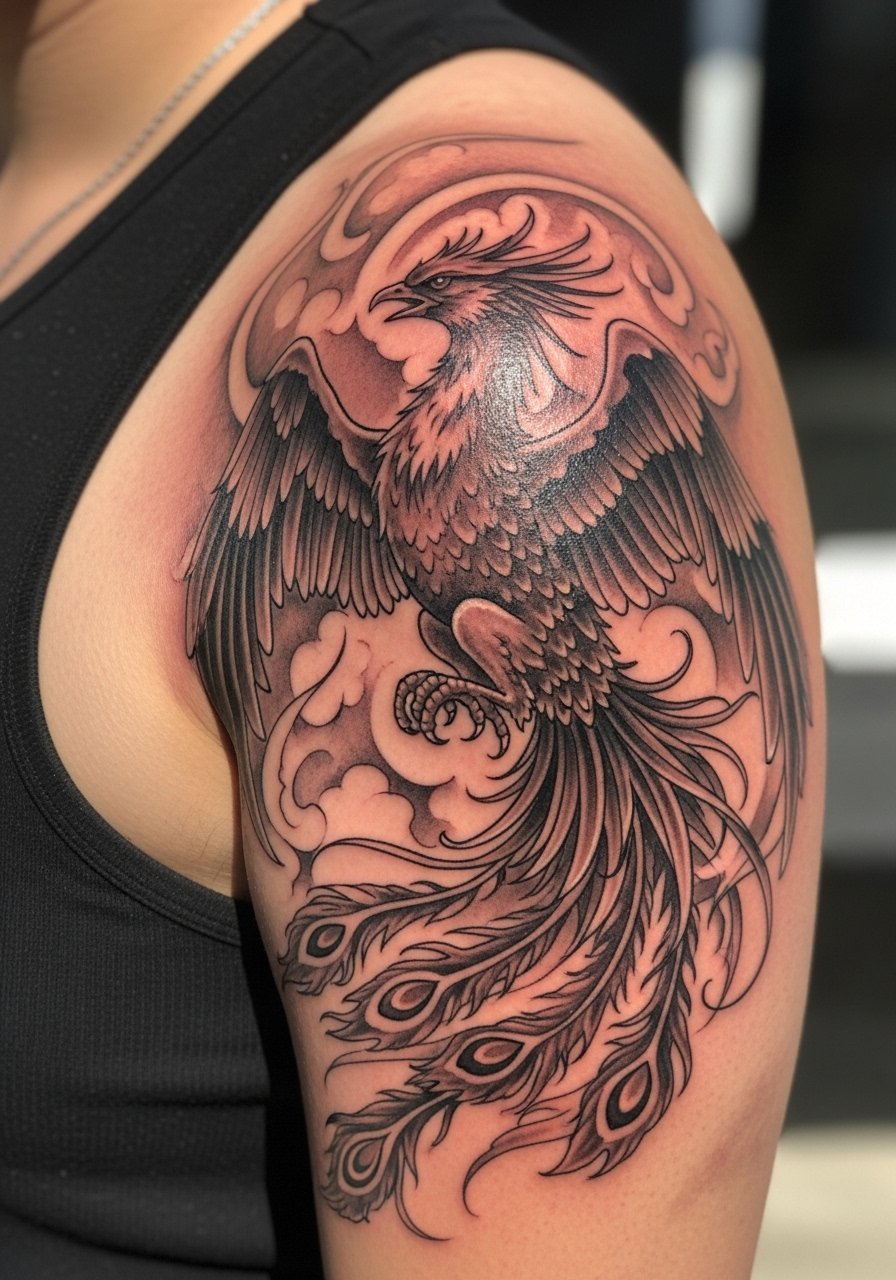
2. Traditional Phoenix With Fiery Tail On Shoulder Blade
Style/Technique: Traditional / Bold Lines
Pain Level: Low-Medium (3/4/10)
Session Time: 1–3 hours, single visit possible
Best For: Bold, showy phoenix tattoo
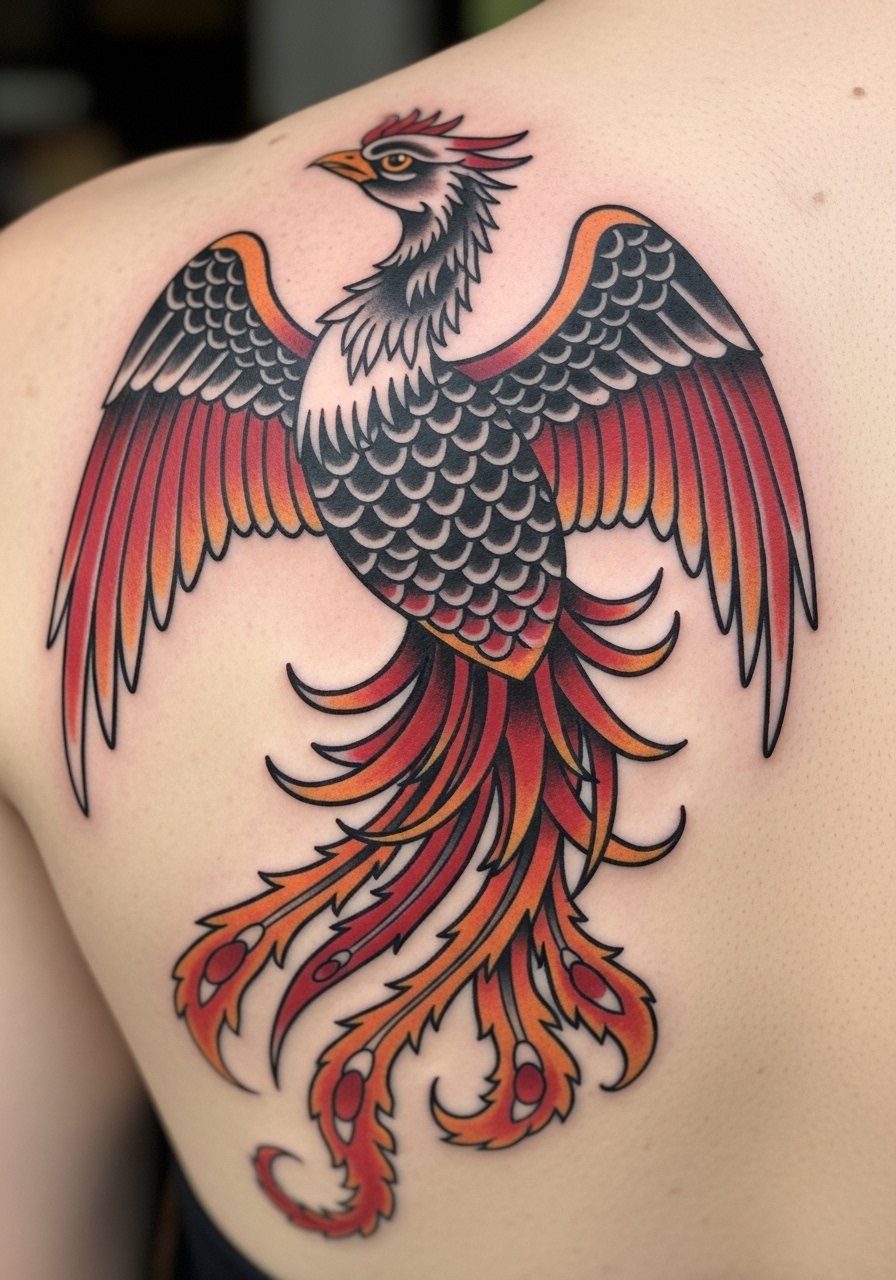
A traditional phoenix with flames looks graphic and timeless. Bold black lines and saturated reds/oranges keep the fiery tail readable years later. Shoulder blade placement lets you show or hide it easily. Expect a straightforward session and fast surface healing. Artists I’ve spoken with recommend heavy outlines to protect color from fading. Common mistake: asking for tiny flame details—those blur. Instead, lean into strong shapes and vibrant color blocks for a lasting rising-phoenix vibe.
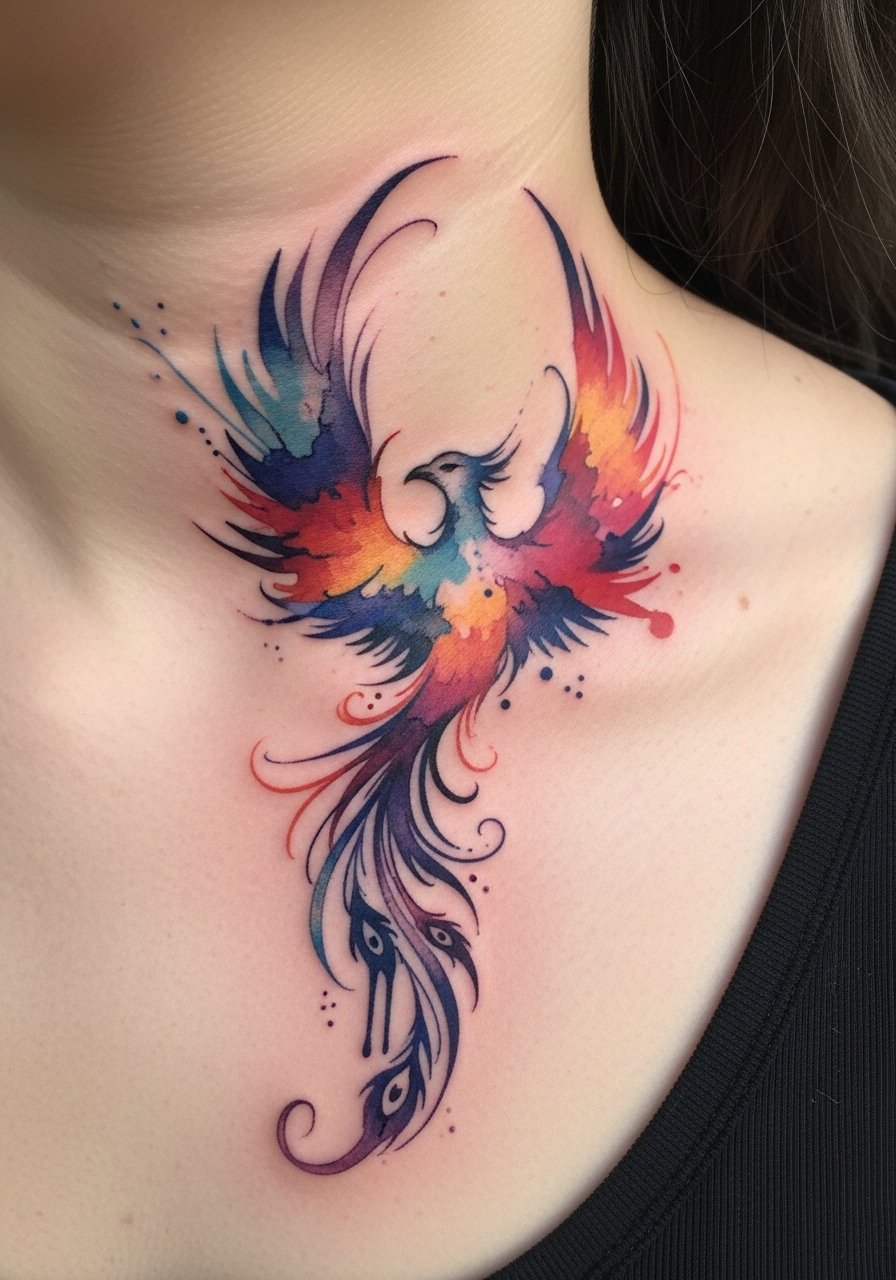
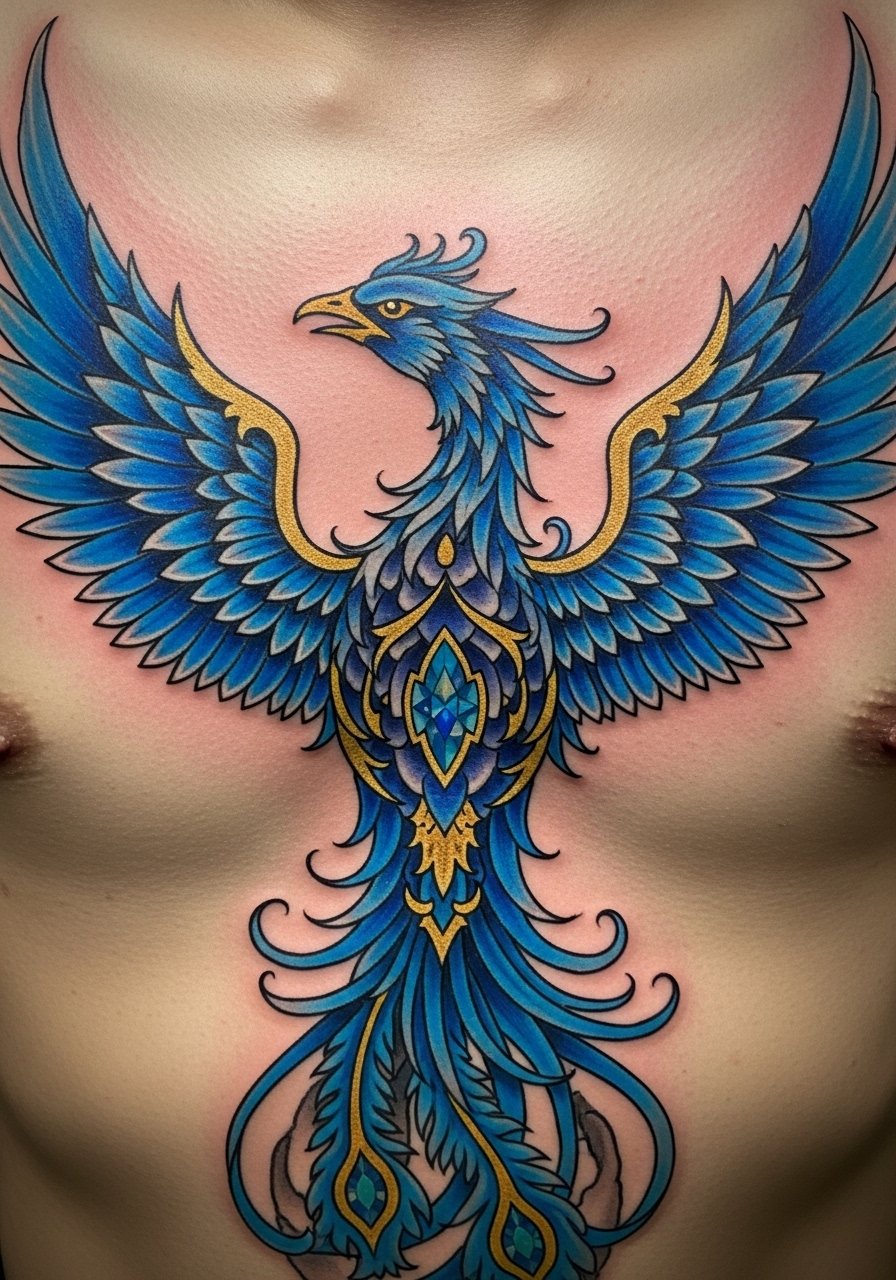
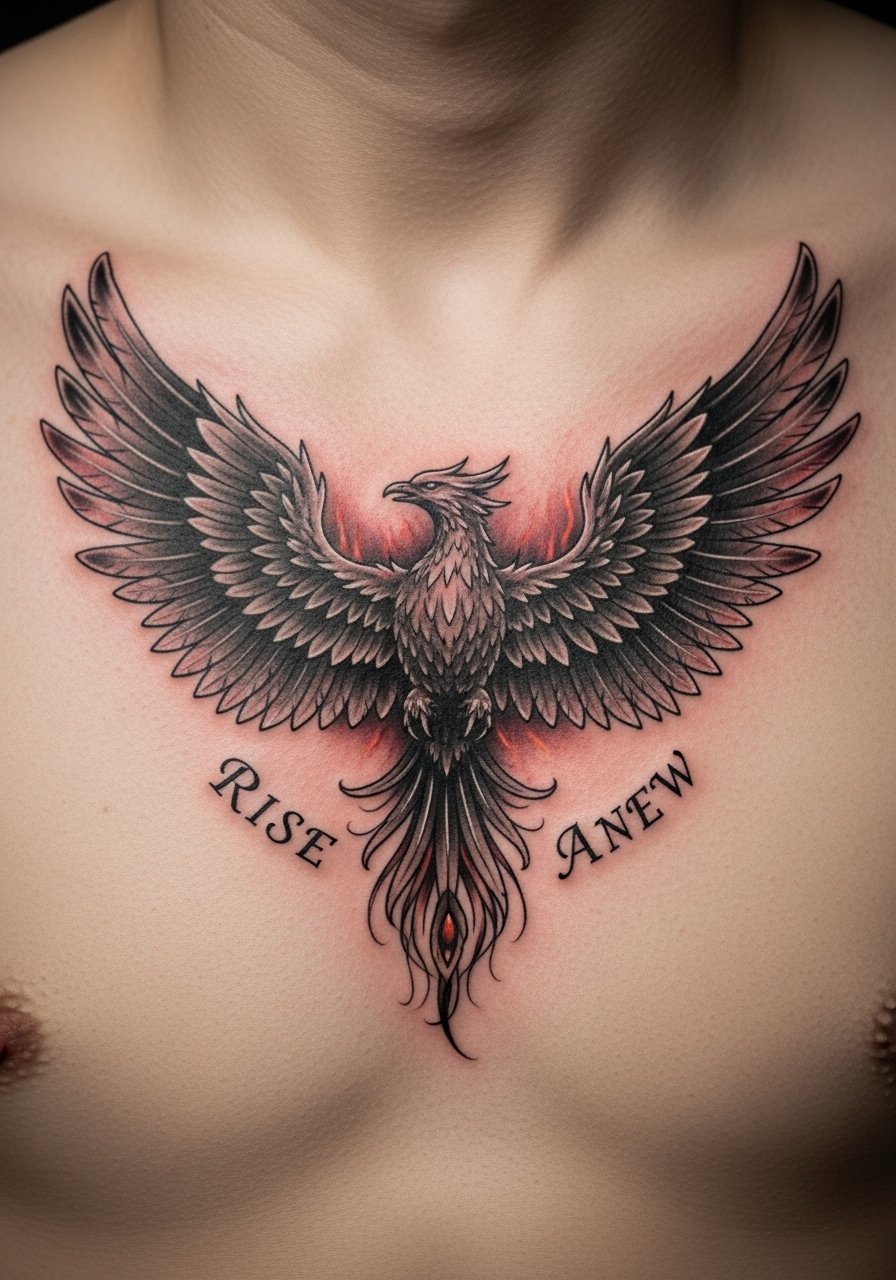
3. Neo-Traditional Phoenix Chest Piece With Gold Accents
Style/Technique: Neo-Traditional / Painterly Color
Pain Level: Medium (4-5/10)
Session Time: 2–4 sessions
Best For: Statement piece with color depth
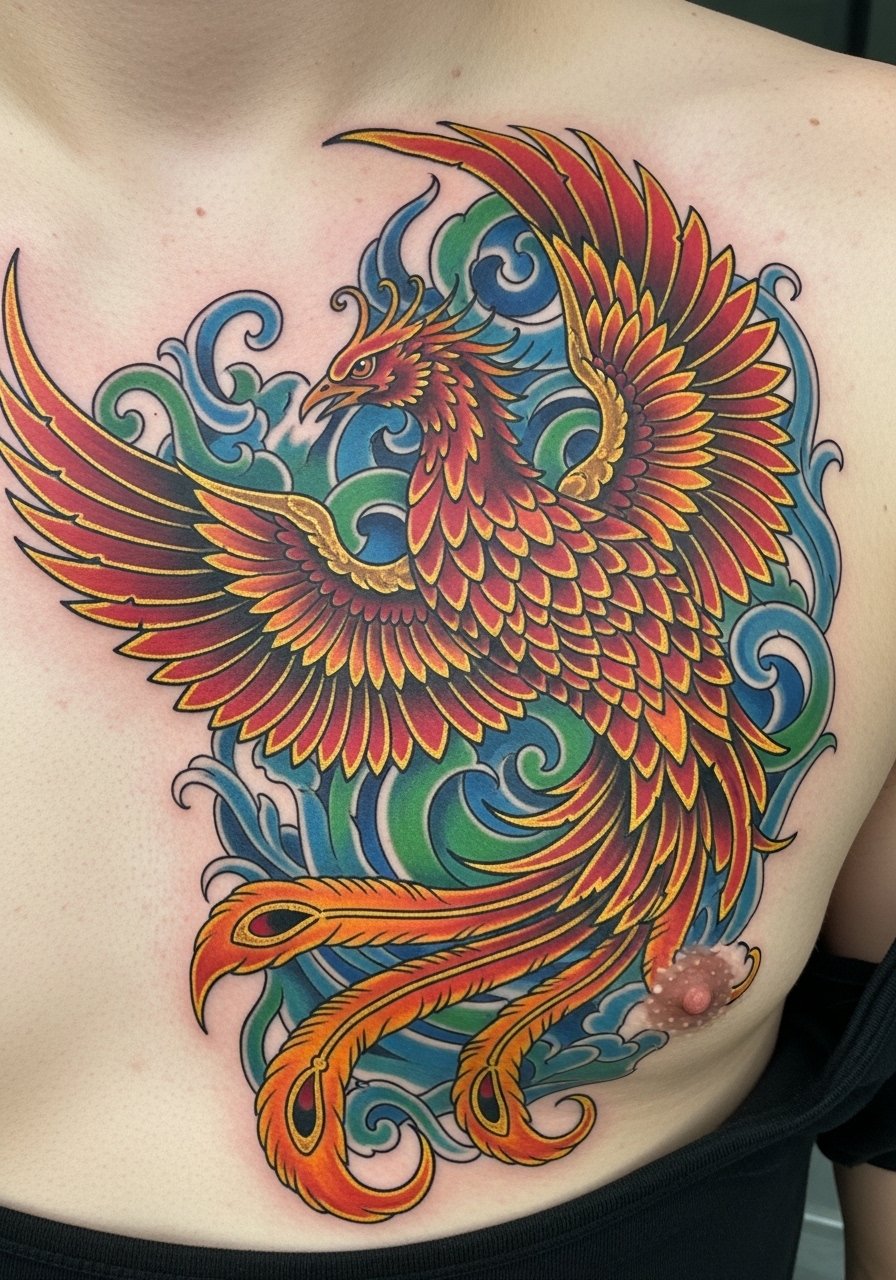
Neo-traditional gives the phoenix a classic yet modern voice. Chest placement lets wings wrap toward the collarbone and sternum for dramatic flow. Pain is higher than the arm but tolerable in padded areas. Gold and warm tones speak to rebirth; I’ve seen artists use blue accents for a calmer take. Watch for overly thin shading in feather edges—ask your artist to design larger color blocks so the flames keep their punch as the tattoo ages.
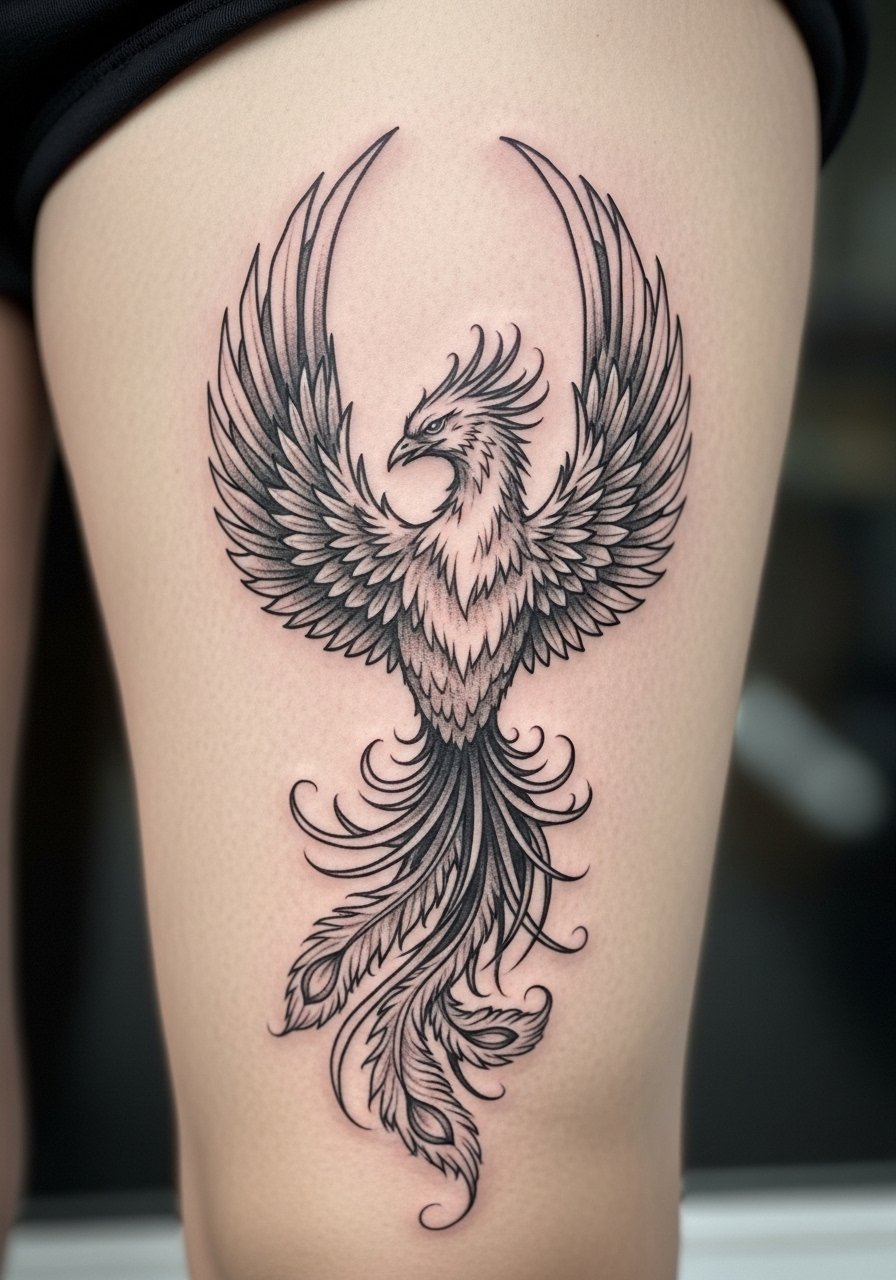
4. Watercolor Phoenix Silhouette On Thigh With Flame Wash
Style/Technique: Watercolor / Abstract Color
Pain Level: Low-Medium (3-4/10)
Session Time: 1–2 sessions
Best For: Dreamy, colorful phoenix tattoo
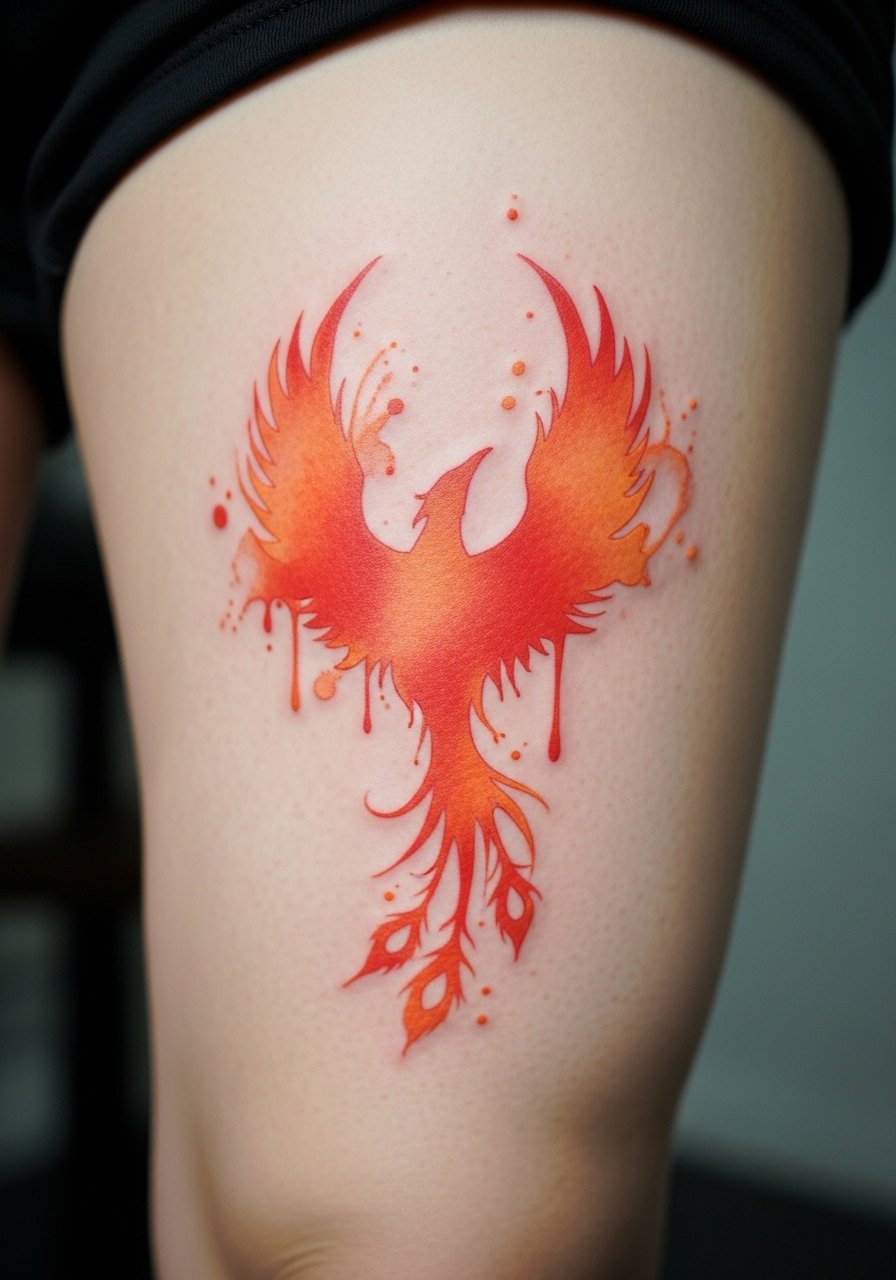
Watercolor phoenix tattoo ideas give that ethereal, painterly feel. Thigh placement lets the color breathe and avoids daily sun exposure. In my experience, watercolor looks stunning fresh but can fade faster—especially yellows and light oranges—so discuss saturation and touch-up plans with your artist. A common mistake is choosing tiny watercolor spots; this style needs space. If longevity matters, pair watercolor with subtle black anchors to keep the silhouette readable as it heals.
5. Black And Grey Realistic Phoenix Across Full Back
Style/Technique: Black & Grey Realism
Pain Level: High (6-8/10)
Session Time: Multiple sessions, staged over months
Best For: Dramatic, endurance-themed piece
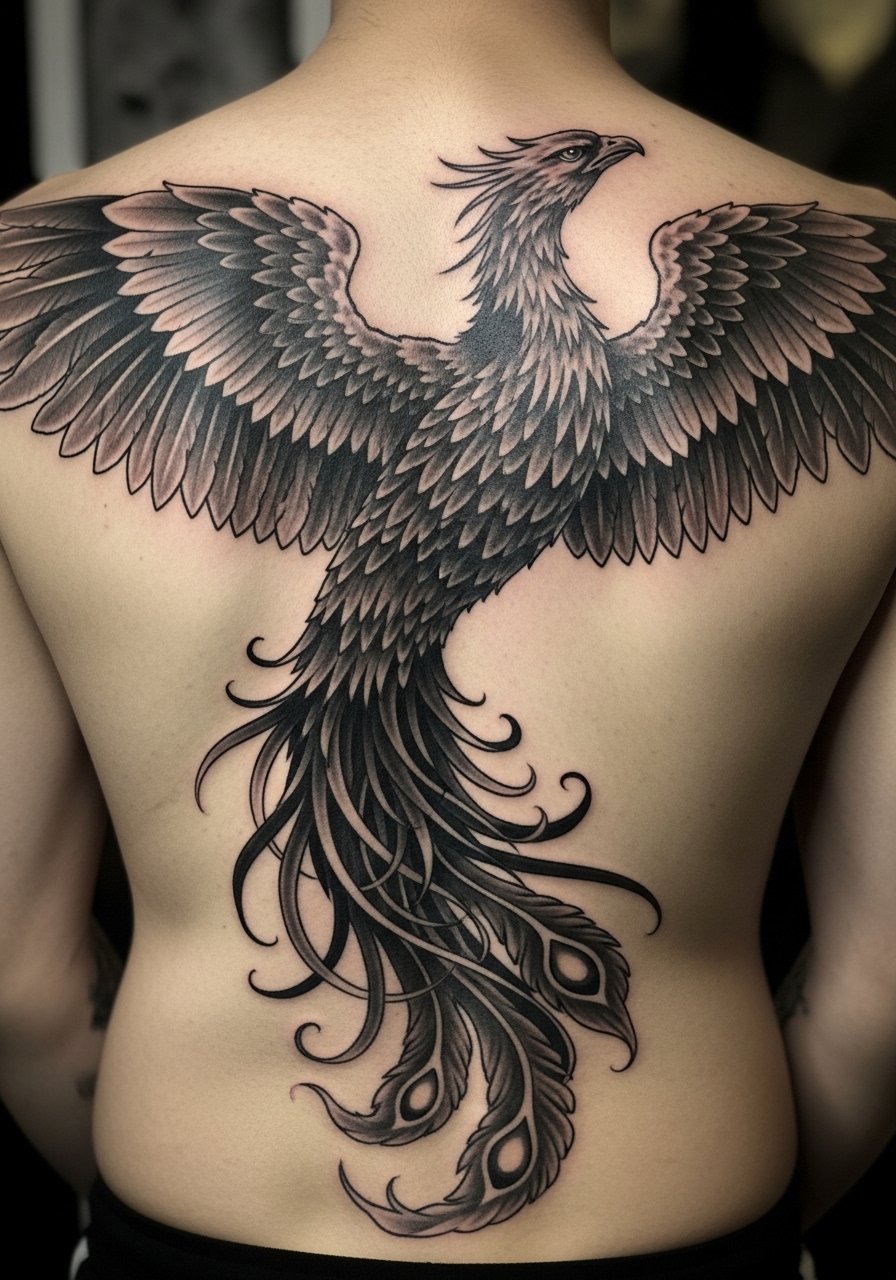
For gravity and endurance, black-and-grey realism nails the phoenix symbolism. A full-back phoenix reads monumental—like a personal resurrection. Pain and session time are significant, but the layered shading ages beautifully. I've noticed that realistic feathers need expert shading to maintain texture over time. Avoid designs with tiny stipple shading across the whole piece unless your artist is a specialist in realism. This is for people who want the phoenix tattoo meaning to feel solemn and timeless.
6. Geometric Dotwork Phoenix On Calf
Style/Technique: Geometric / Dotwork
Pain Level: Medium (4-5/10)
Session Time: 2–3 sessions
Best For: Modern, abstract phoenix tattoo
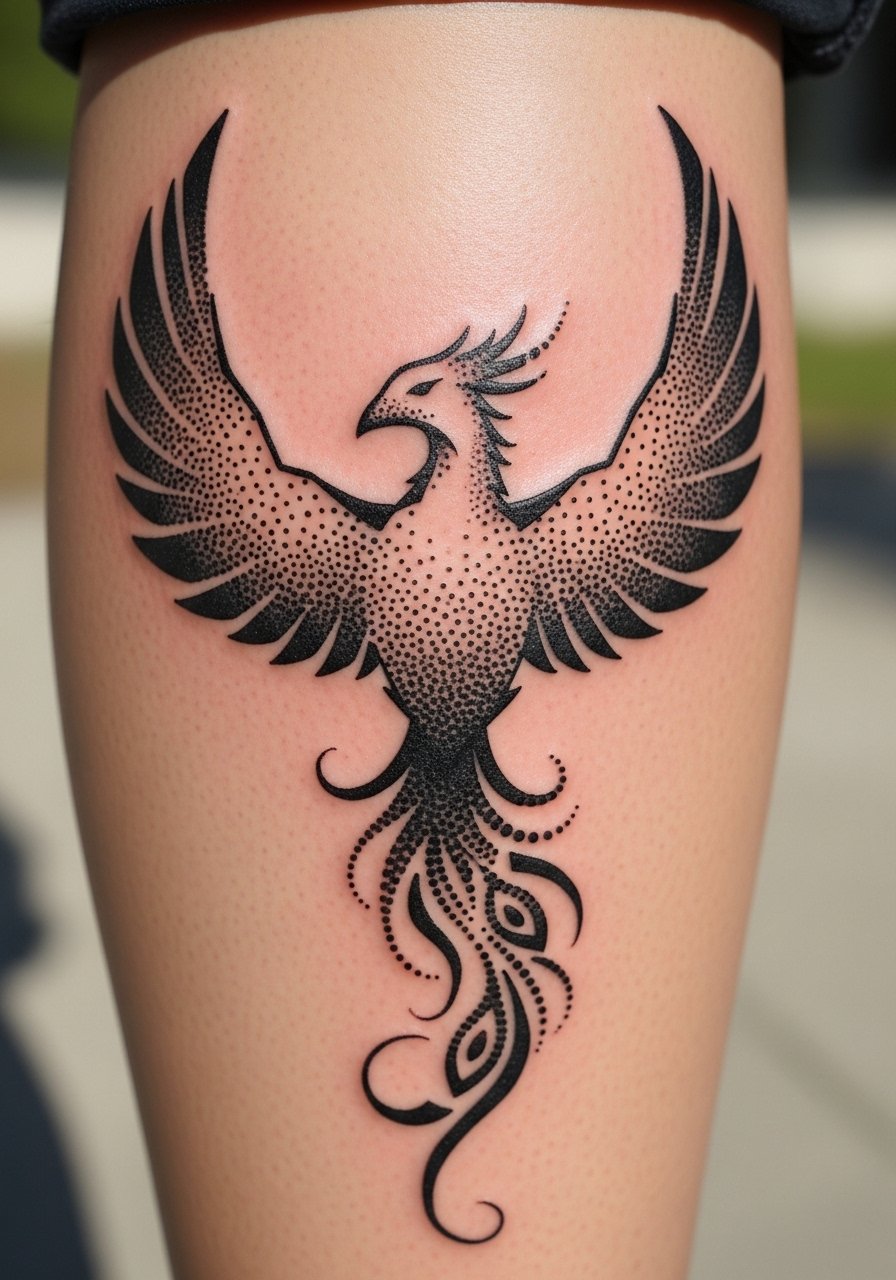
Dotwork turns the phoenix into texture and geometry. On the calf, the vertical flow mimics flight. The look is modern and reads more like an emblem than a creature. In my experience, dotwork requires patience: dense dots can be painful and need time to settle. Artists often recommend black-only work for best longevity. A mistake I see is mixing inconsistent dot sizes—ask for a consistent language across the wings so the phoenix reads as one piece as it ages.
7. Minimalist Phoenix Outline Behind Ear
Style/Technique: Minimalist / Line Work
Pain Level: Low (2-3/10)
Session Time: Under 1 hour
Best For: First phoenix tattoo, subtle symbolism
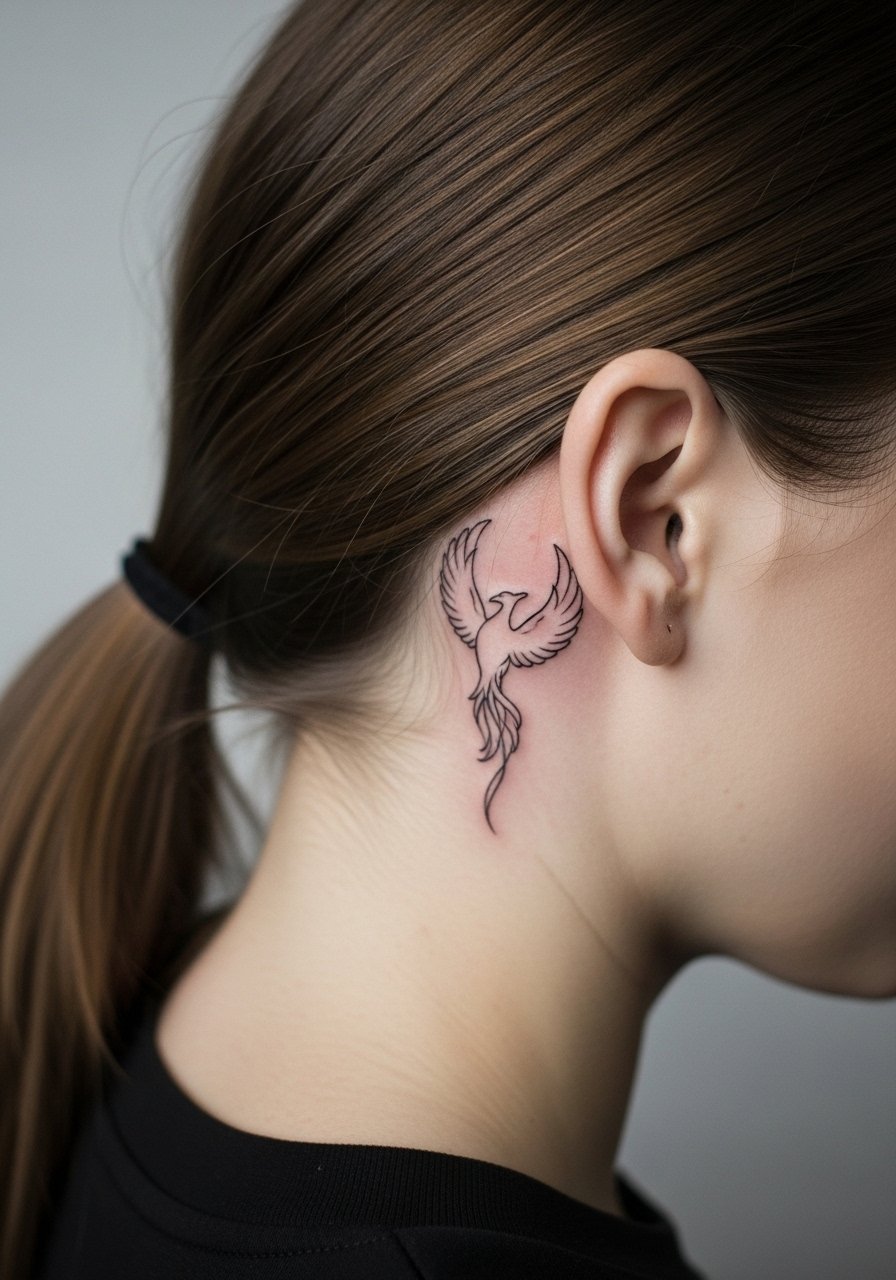
Small phoenix tattoo ideas like a behind-the-ear outline are perfect if you want symbolism without visibility. Pain is low but the area is sensitive. Expect quick healing; the main risk is line blowout if the lines are too thin. From what I've gathered, slightly thicker single lines last longer. Avoid white-ink fills here. This gives a timeless nod to rebirth without shouting it.
8. Fire Phoenix Bust On Ribcage
Style/Technique: Illustrative / Fiery Color
Pain Level: High (7-8/10)
Session Time: 1–3 sessions depending on size
Best For: Intense, private statement
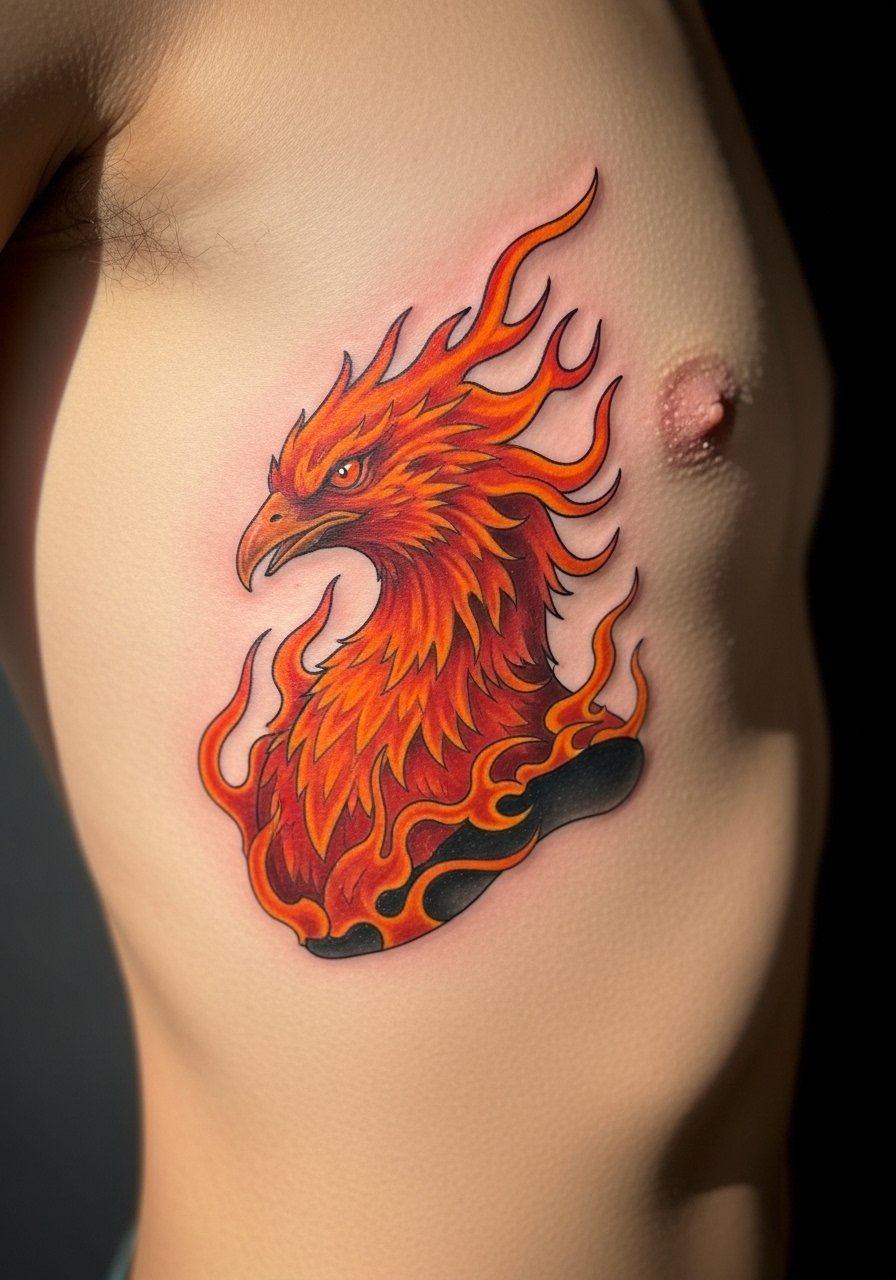
Ribcage phoenix tattoos are intimate and intense. The proximity to bone makes pain real, but the canvas allows dramatic flame detail. I recommend breaking sessions up and using numbing tactics if needed. Aftercare is crucial—avoid tight clothing that rubs the area while it peels. As with watercolor, flames can soften; bold outlines and deeper saturation help flames stay vibrant as skin settles.
9. Blue Phoenix Rib Tattoo For Calm Rebirth
Style/Technique: Illustrative / Blue Palette
Pain Level: High (7/8/10)
Session Time: 1–2 sessions
Best For: Alternative color symbolism

A blue phoenix reads as wisdom and calm rather than rage. I first saw this variation on an artist’s feed and it stuck—blue gradients look elegant with flame motifs reimagined as soft waves. Rib placement increases pain, but the result is striking. Discuss color saturation with the artist because blues can look muted on darker skin. This is a great pick if you want the phoenix tattoo meaning to emphasize growth and serenity.
10. Tribal Phoenix Forearm Band
Style/Technique: Tribal / Bold Blackwork
Pain Level: Low-Medium (3-4/10)
Session Time: 1–2 sessions
Best For: Graphic, cultural-feel phoenix
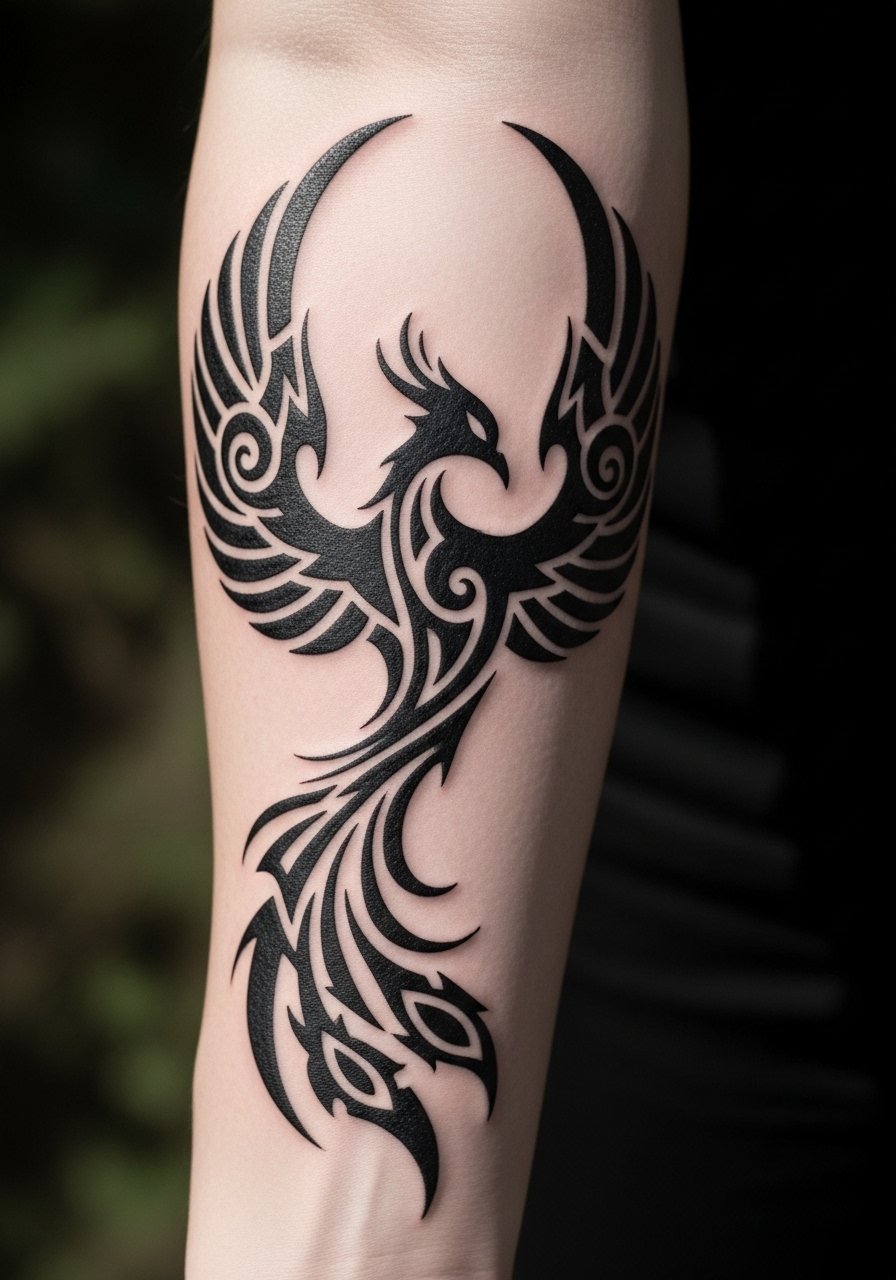
Tribal phoenix patterns reduce the bird to bold shapes. On a forearm band, it reads strong and graphic. The heavy blackwork lasts well on all skin tones. In my experience, this style is forgiving: lines hold up and colors aren’t an issue. Make sure the motifs respect cultural sources—discuss symbolism with your artist. Avoid overly tight repetitive patterns that don’t flow with arm anatomy.
11. Japanese-Inspired Phoenix Sleeve With Clouds And Flames
Style/Technique: Japanese / Irezumi Elements
Pain Level: High (6-8/10)
Session Time: Multiple sessions over months
Best For: Full-sleeve narrative phoenix
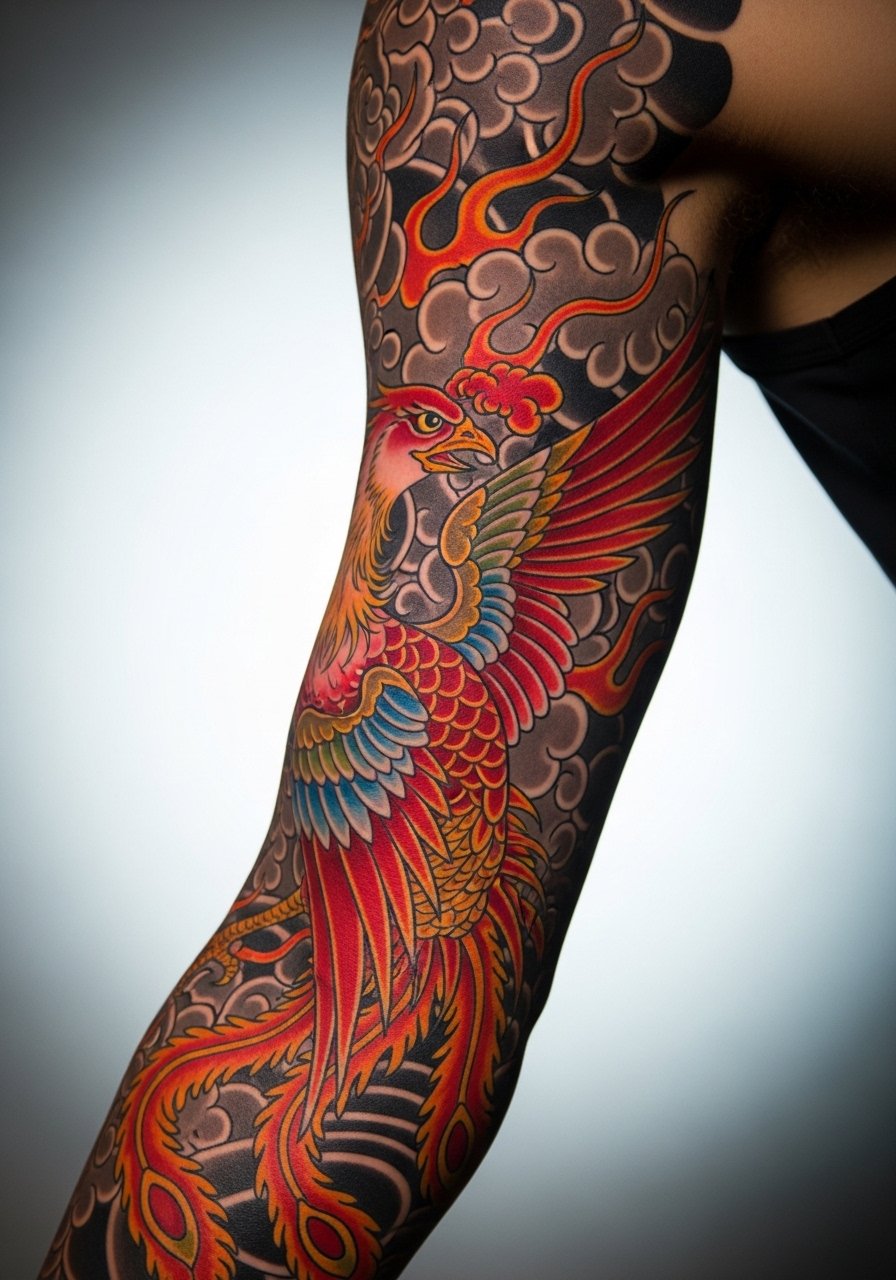
A Japanese phoenix brings ceremonial symbolism and flow. The sleeve format allows the bird to wrap through negative space and traditional cloud motifs. Expect a long commitment, but pieces heal into a cohesive narrative. From what I’ve seen, Japanese-style color blocks and bold outlines age well. Avoid tiny script or micro details that get lost in a big sleeve—this style thrives on scale and contrast.
12. Graphic Sketch-Style Phoenix On Thigh
Style/Technique: Graphic / Pencil-Sketch Lines
Pain Level: Medium (4-6/10)
Session Time: 2–3 sessions
Best For: Masculine, textured phoenix look
Sketch-style phoenix tattoos read raw and masculine. I saw several artists merging pencil strokes with feather detail; it reads like a powerful drawing on skin. Thigh placement hides well and offers room for motion. Pain sits in the middle—muscular areas take ink well. The trick is to find artists comfortable with organic strokes; otherwise, the sketch look can come out messy. Ask for healed photos of similar work.
13. Abstract Watercolor Collarbone Phoenix
Style/Technique: Watercolor / Abstract
Pain Level: Low-Medium (3-5/10)
Session Time: 1–2 sessions
Best For: Subtle color splash, collarbone accent
Collarbones are perfect for small abstract phoenix pieces. Watercolor strokes curve with bone anatomy for an airy effect. I always warn people that collarbone skin is thin—colors can look delicate and may need touch-ups. To preserve flames, ask your artist to integrate thin black anchors around main shapes. This reduces the "dull band" look that sometimes appears after healing.
14. Handpoke Minimal Phoenix On Wrist
Style/Technique: Handpoke / Minimalist
Pain Level: Medium (4-5/10)
Session Time: Short sessions, multiple tiny ones sometimes
Best For: Organic, personal phoenix mark
Handpoke phoenix tattoos have an organic irregularity that reads personal. On the wrist they’re visible and meaningful. Pain profile differs from machine work—more localized stinging. In my experience, healing can be slightly longer for handpoke because of dot clustering; keep moisturized. A common mistake is asking for too dense a fill—embrace the breathy, dotted look for longevity.
15. Phoenix Feather Sleeve Accent On Bicep
Style/Technique: Illustrative / Feather Focus
Pain Level: Medium (4/5/10)
Session Time: 2–3 sessions
Best For: Partial sleeve with room to expand
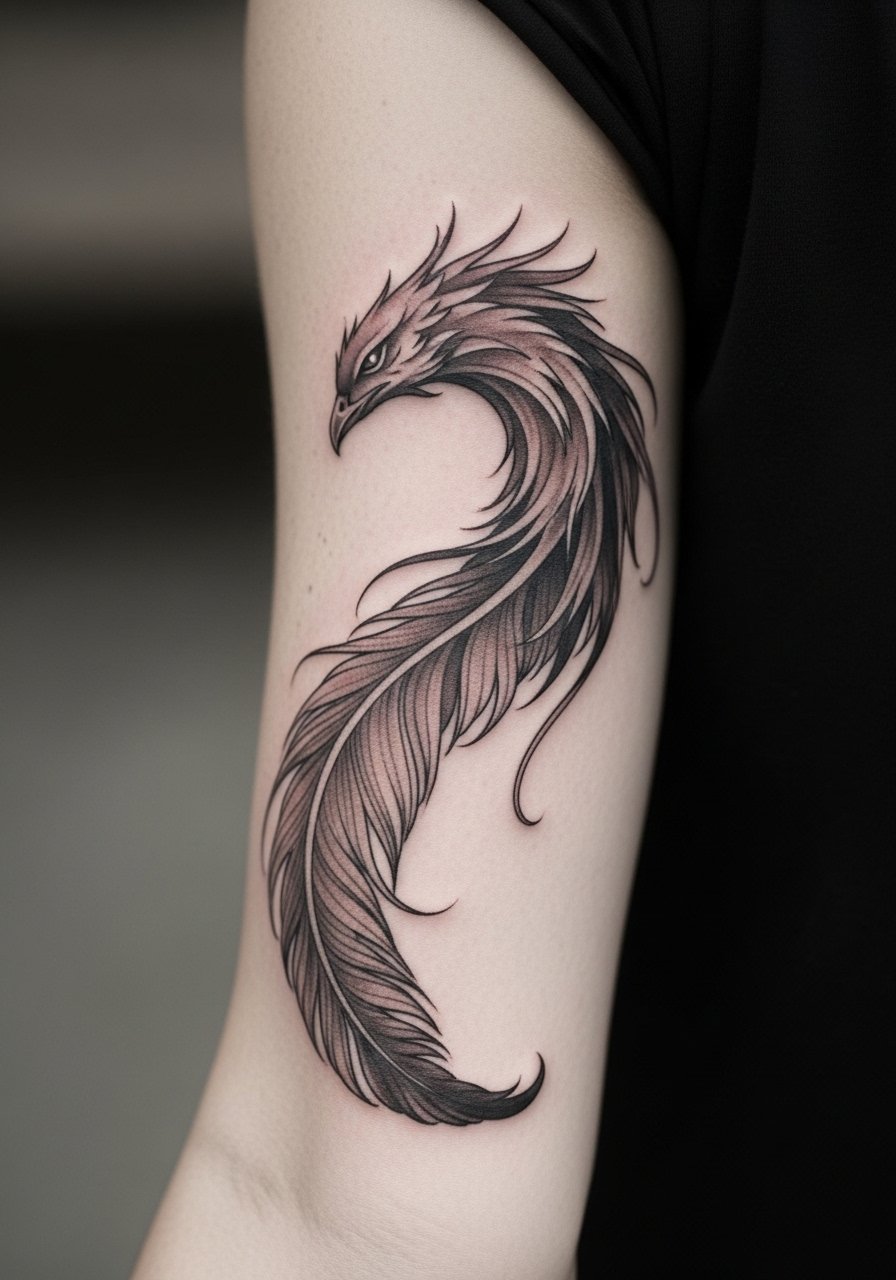
Sometimes a full bird is too much. A feather-focus sleeve accent suggests rebirth without a literal phoenix. Biceps offer lowish pain and a canvas that moves with muscles. I like this for people who want expansion later—the feather motif integrates well into future sleeves. Ask your artist for slightly stronger feather quills so detail doesn’t blur over time.
16. Small Phoenix On Ankle With Flame Trail
Style/Technique: Minimalist + Fiery Detail
Pain Level: High (6-7/10)
Session Time: 1 session, short
Best For: Small visible phoenix tattoo
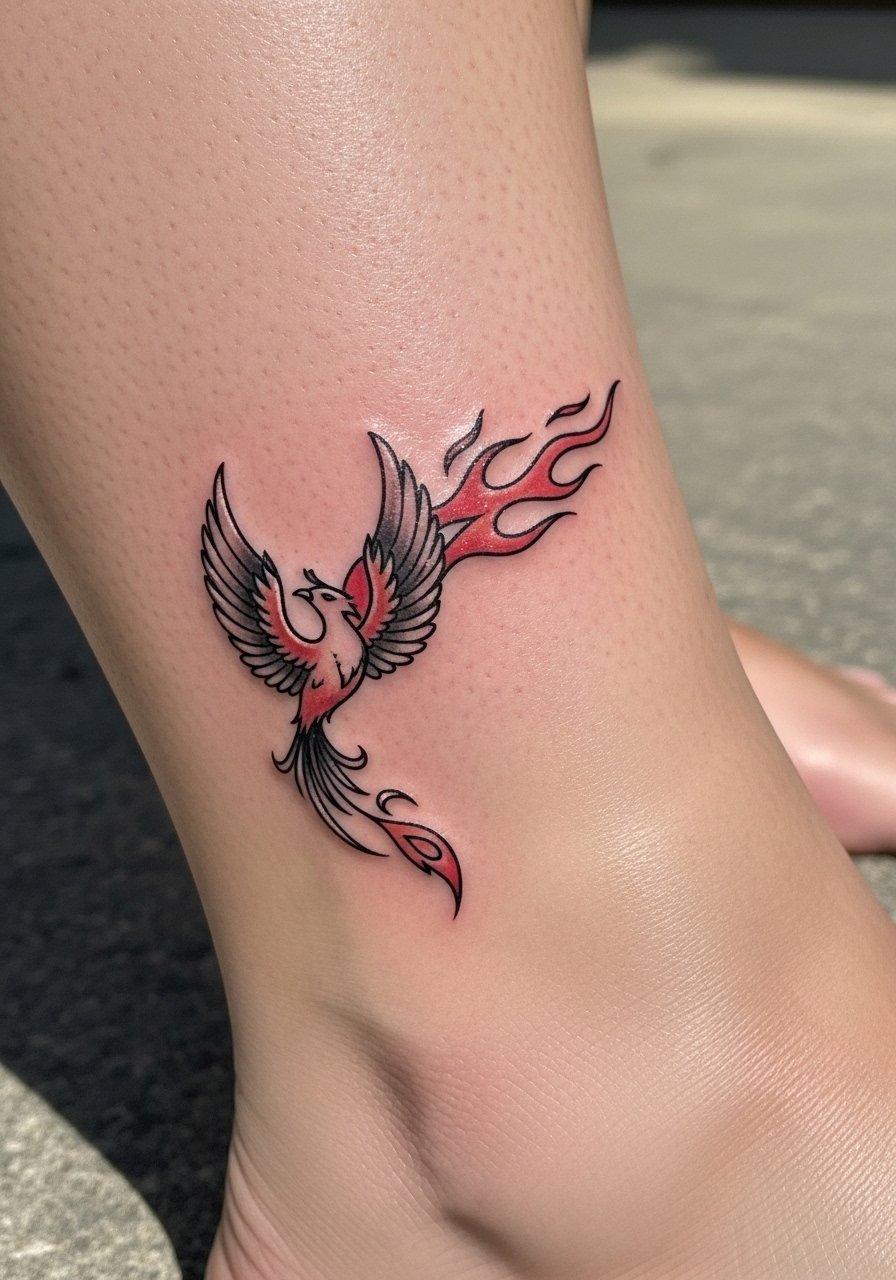
Ankle tattoos look cute but can hurt more than expected. The phoenix with a flame trail reads dynamic despite small size. In my experience, small fiery colors can settle and soften—ask for slightly deeper saturation. Avoid ultra-fine line flames; they lose shape. Keep footwear and socks loose during healing to avoid rubbing and scabbing disruption.
17. Phoenix Rising From Scars Cover-Up On Shoulder
Style/Technique: Blackwork / Cover-Up Adaptation
Pain Level: Medium-High (5-7/10)
Session Time: Multiple sessions, consult first
Best For: Burn or scar cover-up with rebirth symbolism
This is one of the most personal phoenix tattoo ideas: literal rebirth by covering scars. I’ve seen artists use layered blackwork and flame motifs to mask texture and color differences. Scar tissue ink behaves differently—expect longer sessions and slower healing. Ask for healed examples of scar cover-ups and start with a consult. From talking to folks with similar work, a staged approach gives the best visual and healing outcome.
18. Fine Line Phoenix On Side Rib With Open Flight
Style/Technique: Fine Line / Elegant Flow
Pain Level: High (7-8/10)
Session Time: 1–2 sessions
Best For: Graceful, elongated phoenix tattoo

Fine line on the rib reads delicate and poetic. The side rib lets wings stretch across the torso for motion. Pain is on the higher side, but the result is worth it for many. I always advise slight line thickening to avoid early blowout. For first phoenix tattoos, this placement is dramatic but not for everyone because of aftercare friction with clothing.
19. Blue-And-Gold Phoenix On Sternum
Style/Technique: Illustrative / Color Contrast
Pain Level: High (7-8/10)
Session Time: 1–3 sessions
Best For: Center-chest statement with symbolic color mix
Blue and gold create a regal phoenix palette. Sternum placement centers the symbolism—rebirth at the core. Expect higher pain and careful aftercare to avoid friction from clothing. From what I’ve seen, jewel tones can look stunning when the artist uses a glaze technique. Make sure the artist has healed photos of similar palettes, especially on your skin tone.
20. Half-Sleeve Phoenix With Open Wings On Upper Arm
Style/Technique: Neo-Traditional / Flowing Composition
Pain Level: Medium (4-6/10)
Session Time: 2–4 sessions
Best For: Expandable half-sleeve phoenix design
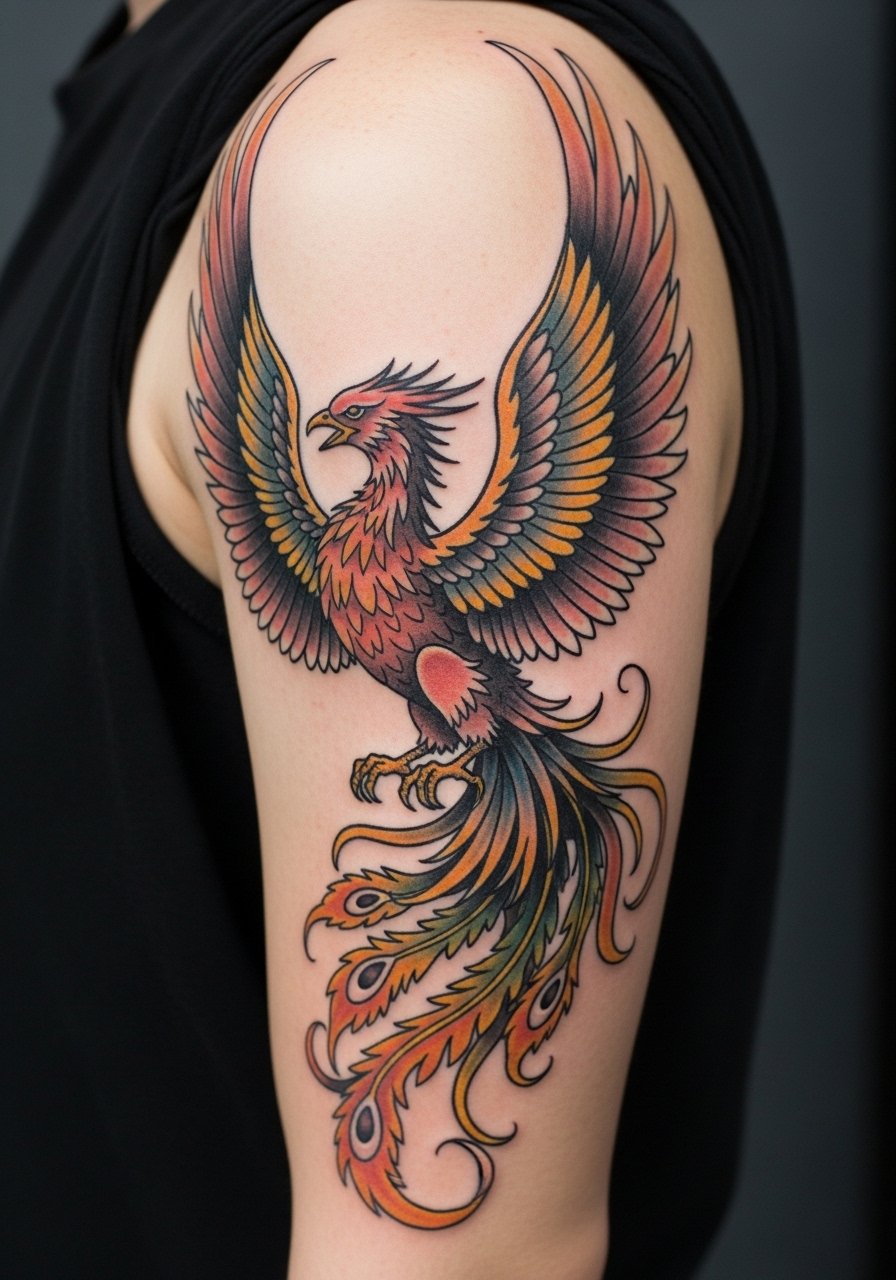
Half-sleeves let the phoenix breathe without a full commitment. Upper arm pain is moderate and sessions are flexible. This is a safe bet for someone who wants visibility but can hide it. I recommend wing direction that complements muscle curves so the bird looks alive with movement. Avoid cramming unrelated elements—keep the composition focused on wings and flames.
21. Geometric Phoenix On Sternum With Dotwork Halo
Style/Technique: Geometric / Dotwork Accent
Pain Level: High (7/8/10)
Session Time: 2–3 sessions
Best For: Symmetrical chest-centered phoenix
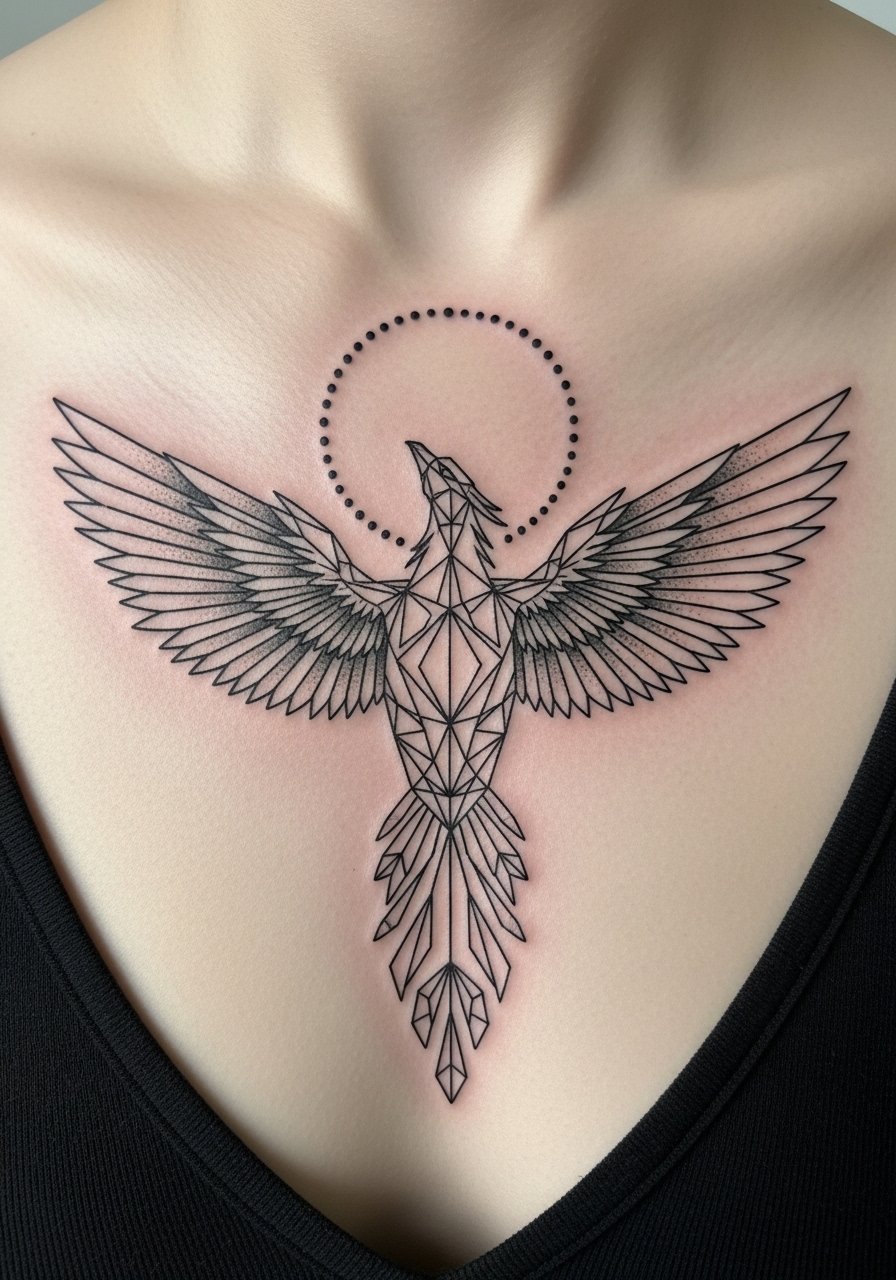
Geometry lends a modern emblematic feel to phoenix tattoo ideas. A dotwork halo around the bird suggests energy and rebirth. On the sternum, symmetry is powerful but painful. I’ve noticed these designs look sharp healed if the artist is precise. Ask to see healed examples—any wobble in geometry becomes obvious once settled.
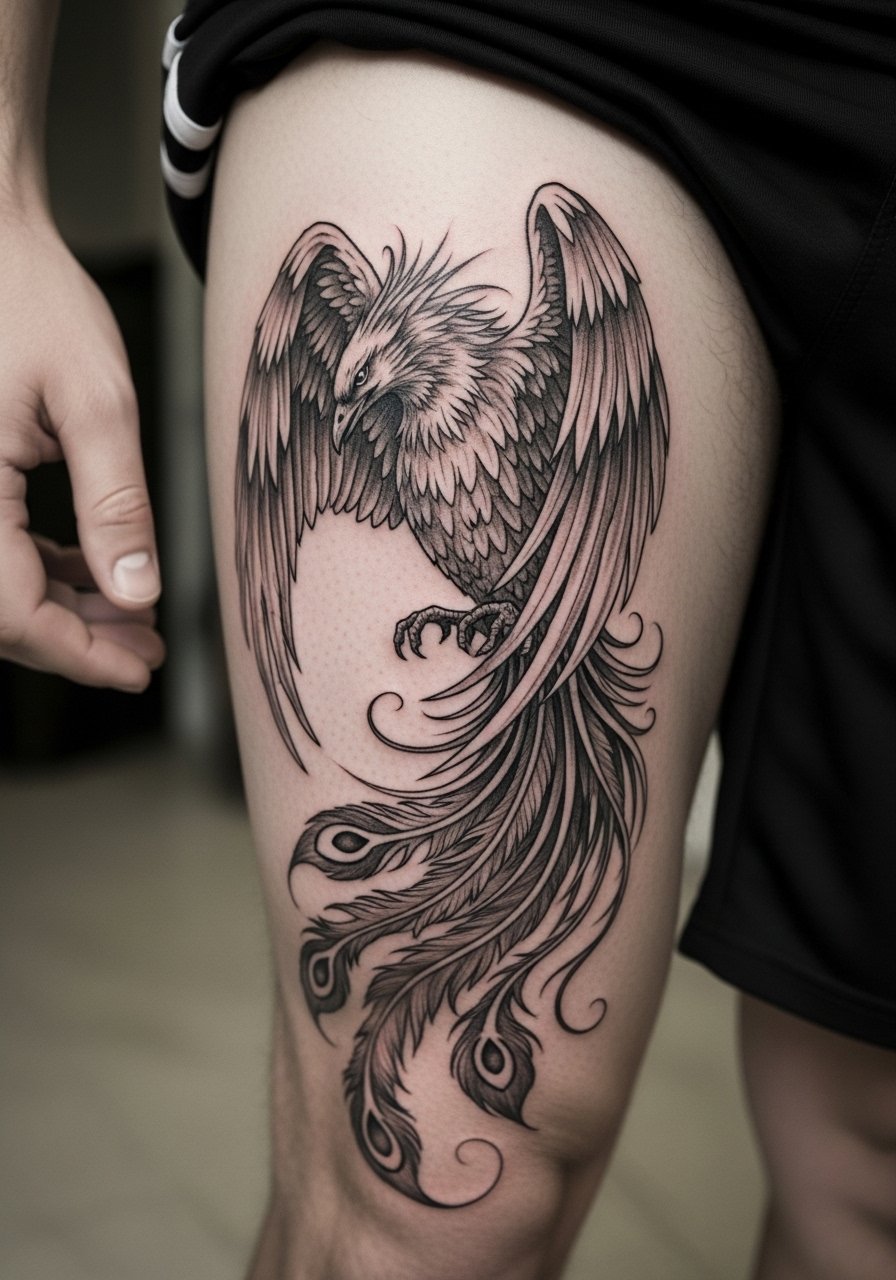
22. Large Fire Tail Phoenix On Thigh Wrapping To Hip
Style/Technique: Illustrative / Large-Scale Color
Pain Level: Medium (4-6/10)
Session Time: Multiple sessions
Best For: Dramatic lower-body phoenix

Thigh placement suits long flame tails that sweep across the hip. It’s a private canvas with room for big motion. Healing is straightforward; friction from pants matters early on. From what I’ve learned, larger flame shapes age better than intricate tiny flames in this area. Consider a staged session plan to manage healing and color layering.
23. Phoenix Emblem On Chest With Script Below
Style/Technique: Illustrative + Script
Pain Level: Medium (4-6/10)
Session Time: 1–2 sessions
Best For: Symbol plus a small motto or date
Pairing a phoenix with a short script can personalize the rebirth meaning. Chest placement lets both the symbol and words sit together. I always caution clients to choose short, timeless text and to place it where body movement won't distort letters. From experience, script needs a steady hand—ask for healed lettering samples from your artist.
24. Micro-Realism Phoenix Eye On Wrist
Style/Technique: Micro-Realism / Tiny Detail
Pain Level: Medium (4-6/10)
Session Time: 1 session, focused
Best For: Tiny, detail-focused phoenix element

Micro-realism in a tiny element like a phoenix eye is striking. The wrist gives visibility but is a higher-movement area. In my experience, micro pieces need excellent aftercare and occasional touch-ups. Avoid placing micro-realism in areas that rub constantly. Ask for healed close-ups of similar scale to ensure the artist can hold fine detail.
25. Phoenix Winged Collarbone Tattoo With Flame Tips
Style/Technique: Fine Line + Color Tips
Pain Level: Low-Medium (3-5/10)
Session Time: 1–2 sessions
Best For: Neckline accent and elegant motion
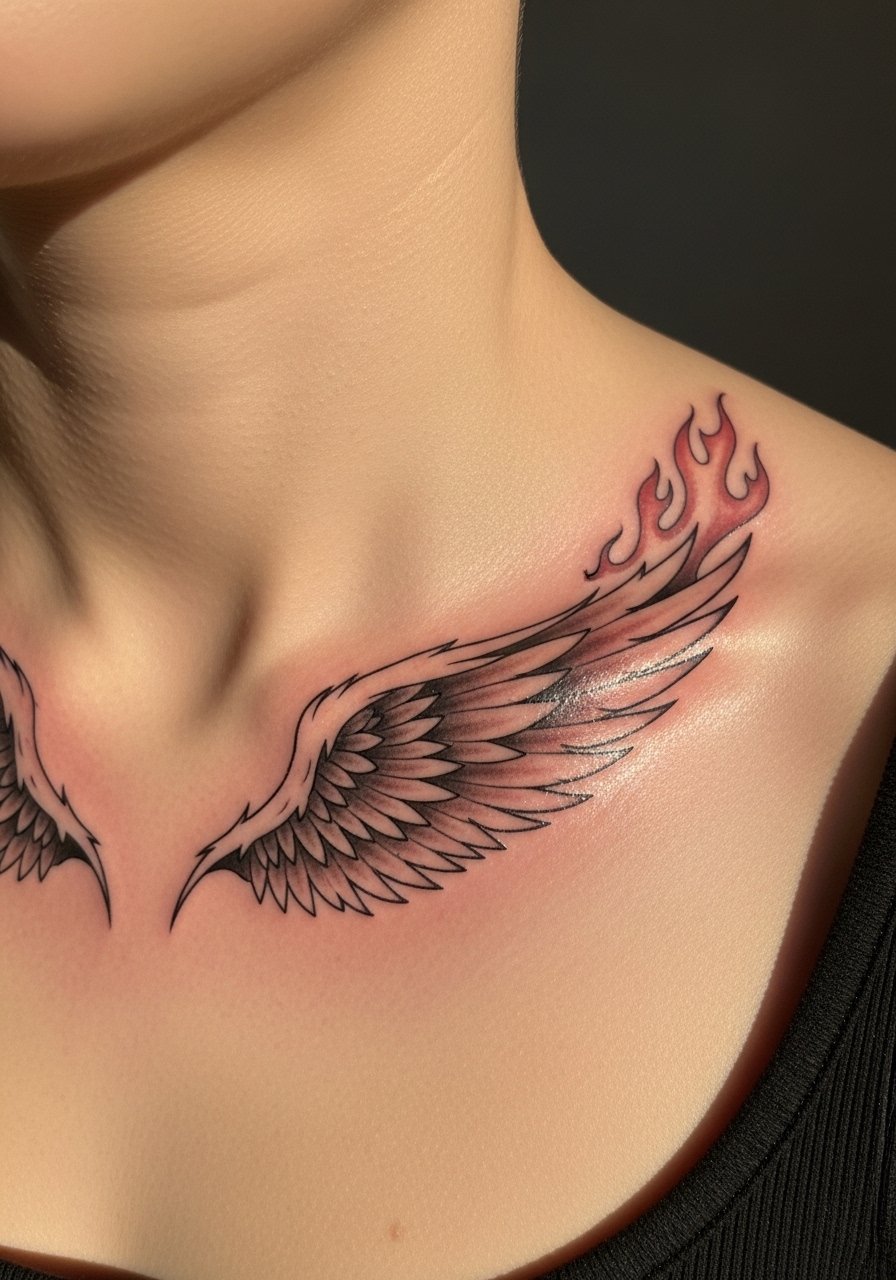
Wings along the collarbone frame the face and neckline. Flame tips add a spicy edge without being loud. I've seen this style become a favorite for people who want a daily visible reminder of growth. Keep in mind collarbone skin is tight—ask for moderate line weight to prevent early softening.
26. Stylized Phoenix Mandala On Upper Back
Style/Technique: Blackwork / Mandala Fusion
Pain Level: Medium-High (5-7/10)
Session Time: 2–4 sessions
Best For: Symmetrical, meditative phoenix design
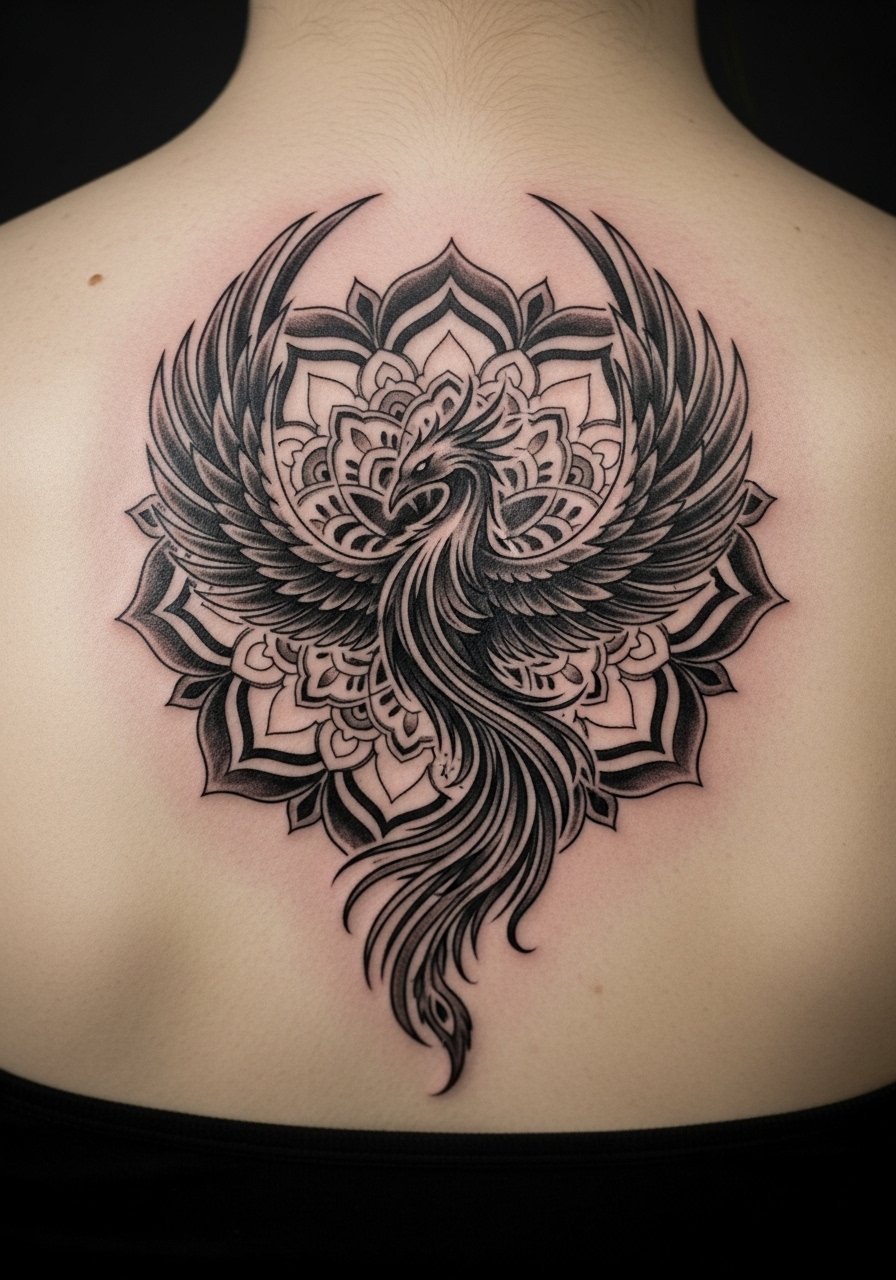
Combining mandala elements with a phoenix makes the piece feel ritualistic. Upper back is an ideal canvas for symmetry. Pain is medium but tolerable. I’ve noticed mandala lines need boldness to avoid softening; ensure your artist plans for heavier primary rings so the pattern remains crisp as it settles.
27. Pencil-Sketch Phoenix On Upper Thigh For Men
Style/Technique: Graphic Sketch / Masculine Texture
Pain Level: Medium (4-6/10)
Session Time: 1–2 sessions
Best For: Masculine graphic phoenix
A pencil-sketch phoenix appeals to clients who want a masculine, raw aesthetic. Upper thigh placement provides privacy and scale. From what I’ve seen, this style needs an artist comfortable with illustrative strokes. The look ages well if the primary lines have some weight; pure hairlines can disappear.
28. Phoenix Foot Tattoo With Flame Trail Along Instep
Style/Technique: Small Illustrative / Flowing Line
Pain Level: High (7-8/10)
Session Time: 1 short session
Best For: Visible but controllable phoenix mark
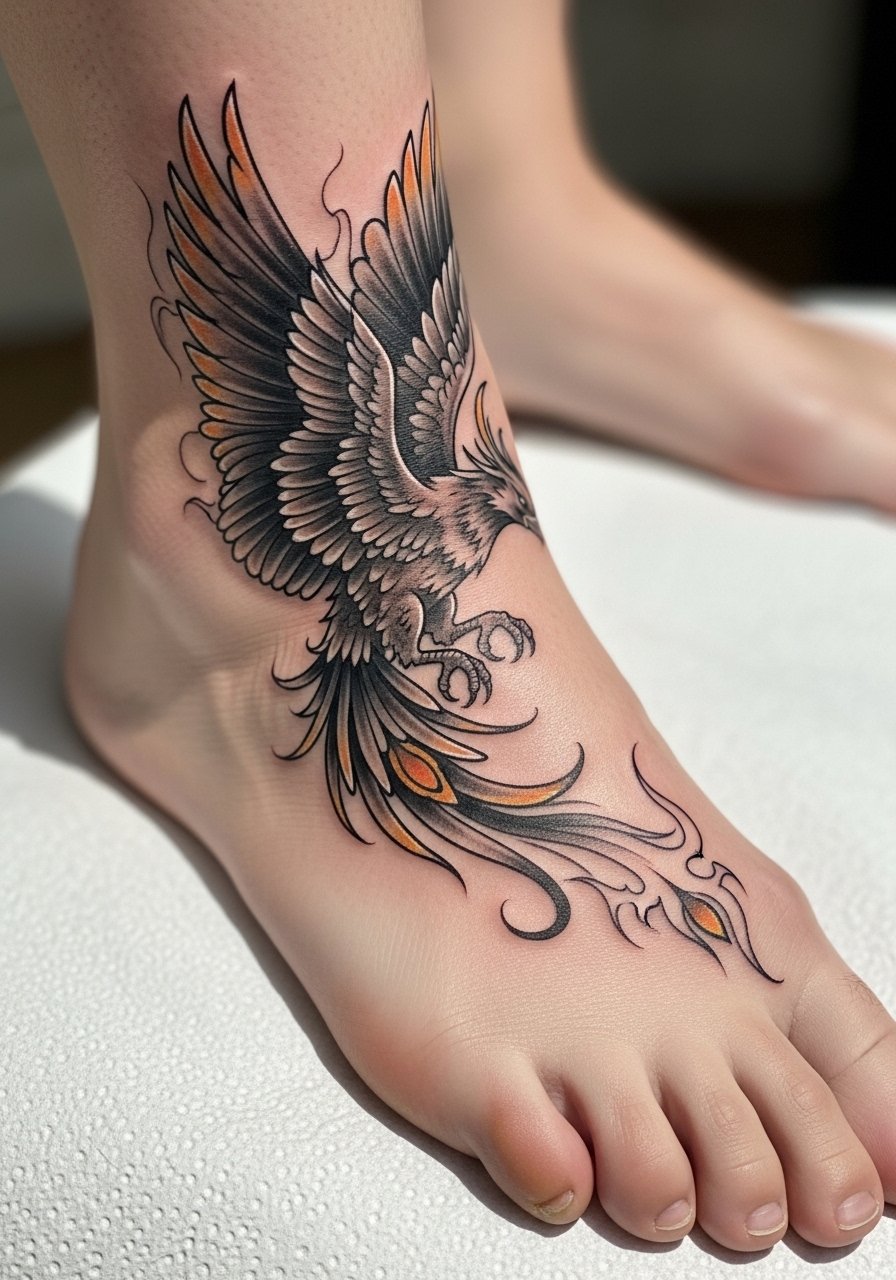
Foot tattoos are notorious for pain and longer heal times. A phoenix along the instep is delicate and visible. From conversations with friends, expect slower settling and potential color loss near high-friction zones. Keep footwear off during early healing and consider black-only lines for better longevity.
29. Phoenix Back-Of-Neck Tiny Emblem
Style/Technique: Minimalist / Small Emblem
Pain Level: Low (2-3/10)
Session Time: Under 1 hour
Best For: Hidden or easy-to-show emblem

A tiny back-of-neck phoenix is a simple nod to rebirth. Pain is low and sessions are quick. I recommend slightly bolder single-line work to maintain visibility as the skin ages. This is an easy first phoenix tattoo if you want something symbolic and low-commitment.
30. Full-Back Phoenix With Dynamic Flames And Open Wings
Style/Technique: Illustrative / Large-Scale Motion
Pain Level: Very High (8-9/10)
Session Time: Many sessions over several months
Best For: Major life-statement phoenix
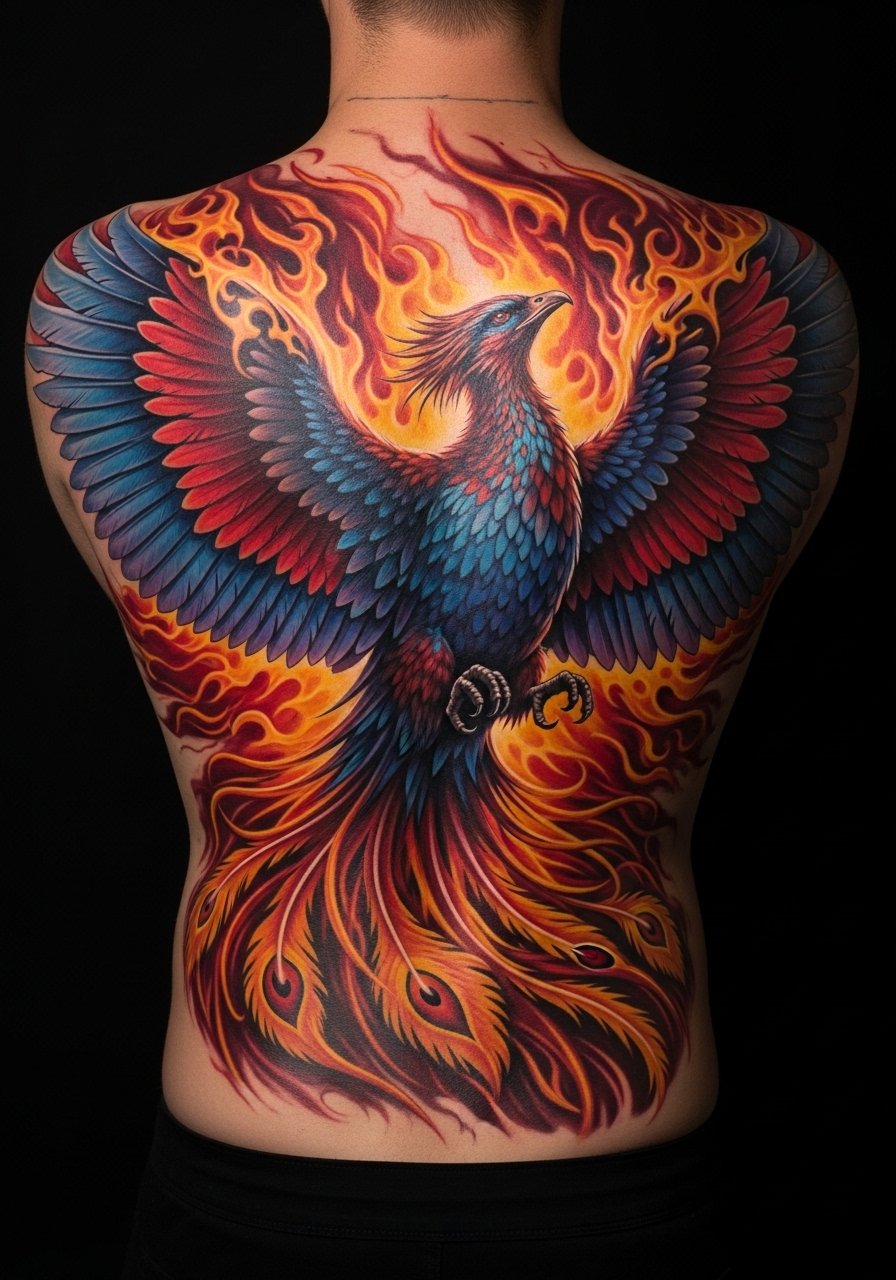
This is the maximal phoenix tattoo idea: full-back, sweeping wings, roaring flame tail. It’s a long commitment but gives incredible presence. From my experience, breaking it into multiple sessions is essential—both for pain management and for letting shading settle. Artists who excel at large-scale composition are a must. Expect careful aftercare, sun protection, and eventual touch-ups to keep the flames vivid as the years go by.
Tattoo Prep and Aftercare Essentials
Aftercare Essentials:
- Aquaphor Healing Ointment, 14oz tube — Industry standard for first 3–5 days
- Saniderm Transparent Adhesive Bandage, 6-inch roll — Second-skin healing method many artists use
- CeraVe Fragrance-Free Moisturizing Lotion, 16 oz — Daily moisturizer after initial healing
- Dr. Bronner's Unscented Castile Soap, 16 oz — Gentle wash for first 2 weeks
Before Your Appointment:
- Tattoo Numbing Cream With 5% Lidocaine — Ask your artist before using; helps for very sensitive placements
- Tattoo Stencil Transfer Paper (A4 Pack) — Useful if you’re testing placement or mockups at home
Long-Term Maintenance:
- SPF 50 Sunscreen Stick For Tattoos — Daily UV defense keeps flames bright
- Mad Rabbit Tattoo Balm 2.0 — Healed-tattoo maintenance recommended by many artists
- Hustle Butter Deluxe 4oz — Vegan aftercare option for long-term moisturization
Optional Comfort Items:
- Hydrocolloid Bandages (Large) — For spot protection during peeling phase
- After Inked Tattoo Moisturizer & Aftercare Spray — Lightweight long-term care
From my experience, artists will flag which of these they prefer. Saniderm and Aquaphor come up a lot in conversations. Use soap for gentle cleaning, follow a light moisturizer, and never skip sunscreen once healed.
Frequently Asked Questions
Q: How bad does a phoenix tattoo actually hurt?
A: Pain depends on placement. Outer arm/shoulder = lower (3–4/10). Ribcage/ankle/foot = much higher (7–8/10). I always tell nervous friends that pain is more of an annoying burn than sharp agony. For sensitive areas, some people use tattoo numbing cream with 5% lidocaine after checking with their artist.
Q: What if I regret my phoenix design later?
A: Sit with the idea for months and start with a smaller placement if unsure. If you want to test symbolism, try a minimalist phoenix first. Laser removal exists, but it takes time. From what I’ve gathered, choosing a design tied to personal meaning reduces regret.
Q: How do I keep a fiery watercolor phoenix from fading?
A: Sunscreen is non-negotiable. Use an SPF 50+ stick daily over exposed work—SPF 50 sunscreen stick for tattoos is convenient. Also, consider mixing in black anchors or bolder outlines with watercolor so the silhouette stays readable as colors settle.
Q: Can I exercise after getting a phoenix tattoo?
A: Wait at least 48–72 hours before heavy sweating near the new ink. If the tattoo’s on the leg or ribcage, give it a week before intense sessions. Sweat can interfere with scabbing and increase infection risk. Keep the area clean with gentle soap like Dr. Bronner's Unscented Castile Soap.
Q: Should I get a tiny phoenix first to test my tolerance?
A: Only if you truly want a small piece. A tiny wrist phoenix might hurt more than a larger bicep piece. I usually recommend choosing a placement you can live with—doing a test tattoo solely to check pain can lead to regret if the design doesn’t fit you.
Q: How long until my phoenix heals fully?
A: Surface healing: 2–3 weeks. Deeper healing: 2–3 months. The first week is critical—clean gently, apply recommended ointment like Aquaphor or an artist-preferred balm, and avoid sun and soaking. Expect colors to look muted during healing and brighten once the skin finishes regenerating.
Q: Do phoenix tattoos look different on darker skin tones?
A: Yes. Black-and-grey and bold black outlines read best across tones. Bright colors can still work, but discuss saturation with your artist. I always ask to see healed examples on similar skin tones before booking. Artists who regularly tattoo diverse clients will show you what holds up best.
Q: What aftercare products do artists actually recommend vs hype?
A: From what I've heard, many artists recommend Saniderm or Aquaphor for the initial phase, then a fragrance-free lotion like CeraVe for long-term care. Hustle Butter and Mad Rabbit are popular for keeping healed tattoos vibrant. Avoid heavy scented creams during the first two weeks.
