

A good Tree of Life tattoo reads like a private emblem, not a Pinterest collage. Pick the visual lane that matches how public you want the symbol to be, then lock the technical choices that make it last. Small fine-line trees need bolder anchors. Big back pieces need symmetry that follows the spine. Start with placement, not a single favorite sketch, and you will avoid the usual readability mistakes.
1. Celtic Circle with Knotwork on Upper Back

A Celtic circle reads as a compact emblem, so choose it when you want a balanced, medallion-like composition that sits on the spine. For this placement ask for slightly heavier primary outlines around the circle and knot edges to stop delicate interlace from merging over time. Common mistakes are packing tiny knotwork into a small circle and expecting the same crispness ten years out. Session time for a medium piece like this usually runs two to three hours per pass, and touch-up at one year is common to restore any softened knot edges. For showing it off, a scoop-neck tank or an open-back top frames the circle well, try a scoop-neck tank in neutral tones.
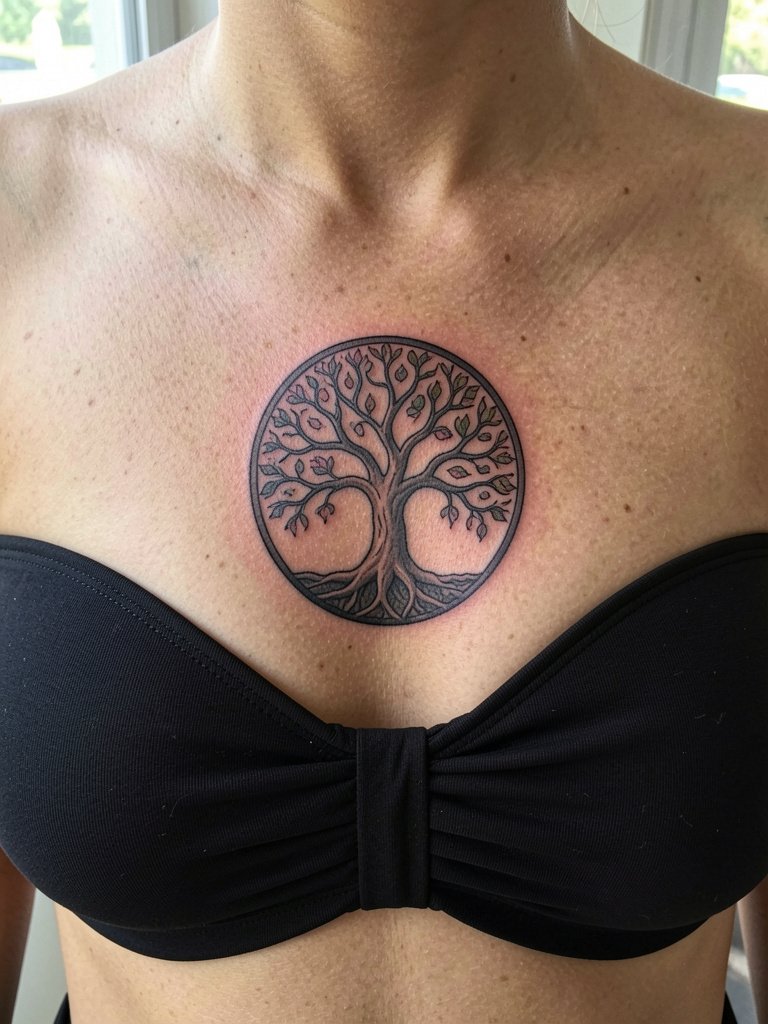
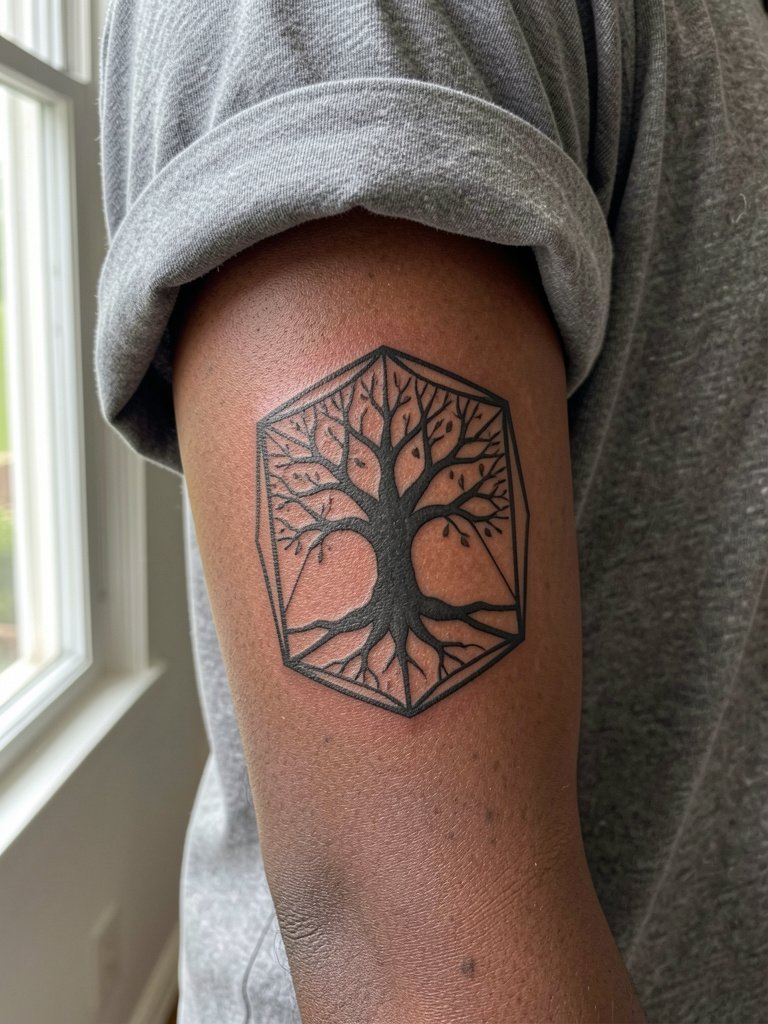
2. Geometric Mandala Tree on Chest

This version pairs clean geometry with organic branches, and it works when you want structure and symbolism together. During the consultation show two scale examples so the artist can map the mandala rings to your chest width. A common aging trap is very tight dot-work rings placed too small; those dots can blur into a ring instead of a pattern. Plan for one to two sessions depending on diameter. When you wear it, layered delicate necklaces can either sit over the outer rim or be kept off to let the mandala breathe, so try a layered necklace set in matte metals.
3. Watercolor Canopy on Shoulder Blade

Watercolor accents soften the motif, but color choice affects longevity. Name the colors you want up front and ask how saturated the artist plans to lay the pigments so you understand future fading. One mistake is asking for pale washed pastels in a small design. Those colors can disappear quickly and leave only the black skeleton. For the shoulder blade, healing is easy unless you sleep on it; expect a single session of two hours for a medium wash and a possible touch-up at six months. To style it, a loose linen button-down worn open frames the shoulder like a casual reveal, consider a linen button down shirt.
4. Minimalist Single-Line Inner Forearm
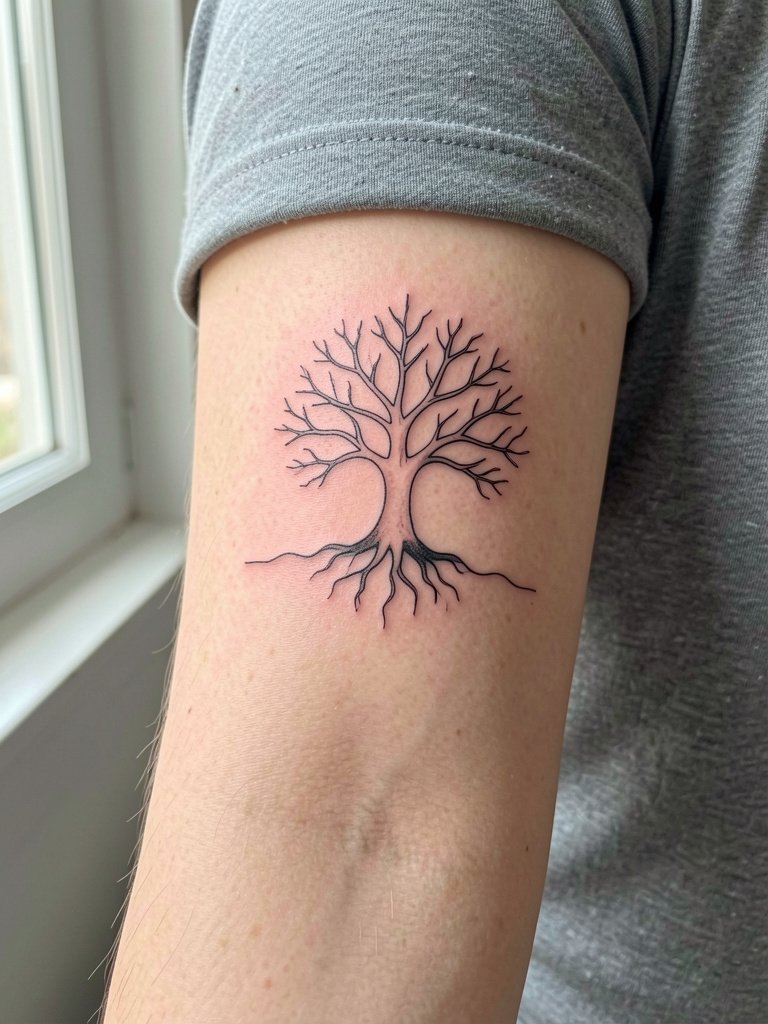
Some people choose a single-line tree for its quiet look, but artists split into two camps about this approach. One group says fine single-needle work reads as delicate and modern, especially on the inner forearm. The other group warns that ultra-fine single lines can blur into a soft thread over a few years unless the design includes slightly heavier anchor lines. If you want the minimalist look and longevity, request one or two thicker anchor strokes at the trunk and main root so the silhouette holds. Show-off pairing includes rolled-up shirt sleeves and slim bracelets, and a thin gold bracelet looks minimal without competing.
5. Family Names Woven Into Roots on Inner Arm

Personalization works here but crowding is the common error. Pick initials or one name per major root rather than full names for every branch. Bring a mock layout with the exact names and font size requested so the artist can show legibility at the intended scale. The inner upper arm can hide the piece when needed, and sessions are usually one to two hours. For session wear choose a loose short-sleeve button shirt that removes easily so the artist can access the medial surface, try an oversized boxy tee in a neutral color.
6. Hidden Animals in the Canopy on Outer Arm
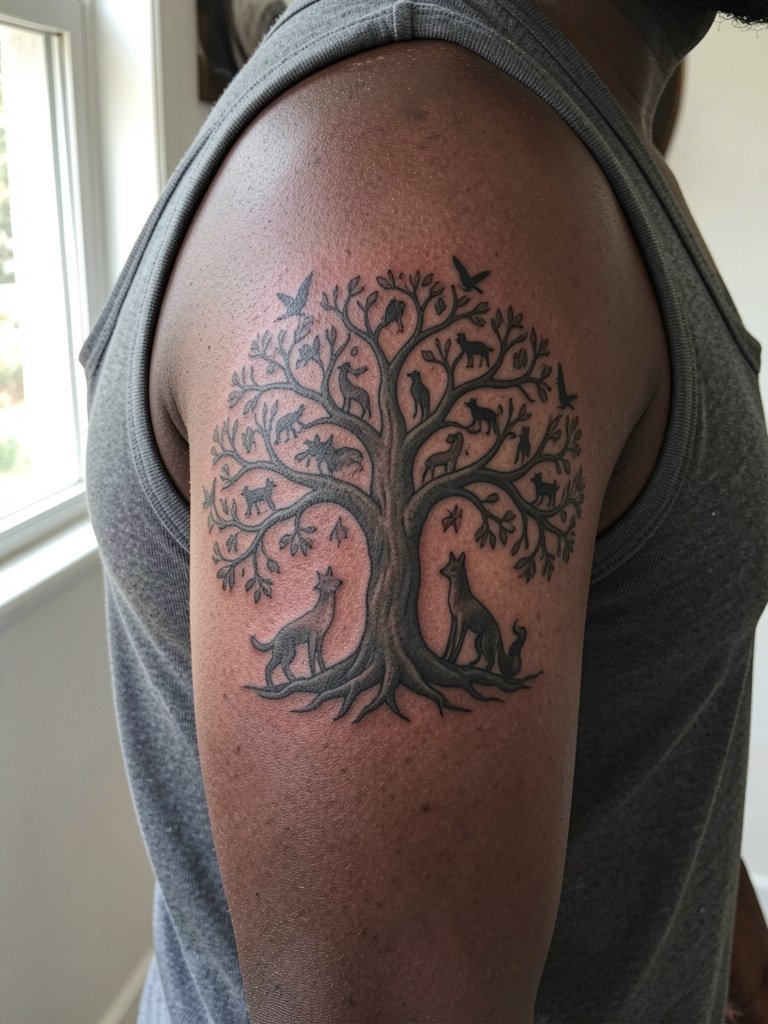
Work like this adds a discovery moment and is best at medium scale so animals remain recognizable. Ask the artist to place the largest hidden silhouette no smaller than the size of a thumbnail so it does not lose detail as the ink settles. People often request many tiny creatures and then find the canopy becomes a texture rather than a set of figures. The session tends to feel like a standard outer-arm appointment with light vibration and brief breaks. For showing it off, sleeveless tanks and rolled sleeves help, try a women sleeveless tank.
Session Day Picks
The first six designs above include placements that need easy access or light protection during the first week, so a small kit streamlines the session day and the initial healing.
- Stencil transfer paper kit. Lets you test placement on skin before the needle starts, which is especially helpful for chest and upper back symmetry.
- Topical numbing cream. Applied about 45 minutes beforehand reduces discomfort for rib and sternum sessions without changing linework when used properly.
- Thin protective film roll. Useful after sleeves or shoulder sessions to keep friction low during the first three days.
- Fragrance-free gentle body wash. Cleanses healing skin without added perfumes that can irritate delicate ink.
- Aquaphor Healing Ointment. A mainstream choice for short-term moisture during the first 48 to 72 hours, applied in a thin layer.
7. Norse-Influenced Yggdrasil Motif on Calf

Norse framing gives the tree a mythic identity, and the calf is a forgiving canvas for vertical roots. Be explicit about rune placement and ask the artist to show healed examples of runes at similar scale so you know how they read over time. Avoid adding too many tiny runes around the roots. The calf tolerates multi-hour sessions well since muscle support reduces vibration sensitivity. For footwear and outfits choose cuffed jeans or midi skirts that reveal the calf. Consider a pair of cuffed straight leg jeans for reveals.
8. Black-and-Gray Realism on Ribcage
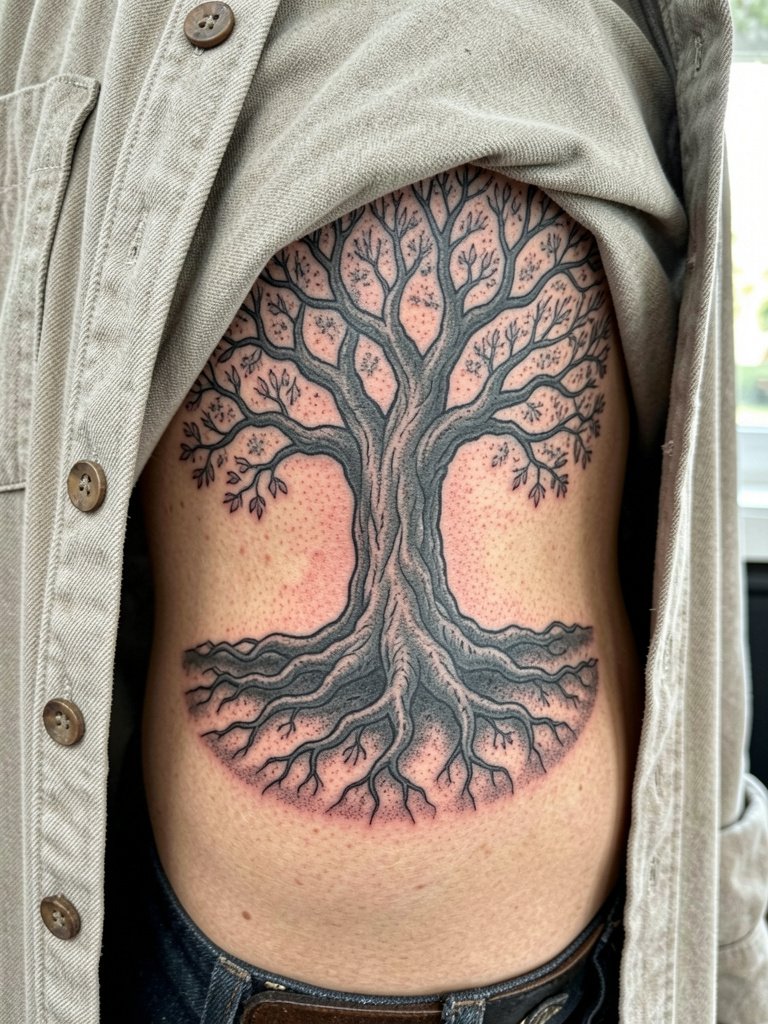
Realism emphasizes age and texture, which suits private placements like the ribs. Artists disagree about fine-line on ribs. One camp says the stretching and motion there blur ultra-fine lines quickly. The other camp counters that with careful needle depth and slightly wider spacing fine details can hold. If you favor realism on the ribs request reference healed photos from the artist at similar scale so you see actual results. Pain is higher on ribs, so plan for short breaks and a steady pacing. For session wear choose a button shirt that opens fully so access is clean.
9. Patchwork Micro Tree for Sleeve Fill

Collectors use patchwork trees to knit larger compositions, and scale is the core decision here. Tell the artist the approximate diameter you want so they can plan negative space for future pieces. A common error is making the patch too detailed for its small footprint, which prints poorly next to bolder flash. Sessions are usually short single-pass fills, and touch-ups may be needed after other adjacent work. For showing this placement off push your sleeves up and wear a rolled sleeve shirt to keep lines visible.
10. Full Back Spread with Root Network

A full back Tree needs composition that follows the spine and shoulder blades. When planning, take a standing photograph so the artist can place the trunk on the vertical centerline and let the roots flow with lumbar contours. This work often requires multiple sessions and realistic time budgeting. People sometimes try to cram portrait-level detail into a single session and end up with uneven saturation. For wardrobe a backless dress or low-back top is the reveal moment, and a backless top pairs well.
11. Chest Sternum with Circular Frame
Centered sternum pieces feel intimate and need a balance between frame weight and interior detail. Avoid overly intricate interior filigree if you want the piece to remain readable when the skin moves. Sessions can be sensitive, so plan breaks and short passes. Wear a front-closure bra or a bandeau to the appointment so access is quick. For wear, delicate pendant necklaces can complement the circular frame, try a delicate pendant necklace.
12. Shoulder Cap Wrap with Branch Flow
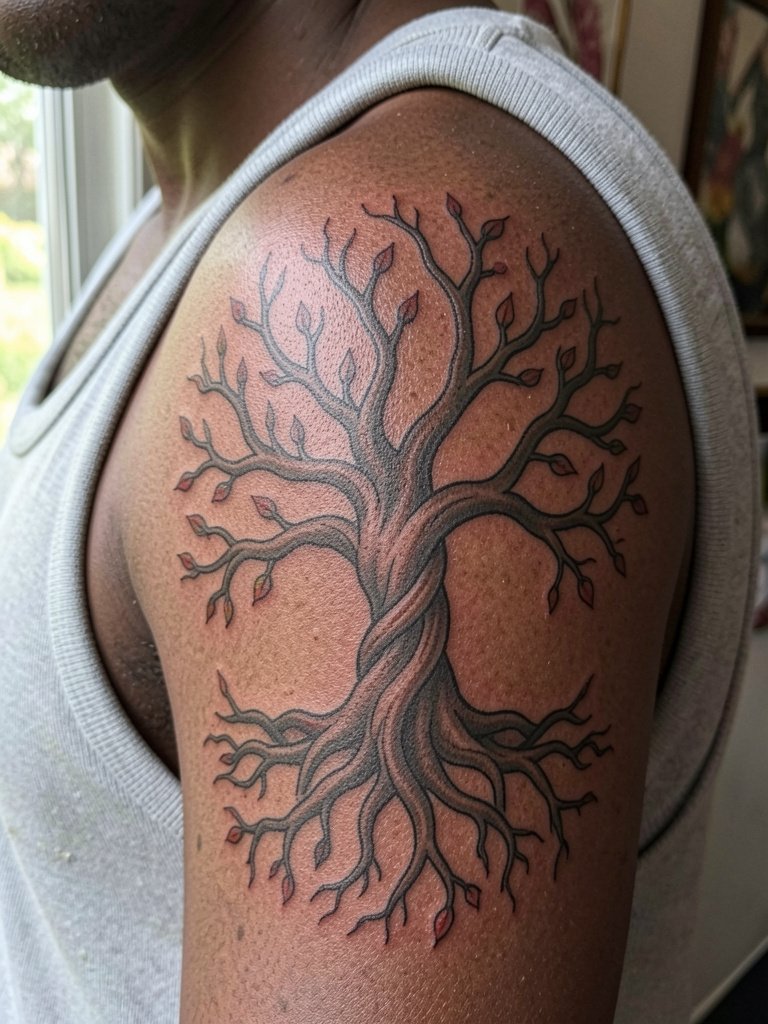
Round anatomy calls for branch flow that follows the shoulder curve so the canopy sits naturally when the arm moves. Ask the artist to map branch paths on your arm so you see how movement affects silhouette. A mistake is forcing a flat composition onto a curved surface which creates distortion. Session times vary if the piece becomes a half-sleeve. For the appointment a tank top or sleeveless shirt lets the shoulder be worked without fabric interference.
13. Negative-Space Modern Tree on Calf

Negative-space treatments modernize the symbol and are forgiving on the calf because the silhouette remains readable. Discuss silhouette width with the artist so the negative area does not narrow and vanish as the skin ages. One common mistake is making the negative legs of branches too thin. The calf is a great reveal area for midi skirts or cuffed pants, try a midi skirt for show-off moments.
14. Abstract Fragmented Tree on Ankle

Ankle tattoos face friction from socks and shoes so keep fine filigree to a minimum. Ask for blocky silhouettes or bolder outlines that survive repeated rubbing. The typical mistake is requesting tiny branching detail there. For session wear bring shorts or pants you can roll up without tugging the area. When you want to show it off pick ankle-strap sandals or cropped jeans, try cropped straight jeans.
15. Ribcage Script-Integrated Memorial
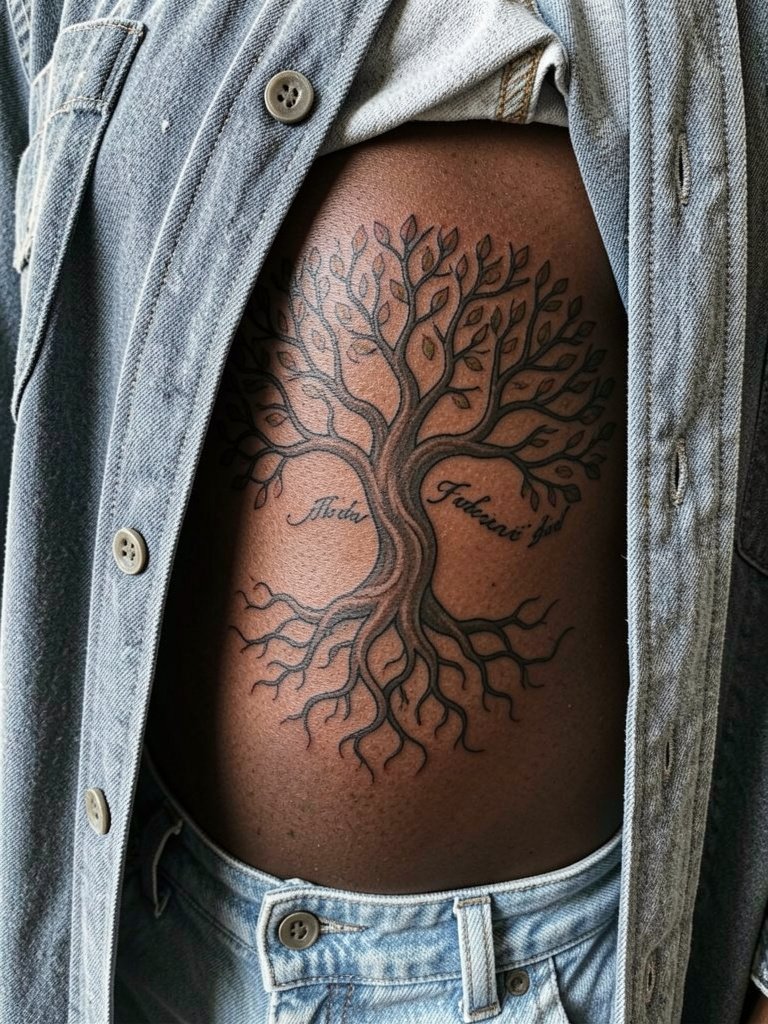
Memorial pieces work on the ribcage when the script is concise. Avoid long sentences. A common mistake is asking for full paragraphs in a narrow vertical tree. Discuss exact font size and have the artist stencil the text so you can test readability. Ribs are sensitive, so plan for breaks and a two-session schedule if the tree is large. For discreet reveals wear an oversized button shirt and a soft bralette during the appointment.
16. Inner Thigh Private Family Tree

Inner-thigh pieces are intimate and suit private family trees. Keep initials compact and place them on larger leaves to avoid crowding. People sometimes include many dates and then regret the density. Appointments require comfortable session wear and privacy. Choose loose shorts or gym shorts for access, and mention exact placement to the artist to avoid accidental proximity to the groin line.
17. Lateral Hip Curved Composition
Hip curvature benefits from a composition that hugs the bone. Ask to preview the stencil while standing so you can see how the curve reads in clothing. A common error is placing too much vertical weight that collides with waistlines. Session wear should avoid tight waistbands for the first week. High-waisted jeans and crop tops can highlight the work when healed, try high waisted jeans.
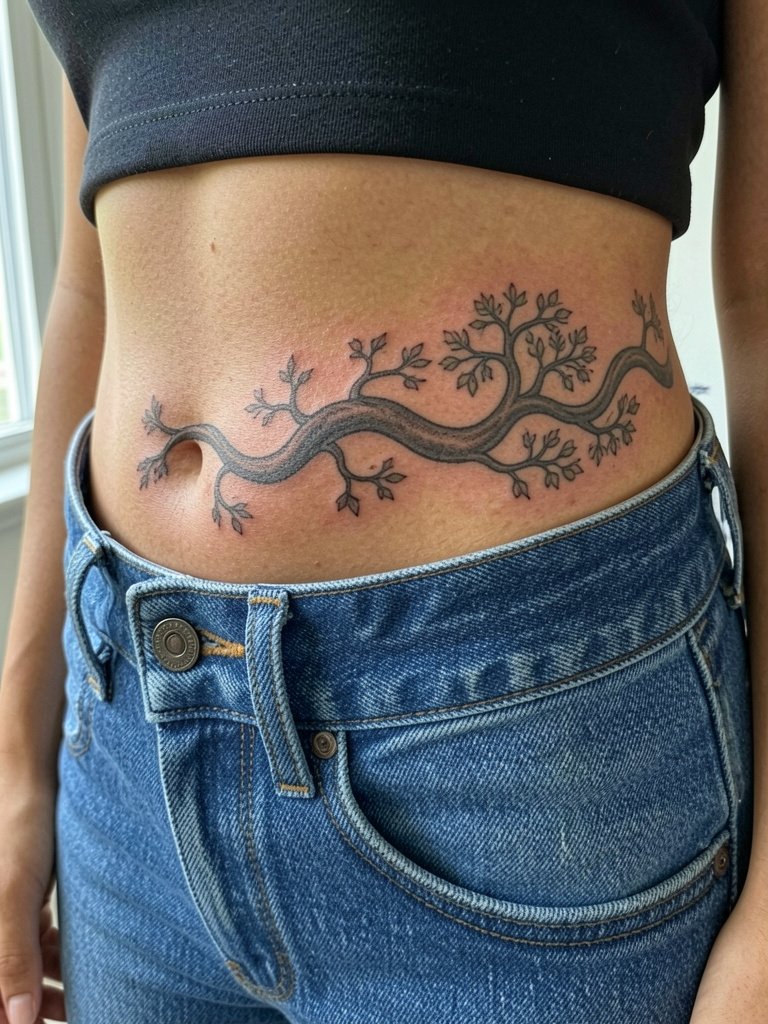
18. Lumbar Low-Back Flowing Roots

Lower back pieces need a composition that reads when seated and standing. Keep root terminals broad to avoid thin root tips that disappear with movement. A mistake is placing very fine ends that blur into surrounding skin texture. Session wear with a cropped tank and low-rise bottoms gives the artist access without disrobing. For evening reveals a backless dress works nicely.
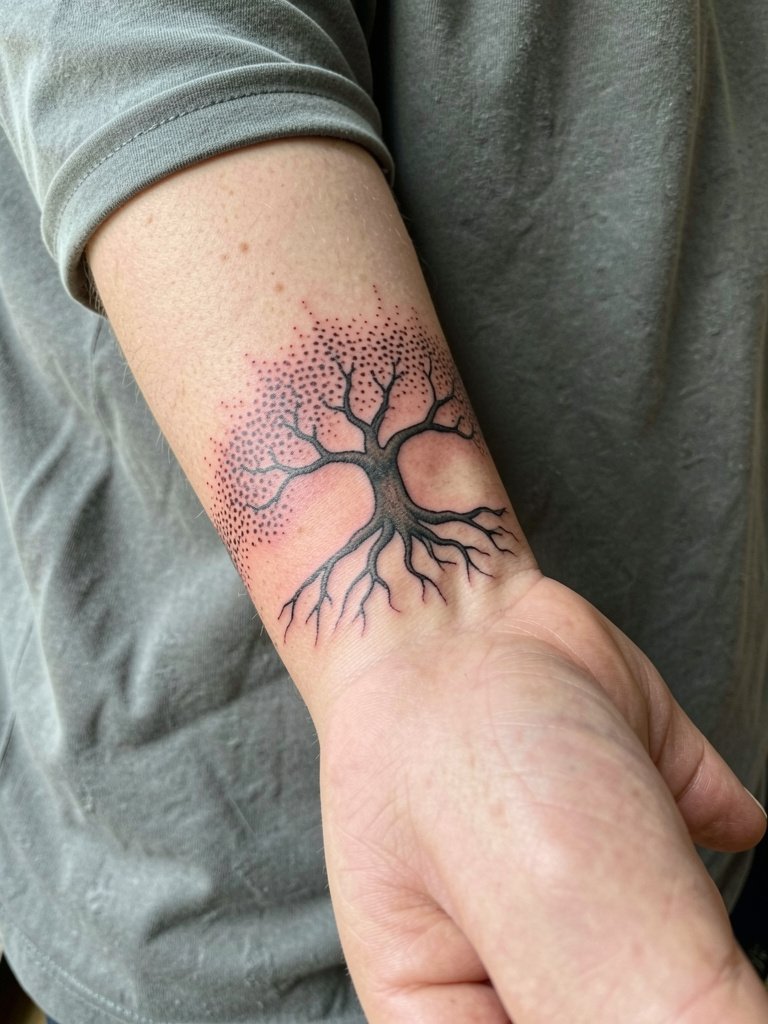
19. Seedling Micro on Wrist
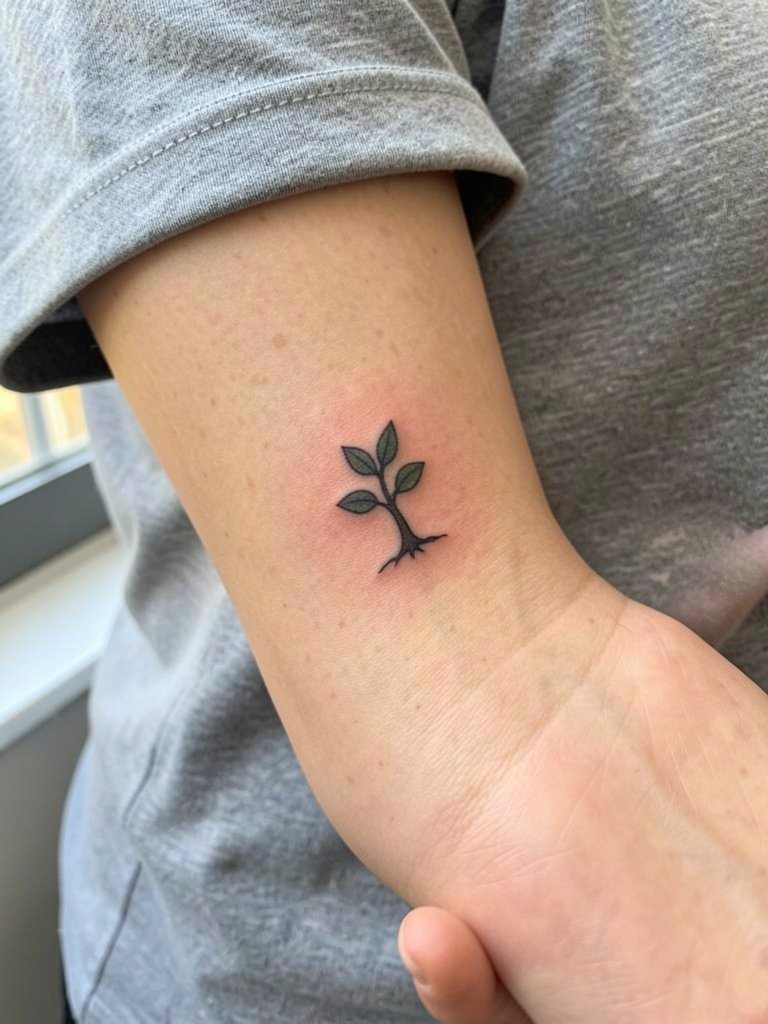
Wrist pieces show easily but face constant washing and abrasion. For micro seedlings ask for a slightly bolder trunk so the form remains. The common mistake is relying on ultra-fine twigs which soften quickly. Sessions are usually under an hour. Style it with slim watches on the opposite wrist or bare wrist styling and consider a minimal watch on the other arm to keep attention on the tattoo.
20. Stipple-Shaded Canopy on Thigh

Stipple shading builds soft texture without heavy black fills, and the thigh accepts large dot towers well. Discuss dot density and distance between stipple passes so you know how the effect reduces with time. People who demand extremely tight stipple fields then regret the repainting needed later. Sessions vary depending on size. For appointments wear loose gym shorts that can be pulled slightly without rubbing the area.
21. Geometric Negative-Frame Forearm
Geometric framing modernizes the forearm motif and reads well when lines have breathing room. Ask the artist to mock up the negative shapes at full-size so you can see spacing. A mistake is compressing geometry too tightly for a forearm width. Sessions are tidy and usually one pass. For casual show-off push sleeves up and try a relaxed fit t shirt.
22. Dot-Work Roots Around Wrist Band
Wrist bands made from roots give a subtle ring effect. Because the area sees friction target slightly denser dots for the outer band so it does not break into gaps. Avoid single-needle dots as the outer ring. Sessions are compact but expect touch-ups as the band ages. Access is simple, and show-off pairs well with stacked bracelets on the opposite wrist, try thin chain bracelet.
23. Mixed Media Tree for Sleeve Transition

Patchwork sleeves use a mixed approach to bridge styles. Be clear about which elements should dominate so the sleeve does not read disjointed. The typical misstep is blending three strong styles without a unifying element. Plan for multiple sessions and ask for mapping to adjacent pieces. For outfits, a canvas jacket rolled at the forearm gives a rugged contrast, try a canvas jacket.
24. Neo-Traditional Tree with Color Highlights on Shoulder
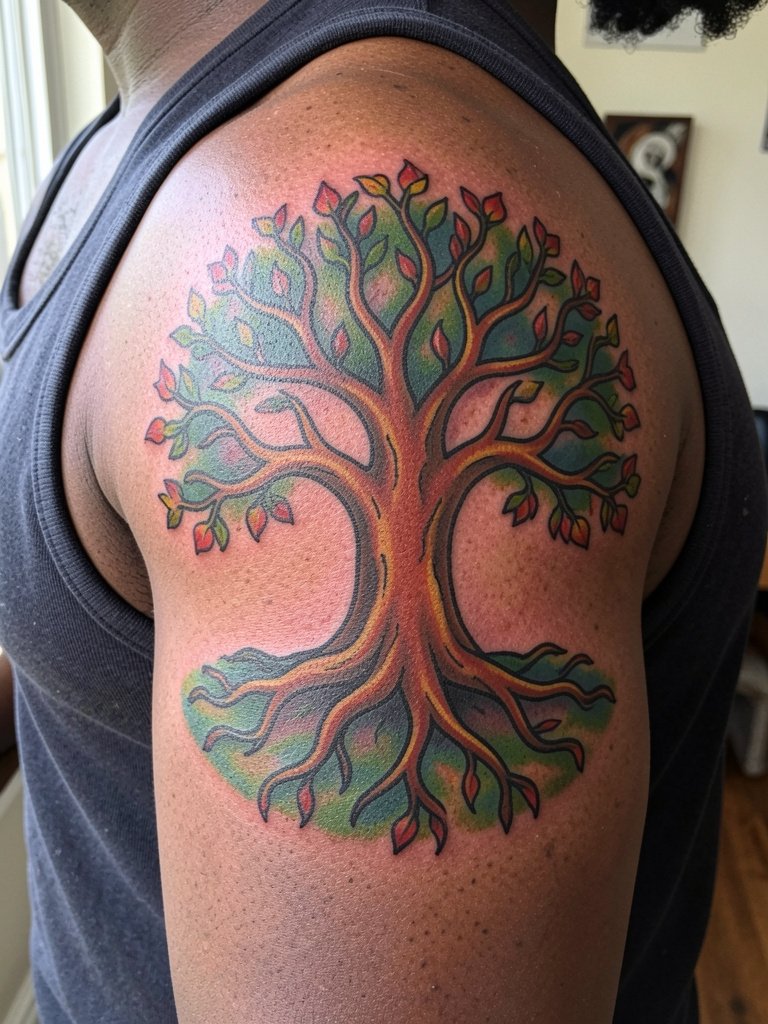
Neo-traditional color keeps strong edges so color fading is gradual and the tree reads from a distance. Ask the artist about pigment saturation and planned layering so you know when touch-ups might be needed. A common mistake is asking for tiny color spots that wash out. Sessions for shoulder pieces are comfortable and the area recovers quickly. For showing off choose a muscle tank or open button-down and try a mens muscle tank.
25. Orphan Leaf Minimal on Behind-the-Ear

Behind-the-ear tattoos are intimate and need a confident silhouette. Because the area is small ask for one slightly heavier stroke at the leaf base so the shape survives hair growth and shampoo abrasion. Avoid complicated internal veining. Session time is brief and healing is straightforward when hair is kept away for the first week. For styling choose hair-up looks to reveal it, and try a simple hair accessory for the reveal moment.
26. Spiral Root Circle for Sternum Area

Spiral root motifs read as meditative emblems and need strong framing on the sternum. One camp of artists favors dense circular edges for longevity. The other camp prefers open rims for breathing space that move with chest expansion. Ask to see both frame styles on a stencil so you can decide how it looks with your chest movement. For session wear a strap-friendly top and a front-closure bra for convenience, and if revealing pick a low-cut top to show the circular emblem.
27. Branchwork Collarbone Accent
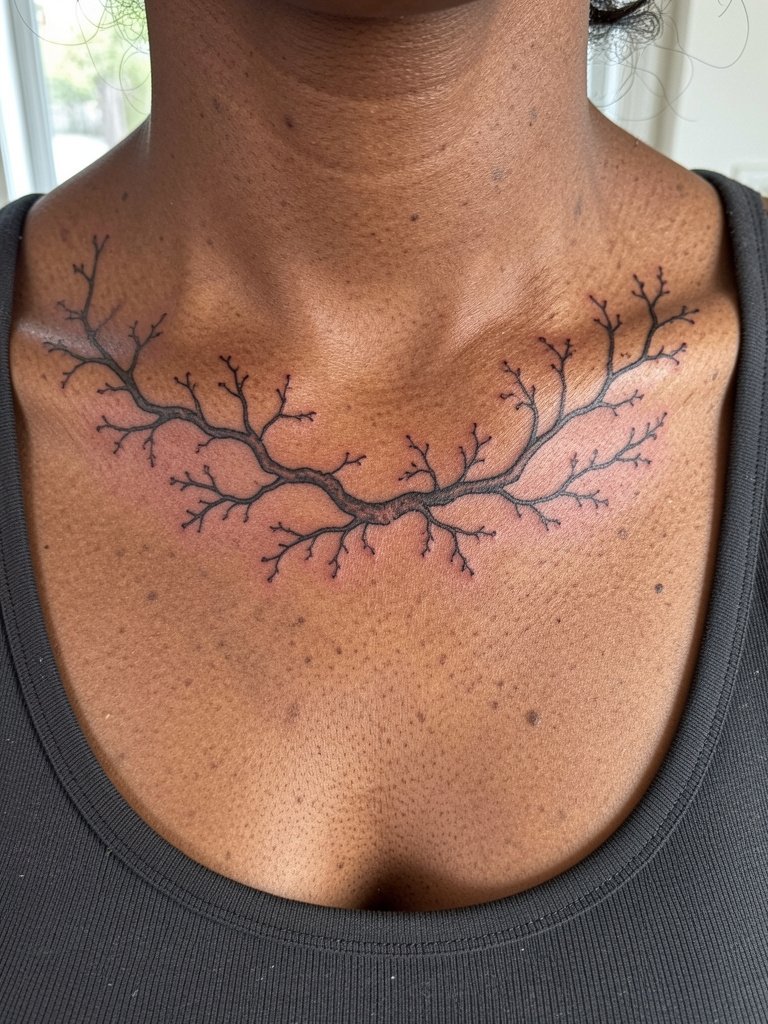
Collarbone pieces need balance so the branch ends do not float off the bone. Request junctions where branches meet the collarbone to be slightly bolder so the form reads. A mistake is relying on ultra-fine terminal twigs that blur with necklaces and clothing friction. Sessions are short and sensitive. For wearing choose scoop-neck tops or layered necklaces that sit above or below the work, consider a scoop neck top.
Frequently Asked Questions
Q: How much should I budget for a Tree of Life tattoo?
A: Pricing varies by size, detail, and region. As a rough guide small micro or wrist trees often fall in the range of about 50 to 200 dollars. Medium forearm or calf pieces commonly range from about 200 to 800 dollars. Large custom back or chest compositions typically range from about 800 to 2,500 dollars or more depending on sessions. Final price depends on the artist's hourly rate and the amount of custom work.
Q: Will a fine-line Tree of Life blur faster than a bolder one?
A: Artists are divided on this point. One group argues that fine-line trees lose definition faster on active, thin-skinned areas because the tiny lines spread into softer marks. The other group says fine lines can hold when the artist uses slightly deeper needle depth and wider spacing. The practical solution is to ask for a modestly increased anchor weight at trunks and main branches so the silhouette remains readable while keeping the delicate look.
Q: Where can I find healed examples and local artists without naming anyone directly?
A: Search location-filtered Instagram and TikTok feeds with tags like #treeoflifetattoo, #treeoflifeblackwork, and #finelinetattoo while adding your city name to narrow results. Browse portfolio galleries on tattoo platforms and check for healed photos rather than only fresh work. Pinterest boards help for composition ideas, but prioritize artists who share healed shots in a range of skin tones.
Q: How should I prepare clothing for my session based on placement?
A: Match your outfit to the area being tattooed. For forearm pieces wear a short sleeve tee you can roll, for ribs or sternum wear a loose button shirt or a front-closure bra, and for thigh or hip pieces choose loose shorts. Bring a layer that keeps you comfortable after the session. If you want a ready option try packing a loose drawstring linen pant for leg placements.
Q: How long before I should expect to need a touch-up?
A: Touch-up timing depends on size and technique. Many fine-line and color pieces benefit from a touch-up around six to twelve months to correct early fade or fill lighter spots. Larger black-and-gray work often stabilizes and may go longer before any touch-up is necessary. Expect that delicate details like tiny knots or micro leaves are the first elements to need attention.
