

Traditional flash sheets were made to solve a problem fast. A single sheet packs dozens of compact motifs that read from a distance, survive repeated touch-ups, and make smart fillers between larger pieces. Savvy collectors pick flash designs that match their anatomy and wardrobe so the tattoo still looks intentional at year three. Below the hero image you'll find specific flash ideas, placement notes, and outfit pairings that help these classic motifs age like they were always meant to be worn.
1. Classic Rose on Outer Forearm
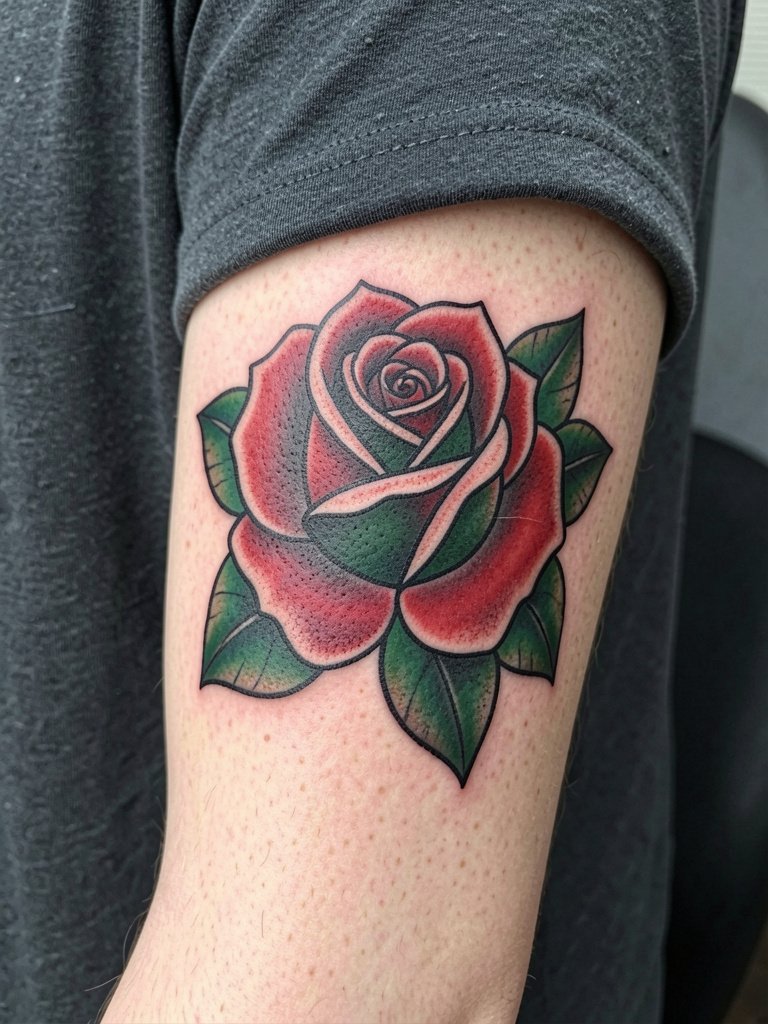
The outer forearm handles saturation well, so the classic rose reads bold at a glance. I recommend asking for a slightly larger bloom than your reference so the petal details have room to separate as the piece heals and ages. On this placement session time is usually one to two hours depending on color blocks, and pain sits around a three out of ten. A common mistake is shrinking the rose to wrist size, which loses petal definition by year three. For evenings out, this placement looks great with rolled-up sleeves and a short-sleeve linen shirt that frames the bloom.
2. Anchored Ship Wheel on Upper Arm
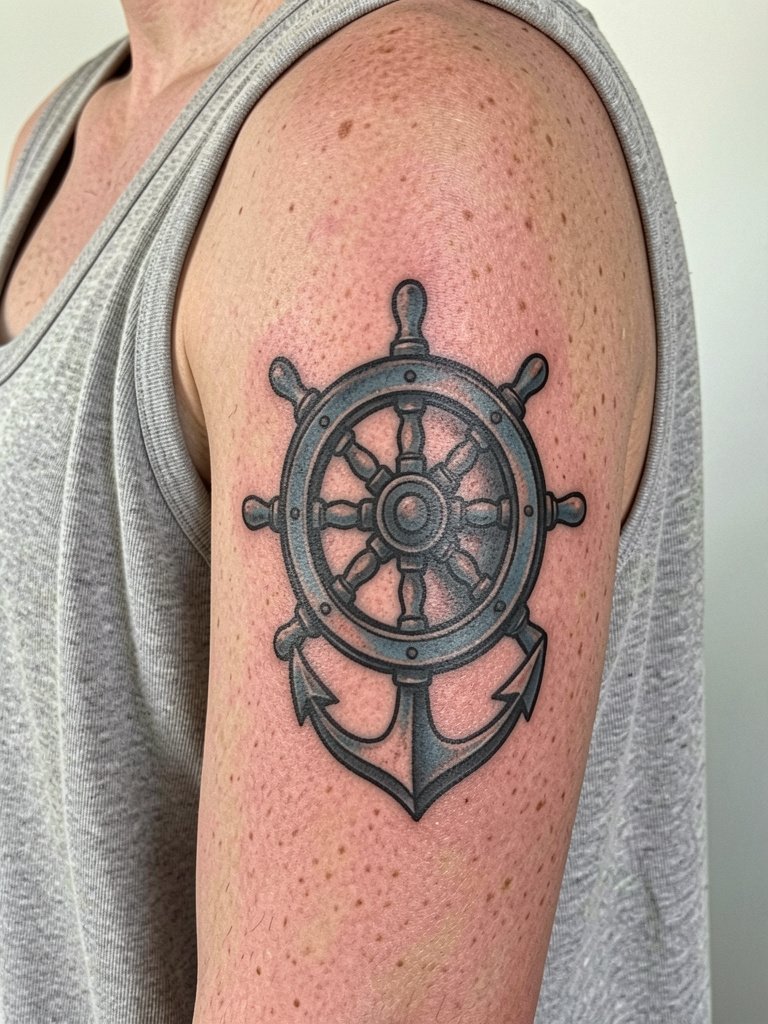
This classic naval motif benefits from bold outlines and flat color so the wheel and anchor stay distinct through years of wear. Session time runs about 90 minutes if you take color fills. The visual reads differently if moved toward the tricep versus centered on the lateral arm, so bring a silhouette photo to show scale. Blowout risk on the outer arm is low, but tiny details inside the wheel will soften over time if the wheel is scaled too small. Pair this with casual sleeveless tees and a vintage-style denim jacket for a retro nod.
3. Swallow Pair on Chest Plates
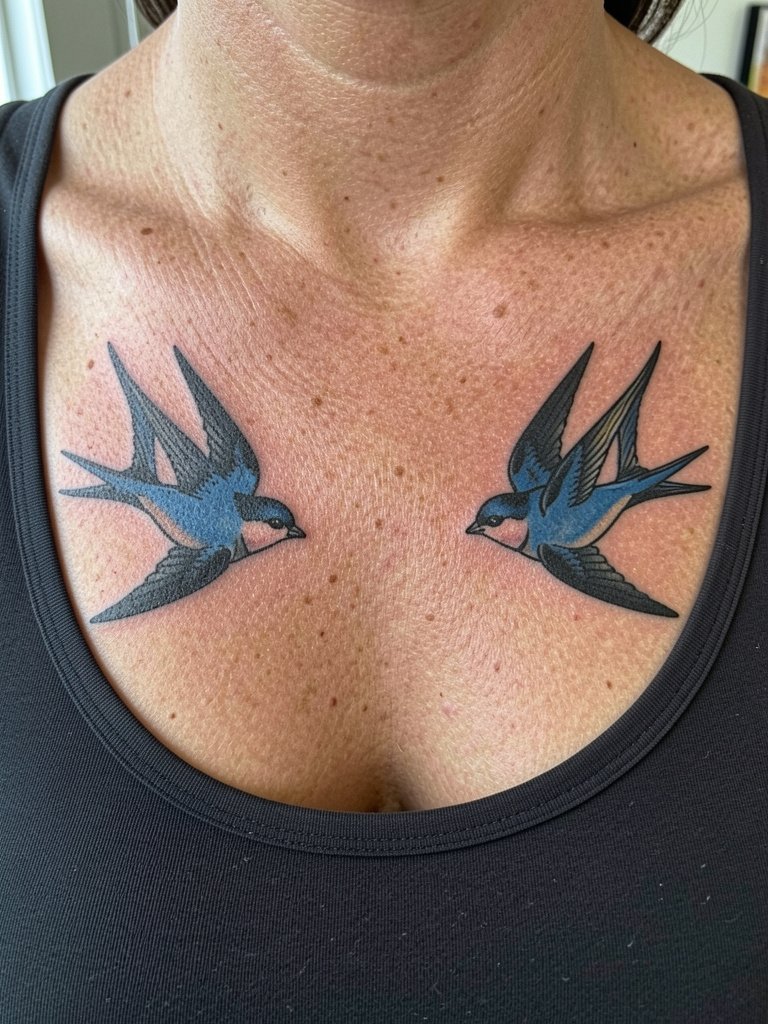
Chest swallows age well when they have strong outlines and ample negative space between wings and body. Placement just below the collarbone is convenient for showing when wearing scoop-neck tops, and the session is usually kept under two hours per bird. Be wary of requests that compress both swallows into a tiny chest patch. That is a classic mistake that makes the birds lose silhouette over time. If you want to show the flight lines, wear an open-collar linen shirt that keeps the collarbone visible.
4. Straight Razor Dagger on Inner Bicep
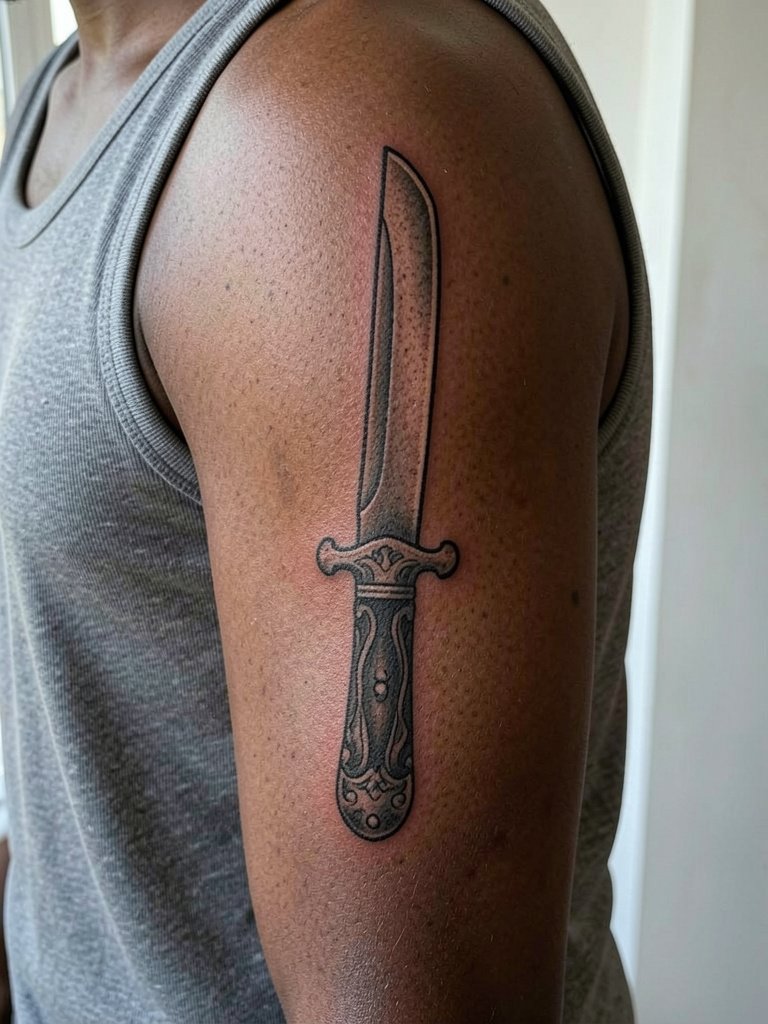
Inner bicep pieces can look crisp when the artist spaces the linework to suit softer skin. The biggest mistake is asking for single-needle filigree too small for a spot that naturally stretches. Pain on the inner bicep lands at about a five, and sessions often include short breaks as the skin tenses. Bring two scale references so the artist can show how the dagger reads at three inches versus five. For the appointment, wear a sleeveless tee so the artist has unobstructed access and you stay comfortable during breaks.
5. Pin-Up Bust on Shoulder Cap
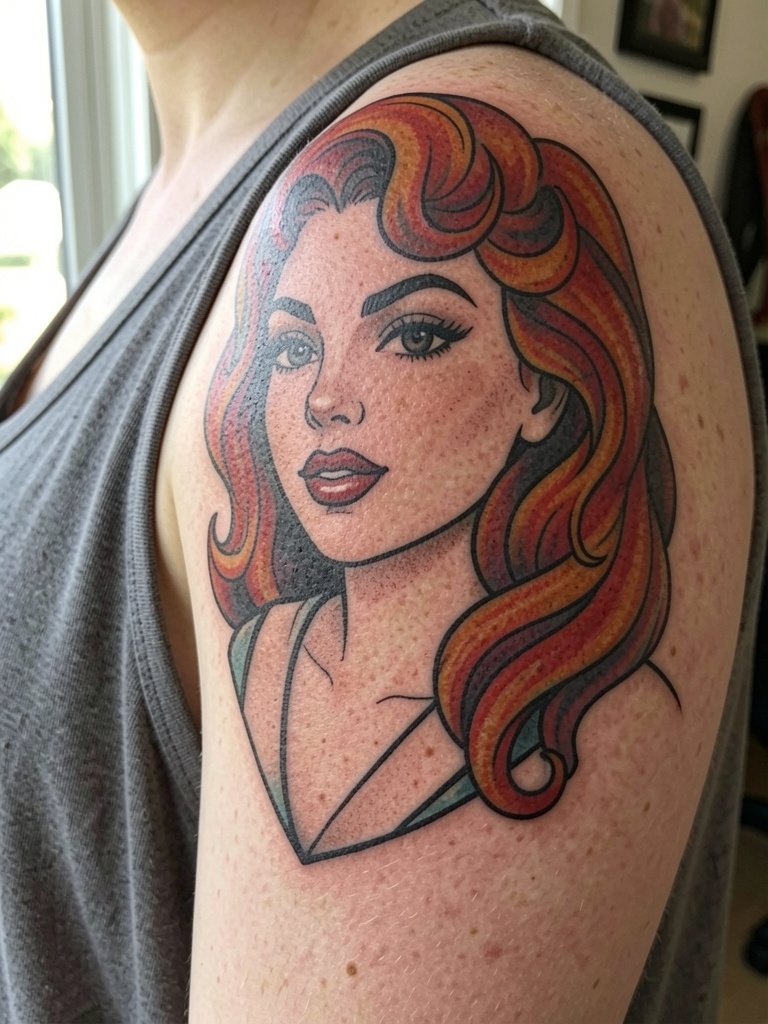
The shoulder cap is forgiving for portrait-style flash when lines are bold. I often tell clients that the shoulder's rounded surface helps the pin-up read from multiple angles, but detail inside the face should be kept minimal to avoid softening into a blur over time. Session length varies from ninety minutes to three hours depending on color and size, and pain is usually a two to three. For a night out, this placement pairs cleanly with a strappy cami dress that leaves the shoulder visible without stretching the skin.
6. Nautical Star on Wrist
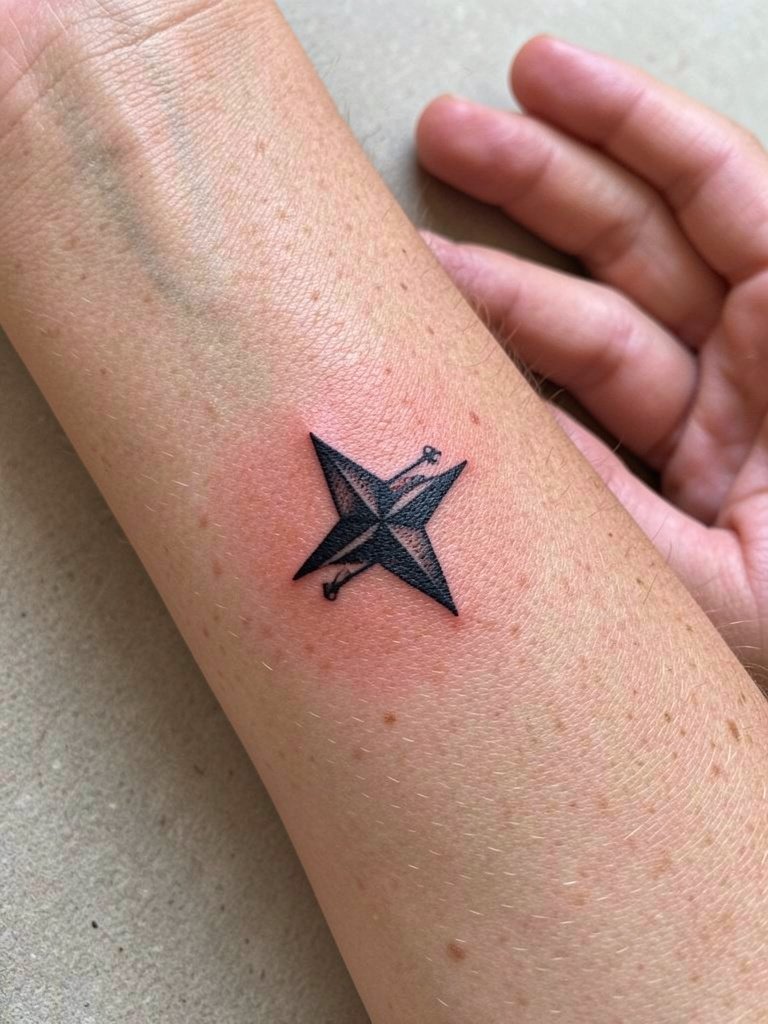
Wrist pieces are high-motion and face constant washing, so simple solid forms thrive here. The common mistake is overcomplicating the interior of a small star. Expect a thirty to forty-five minute session if you're keeping it compact, and plan on a quicker touch-up at the six- to twelve-month mark for saturation. For showing it off, cuffed sleeves or a lightweight bracelet stack work well without rubbing the new ink during the first week.
Session Day Picks
Those first six ideas cover wrists, shoulders, and forearms where session comfort and first-week protection matter most. A couple small tools smooth the appointment and the initial healing window.
-
Stencil transfer paper kit. Lets you preview line placement on skin before the needle starts, handy for precise wrist and forearm motifs above.
-
Topical numbing cream. Applied about 45 minutes before the session takes the edge off sensitive spots like inner biceps and ribs.
-
Thin protective film roll. Keeps small new tattoos clean from contact during the first few days, useful for wrist and hand pieces.
-
Fragrance-free gentle body wash. Cleans healing skin without irritating the ink in areas that see friction, like the chest and forearms.
-
Aquaphor healing ointment. A widely used option for the thin first-layer application that helps prevent scabbing on dense color patches.
7. Panther Head on Calf
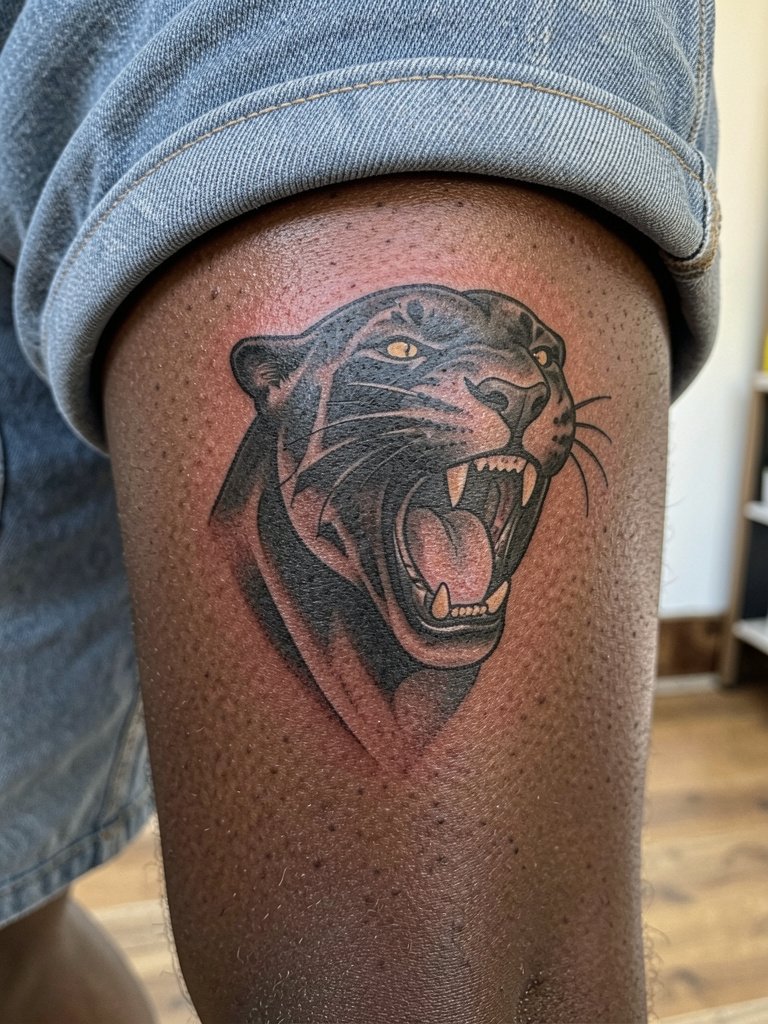
Calf pieces give a painterly canvas for bold animal heads. The visual impact is strongest when the face is scaled so the jaw and eyes remain clear after a few years. Expect a one to two hour session and mild to moderate pain through the muscle. A typical error is packing too much stipple or tiny teeth into the muzzle, which fuses in time. For showing it with boots and socks in cooler months, a timber-style ankle boot looks rugged without hiding the silhouette.
8. Sugar Skull on Upper Thigh
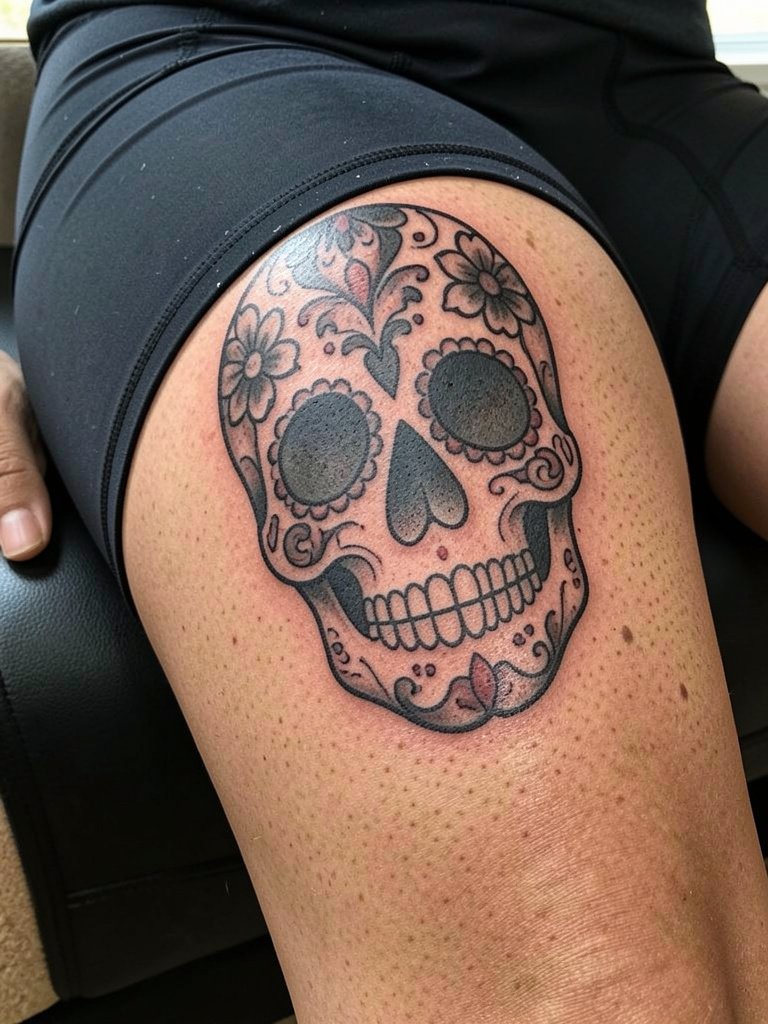
Upper thigh pieces hide well and tolerate dense shading. A sugar skull done in bold flash reads clearly and makes a fast session if kept to one panel. For this placement touch-ups are common at two to three years if there's a lot of blackwork. The main mistake is asking for ultra-fine lace inside the skull, which has trouble holding on textured skin. For the appointment, wear bike shorts so the artist can expose the area without adjusting underwear.
9. Classic Skull with Dagger on Ribcage
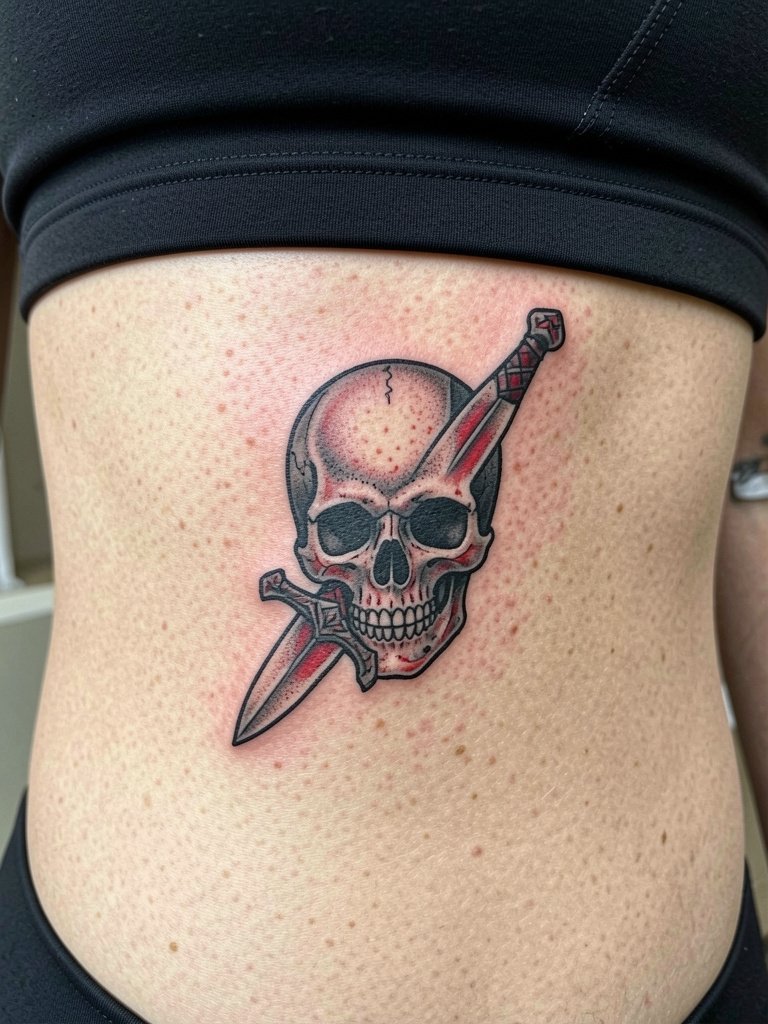
Ribcage takes bold blackwork well but does not forgive tiny, single-needle detail. There is a known controversy about fine line on ribs. One camp argues fine single-needle work blurs quickly on rib skin and loses contour within two years. The other camp counters that slightly heavier line weight and careful spacing allow fine line to settle cleanly on ribs, and they point to healed portfolios as evidence. If you want a skull and dagger here, favor thicker contour lines and leave room for shading to breathe. Pain is high and you should plan for breaks and a longer session.
10. Sparrow Flight Over Knuckles
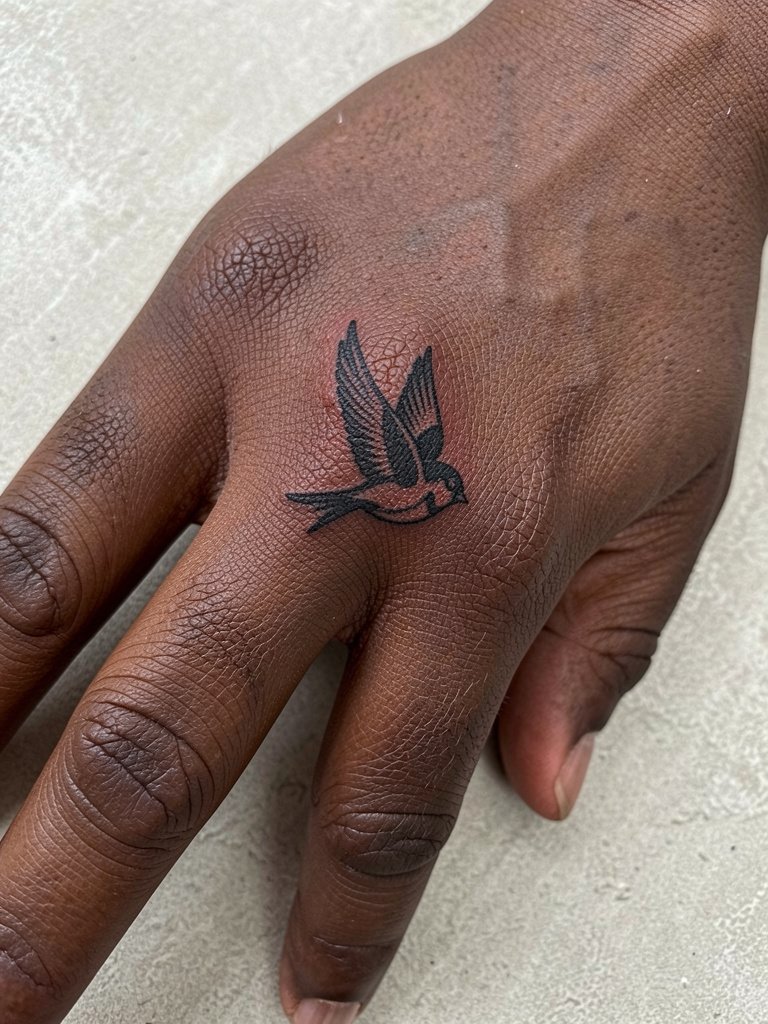
Finger and knuckle tattoos are high-touch and fade faster than larger placements. The advice I give is to keep motifs simple and heavy, because the skin there sheds differently and fine detail disappears. Sessions are short but may need a planned touch-up at the nine to twelve month mark. A common mistake is requesting intricate shading across knuckles. For everyday wear while it heals, avoid rings that rub the design and choose a thin leather band rather than a chunky ring.
11. Bold Rose and Banner on Thigh
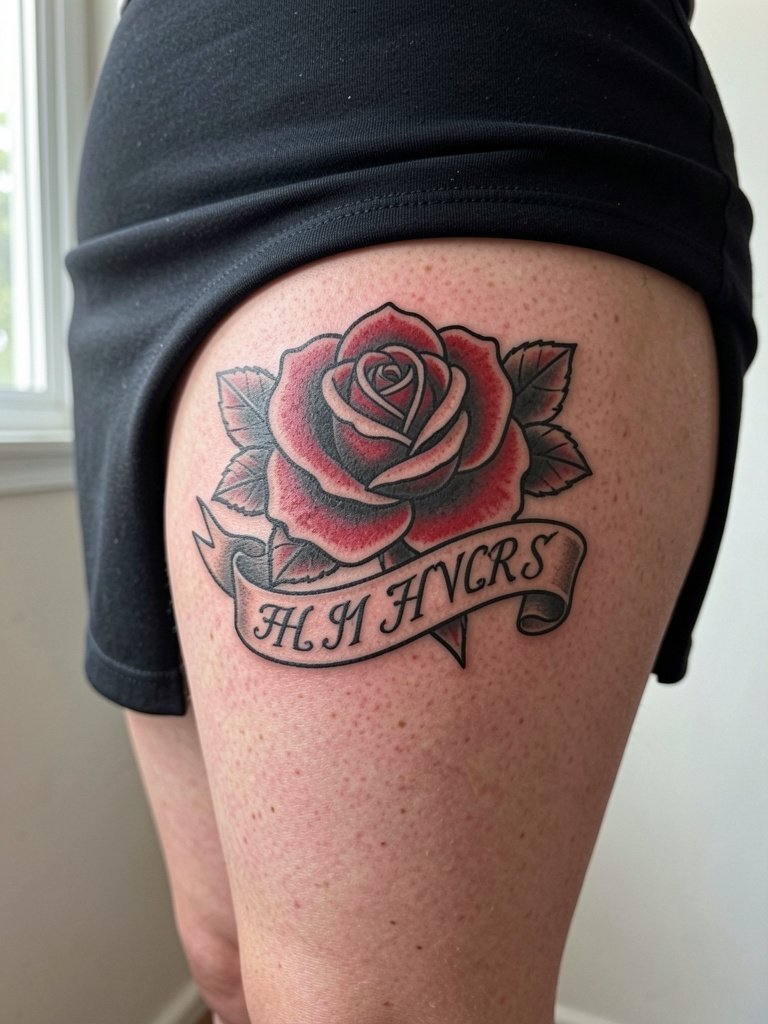
Thigh placements allow for larger scale and crisp banners that hold text. I suggest requesting the banner at least an inch tall in the design so lettering stays legible after a few years. Sessions can run two to three hours for a piece this size, with moderate pain. A typical mistake is picking a script that looks delicate on paper but becomes unreadable on skin. For show-off looks, pair the piece with high-waisted skirts that keep the art visible without sitting directly on the ink.
12. Lightning Bolt on Ankle
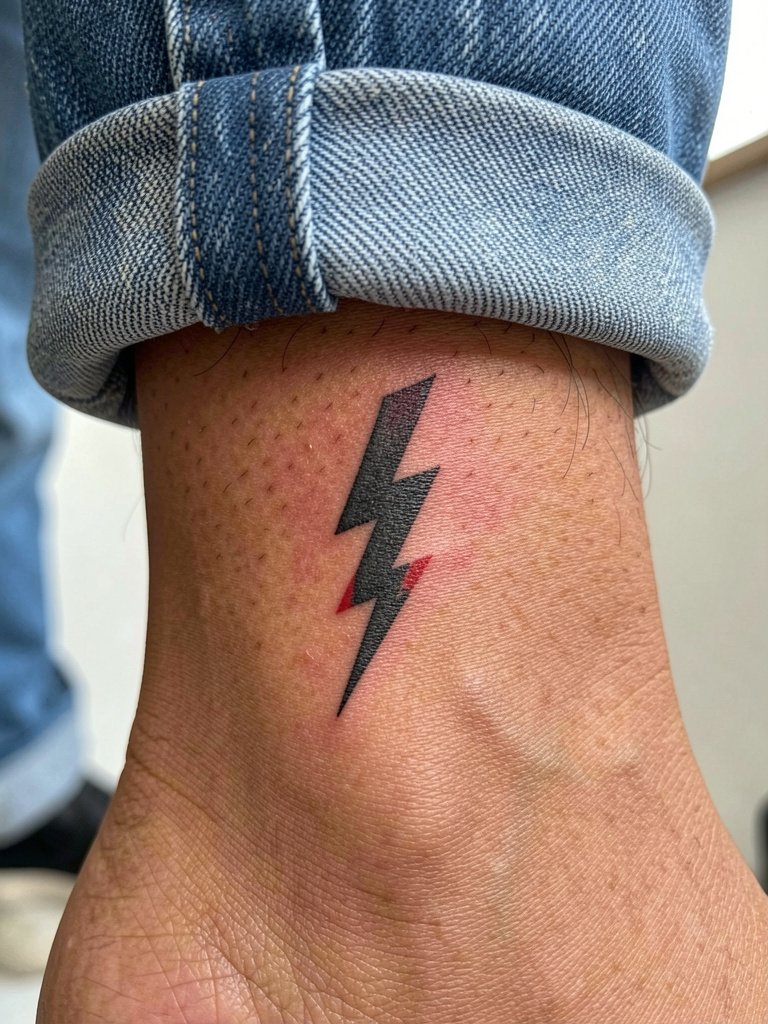
Ankle tattoos face lots of friction from socks and shoes, so solid silhouettes do best. Keep the bolt simple and ask for clean negative space that reads even with slight edge softening. Sessions are brief, pain is variable depending on bone proximity, and touch-ups at one year are common for ankle pieces. Avoid requests for ultra-thin filigree around the bolt, it fades quickly. For footwear matches, try a low-cut canvas sneaker that keeps the ankle visible.
13. Ship in Bottle on Inner Forearm
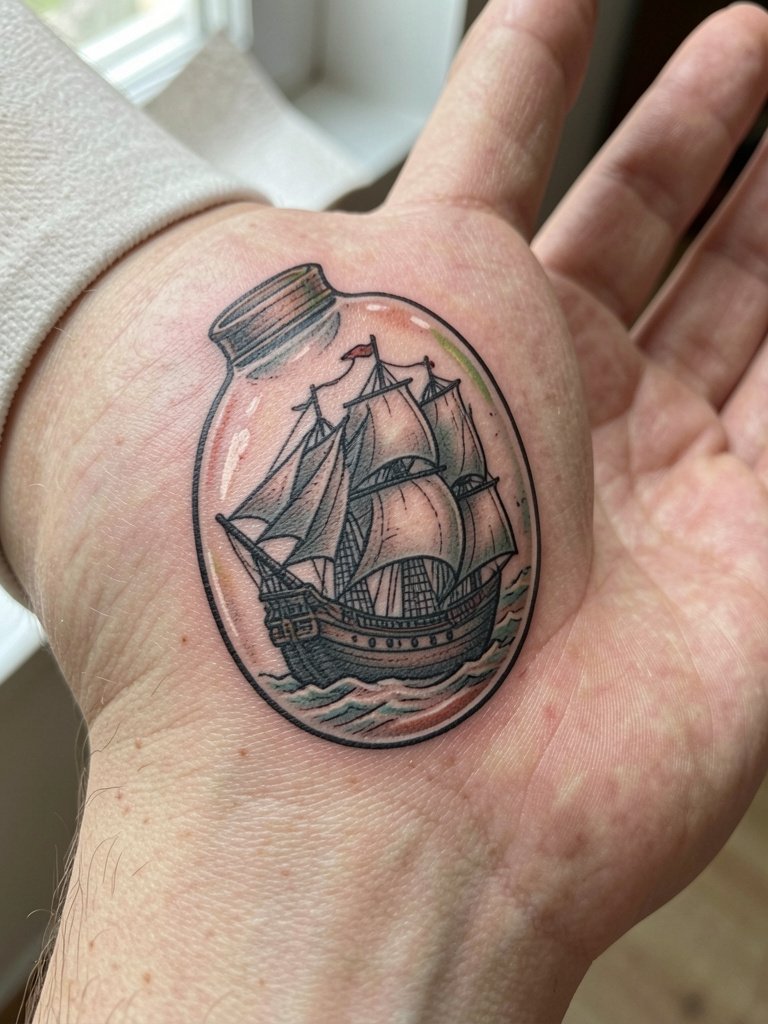
The inner forearm is a versatile canvas and holds linear composition well. For a ship in a bottle keep the bottle rim bold and the rigging simplified so individual lines do not merge in time. Expect a one to two hour session and low to moderate pain. A mistake I see often is compressing too many tiny details inside the bottle. As an outfit pairing, this placement looks clean with rolled-up sleeves and a long-sleeve henley so the scene gets framed without rubbing.
14. Classic Bannered Heart on Sternum
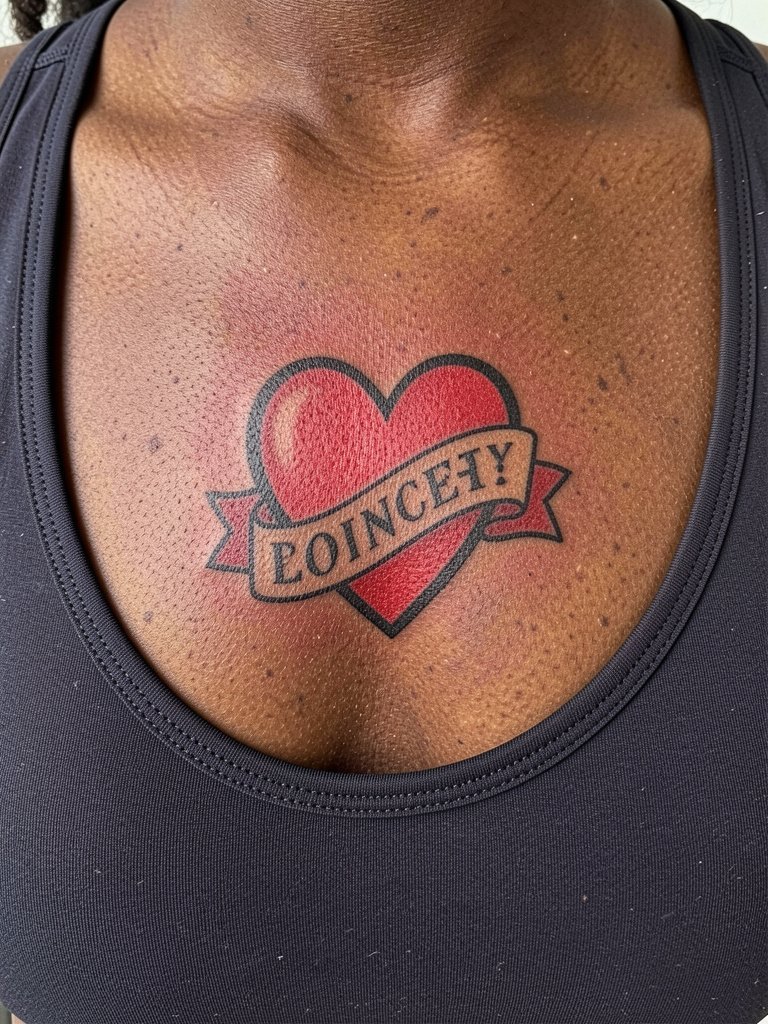
Sternum work requires an artist comfortable with chest anatomy because the skin can shift with breathing. The common pitfall is squeezing fine script into the banner. Instead, ask for hearty lettering and robust outline. Pain here trends high and sessions are slower paced. Since this is a sensitive area, bring clothing that is easy to remove and replace, like a sports bra you are comfortable in. Flash hearts on the sternum photograph well with a low-cut top that leaves the area exposed.
15. Bold Rose and Dagger Sleeve Accent
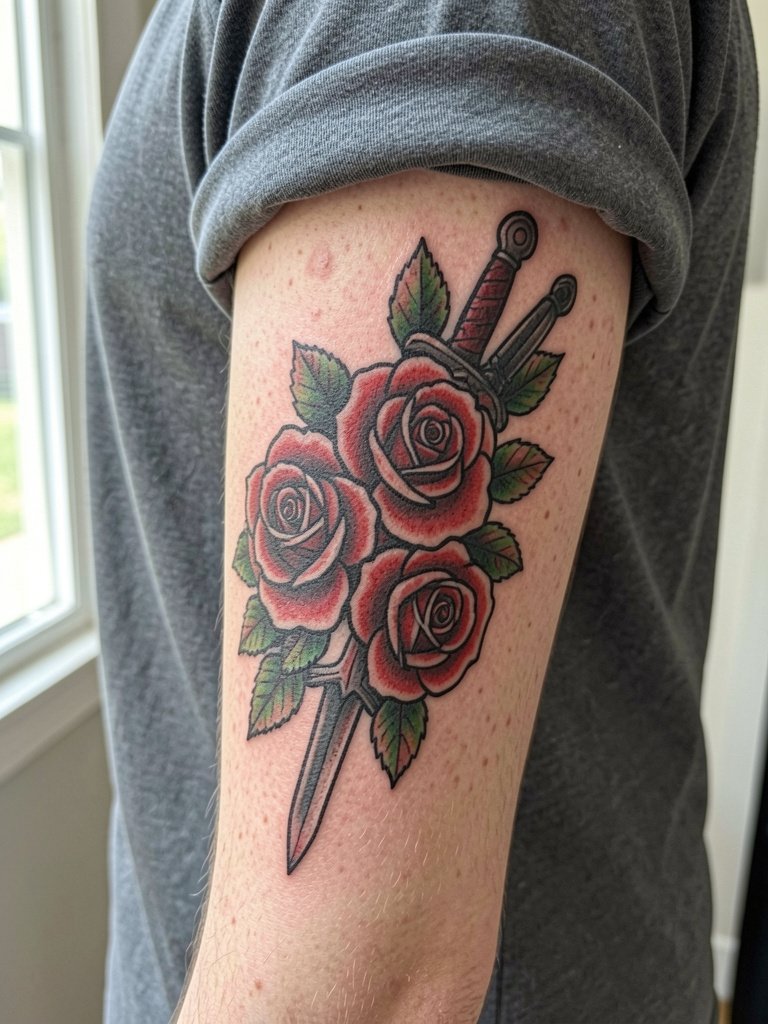
When building sleeve accents from flash, consistency in line weight keeps the composition coherent. For a rose and dagger stack, have the artist map out overlaps so colors do not muddy at edges. Sessions will be segmented and could run multiple appointments of two hours each. A common mistake is mixing flash pieces with wildly different line scales, which ages unevenly. This outer forearm accent pairs well with rolled-up shirts and a casual button-down that reveals the flow.
16. Anchor on Rib Side
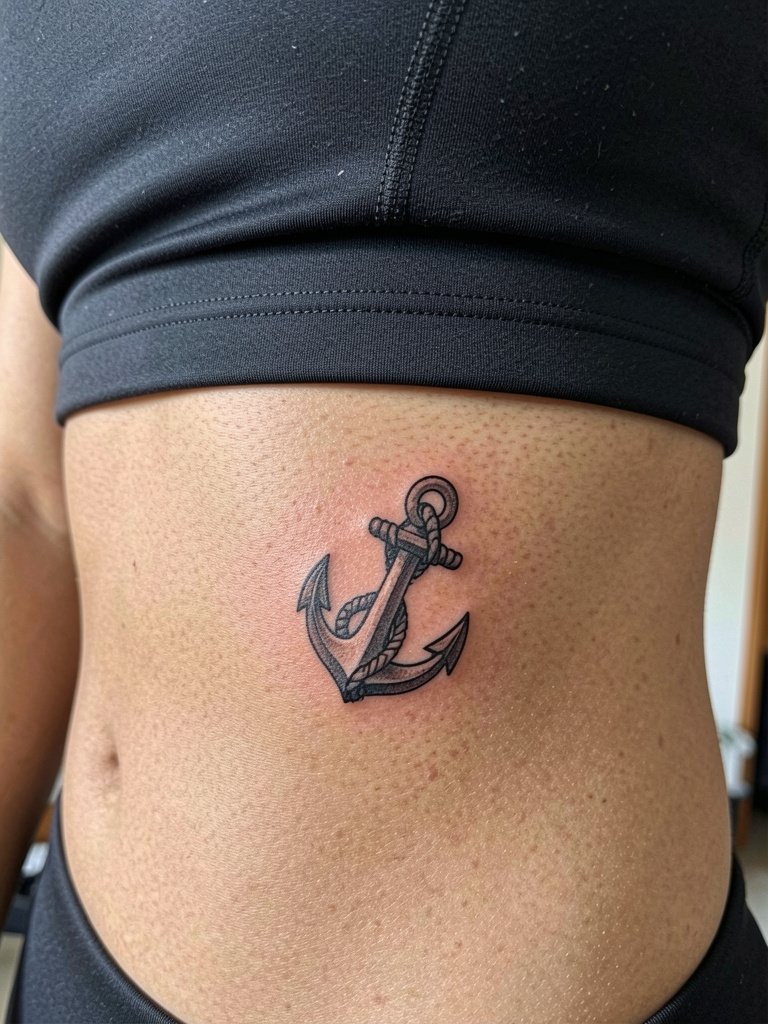
Rib anchors read crisp when linework is bold. Because the ribs flex with breathing the trick is spacing and depth, not more tiny detail. Pain is high and you should plan for a longer session time. A common error is asking for delicate rope twists that later blur. If you want a compact look with longevity, request simplified rope patterning. Light cropped tops show off this spot without stressing the ink.
17. Traditional Cobra on Thigh Side
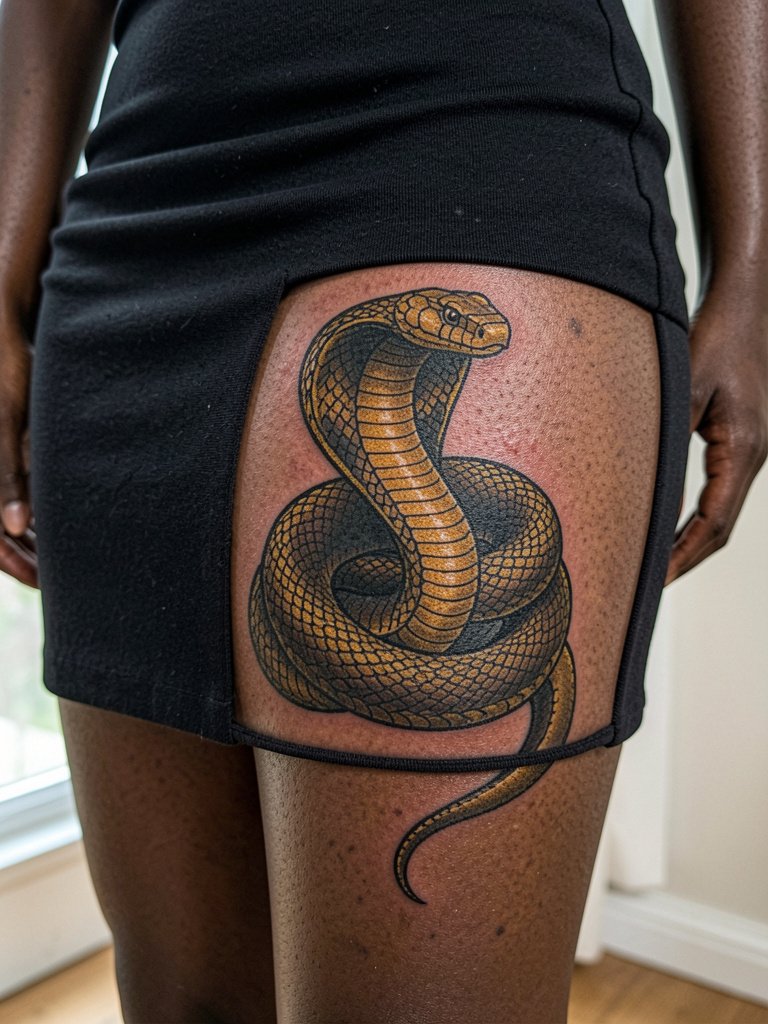
Large reptile motifs benefit from negative space that defines scales rather than tiny stippling. On the thigh you can go bolder without risking early blur. Sessions vary by size but expect more than one hour for a medium cobra. A frequent mistake is asking for photo-realistic scale texture in a flash style. For nights out, a wrap skirt showcases the lateral thigh artwork without compressing it.
18. Compass Rose on Upper Back
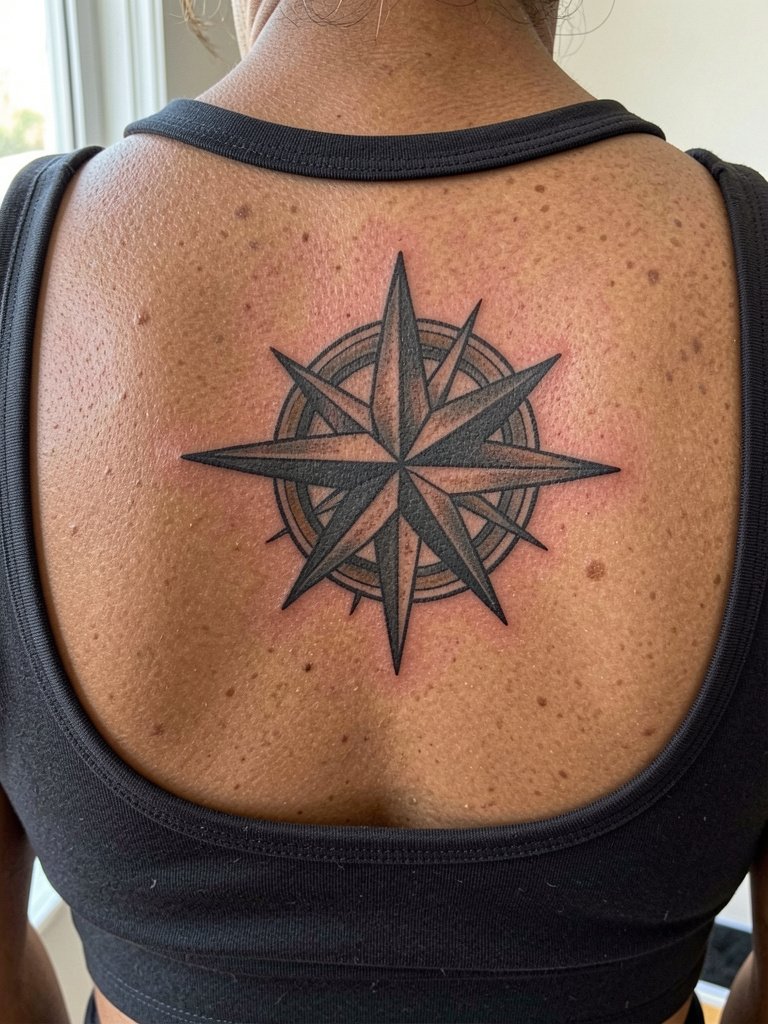
Upper back pieces hold symmetrical compositions well because the spine provides a natural centerline. A compass rose in bold flash will keep cardinal points readable after years. Plan for a longer session and moderate pain, and ask the artist to scale elements to the shoulder blade width. A common error is shrinking the compass too small which makes directional markers unreadable later. Back-exposing tops like a cropped tank show the design without straining the skin.
19. Small Crescent Moon Behind Ear
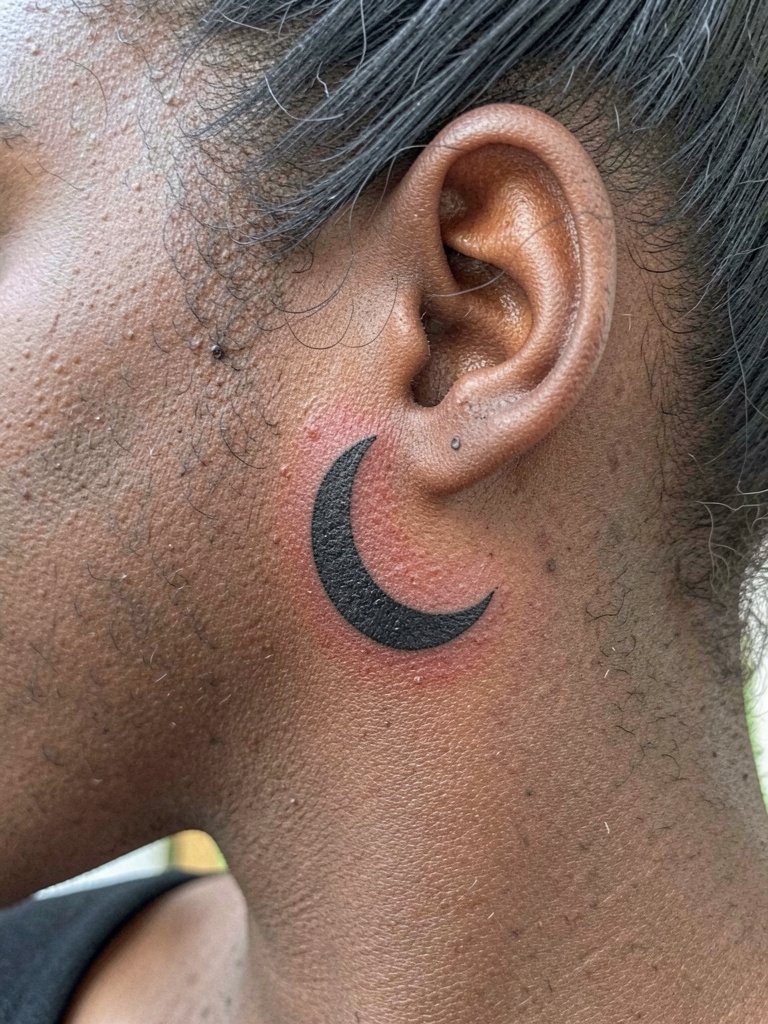
Behind-the-ear pieces need a steady hand and a design that reads small and bold. One-sentence professional note: these placements require an artist who regularly tattoos small face-adjacent areas. Pain is brief but sharp and sessions are short. The mistake is asking for intricate shading there. For daily styling, tuck hair into a loose updo to reveal the tiny crescent without irritating the area and consider small hoop earrings to draw attention.
20. Traditional Mermaid on Side Hip
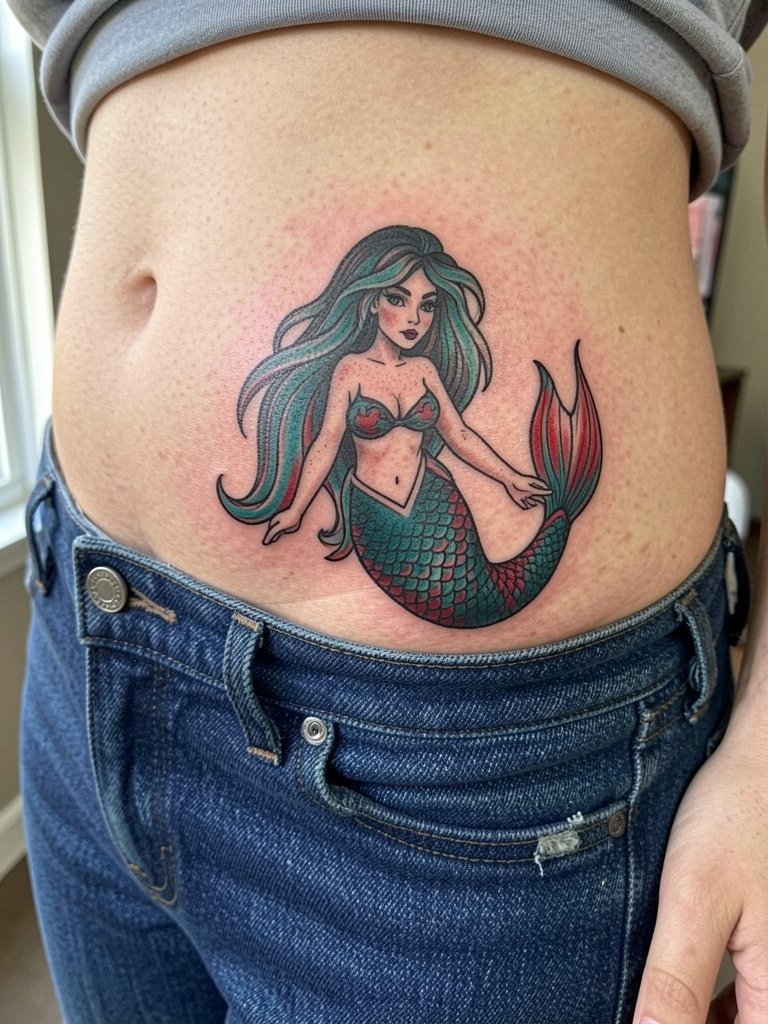
Hip work holds bold portraiture and color when the design is given breathing room. The pitfall is placing the mermaid too close to the waistband which causes rubbing and fading. Session time can be longer depending on color and shading. For appointments wear fitted low-rise jeans or bottoms that allow the artist to access the area without adjusting underwear. For nights when you want to show it, a crop top and low-rise jeans reveal the hip art while minimizing friction.
21. Classic Key on Palm Side of Wrist
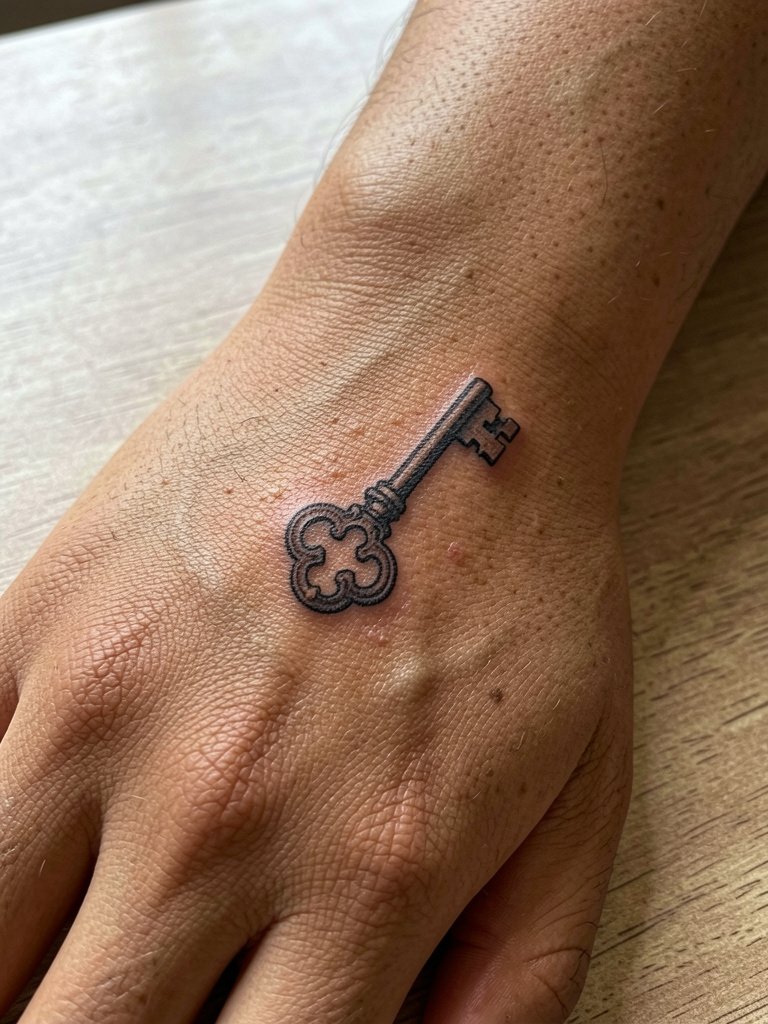
Wrist undersides see constant contact and may need a planned touch-up. The key should be kept bold and slightly larger than a decorative sketch to preserve the shaft and bit shapes. Sessions are short but the area is sensitive. A common mistake is requesting tiny filigree on the wrist undersurface. For comfort during the session and easy dressing afterwards, wear a loose cuffed long-sleeve that can be rolled without rubbing the fresh ink.
22. Rose and Banner Micro on Finger Side
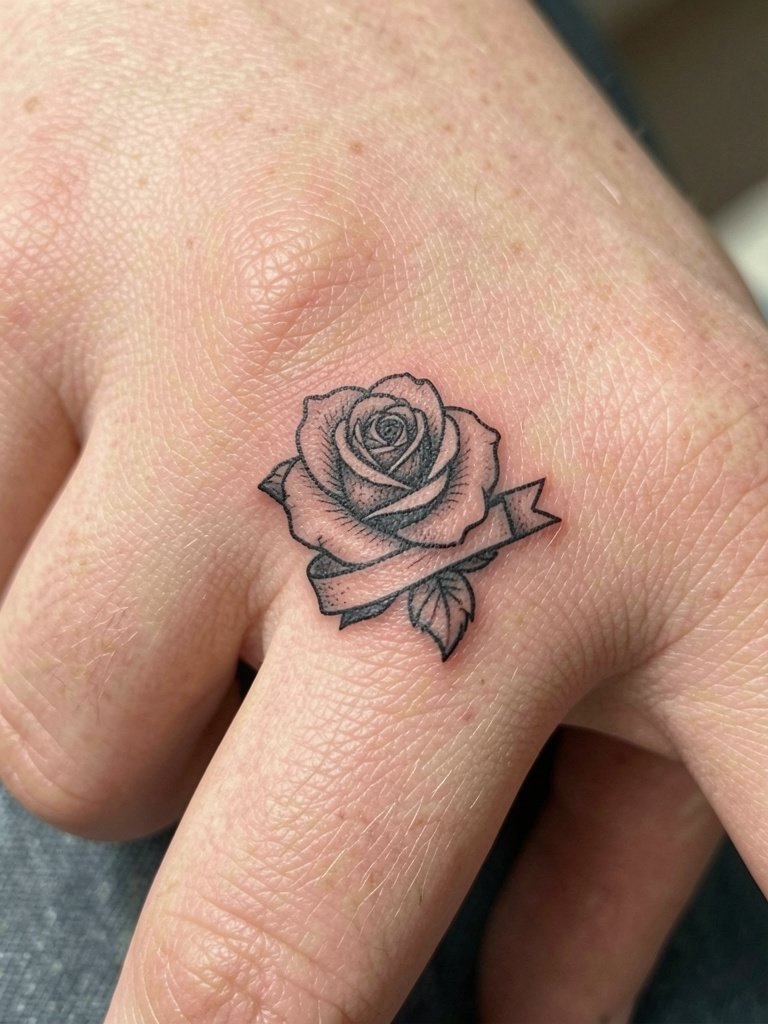
Finger-side micro art is charming but maintenance-heavy. The trick is keeping the silhouette strong and the banner simplified to avoid losing letters. Expect faster fading and plan for touch-ups. A frequent error is packing script into a banner this small. For daily wear pick slim rings that do not rub the side of the finger, or choose a thin stacking ring so the metal does not abrade the ink.
23. Traditional Falcon on Collarbone
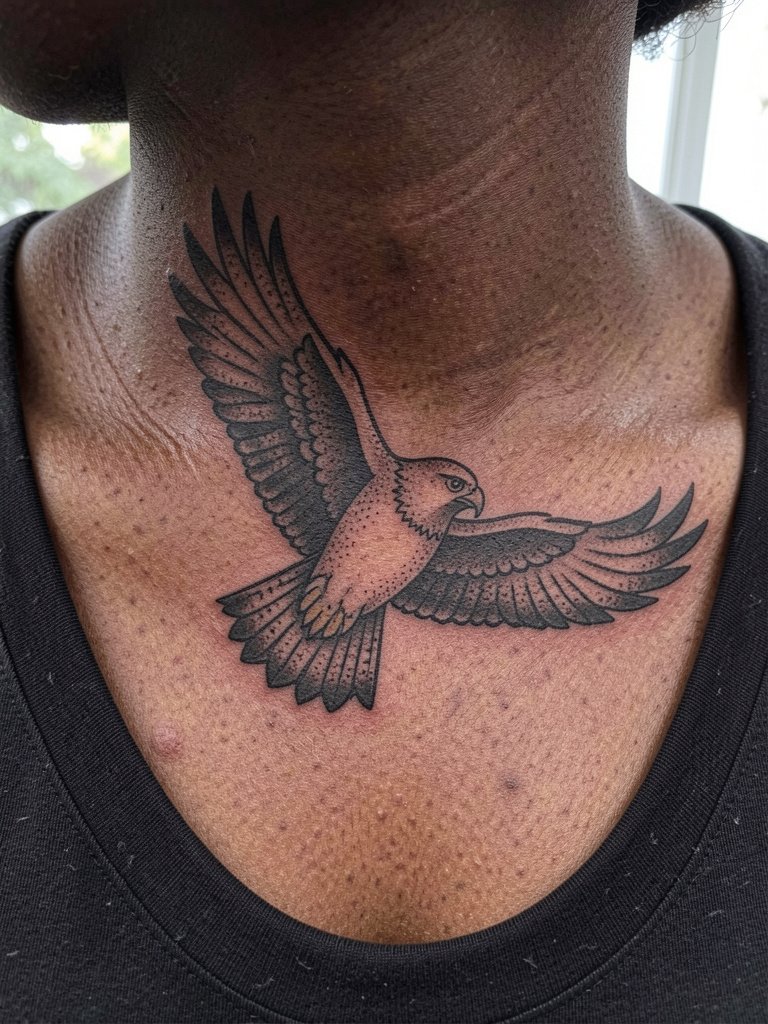
Collarbone placements reward bold directional shapes that follow the bone. The main mistake is over-detailing the wing feathers in too small a space. Pain is moderate and sessions are quick for compact designs. If you want the falcon to hold up, ask for a slightly thicker beak and primary wing lines. For show-off outfits, wear an open-neck blouse that frames the clavicle without pressing on the new ink.
Frequently Asked Questions
Q: How do traditional flash pieces age compared with fine-line tattoos?
A: In my experience, traditional flash pieces with bold outlines and saturated color tend to keep their visual identity longer. Fine-line work looks delicate at first, but on high-motion or thin-skinned areas it often loses crispness faster. If longevity matters, favor heavier contour lines and slightly larger scale.
Q: Where can I browse healed flash examples and find local portfolios without naming specific artists?
A: Try searching platform hashtags and location filters to see healed results, for example #TraditionalFlash, #HealedFlash, and your city plus "healed tattoo" on social platforms. Reddit tattoo threads and community galleries also surface real healed shots across skin tones. Use Tattoodo or portfolio pages filtered by "traditional" for studio collections.
Q: Are there placements to avoid with traditional flash if I want minimal touch-ups?
A: High-friction spots like fingers, knuckles, and the underside of the wrist need more maintenance. Areas that flex a lot such as ribs and the inner bicep may also require touch-ups if the design is very detailed. Opt for simplified silhouettes and thicker lines on those spots to reduce frequency of touch-ups.
Q: What should I wear to a session for chest, thigh, or back flash pieces?
A: For chest and sternum book a fitted sports bra you are comfortable in. For thigh sessions wear modest bike shorts or a skirt that allows easy access without adjusting underwear. For upper back work choose a loose top you can step out of without straining. A recommended item for chest and back sessions is a soft sports bra that offers coverage while allowing the artist access.
Q: How soon will I need a touch-up for small wrist or ankle flash tattoos?
A: From what I have seen, small wrist and ankle pieces commonly need a minor touch-up within the first year as those zones see friction and frequent washing. That does not mean the design failed. It is a normal part of keeping compact motifs sharp in high-wear areas.
