
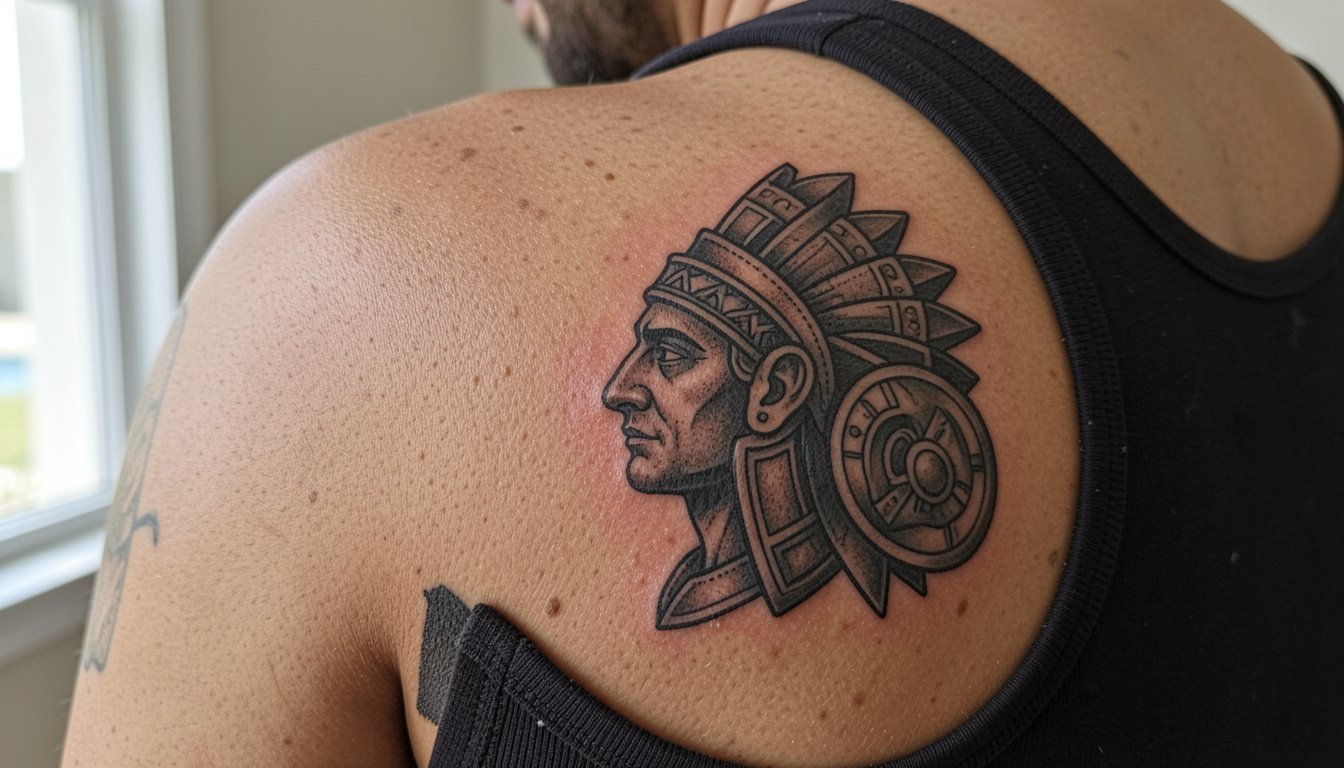
Bold black-filled Aztec warrior imagery tends to outlast delicate filigree, especially where skin stretches and rubs. If you want an Aztec shield or warrior profile that still reads at year five, pick confident linework and thoughtful negative space over tiny internal detail. Below you will find designs that respect iconography, read well from a distance, and give clear talking points for your consultation.
1. Inner Forearm Warrior Shield Panel
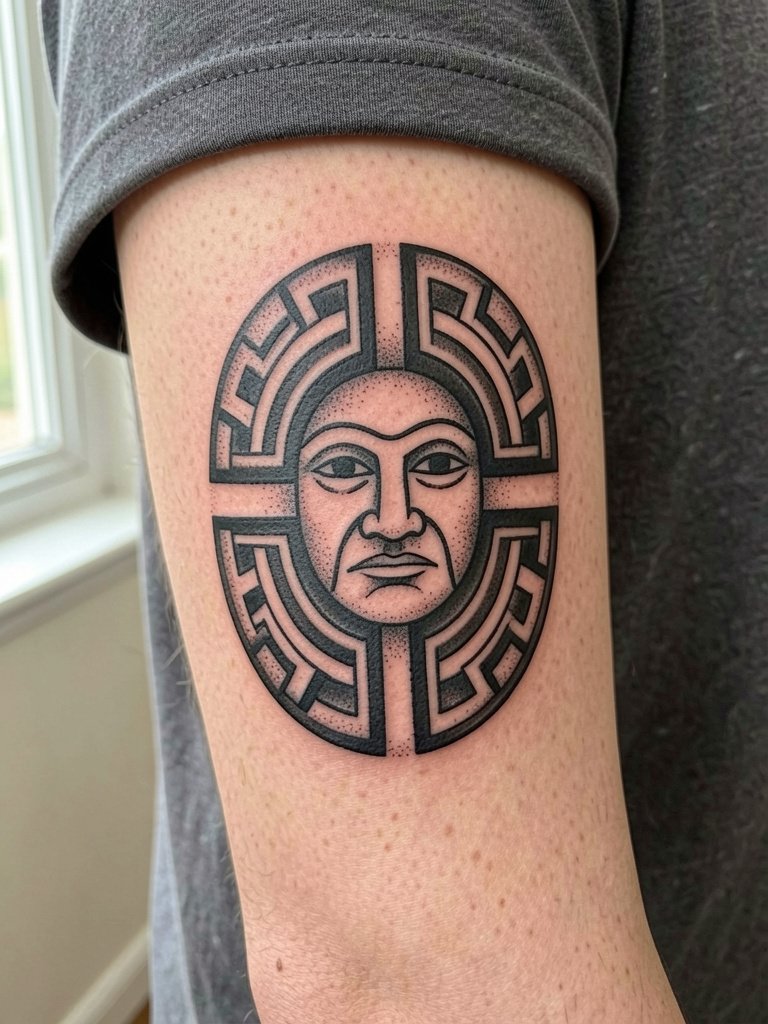
A compact shield on the inner forearm reads clearly and resists blowout better than tiny filigree. Recommend asking for bold outer outlines and slightly wider negative gaps inside the pattern so the concentric steps do not merge over time. The inner forearm is low to moderate pain and most sessions for a piece this size run 60 to 90 minutes. Common mistake is asking for full micro-detail at three inches, which eats into long-term legibility. For session comfort wear a short-sleeve tee and bring a light jacket that does not rub the fresh ink, like a linen overshirt. Respect the cultural origin by stating the piece is inspired by Aztec motifs and asking the artist to avoid sacred regalia that should not be copied.
2. Bicep Warrior Bust with Featherwork
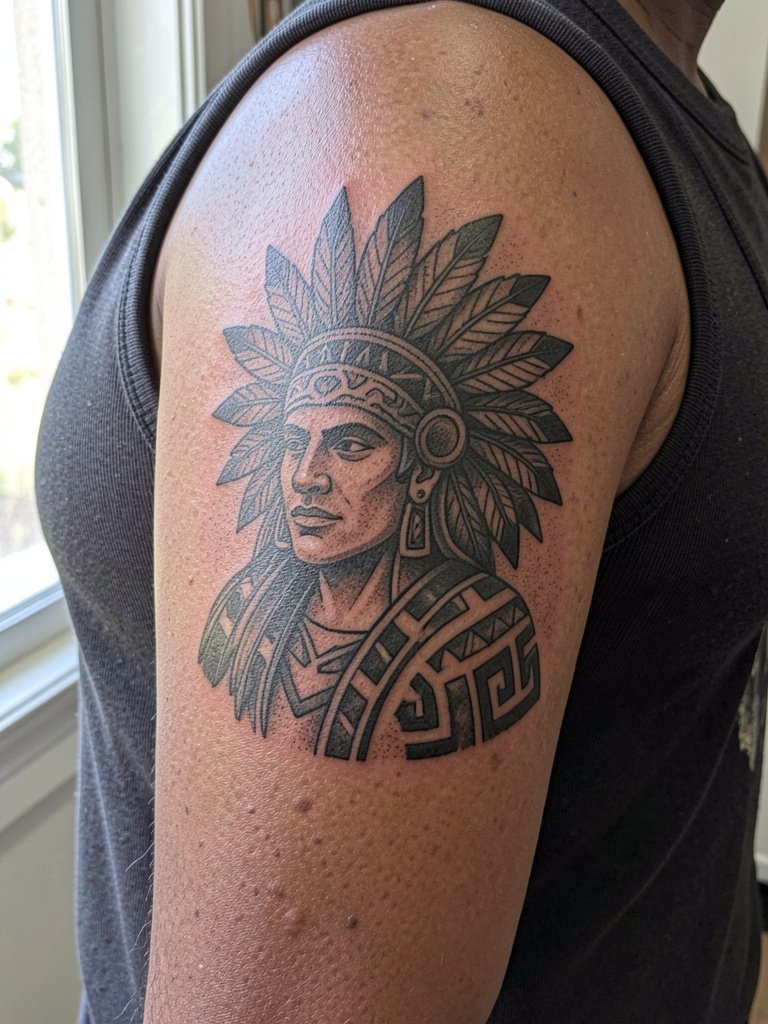
This bicep bust suits people who want a visible masculine silhouette without committing to a sleeve. Ask the artist to keep feather edges bold rather than micro-feathered so the headdress does not soften into a gray mass at two years. The outer bicep is one of the easier placements during a session, typically a 90 to 120 minute appointment for this scale and moderate pain. A regular mistake is compressing too many face details into a small face area. For evenings out pair the piece with rolled-sleeve button shirts to frame the shoulder without covering the upper arm. Note the imagery draws from Aztec visual language, so discuss symbolism and avoid exact copies of sacred artifacts.
3. Calf Standing Warrior Scene
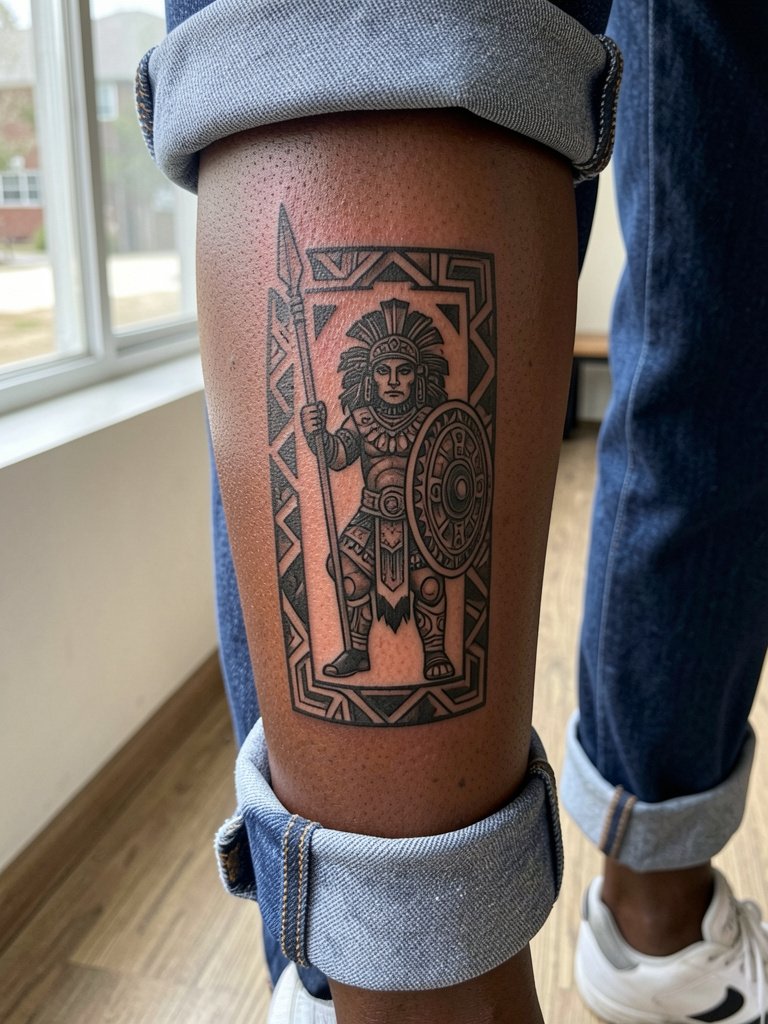
A vertical calf scene gives room for narrative panels and holds detail without crowding. Ask for panel spacing that uses negative bands between elements so the spear, shield, and helmet stay distinct as the calf muscle changes. Calf sessions are moderate pain and often done standing or reclined in a two-hour block. People often try to cram tiny facial expressions into distant figures, which becomes muddled healed. For showing the design, wear cropped pants or rolled cuffs with canvas sneakers so the artwork reads when you sit. A cultural respect note: use Aztec motifs as inspiration and avoid replicating ritual objects meant for community use.
4. Sternum Ceremonial Headdress Panel

Sternum work reads best when the central motif is bold and symmetric. Because sternum skin moves with breathing, request slightly thicker linework inside the main panels and a lighter hand on fine interior stippling so the panel ages predictably. Sternum pieces are higher on the pain scale and usually split into a couple shorter sessions rather than one long marathon. A common error is requesting ultra-fine interior details in a first session, which stretches unevenly. For the appointment wear a supportive sports bra and a loose button-up top to change without rubbing the area. Note that this placement may require an artist experienced with chest anatomy.
5. Upper Back Double-Warrior Composition
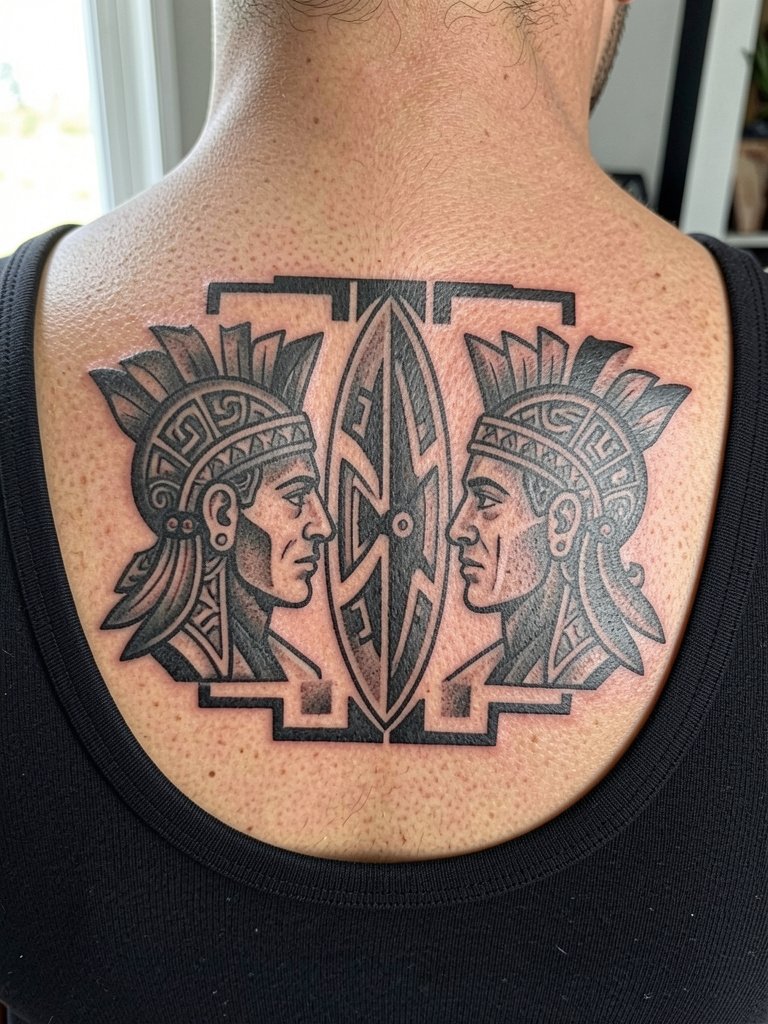
A twin-warrior composition across the upper back makes a bold statement while aging well thanks to generous spacing. During consultation bring full-width references and ask the artist to map the placement with a mirror while standing, because posture changes can shift symmetry. Upper back work is moderate pain and typically done in two to three hour sessions for this scale. A mistake is centering solely on the spine without allowing the designs to move with the shoulder blades. For show-off outfits choose open-back tops or halter dresses that reveal the piece when appropriate. A brief note on origins: acknowledge Aztec line language and avoid copying ceremonial insignia meant for specific cultural rites.
Studio Day Picks
These first six chest, arm, and back pieces vary in scale and healing concerns, so a few session basics smooth the experience.
-
Stencil transfer paper kit. Lets you preview exactly where stepped patterns and headdresses sit relative to bone landmarks, useful for inner forearm and sternum mapping.
-
Topical numbing cream. Applied 30 to 45 minutes before can help with sternum and rib sessions without compromising linework when used properly.
-
Thin protective film roll. Useful for small wrist and hand placements that face friction from clothing in the first week.
-
Fragrance-free gentle body wash. Cleanses healing areas without stripping saturated blackwork during the first two weeks.
-
Aquaphor healing ointment. Thin application in the initial days locks in moisture for bold blackwork while avoiding clogged channels.
6. Ribcage Single-Line Warrior Mask
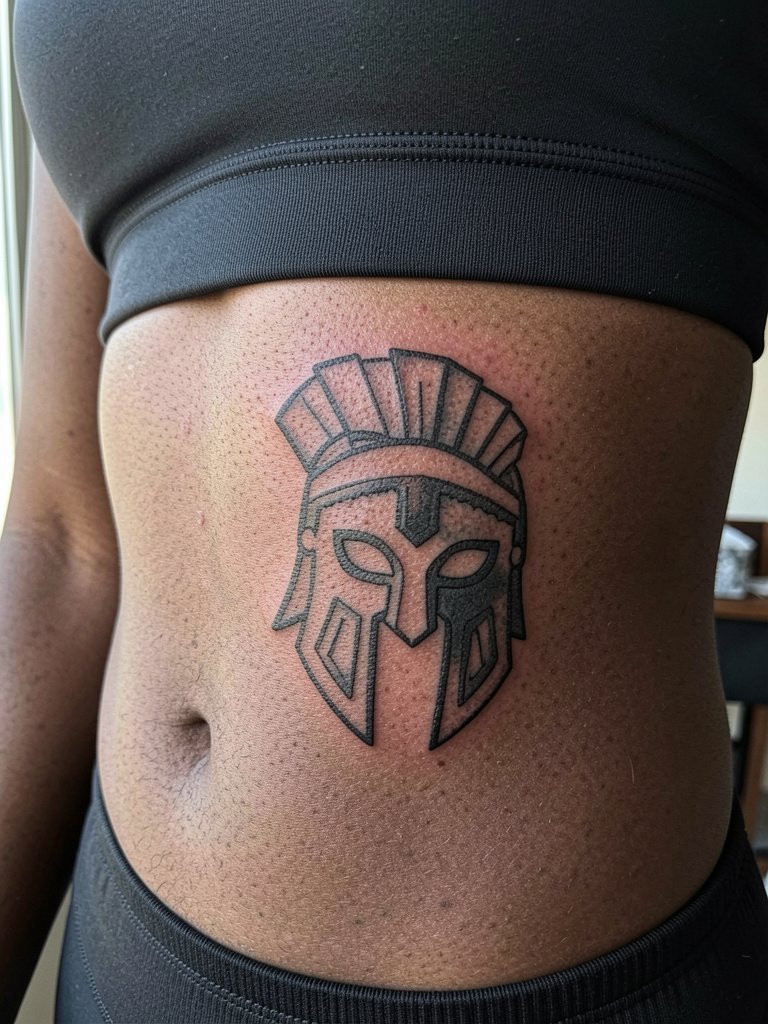
Ribcage tattoos are divisive because of how the skin stretches. One camp says fine-line ribs blur within two years due to constant expansion and friction. The other camp argues that with slightly wider spacing and controlled needle depth, bold single-line or minimal blockwork settles fine and can look striking at year three. For this placement select bold contours and generous negative areas rather than tiny facial lines. Rib sessions are high on the pain scale and often split into shorter passes. Wear a fitted cropped top for easy access during the session. Respect cultural origins by avoiding sacred iconography used in ceremonial contexts.
7. Inner Thigh Guard Panel
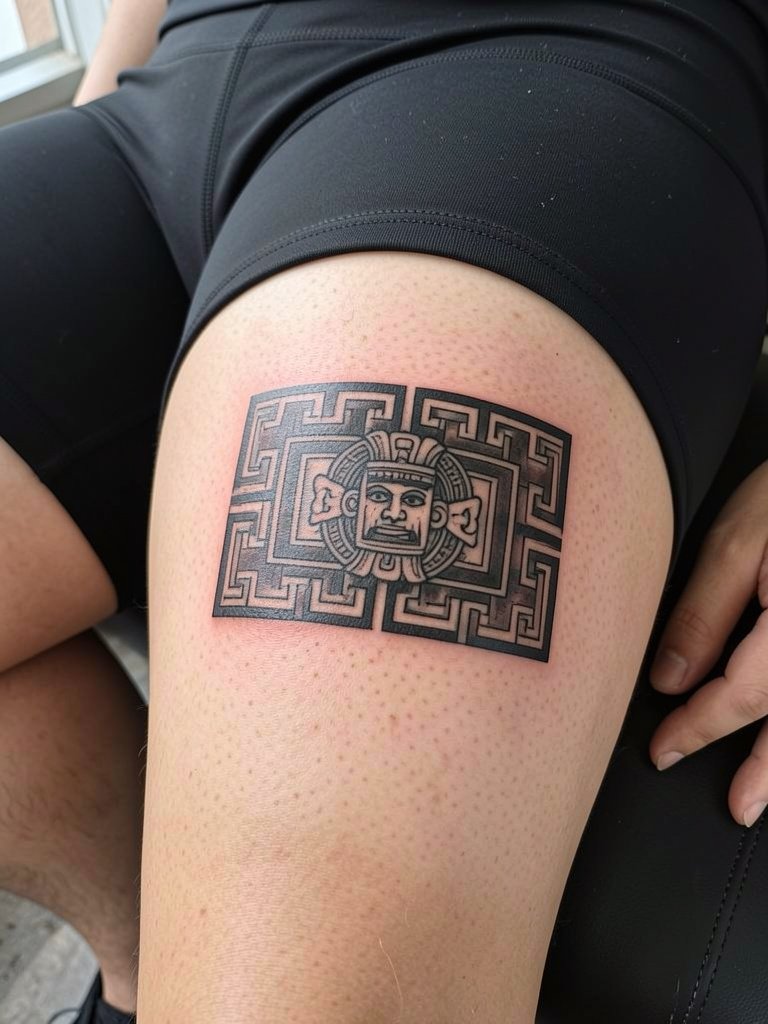
Inner thigh panels are private and age well when scaled correctly. Ask the artist to plan for a minimum of two inches of breathing room around the central emblem to avoid compression when seated. Inner thigh sessions are lower on the pain scale for some and intense for others, and they usually require at least a pair of longer appointments for larger panels. A frequent mistake is putting tiny negative details too close to where skin rubs against clothing. For the session wear loose bottoms or fitted bike shorts for quick access during breaks, such as athletic bike shorts. Also consider cultural sensitivity and avoid reproducing religious regalia tied to living communities.
8. Collarbone Warrior Crest
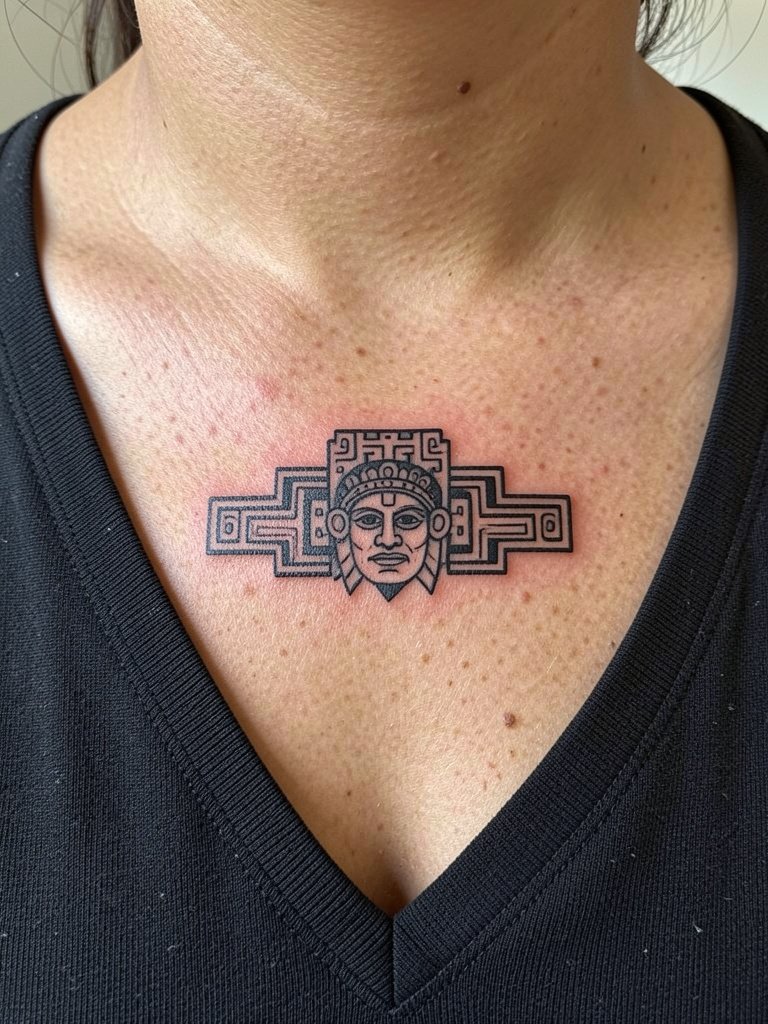
Collarbone crests benefit from symmetry and restrained interior work so the piece keeps its shape as the skin moves. Specify the exact width in inches during consultation so the crest sits flat and does not fight the bone ridge. Collarbone placement is moderately painful and often done in a single one- to two-hour session for small crests. Mistakes include centering too close to the sternum where breathing distorts the image. For showing off the piece, try open-neck tops like v-neck blouses that frame the collarbone without covering the design. Cultural note: credit Aztec inspiration and avoid sacred tattoo replication.
9. Hand or Knuckle Warrior Mark
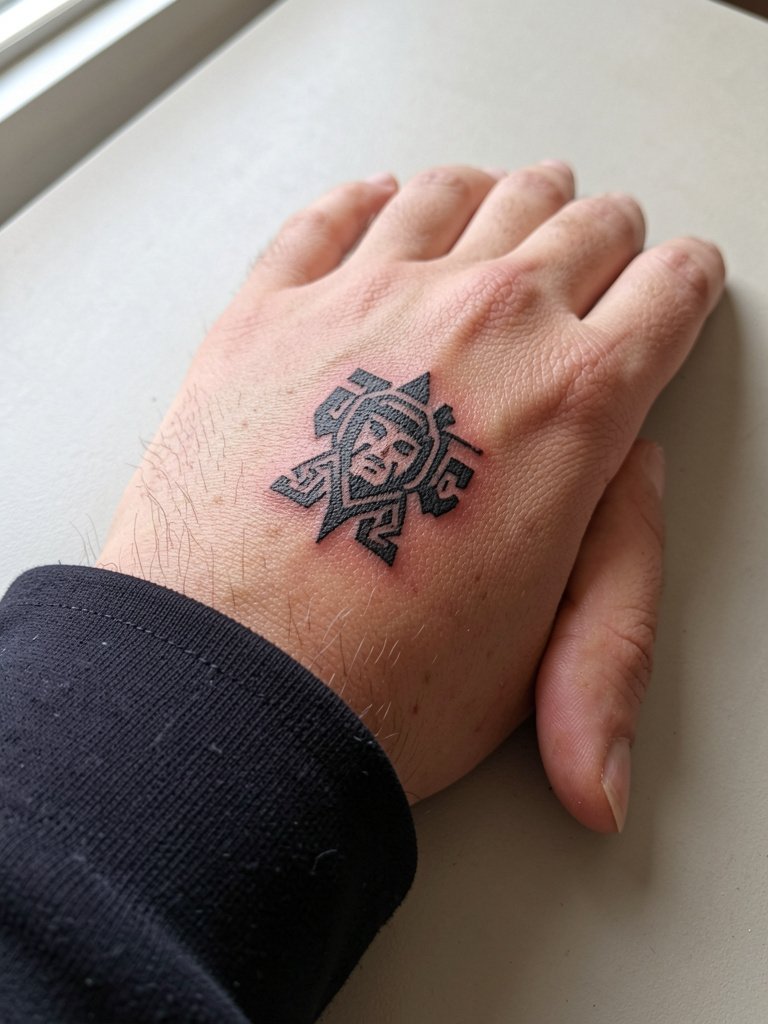
Hand pieces face extra wear from washing and motion, so request compact, blocky shapes with clear negative edges rather than fine filigree. The hand is high risk for early fading and may require a touch-up within the first year depending on your routine. A common mistake is requesting text or tiny faces across knuckles, which smudge quickly. For the appointment avoid heavy rings and wear a long-sleeve shirt you can roll up easily, or choose thin cuffed options like cotton button-downs so the artist has unobstructed access. Also note cultural origins and avoid copying ritual markings used in living communities.
10. Thigh Full-Wrap Battle Scene
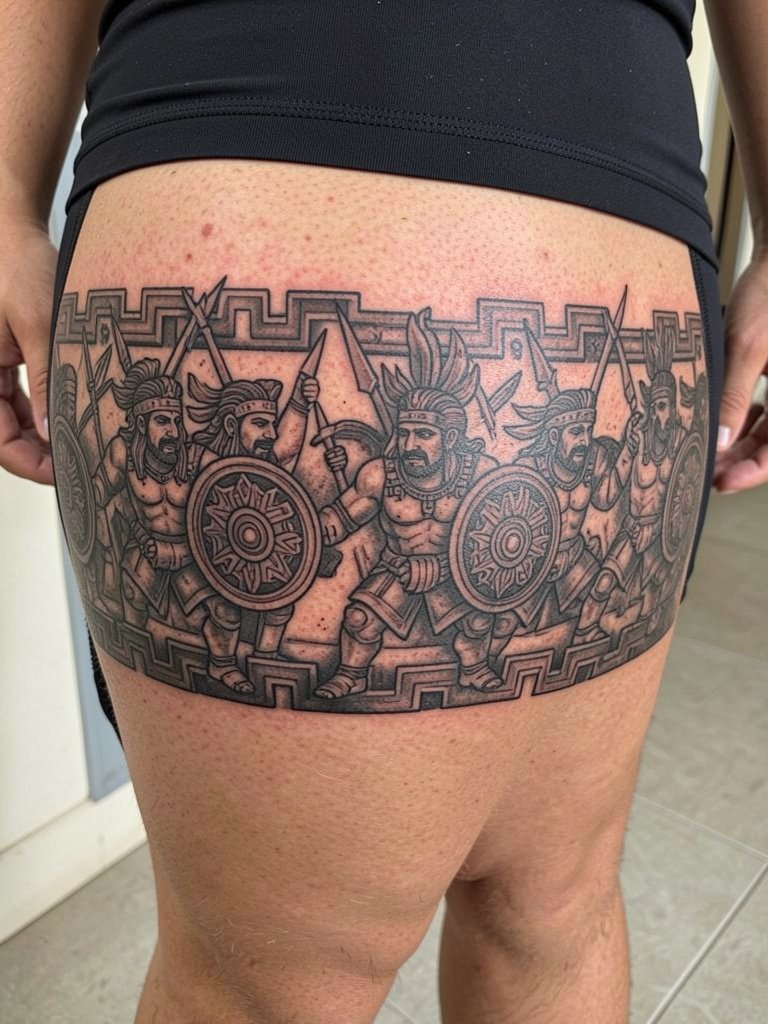
A full-wrap thigh scene works well for storytelling and holds detail because the thigh offers broad, flat canvas. Ask the artist to mock up how the panels read when standing and seated so the composition does not break at the joint. Thigh sessions are moderate to low pain and can be completed in two to four hour blocks depending on coverage. People sometimes request tiny faces inside busy scenes which disappear healed. For reveal looks pair the art with midi skirts or split skirts and try high-waist midi skirts to show the wrap without exposing too much. Respect the source visual language and avoid copying identified ceremonial insignia.
11. Ankle Mini Warrior Totem
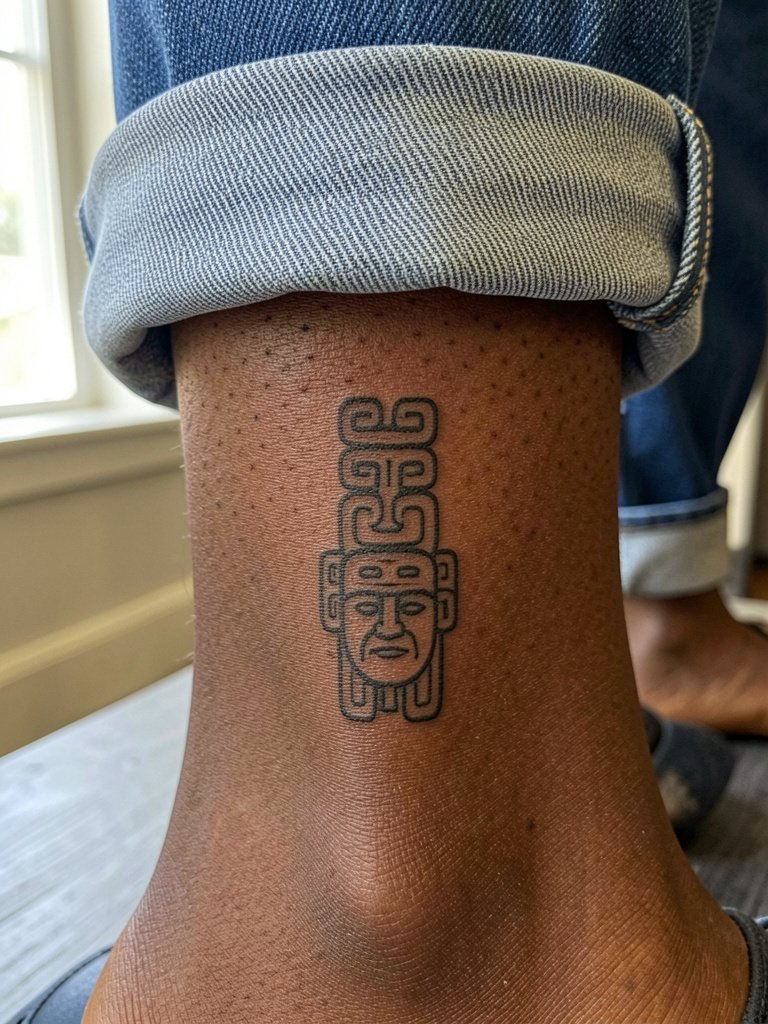
Ankle totems must be chunkier than they look in reference photos to survive washing and footwear friction. The ankle is low to moderate pain and a one-hour session often covers a small totem. Mistakes include requesting very thin negative lines which fill in from shoe rubbing and frequent washing. For the session wear shoes you can easily remove and bring socks that do not rub the area, or choose low-cut canvas pairs like slip-on sneakers. Because Aztec imagery can be culturally meaningful, avoid reproducing motifs tied to ritual practice without permission.
12. Full-Shoulder Mandala-Warrior Hybrid
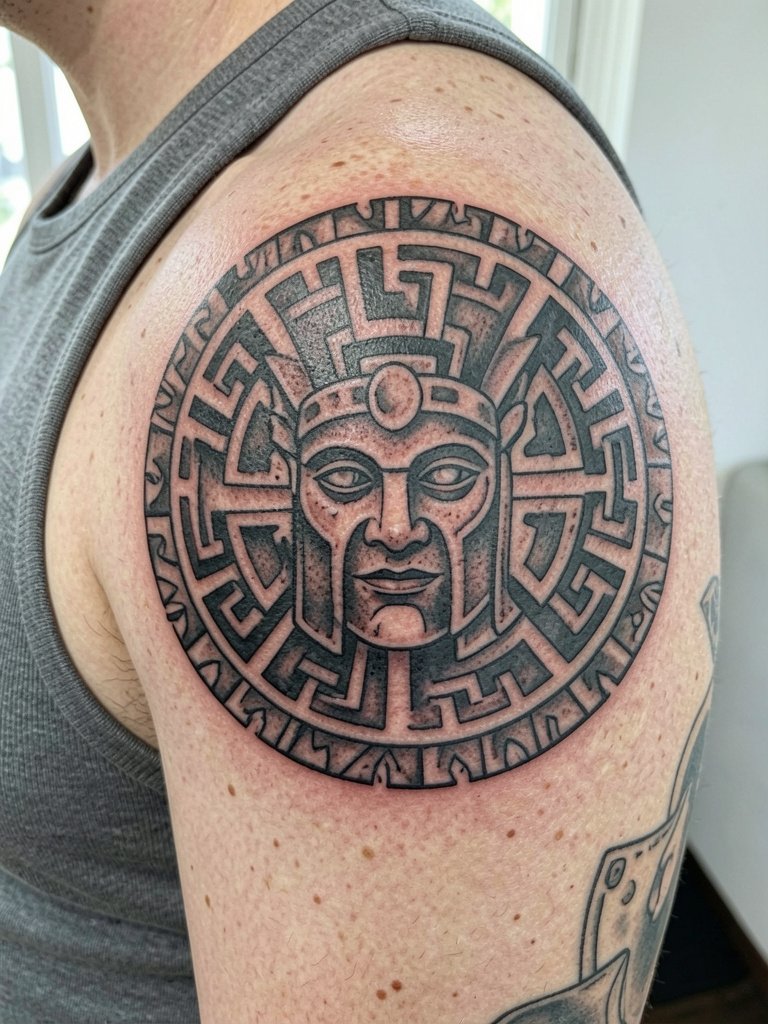
A shoulder mandala hybrid benefits from a decisive outer ring and broad negative channels so the radial steps remain readable over time. Discuss how the ring will sit when the arm is relaxed and when raised so the radial lines do not warp across the deltoid. Shoulder sessions are lower on the pain scale and often done in two-hour increments. An error I see commonly is adding micro-dotwork inside each step, which blurs into gray at the one- to two-year mark. For styling choose sleeveless or wide-strap tops that let the mandala sit visible, such as tank tops with wide straps. Note origin respect and avoid direct copies of sacred circular motifs used in ritual contexts.
13. Neck Nape Warrior Crest
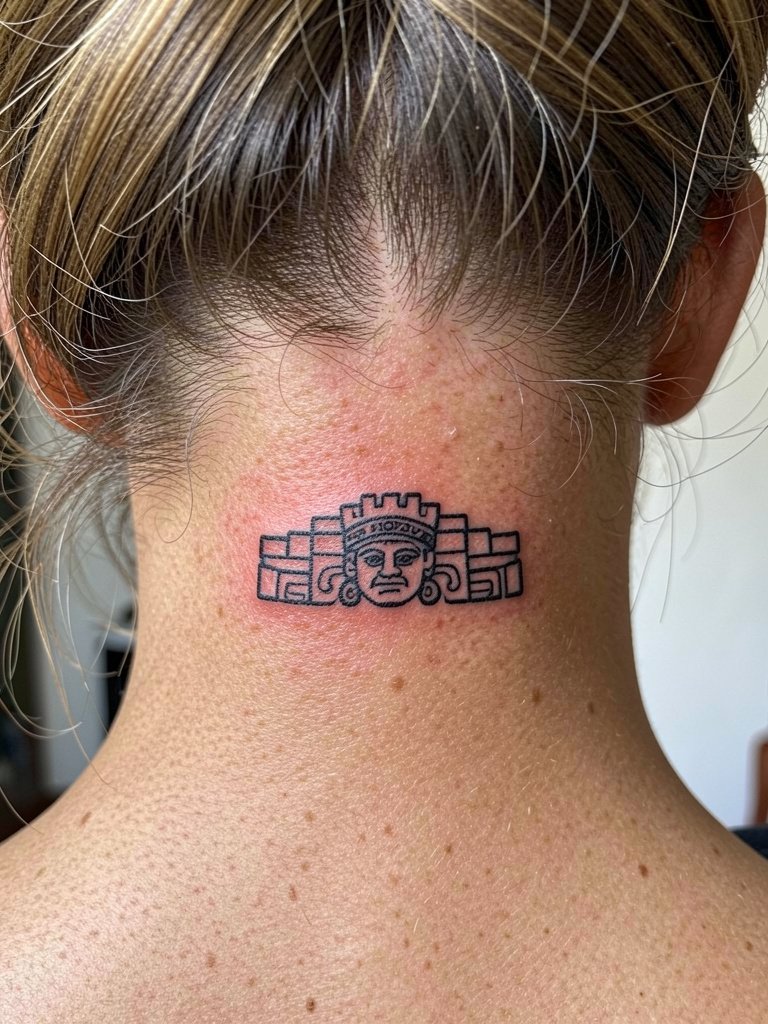
Nape pieces require decisive black shapes because the area moves with the head and can show blur sooner than other zones. One group of artists says the nape is too mobile for fine-line detail and will widen lines preemptively for longevity. Another group says with very controlled needle depth and careful aftercare, tighter linework can survive. For placement, ask to see healed nape examples at one and three years. Nape sessions are moderately painful and usually short. Wear hair in an easy updo so the artist has access. Because these motifs come from cultural sources, avoid copying ritual headpieces.
14. Lower Leg Single-Panel Warrior Emblem
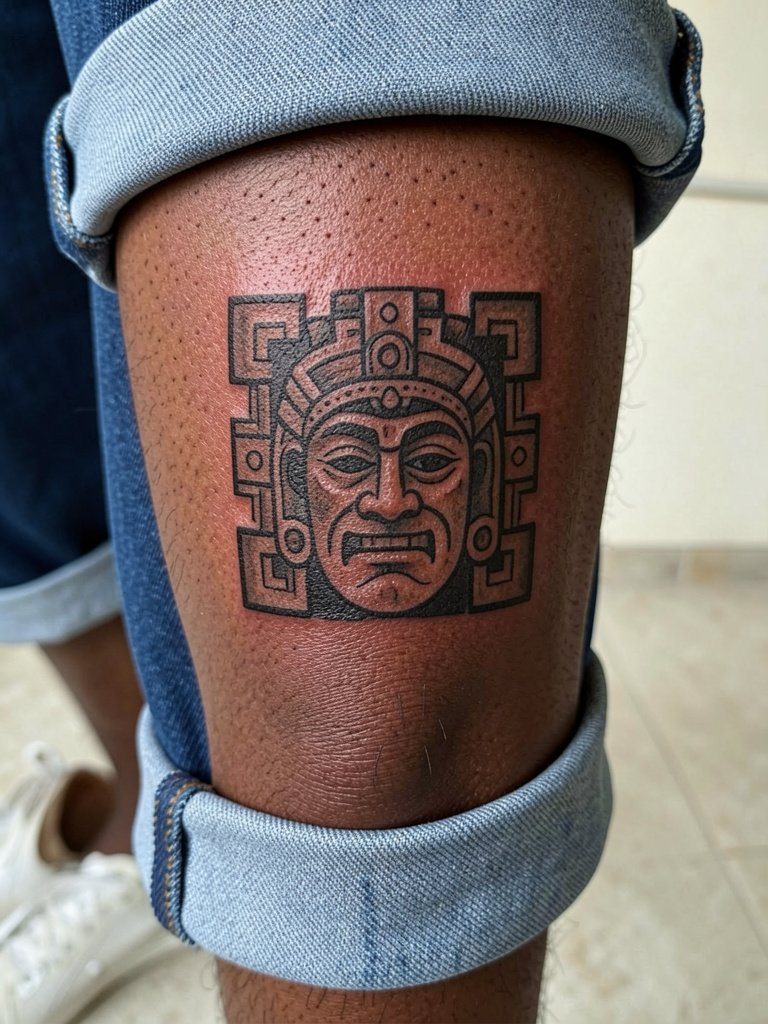
A lower leg emblem holds up well because the skin there is relatively stable and not subject to constant friction like hands. Ask for a touch-up plan in your consultation since lower leg sun exposure can lighten saturation over years. Sessions are moderate and often completed in an hour for emblem-sized pieces. The mistake is overcomplicating the negative bands, which can blend during healing. For styling try cropped trousers or mid-calf boots and consider drawstring linen pants for shows and comfort during healing. Remember to credit Aztec influences and avoid using community-specific insignia.
15. Full Back Stylized Warrior Mural
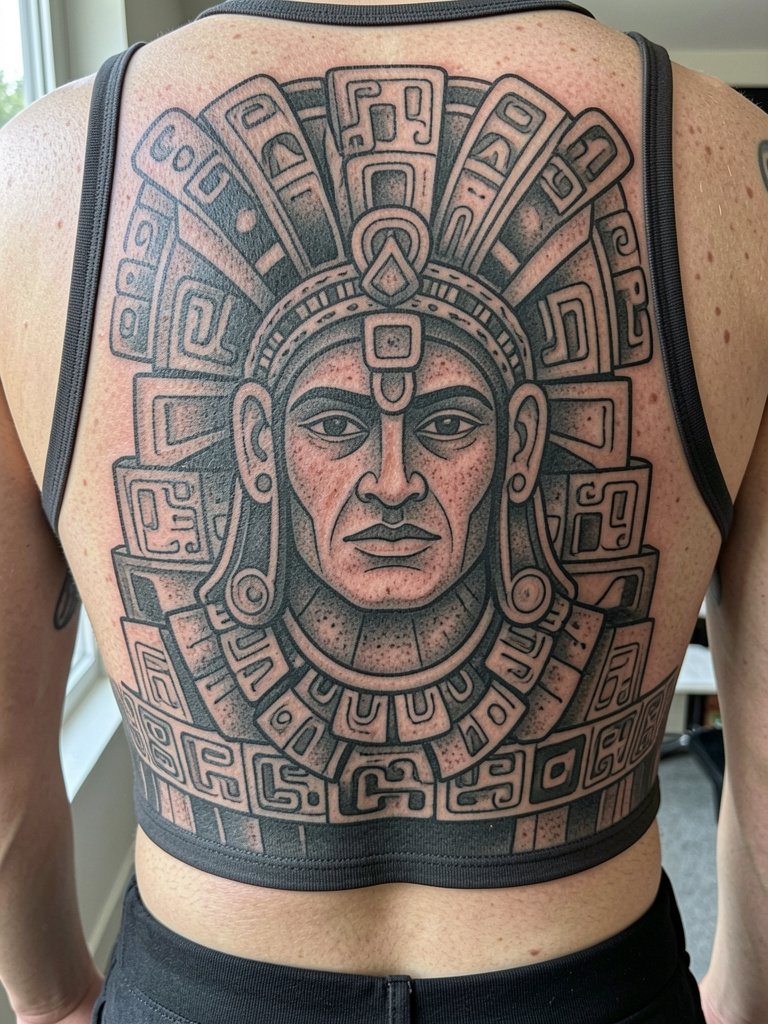
Full-back murals are a commitment but they age well when the composition uses large shapes and clear negative bands. In consultation have the artist map how panels align with the spine and shoulder movement so elements do not get swallowed by muscle shifts. Full-back sessions require multiple long appointments and can be staged across weekends. A typical oversight is packing tiny glyphs into margins which disappear once the skin settles. For session comfort bring loose, button-up layers and consider soft cotton robes for between-block warmth. Because Aztec art has living descendants, avoid reproducing sacred, community-only designs and ask about inspiration sources.
Frequently Asked Questions
Q: Will Aztec warrior motifs be seen as cultural appropriation or homage?
A: Opinions split into two clear positions. One camp believes using Aztec motifs can honor a culture when done with care, credit, and permission from people connected to the imagery. The other camp feels that outsiders copying sacred symbols without context or consent is appropriation and can harm communities. My practical advice is to learn the meaning behind the motifs you like, credit the tradition in your consultation, and avoid exact copies of ritual objects.
Q: How should I prepare clothing-wise for a sternum or rib session?
A: Wear a fitted sports bra or cropped top that the artist can lift and replace without rubbing the fresh ink, and avoid high-waist bottoms that force fabric over the area. Bring a loose button-up layer to put on after the session for minimal friction. For rib sessions a sleeveless button shirt makes position changes easier.
Q: How long until a bold black Aztec piece needs a touch-up?
A: For solid blackwork most pieces stabilize by six months and often need a minor touch-up within one to three years depending on sun exposure and friction. Areas like hands and feet usually require earlier touch-ups than the torso. Keep a note of which zones you use daily and schedule a check-in with your artist around the six to twelve month mark.
Q: Where can I find portfolios and healed examples without naming individual artists?
A: Search platform tags that focus on Aztec-inspired work and healed images such as #AztecTattooHealed or #MesoamericanInk and use location filters on Instagram and TikTok to find nearby studios. Tattoodo and Reddit threads often host portfolio collections and before/after shots that show healing across skin tones.
Q: Can I pair visible Aztec pieces with everyday clothing without hiding them?
A: Yes, designs with broad black areas and clear negative borders show through casual clothing better than micro-detail pieces. Try open-back tops, wide-strapped tanks, or cropped shirts to showcase shoulder, back, and collarbone work. A practical item to have during recovery is a light button-down shirt that covers yet does not rub new ink.
