
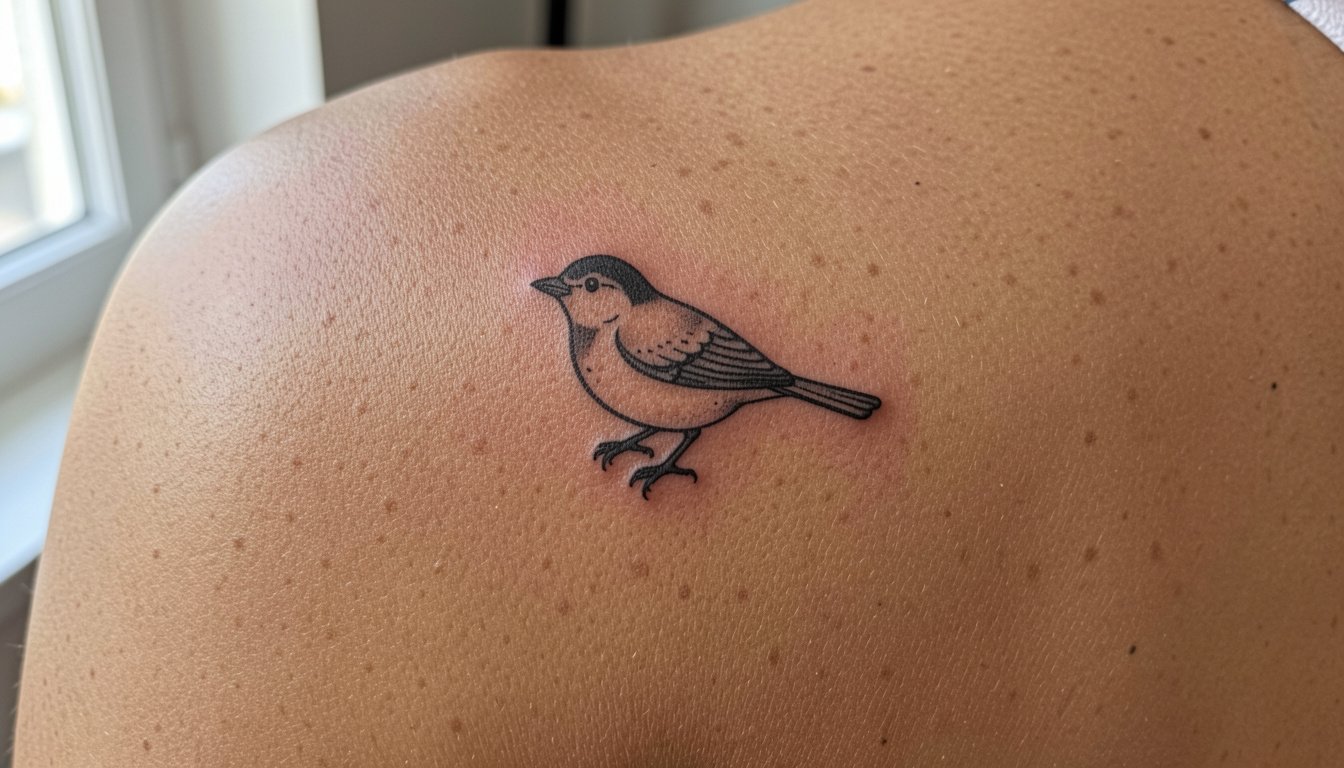
Tiny bird tattoos often look delicate the day you get them, but I have noticed the ones that still read crisp after several years share two things. They keep enough negative space so tiny feathers do not blur, and their linework is a touch bolder than the saved single-needle photos people paste into consultations. Expect a little tradeoff between the exact look you want today and how legible the bird will be on healed skin years from now.
1. Fine Line Flying Sparrow on Inner Wrist
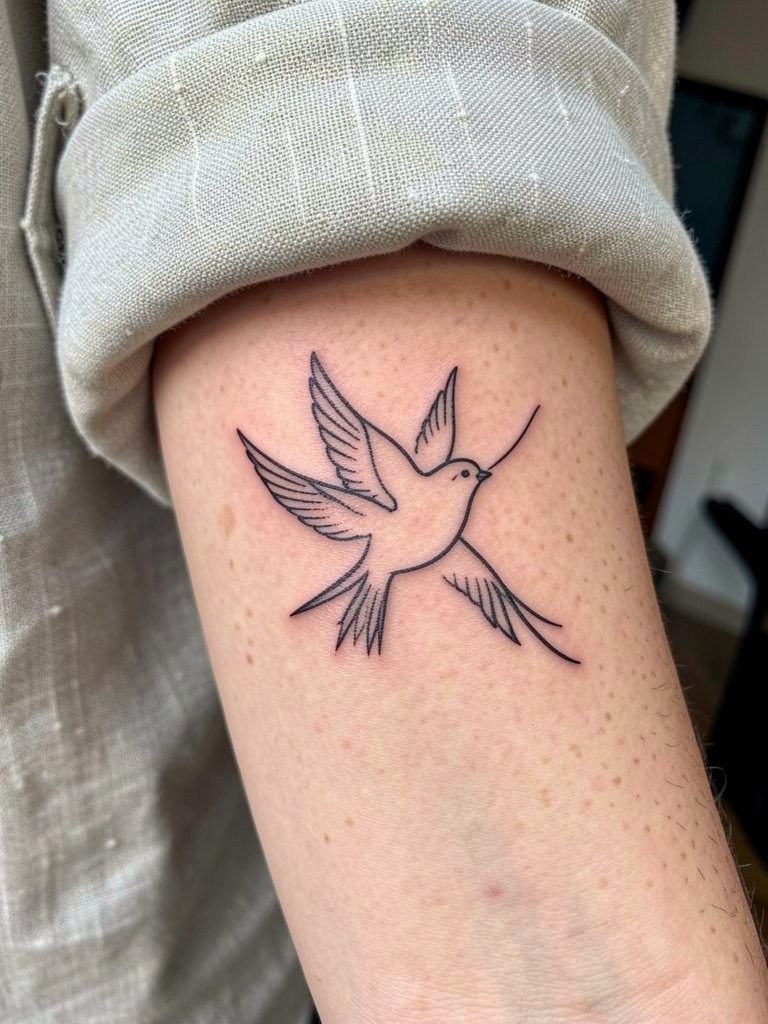
A tiny sparrow on the inner wrist makes a discreet, everyday piece. I recommend bumping the linework a hair heavier than the thinnest single-needle reference so the tiny feather barbs do not merge at year two. Discuss specific line weight and a reference photo at three inches versus five so the artist can show how the bird reads at wearable size. The inner wrist gets frequent washing and sunlight exposure. Expect softening by year two and a likely touch-up around year three if you want crisp edges. Pair this with rolled sleeves and a slim cuff bracelet so the bird sits in the open when you gesture with your hand. For a session wear option, choose a linen button shirt so the artist has clear access without fabric tugging.
2. Minimal Silhouette on the Outer Ankle
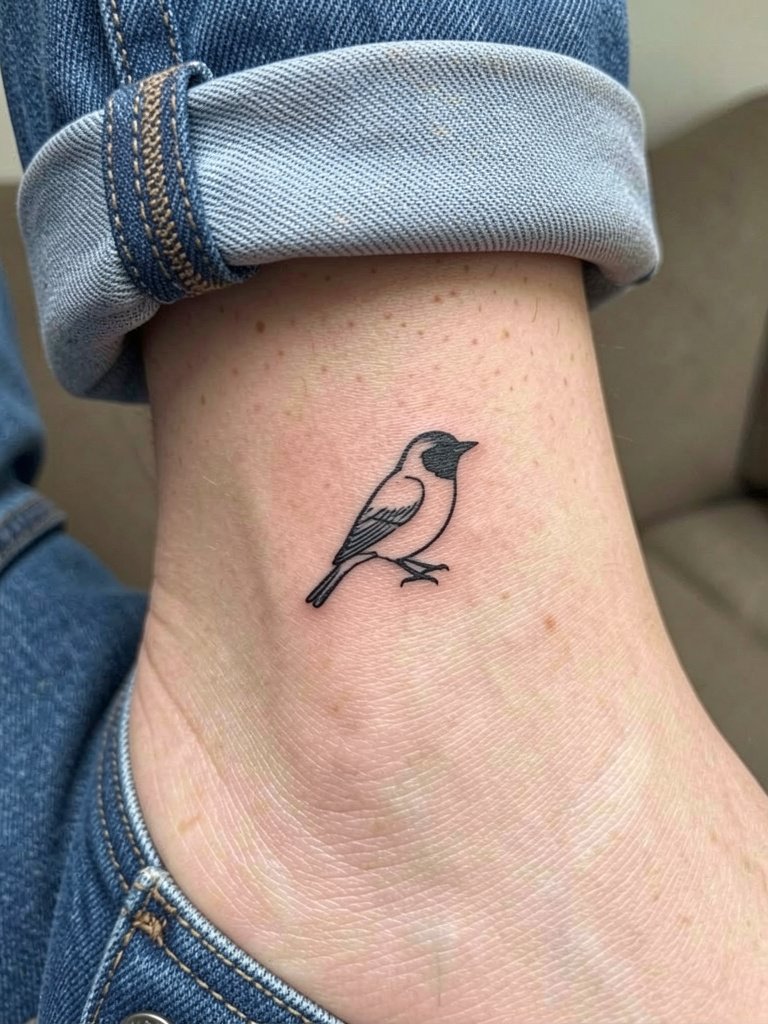
Ankle silhouettes survive well if you choose a bold, stable outline instead of the faint contour some clients request. The ankle tolerates compact shapes, but thin twig-like legs can blur from constant shoe friction. Ask for a slightly bolder outer line and clean negative space inside the body so the shape reads from a few feet away. Expect visible crispness at six months, mild softening at two years, and potential color loss on the toe-side after heavy sandal seasons. The ankle heals under socks and shoes so be gentle the first week. When you want to show it off, pair the design with low-profile ankle boots or cuffed jeans that reveal the placement.
3. Stipple Hummingbird Behind the Ear
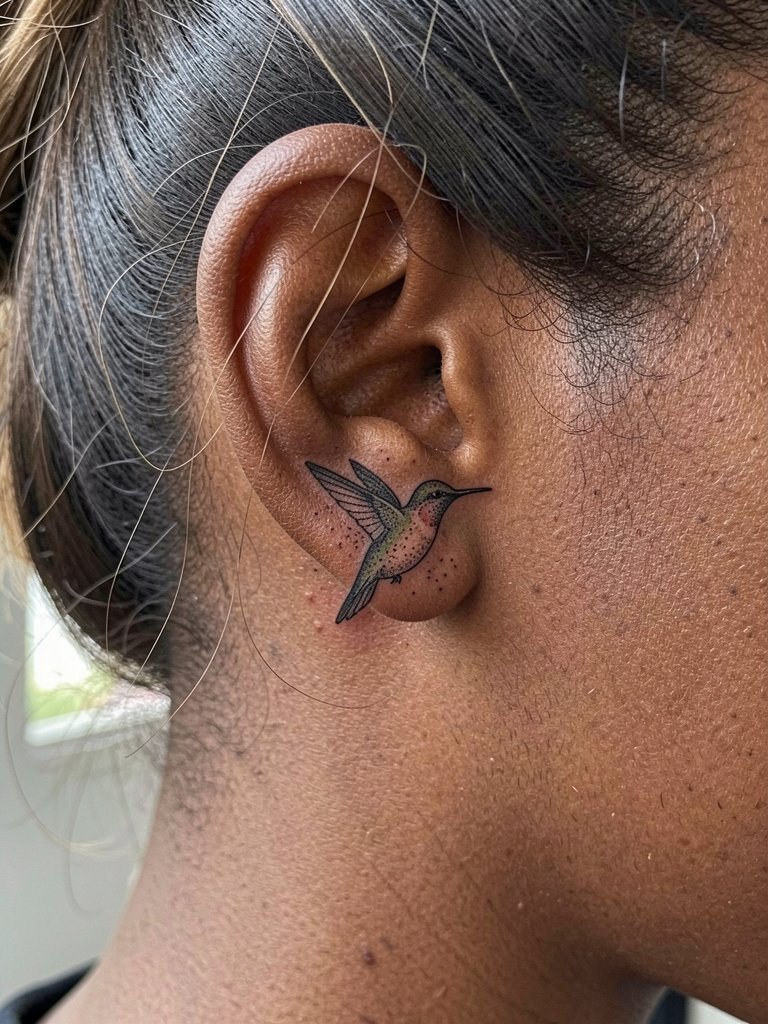
Behind-the-ear placements are tiny canvases that reward delicate stipple shading, but they demand precision. Book an artist experienced with dot work and ask to see healed photos of similar placements on comparable skin tones. The area is thin-skinned so the sensation is sharp yet brief, and you may need a short break if multiple passes are required. The most common mistake is insisting on ultra-fine dots without enough density, which reads like a faded smudge over time. For show-off styling, short hair or a simple metal hair clip set frames the area and keeps the ink visible without covering it.
4. Micro-Realism Sparrow on Inner Forearm
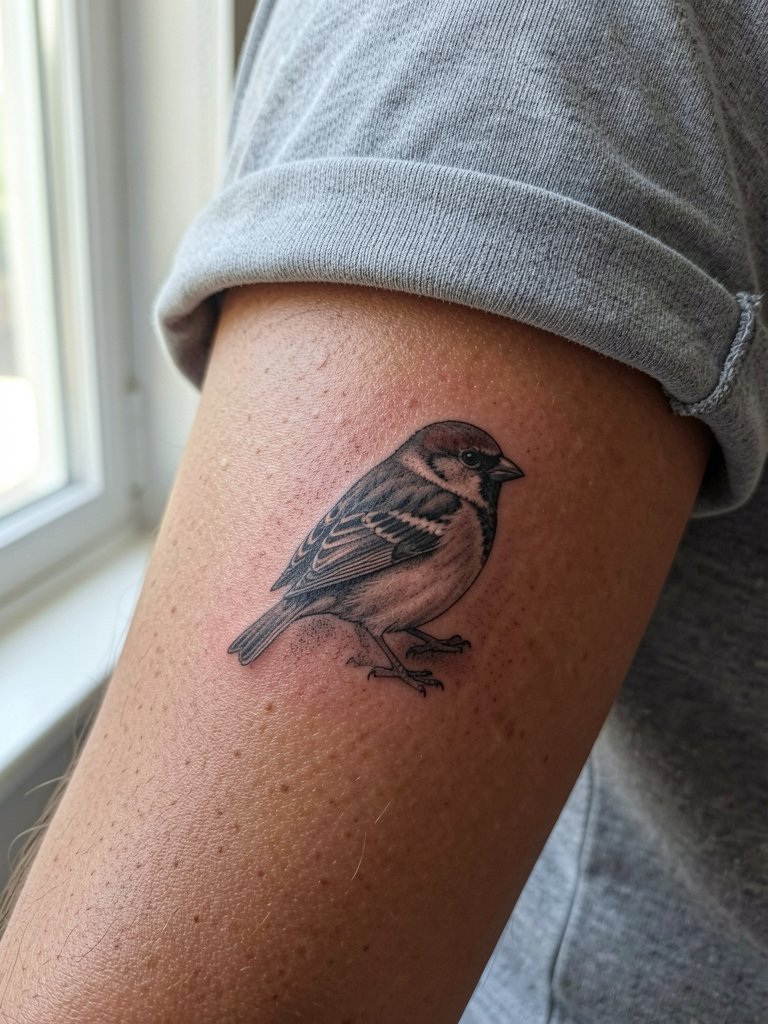
Micro-realism brings feather detail into a very small space, but the inner forearm can show aging differently than the wrist. Ask the artist to show a three-month and three-year healed progression for similar pieces so you know how contrast holds. The usual error is crowding too many tiny highlights into a one-inch square; the fix is slightly enlarging the focal area by 20 percent so details survive longer. Expect strong reading at six months, then gradual flattening of micro-contrast after two years. For session comfort, forearm pieces are low pain and usually finish in a single short sitting. If you prefer a more obvious piece, choose a marginally larger size so stipple shading keeps its texture.
5. Negative Space Bird on the Collarbone
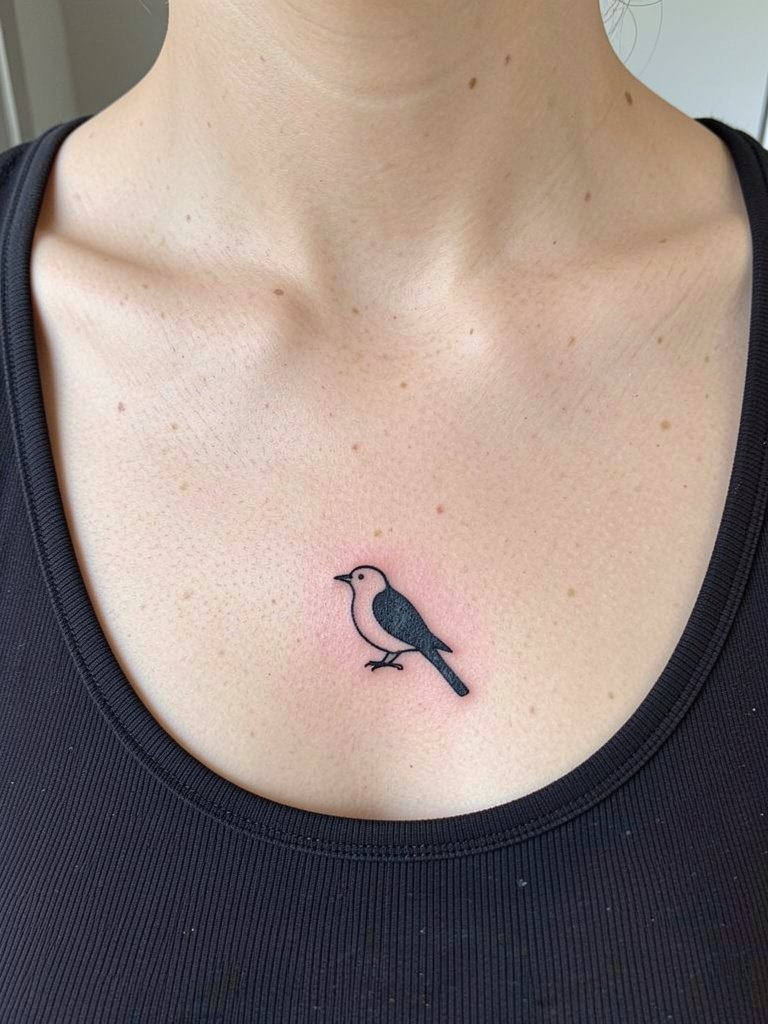
Collarbone placements need composition that respects bone contours. A negative-space bird gives a graphic result that reads well from across a room, and it ages more predictably than ultra-fine internal detail. Tell the artist exactly how far from the clavicle you want the wingtip to sit so the piece does not migrate into shadowed skin under the collar. The common mistake is placing the bird too close to the bone where lines can thin as the skin moves. Pain is moderate near the collarbone, so expect sharp moments during the session and plan for short breaks. For evenings out, pair the piece with an easy scoop-neck tank to let the negative space read clearly.
6. Geometric Swallow on the Side Ribcage
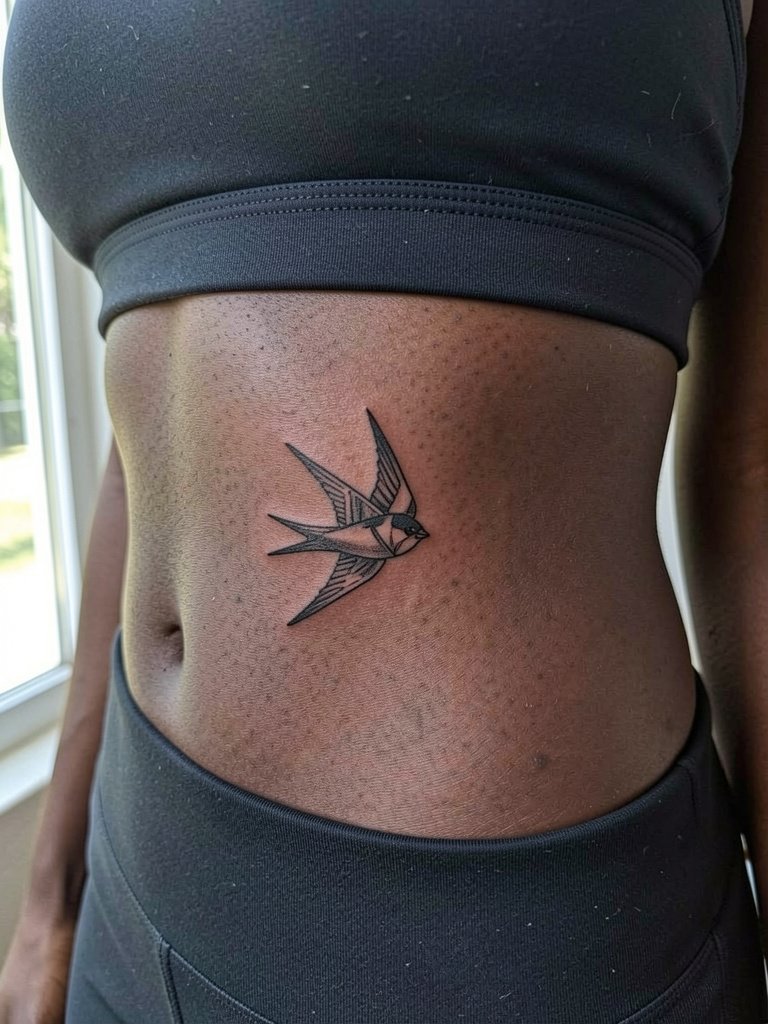
Fine line on the ribs splits artists into two camps. One camp argues the skin stretch and frequent movement in that zone blur ultra-fine lines within two years. The other camp maintains that with slightly wider spacing and consistent needle depth the lines settle and stay legible. If you lean toward the delicate look, compromise by increasing spacing and accepting a modest increase in session time. The rib is a high-pain zone, and the session often requires short breaks. For access and comfort, bring a supportive sports bra that the artist can work around without fabric shifting.
Pre-Session Essentials
The wrist, ear, collarbone, and ribcage pieces above have different access and healing requirements, so a few targeted items smooth the chair time and first week.
-
Stencil transfer paper kit. Lets you preview linework placement on skin, which is especially helpful for the inner wrist and collarbone where small shifts show up immediately.
-
Topical numbing cream. Applied per instructions before sessions on sensitive zones like the ribs it reduces flinching during fine-line passes without affecting line clarity.
-
Thin protective film roll. Useful for ankle and finger placements that face friction from shoes and daily hand movement in the first 48 hours.
-
Fragrance-free body wash. Gentle cleansing helps avoid irritation on delicate placements while you shower.
-
Aquaphor healing ointment. A thin application in the first days keeps fine line pieces moisturized without clogging needle channels.
7. Tiny Outline Swift on the Side of a Finger
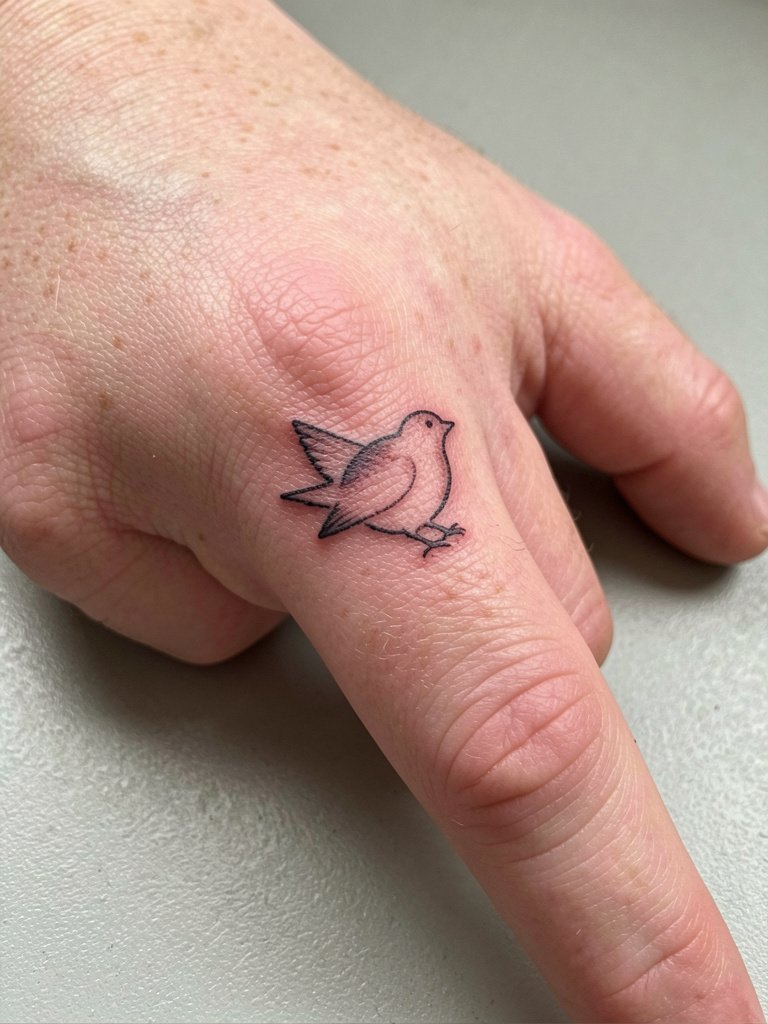
Fingers are high-maintenance for tiny birds because constant hand washing and thin skin accelerate fading and occasional blowout. The practical choice is a slightly thicker outline than you might want at first. Ask the artist how the line will sit in the first session and when they recommend a touch-up, because many finger pieces need a touch-up within six to twelve months. The session feels sharper than an arm but often finishes quickly. The typical error is insisting on hairline legs and feathers, which blur into a soft spot. To frame a finger bird, consider delicate stacking rings that sit either side of the piece so the shape reads as an intentional styling choice. Try a set of delicate stacking rings to complement the placement.
8. Dot-Work Kingfisher on the Shoulder Blade
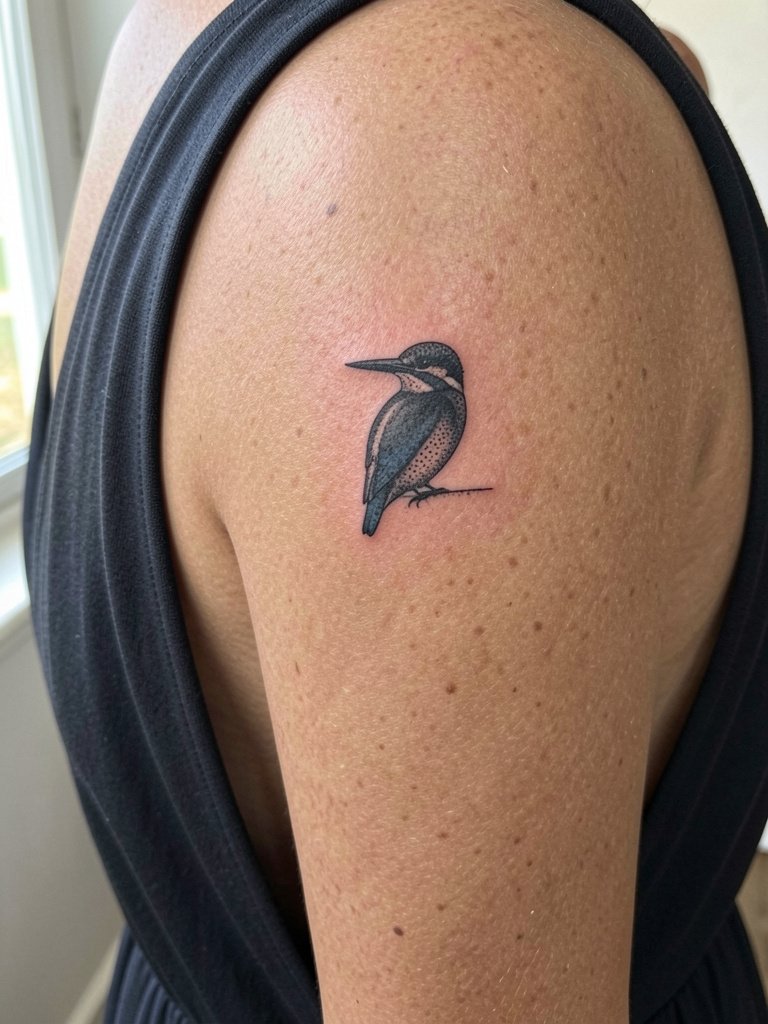
The shoulder blade is forgiving for dot-work because the skin there moves less and the piece is easy to display. Ask for healed examples of stipple shading so you can judge how dot density holds on your skin tone. A common mistake is using too few dots at the start, which flattens into a faint patch after a year. Sessions here are comfortable and often finish in one or two short passes without heavy saturation. For show-off outfits, an open-back dress or top frames the shoulder blade, and a flowing open-back midi dress keeps the area visible during social occasions.
9. Flight Line of Three Birds Across the Upper Back Near the Nape
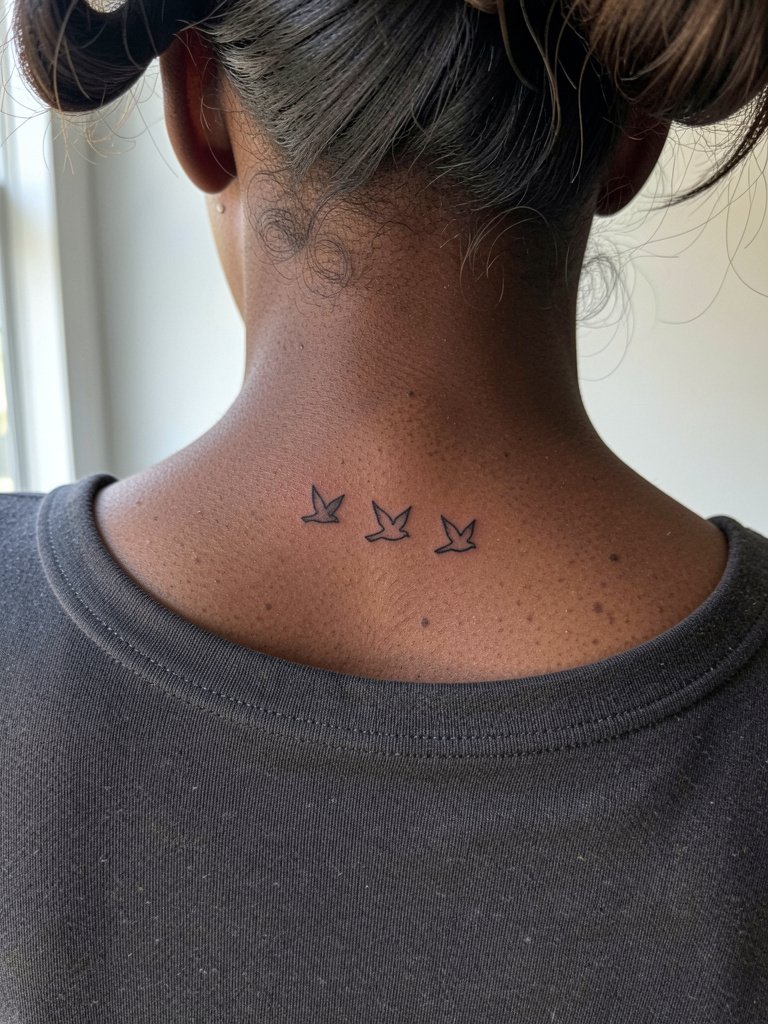
Three small birds spaced in a flight line are a classic composition that benefits from consistent spacing and stable linework. The nape area can cause friction from collars and hair, so ask the artist to plan spacing that keeps each bird distinct even if the skin shifts slightly. The mistake I see is compressing the three motifs too close together which merges into a single dark smudge after a few years. Session discomfort is low near the upper back, and healing is fast when you avoid tight collars for the first week. For styling, a wide-neck top or a relaxed updo shows the flight line while protecting the area during recovery.
10. Origami-Inspired Minimal Bird on the Top of the Foot
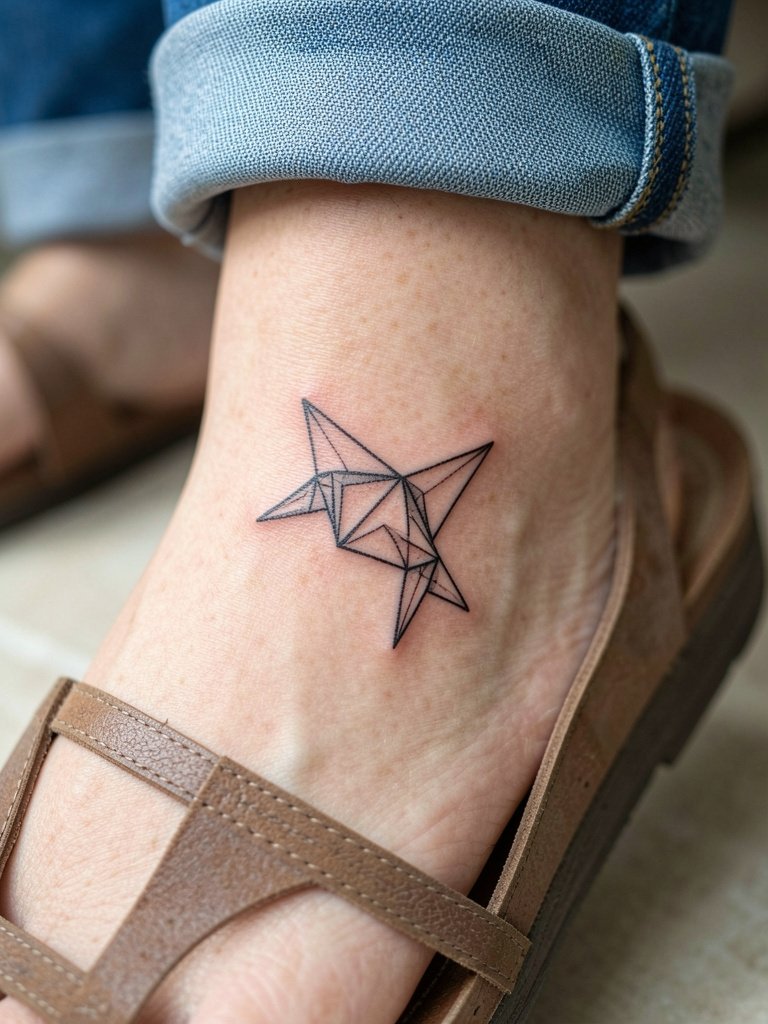
Top-of-foot placements look striking but suffer from shoe friction and sun exposure. For geometric designs choose slightly thicker line junctions where angles meet to prevent junctions from feathering out. Ask the artist about a realistic healed timeline for that exact paper-fold style, because sharp corners tend to soften first. The session can be tender and sometimes requires two short passes. Expect a touch-up sooner than larger body placements. Sandals show the piece well, so consider footwear choices like flat summer sandals when you want the design to be visible without rubbing from closed shoes.
11. Tiny Bird Silhouette on the Sternum
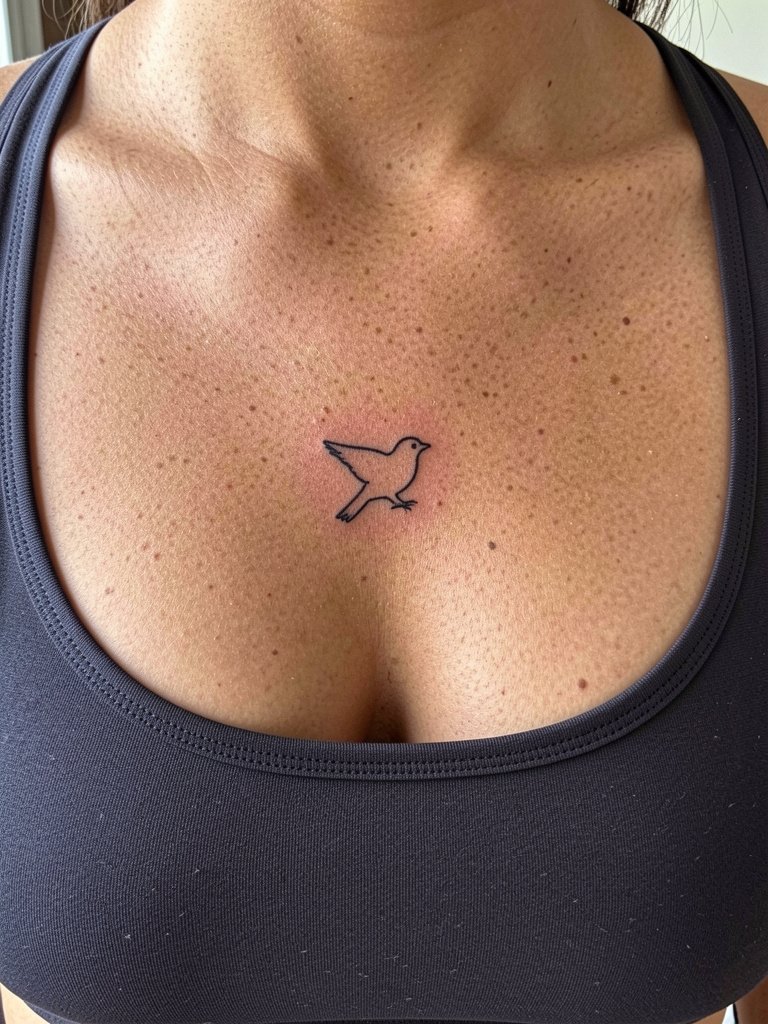
Sternum placements require careful planning because the skin curves and shifts with breath. The typical mistake is picking a design with interior fine detail that blurs at the center line. I advise a solid silhouette or slightly simplified interior so the shape keeps its identity as the skin moves. The sternum can be a high-pain area, and sessions may need breaks. If the bird has any cultural or religious connotations, state your intent so the artist can discuss iconography and respectful execution. For session comfort, wear a fitted bandeau that the artist can work around without you exposing more than necessary.
12. Tiny Swallow on the Upper Thigh Outer Side
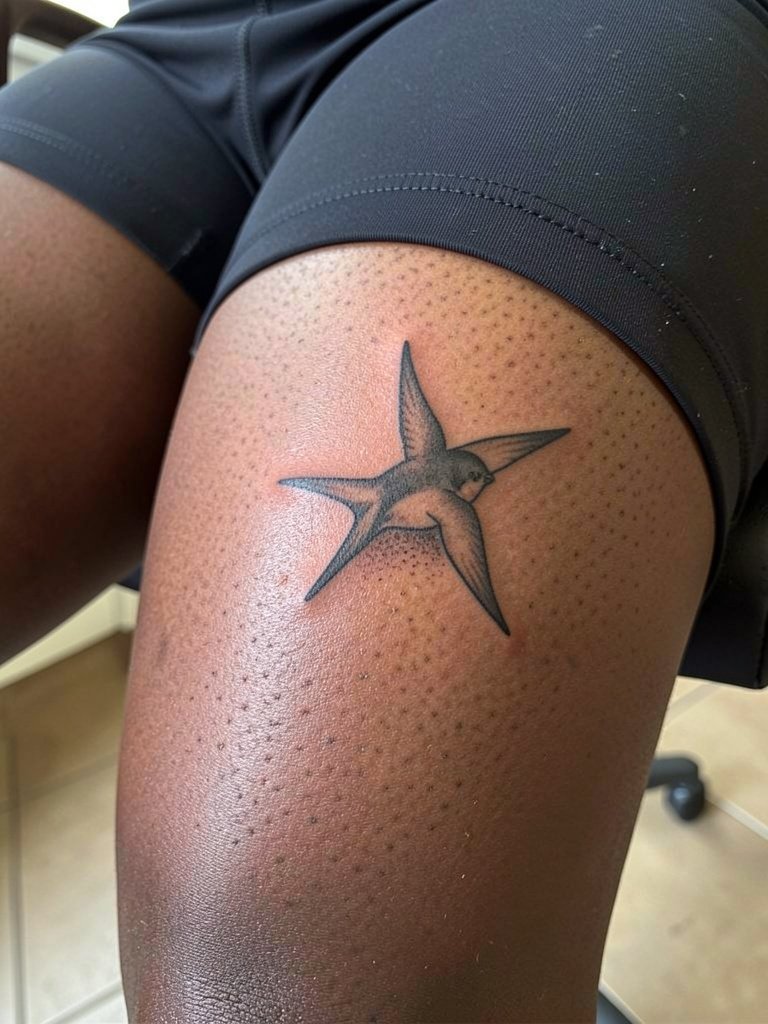
Outer upper thigh is an excellent option for a private tiny bird that you can still show in swimwear or shorts. Because the area rarely sees harsh sun or friction, fine line and light stipple work often last longer here than on hands. Discuss with the artist how the piece will sit when you wear both shorts and swim bottoms so the bird does not end up on a fold. Many clients underestimate the need for a small touch-up at the one- to two-year mark for clarity. For showing the piece casually, high-waisted shorts or a simple denim short hover below the design and let it peek out naturally.
13. Tiny Flight Silhouette on the Back of the Wrist

The dorsal wrist is a prime place for tiny flight motifs but it faces high movement and frequent sun. The most common mistake is choosing a hairline stroke that disappears after repeated washing. Ask the artist to increase contrast slightly and to place the design so it does not sit directly over a wrist crease. Sessions here are brief and usually tolerable. Expect a softening of detail at year two and a likely touch-up if you want long-term crispness. Accessorize with a simple bracelet that sits below the piece so the bird appears undisturbed when you move your hand.
14. Micro Line Silhouette at the Nape Hairline
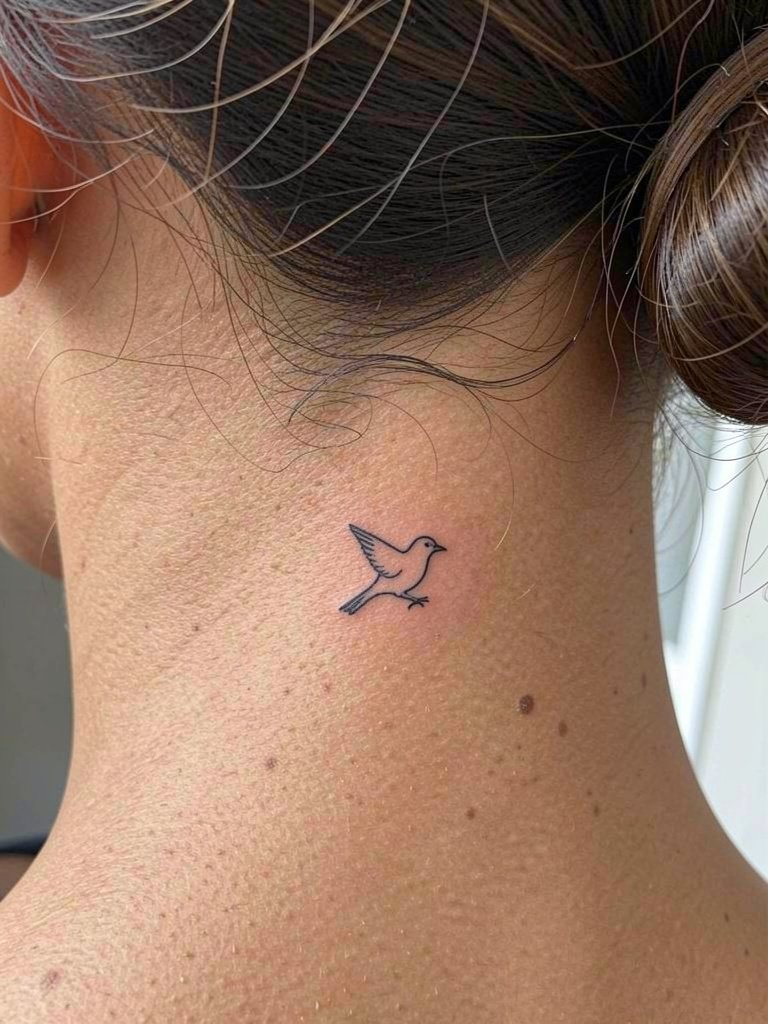
A tiny nape piece reads best with a confident continuous line that avoids tiny interior detail. That area can be disturbed by hair oils and friction from collars, so the design should be bold enough to resist early flattening. Ask the artist how they manage touch-up timing for hairline nape work and whether they recommend a short follow-up at six months. If you regularly wear high collars, plan to avoid them for the first week. For showing the piece, a low bun or short haircut keeps it visible without danger of tugging at the healing skin.
15. Tiny Perched Finch on the Calf

The calf provides a stable, low-friction canvas for tiny perched birds, and small stipple shadows often hold well there. Recommend asking for a slightly denser belly stipple to preserve the impression of volume over time. The common mistake is compressing detail into a too-small footprint, so consider a few extra millimeters for breathing room. Sessions on the calf are comfortable and usually finish in a single sitting. For casual wear, cropped denim or a midi skirt reveals the area in a flattering way.
Frequently Asked Questions
Q: How small is too small for a tiny bird and where do line details fail first?
A: Micro detail starts to fail when the single-needle strokes are closer than one millimeter apart, especially on high-use areas like fingers and wrists. Expect feather barbs to blur first, followed by junctions near the beak. If you want precise internal detail, increase the size slightly or ask for simplified contrast that keeps the bird readable.
Q: Which placements need touch-ups most often and how long before a touch-up is typical?
A: Fingers, hands, and top-of-foot placements usually need touch-ups sooner because of friction and exposure. Many artists recommend a touch-up window between six and eighteen months for those zones, while shoulder blade and thigh work often go two to three years before a cosmetic touch-up if you want restored crispness.
Q: Where can I find healed examples and portfolios without naming specific artists?
A: Search platform tags and location filters to find portfolios and healed photos. Try targeted hashtags, check short-form video platforms with location filters for healed shots, and browse portfolio aggregators by keywords like "tiny bird healed" or "micro bird tattoo." Reddit threads also collect real healed photos from people across skin tones.
Q: Are there cultural concerns with bird imagery I should consider?
A: Some bird motifs carry specific cultural or spiritual meaning, so state your intent and ask how the iconography will be handled. If a bird design originates from a living tradition, ask the artist how they plan to credit or adapt motifs respectfully and whether a collaboration with someone knowledgeable is appropriate.
Q: What should I wear to a ribcage or sternum session for access and comfort?
A: Choose fitted, non-shifting garments that the artist can work around without you disrobing further. For ribs and sternum a snug sports bra or fitted bandeau keeps coverage in place while letting the artist reach the area. Bring a loose button-up to wear to and from the studio so you do not tug over fresh skin.
Q: Is color worth it for tiny bird tattoos or is black and grey more reliable?
A: Black and grey holds edge definition longer on very small work because color saturation thins with tiny needles and can require more frequent touch-ups. If you want color, pick a limited palette and plan for a one-year check to refresh saturation.
