
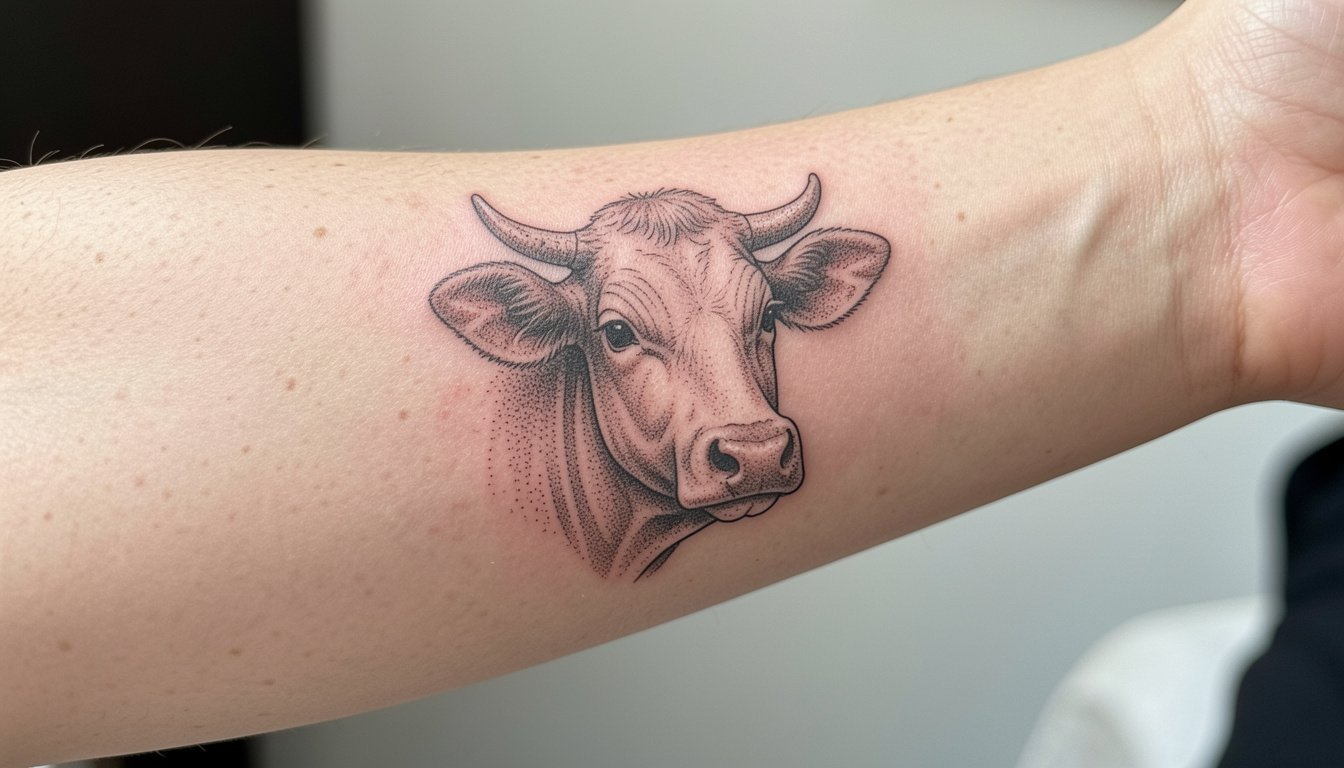
Small strokes and ultra-fine portraits look great on a mood board, but they often blur into a single patch on moving skin. For two-headed calf tattoos, the safest pieces balance readable anatomy with a little breathing room between the heads and slightly stronger linework where facial features matter. That keeps expression intact as the skin settles, and it makes the design read like a poem rather than a novelty at two years healed.
1. Micro-Realism Twin Calf on Outer Calf
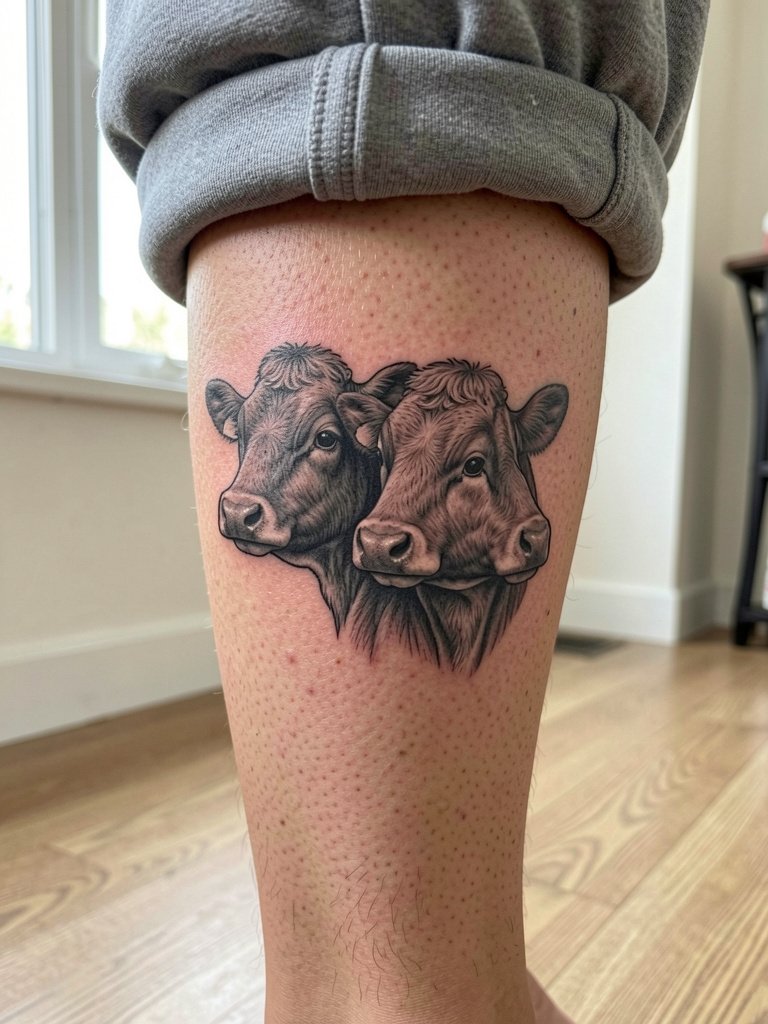
Micro-realism keeps expression intact on a medium-scale outer calf piece. I recommend this when you want tenderness in the faces but still need enough room for eyelids and nostrils to settle. Tell your artist you want slightly wider spacing between heads so the eyes do not merge as the skin softens. A common mistake is asking for portrait-level detail in a two-inch space, which leads to blurring and early touch-ups. Session time for a medium micro-realism calf is often one long sitting or two shorter sessions, and pain is moderate for the outer calf. For warm-weather reveal pair with midi skirts that let the piece show without constant rubbing.
2. Fine Line Paired Heads on Inner Calf
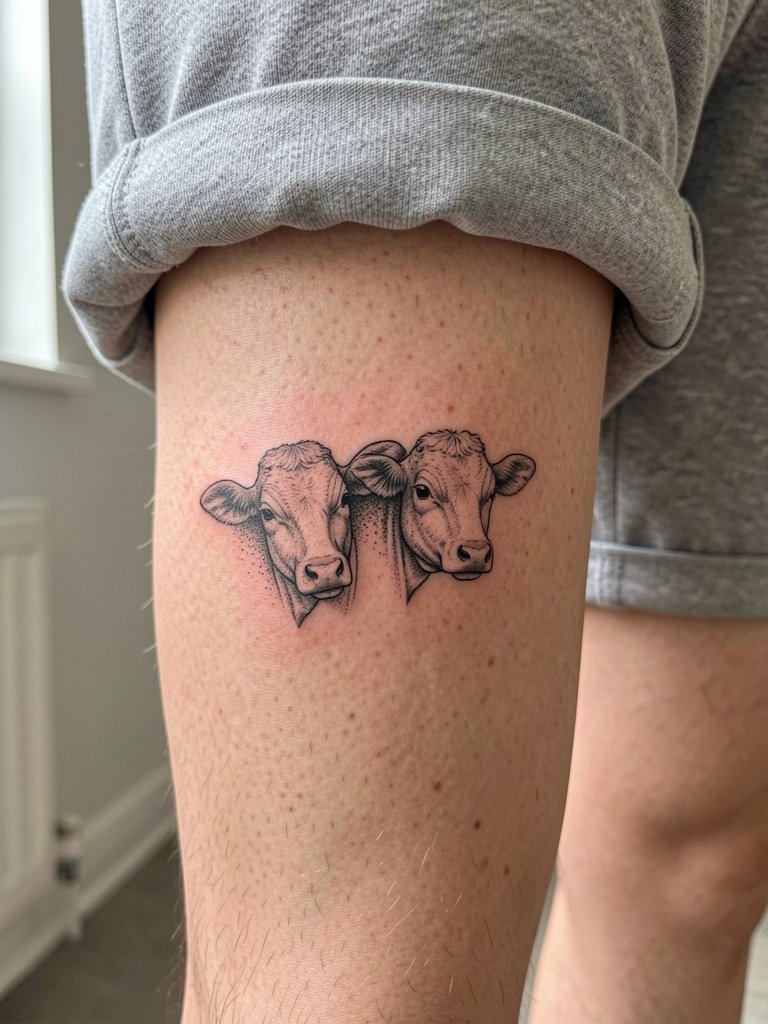
Fine line reads as delicate and literary on the inner calf, where the flesh is smooth and the piece can stay discreet. Recommend this if your references emphasize single-needle contour and minimal shading, but ask the artist to thicken critical contour lines over eyes and nostrils so they keep definition. The inner calf moves less than the ankle, but it still stretches with walking, so expect a touch-up at one year if you want crisp micro details. For session wear, pull on loose joggers that roll easily above the area.
3. Blackwork Silhouette Duo on Lower Calf
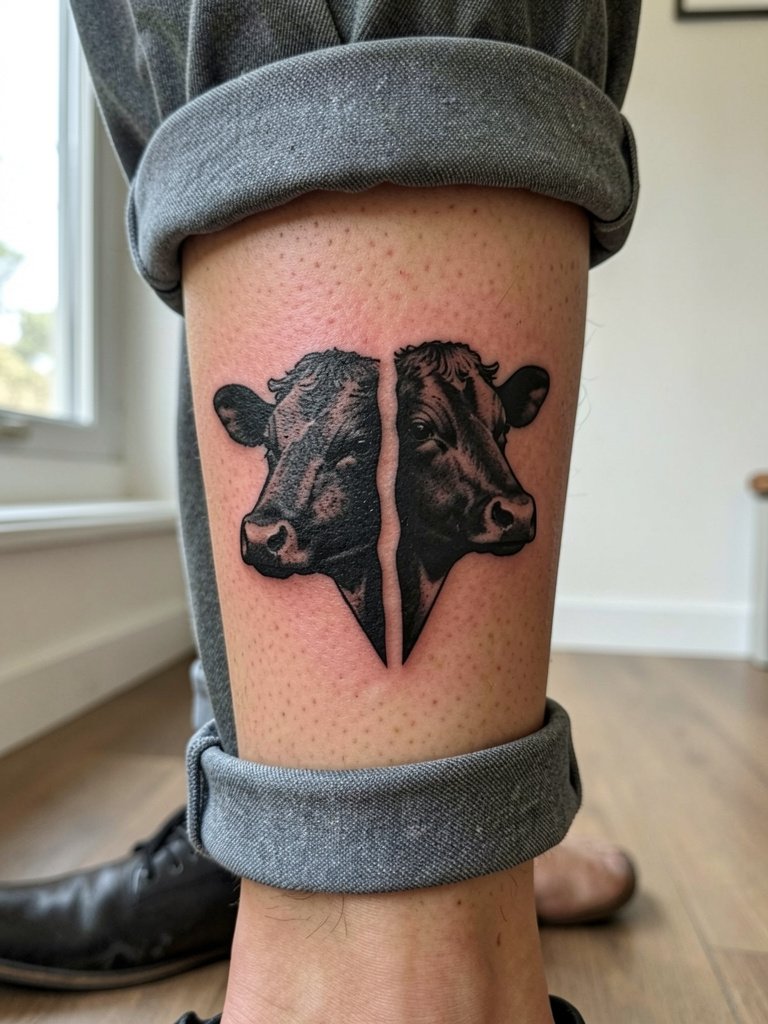
Blackwork silhouette is the best pick when you want strong readability from a distance. It solves the readability problem without relying on tiny facial detail. Ask for crisp negative-space edges between the two heads so the overlap reads as intentional separation, not a merged blob later on. A frequent error is scaling a silhouette too small near the ankle where friction from socks causes edge wear. Expect medium pain near the ankle and a single visit of 60 to 120 minutes. Show-off styling pairs well with ankle-length pants that frame the silhouette.
4. Poem Fragment with Tiny Twin Heads on Ribcage
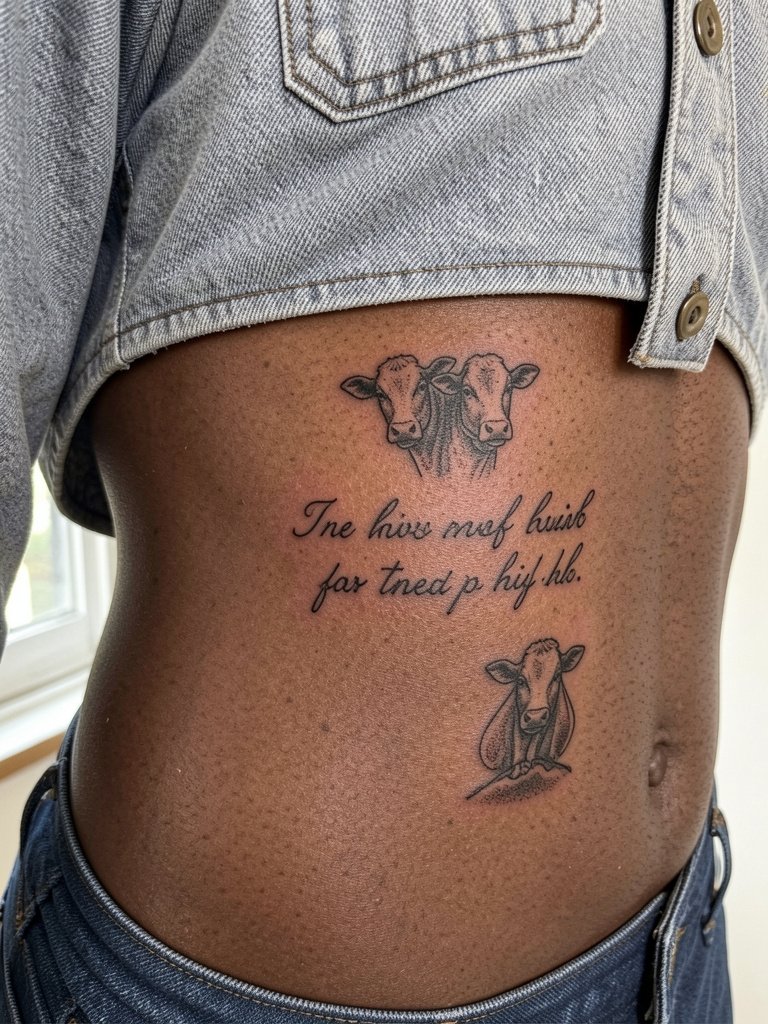
Pairing one or two lines of script with micro calf heads works if you accept the trade-off: the words anchor context but risk blowout if the script is too small. One camp favours adding text so the poem is explicit. The other camp prefers image-only pieces to avoid script sizing issues and to keep the image legible over time. If you choose script here, ask for a slightly larger script size and a simple sans cursive that ages well. Ribcage sessions are higher pain and often split across two sittings. For session comfort wear a button-front shirt that opens easily for artist access.
5. Constellation Twin Heads Below Collarbone
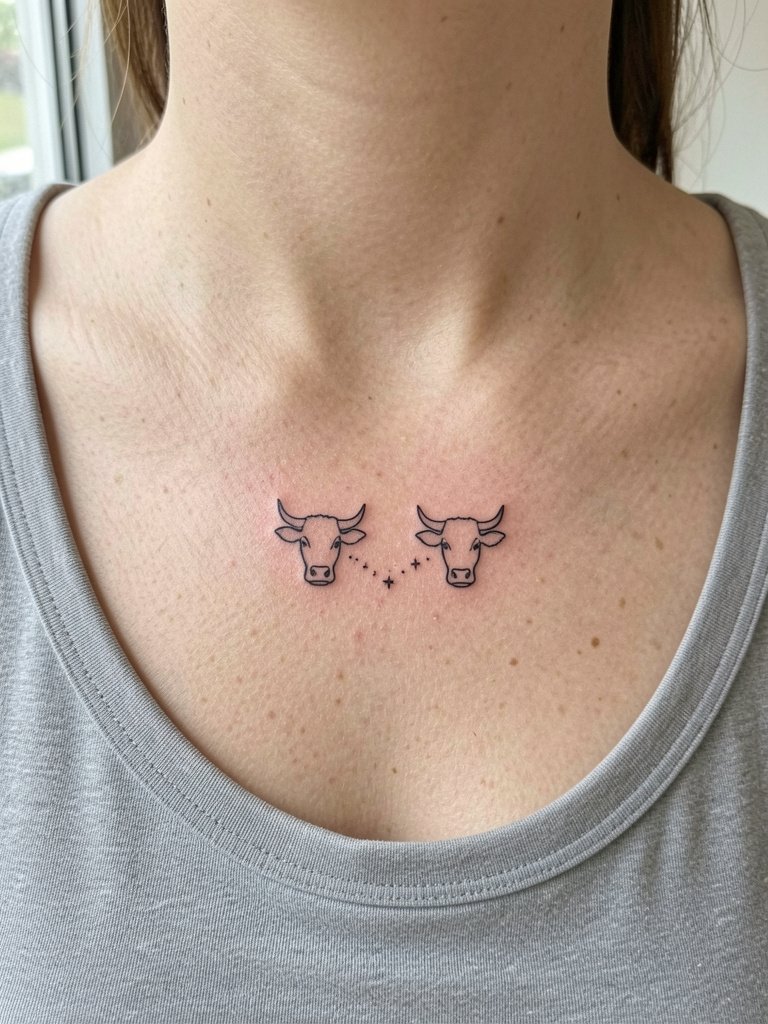
A constellation treatment turns the calf into symbol rather than literal animal. It is ideal if you want the poem referenced but not spelled out. Ask the artist to map the dotwork so the two heads sit three to four millimeters apart for long-term clarity. One mistake people make is packing too many micro stars into a tiny area, which ages into visual noise. Collarbone pieces need low-to-moderate pain tolerance and usually fit in a single session. Pair reveal looks great with an off-shoulder top.
6. Soft Realism Twin Heads on Mid Calf
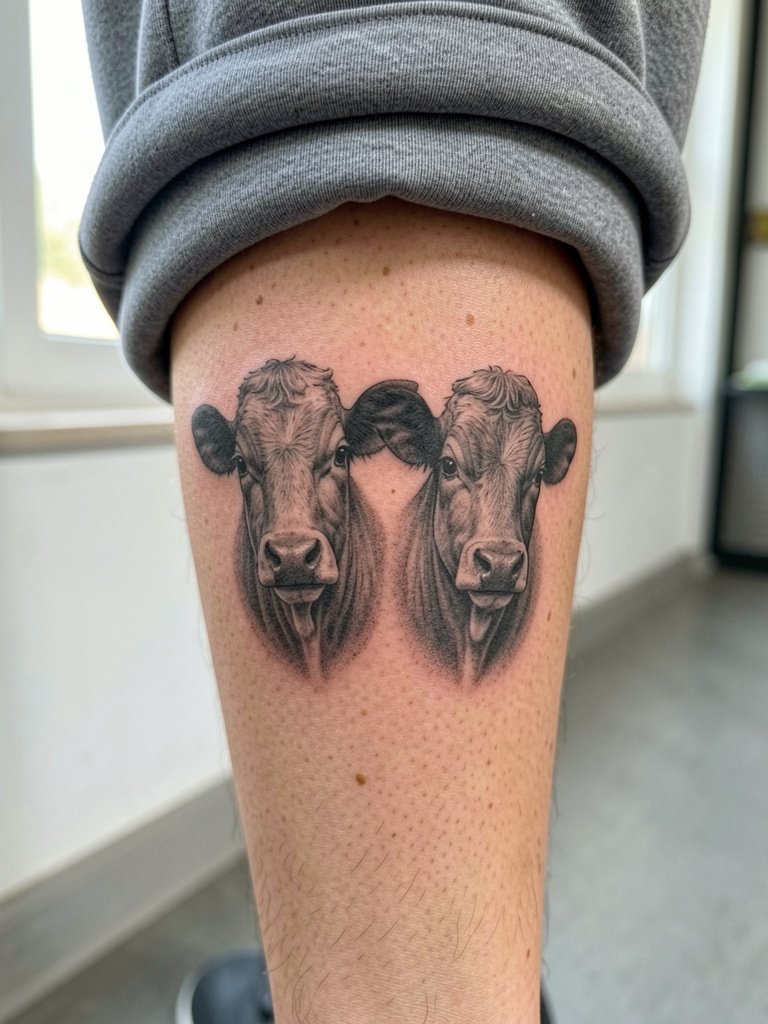
Soft realism keeps the emotional core of the poem while staying tender, and it suits medium-scale calf placements. When briefing the artist, bring both close-up eye references and a full-leg photo so they can judge contrast for the whole calf surface. A common aging issue is using too much subtle mid-tone without enough contrast, which causes features to flatten by year three. Expect one two-hour sitting for a mid-calf soft realism piece and moderate soreness afterwards. For warm days plan outfits with midi skirts to show the healed work.
Session Day Picks
The outer and inner calf treatments above heal differently, so a small kit eases the appointment and the first week for both micro and blackwork pieces.
-
Stencil transfer paper kit. Lets you preview composition and spacing directly on skin before needle touches the surface, useful when positioning twin heads to avoid overlap.
-
Topical numbing cream search. Applied 30 to 45 minutes before helps people get through longer calf sessions without frequent breaks.
-
Thin protective film roll. A breathable film helps protect lower calf pieces from friction when wearing socks or longer pants the first week.
-
Fragrance-free gentle body wash. Cleanses the healing area without adding irritants for delicate linework and dotwork.
-
Aquaphor healing ointment. A mainstream ointment used by many artists for thin first-week layers that protect fine line work while allowing oxygen exchange.
7. Tiny Twin Calves Around the Ankle
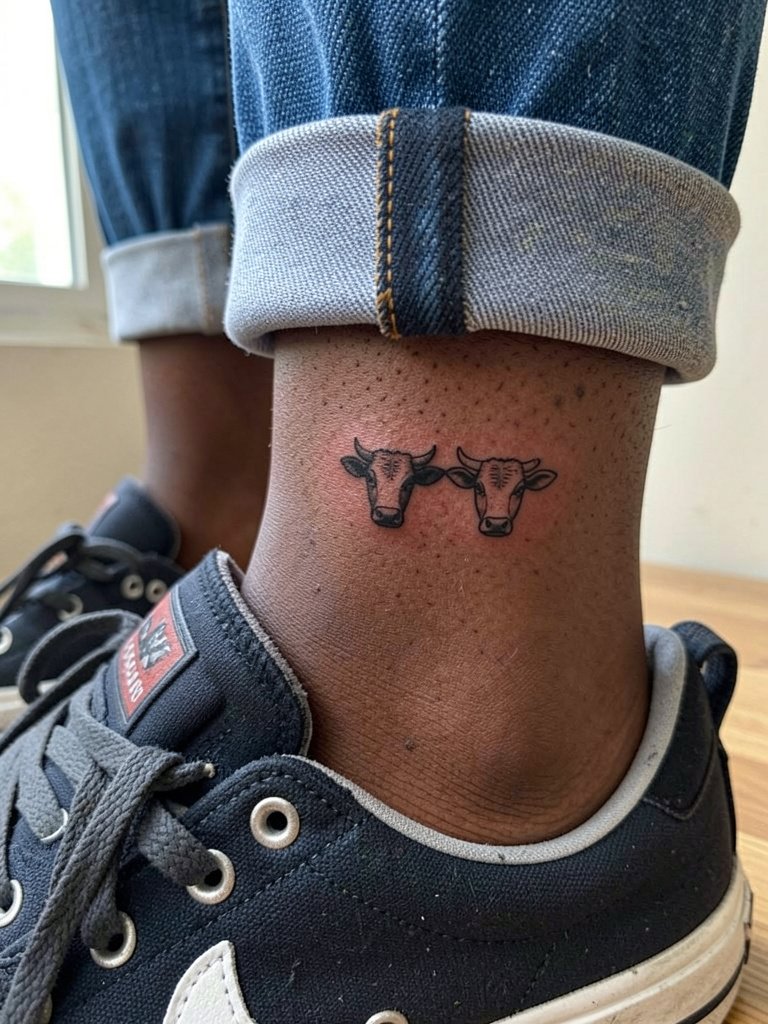
Ankle placements are discreet but high-risk for early edge wear because of shoe and sock friction. Choose simplified contours and slightly bolder outlines for the tiny heads rather than ultra-fine eyelid lines. A common mistake is demanding photo-realism at two centimeters, which leads to rapid softening. The session is short but the ankle can feel sharp. Plan to wear low-top sneakers or loose socks for the week so the area breathes.
8. Negative-Space Dual Heads on Outer Calf Panel
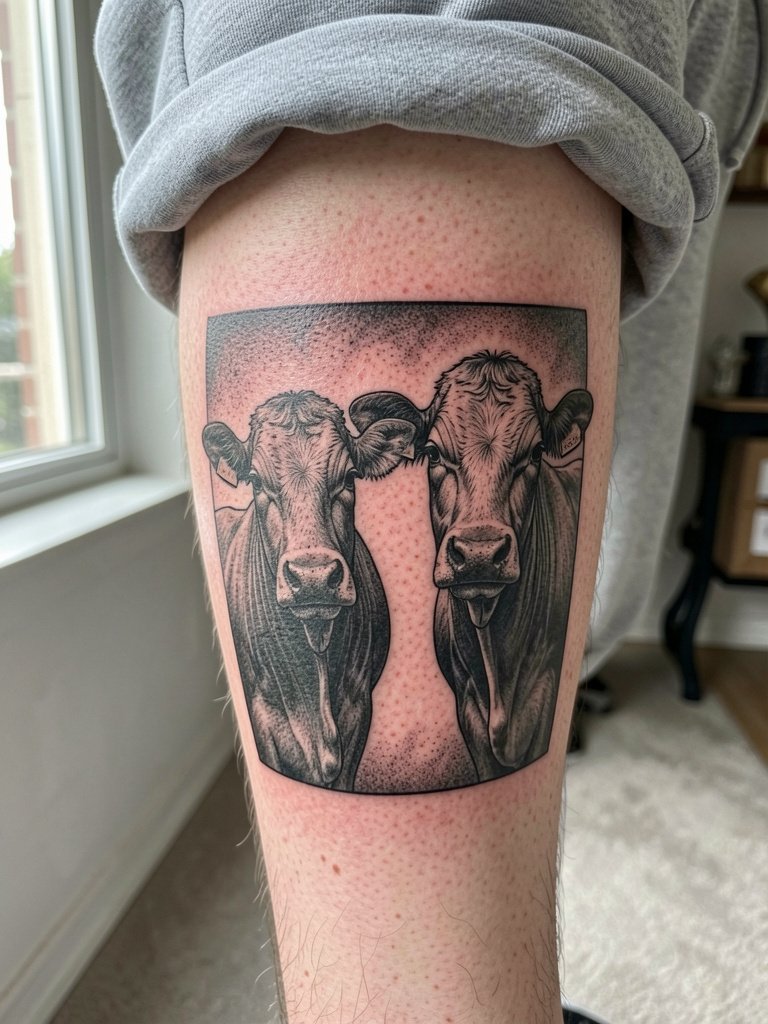
Negative space tricks are great when you want surrealism without clutter. One advantage is that the skin forms part of the composition, reducing the need for tiny interior detail. A mistake is mapping too many carved lines close together, which heals into a single dark block. For this method ask for clear negative buffers three to five millimeters wide between dark fills and critical contours. Outer calf is forgiving and settles well, and this piece usually finishes in one session. Pair with midi skirts or rolled joggers for display.
9. Memorial Floral Frame with Two Heads on Upper Calf
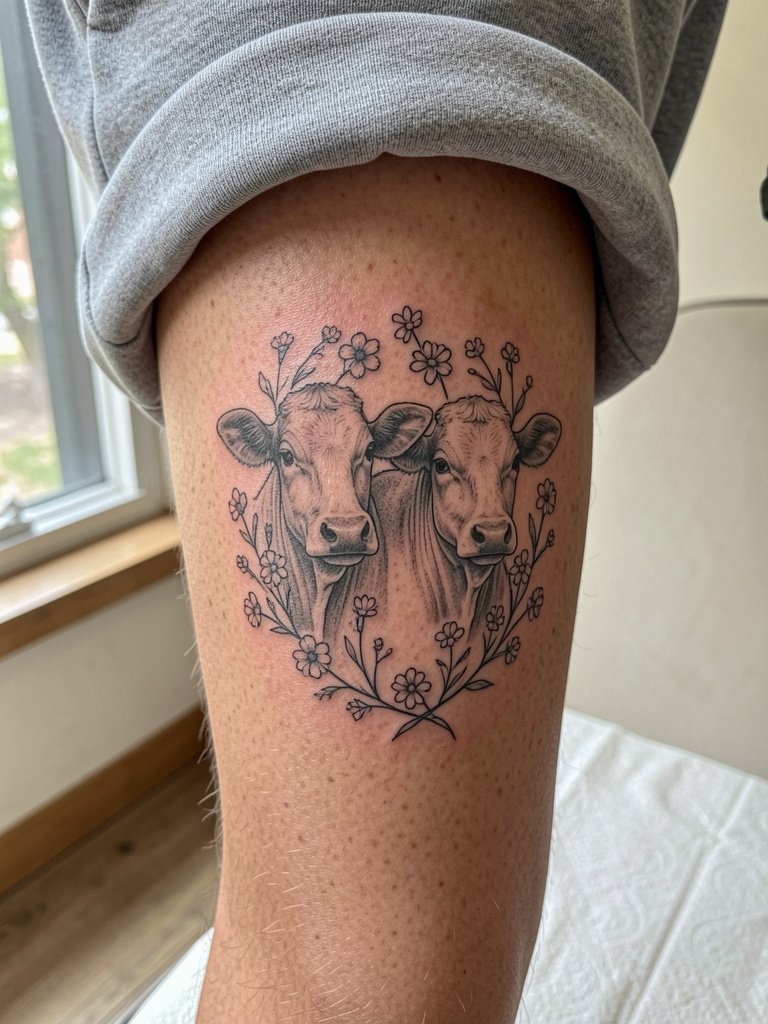
Adding floral elements softens the surreal image and works well for memorial intentions without overdoing realism. If you want flowers, request simplified botanical linework and avoid dense petal shading near the faces so the main subject keeps space to breathe. A common aging pitfall is placing thin floral stems too close to facial contours. Upper calf tolerates shading and is less prone to blowout than inner thighs. For pairing try ankle-length pants or a casual dress to show the art.
10. Abstract Twin Profiles on Side Torso
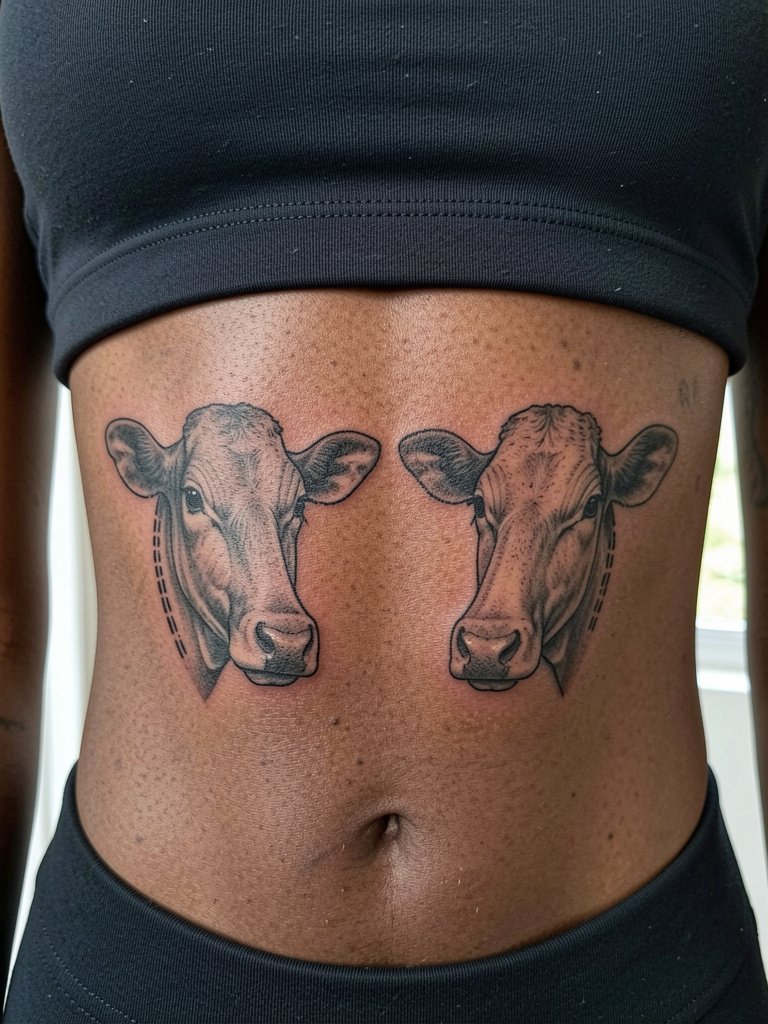
Abstract profiles are modern and less literal, which helps when you want a poetic reference without animal depiction. For the rib placement, artists split into two camps. One camp says fine line on ribs blurs quickly because the skin stretches and shifts. The other camp argues that slightly wider spacing and consistent needle depth make fine line rib pieces last. When choosing this placement ask for healed examples from the artist on similar skin. Rib sessions are higher pain and you may need breaks. Wear a button-front shirt for easy access.
11. Neo-Traditional Bold Heads on Calf Flank
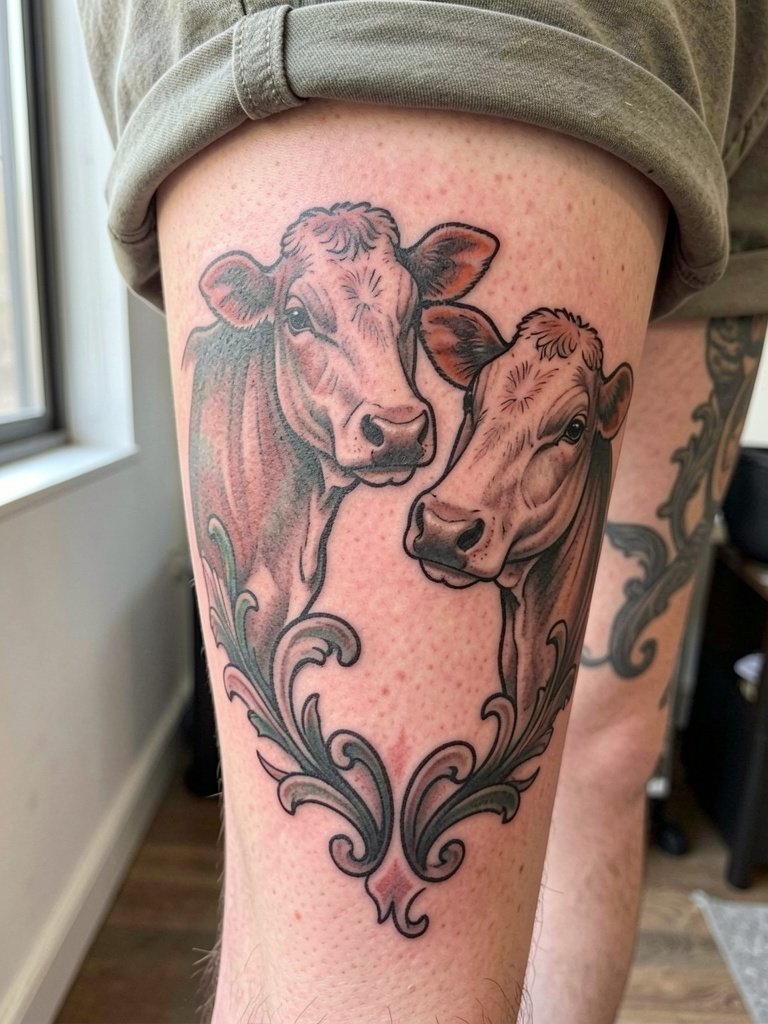
A neo-traditional take gives the two-headed calf a graphic edge and helps with longevity through bolder outlines. If you want color, limit saturation so the piece does not compete with tiny facial detail. A typical mistake is layering too many small color patches inside features, which can fade unevenly. This design usually takes one to two sessions depending on color saturation. For showing it off pick midi skirts or cropped shorts that keep the art visible.
12. Twin Heads with Starfield Background on Upper Calf
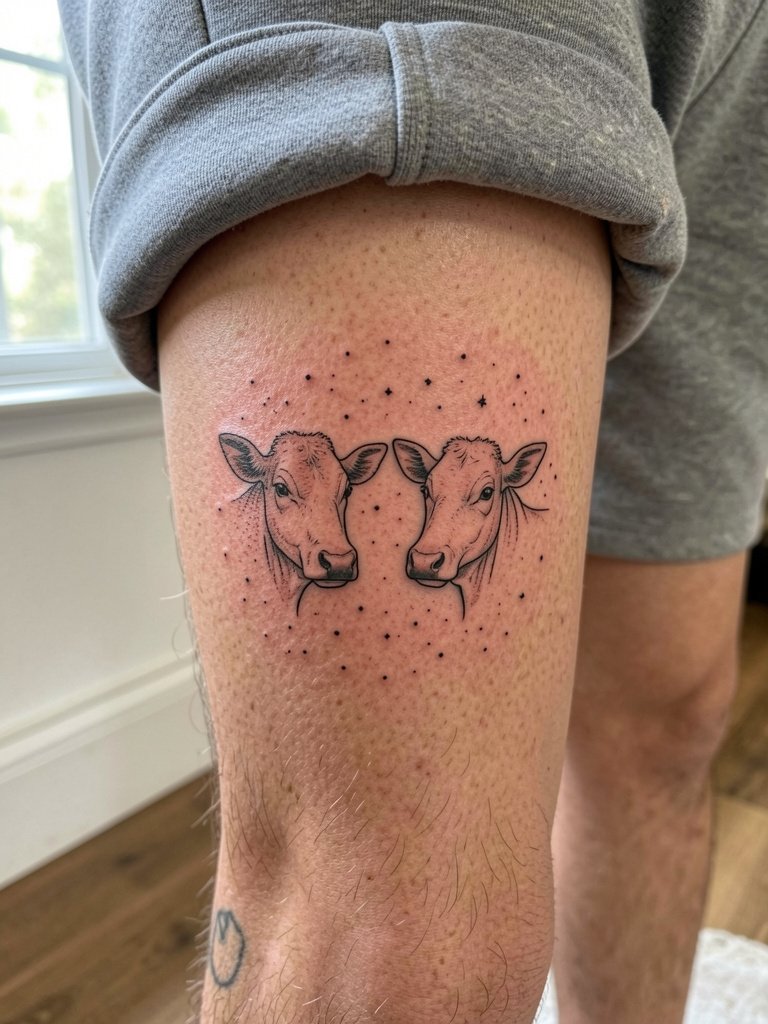
A starfield background can turn the image into a small narrative panel while avoiding heavy shading near the heads. When planning this add negative space around facial edges so the dotwork does not visually merge with features. The common error is packing dots too densely. Expect a single session with careful dotwork pacing and a touch-up timeline of one year for any softened dots. For casual reveal wear ankle-length pants that stop just below the art.
13. Tiny Paired Heads Behind the Knee
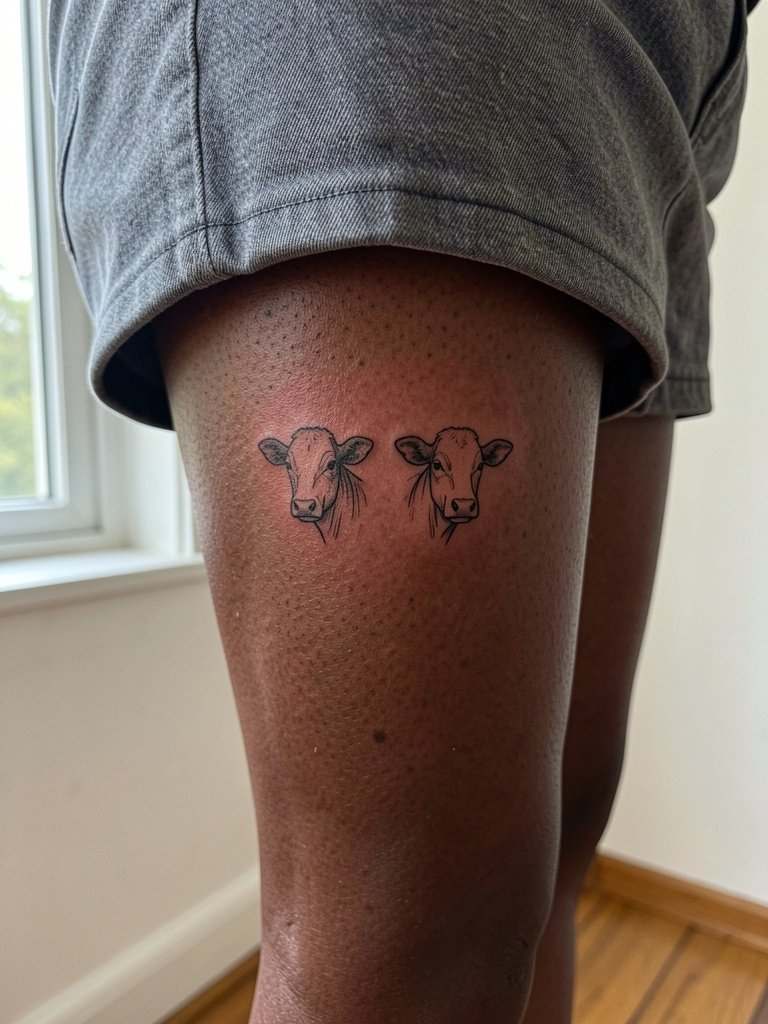
Behind-the-knee placements age differently because the skin creases and stretches every step, so they need extra spacing and fewer micro details. This spot is best for simplified, bold contours rather than very fine line shading. A common mistake is underestimating the movement there and expecting facial micro features to hold. Sessions feel strange because sitting with the knee flexed can be awkward, so plan for breaks. For comfort choose loose shorts or a midi skirt for the appointment.
14. Mirrored Twin Profiles with Geometric Frame on Calf
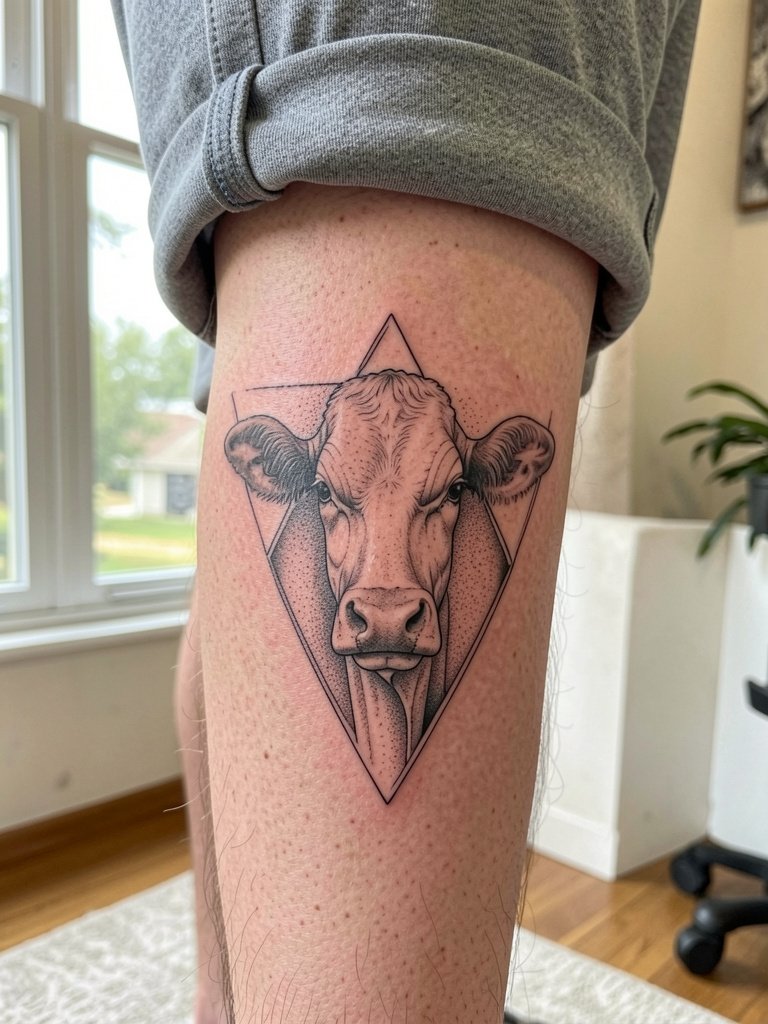
A geometric frame helps anchor the surreal imagery and gives the eyes a consistent border to read against. Ask for a slightly heavier outer frame line so the inner details have a reference edge as the skin matures. A frequent problem is making the frame too thin relative to interior detail, which then dominates as interior lines soften. This piece fits well in a single session and the touch-up timeline is usually two years for minor line weight losses. For the session wear comfortable loose joggers you can roll above the calf.
15. Emotional Realism Pair on Shoulder Blade
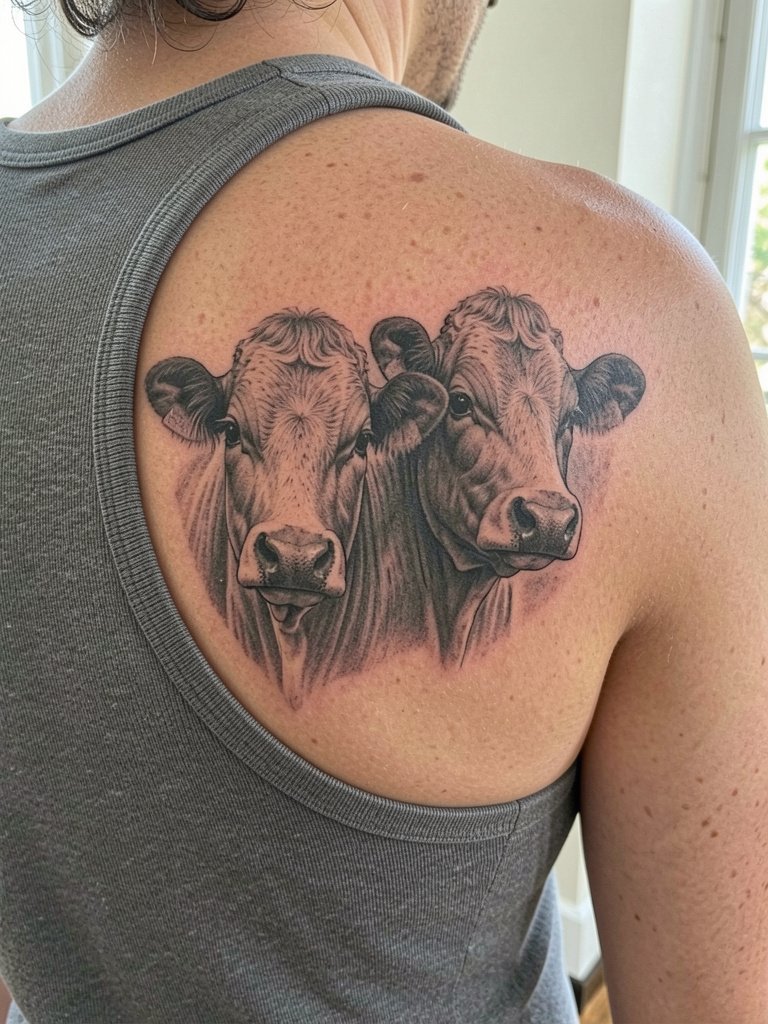
Shoulder blade pieces age well because the skin is stable and the area handles larger tonal transitions gracefully. This is a good choice when you want emotional realism at a slightly larger scale than the calf alone can hold. When briefing the artist, bring full-shoulder photos to show how the piece will flow with the scapula contours. The frequent mistake with shoulder realism is crowding the faces too close to the spine, which complicates healing. Sessions are moderate pain and often single long sittings. For display pair with square-neck tanks.
Frequently Asked Questions
Q: How small can the two-headed calf be and still read after a year?
A: For facial features to remain legible plan for at least two to three inches across for any realistic or micro-realism heads. If you want it smaller, opt for silhouettes or simplified lines because tiny eyes and nostrils can blur and require touch-ups.
Q: Should I include a line of the poem with the calf or keep it image-only?
A: Both camps have a point. Adding script makes the literary reference explicit and can deepen meaning. Leaving the image alone avoids script blowout and keeps the visual cleaner; if you add text pick slightly larger lettering and a straightforward type style.
Q: Where do I find healed examples and artist portfolios without naming specific creators?
A: Search hashtags like #twoheadedcalf, #poemtattoo, #finelinetattoo, and #microrealismtattoo on Instagram and TikTok with location filters. Tattoodo and community threads on Reddit also surface healed shots; look for posts labeled "healed" and check multiple skin tones to see how similar styles age.
Q: Will fine line or bold outline hold up better on calf placements?
A: There is a split. One group prefers fine line for the poem's softness and will widen spacing slightly to preserve those strokes. The other group argues bold outlines age into clear shapes and prevent tiny features from washing out. Ask to see healed photos from the artist of the exact style you want.
Q: What should I wear to the appointment and for the first week of healing?
A: For calf sessions wear shorts or loose joggers so the artist can access the area without fabric pulling. For the first week choose ankle-length pants with loose cuffs or midi skirts that do not rub the tattoo continuously. A thin protective film from the product kit helps the first days.
Q: How often do two-headed calf pieces need touch-ups?
A: Expect a possible light touch-up around the one-year mark for fine detail work, and a two- to three-year touch-up if you chose very subtle shading. Bold silhouettes generally need fewer corrections, while single-needle portraits typically require earlier touch-ups to maintain crispness.
