
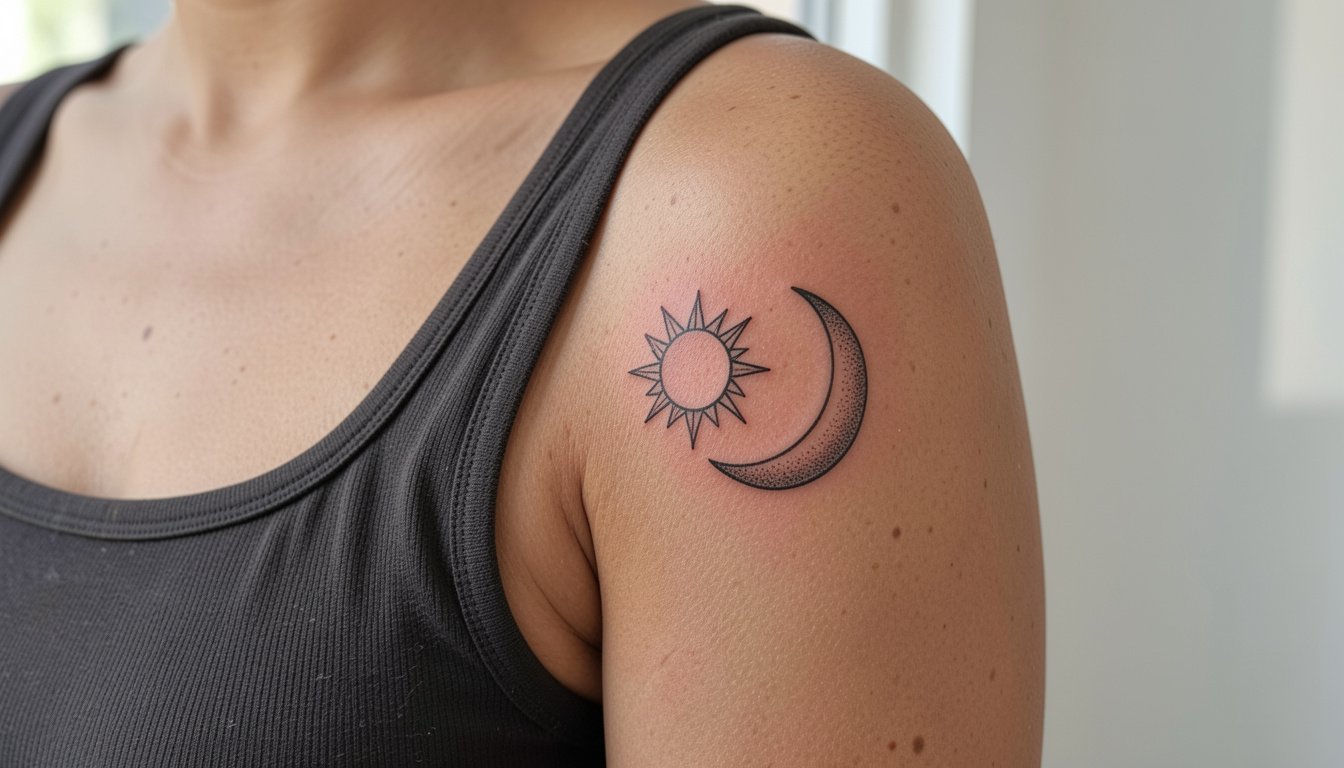
The sun and moon pair is everywhere on inspiration boards right now, but the pieces that still read crisp after a few years are the ones planned for how skin moves and how linework ages. Pick a composition that gives room for rays and the crescent to breathe, pick line weight for the placement, and plan wardrobe for the first week. The sections below jump straight into balanced compositions and real-world tradeoffs to help you choose.
1. Split Sun and Moon Forearm Composition
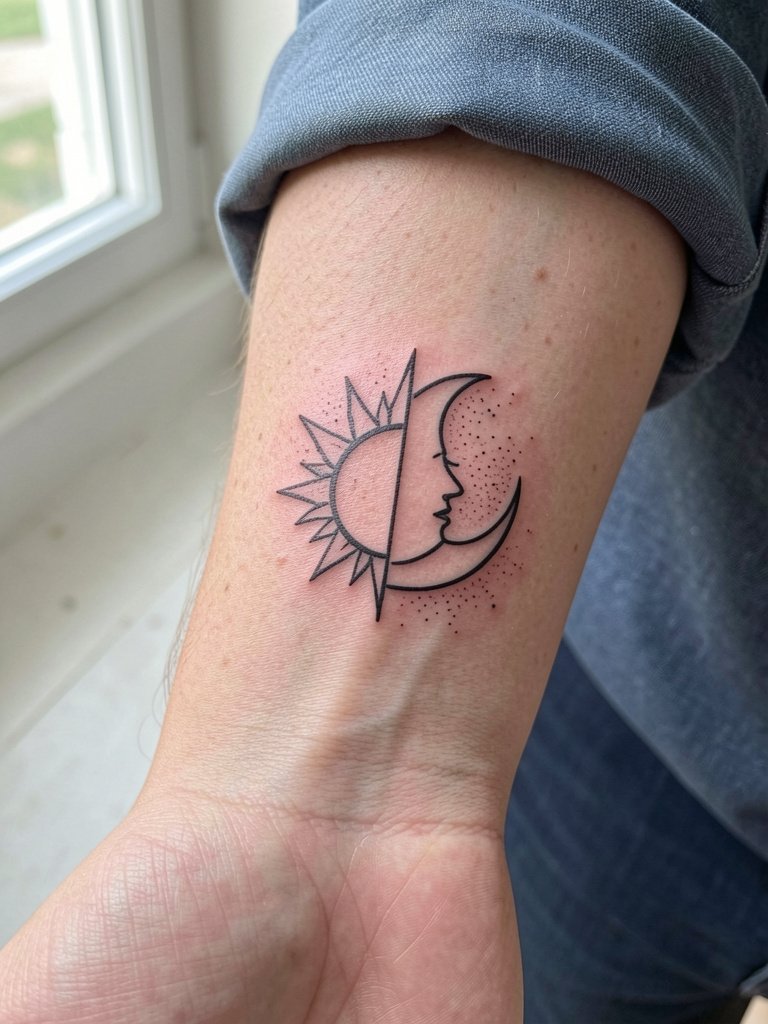
A forearm split reads immediately because the forearm gives horizontal real estate for the sun rays and the moon curve. For this placement pick linework a hair thicker than your tiny reference image so the rays do not blur into a gray mass at year two. Bring two scaled references so the artist can show how the composition reads at three inches and five inches. The most common mistake is shrinking the rays to conserve space, which kills readability. For outfit pairing, roll sleeves and favor linen button-down shirts that show the forearm without competing prints. Expect a one-session appointment and light soreness across the underside for a day or two.
2. Fine Line Micro Sun and Moon at the Wrist
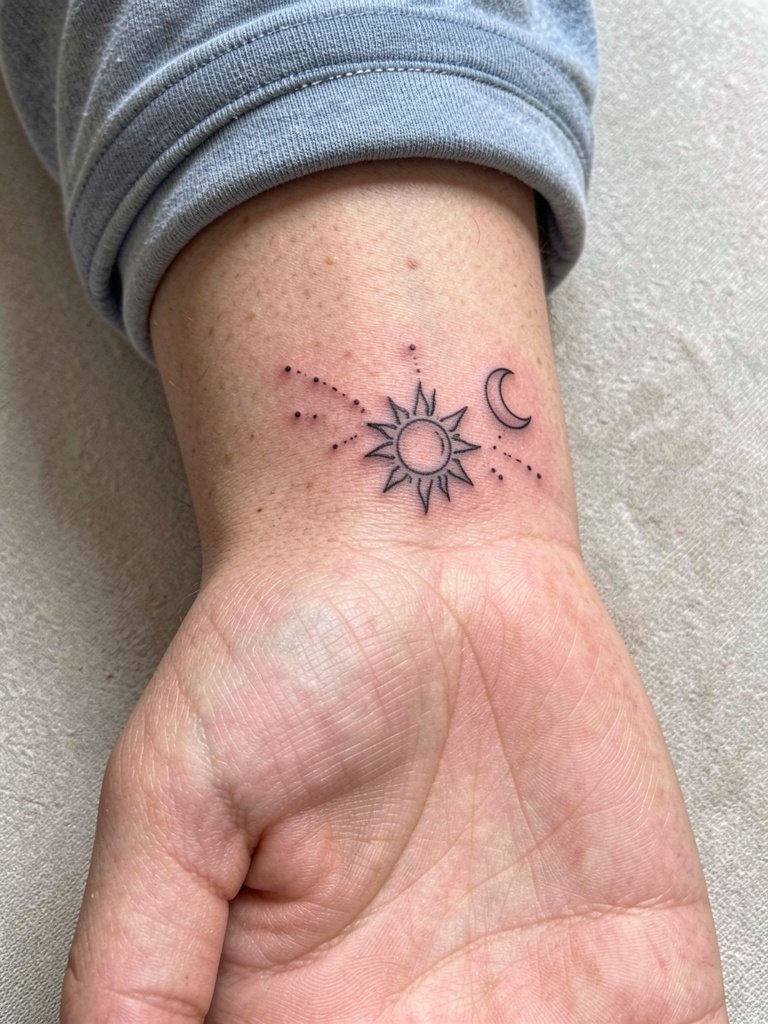
Tiny wrist tattoos look elegant at first, but artists split into two camps on longevity. One camp favors ultra-fine detail, saying the delicate look matches jewelry and reads feminine. The other camp favors slightly heavier single-needle work because the wrist sees constant motion and thin lines often blur into fuzzy bands by year two. If you want the delicate look, ask the artist to widen spacing between rays and to plan for a touch-up around year two. For the session wear a short sleeve tee so the wrist is easy to access. Keep in mind wrist skin is high-motion and touch-ups are common.
3. Matching Sun and Moon Inner Forearm Pair
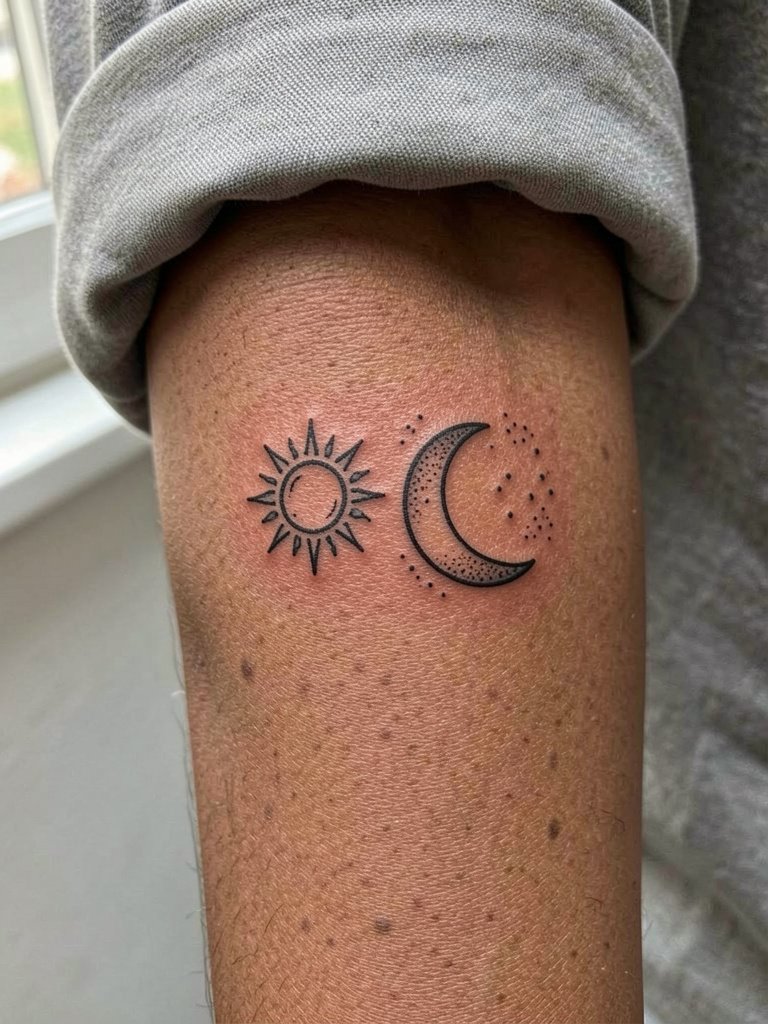
Matching pieces work well because you can plan negative space so the two halves sit visually balanced. When you book, bring a paired mockup so the artist aligns scale and orientation for both arms. A common mistake is copying a single-image reference onto both arms without rescaling for handedness, which makes the pair read asymmetrical in photos. For showing off, rolled-sleeve linen tees and slim chain bracelets make the pairing look intentional. These are typical one-session tattoos but expect the possibility of a minor touch-up if one arm heals differently.
4. Celestial Cluster with Stars and Dot Work
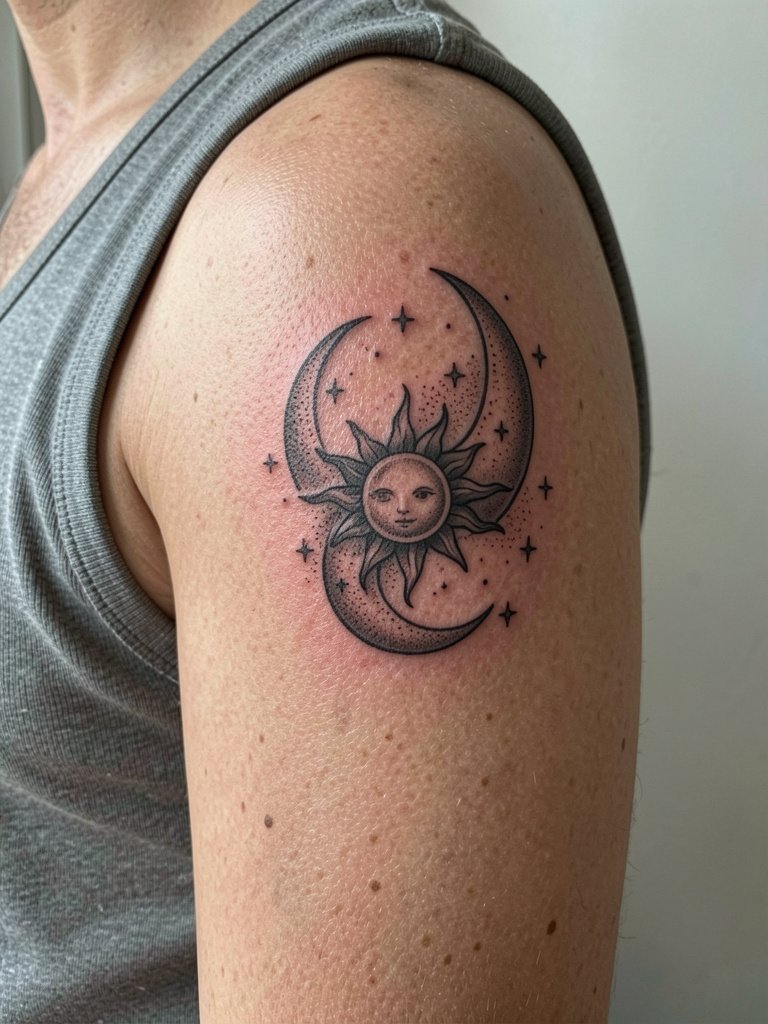
A small cluster gives you variety in one composition and scales well for the bicep. Recommend stipple shading between elements so the design reads without heavy solid fills. Tell your artist you want grouped dot work that ties the sun and moon, not a single blackout background, so it ages with texture. A frequent error is overcrowding the cluster to look dense in photos, which leads to blurring over time. Style it with sleeveless tops and show a little contrast using square neck tanks that frame the upper arm without covering the piece. Plan on one to two sessions depending on stipple detail.
5. Neo-Traditional Radiant Sun and Crescent
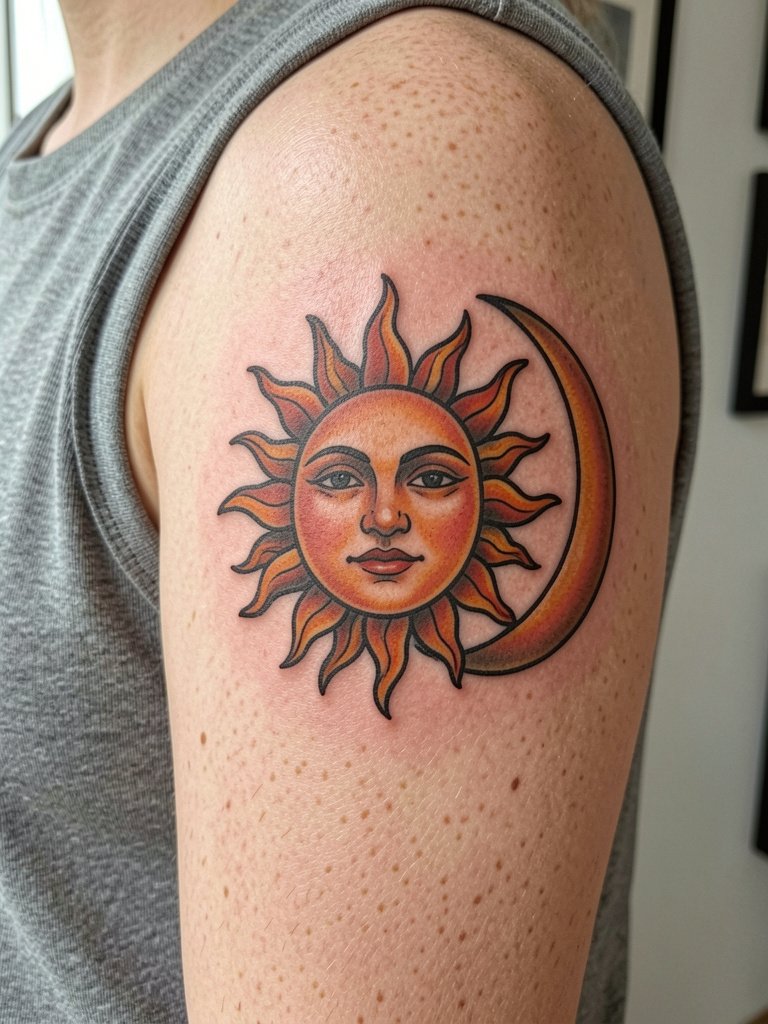
Neo-traditional lines help a sun and moon remain readable at distance because strong outlines protect interior detail. If you like color, pick a limited palette with blocked saturation instead of watercolor washes for longer-lasting impact. Tell your artist which tones you prefer and ask for healed examples with similar shades on similar skin. A common mistake is adding too many small highlights that disappear after healing. For wardrobe, tank tops with wider straps and off-shoulder tops let the cap composition breathe. Expect one to two sessions depending on color saturation.
6. Blackwork Sun and Moon with Heavy Shading
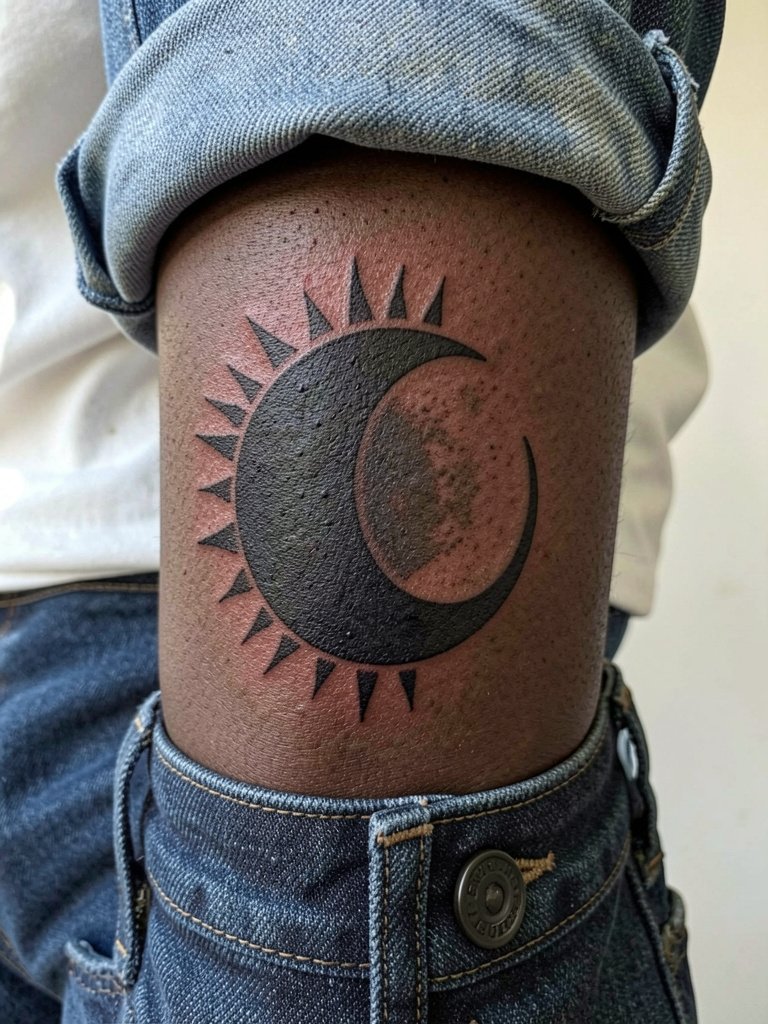
Blackwork reads like a stamp and tends to age predictably if artists keep edges crisp. This is a good option for high-motion areas because heavy saturation resists early softening. Warn the artist if you bruise easily as large black fills can require longer healing and extra aftercare. For showing off, wear cropped pants or low-rise shorts that expose the calf, and try cropped straight leg pants with low-profile sneakers. Solid black takes one session for medium pieces but may need a second pass for full saturation.
Studio Day Picks
These first six ideas include wrist, forearm, and calf placements that all benefit from a few small session-day tools and gentle cleansing products.
- Stencil transfer paper kit. Use this to test placement on the body before needle hits skin, especially helpful for split forearm and matching arm pairs.
- Topical numbing cream. Applied per product instructions about 30 to 45 minutes before helps with wrist and rib sessions without altering linework.
- Thin protective film roll. Keeps small wrist or finger pieces from rubbing against shirts during the first day.
- Fragrance-free gentle body wash. Cleans tattooed skin during showers without added irritants when healing larger shaded pieces.
- Aquaphor healing ointment. Thinly applied for the first two to three days when heavy blackwork or dense shading is present.
7. Ornamental Mandala Sun with Crescent Accents on Sternum
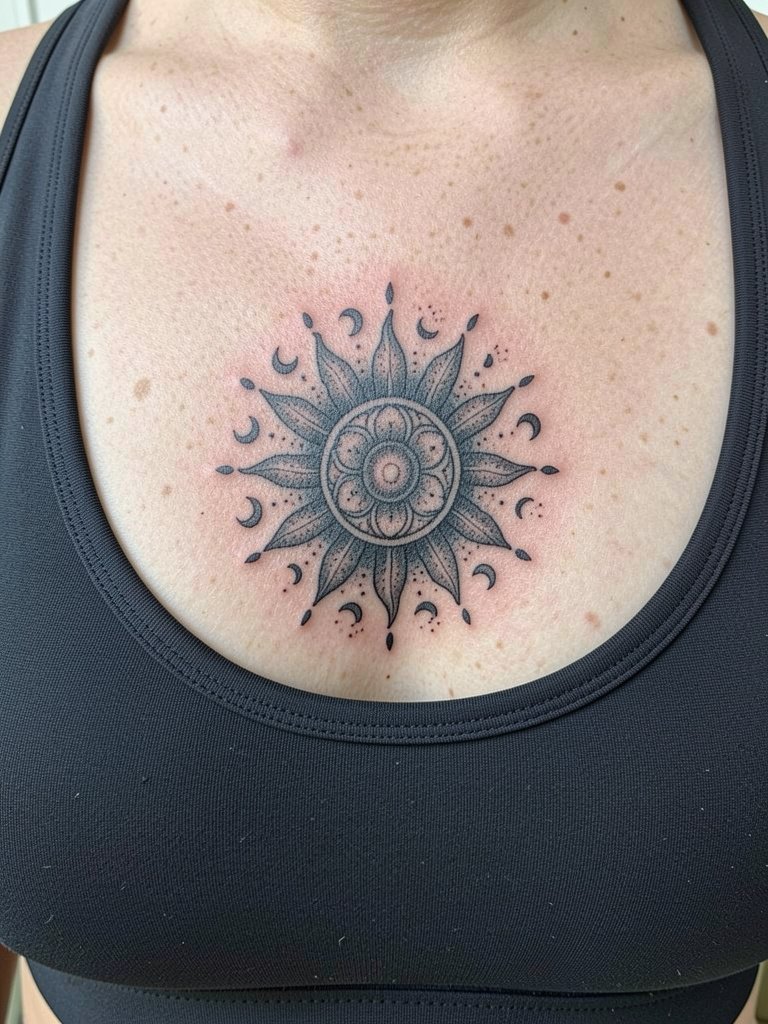
Sternum pieces need careful spacing because the curves of the chest can compress detail. Ask for a stenciled mockup that sits on your sternum while you stand and while you lie back so the artist can adjust placement. A common mistake is packing tiny mandala repeats too close to the breast crease, which blurs with movement. For the appointment wear a fitted sports bra that allows access and modesty during the session. This area rates high on the pain chart but yields a centered, decorative statement that works beneath open-neck clothing.
8. Minimal Behind-the-Ear Sun and Moon
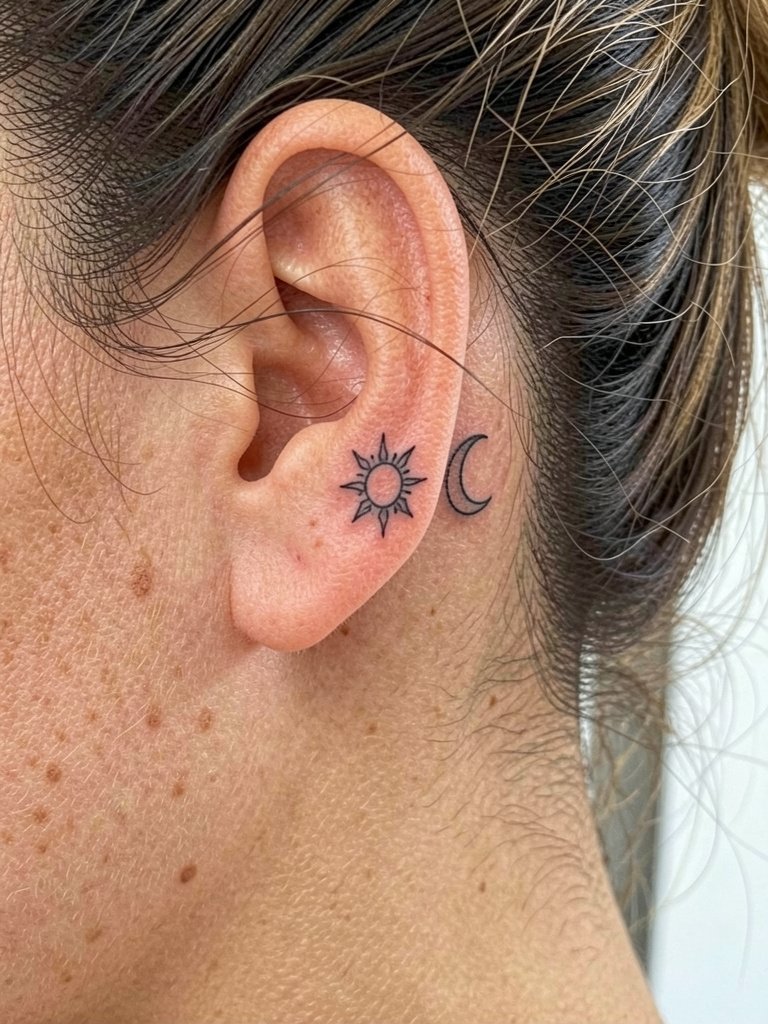
Behind-the-ear placements are subtle and great for first small pieces. Fair warning that mastoid skin is thin so line depth matters and touch-ups are not uncommon. The biggest mistake is expecting ultra-fine detail to survive; ask your artist for a slightly stronger contour so the tiny sun and moon keep shape. Session wear is a loose updo or clip that leaves the area exposed and makes aftercare easier. If you want to highlight the area, try hair claw clips that let you tie hair back without rubbing the spot.
9. Ankle Crescent Moon with Radiant Sun Accent
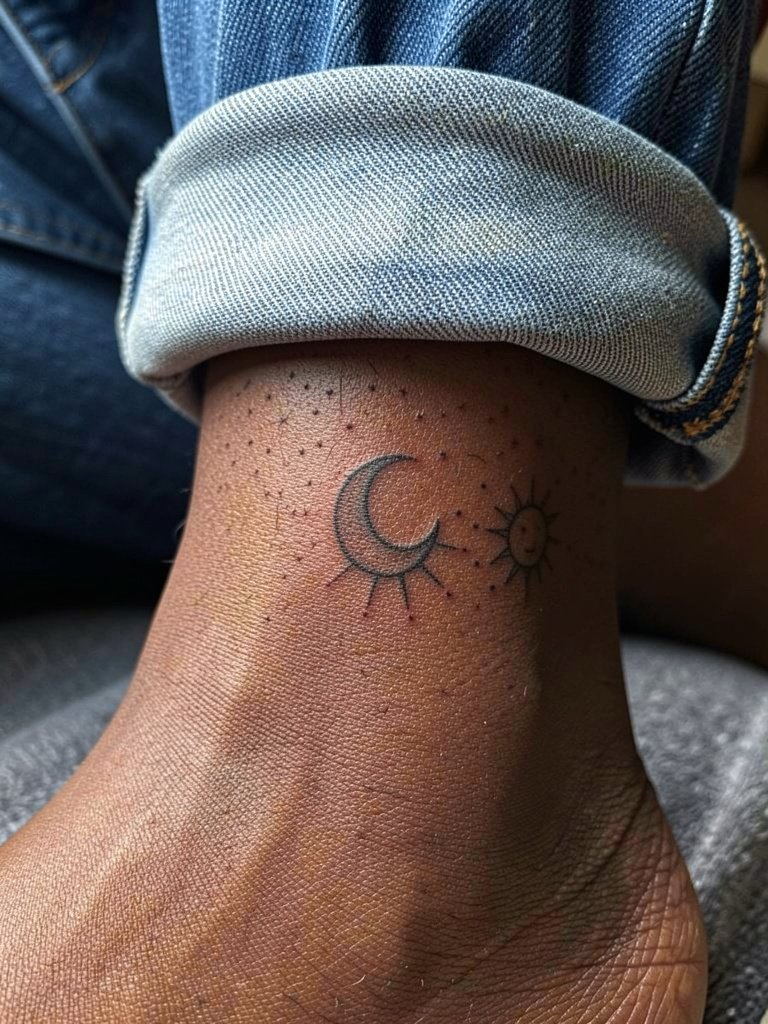
Ankle tattoos face friction from socks and shoes so silhouettes work better than micro filigree. A common mistake is placing tiny rays too close to the bone where they soften from constant rubbing. Request placement a finger-width above the lateral malleolus and plan for protective socks the first week. For showing off, cropped trousers and minimalist sandals work well. Consider minimalist sandals that draw attention to the ankle without straps over the tattoo as it heals.
10. Shoulder Cap Sun and Moon Panel
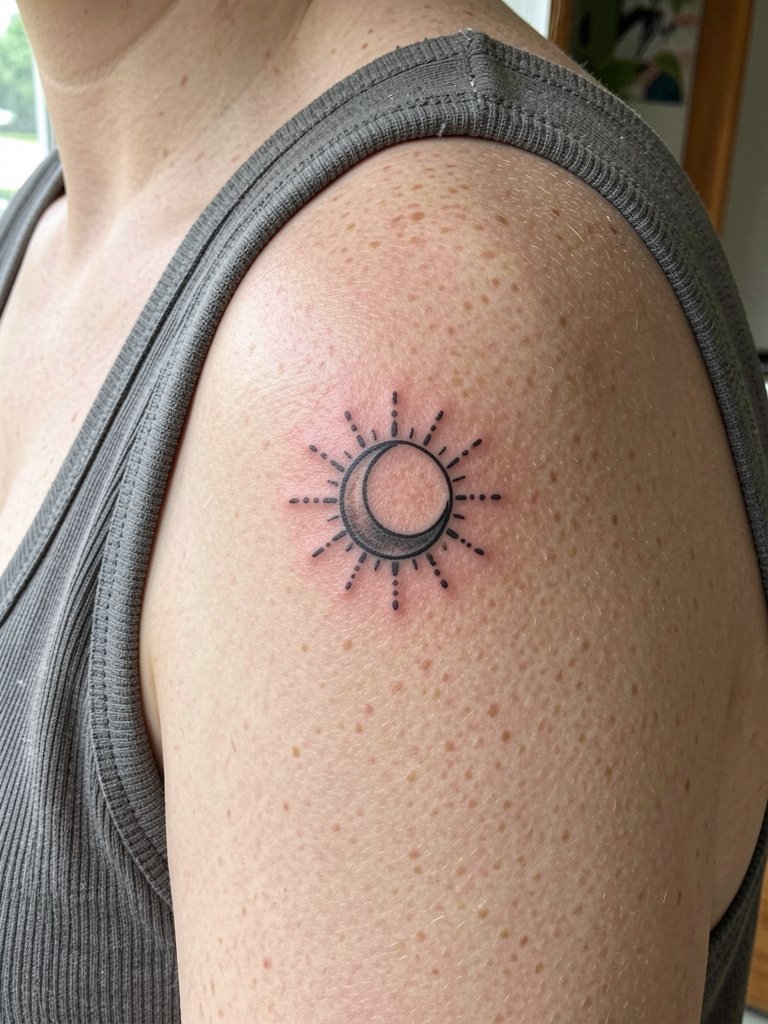
The rounded shoulder is forgiving because circular compositions sit on the cap naturally. Make sure rays do not wrap into the deltoid fold where movement will soften edges. Ask the artist to orient the design so the brightest face of the sun points toward the chest if you want the piece to read when you wear tanks. For showing off, square-neck tops frame the shoulder cap and let the piece sit visually balanced. One session usually covers a medium shoulder cap with light shading.
11. Watercolor Wash Sun Behind a Stipple Moon
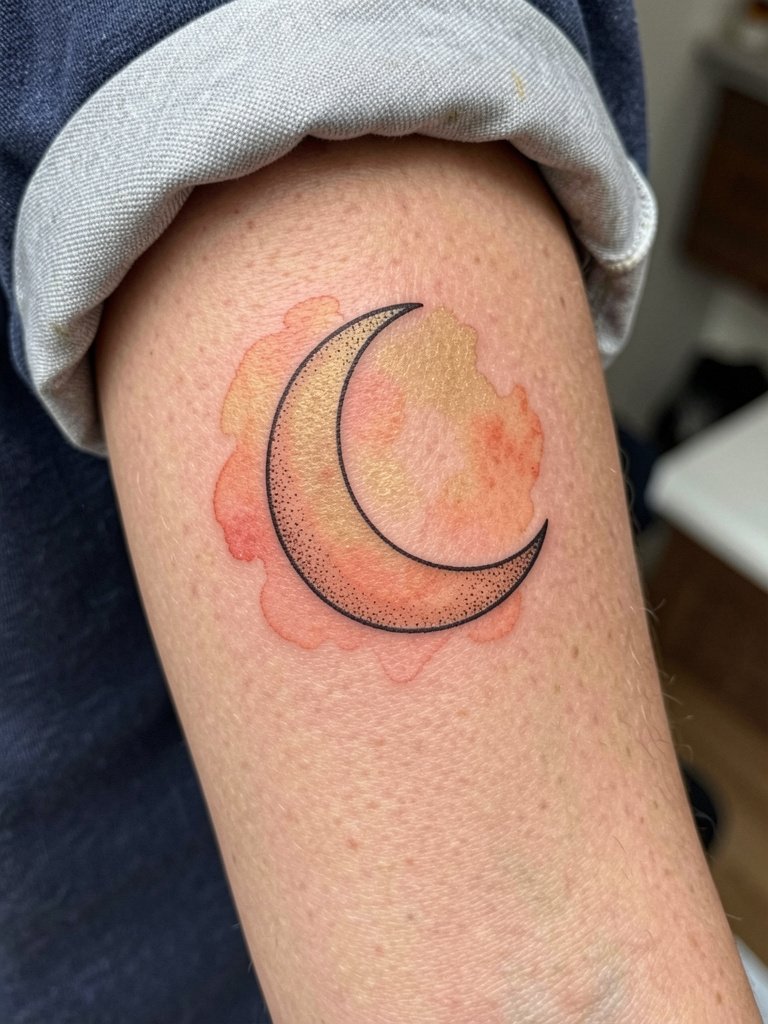
Color versus black and gray splits artists into two clear camps. One camp favors color washes for their expressive warmth, saying the palette makes sun motifs feel vibrant and distinct. The other camp argues black and gray ages more predictably, especially on small-scale work where pigments can fade unevenly. If you want watercolor, ask for saturated edge guards and discuss touch-up timelines up front. Watercolor needs careful sun protection, so plan to use a UPF sleeve or cover when outdoors in the first year. For wardrobe, neutral tees keep the color visible without visual competition.
12. Tiny Finger Sun and Moon Accents
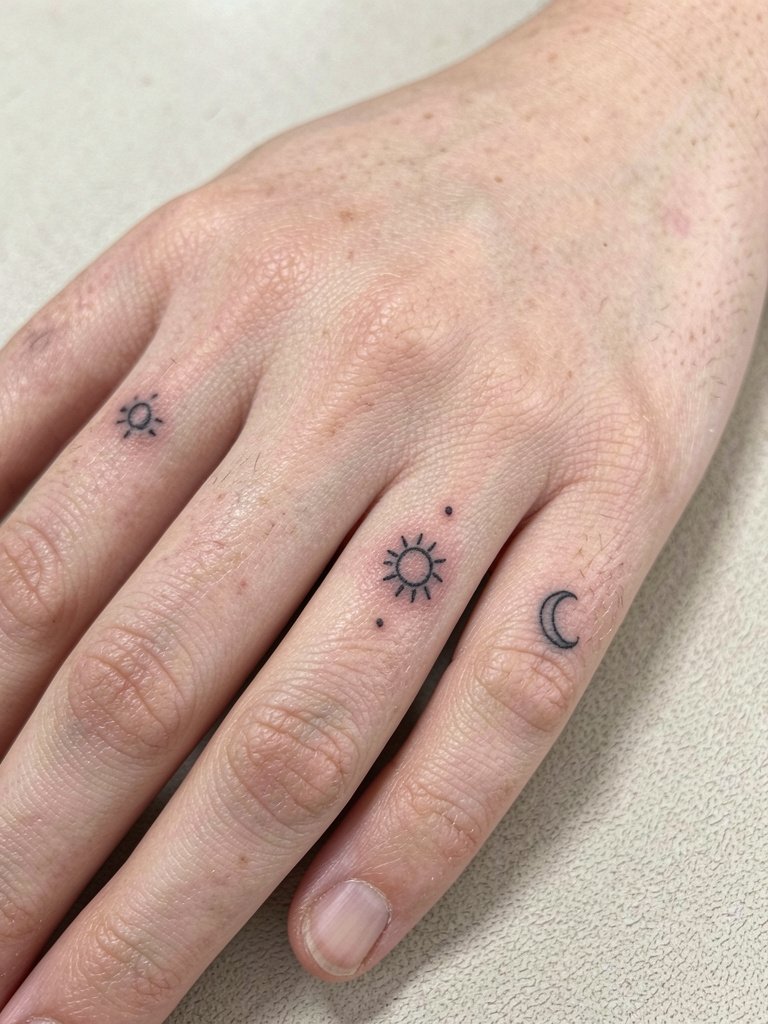
Finger tattoos look charming but they fade and often need touch-ups because the skin there regenerates quickly and sees constant contact. Ask the artist about expected touch-up windows for finger placement. A common mistake is requesting the same thin linework used on the wrist for fingers; line weight needs to be heavier to survive washing and friction. Session wear should leave hands free and clean, and plan to avoid heavy detergents for the first few weeks. Finger accents are low-commitment visually but accept maintenance over time.
13. Large Spine Sun-to-Moon Vertical Composition
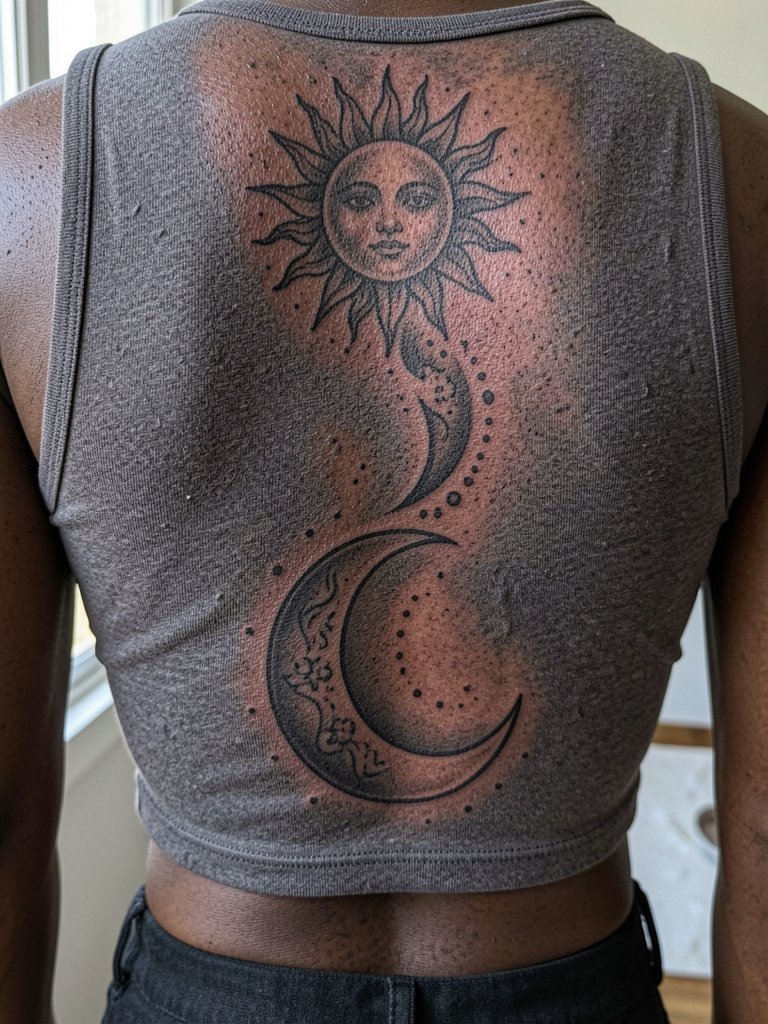
A spine composition is dramatic and scales well if you want a larger balance piece. The key is vertical spacing so the sun and moon have room to breathe, and the spine anatomy requires the artist to mark the center carefully. Pain expectations are higher along the spine, so plan session breaks. A mistake is trying to compress a complex scene into a narrow strip; wider spacing improves readability and long-term appearance. For showing off, a low-back cropped top pairs well and highlights the vertical flow.
14. Upper Chest Crescent with Radiant Rays Below Clavicle
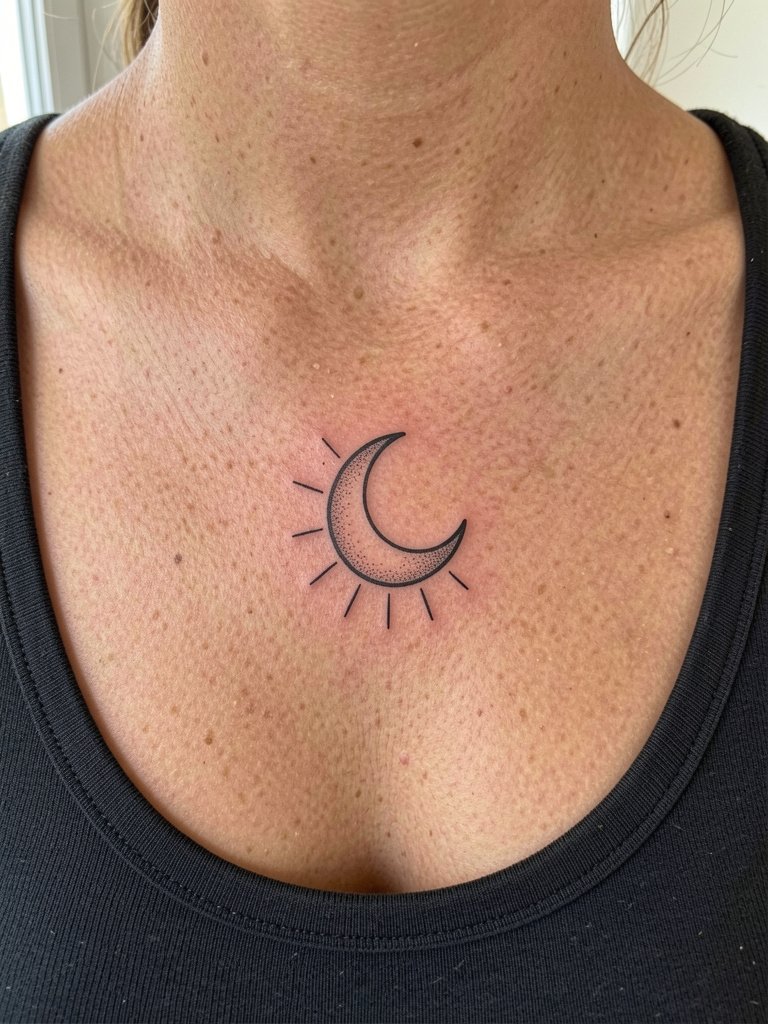
Collarbone placements need slightly bolder lines so the sloped anatomy does not eat detail. Ask your artist to place the crescent so it follows your clavicle line and to check the stencil in standing and seated positions. People often underestimate how jewelry layers will interact with this area, so plan necklace length accordingly. A scoop-neck top and layered fine necklaces frame this spot well. Expect moderate pain and a one-session appointment for small-to-medium sizes.
15. Ribcage Half-Moon and Sun Accent
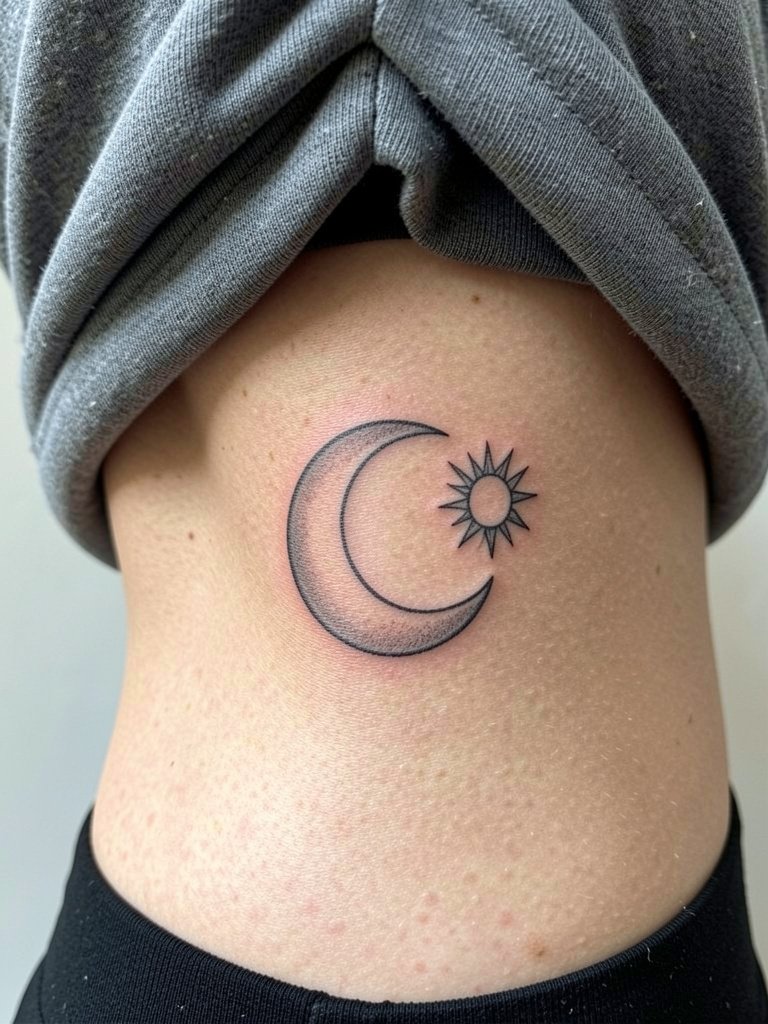
Rib pieces are high on the pain scale and need breathing room in the design. When planning a rib tattoo, ask for slightly wider spacing and a test stencil to see how the curve reads while you breathe. Artists are split about fine line on ribs; some say lines blur quickly due to skin stretch and movement, while others argue that with correct needle depth and spacing it holds up. If you prefer a delicate look, accept that touch-ups are possible. Session wear should be a sports bra or loose top that gives the artist unobstructed access.
16. Hip-Side Lateral Sun with Crescent Along Waist
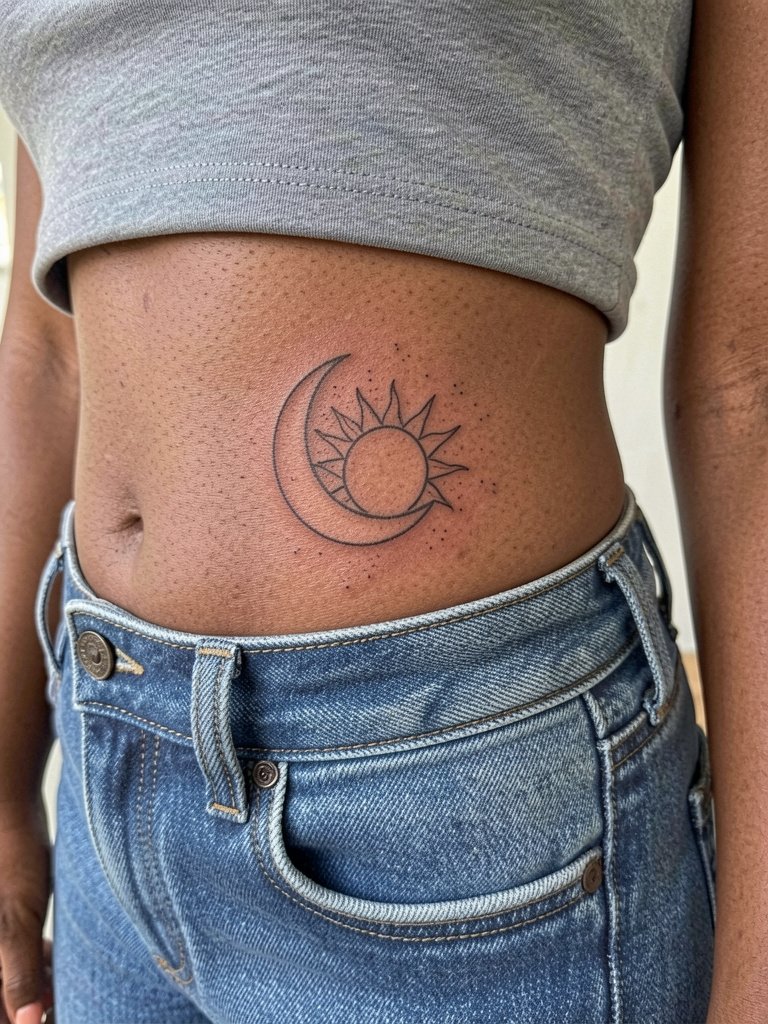
Hip placements are easy to hide and can be designed to peek from swimwear or low-rise jeans. The main mistake is placing the design too close to waistbands which cause friction and fading. Ask for placement a bit above the usual waistband line and wear loose waistbands to sessions. When you want to reveal it style with high-waisted jeans or bikinis that let the arc sit naturally. Plan for a one-session tattoo but expect some initial tenderness from sitting and walking.
17. Calf Sun and Moon Vertical Emblem
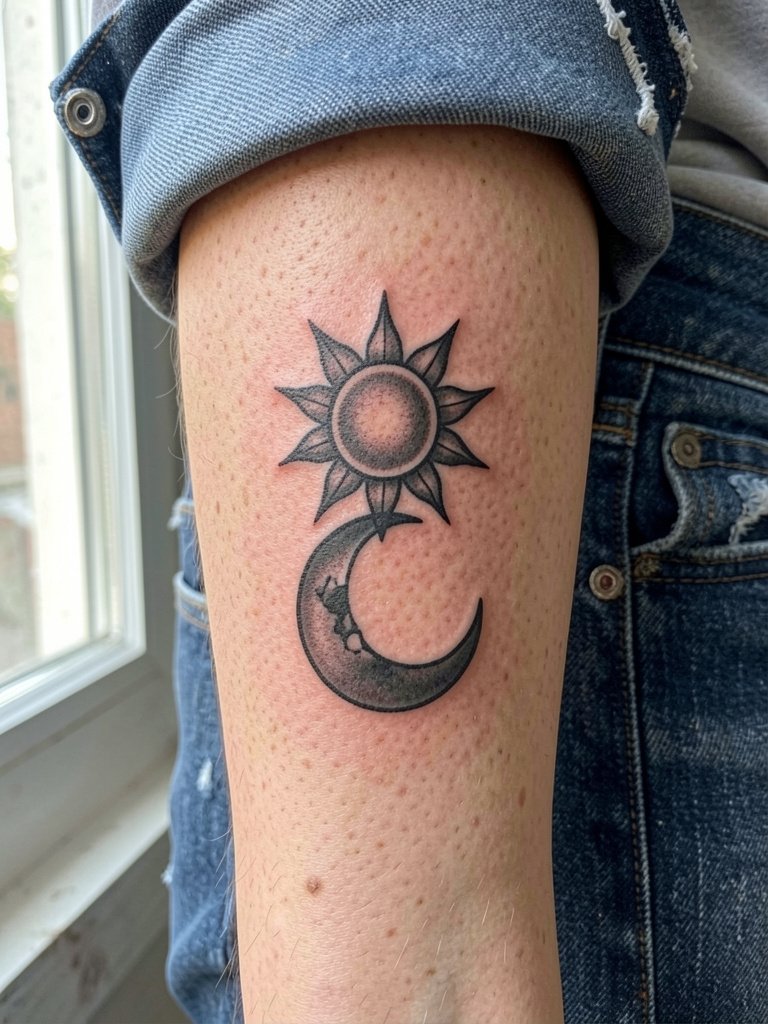
Calf pieces take well to bold silhouettes because the muscle gives a flat canvas. If you want longevity pick clear black outlines and controlled shading. A mistake is over-detailing small motifs on the rounded calf which can distort as muscles flex. For session wear choose pants you can roll up easily and try loose drawstring linen pants for comfort during healing. Calf tattoos are moderate in pain and usually finish in a single session for medium sizes.
18. Small Solar Mandala on the Thigh
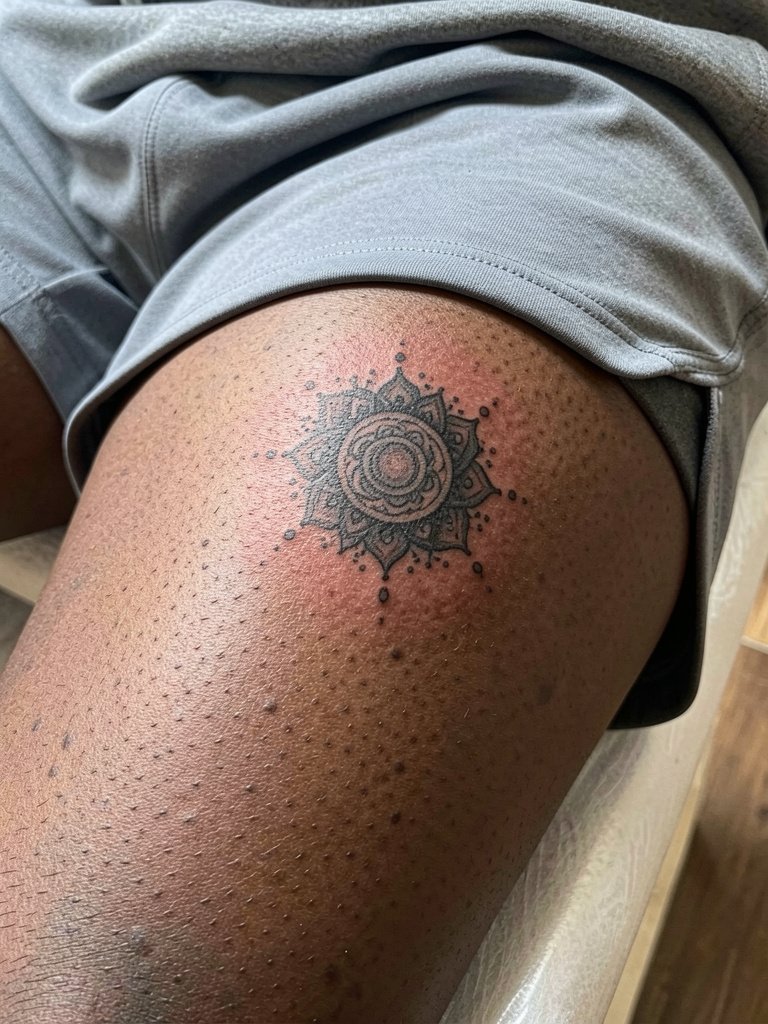
Thigh placements allow intricate mandala detailing because the skin does not see constant friction. Request a proving stencil and ask how the pattern scales across muscle curvature. A common error is over-compressing tiny details; give each ring room. Session wear should be breathable shorts or a long tank so the artist can access the area without fabric bunching. For showing off, high-waisted skirts or shorts highlight the upper thigh placement. Healing tends to be straightforward with low accidental rubbing.
19. Sternum Crescent with Chain-like Dot Border
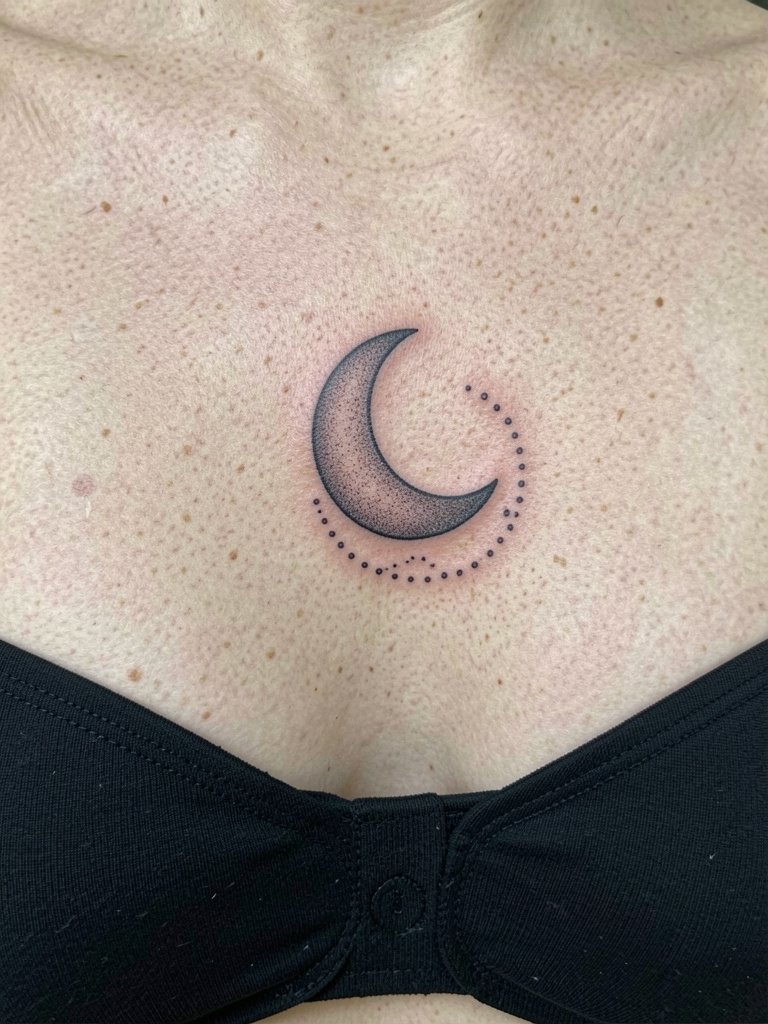
Delicate chain-style dot borders look ornate and gentle on the sternum, but dots too close together will blur. Ask the artist for measured spacing between dots and to show healed photos with similar spacing. People often forget how jewelry and bras will press on the area during the first weeks, so choose supportive but non-binding garments. For the session a fitted bandeau or sports bra works best. Expect tenderness in the area and schedule lighter activity for several days.
20. Geometric Sun and Crescent on the Inner Bicep
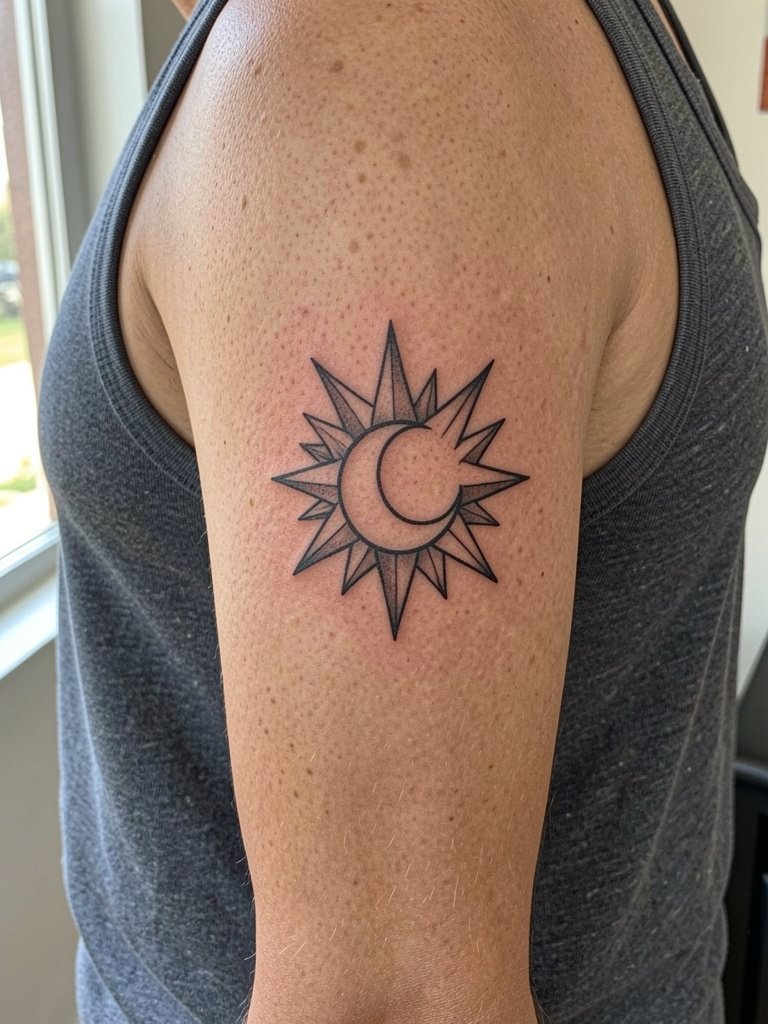
Inner bicep skin is more delicate and movement can affect how fine geometry settles. Tell the artist to maintain clear negative spaces and to avoid ultra-fine interior filigree that blurs. The typical mistake is choosing an image meant for a flat surface and not accounting for curvature and flex. For the appointment wear a sleeveless top so the inner arm stays relaxed and accessible. Expect low-to-moderate pain and a single session for small-to-medium geometry.
21. Back Shoulder Blade Sun and Moon Pairing
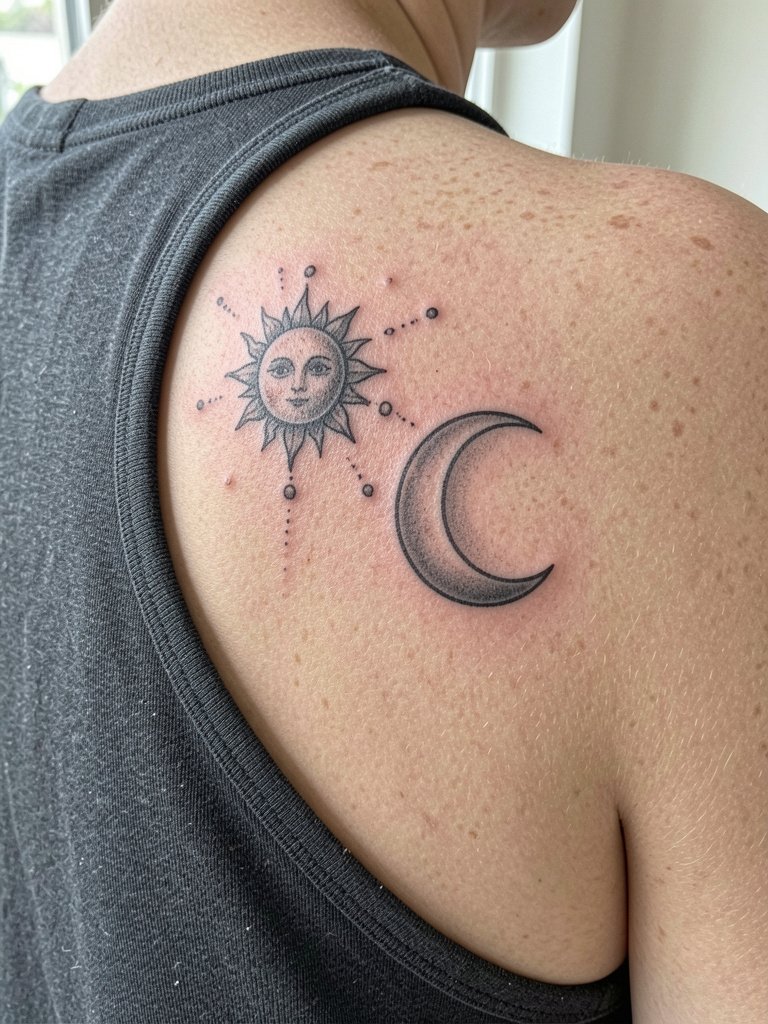
Shoulder blade placements allow for expansion later into larger back pieces. Ask the artist to leave breathing space so future additions do not disrupt the sun and moon balance. A mistake is anchoring the design too close to the spine where symmetry becomes tricky. For session wear a loose button-down you can remove or a wide-neck top for easy access. This area heals well and tends to show crisp linework for several years with normal sun protection.
22. Stipple-Shaded Moon with Tiny Sun Halo on the Wrist Inner Side
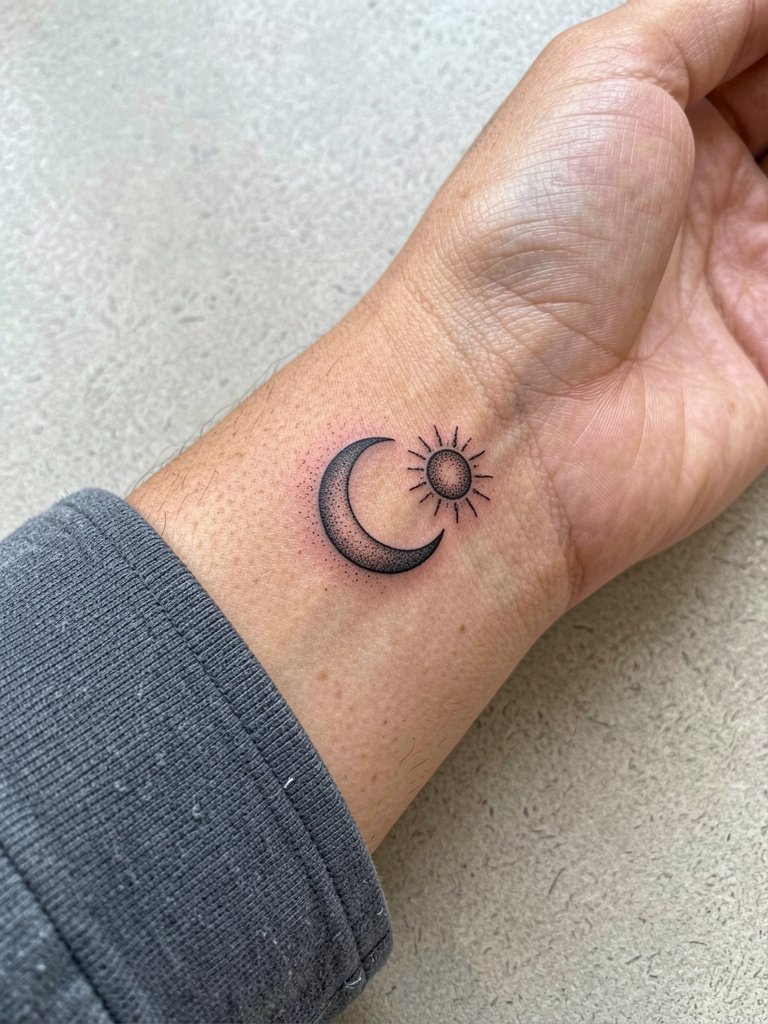
Stipple shading gives moon crescents depth without heavy fills that can look flat over time. For the inner wrist pick a slightly heavier dot density near edges so the design does not disappear into motion. People often copy a thin-lined reference and then see it blur; plan touch-ups. For the session wear short sleeves and keep wrist jewelry off for two weeks. This spot is visible daily, so consider how it will pair with watches and chains.
23. Minimal Solar Disc Behind the Ear Nape
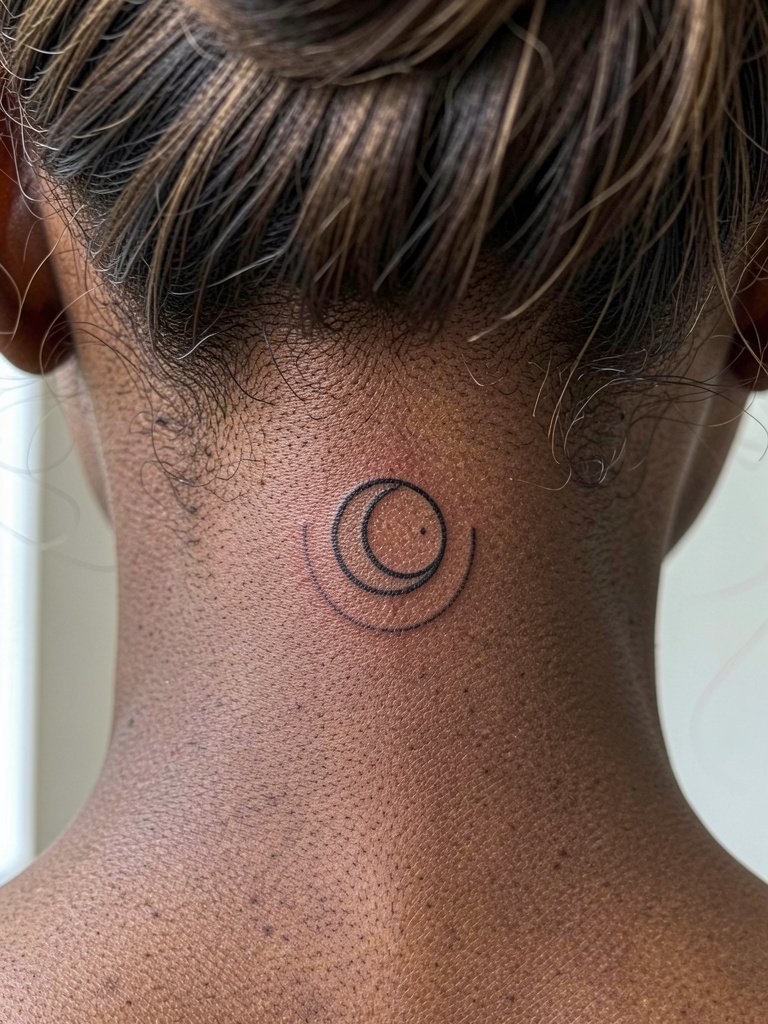
Nape placements are discrete and look great when hair is up. Ask the artist to check the stencil against your hairline so the disc does not sit where hair will rub it constantly. A common mistake is placing the piece too low under long hair, causing friction and fading. For the session have a hair clip ready and consider hair claw clips that avoid pressure on the area. Healing is quick if you avoid collars and tight straps rubbing the spot.
24. Sun Face Neo-Traditional on the Upper Arm with Moon Crescent Wrap
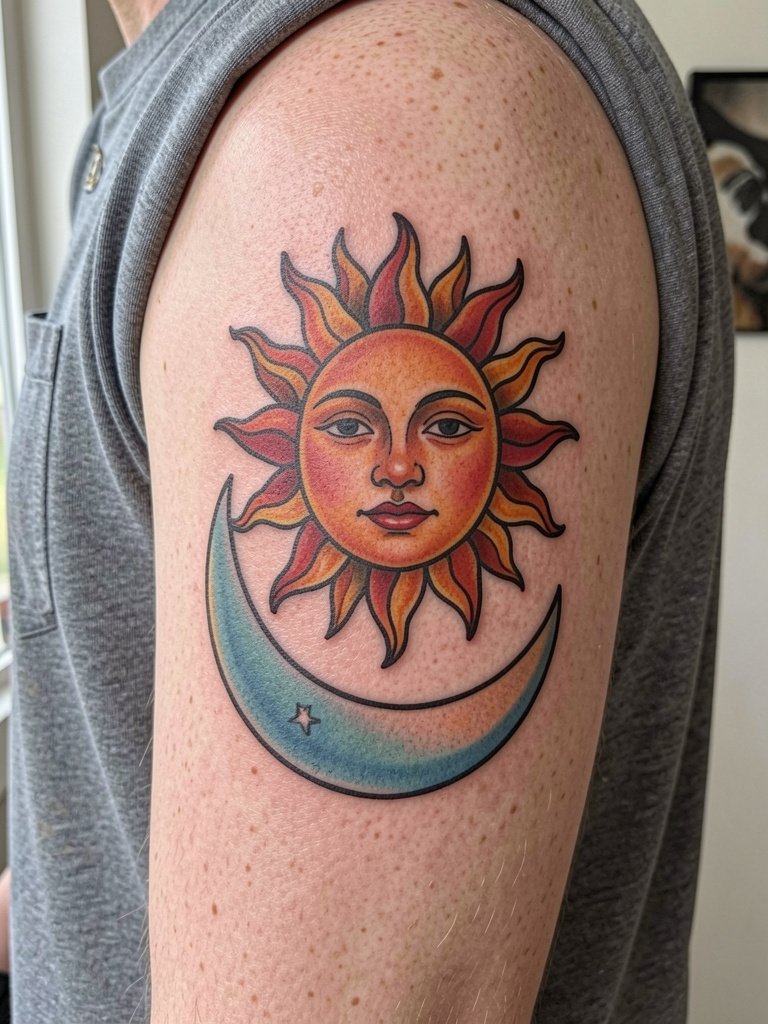
A sun face with moon wrap plays into classic motifs and reads well with bold outlines. For longer life pick blocked color fills and avoid tiny facial features that turn into smudges. The mistake is overworking facial detail at small scale. For showing off, wider strap tank tops frame the upper arm and balance saturated color. One to two sessions are typical depending on color passes and shading.
25. Pocket-Size Sun and Crescent on the Rib Side for Hidden Detail

Hidden pocket placements suit people who want a private motif. Plan the piece slightly larger than your initial idea so the lines hold under skin stretch. The usual error is making it too small and then losing definition. Session wear that gives full access includes a sports bra or loose top. Expect medium discomfort for ribs and side torso locations and be ready for a relaxed healing window.
26. Matching Ankle Pair with Mirrored Rays
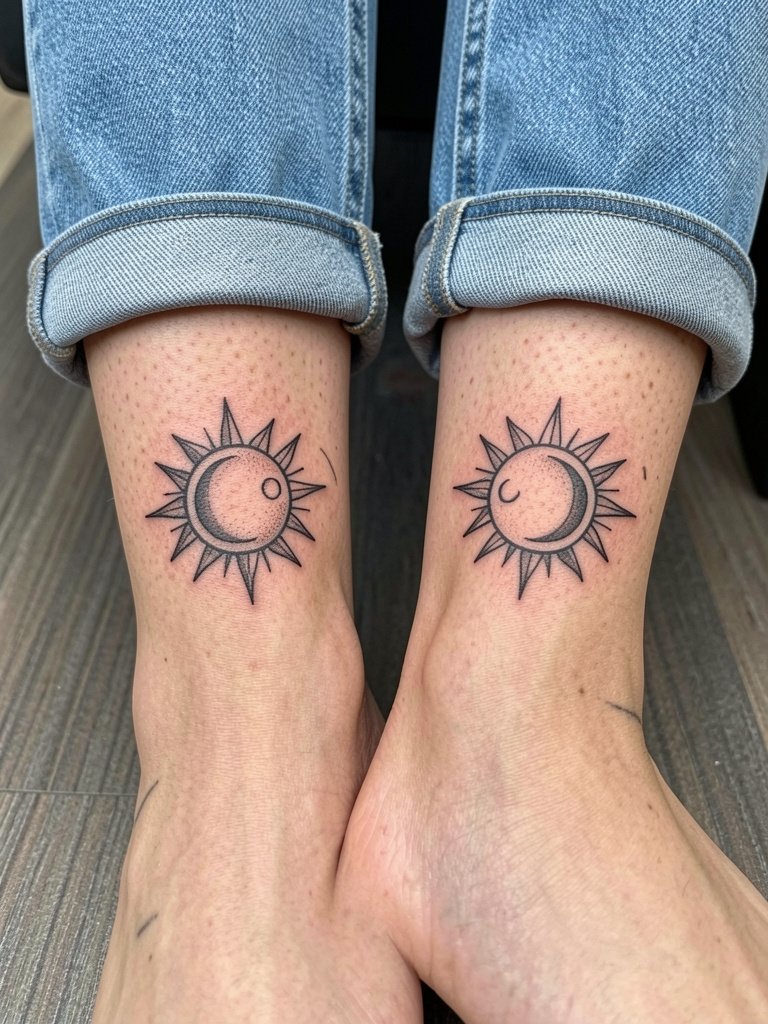
Matching ankle pairs are charming and wearable, but both ankles rarely age the same. Ask the artist to match line weight and placement precisely and to point out which ankle might need a touch-up first. The common mistake is using too-fine rays that vanish under sock and shoe friction. For showing off with low-profile footwear try minimalist sneakers or sandals and avoid tight socks while the area heals. These pieces typically finish in a single session each.
27. Large Back-Centered Sun and Moon Tapestry
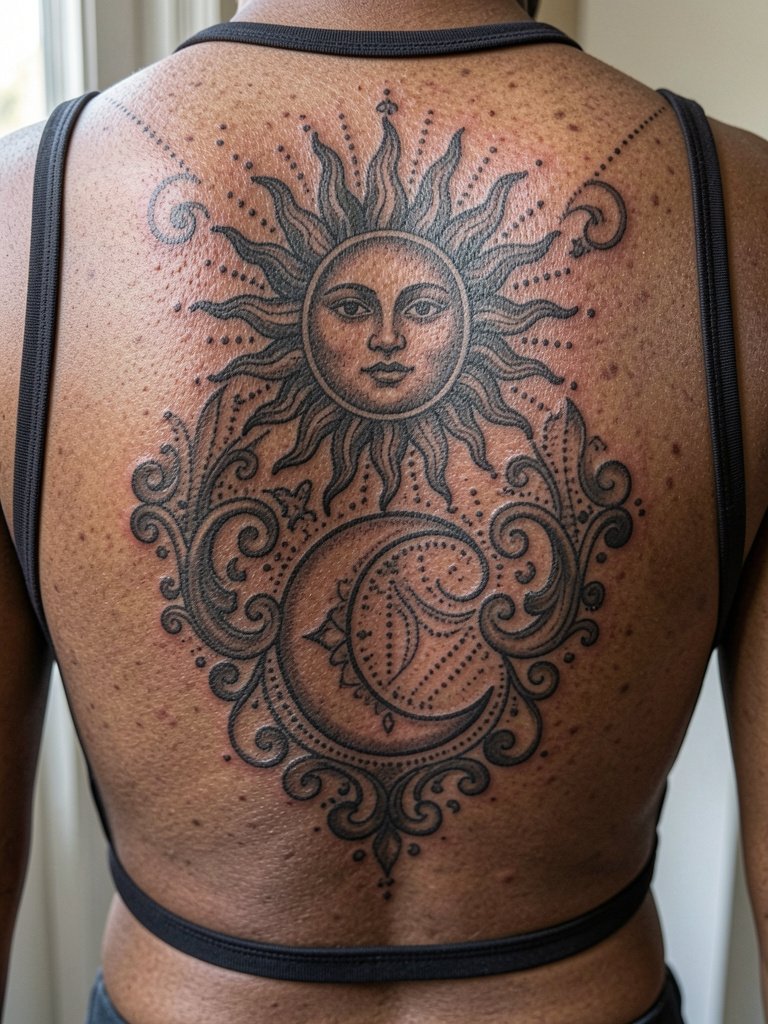
Full back tapestries let you go big with balance and ornament. Plan the composition in stages with clear negative spaces so the sun and moon remain focal points when other elements are added later. A frequent mistake is packing in too many small motifs at first pass which forces revisions. Expect multiple sessions and discussion about how it will sit with clothing and swimwear. Wear a loose button-down to the first session for easy undressing that keeps the area comfortable.
Frequently Asked Questions
Q: How do I choose between fine line and bold line for a sun and moon piece?
A: Fine line looks delicate and pairs well with jewelry-like placements, but on high-motion areas like wrists and ankles bold linework tends to hold up better. Consider the placement first, and if you prefer thin detail ask for slightly heavier single-needle weight and a planned touch-up timeline. If longevity is a priority, pick bold contours and controlled fills.
Q: Will color watercolors require more maintenance than black and gray?
A: Color often needs more attention because some pigments fade faster, especially with sun exposure. Black and gray usually ages more predictably for small symbolic tattoos, while watercolor washes can look great but may demand touch-ups. If you choose color, discuss sun protection and realistic touch-up schedules with the artist.
Q: Where can I find current sun and moon tattoo portfolios and healed examples?
A: Search Instagram and TikTok hashtags like #sunandmoontattoo, #celestialtattoo, #finelinetattoo, and #blackworktattoo and use location filters to narrow to your city. Look for portfolios that show healed photos instead of only fresh ink, and use Reddit threads to check community feedback on artists and healed results. Pinterest is useful for refining style ideas but confirm healed work on artist pages.
Q: How should I dress for a session depending on placement?
A: For forearm and wrist pieces wear short sleeves or a rollable linen shirt. Shoulder caps and upper arm work need sleeveless tops or spaghetti straps. Sternum and rib sessions are easiest in fitted sports bras or bandeaus that let the artist access the area without shifting fabric. For ankle and calf pieces wear jeans you can roll up or cropped pants that expose the spot naturally.
Q: Are there special concerns for darker skin tones with sun and moon designs?
A: Contrast and line weight matter more than color choices. Slightly stronger contours and richer saturation help motifs read clearly on darker skin. Ask to see healed examples on similar skin tones and request that the artist demonstrate how dot work and stippling look once healed. Touch-ups may be necessary to retain crisp edges.
Q: How often should I expect touch-ups for small celestial pieces?
A: Touch-up frequency depends on placement and style. High-friction spots like fingers and ankles often need a touch-up within one to three years. Wrists and ribcage may require work earlier if lines were extremely fine. Expect a small maintenance session every few years for delicate pieces and more rarely for bold blackwork.
