
The Statue of Liberty is one of those icons people either want exactly or want to remix until it feels personal. Trends push tiny single-needle crowns and soft watercolor torches, while experienced collectors often scale up and choose heavier linework so the face and crown hold over time. I’ll show designs that work for first tattoos and for full sleeves, with placement tips, session notes, and outfit ideas so the piece reads the way you expect after it heals.
1. Minimalist Torch on the Wrist
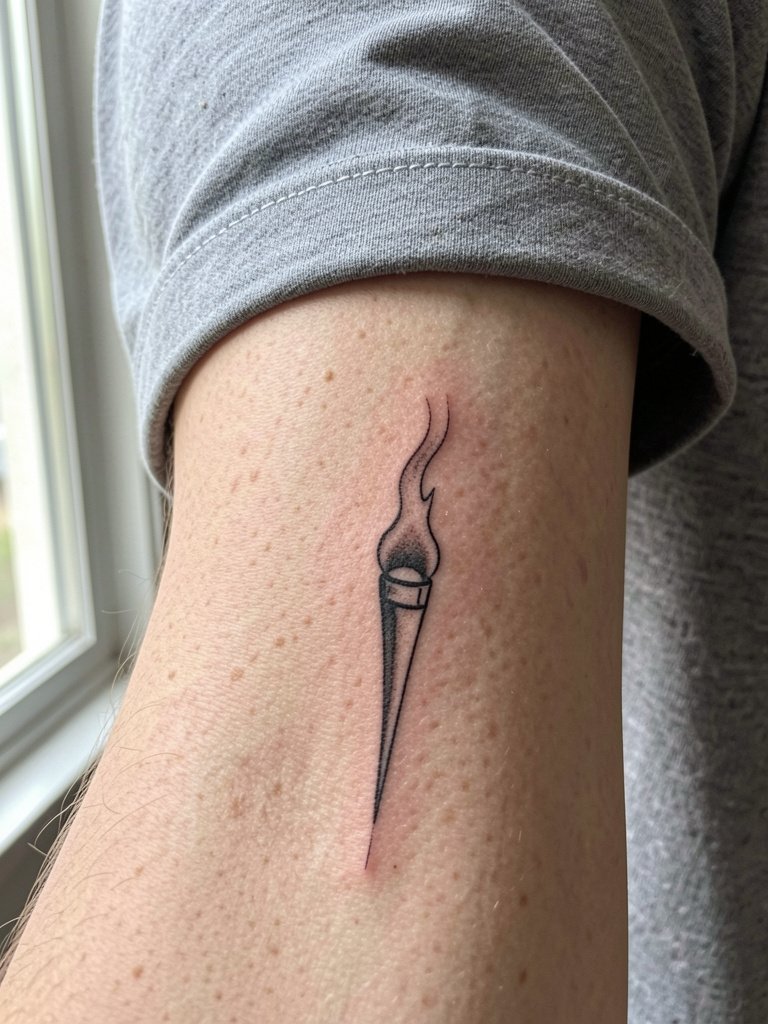
This tiny torch reads like a symbol rather than a portrait. The inner wrist eats fine detail, so the line weight should be a hair heavier than the Pinterest single-needle look to avoid early blurring. Expect a 20 to 40 minute session and mild, brief sensitivity when the needle crosses bone near the wrist. A common mistake is asking for tiny crown spikes that will merge by year two. For showing it off wear a thin chain bracelet on the opposite wrist so the tattoo reads without competition. Plan a touch-up around year two if you want crisp crown points.
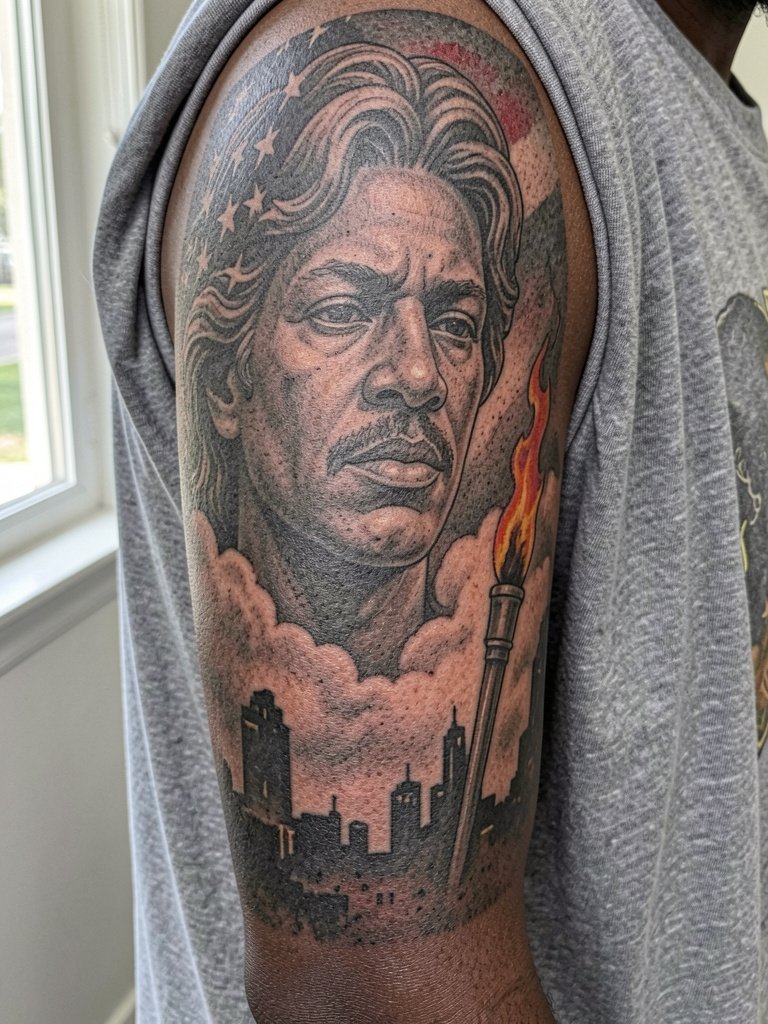
2. Forearm Portrait with Skyline Background

The forearm suits vertical Statue of Liberty pieces because the composition follows the limb. This version pairs a portrait-style bust with a skyline wash so the statue does not feel isolated. Session time is often two to three hours for a medium piece and the forearm is low-to-moderate on the pain scale. Ask for reference photos that show the exact crown spacing so the artist can scale facial features correctly. For outfits, a rolled sleeve denim jacket keeps the forearm visible in casual looks. Expect to book a touch-up once healed if saturation dips in patchy zones.
3. Sleeve Centerpiece with Flag Accent
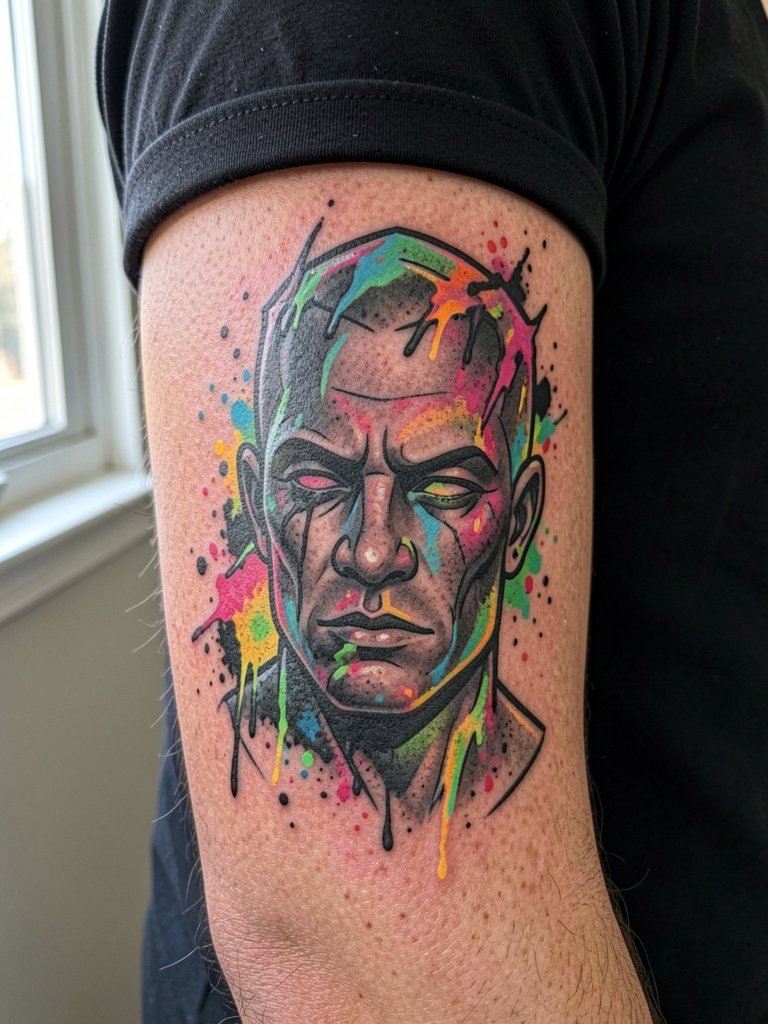
Large sleeves let artists balance monument detail with background filler. One camp favors black and grey because it preserves sculptural depth and facial detail as the piece ages. The other camp likes color because a red or blue accent makes the torch or flag read instantly in photos. If you want color, restrict it to one saturated element and keep the statue work in black and grey so contrast holds. Expect multiple sessions, moderate pain on the inner arm panels, and a realistic touch-up schedule after a year for saturation maintenance.
4. See-No-Evil Concept on the Outer Forearm
This playful reinterpretation keeps the monument but changes the pose for personality. The outer forearm gives the artist room for bold outlines and color pops that age well. The mistake is crowding too many small details into the hands and crown, which blurs after healing. Session time is usually one to two hours depending on color. For showing it off, pair with a fitted black tee and rolled sleeves so the graphic reads cleanly.
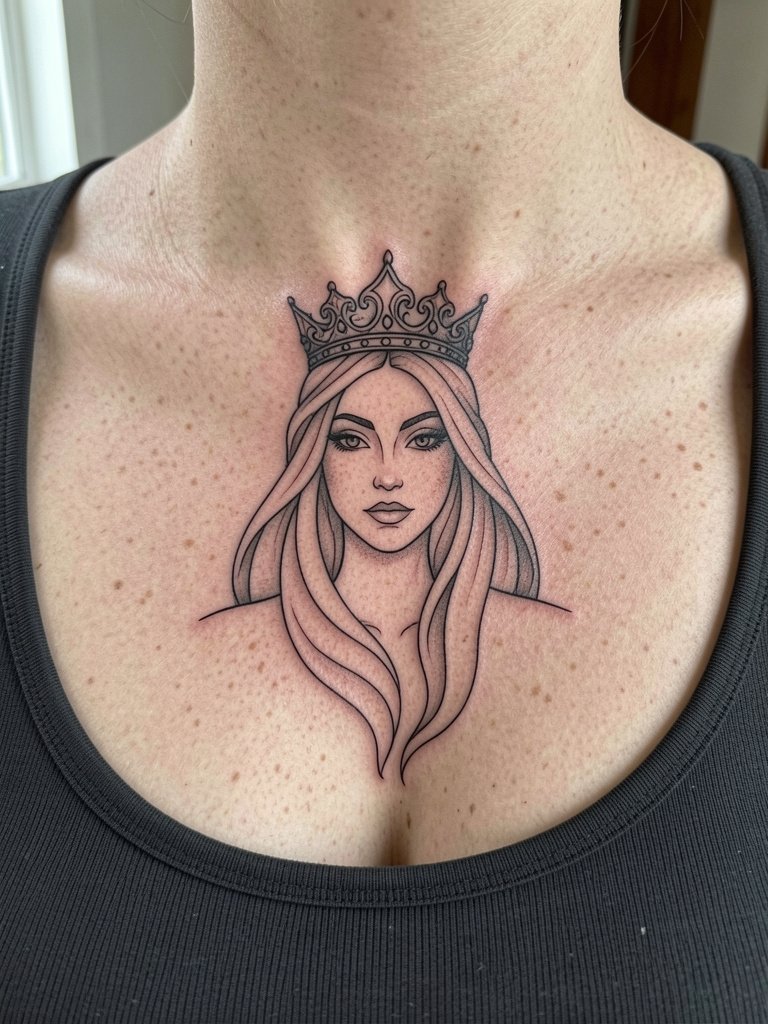
5. Minimalist Outline on the Collarbone
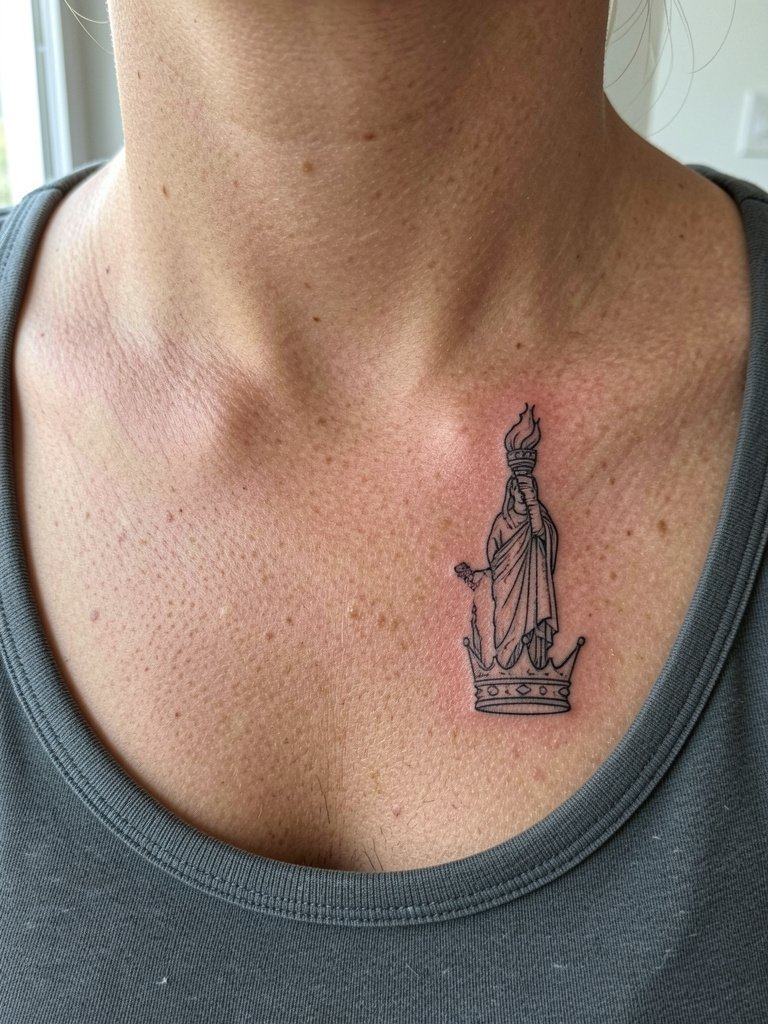
Fine-line collarbone pieces read delicate but can lose crispness if drawn too thin. One camp argues fine line fails here because the skin shifts over the bone and the lines blur within a couple of years. Another camp says a slightly larger, well-spaced single-needle design can settle fine if the artist spaces the elements and avoids micro-detail. Keep the crown simplified and avoid tiny spikes. Wear a wide V-neck or scoop top to frame the area and bring the design into view.
6. Micro-Realism Face on the Inner Forearm
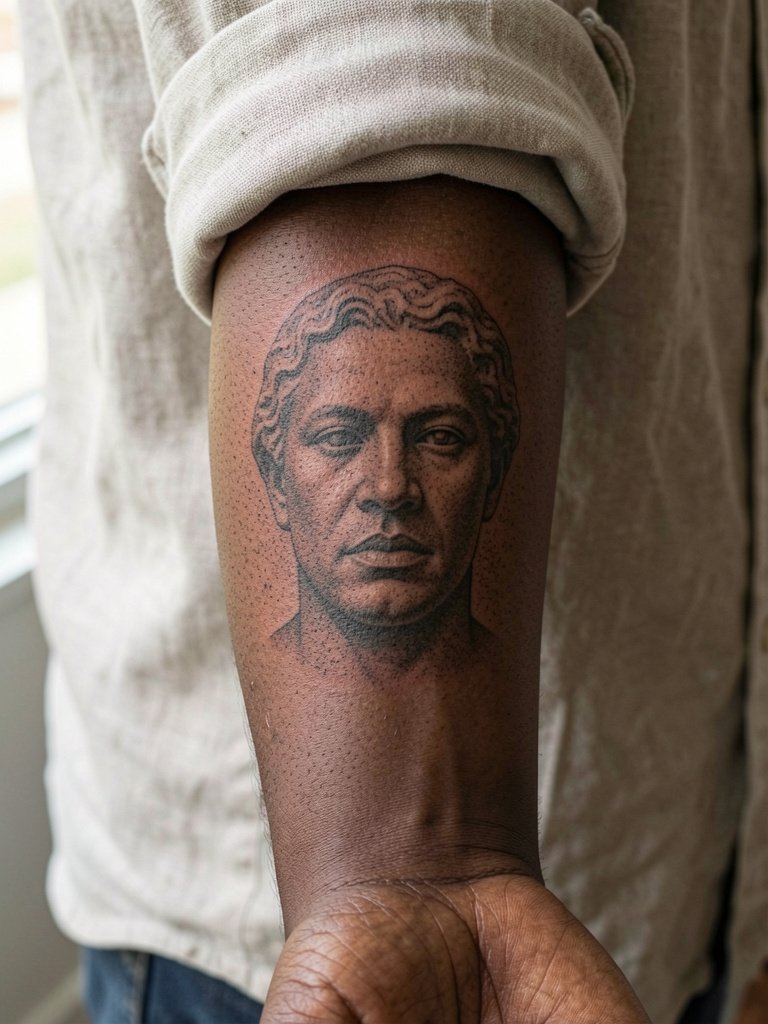
Micro-realism captures sculptural nuance in a compact size but requires restraint. The inner forearm is a good canvas because it stays relatively flat. A common error is compressing too many facial lines into a too-small area which looks great fresh and then softens. Expect a two- to three-hour session and plan for a touch-up at six to twelve months to rebalance subtle shading. For appointment wear choose a rolled cuff linen shirt so your sleeve can stay out of the way without rubbing the fresh ink.
Session Day Picks
The first six designs above cover wrist, forearm, collarbone, and upper arm work, so a few small kit items help the session and the first week of healing.
- Fragrance-free gentle body wash. Useful for rinsing fresh tattoo areas without irritating sensitive linework from the wrist to the forearm.
- Thin protective film roll for small areas. Keeps wrist and finger-adjacent pieces protected from friction during the first days.
- Tattoo-specific sunscreen stick with SPF. After healing, a stick helps shield small exposed pieces from UV fade on forearms and collarbones.
- Fragrance-free healing balm alternative. A lighter option than heavy ointments for detailed black-and-grey work.
- Aquaphor Healing Ointment. A common first-day product to keep small stencil lines from scabbing too hard on precise portrait pieces.
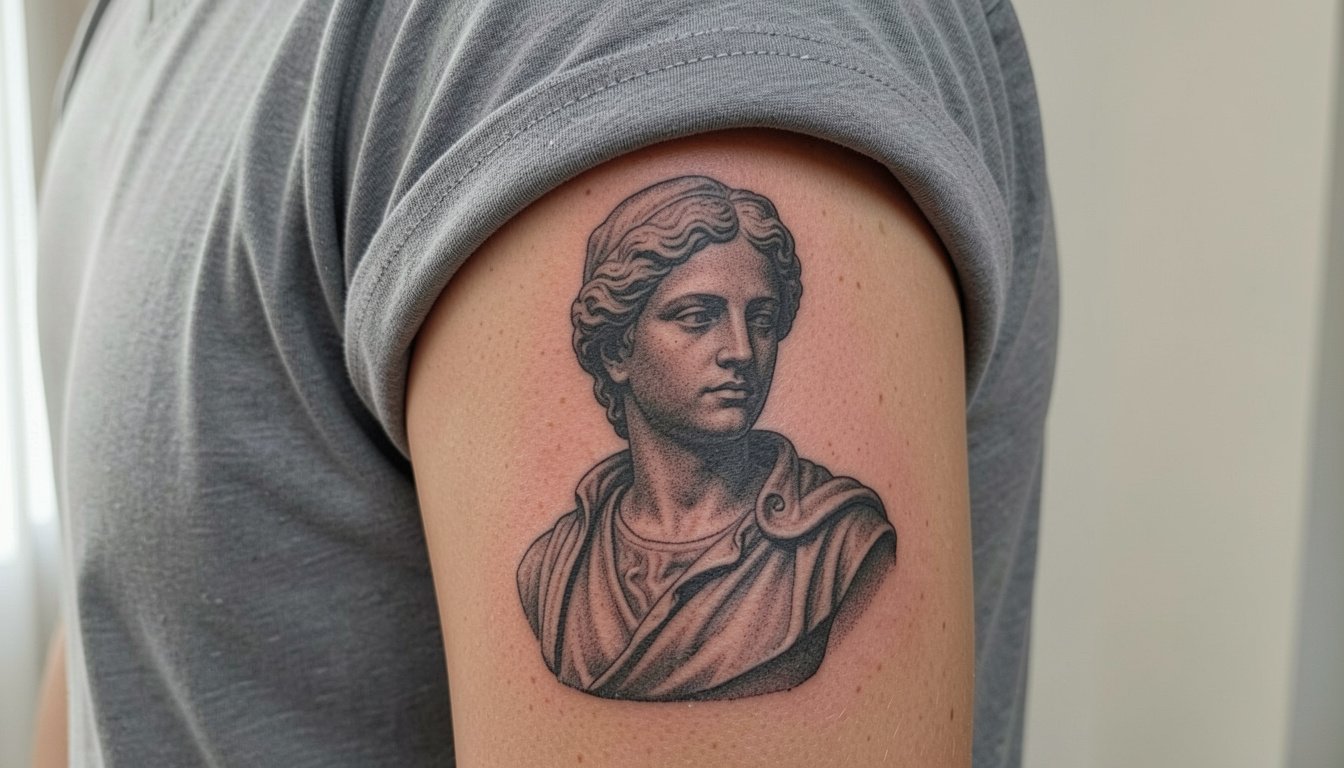
7. Ornamental Framed Bust on the Upper Arm
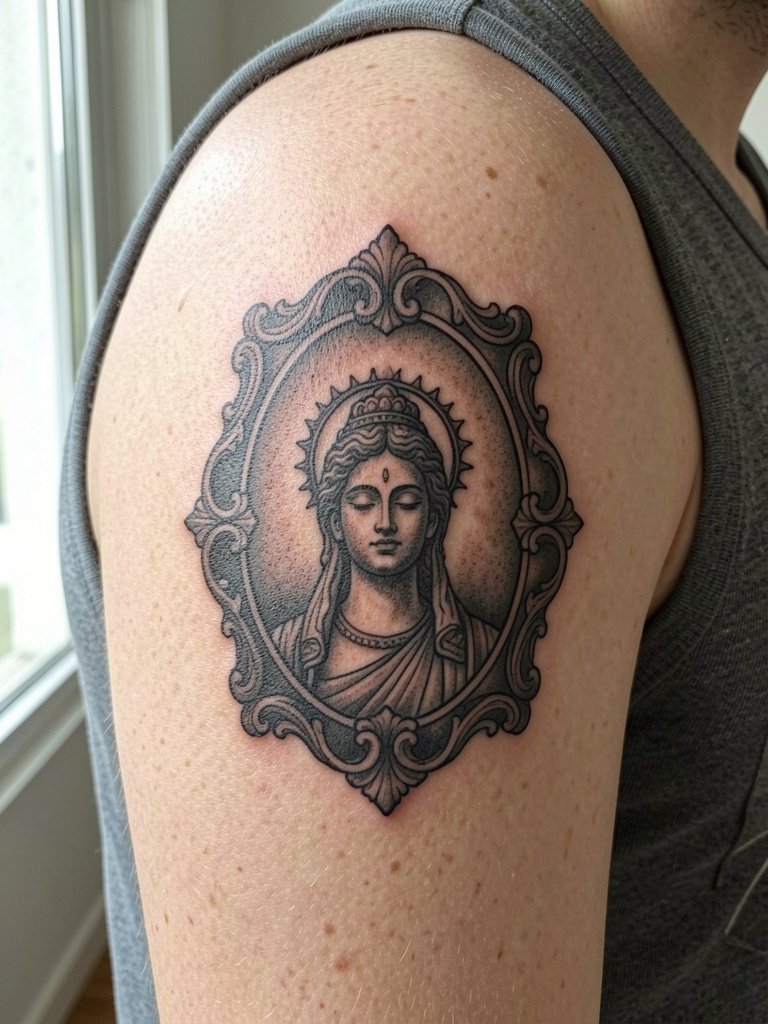
Framed ornamentals turn the statue into a portrait medallion that reads like custom flash. Upper arm skin handles shading well and the shoulder cap can hide the beginning of a sleeve. A typical error is over-detailing the filigree at small scale which blurs with time. Session time is one to two hours for a medium framed piece. For outfits try an off-shoulder top to let the frame rest visually on the shoulder. Discuss how the halo spacing will look from three inches away so the medallion does not compress.
8. Blackwork Silhouette on the Calf
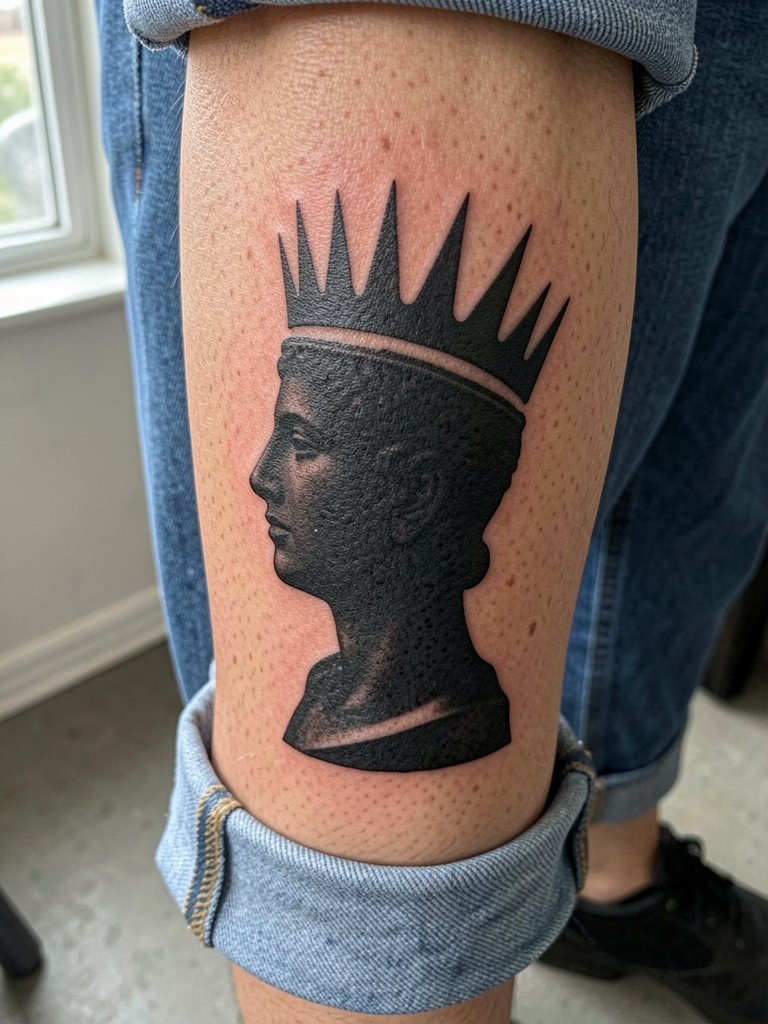
Blackwork silhouettes are durability-first. Solid fields age predictably and hide minor blowout risk because the design is meant to be graphic. Calf skin is forgiving and the piece shows well with shorts or skirts. The main session is one or two hours and the pain is generally low. Avoid half-tones that try to force portrait detail into a silhouette. For summer outfits try cuffed jeans so the calf sits in clear view.
9. Statue with Rose Accents on the Thigh
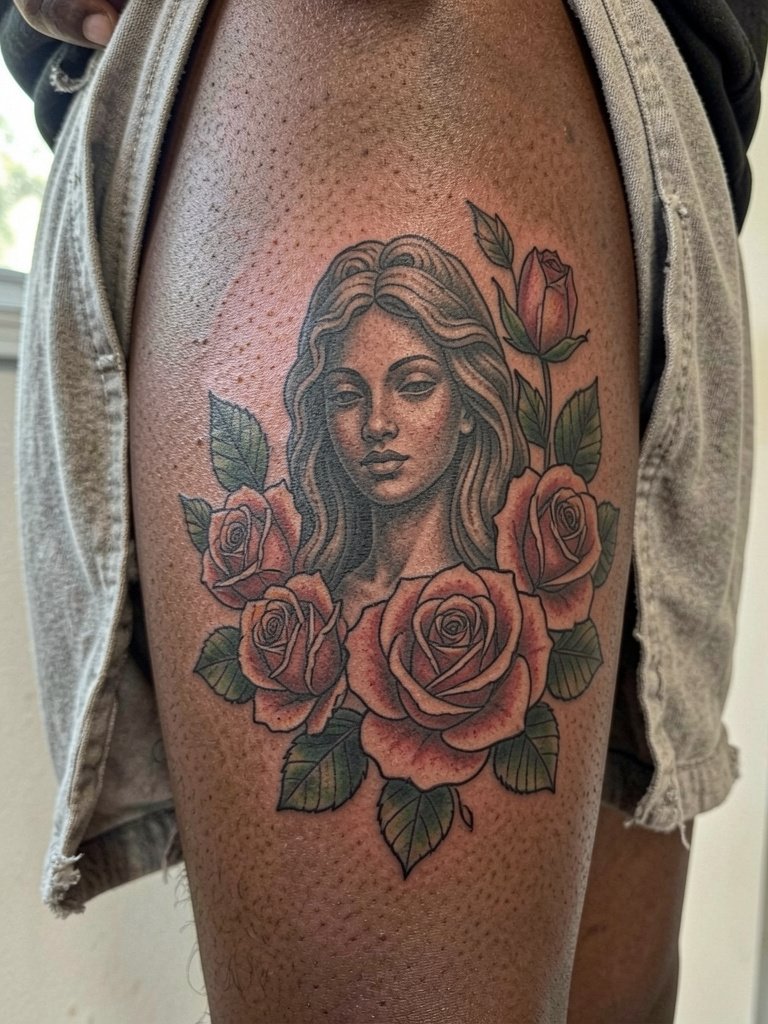
Combining the statue with florals softens the monument and opens personal symbolism beyond patriotism. Thigh pieces let you blend color without forcing it onto the face area. A mistake is over-saturating tiny flowers that turn into blotches; scale the petals to the thigh. Session time is often longer, two to four hours, and the pain is moderate. For showing it off in summer choose bike shorts or a slit skirt so the composition sits where clothing frames it.
10. Torch-Only Micro Tattoo on the Ankle
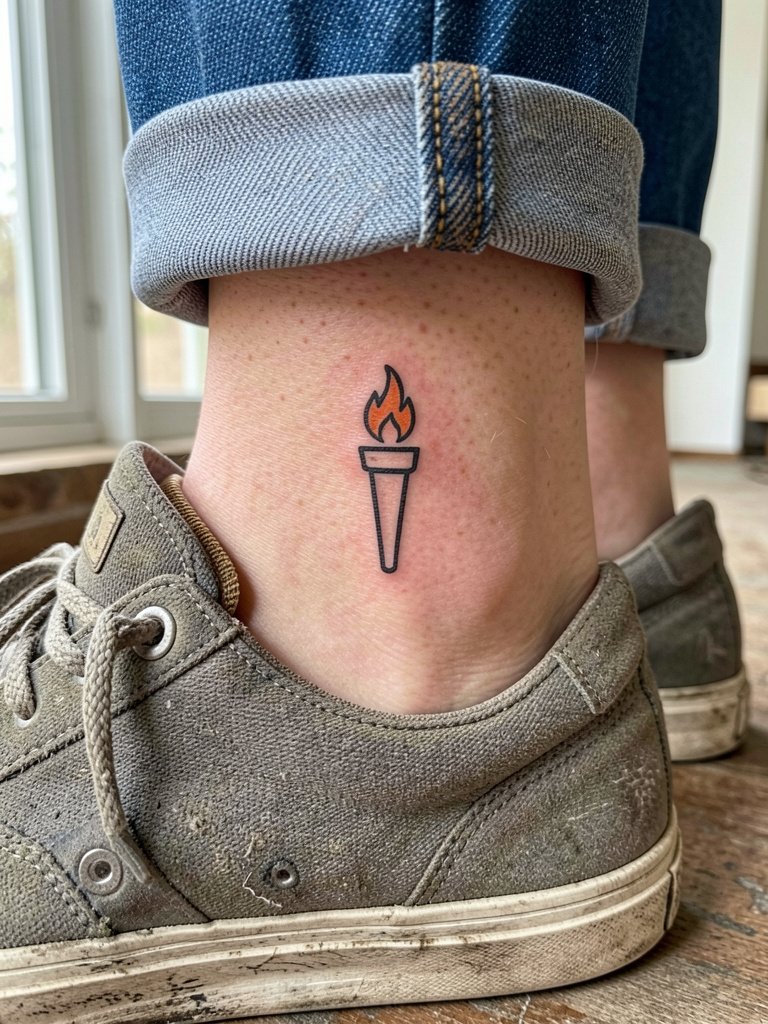
A torch-only micro tattoo is subtle and travel-friendly. The ankle faces friction and washing, so the design should avoid ultra-fine strokes. Typical session time is under an hour and pain varies with bone proximity. People usually regret too-tiny flames that lose shape after six months, so opt for modest spacing and a tiny color spot for the flame. Wear low-profile sneakers and avoid tall socks until healed.
11. Graffiti-Style Reinterpretation on the Outer Forearm
Street-style reinterpretations modernize the statue and avoid cliché patriotic looks. Bold outlines and high saturation read well at medium scale and photograph strongly. The pitfall is over-using color in tiny areas which then loses contrast. Expect one to two hours for a medium forearm piece and moderate pain. Keep sleeves minimal and let the piece be the focal point by pairing with a plain white tee.
12. Skyline Wrap with Statue Silhouette on the Upper Arm
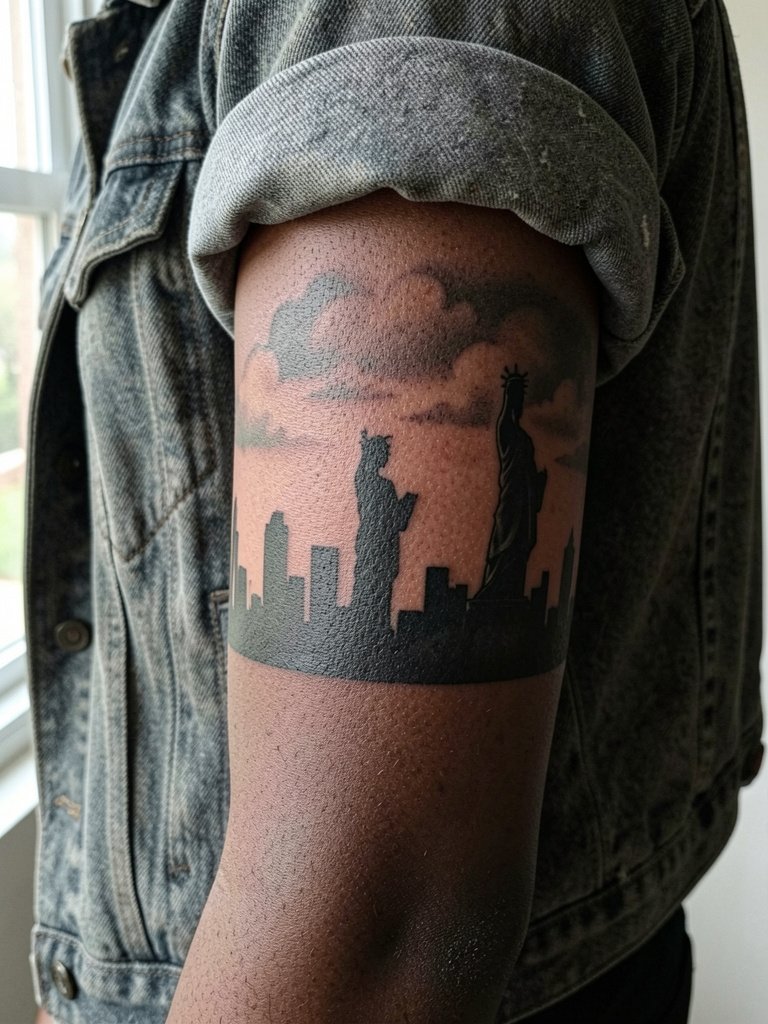
A wrap design uses the arm's circumference to create a continuous city scene with the statue set in negative space. One common mistake is trying to cram too much skyline detail into a narrow band. Session time varies with the wrap length and may require two sessions. For casual visibility, try an oversized tee with rolled sleeves so the band reveals itself when you move. Discuss how the silhouette reads from both sides before you book.
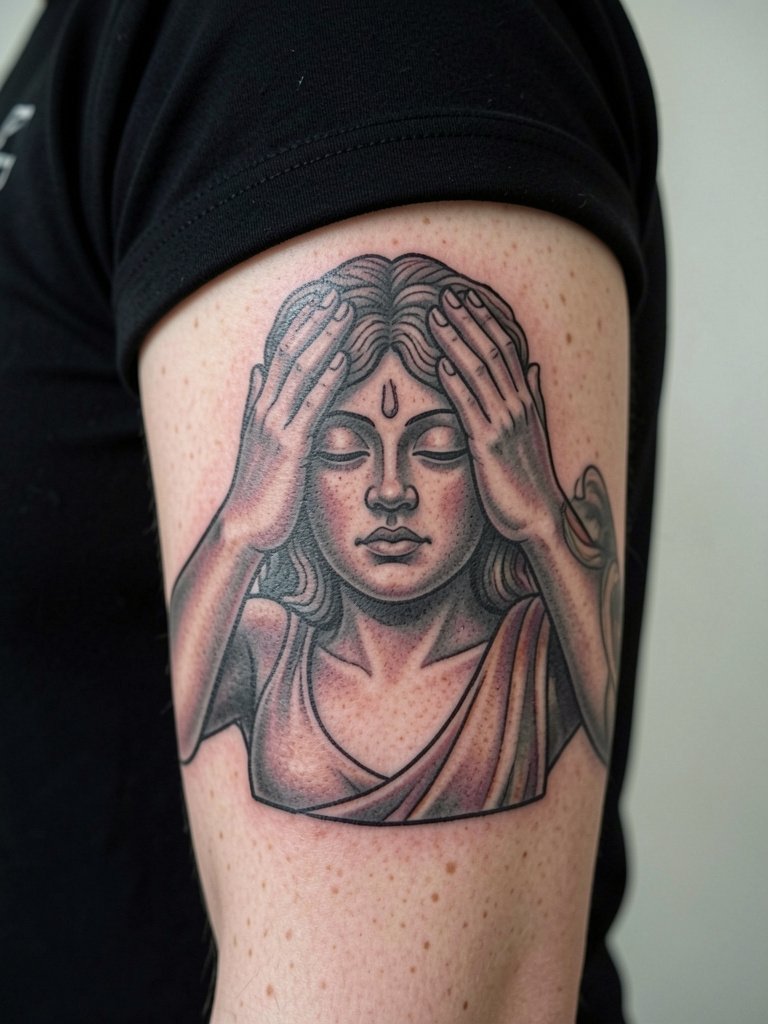
13. Woman-as-Symbol Linework on the Collarbone
Stylized woman-as-statue designs let you personalize expression and age better than overly literal monuments. The collarbone placement needs careful spacing so facial lines do not compress into the clavicle. Typical session time is one to two hours and pain is moderate to high when crossing bone. Avoid adding tiny script along the collarbone edge because lettering blurs here. A wide-neck top highlights the piece without pulling it into the chest area.
14. Distressed Monochrome Bust on the Ribcage
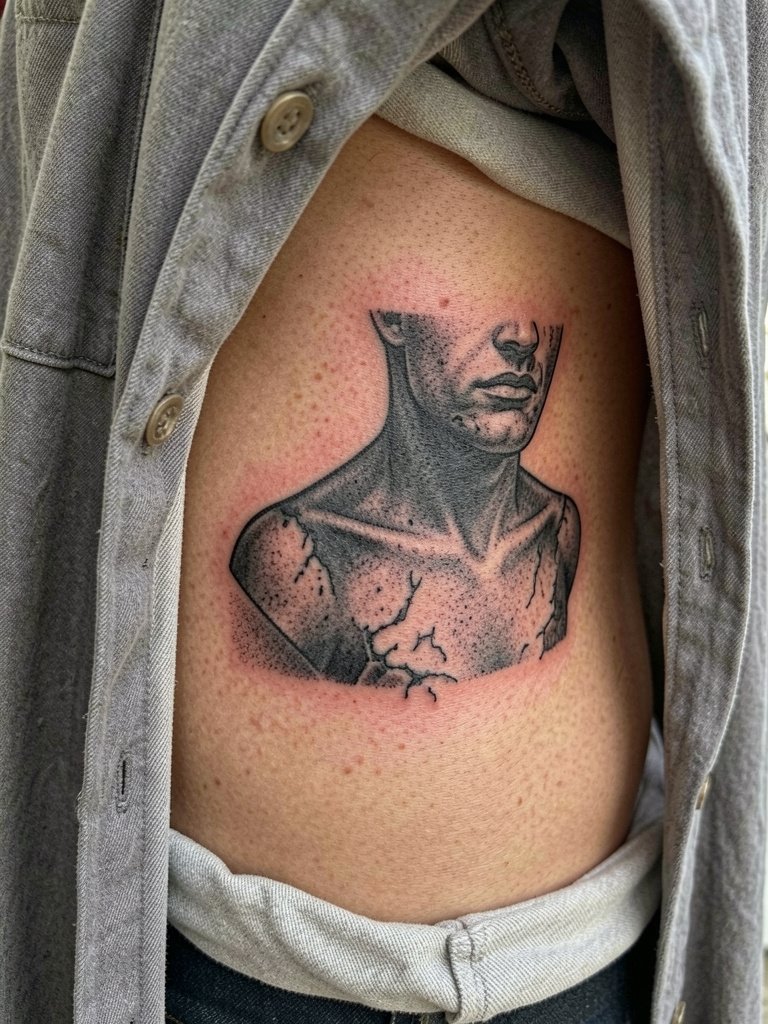
Ribcage work reads dramatic but it heals on stretchy skin that moves with breath. One group of artists avoids fine line here because the stretch can cause blurring within two years. Another group says that with slightly wider spacing and proper needle depth fine line can settle well, and they will show three-year healed shots. Be candid about pain. Ribs are often described as high on the scale, and you should plan for breaks. For the session wear a zip hoodie or sports bra that can be adjusted without rubbing the area during healing.
15. Small Torch with Coordinates on the Ankle
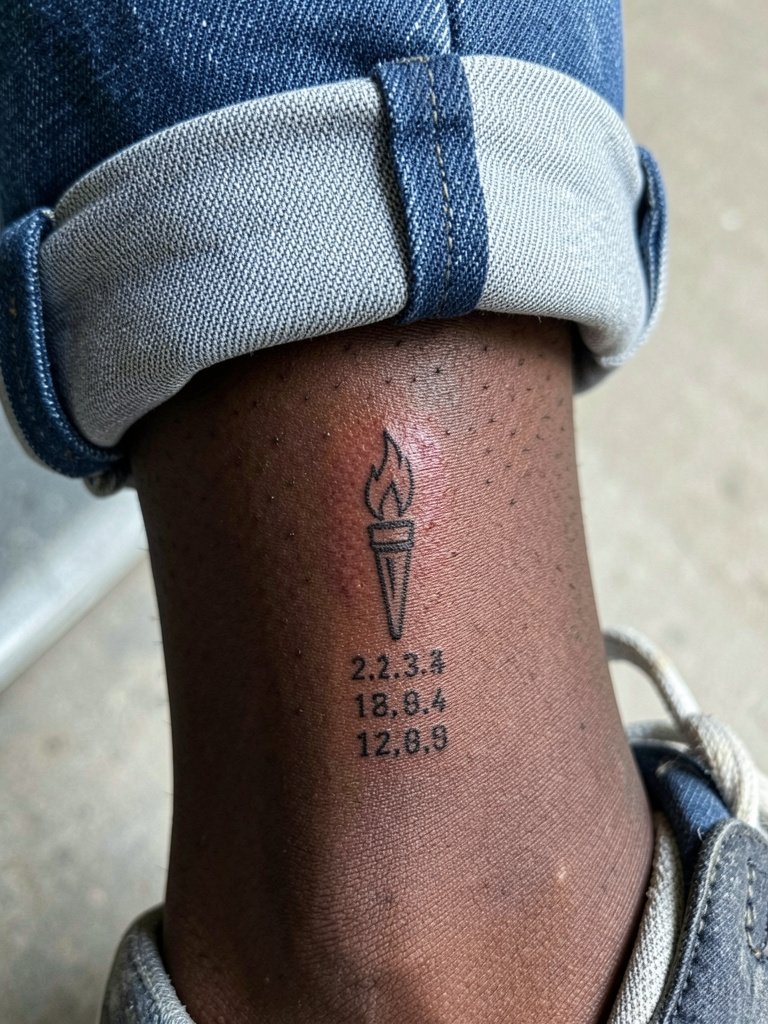
Adding coordinates makes a small torch personal and avoids cliché imagery. The ankle faces friction from socks and shoes so simple, solid shapes outperform micro-detail. Session time is short and pain is mild to moderate. A realistic mistake is requesting five-digit numerals in micro type that become illegible; choose slightly larger digits and a clean monospace font. Keep socks off the area until fully healed and wear shoes that do not rub the site.
Frequently Asked Questions
Q: How do I decide between black and grey or color for a Statue of Liberty piece?
A: It depends on size and placement. Black and grey usually preserves sculptural detail and facial contrast on medium and small pieces, so it is safer for portraits and crown work. Color fans argue a selective accent like the torch or a flag wash gives immediate recognition and photographic pop, especially on large sleeves. If you want both, ask for a black-and-grey study with one planned color element so you can see how contrast will read.
Q: What is the smallest size that still holds crown and face detail?
A: For legible crown spikes and a recognizable face plan on at least three inches of vertical height. Smaller than that the crown will need simplification to avoid early merging. Bring two reference images at different scales so the artist can show how line weight and spacing change between three inches and five inches.
Q: Where should I look to find artists who show healed Statue of Liberty work without naming anyone directly?
A: Search hashtags like #statueoflibertytattoo, #blackandgreytattoo, and #finelinetattoo on Instagram and TikTok and filter by your city to find portfolios that match the style you want. Use Reddit threads in r/tattoos and r/tattooadvice to ask for healed photos because many artists post only fresh work. Check whether the portfolio labels healed shots to compare how linework and saturation settled across skin tones.
Q: How many sessions and what pain should I expect for an upper-arm sleeve with statue and skyline?
A: Plan for multiple sessions totaling several hours spread over at least two appointments. Upper-arm sleeves are moderate in pain with some spots more sensitive under the inner bicep. Expect an initial long session for outline work and follow-ups for shading and any color. Schedule breaks and arrange loose clothing for the sessions.
Q: What should I wear to my appointment for a forearm or collarbone tattoo?
A: For a forearm piece wear a loose short sleeve or denim jacket that you can roll easily so the artist has clear access and the fabric does not rub the fresh tattoo. For collarbone work pick a scoop-neck or wide V-neck top that exposes the area without needing to be pulled or adjusted during the session. A loose button-down shirt works well when you need to stay covered and still give access.
