
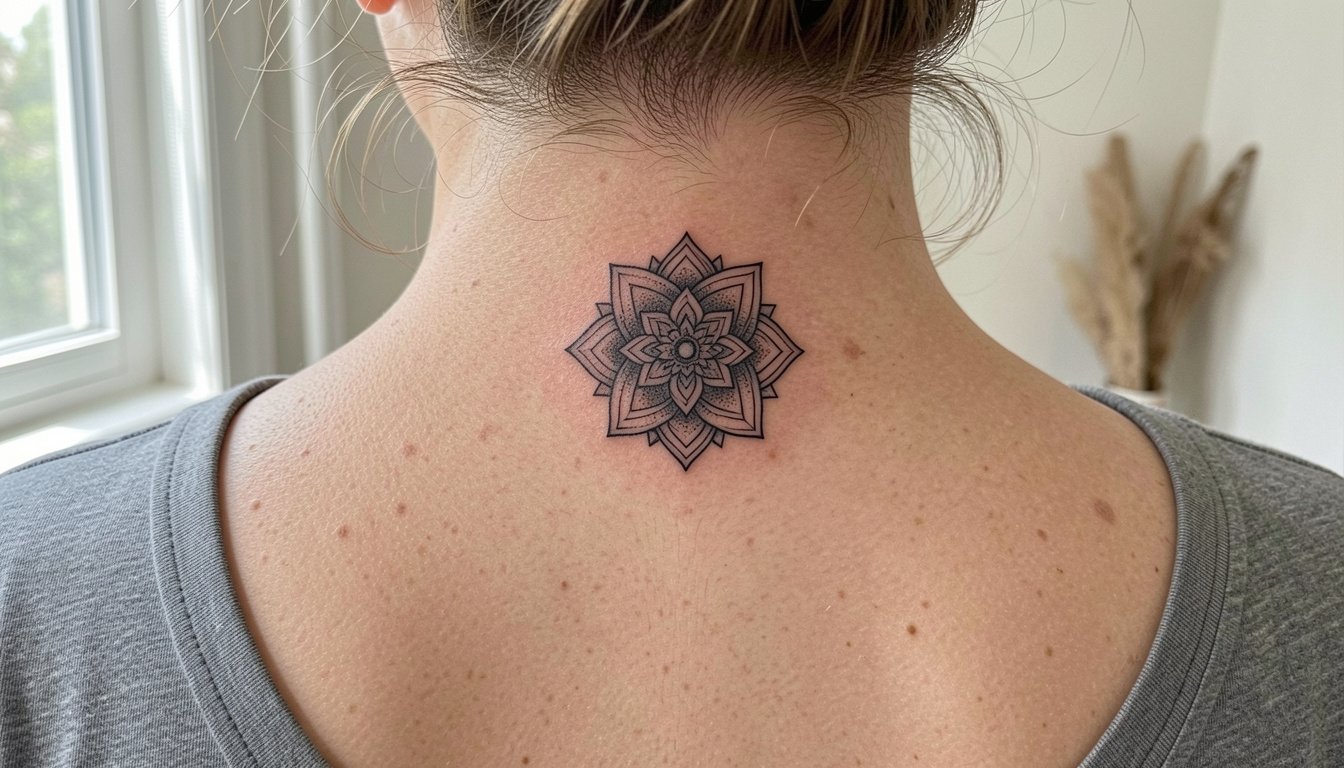
The stencil sat on the side of the neck, sticky and slightly askew, while the artist stepped back, squinted, and repositioned it by a millimeter. That tiny reset matters on neck skin because every millimeter changes how linework settles with movement and collars. The next sentences show subtle neck ideas that read private but still hold up as the years and collars do their work.
1. Micro Compass on Side Neck

A micro compass works when you want a clear symbol without a loud statement. Recommend keeping the diameter around two centimeters so the circle and arrow avoid crowding, which reduces blowout risk on the thin lateral neck skin. During consultation bring a scaled mockup at actual size so the artist can show how the needle spacing reads on this curving surface. Expect a short 20 to 35 minute session and a light sting across the lateral neck. For showing off, this placement pairs with open-collar shirts and crewneck sweaters that allow a brief peek, try a wide-neck tee for a clean frame. Note that neck tattoos need an experienced hand because movement and thin skin affect long-term sharpness.
2. Tiny Anchor Beside the Adam's Apple
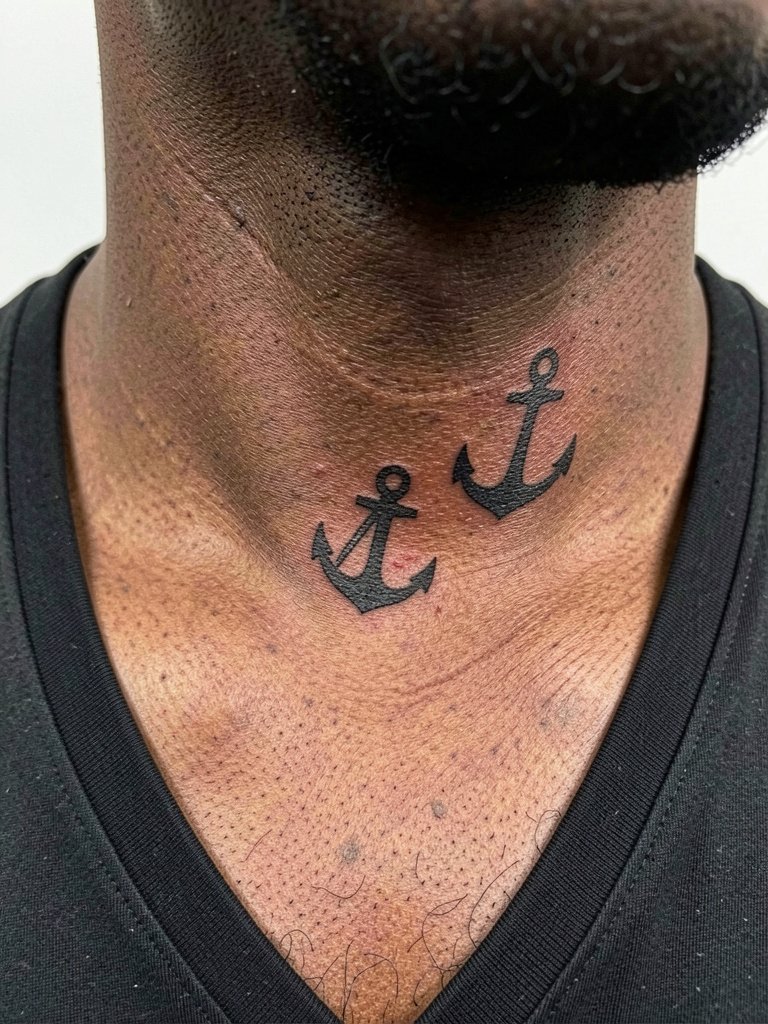
Put a compact anchor slightly off-center from the midline if you want the symbol to read clearly while avoiding the thyroid tissue area. The front-neck skin moves a lot when swallowing so linework should be slightly bolder than a wrist script, which lowers the chance of losing crispness by year two. Session time is typically under 30 minutes and sensitivity is moderate for most men. For daytime wear, pair this with button-down shirts left one or two buttons open so the anchor is framed without being obvious. Professional considerations apply because front-neck placements often require a specialist familiar with neck anatomy.
3. Whisper Script Along the Nape

A whisper script on the nape reads private when hair falls down and becomes visible only with hair up. Keep the letter spacing slightly wider than usual so the thin single-needle strokes do not merge over time. Ask for a healed mockup so you can see how the cursive reads at six months and two years, because the nape can soften tiny scripts if spacing is too tight. This session is short and generally tolerable but the nape can feel scratchy as the artist works. For nights out, a button-up shirt worn with the collar popped hides or reveals the script with minimal fuss. Professional note, nape work benefits from an artist experienced with hairline placement.
4. Single Dot Cluster at Side Nape
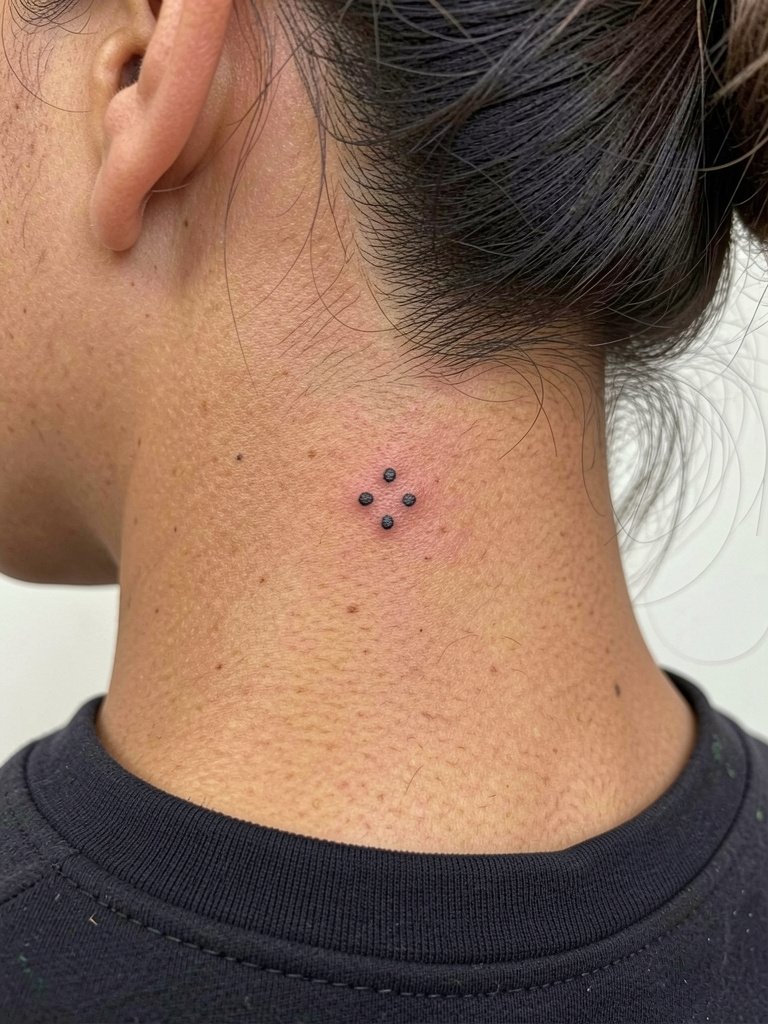
A simple dot cluster is low-profile and ages predictably when the dots are spaced with a plan. One camp says micro dots on neck skin blur because the skin moves and the dots settle into small ovals. The other camp argues that with precise depth control and small spacing the dots retain their circular shape for years. If you lean toward minimalism pick dots at least three millimeters apart and expect a single touch-up after the first year if any dots soften. Session time is usually under 20 minutes and sensitivity is low to moderate. Note that nape placements require an artist who works cleanly on tight, moving skin.
5. Tiny Crescent Moon Behind the Ear
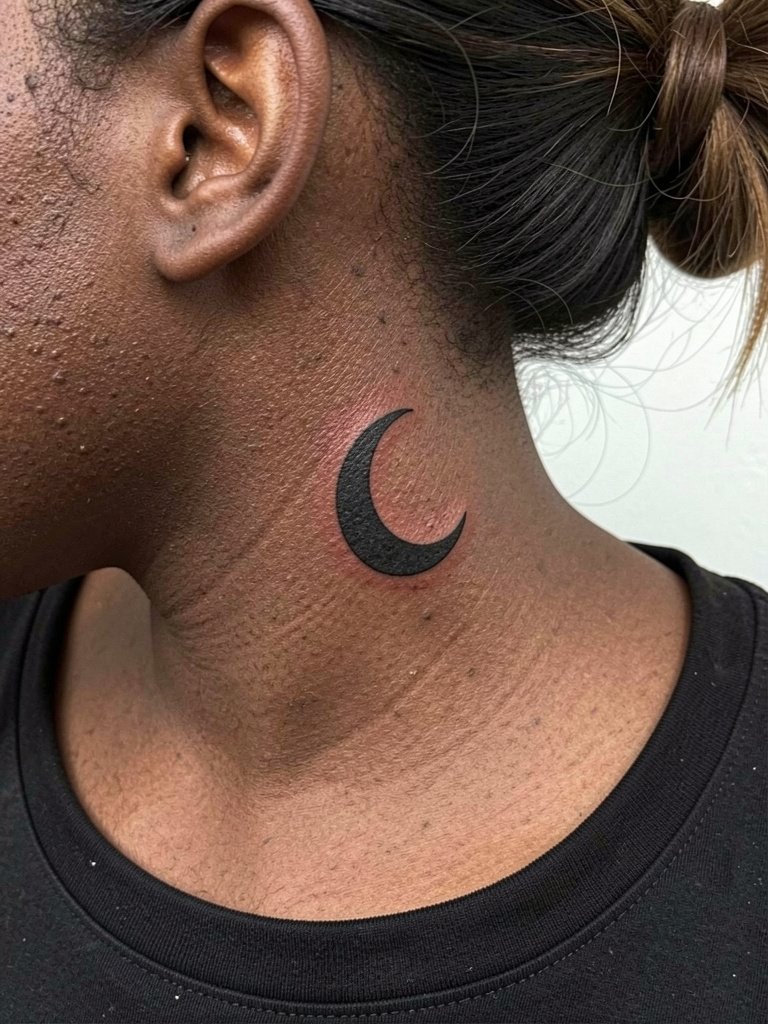
Behind-ear miniatures are easy to conceal and they heal quickly because the skin is thin and stationary when hair or collars are in place. Use a compact solid crescent rather than thin filigree to avoid softening into an indistinct smudge. During the consult have the artist show the exact placement relative to the ear to avoid crossing the mastoid crease. Session time is brief and sensitivity is low but you should expect a slightly louder buzzing sensation because of proximity to bone. For dressing, this spot pairs naturally with crewneck sweaters, and a scoop-neck tee keeps the ear area visible without dramatic exposure. Professional note, the region needs precise application to avoid ink migrating into hairline.
6. Micro Bar Code Style Vertical Lines
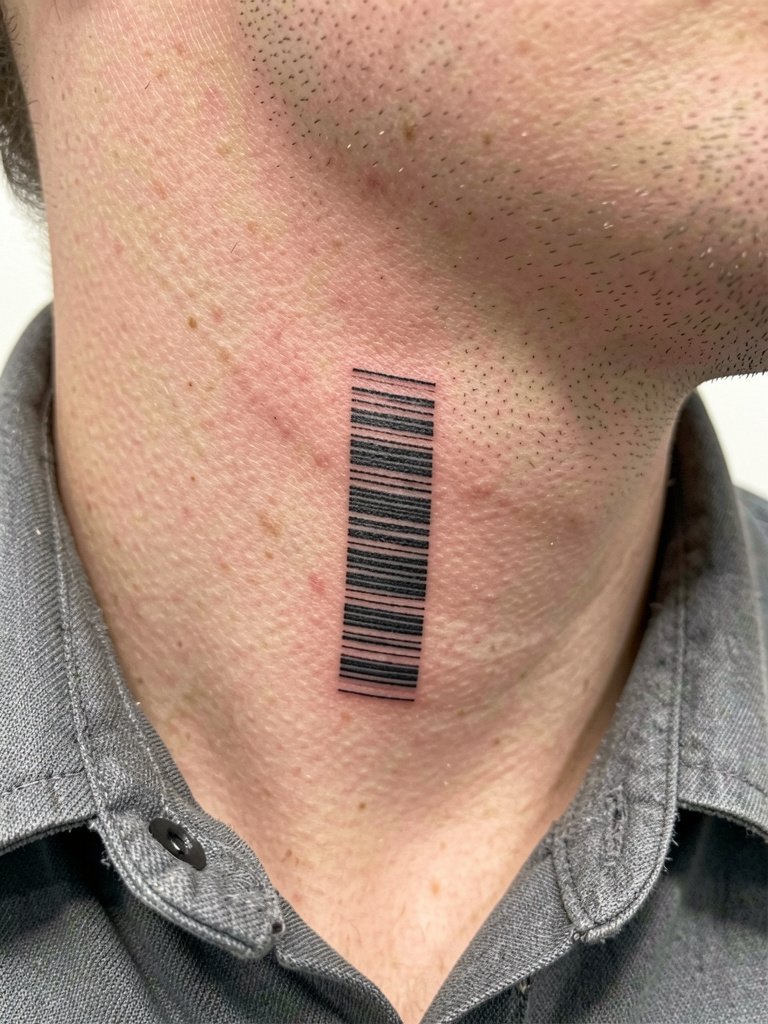
A barcode motif reads architectural and private when narrow and vertical. Keep the stroke weight consistent across the column to prevent visual wobble as the skin settles. A frequent mistake is requesting ultra-thin lines which look crisp at first but blur into a gray column by year three. Expect a 30 to 45 minute session and moderate sensitivity along the jawline. For outfits, narrow verticals frame a mock turtleneck or layered collared shirt well, so try a men's collared shirt to subtly reveal the motif. Professional considerations apply because precision on the neck requires steady needle pacing and exact placement.
Studio Day Picks
These small neck styles often mean a short session and precise aftercare, so a few items smooth the day and first week.
-
Stencil transfer paper kit. Helps the artist position a micro design exactly where the anatomy will let it sit without warping, especially useful for side-neck compass and vertical barcode ideas above.
-
Topical numbing cream. Applied as directed before a short neck session reduces surface pain while still allowing the artist to read subtle linework.
-
Clear protective film roll. Provides a barrier during the first night for low-profile neck tattoos that rub against collars and scarves.
-
Fragrance free gentle body wash. Mild cleansing for the first week keeps tiny linework clean without irritating the skin or stripping pigment.
-
Aquaphor healing ointment. A mainstream balm useful for the initial moisture window on small single-needle work that needs a thin layer for the first few days.
7. Tiny Geometric Arrow at the Nape
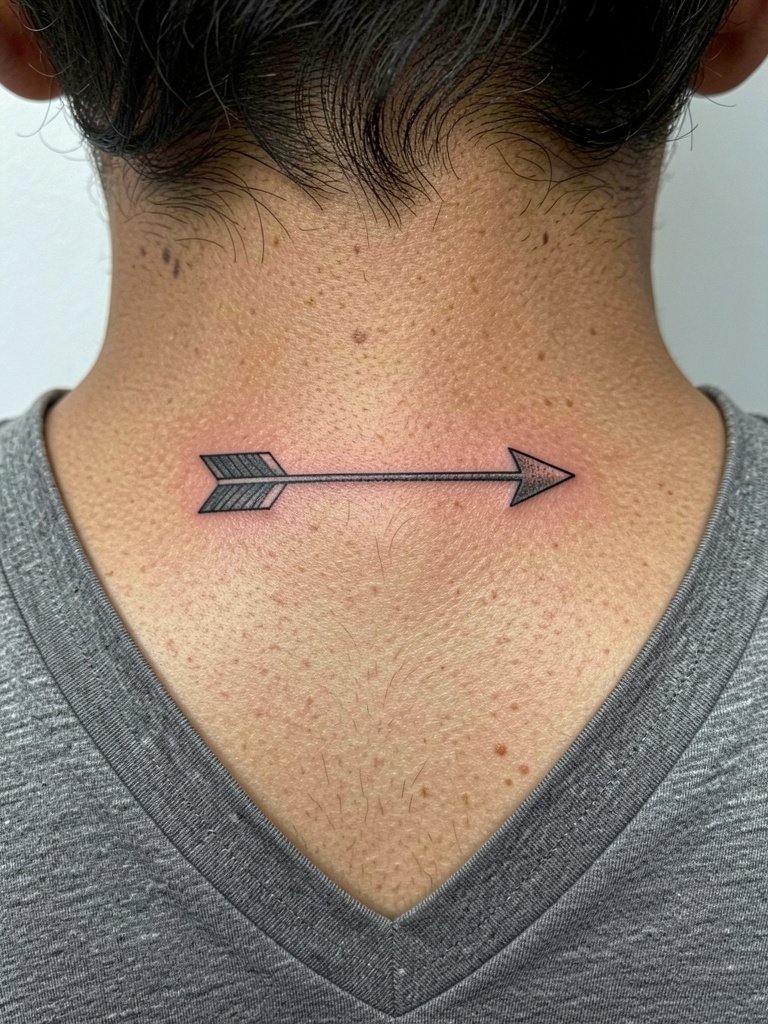
A small geometric arrow is directional without calling attention. Choose a slightly thicker shaft than a wrist arrow so motion around the neck does not blur the linework. A common mistake is requesting microscopic angles that the neck's shallow canvas cannot hold. Expect a 20 to 40 minute session and a quick touch-up window around six to twelve months if any point softens. For session wear, a loose-collar shirt allows the artist to access the nape without tugging at fabric. Professional note, the nape benefits from a steady hand and a clear mapping of the hairline.
8. Micro Pine Tree Along the Side Neck
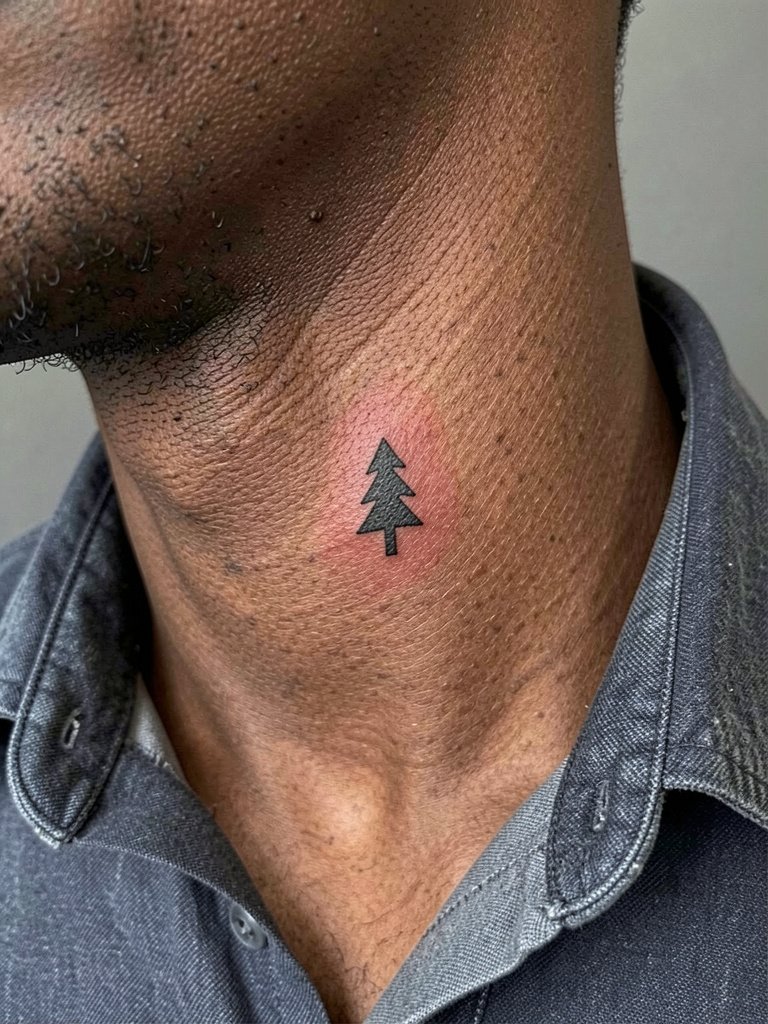
A small tree silhouette reads like a private emblem and holds well when drawn with confident solid black fill. Discuss silhouette scale with the artist to ensure the trunk keeps a little negative space around it, which reduces blowout risk. Expect a 25 to 40 minute session with moderate sensitivity. For showing the piece, open-collar shirts and light jackets work neatly, consider a mens lightweight jacket that frames the side neck without covering it completely. Note that side-neck placements require precise mapping so the tree does not tilt with posture.
9. Tiny Anchor on the Nape Centerline
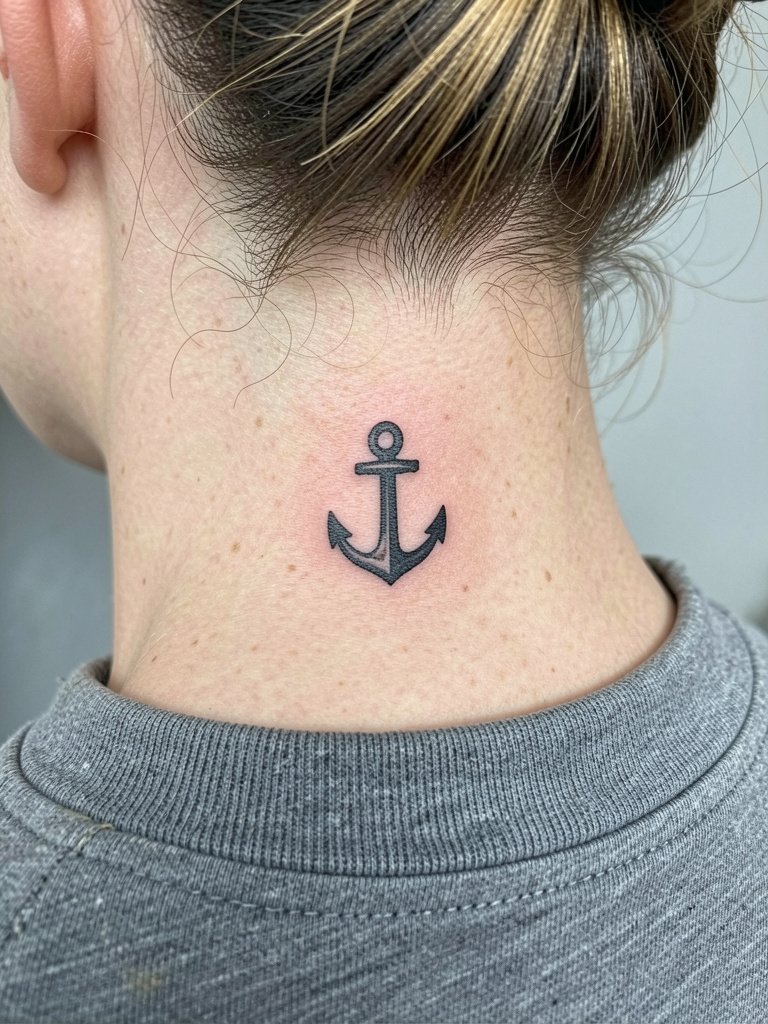
A tiny anchor on the nape centerline keeps the symbol symmetrical and easy to conceal with hair. The centerline reduces distortion as the neck moves, which helps linework stay crisp. Avoid requesting micro details inside the anchor because the nape's thin skin and movement can blur tiny internal strokes. Sessions run around 20 minutes and sensitivity is low to moderate. This spot pairs well with casual tees and lightweight jackets, so try a crewneck tee for a simple reveal. Professional note, the center nape is a precise area that benefits from a clean single-needle placement.
10. Small Wave Line Curving Behind the Ear

A short wave line behind the ear gives a subtle fluid accent when you tuck hair up. For longevity choose a tiny but steady stroke rather than a feathered line because the back-of-ear area can make hairline strokes blur faster. Session is brief and sensitivity is low but expect a sharp tap near bone. Avoid overly thin calligraphy strokes to reduce risk of dot merging into a faint bar. This placement is flattering with short hair or updos and pairs with simple necklaces, consider a minimal chain necklace to balance the area. Professional considerations include careful placement to avoid encroaching on the hairline.
11. Small Keyhole on the Side of the Neck

A keyhole motif reads intimate and works when scaled to hold black fill without tiny inner details. Mistakes happen when clients request an ornate interior on a tiny keyhole because the inner negative space disappears as the skin ages. Plan for a small touch-up at the one-year mark to maintain solid saturation. Expect a 25 to 35 minute session and moderate sensitivity. For outfits this pairs with open-collar shirts and jackets that leave the neck visible. Wear a wide-neck top during reveal photos to frame the piece. Professional note, lateral neck texturing and muscle movement affect how the keyhole will sit over time.
12. Micro Chevron Stack Below the Ear
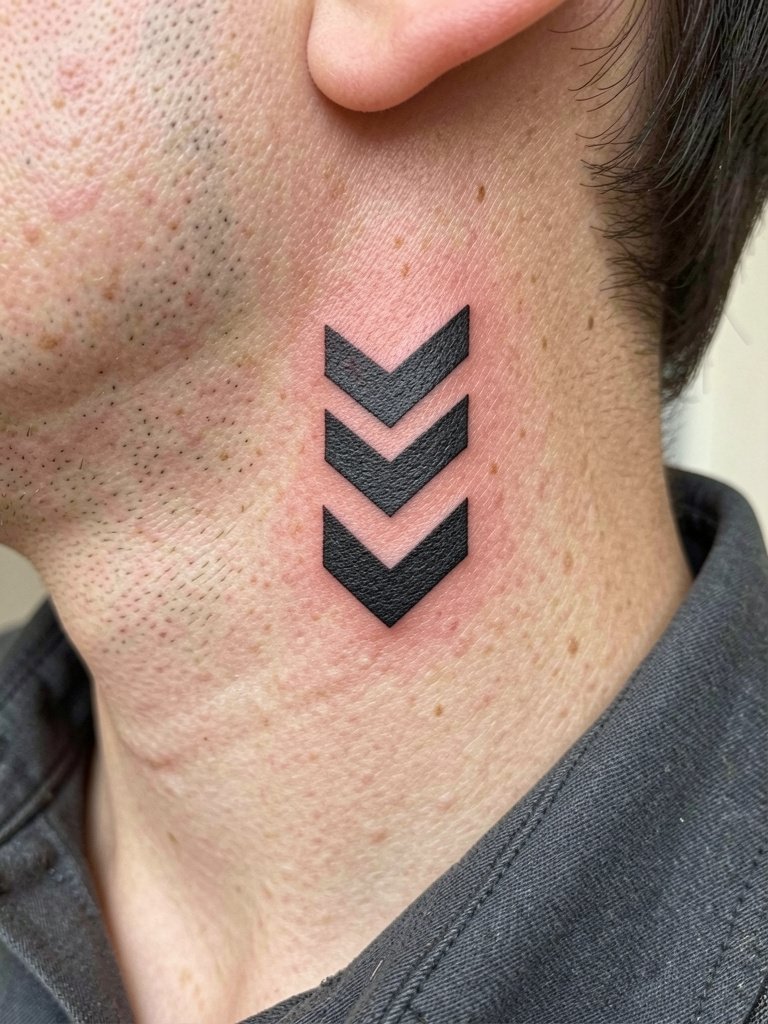
Chevron stacks make for a compact, directional accent that ages consistently when spacing and angle are precise. One group of artists says small chevrons on necks lose their peak crispness within a couple years because of skin stretch. The other group insists that slightly thicker peaks and careful spacing preserve the triangular shape for five years. Choose medium line weight so the angles stay recognizably chevrons and plan on a possible touch-up around year two. Session time is brief and sensitivity is moderate. This area looks smart with collared shirts and light jackets, so try a casual collared shirt that frames the neck.
13. Single Small Roman Numeral at the Nape
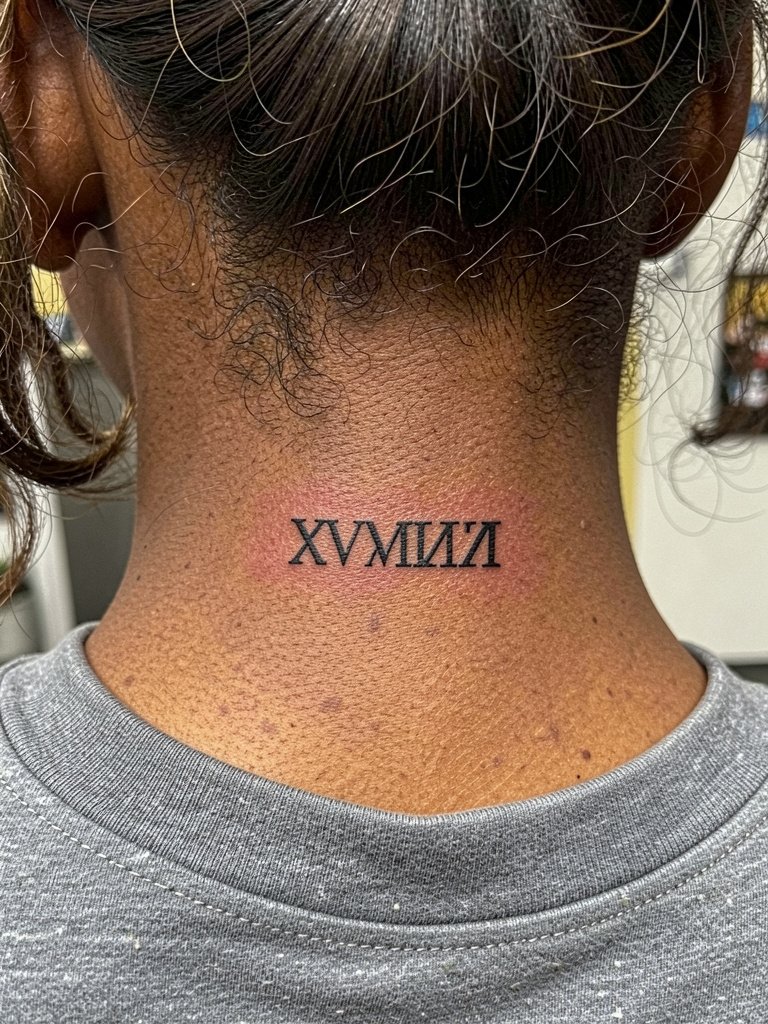
Roman numerals are discreet and readable when the type is slightly bolder than micro script. A common error is asking for ultra-thin serifs which blur into tiny smudges on the nape. Bring the exact numeral in print at actual size so you can preview how the serif spacing reads across the curved skin. Expect a short 20 to 30 minute session. For subtle display, crewnecks or hair-up styles reveal the number only when you intend. Professional note, lettering on the nape needs exact stenciling to preserve alignment.
14. Micro Lightning Bolt Near the Jawline
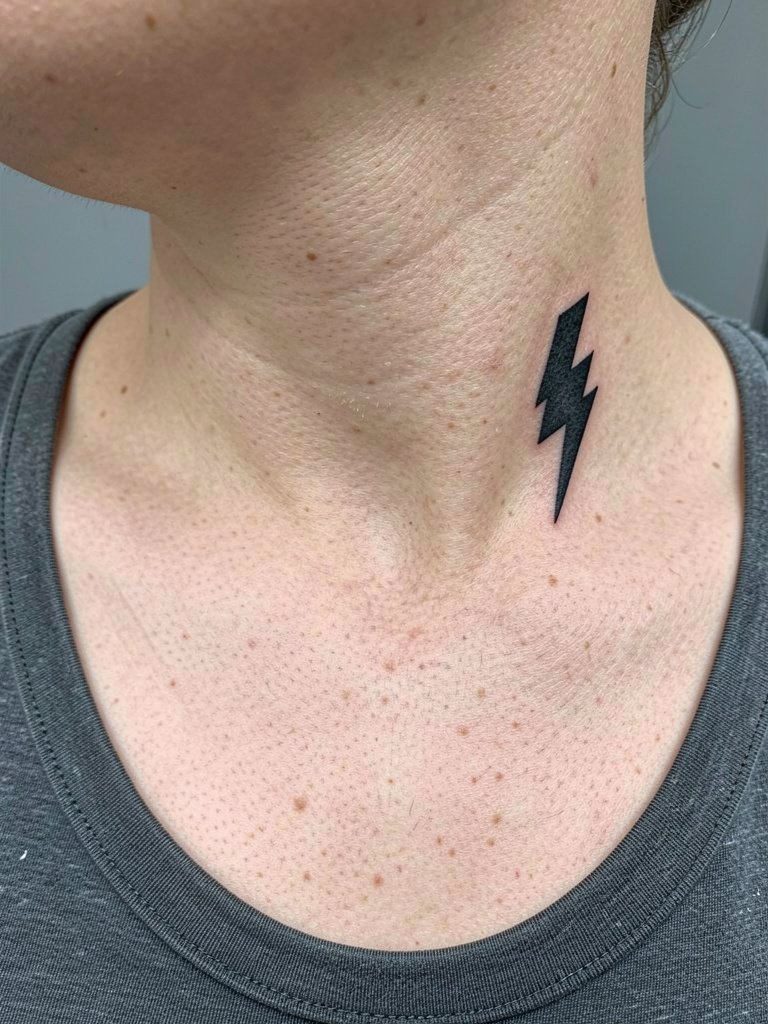
A lightning bolt reads modern and compact when the angles are decisive and the fill is solid. Avoid requesting a hairline lightning stroke because the jaw-adjacent skin moves a lot and will round off sharp points. Instead ask for tidy edges and slightly heavier black saturation so the bolt stays crisp after a year. Expect a 25 to 45 minute session and moderate sensitivity due to proximity to jawbone. For showing off, roll up sleeve layers or wear a crewneck to draw the eye upward, and try a scoop-neck tee to frame the jawline. Professional note, this placement needs a steady hand to keep the bolt symmetric with facial contours.
15. Tiny Leaf Outline Along the Side Neck
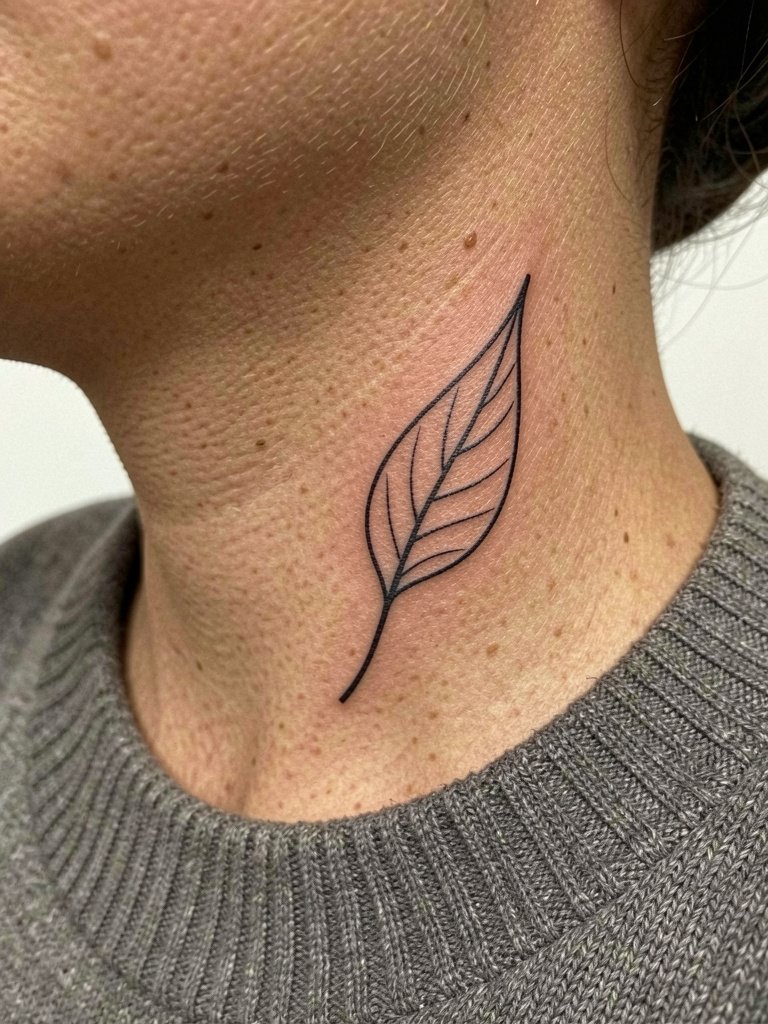
A slim leaf outline gives an organic accent without heavy saturation. Ask for slightly wider spacing within the line so the thin contour keeps its shape as the neck skin moves. Most people underestimate how much movement affects a narrow stem, so plan for a touch-up if the stem softens. Session time is usually under 30 minutes and sensitivity is moderate. For outfits, open-neck knits or collared shirts show a flash of the leaf, consider a wide-neck sweater to balance casual reveals. Professional note, the lateral neck requires clear stenciling to keep botanical curves in the intended orientation.
16. Tiny Lock Silhouette at the Nape
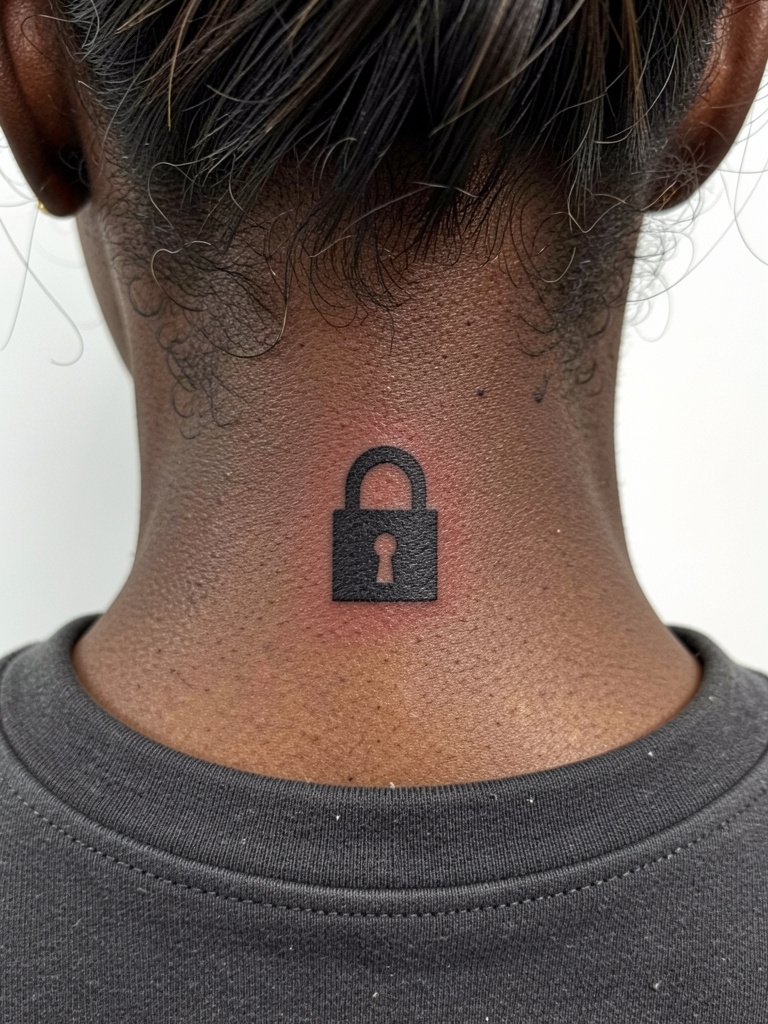
A tiny lock center nape has clear geometry and conceals easily. Keep the inner keyhole minimal but not microscopic so its negative space remains visible after settling. A frequent mistake is shrinking interior openings too small for the neck canvas. Plan for a single quick touch-up if needed and expect a 20 to 30 minute session. For dressing, crewnecks or casual jackets let you hide or reveal the lock with minimal fuss, try a crewneck sweatshirt for casual framing. Professional note, the center nape needs exact placement relative to the spine to sit symmetrical.
17. Micro Crescent Row Along the Side Neck

A delicate crescent row gives subtle rhythm to the side neck when spacing is uniform. Tell the artist you want equal negative space between crescents to avoid a stacked blob where crescents merge. Expect a 20 to 35 minute session and moderate sensitivity. For wardrobe, collared shirts and slimmer necklines frame vertical stacks well, try a V-neck tee to showcase the line. Professional considerations include careful mapping since neck muscles shift shape and can alter vertical spacing.
18. Small Anchor Silhouette Behind the Ear
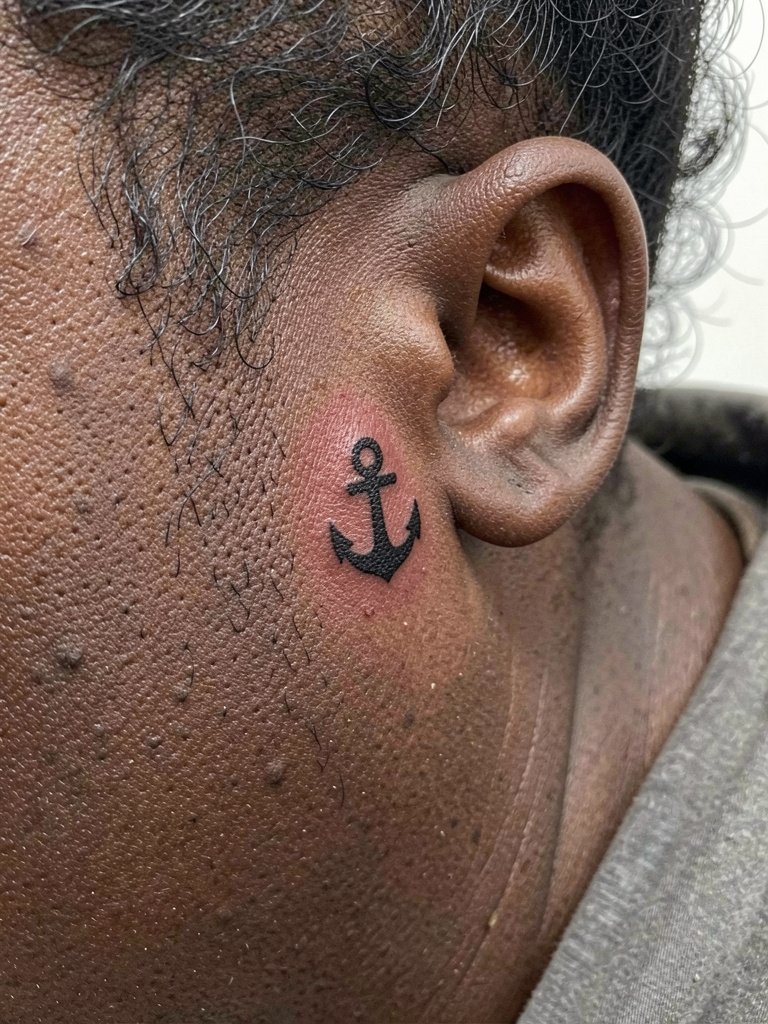
A behind-ear anchor reads like a private nod and heals well when the silhouette is bold rather than filigreed. Small internal details vanish quickly in tiny behind-ear placements, so keep the anchor simple. Sessions are short and sensitivity is low because the skin is thin and the area is stationary. For looks, keep hair up or wear short hair to make the piece visible, and experiment with a minimal chain necklace that balances the side profile. Professional note, this placement requires avoiding ink too close to the hairline.
19. Micro Constellation Row Down the Nape
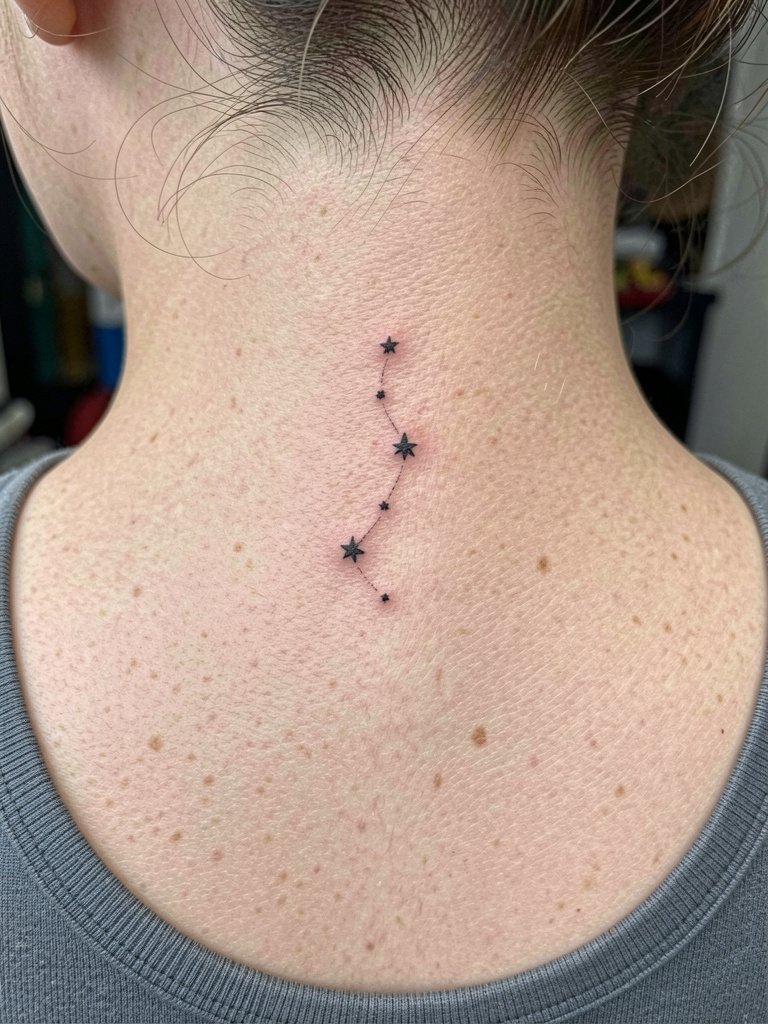
A small constellation down the nape reads like a private alignment and holds when the connecting lines are faint and the star dots are slightly spaced. Avoid ultra-thin connectors that disappear; instead use small dot-work stars and faint fine lines for a balanced healed look. Expect a 30 to 45 minute session with mild sensitivity. This placement pairs well with open collars and hair-up styles, so try a scoop-neck sweater for a casual reveal. Professional note, nape mapping keeps the constellation centered as the hairline shifts.
20. Tiny Anchor Row on the Side Neck
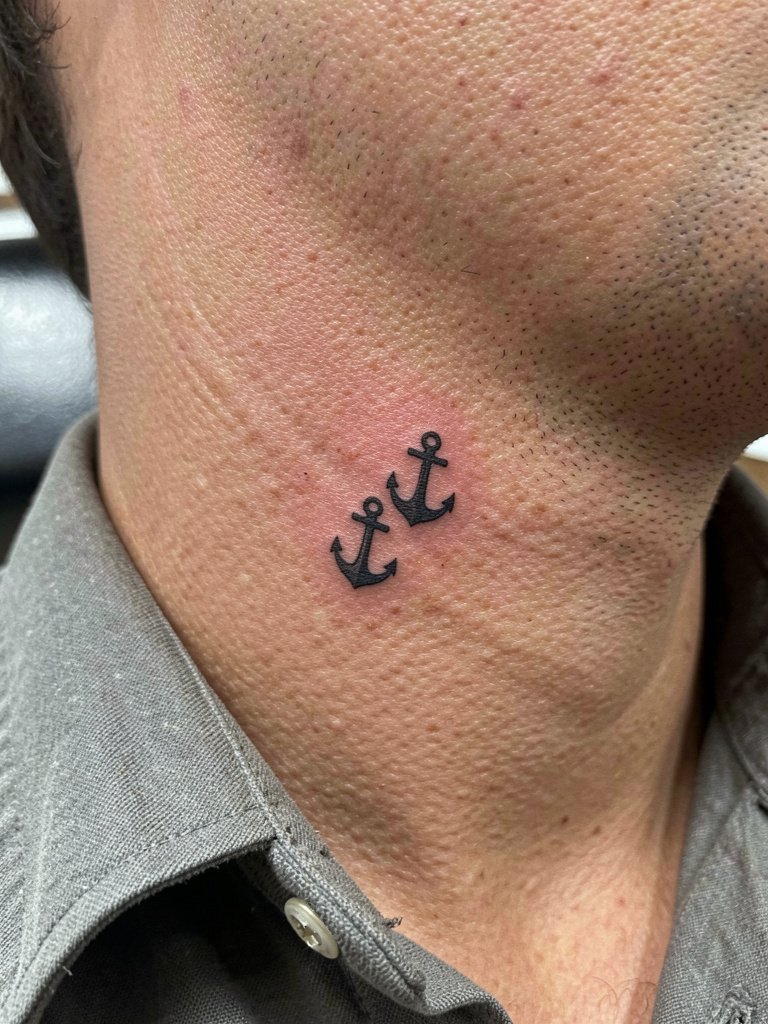
A pair of tiny anchors creates a motif that still reads low-profile when scaled correctly. Keep spacing deliberate to prevent the two icons bleeding together as the skin settles. A typical error is clustering too tightly; instead request a small but noticeable gap and anticipate a touch-up after the first year if lines soften. Session time is short and sensitivity is moderate. For display, pop the collar or wear layered shirts to control when the anchors are visible, consider a mens light jacket for staged reveals. Professional considerations include exact spacing so the row reads symmetrical with the jawline.
21. Small Minimal Map Pin Near the Neck Base
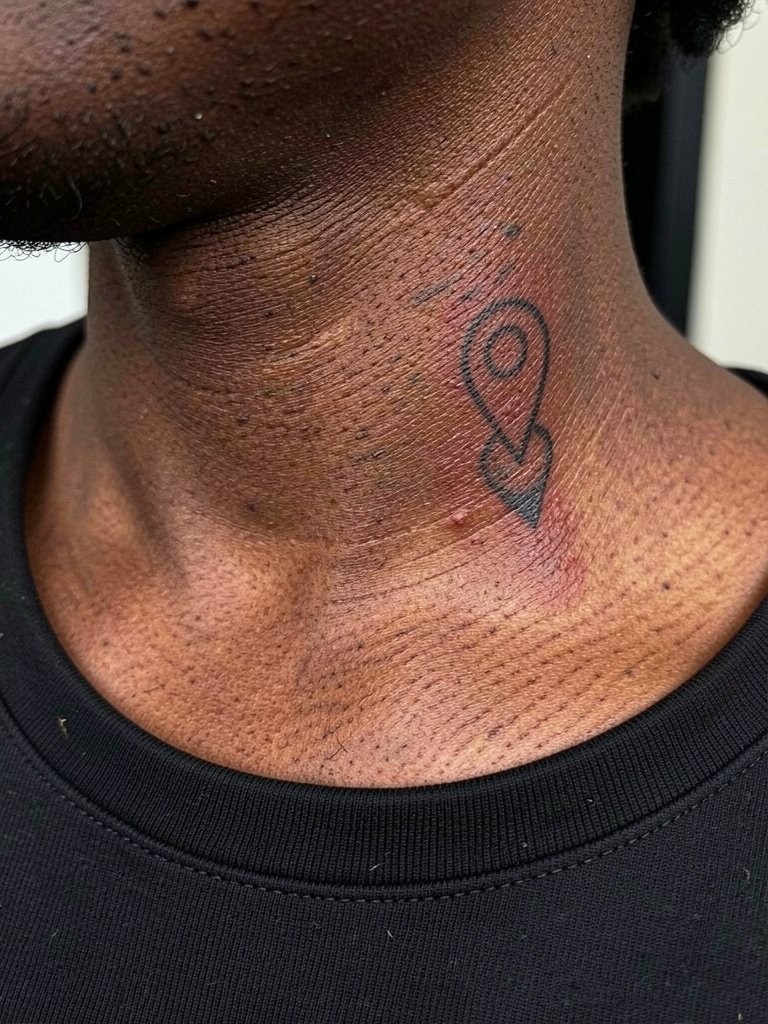
A map pin near the neck base gives a subtle location symbol that stays readable when the inner circle is kept slightly larger than you might expect. Very small inner circles tend to fill in with time, so request a slightly bolder inner mark. Expect a 25 to 35 minute session and mild-to-moderate sensitivity near the collar. For showing off, low collars and open shirts frame the pin neatly, try a wide-neck top for subtle exposure. Professional note, this lower-neck region sits over soft tissue so the artist should test stencil adhesion carefully.
22. Micro Arrowhead Under the Jawline

A tiny arrowhead under the jaw gives an edgy accent when executed with solid silhouette rather than hairline detail. Keep the base slightly thicker than the tip so the triangular form reads even as the skin moves. A common mistake is requesting a micro tip that dissolves into fuzz after a year. Sessions are short and sensitivity moderate. For wardrobe, rolled sleeves and open collars draw attention upward to the jawline, consider a casual collared shirt to frame it. Professional note, the under-jaw area requires careful stencil placement to avoid asymmetry.
23. Small Ellipse Accent Behind the Ear
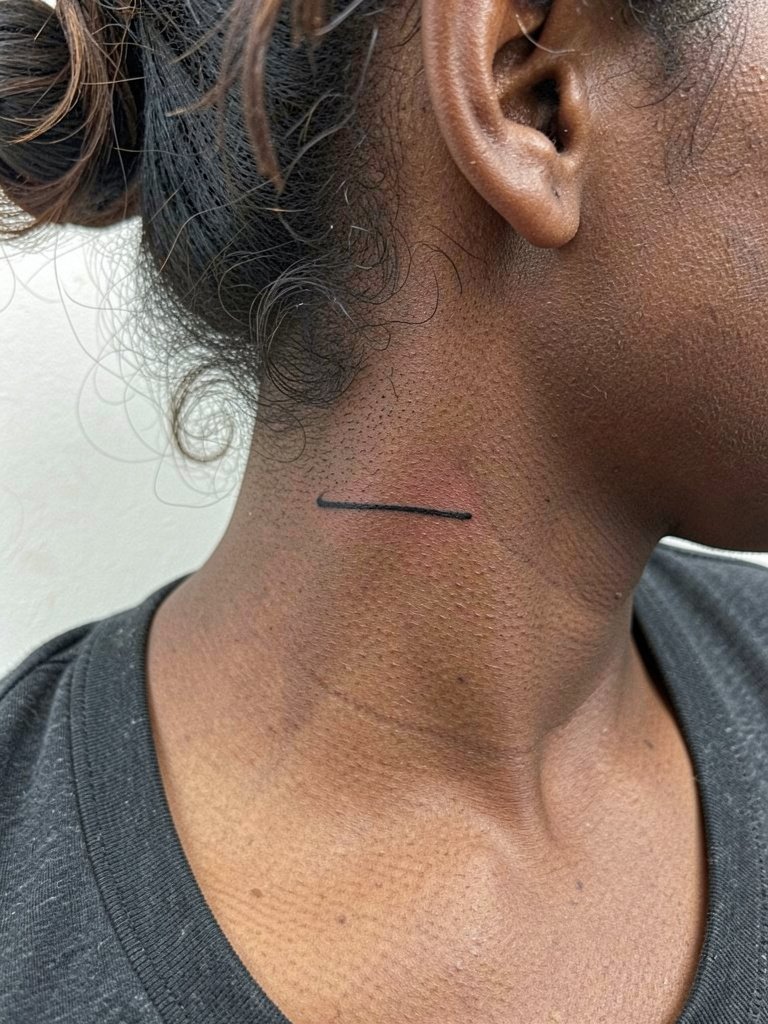
A tiny ellipse behind the ear is quietly geometric and keeps attention minimal. Ask for a consistent oval width so it does not appear lopsided as the skin settles. Expect a brief session and low sensitivity because the mastoid area is small and steady. For styling, this works when hair is up and pairs with subtle stud earrings, try a minimal stud earring set to complement the area. Professional note, avoid placing ink too close to the hairline to prevent pigment migration into follicles.
24. Miniature Anchor with Dot Row Along the Nape
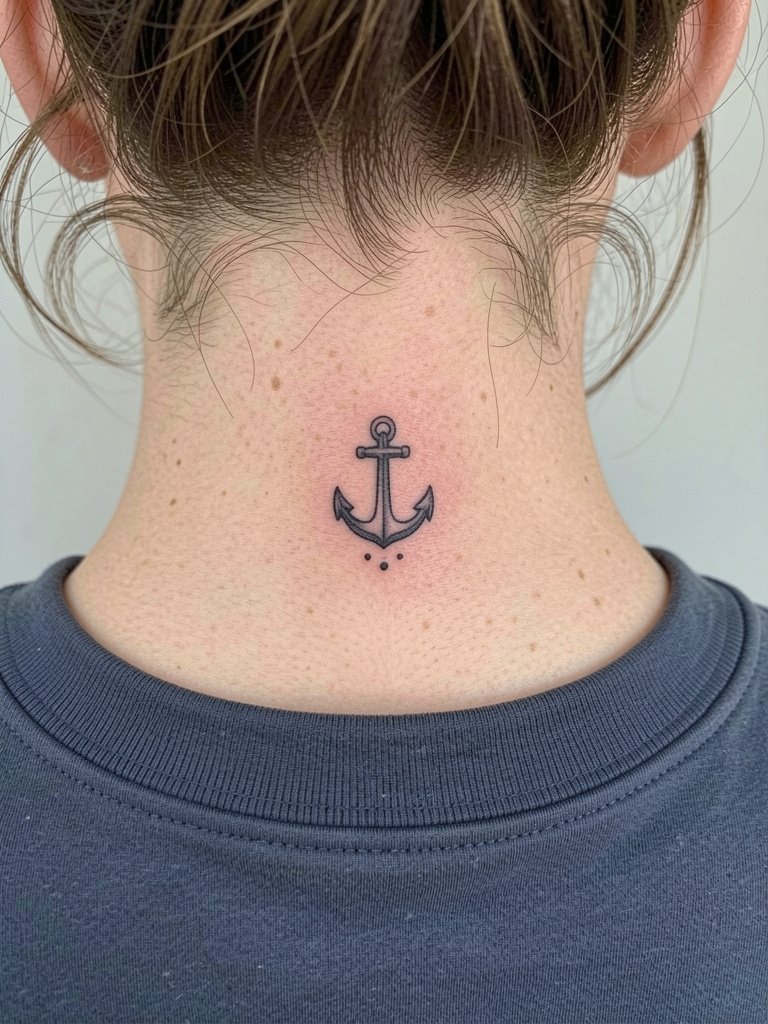
Combining a simple anchor with a dot row gives a composed focal point on the nape. Keep dot spacing consistent and the anchor bold enough so the two elements do not merge over time. A frequent oversight is compressing the dot row too close to the anchor which invites blurring. Session time is typically 30 to 45 minutes and sensitivity is low to moderate. For outfits, crewnecks or casual jackets provide a neat reveal, and a crewneck tee works well. Professional note, the nape's curvature requires a clear stencil to center the composition.
25. Small Geometric Sunray at the Lower Neck
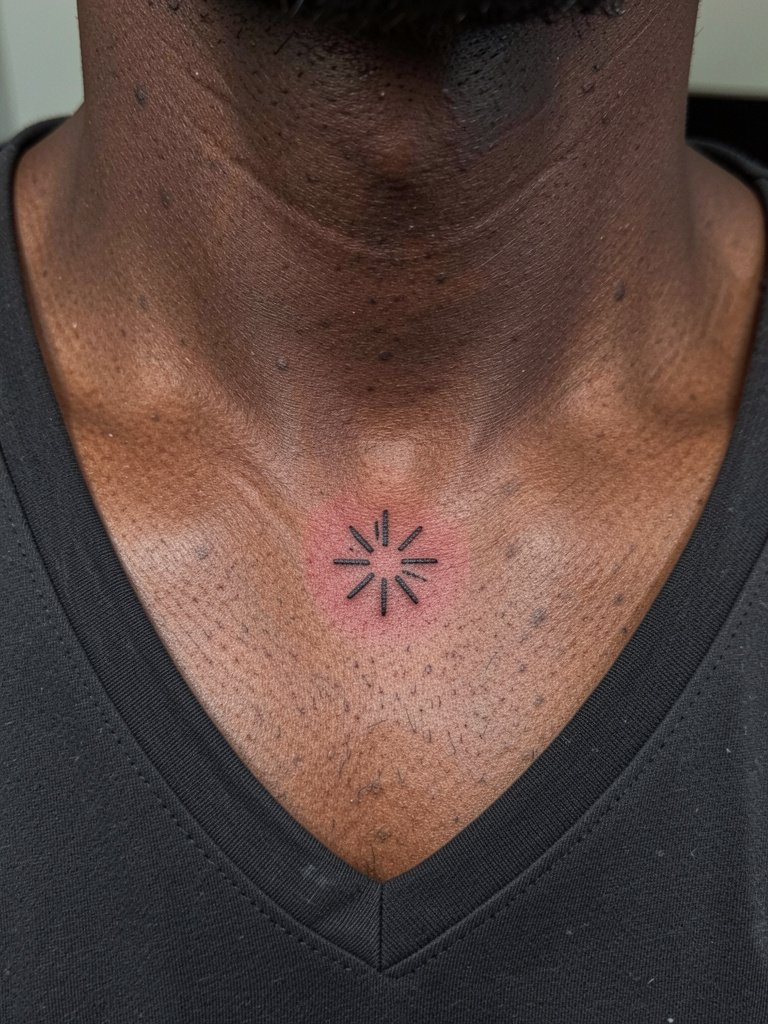
A micro sunray cluster near the collar sits cleanly when the rays are short and evenly spaced. Avoid requesting long thin rays that will blur into a soft halo over time. Expect a 20 to 35 minute session and low-to-moderate sensitivity. For wearing, V-necks and open shirts frame the lower neck elegantly, consider a V-neck tee for a subtle reveal. Professional considerations include ensuring rays are aligned with the natural collarline.
26. Tiny Arrow Through a Dot at the Side Neck
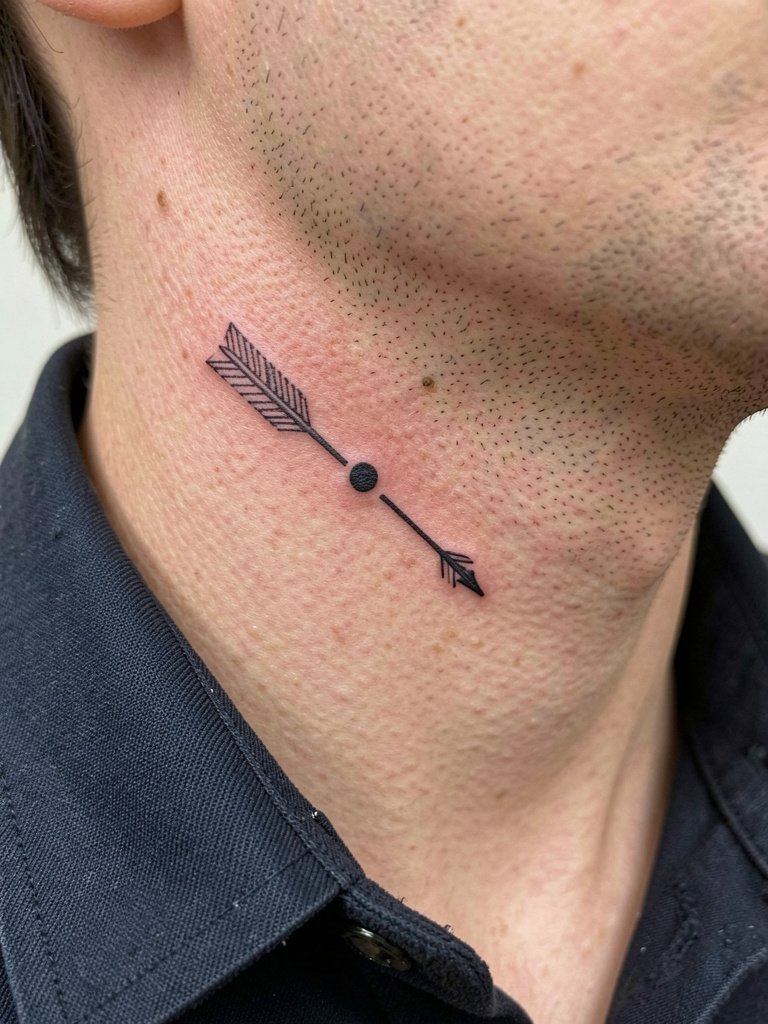
An arrow-through-dot combines motion and punctuation and holds when the dot is sized to match the arrowhead thickness. Too small a dot will disappear, and too thin an arrow will lose its tip. Plan for a 25 to 40 minute session and expect moderate sensitivity. For styling, open collars and layered shirts highlight the diagonal movement, try a casual collared shirt to frame it. Professional note, the lateral neck requires steady needle speed so the diagonal reads sharp.
27. Micro Minimal Cross at the Nape
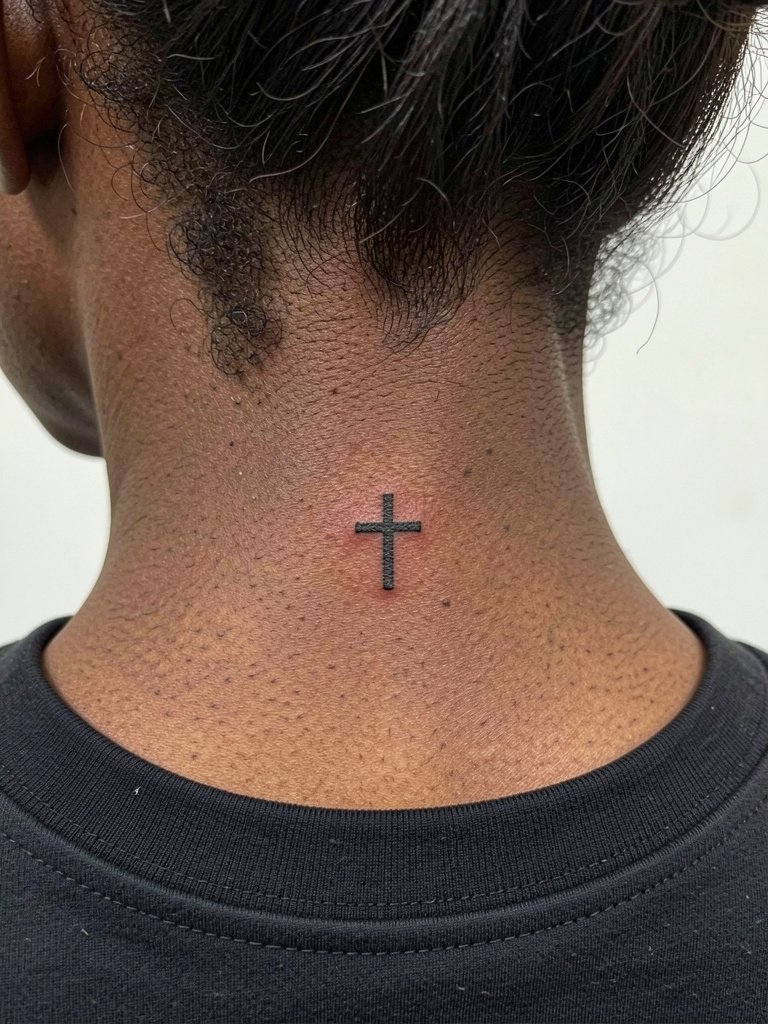
A tiny cross centered on the nape is discreet and symmetrical. Choose slightly thicker strokes than you might on the wrist so the perpendicular bars remain distinct over time. A common mistake is picking an overly thin cross that softens into a gray smudge. Sessions are brief and sensitivity is moderate. For wardrobe, crewnecks or hair-down looks can conceal it easily, and a crewneck tee is an uncomplicated option. Professional note, exact central placement over the spine makes the cross read balanced.
Frequently Asked Questions
Q: How painful is a small neck tattoo compared with other placements?
A: Neck sensitivity varies by specific spot. The nape and behind-ear zones are usually less painful than the front throat or just under the jaw because there is more soft tissue and fewer nerve endings. Expect a short moderate sting for most micro pieces and plan for a brief session with breaks if you tense up.
Q: How do these tiny neck designs age over five years?
A: Most small neck tattoos soften in edge sharpness as the skin moves and ages. Designs with slightly heavier linework and intentional spacing hold better than hairline scripts. Plan for a touch-up in the first one to three years if you want the crisp original contrast to persist.
Q: Are single-needle scripts on the neck likely to blur?
A: Artists split into two camps on single-needle neck work. One camp warns that single-needle scripts blur within a couple years because the neck skin stretches and moves constantly. The other camp says that with slightly wider spacing and proper needle depth single-needle scripts can settle clean and legible. If you prefer script, ask for a slightly bolder single-needle weight and a stenciled preview at actual size so you can judge long-term readability.
Q: Where can I find healed examples and discovery pathways without naming artists?
A: Search location and theme hashtags on social platforms like Instagram and TikTok, and filter by recent posts to see healed photos. Try hashtags that combine placement and style, for example #sideNeckInk, #napeTattooHealed, and #microNeckTattoo. Reddit threads with "healed photos" in the title also surface real-world before and after shots across skin tones.
Q: What should I wear to a neck tattoo session and what shows the design best afterwards?
A: For the session wear a shirt with a wide or V-neck so your artist can access the neck without tugging at fabric. After it heals, open-collar shirts and crewnecks reveal small neck work well, and behind-ear pieces look great with hair up. For session comfort try a wide-neck tee so the collar sits away from fresh ink and the artist can work without fabric interference.
Q: Are there cultural sensitivity concerns with specific small neck symbols?
A: Yes, if a design borrows from cultural or religious iconography check the origin and meaning. For motifs like mandala shapes or heraldic crests, acknowledge their roots and avoid appropriating sacred symbols without understanding or permission. A respectful brief with your artist helps adapt a visual idea into a personal piece that honors its origin.
Q: How often do these micro neck pieces need touch-ups?
A: Touch-ups are common for micro neck work, often within the first one to three years depending on skin type and sun exposure. Expect the possibility of a single short touch-up session to restore linework or saturation rather than a full redo.
