
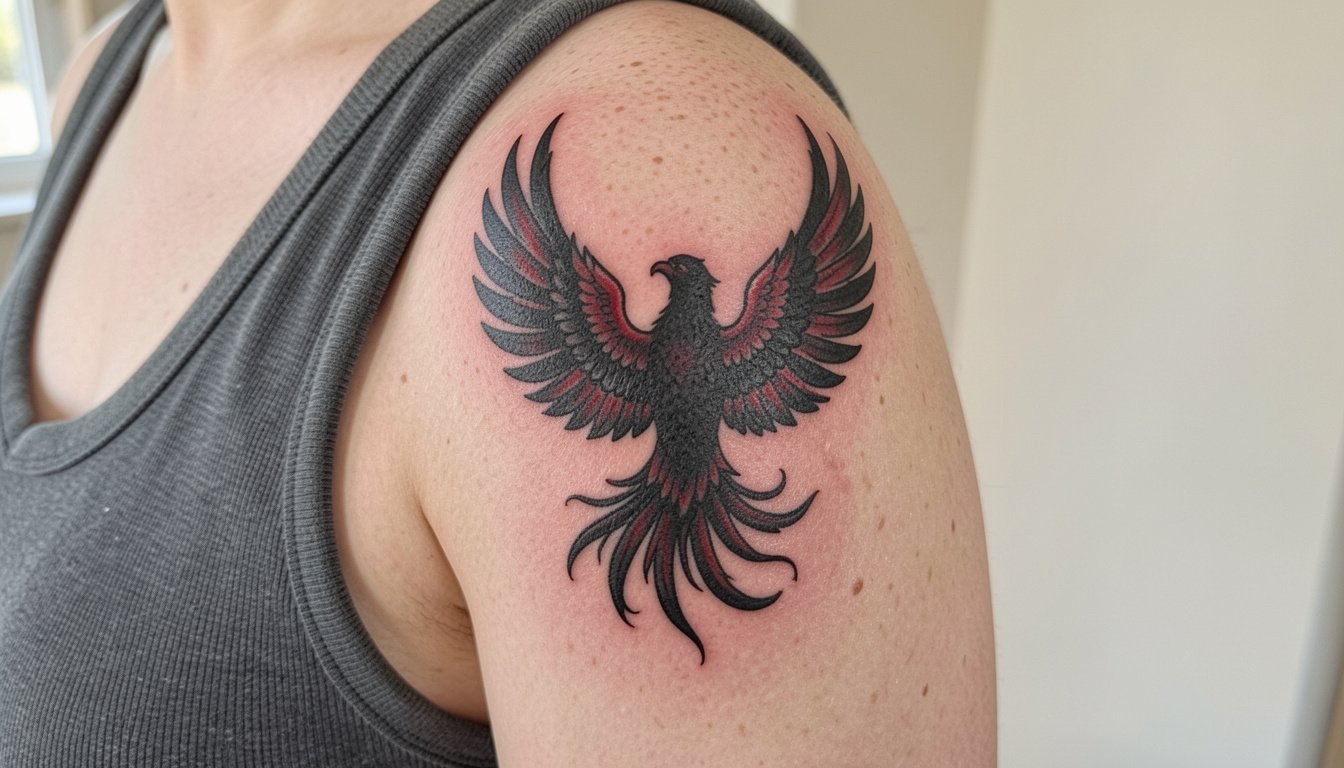
The wispy phoenix tattoo you bookmarked for its delicate single-needle lines might not be the one that still reads in five years. In my experience, phoenix designs that balance bold anchors with fine detail hold their shape far better than pieces built only on ultra-thin strokes. Read on for 27 rising phoenix directions that map placement, how they age, what to wear to your session, and the styling pieces that actually frame the finished work.
1. Fine Line Phoenix on Inner Forearm
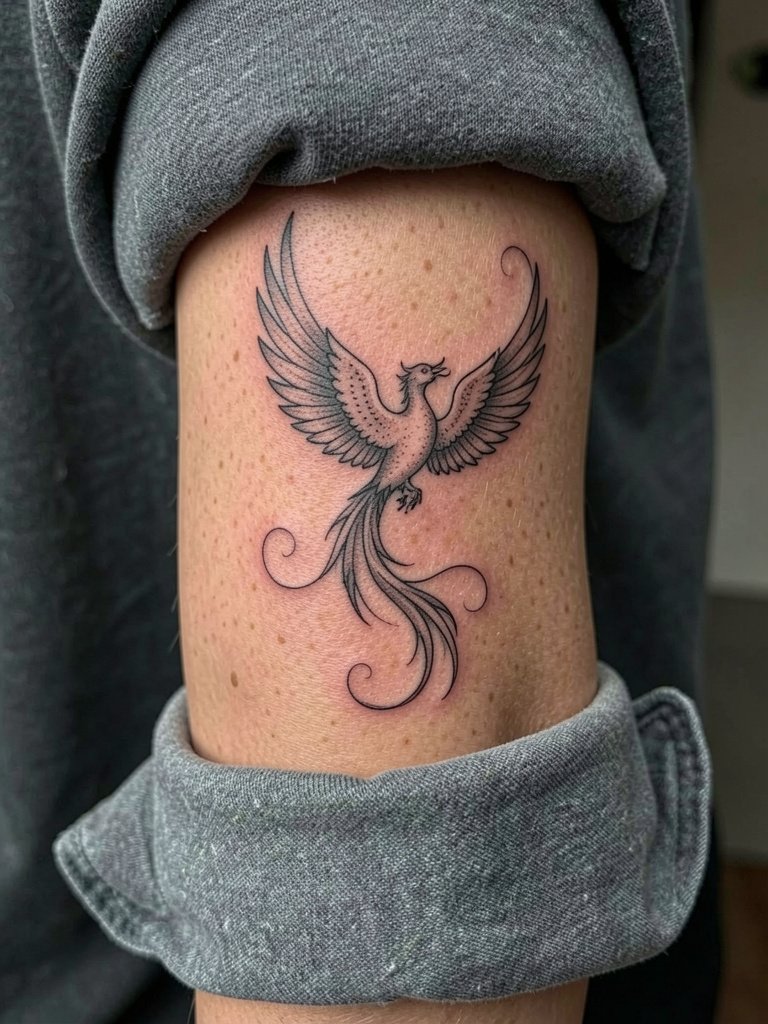
This inner forearm phoenix works when the central spine of the bird is drawn a touch bolder than the filigree feathers. Pain is mild to moderate and a single 60 to 90 minute session usually covers it. The common mistake is asking for uniform ultra-fine lines across the whole piece, which the inner forearm eats by year two. For longevity, request slightly heavier linework on the bird's core and keep the feather tips airy. For showing it off, pair with a rolled cuff linen shirt in neutral tones that keeps the forearm visible without overwhelming the tattoo.
2. Minimalist Tiny Phoenix on Wrist
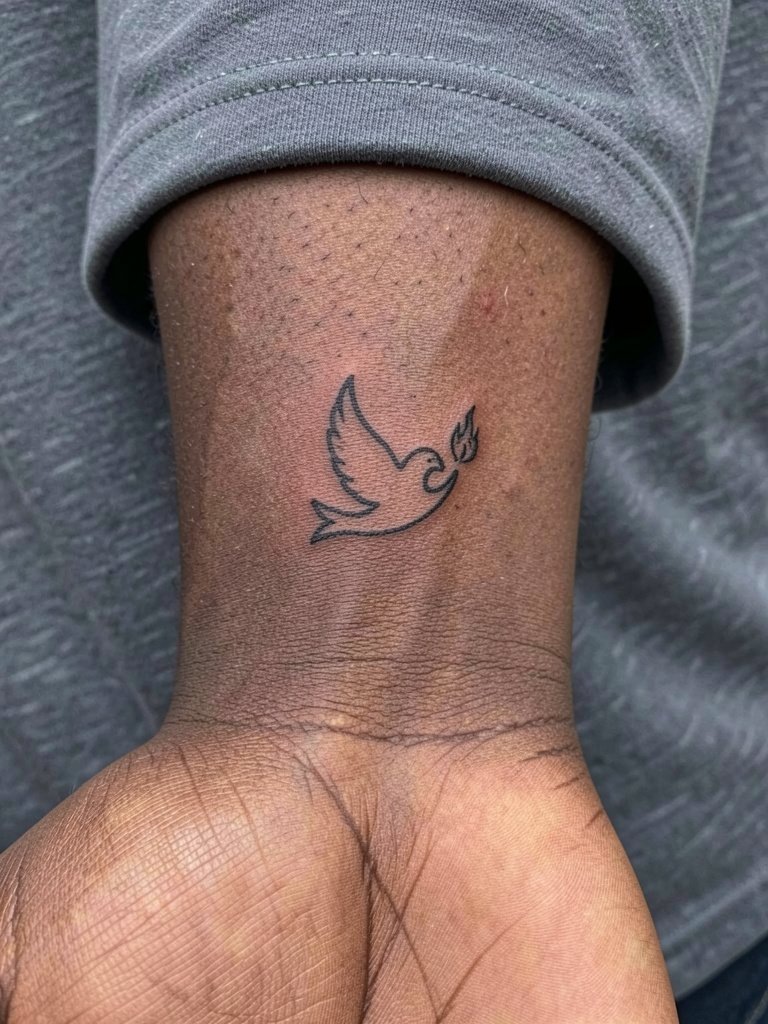
Tiny wrist phoenixes read clean if you accept that very small textural detail will blur over time. Expect a 30 to 45 minute session and a likely touch-up at year one if you want the silhouette crisp. A typical error is packing feathers into a 2-centimeter circle. Instead, pick a simplified silhouette and let negative space do the work. Wear a delicate cuff bracelet when you want the piece framed, and go with a soft cotton tee for the session so the artist has full access.
3. Neo-Traditional Phoenix on Outer Bicep
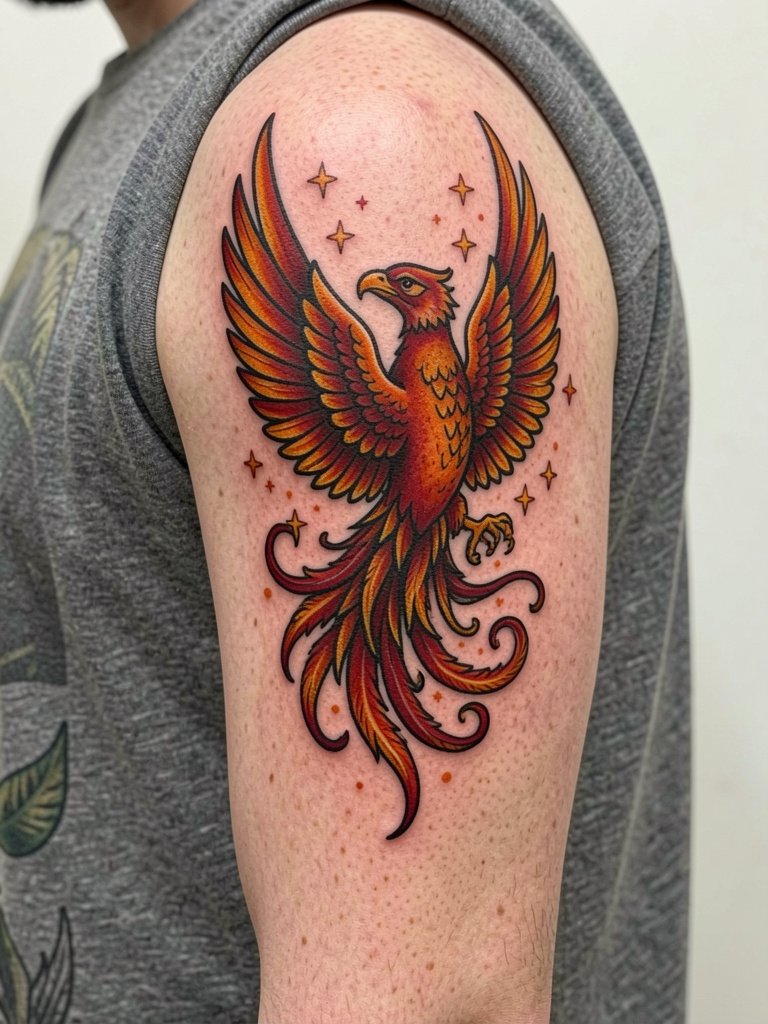
The outer bicep holds color well and is forgiving during healing. Session time varies from two to four hours depending on saturation. A common mistake is asking for washed-out watercolor fills in this style, which undermines the neo-traditional blocky read. Discuss saturation levels and color layering during the consult so the wings keep their contrast at year three. For evenings out, this placement pairs with sleeveless linen tops that let the color pop without heavy jewelry.
4. Small Blackwork Phoenix Behind Ear
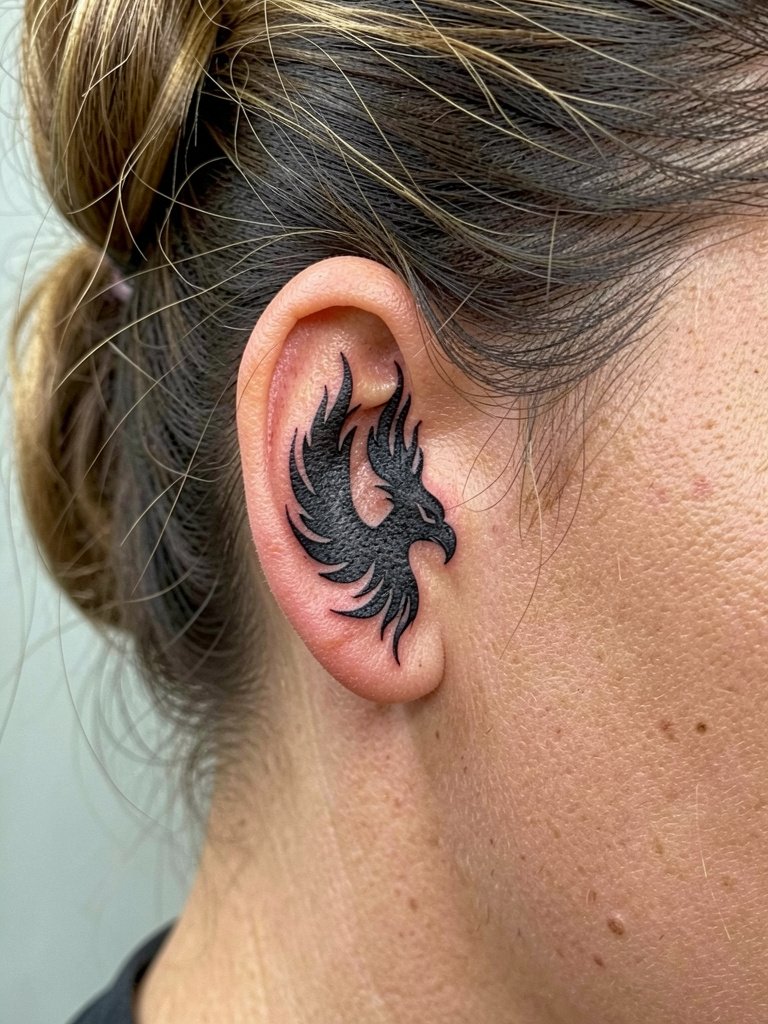
Behind-the-ear pieces are tiny and high-detail failure magnets. Pain is low but visibility is conditional on hair style. Expect a 30 minute session and minimal touch-up needs if the design is bold. The frequent mistake is requesting a complex head with feather texture; instead opt for a bold silhouette that still reads when hair grows out. If you want easy concealment, style hair down or use small hoops to draw attention away.
5. Stipple Shaded Phoenix on Sternum
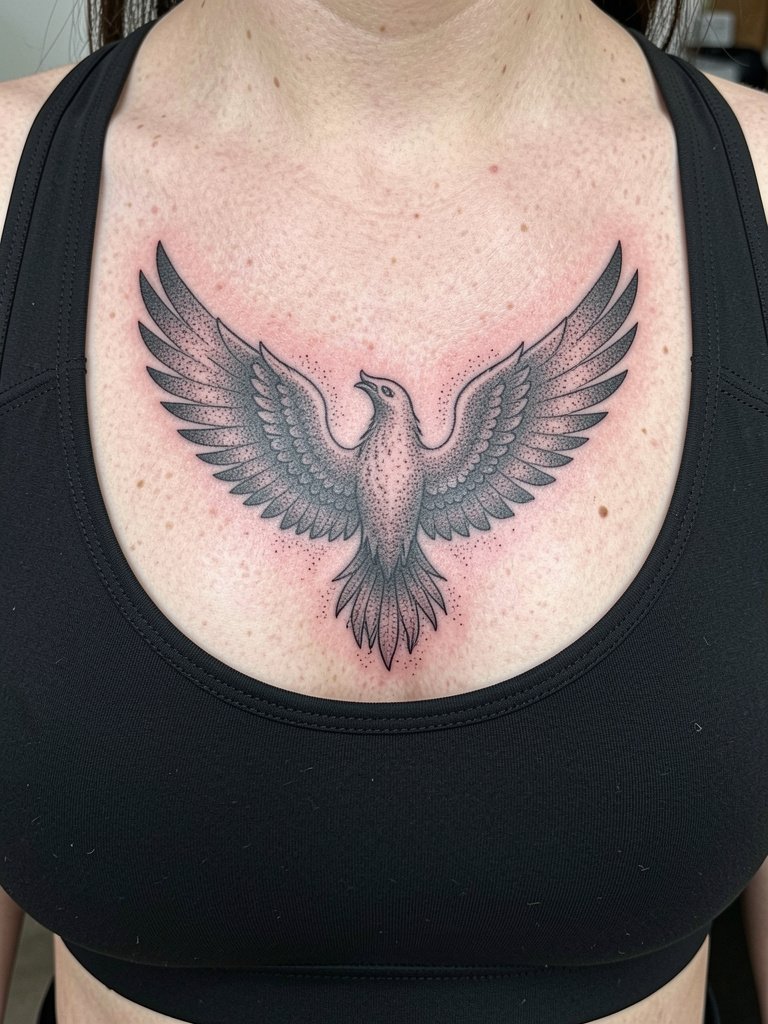
Sternum phoenixes age well when dot work transitions are planned to avoid solid blocks near high-motion skin. Pain on the sternum is above moderate and sessions usually split into two to three sitting windows totaling three to five hours. A common error is too-tight stippling near the breast crease. When you sit down with your artist, ask for graduated dot density and a clear plan for wing spread so the center spine keeps structure. For the appointment, a fitted sports bra makes access straightforward and keeps the area supported during healing.
6. Minimal Feather at Ankle
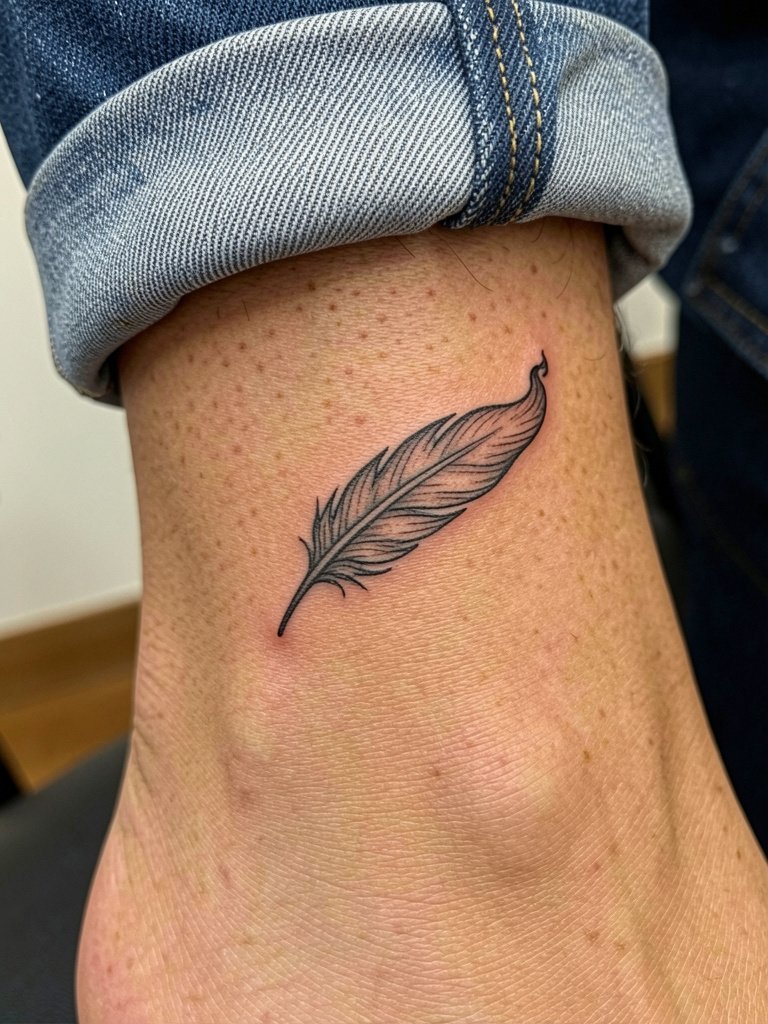
Ankle feathers look elegant but face a lot of friction from socks and shoes. Expect a 45 minute session and plan for a possible touch-up at year one. The usual mistake is pushing for ultra-thin internal veins in the feather which vanish under repeated abrasion. Keep the quill line slightly stronger and choose a placement just above the bone. Pair the healed tattoo with low-rise canvas sneakers and ankle socks that do not rub directly over the design.
Pre-Session Essentials
The shoulder through ankle pieces above have different access needs, so these five items smooth the session and the first week after ink.
-
Stencil transfer paper kit. Lets you preview line placement on skin before the needle, especially helpful for the inner forearm and wrist silhouettes in the ideas above.
-
Topical numbing cream. Applied about 30 to 45 minutes before can blunt the sting for sternum and rib sessions without impacting shading.
-
Thin protective film roll. Useful for ankle and foot pieces that face constant abrasion during the first few days.
-
Fragrance-free gentle body wash. Cleanses healing skin without stripping pigment, which matters for stipple and fine-line work.
-
Aquaphor healing ointment. A thin layer for the initial 48 to 72 hours keeps linework moist and reduces scabbing on detailed phoenix feathers.
7. Full Back Rising Phoenix
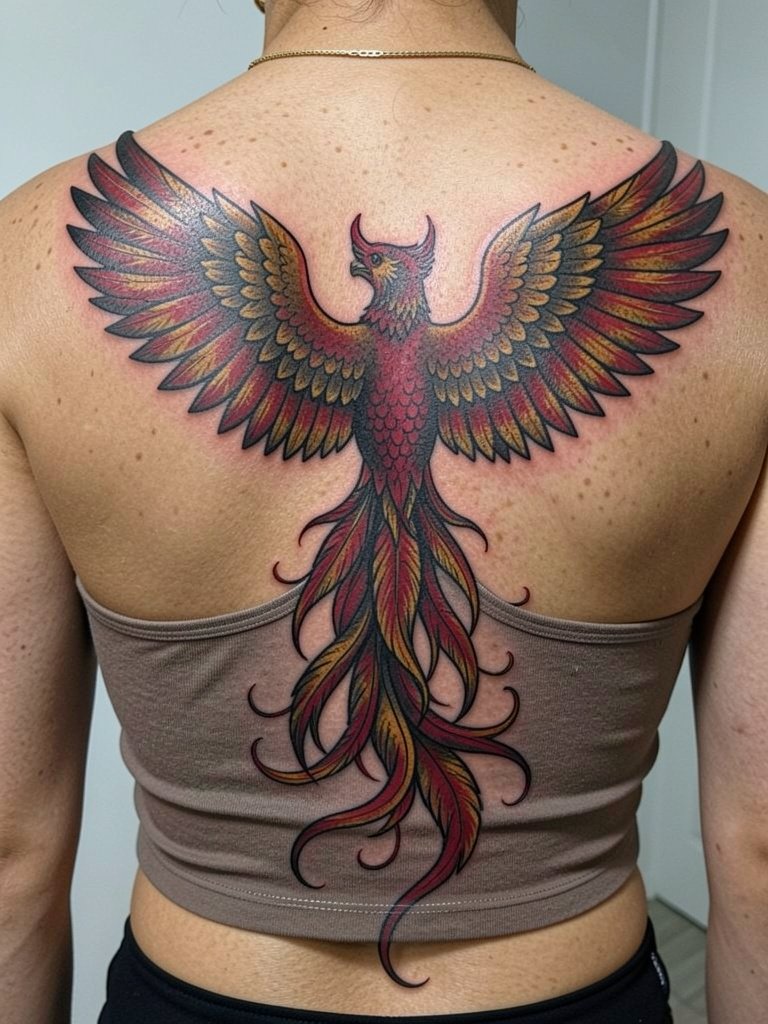
A full-back phoenix is a commitment that rewards layered sessions. Pain varies across the back with the spine and lower ribs being the sharpest areas. Sessions commonly run four to six hours across multiple days. One mistake is crowding decorative elements into the tail, which reduces negative-space flow. For the session, bring loose zip-up tops so you can remove clothing without stepping over your head. For nights out after healing, this design pairs well with open-back dresses that let the wings show.
8. Watercolor Phoenix on Shoulder Blade
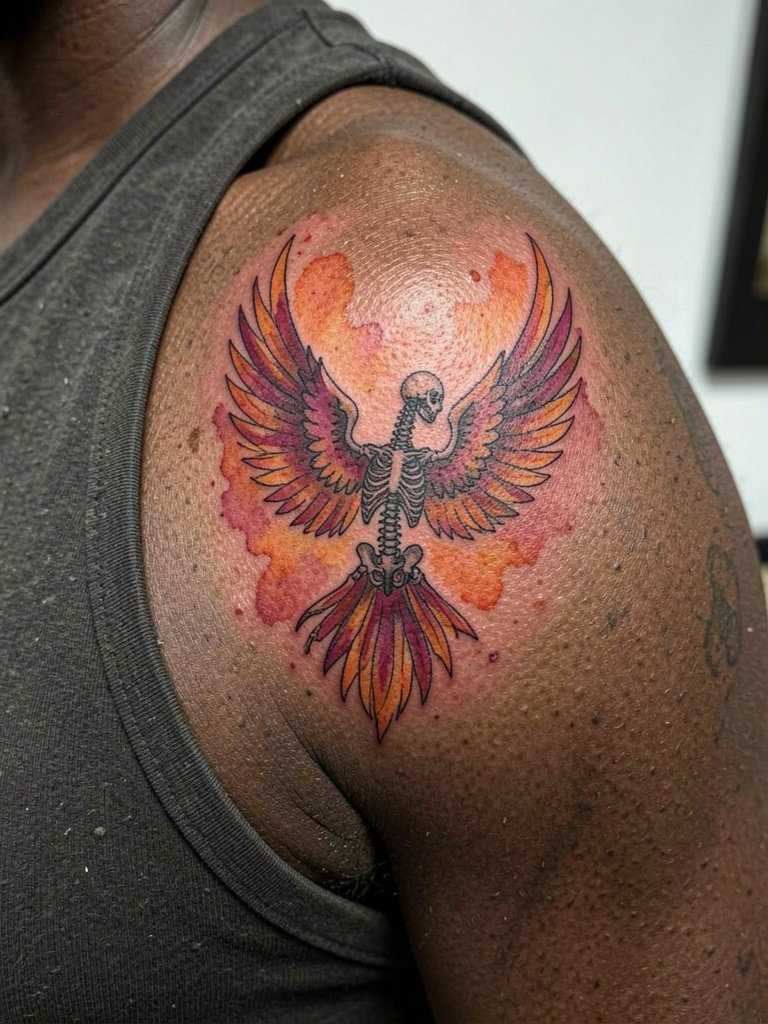
Watercolor phoenixes look painterly at first but can age into indistinct patches if placed where skin stretches. Shoulder blade placements are a safe spot for controlled watercolor because the area moves less than the ribs. Expect two to three hours per session and plan for a color top-up at year two. The frequent mistake is asking for extreme soft blends without anchor lines. Bring reference images that show clear anchor strokes so the artist knows where to hold contrast. For showing the piece, a thin-strapped cami frames the shoulder blade without covering it.
9. Geometric Dotwork Phoenix on Calf
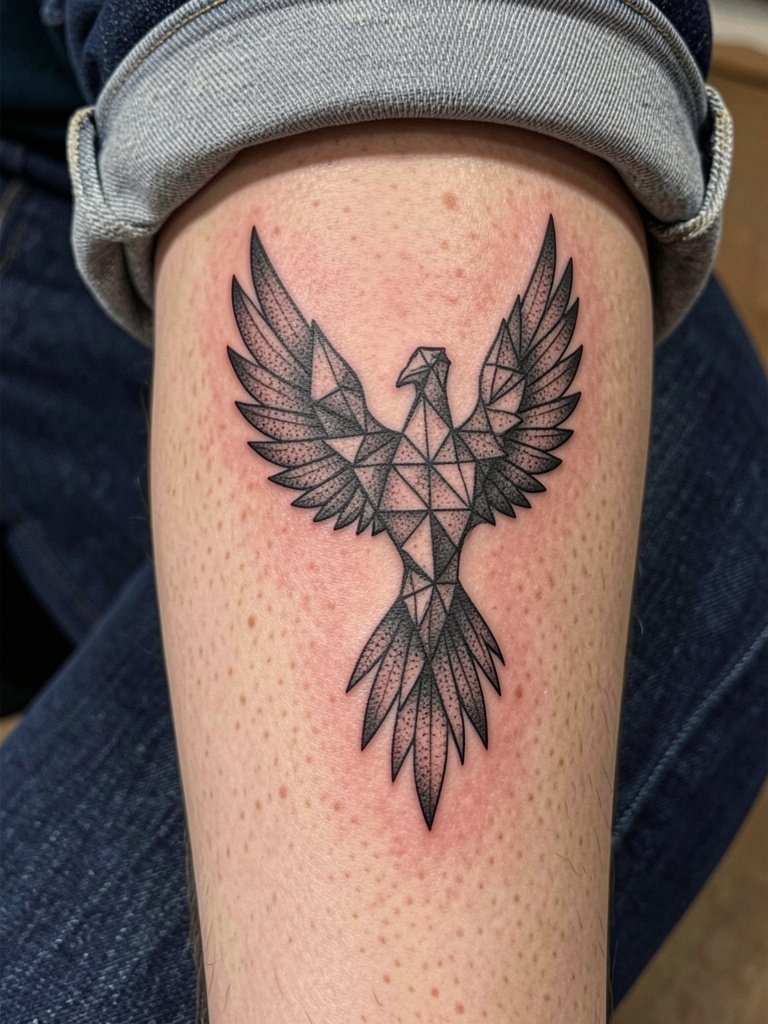
Calf placements hold dot work beautifully with lower blowout risk than inner arms. Expect sessions between two and three hours depending on detail. A common error is packing dots too close, which can merge into gray patches over time. Ask for measured dot spacing and a small test patch area to confirm density. For styling, calf phoenixes peek best with ankle-length boots or culottes that stop just above the design.
10. Micro-Realism Phoenix on Inner Thigh
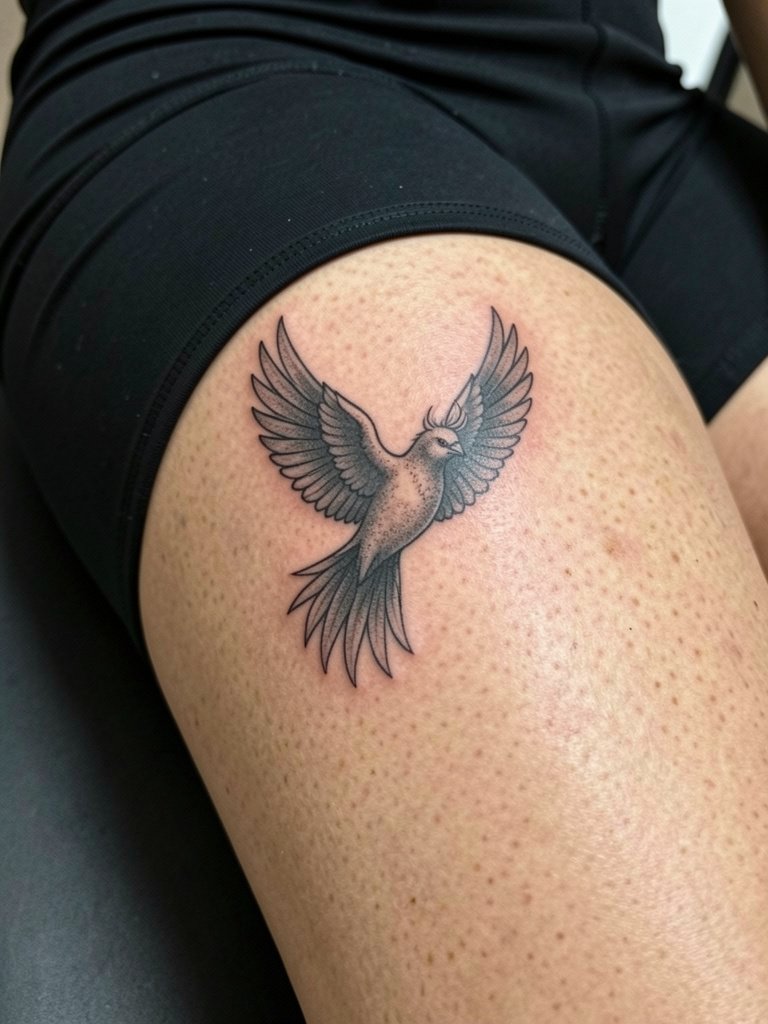
Inner thigh pieces are intimate and require an artist used to soft shading in high-friction zones. Pain ranges moderate to high and sessions are often split. The mistake is tiny micro-detail too close to the groin edge where friction accelerates fading. For placement, keep the piece centered mid-thigh and expect a touch-up at year one. Wear comfortable shorts for the session and consider mid-thigh bike shorts that keep the area accessible without exposing more than necessary.
11. Neo-Japanese Phoenix on Upper Arm
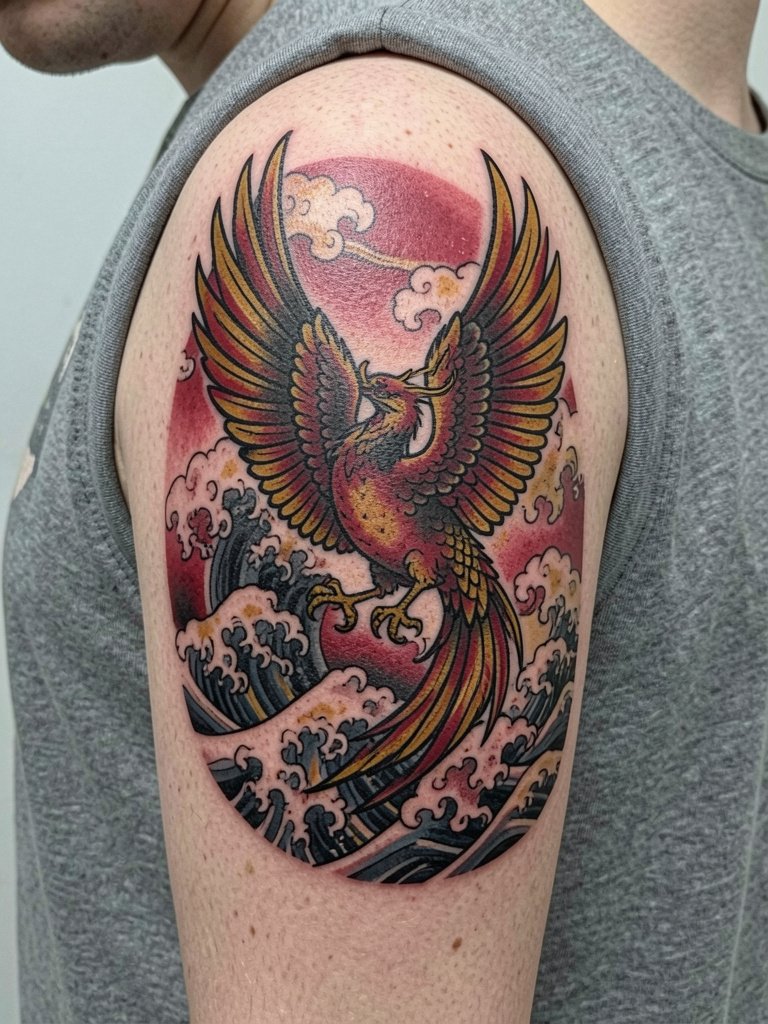
Neo-Japanese phoenix motifs thrive on scale and contrast. The upper arm is great for three-hour sessions that layer color without overrunning. A common error is shrinking the composition into a small patch. Plan for the wingspan to have room and request explicit composition sketches so the motifs breathe. For dressing-up situations, pair with rolled sleeve button-down shirts that let the bicep show when desired.
12. Single Feather Ring on Finger
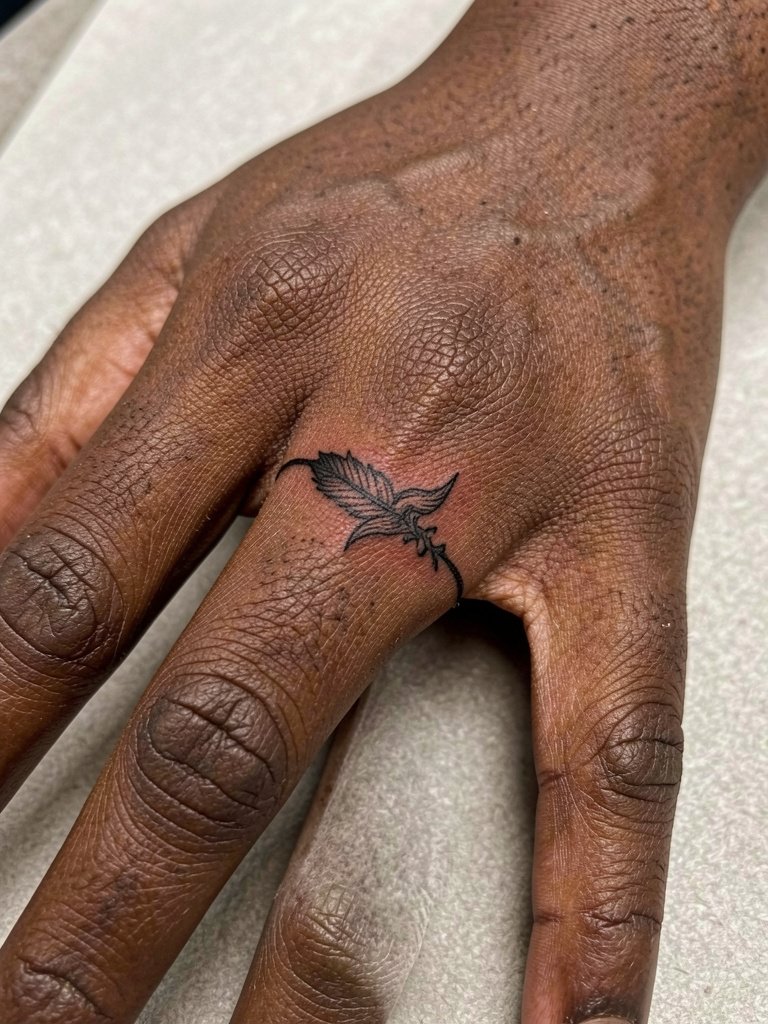
Finger tattoos are convenient but high-maintenance due to constant washing and abrasion. Expect a quick 20 to 40 minute session and plan for touch-ups every 12 to 18 months. The mistake is asking for hairline details that disappear fast. Keep the band bold enough to survive hand work. For longevity, avoid heavy hand creams that strip pigment and consider minimal rings to avoid direct friction.
13. Collarbone Mini Phoenix with Script
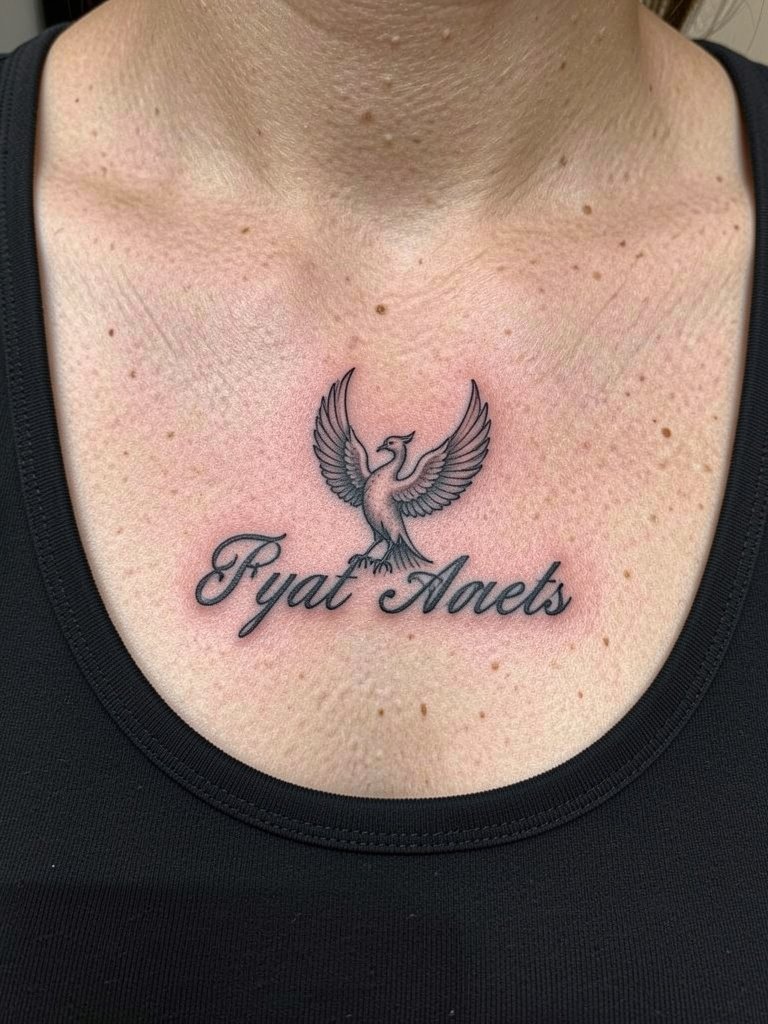
Collarbone placements catch eyes but face frequent movement and sun exposure. Pain is moderate and sessions are often under 90 minutes. A divided controversy exists about fine-line work on collarbones. One camp says single-needle scripts and tiny birds blur quickly because the skin there flexes and the bone interrupts needle depth. The other camp counters that with slightly heavier line weight and careful spacing, fine detail can hold for years and they point to healed photos as evidence. If you choose fine line, request a slightly stronger stroke for the section closest to the bone so the composition maintains integrity.
14. Chest-Facing Half-Sleeve Phoenix
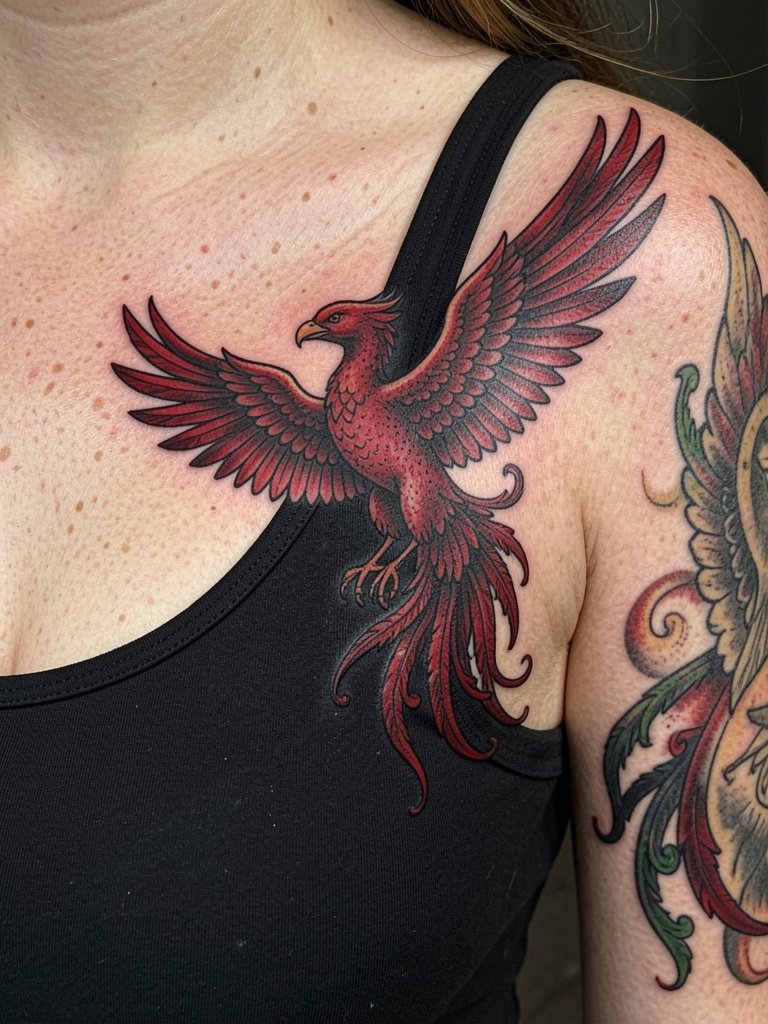
Half-sleeve chest pieces require careful flow over the shoulder joint. Expect multiple sessions over several months. The usual error is treating the chest and arm as separate pieces. Insist on full-wrap comps so the wings and tail read in motion. For session comfort, bring a button-up shirt you can remove without raising your arms. For social wear, a structured blazer with a deep V or open front frames the half-sleeve without covering the chest detail.
15. Finger Micro Phoenix Accent
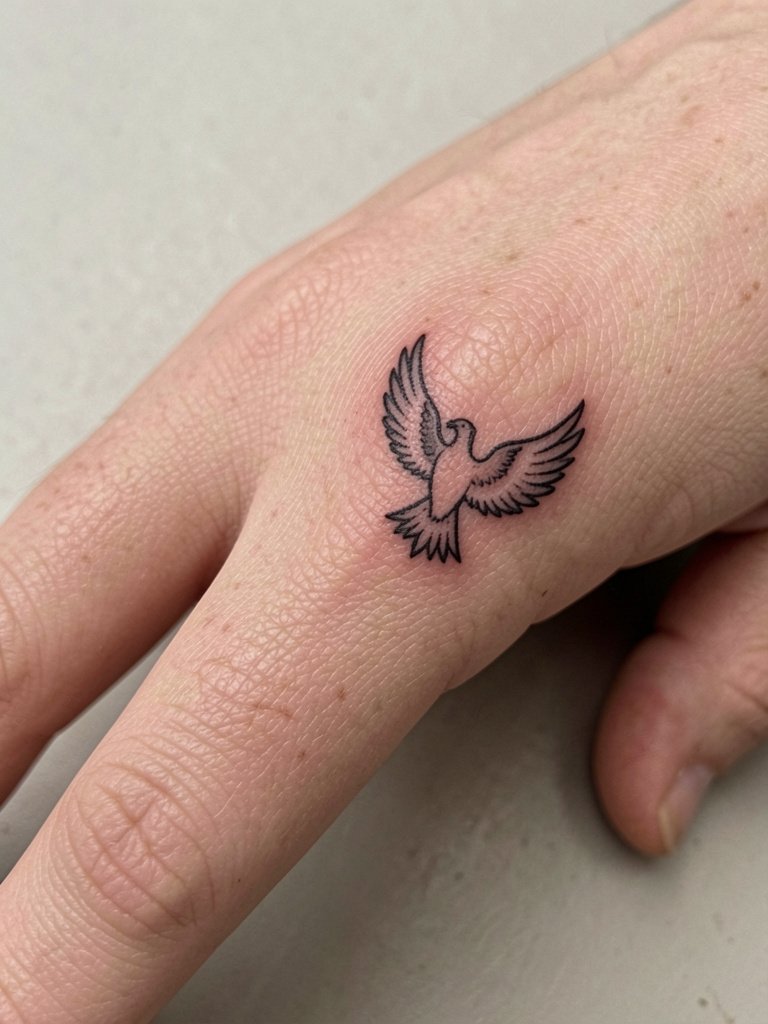
Tiny finger accents are impactful but require acceptance of higher fade rates. Session times are short and touch-ups may be needed every year. A common mistake is placing complex texture on a fingertip. Keep the silhouette bold and avoid tiny inner strokes. Accessories like thin stackable rings complement this placement without rubbing directly on the ink.
16. Stained Glass Phoenix on Thigh
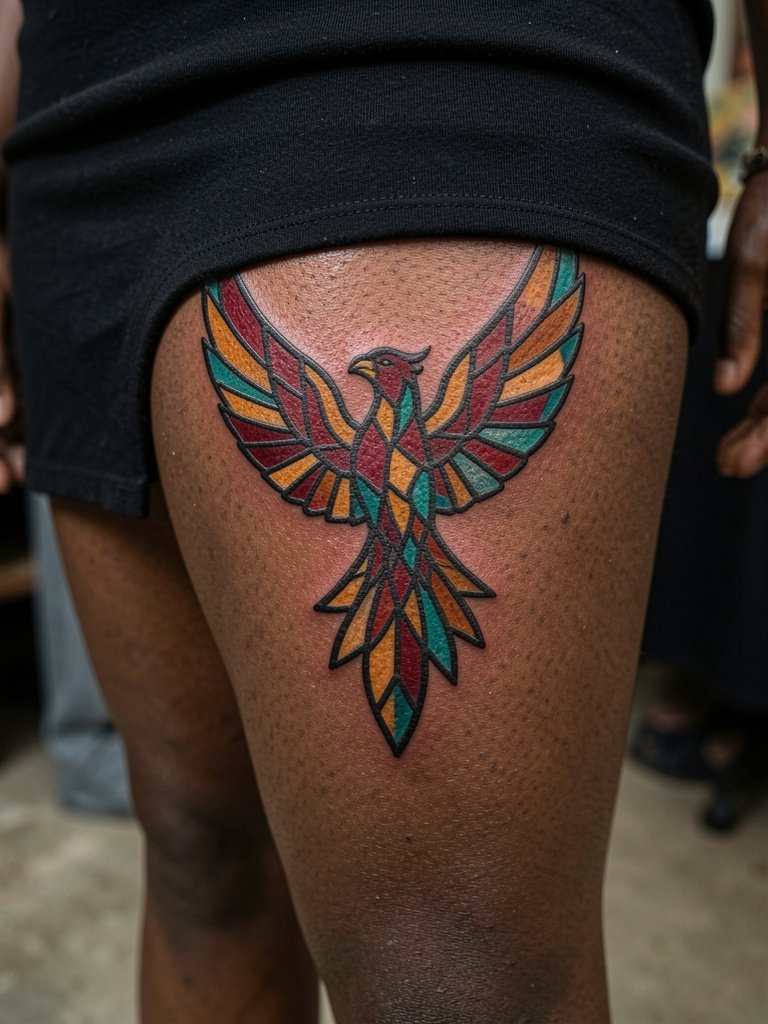
Thigh canvases allow big compositions and color play. Sessions can be long and are best split into two sittings. One mistake is tiny mosaic fragments that blend into muddiness after healing. Ask for slightly larger color panels and crisp leading lines to maintain the stained-glass effect. For showing the piece, mid-thigh skirts and wrap dresses reveal the art without tight seams across it.
17. Upper Ribcage Flowing Phoenix
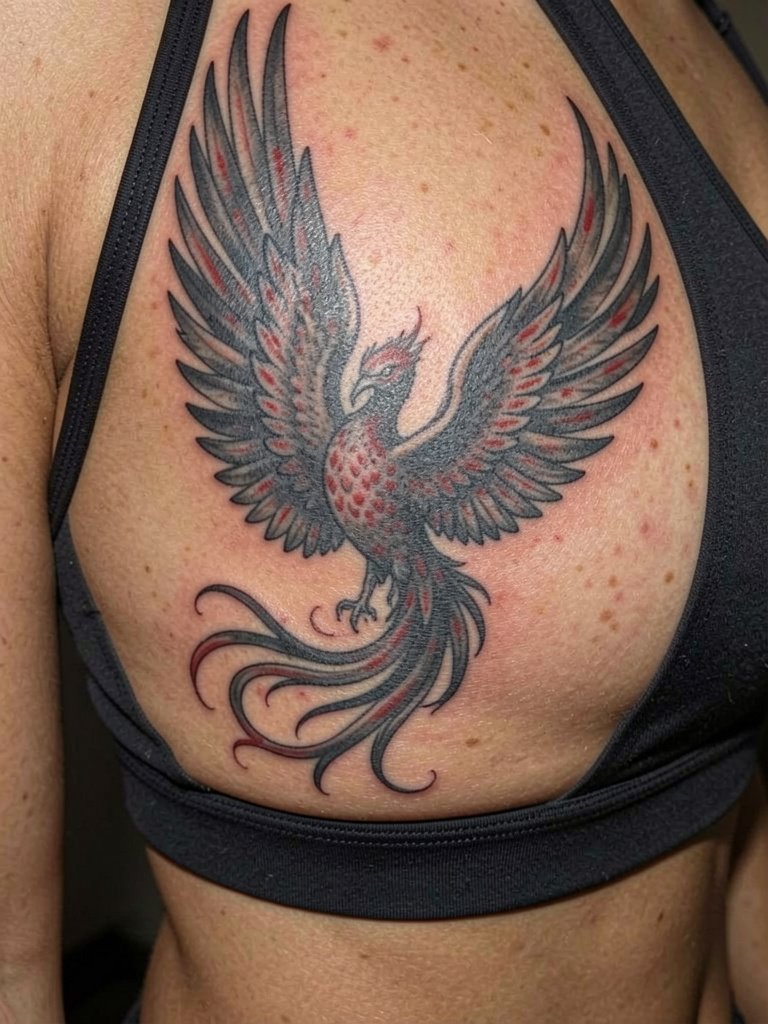
Ribcage phoenixes are visually stunning but technically fraught. Pain is high and sessions often require breaks. Artists are split into two camps about fine line on ribs. One group says the skin stretch and frequent movement blur single-needle work within two years. The other group says that with slightly wider spacing and disciplined needle depth, fine line can settle well, and they point to longer-term healed examples to support that. If you want detail here, plan for heavier structural lines near the spine and allow the feather tips to be softer.
18. Half-Chest Heraldic Phoenix Crest
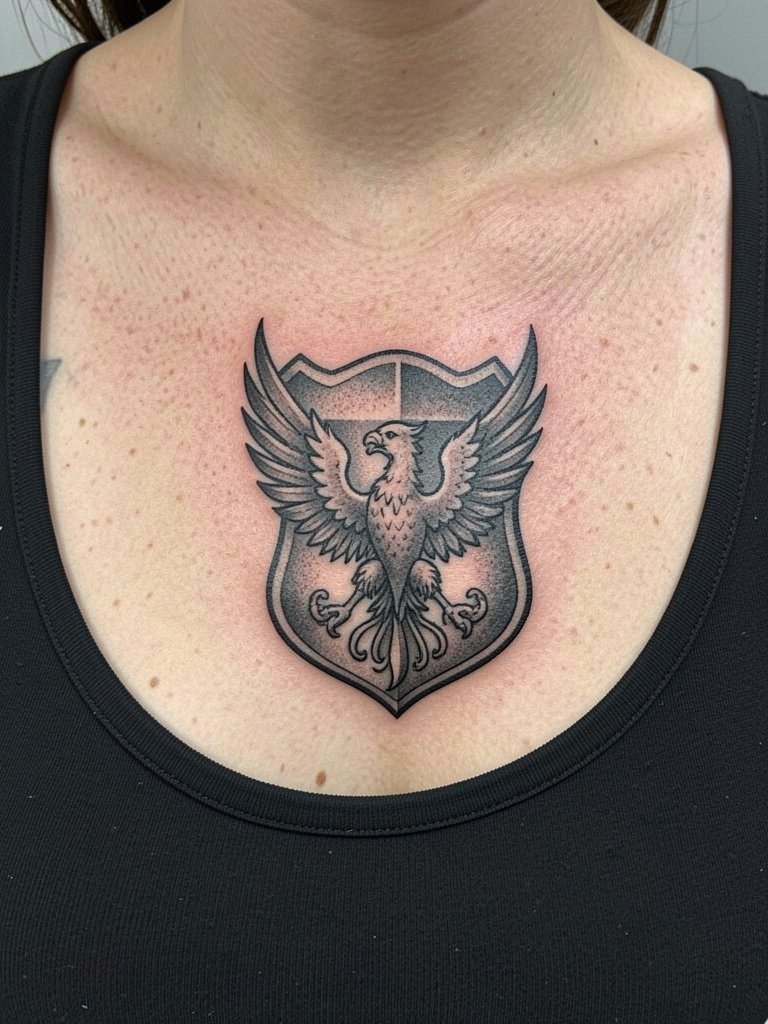
Crest-style phoenixes borrow from heraldry and benefit from strict negative-space planning. Sessions are moderate to long depending on size. A common misstep is over-detailing the shield interior, which can muddle. Ask the artist to prioritize bold borders and keep interior patterning simple. For dressed-up looks, open shirts and low collars complement the crest silhouette.
19. Feather Cluster Shoulder Cap
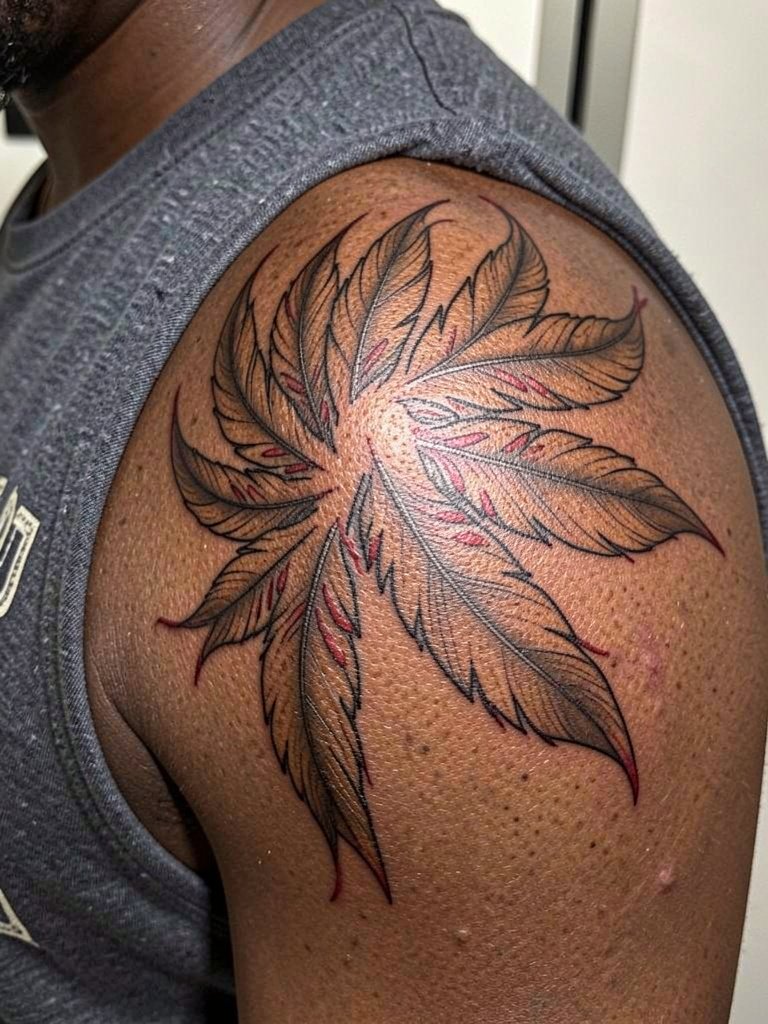
Shoulder caps read well because they sit on a rounded surface that shows feathers in motion. Expect two hours plus for moderate coverage. The mistake is trying to cram tiny micro-detail into each feather. Ask for varied feather scale so the cap reads from a distance. For casual wear, tanks and off-shoulder tops show the cap without friction risks.
20. Blackwork Phoenix Over Sternum and Rib
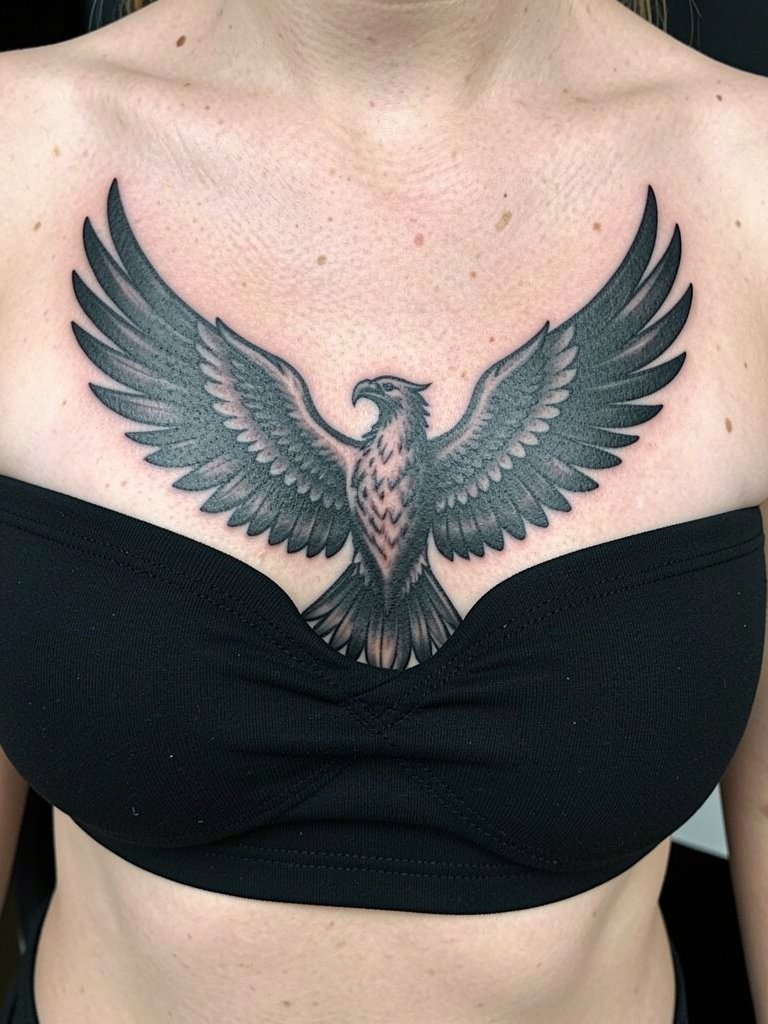
Bold blackwork on the chest and ribs anchors well and often outlasts delicate washes. Pain is significant and sessions are lengthy. A mistake people make is overextending solid black into high-motion folds. Plan black blocks with breathable negative-space channels so the piece breathes as you move. For appointments, wear a supportive top that gives the artist clear access without awkward undressing.
21. Small Back of Neck Phoenix
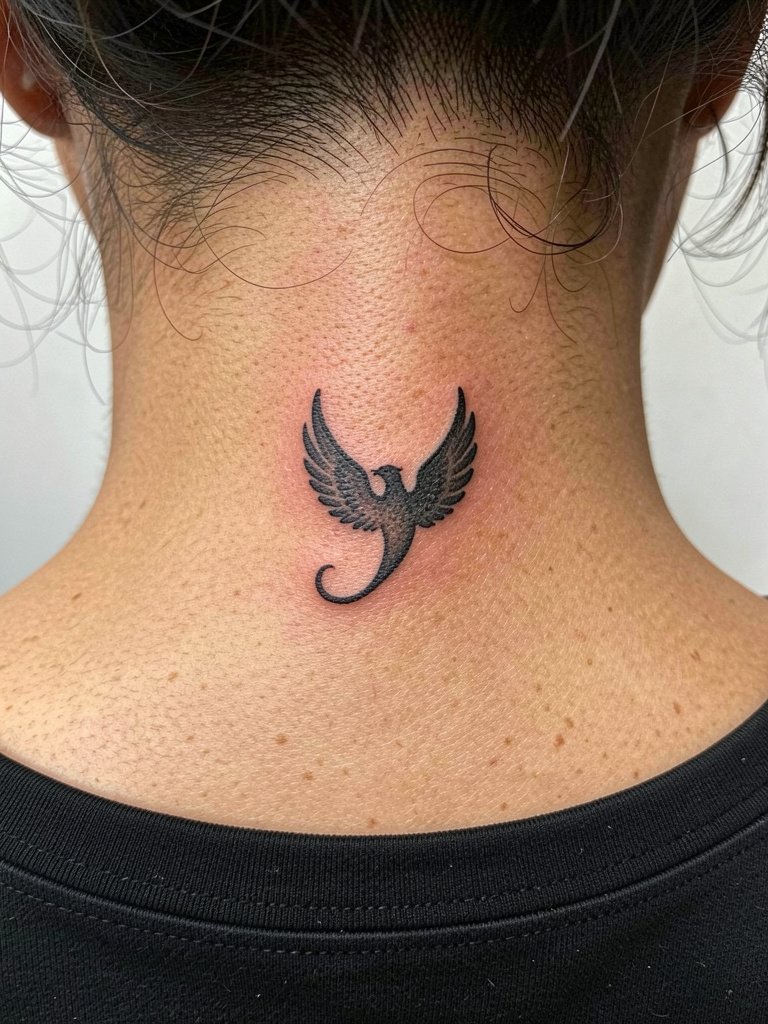
Nape tattoos are subtle and easy to hide with hair. Sessions are short and pain is moderate. Avoid asking for tiny feather textures because the area is low tolerance for micro work. For visibility, wear hair up or choose short cuts. A simple pendant or choker can draw attention upward without covering the ink.
22. Textured Black and Grey Phoenix on Thigh Panel
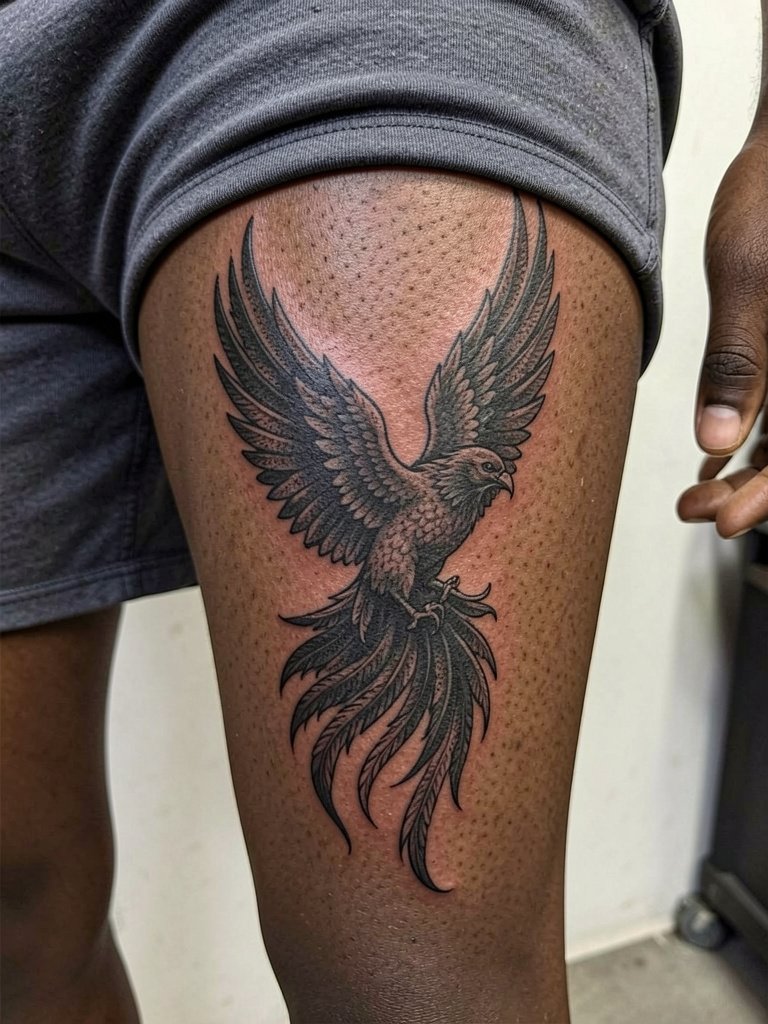
Thigh panels support heavy texture without high blowout risk. Sessions can be long and often split. A typical mistake is using uniform shading that flattens the bird. Ask for layered shading techniques so feathers pop at varying depths. For nights out, thigh panels work with high-slit skirts or shorts that let the vertical composition read.
23. Small Mandorla Phoenix Between Shoulder Blades
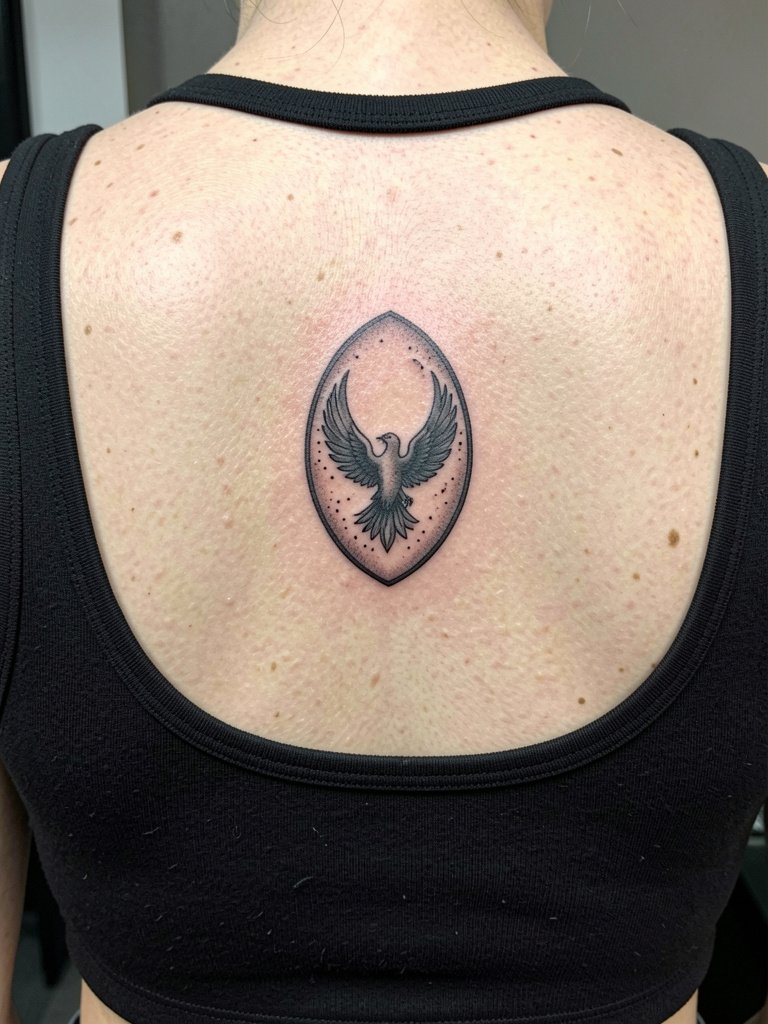
Center-back mandorlas are elegant and age predictably because the area is low friction. Sessions are moderate and aftercare is straightforward. On cultural origin, this design borrows iconography familiar to many traditions and requires respectful treatment. Credit to the broader decorative language and avoid asserting ownership of sacred symbols or using specific ritual motifs without understanding. For the session, wear a top that unbuttons or a loose zip so the artist can access the back easily.
24. Photorealistic Phoenix Head on Forearm
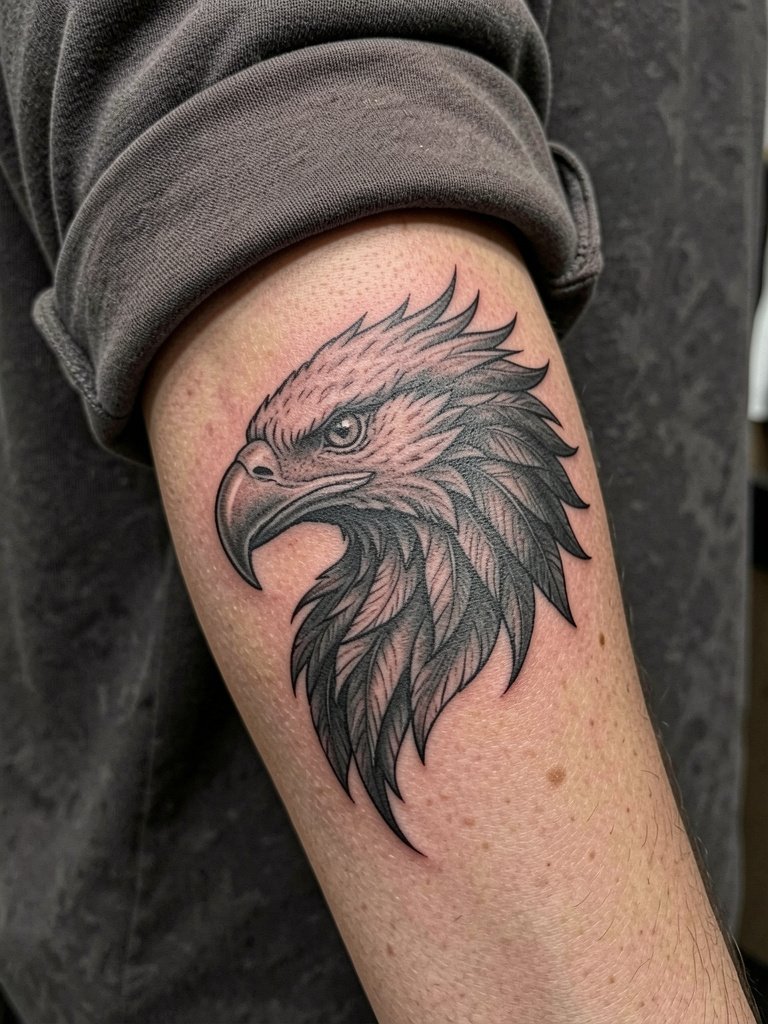
Realism on the forearm can be striking but requires an artist skilled at tonal transitions. Sessions run long and may be broken into multiple visits. A common error is compressing too much tonal info into a narrow band. Ask for reference photos that show the exact lighting the artist should mimic. Forearm pieces show well with three-quarter sleeve shirts rolled to expose the art when you want it visible.
25. Mandala-Integrated Phoenix on Hip
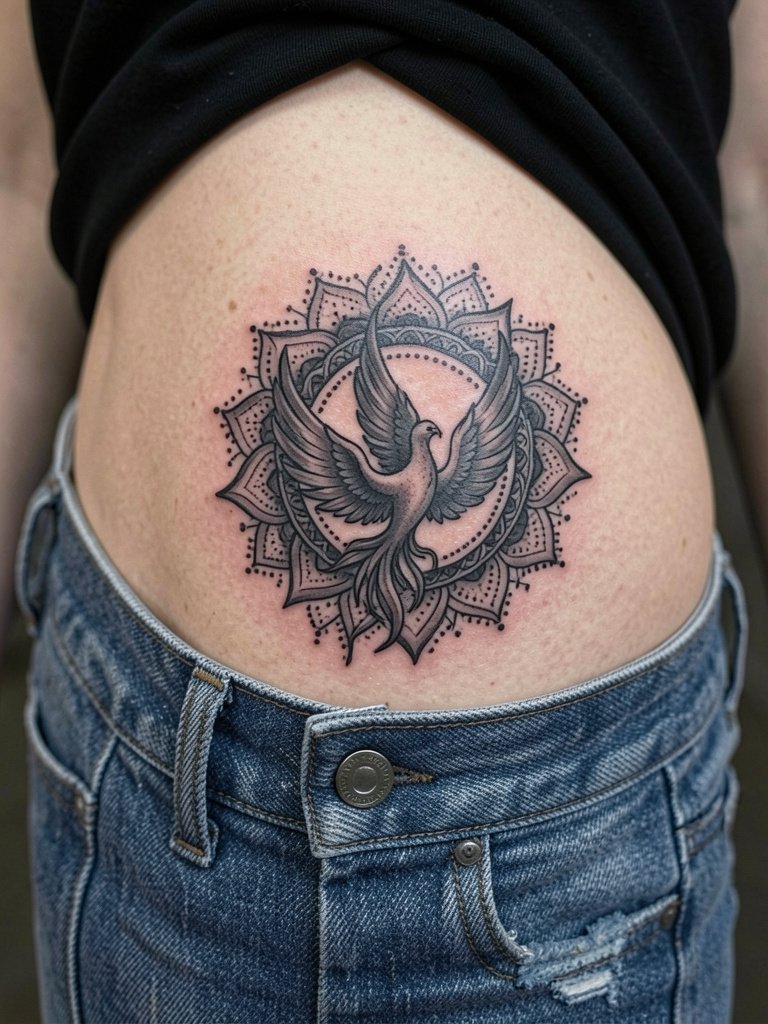
Hip mandala phoenixes are decorative and read strongly when centered over the pelvic line. Sessions are moderate and healing benefits from loose clothing. A mistake is building too many thin spokes that later blur into indistinct lines. Ask for slightly thicker radial elements and breathing room between rings. For evenings, this placement works with low-rise skirts or high-cut shorts that reveal the top curve.
26. Negative Space Phoenix on Lower Back
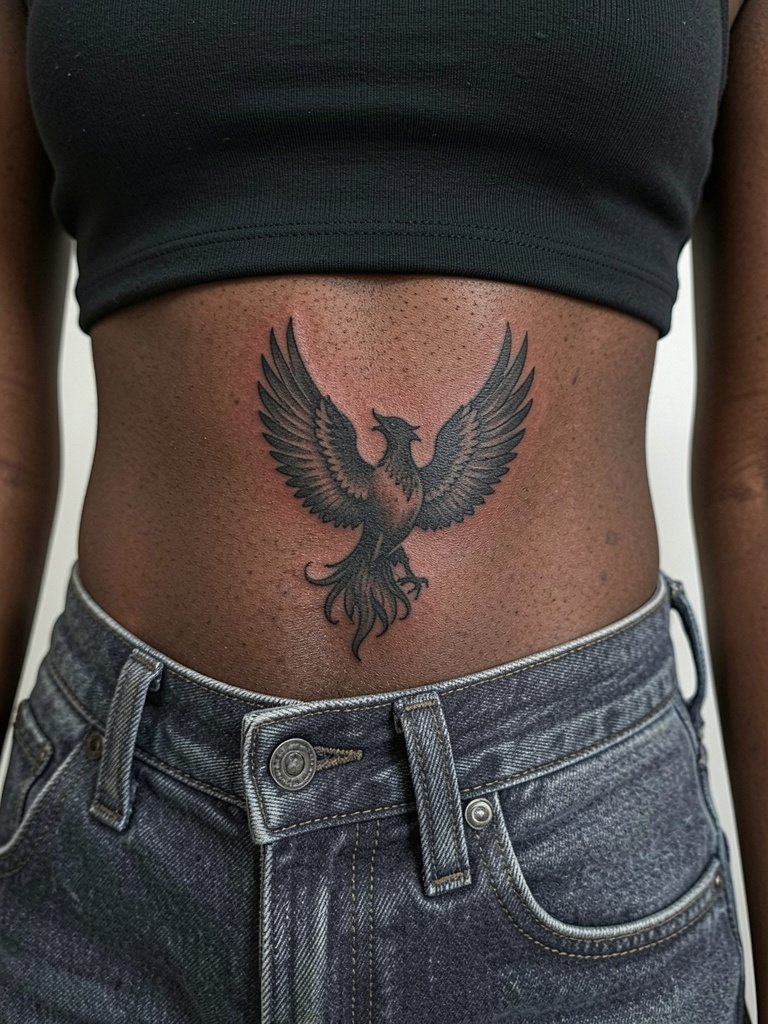
Lower back negative-space pieces read cleanly when constructed thoughtfully. Sessions are moderate length. The error people make is blocking too much solid black that caves in visually. Ask for balanced margins so the negative silhouette maintains shape as the skin moves. For showing it in summer, low-rise jeans or crop tops highlight the area.
27. Full-Sleeve Rising Phoenix Wrap
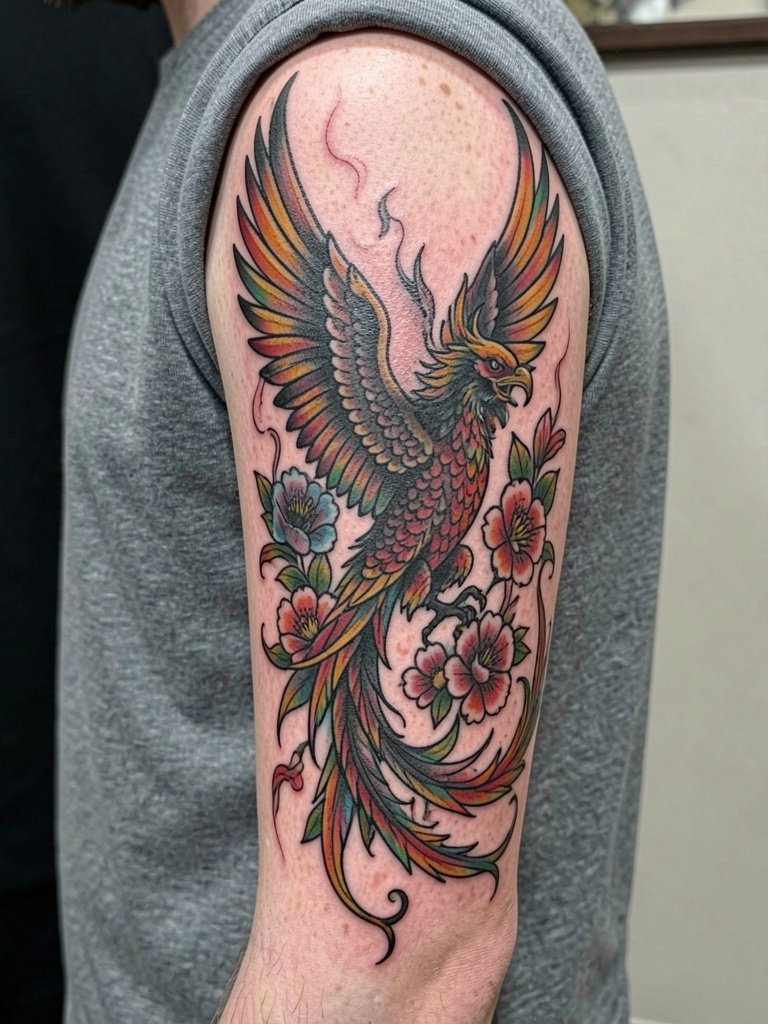
Full sleeves demand a long-term plan and multiple sessions over many appointments. Pain varies but expect multiple blocks of three to five hours. A common mistake is treating the sleeve like a stack of disconnected pieces. Start with a clear layout and let the artist map the phoenix flow before inking. For daily wear, short sleeves show the upper arm work, while long sleeves tuck away the wrist detail when needed.
Frequently Asked Questions
Q: How long will a phoenix tattoo actually take to heal and when should I expect to book a touch-up?
A: Expect surface healing in one to two weeks and fuller settling over three to six months, depending on saturation and placement. Fingers, wrists, and ankles often need touch-ups around the one-year mark, while bold blackwork and thigh or back pieces can hold longer before a touch-up is necessary.
Q: Are there placements I should avoid if I want the phoenix to look crisp after five years?
A: High-friction zones like the insides of wrists, fingers, and the area under a bra strap tend to soften detail faster, so choose slightly larger scale and stronger anchor lines there. Low-friction zones like the upper back, thigh, and outer calf generally preserve fine detail much longer.
Q: Where can I find healed phoenix portfolios and discovery pathways without naming artists directly?
A: Search social platforms by themed hashtags and location filters, for example try searchable tags that combine style and subject words. TikTok and Instagram location filters let you find healed photos in your city, and Reddit tattoo threads often link to portfolio compilations showing multiple healed stages.
Q: Will fine-line phoenix details survive on ribs or sternum?
A: It depends on your goals and the artist's approach. Fine single-needle work on ribs and sternum risks blurring more quickly because of skin stretch. If you want fine detail there, plan for slightly heavier anchor lines and accept a higher chance of touch-up down the line.
Q: What should I wear to my appointment for a chest, sternum, or hip phoenix so the artist has clear access?
A: Pick clothing that exposes the area without requiring you to step out of garments awkwardly, such as a fitted sports bra for sternum work, a scoop-neck tank for collarbone pieces, or low-rise jeans for hip tattoos. Comfortable layers and zip-ups make breaks easier.
