
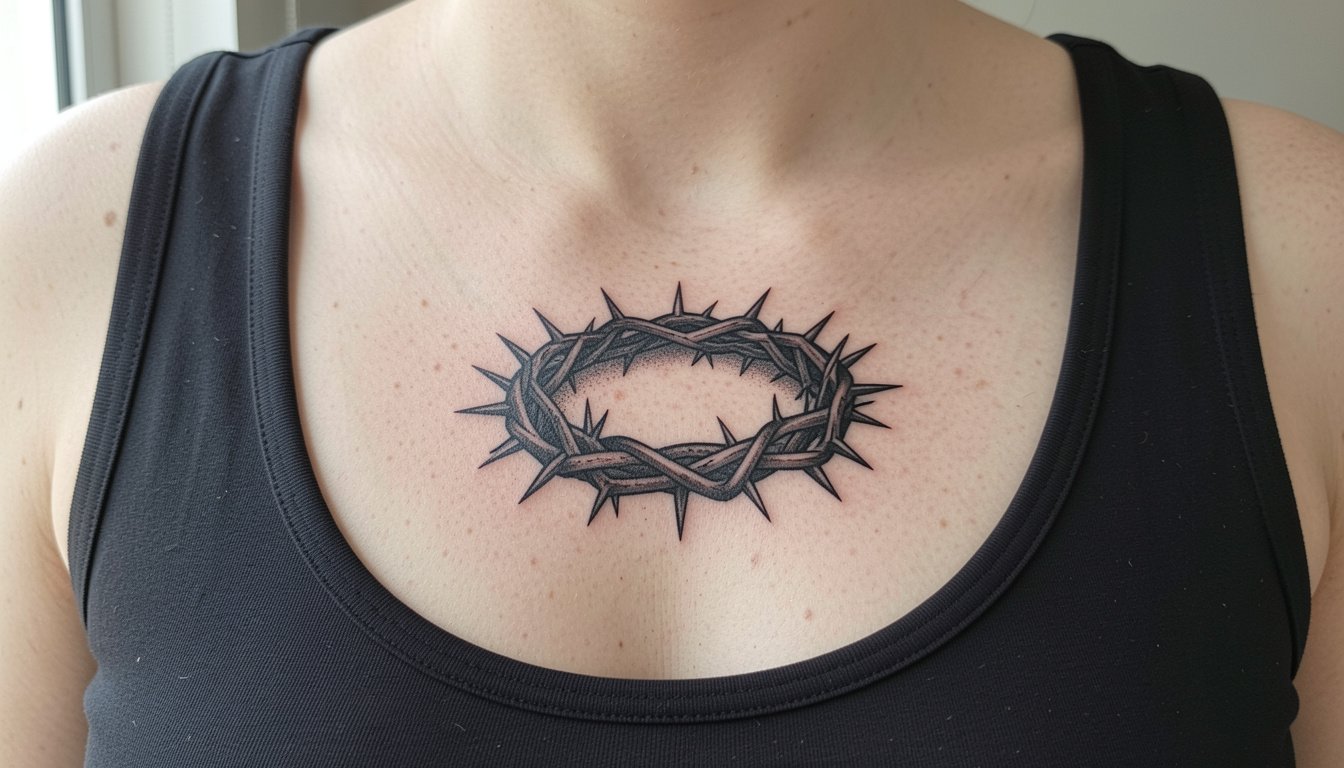
A tiny crown of thorns on a wrist reads differently than a saturated chest piece. I say that because I have watched both age in real skin, and the small, single-needle versions often blur into a gray line while denser blackwork stays legible. These examples pick placements, line weights, and styling pairings that help a crown design feel intentional and, yes, quietly sacred for years to come.
1. Fine-Line Crown on Inner Forearm

Choose this when you want a subtle devotional mark that can be covered easily for work. The inner forearm is forgiving for single-needle work but eats the finest details over time. Specify slightly heavier single-needle line weight than your reference photo, and a bit more spacing between the thorn points so the negative space survives at two years. Expect a six-month look that is crisp, at two years slight softening, and by five years the thinnest spikes may need a gentle touch-up. Session time is about one hour and pain is low to moderate. For showing it off, a rolled-sleeve linen shirt works well and pairs with open-back midi dresses for evenings.
2. Blackwork Crown Around a Small Cross on the Sternum
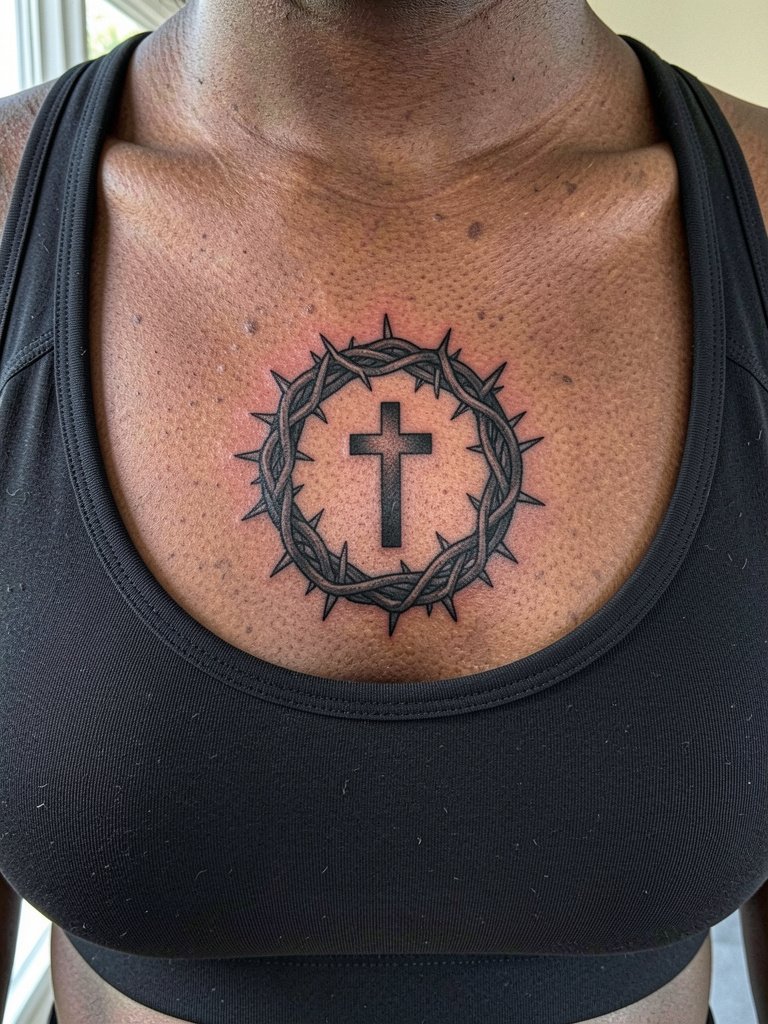
This chest placement reads deliberate and devotional because of scale and saturation. The sternum is sensitive, so plan for an hour to two hours and expect sharp moments of pain. Ask for heavy saturation and slightly thicker contour lines so the crown remains legible under the natural movement of chest skin. One camp argues that sacred symbols should be rendered large and reverent, and they prefer dense blackwork and scale to preserve detail. Another camp favors intimate, minimalist renditions for private devotion and personal reflection, and they often choose single-needle or micro script. Touch-up at year two is common with dense chest pieces because the area moves with breathing and clothing.
3. Micro-Realism Crown on the Side of the Wrist
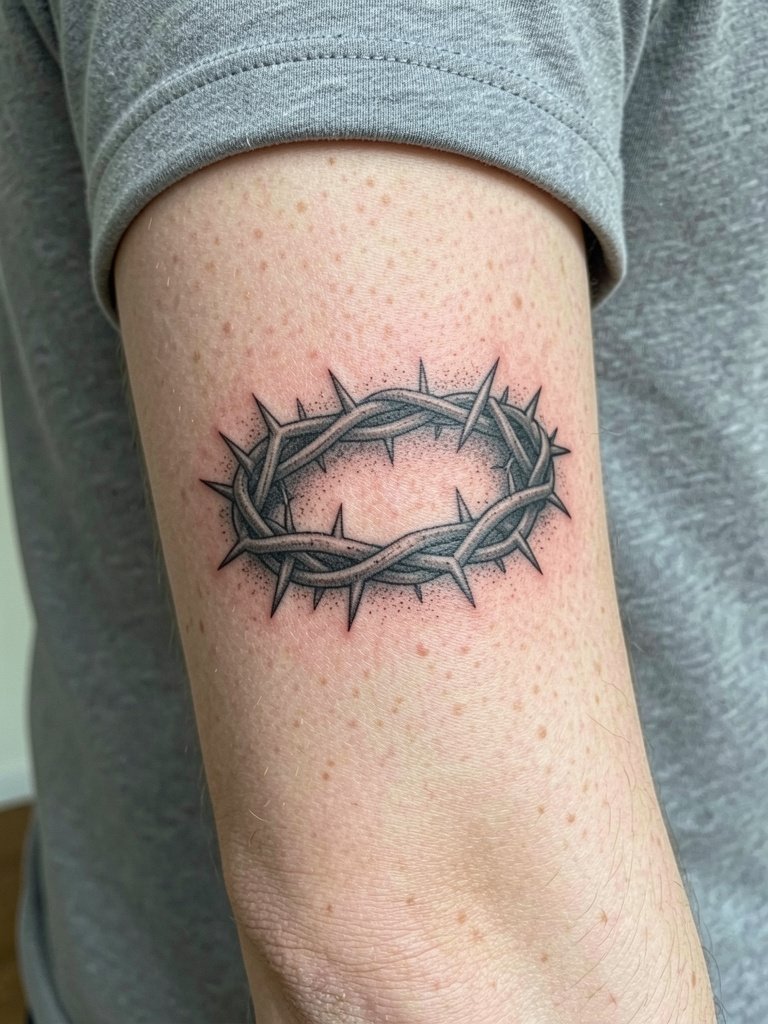
The wrist is high-visibility and high-friction, so micro-realism looks beautiful early and can soften fast. Specify stipple shading rather than smooth gradients to keep texture when healed. The common mistake is scaling the crown too small; give the design at least three inches across so the thorns do not merge with wrist creases. Session time is about 45 minutes and pain is moderate. For the appointment wear a loose sleeve to expose the wrist easily and protect the new ink afterward with a thin protective film roll recommended in the product block for first-week friction.
4. Traditional Linework Crown on the Outer Bicep
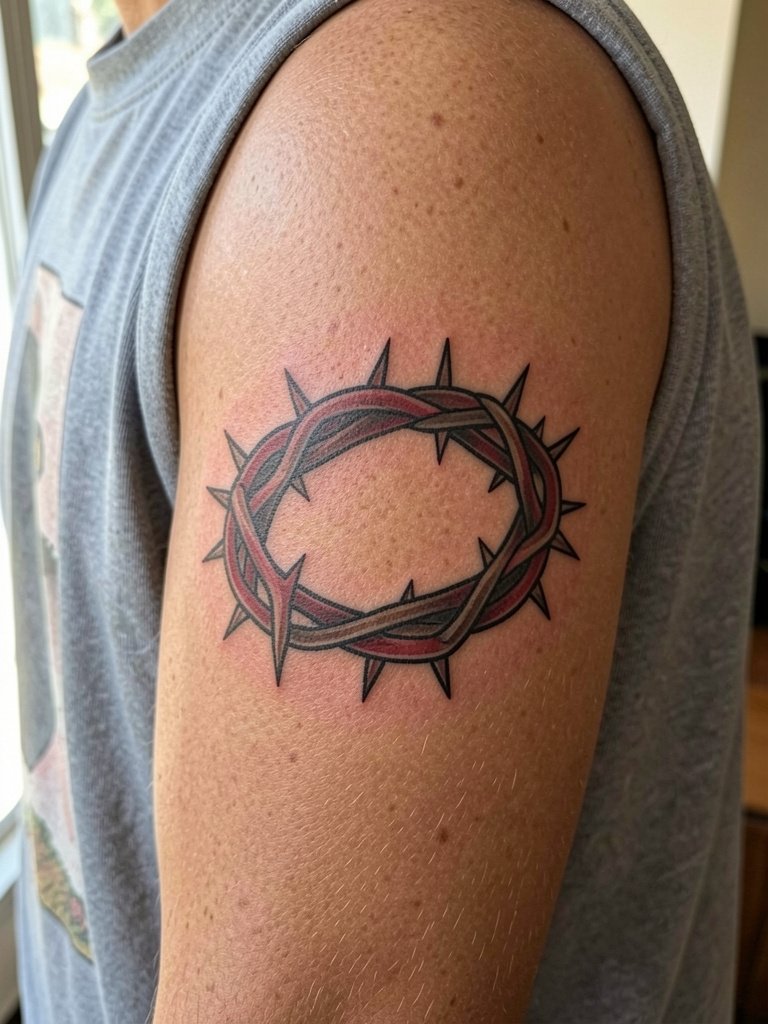
Outer bicep is a low-risk placement for blowout and it ages predictably, which makes traditional bold crowns a safe long-term choice. Ask for saturated fills and a bold outline so the thorns keep crisp edges at five years. The session feels like steady work with low sharp pain and likely takes 1.5 hours. A common error is asking for tiny traditional detail that gets lost; the fix is to confirm plate-scale and fill density in the consult. This placement pairs nicely with short-sleeve shirts and loose drawstring linen pants for summer looks.
5. Minimalist Ring of Thorns on the Finger Side
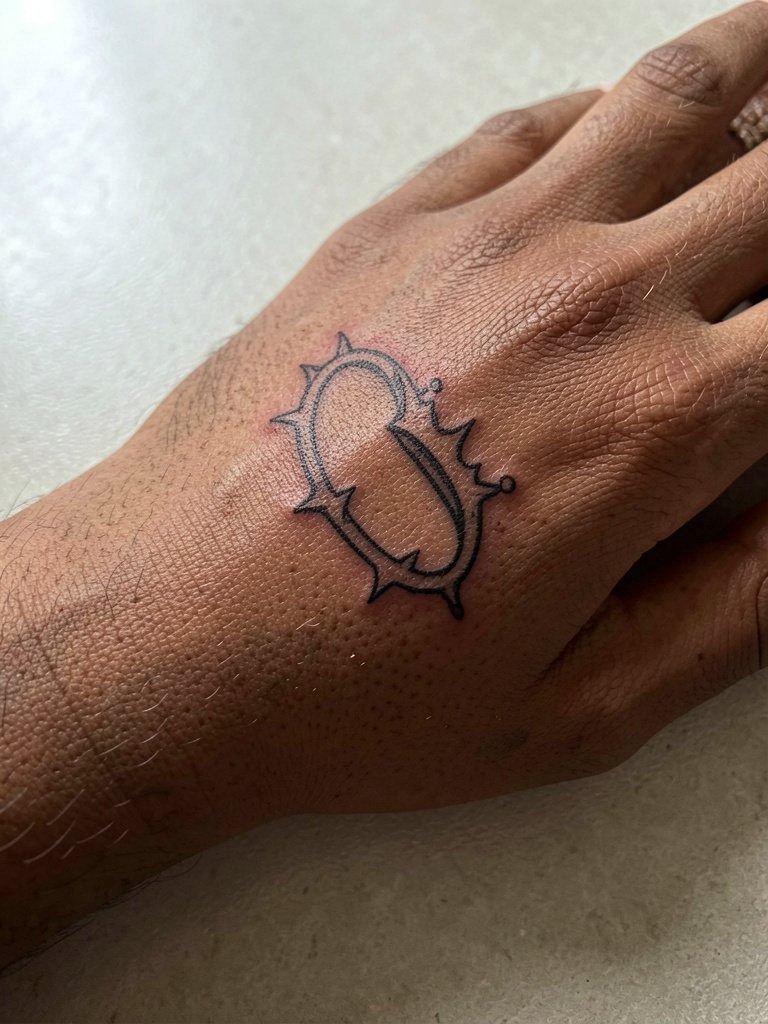
Finger tattoos are notoriously prone to fast fading and blur because of constant washing and motion. Request slightly heavier line weight than a typical single-needle ring and plan on touch-ups within 12 to 18 months. The session is brief but the pain is sharp and localized. One practical tip is to choose the side of the finger rather than the top so the design avoids the knuckle crease. For styling, fine rings sit well next to thin metal bands and pair with stackable minimal rings when you want to show it off.
6. Encircled Crown with Script on the Collarbone
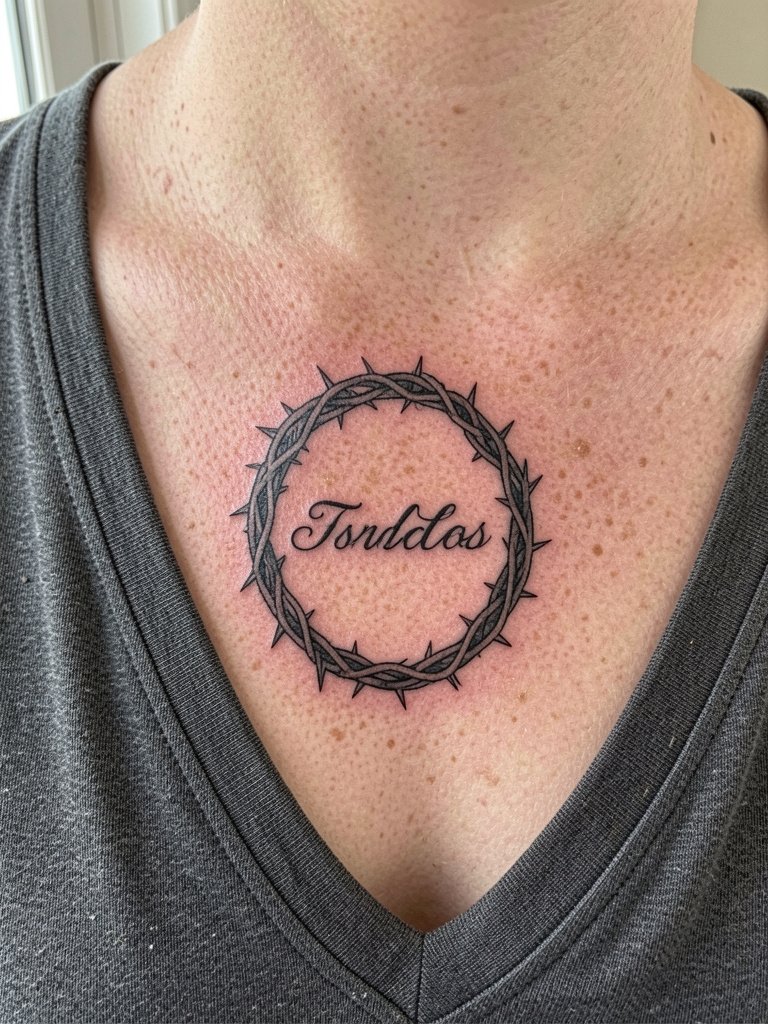
Collarbone pieces age depending on movement and sun exposure, so ask for slightly bolder line weight around the circular crown to protect the script inside. Specify the exact word and font size during the consult so your artist can create stencils that read at two and five years. Pain here is moderate and a session can be one to two hours depending on script length. A common mistake is choosing script too tiny. For wardrobe, scoop or V-neck tops show the crown elegantly and pair well with open-back midi dresses when you want to highlight the area.
Session Day Picks
These products help with the small-scale crowns and high-friction placements in the first week after inking.
- Stencil transfer paper kit. Lets you preview line weight and placement on skin before committing, which is useful for inner forearm and wrist ideas above.
- Topical numbing cream. Applied 45 minutes before takes the edge off sternum and rib sessions without altering ink saturation.
- Thin protective film roll. Keeps finger and wrist tattoos clean during intensive handwashing and friction from typing.
- Fragrance-free body wash. Cleanses healing areas without irritating delicate linework on the collarbone or chest.
- Aquaphor healing ointment. Thin layer for the first few days helps lock in moisture and supports fine-line retention for single-needle crowns.
7. Neo-Traditional Crown with Floral Accents on the Thigh

Upper-thigh pieces let you build composition and color without constant sun exposure, which helps saturation last longer. Tell the artist you want stipple shading in the background for texture and to avoid heavy gradients that can fade into patchiness. The session is moderate in pain and usually two to three hours for color work. One mistake is adding tiny floral details that disappear at scale; plan slightly larger petals and heavier color saturation. For session comfort, wear high-waisted jeans that are fully zipped and buttoned so you can slide them down slightly without disrobing. Pair the healed piece with flowy mid-length skirts to let the design peek at the hem.
8. Whip-Shaded Crown on the Ribcage
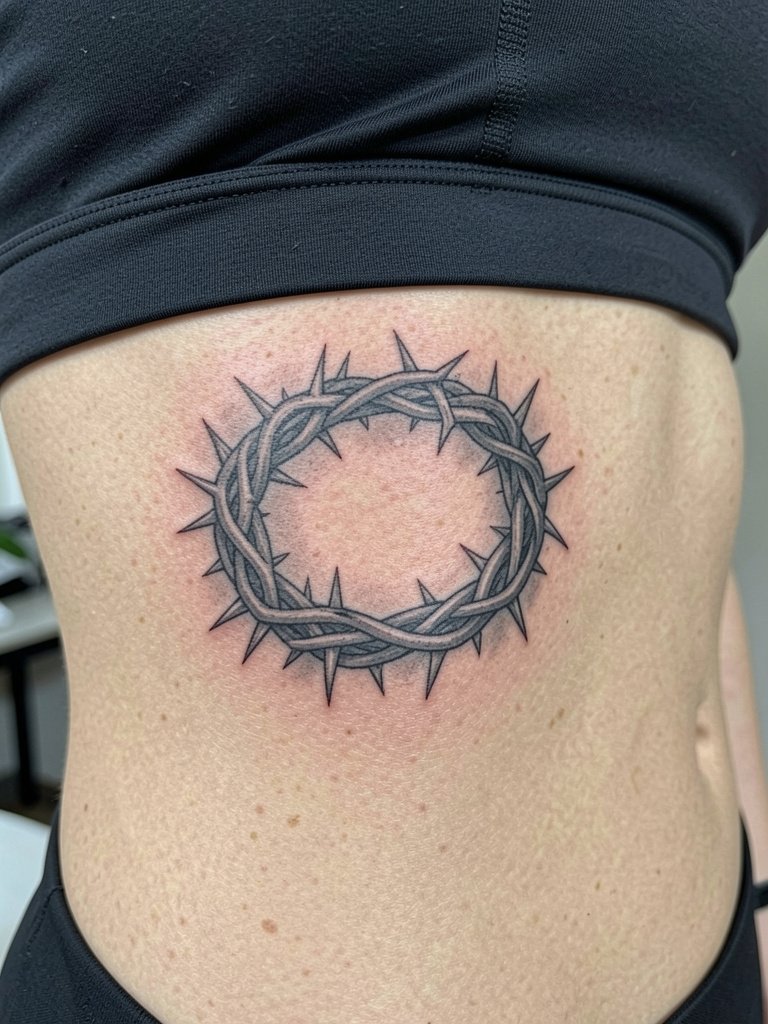
Rib work is high on the pain scale, so prepare for breaks and a numbing plan. I recommend a shading approach like whip shading instead of tight solid black because the skin stretch on ribs can cause heavy blacks to look muddy later. Artists are split on fine line here. One camp says the ribs stretch and blur fine lines within two years, especially near the breast crease. The other camp says slightly wider spacing and controlled needle depth settle fine and they show healed photos as evidence. If you favor softer contrast, plan for a touch-up at year one to deepen the thorns where needed.
9. Botanical Crown Wreath on the Shoulder Blade
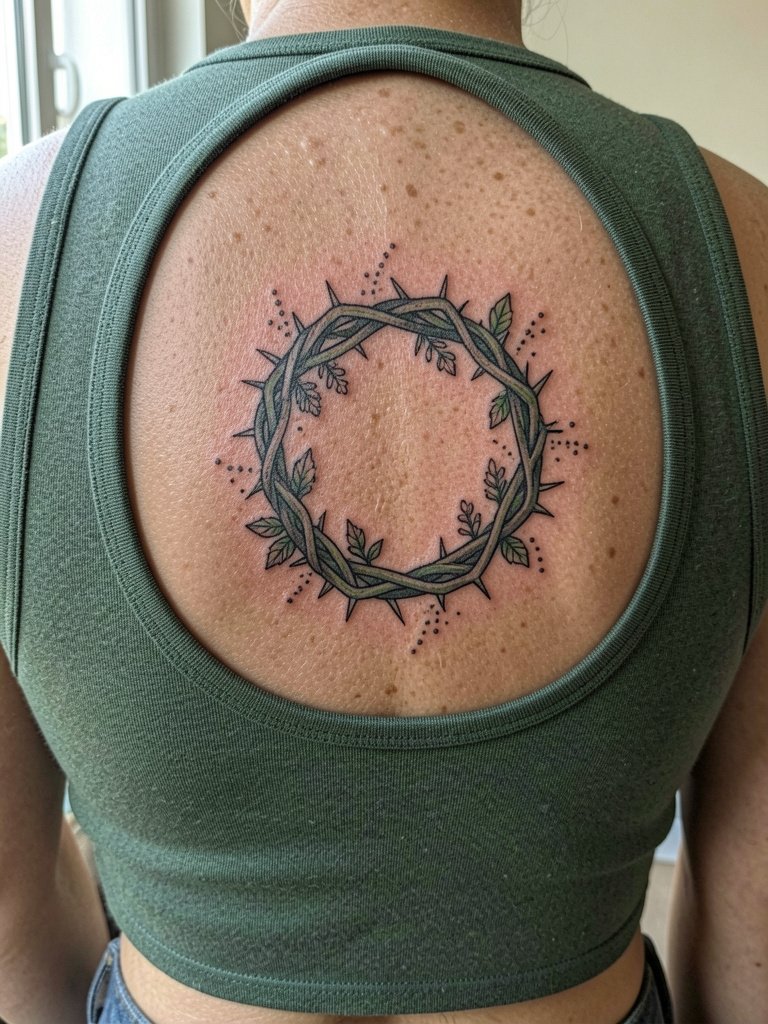
The shoulder blade is a low-friction zone that preserves detail well, so dot work crowns can hold for many years. Discuss negative space with your artist so the wreath breathes on the skin and does not become a flat mass. The session is moderate and often split into two shorter sittings for comfort. A common mistake is packing too much tiny leaf detail close together; ask for slightly more spacing to keep the stipple readable at five years. For outfits, cropped tanks and open-back tops pair naturally with this placement and look great with open-back midi dresses.
10. Single-Thorn Accent Behind the Ear
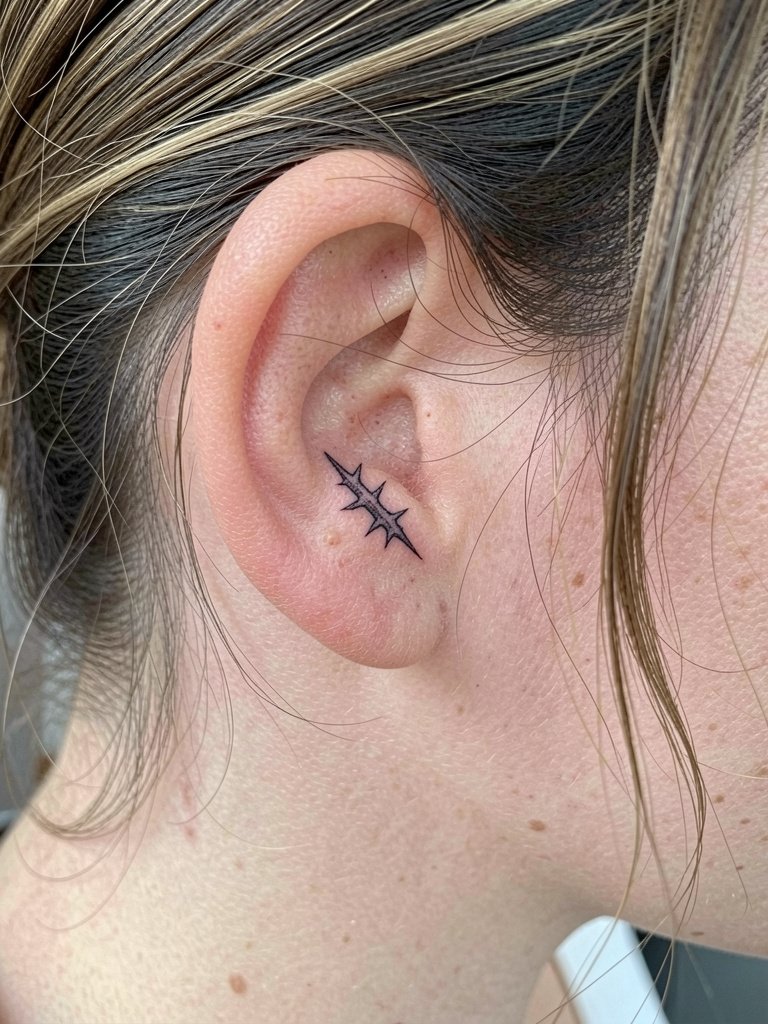
Behind-the-ear placements require an experienced hand because the skin is thin and curved. Ask your artist for a micro-stencil preview and request slightly thicker linework than a typical single-needle to account for any minor spreading. Pain is brief but sharp and the session is quick. The mistake people make is choosing complex detail for the area. Keep designs very simple and plan on a possible touch-up at one year. A helpful styling piece to pair with this is a slim hair clip or small hoop that draws attention to the nape without covering the tattoo, such as minimal hair clips.
11. Geometric Crown with Negative Space on the Forearm
Geometric arrangements make a crown feel modern and symbolic rather than literal. Specify the exact spacing and the size of the negative triangles during the consult so the pattern keeps its rhythm as it heals. Outer forearm work is lower pain and usually heals with minimal touch-up when done cleanly. The common error is overcomplicating the grid. Ask the artist to test how the geometry reads at three inches and five inches so you pick a size that preserves the pattern over time. For daytime looks, roll the sleeves and pair with casual button-ups.
12. Micro-Blackwork Halo on the Nape
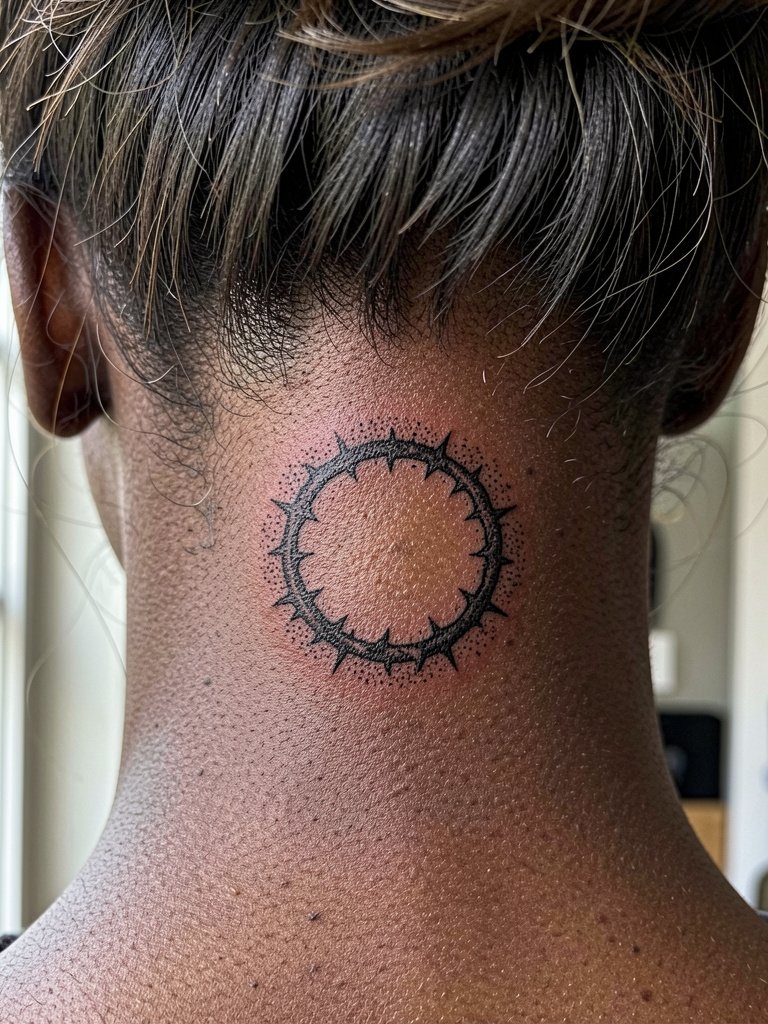
Nape pieces show beautifully when hair is up but they do get more sun exposure on very short hair. Ask for denser dot saturation instead of single thin lines so the halo maintains presence with time. Pain at the nape is moderate and the session tends to be quick. A common mistake is placing script too close to the hairline; keep the design a little lower to avoid hair growth interfering with healing. For styling, a simple updo or scoop-neck shirt will let the halo read without being hidden.
13. Watercolor-Style Washed Crown on the Rib Side
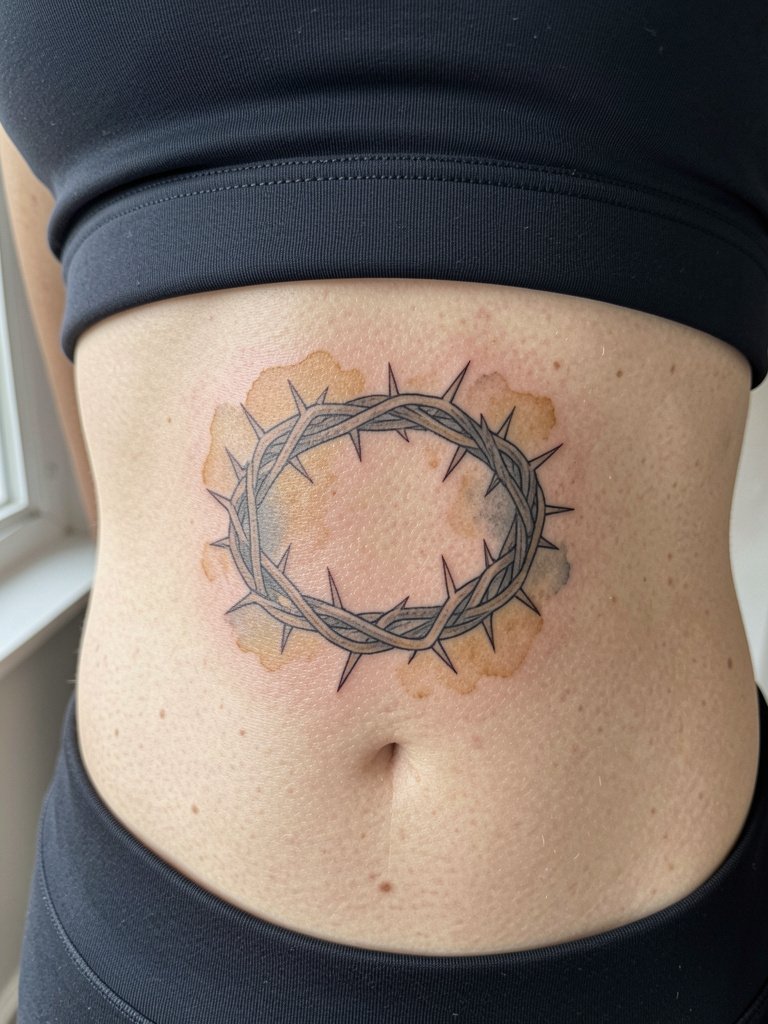
Watercolor effects can be risky on the ribs because gradients can disperse unevenly as the skin moves. Request the watercolor as a background wash with the crown drawn in stable black linework over top. That way the color can fade naturally but the outline keeps meaning. Pain and session length are significant for ribs, so plan for breaks and a realistic timeline. The typical mistake is asking for large, diffuse watercolor with tiny linework, which loses contrast as the wash fades. For appointment day, consider numbing and wear a fitted top that exposes the area while staying modest.
14. Heraldic Crest Crown on the Thigh Panel
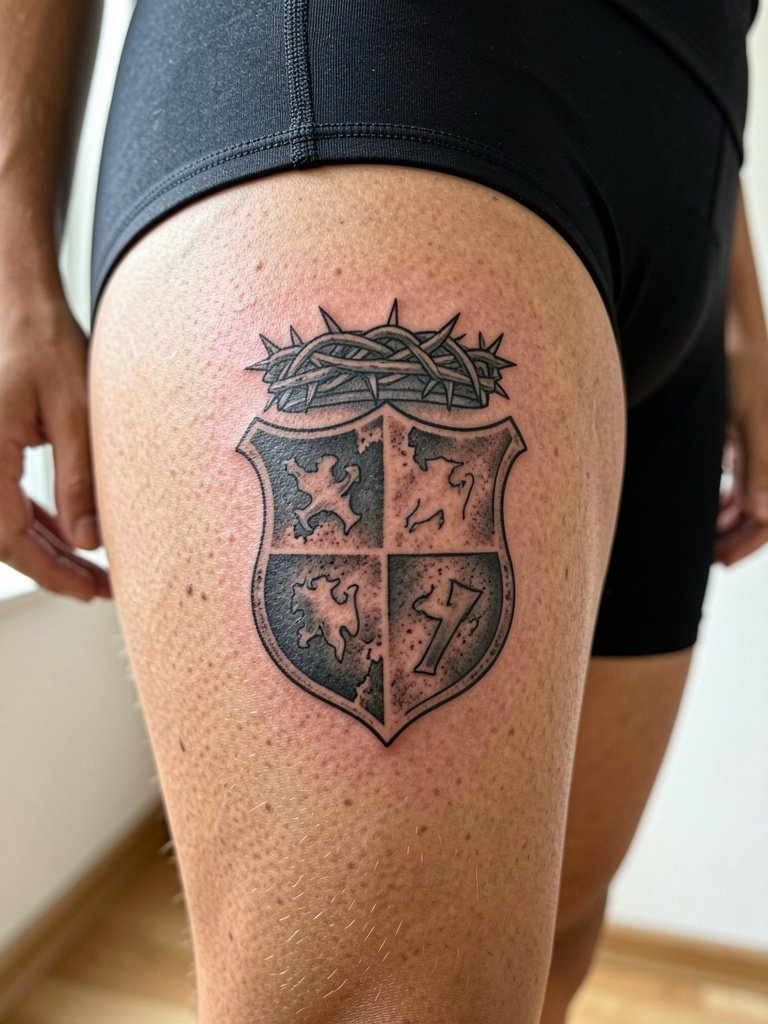
Thigh panels grant room for storytelling and heavy detail so the heraldic crest crowns benefit from scale. Tell your artist you want weathering and texture rather than crisp modern edges to maintain an aged, sacred feel. Pain is moderate and sessions can run two to four hours for a larger composition. A typical mistake is cramming too many insignia elements into a small patch. Plan the composition in stages and book a long session day. For showing off, mid-length skirts and slits work well with this placement and pair with flowy mid-length skirts.
15. Small Contour Crown on the Ankle

Ankle tattoos contend with footwear friction and cuff abrasion, so solid outlines outperform delicate whips here. Ask for slightly thicker outer lines and request the artist avoid tiny inner detail that will disappear. The session is short and the pain is moderate. People often underestimate the need for touch-ups on ankles; plan a revisit at year one. For showing off, rolled cuffs and sandals highlight the piece and pair nicely with neutral leather sandals.
16. Asymmetrical Crown Over a Scar on the Rib
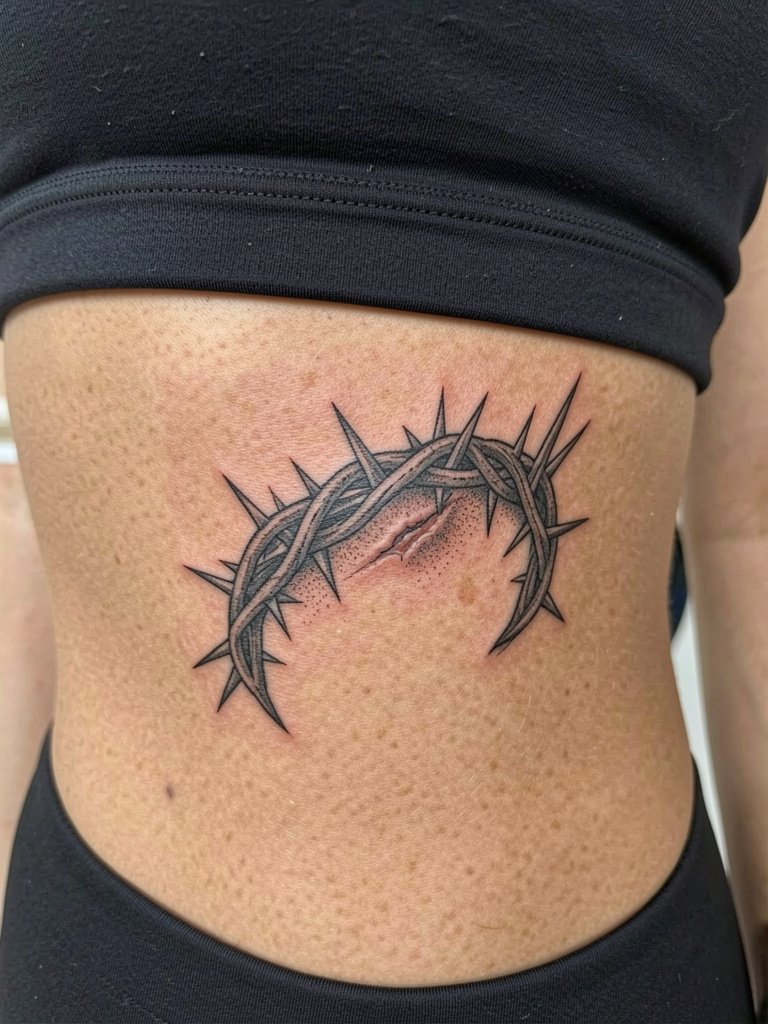
Scar work requires a consult that addresses texture and ink uptake. Specify that you want the crown to flow with the scar lines rather than trying to hide them completely. Some artists prefer heavier dot work to avoid dense lines over scar tissue, and others will use bolder outlines to anchor the composition. The pain at the ribs is high and sessions may need to be staged. Touch-ups are more likely on scarred skin because pigment settles unpredictably.
17. Tiny Crown at the Base of the Thumb

Thumb-base tattoos are exposed to constant washing and gripping, so expect faster fading. Ask for a compact design with thicker contour and plan on a touch-up at eight to twelve months. The session is quick but painful in nerves and tendons. People often pick too much interior detail for such a small canvas. For showing it off, pair with a casual bracelet or cuff and choose minimal leather bracelets that do not rub directly on the ink.
18. Ringed Crown Around a Small Rosary on the Wrist

Religious iconography like rosaries paired with a crown of thorns triggers discussion about intent. One camp says sacred imagery demands reverence and careful scale, preferring clear devotional context and larger pieces. The other camp views these motifs as personal symbols that can be small and private. State your intent clearly with the artist so the visual language matches your meaning. The wrist is high-use, so thicker outlines and scheduled touch-ups at year one are realistic.
19. Black-and-Gray Portrait Crown on the Shoulder Cap
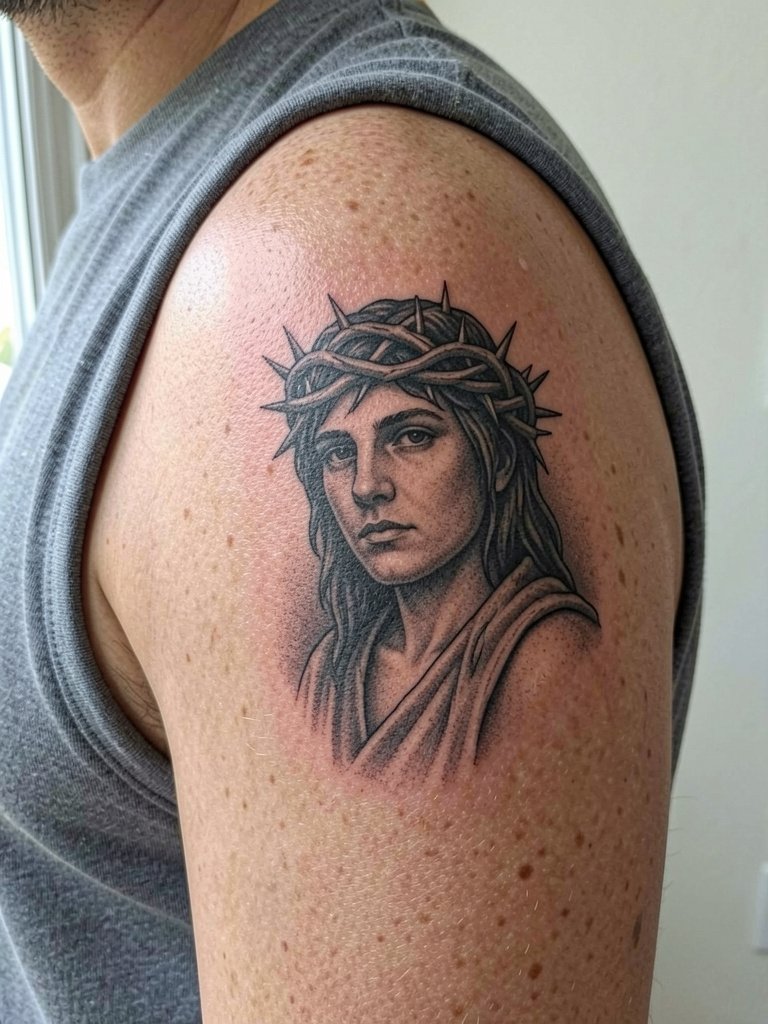
Portrait elements add narrative but require scale to hold detail. Request a reference with similar skin tones and ask the artist to test tonal transitions at the proposed size. Shoulder cap work is lower pain and often heals with little distortion. Common mistakes include compressing portrait details into too small a field. For styling, sleeveless tops and tank dresses work well to showcase the shoulder cap and pair with simple chain necklaces.
20. Choker-Style Thin Crown Around the Neck Base
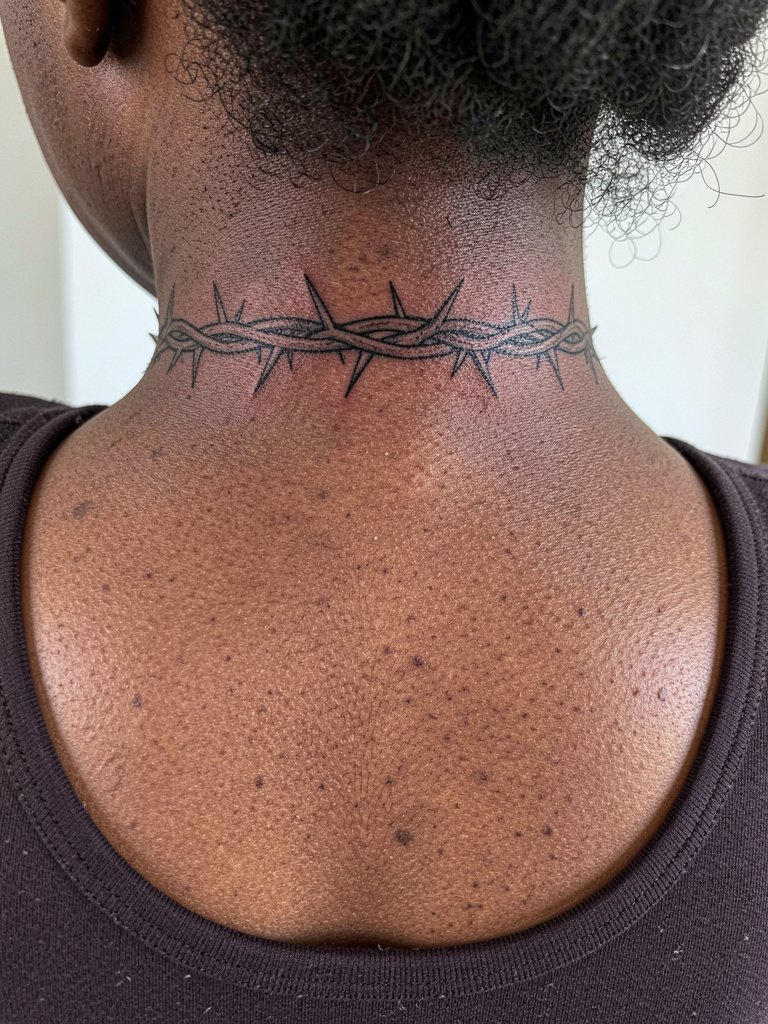
Neck choker pieces are high-visibility and sometimes viewed differently in professional settings, so consider workplace implications. Pain is moderate and touch-ups may be needed because of close contact with collars and hair. Ask the artist to space the thorns and use slightly heavier outer contours to prevent the choker from softening into a thin band. For accessorizing, thin chokers or open-neck tops create a layered look without rubbing the tattoo directly.
21. Negative-Space Crown on the Back of the Hand
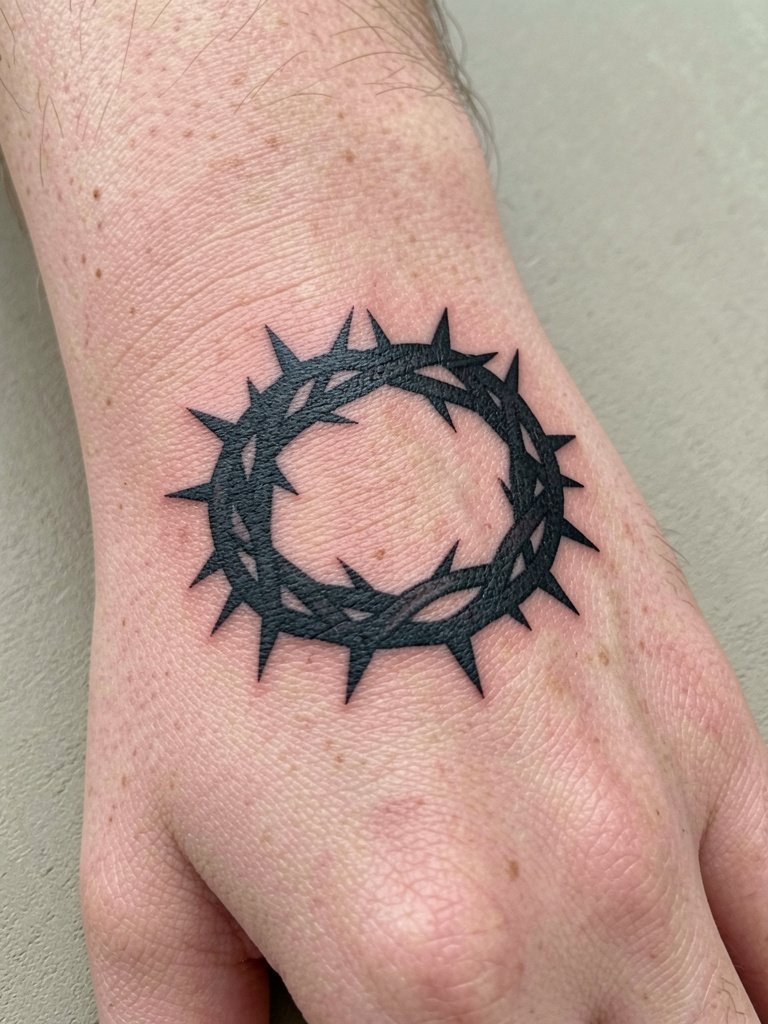
Back-of-hand tattoos are exposed to sun, washing, and abrasion, so high-contrast negative-space solutions can look striking early but may need refreshes. Ask for dense saturation around the negative crown so the negative shape keeps definition as the skin ages. The session is brief and the pain is higher than the forearm. A common mistake is expecting the design to remain razor-sharp without scheduled maintenance. Hand pieces pair with simple ring stacks and gloves that avoid rubbing the ink.
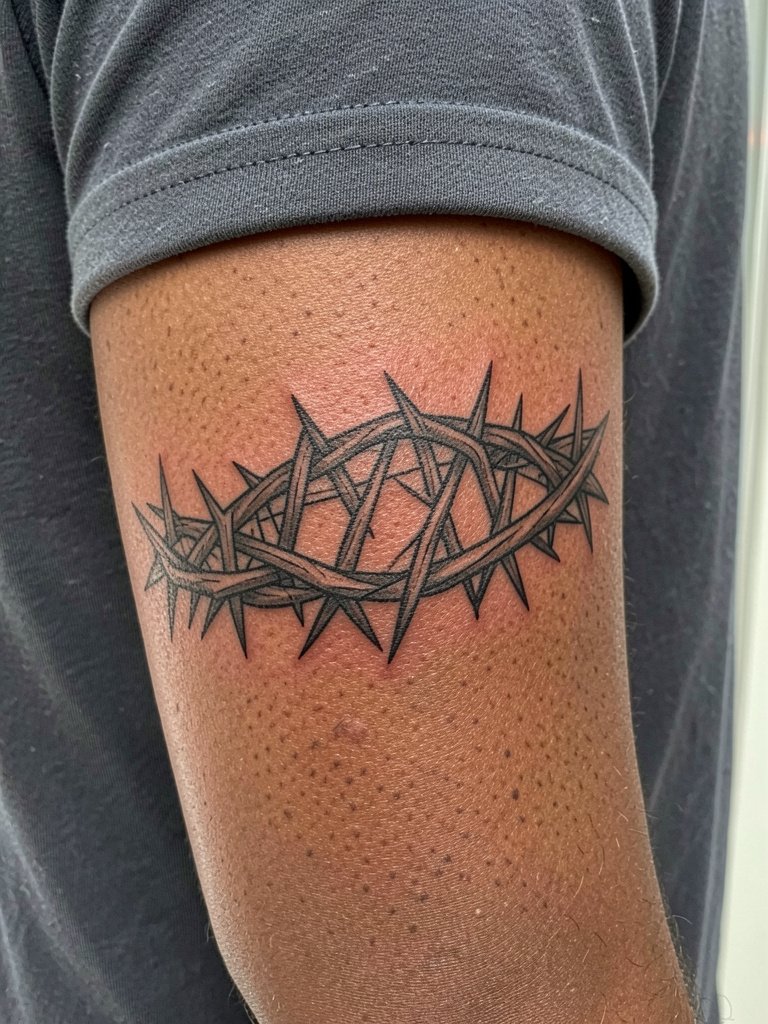
22. Band Around the Upper Arm with Tiny Thorns
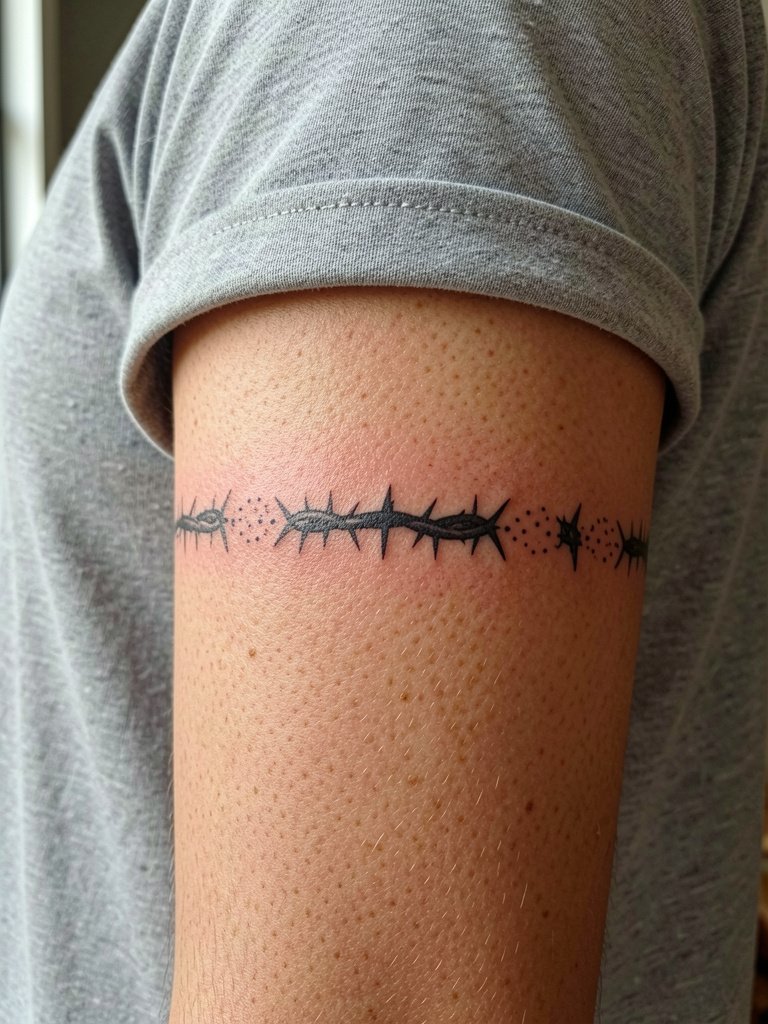
Armband pieces require even spacing so the pattern looks continuous around the limb. Discuss exact circumference measurements and ask for a physical stencil wrap so you can preview the repeat. Upper arm is low pain and holds fine detail when given room. The common misstep is making the band too tight with tiny thorns that disappear; aim for a slightly larger thorn scale. For showing it off, short sleeves or rolled cuffs work well and pair with casual button-ups.
23. Large Back Panel Crown With Radiant Lines
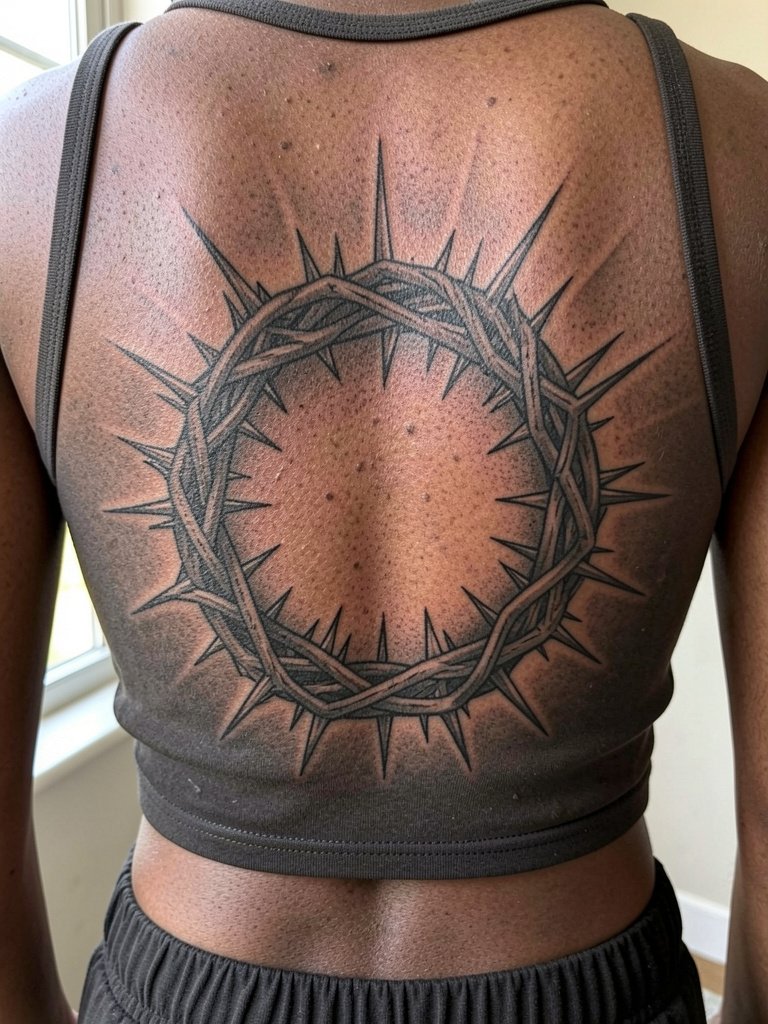
Large back panels let you treat a crown as iconography with radiating lines that survive long term. Discuss how the negative space will read at different distances and request mockups at life-size so you can judge composition. Sessions will be long and staged, pain varies by zone and may require multiple days. The common error is overloading the layout with competing motifs; pick one focal element and let the surrounding lines breathe. For showing, low-back tops or open-back garments highlight the piece without rubbing the healed ink.
Frequently Asked Questions
Q: How do I decide between a minimalist crown and a saturated blackwork crown for a devotional piece?
A: Think about how public you want the symbol to be and how it will age. Minimalist single-needle crowns read intimate at first but often need touch-ups sooner because thin lines can blur. Saturated blackwork holds longer, especially on chest and back, but it requires more session time and higher upfront saturation.
Q: Are there placement safety concerns for crowns near scar tissue or stretch-prone areas?
A: Yes. Scarred skin and highly mobile zones like ribs need experienced planning because ink uptake is unpredictable. Tell the artist where the tissue is different and ask them to test a small area or use stipple shading over scar lines. Touch-ups are more likely on these surfaces.
Q: Where can I find portfolios and healed photos for crown of thorns designs without naming artists directly?
A: Search social platforms using targeted tags and phrases and filter by location and healed photos. Try hashtags like #CrownOfThornsInk, #SacredCrownTattoo, and #HealedTattooShots. Use location filters on Instagram and TikTok and visit community forums where people post multi-year healed examples to compare how different techniques age.
Q: What should I wear to the session for a sternum, rib, or inner thigh crown placement?
A: Wear fitted but modest pieces that expose only the area being tattooed. For sternum and ribs a fitted sports bra works well. For inner thigh choose fitted bike shorts that can be shifted without active disrobing. Comfortable, fully fastened bottoms are best so you can move into position without fuss.
Q: How often do crowns need touch-ups depending on placement?
A: Expect finger and hand placements to require touch-ups within 6 to 18 months. Wrists and ankles often need a year revisit. Chest, back, and upper arm work usually holds longer and may only need touch-ups at two to five years depending on sun exposure and saturation.
