
The most reliable shark tattoos I see are the ones designed around movement and silhouette, not tiny surface detail. When an artist plans where the fin, eye, and mouth will sit on the body, the piece reads as an animal in water instead of a sticker on skin. I walk through placement-ready options, what to tell your artist about line weight and spacing, and which looks still fierce after several years.
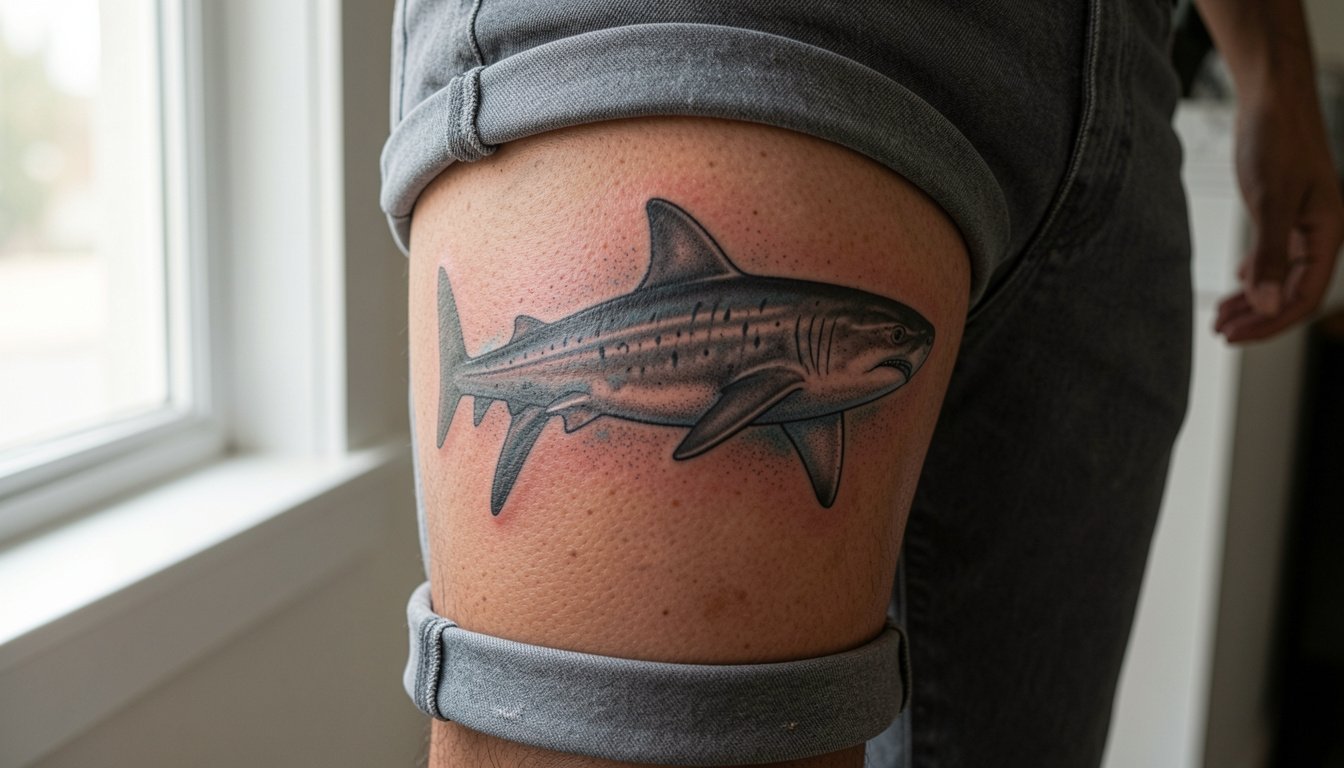
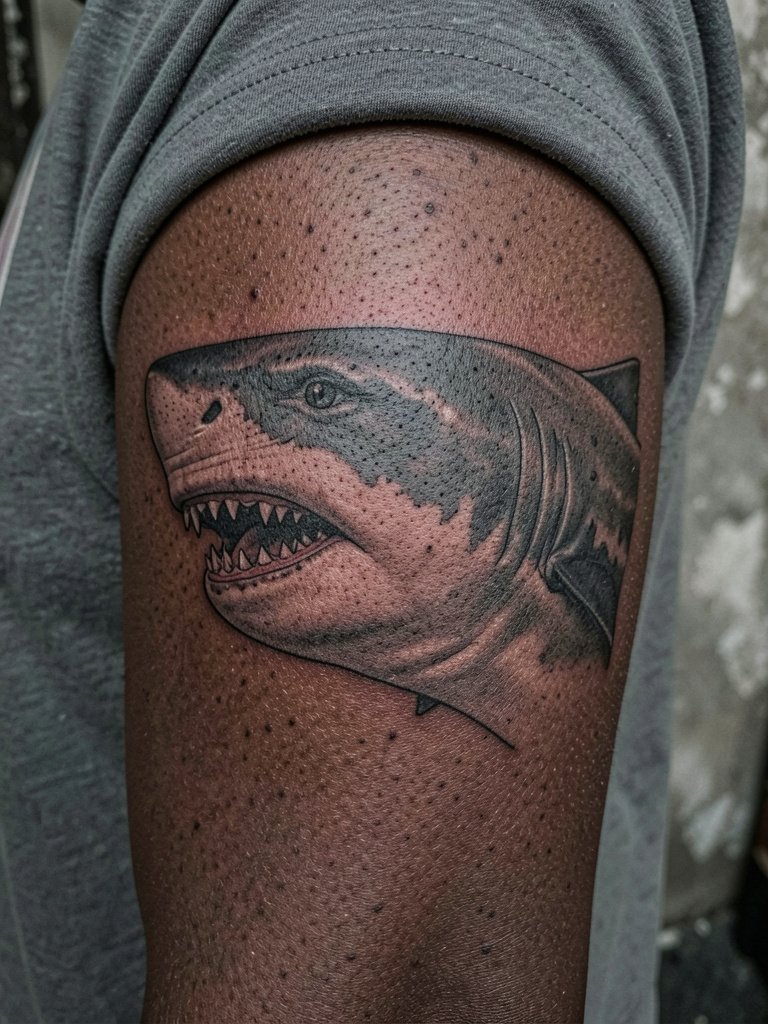
1. Great White From Above, Forearm Sweep
A top-down great white uses foreshortening and silhouette to read as predator and motion. Pick this angle when you want the shark to feel like it is passing under the skin rather than sitting flat. Tell the artist to exaggerate the dorsal fin contrast and keep teeth shapes readable rather than tiny serrations. The usual mistake is over-detailing the jaw for a small forearm piece. At six months the edges should be crisp, at two years tiny tooth lines will soften if they are under three millimeters. For session wear, a rolled short sleeve shirt gives clear access and looks good when you want to show the forearm off in summer via rolled short sleeve shirts.
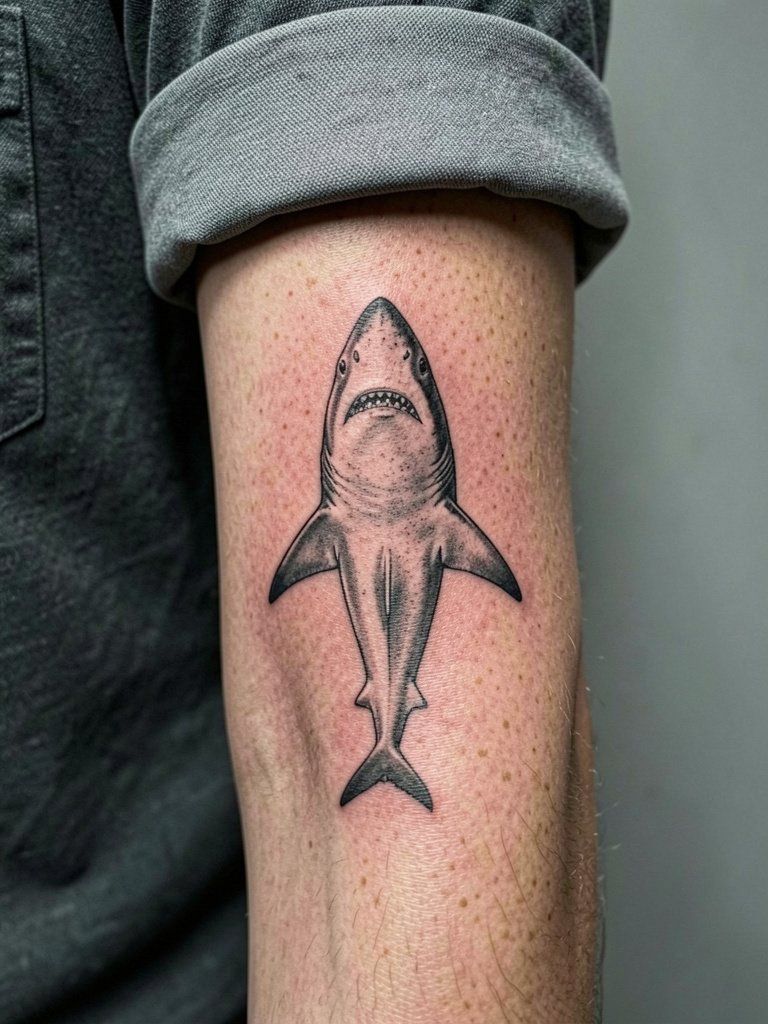
2. Shark Swimming Up the Arm, Inner Upper Arm Flow
This vertical swimmer uses body flow to sell motion. It is a smart choice when the arm will be down most of the time and you want the shark to look long rather than squat. Specify slightly heavier linework near the nose and tail so the silhouette stays readable after healing. Common mistakes include squeezing too much texture into the throat area. The inner upper arm bruises and swells more than the outer arm, so expect one longer session or two short passes. For session comfort and access, wear a muscle tank so the artist can work without you tugging at sleeves.
3. Realistic Chest Piece, Upper Chest Anatomy

Upper chest pieces let you compose the shark against muscle contour with room for water motion. I recommend this when you want dramatic anatomy and a composition that will not be forced into a cramped shape. Ask for strong contrast around the clavicle edge so the shark does not get lost as the chest moves. A common aging issue is softening where the chest meets the shoulder. Expect multi-session work and discuss realistic session lengths up front. For showing the piece in summer, wide-neck tees frame the art without competing for attention. Consider a wide neck tee for photographed reveals.
4. Hammerhead Forearm, Recognizable Silhouette
The hammerhead reads well even at a slightly smaller scale because the head shape is iconic. Choose this when you need a design that reads at a distance but still holds realistic detail close up. Tell the artist to keep the cephalofoil outline bold while using stipple shading for texture rather than tiny gray gradients. A frequent error is adding too much internal linework that blurs by year two. Forearm sensation is moderate, and touch-up around fin edges is common after the first year if you want that crisp silhouette to persist.
5. Minimalist Realistic Shark, Wrist or Ankle
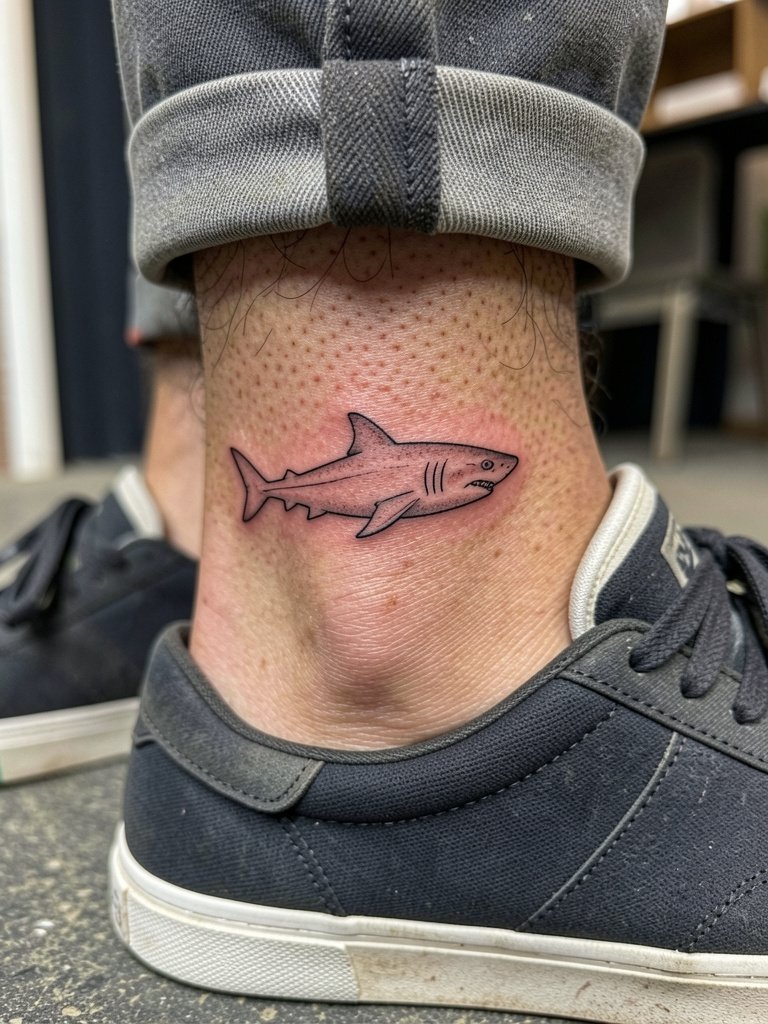
A minimalist realistic shark gives shark energy in a small footprint without heavy background clutter. It works well when you want a first tattoo or a subtle addition to a patchwork. The key is stronger silhouette and fewer tiny tooth marks. When the design is tiny, the mistake is keeping the same inside shading as a larger piece. At six months a clean shape holds, at three years very fine interior lines may blur. For session wear and later styling try low-profile sneakers and cropped pants. A helpful option for finishing looks is a cropped pant search that shows off the ankle.
6. Whale Shark Ocean Scene, Outer Calf or Back
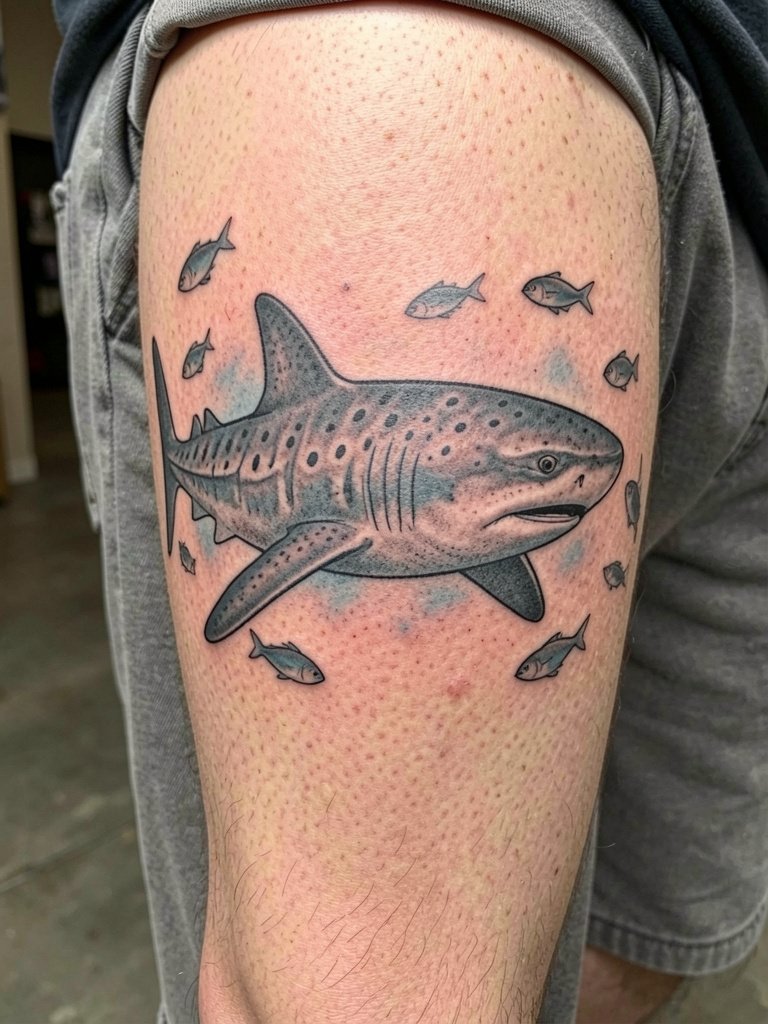
Whale sharks give a calmer ocean aesthetic while keeping a marine subject. This is a great choice for someone who wants scale and surface texture rather than aggressive teeth. If you want color, ask for muted blue accents rather than full saturation to keep longevity strong. Artists split on color versus black and gray. One camp says black and gray is safer because it keeps contrast and ages without patchy fading. The other camp says color brings ocean context that makes the scene more alive, especially with controlled muted tones. Plan for 2 to 4 sessions for a larger calf or back piece and expect a touch-up in the first year for saturation balance. For showing it off try straight-leg shorts that stop above the calf.
Chair Day Essentials
The forearm, wrist, and calf pieces above need different first-week care and protection. These five items smooth the session and the first week of healing.
-
Fragrance free gentle body wash. A mild cleanser reduces irritation during showers without stripping healing pigment, which protects fine black and gray shading in small shark tattoos.
-
Thin protective film roll. Useful for high-friction placements like wrists and ankles during the first few days, it limits rubbing from clothing while you start the healing window.
-
Topical tattoo numbing cream. Applied according to product directions before long sessions helps people get through chest or ribcage work without repeated breaks.
-
Soft, breathable healing ointment jar. A thin layer for the first two to three days locks in moisture for dot work and stipple shading without clogging.
-
Aquaphor Healing Ointment. A mainstream option that many clients use for the immediate post-session period to control dryness around detailed linework.
7. Stingray and Shark, Side Torso Motion

Mixing species gives the artist compositional freedom and reduces the single-focal-point trap. This layout suits larger canvases like the rib or outer thigh. Be specific about which animal is the focal point and ask the artist to leave negative space around that subject. A common error is cramming extra fish into the composition so the shark loses dominance. For rib placements, expect higher pain and longer single sessions. Plan for touch-up work after the first healing cycle if you want saturated gray fills to remain consistent.
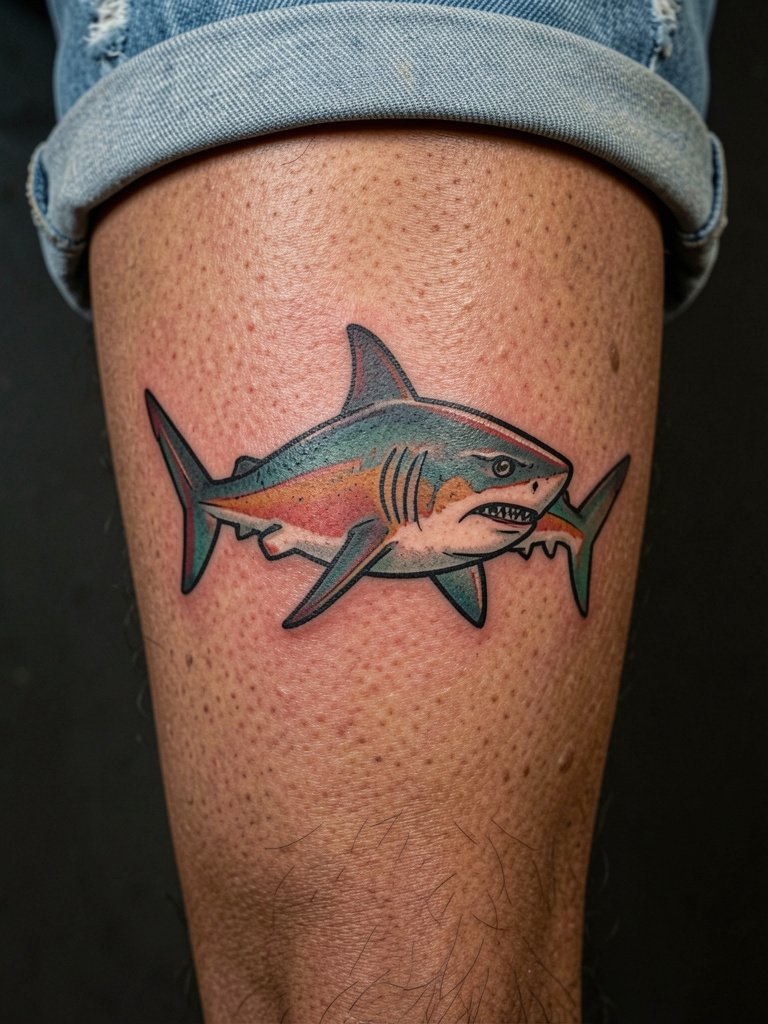
8. American Traditional Shark, Upper Arm Flash
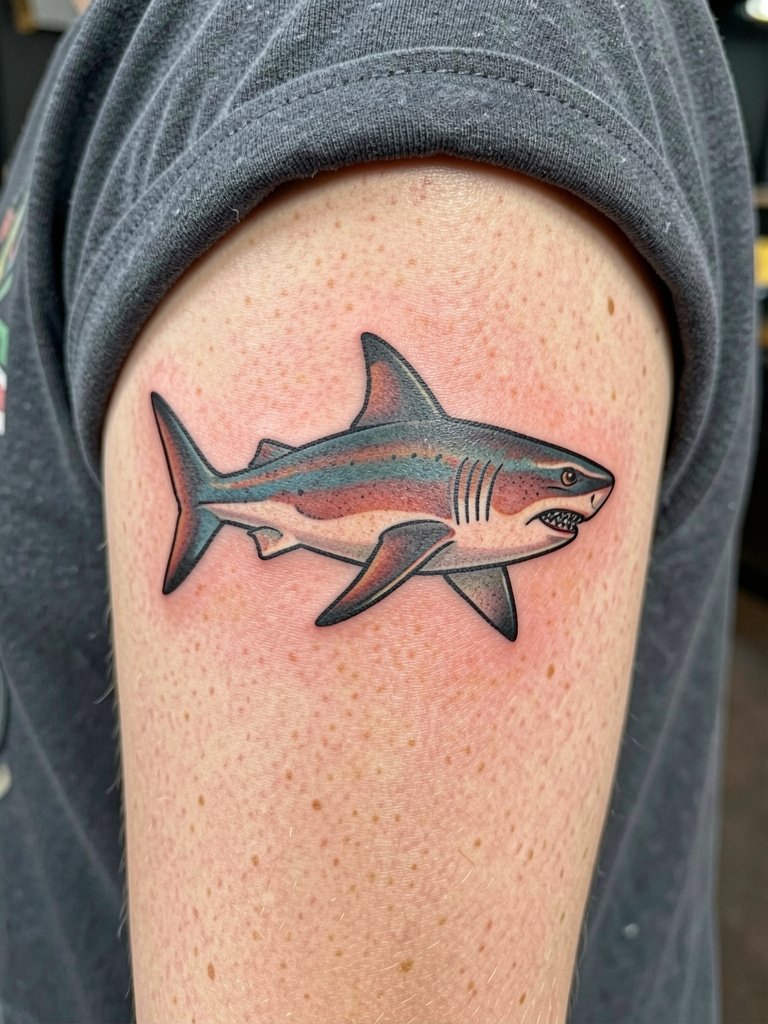
Traditional shark flash relies on silhouette and bold linework to hold for decades. This is the side of the debate where one camp prefers traditional for its aging advantages. They argue heavy outlines preserve the shark shape against sun and skin movement. The other camp supports realism for its anatomy accuracy and depth, and they accept more touch-ups to keep detail. Choose traditional if longevity with minimal maintenance is your priority. This style usually fits a one-session outer arm slot and pairs naturally with classic rolled shirts or camp collars. For showing off try a cropped utility jacket layered for contrast.
9. Vintage Shark Flash, Calf Statement
Vintage flash is graphic and purpose-built to last. It is a strong option if you want shark symbolism without the upkeep realism demands. Common mistakes include adding tiny internal shading that conflicts with the flat color philosophy. For calves that see sun, plan on sunscreen once healed to slow fading. The session feels tolerable and often fits into a single long appointment for medium sizes. For summer reveals, cuffed denim shorts make the calf placement a focal point.
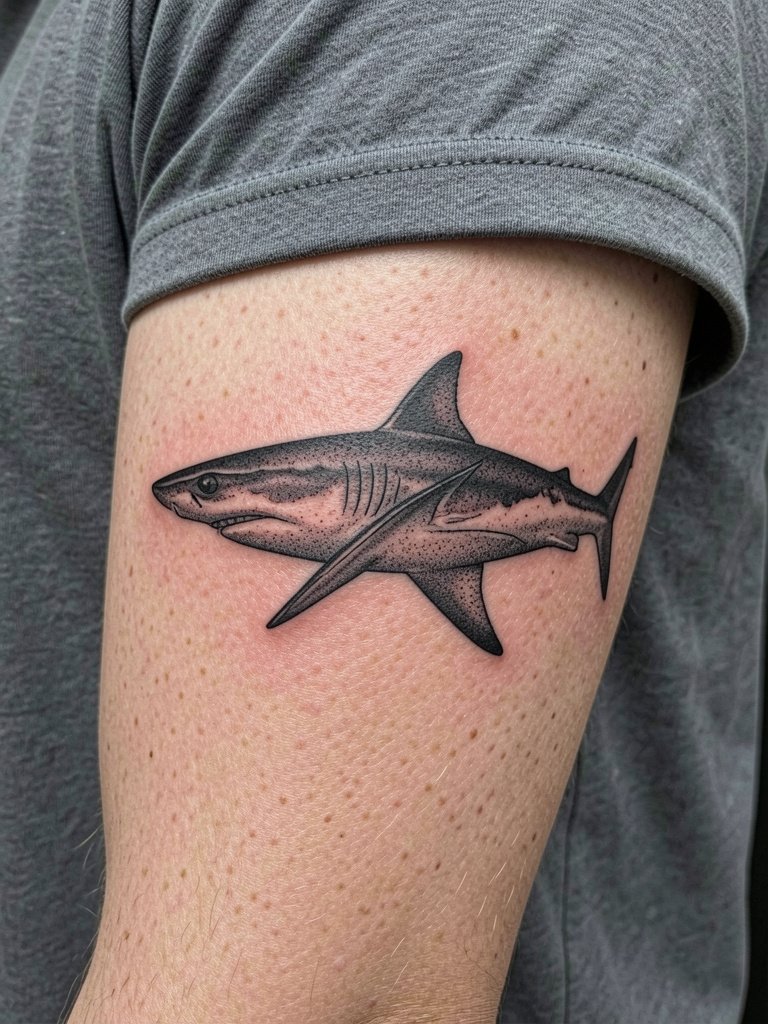
10. Great White Side Profile, Outer Forearm or Upper Arm
A side profile is a classic anatomy study and works well when you need a horizontal composition. Ask the artist to plan the jaw so that key curves fall on flatter skin stretches to avoid distortion when the arm bends. The common aging issue is jawline softening if the line weight is too fine. Expect one to three sessions depending on scale and a likely touch-up after a year for edge clarity. This placement pairs with open camp-collar shirts for casual reveal. Consider an open collar shirt if you want a relaxed show-off look.
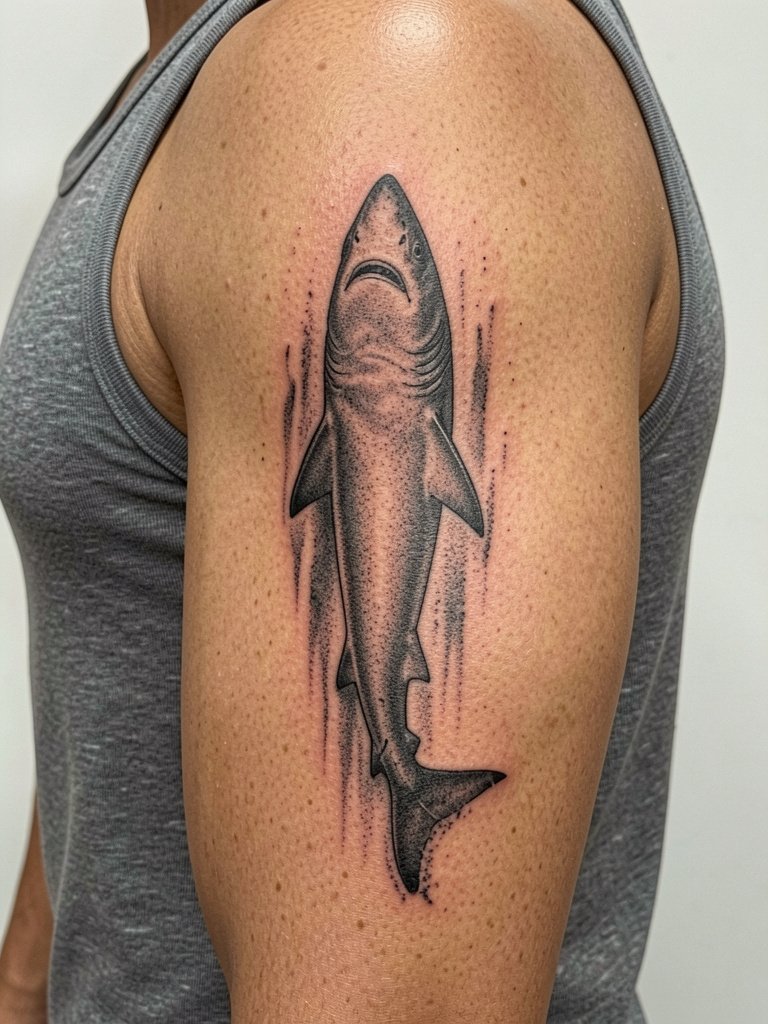
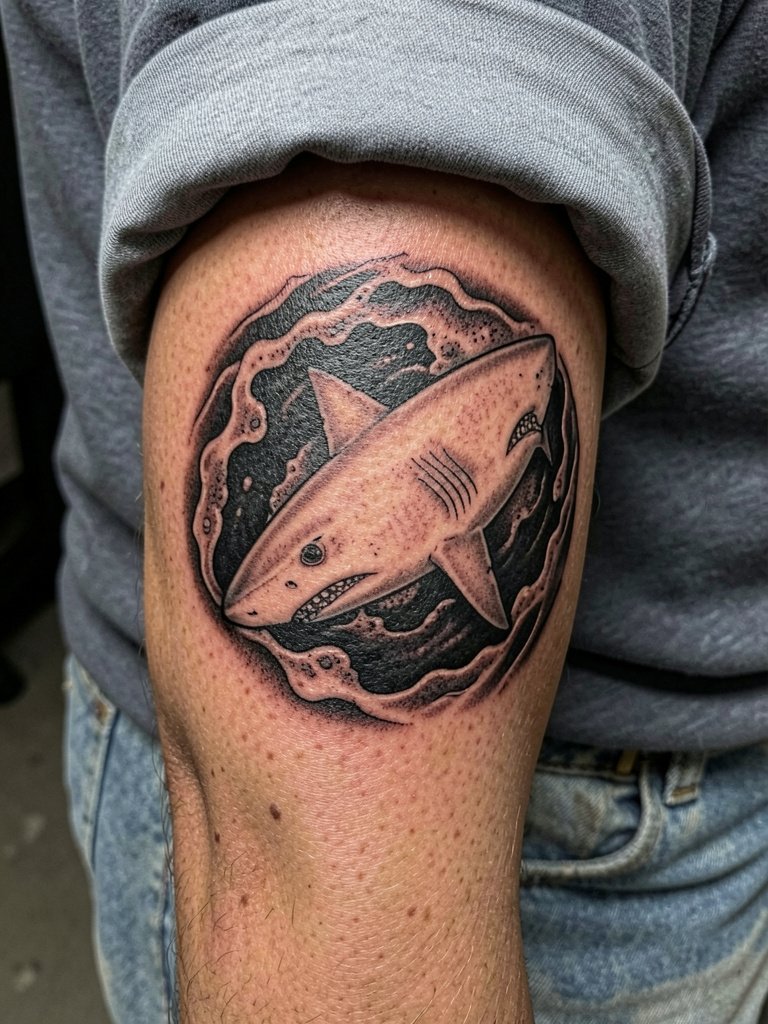
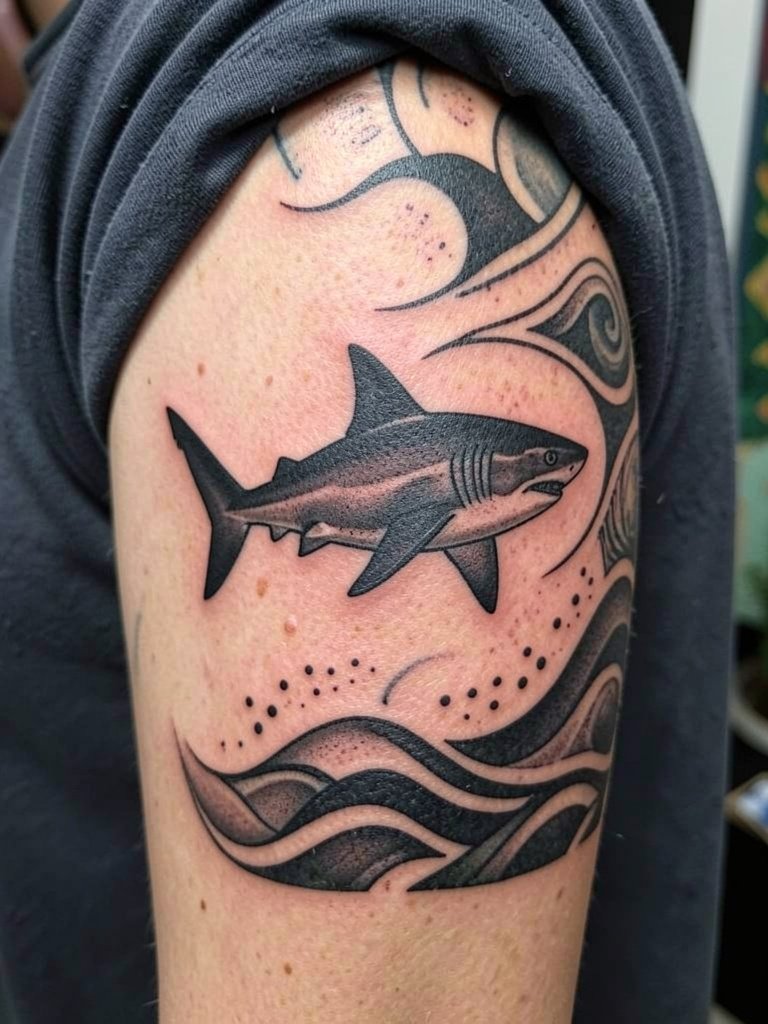
11. Shark With Water Motion, Shoulder or Calf

Adding water motion keeps the piece from feeling like a sticker, which is especially helpful on rounded placements. Use motion to lead the viewer's eye away from areas that will stretch. Specify the direction of foam and where shadows land so the artist does not crowd the shark. The most common mistake is too many tiny droplets that merge during healing. On the shoulder the session is easier than the calf, and both placements generally benefit from a small touch-up at six to twelve months.
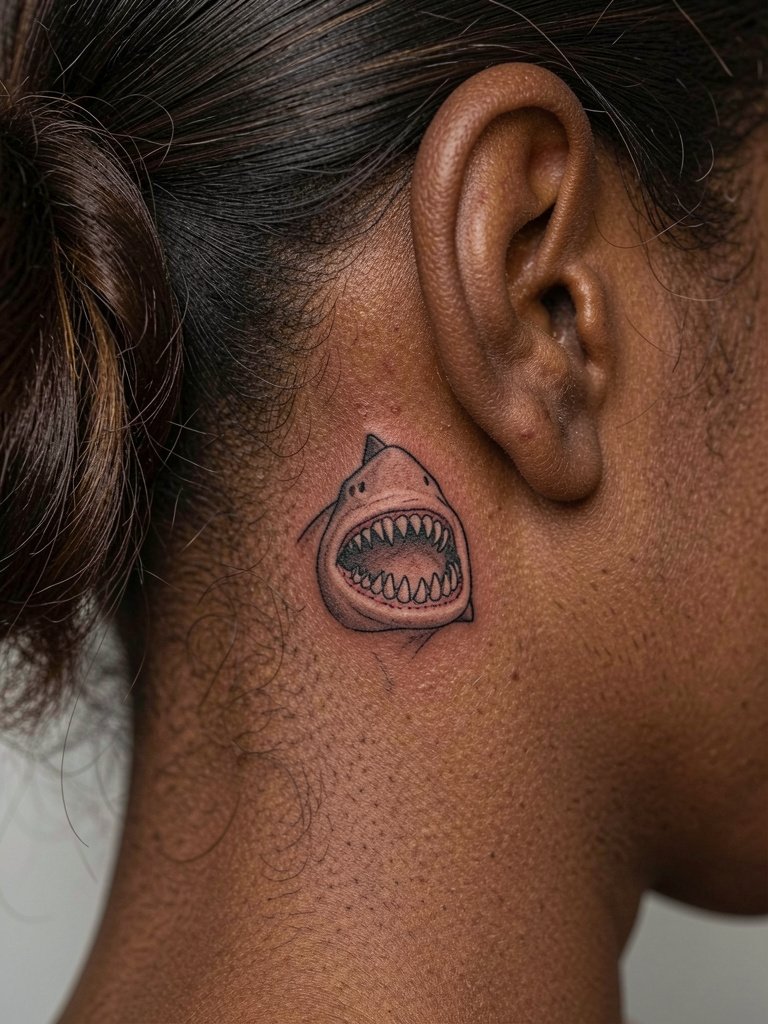
12. Compact Shark Symbol, Behind the Ear or Wrist
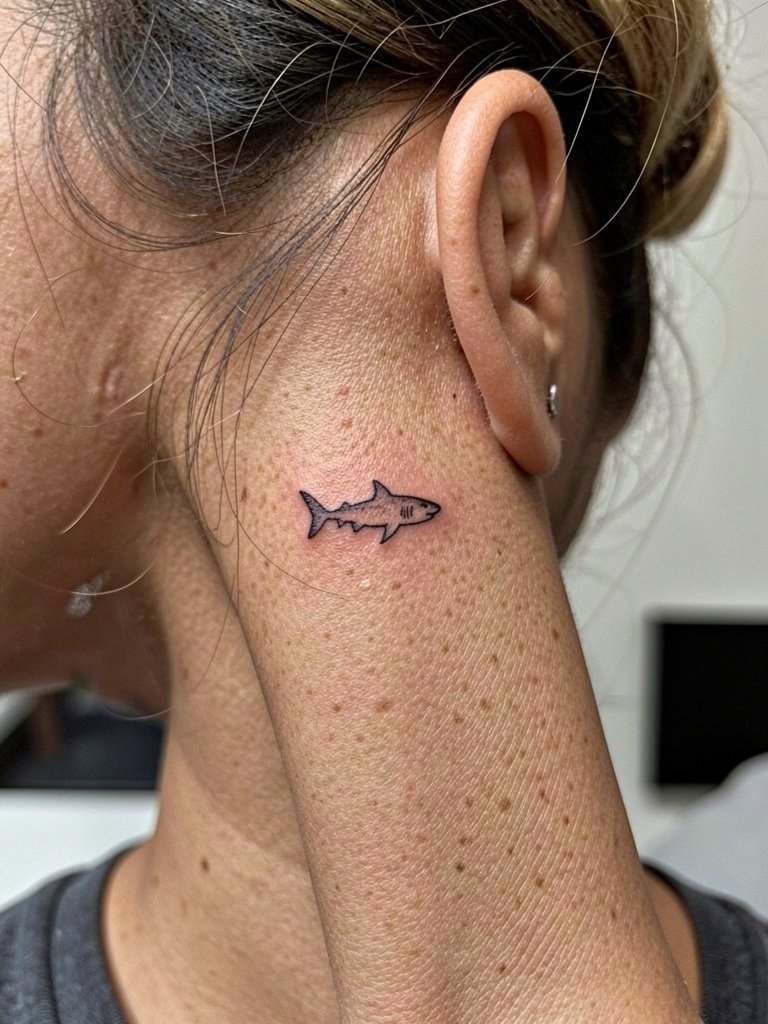
Compact symbols work when you want shark energy with minimal commitment. For the wrist, prioritize a slightly thicker silhouette to resist blowout from frequent washing. Behind the ear pieces need someone who handles small healed shots well because the area can be tricky. A common mistake is asking for internal tooth texture in such a tiny piece. For session wear keep jewelry off the same wrist to avoid rubbing while it heals. A thin chain bracelet on the opposite wrist balances visible accessories and keeps focus on the tiny shark.
13. Chest-to-Shoulder Flow, Large-Scale Realism

This layout is for someone who wants a custom statement with natural body flow. The artist must plan how the pectoral curve and shoulder cap will change the shark's shape when you move. Request compositional mockups with the arm both relaxed and raised so the anatomy does not look cropped. The common error is forcing a flat shark image onto curved anatomy without adjustment. Sessions can span multiple visits. For an outfit that frames the piece try an unbuttoned linen shirt in warm tones for a photoshoot-ready reveal.
14. Hammerhead on Inner Bicep, Vertical Accent

Placing a hammerhead on the inner bicep gives a private reveal when you lift your arm. Emphasize the head silhouette so it remains legible after healing. Inner bicep skin is softer and more prone to creep, so avoid ultra-fine surface detail. The typical mistake is a faint cephalofoil outline that fades into blur within a couple of years. Expect moderate pain and plan for one longer sitting or two shorter ones. For session comfort choose a sleeveless tee so the artist can work without fabric rubbing the area.
15. Negative-Space Shark Bite, Forearm or Calf
Negative-space compositions use the absence of ink to sell form and often age well if planned right. Ask your artist to map the silhouette so that the negative space rests on flatter skin when possible. A mistake is too thin a negative silhouette that becomes indistinct after healing. For a forearm this technique reads bold and can require a single long session for solid black fills. Keep in mind that large black areas may sit warmer on the skin while healing, so follow breathable clothing guidance on day one.
16. Micro-Realism Shark Tooth Cluster, Ribcage Accent
Micro-realism can be striking as a small study but it risks losing definition on the ribcage. If you pick this, request slightly wider spacing between tiny teeth to help them last. Artists differ on whether micro-detail holds on ribs. One camp says the skin stretch and breathing motion blurs ultra-fine lines in two years. The other camp says careful needle depth and modest spacing lead to durable micro-work, and they will show healed photos to support that view. Expect a sensitive session and plan for numbing and two shorter passes rather than one long pass. For session wear pick a sports bra or fitted top that can be moved without friction.
17. Lateral Hip Hidden Shark, High-Waist Reveal

The lateral hip is a great place for a private piece that shows with high-rise styling. When the shark sits along the hip bone, keep the composition compact and the silhouette strong. A common error is placing too much motion in a small space so the focal shark becomes secondary. Session-wise this area tolerates medium-length sittings and heals with friction risk from waistbands, so wear loose waistbands while it scabs. For showing off later, high-waisted jeans or bikini bottoms work well for seasonal reveals.
18. Throat or Collarbone Accent Shark, Subtle Neck Placement
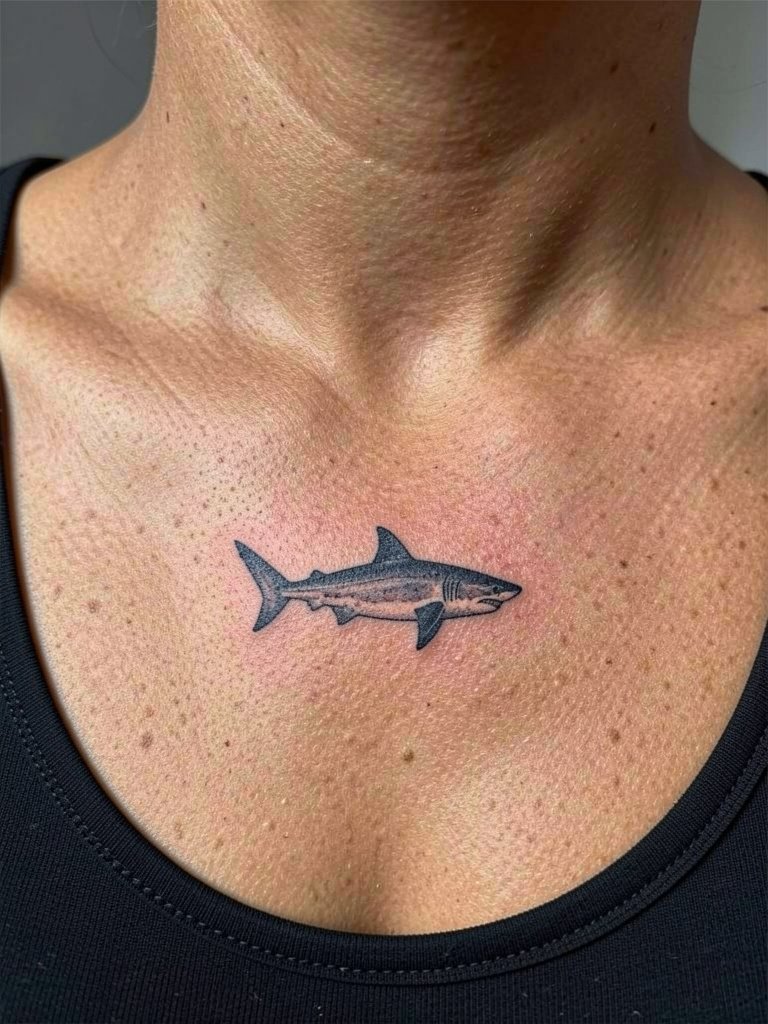
Neck and collarbone placements are visual and noticeable. For a shark accent, keep the scale small and the silhouette solid. The biggest mistake is using tiny internal shading that the neck skin will diffuse. Expect higher visibility and conversations about workplace policies if that matters to you. Session wear should be a scoop-neck top you can remove easily. For style pairing, wide V-neck tops or scoop-neck tanks frame the collarbone elegantly when you want to show the art off.
19. Back-Facing Shark, Full-Back Custom Scene

Full-back shark scenes let the artist build depth and layered ocean life. Choose this when you want a custom narrative and multiple sessions. Be explicit about the focal plane so smaller elements do not compete with the main shark. Rushing a back piece into too few sessions is the common mistake I see. Expect several long sessions spread over months and a touch-up cycle after full healing. For wardrobe during sessions pick a button-down or zip hoodie that you can remove without rubbing the fresh area.
20. Upper Thigh Curved Shark, Intimate Reveal

Upper-thigh placements are private and photograph well when revealed. Curve the shark to match the line of the muscle to avoid the piece looking warped when you sit. A classic error is placing the shark too close to the groin line where friction and sweat accelerate fading. Sessions here are moderate in discomfort and often fit into one to two sittings. For session wear pick loose shorts or drawstring bottoms so nothing presses against fresh work.
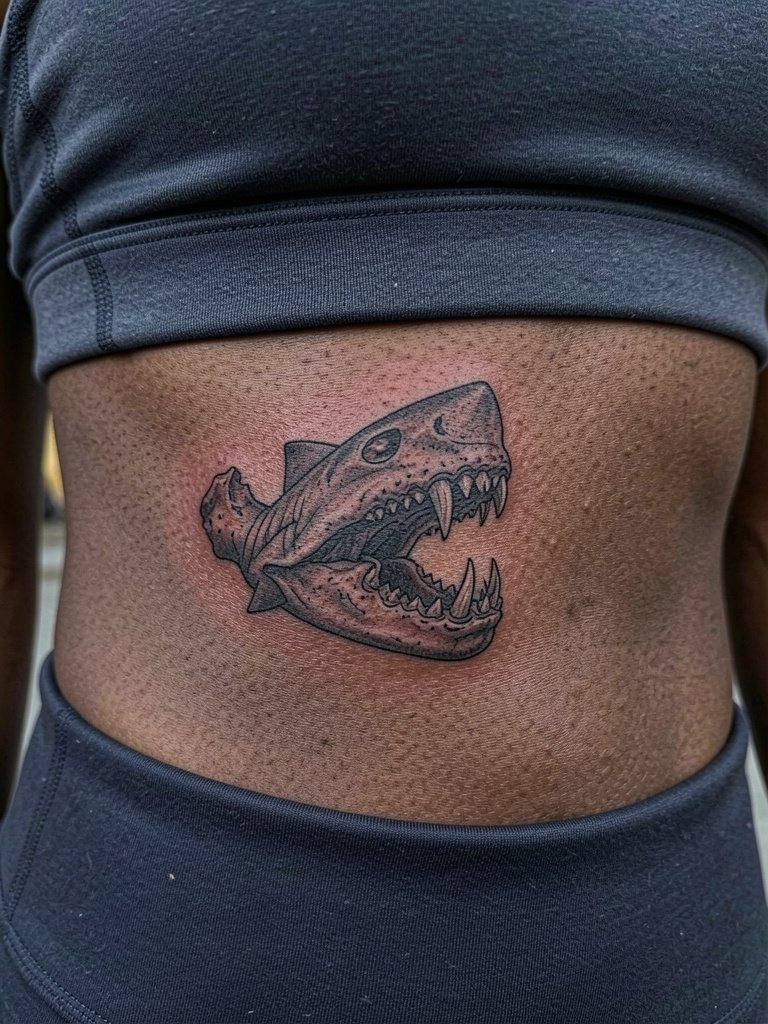
21. Stylized Jawline Fragment, Behind the Ear or Nape
Small jawline fragments work as accents where they peek out from hair or collars. Keep the composition simple and avoid internal micro-detail. The usual mistake is trying to cram too much shading into a tiny behind-ear spot. These areas heal with low friction if hair is kept away during the first week. For reveal looks, consider a cropped hairstyle or a simple updo that highlights the nape.
22. Blackwork Full Shark Silhouette, Sleeve Integration
Full black silhouettes read from a distance and age predictably when executed correctly. This is a go-to when you want strong graphic impact with low maintenance. The drawback is large saturated black areas can need touch-ups to avoid patchy fading in high-sun zones. Common errors are uneven black fills or poorly planned negative space that confuses the shark shape. For styling, sleeve work pairs well with rolled cuffs and simple short sleeves to let the arm composition speak.
23. Whale Shark and Micro-Fish Cluster, Back of Calf Detail

A back-of-calf cluster gives motion and scale without overwhelming. The design favors stipple shading and dot work to suggest texture rather than heavy gradients. Request clear spacing between the whale shark and the micro-fish so the scene does not read as one blob after healing. For session wear choose loose shorts that can be rolled up without compressing fresh ink. Most people find the calf a medium-pain placement and plan one or two sessions for this type of work.
Frequently Asked Questions
Q: How much does a realistic shark tattoo cost?
A: Cost depends mostly on size and detail, not the subject. Small compact realism runs in the lower price tiers, medium forearm or calf pieces land in a mid-tier range, and large chest or back compositions need multiple sessions at a higher tier. Expect that heavy stipple shading and color accents add session time.
Q: Which placements age best for realism and which need simplification?
A: Flatter, less mobile skin holds detail longer. Forearms, outer calves, and upper chest generally preserve linework and stipple well. Ribs, inner biceps, and areas with lots of stretch usually need simplification or slightly bolder line weight to retain clarity.
Q: Where can I find healed portfolio examples and local artists who do shark work?
A: Start with hashtag searches and location filters on Instagram and TikTok for phrases like #sharktattoo and #blackandgreytattoo, then check studio pages for healed photos. Pinterest is useful for building a reference board by placement keywords. Reddit threads in r/tattooadvice and r/tattoos often contain honest healed shots and payment notes from clients near you.
Q: Should I choose black and gray or color for a shark scene?
A: Black and gray is the safer longevity play because contrast carries the composition. Color can add ocean context and vibrancy when used sparingly. One camp prioritizes black and gray for durability. The other camp favors controlled color accents to bring scenes alive while accepting periodic touch-ups.
Q: What should I wear to a session for an inner arm or ribcage shark?
A: For inner upper arm wear a sleeveless tank so the artist can work without fabric rubbing the skin. For ribcage or side torso wear a fitted cropped athletic top or a button-down you can move aside without friction. Loose waistbands and drawstring bottoms are best for hip and thigh work.
Q: How often do realistic shark tattoos need touch-ups?
A: Many realistic pieces benefit from a check-in touch-up at six to twelve months, especially if they include fine texture or muted color accents. Solid silhouettes and traditional styles tend to need fewer touch-ups over the first five years.
Q: Will a tiny realistic shark on my wrist still look like a shark in five years?
A: Tiny realism can soften. If you want a small wrist piece that reads after several years, ask for a slightly thicker silhouette and minimal internal texture. Expect some softening, and budget for a small touch-up if you want maintained crispness.
