
A bold little surprise is how many portrait tattoos that look perfect fresh are the ones that cause the most headaches a year later. Tiny faces, wispy scripts, and photos with blown-out highlights all hide risks that only healed comparisons reveal. If you want a portrait that still reads like the person five years from now, think about contrast, placement, and a reference image that shows the face clearly from good light.
1. Hyper‑realistic family portrait on the inner upper arm
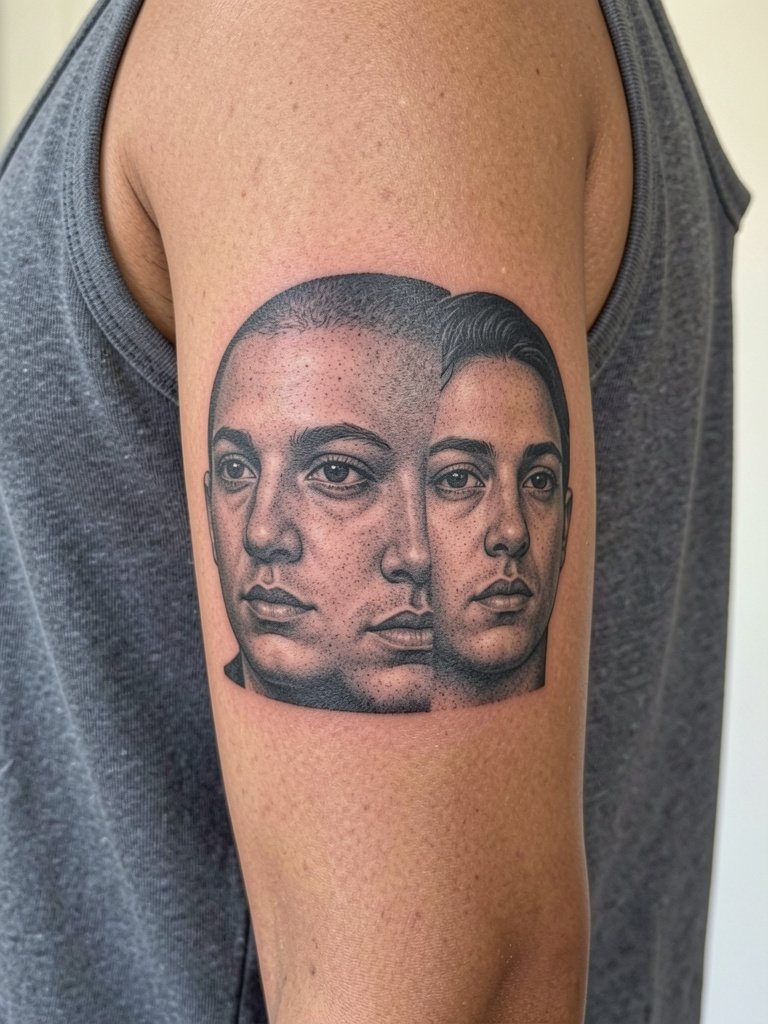
A memorial family portrait does best on smooth inner arm skin where the surface stays relatively flat and the artist can place features with breathing room. Bring high-resolution reference photos that match expressions and lighting so the artist can merge two faces into one cohesive read. Common mistakes are small group faces jammed into a wrist-sized area and reference images with heavy filters. Expect a session that feels like steady shading work on a low-movement zone, not a fast one-pass flash piece. For showing the finished piece off, a rolled short-sleeve or boxy tee keeps the portrait visible without visual competition.
2. Celebrity-style portrait with soft shading on the outer upper arm
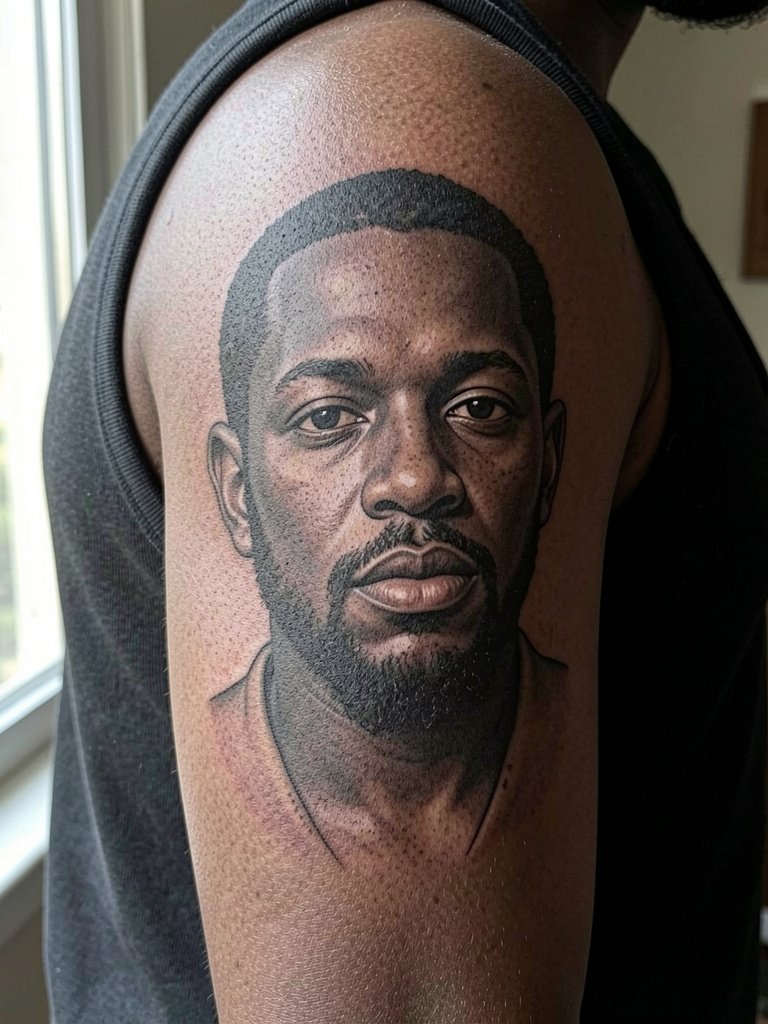
This is the go-to for anyone who wants a recognizable likeness that reads from a short distance. The outer bicep gives enough canvas to keep eyes and mouth detailed and to avoid the mush that happens when portraits are scaled too small. During consultation bring a face-forward photo with natural contrast and no heavy filters so the artist can place catchlights in the eyes and controlled shadows on the cheek. For session wear pick a ribbed tank top so the shoulder and bicep are fully accessible. Typical session feels like steady, focused shading with short breaks for stencil checks.
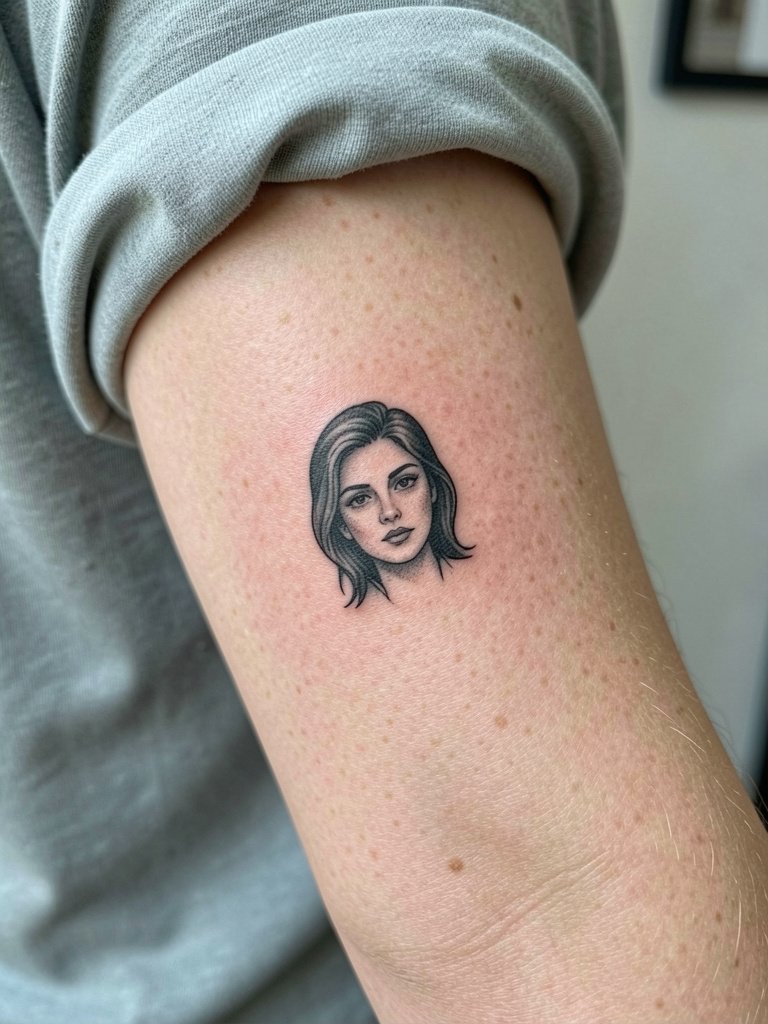
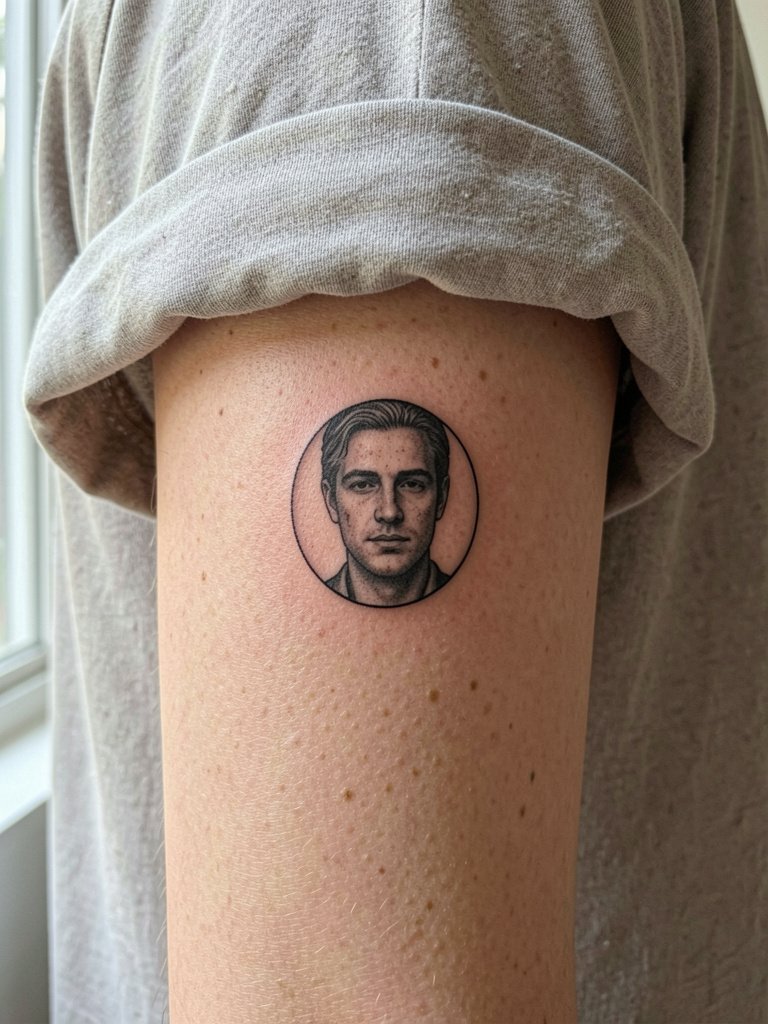
3. Micro‑realism single-face on the inner forearm
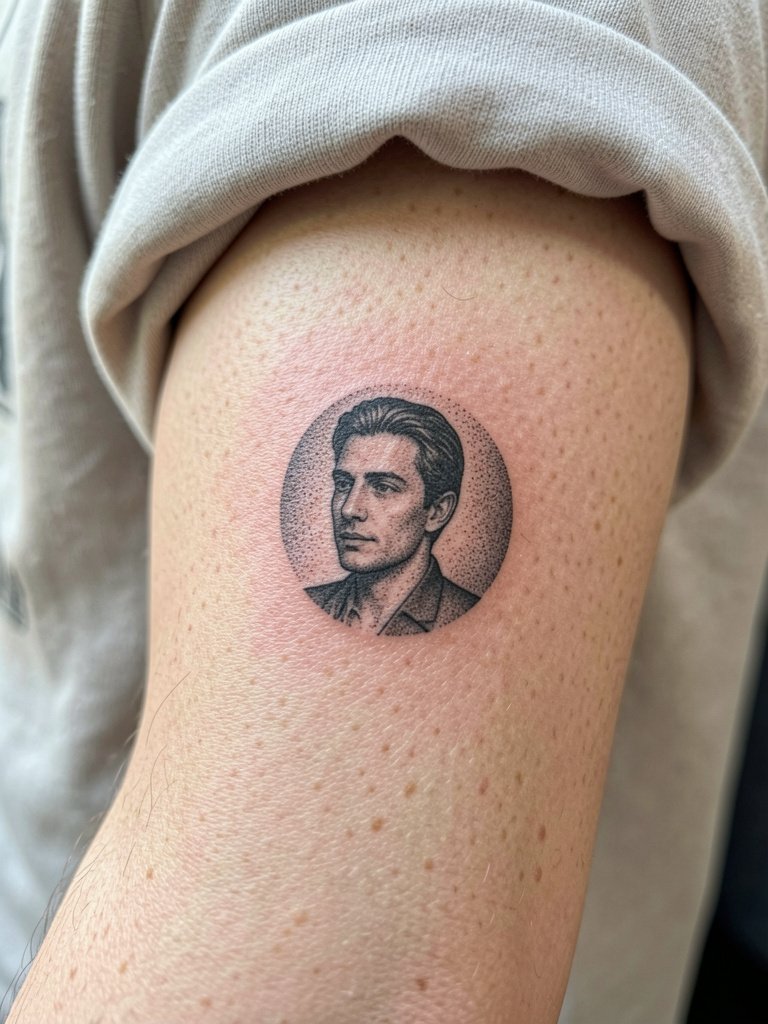
Micro portraits can be hauntingly precise when done by someone who specializes in tiny realism. A major controversy surrounds small portraits. One camp argues small portraits are a compromise because the face is the first area to degrade and blur, especially on high-motion skin. The other camp points out that scaled-appropriate line weight and carefully selected reference photos let micro-realism hold up in the right placement. If you choose this route, bring healed examples from the artist at similar size and skin tone so you see longevity, not just fresh photos. For show-off pairing keep things minimal with a rolled cuff shirt and simple bracelets on the opposite wrist during casual wear.
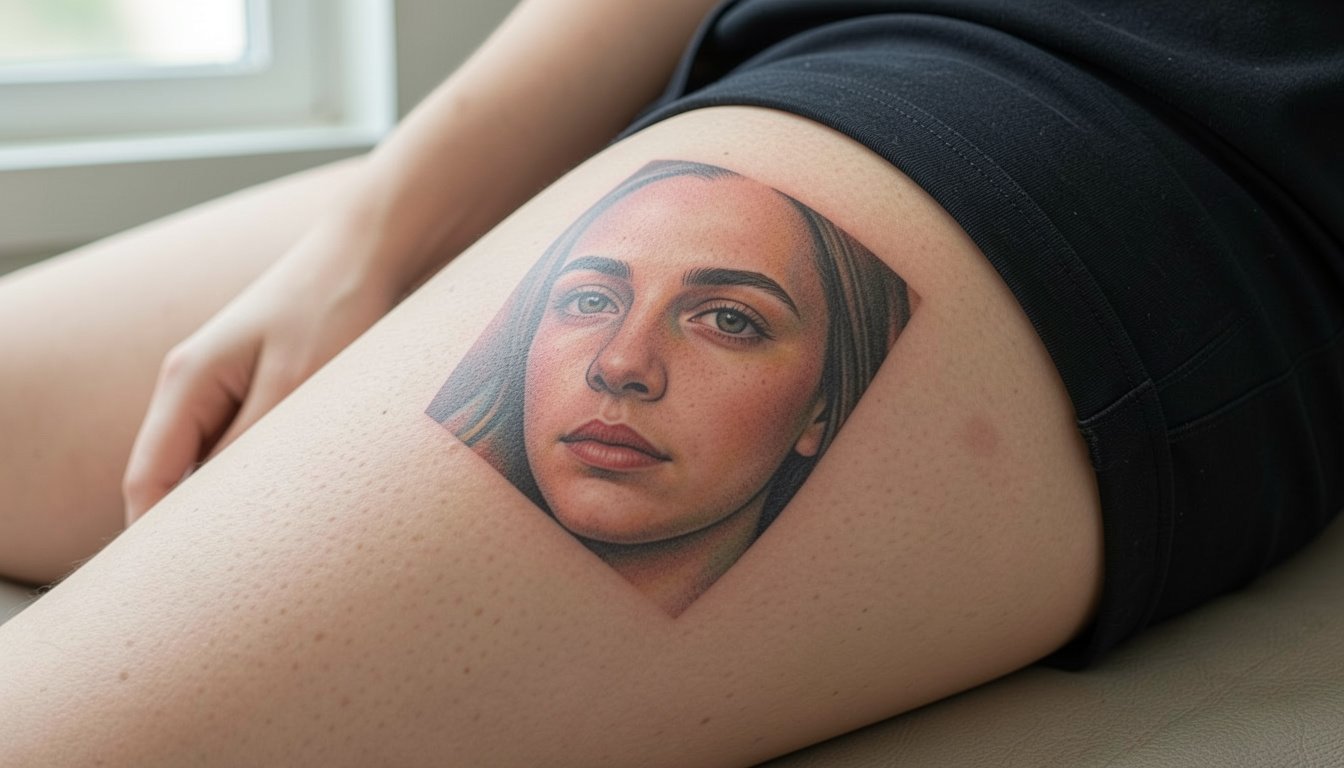
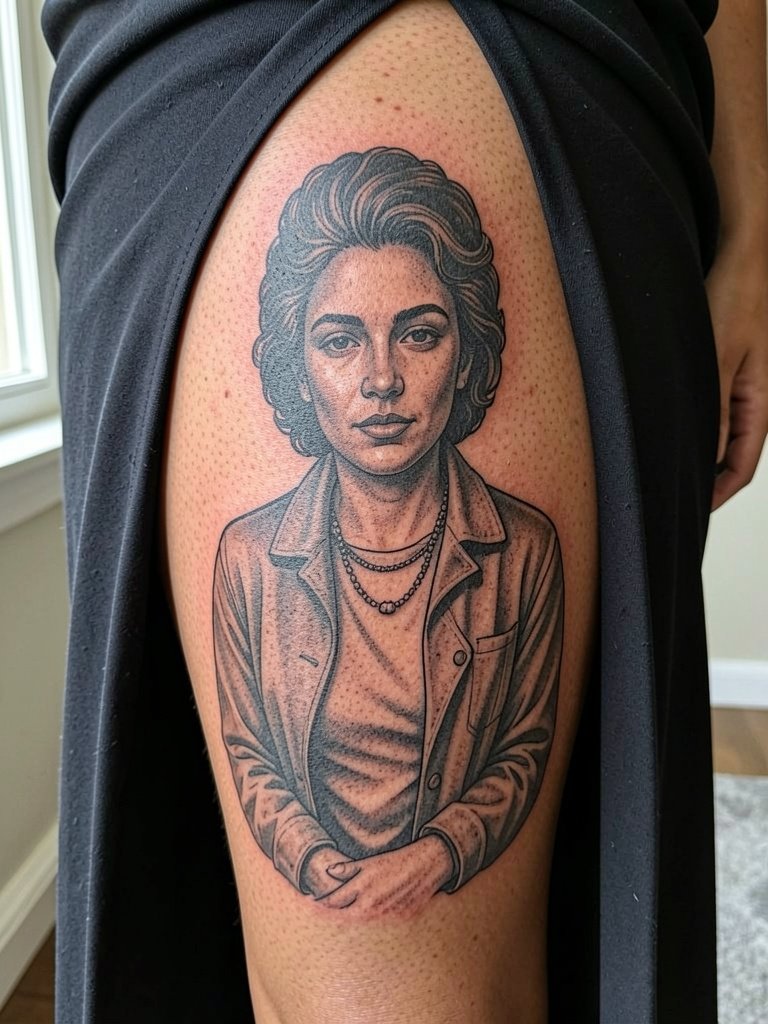
4. Family group portrait with careful composition on the thigh
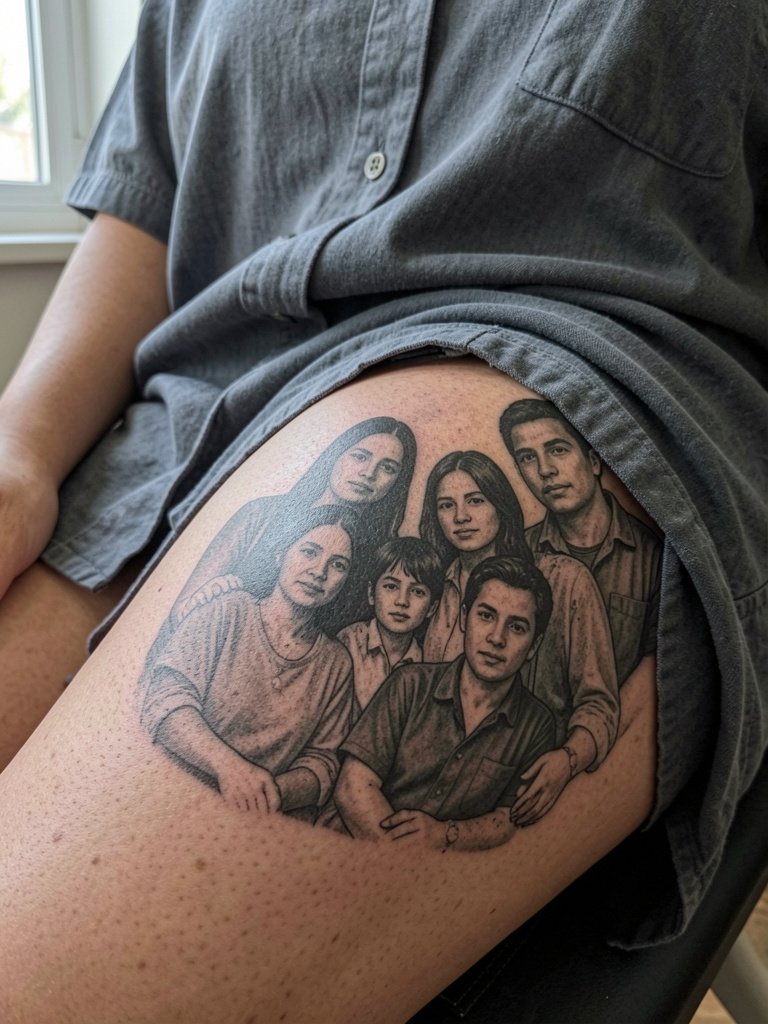
When multiple faces share a composition the trick is negative space and scale. Thigh placements give you room to include shoulders and subtle props that help each face breathe. A common mistake is stacking faces with identical contrast so the portrait reads like a single blob. Ask for a mockup that shows how each face reads at full size and at a cropped view. Session time is longer and often split into two sittings. For nights out try an oversized shirt dress to reveal just enough of the composition when you want to show it.
5. Portrait with a floral frame on the outer upper arm
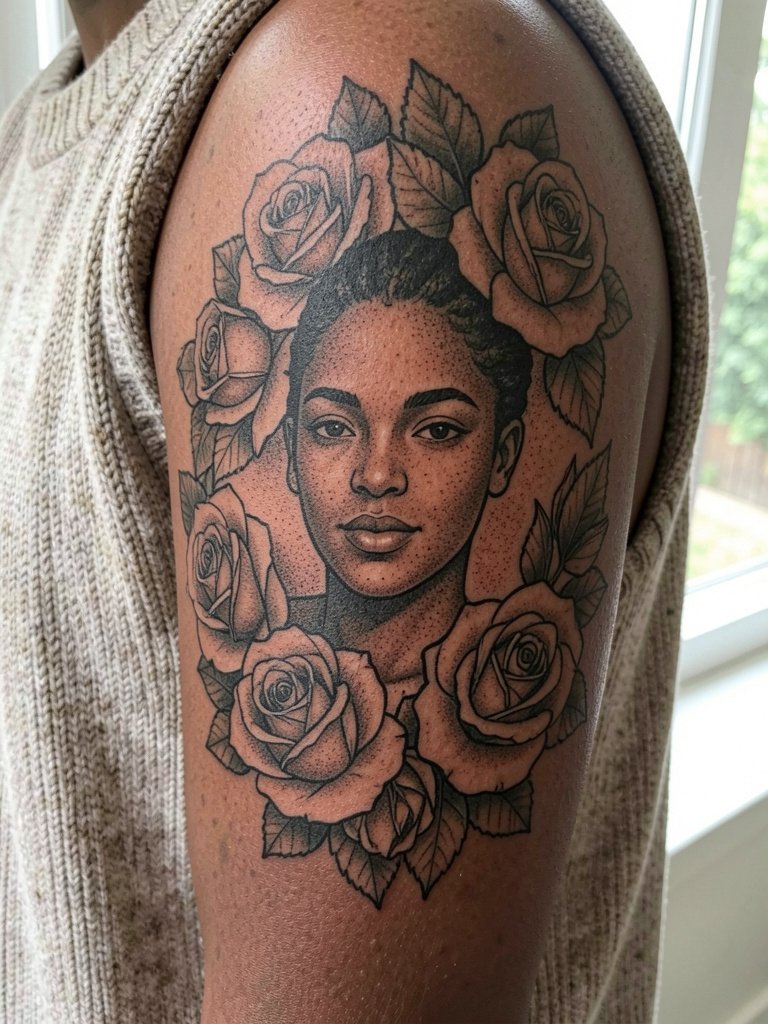
Framing a portrait with florals softens the edge and helps integrate the piece into the body. Tell the artist which flower has symbolic value and show examples of petal weight so lines do not trap pigment next to the face. The common failure is too many tiny petals close to facial features which creates muddiness after healing. For showing the piece off, a fitted tank or open camp shirt lays flat and keeps the frame visible. Expect one focused session for a medium portrait plus a small touch-up window after healing.
6. Black and gray realism for contrast and longevity on the forearm
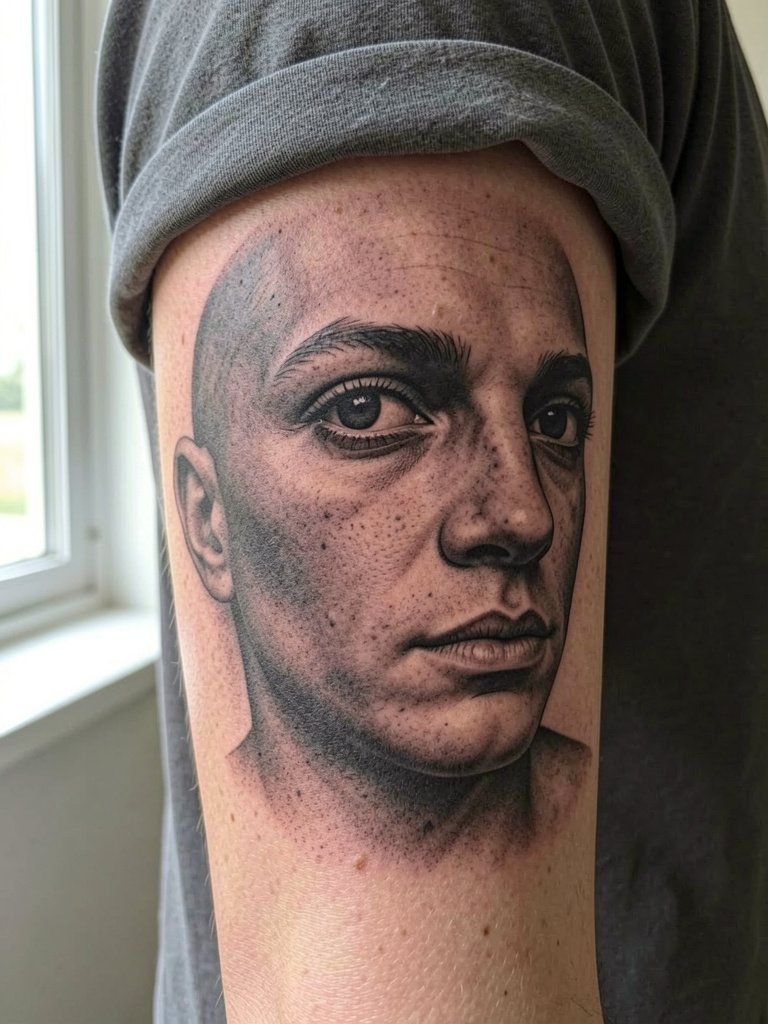
For clients worried about longevity, black and gray often wins because it preserves contrast as pigment settles. A mistake is asking for ultra-soft, low-contrast shading at a small scale. Stronger blacks around the eyes and hairline give the portrait features that survive the first few years. Talk specifics about eye catchlight placement and midtone balance so the artist can adjust the reference. For session wear a black oversized tee that you can roll up to expose the forearm cleanly. Touch-ups for contrast are common around years two to four.
Session Day Picks
The first six ideas include inner arm, forearm, and upper arm placements that need clothing you can move or pull aside easily without disturbing the skin. These picks reduce friction during the first 48 hours and make stencil checks simpler.
-
Aveeno fragrance-free lotion. A lighter option some people prefer during the lotion phase when heavy balms feel too greasy, useful on larger portrait areas that need gentle daily moisture.
-
Dial Gold antibacterial soap. A no-frills cleanser that many forum users mention for gentle washing during the early healing window, especially where sweat or friction is likely.
-
CeraVe Healing Ointment. Sits well for dry skin phases without feeling overly thick, which helps when a portrait needs daily protection but not heavy occlusion.
-
Bepanthen healing ointment. A lighter alternative some clients favor for the first few days, especially on sensitive inner arm placements that get more movement.
-
Saniderm second-skin dressings. Useful for protecting a fresh portrait from friction and contaminants during the first 24 to 72 hours when touching and clothing drag are most likely.
7. Color portrait with a restrained palette on the calf
Color portraits look beautiful but demand planning for fade. There is a clear split in opinion about color versus black and gray. One group favors color for emotional specificity and accents that make eyes or clothing pop. The other group favors black and gray because it often reads better long term and hides small pigment shifts. If you pick color, pick a restrained palette and plan for one or two extra sessions to build saturation in layers, especially on thicker skin like the calf. For session wear choose cuffed denim shorts so the artist can access the calf easily without fabric rubbing during healing.
8. Portrait with heavy negative space on the shoulder

Negative space helps a portrait breathe and guards against muddiness as the skin ages. On the shoulder the skin moves but not as much as a wrist, so keep the face as the focal point and use blank skin as a design element. A frequent error is packing too much hair detail into the negative area which defeats the purpose. For the session wear a loose button-down or a open button shirt to give the artist full access without tugging on the garment. Expect the shading passes to feel like extended stipple work with pauses to check how the negative space reads.
9. Memorial portrait with script on the inner upper arm
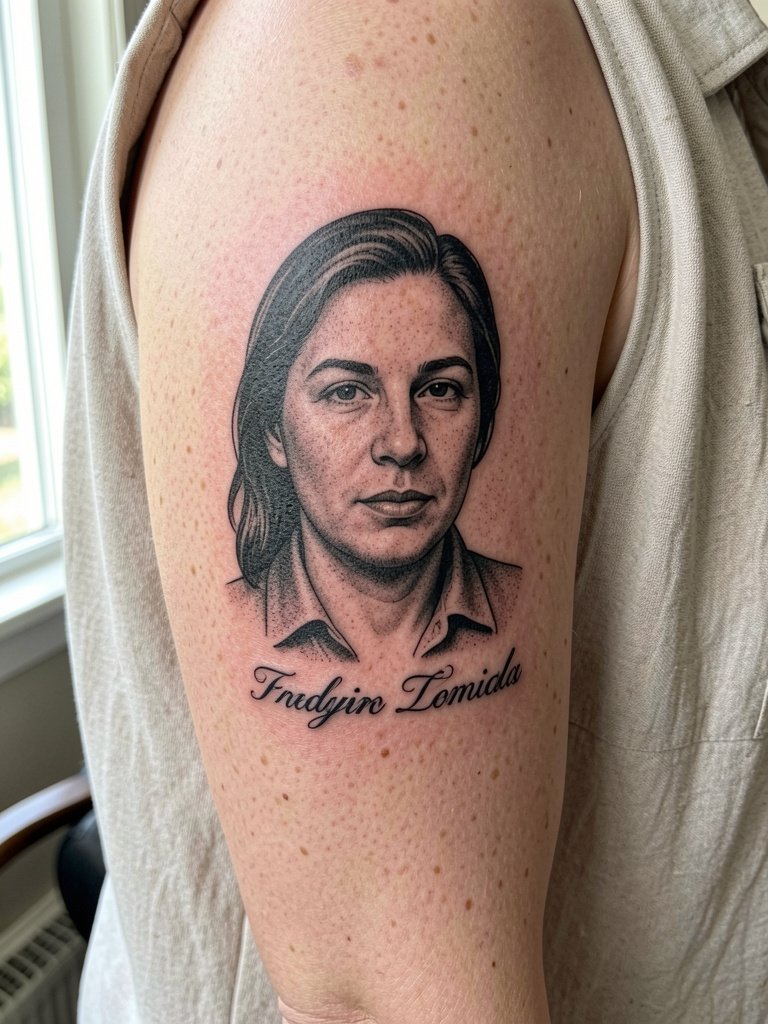
Adding a name or date can tighten the memorial intent, but the balance matters. One common mistake is placing script too close to the jawline so it competes with facial features. Leave clear spacing and pick a font size that stays legible at arm movement. For the appointment wear a sleeveless blouse or tank so the artist can reach the inner arm without obstruction. Expect the script to need a small touch-up after the initial healing if it sits in a high-motion band.
10. Healed portrait in bold contrast on the calf
If readability is your priority, ask the artist to prioritize contrast over near-invisible details. Faces with defined darks around the eyes and nose bridge keep identity strong after healing. The trade-off is you lose some soft, painterly transitions but gain longevity. The calf tolerates heavier shading and will take saturation better than the wrist. For comfort wear loose shorts or straight-leg shorts so the artist can roll the leg without pressure on the area. Large portraits on the calf often take multiple passes with at least one long break.
11. Surreal background elements with a realistic face on the thigh
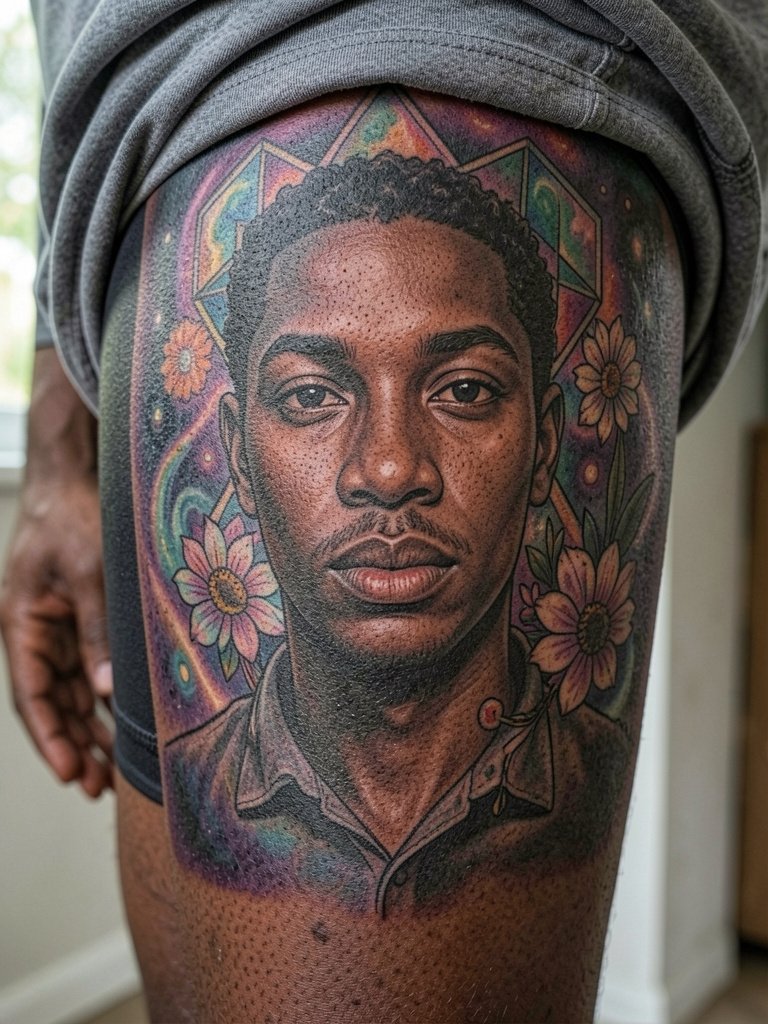
A surreal backdrop gives you personalization without distorting the likeness. Keep the face strictly realistic and the background more interpretive so the portrait remains the focal point. One mistake is giving the face and background the same contrast level which flattens the composition. Thigh placements let you add scale and movement, and the session will likely be multiple sittings. For showing it off consider editorial outfits like a longline shorts with a simple top so the surreal parts peek through without competing prints.
12. Small tribute portrait on the inner forearm
A discreet forearm tribute is a popular choice for collectors who want closeness without full commitment. The inner forearm gives a flatter surface but avoid squeezing a two-inch portrait with ultra-soft shading. The biggest risk is the tiny portrait becoming a blur by year three. Plan a slightly heavier line weight than the photo suggests and confirm healed examples from the artist at comparable size. For the appointment wear a loose short sleeve top so the artist can push the sleeve comfortably without pressure.
13. Large full‑figure portrait composition on the thigh
When you want the whole presence of a person, the thigh is the ideal canvas. This allows inclusion of clothing and posture which strengthen recognition. Plan multiple sessions and a staged mockup so you can see how fabric folds and shoulders read on skin. The mistake is trying to cram a full figure into a space that is too small for the torso proportion. For sessions wear biker shorts or loose shorts to give the artist unobstructed access and comfort during long passes. Expect touch-ups where clothing edges meet shading after the first healing round.
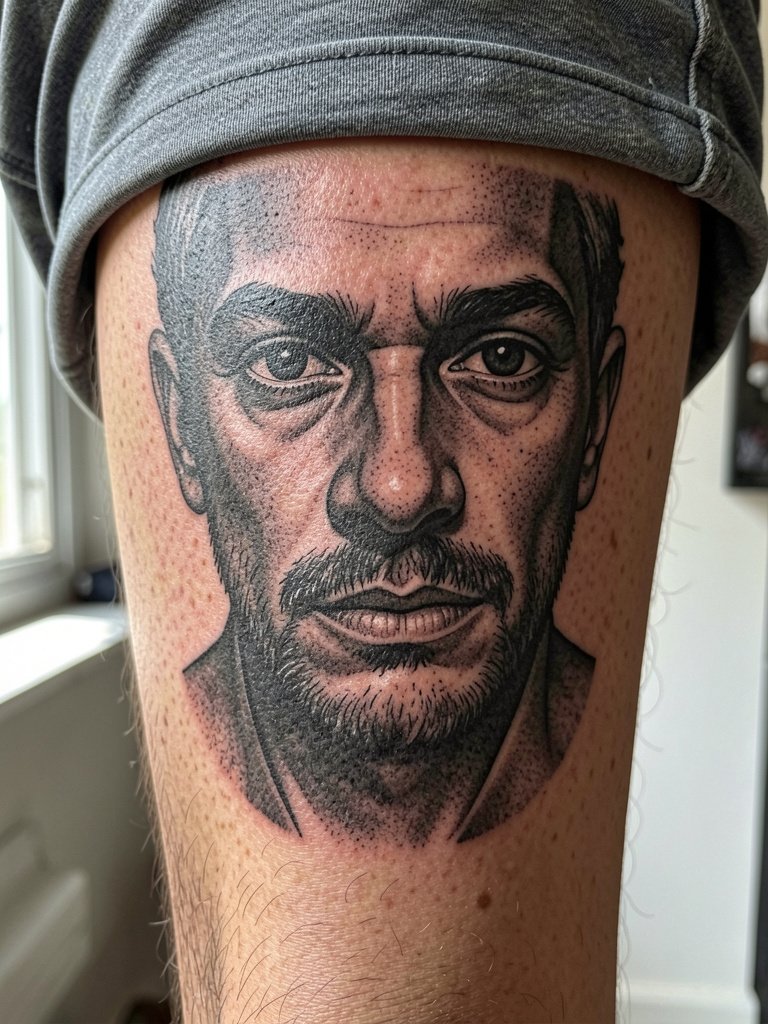
14. Portrait emphasizing high facial feature contrast on the outer upper arm
The eyes, nose bridge, and lips are where the portrait reads as a person rather than a face-shaped patch. Prioritize contrast in those areas and simplify surrounding midtones to protect readability. One common error is adding fine texture across the cheeks that disappears and then looks patchy. For showing the piece pick a charcoal sweatshirt with sleeves pushed up to reveal the focal area without distraction. Session-wise, this placement is comfortable and allows the artist to sit or stand as needed.
15. Collector-style portrait patch for patchwork compositions
Collector-style patches let you stitch small portraits into a larger body plan. Key advice is to give each patch a clean edge and a bit of negative space so it can be rearranged visually as you add more pieces. A common mistake is tiny portraits with ragged edges that blur and ruin the patchwork balance. For session clothes wear a loose cuff shirt so the artist can access forearm or bicep areas without fabric abrasion. Most patch portraits finish in one session but expect touch-ups as new neighboring pieces change flow.
Frequently Asked Questions
Q: How do I pick a reference photo that actually works for a portrait tattoo?
A: Look for high-resolution images with clear catchlight in the eyes, natural contrast, and a neutral expression. Avoid group photos, heavy filters, or extreme highlights that crush facial detail. Bring two scale-matched photos so the artist can show how the face reads at different sizes during the consultation.
Q: Where should I look to find artists who show healed portrait work and portfolios near me?
A: Search hashtags like #realisticportraittattoo and #blackandgreytattoo on Instagram and TikTok, then filter results by your city to find nearby portfolios. Browse Reddit threads in r/tattooadvice for people sharing healed photos and real booking experiences. When you find candidates compare healed shots rather than just fresh work.
Q: Will a tiny portrait on my wrist hold up or should I go bigger?
A: Tiny wrists are high-risk for portrait detail loss because the skin moves and the face has little room to breathe. If you want longevity, increase the scale so eyes and mouth get at least a couple centimeters of space, or pick an inner forearm or outer upper arm placement. Expect possible touch-ups by year two or three if you keep the scale small.
Q: How different is the healing and touch-up schedule between black and gray portraits and color portraits?
A: Black and gray portraits usually need fewer saturation passes and can hold contrast with one main session and occasional touch-ups. Color portraits often require extra saturation passes, especially if you want subtle skin tones or eye color that stays vivid. Plan for at least one return appointment with color work and budget time for a touch-up as the pigment settles.
Q: What should I wear to a portrait session for easy access and comfort?
A: Pick clothing that gives the artist full access to the placement without exposing you to cold or rubbing. For outer upper arm or shoulder try a loose tank top you can comfortably roll or lift. For thigh or calf wear loose shorts or biker shorts so the artist can roll fabric without pressure on the fresh ink.
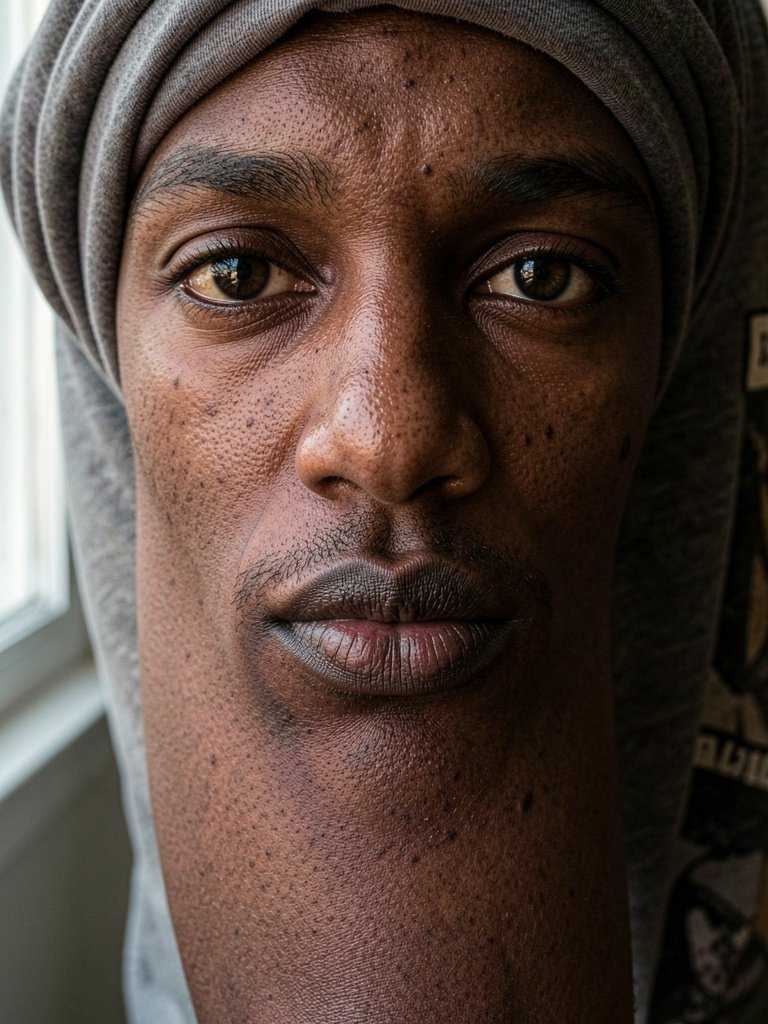
Q: Are there special considerations for portraits on darker skin tones?
A: Yes. Contrast strategy changes across skin tones so the artist should plan deeper blacks and different midtone placement for readability. Request healed photos on similar skin tones and ask the artist how they handle highlight placement without relying on white ink. Many experienced portraitists adjust line weight and shading approach to keep the face recognizable long term.
Q: How soon can I expect healed photos from my artist so I can judge their work?
A: Ask to see healed examples that are at least six months old and ideally a year old on similar placement and skin tone. Fresh photos show flash sheen and clarity that often fades, so healed images give the real picture of touch-up frequency and long-term contrast. If an artist cannot show healed work for similar portraits consider looking for someone who can.
