
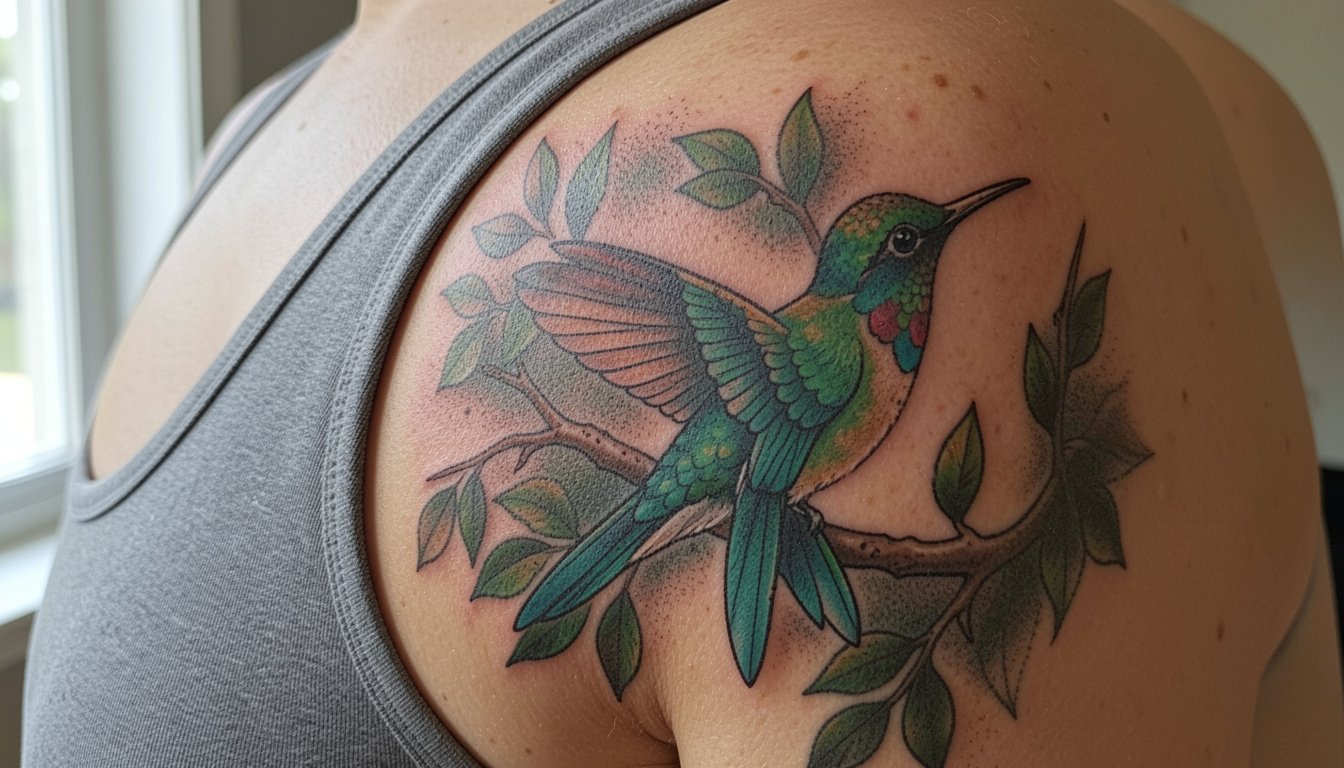
Realistic hummingbird tattoos often fail not because the reference was weak, but because the chosen scale and line weight were too timid for living skin. Tiny single-needle throat details that look incredible on-screen can blur into a gray smudge after two years on high-motion areas. Read on for realistic directions that preserve wing feathers, bill definition, and the sense of motion, starting with a forearm approach that holds up at small scale.
1. Micro-Realism on Inner Forearm
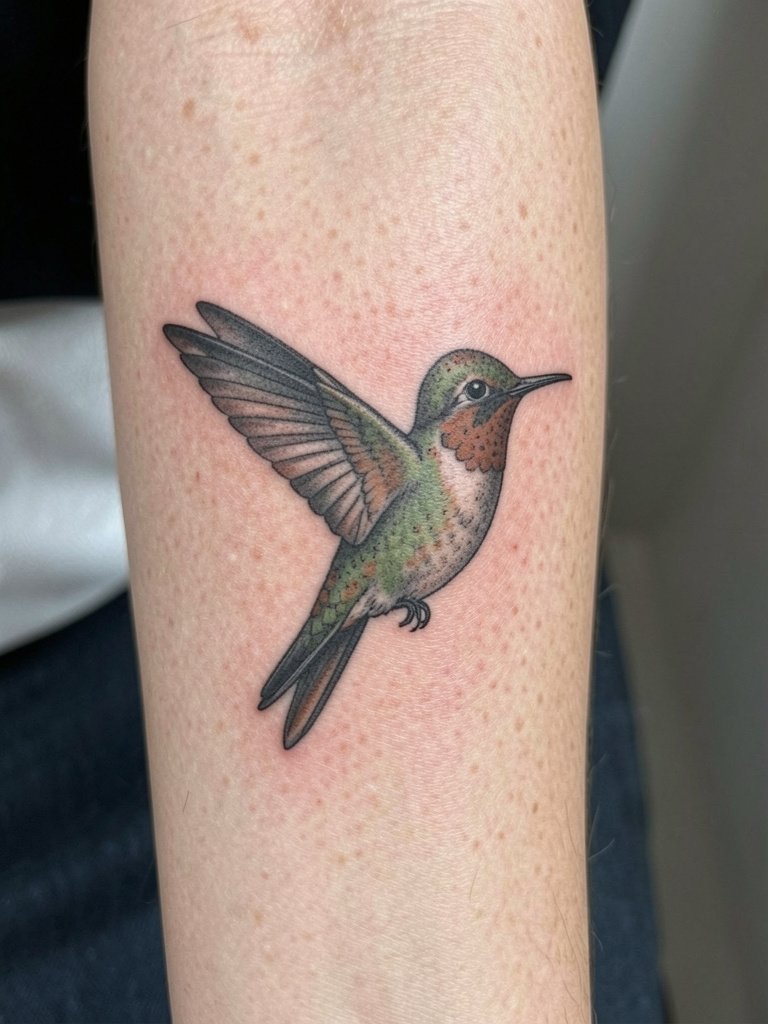
A micro-realism hummingbird on the inner forearm is ideal when you want detail without a large commitment. Recommend scale at three to four inches to preserve individual throat feathers, and ask for slightly heavier single-needle linework than your reference so the bill and eye retain contrast at year two. Common mistakes include requesting ultra-thin script-level lines, which the inner forearm's motion wears down faster than the outer bicep. At six months the stipple shading will read soft, at two years expect slight feather merging unless spacing was increased, and most clients need a small touch-up around year three. Session length is usually one to two hours and pain is low to moderate. For showing off, pair with a rolled-up linen shirt to keep the forearm visible during warm months.
2. Shoulder Blade Portrait-Scale Hummingbird
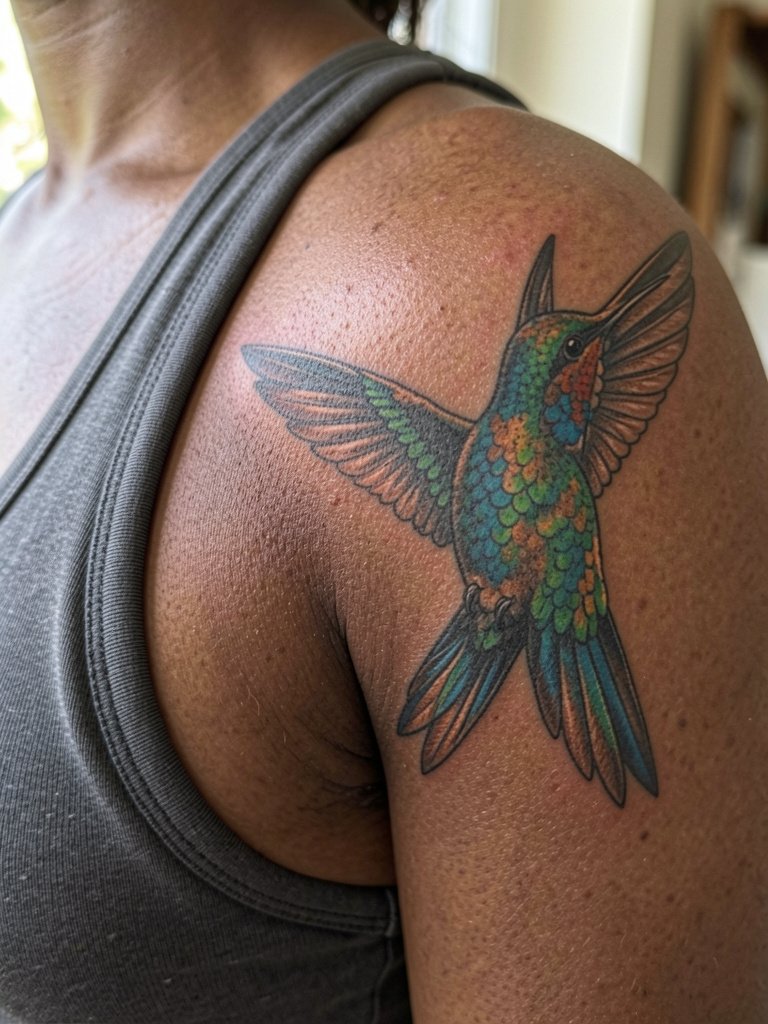
A shoulder blade canvas lets realism breathe and keeps delicate details safe from daily abrasion. Recommend a layered approach using stipple and soft whip shading for the background to lift the bird visually from the skin. Tell the artist you want separation between wing feather groups, not continuous cross-hatching, so contrast survives at five years. Expect a two to four hour session depending on color saturation goals and moderate pain when the needle nears the spine edge. Shoulder blade work ages well because of lower friction, but poor saturation choices can leave the highlights looking patchy at long range. For evenings out, the piece pairs well with open-back dresses that frame the shoulder blade without rubbing the area.
3. Collarbone Flight Accent
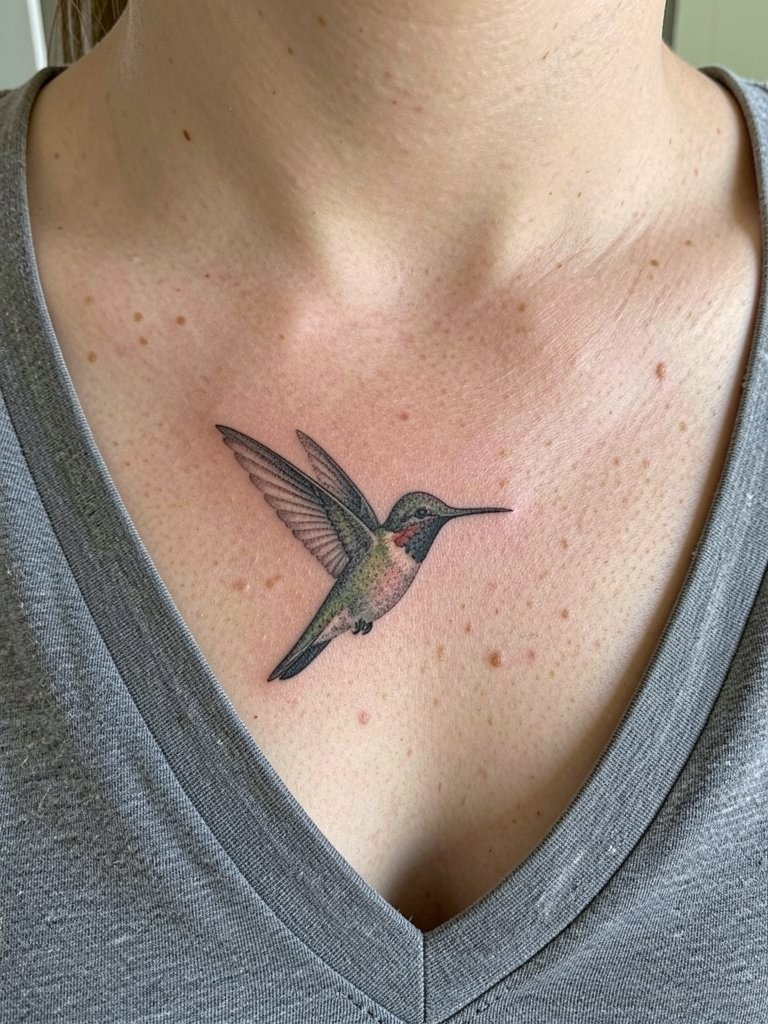
A collarbone placement reads elegantly when the hummer is kept slightly above the bone rather than overlapping it. Recommend slightly bolder linework for the beak and eye so those features do not fade into the collarbone's natural shadow over time. The common aging error is sitting the design directly on the bone edge where movement and occasional jewelry contact accelerate blurring. Session pain fluctuates from moderate to higher where the needle crosses the bony ridge. At six months expect crisp edges, and at two to five years plan for a small touch-up if you want the throat highlights to pop. This spot shines with wide V-neck tops, try pairing with a delicate pendant necklace that sits below the bird so both elements read separately.
4. Behind-the-Ear Micro Accent
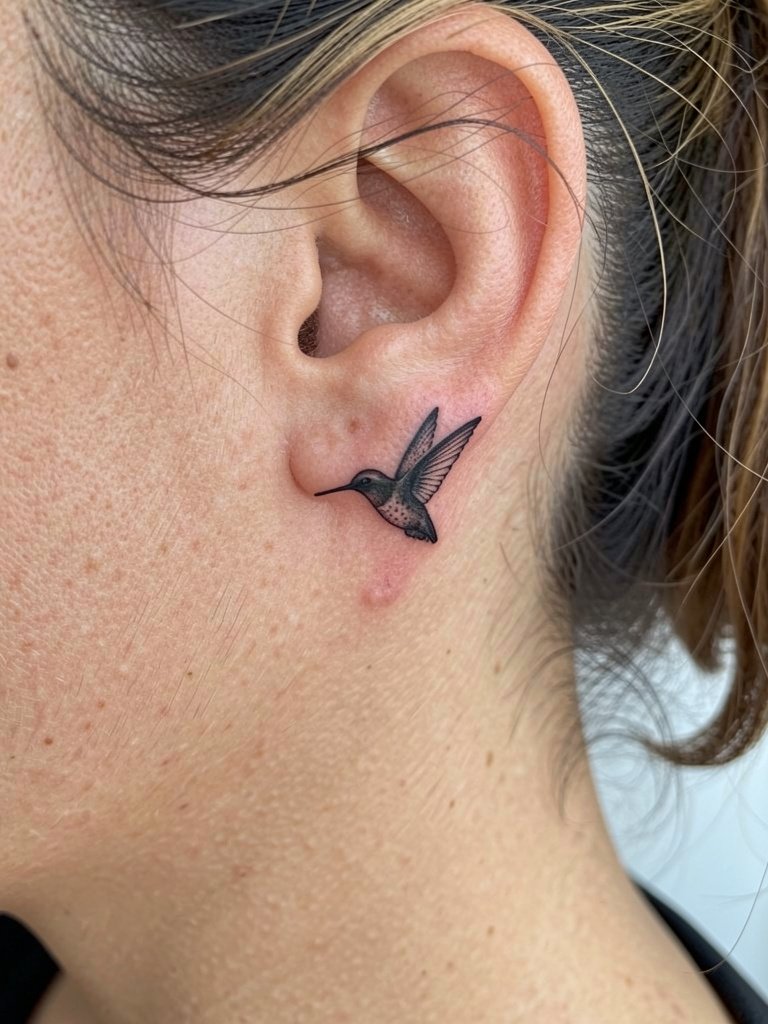
Behind-the-ear hummingbirds work best as micro accents rather than full realism because the skin there is thin and prone to fading. Choose a clean silhouette with minimal internal detail, and ask for a slightly darker outline so the shape reads when hair is down. This placement requires a specialist comfortable with tiny single-needle work and precise hand speed. Expect a short session and sharp, localized pain. Because the area sees hair oils and regular shampooing, plan on a touch-up at year two to retain saturated edges. If the design references cultural motifs, mention origin respect requirements during consultation so the artist can guide respectful adaptation.
5. Mid-Sleeve Hummingbird and Bloom Cluster
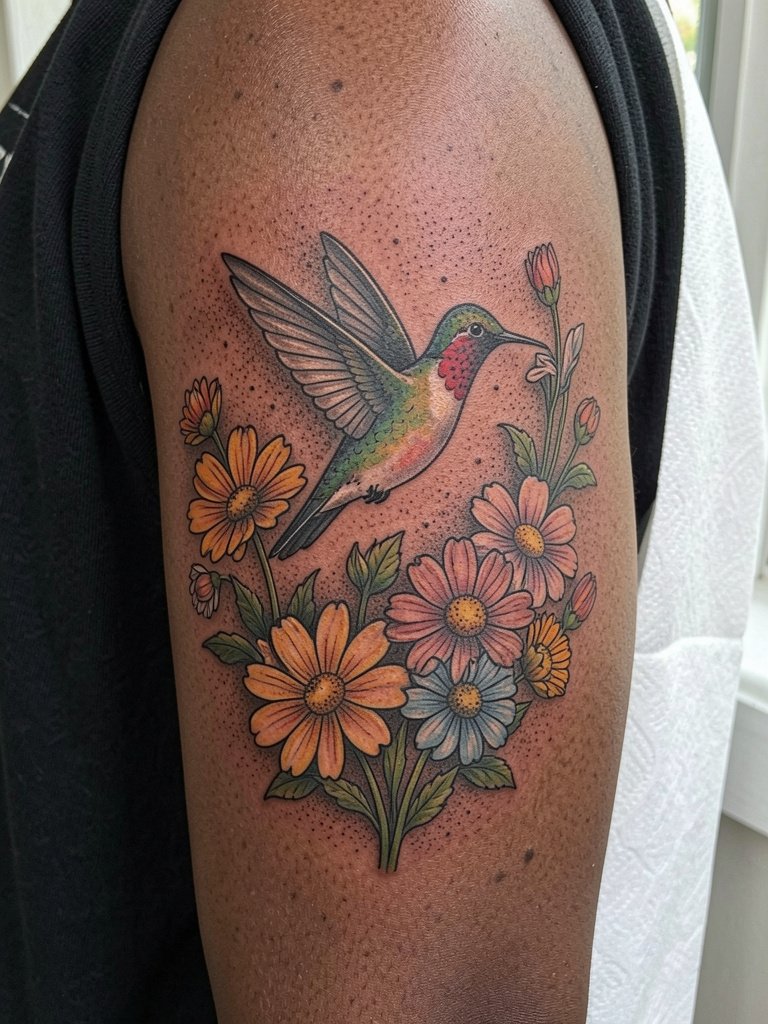
A mid-sleeve composition gives room for a hummingbird plus floral elements without crowding the imagery. Recommend a mix of bold anchors and loose stipple fills so the hummingbird's eye and bill remain focal points. If you want visible motion in the wings, ask the artist for two or three layered wing positions with decreasing saturation to simulate blur. People often try to compress too many tiny flowers into the band and lose negative space, which causes a muddied look at distance. Sessions run three to five hours for partial sleeves, with moderate pain and frequent position shifts. For casual display, rolled short sleeves or a cropped jacket highlight the wrap; try a lightweight cropped denim jacket to frame the sleeve without rubbing fresh ink.
6. Thigh-Scale Hyperreal Hummingbird with Water Droplets
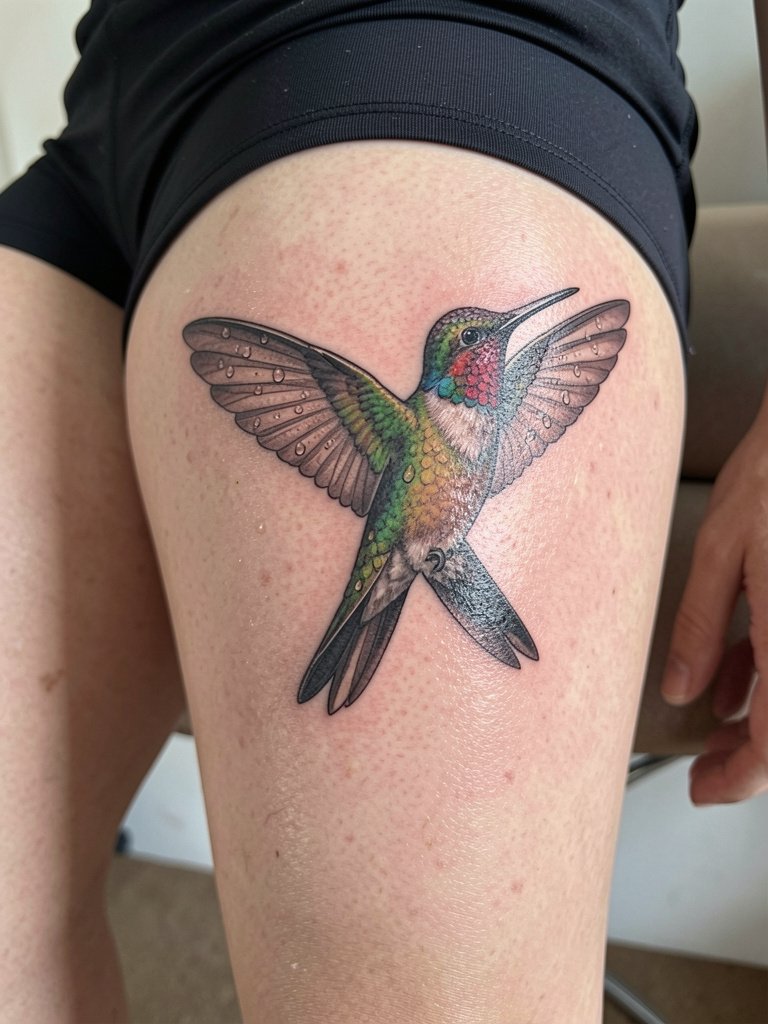
The upper thigh handles large realism beautifully because it tolerates dense saturation and detailed shading. Ask for layered color glazing and a subtle specular highlight treatment to sell the water droplets without relying on white ink. The biggest mistake is asking for tiny, high-contrast details when you actually want a life-size effect; scale up for realism. A thigh piece of this size usually takes three to six hours across a session and rates moderate on pain, though inner-thigh zones are more sensitive. Expect excellent long-term saturation with touch-ups rarely needed before year five, assuming normal sun protection. For the appointment, wear loose shorts so the artist can access the front thigh without fabric tension, and bring a pair you can slide on over the area after the wrap.
Pre-Session Essentials
The upper forearm, inner wrist, and thigh ideas above each need small pre-session adjustments to save time and protect fresh ink.
-
Stencil transfer paper kit. Lets you preview exact placement on skin for small forearm and wrist pieces so the hummingbird's bill lines up with natural arm contours.
-
Topical numbing cream. Apply as directed before longer thigh or rib sessions to reduce discomfort without compromising linework.
-
Thin protective film roll. Useful for ankle and wrist pieces that face constant friction from shoes and daily washing during the first week.
-
Fragrance-free gentle body wash. Cleanses healing skin without stripping color, which matters for the pale highlights on realistic feathers.
-
Aquaphor healing ointment. Thin application for initial days helps maintain moisture on dense color work without clogging delicate needle channels.
7. Fine-Line Wrist Wrap with Motion Blur
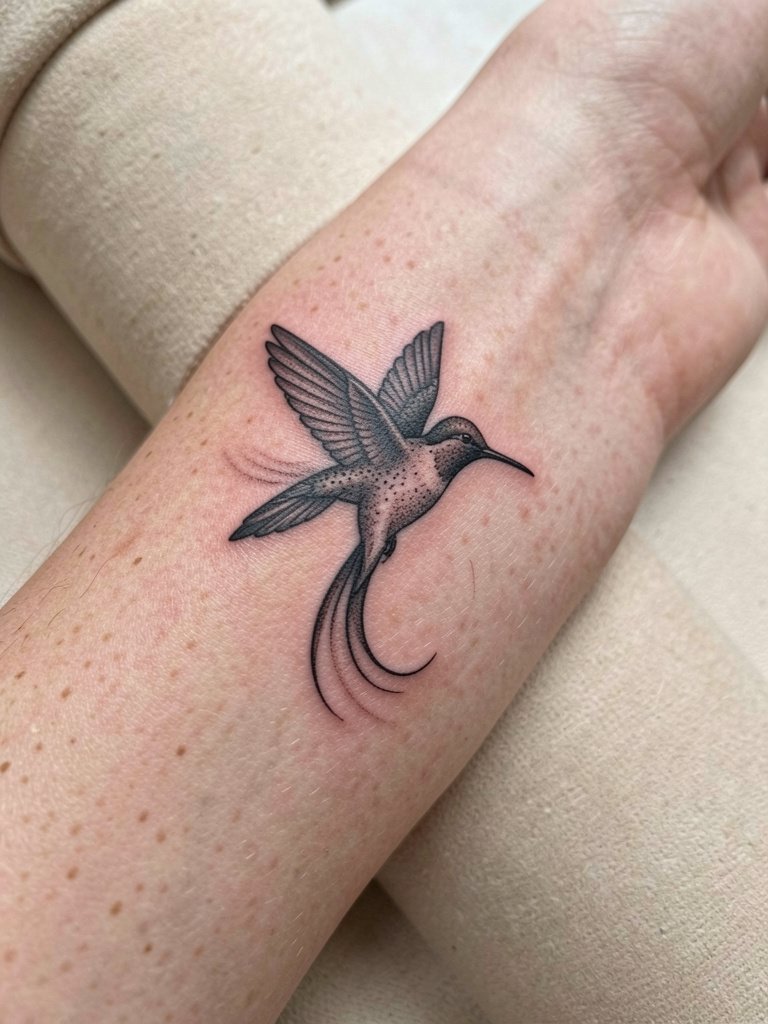
Fine-line wraps on the wrist split artists into two camps. One camp argues the wrist's constant flex and washing blurs single-needle detail within two years. The other camp argues that slightly heavier line weight, strategic spacing, and minimal internal detail can make wrist pieces hold surprisingly well. If you prefer micro detail, ask for a marginally thicker contour for the bill and eye and for negative space inside the wing to read as feather separation. Expect higher sensitivity and a one-hour to two-hour session. Plan a small touch-up after a year to maintain edge clarity. For styling, bracelets and cuff watches work well, and a slim leather cuff frames the wrap without rubbing fresh edges.
8. Nape/Nape-of-Neck Hover
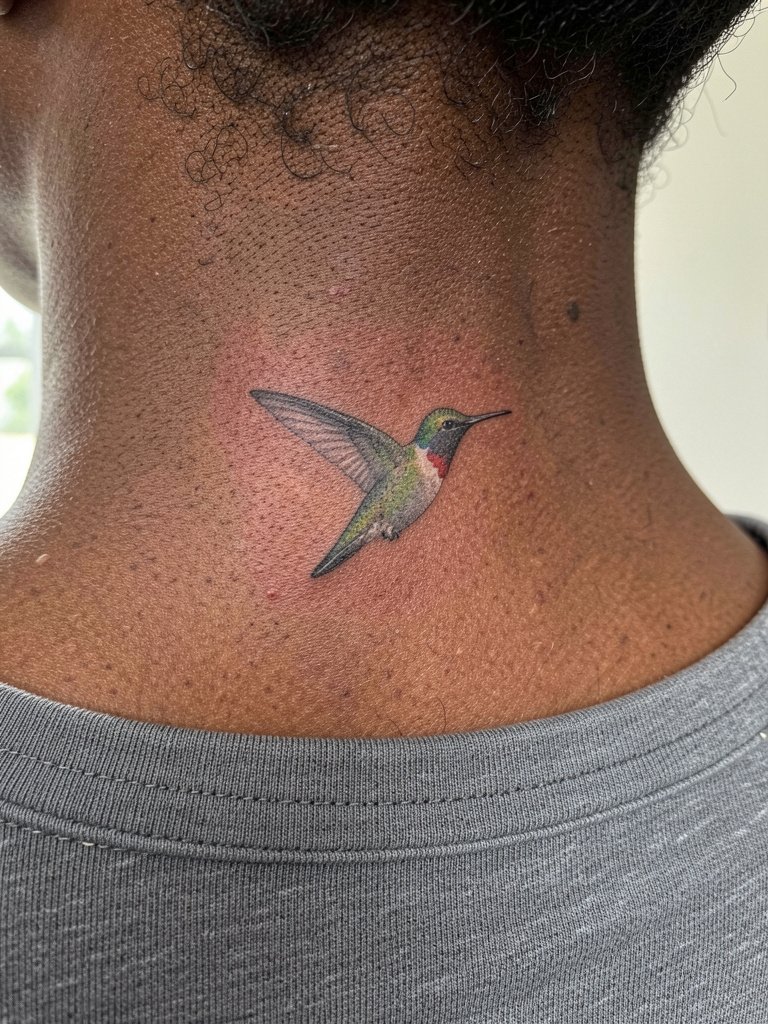
Nape placements demand careful size decisions because hair growth and collars can obscure fine detail. I recommend a silhouette with internal stipple rather than tiny feathers if you plan to hide the piece some days. The nape heals well because of limited abrasion, but contact from shirt collars can dull saturation early if not careful. Session pain is low to moderate. If you want visible throat iridescence, ask for layered glazing rather than single white-ink highlights. Mention any hair parting you prefer so placement sits where hair will frame the design.
9. Ribcage Floating Hummer in Black and Gray
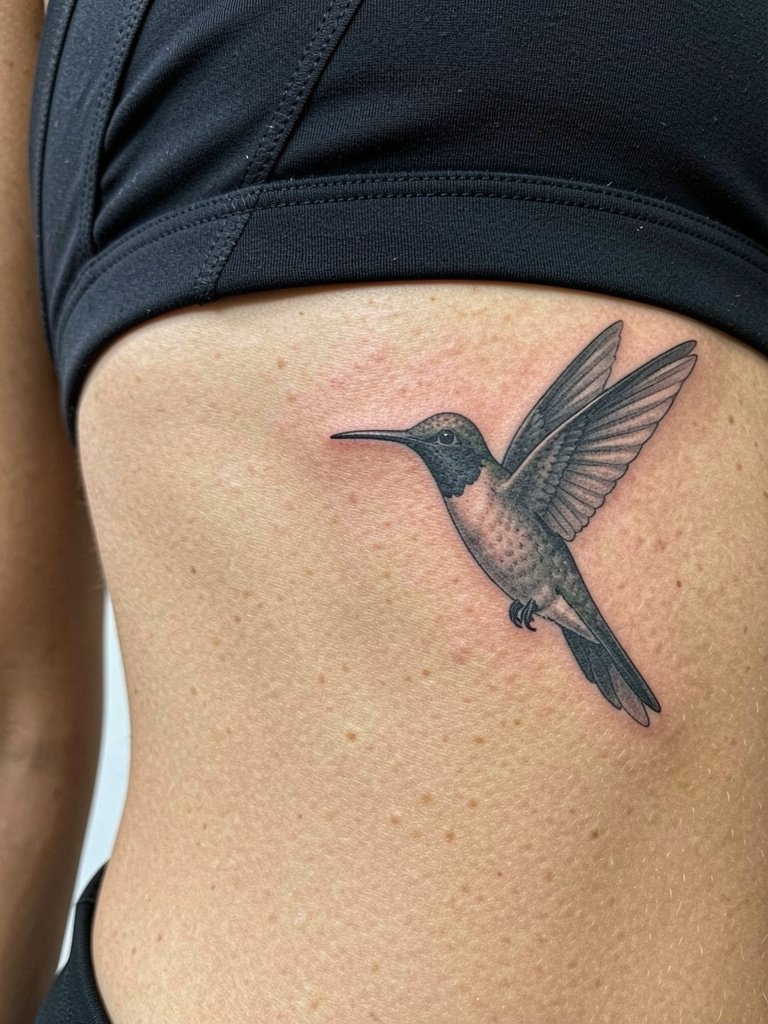
Fine-line rib pieces divide artists into two camps. One camp warns that the stretch and motion over the ribcage, especially near the breast crease, will blur intricate featherwork within a couple of years. The other camp maintains that with slightly increased line weight and careful spacing, fine work can settle and hold for many years. For rib placements I advise asking the artist for staged depth testing on a small adjacent sample spot so you can see healed results on similar skin. Expect a longer session, moderate to high pain, and a touch-up at year two for high-contrast edges. For the appointment wear a fitted sports bra so the artist has unobstructed access while keeping you comfortable.
10. Ankle Perch with Subtle Shadow

Ankle pieces face daily abrasion from socks and shoes, so solid silhouette and modest saturation beats micro-feather detail for longevity. Recommend a bold contour with a tiny counter-shadow to anchor the perch visually. People commonly ask for ultra-fine feather edges that do not survive repeated rubbing from footwear. Sessions are short and pain is low to moderate depending on proximity to bone. Plan for a touch-up in year one or two if the design is very small. For show-off days roll denim cuffs to keep the ankle visible without creating extra friction.
11. Shoulder Cap Flight Scene
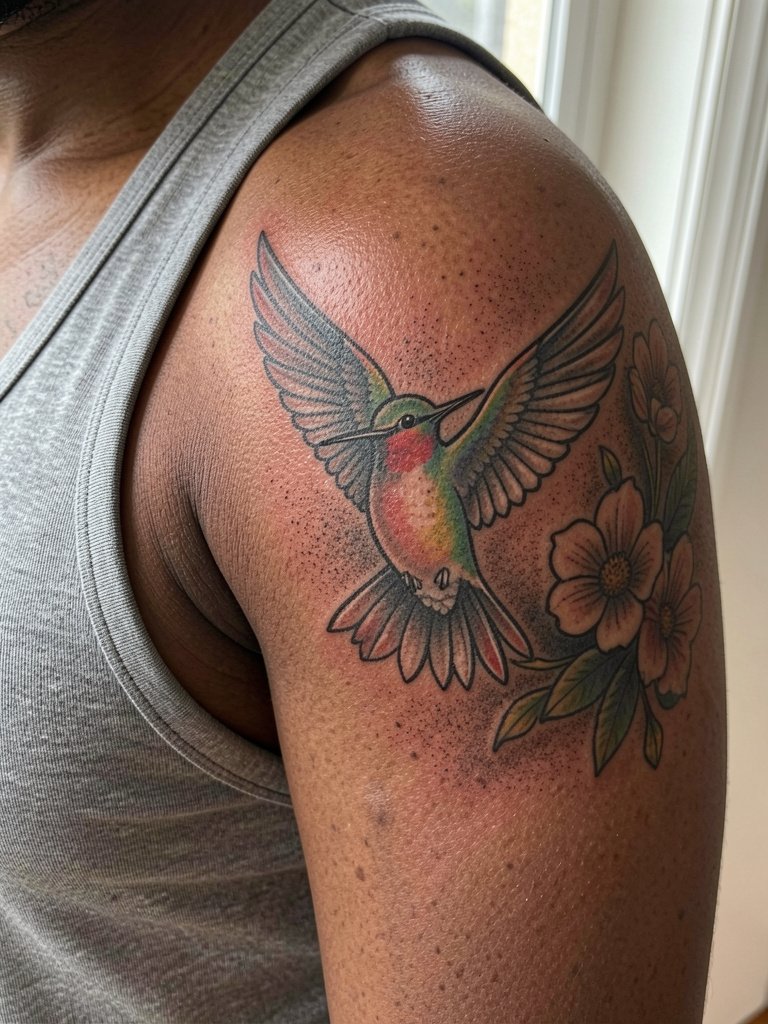
A shoulder cap is forgiving and displays motion well when you want a small scene rather than a standalone bird. Ask for bold primary lines around the head and bill, with softer whip shading in the tail and wing tips to imply motion. The common session mistake is too-small negative space between wing feathers, which fills in by year three. Expect moderate pain and a two- to three-hour session for a detailed cap. For summer wear, tanks keep the piece visible. Try pairing with a loose linen tank top so the shoulder reads without rubbing the area.
12. Calf Flight Strip
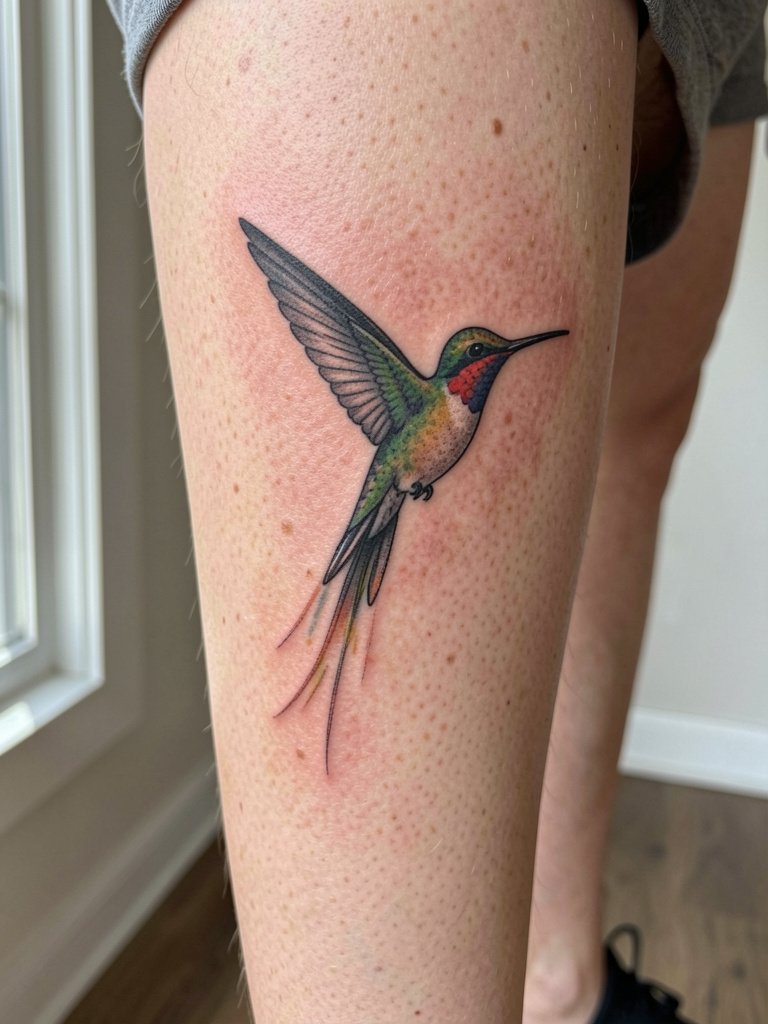
Calf placements suit elongated hummingbird compositions that read while walking. Ask for graduated saturation from head to tail so the eye is drawn upward when standing. People sometimes compress too many tiny details into the vertical strip, which loses legibility at casual viewing distance. Sessions run two to three hours depending on color, and pain is generally low because of muscle coverage. Because calves see sun exposure from shorts, plan regular sunscreen after healing to maintain saturation. If you plan to wear ankle boots often, choose a slightly higher placement to avoid the boot rubbing the fresh skin.
13. Hand Accent Near Thumb Web
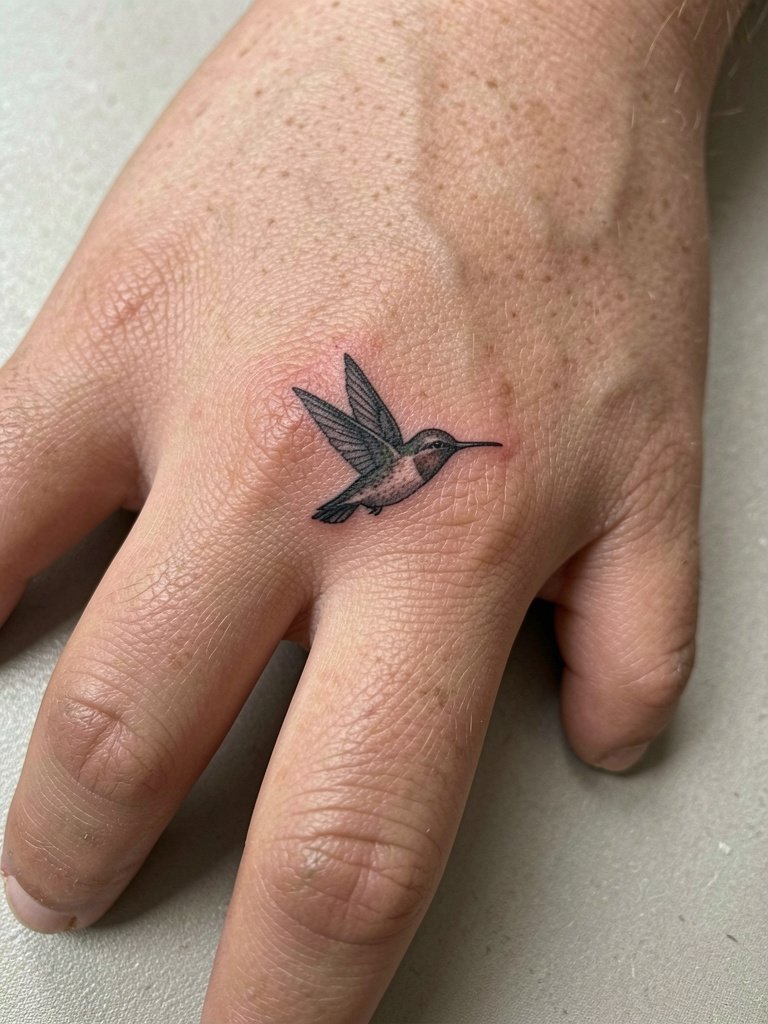
Hand and finger work demands uncompromising realism choices because those zones fade and require frequent touch-ups. For a thumb-web hummingbird I advise a compact silhouette with very bold key lines and minimal internal feather detail. The hand's constant washing and friction will soften single-needle textures, so plan touch-ups every 12 to 18 months if you want the shape maintained. Sessions are quick and quite sensitive because of thin skin and many nerve endings. When styling, use rings that frame but do not cover the area and consider stackable rings to draw attention away from early softening. I like simple stackable silver rings that complement the small black silhouette.
14. Sternum Hummingbird with Soft Shading
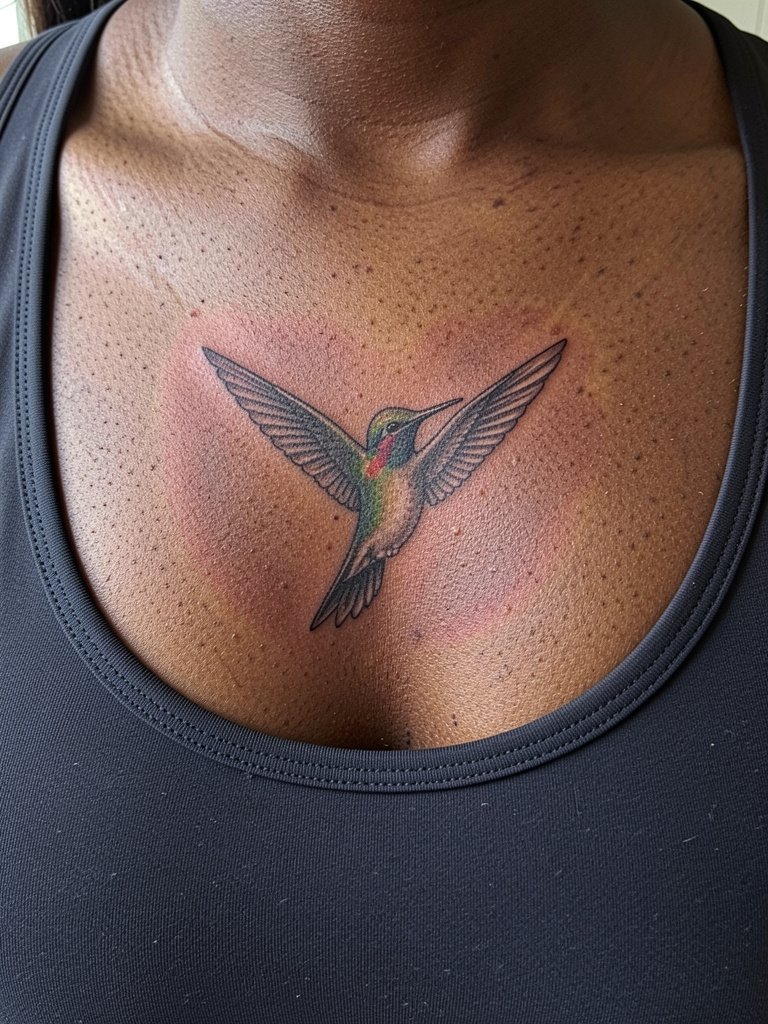
Sternum placements look exceptionally cinematic with soft shading, but they require an artist comfortable with body-contour shading. Recommend slightly wider spacing for feather groups and avoid tiny single-needle filigree that the sternum's movement will blur. Pain ranges from moderate to high depending on proximity to bone and chest sensitivity. Because this is an intimate area, work only with an artist experienced in chest realism. Expect at least one touch-up within two years if you want the central highlights to remain crisp. When discussing placement, bring references that show how the design sits on the sternum line rather than centered over the nipple or too high under clothing.
15. Upper Back Paired with Floral Field
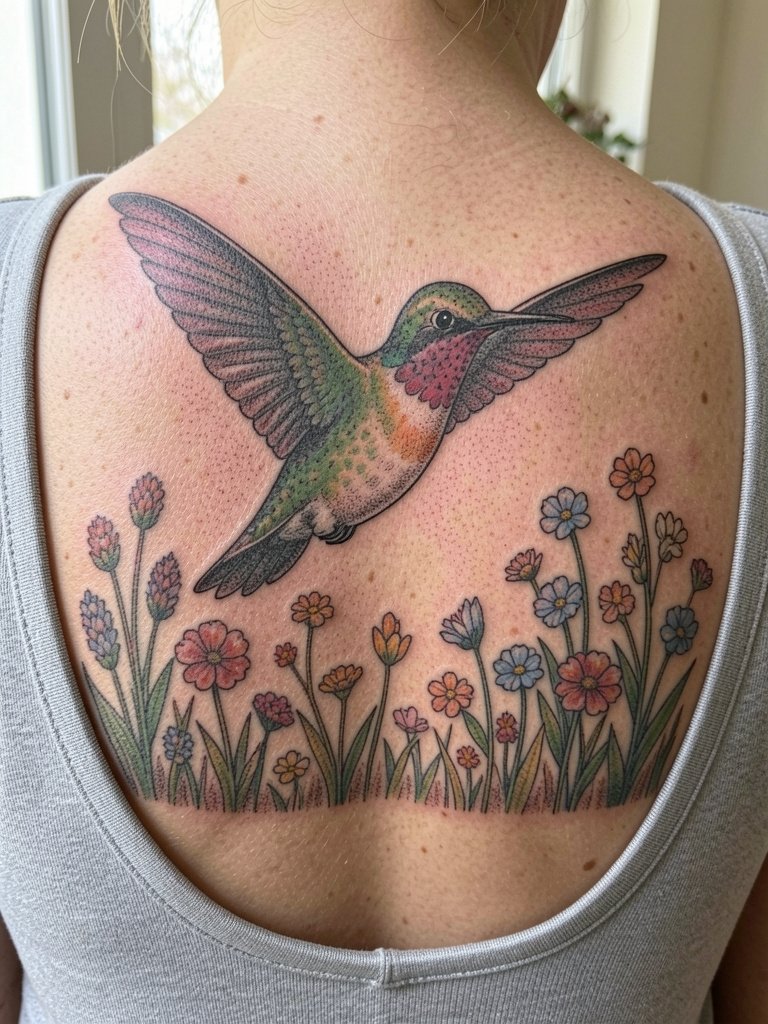
An upper-back composition allows multiple hummingbirds and a supporting floral field while keeping each element readable at a distance. Ask for variable saturation so the foreground bird keeps strong contrast and background florals wash back with stipple and light gray washes. A common error is crowding the shoulder-blade area with too many competing focal points. Sessions for this area can be lengthy and often split across two appointments. Healed results are durable because the back avoids daily abrasion, but sun exposure can lighten midtones, so plan sunscreen use. For evening wear, open-back tops showcase the whole field without stressing the skin; try pairing with an open-back blouse that frames the upper back.
Frequently Asked Questions
Q: How do realistic hummingbird tattoos age on different placements?
A: Placement makes a large difference. Forearms, shoulders, and the upper back hold saturation and detail longer because they see less constant friction. Wrists, hands, and ankles face more movement and washing, so ask for slightly bolder contours and plan for touch-ups at year one to three.
Q: What should I bring to a consultation to get accurate feather texture and color?
A: Bring close-up photos showing actual iridescent feather color you like and at least two scale references so an artist can map how three inches versus five inches will read. Also supply a note about which clothing you tend to wear so the artist can advise placement that avoids constant rubbing.
Q: Where can I find healed real-life hummingbird portfolios without naming artists directly?
A: Search hashtags like #HummingbirdTattoo, #RealismTattoo, and #HealedInk on Instagram and TikTok, use location filters to find nearby shops, and browse community threads on Reddit for healed photo sets in different skin tones. Those platforms tend to show the most healed work and give a practical sense of long-term results.
Q: Is single-needle detail worth it for a small hummingbird on the wrist or hand?
A: Single-needle can look beautiful at first but tends to blur faster on high-motion skin. If you want fine texture in those spots, request modestly increased line weight for anchors and limited internal detail, and accept that a touch-up may be needed within a year or two.
Q: What should I wear to the session for a sternum, rib, or thigh hummingbird?
A: Choose fitted but comfortable pieces that allow direct access to the area without adjusting during the session. For rib work wear a fitted sports bra. For thigh pieces bring loose shorts that slide over the area. For a show-off look after healing consider an open-back dress to frame upper-back work, like a backless evening dress search.
Q: How often will a realistic hummingbird need touch-ups?
A: It depends on placement, sun exposure, and how closely you want to keep crisp highlights. Many clients plan on a light touch-up between year one and year three for wrists and hands, while shoulder, back, and thigh pieces often go three to five years before a noticeable refresh. Use sunscreen and gentle cleansers to extend the interval.
