
Someone I know saved up for a Penrose forearm and then realized three things the hard way: fine line illusions can blur fast on hands and wrists, curved placements kill the intended depth in photos, and it is surprisingly hard to find shading that pops on darker skin. Below are ten optical illusion tattoo ideas that account for those problems and practical notes to help you pick one that actually heals the way you want.
1. Penrose triangle on outer forearm

Someone I know first saw this on a friend and kept staring at how the corners never lined up. Forearm placement keeps the geometry stable, so the impossible loop reads consistently in photos. Tell your artist you want bold, slightly spaced linework so the strokes do not migrate into each other as it heals. The common mistake is asking for extremely thin lines to get delicate optical tricks. That looks crisp at first and tends to blur into a muddy shape by year two on active forearms. Expect a one- to two-hour session, mild pain, and a touch-up opportunity after a year if lines soften. Best for people who want a statement that ages predictably.
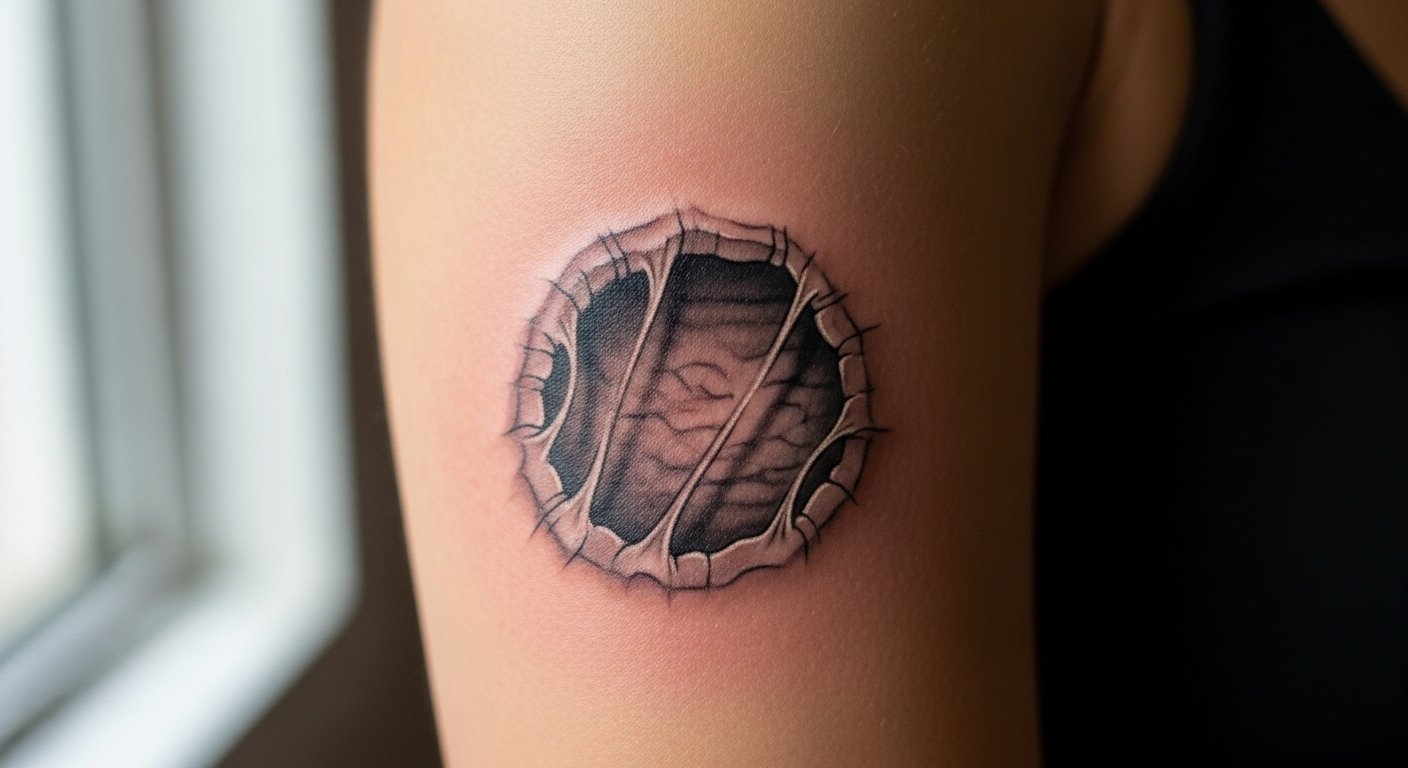
2. Rippling skin hole on upper bicep

Fair warning, the upper arm gives room for shading that reads as an actual tear in skin when you flex. The illusion relies on layered gray wash and stipple shading to sell the depth. When you book, bring close-up references showing under-edge shadows and ask for gradual saturation rather than one heavy black block. A common issue is over-texturing that photographs as noise instead of depth. On darker skin, high-contrast dot work helps the void read clearly, and you may need a dotwork specialist rather than a conventional realism artist. Sessions usually run two sittings for a medium piece and the pain is moderate.
3. Shifting cube that flips on the calf

This calf placement is great because the long flat area lets the cube rotate visually as you move. If you want the flip to happen at a certain angle, have your artist stencil the cube while you stand and walk through common poses. The fine line camp and the bold line camp disagree on longevity. One group argues thin faces capture the flip best. The other says thicker linework preserves the illusion over two years. If you sweat or wear tight socks, choose slightly thicker blackwork edges to avoid early blur. Expect one to three sessions depending on size, and fewer touch-ups if you favor heavier linework.
4. Impossible staircase on the shoulder blade

I've seen these look incredible in mirrors and less convincing straight on. A shoulder blade canvas lets the staircase read across a wider field, and the trick is in consistent vanishing points. During consultation, ask the artist to show the design in situ with a mockup so you can confirm sightlines when you stand and when you look at a mirror. The mistake is shrinking an intricate staircase to wrist size. That loses the impossible connections and ages poorly. Expect two to four sessions, a moderate pain level, and touch-ups after a couple of years if you want to keep crisp shadow edges.
5. Depth tunnel on the inner thigh
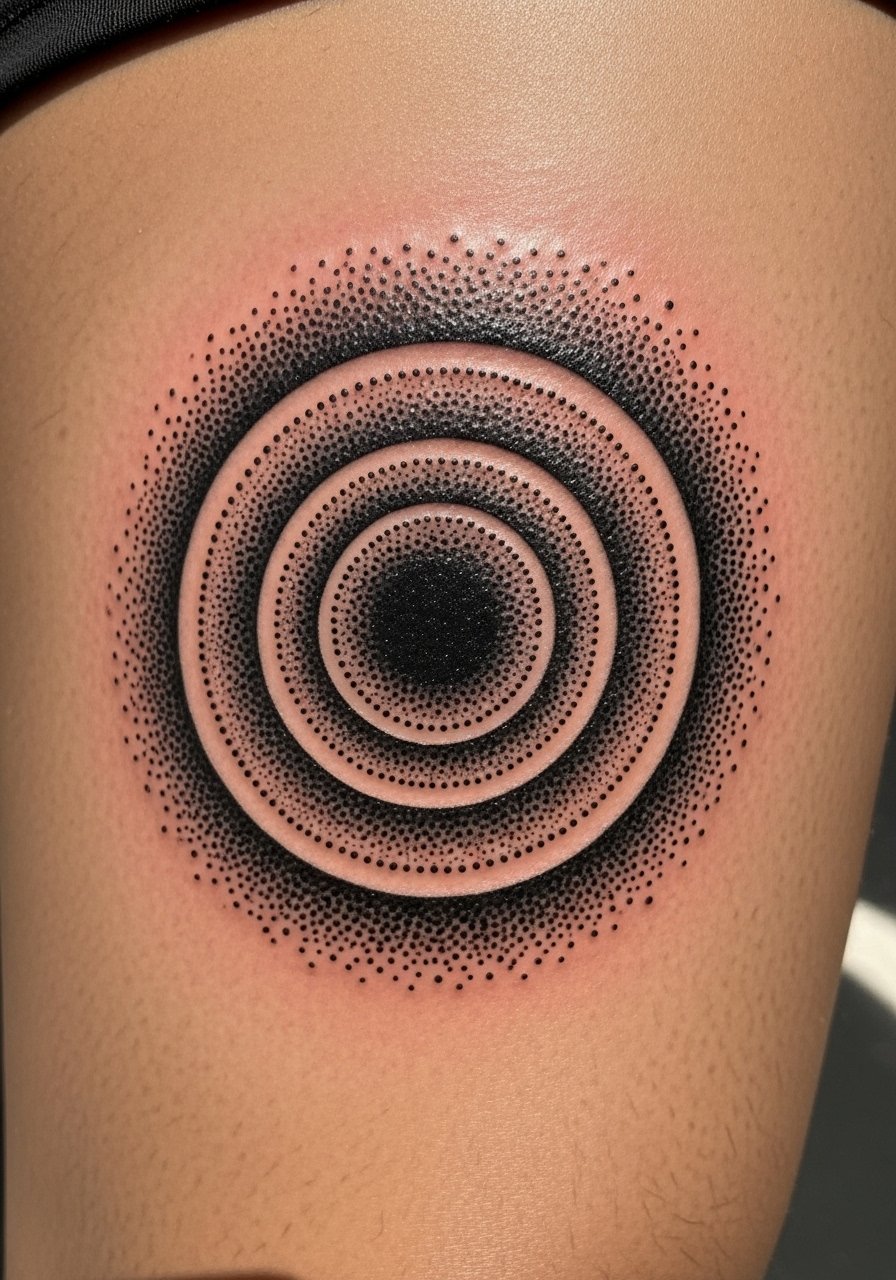
Inner thigh is intimate and hides the tattoo when you want it hidden. The dot work tunnel looks like a bottomless void up close and holds up well because dense dot shading ages into texture rather than blur. Warn your artist if you want the tunnel perfectly centered while standing and while seated, because skin shifts between poses. A common error is too much contrast at the edges, which can read like a bruise while healing. Sessions tend to be two sittings, pain ranges from moderate to high depending on sensitivity, and a touch-up after the first year is common for the innermost darks.
6. Floating orb distortion on the inner wrist
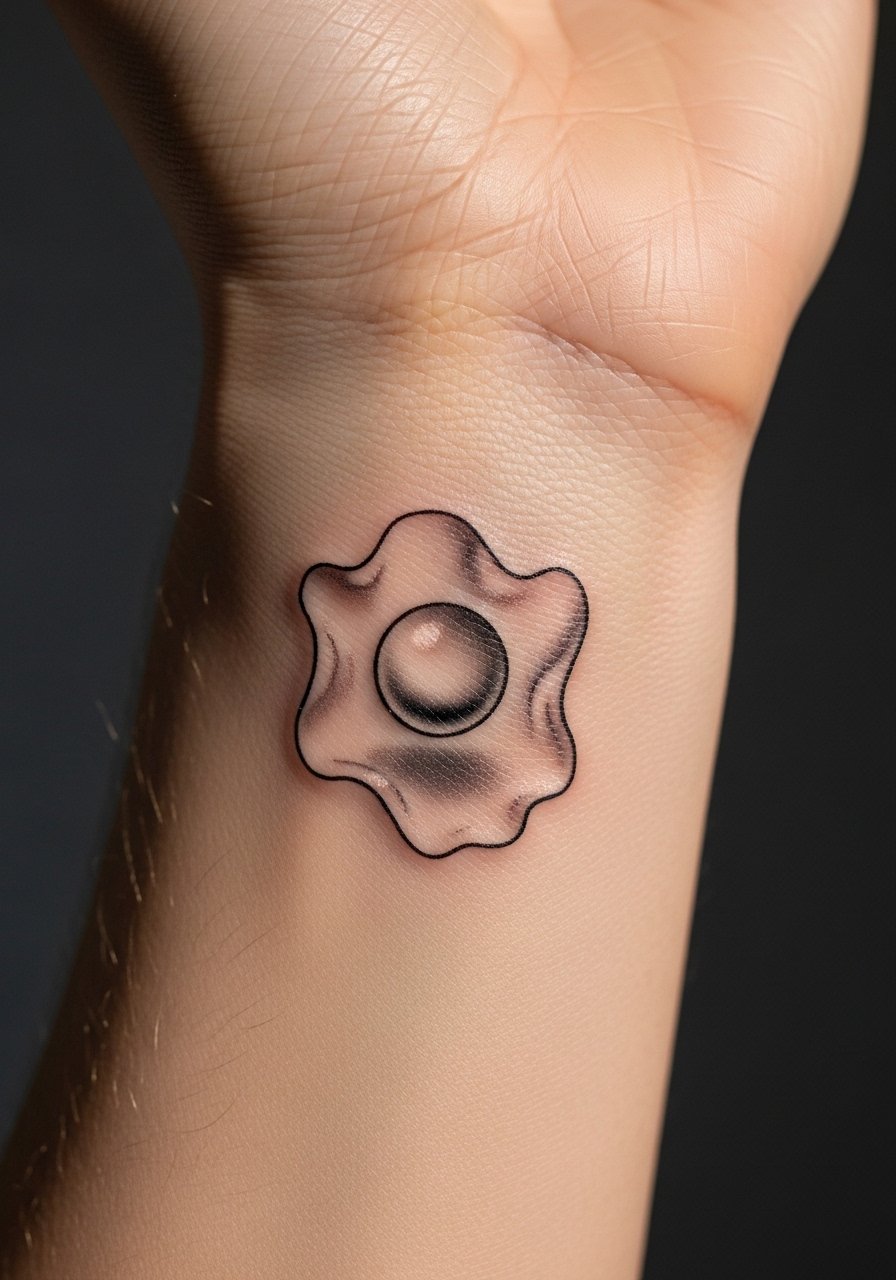
Wrist pieces are compact and visible, so the orb needs to read as a single, drifting volume at arm rest. Ask for a small field study in the consultation where the artist stencils the orb and you look at it under different light angles. The biggest mistake is over-detailing a tiny orb, which blurs into a smudge in six months. For longevity, request slightly bolder contour lines and conservative shading. Expect a one-hour session, higher fade risk because of washing and sun exposure, and touch-ups potentially at the one-year mark.
7. Bending finger illusion on the back of the hand

Hand and finger tattoos are notorious for fading and needing yearly maintenance. If you want an elongation or fracture illusion, the artist must plan line breaks to align with knuckles and flex lines. Tell the artist you understand touch-ups are likely and ask how they space the linework to reduce blowout. The controversy here is obvious: some artists refuse hand fine line work, while others build a routined approach with bolder anchors. Pain is high and sessions are short. Consider this one if you accept maintenance and the social implications of hand ink.
8. Wave ripple across the ribs

Fair warning, the ribcage moves when you breathe and that can distort linear illusions. The solution is to orient ripples along muscle lines and keep contrasts crisp at edges. When you consult, ask the artist to sit you up and breathe during the stencil stage so you both see how the waves distort. The common mistake is putting highly detailed fine line ripples on the ribs without accounting for stretch. Pain is typically high and plan for three sessions if you want color accents. Touch-ups after healing are normal if the shading softens.
9. Infinite zoom fractal on the ankle bone

Ankle placement hides small tattoos well under socks and shoes, which helps preserve saturation. Fractals rely on repeating geometry and precise spacing. Ask your artist to maintain line spacing that allows the smallest rings to stay visible after healing. The common aging problem is trying to cram too many iterations into a tiny footprint. That reads beautifully fresh and then becomes an indistinct knot. Expect a one-hour session, low to moderate pain, and a likely touch-up if you want the innermost rings to remain crisp after a year or two.
10. Portal to void on the kneecap that moves with bends

Joint-based illusions like knee portals are unique because the motion animates the design. Ask for a mockup with the leg bent and straight so you see the animated result. There is a real advantage here: movement sells the trick. One mistake is ignoring how tight clothing or sleeves of pants will rub the area during healing. The kneecap is a moderate pain zone and usually fits in one to two sessions. Expect touch-ups if you want to preserve the deepest blacks near the crease, and be honest with your artist about aftercare habits.
Tattoo Prep and Aftercare Essentials
I've noticed people underestimate how much aftercare affects how an illusion settles. Keep the initial healing controlled so fine edges stay distinct. Below are essentials that match the needs of blackwork, dotwork, and micro-realism illusions. Eight items cover pre-appointment prep, immediate healing, and long-term maintenance. Links point to relevant searches so you can compare options quickly.
Fragrance-free gentle foaming cleanser for first-week washes. Use this for the first week to remove crust gently without stripping saturation. It reduces the need to scrub and lowers scab lifting risk.
Lightweight, low-occlusion healing balm recommended for line clarity. A thinner balm prevents over-moisturizing that can blur fine details while still keeping skin supple.
Indie dotwork salve or small-batch balm from boutique makers. These formulations are often geared toward high-contrast styles and may help pigment settle evenly in stipple shading.
Medical-grade second skin bandage, 6-inch roll. Use this for the first 24 to 48 hours on larger or high-friction areas to protect fresh linework.
Thin silicone scar sheets for long-term texture smoothing. After initial healing, these can help even out minor raised areas without affecting saturation.
Broad-spectrum SPF 50+ sunscreen stick for tattoos. Keep fresh illusions out of direct sun to protect gradients and blacks.
Soft, breathable compression wrap for joint placements. Use this when sleeping or during the first nights for knee and elbow tattoos to reduce rubbing.
Aquaphor original ointment as a familiar option in small amounts. Use sparingly if your artist recommends it because heavier occlusives can sometimes soften extremely fine lines.
Every tattoo is different. Always follow your artist's specific aftercare instructions. Consult a dermatologist if you have skin concerns or unusual healing issues.
Frequently Asked Questions
Q: Will fine line optical illusions blur faster than bold blackwork on hands and wrists?
A: From what I've seen, yes, fine line on hands and wrists tends to need touch-ups sooner. Skin on hands gets more sun and washing, and friction is constant. If you want a longer-lived illusion there, ask the artist to slightly thicken anchor lines and plan for a touch-up at the one-year mark.
Q: How do I test whether a design will hold its intended angle-dependent trick before booking?
A: Ask the artist to stencil the piece on and photograph it from multiple angles and lighting conditions, then mimic common poses you expect to use. Walk around with the stencil on if possible. Many artists will mock up the image digitally on a photo of your limb so you can preview the visual flip or tunnel in situ.
Q: For dark skin, which illusion techniques tend to read best?
A: High-contrast dot work and solid blackwork generally show up most reliably. Very subtle gray washes can get lost, so discuss stipple density and edge contrast. Seek portfolios on platforms and hashtags that show healed work on similar skin tones before booking.
Q: How much should I budget for a blackwork illusion tattoo?
A: Expect a range. Small blackwork pieces often start in the low hundreds, while larger, multi-session blackwork can reach several hundred to over a thousand depending on size and complexity. Prices vary by city and artist experience, so get time estimates and session counts during consults.
Q: Are joint-based portals on knees or elbows riskier to heal than arm or calf pieces?
A: They come with specific risks. Joints flex and rub against clothing which increases scabbing and friction. Covering and gentle movement management in the first two weeks help. Plan for touch-ups because the creases often lighten where skin stretches most.
Q: What are the best discovery pathways to find artists who excel at optical illusion linework?
A: Search hashtags like #opticalillusiontattoo and #blackworkillusion on Instagram, filter Tattoodo or local booking apps for "illusion" or "geometric blackwork," and read r/tattoos threads for portfolio links. Narrow candidates by looking for healed photos rather than just fresh work.
Q: Does using a second skin bandage hurt the illusion's final look more than dry healing?
A: Opinions split on this. Some artists prefer second skin because it protects crisp lines during the first 48 hours. Others prefer air drying to avoid trapped moisture. Ask how your chosen artist handles their aftercare routine and follow that plan for the best result.
