
Someone I know spent months narrowing down an ocean theme tattoo only to find the real problem was picking a style that would still read well five years later. You want something that suits your skin tone, works with how you move, and does not require constant touch-ups. Below are 15 ocean tattoo ideas, each with practical notes on placement, aging, common mistakes, and what to say at your consultation so the piece stays strong long after the stencil comes off.
1. Realistic Humpback Whale Portrait on Forearm
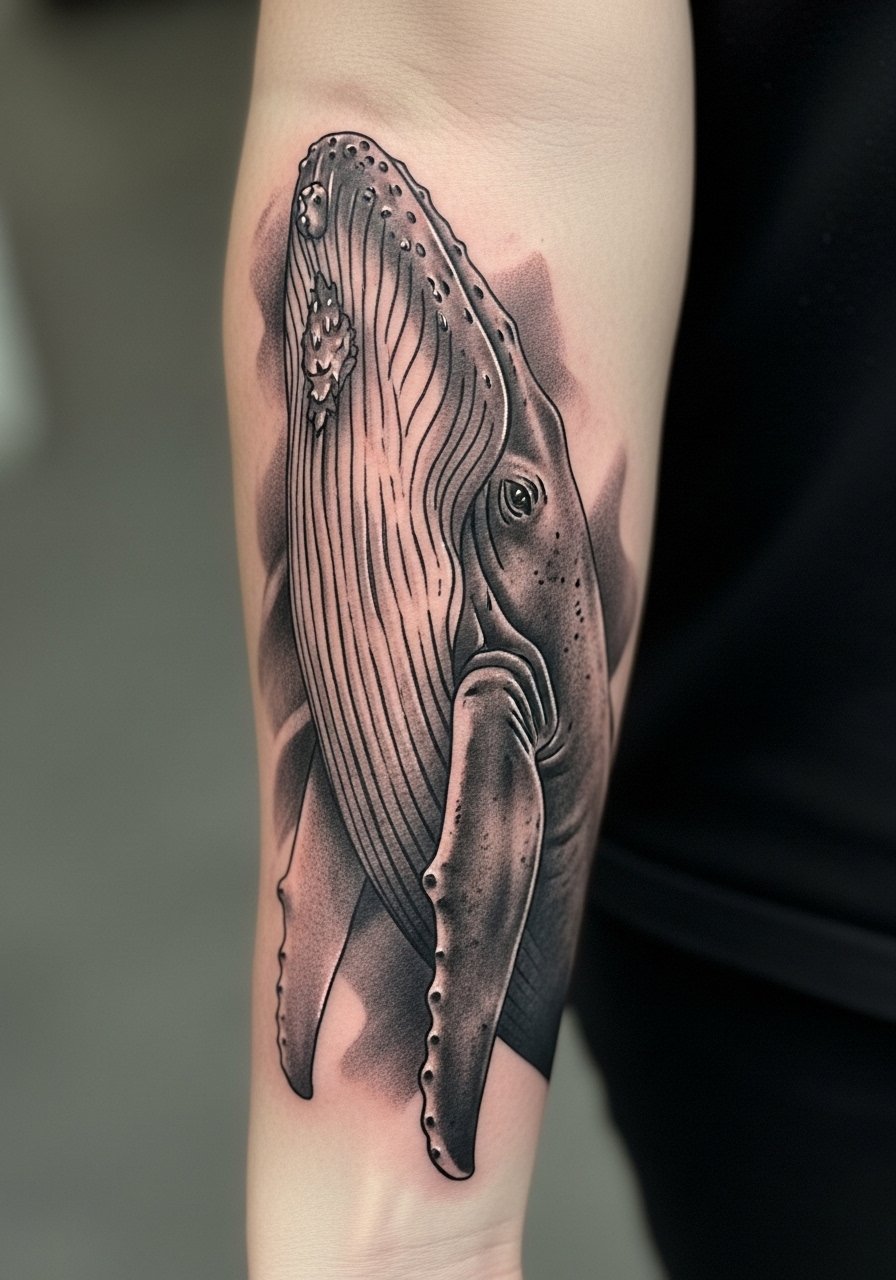
Someone I know first saw this on a friend and booked the same placement. A forearm whale reads well because the limb gives room for the tail and fluke to curve. Tell your artist you want micro-realism with clear separation between dark and mid tones, and ask for slightly larger eyes so the face keeps character as it heals. Common mistake is shrinking the design to fit a wrist; that causes loss of texture and forces early touch-ups. Expect a two to three session build for full saturation. Blowout risk is low on forearm, but ask about needle spacing if your skin is thin.
2. Traditional Nautical Anchor with Rope on Inner Calf
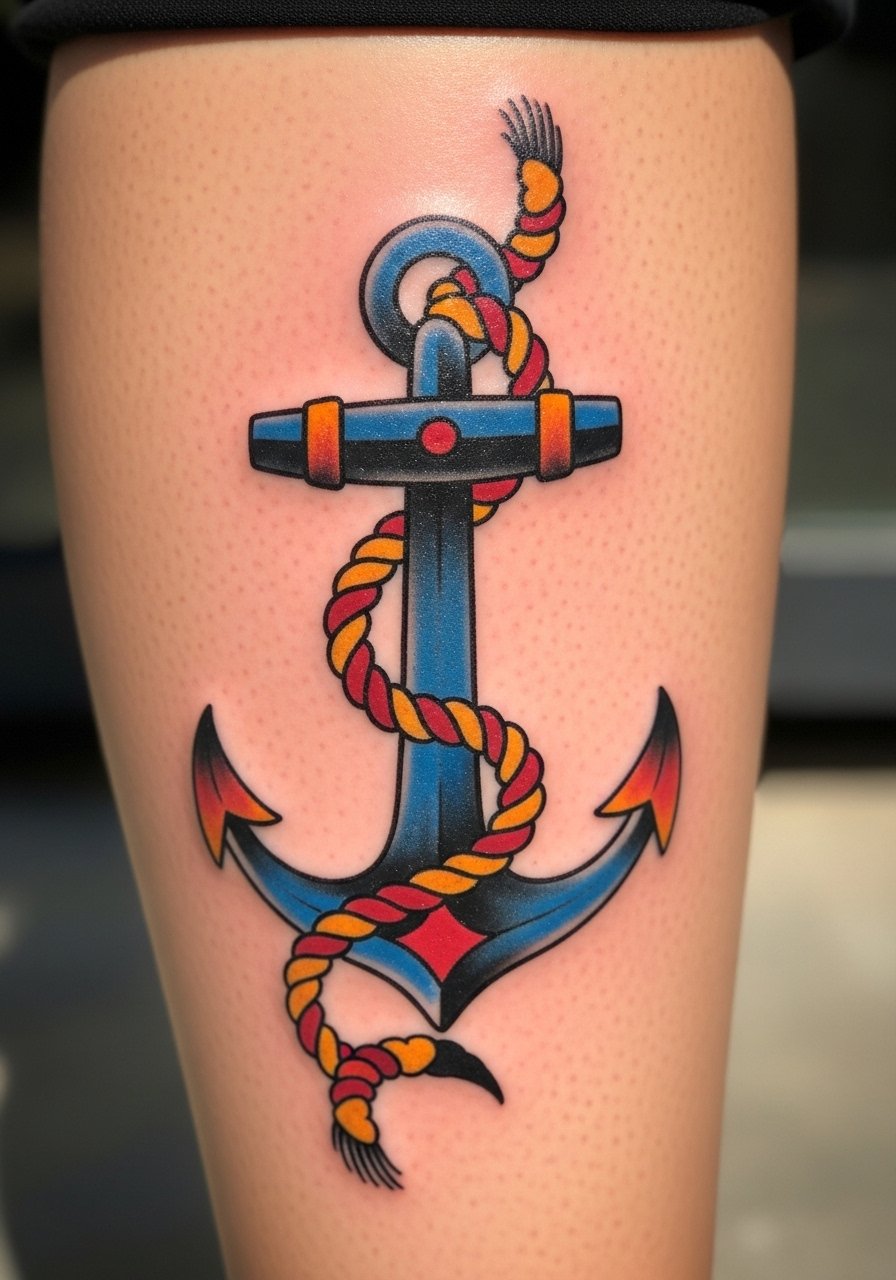
Fair warning: the inner calf can hurt more than the outer leg but it holds bold outlines well. Classic anchors age nicely because artists use heavy linework and strong color blocking. Ask for slightly thicker outlines than a flash design so the rope detail does not blur into the anchor over time. A typical session is short and straightforward, and touch-ups are rare if the saturation is solid. The main mistake is asking for too many tiny knot details on a small anchor. If you want delicate rope, pick a larger placement.
3. Fine Line Jellyfish Tentacles as Wrist Wrap
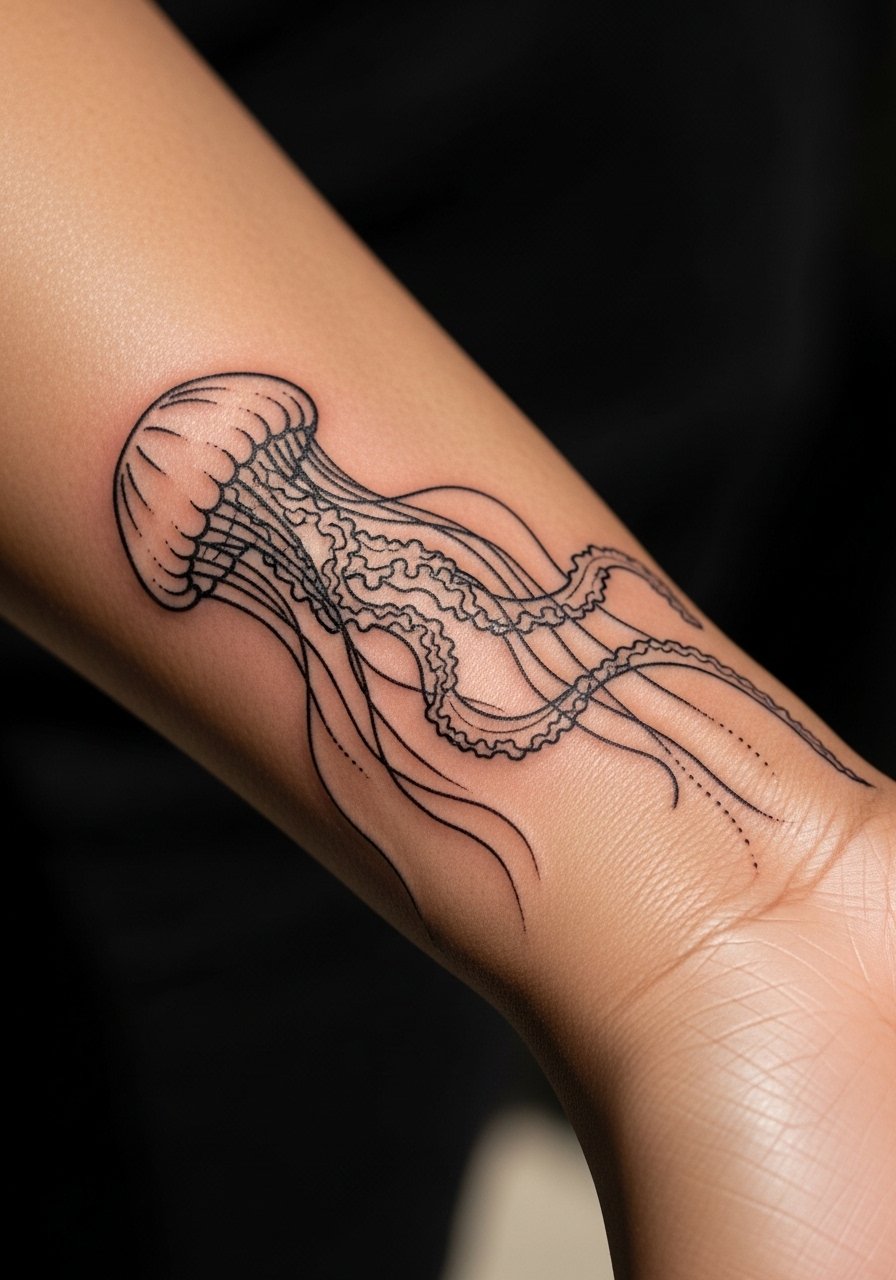
When you opt for a fine line ocean tattoo at the wrist, be clear you want confident ink depth and slightly thicker primary lines to prevent early fading. One camp of artists accepts that fine line will soften over time and prefers the look, while another camp recommends bolder anchors for longevity. Name both camps during your consult and ask where your chosen artist stands. A common mistake is over-compressing tentacles into a tiny wrist band. For dark skin tones, consider micro-realism or blackwork accents to preserve contrast. Expect a single session if kept small, with a possible touch-up around year two.
4. Watercolor Wave Band on Thigh
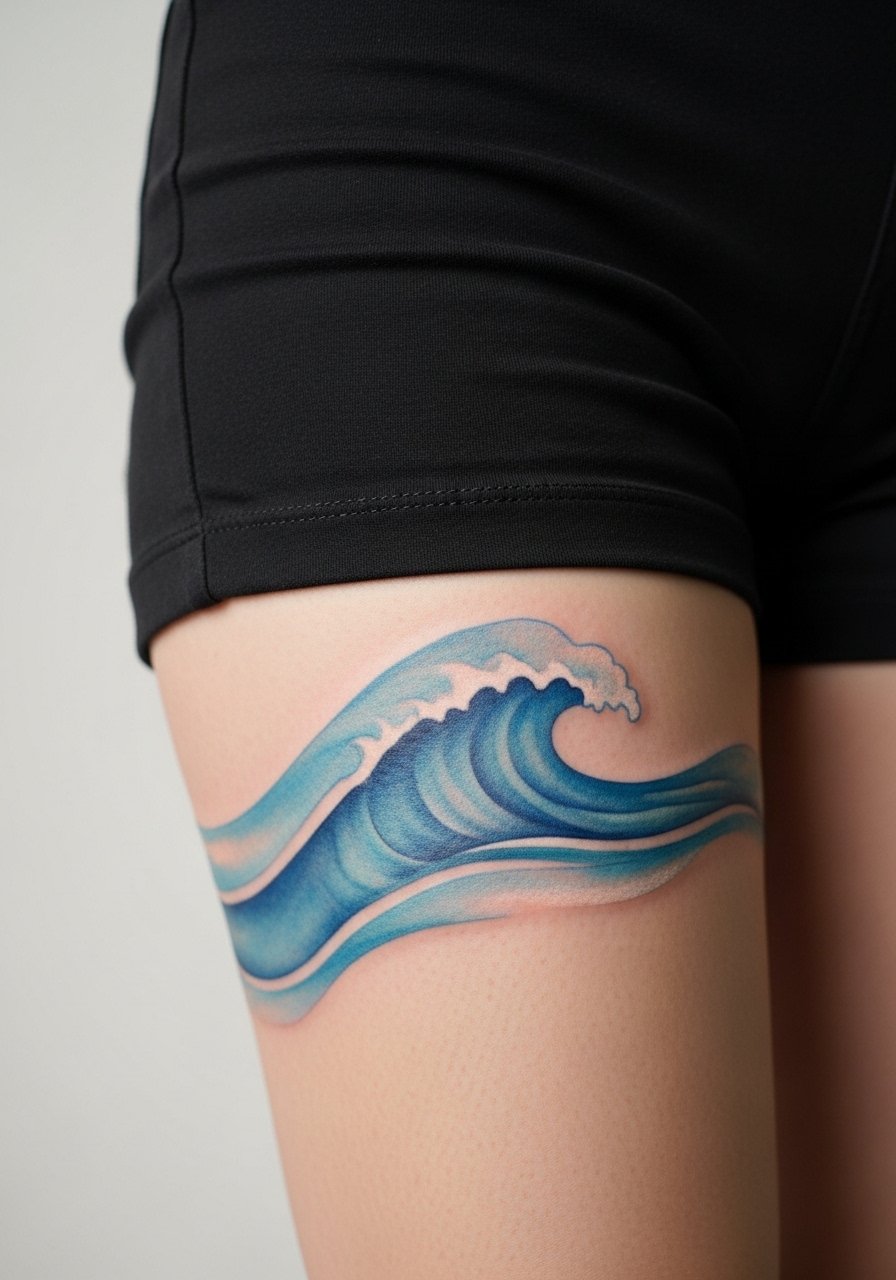
Most watercolor wave bands look soft and painterly at first but can fade faster if placed on sun-exposed areas. I suggest putting the band on the thigh where there is less daily UV exposure. Tell your artist you want color gradients with defined edges rather than feathered outlines, because crisp borders help maintain the band shape as pigment migrates. The common aging problem is color bleed into a bruise-like wash after a few years. Plan for a touch-up at year two to restore vibrancy. Session time depends on width, often one to two sittings.
5. Neo-Traditional Octopus Tentacles Wrapping Upper Arm
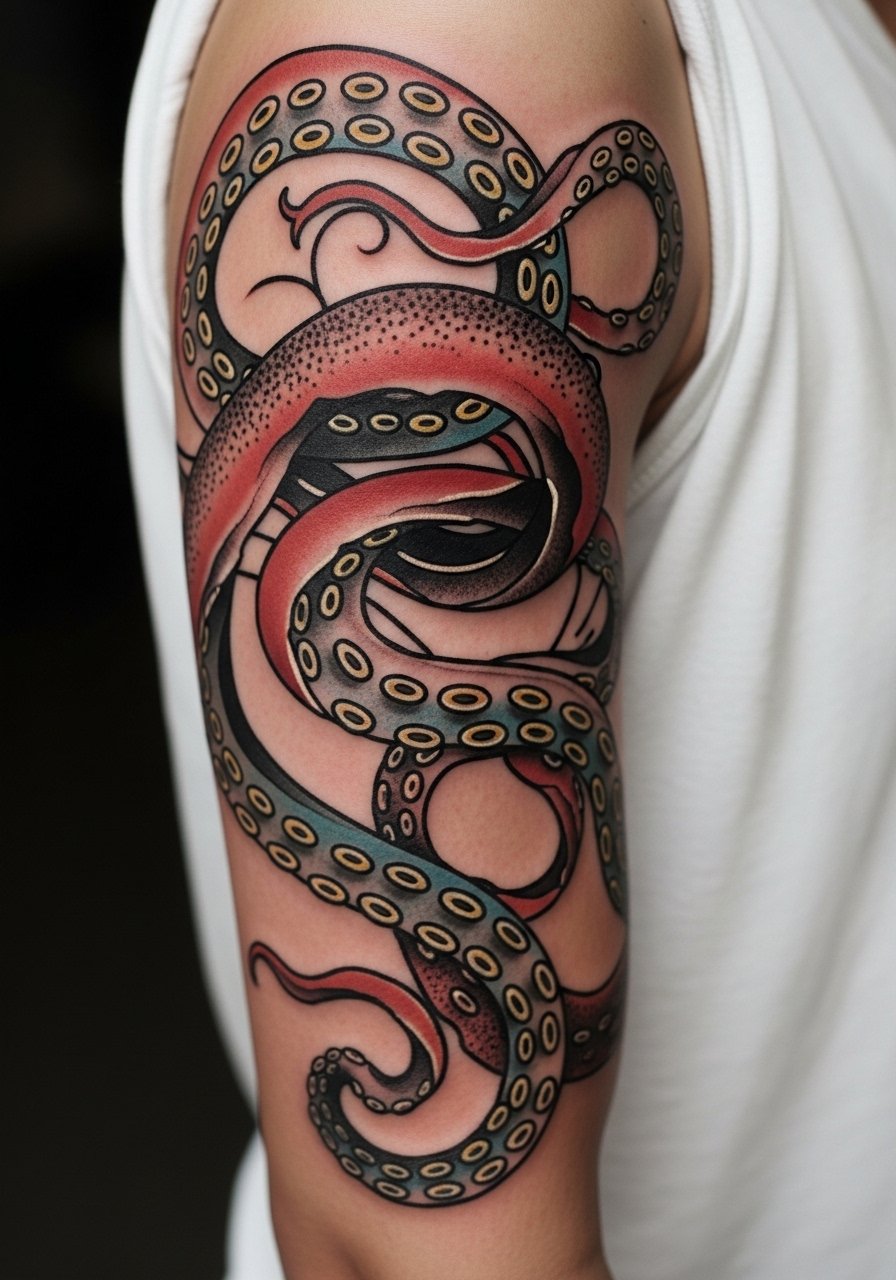
There is something memorable about tentacles that move with muscle. I recommend upper arm placement for wrapping designs because it allows the limbs to follow natural curves without too much distortion. During your consultation, ask the artist to map tentacle flow with a temporary mockup so you can flex and test movement. A mistake I see is starting a wrap too close to the elbow crease where the design will warp when you bend your arm. Expect multi-session work for saturation and dot work details. Touch-ups may be needed in areas that rub against clothing regularly.
6. Minimalist Seashell Outline Behind the Ear
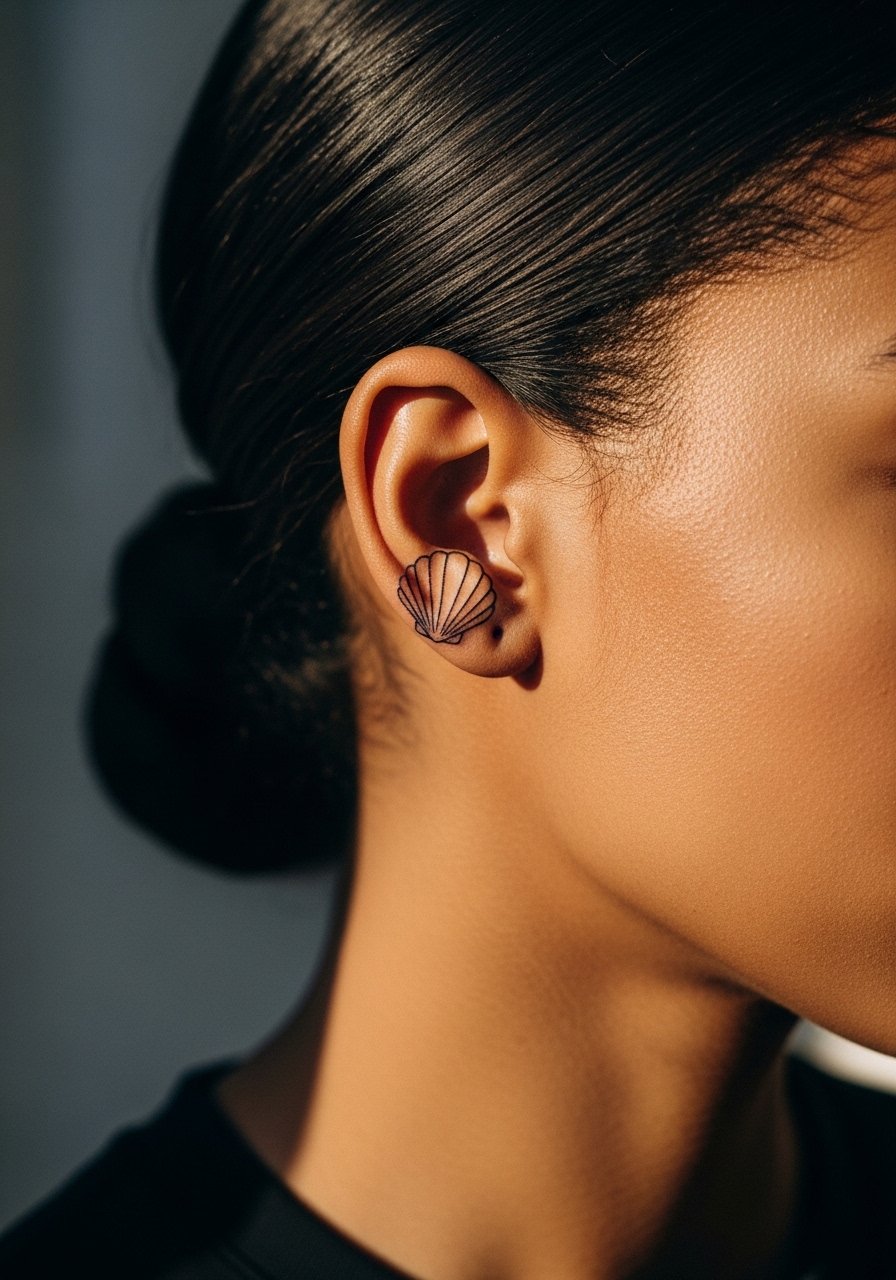
When kept tiny behind the ear, a shell is discreet and low commitment. The key is to avoid forcing too many internal lines into the small space. Tell your artist you want a single-line outline with clean exit points so the shell does not blur into a smudge. One common mistake is picking a highly detailed shell for a 1-inch placement. Pain is low for this spot, but the area receives friction from hair and hats, which affects healing. Typically a one-session piece, expect possible light touch-ups at one to three years.
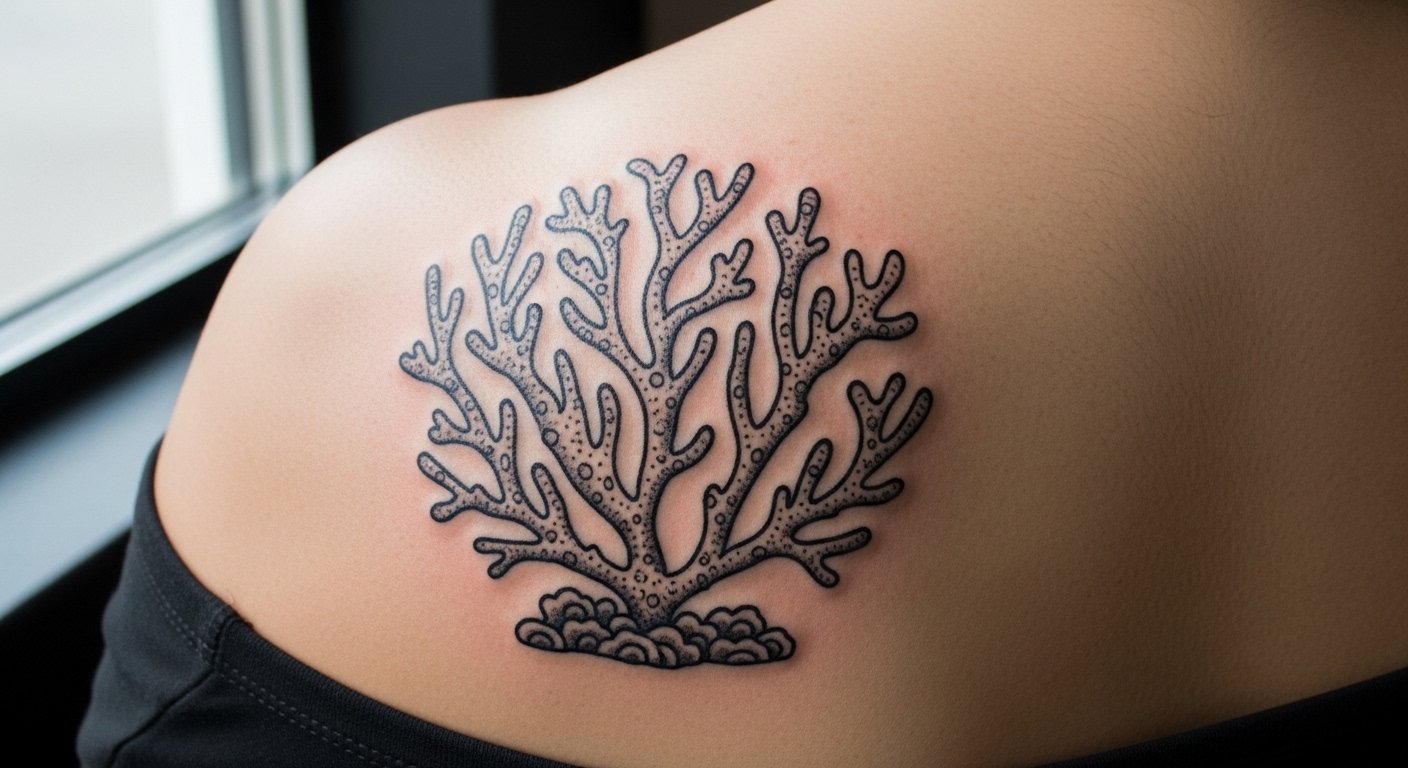
7. Blackwork Coral Reef Scene on Ribcage
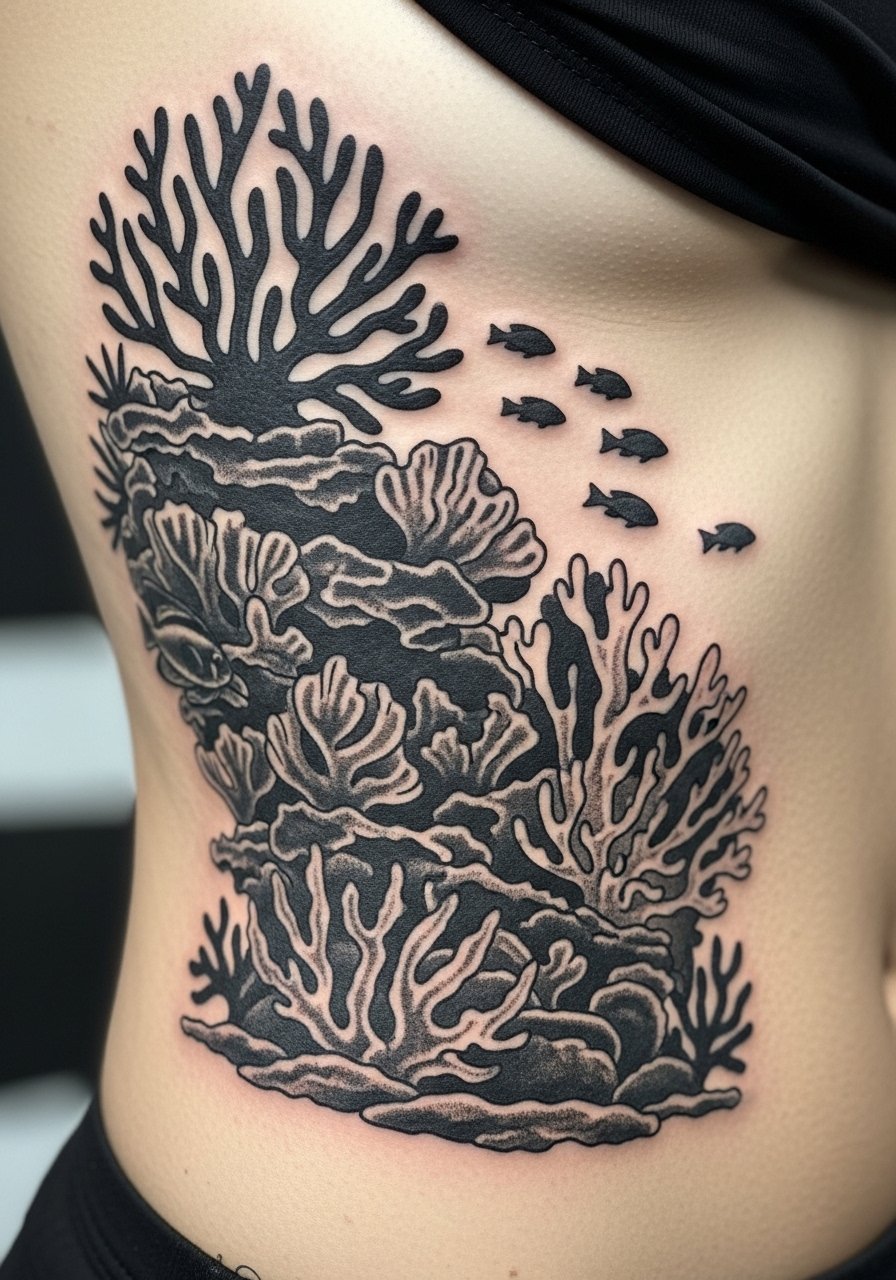
Most people know the ribcage is a higher pain area, but it also accepts bold blackwork beautifully. One benefit of a blackwork reef is contrast across skin tones, especially on darker skin. During your consult, ask the artist to plan negative space and stipple shading rather than tiny cross-hatching to avoid a muddy look. A common error is packing too much small detail into the curve of the ribs. Expect multiple sessions and plan healing days off work. Touch-ups may be needed where movement is constant.
8. Ignorant Style Shark Outline on Outer Forearm
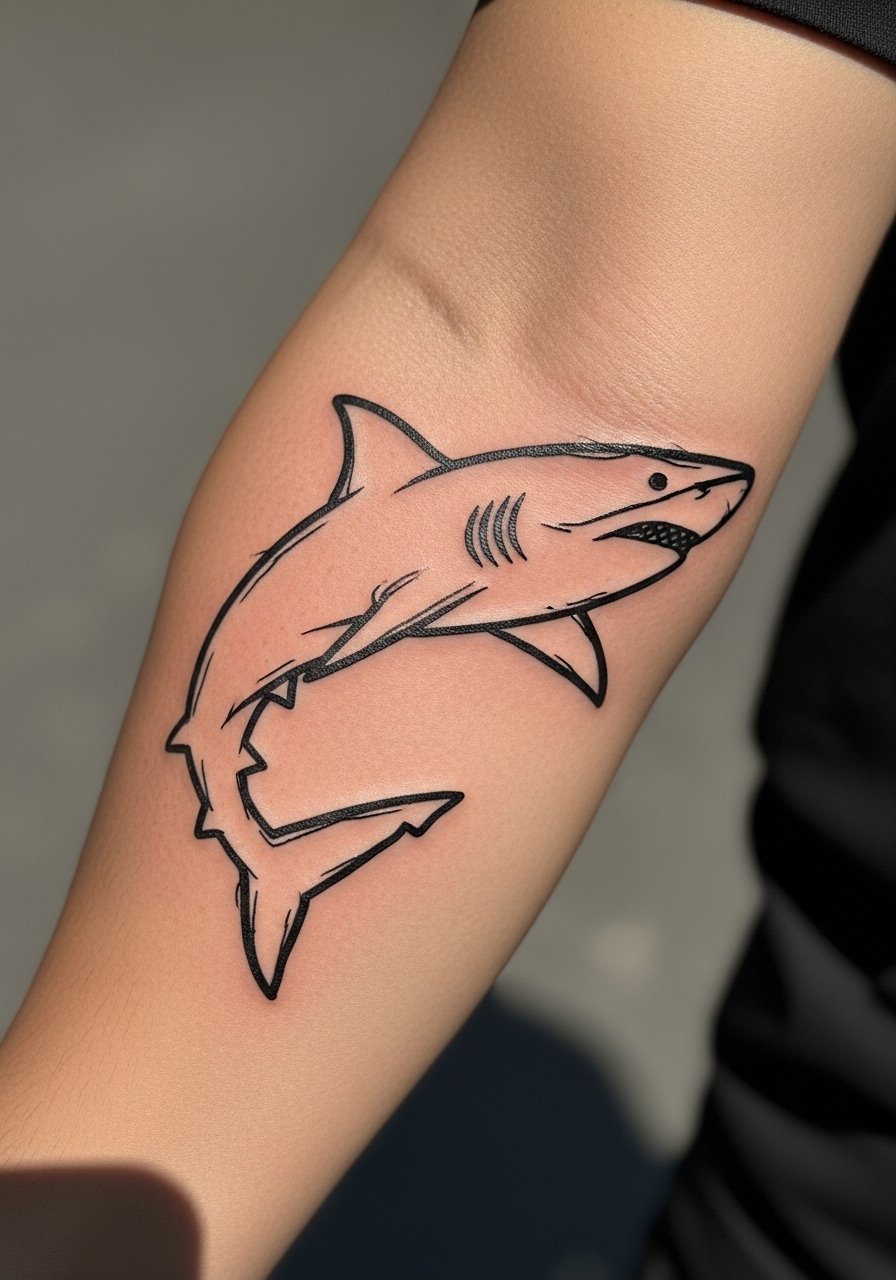
Visual impact leads this section because the ignorant style reads bold without heavy sessions. If you want low-detail predator energy, ask for deliberate imperfections so the shark looks hand-drawn instead of a shaky stencil. A mistake is asking for tiny ignorant lines that lose their character when they shrink. This style holds up well through frequent swims and sun exposure if linework is strong. One session usually does the job and long-term upkeep is minimal. Discuss touch-up expectations for line crispness at year two if you swim a lot.
9. Ornamental Turtle Mandala on Calf
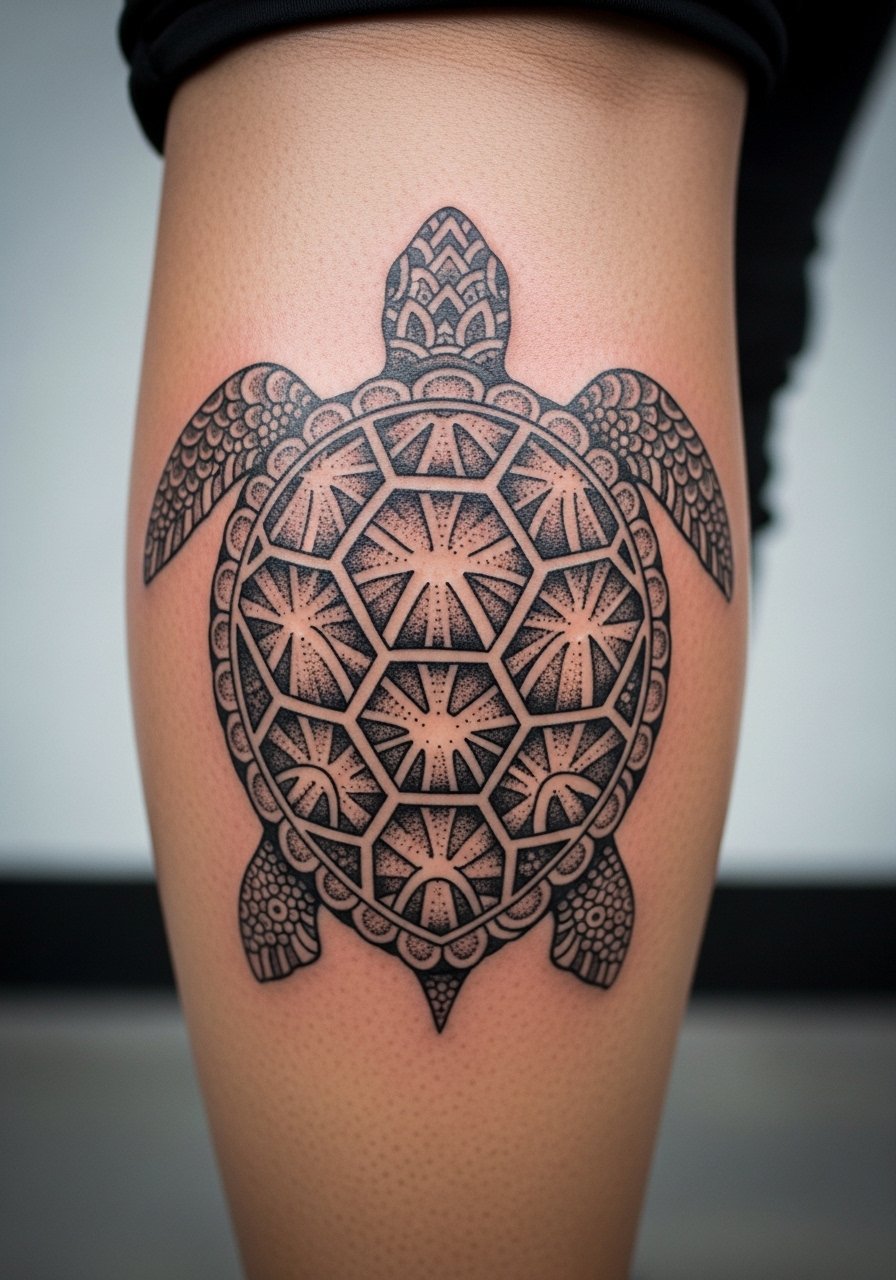
When a turtle doubles as a mandala the symmetry needs room to breathe, which makes the calf a wise placement. Tell your artist you want consistent dot spacing for stipple shading and slightly larger geometric cells so the pattern reads at a distance. A common mistake is shrinking a mandala into a small ankle space where rings and dots merge. Expect two sessions for detailed dot work and touch-ups around year three if lines soften. This design traces ornamental roots, so consider subtle variations rather than direct cultural motifs.
10. Micro-Realism Seahorse Pair on Wrist
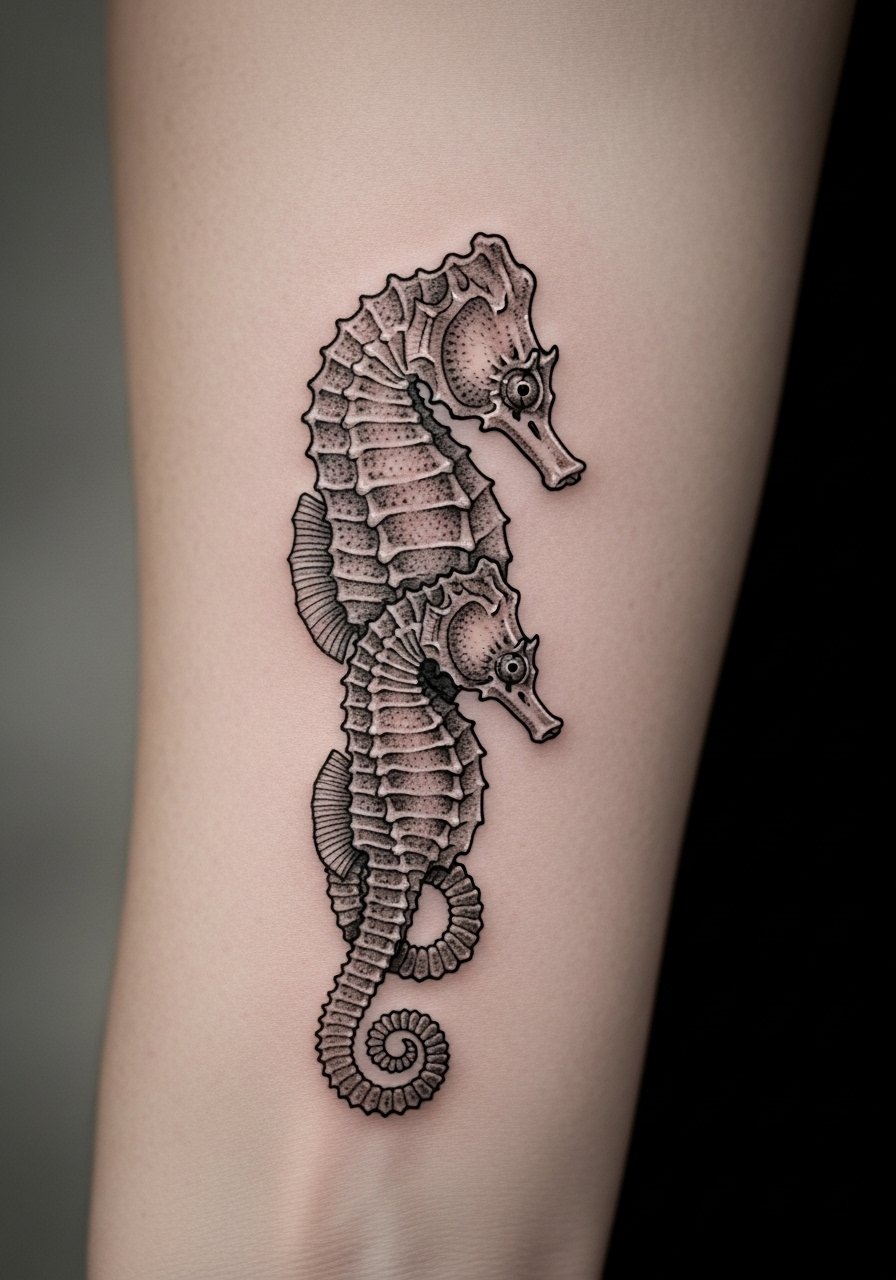
Aging and healing lead here because micro-realism on wrists can look crisp at six months but soften by year two unless contrast is planned. I advise asking for slightly heavier mid-tones to keep texture readable as it settles. The usual mistake is asking for micro-scale ornamentation that cannot be supported by wrist skin. Session time is short but meticulous. For dark skin tones, consider adding subtle blackwork outlines to maintain silhouette. Expect a touch-up within two years if you want the tiny fins and ridges restored.
11. Traditional Kraken Sleeve Starter on Upper Back
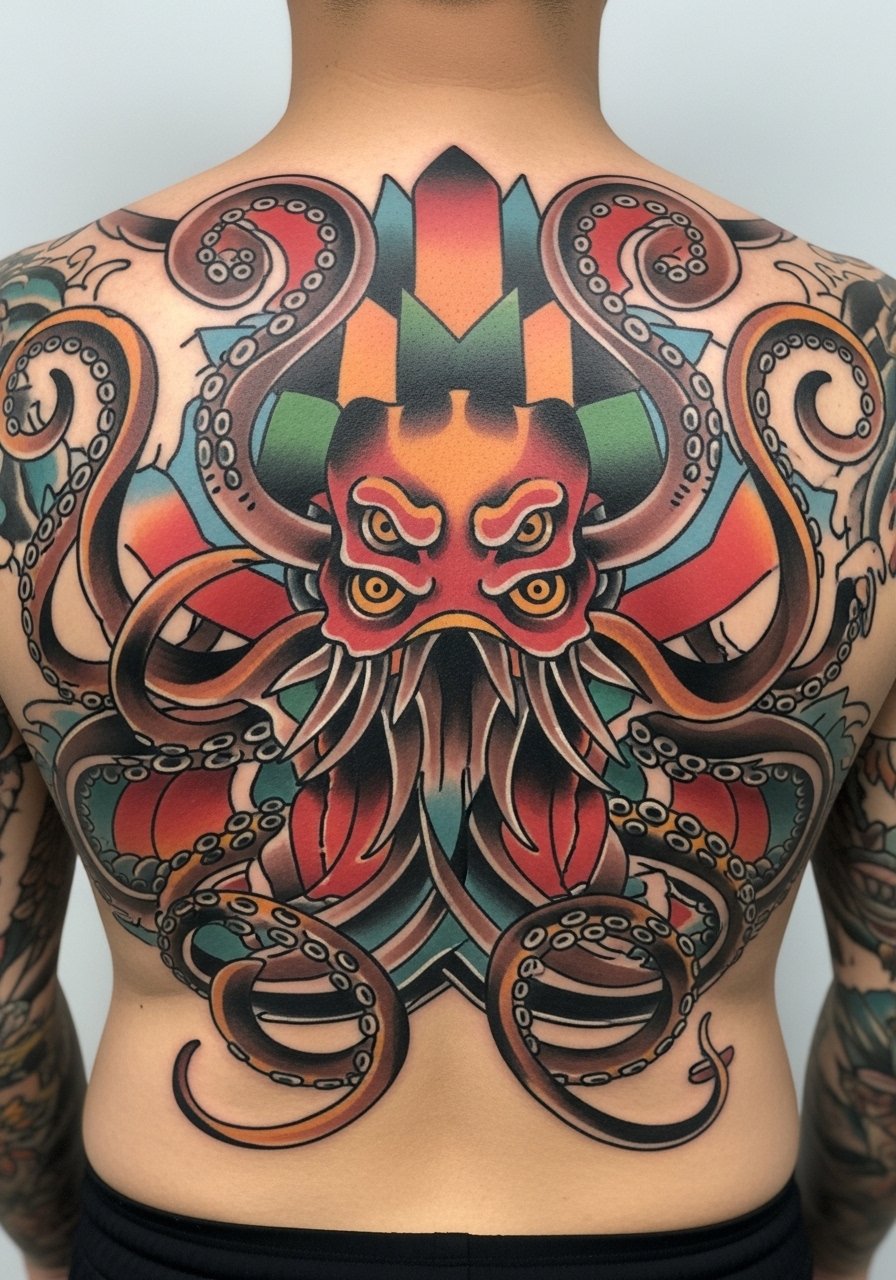
When starting a kraken sleeve, plan it as a build over sessions so the story can expand. Many fans prefer starting with the head or a single tentacle anchor point to allow future additions. Tell your artist you want defined color fields and strong outlines that can be tied into later pieces. A common mistake is trying to cram a full sleeve into one visit which leads to under-saturated color. Expect session-by-session building with comfortable recovery scheduling. This style requires a long-term vision and occasional touch-ups to maintain color density.
12. Fine Line Aquarius Wave Lines on Collarbone
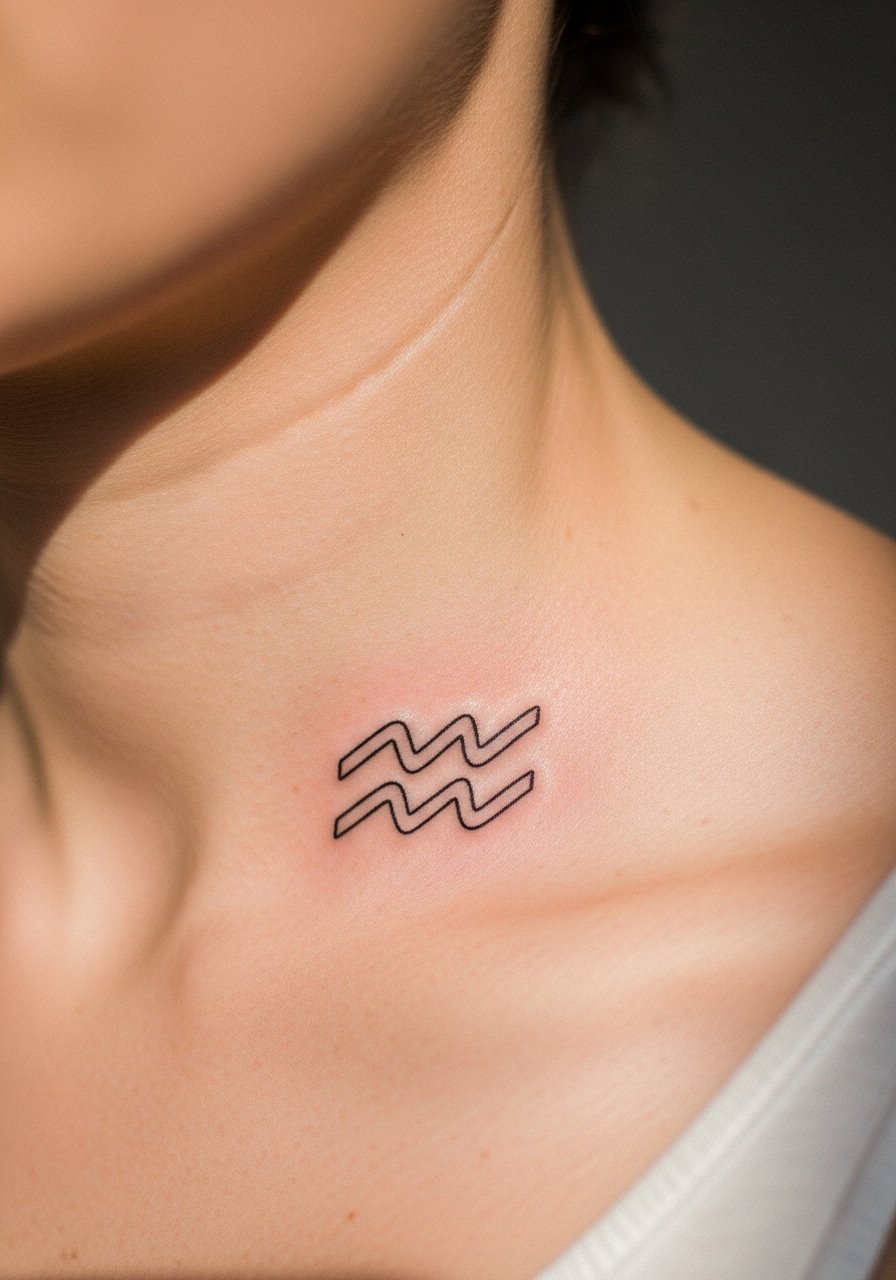
Consultation lead: when you sit down for this minimalist zodiac tie-in, bring reference images showing exact line spacing and wave curvature. Artists differ on fine line longevity on the collarbone. One group says thin lines blur quickly because of the skin stretch there. The other group says with correct depth and spacing it settles well. Ask your artist which approach they use and request slightly larger spacing if you want durability. Expect a single brief session and a likely touch-up by year three.
13. Coral Reef Sleeve Accent on Shoulder and Bicep
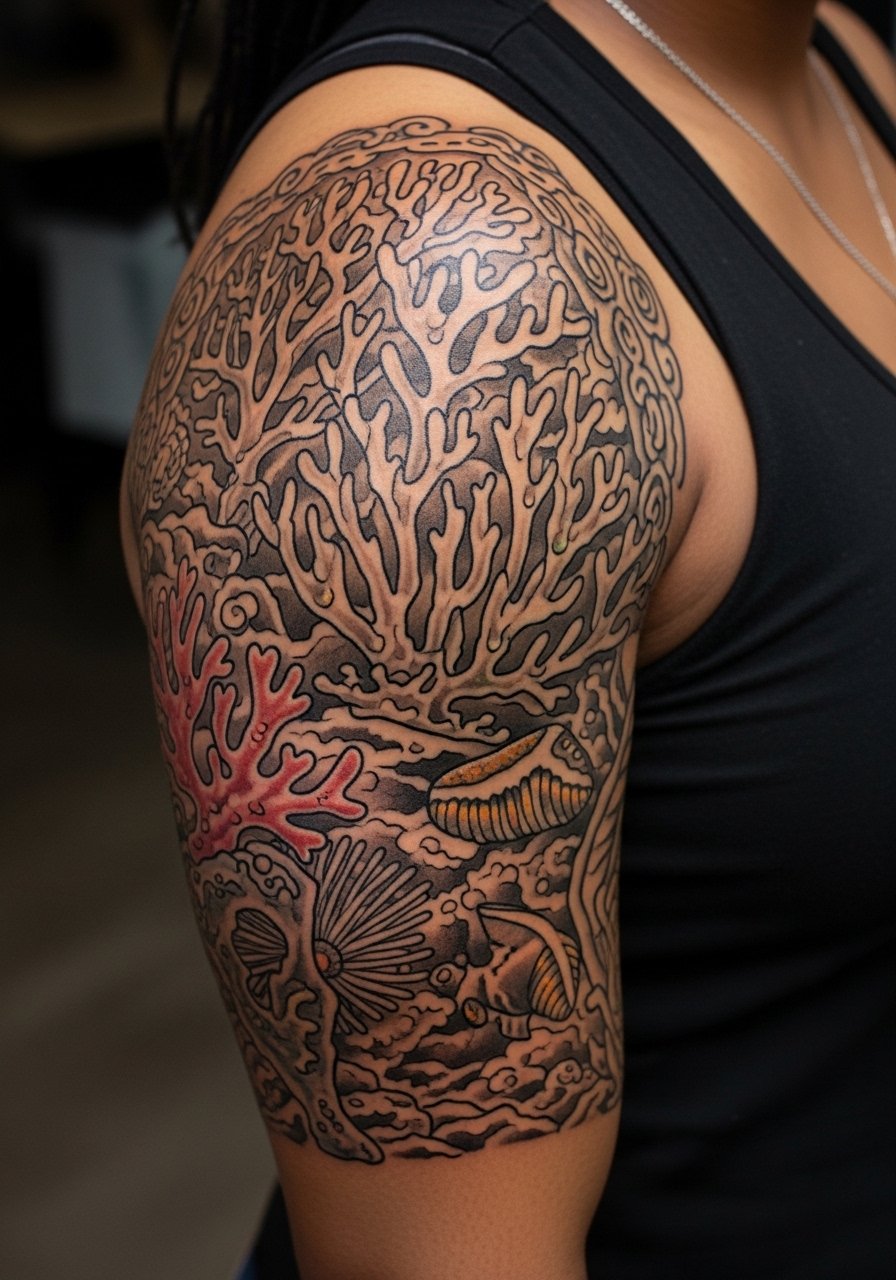
Visual impact and movement make shoulder-to-bicep reef accents a favorite. For skin that tans, blackwork components help maintain silhouette while selective color pops add life. Tell your artist you want coral masses with negative space windows and stipple shading for texture. Common mistakes include over-coloring small coral branches which fade into a single mass over time. Plan for two to three sessions and anticipate touch-ups in high-friction zones like under straps. This placement gives room for future additions like fish or a whale tail.
14. Micro-Realism Pair of Seahorses Behind Ankle
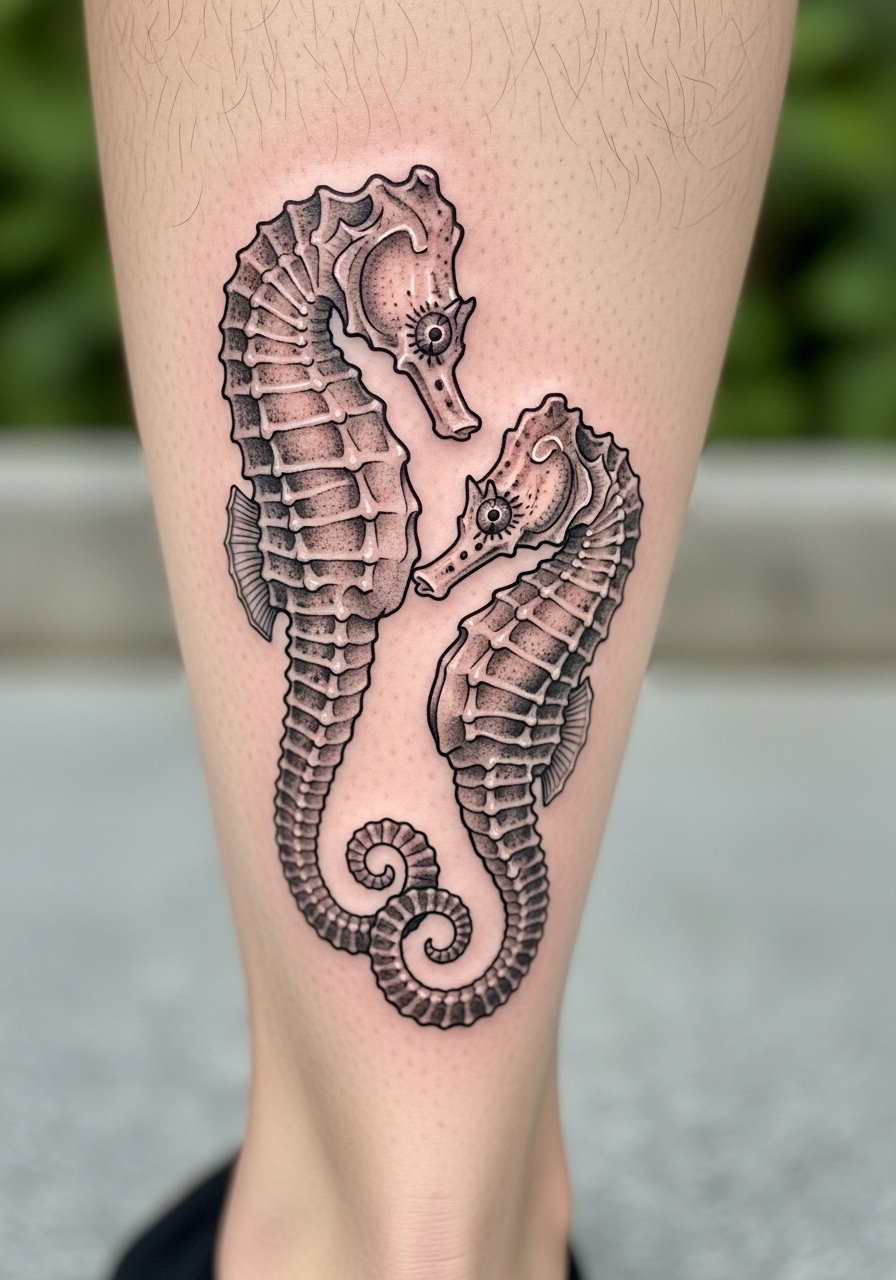
A mistake people make with tiny ankle pieces is forgetting how shoes and socks rub during healing. If you pick behind the ankle, ask for a slightly higher contrast between highlights and shadows so shapes remain distinct after scabbing. The session is usually short and delicate. Expect a possible touch-up in year two to keep fine ridges crisp. For very dark skin tones, discuss adding subtle black outlines or dot work to preserve the seahorses' silhouette. Also consider footwear that minimizes friction for the first two weeks.
15. Ignorant Style Shark Outline on Outer Thigh
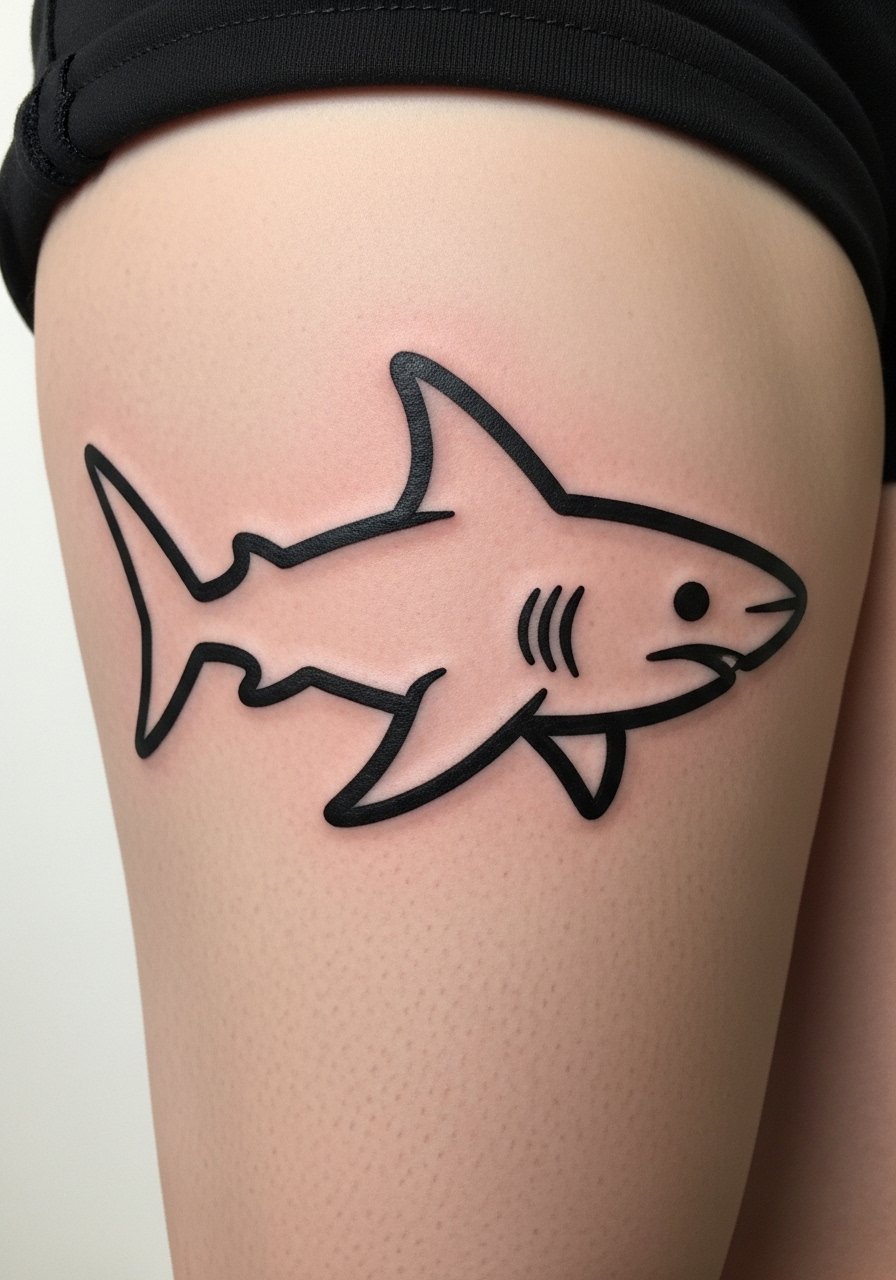
Mistake lead: the biggest error with large ignorant designs is treating them like sketches and keeping linework too close together. On the outer thigh you can afford breathing room so the shark keeps its expressive edge. During the consult, request confident, imperfect strokes instead of tiny hatch marks. Pain is moderate for a thigh piece and sessions are usually quick. This style survives frequent washes and swims if the outlines are dense. Touch-ups are rarely needed, but expect a check-in after a year if you want the lines punched up.
Tattoo Prep and Aftercare Essentials
Start prep a few days before your session by keeping skin hydrated and avoiding heavy sun exposure. From what I have gathered, artists split on Saniderm versus dry healing. One camp recommends occlusives for faster barrier formation. The other prefers dry healing to let the natural scab form. Ask your artist which method they use and follow their timeline.
Shopping list, grouped for clarity:
Lightweight fragrance-free balm for daily healing. Use this after the initial wrap removal for gentle hydration without clogging pores. Works for tender color and blackwork pieces.
Medical-grade second skin bandage, 6-inch roll. Helpful if your artist recommends occlusive coverage for the first 24 to 48 hours and for protection during workouts.
Soft antibacterial foaming soap, fragrance-free. Good for the first week when you need clean but gentle cleansing twice daily.
Lightweight microfiber wrap or loose clothing cover. Wear this during sleep to avoid rubbing fresh tattoos on bedding.
Silicone scar sheet for long-term maintenance. Use months after healing for raised or textured areas to smooth surface irregularities.
Broad-spectrum mineral SPF 50 stick formulated for tattoos. Sunscreen is the single most important product to prevent color fade and patchy loss of saturation.
Gentle physical exfoliant for later maintenance. Use months after healing to remove dull surface cells and restore surface clarity on larger color pieces.
Aquaphor healing ointment tube. This is the one mainstream product I mention. Some people like it for short-term occlusion; others find it heavy. Use only if your artist recommends it.
Every tattoo is different. Always follow your artist's specific aftercare instructions. Consult a dermatologist if you have skin concerns or unusual healing issues.
Frequently Asked Questions
Q: Will fine line ocean tattoos blur into each other if I go for a full sleeve?
A: Fine line in a sleeve is possible but you should expect some softening over time. From what I've seen, spacing lines slightly farther apart and combining fine line with micro-realism or blackwork anchors prevents lines from merging. Ask your artist for mockups in motion so you can see flex points and plan touch-ups around year two or three.
Q: Do watercolor-style wave bands need different aftercare than traditional pieces?
A: Yes, watercolor bands often rely on subtle gradients that can wash out if exposed to sun or harsh exfoliants during healing. Keep them covered from direct sun for several months and use mineral sunscreen once healed. The mineral SPF stick linked above is handy for beach days because it sits on top of the skin.
Q: Why do tentacle wraps distort more on arms than thighs?
A: The arm experiences more flexing and muscle movement which compresses fine detail. Thighs have broader surfaces and less daily flex. For tentacle wraps on arms, request larger segments and clear flow mapping during consultation so the design moves with your anatomy instead of against it.
Q: Is Saniderm better than dry healing for ocean tattoos on the ribcage?
A: Artists are split. One group prefers Saniderm for ribs because it reduces friction and speeds barrier formation. The other group favors dry healing to let the natural scab guide texture. The right choice depends on your healing history, activity level, and the artist's method. Discuss both approaches and follow the artist's aftercare if they plan the touch-up schedule around it.
Q: How often will a neo-traditional octopus need touch-ups if I swim regularly?
A: With regular swimming and sun exposure, color accents tend to need refreshing every two to four years depending on saturation and location. Black outlines usually last longer. I recommend annual checks and a touch-up plan after two years for active swimmers who want to keep color vivid.
Q: Can blackwork coral reefs be adapted for darker skin tones without losing detail?
A: Absolutely. Blackwork is very effective across darker tones because it relies on silhouette and negative space. Ask for strong solid fills, stipple shading, and clear negative windows. Avoid tiny intricate cross-hatching unless the artist has proven experience with deep contrast work on darker skin.
Q: Should I worry about shoes and socks when getting ankle or behind-ankle designs like seahorses?
A: Yes. Friction from footwear can interfere with scab formation and cause ink loss. Wear low-friction footwear and loose socks for the first two weeks. If your job requires closed shoes, discuss alternate placements or minor schedule adjustments with your artist.
