
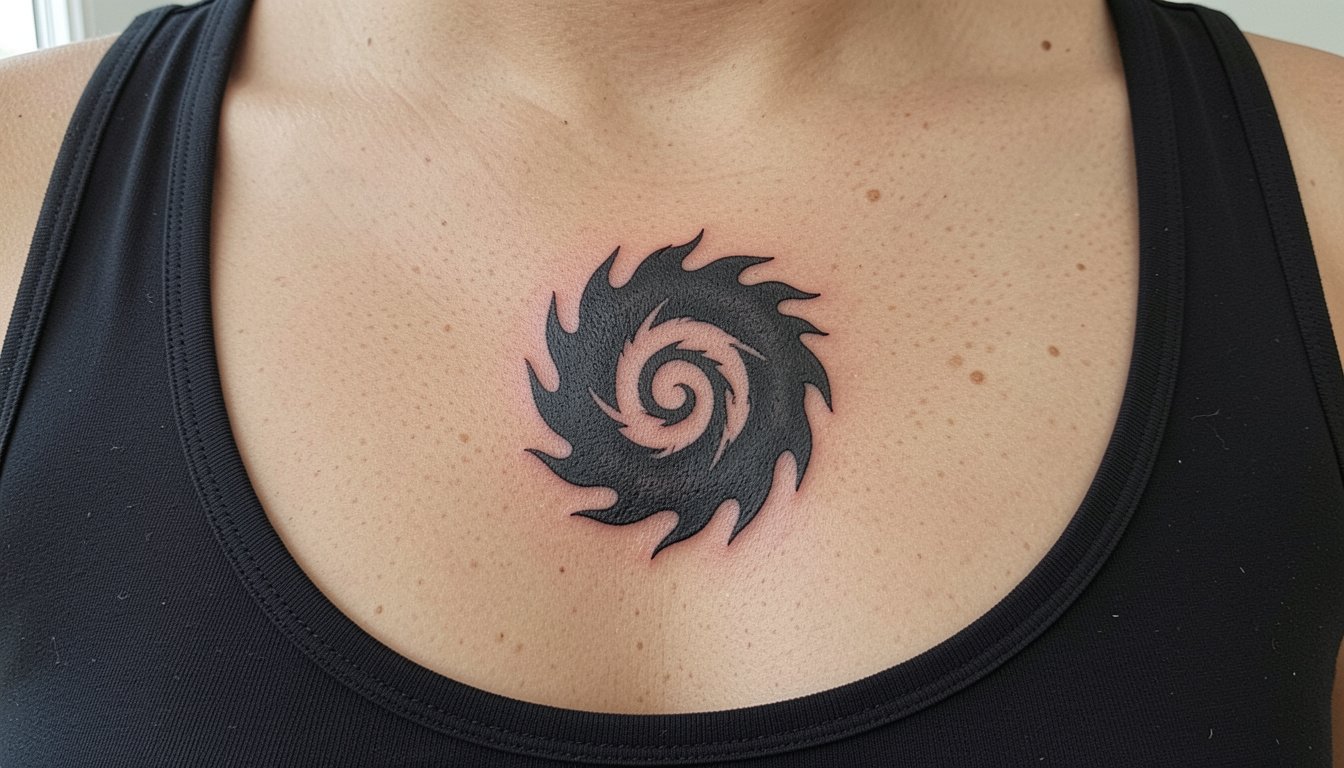
The Naruto curse mark often looks best when treated like a graphic symbol rather than a literal copy. Fans expect razor-thin detail, but skin texture, motion, and time change tiny strokes. These 15 ideas show how to translate that mark into pieces that hold up healed, fit different pain tolerances, and pair with everyday clothes so you know what to pick before you book.
1. Minimal Inner Forearm Curse Mark
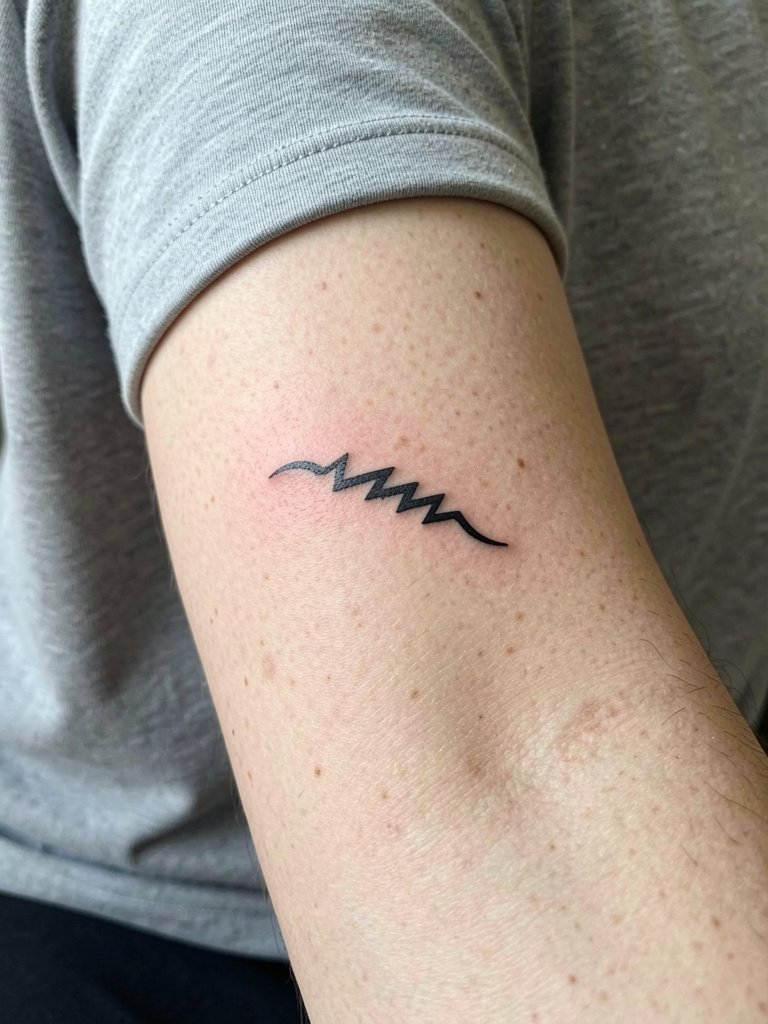
A compact inner forearm version reads well when you want a visible fandom nod without a splashy sleeve. Pain is low to moderate and a session usually runs 30 to 60 minutes. I recommend asking for a slightly heavier single-needle line weight than the reference so the linework holds up at year two. A common mistake is going paper-thin which blurs into the skin texture. At six months the edges will look crisp, at two years expect minor softening, and a targeted touch-up at year three keeps the mark crisp. This spot pairs with rolled sleeves and short-sleeve linen shirts for everyday show-off looks.
2. Bicep Wrap Curse Mark
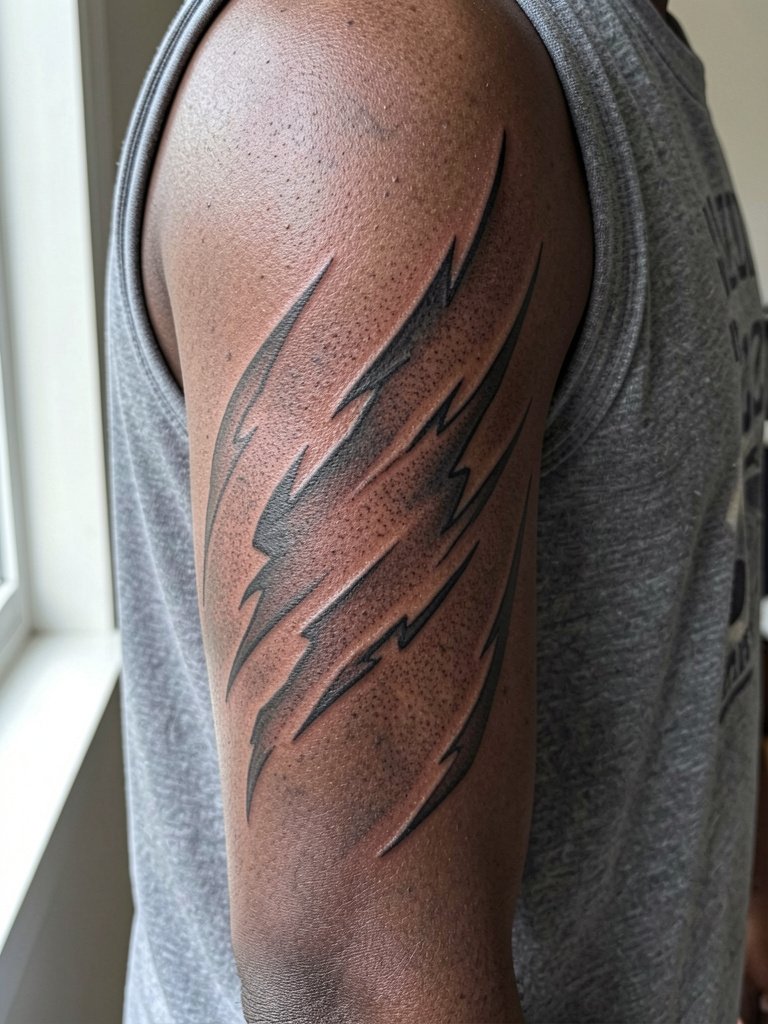
This wrap follows the bicep curve so the mark feels dynamic when the arm moves. Expect moderate pain and a session of 90 to 150 minutes for a clean curve plus shading. Tell the artist to map the wrap so the thickest points sit on muscle peaks rather than in creases. The biggest mistake is trying to force a perfectly symmetrical mark across a round surface. At six months the stipple shading softens, at two years saturation holds if the black is saturated, and a touch-up after a year is common for wrap pieces. Roll-up sleeves and tank tops with broader straps make this placement look intentional.
3. Collarbone Single-Symbol Mark
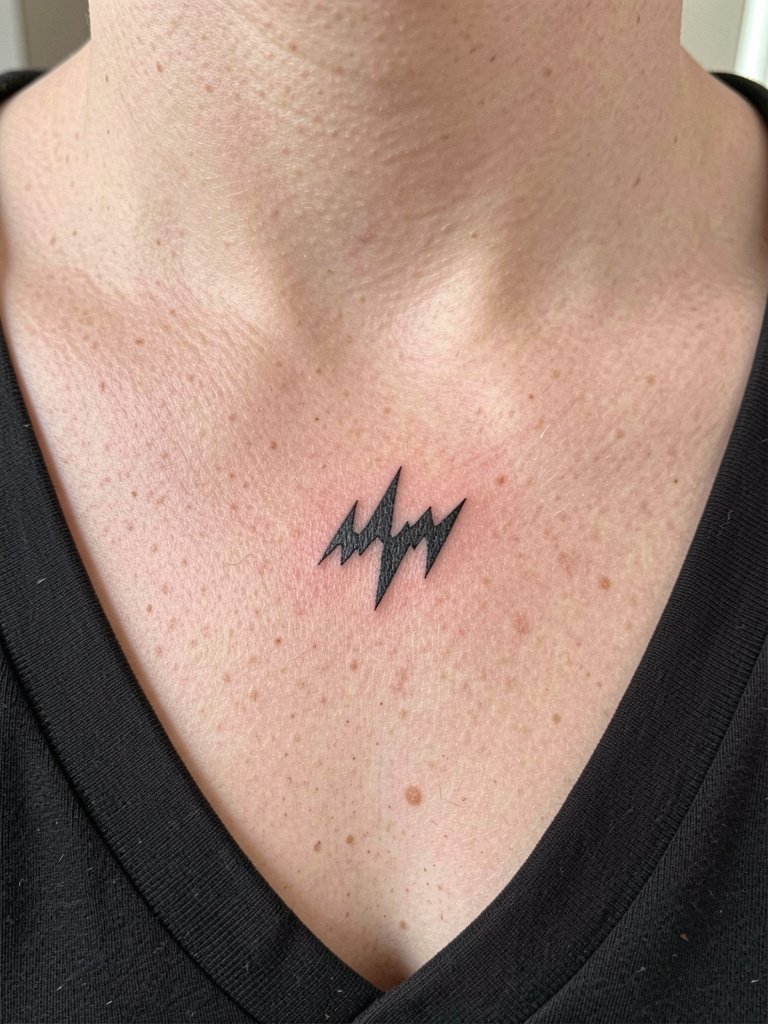
A single mark on the collarbone reads like an emblem rather than a copied image, and it plays well with low-cut or scoop-neck tops. Pain on the collarbone is higher than on the forearm and a session can be 45 to 90 minutes depending on size. Bring reference photos that show exact scale and lineweight so your artist can place the mark above or below the bone to avoid blowout. Tiny placements often lose saturation by year two if the lines are too thin. A safe approach is slightly heavier contour linework and a small fill to lock saturation. Pair this with open-neck blouses to show it off.
4. Shoulder Blade Flowing Curse Mark
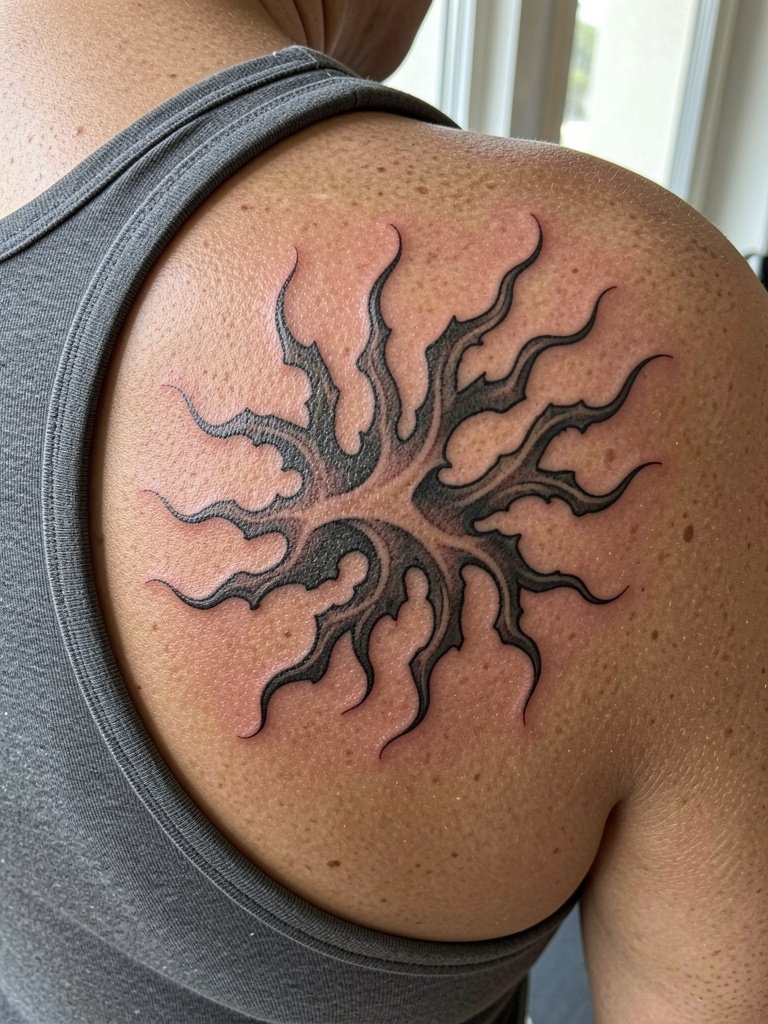
This placement lets a larger version breathe across flat skin so the tendrils read from a distance. Expect moderate pain and a two- to three-hour session for linework and shading. Artists are split on technique for these marks. One camp favors bold blackwork and saturated fills to ensure the symbol remains legible as skin ages. The other camp recommends precise fine line with careful spacing to preserve detail, and they will show you healed photos to support that approach. When you prepare, bring images that show healed back pieces at the size you want so the artist can scale confidently. Wear a scoop-back top for the appointment and a soft sports bra afterward to avoid friction.
5. Tiny Finger Accent Mark
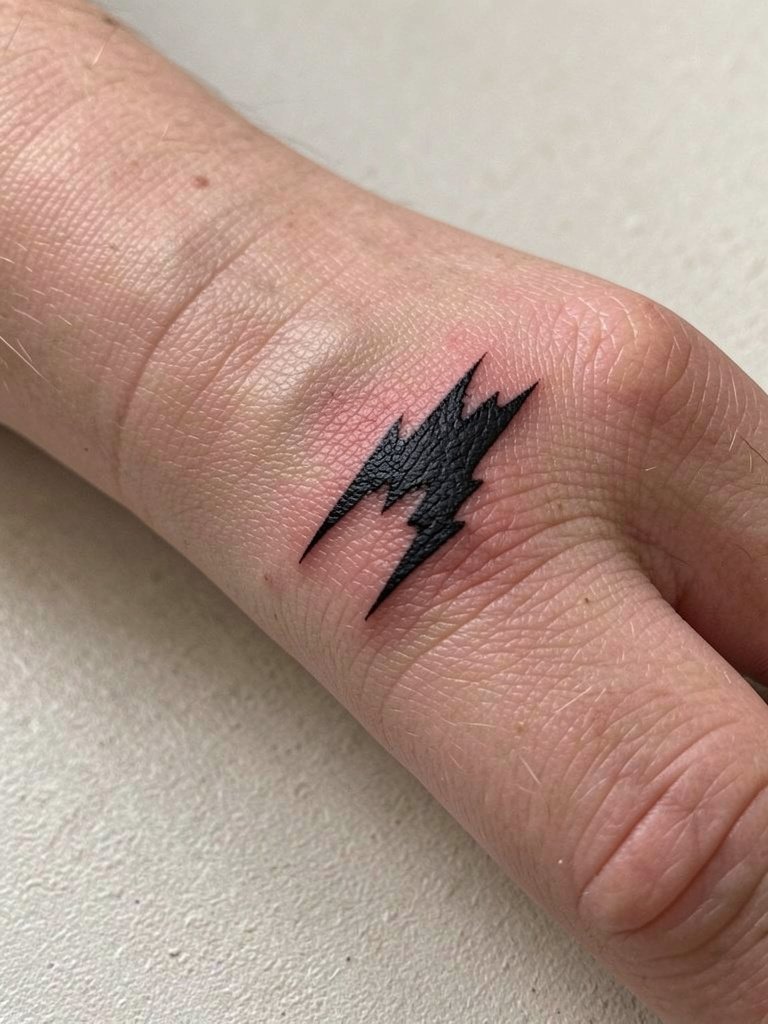
Finger marks read as subtle statements but they carry higher risk of early fading due to constant washing and friction. Pain is sharp but brief and sessions are usually under 30 minutes for a single micro mark. Ask for solid black saturation and expect a follow-up touch-up within six to twelve months. The common error is asking for hairline work that cannot withstand daily hand use. At six months the mark may already fade, and at two years it likely needs a thicker touch-up. If you want to wear rings that frame the mark, choose slim bands that do not sit directly over the tattoo.
6. Side Ribband Flowing Mark
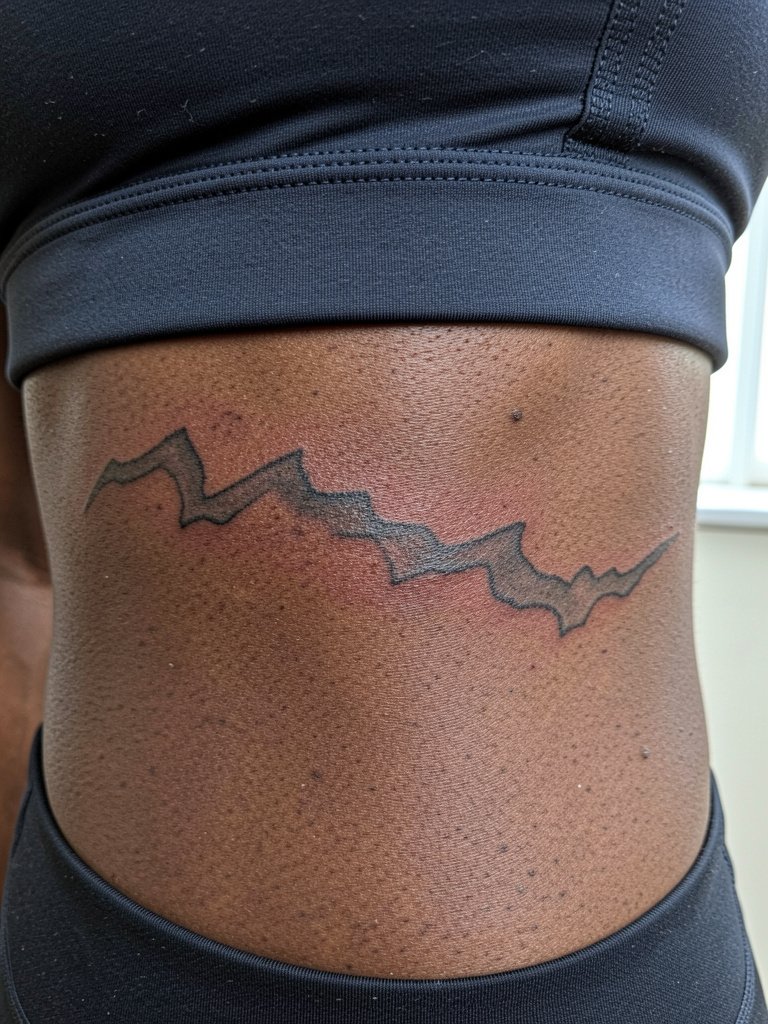
Side rib placements make the mark intimate and dramatic but they also raise the pain dial and session length to two hours or more. For this area, specify slightly wider spacing between decorative tendrils so the skin movement does not fuse nearby lines. The mistake is pushing micro detail into a high-motion zone. Expect sharp sensation during work and a realistic touch-up at 12 to 18 months. For the session wear a cropped top or sports bra so the artist has clear access and you stay comfortable. This placement pairs with high-waisted skirts or drawstring linen pants for evenings when you want to reveal the band.
Session Day Picks
The bicep wraps and rib ribbons above benefit from a few small items that make the chair day and first week easier.
-
Disposable stencil transfer pads. Use these to preview different rotations and sizes so the wrap and collarbone placements land exactly where you want them.
-
Thin medical-grade film roll. Small strips protect delicate forearm and finger work during the first showers without trapping moisture under a bulky bandage.
-
Gentle barrier gloves for aftercare handling. Keep these on hand when changing sterile dressings for the first 48 hours to limit exposure to soap and grime.
-
Portable cooling gel mask. A brief cold pack after a long session soothes shoulder blade and ribcage soreness without numbing the area excessively.
-
Aquaphor Healing Ointment. A thin layer for the first two to three days locks in moisture for micro and bold work without clogging the needle channels.
7. Nape Mark Under the Hairline

The nape hides nicely under hair and reads private unless you wear an updo. Pain is moderate and a session is usually 30 to 60 minutes. Tell the artist whether you plan to keep your hair long or short so they can place the mark where it will be hidden or revealed. One mistake is centering the mark too low where shirts rub the area. Healed results at two years show minimal wear if the area avoids constant sun exposure. If you plan to wear scarves often, mention that during placement so the tattoo sits outside habitual rubbing.
8. Negative-Space Full Back Mark
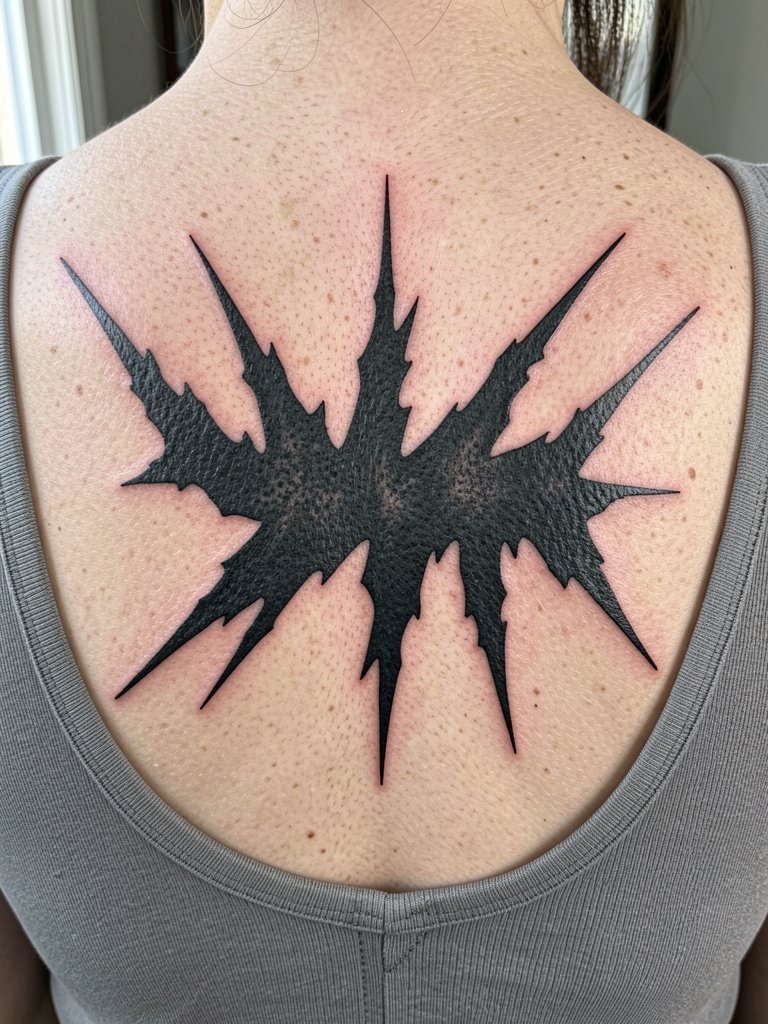
A full back negative-space piece turns the mark into an architectural element that reads from a distance. Expect multi-hour sessions or split appointments and moderate pain. During consultation bring scale references and picture how the negative shapes will age against the skin tone. The common error is underestimating surface area which leads to awkward cropping. At six months the edges will soften slightly, and saturation in the black fields usually stays strong for years. For show-off outfits choose open-back dresses or scoop-back tops to frame the design.
9. Central Sternum Emblem

A sternum emblem is bold and intimate, and it comes with higher pain and longer sessions. One camp sees visible fandom marks as a proud personal statement that belongs on the chest. The other camp worries about visible pop-culture imagery affecting job perceptions and advises careful placement or concealment. If you choose this area, discuss how the emblem sits relative to the breast crease so you avoid distortion. Healing here benefits from a soft, supportive bra and minimal friction for the first two weeks.
10. Calf Vertical Mark
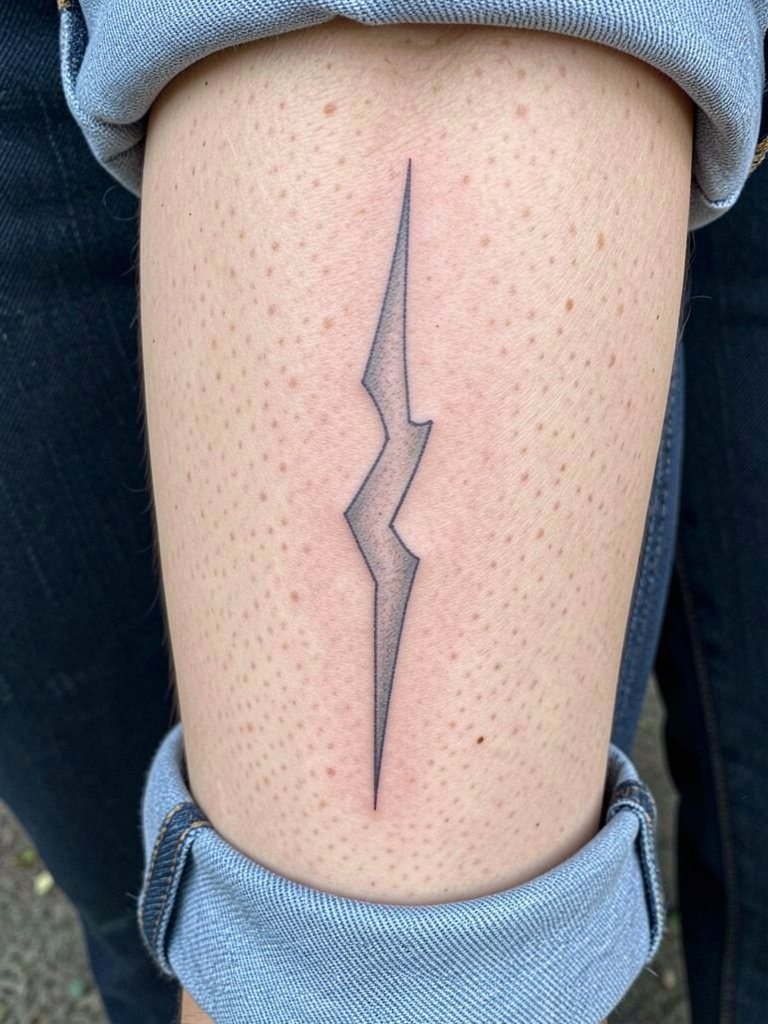
A vertical calf piece stretches the mark along a long canvas so it reads well in motion. Pain is moderate and sessions are usually 60 to 120 minutes. Specify how far the mark should sit from the knee to avoid distortion when you bend. People often pick designs that sit too low and get hidden by socks. At six months the tapering should remain visible, and most calf pieces settle cleanly by two years with minimal touch-ups. For outings roll your jeans or choose cropped trousers and drawstring linen shorts to show the work.
11. Thigh Hidden Panel Mark

The inner thigh lets you hide the mark unless you choose to reveal it. Pain can be higher near the groin and sessions last 60 to 150 minutes. Be explicit about how close you want the mark to the underwear line and have the artist draw the stencil while you are seated so placement is accurate. Common mistakes include underestimating friction from thighs which can rub new ink during the first week. For session comfort wear loose shorts or bike shorts so the artist can access the area without you feeling exposed.
12. Outer Hand Accent Mark
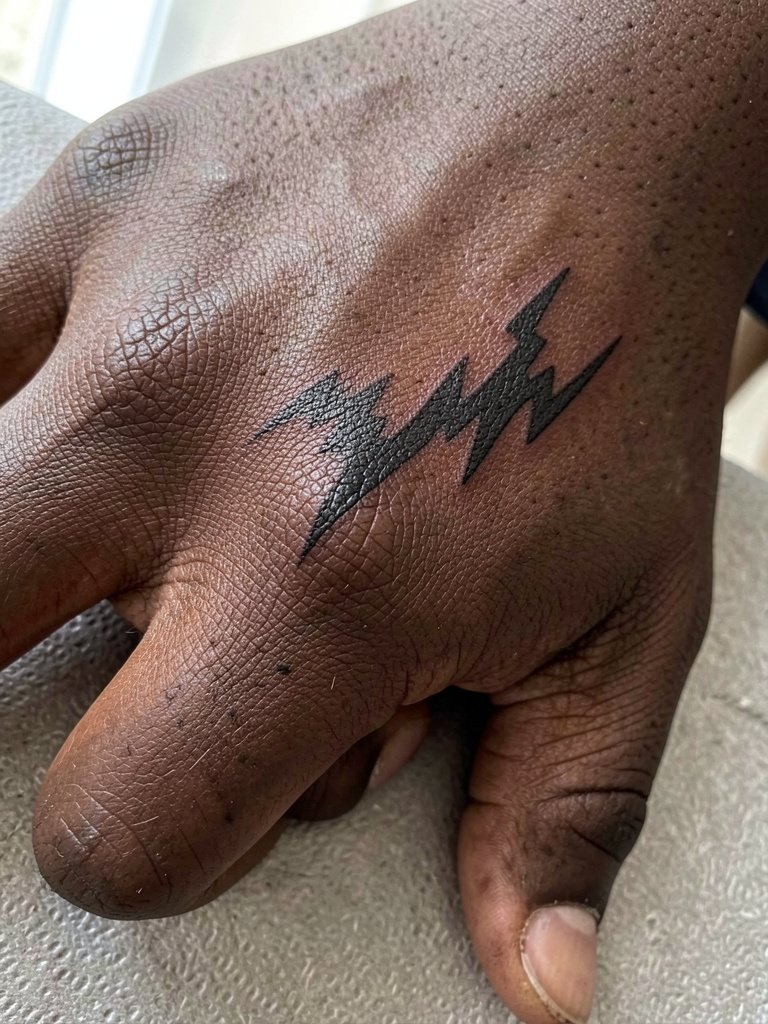
Hand placements are high visibility and they fade faster from wear. Pain is sharp and sessions are quick, usually 20 to 40 minutes for a single small mark. One camp argues hands are powerful places to show fandom with confidence. The other camp warns that visible hand tattoos can affect some job opportunities and suggests considering long-term visibility. If you still choose the hand, ask for thicker contouring and expect a touch-up within six to twelve months. Style this with rings that avoid sitting directly on the mark, and try pairing with a minimal leather bracelet to frame the piece.
13. Sleeve-Integrated Curse Mark with Florals
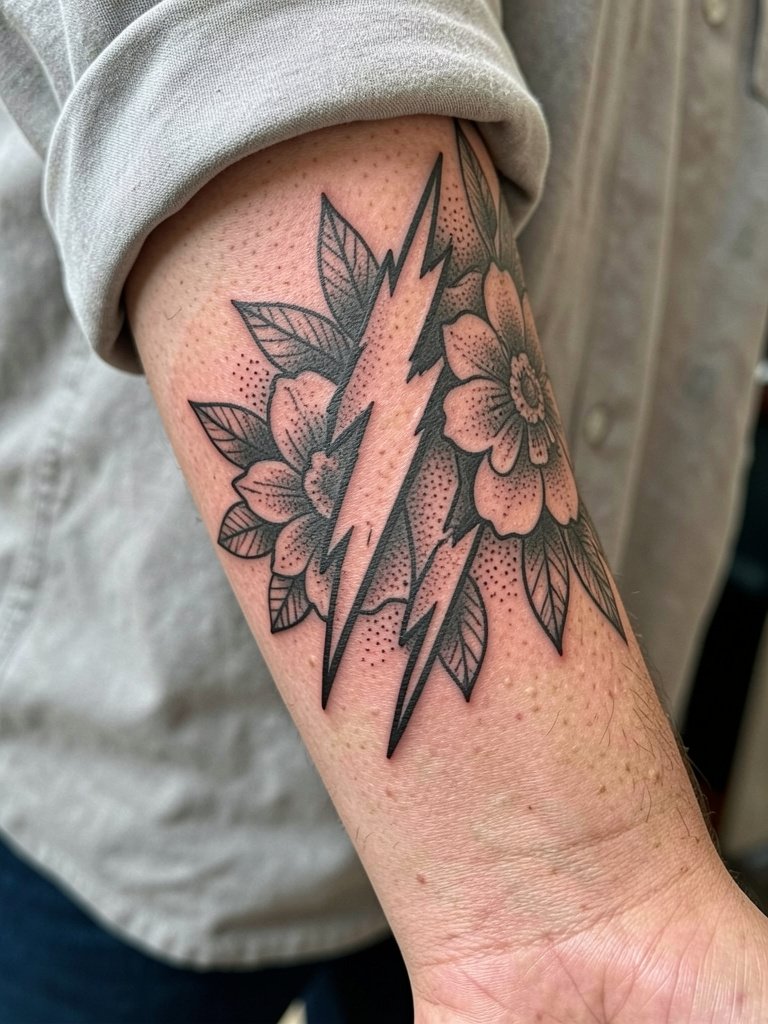
Weaving the mark into a sleeve lets you control scale and context so the symbol becomes part of a broader story. Sessions vary widely and you should plan multiple appointments for saturation and cohesion. Bring reference art that shows how negative space around the mark reads when the arm is in different positions. A common oversight is domain creep where extra elements outcompete the original mark. Forearm sleeves heal predictably but expect a touch-up for densely shaded fields after a year. For outfits, roll sleeves or choose three-quarter linen shirts that expose the integrated area.
14. Ankle Wrap Micro Mark
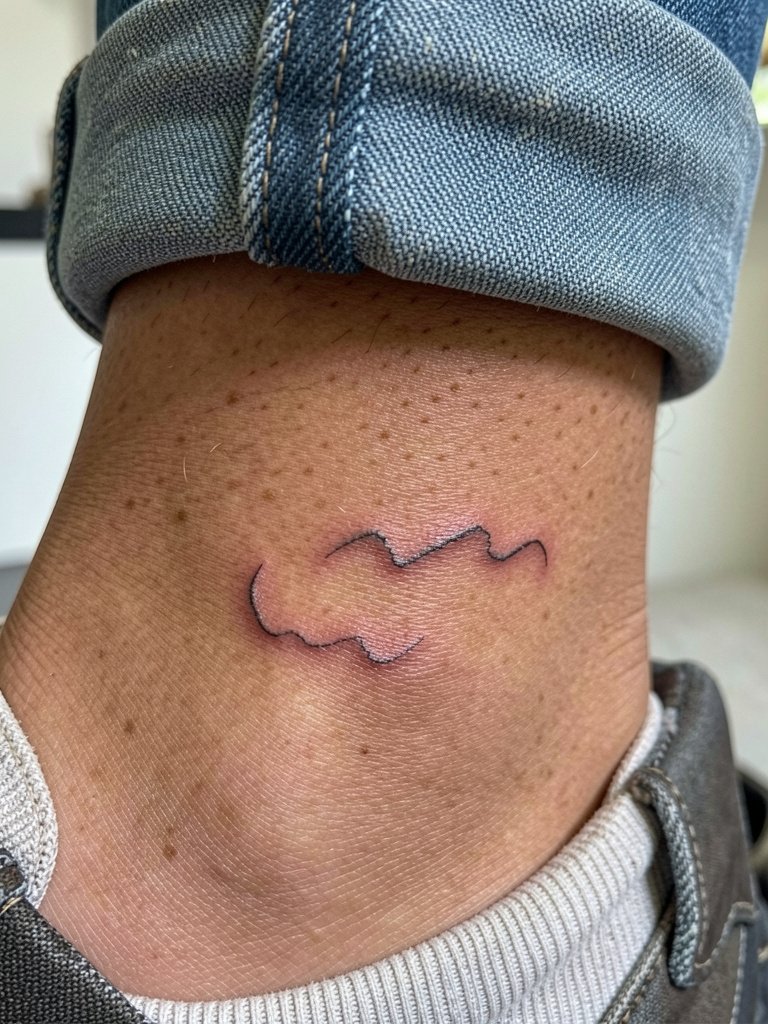
An ankle micro mark is discreet yet easy to show. Pain is moderate and session times are short. The ankle takes more impact from footwear and socks so request a slightly bolder outline than your saved image. A frequent mistake is picking filigree that the ankle does not support over the long term. After six months expect modest softening, and plan for a minor touch-up around the one-year mark for micro work. Pair with low-profile sneakers or ankle-strap sandals when you want to reveal it.
15. Behind-the-Ear Tiny Mark
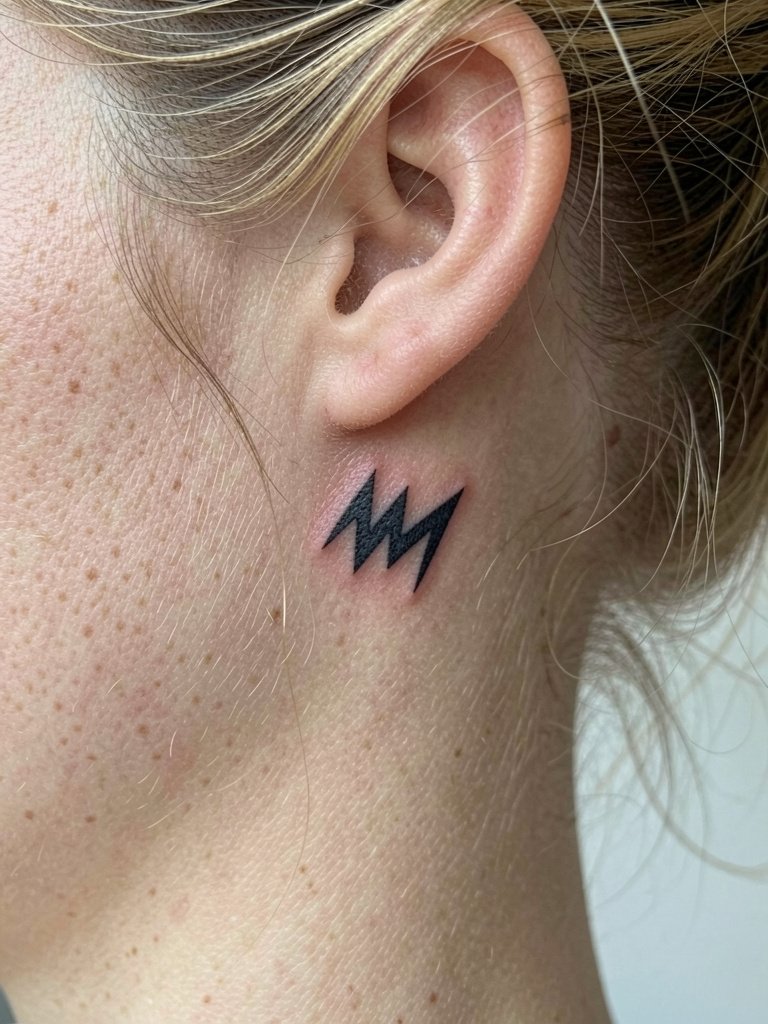
Behind-the-ear marks are tiny and discreet, with low session time and quick healing for most people. This spot requires an artist experienced with small placements near hairlines and ears, so pick someone comfortable with tight contours. A common error is pushing too much micro detail into this area which leads to blurring. At six months the dot will look like a clear glyph if shaded properly, and by two years it will likely need a small refresh. If you wear short hair or frequent updos, consider how often the mark will be exposed and plan placement accordingly.
Frequently Asked Questions
Q: How do I choose between fine line and bold blackwork for a curse mark?
A: My practical take is size and placement guide the choice. Small placements like fingers or behind the ear usually need bolder line weight than a photo reference shows or they blur. For larger canvases like the back or shoulder blade you can keep more detail and use a mix of bold contours with delicate internal shading.
Q: Will a curse mark tattoo look "anime" or childish over time?
A: That depends on the design language and styling. If you treat the mark as a graphic symbol with age-proof linework and saturation it reads as a personal emblem rather than a cartoon. If you want a subtler fandom reference, choose abstracted shapes and avoid literal character elements.
Q: Where can I find healed examples and collections without naming individual artists?
A: Try searching platform tags like #NarutoCurseMarkTattoo, #AnimeInkHealed, and #SymbolBlackwork on image-focused social apps. Use location filters on short-video and image platforms to see nearby healed shots. Reddit tattoo threads and community galleries are also good for comparing how marks age on different skin tones.
Q: How long should I plan between sessions for a large back or sleeve piece?
A: Plan for multiple sessions spaced at least four to six weeks apart so the skin fully heals and the artist can assess saturation. Larger fields usually settle after two to three appointments, and a follow-up touch-up nine to twelve months later is common to correct any soft spots.
Q: Any tips for the appointment day clothing and comfort?
A: Wear loose, easy-to-remove layers that give the artist full access to the placement. For shoulder, back, and chest pieces try a button-front shirt or a scoop-back top so you do not need to tug at fabric. If you want a small accessory for the session, a soft zip-up hoodie helps keep the area covered afterward without rubbing.
