
Minimalist Sagittarius ink is less about filling a sleeve and more about making a tiny mark read clearly for years. Trends push single-needle glyphs and micro arrows, but those choices need spacing and the right placement to age well. Read on for carefully chosen small Sagittarius designs, how they heal over time, and which options photograph best on different skin tones.
1. Minimal Sagittarius Glyph with Negative Space
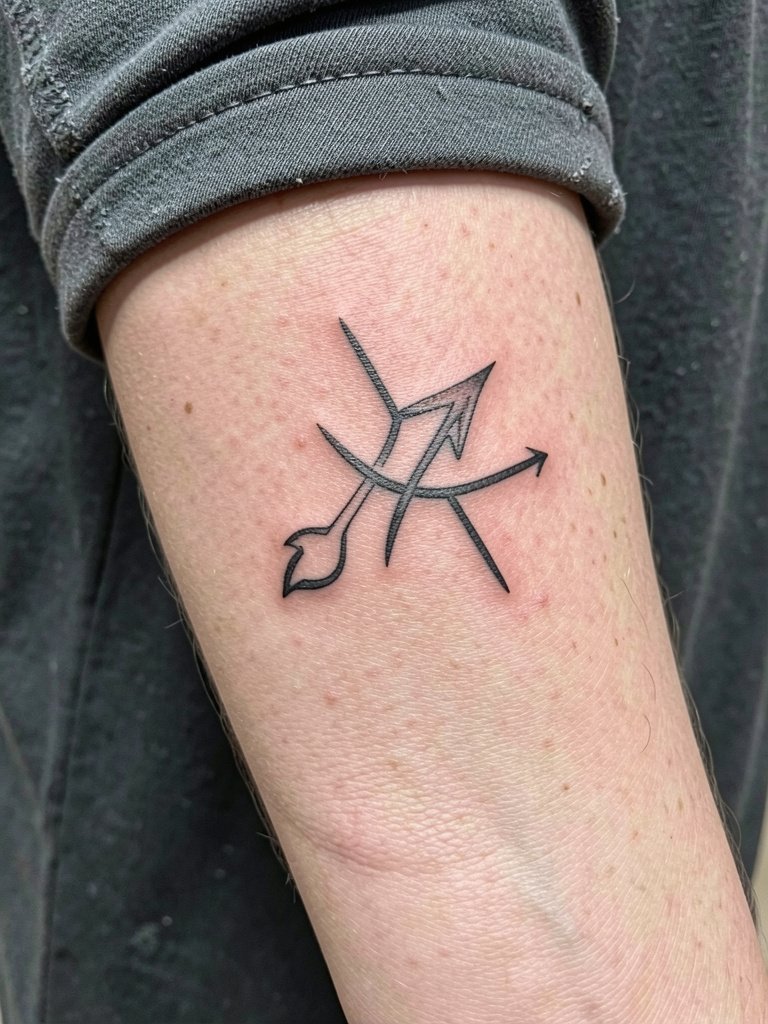
A tiny glyph on the inner wrist reads instantly as Sagittarius when the linework has clean spacing and a bit more presence than the thinnest single-needle pieces. Expect a short session under 30 minutes and mild wrist sensitivity while the artist works over the tendon areas. Healed at six months the glyph should look sharp if linework was slightly bolder, but ultra-thin glyphs often soften by year two and need a touch-up. Bring two reference photos at different scales so you can compare how the negative space behaves at one inch versus two inches. For showing it off pair the wrist with a thin chain bracelet on the opposite wrist to avoid friction during healing.
2. Tiny Arrow Alone on the Outer Forearm
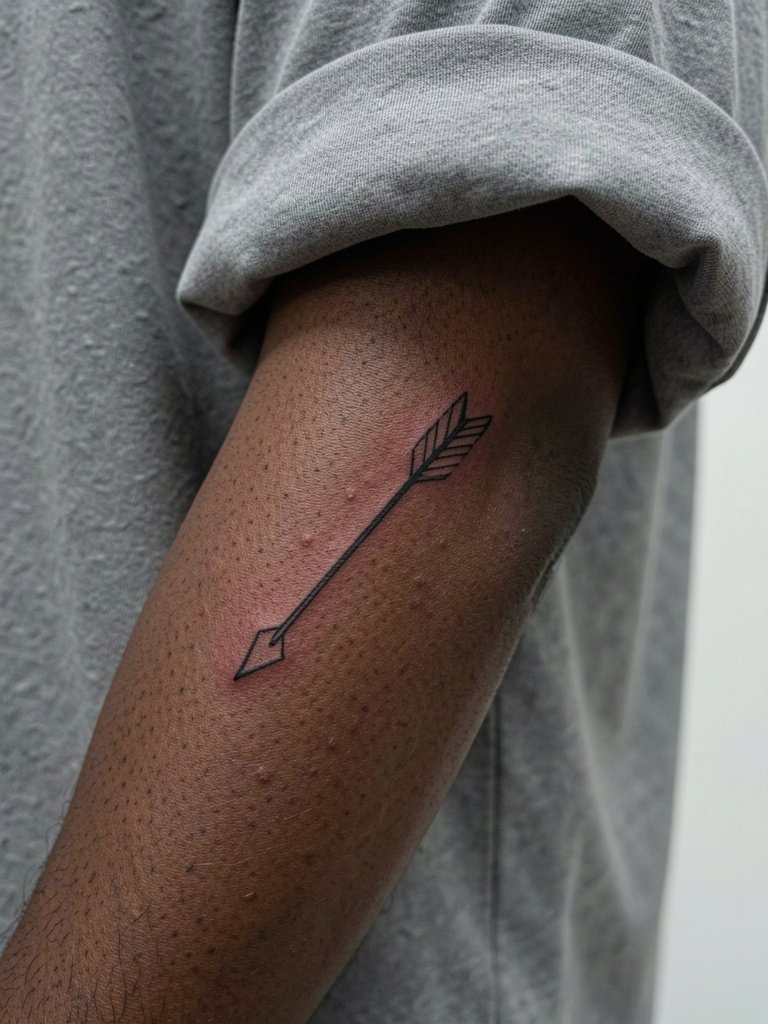
The lone arrow is the easiest Sagittarius shorthand to scale up or down without adding clutter. Outer forearm placement gives the arrow room so the shaft does not merge with nearby contours. Pain is low to moderate and session time is usually under 40 minutes. A common mistake is asking for hairline thinness and then being surprised by early softening. Specify that the line should be a hair heavier than the thinnest reference to preserve crispness at two to five years. Styling tip, this reads well with oversized tees with rolled sleeves so the arrow sits in view when you want it visible.
3. Sagittarius Constellation in Dot Work
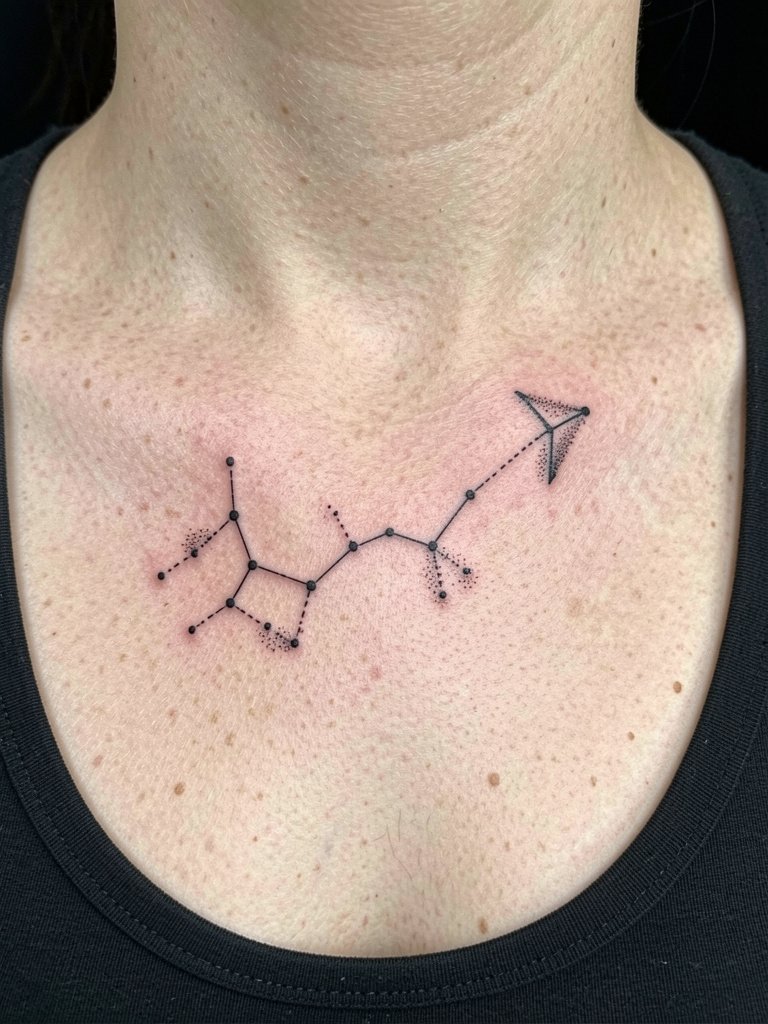
Constellation work reads well as tiny dots and short connectors on the collarbone where the surface is relatively flat and visible. Expect light to moderate pain on the collarbone and a single 45 to 60 minute session for a compact cluster. Dotwork can show softening if the dots are placed too close, so request slightly wider spacing between points and ask to see healed dotwork photos from the artist. Over time the connectors can blur if the cluster is under two inches, so aim for a one-and-a-half to two-inch spread for longevity. For wardrobe, this spot pairs with an off shoulder top to frame the constellation without rubbing the ink during the first week.
4. Fine Line Bow and Arrow Outline on the Inner Forearm
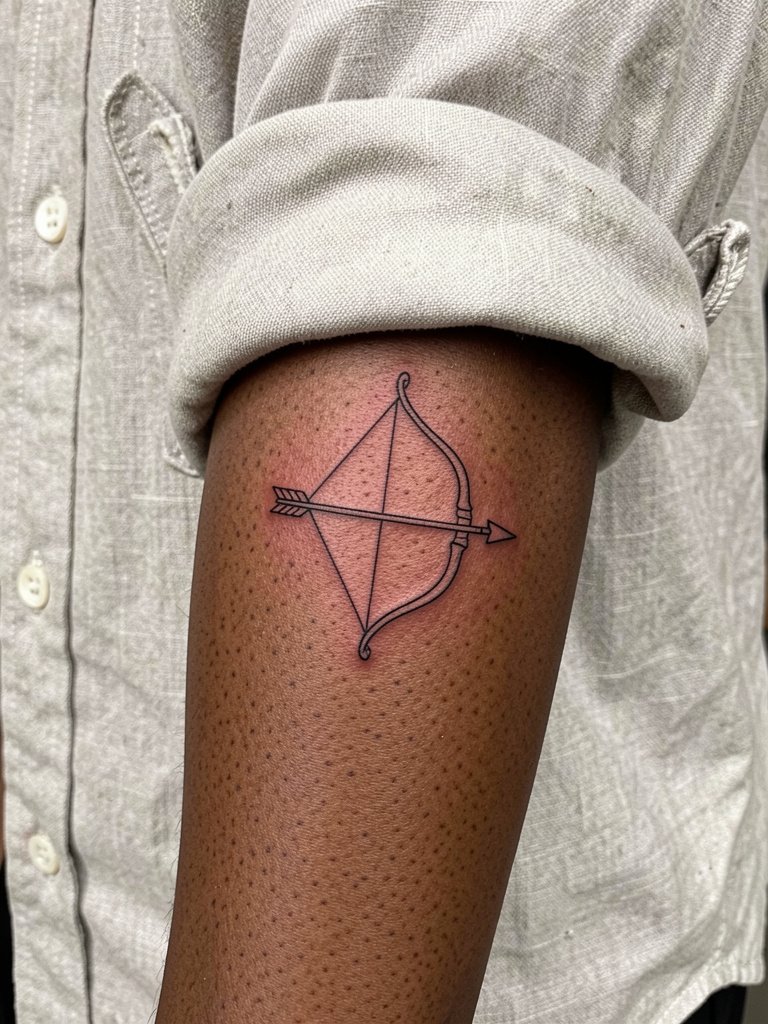
A bow outline on the inner forearm reads elegantly because the long vertical surface keeps the composition from compressing. Pain is moderate as the area wraps the flexor muscles. The session usually takes 40 to 75 minutes depending on line complexity. Many people request filigree on the bow and then find it loses definition as the piece heals. To avoid that, choose clean contours and ask for a tiny increase in line weight where the curves are tight. This placement looks great with rolled linen shirts when you want to show the piece, and for the appointment wear a linen button down shirt you can roll without tugging.
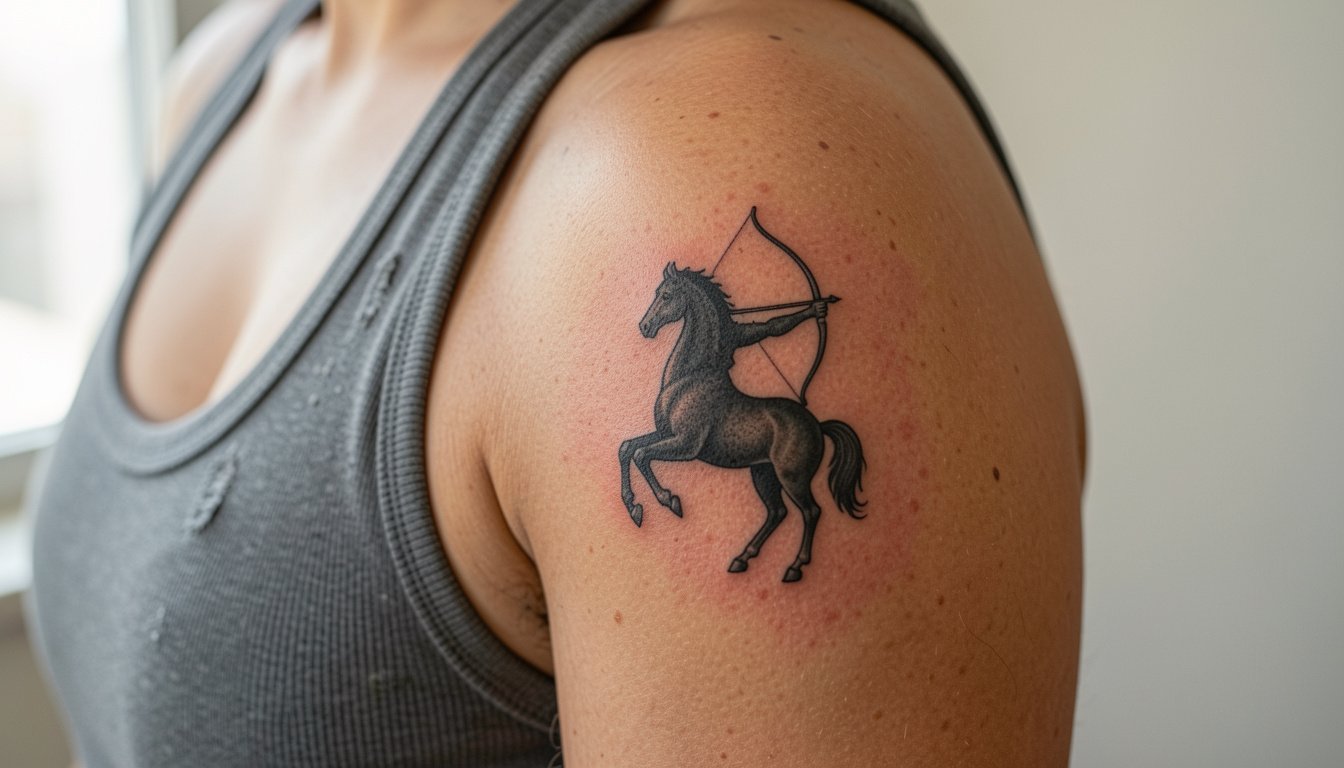
5. Tiny Centaur Archer Silhouette on the Upper Arm
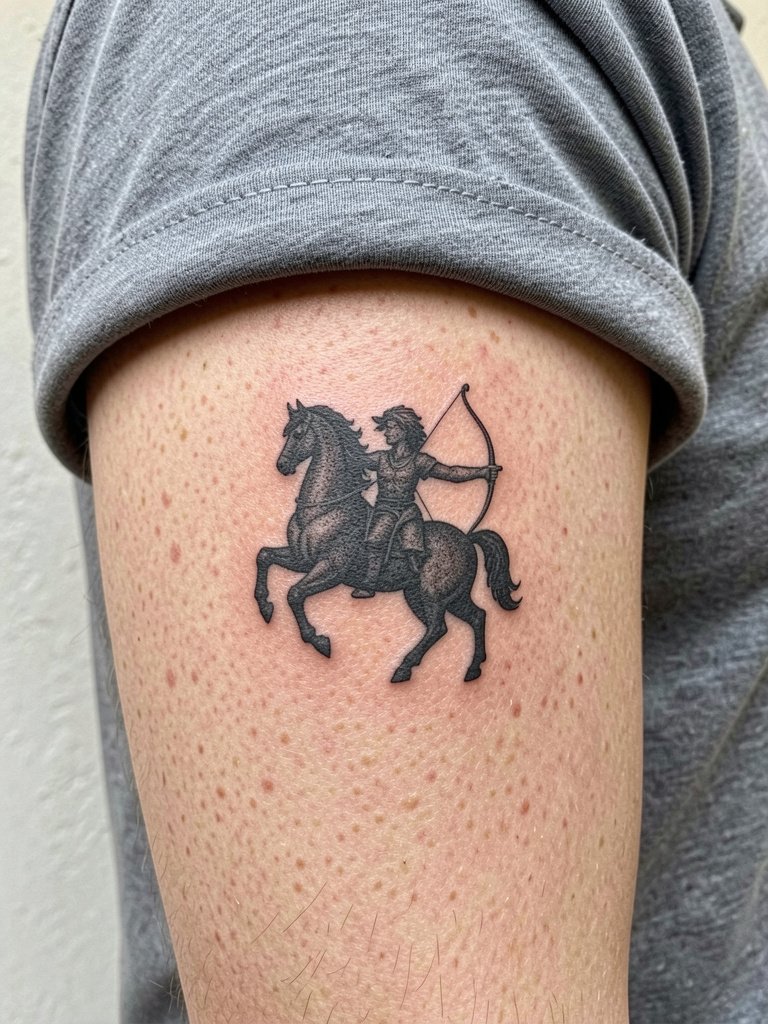
A tiny centaur silhouette gives a mythic reference without turning into full fantasy work. The outer upper arm tolerates more detail than wrist or ankle, so you can include subtle stipple shading and still expect the piece to travel well over time. Session time ranges from 40 minutes to 90 minutes depending on shading. A common mistake is squeezing too much anatomy into a two-inch silhouette. Ask the artist to simplify the profile lines and to show a mockup scaled to the placement so you can see how much detail will survive at two years healed. For casual reveals this upper-arm spot pairs well with short sleeve tees and loose sleeves that sit above the image.
6. Sagittarius Symbol with a Tiny Star Accent Behind the Ear
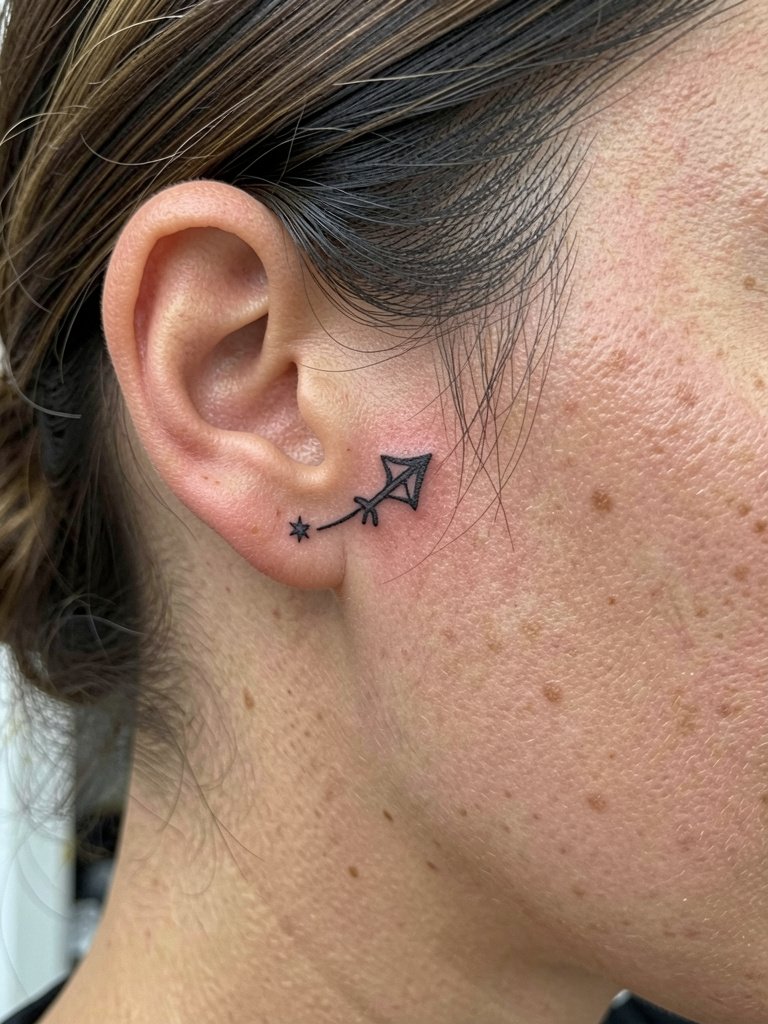
Behind-the-ear pieces are discreet and take under 30 minutes when the symbol is tiny. The skin there is thin so single-needle work can heal crisp, but overly delicate dots will fill in. One camp of artists warns that ultra-fine dots blur quickly in that area. The other camp says that with slightly wider spacing and exact needle placement the detail can settle nicely. Both positions are valid. If you favor visibility, request a modest boost in line weight and ask for healed examples on similar skin tones. Style the reveal by tucking hair behind the ear and wearing small hoop earrings to draw attention without rubbing the tattoo.
Studio Day Picks
The first six ideas focus on small, visible placements and tiny linework, so a handful of practical items can save the session and the first week of healing.
-
Temporary Sagittarius tattoo packs. Use these as a try-before-you-buy option to test scale and placement on your wrist, ankle, or collarbone.
-
Custom stencil sticker kit. Makes it easy to move a design around on the skin so you can compare angles in real time during a consult.
-
AI concept generator tools. Helpful when you want several rapid variations of arrow, glyph, or constellation layouts before narrowing down to two favorites.
-
Astrology temporary ink sets. Great for seeing how a tiny celestial accent reads under different clothing and lighting.
-
Temporary tattoo sheets. A mainstream, widely available option that lets you test multiple placements at home before booking a studio appointment.
7. Fine Line Bow with Single Arrowhead on the Collarbone
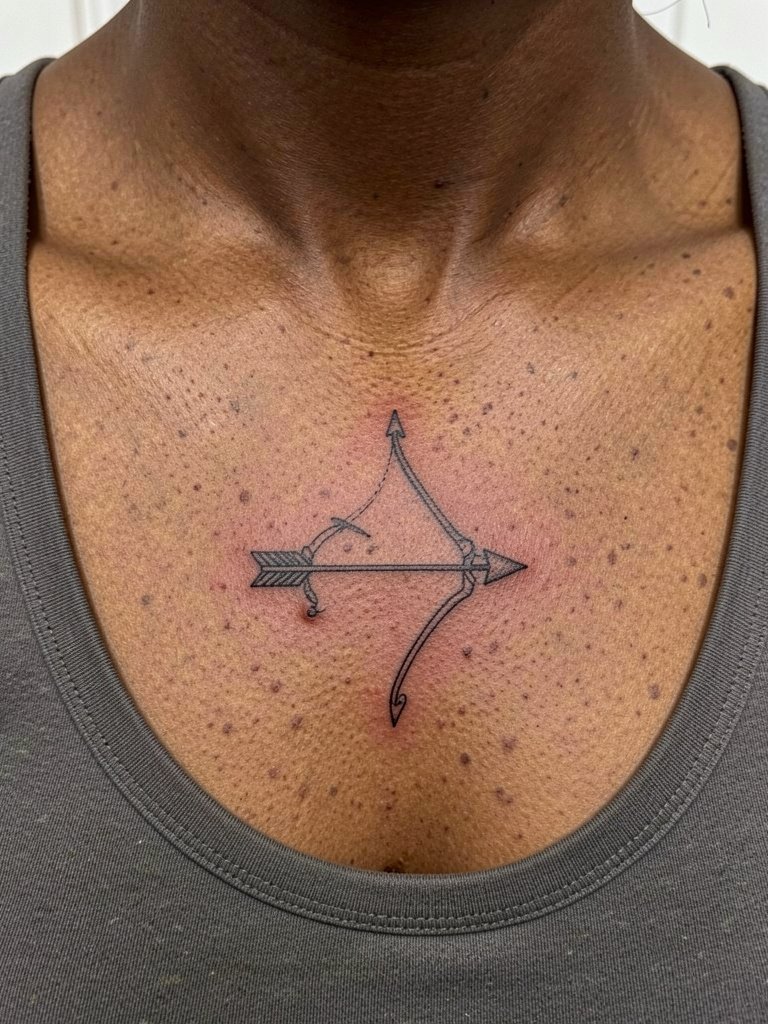
Collarbone linework photographs beautifully when the lines sit flat across the bone and avoid tiny cross-hatching. Pain is moderate because the bone is close to the surface and sessions often last 30 to 60 minutes. There is debate about whether ultra-thin collarbone lines hold up. One group of artists says fine single-needle work blurs on the collarbone within a few years because of constant movement and clothing friction. The other group maintains that with correct depth and slightly wider spacing the lines remain readable. Both views come from real shop experience. If you want longevity, ask for slightly thicker anchor points and plan a touch-up at year two if the piece sits in a friction zone. For evenings out this placement pairs nicely with a layered necklace set that frames the bow without rubbing the skin.
8. Sagittarius Wordmark in Small Script on the Ribcage
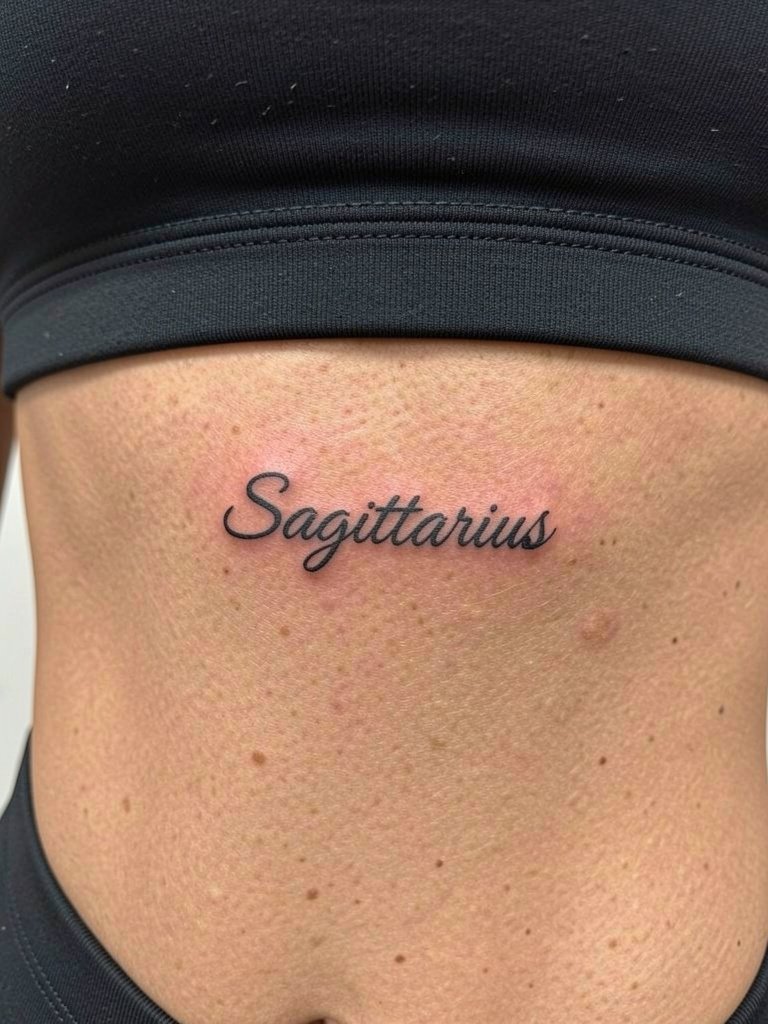
Ribcage text can be a private keepsake but it is also one of the higher-pain placements. Expect a session ranging from 30 to 90 minutes depending on size. Script that is too thin can blur as the rib skin shifts and stretches, so request letter spacing and a modest stroke weight. Artists are split on fine line on ribs. One camp argues that the skin there moves too much and the script blurs within two years. The other camp points to carefully spaced lettering in healed photos that stays legible. If you like the location, ask for a mockup mapped to your torso and plan for a possible touch-up after the first year. For the appointment wear a loose sports bra you can remove or a button-front top for easy artist access.
9. Tiny Crescent Moon with Sagittarius Dots on the Ankle
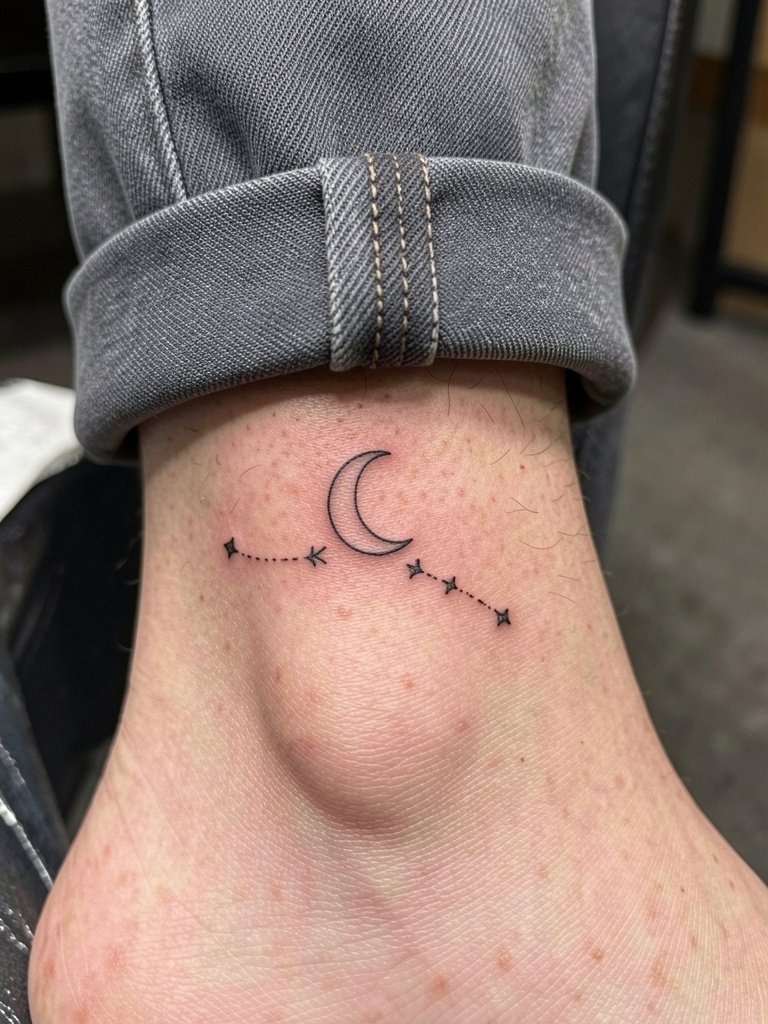
Ankle pieces are vulnerable to friction from shoes and socks, so silhouettes outperform intricate filigree in that position. The session is short, usually under 30 minutes, but expect soreness from rubbing with footwear during the first week. A common error is placing dotwork too close to the ankle crease where blowout risk is higher. Ask for the dots to sit slightly above the bone and plan for a light touch-up if needed after six months. For summer reveals, pair the ankle with ankle strap sandals that frame the design without rubbing it.
10. Micro Arrow Through a Star on the Inner Wrist
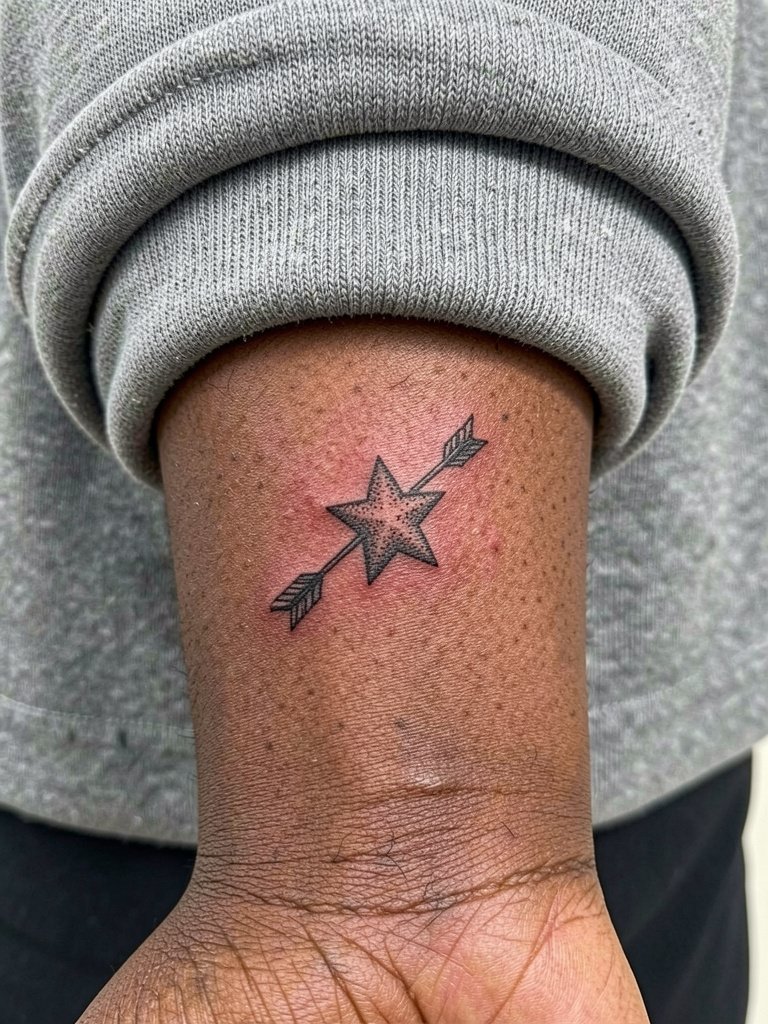
This micro composition reads as both zodiac and an emblem of intent in a very small package. The inner wrist can soften details faster because of constant movement. To avoid early blurring, request slightly bolder star points and ask the artist to place the arrow so it follows natural wrist lines. The session is brief and sensitivity is moderate. Healed at two years a well-spaced micro arrow and star should still be legible, but expect a touch-up window at year two if the star points have rounded. On session day wear a cropped sleeve top so the artist can access the wrist without tugging your clothing.
11. Abstract Arrow with Dotwork Trail on the Calf
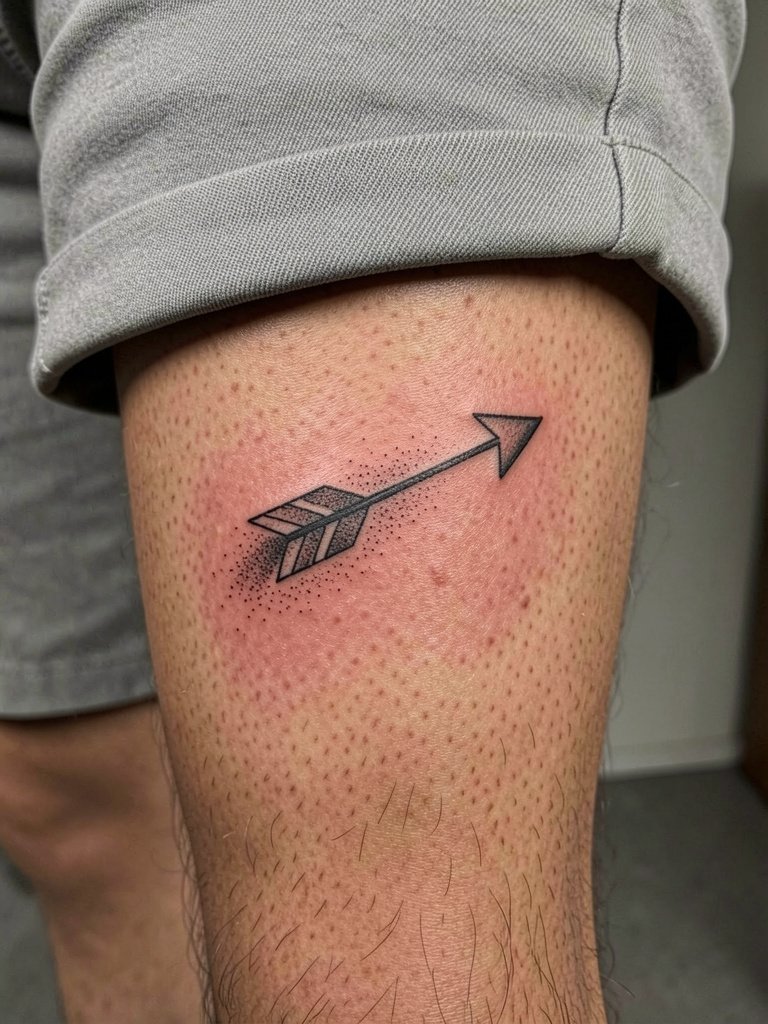
The calf accepts longer compositions and subtle dotwork without the same blowout risk as hands or wrists. Pain is low to moderate and sessions can run 45 to 90 minutes when there is stipple shading. A real mistake is compressing the dotwork into a small area which reads muddy after healing. Ask the artist to draft the dot fade across a longer trail so each dot has breathing room. For summertime show-offs this placement pairs with midi skirts or straight-leg shorts that leave the lower leg visible.
12. Small Sagittarius Constellation with a Shooting Star on the Outer Forearm
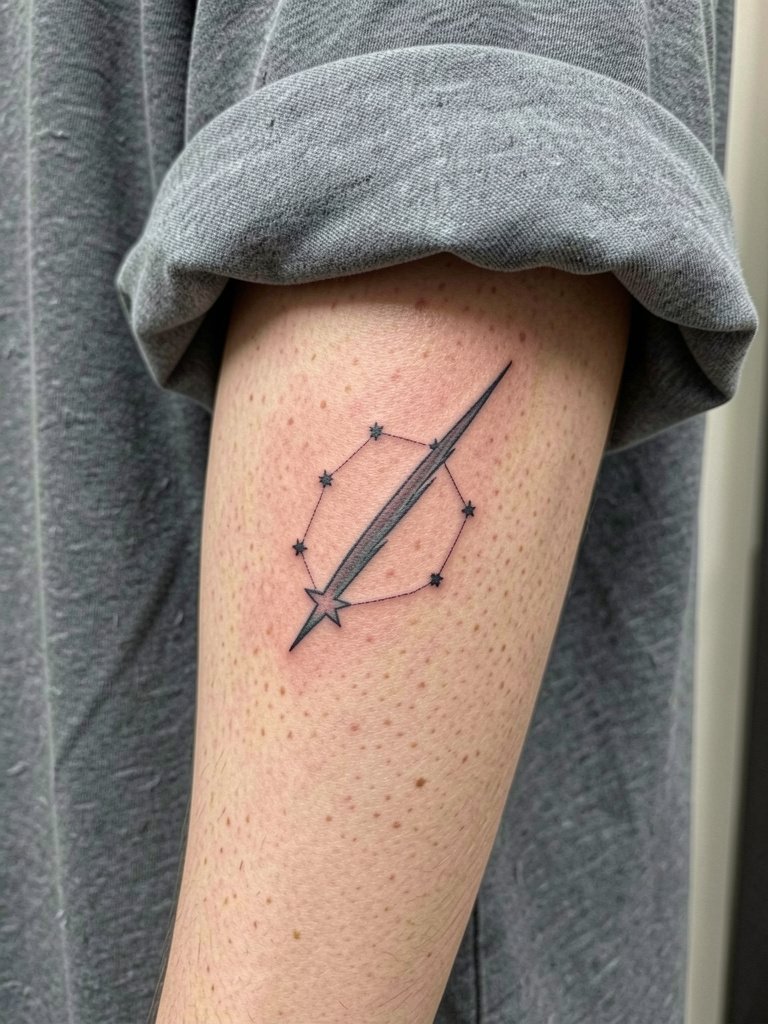
Adding one shooting star creates motion without crowding the constellation. The outer forearm reduces the blurring risk that shows up on wrist or ankle clusters. Sessions for this size generally last 30 to 60 minutes and heal well if dots are spaced. Artists sometimes disagree about whether to connect every star with a line or leave points separated. Both approaches work when spacing is prioritized, but connected lines need slightly heavier weight to avoid disappearing in time. For casual wear pair this with an oversized tee and rolled sleeves to keep the piece visible when you want it to show.
13. Minimal Sagittarius Symbol Inside a Tiny Circle on the Ankle
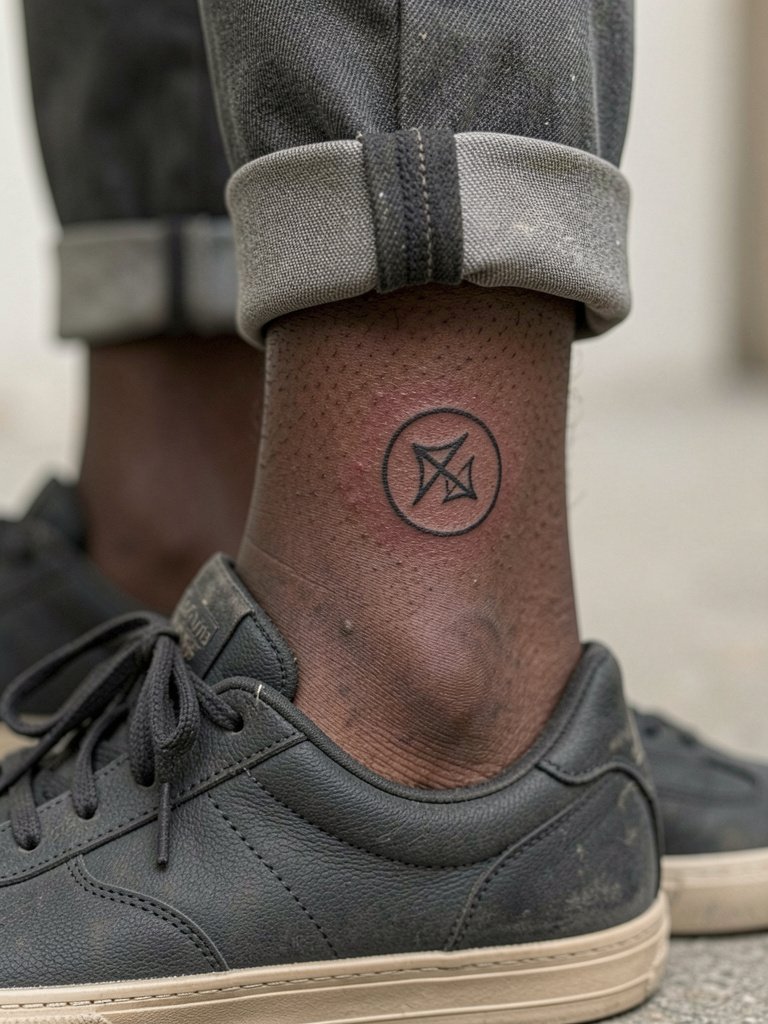
The circle helps small symbols read as finished pieces and prevents the eye from losing the glyph against skin texture. Ankle placement requires the circle to be sized so the ring line does not collapse into a blur. Sessions take about 20 to 40 minutes with low to moderate pain. A typical mistake is a circle line that is too thin for the ankle's friction environment. Ask for a steady medium line and a mockup placed above the ankle bone to reduce contact with shoes. For visible styling pair this with low profile sneakers or cuffed pants.
14. Simple Arrow with a Faint Trail Line on the Inner Forearm
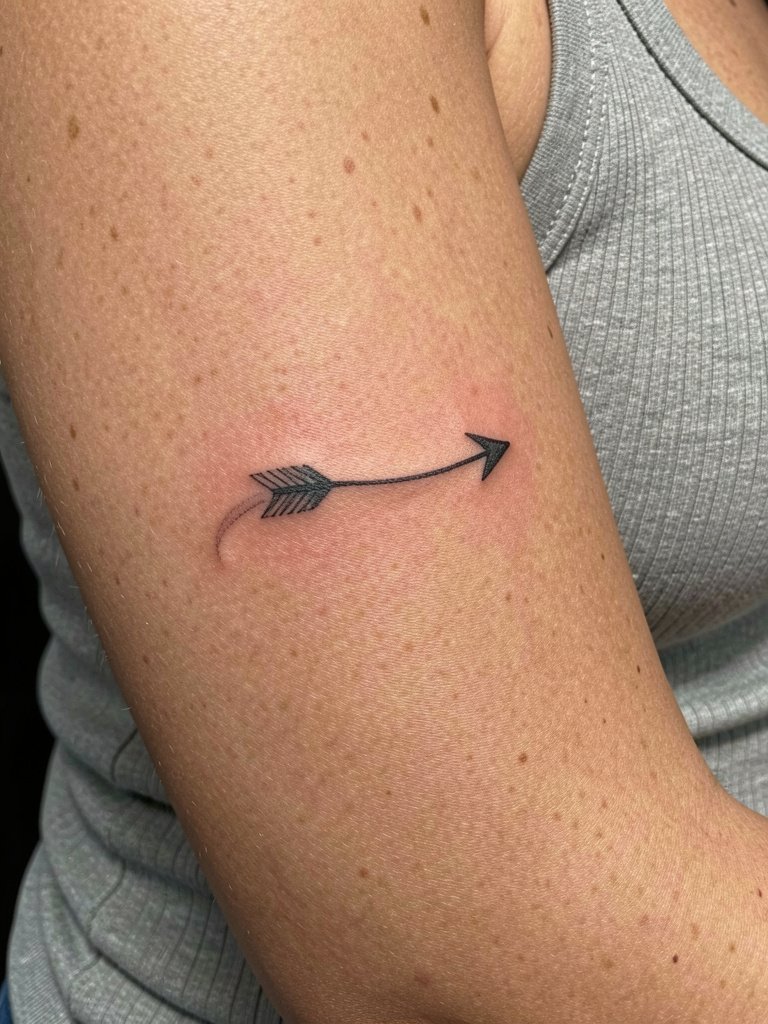
Motion lines add personality without adding clutter. On the inner forearm, a faint trail can fade faster than the arrow itself if the line is too thin. Plan for a slightly heavier trail line near the arrowhead that tapers out cleanly so the eye reads motion rather than a blurred streak over time. Expect moderate pain and a 30 to 60 minute session. For the appointment wear a ribbed tank top so the artist can access the whole inner forearm without obstruction.
15. Micro Arrow with Dotwork Tail on the Outer Forearm
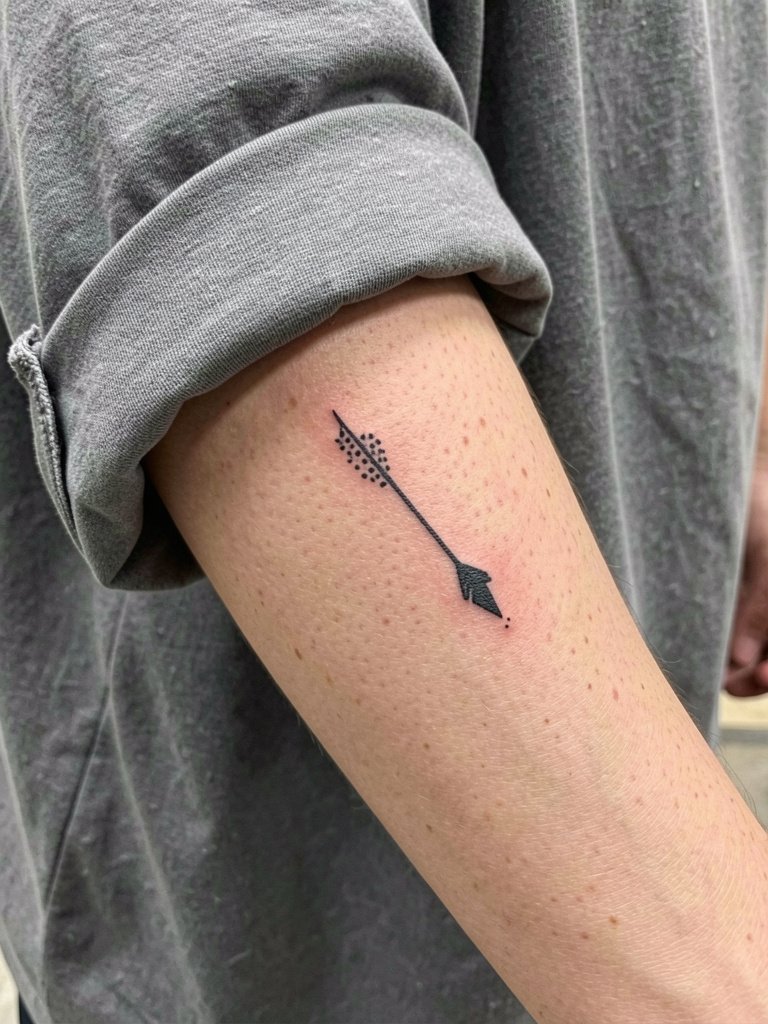
This composition is a compact alternative when you want the symbolic arrow plus a little texture. The outer forearm tolerates dotwork tails better than the wrist. Sessions are short and discomfort is low. A common mistake is clustering dots too tightly which can read as a smudge after healing. Ask for a dot spacing that maintains negative space and consider a light touch-up window at one year. For styling, this placement shines with gold stacking rings and rolled sleeves that keep attention on the forearm linework.
Frequently Asked Questions
Q: How much does a minimalist Sagittarius tattoo usually cost in the U.S.?
A: Small minimalist pieces often fall into a shop minimum range. Expect work like a tiny glyph or arrow to start around $100 to $200 plus, and more detailed micro-realism or small shaded silhouettes to run higher, depending on studio minimums and local market. Budget for a touch-up in year one or two.
Q: Will fine line Sagittarius tattoos blur quickly?
A: Artists are split. One camp warns that ultra-thin single-needle lines packed into a tiny space tend to soften or blur in a couple of years, especially on high-movement areas. The other camp says fine line holds when elements are spaced and line depth is correct, and they point to healed photos that show it settling well. If you want the delicate look with better longevity ask for slightly increased line weight and request healed shots of similar work from the artist.
Q: How can I test placement before getting ink?
A: Use temporary Sagittarius tattoo packs or stencil stickers to try scale and position for a few days. Search Instagram and TikTok with hashtags like #sagittariustattoo and #finelinetattoo while narrowing by location filters to see current portfolios. Reddit threads in r/tattoos and r/tattooadvice are useful for seeing healed examples on different skin tones.
Q: What should I wear to the appointment for a collarbone or ribcage piece?
A: Wear clothing that gives the artist easy, stable access without tugging. For collarbone work choose a scoop or V-neck that sits naturally so the artist can reach the area without you shifting. For ribcage tattoos a fitted sports bra or button-front shirt makes access simple and preserves modesty during the session.
Q: How do I make sure the reference photos show healed work and not just fresh ink?
A: Ask the studio for healed photos of similar small linework or dotwork on comparable skin tones. If a portfolio only shows fresh pieces, request to see photos taken six months or later so you can judge how spacing and line weight held up. A careful studio will be able to provide those images or explain their touch-up policy.
Q: Will a tiny Sagittarius tattoo be noticeable in professional settings?
A: It depends on placement and clothing. Wrist, collarbone, and forearm pieces are visible when you choose to show them. Inner wrist or behind-the-ear placement can be discreet with certain outfits. Plan test runs with temporary stickers to see how the tattoo reads under your typical work attire.
