
Bold black panels hold up better than tiny Pinterest fillers when you want a Maori sleeve that still reads at five years. If you want the visual weight and body flow that make a sleeve look cohesive, plan for large shapes, carved negative space, and motifs that follow muscle direction. This list gives 23 sleeve concepts, how each one ages, what to specify in your consultation, and outfit ideas that actually show the work.
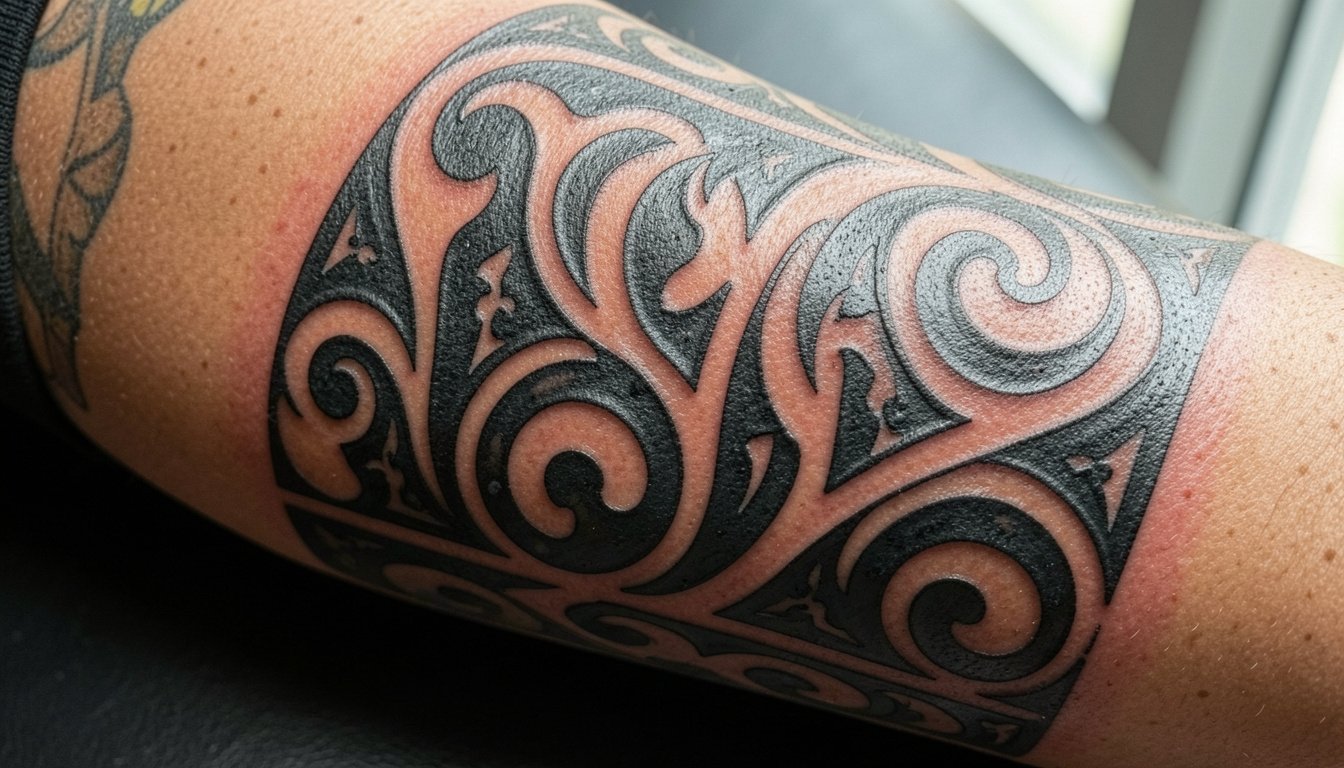
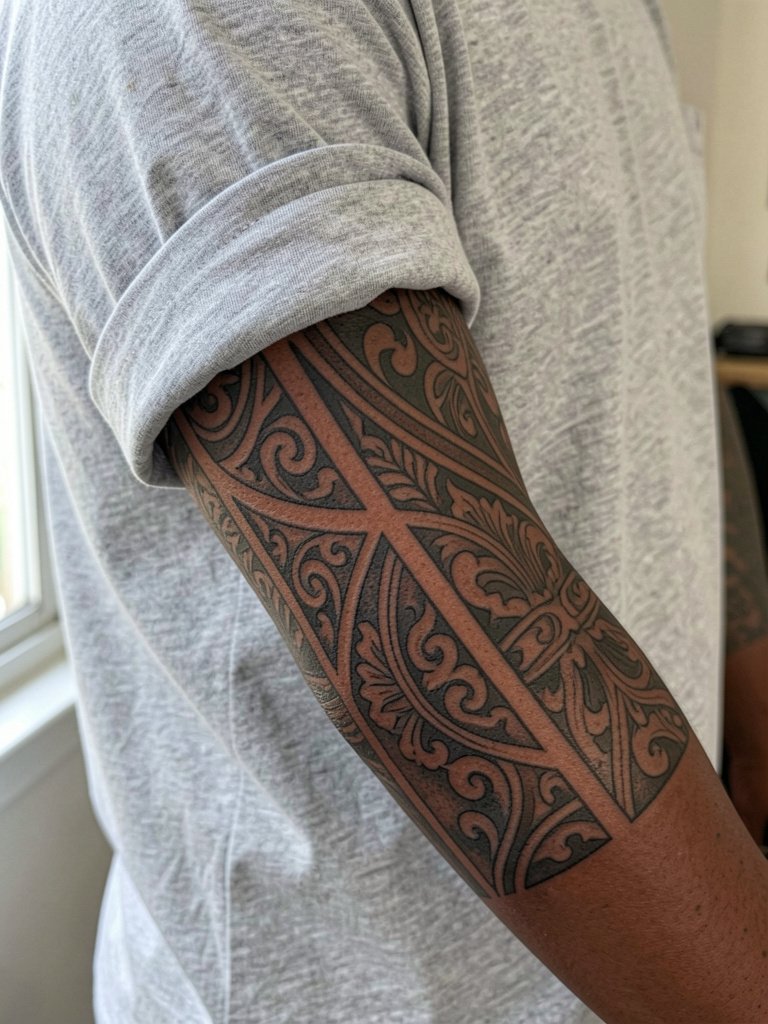
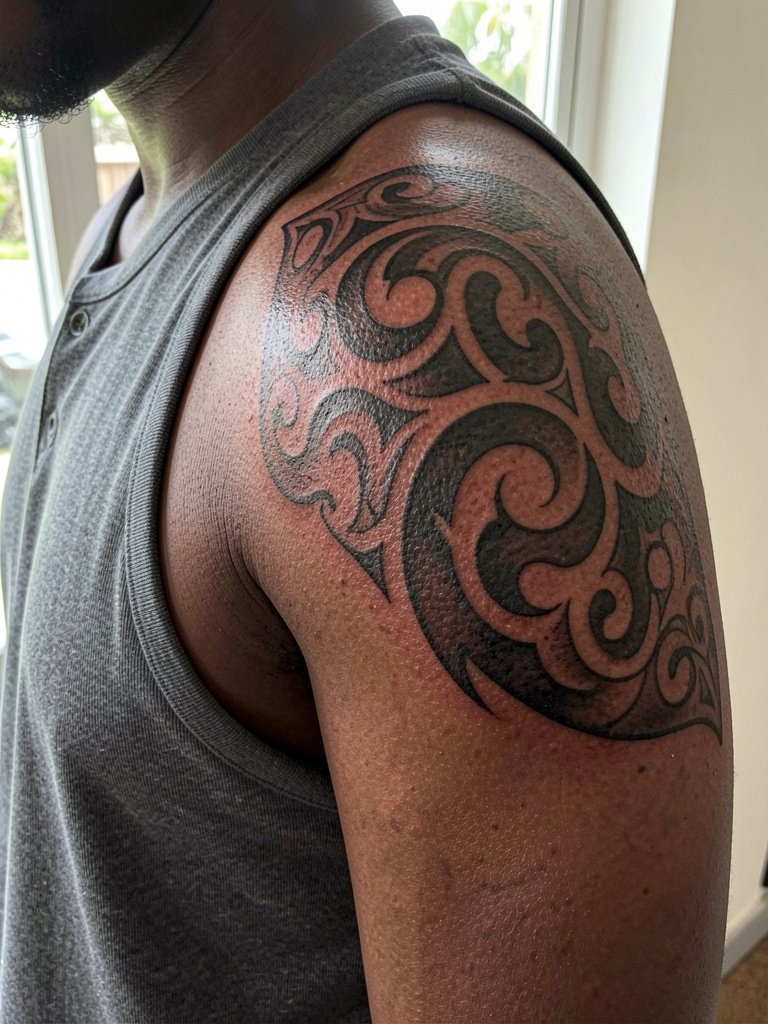
1. Full Kowhaiwhai Flowing Sleeve
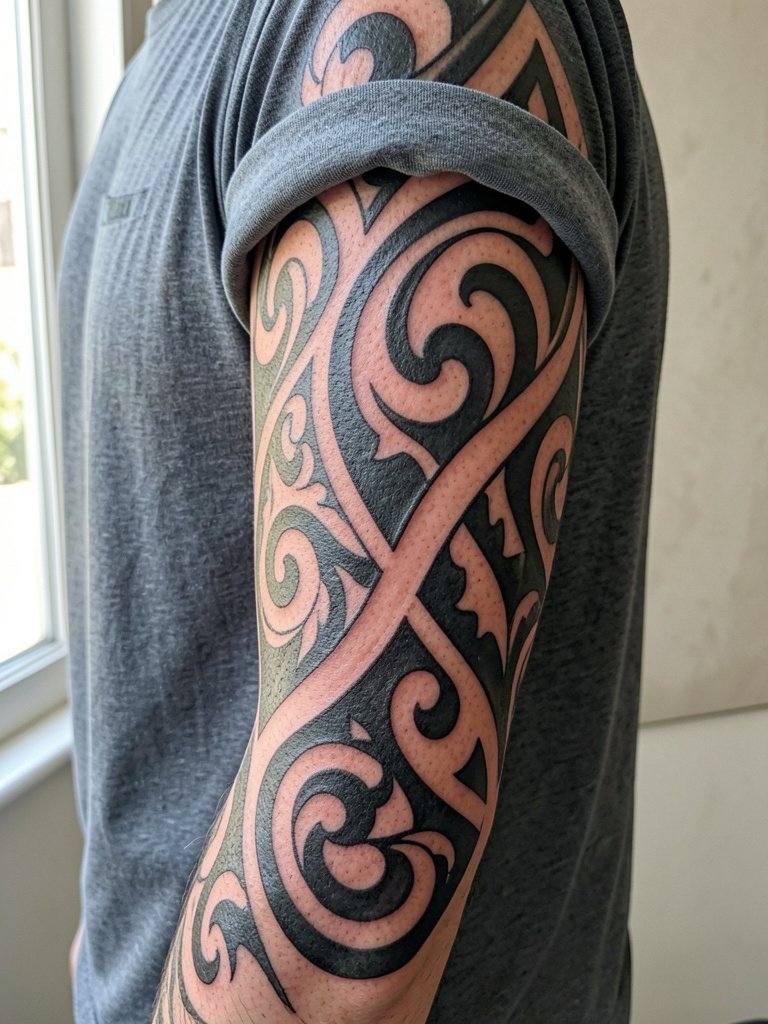
This full-sleeve idea uses broad kowhaiwhai panels that follow muscle flow so the design reads when the arm moves. Plan sessions in three to eight blocks depending on coverage and saturation, and expect longer sittings for shoulder cap wrapping. In the consultation bring a wide-angle reference that shows the full arm so the artist can map flow, and ask for demonstrated healed sleeves that share similar negative-space carving. A common mistake is shrinking motifs too small, which leads to blowout and muddied linework after a couple of years. For showing off, pair this with a black sleeveless tank like oversized black tank tops on Amazon to keep attention on the arm.
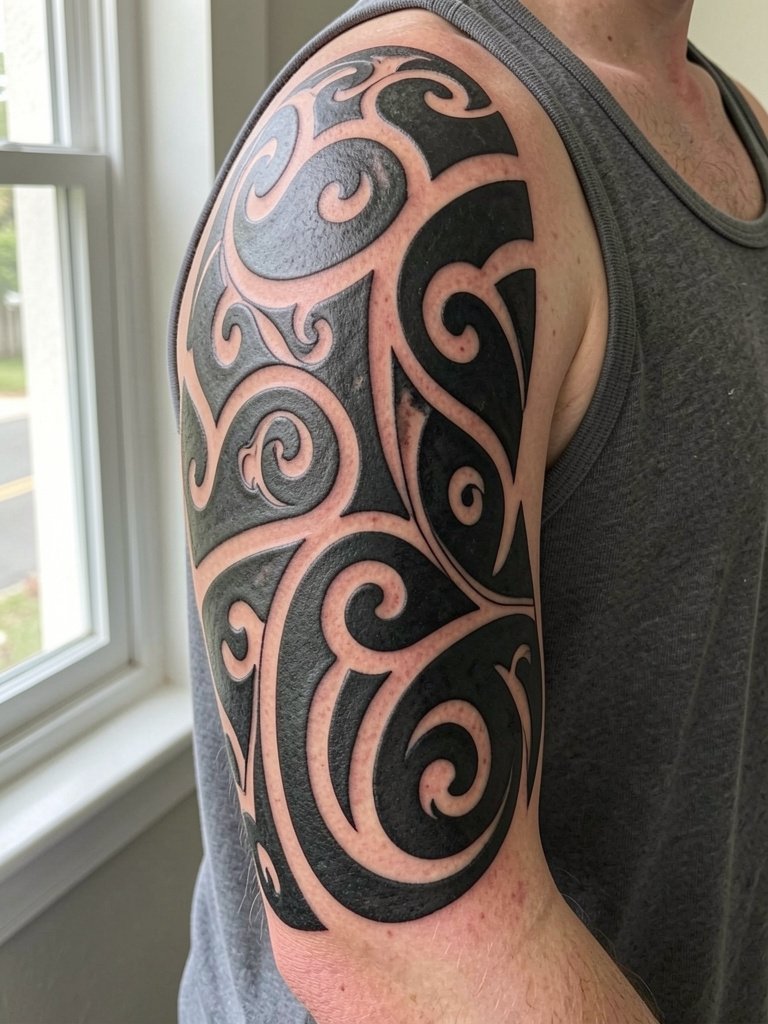
2. Half-Sleeve Outer Arm Wrap
A half-sleeve is a good way to commit visually without the full time and budget of a full-arm project. Sessions often run shorter and can be scheduled as two to five sittings. Ask the artist to show healed outer-arm gallery shots so you can evaluate saturation and touch-up needs. Because the outer arm gets more sun, discuss future sunscreen routines and placement of dense black panels to avoid frequent touch-ups. For appointment day wear a muscle tank top so the shoulder cap is easy to access and the artist can rotate the arm without fabric rubbing the work.
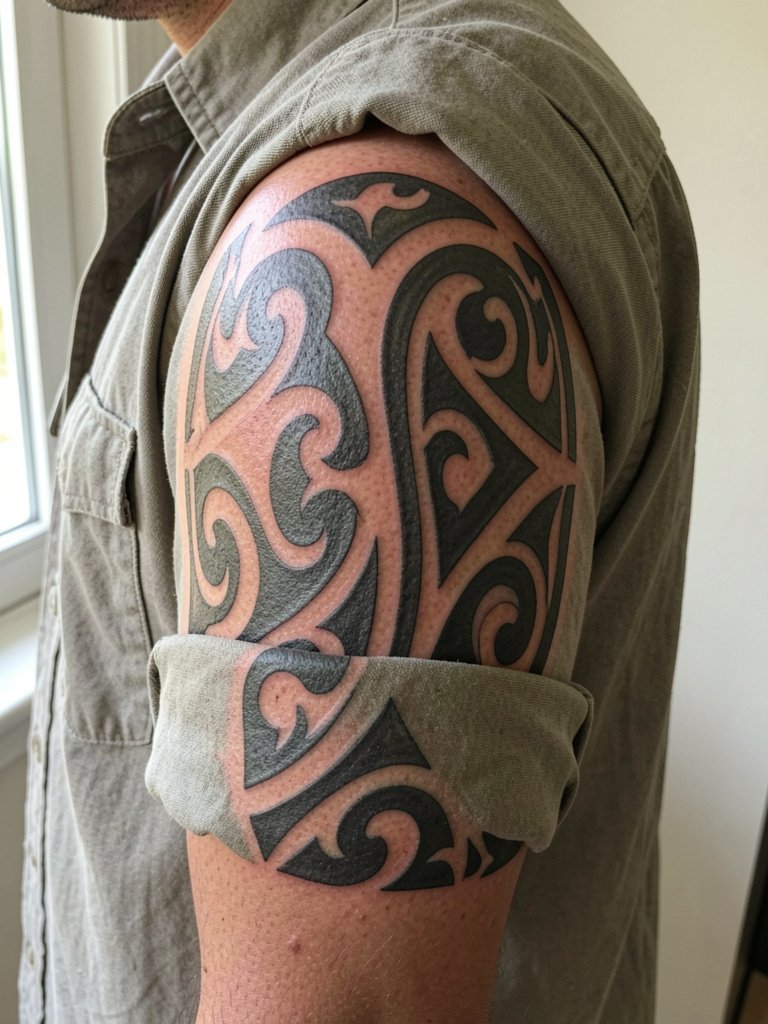
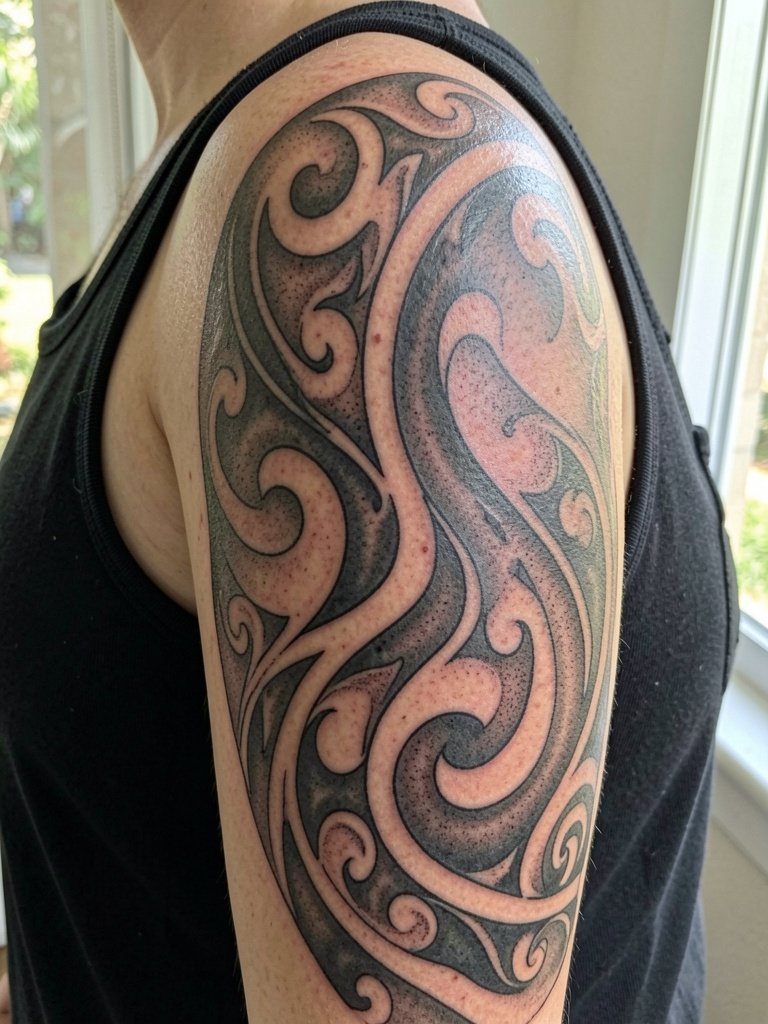
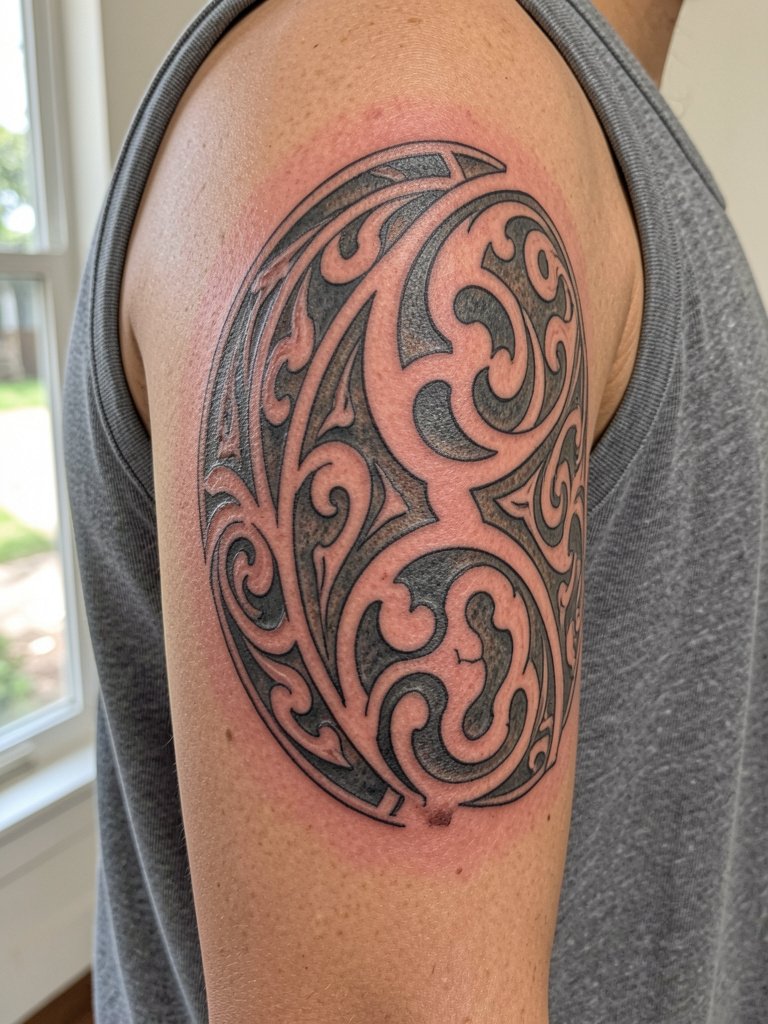
3. Upper Arm with Bold Negative Space
This style favors big black blocks instead of filling every gap with micro detail, which preserves readability on curved anatomy. A typical session can be one to three visits for a clean upper-arm panel. Discuss linework depth and spacing so the artist knows to use slightly heavier lineweight than a delicate reference. A frequent error is insisting on tiny motifs that lose clarity as the arm ages. For show-off fits, wear an open button shirt men left open so the upper-arm flow reads next to the shoulder.
4. Chest-to-Sleeve Geometry Extension
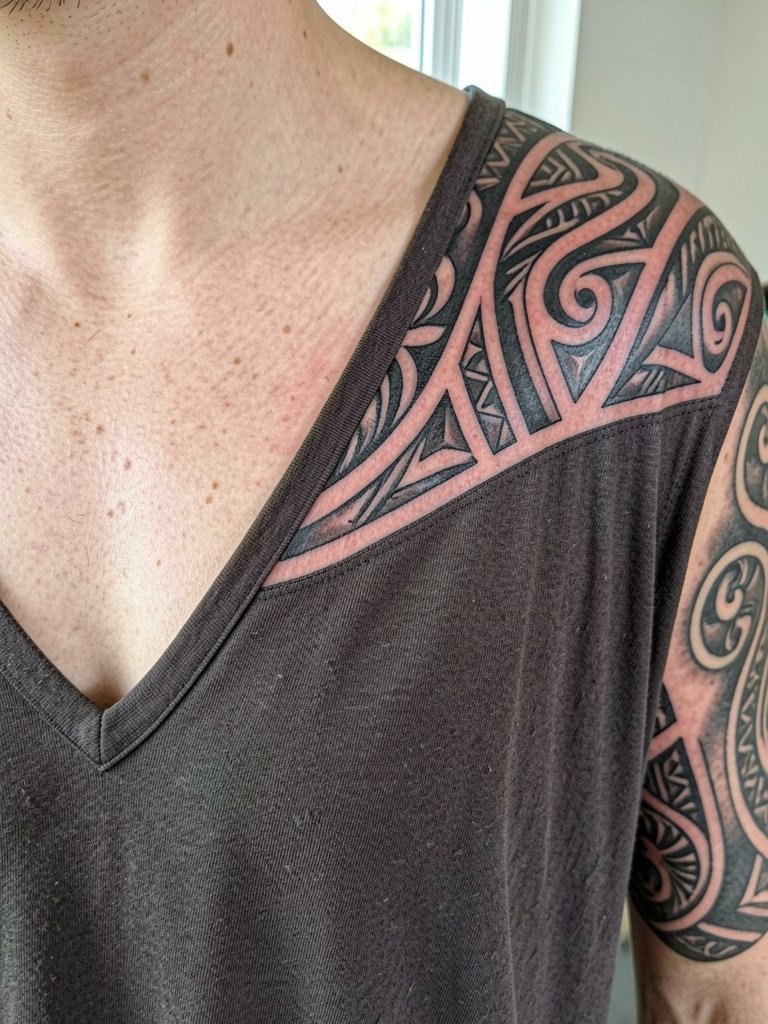
Connecting chest geometry to a sleeve ties the upper torso into the arm so the piece reads as one composition. This typically needs more planning and four to ten sessions depending on how much chest you include. Ask for healed photos that show the chest-to-shoulder junction because that area moves a lot and needs consistent saturation. Avoid packing tiny details into the clavicle zone; these get lost when the chest moves. For session wear choose a camp-collar shirt that opens easily and does not rub the fresh work.
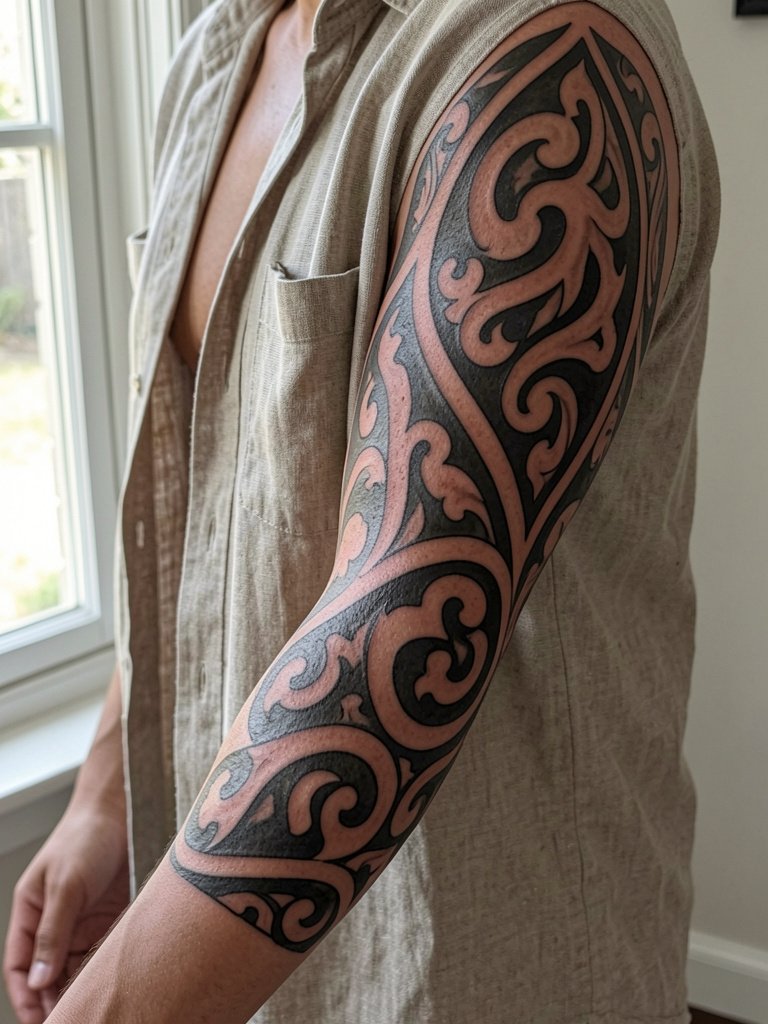
5. Freehand Full Sleeve on Muscle Flow
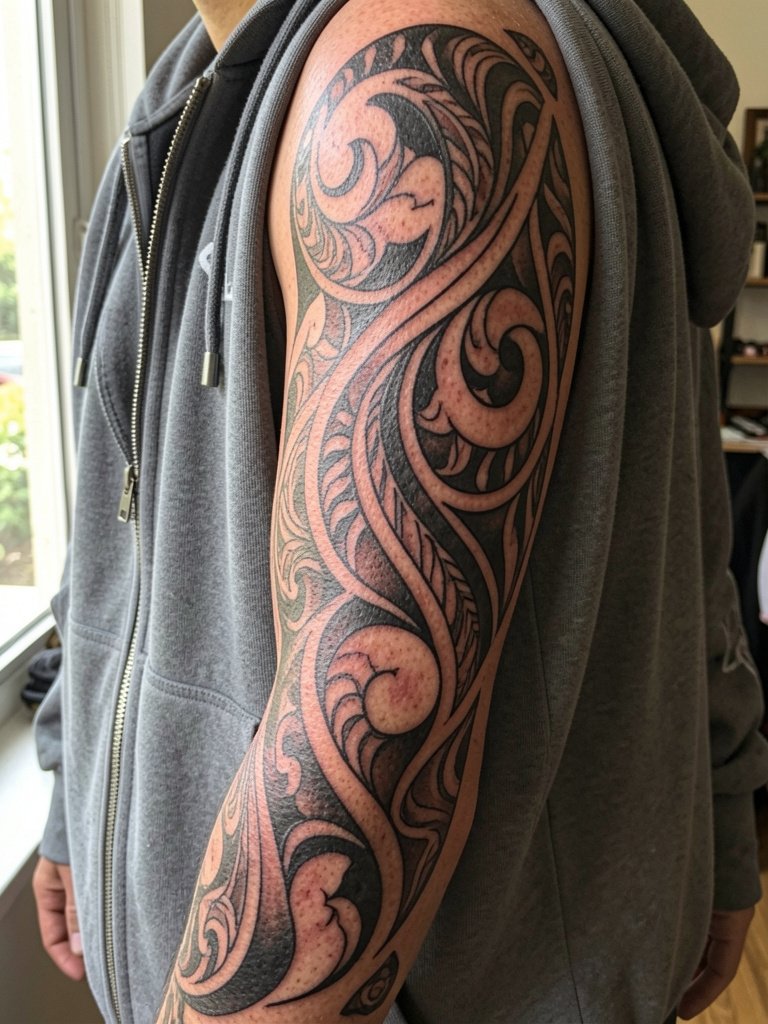
Freehand sleeves let artists build designs that wrap muscle curves and joints for a natural look. Expect multi-hour sessions and a design that evolves on the body rather than a fixed flash. Bring photos of arms with similar body type to help the artist plan flow and placement. A common mistake is bringing only small motif snaps instead of full-arm references that show how modules connect. For the appointment pick a loose zip-front hoodie so you can stay warm between passes and the artist can access the arm.
6. Ta Moko–Inspired Ancestry Blocks
This variant emphasizes ancestry-led motifs and block placement that reads like lineage panels. One camp insists the term ta moko and certain motifs are reserved for cultural protocol and genealogical context. The other camp believes non-Maori clients can wear Maori-inspired work respectfully if they avoid sacred markings and commission culturally literate custom pieces. If you want ancestry elements without appropriation, ask the artist to explain which symbols are public motifs and which are culturally restricted so you avoid copying identity markers.
7. Gallery-Style Blackwork Sleeve

A gallery-style sleeve borrows motifs from several references but ties them with consistent spacing and black saturation so it feels cohesive. The session load is heavy because of coverage, and touch-ups are common in the first year while saturation settles. During consult show healed gallery pages and ask the artist how they plan transitions between motifs so the negative space does meaningful work. To show this sleeve off, an open-back overshirt or simple tank in a neutral color keeps the focus on the arm.
8. Mackerel-Tail Movement Sleeve
Mackerel-tail motifs add directional rhythm to the sleeve and work well on elongated forearms. This is often a medium session project with one to three sittings. A key consultation point is spacing for scale repeats so the pattern does not crowd near joints. People sometimes over-tighten pattern repeats which creates visual blurring after two years. For casual wear that frames the forearm bring a rolled sleeve button up to photograph the piece with cuffs pushed back.
9. Modern Polynesian Hybrid Sleeve
A hybrid approach gives you the boldness of Maori work while letting modern composition soften transitions. Discuss with the artist how much grey shading you want for transitions so you get the look without losing the graphic language. A common aging mistake is adding too much micro-shading inside black panels, which can fill in and look muddy. For nighttime events pick a simple charcoal or olive shirt so the sleeve contrasts cleanly against fabric.
10. Black-and-Grey Transition Sleeve
The black-and-grey route softens transitions and suits arms with less contrast naturally. One camp prefers black ink only because it preserves sharp graphic language and long-term readability. The other camp argues that careful grey shading helps complex sleeves read better on varied arm shapes and masks small touch-up needs. If you choose grey, specify stipple shading or whip shading as the technique so the artist uses texture that ages predictably and avoids full soft shading that pools in recessed areas.
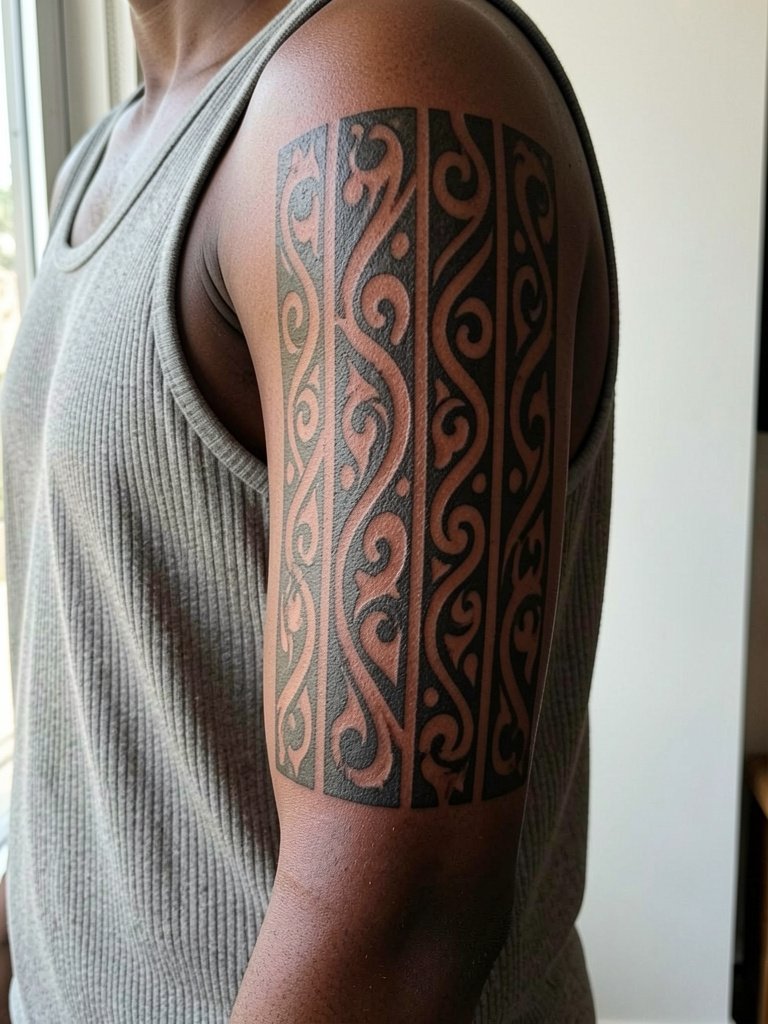
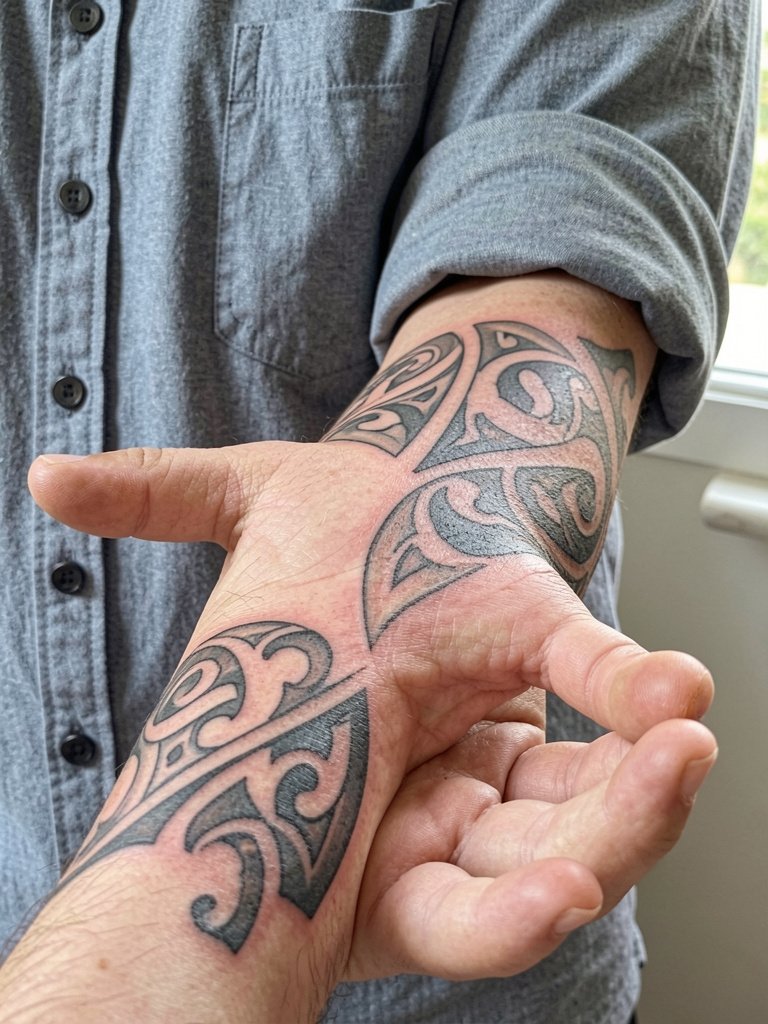
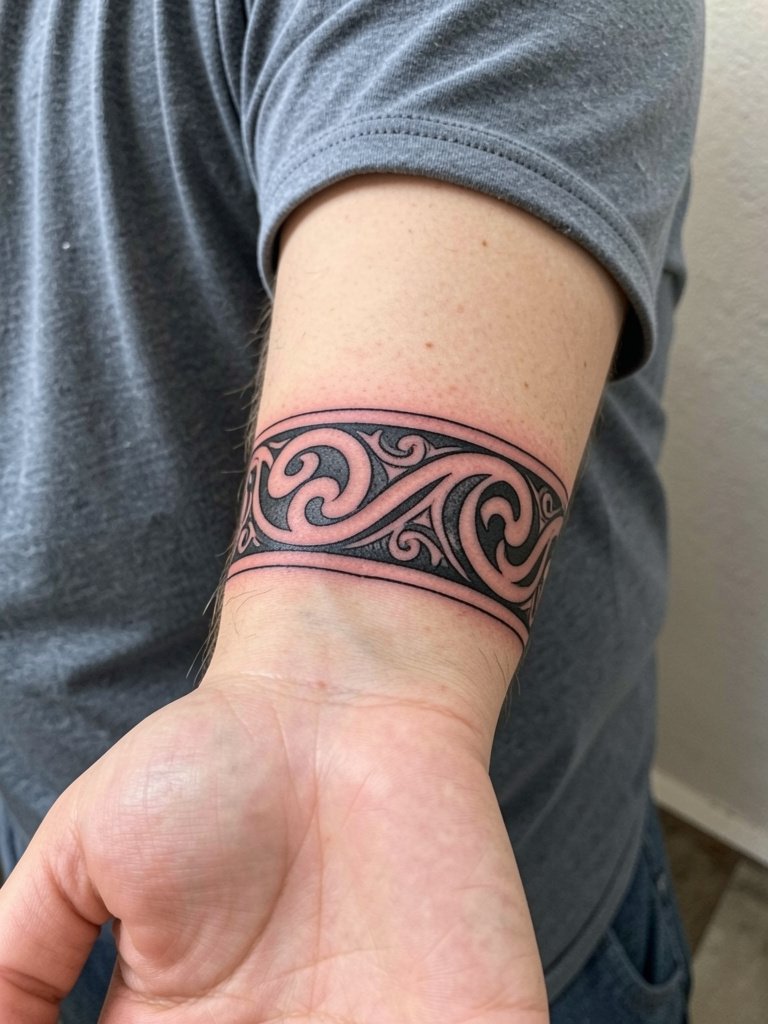
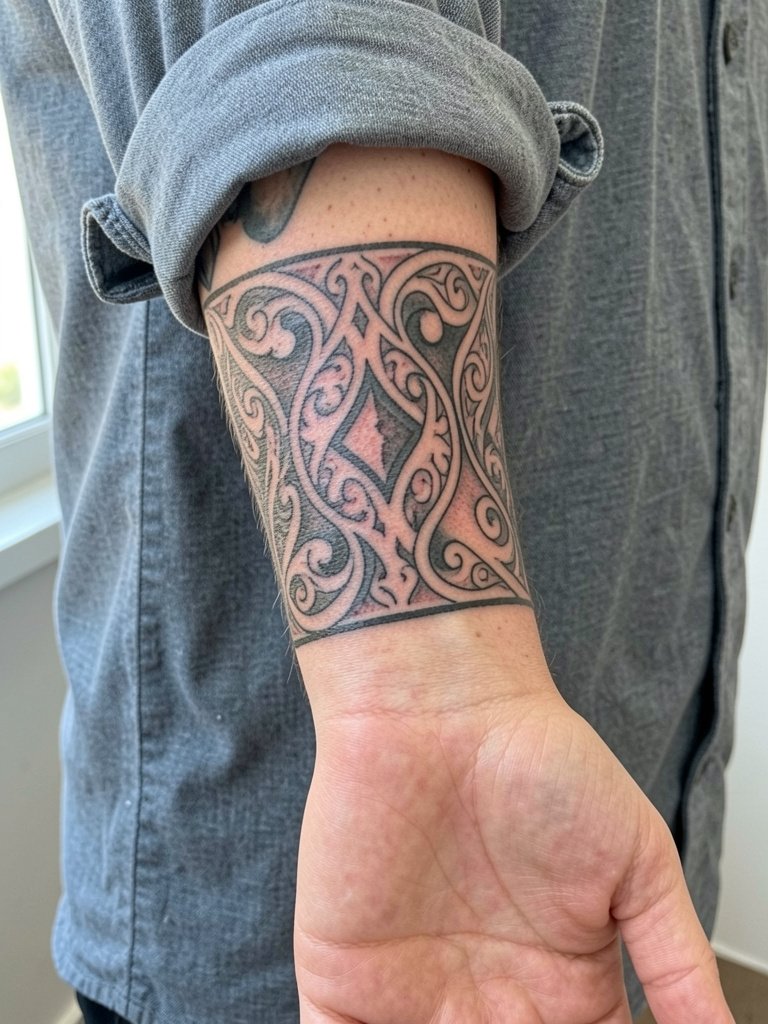
11. Arm Band to Sleeve Transition
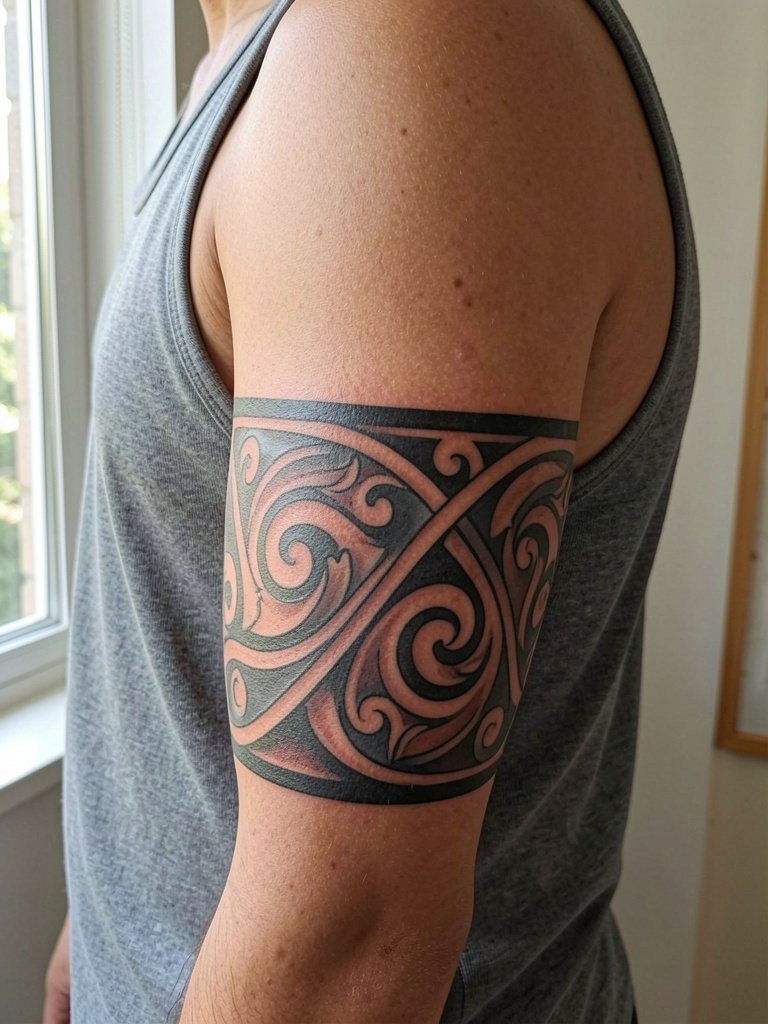
An arm band is a low-commitment way to test motifs before expanding them into a sleeve. One to two sessions can complete a crisp band, then future sessions add panels that reference the band pattern for continuity. Ask the artist to show healed band work to evaluate how tight linework settles and whether touch-ups were needed. People often pick a band too thin, which fades into skin tones; request slightly wider linework for longevity. For photos wear a wide armhole tank top so the band sits cleanly against bare skin.
12. Symbolic Custom Sleeve for Life Events
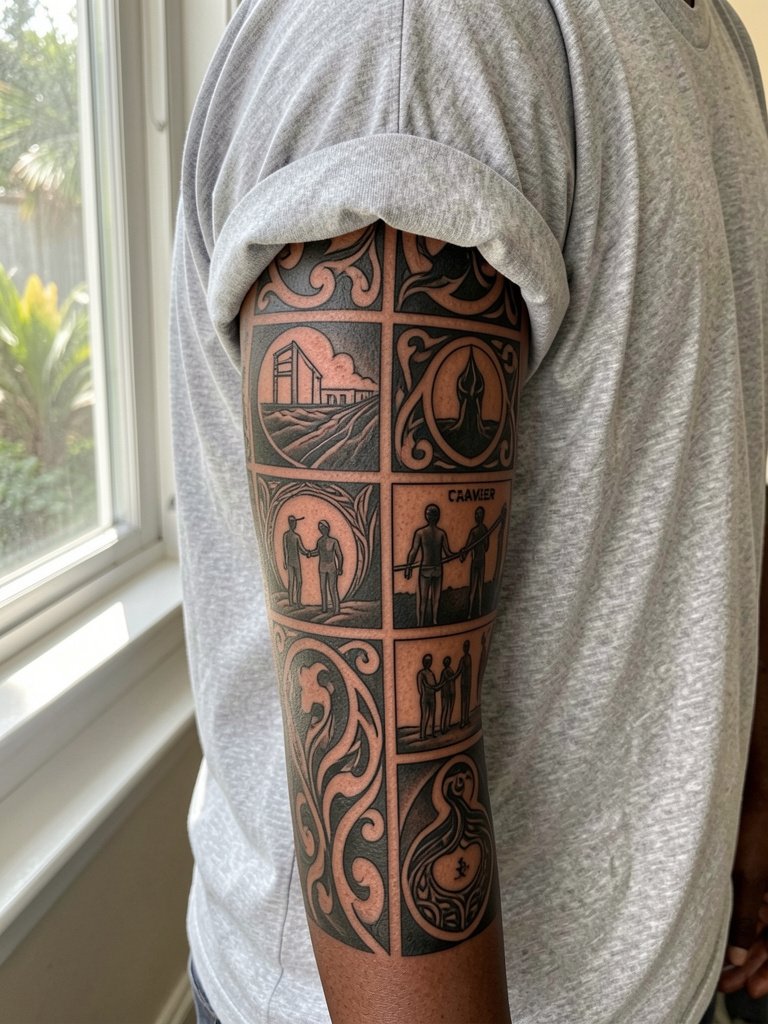
Custom symbolic sleeves let each panel represent a part of your life without copying sacred iconography. Before the session, write short notes for the artist that explain the personal references and specify which motifs are decorative and which have cultural weight. One mistake is asking for a directly copied sacred symbol without understanding its meaning. Expect multiple design reviews and at least one touch-up after the initial healing to lock saturation into high-contrast areas.
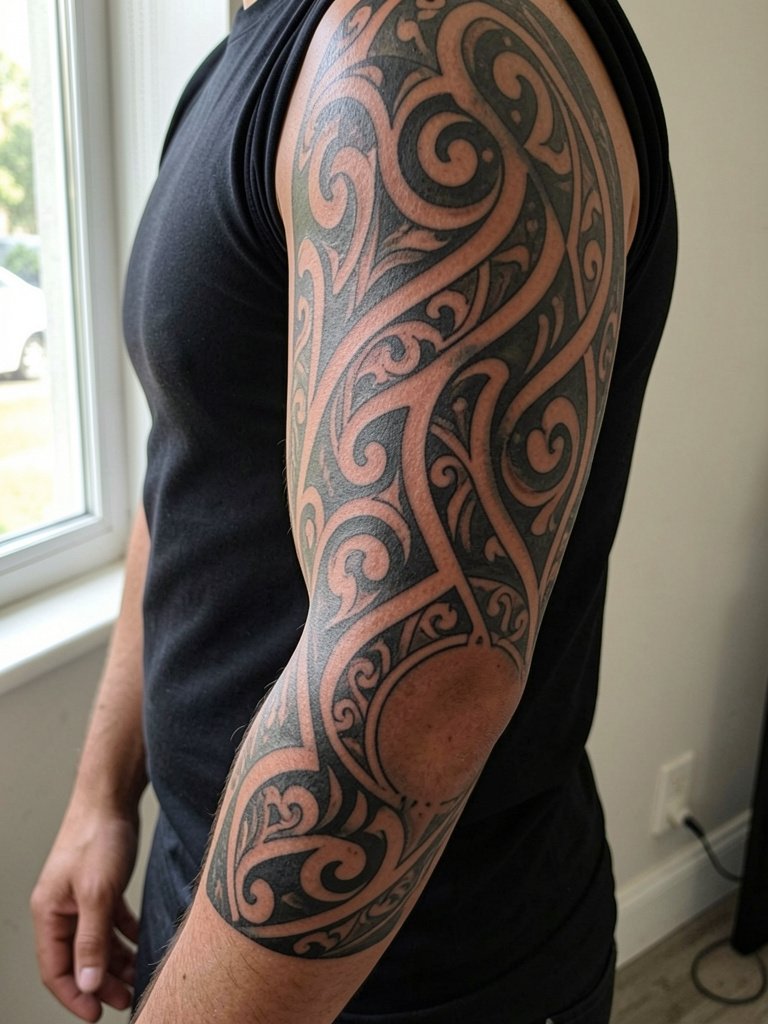
13. Large-Scale Crisp Negative Space Sleeve
This approach intentionally leaves skin as a design element so the sleeve does not get visually heavy. It ages well because the empty spaces prevent small fills from turning into blotches. For the consult bring scaled references so the artist can plan how wide the negative fields should be. A common error is shrinking those margins during execution, which reduces long-term legibility. For outfits choose neutral tones like sand or olive so the contrast reads cleanly against the arm.
14. Male-Focused Full Sleeve Gallery
This framing emphasizes how a sleeve enhances torso proportions for people who prefer stronger graphic weight. Expect multiple long sessions and a consult that includes body type discussion so the artist adapts motif scale. Mistakes often show when a client picks motifs from several sources without ensuring cohesive spacing. For showing off a sleeve of this type, a fitted black tee keeps negative space and black panels crisp in photos.
15. Kiwiana-Influenced Hybrid Sleeve
Blending regional motifs can give you a New Zealand aesthetic without replicating restricted symbols. Specify which local elements you want stylized and ask the artist how they will adapt scale so motifs do not crowd. A frequent amateur move is to insist on many tiny commemorative marks, which do not age well in dense arrangements. For events wear an open overshirt so the hybrid elements read clearly against neutral fabric.
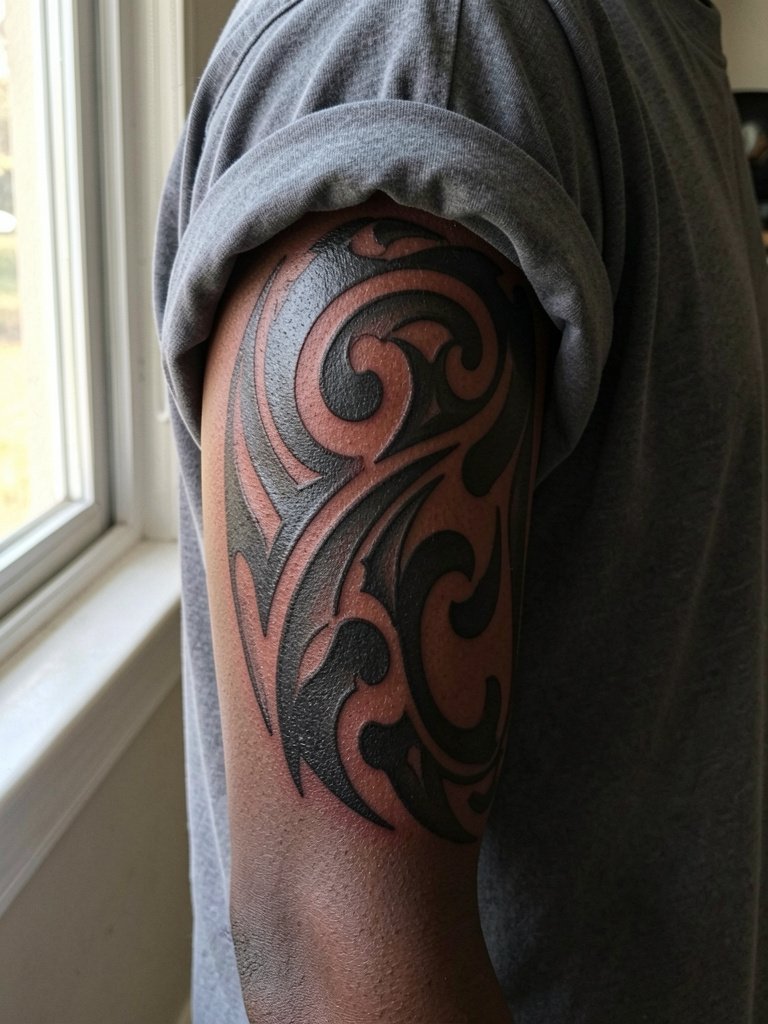
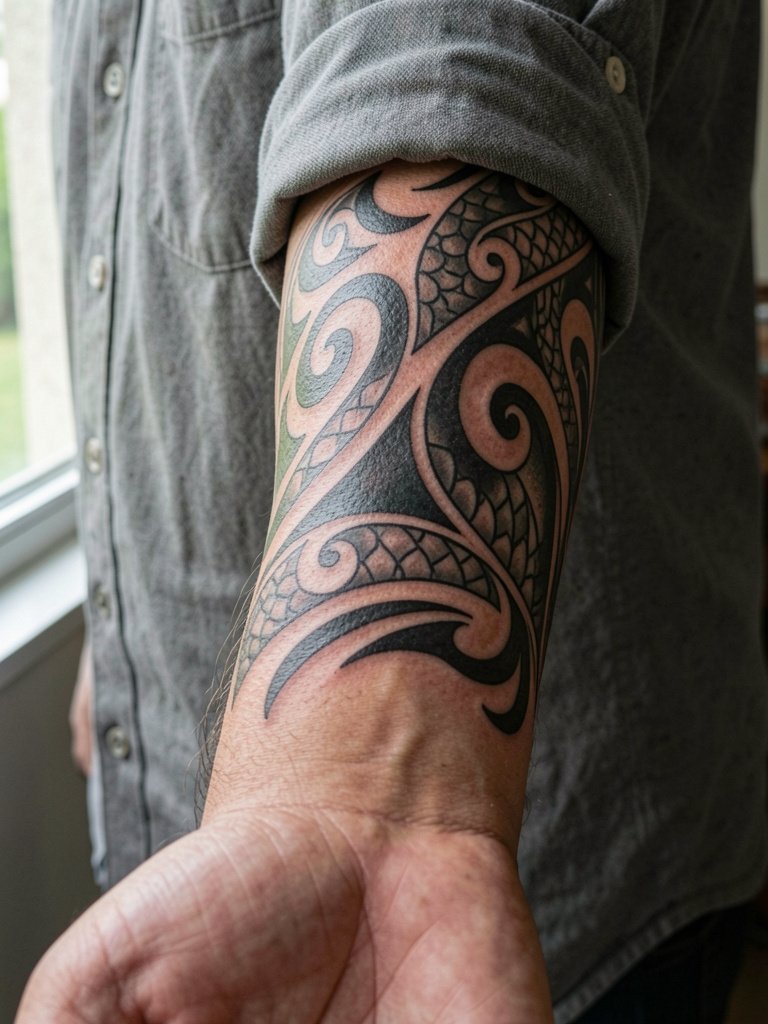
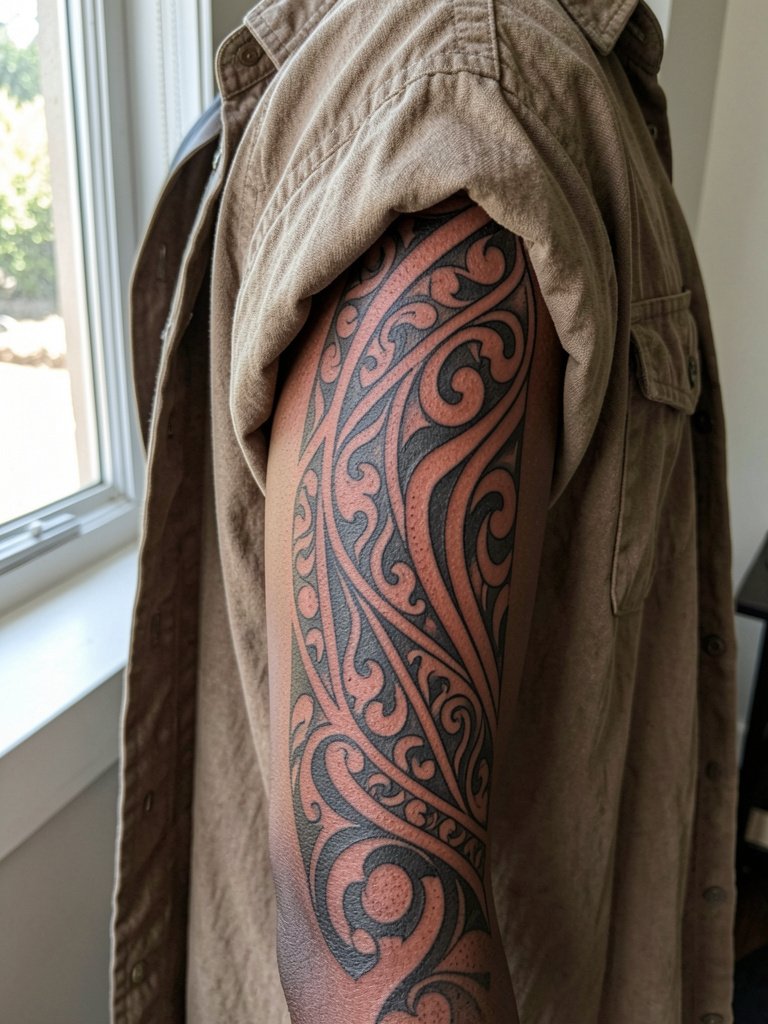
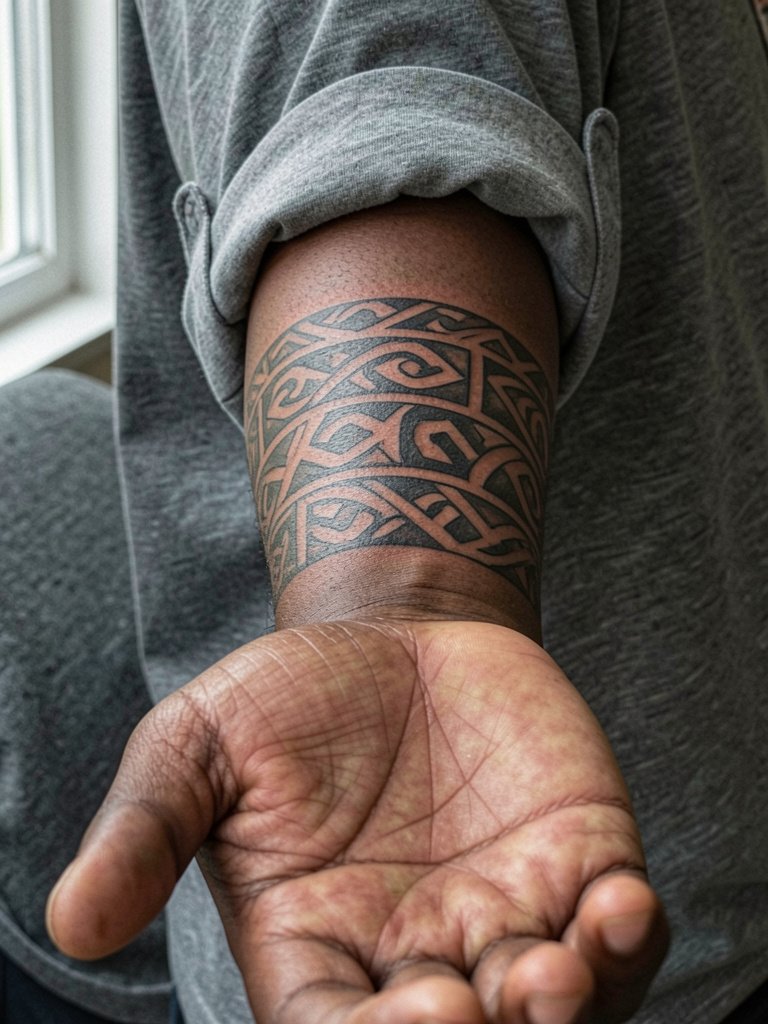
16. Forearm-Forward Visibility Sleeve
Forearm-forward sleeves are the most visible and need high contrast for daily wear. Expect two to four sessions depending on coverage and insist on seeing healed forearm photos to confirm how linework settles. One practical tip is to place your densest black fields on the outer forearm and use carved skin on the inner forearm to avoid a patchy look. For regular wear choose a rolled sleeve button up to frame forearm motifs for daytime photos.
17. Inner Bicep Statement Panels
Inner bicep panels feel intimate and age differently because that skin is softer and prone to stretch. Pain is moderate to high for most people on the inner arm, and sessions should be planned in manageable segments. Ask the artist about lineweight adjustments for inner-arm skin because single-needle work tends to blur faster there. During the session wear a soft cotton tee that can be moved off the shoulder without rubbing fresh ink.
18. Forearm Edge-to-Edge Pattern Work
If you want a sleeve that wraps fully around the forearm, the key is planning how patterns meet at the seam near the elbow. This is medium to heavy session work and often requires a mock-up so the repeat lines match at rotation points. A common error is failing to consider how the wrist and elbow distort the repeat, creating a visual break. For style photos roll your sleeves to mid-bicep or wear a short-sleeve button-up with cuffs rolled to frame the wrap cleanly.
19. Clean Edge Forearm Extension
Stopping a sleeve cleanly near the wrist keeps the design intentional and avoids the messy look of unfinished bands. This is usually a two to three session project. Tell the artist exactly where you want the stopping point and have them stencil it so you can preview its placement. Many people assume a wrist stop will be unnoticeable, but a half-inch difference changes how jewelry and watches sit against the work. For everyday looks wear a minimal bracelet on the opposite wrist to balance photos.
20. Freehand Forearm Panel with Dot Work Accents
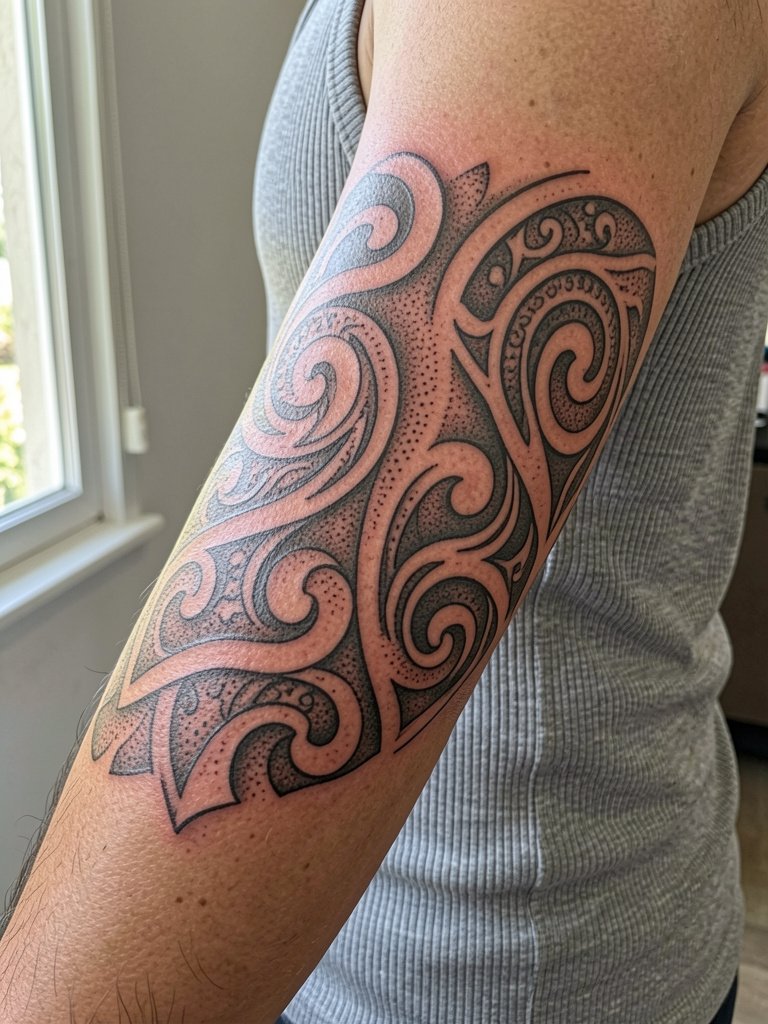
Using stipple shading and dot work inside larger black elements adds texture without turning the sleeve into a grey field. This technique can age nicely if dots are spaced correctly and the artist knows how to control saturation. Ask for healed dot-work photos because healing density determines whether dots merge. For session comfort wear a relaxed ribbed tank so the artist has unobstructed access to the forearm.
21. Shoulder Cap Wrap with Bold Motifs
The shoulder cap is forgiving for bold motifs and photographs well. Sessions are often shorter per visit because the area is broad and the artist can move quickly. Make sure the artist accounts for the way shirts contact the shoulder so dense black fields are placed where fabric will not constantly rub healing skin. For evening wear, camp-collar shirts or sleeveless tanks let the cap read as an intentional framing device.
22. Forearm to Wrist Tapered Sleeve
Tapered sleeves that reduce motif density toward the wrist let the design feel balanced next to hands and watches. Expect two to four sessions depending on how tight the detail gets at the wrist. Ask the artist to show healed wrist-area photos to understand how fine details hold. A frequent problem is sequencing too many small shapes near the wrist that blur into one band. For daily wear choose shirts with sleeves you can roll to mid-bicep so the taper reads well.
23. Full-Arm Statement with Strategic Breaks
This maximal approach uses deliberate negative-space breaks so the sleeve does not read as a single heavy mass. It is session-heavy and benefits from a multi-stage plan that sequences dense areas first and connecting breaks later. During consultation bring examples of healed sleeves that show similar pacing and ask the artist how many touch-ups they typically plan in the first 12 months. For events select neutral overshirts or sleeveless layers so the strategic breaks create visual rhythm when photographed.
Pack Smart
The upper-arm and forearm ideas above share three practical needs during sessions and in the first week.
-
Fragrance-free tattoo balm. Gentle hydration that does not irritate freshly inked blackwork and helps avoid clogged pores during the early healing window.
-
Non-scented gentle body wash. Cleans the sleeve area without additives that can sting or disrupt scabbing, useful when showering a large area.
-
Broad-spectrum mineral sunscreen stick. After the tattoo heals, daily application on exposed forearms and shoulders preserves saturation and slows fading from UV exposure.
-
Breathable recovery arm sleeve. Lightweight cover for outdoor chores to protect healing skin from friction and direct sunlight.
-
Aquaphor Healing Ointment. A widely used option for the very first days when a thin protective layer helps prevent excess crusting on dense blackwork.
Frequently Asked Questions
Q: How do I tell the difference between ta moko and Maori-inspired designs when briefing an artist?
A: Ta moko has cultural protocols and often denotes genealogy, while Maori-inspired designs adapt motifs without claiming lineage. One camp insists that ta moko be treated as identity-marking and reserved for those with the cultural standing to wear specific symbols. The other camp accepts Maori-inspired aesthetics for non-Maori clients who commission respectful, custom work that avoids sacred elements. Request the artist explain which motifs are culturally public and which require deeper permission.
Q: How much detail can hold up on a curved arm like the inner bicep or wrist?
A: Curved or softer skin zones need larger motifs and slightly heavier linework for longevity. Inner biceps and wrists tend to blur faster, so specify wider spacing and ask for healed examples on similar placements to check for blowout. If you want fine texture, prefer stipple or dot work applied with deliberate spacing so dots do not merge.
Q: Where can I find portfolios and healed examples for Maori sleeve tattoo ideas without naming artists directly?
A: Search hashtags like #maoritattoo, #polynesiantattoo, #ta moko, and #maorisleeve on Instagram and TikTok then use location filters to narrow to your area. Prioritize portfolios that show healed photos and full-arm compositions rather than fresh flash. Reddit threads can point you to healed examples and give practical booking and budget experiences.
Q: What should I wear to a multi-hour sleeve session to stay comfortable and protect fresh ink?
A: Prefer loose, easy-access clothing that leaves the placement exposed without rubbing. For shoulder or upper-arm work a loose button shirt or tank top is best. For forearm sessions roll sleeves above the elbow or wear short sleeves that do not constrict the arm. Bring a zip-front hoodie to stay warm during breaks.
Q: How often will a Maori-style blackwork sleeve need touch-ups?
A: Most bold blackwork pieces need at least one touch-up in the first 6 to 12 months while saturation evens out. Afterwards touch-ups depend on sun exposure and skin type. Dense black fields and crisp edges typically hold better than tiny micro-detail, so planning larger shapes reduces how often you return.
