
Bold black silhouettes hold up better than ultra-detailed portrait pieces when you want an anime nod that still reads clean after a few years. Simplified manga eyes, motion lines, and stylized symbols keep character while giving linework room to breathe. Below you will find ideas that balance recognizable anime aesthetics with practical spacing, placement, and styling so your ink still reads healed and intentional years from now.
1. Minimal Manga Eye on Inner Forearm
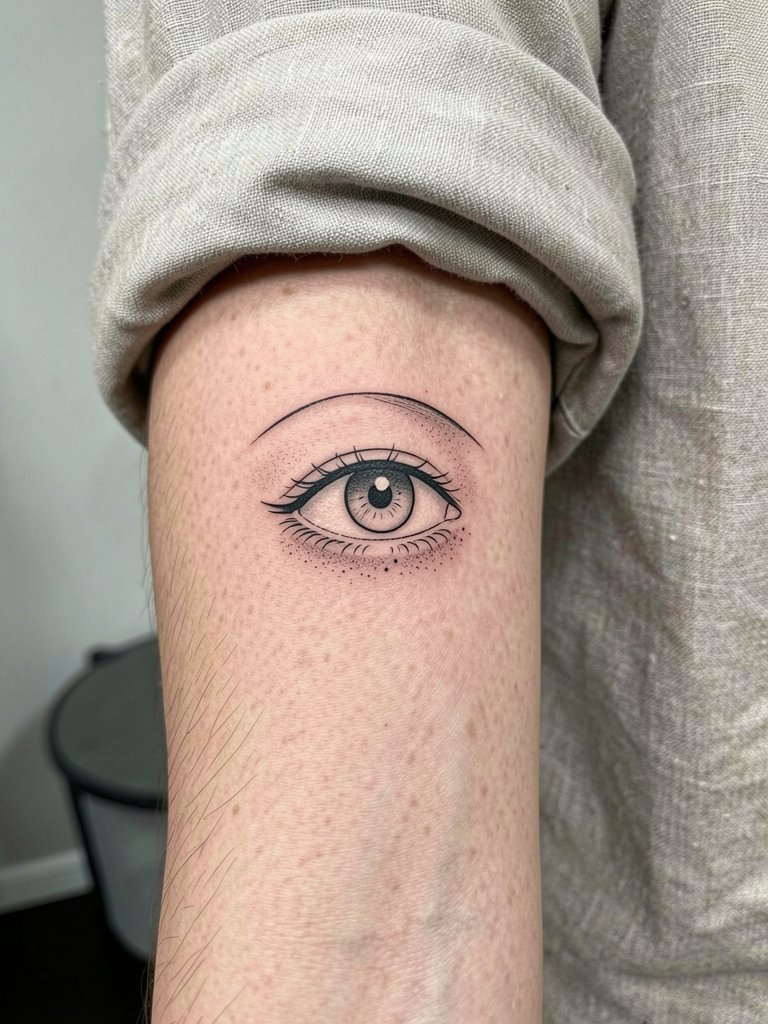
A single-needle manga eye reads delicate and iconic on the inner forearm when linework is given breathing room. Pick this when you want a symbolic nod to anime without a full portrait. Discuss exact line weight and highlight placement during consultation so the pupil and lashes keep contrast after one and three years. The inner forearm is medium pain, usually one to two hours for a small piece, and it shows touch-ups sooner if lines are placed too close. A common mistake is asking for ultra-fine lashes that blur into a soft grey by year three. For showing the piece, roll sleeves and try a linen button shirt to frame the forearm without covering the design.
2. Stylized Oni Mask on Shoulder Blade
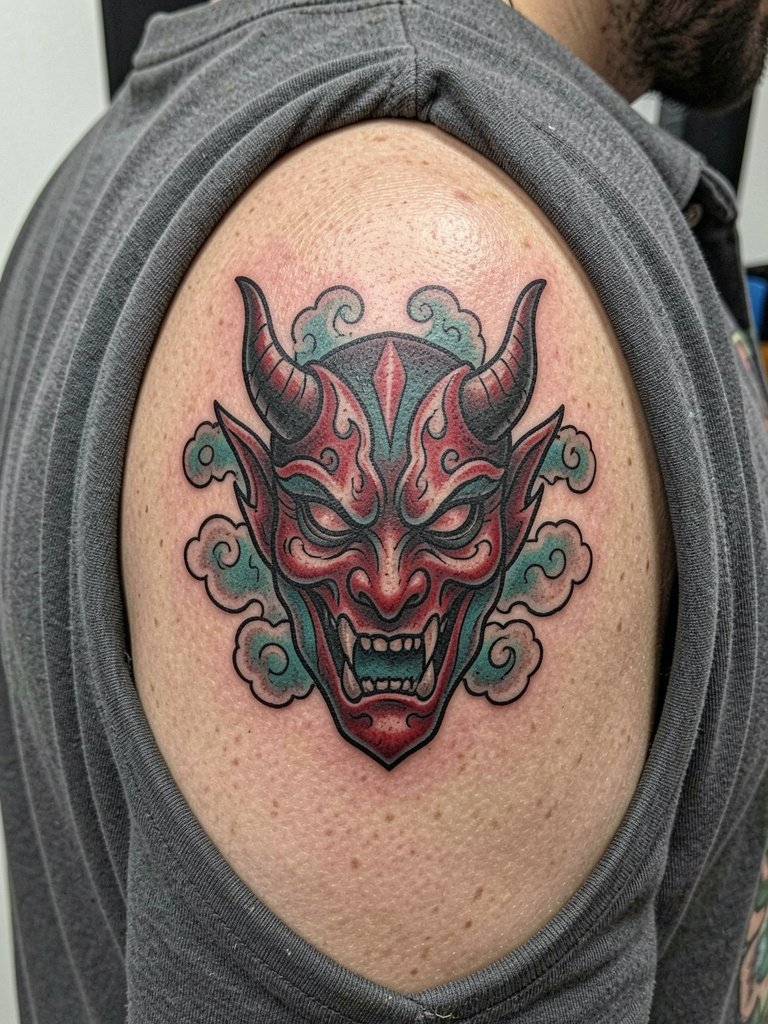
A shoulder blade canvas lets neo-traditional shapes read bold while keeping manga energy. I recommend heavy outlines and mid-tone saturation over tiny facial details, especially if you plan to add color. In the chair this is a three to four hour session depending on shading. Ask for reference shots showing the outline scale at two to six inches so the artist sizes the mask to the blade. A mistake is packing micro-detail into the cheeks, which tends to fill in over time. Pair this look with open-back tops when you want it visible at night.
3. Manga Panel Fragment as Upper Arm Accent
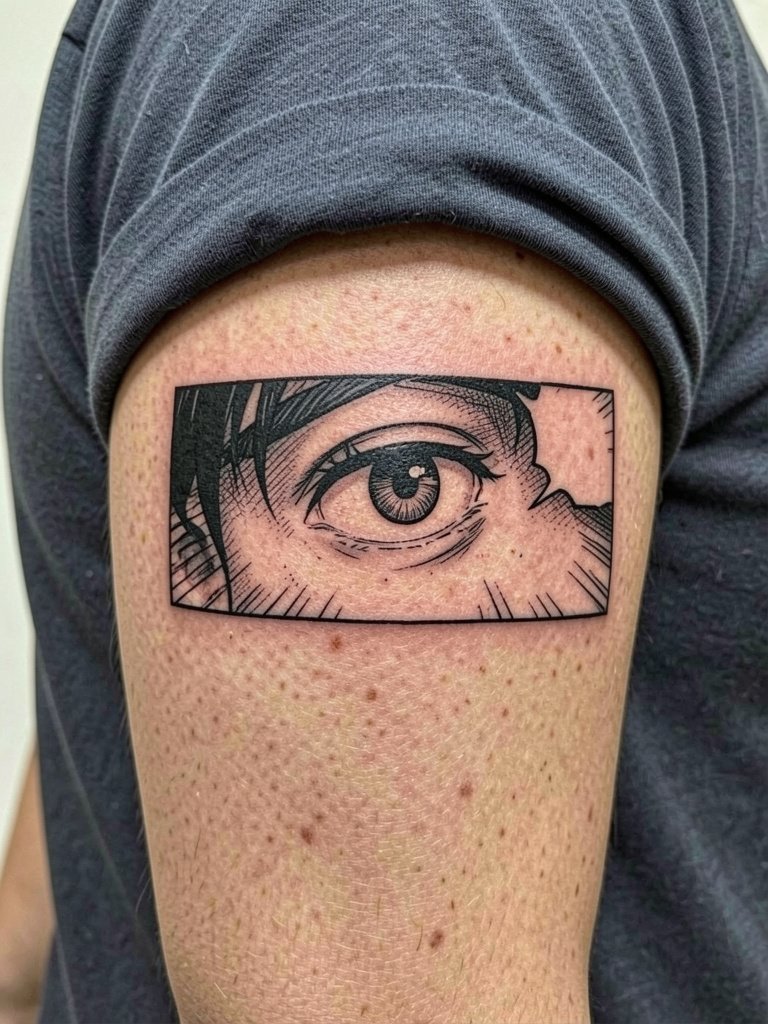
Use a single manga panel fragment when you like the comic layout without committing to a full sleeve. This works well as an accent on the upper arm because the curve helps the panel read from multiple angles. In practice bring two to three scaled references so the artist can show how the panel reads at three inches versus six inches. The outer arm is lower on the blowout risk list, but thin facial details still need room to avoid merging after a couple of years. Expect a two to three hour session with medium saturation. A common error is asking for a literal comic page shrunk down, which loses its energy when the type and lines compress.
4. Speed Line Burst on Calf
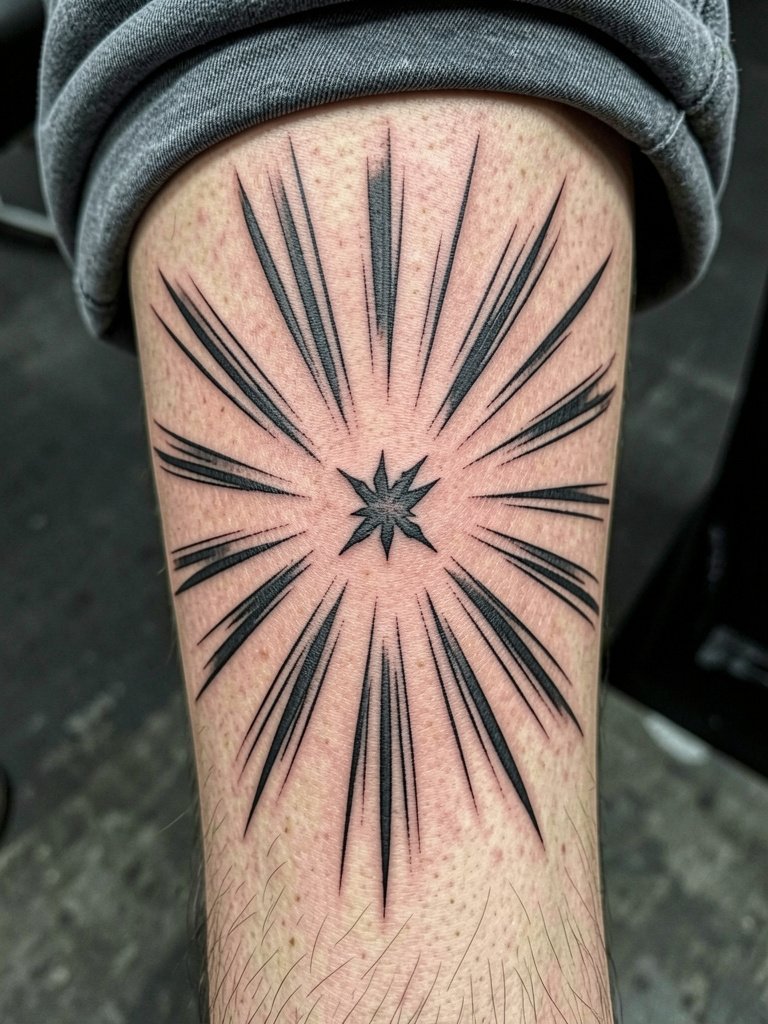
A speed-line motif is a quick, graphic way to add motion to a simple symbol. Choose thick linework and wide spacing so the burst keeps impact at six months and year two. The calf is comfortable for most people and sessions for a strip like this usually take under an hour. Discuss exact spacing and the central focal size before the stencil goes on so the burst does not crowd the muscle contours. A mistake is asking for narrow, dense strokes that appear muddy healed. For showing it off try a pair of athletic shorts with a rolled hem so the calf remains visible.
5. Chibi Silhouette on the Ankle
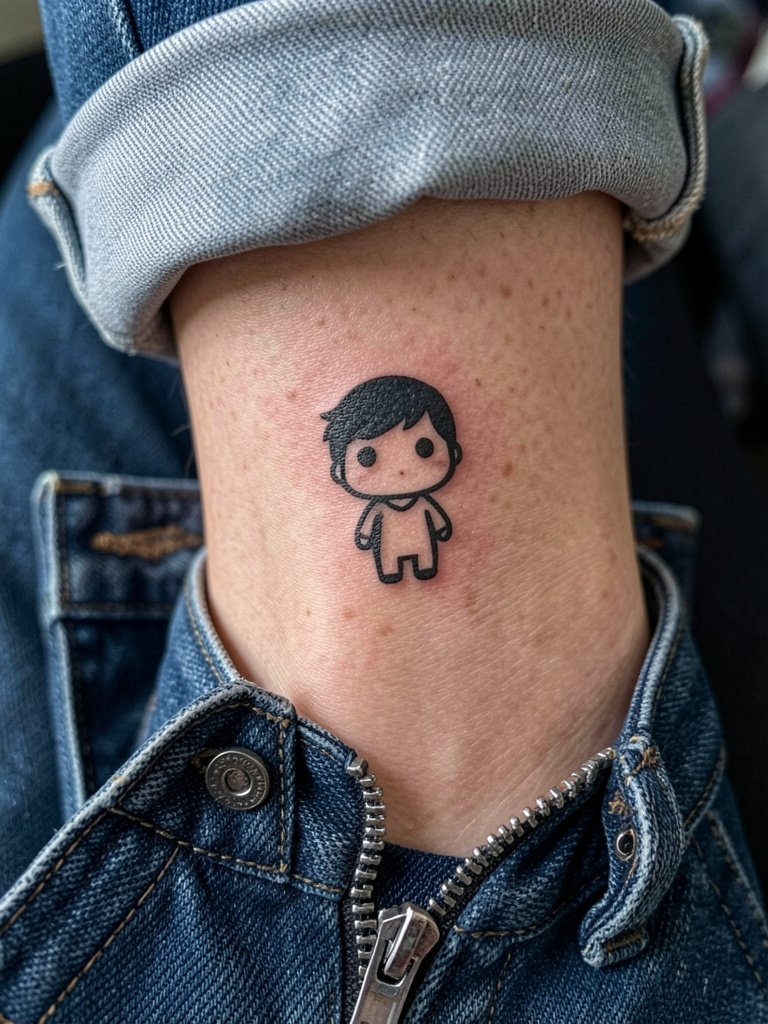
Ankle silhouettes work if the design is kept bold and simple. The skin there sees friction from socks and shoes, so a solid fill with crisp edges beats tiny facial detail for longevity. Sessions are short and the area is one of the higher blowout risk places because of thin skin near bone. Ask for a single pass of saturated black and a slightly thicker outline to protect the fill. The mistake is requesting micro facial features that disappear under friction. Accent this area with an ankle chain or minimal leather anklet when you want to show it off.
6. Onomatopoeia Script Along the Ribcage
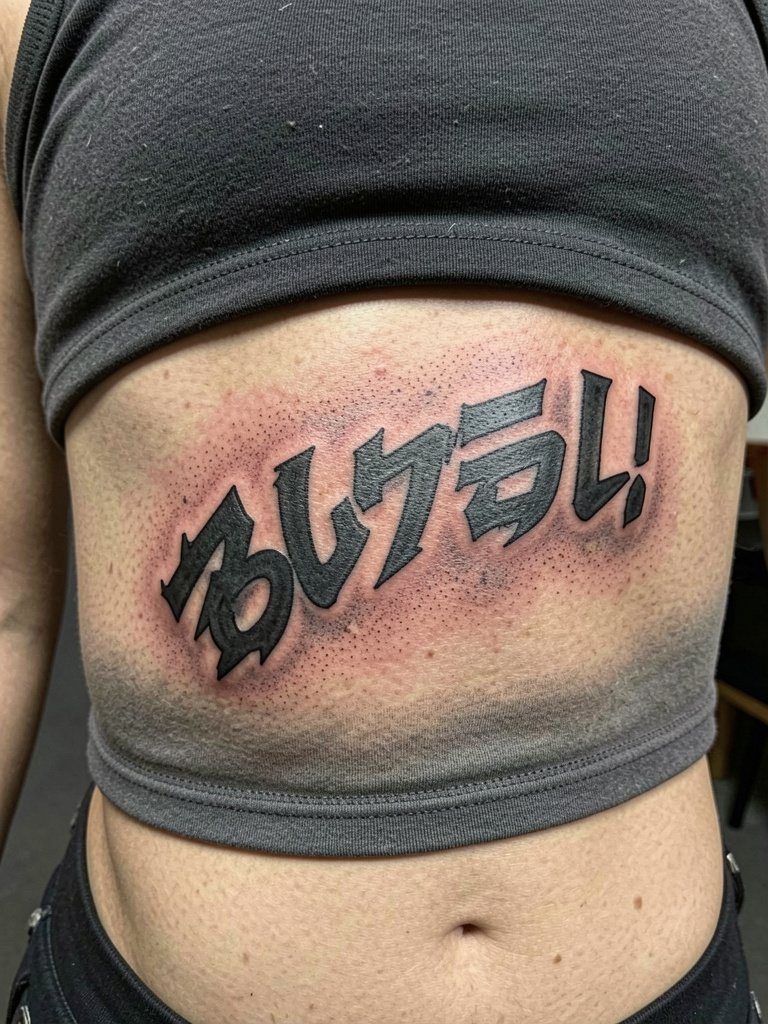
Ribcage lettering reads dramatic when left bold and slightly spaced. Pain on the ribs is higher than on the arm, and sessions may need breaks. Artists are split on fine line on ribs. One camp says fine single-needle scripts blur within two years because the skin flexes and lines are too close. The other camp argues that with slightly wider spacing and careful depth single-needle can settle well, and they will show healed photos to support that. For this placement plan on a one to three session schedule depending on size and ask the artist to place the type with at least two to three millimeters of spacing between strokes to reduce future merging.
Session Day Picks
The wrist, ankle, and ribcage above all heal differently, so a few small items smooth the chair time and the first week.
-
Stencil transfer paper kit. Lets you preview the panel and script placement on skin before inking, which is helpful for the manga panel and ribcage ideas.
-
Topical numbing cream. Applied as instructed forty to sixty minutes before can ease rib and ankle sessions without affecting linework when used correctly.
-
Thin protective film roll. Keeps ankle and wrist pieces clean through the first days of friction from socks and watches.
-
Fragrance-free gentle body wash. Cleanses without stripping saturation during daily showers for the first two weeks.
-
Aquaphor healing ointment. Thin layers in the immediate healing window lock in moisture for fine-line work without clogging needle channels.
7. Manga Face Fragment with Stipple on Upper Thigh
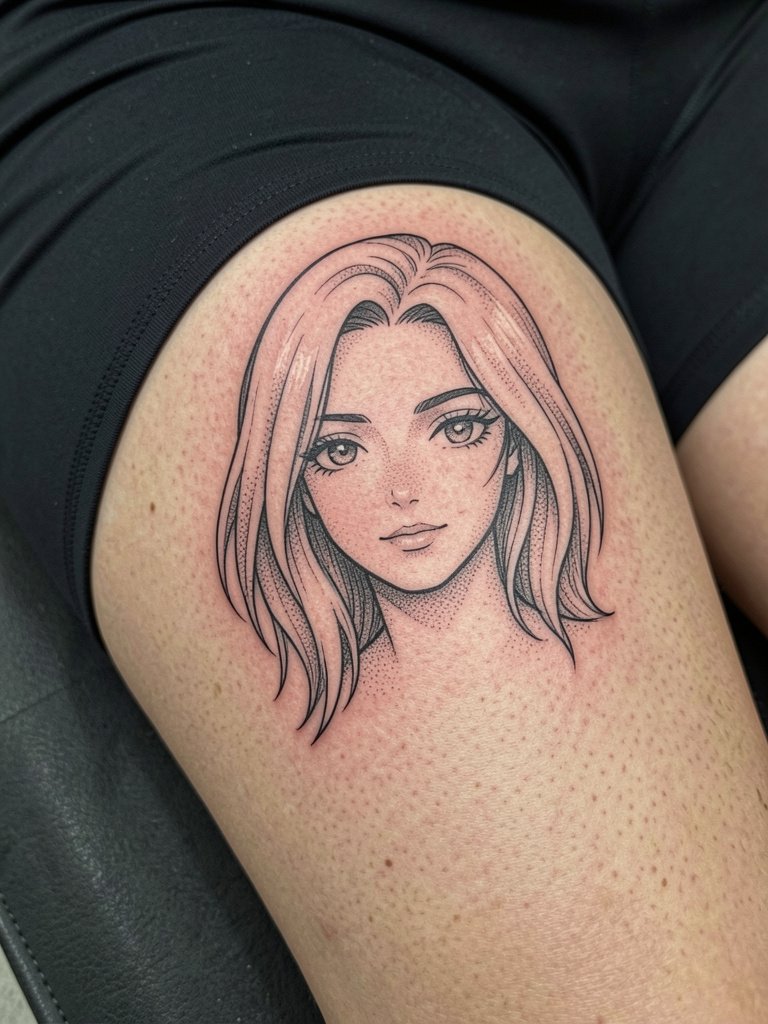
An upper-thigh face fragment reads intimate and cinematic when stipple shading is used to suggest tone instead of tiny filled lines. This placement is less exposed to sun and often ages well in terms of saturation. Sessions can be comfortable lying down and will often run two to three hours. A common mistake is packing busy hair detail into a narrow column, which causes lost contrast after healing. Because this is an intimate area, choose an artist experienced with thigh work and plan for a touch-up in year two if you want the stippling to hold its mid-tone.
8. Mecha Gear Minimalist on Collarbone
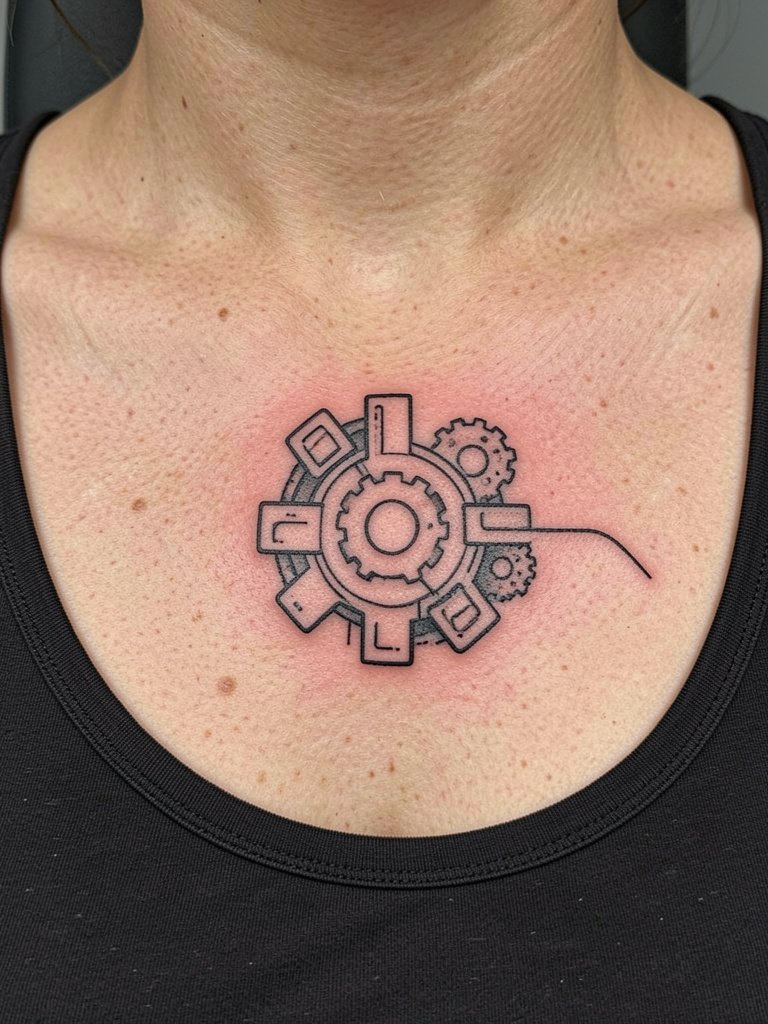
Collarbone placements highlight linear manga geometry when the linework follows the bone. This placement is visible and often photographed, so prioritize bold single lines and avoid ultra-skinny crosshatching that can soften. The session is short and the area can be painful due to thin tissue over bone. During consultation show the artist the exact curve you want so the gear elements read symmetrically across the clavicle. For outfits, a wide V-neck or a scoop-neck tank keeps the collarbone exposed without shifting fabric. Expect a touch-up at one to two years for very thin details.
9. Retro Manga Rose on the Wrist
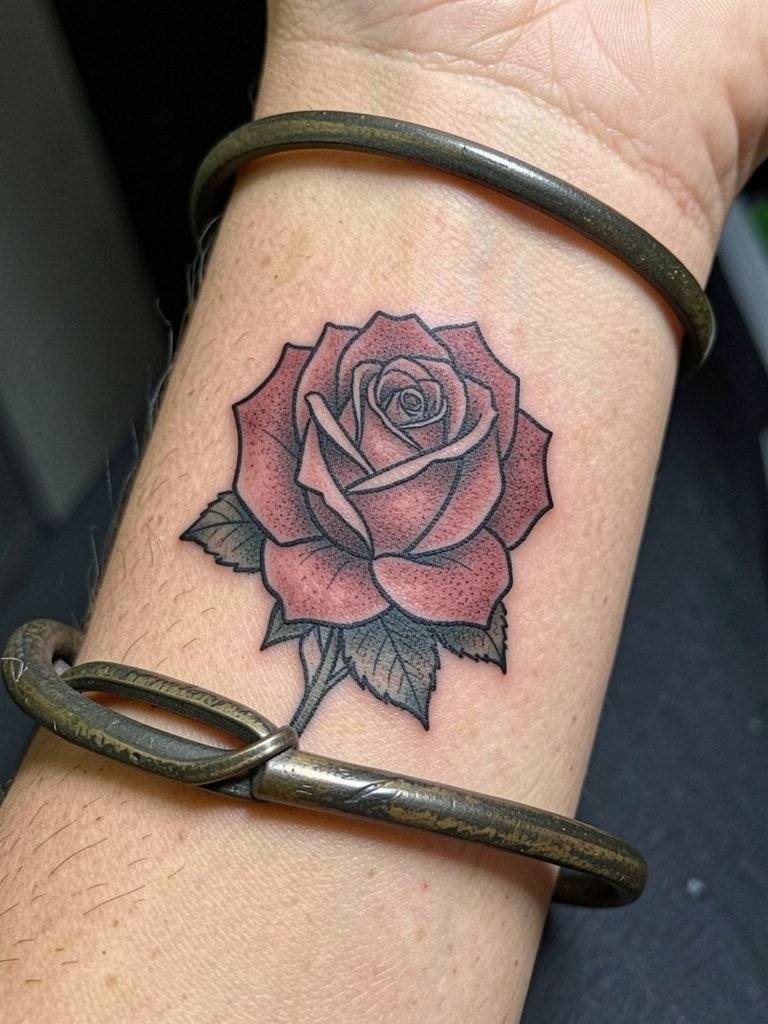
A wrist rose balances classic silhouette and manga-influenced linework. The wrist is a high-visibility spot that takes a lot of washing, so saturated outlines and modest fill hold better than micro detail. Talk about how wide you want the outline and whether the sepia or red fill should be patchy or flat. Sessions are short but expect touch-up sooner because of constant friction. A typical mistake is shrinking the rose to an inch with tiny petals that lose shape. Style it with a slim cuff or beaded bracelet to frame the tattoo without covering it.
10. Cel-Shaded Koi and Wave on Lower Calf

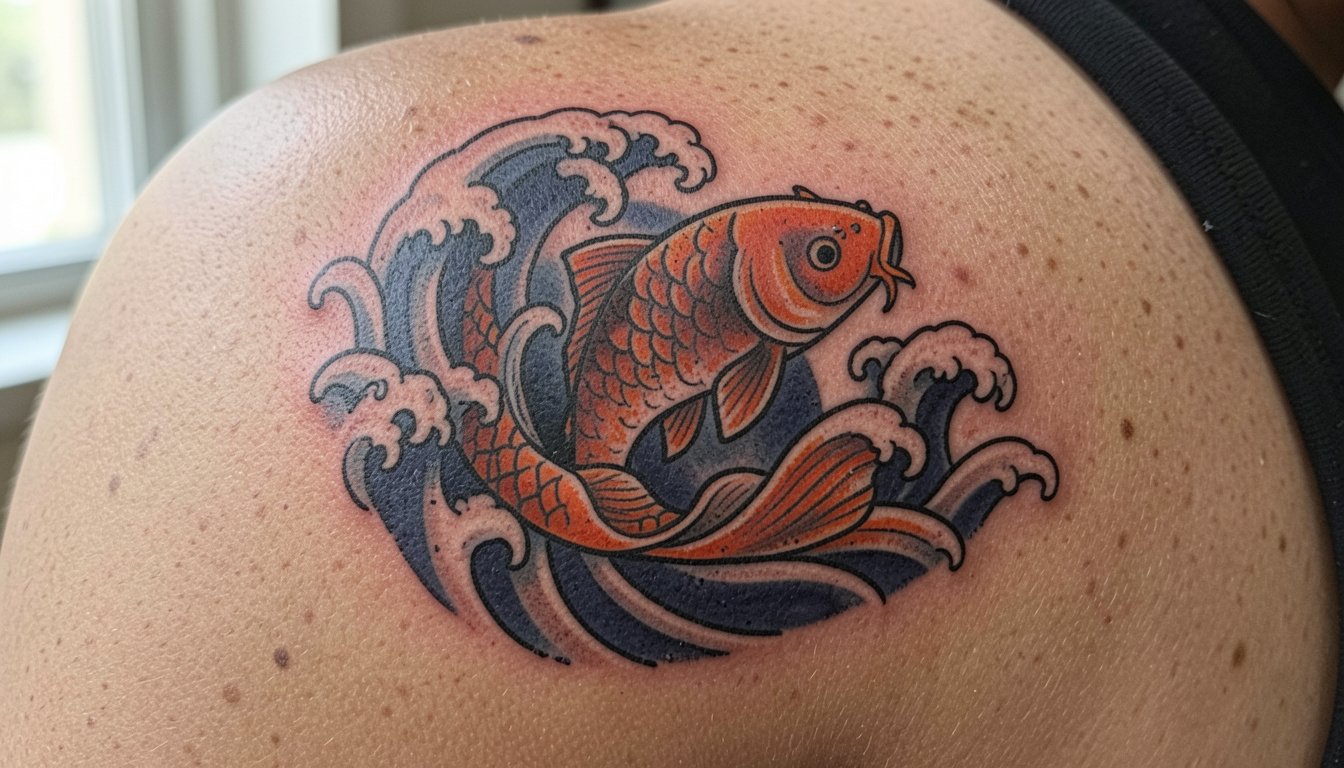
Koi rendered in cel-shaded blocks reads like an anime poster on the calf. The composition needs broad planes of color to keep saturation consistent over time. Expect a longer session if multiple color panels are included, often split into passes to let skin heal between layers. A mistake is crowding the scales with tiny linework instead of suggested shapes. The lower calf tolerates heavier saturation, so this is a good spot for a stylized, colorful piece that keeps visual depth without microscopic detail.
11. Katakana Single Word Behind the Ear

Using Japanese script carries questions people discuss. One camp treats script tattoos as homage and a way to celebrate language and culture. The other camp sees unchecked use of foreign script as appropriation, especially when the wearer does not engage with the culture beyond aesthetics. If you choose a script, confirm exact wording and correct orthography in advance. Behind-the-ear sessions are quick but the area is small and sensitive, so increase line weight a hair to protect against future blurring.
12. Micro Panel on the Finger Edge
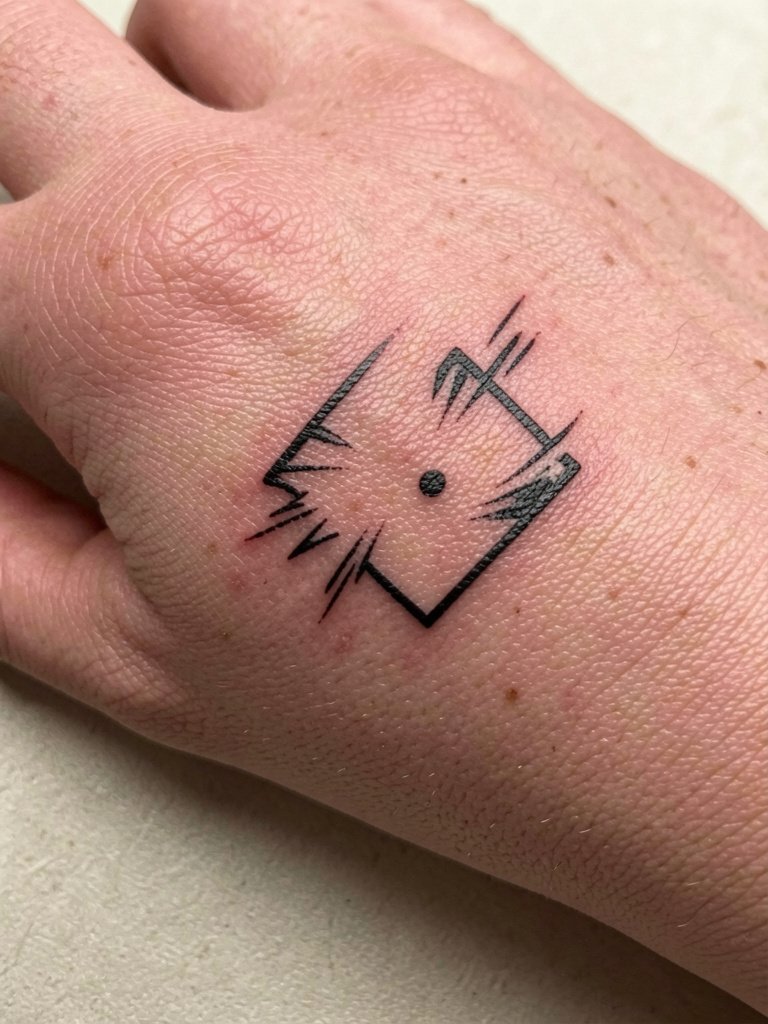
Finger work is high maintenance and often needs touch-ups. For a micro manga panel keep outlines bold and avoid internal type or tiny facial lines that the skin will absorb. Sessions are quick but painful due to thin tissue and proximity to bone. Discuss how wide the border needs to be so the design keeps contrast after months of hand washing. A mistake is copying a twelve-point font into a one inch panel. For display, pair with slim stackable rings that leave the design visible rather than covering it.
13. Whip-Shaded Portrait Eye on Nape

A nape portrait eye with whip shading creates motion without tiny filled lines. The nape heals predictably but can blur if the shading becomes too tight. Sessions are short and the area can be sensitive in patches. Ask the artist how confident they are with whip shading near hairline because technique affects long-term fade. A common error is over-shading the pupil and losing the focal contrast. For sessions wear a wide-neck top so the artist has clear access and your clothes do not rub the fresh ink.
14. Stipple Moon with Sakura on Upper Back
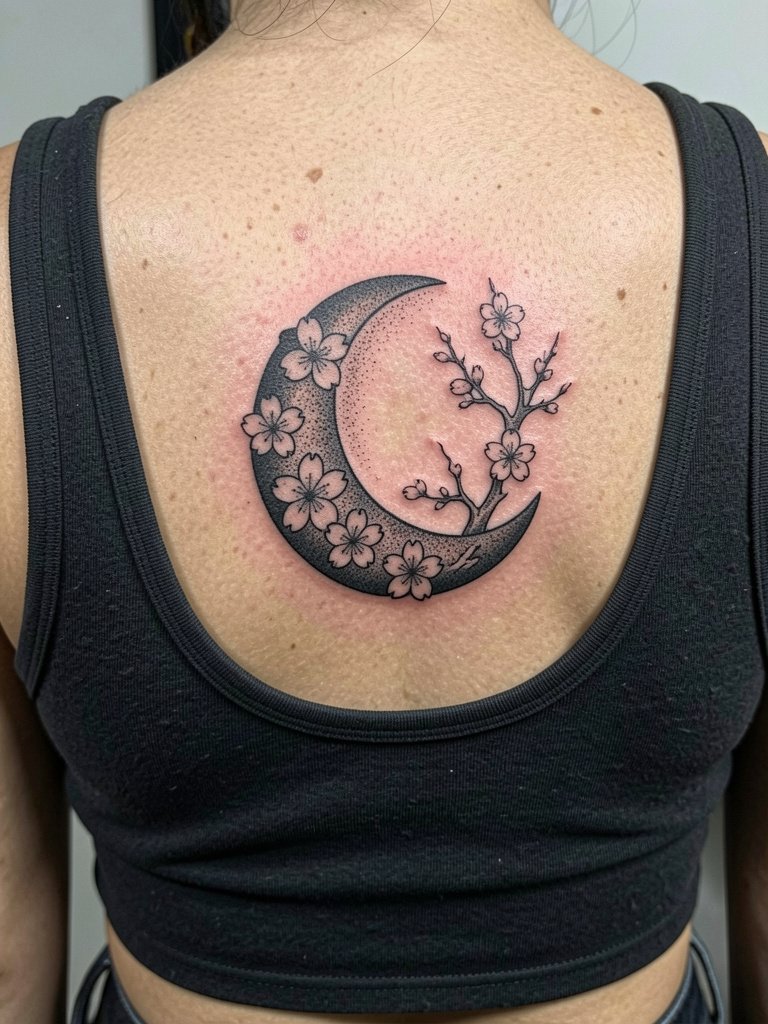
Sakura and moon motifs reference Japanese visual language, so treat origin respectfully. One camp views floral motifs as universal design language that can be shared across styles. The other camp asks for context and respect, especially when symbols carry cultural or ritual meaning. If you use sakura include an acknowledgment of the motif's origin in your reference and consider working with artists who understand the visual history. The upper back gives space for stipple work to age elegantly, and sessions are often longer but comfortable because the area tolerates heavy detail.
15. Scroll-Tied Minimal Panel on Inner Forearm Wrap
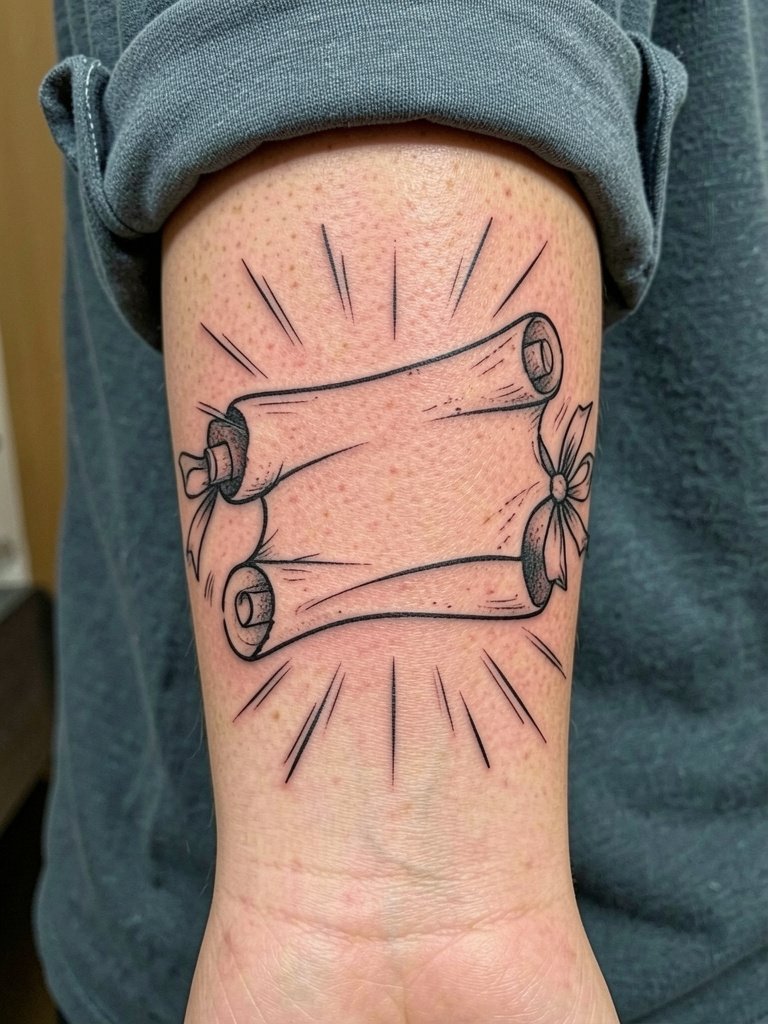
A wrap panel works when the scroll and ribbon are drawn with confident contours and generous spacing. The inner forearm gives the design room to breathe and keeps lines away from constant friction. Ask the artist to map how the ribbon ties overlap at normal arm positions so the wrap does not crimp when you bend the wrist. A typical session runs one to two hours and you might want a touch-up at year one for the ribbon edges. Avoid asking for tiny script inside the scroll unless you accept a planned touch-up.
Frequently Asked Questions
Q: Will fine single-needle manga lines on ribs hold up?
A: Ribs are high movement skin and fine single-needle lines can blur faster there. One approach is slightly wider line weight and more spacing, which reduces the risk of lines merging. Plan for a possible touch-up at year one to keep crispness.
Q: How should I dress for a shoulder blade or upper back session?
A: Wear an open-back tank or a wide-neck shirt that you can remove without pulling across the tattoo area. A fitted cropped tank layered under outerwear works well for shoulder and upper back sessions.
Q: Where can I find healed examples and portfolios of anime-inspired work without following specific artists?
A: Search platform tags and keyword filters on social apps and portfolio sites. Try hashtags like #AnimeTattooHealed, #MangaInk, and #MangaLinework on image platforms. Use location filters and portfolio search terms such as "stipple manga" or "manga panel tattoo" to find healed shots in different skin tones.
Q: Is using Japanese script disrespectful for a small tattoo behind the ear?
A: It depends on context and intent. If you use script as a respectful nod and double-check meaning and orthography, many see that as homage. If you pick a script because it only looks cool without engaging the language or culture, some people will call that appropriation. Verify exact characters with a fluent speaker to avoid embarrassing mistakes.
Q: How often do anime-style tattoos need touch-ups compared to other styles?
A: Micro ink and single-needle details usually need a touch-up sooner, often within one to two years. Bolder silhouettes and solid fills can go longer before touch-ups. Real-life factors like sun exposure, placement, and daily abrasion change the timeline.
