
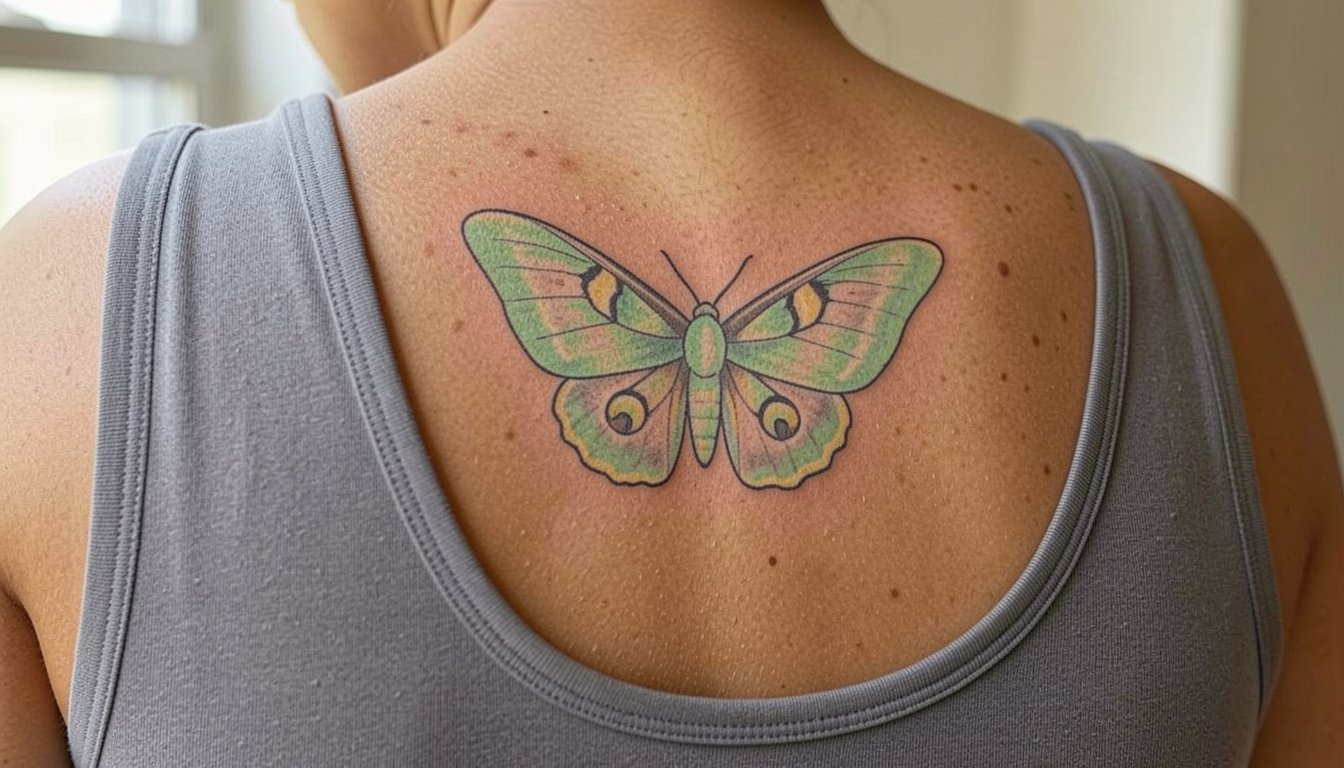
Luna moth tattoos often look best when the artist treats the wings like negative space instead of tiny filigree. Bold anchors of black and selective color stop the delicate parts from merging into a blur as skin texture changes. Expect a range of sizes and placements here, with practical notes on aging, session feel, and wardrobe choices that help each design read clearly for years.
1. Fine-Line Luna Moth on Inner Forearm
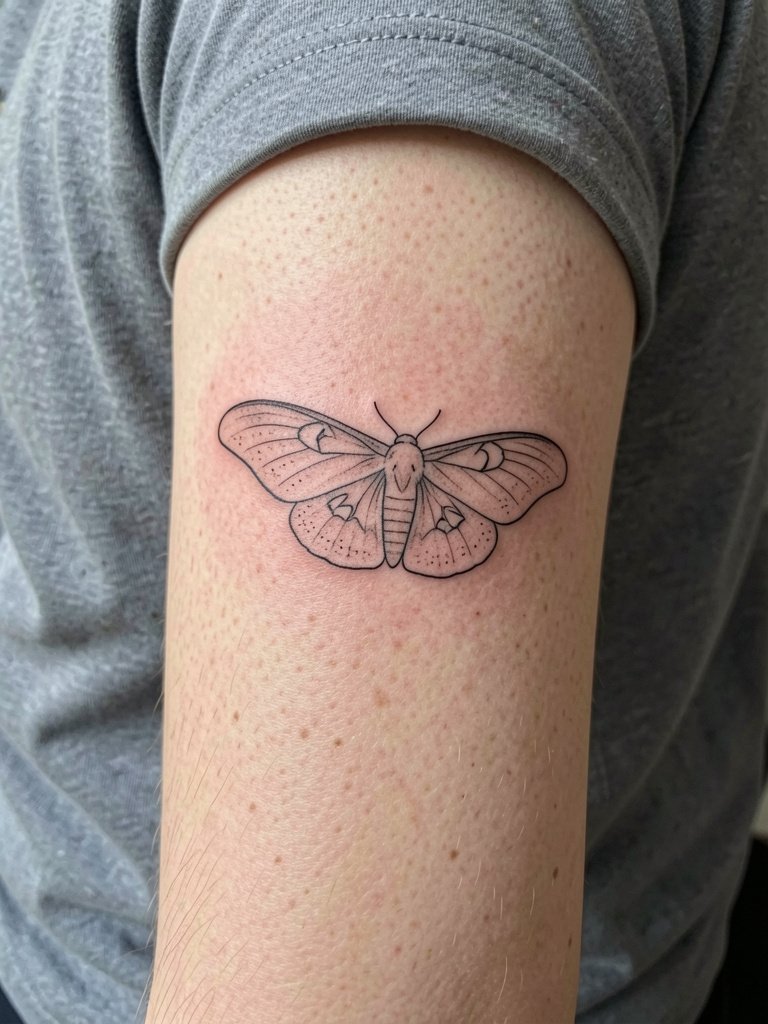
This is the go-to for someone who wants an elegant, narrow piece that tucks under sleeves. I recommend keeping the wings slightly wider than initial Pinterest references so the tiny veins have room to breathe over time. Talk with the artist about line weight and spacing, request a sample stencil at three inch and five inch sizes, and choose a single-needle with a confident hand for crisp linework. Expect a quick session of about 45 to 75 minutes and light soreness the first day. At six months the lines usually look settled. By year two thin veins may soften, and a small touch-up often restores crispness. For showing off, pair this with rolled-up linen sleeves to keep the forearm visible.
2. Minimalist Silhouette Behind the Ear
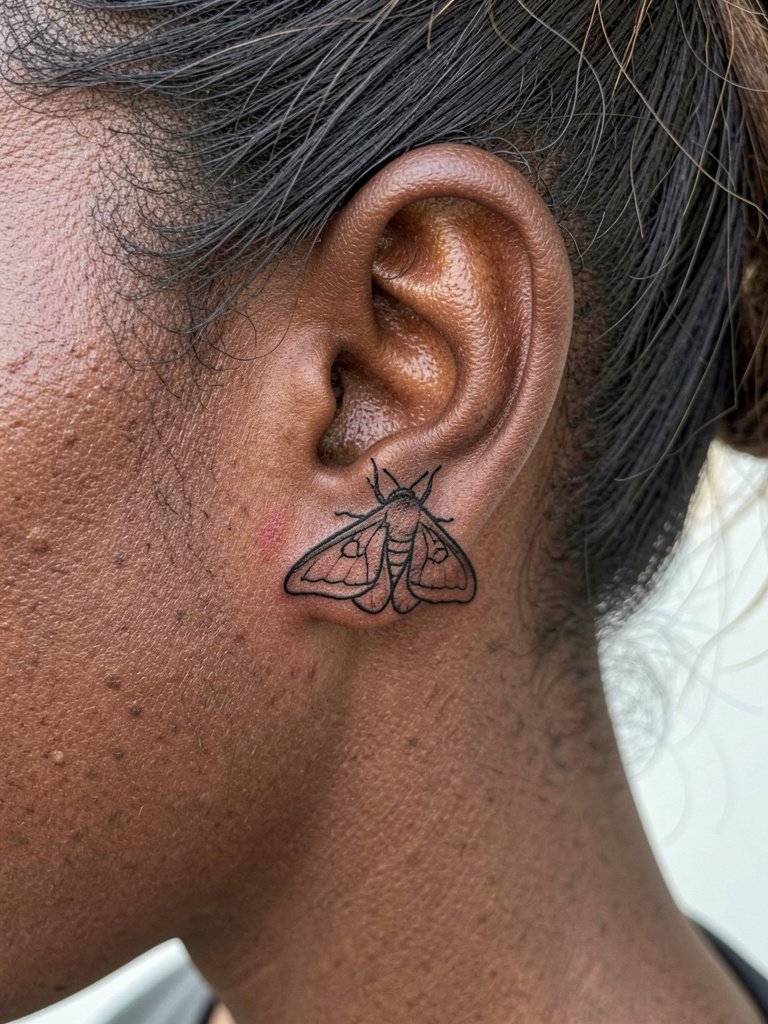
Small neck-adjacent pieces read best with simplified shapes rather than lots of internal detail. I suggest a slightly heavier outline so the moth silhouette keeps its presence as the skin moves. The session is short and sharp, often under 30 minutes, with pinpoint pain because the area is thin. A common mistake is packing micro-detail that becomes muddy after healed movement. For visibility, wear hair up or try simple studs that frame the nape. A sleek hair claw works well for evenings when you want the tattoo visible.
3. Color-Block Neo-Traditional on Thigh
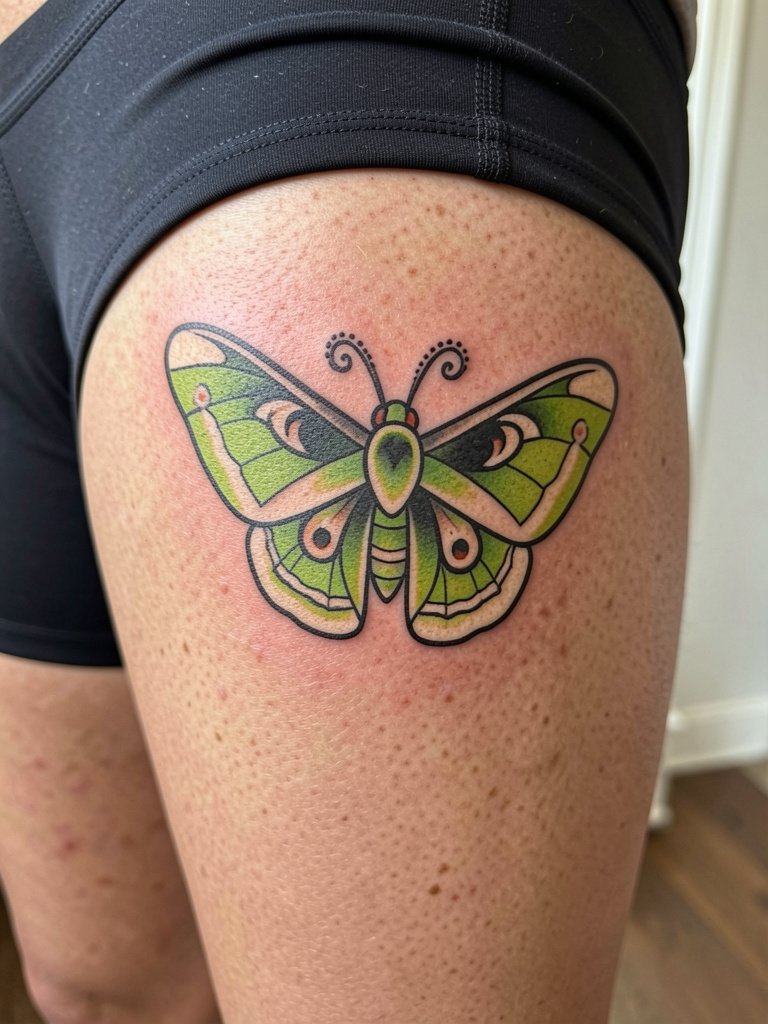
Larger thigh canvases let you push saturation without losing the moth's form. One camp of artists argues that solid color blocks age better because they maintain contrast. The other camp favors subtle gradient shading for realism and accepts more frequent touch-ups. State your preference openly during consultation and show two healed examples so the artist can match your aftercare plan. Session time is often two to three hours depending on size, with the thigh offering a relatively low pain profile. Expect a bright look at six months and slightly softened edges by year three. For nights out, this placement pairs with mid-thigh slip dresses that let the color peek without revealing too much.
4. Stipple-Shaded Chest Piece Near the Collarbone
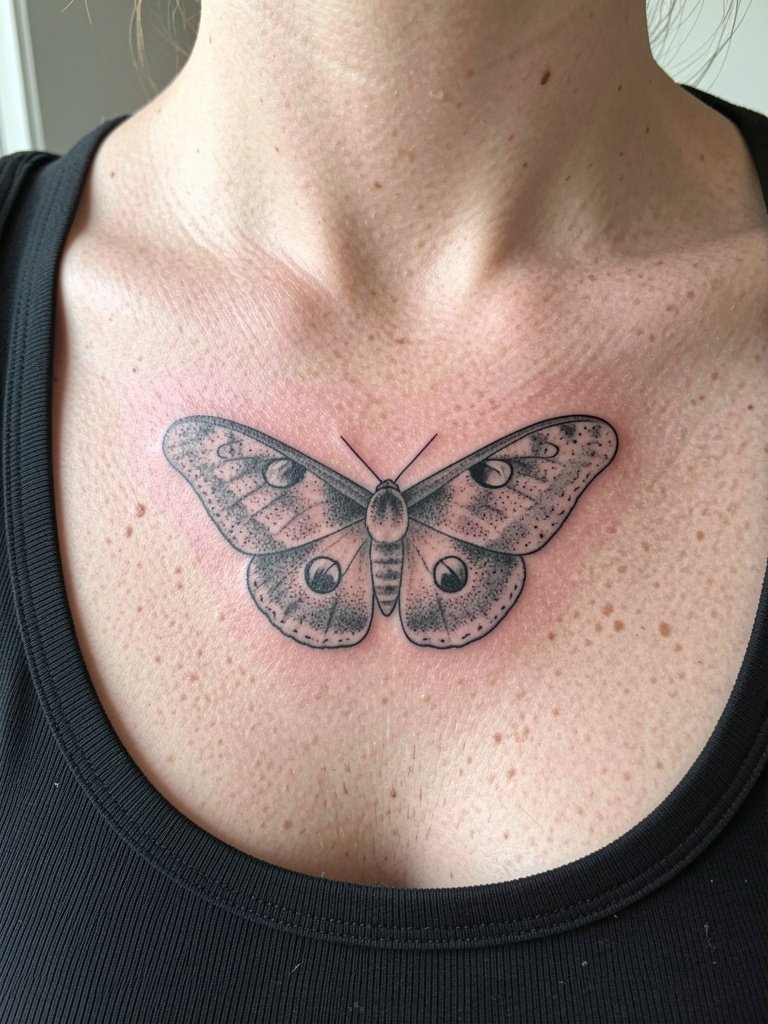
The collarbone sits where thin skin and frequent movement meet, so stipple shading gives the illusion of gradient without relying on tiny blended patches that can disappear. When booking, ask to see healed stipple work on the collarbone area to confirm scale. Pain is moderate. The common mistake is asking for watercolor splatter across the sternum without strong anchors, which tends to fade into a bruise-like wash. At six months shading reads soft. By two years the stipple holds contrast better than feathered blends. For outfits, a wide V-neck or open-collar linen shirt frames the piece and keeps the skin tones flat.
5. Geometric Wingline on Upper Arm
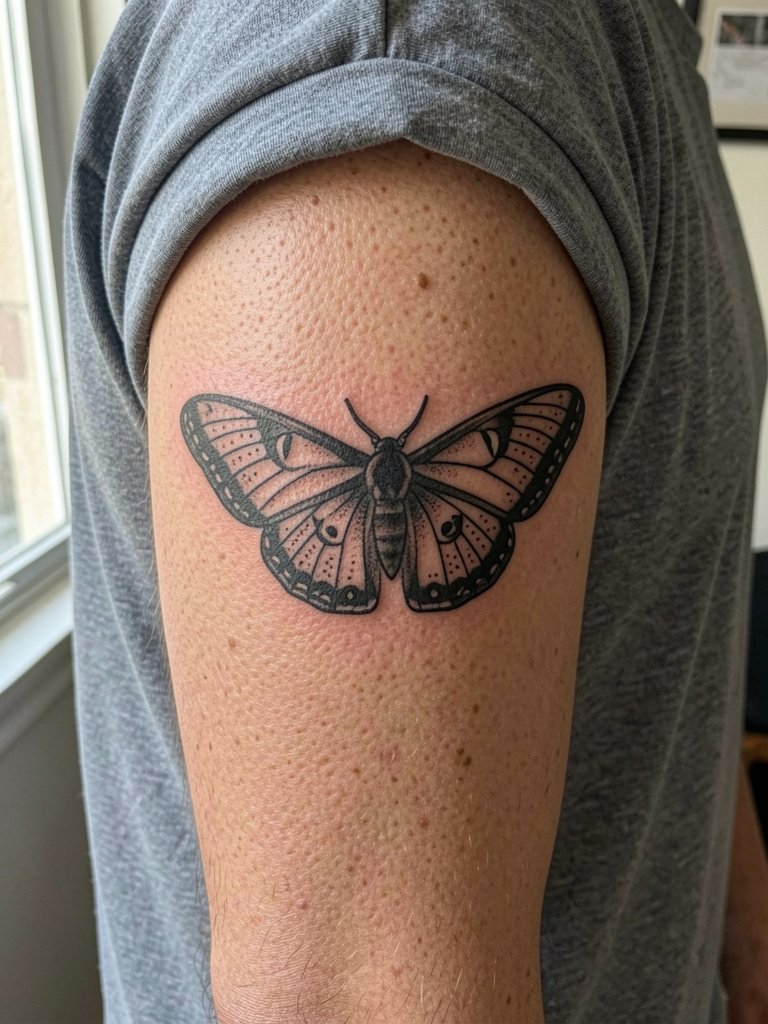
Geometric applications read well on the rounded upper arm because the shapes follow the muscle form. One practical tip is to request the artist draw the arcs directly on the arm with a dry-erase marker so you can see how the geometry curves in motion. Expect a one-hour session and mild soreness. Blowout risk is low if lines are spaced properly. A common error is compressing the geometry too tightly, which looks clean the first month but merges by year three. For casual show-off, roll sleeves to mid-bicep or wear structured short-sleeve shirts that keep the design visible.
6. Watercolor Moth Across the Sternum
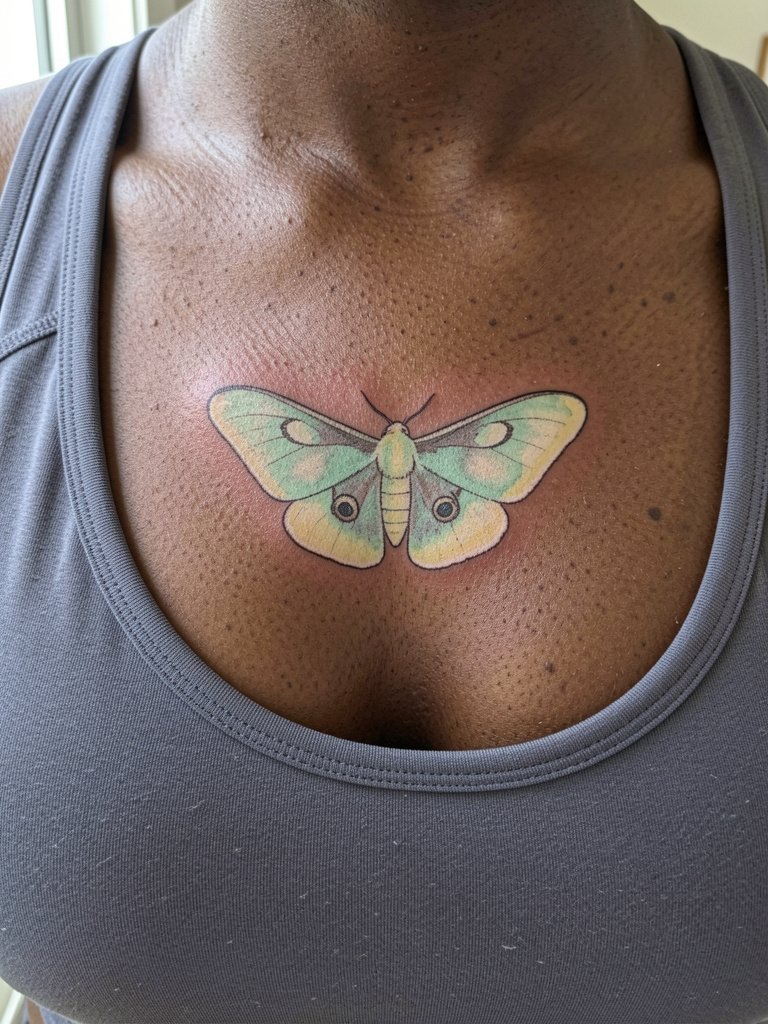
Sternum placements are intimate and sensitive, so session pacing matters. Artists split into two camps on watercolor here. One group says soft washes fade into uneven patches on sternum skin and advise heavier outlines or touch-ups. The other group believes careful layering and realistic expectations produce a lasting painterly effect. State comfort and touch-up willingness in your consultation. Expect a longer session with breaks and moderate to high pain. Watercolor reads vibrant at six months and often needs careful color-touch-ups by year two. For appointment day, wear a fitted sports bra so the artist can work with minimal repositioning.
Pre-Session Essentials
The delicate placements above, from behind-the-ear spots to chest washes, benefit from a few small items that smooth the session and the first week.
-
Stencil transfer paper kit. Lets you preview exact placement on skin before needle work, which is helpful for inner forearm and collarbone pieces.
-
Topical numbing cream. Applied per instructions ahead of sternum or rib sessions it reduces the edge without impacting linework.
-
Thin protective film roll. Keeps ankle and foot tattoos clean through the first days of friction and showering.
-
Fragrance-free gentle body wash. Cleans skin during the healing window without stripping pigment.
-
Aquaphor healing ointment. Thin layer for the first few days helps retain moisture on fine-line pieces without over-suffocating the skin.
7. Blackwork Moth Sleeve Accent
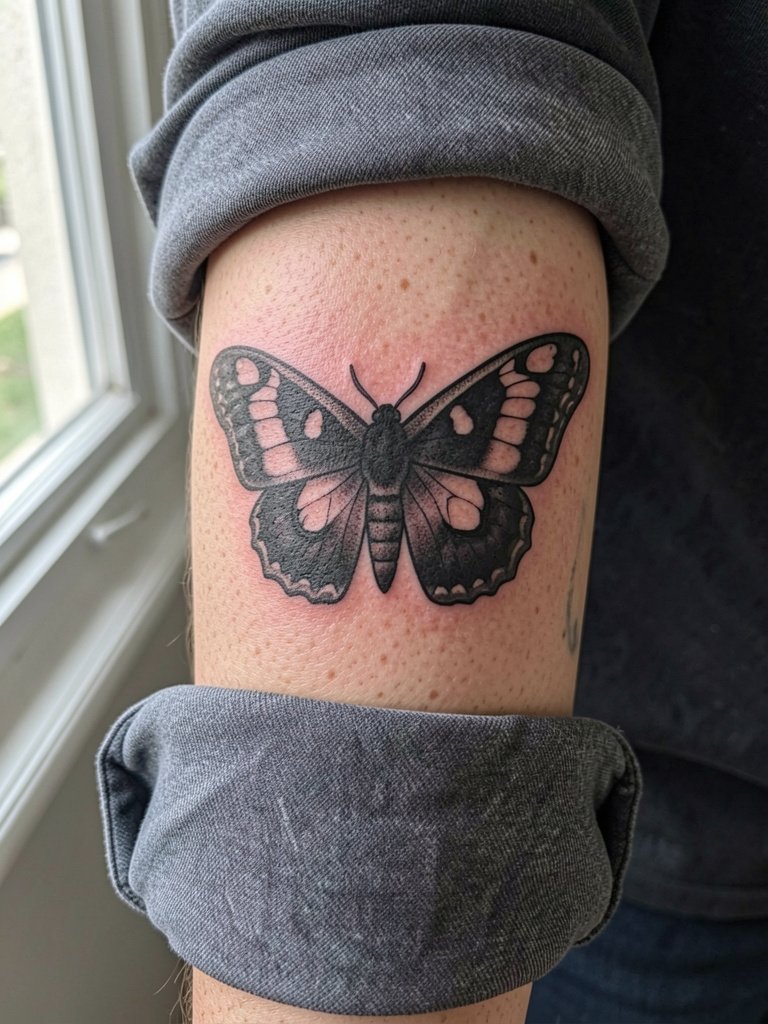
Blackwork gives lunar motifs bold presence and resists the fading issues that affect tiny color fills. For sleeves, talk about how the moth will sit with existing pieces so the negative space reads clearly. Sessions vary widely, expect multiple sittings if this ties into a half or full sleeve. The mistake is trying to cram too many small motifs into one arm band. Plan broader shapes and allow for spacing so the moth remains legible at arm distance. For showing off, pair this with rolled-up sleeves or cropped jackets that expose the forearm.
8. Micro-Realism Moth on the Wrist

Wrist micro-realism demands restraint. The wrist moves constantly and sees lots of washing. I recommend slightly increasing line weight compared to a photo reference so tiny hairs and antennae do not disappear. Session is usually under an hour but uncomfortable due to bones and tendons. Common mistakes include requesting extreme tiny detail at a tiny scale. At six months a crisp micro-realism looks soft but readable. By two years, expect some loss in the finest strokes and plan for a targeted touch-up. Wear bracelets that do not rub the area during the first week.
9. Abstract Linework Across the Ribcage
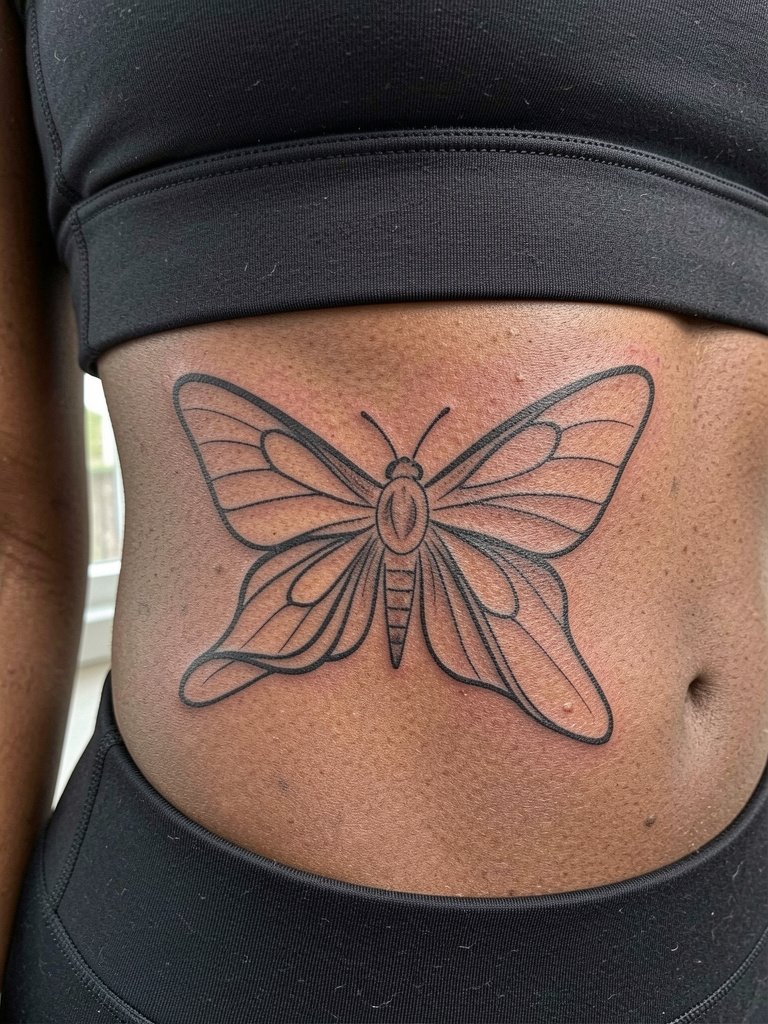
Rib placements require careful sizing because the skin stretches with breathing. One camp argues the ribs are too mobile for fine line and that lines blur quickly. The other camp says that with slightly bolder line weight and planned spacing, linear designs last. If you favor delicate lines, ask for a mockup on the body and a note about touch-up expectations. Sessions here are longer and involve higher pain. At six months the piece will look close to final but may soften around the edges by year two. For the appointment, wear a fitted cropped top so the area is exposed without fabric moving.
10. Monochrome Stag-and-Moth Back Piece
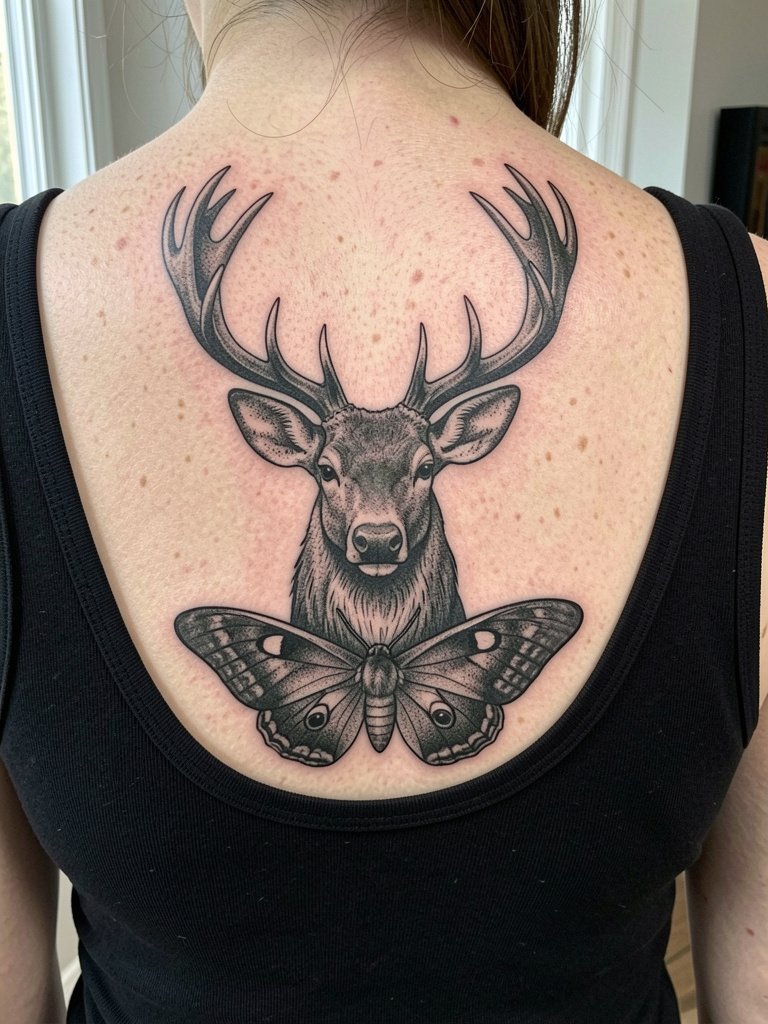
Large back pieces allow narrative layering and heavier shading that ages predictably. Discuss composition and how the moth overlays existing imagery so the moth's wings do not get lost. A typical session can be multiple sittings totaling several hours. The common error is underestimating how long the project will take and booking back-to-back long days. After healing, the contrasts from black and gray pieces tend to hold better than delicate color washes. For clothing, a low-back dress makes the piece part of your evening wear.
11. Antique-Inspired Heraldic Moth on the Thigh
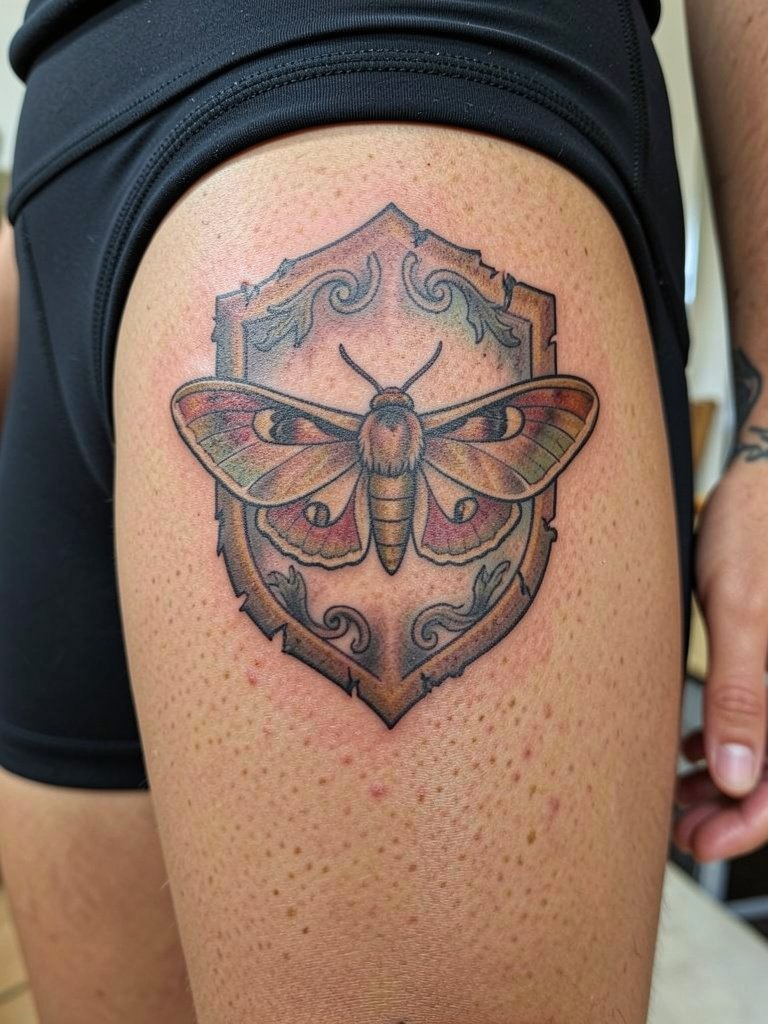
Antique crests pair well with natural motifs, but artists disagree on scale and texture. One group favors precise heraldic block shading that keeps its edges for years. The other group recommends a weathered look with stippling and tiny cracks that will need touch-ups sooner. If you want the worn aesthetic, plan for a follow-up at two years. Thigh placements are low pain relative to ribs. Expect a two-hour session for a medium crest. For showing the piece, try mid-thigh skirts that let the motif show when seated.
12. White Ink Highlights on Darker Skin
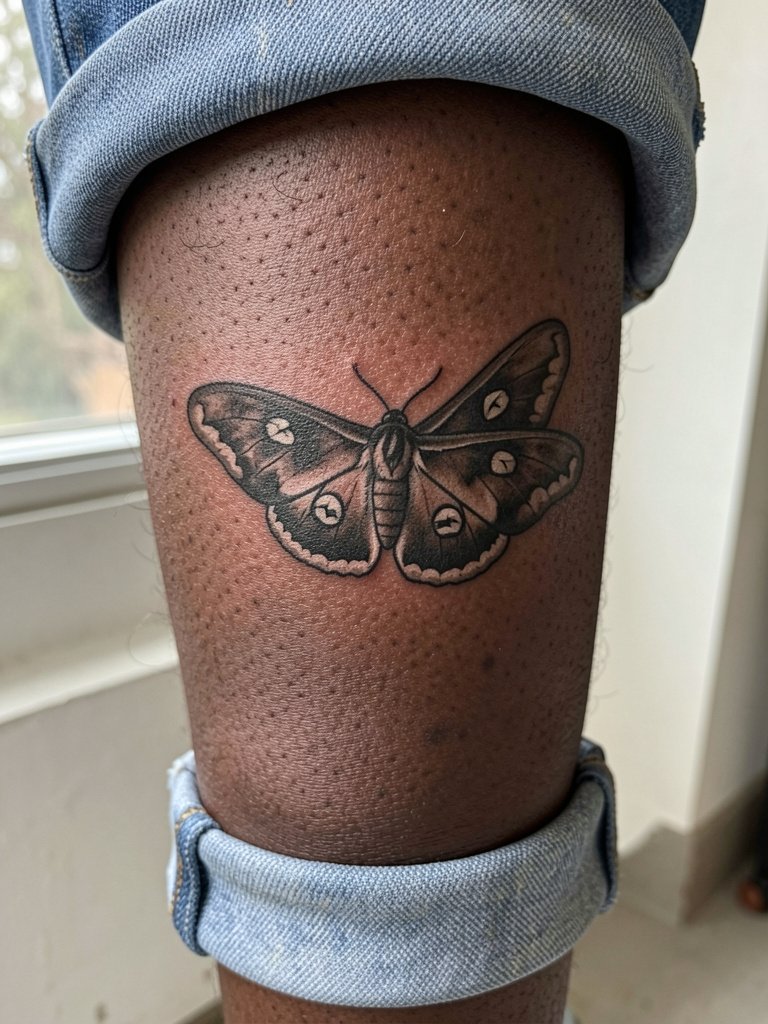
White ink can add pop on richer skin tones, but it behaves differently than black or color. A practical scenario is to request white only as highlights on sturdy black shapes so contrast remains even if the white scatters. Discuss realistic expectations for fade and how many sessions the artist recommends for layering white. Session time is moderate. A frequent mistake is overusing white at very small scales where it simply disappears. For evenings out, show the ankle or calf with cropped hem jeans that keep the highlighted areas visible.
13. Dot-Work Mandala with Moth Centerpiece
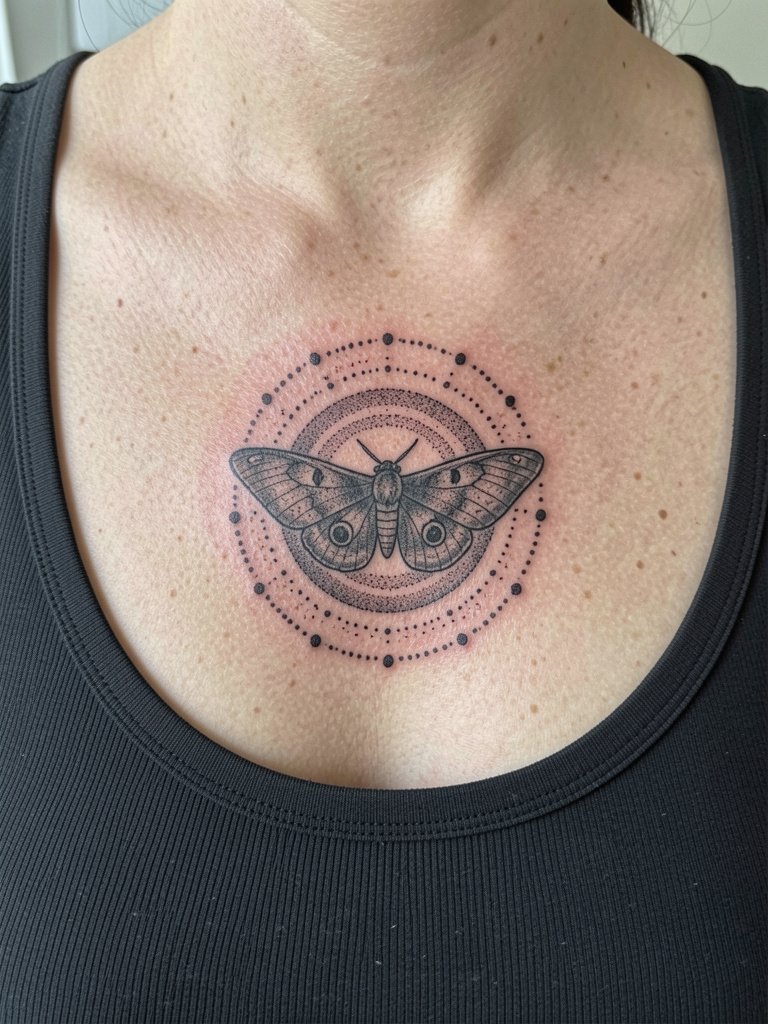
Mandala dot-work needs even spacing so the radial symmetry does not warp with body curves. For chest placement be explicit about the center point relative to the sternum. Plan for a multi-session project and ask for a drawn transfer that shows the final symmetry. The mistake is going too small with dots on the sternum where skin irregularities can make stippling read uneven. At one year the dot-work looks cohesive but tiny gaps may soften by three years. Pair with a low scoop top to reveal the pattern.
14. Single-Winged Moth on the Collarbone Edge
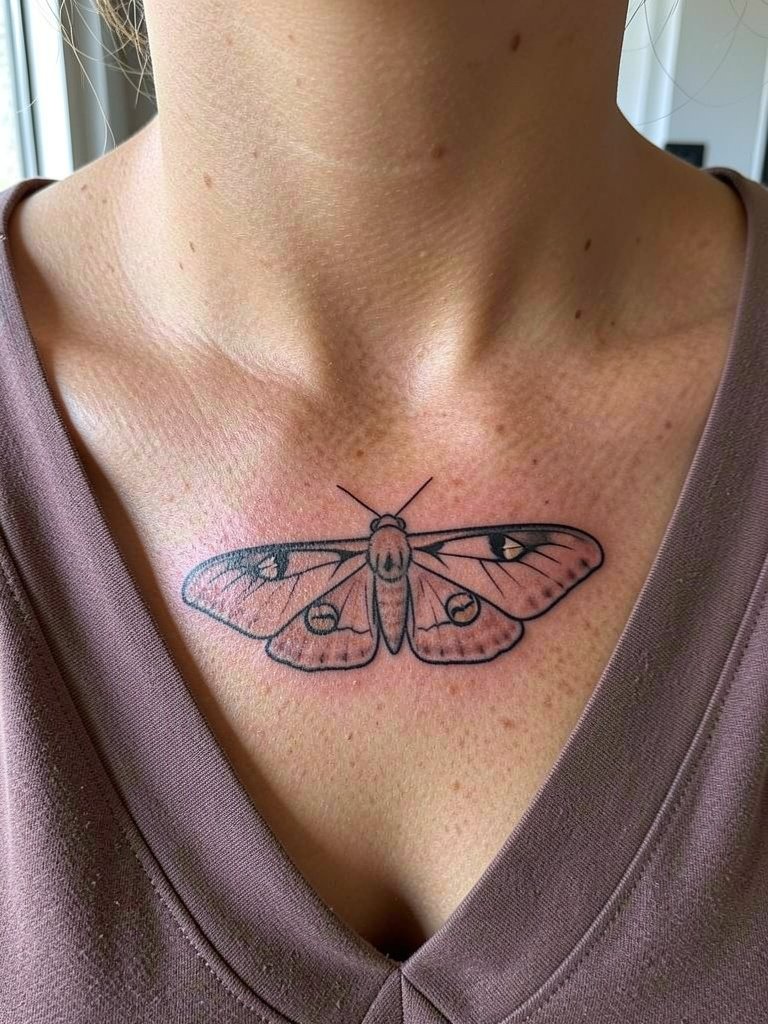
A single-wing motif is a good way to suggest the moth without a full body. Discuss exact placement so the wing follows the collarbone line and does not feel like an afterthought. Session time is brief and the area is moderately sensitive. Many people ask for extreme filigree on the collarbone which tends to blur, so prefer a confident outline and sparse interior detail. At six months the outline looks crisp and by two years interior lines may need a touch-up. For outfits, a wide V-neck blouse frames the wing naturally.
15. Full-Color Realistic Moth on the Shoulder Blade
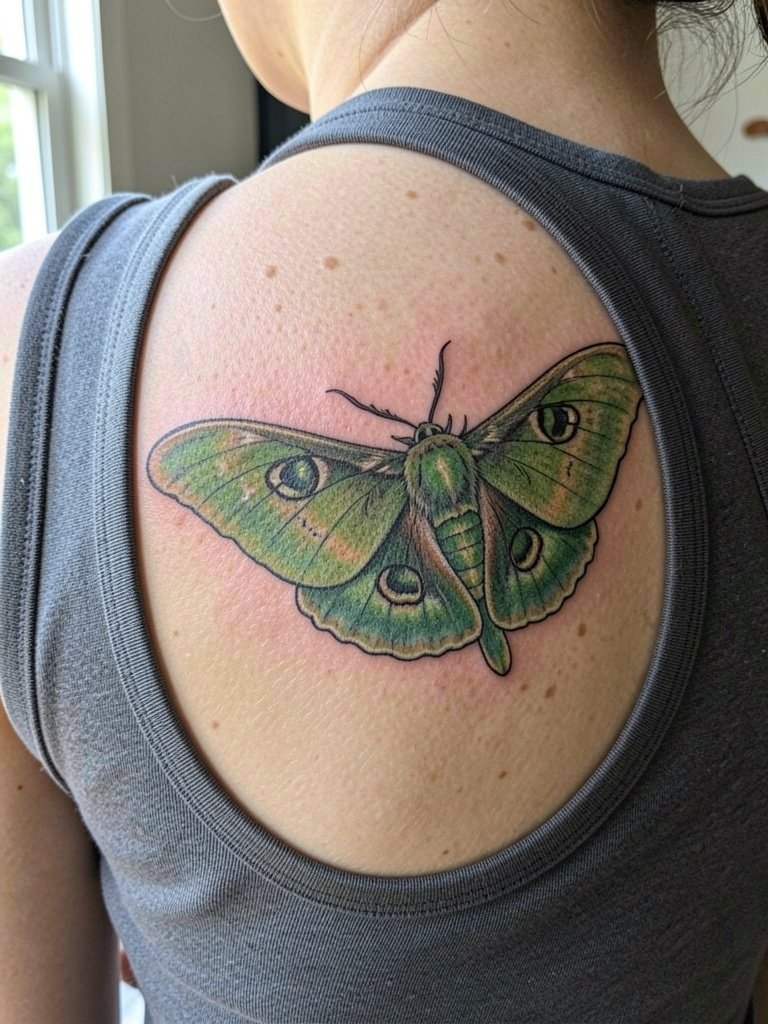
Realistic color demands commitment to maintenance. If you want long-lasting vibrancy, choose saturated layering at the first session and accept periodic color-touch-ups to refresh fades. Sessions vary with complexity and can take multiple sittings. A common misstep is trying to replicate a high-saturation photo without accounting for how colors soften on healed skin. At six months the piece is usually close to the finished look, with subtle flattening by three years. For wardrobe, a scoop-back top lets the shoulder blade art show.
16. Minimal Script with Moth Accent on the Wrist
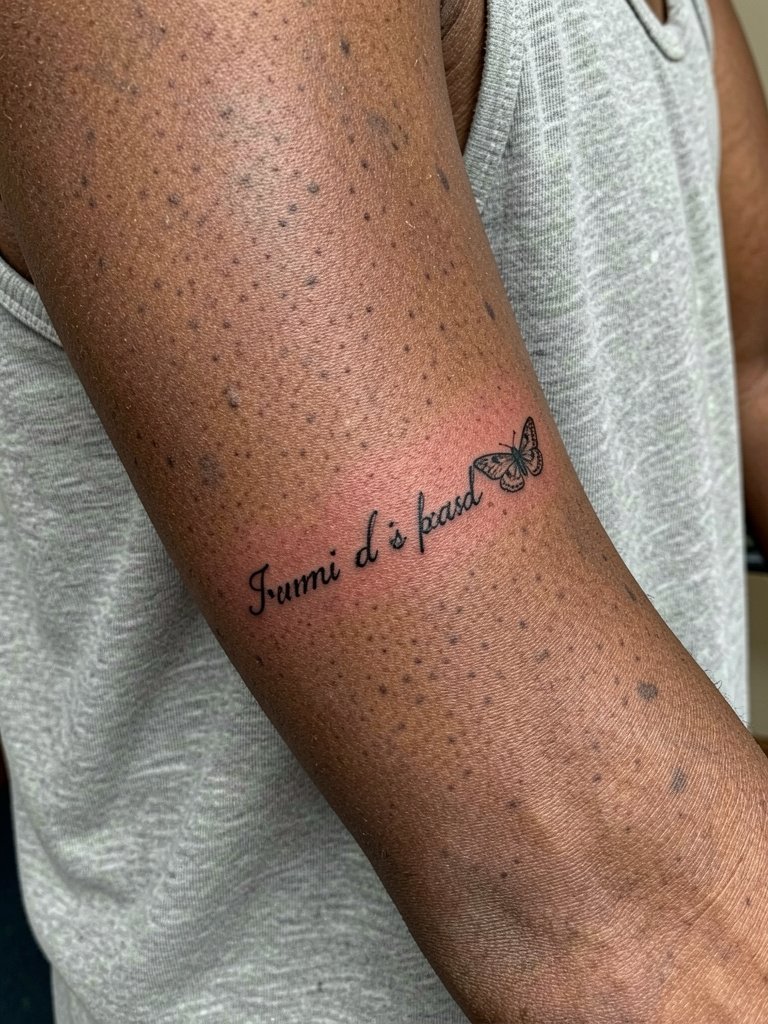
Script with a moth detail is subtle and personal. Keep the word small and the moth slightly larger than you imagine so the accent does not disappear under wrist motion. Specify exact lettering size and spacing during the consultation and ask for a scaled stencil. The wrist is a high-movement area and will show blur sooner than a chest piece. Expect light touch-ups at two to three years for fine scripts. Bracelet choices can highlight this placement. Try a thin cuff that sits below the piece so the skin shows when you move.
17. Negative-Space Moth Over Sternum Pocket
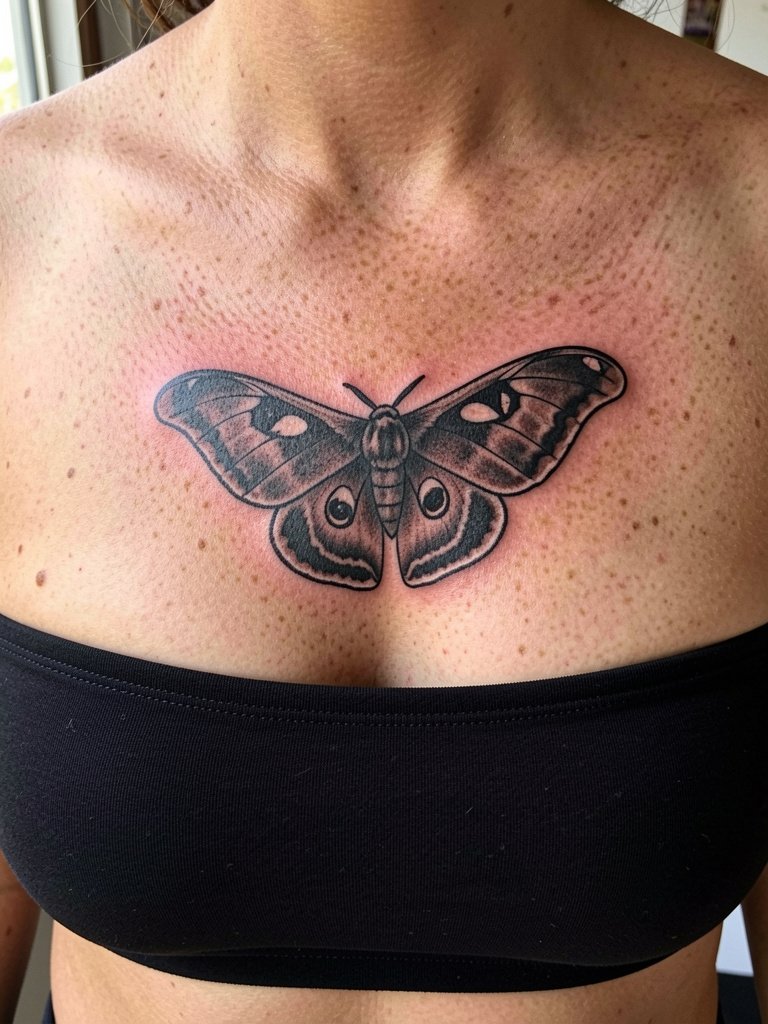
Negative space creates bold contrast without micro-detail that can fade. The key is careful balance between the surrounding black and the uninked moth silhouette so the negative area does not collect pigment from adjacent shading. Ask the artist to map out the black pocket on your body before committing. Sternum sessions can be clinically painful and often need breaks. At one year the negative shape reads strong, but adjacent blackwork may require touch-up to avoid haloing. For nights out, a bandeau or low-cut top shows the pocket without interference.
18. Tiny Moth on the Ankle

Ankle tattoos face a lot of friction from socks and shoes, so keep the design bold rather than full of filigree. Mention your shoe and sock habits so the artist can advise on placement away from constant rubbing. Sessions are quick but the area is prone to scabbing if socks press against fresh ink. A typical mistake is choosing tiny whisk-like details that vanish after a few months. For footwear that shows the piece, try low-rise sneakers or sandals with a simple strap that keeps the ankle visible.
19. Mirror-Symmetric Moths on Each Hip
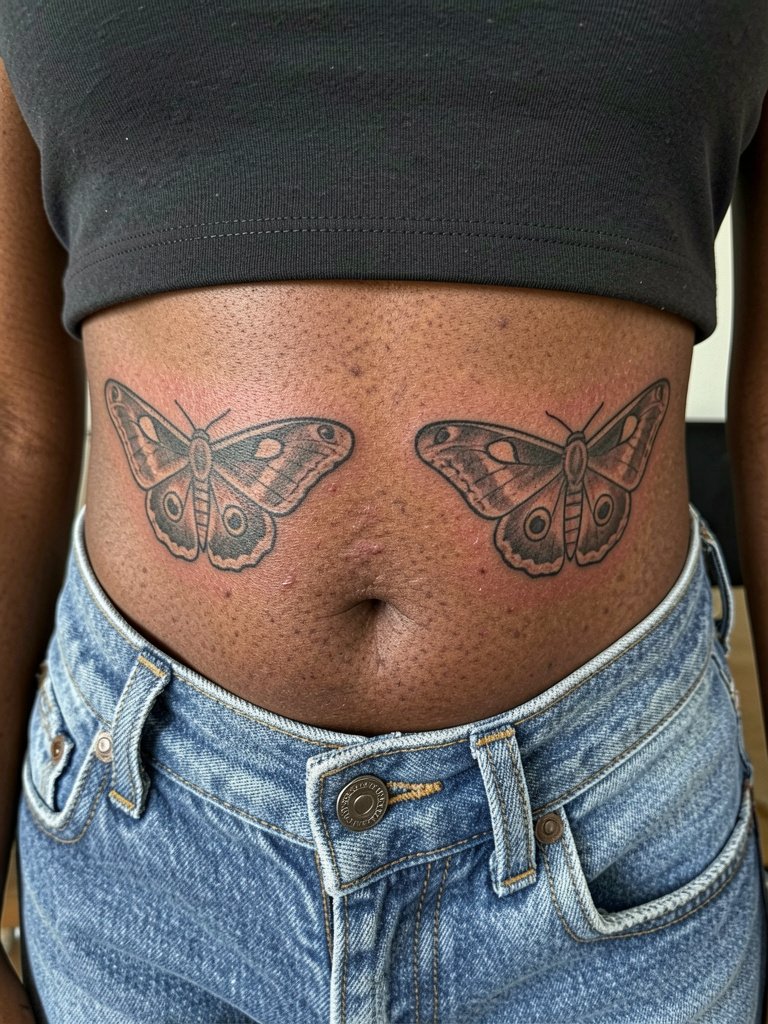
Symmetry across the hips requires exact placement relative to the hip bones so the moths read as deliberate pairs. Ask for measurable stencils referencing the ASIS points so the artist can mirror them precisely. Hip tattoos are lower pain than ribs but higher than thighs. A typical error is assuming both sides will heal identically; sleeping position and clothing contact can alter outcomes. For outfits, low-rise jeans or cropped tops reveal the pair nicely.
20. Small Moth Ring Around the Finger
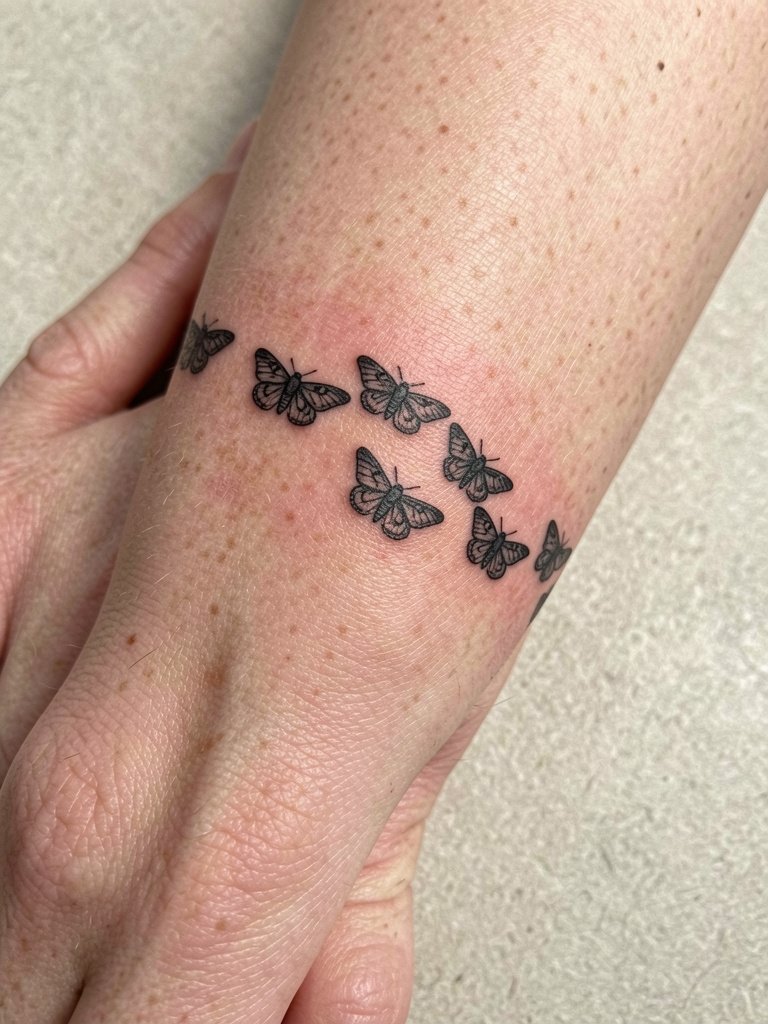
Finger tattoos are exposed to washing and constant motion which accelerates fading. Choose slightly bolder contours and expect a higher touch-up frequency. Discuss realistic longevity with your artist and plan for touch-ups at the one-year mark. The session is quick but uncomfortable because of bone proximity. A frequent mistake is insisting on ultra-fine detail on a tiny circumference. For evenings when you want the ring visible, consider stacking with thin metal bands rather than chunky rings that rub the ink.
21. Arm Band Moth Silhouette
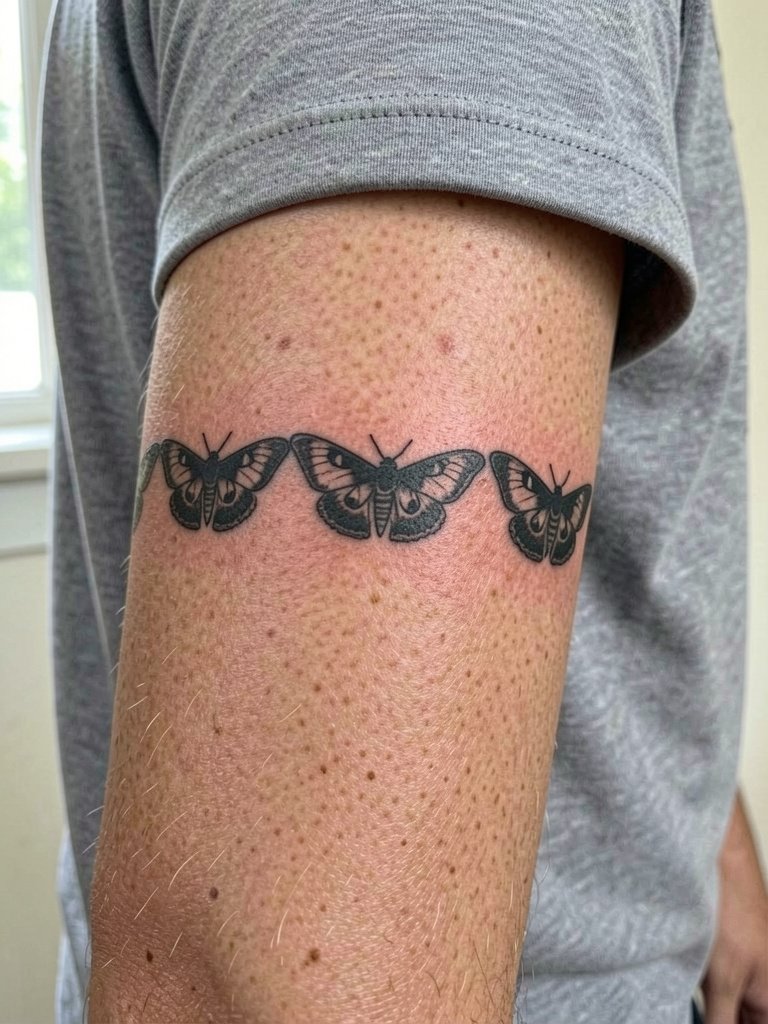
Band work needs consistent spacing so motifs align when the arm turns. Ask the artist to prototype a wrap stencil so you can see how the repeat sits across motion. Mid-forearm sessions are comfortable and showcase the theme continuously. The mistake is compressing too many tiny moths into a narrow band which becomes indistinct. After healing, the band reads well in social distance. For style, short sleeves or three-quarter shirts keep the band visible without obscuring it.
22. Moth and Floral Ankle Collar
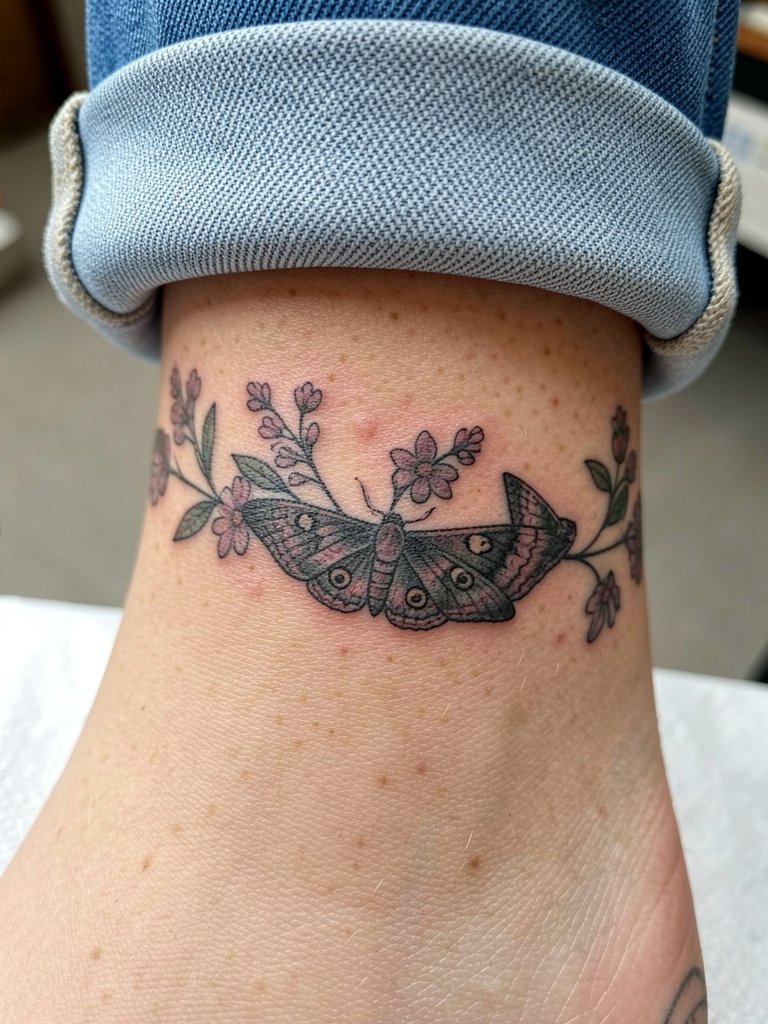
Ankle collars look feminine and intentional when the flora provides a buffer from shoe friction. Plan the spray so flowers sit opposite shoe seams to reduce abrasion. Sessions are moderate in length and can be done in one sitting. A common misstep is placing the design too close to sock lines. For a tidy reveal, pair the collar with sandals or sneakers and a minimal strap sandal.
23. Sleeve-Faint Ghost Moth Behind the Elbow
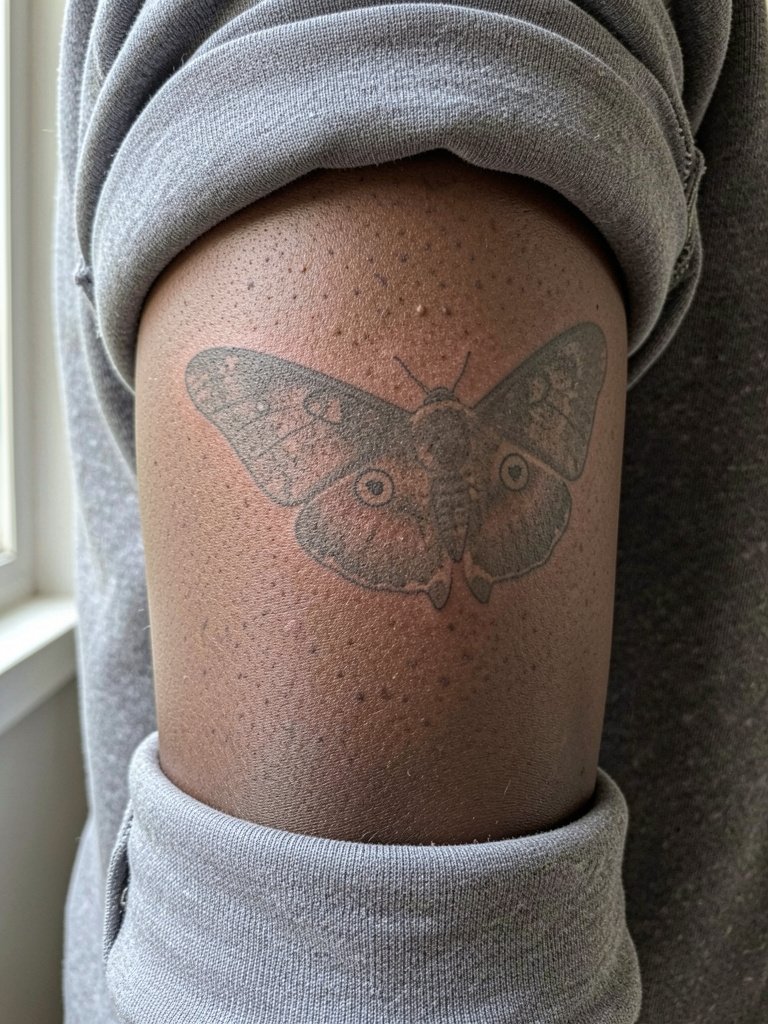
Behind-the-elbow pieces face constant flexion which can break up soft gradients. If you want a ghosted look, request slightly denser anchor points so the motif survives joint movement. Sessions here are short but the area feels tender. Many people ask for faint washes that disappear on healed elbows. A practical alternative is to engineer subtle contrast through stippling and stronger outline anchors. Expect a touch-up within two years for the softest parts.
Frequently Asked Questions
Q: How do I choose the right size for a luna moth tattoo on my chest or sternum?
A: Match scale to the anatomical landmarks rather than a fixed measurement. Ask the artist to position the stencil relative to your clavicles or the sternum notch so you can see how it sits when you move. If you plan subtle shading, err slightly larger to allow for natural softening over time.
Q: Are white ink highlights safe on darker skin tones and how do they age?
A: White highlights can add dimension on darker skin but they behave differently than black. Use white selectively as accent on solid black shapes. Expect the white to soften and sometimes become less distinct, and plan for follow-up sessions if you want to refresh the highlights.
Q: Where can I find healed luna moth portfolios and community examples without naming specific artists?
A: Search platform tags and location filters for healed examples. Try Instagram hashtags like #LunaMothTattoo and #MothInkHealed, TikTok search filters with "healed tattoo" plus placement terms, and Reddit tattoo threads that collect healed galleries. Use location filters if you want to find shops that post depth-of-field healed shots in your city.
Q: How often do fine-line moth tattoos need touch-ups compared with saturated color pieces?
A: Fine-line pieces typically need touch-ups sooner because thin strokes lose contrast with skin movement and washing. Saturated color pieces can hold longer visually but may still require refresh sessions for vibrancy. Expect fine-line touch-ups around two years and color refreshes around three to five years depending on exposure and care.
Q: What should I wear to my appointment for a sternum or ribcage moth so the artist has good access?
A: Wear fitted but easy-to-remove layers that expose only the area being tattooed. For sternum work a fitted sports bra or bandeau in normal worn state keeps fabric stable. For ribs wear a cropped top that sits above the area. Avoid any clothing that the artist will have to pull or hold during the session.
Q: Can I mix styles, for example realistic moth wings with neo-traditional ornamentation, and how should I brief the artist?
A: Yes, mixed-style pieces work if you provide clear references showing both elements and specify which part should dominate. Bring separate photos highlighting scale and color for each style and request a composite mockup so you can approve proportions before the needle touches skin.
