
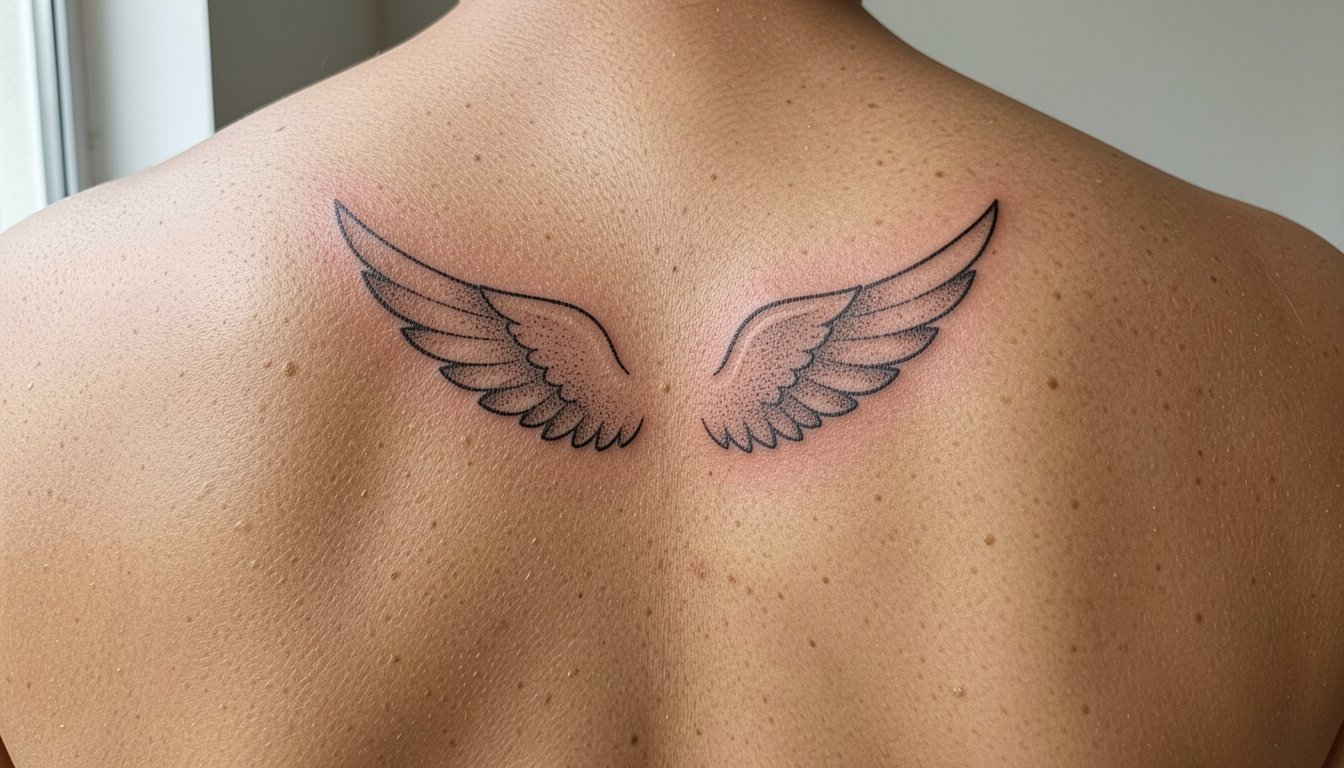
A lot of back-wing photos online favor the same glossy angel spread, but that look does not always sit well on every body or age the same way. Lighter feather blocks with breathing room last longer than tiny micro-detail. This list offers large-scale wing concepts that read from across a room, how they heal, and what to show your artist so the piece stays sharp for years.
1. Full Back Angel Wings with Soft Feather Layering
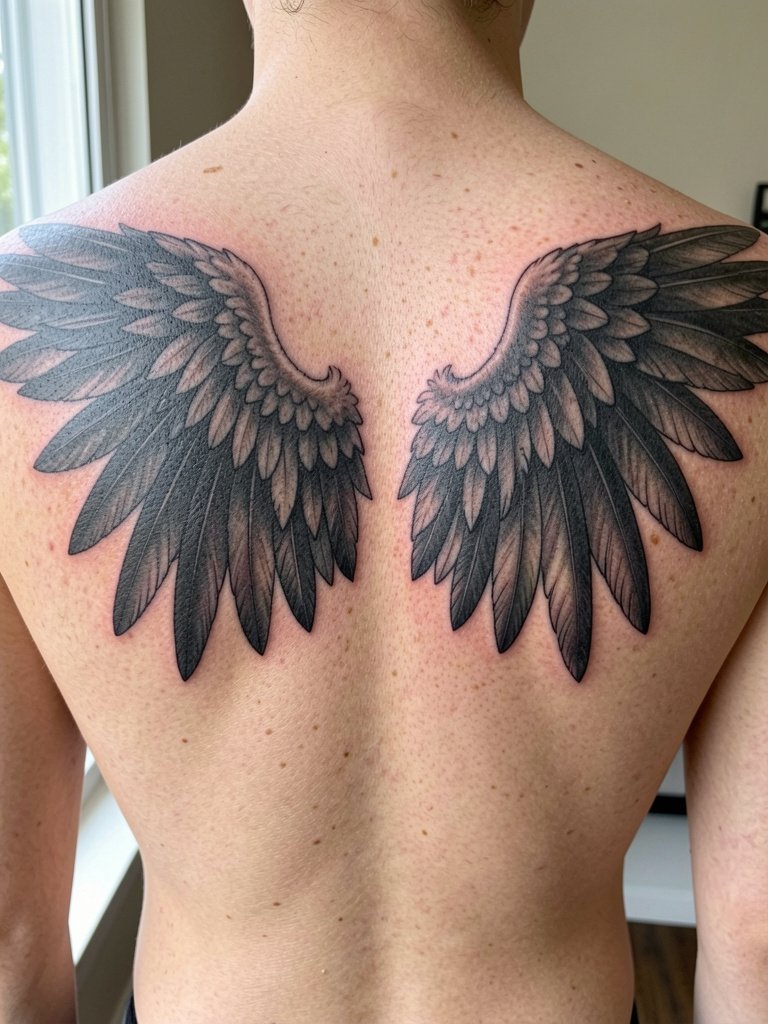
A full-back angel wing spread uses broad feather blocks to remain readable at a distance. Expect multiple sessions lasting two to four hours each depending on saturation and how much shading you want. Pain is moderate on the shoulder blades and a bit sharper along the spine. A common mistake is asking for extreme micro-feathering across the whole piece, which tends to blur into texture after a few years. Bring photos showing the exact feather scale you like and ask about spacing between feather groups so the design keeps contrast as it settles. For reveal moments, this piece pairs with open-back tops or racerback tanks, and wearing a loose button-down backward makes the session access easy for the artist.
2. Half-Wing Anchored on One Shoulder Blade

Half-wings are smart for someone who wants the visual language of wings without committing to a symmetrical full-back project. Session time is usually one to three hours. Pain concentrates where the wing anchors to the shoulder blade edge. Plan it as a finished composition and not a placeholder; otherwise you risk it reading incomplete. The aging advantage is you can add the opposite side later if you want, and the negative-space breaks help avoid a crowded look long term. For the appointment, wear a loose tank or a bra with removable straps so the artist can work without fabric rubbing the area. Pair the finished piece with one-shoulder tops to echo the asymmetry, and link to one-shoulder tops for styling ideas.
3. Fallen Angel, Torn-Feather Upper-Back Concept

This broken-feather look reads emotionally because the asymmetry and ragged tips create movement. Expect two to five sessions depending on size and edge detail. A common error is overloading the torn areas with tiny detail that ages into a patchy look. Instead, ask for broader shadow shapes and deliberate feather gaps so the story stays visible at one meter and five years. Pain is moderate across the upper back and less intense than on the spine. The piece pairs well with high-neck tops that have an open-back panel for reveal settings. During the consultation, bring two healed examples that show edge treatment you like so the artist can match scale and shadow without crowding the ragged tips.
4. Demon or Bat Wing Spread with Strong Silhouette

If you want a darker edge, bat-style wings give a crisp graphic silhouette that ages well because bold black holds up. Sessions tend to be two to four hours for saturation and membrane texture. Blowout risk is lower with heavier lines, but the membrane areas need careful line spacing to avoid a smudged look later. A real mistake is asking for tiny veins inside the membrane; those can vanish after settling. For the session, a loose button-down worn backward offers easy access and minimal fabric friction during healing. This layout looks striking with open-back dresses when you want the wings to dominate the outfit.
5. Guardian Wings Framing Subtle Memorial Script
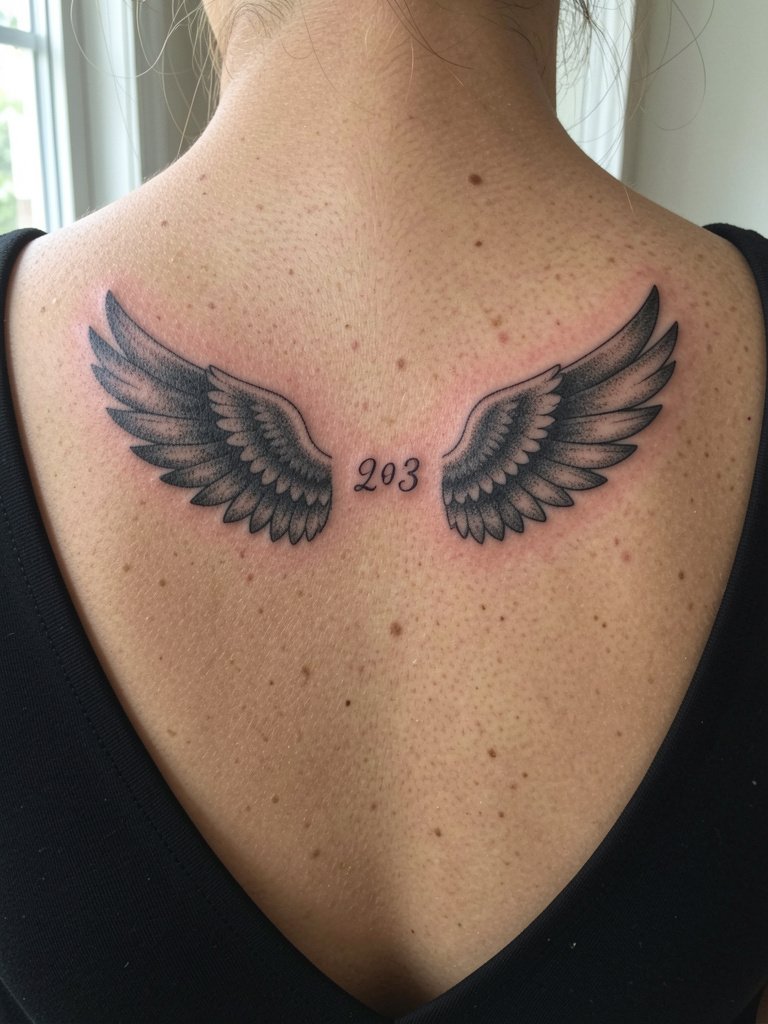
Memorial wings can remain tasteful when the script is restrained and integrated into the composition. Expect two to six sessions if you want highly realistic feather texture around names or dates. A common aging problem is packing script into feather barbs where letters blur. Instead, place the name in a clear central panel or low-contrast ribbon so the lettering stays legible. Discuss font size and spacing with the artist and show examples of healed script that reads at two years. For reveal occasions, pair this design with high-neck tops that have an open-back panel, and consider a delicate pendant to draw the eye from neck to back.
6. Eagle Wings for a More Aggressive Feather Structure
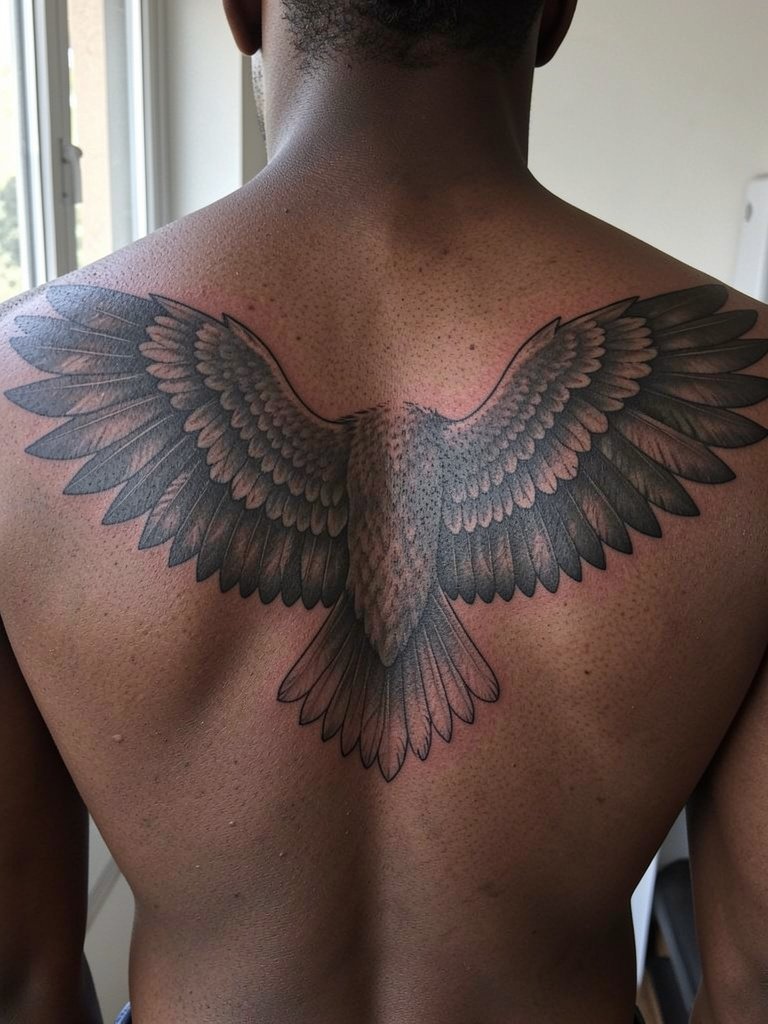
Eagle wings read as power or freedom because of the aggressive feather shapes and crisp leading edges. Plan for two to five sessions depending on how much layered feathering you want. The biggest mistake is squeezing too much micro-detail into overlapping feathers. That detail flattens into noise after a few years. Specify larger feather groupings and heavier leading-edge linework so the wing reads at distance. Pain is moderate across the scapulae and lower near the rib curve. For showing it off, racerback tanks accentuate the shoulder span.
Before You Book
Those first six wing concepts involve either heavy saturation or precise spacing, so a few small items smooth the session and the first week of healing.
-
H2Ocean-style saline healing spray. Saline sprays keep a large-area back piece gently clean without smothering it, which is helpful when the tattoo spans both shoulder blades.
-
Small-batch tattoo aftercare balm. A balm from a tattoo-focused indie brand gives moisture without heavy residue, which reduces the risk of clogged pores on large shaded sections.
-
Unscented antimicrobial soap bar. Gentle cleansing is essential for big back pieces because so much skin is exposed to friction from clothing and chair backs.
-
Thin protective film roll for large areas. A breathable film can protect a fresh back tattoo from shirt rub during the first 24 to 72 hours when the area is most fragile.
-
Tattoo sunscreen for healed skin. After full healing, a high-SPF sunscreen preserves contrast and prevents premature fading on an expansive back piece.
7. Dragon Wings with Scaled Membrane Detail
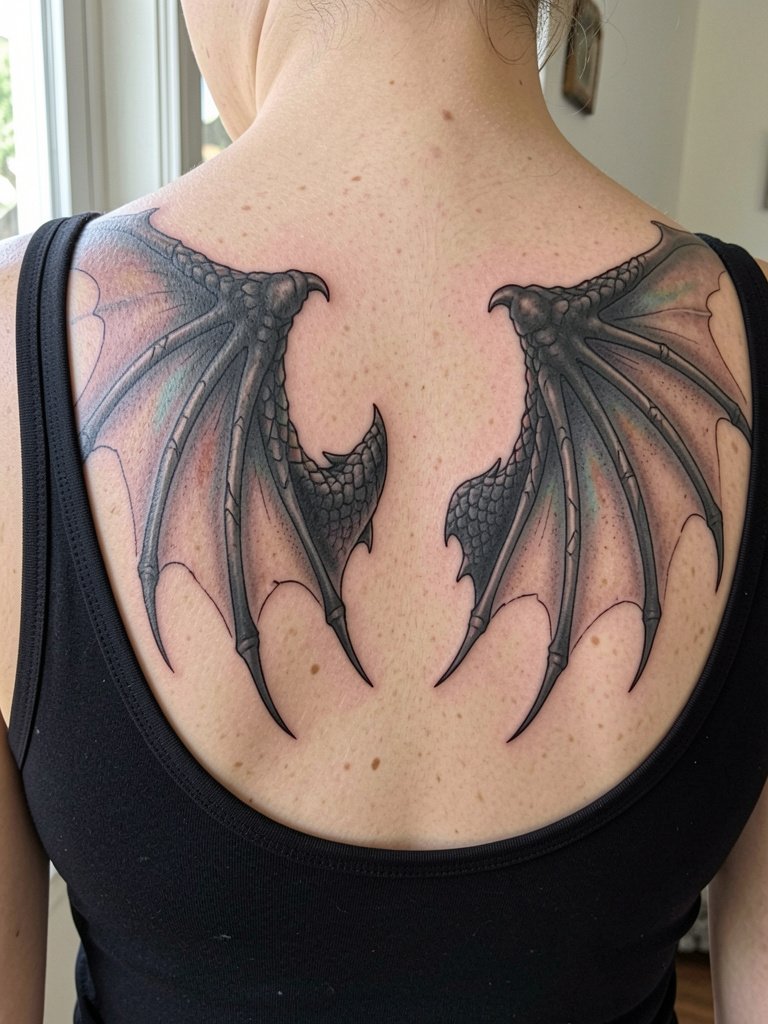
Dragon wings let you mix scale texture with membranous brushwork for a custom fantasy look. Sessions can run three to six hours across multiple appointments for texture and gradient. A frequent mistake is over-coloring the membrane; with time that color can lose saturation and muddy the contrast. Ask for selective accents rather than full saturations so the structure reads even as pigment softens. Expect moderate pain on the shoulder blades and less on the outer wing areas. For session comfort, wear a zip-front hoodie you can open in front so the back stays undisturbed as you enter and exit.
8. Minimalist Fine-Line Centered Upper-Back Outline
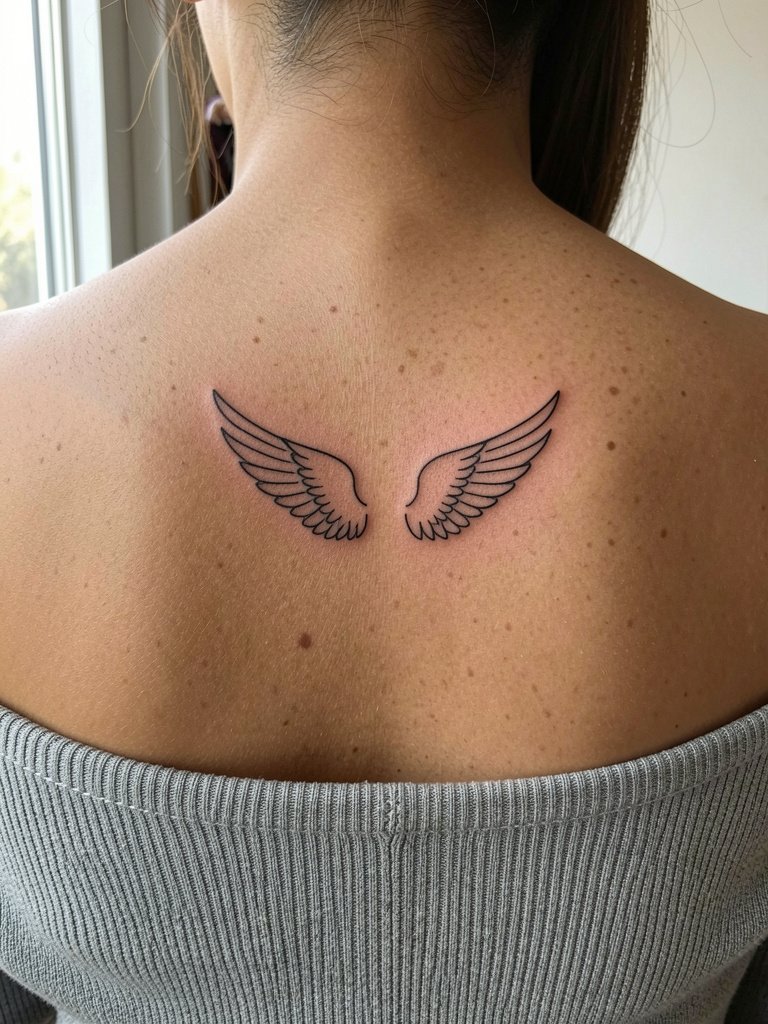
A compact fine-line outline is a lower-commitment path that still uses the wing motif. This is usually a single session under two hours. Fine-line designs can blur if placed too close to the spine or under heavy friction. To avoid that, keep spacing open and resist ultra-tiny inner detail. The inner-back surface usually tolerates fine-line well if the artist leaves breathing room. Pain is mild to moderate. This type pairs nicely with off-shoulder tops and strappy camis that frame the centered placement.
9. Ornamental Filigree Wings with Dotwork Geometry
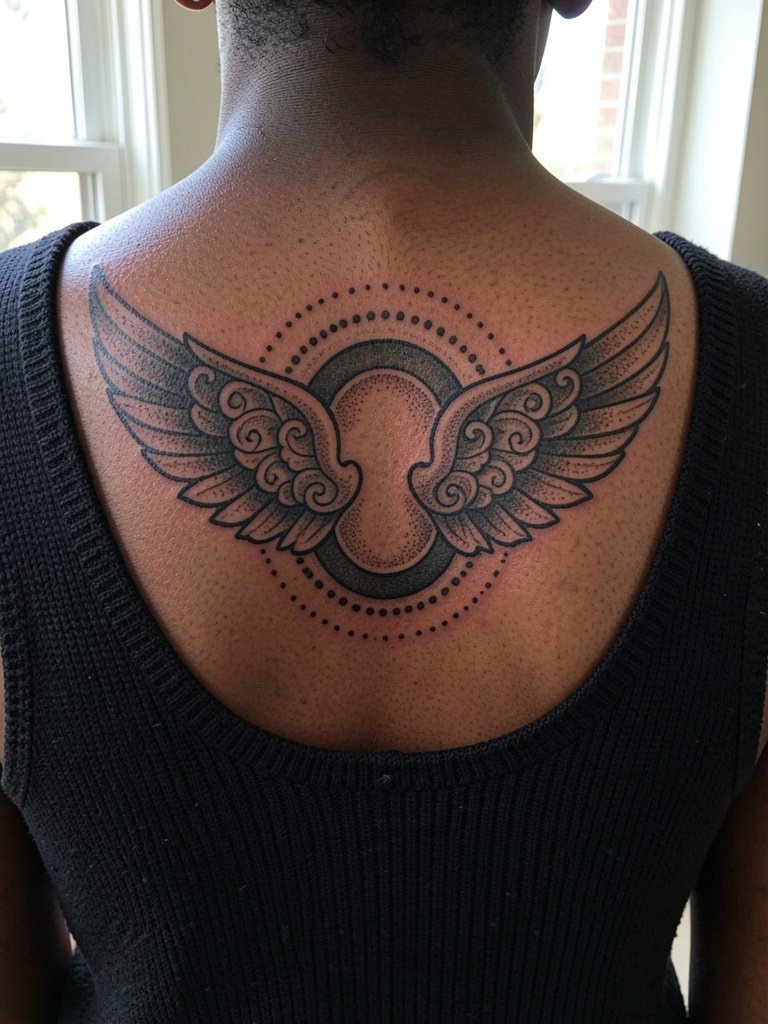
Ornamental wings trade literal feathers for filigree and dot shading, which can be elegant on a broad back. Sessions run two to five hours. The main risk is overcrowding the filigree with too many tiny dots, which can age into a gray patch. Ask for broader negative-space pockets and slightly larger dot groupings for longevity. This design looks great with scoop-back knit tops for occasions, and for the appointment choose a sports bra or wide-neck tee for easy access. Link: scoop-back tops.
10. Broken-Wing Negative-Space Composition
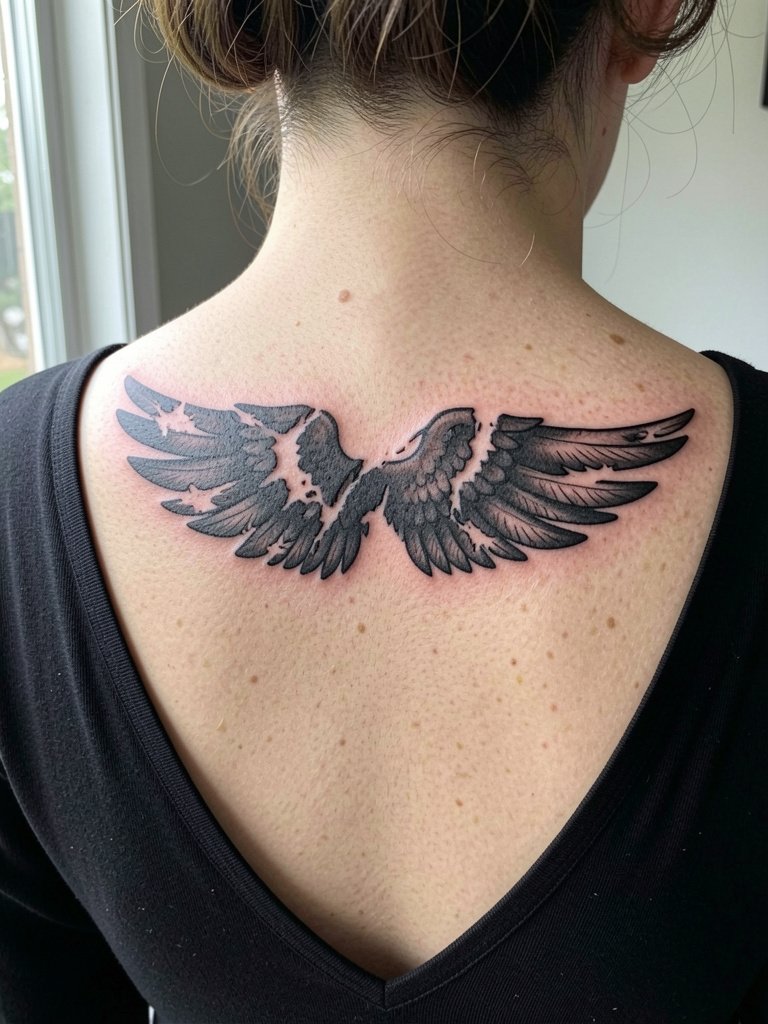
Negative-space breakups create an unfinished look that reads as intentional rather than accidental when planned correctly. Expect one to four sessions depending on scale. The common error is trying to copy a fragmented photo without accounting for the way the skin moves. Get mockups on photos of your own back so gaps align with your anatomy. The portion of the spine near open gaps can feel sharper during inking. For clothing after healing, backless halter tops show the architecture of the gaps well.
11. Archangel-Style, Sharper Combat-Ready Wings

Sharper, armor-influenced wings read as more dramatic and masculine because of pointed tips and hard boundaries. Plan for two to six sessions. A design mistake is blending armor texture too closely with feather detail, which reduces readability. Instead, define the feather tips with heavier contour lines and keep the armor cues as separate panels. Pain concentrates near the spine line. For session wear, a zip-front hoodie or button-front shirt is easier to remove without scraping the fresh ink. This layout pairs well with high-neck tops that have an open-back panel for a dramatic reveal.
12. Abstract Brush-Stroke Wing Shapes

Abstract brush-stroke wings modernize the motif and avoid a stock angel look. They usually take one to three sessions depending on how painterly you want the shading. A common problem is treating brush strokes like fine detail that fades; broader gestural strokes read better as the skin ages. This style can be forgiving for body curves because it prioritizes motion over micro-feathering. Pain varies with placement. For the session, choose a front-open zip hoodie so you avoid pulling fabric over the healing area.
13. Eagle-Claw Wing Hybrid with Sharp Leading Edge
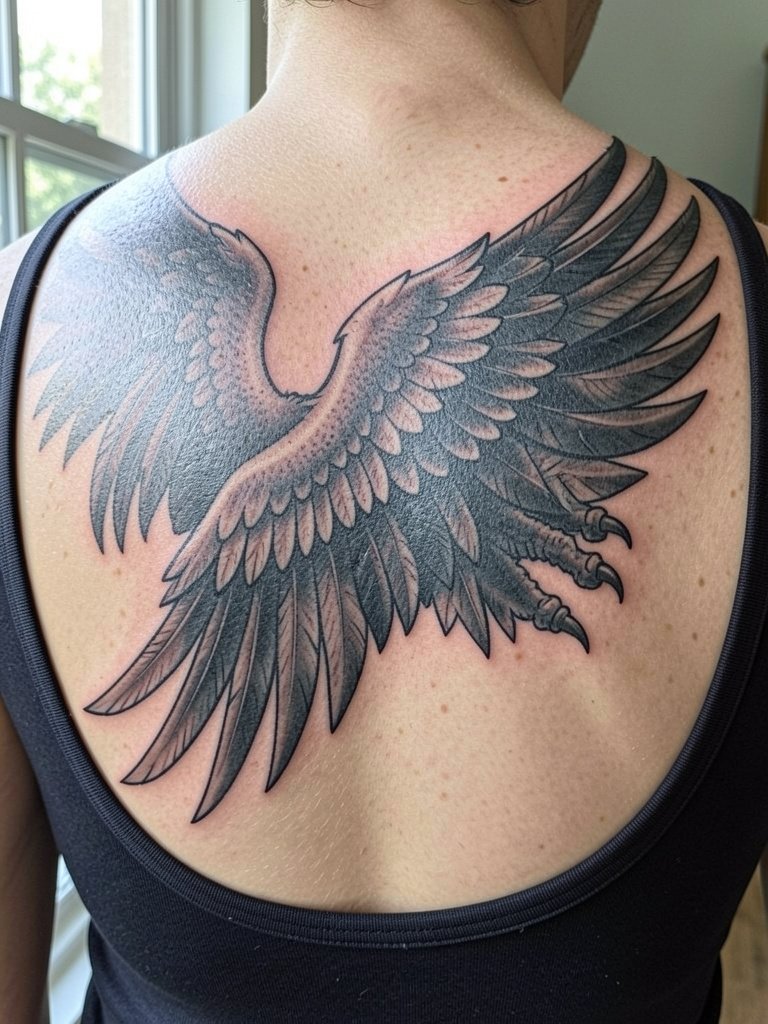
This hybrid emphasizes strong contour and aggressive tip shapes for a bold silhouette. Expect two to five sessions. The mistake is over-detailing the talon tips so they lose separation from the main wing. Keep the leading edge heavier and the interior feather groups more open. The scapular region tolerates stronger lines, which helps prevent blowout. Racerback tanks complement the shoulder-span visually for show-off moments.
14. One-Wing Future-Expansion Piece
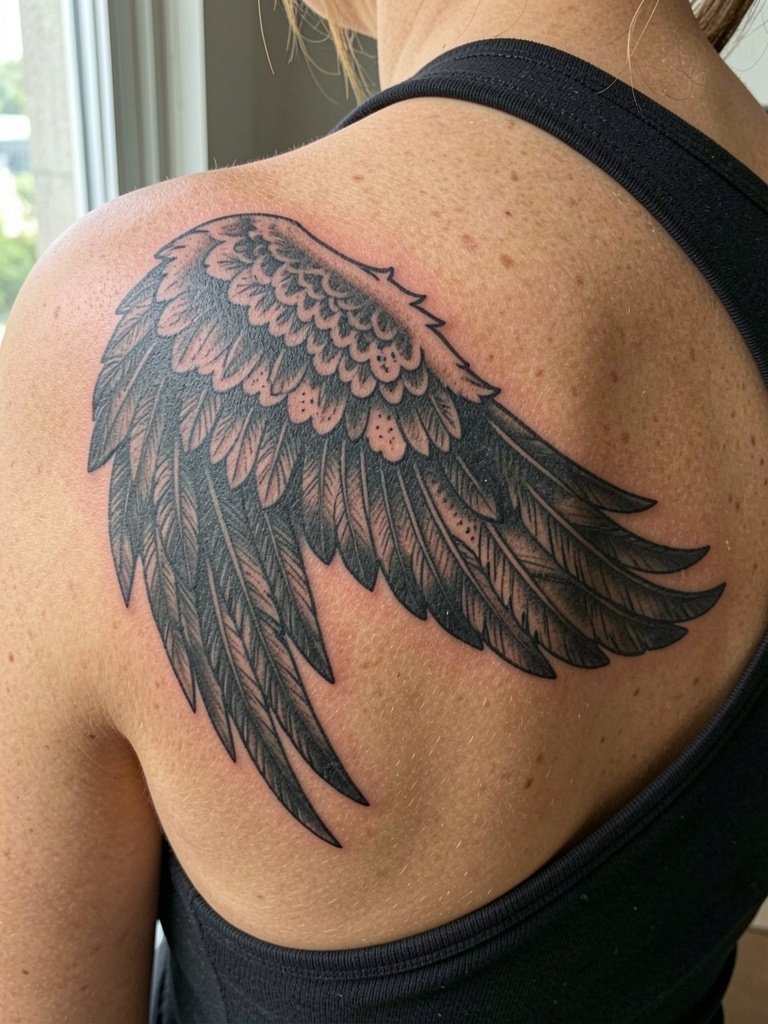
Designed as phase one of a larger back project, a one-wing that plans expansion avoids the unfinished look by using deliberate edge treatment and intentional negative space. Sessions might be one to three hours for the first phase. A mistake people make is leaving the center too sparse; instead, define the wing's outer edge and sketch light anchor points where future work will land. Pain is mild at the shoulder blade and sharper if the design crosses the spine later. For styling, one-shoulder tops and asymmetrical dresses echo the one-sided layout and let the single wing read strongly. Link: one-shoulder tops.
15. Memorial Wings with Integrated Names as Negative Space
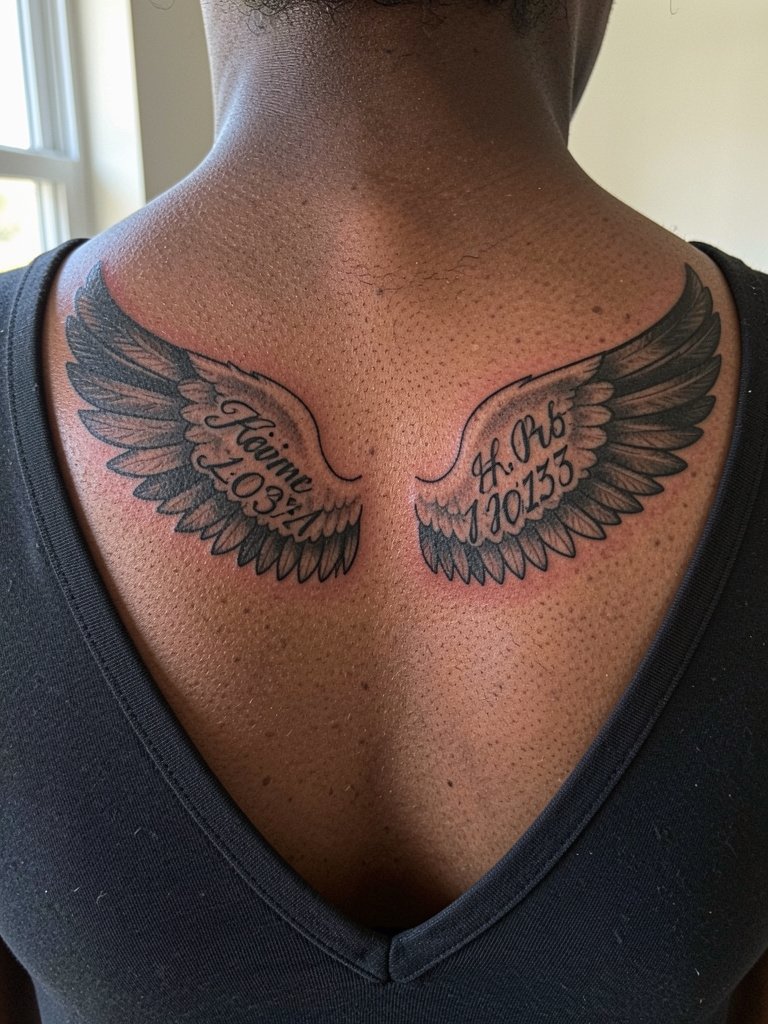
Placing names as negative space inside feather shapes keeps memorial details readable without crowding. Expect two to five sessions for careful shading and crisp letter edges. The usual error is choosing a script that is too thin; the letters should be stout enough to survive slight spreading over time. Ask for mockups that show the name at the final intended size so the artist can confirm line weight. For sessions pick a front-open shirt or zip hoodie to avoid dragging fabric over the healing area.
16. Geometric Wing with Mandala Centerpiece
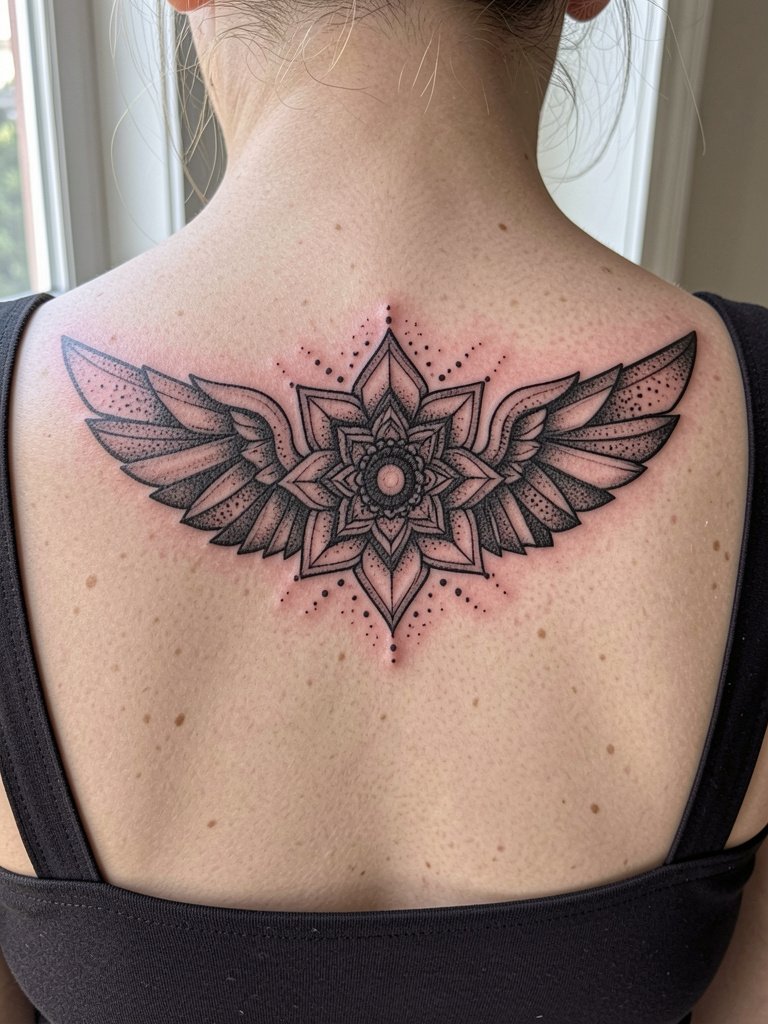
Combining wings with a mandala center creates a decorative focal point and keeps the composition balanced. Sessions usually span two to five sittings for precise dotwork. A common mistake is shrinking the mandala too small relative to the wings; scale matters so the geometry reads cohesively. Dotwork requires spacing to avoid pooling, so ask about dot density and healed examples. This style looks tidy with square-neck tops for a balanced frame.
17. Dragonfly-Wing Hybrid with Transparent Veins
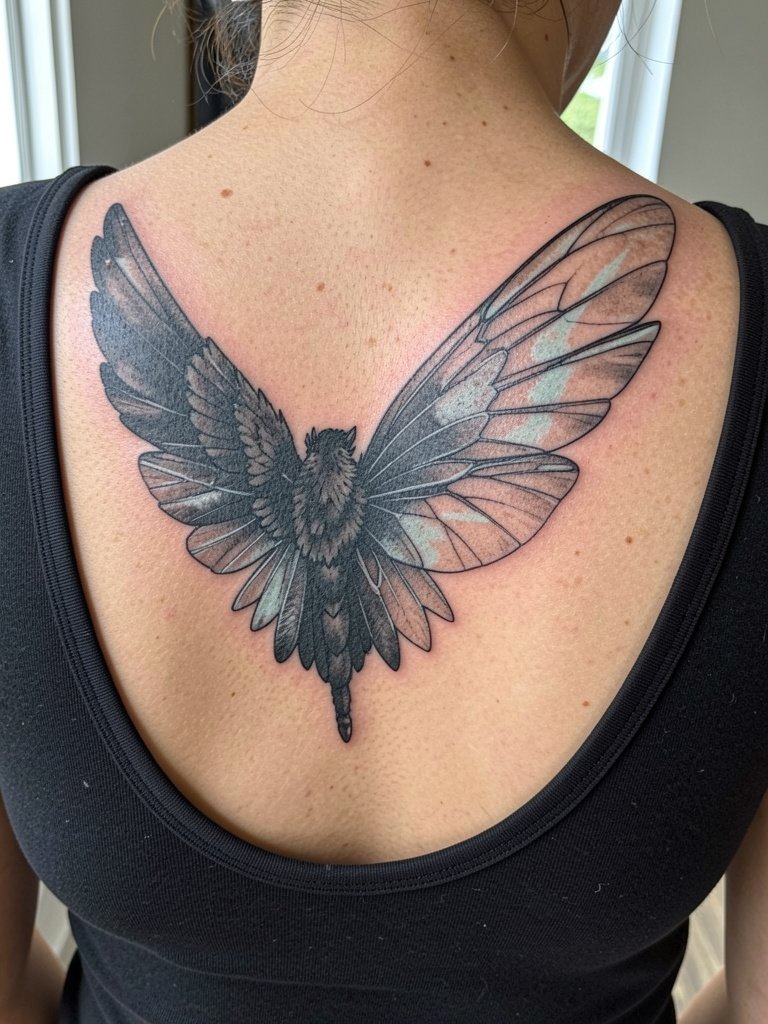
This hybrid softens feather weight into delicate vein work at the tips for a unique silhouette. Expect three to six sessions if you add subtle color. The risk is relying on faint vein lines that fade; request slightly bolder vein anchors so the structure remains. Pain is moderate. For showing off, scoop-back tops complement the elongated tips and reveal the mixed textures.
18. Mechanical Steampunk Wings with Gear Elements
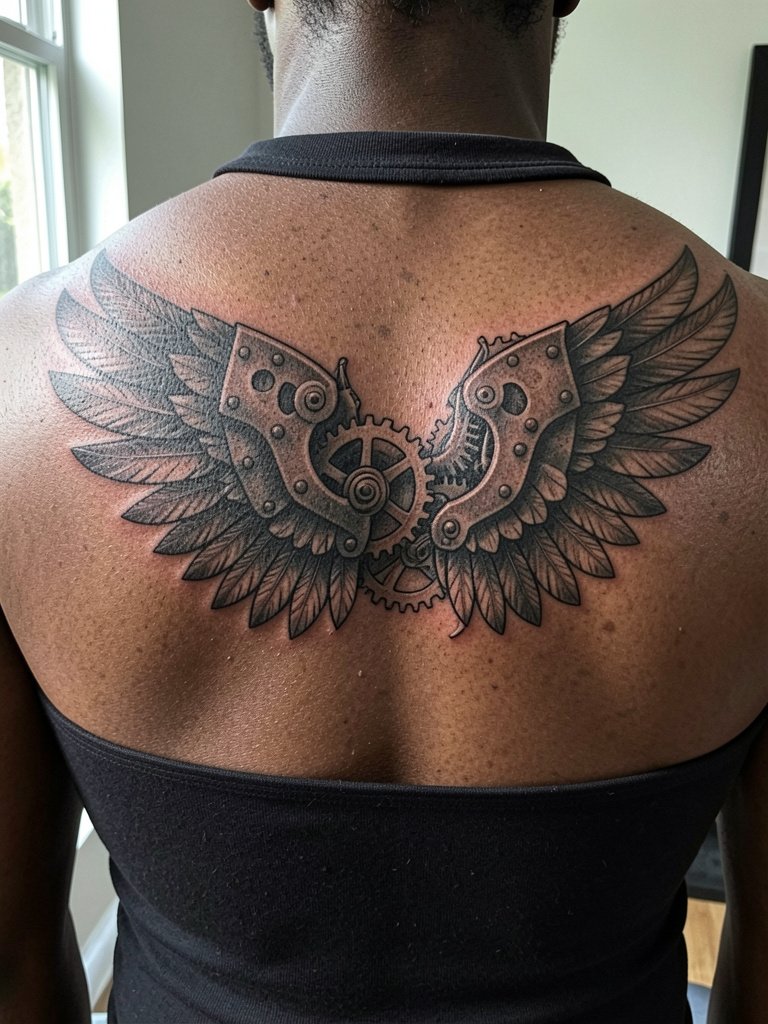
Mechanical wings let you incorporate non-organic elements for a custom vibe. Sessions vary by detail and may take several sittings. A common mistake is trying to cram tiny gear teeth across a broad area; larger gear planes hold their shape longer. Discuss how metallic highlights will age since heavy shading can flatten detail. Pain concentrates near the spine. This motif looks strong beneath simple tops that avoid busy necklines so the mechanical structure reads clearly.
19. Color-Accented Wings with Selective Hues
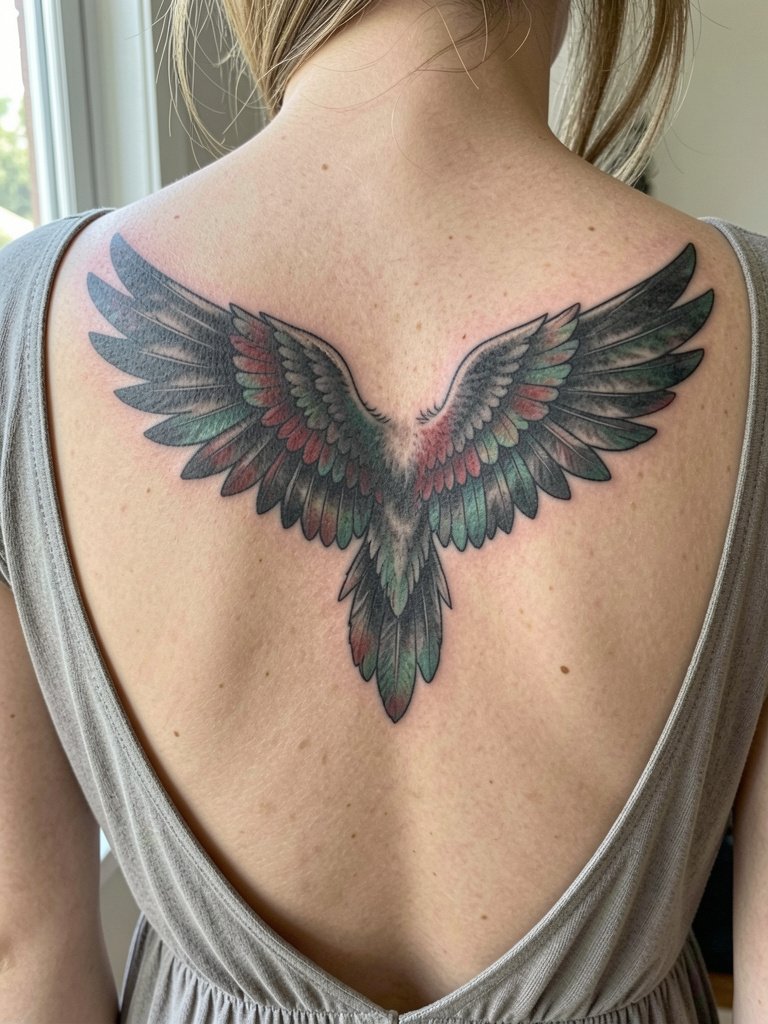
Selective color can make a wing pop without committing to full-color saturation. Sessions take longer when color is added because each pigment needs careful layering. The controversy on color for wings splits artists into two camps. One camp says black and gray is the safer long-term choice because feather texture reads clearly without depending on color. The other camp says subtle accents bring emotional tone and life to the design when placed and saturated thoughtfully. Both positions have merit and the choice depends on how often you will expose the piece to sun and how you plan to maintain saturation.
20. Stipple-Shaded Block Wings for Longevity
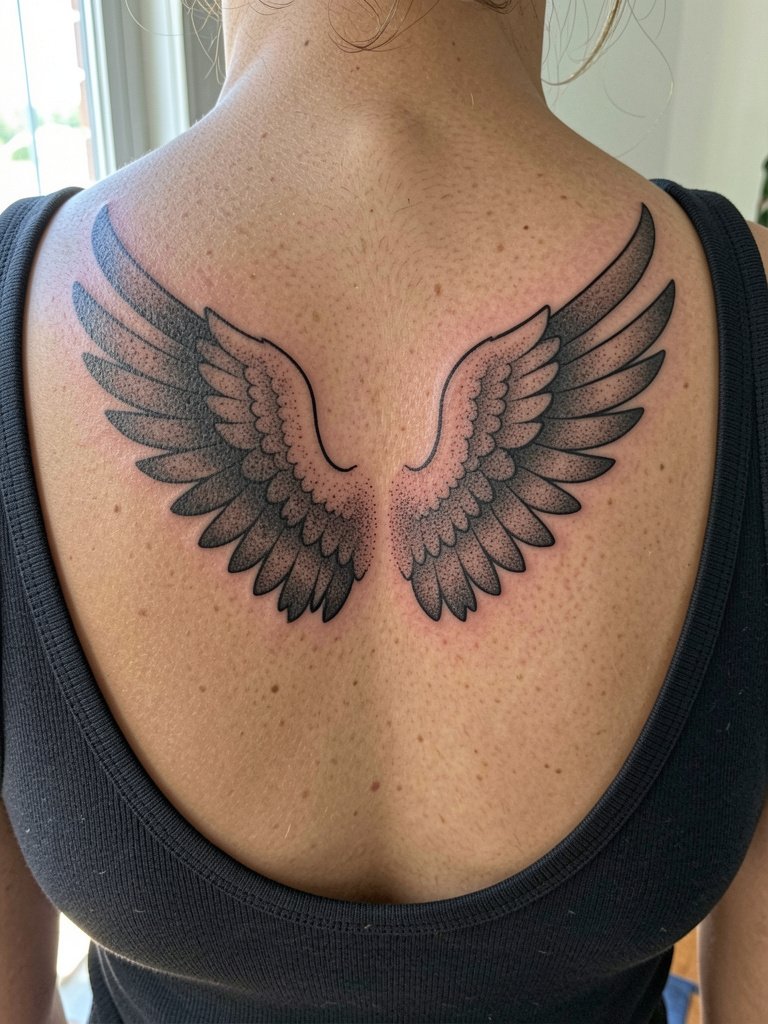
Stipple shading offers a way to suggest texture without micro-feathers that can blur. Expect two to four sessions. Mistakes include trying to make stipple too tight; broader dot spacing creates a stable visual gradient over time. This style is particularly forgiving for different body contours and shows stable contrast even after years. For the appointment, choose a wide-neck tee for access and comfort.
21. Rib-Extended Wings That Flow Toward the Flank
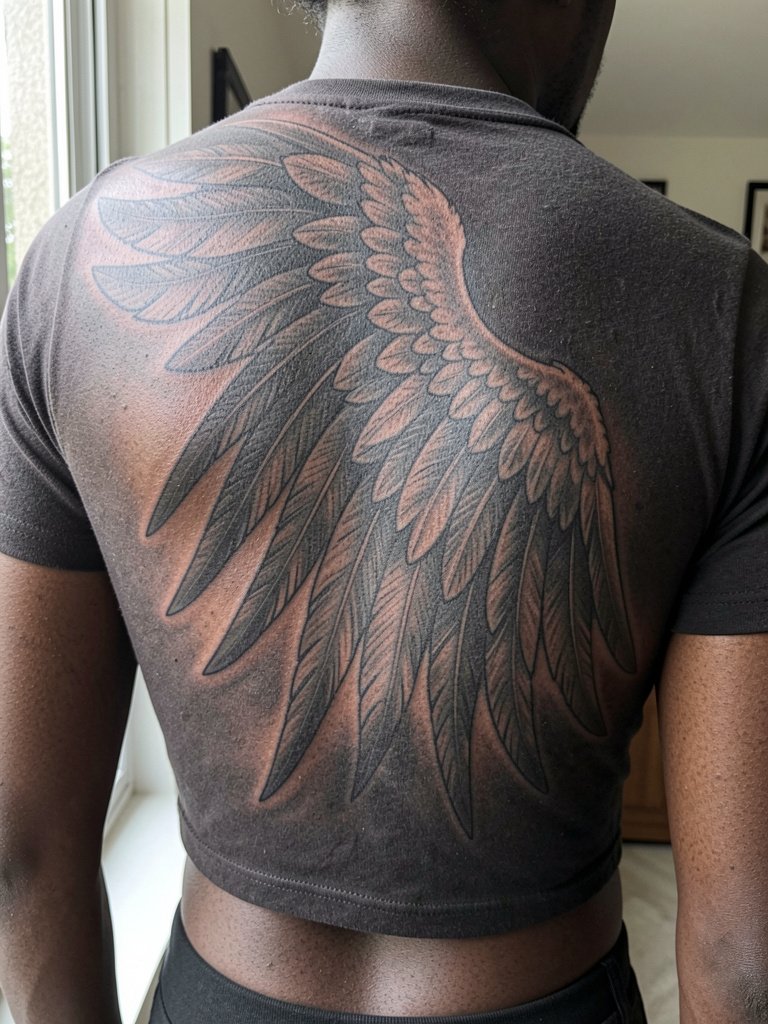
When wings reach the ribs, you get a dramatic sweep that flatters curves. Sessions are longer because of the extra coverage and sensitivity near the ribs. Pain here is higher and can change across sittings. The mistake is extending ultra-fine detail into the rib zone without factoring movement from breathing and torso motion. Ask for slightly bolder anchor lines where the wing crosses the ribcage so the design keeps form. For the session, wear a front-open zip hoodie or a shirt you can slide off without dragging fabric across the fresh ink. This placement pairs well with low-rise jeans and cropped tops for reveal styling.
22. Botanical Feather Wings with Floral Integrations
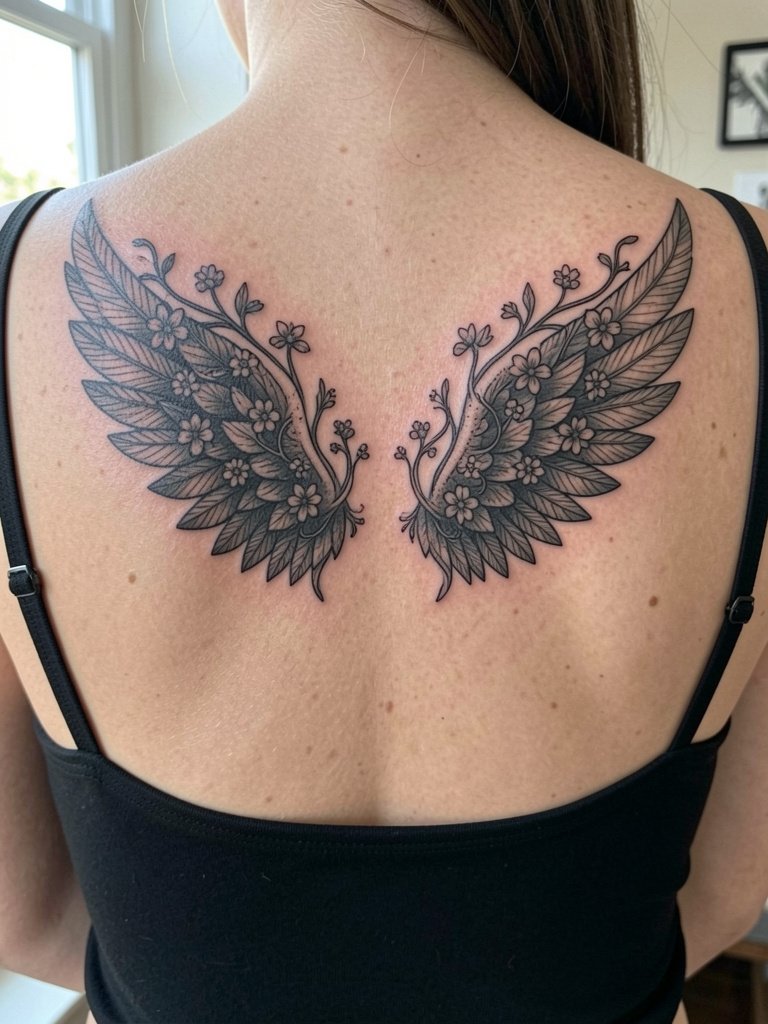
Botanical integrations soften a wing motif and add personal symbolism without heavy lettering. Plan for two to four sessions. A common error is overloading the botanical detail into feather shafts, which makes both elements fight each other. Instead, weave the plants through outer feathers and keep inner feather bands clearer. Pain is moderate across shoulder blades. For outfit pairings, strappy camis or scoop-back knit tops frame the floral work well.
23. Armor-Plate Wings with Engraved Motifs
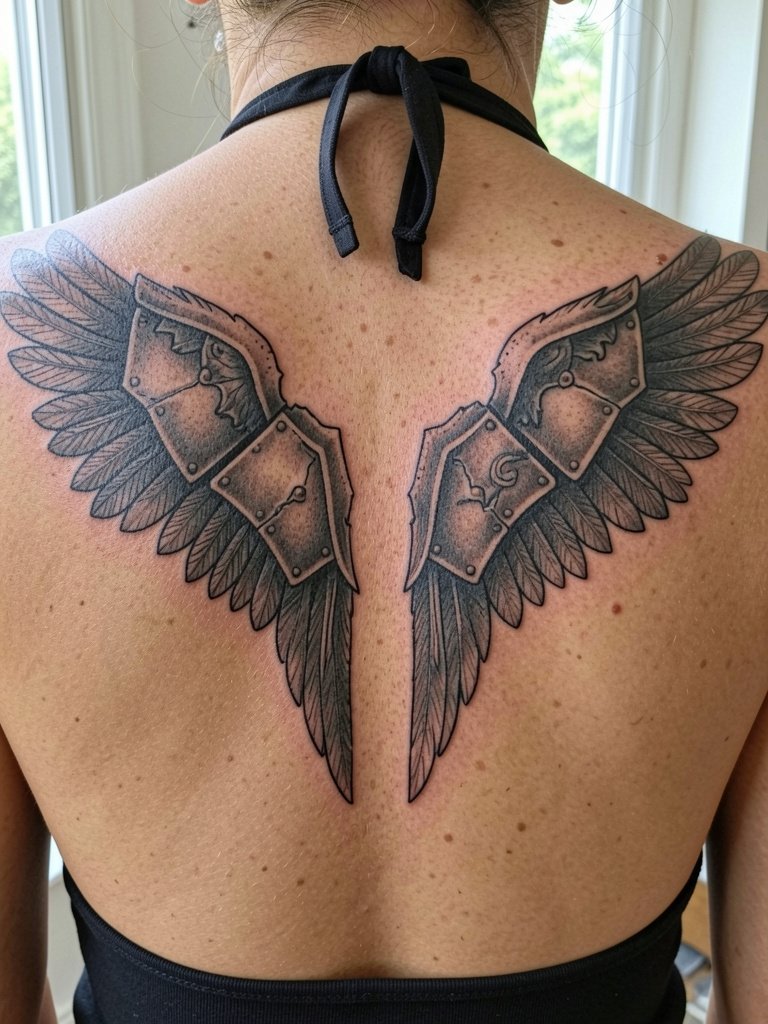
Armor-plate wings read as structured and sculptural. Sessions vary with the level of engraving detail. A mistake is adding tiny engraving that will flatten; keep panels readable by emphasizing borders and shadow planes. For healing, the skin under large shaded panels can feel hot to the touch; a thin breathable film helps in the first two days. For styling try backless halter tops or crisscross-back styles that emphasize the wing architecture.
24. Feather-Fade to Skin, Subtle Gradient Lower Wing

A fade-to-skin finish creates a graceful taper that avoids hard edges near the waistline. Plan for two to four sittings. The trick is to avoid overworking the fade so it does not patch. Ask for mockups that show the fade at three different lighting conditions so you can judge contrast. Pain is lighter where the wing thins out and heavier near the shoulder root. For reveals, low-back sweaters and simple hairstyles show the dissolving tips elegantly.
25. Mandala-Feather Hybrid with Spine Axis
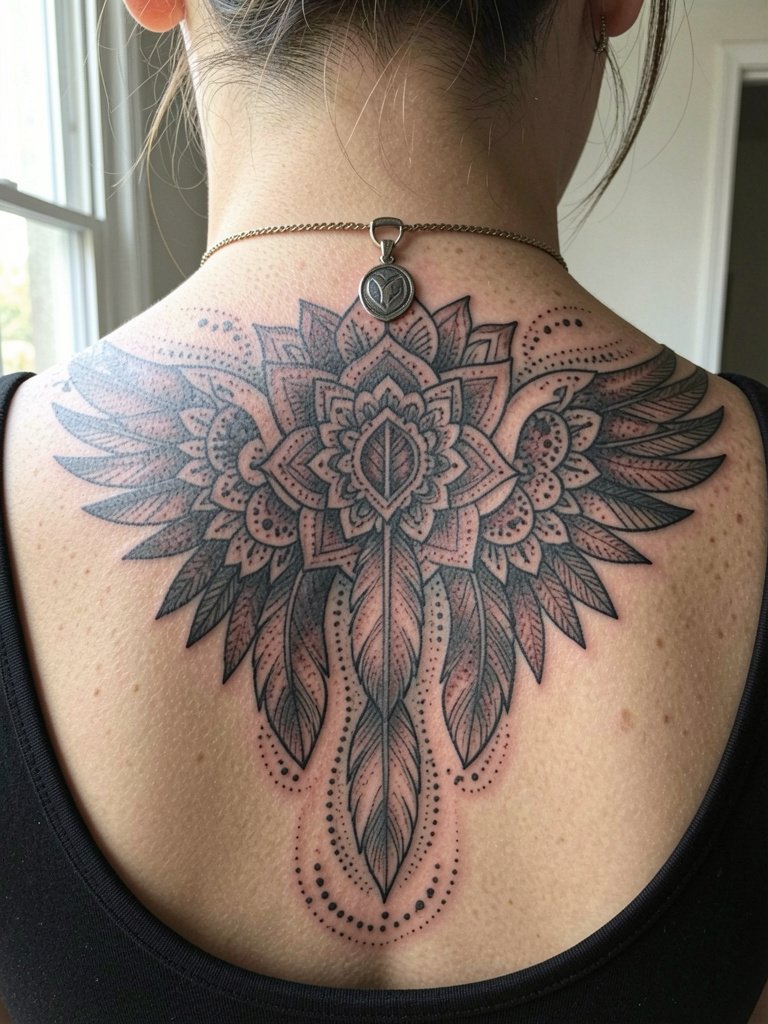
Stacking mandala elements down the spine integrates ornamental detail with wing rhythm. Sessions will include focused dotwork and take multiple sittings. Avoid compressing mandala rings too closely; the spacing must be generous for the dots to hold up. Expect a touch more sensitivity around the nape. For evening wear, high-neck tops with open-back panels or sheer layers let the mandala alignment read without overcrowding. Link: pendant necklaces.
26. Tribal-Influenced Wing Lines with Bold Blackwork
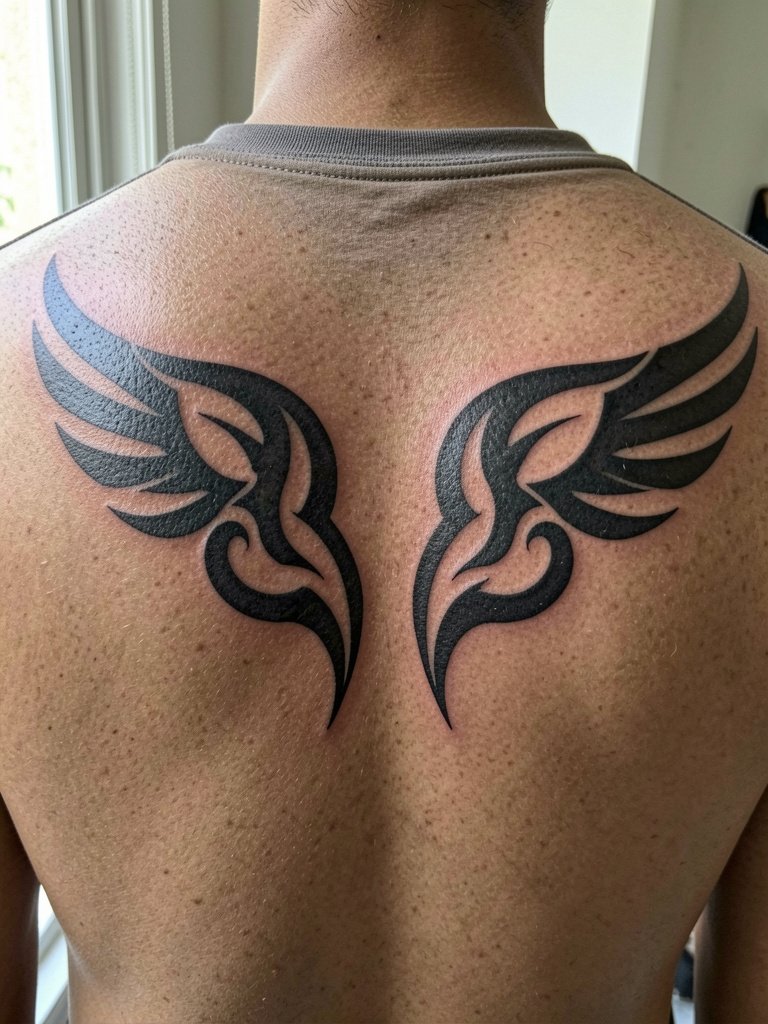
Tribal-influenced work focuses on silhouette and boldness, which often ages very predictably. Plan for one to three sessions. A frequent mistake is borrowing sacred symbols without context; if your design references a cultural style, include a respectful sentence in the consultation about source and permission. Bold black shapes are less prone to blowout if the artist spaces the curves properly. For the appointment, a loose button-down backward helps with access.
27. Compass or Navigation Wings with Map Elements
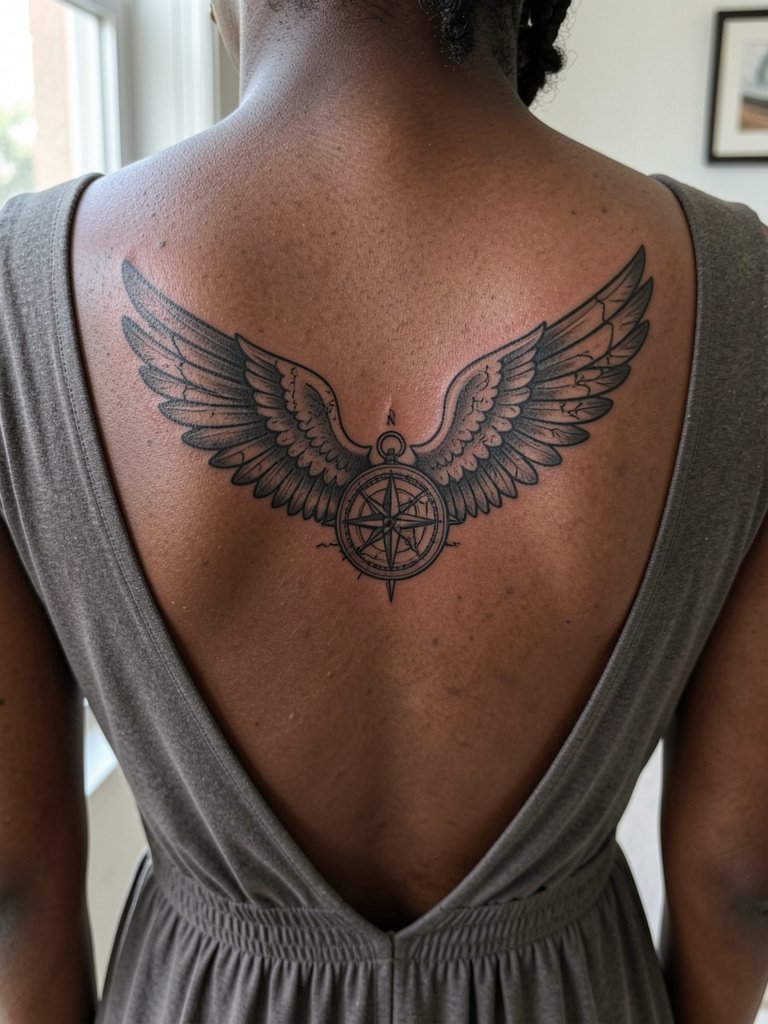
Adding a compass element gives wings navigational meaning without large script. Sessions are typically two to four hours. A typical mistake is placing tiny compass numerals inside feather barbs; instead place the compass as a clear central anchor with the map lines woven into outer feathers. Pain is moderate around the spine anchor. For outings, open-back midi dresses highlight the compass focal point nicely and keep the wings as the visual center.
Frequently Asked Questions
Q: Full wings or one-wing, which should I choose for longevity and resale flexibility?
A: Artists split into two camps about full versus one-wing. One camp favors the full symmetrical spread for complete balance and the immediate dramatic effect on a broad back. The other camp prefers one-wing or half-wing layouts because they read as more modern and leave room to expand the piece later. Your choice depends on whether you want an immediate full composition or a phased project you can add to over time.
Q: How should I budget for a large back wings project?
A: Think in session blocks rather than fixed price tags. A large, realistic full-back wing piece often runs across multiple sessions, so plan for several sittings and build a buffer for touch-ups. Save enough to cover at least two sessions up front and a realistic touch-up later on, and expect the artist to give an estimate based on your chosen style and session pacing.
Q: Where can I find artists who show healed large back wings and not just fresh reels?
A: Use hashtags and location filters on Instagram and TikTok and search for healed-portfolio shots with tags that include the style plus placement. Reddit communities focused on tattoos are useful for seeing real-world feedback on healed projects and session experiences. Look specifically for portfolios that show healed photos at multiple time points so you can judge how feather detail holds up.
Q: What should I wear to the appointment for an upper-back or full-back wing session?
A: For upper-back work, a wide-neck or scoop-back top and a front-open zip hoodie are practical because they give the artist access without dragging fabric across fresh ink. For larger full-back sessions consider a loose button-down worn backward or a front-opening garment so you avoid moving fabric over the tattoo when you exit. Link: zip-front hoodies.
Q: How long before a large back wing looks settled and what are touch-up expectations?
A: Large back pieces often need a few months to look settled and then a touch-up within the first year if needed. Expect pigment to soften during the first six months and for contrast to change subtly as skin remodels. Many people plan a small touch-up sitting between six and twelve months after the initial work to retrace edges and restore any lost contrast.
