
Fine green splashes and tiny three-leaf outlines dominate feeds, yet what looks crisp on a fresh photo can soften in real life. Small color washes and single-needle linework often need a bit more room and saturation than clients expect if longevity matters. Readable shamrock work balances spacing, lineweight, and placement so your piece reads as heritage, not novelty. Below the first idea I show a healed photographic example that is different in style and placement so you can see how choices change the result.
1. Watercolor Shamrock Cluster on the Wrist
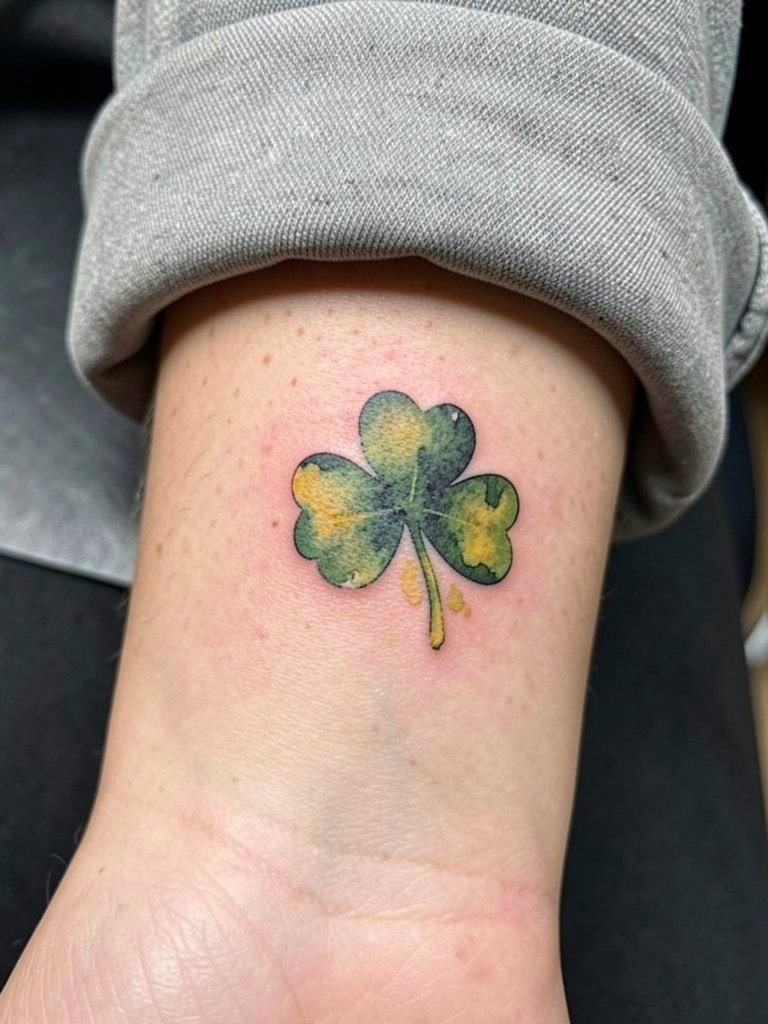
A wrist cluster suits someone who wants a soft, painterly shamrock without the holiday clip art vibe. I recommend asking for slightly heavier watercolor saturation near the leaf veins so color holds after healing. Tiny washes can fade faster than solid fills, so plan on a touch-up around year one if you want the green refreshed. The session is usually quick, about 30 to 60 minutes, and the wrist rates a 4 out of 10 on most pain charts. For showing it off, pair the piece with a thin chain bracelet on the opposite wrist so the tattoo reads like jewelry. For the appointment wear a short sleeve or cropped jacket that stays clear of the area.
2. Realistic Shamrock with Curly Vine on the Forearm
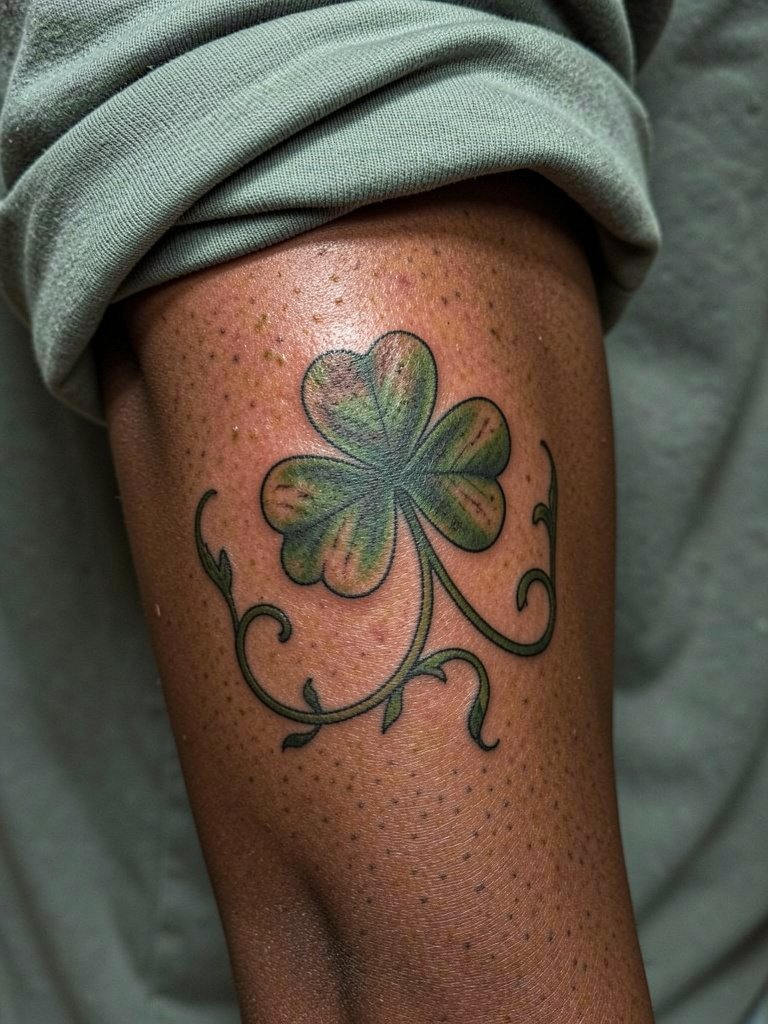
This realistic approach adds botanical movement so the shamrock feels custom, not flash. It reads best at a small to medium scale so the vine has room to breathe. Tell the artist you want pronounced vein contrast and slightly darker leaf bases to preserve depth after healing. Outer forearm pieces take about 45 to 90 minutes and score a 3 on the pain scale for most people. A common mistake is compressing too much vine detail into a tiny patch, which blurs over time. For the session pick a shirt you can roll up easily so the artist has uninterrupted access.
3. Bouquet of Shamrocks on the Outer Forearm
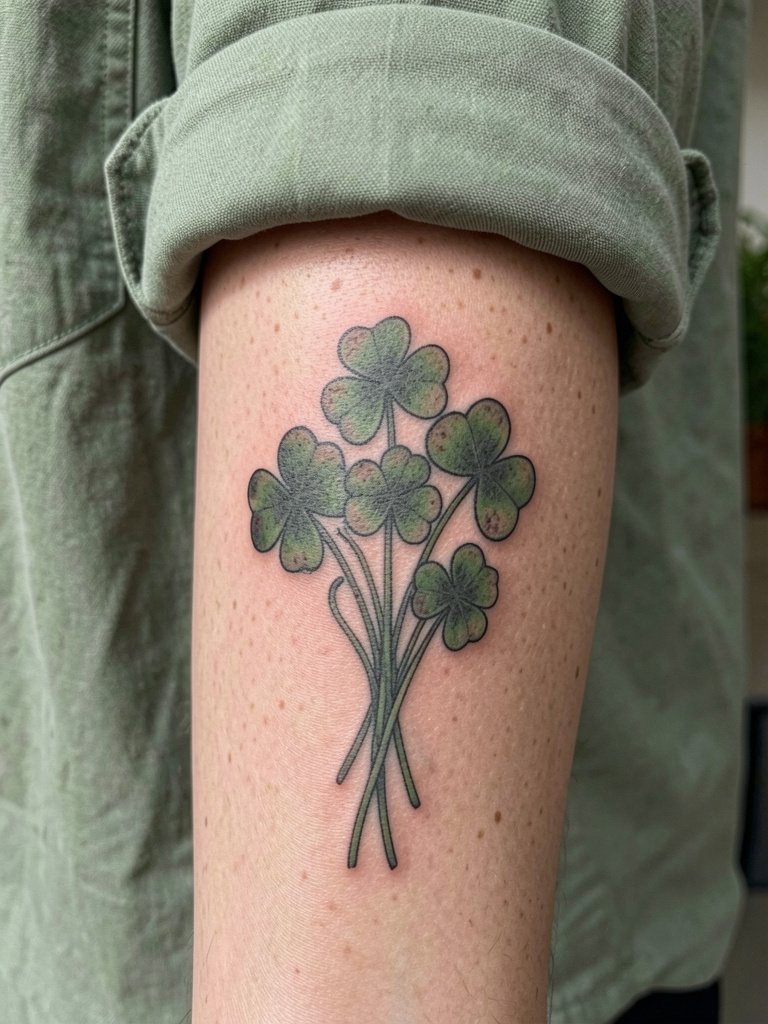
Clusters make a single symbol feel like an intentional botanical study rather than a novelty. For this layout, I suggest spacing leaves so each one has negative space around it, which helps the piece age without muddying. If you want the bouquet to look hand-crafted bring multiple reference images showing leaf spacing and healed color ranges. Sessions can run from one to two hours depending on size, and outer forearm healing is forgiving compared with wrists. Style it with a linen button-down worn with sleeves rolled to show the art when you want it visible. Expect a touch-up in the first 12 to 18 months if you choose softer washes.
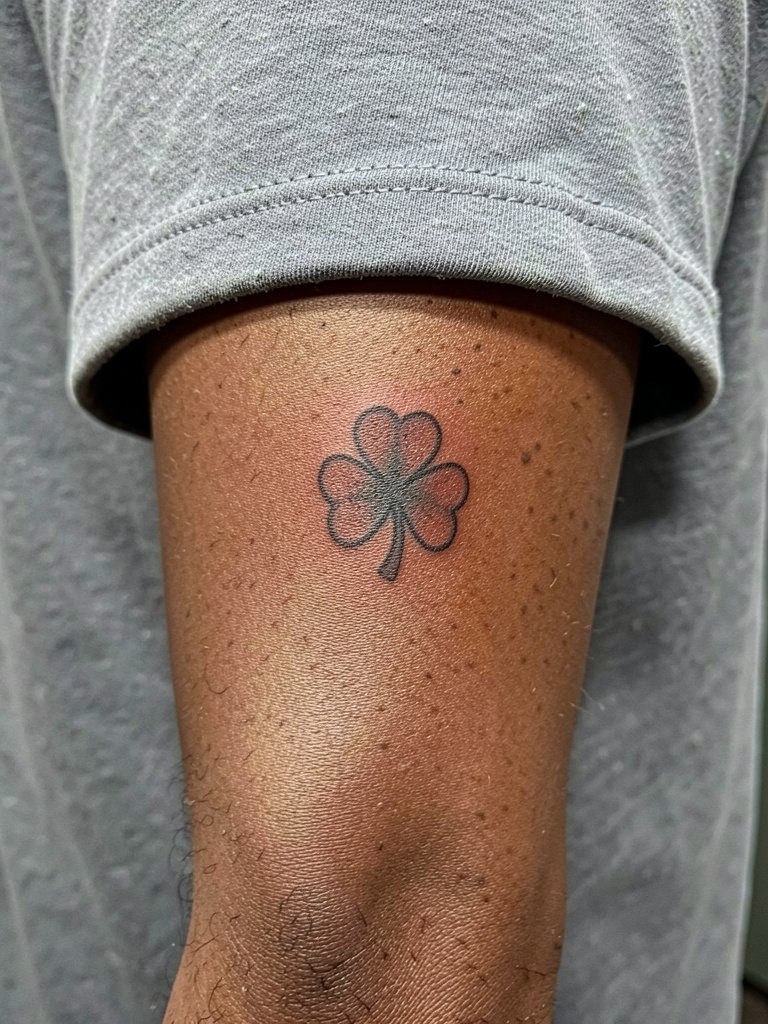
4. Minimalist Shamrock Outline for Wrist or Ankle
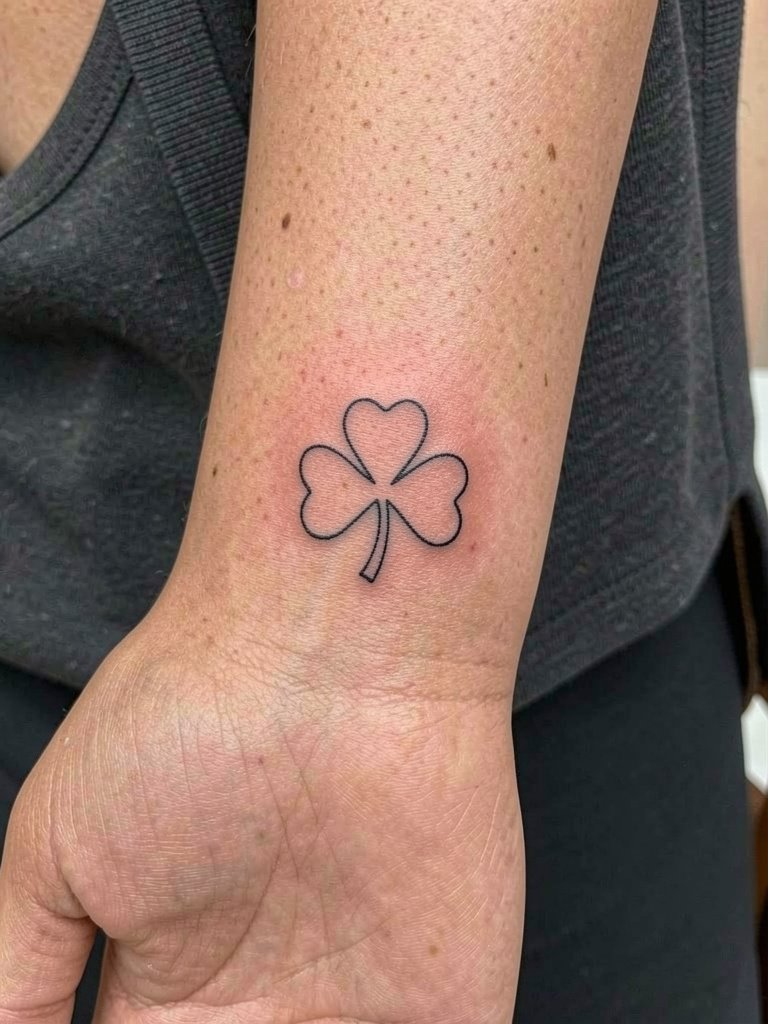
A tiny outline is perfect for a first tattoo or discreet nod to heritage. Keep lineweight a touch heavier than the thinnest single-needle reference so the shape reads after a couple of years. The inner wrist placement is visible and rates a 4 to 5 on pain, while the ankle version is usually a 3 but faces more friction. The most common error is asking for ultra-thin single-needle lines without seeing healed photos, which often leads to early softening. For styling, short sleeves or cuffed jeans and sandals make an ankle piece easy to show off. Plan on a 20 to 40 minute session for a true minimalist outline.
5. Traditional Shamrock Flash on the Upper Arm
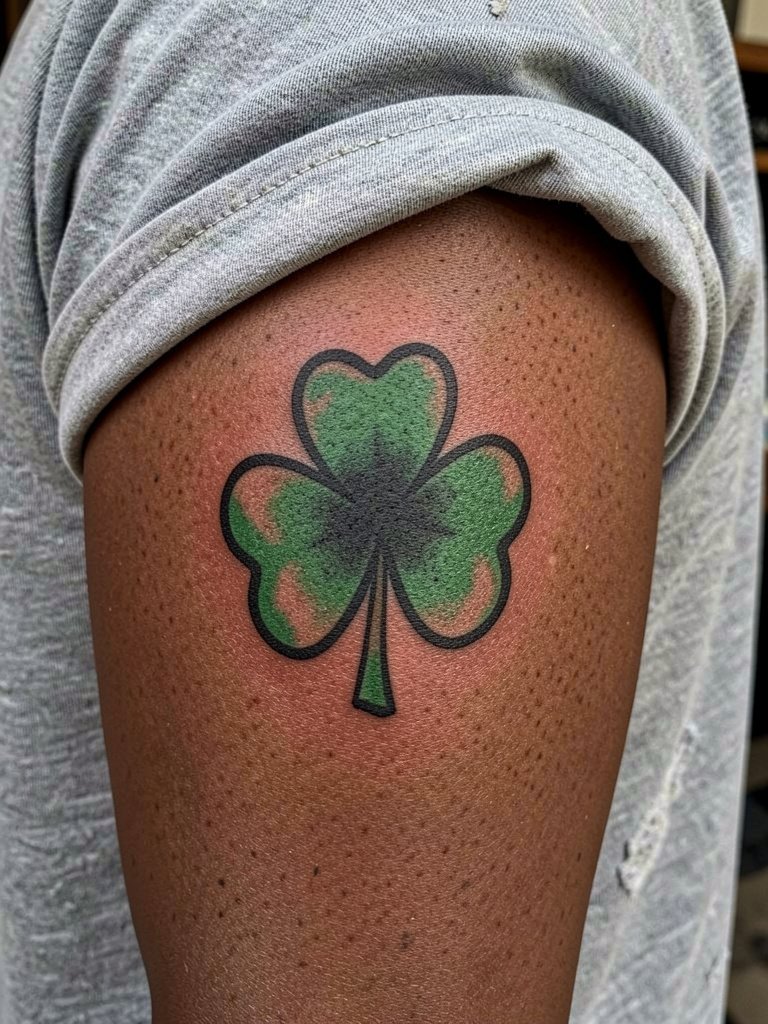
Classic flash ages predictably because the bold linework resists blurring. One camp favors traditional bold work for longevity and clear recognition from a distance. The other camp prefers fine line for a contemporary look and argues it reads cleaner on smaller placements. If you want the traditional route, request saturated fills and a thick outline so the shamrock keeps its shape through years of wear. Upper arm sessions are comfortable and usually take 45 to 90 minutes. Pair this placement with a vintage graphic tee when you want to let the art be visible.
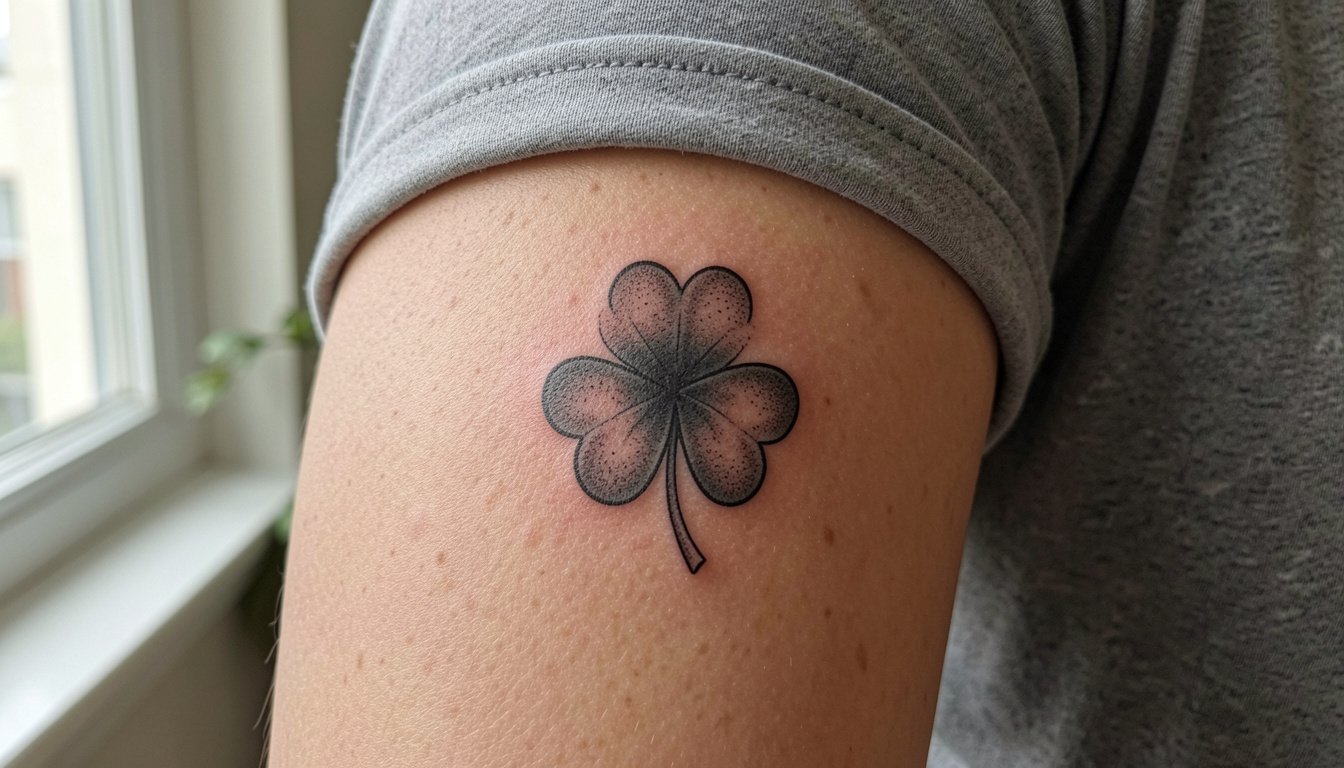
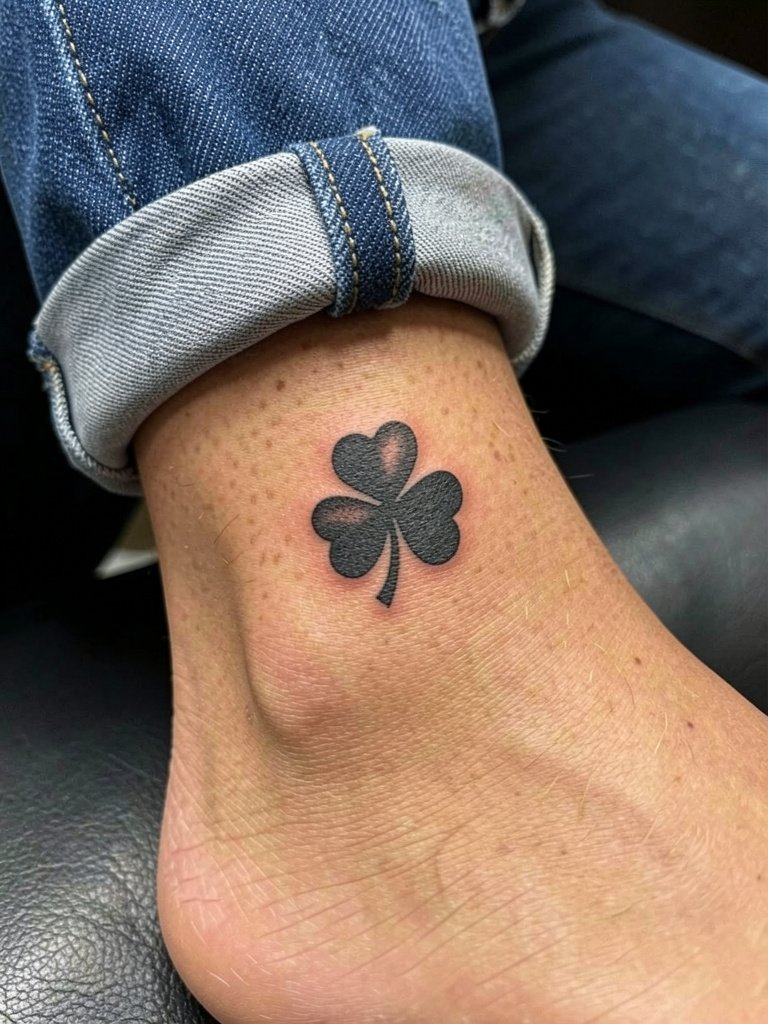
6. Black-and-Gray Shamrock for Subtle Heritage
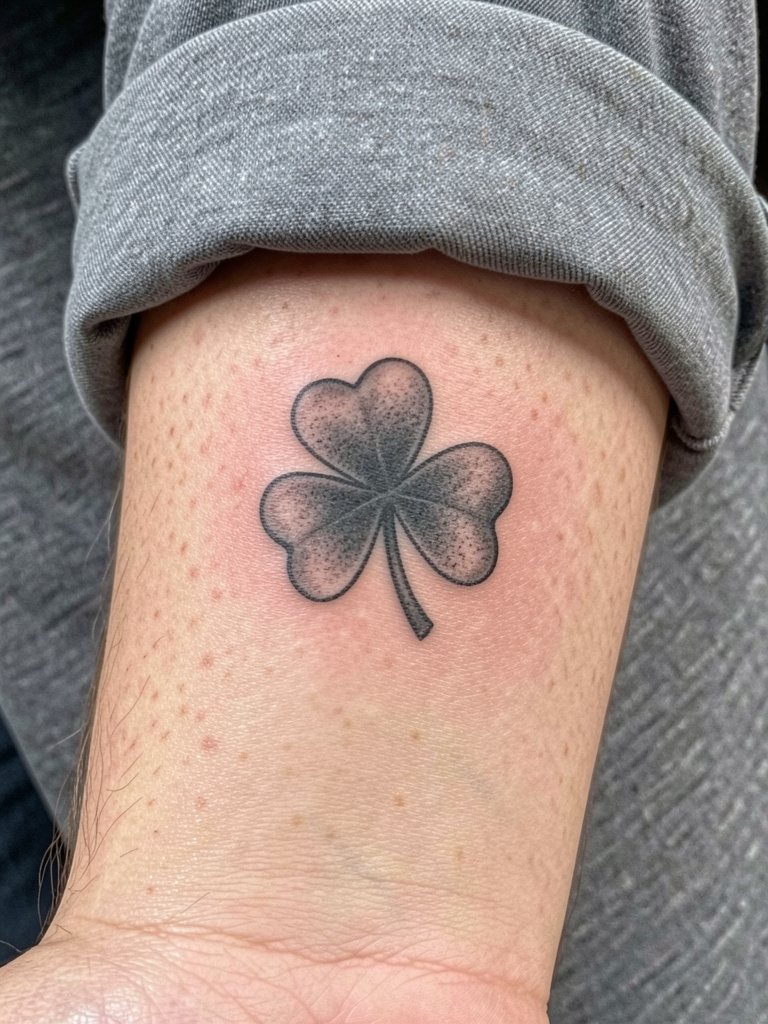
People split on color for shamrocks. One camp says green is essential because it instantly reads as shamrock and carries clear Irish association. The other camp says black-and-gray avoids novelty and ages more predictably, especially for tiny pieces where green can patchily fade. If you prefer a subdued or memorial tone, black-and-gray with stipple shading reads like heritage work. Inner forearm placement is a good middle ground for visibility and healing, usually a 3 out of 10 on pain and a 30 to 60 minute session. Avoid asking for muddy grey fills; request defined contrast and healed-photo examples.
7. Fine Line Shamrock on the Inner Forearm
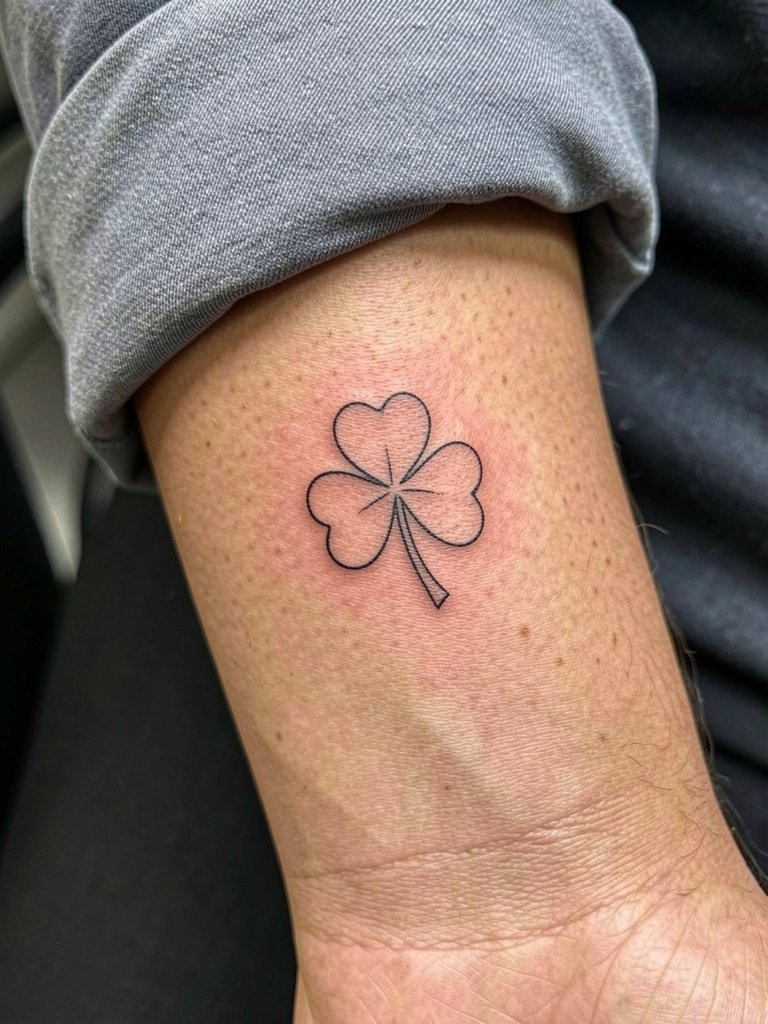
Fine line is elegant but the longevity debate is real. One camp argues fine line looks current and refined for wrist or inner forearm pieces. The other camp warns that ultra-fine single-needle work can blur on high-motion skin and recommends slightly heavier lineweight for lasting clarity. If you like the delicate look, ask for reference healed photos showing that exact needle thickness. Inner forearm sessions are comfortable and often take 30 to 75 minutes. Style this placement with a rolled cuff shirt to frame the piece during casual wear.
8. St. Patrick’s Day Seasonal Shamrock with Subtle Framing
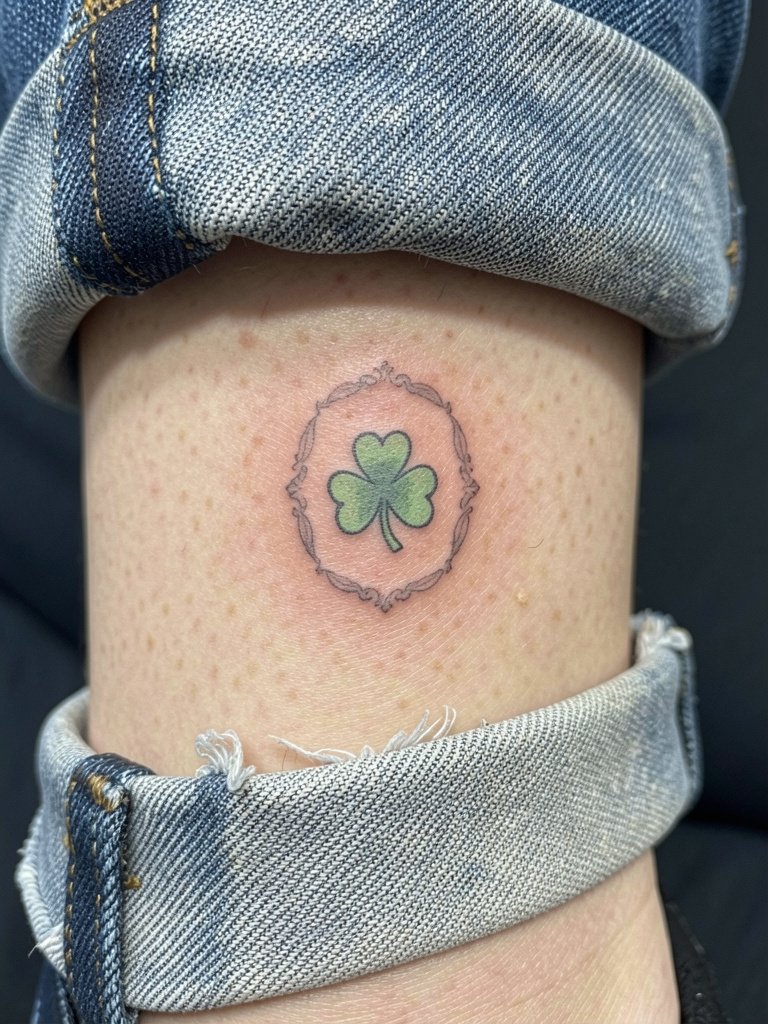
Seasonal-themed shamrocks can feel festive without tipping into cliché if the framing is restrained. Keep any St. Patrick’s motifs small and pair them with botanical or geometric accents so the design reads personal rather than party-driven. Ankle placement offers concealment and low daily friction if you pick a spot just above the bone. Sessions are brief, usually under an hour, and the ankle rates a 3 on pain for most people. For showing the tattoo, cuffed trousers or ankle strap sandals make a simple reveal that looks intentional.
9. Wrist Placement That Ages Well
Wrist pieces are visible and rewards are high when planned correctly. For longevity go for cleaner silhouettes over tiny filigree, and increase lineweight slightly from your reference so the symbol stays readable at two to five years healed. Fresh photos can be deceiving for small color work, so examine healed images before committing. The wrist is a 4 to 5 on most pain scales, and small pieces wrap up in 20 to 45 minutes. Style suggestions include stacked bracelets on the opposite wrist and short sleeves. Wear a sleeve you can roll up easily during the session to keep the area exposed.
10. Celtic-Inflected Shamrock with Knotwork Border
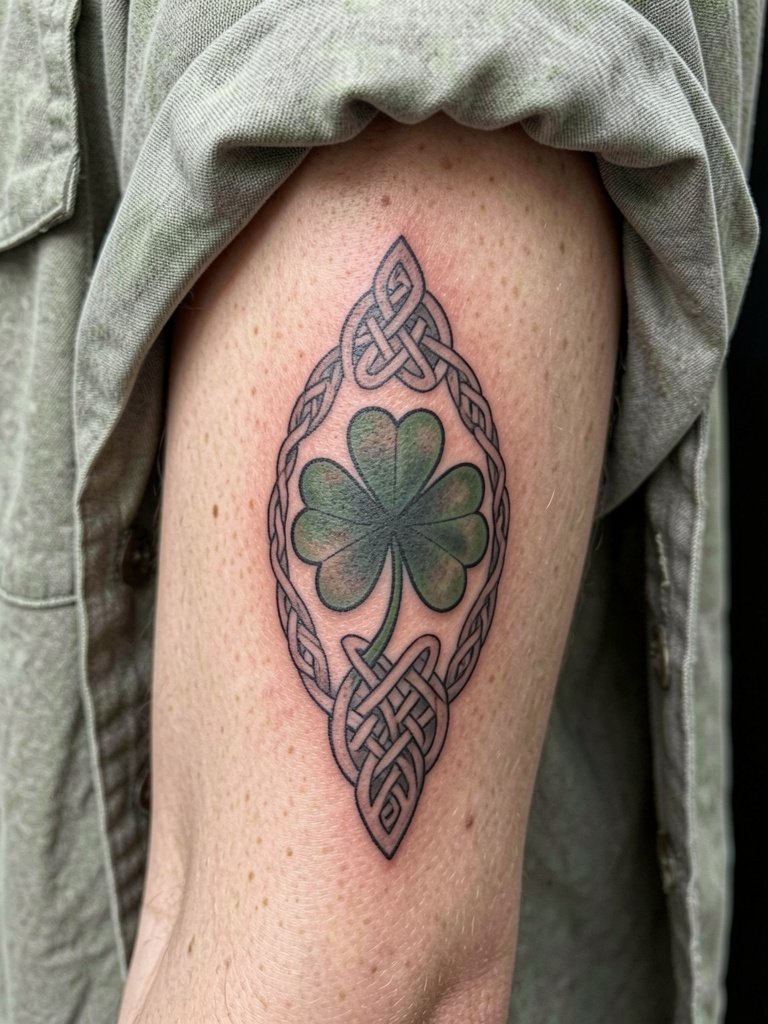
Celtic accents upgrade a simple shamrock into something that reads heritage-first. Keep knotwork minimal around a tiny shamrock or the details will compress. One practical approach is to use knotwork as a shallow border rather than internal filigree so the central leaf shapes stay legible. Outer forearm or calf placements give the artist room for knot spacing and usually need a 60 to 120 minute session. For showing off, try a clean monochrome top or relaxed overshirt so the pattern sits against a neutral background.
11. Single Shamrock with Negative Space Emphasis
Negative space ensures a tiny shamrock reads cleanly without heavy pigment. This approach works well where you want a small symbol but worry about future blur. The ankle and wrist are classic spots for negative-space work because they let the shape breathe. Sessions are short, typically under 45 minutes, and ankle friction suggests avoiding too-small interior details. For styling, cuffed jeans and ankle socks or sandals keep the piece visible when you want to show it.
12. Collarbone Shamrock That Reads Like Jewelry

A collarbone placement reads like a piece of jewelry when executed with fine line spacing and modest scale. Keep the shamrock small and avoid dense Celtic fills in that spot so the lines do not pool. Sessions are short but the bone can increase sensitivity to a 6 on some pain charts. For showing the area look for scoop neck tops or layered delicate necklaces, and for the session wear something strap-friendly so the artist has clear access. The healed look is jewelry-like when you ask for slightly heavier lineweight than the thinnest single-needle samples.
13. Nape Shamrock for Hidden Heritage
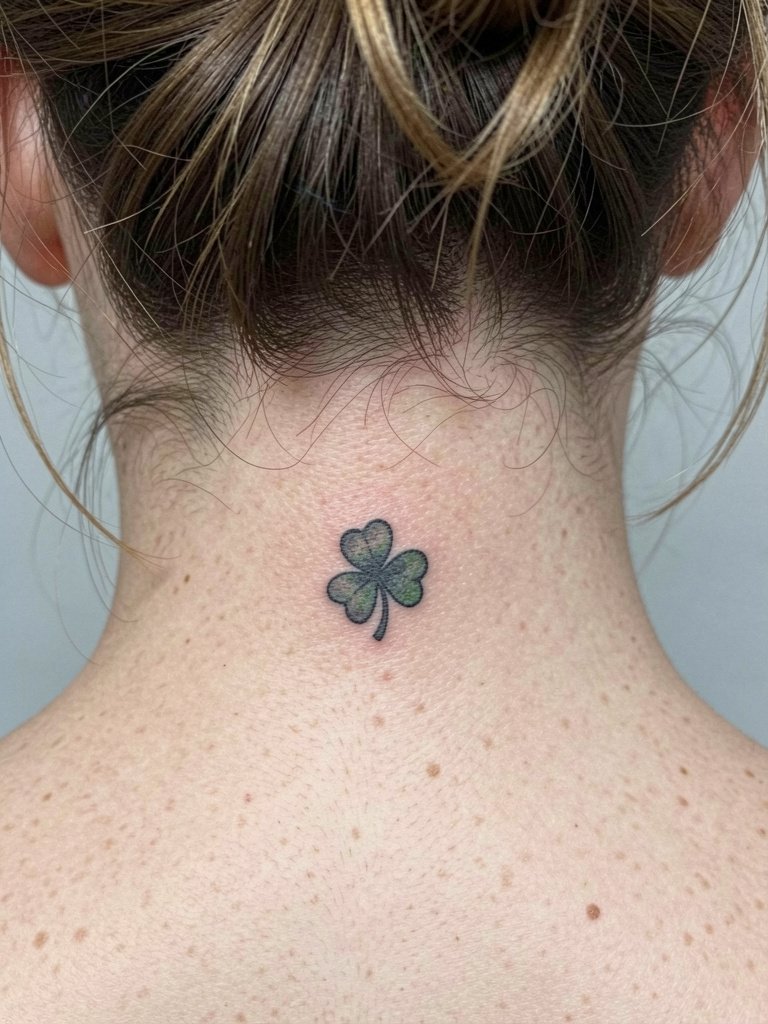
The nape is a discreet spot that looks intentional when your hair is up. It requires precise stencil placement and experience with small-scale neck skin. If you choose this placement plan for a short session and bring a hairstyle that keeps the area accessible. For professional considerations know that neck work sometimes requires an artist who routinely tattoos that location, and some shops have specific policies. For revealing looks, wear collared shirts or open-back tops when you want the piece to show.
14. Lateral Hip Shamrock for a Private Nod
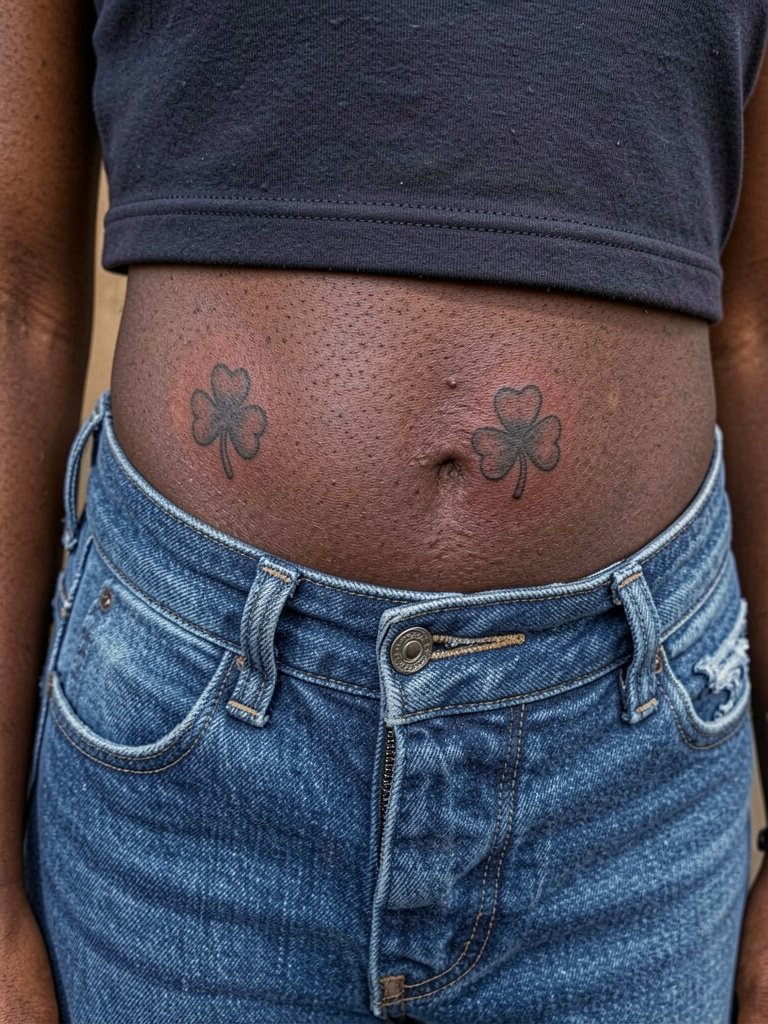
Hip placements are intimate and strike a balance between private and stylish. They heal cleanly when the area is free of tight waistbands and friction. Expect a 3 to 4 pain rating and a 30 to 60 minute session. A common mistake is booking this placement without considering clothing choices during healing. For session comfort choose loose waistbands and for show-off looks try high-waisted denim or bikini bottoms. Note that hip work benefits from an artist experienced in skin that moves with sitting and walking.
15. Micro-Realism Shamrock with Textural Detail
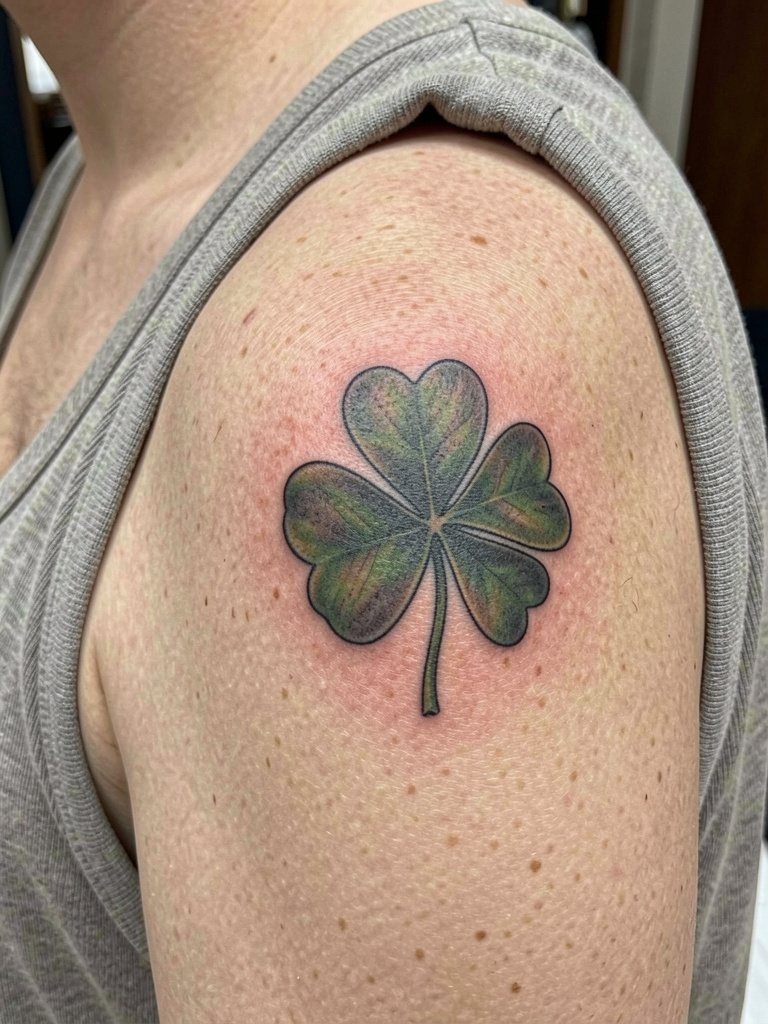
Micro-realism gives the shamrock a tactile feel that reads like a tiny botanical study. It is best on shoulder or forearm where the surface is relatively flat. Sessions vary from 60 to 120 minutes depending on the level of texture and shading. The main mistake is trying to compress photo-real leaf texture into too small a space, which becomes indistinct after healing. For wardrobe, a loose tank lets you both show and protect the area during the first two healing weeks. Expect to plan for a possible touch-up at one year if you want the miniature texture to stay crisp.
Studio Day Picks
The wrist, ankle, and collarbone pieces above heal differently from larger work, so a few small things smooth the session and the first week.
-
Tattoo numbing cream. Used properly before shorter wrist or ankle sessions this can reduce jumpiness and help you sit through delicate single-needle passes.
-
Thin protective film roll. Keeps small placements clean during the first days when friction from clothing or socks is most likely to irritate the area.
-
Stencil transfer paper kit. Lets you preview exact placement on skin so you and the artist can check line spacing before ink goes in, which matters for tiny shamrocks.
-
Fragrance-free gentle body wash. Mild cleansers reduce irritation during showers without stripping the healing ink.
-
Aquaphor healing ointment. A thin layer during the first two to three days helps lock in moisture for fine-line work without clogging needle channels.
Frequently Asked Questions
Q: How much should I expect to pay for a small shamrock?
A: Prices vary by shop and artist, but for tiny wrist or ankle shamrocks expect a shop minimum to range from $50 to $150 and slightly larger custom pieces to fall between $150 and $400. These ranges reflect shop minimums and hourly rates rather than the design itself.
Q: Which placements tend to age best for small shamrocks?
A: Outer forearm and upper arm generally age well because they see less constant friction. Wrists and ankles are visible but face more wear, so pick slightly heavier lineweight for those spots and plan for a possible touch-up in the first year.
Q: How do I find artists who post healed photos and do small botanical or Celtic work?
A: Search Instagram and TikTok by combining symbol and style tags like #shamrocktattoo, #smalltattooideas, #botanicaltattoo, and #celtictattoo while using your city or region as a location filter. Look for the keyword "healed" in captions and saved portfolio highlights, and check Reddit tattoo communities for healed-photo threads.
Q: What should I wear to a wrist, ankle, or collarbone appointment?
A: Wear clothing that gives the artist clear access such as a short sleeve or a loose tank top, depending on placement. For ankles choose loose pant legs or cuffed jeans. A loose tank top is a good multi-placement option because it keeps the area accessible and comfortable.
Q: Will green ink always fade faster than black?
A: Color behavior depends on saturation and placement. Greens can fade unevenly when used in tiny washes, but densely packed green fills with good saturation can last well. Many people choose black-and-gray for predictability and green when the color is integral to the design.
Q: Do small shamrocks need a touch-up and when?
A: Small pieces often benefit from a touch-up between six months and eighteen months if you want color or fine detail refreshed. Fine-line work is more likely to need an early touch-up than bold blackwork, and healed photos should inform that decision.
