
I spent months bookmarking half-sleeve photos before I finally understood the real problem: great art needs a style that actually holds up on skin. These 26 half sleeve tattoo ideas focus on longevity, visual impact, and real-life wear — the things I learned from artists and healed-ink photos.
Quick context: I'm focusing on half sleeve looks that work on upper arm, outer/inner bicep, and down toward the elbow. These picks reflect 2025 trends — fine line detail, bold blackwork contrast, selective color — and what actually ages well. According to Pew Research, roughly one in five U.S. adults has a tattoo (Pew Research Center). Arms remain the most common placement for visible tattoos (Statista).
Fine Line Botanical Half Sleeve on Inner Arm
Style/Technique: Fine Line / Illustrative
Pain Level: Medium (3-4/10)
Session Time: 2–4 sessions
Best For: Timeless, delicate statement; easy to hide with sleeves
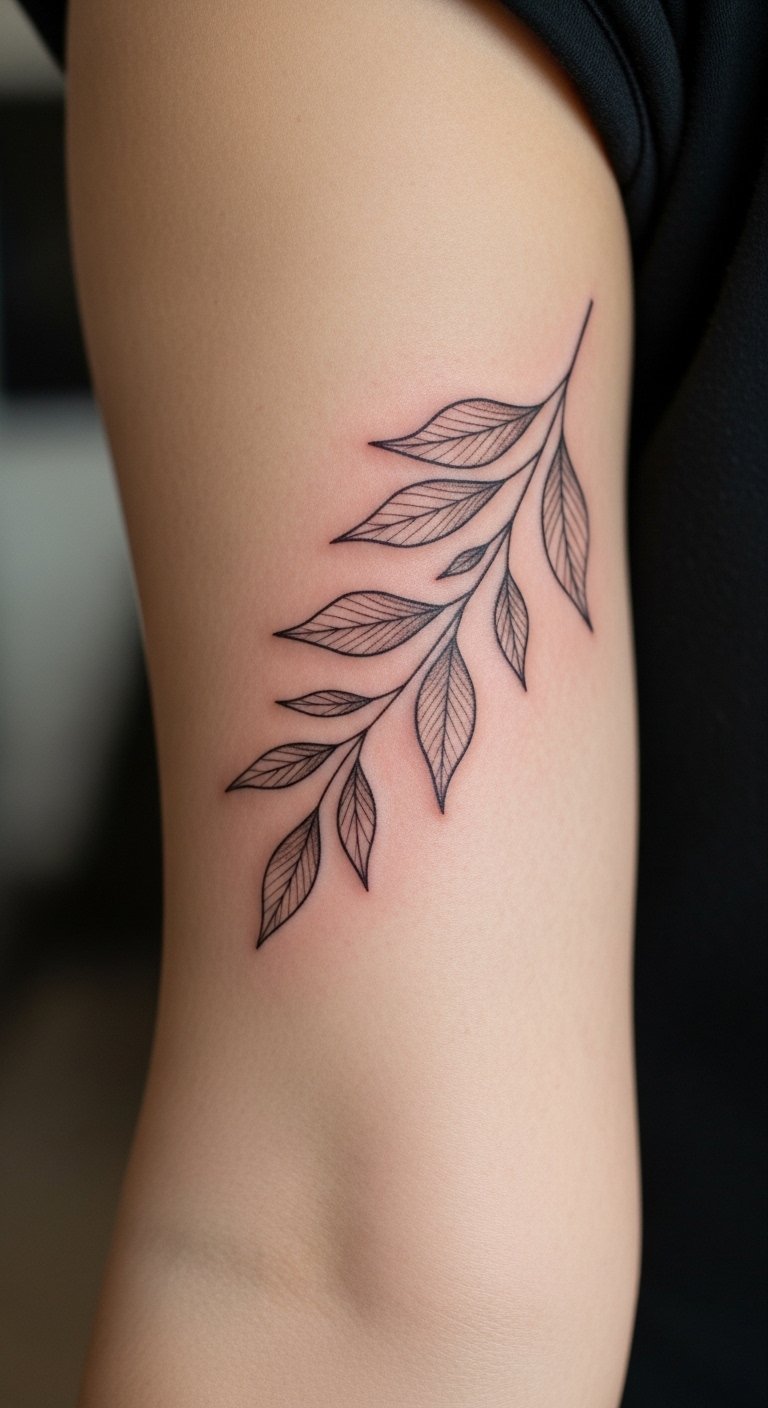
I love this for a soft, meaningful look. Fine line plants create flow down the bicep and inner arm. The inner arm hides well while showing detail when you want it seen. Expect medium pain — inner arm is sensitive where skin meets muscle. Healing: 2–3 weeks surface, 2+ months full. Fine lines can blur over years; ask for slightly bolder anchor lines to help longevity. Common mistake: lines too faint at the start. Ask your artist for healed examples and “line weight that heals” rather than ultra-hairline only.
Bold Traditional Rose Half Sleeve on Outer Arm
Style/Technique: Traditional / American Traditional
Pain Level: Low (2-3/10)
Session Time: 1–3 sessions
Best For: High-contrast, long-lasting arm piece
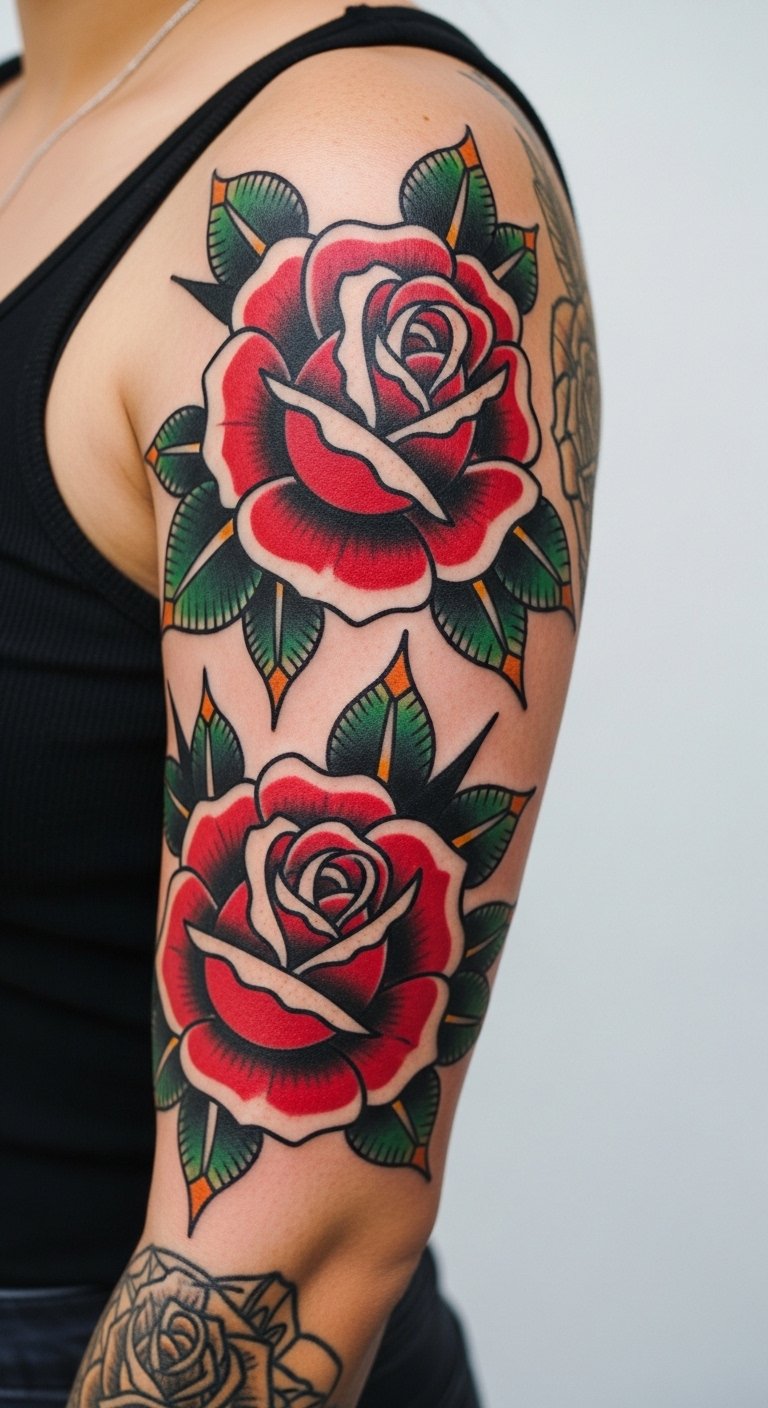
Traditional holds up. Bold lines and solid fills age predictably. A rose motif wraps well around the bicep. Outer arm pain is low; sessions are faster because coverage is denser. Healed look shows slight softening of edges but retains shape. Avoid tiny, intricate details that won't read from a distance. Ask for strong outlines and saturated fills; artists trained in traditional will know color packing and longevity.
Blackwork Geometric Half Sleeve on Upper Arm
Style/Technique: Blackwork / Geometric
Pain Level: Medium (4/10)
Session Time: Multiple sessions
Best For: Statement, modern contrast, hides fading well
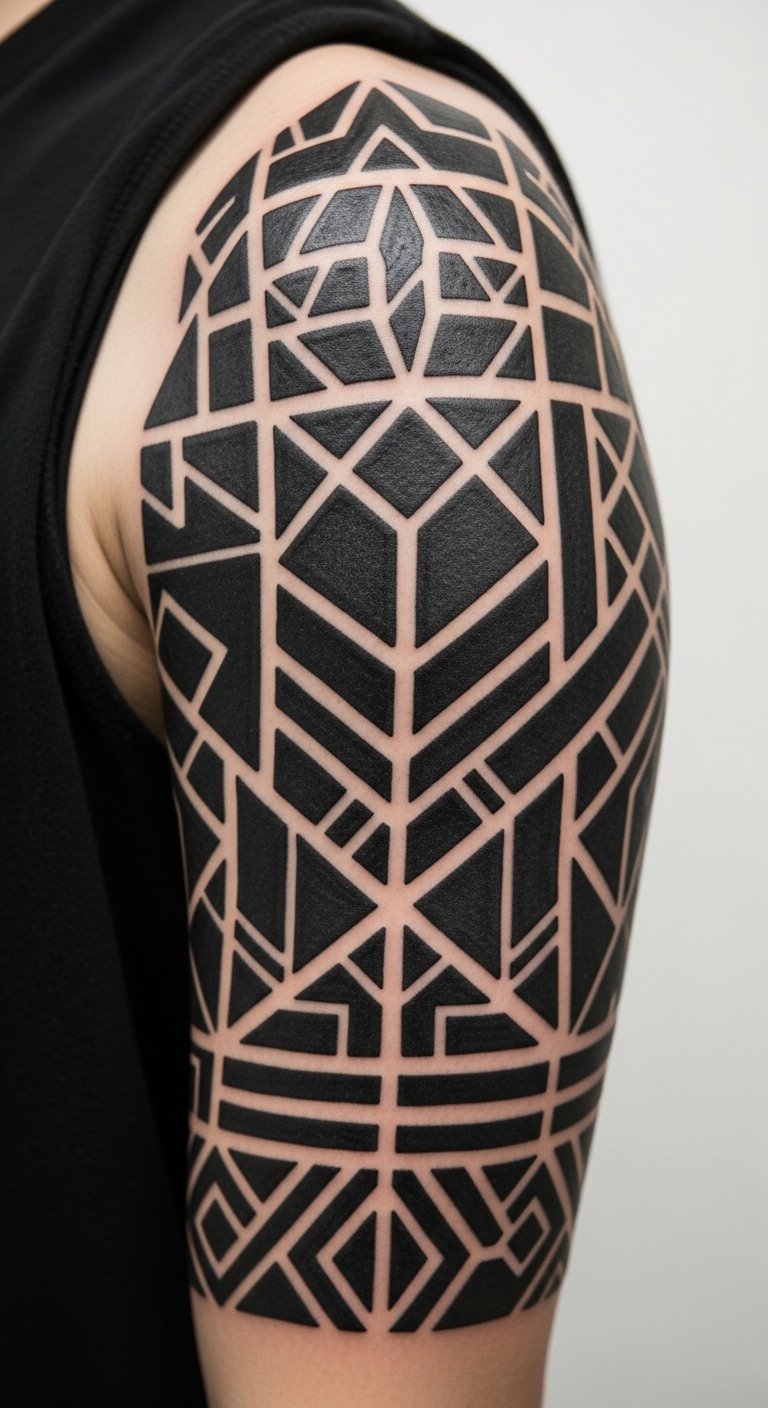
Blackwork is durable. Large black areas age well and can mask scars or older tattoos. Geometry adds a modern, architectural feel. Upper-arm muscle movement can distort tiny patterns — choose bold shapes. Expect steady buzzing during sessions but manageable pain. Healing needs consistent moisturizing to prevent scabbing in heavy-fill areas. Common mistake: overly tight micro-patterns that blur. Ask for tested pattern scales that read when healed.
Micro-Realism Portrait Half Sleeve on Outer Bicep
Style/Technique: Micro-Realism / Portrait
Pain Level: Medium-High (5-6/10)
Session Time: Multiple long sessions
Best For: Pet portraits or loved ones; high-detail keepsake
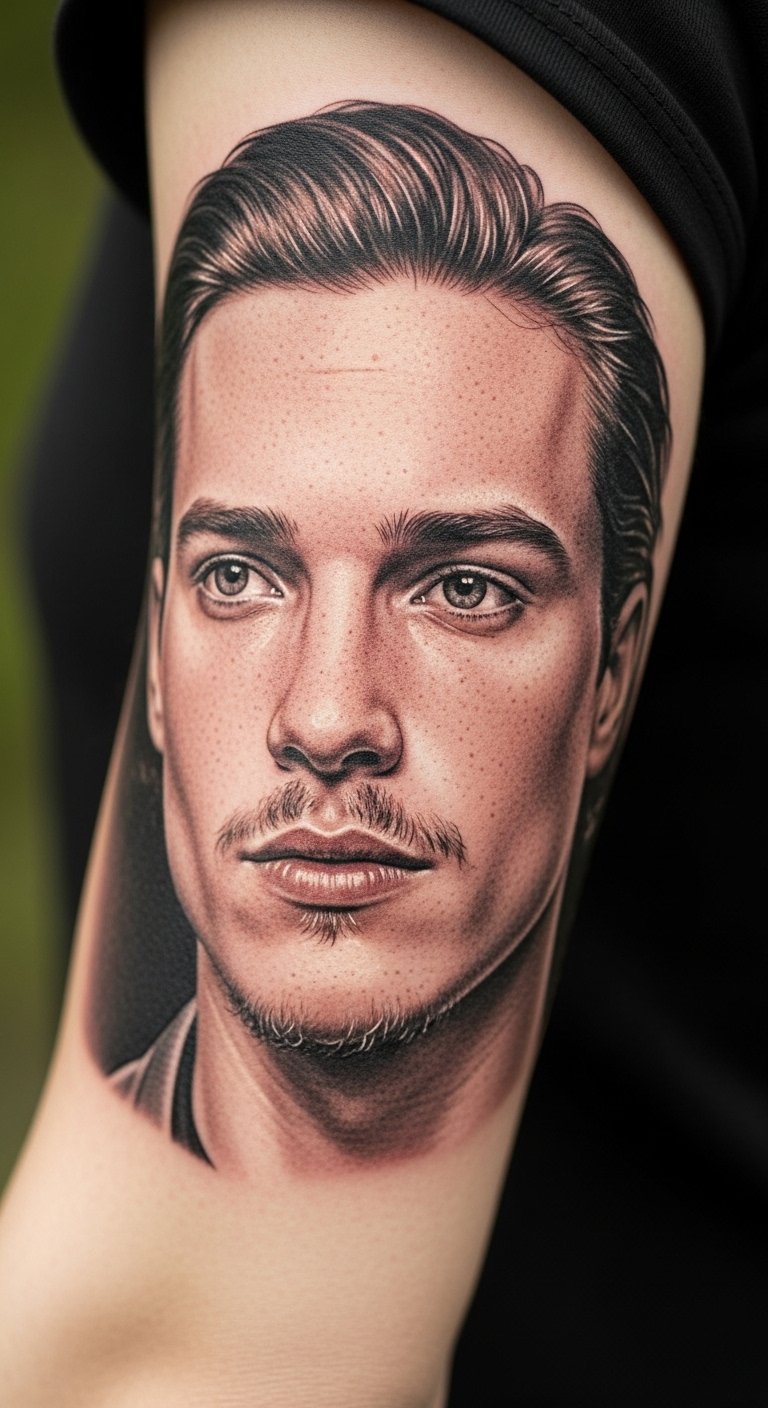
Portrait realism looks stunning on a half sleeve because there's room for tonal shading. Outer bicep is a stable canvas, but realism demands an experienced artist. Pain varies with shading density. Healed portraits can lose tiny highlights — ask your artist to plan contrast for long-term readability. A common mistake is using low-saturation color in tiny facial details; stick with strong mid-tones and crisp edges where needed.
Neo-Traditional Koi Half Sleeve on Outer Arm
Style/Technique: Neo-Traditional / Japanese Influence
Pain Level: Medium (4/10)
Session Time: 2–4 sessions
Best For: Flowing motion, color storytelling

Koi scales and water offer movement across the half sleeve. Neo-traditional keeps bold outlines but adds gradient color and illustrative shading. Placement along the outer arm accentuates muscle curves. Color holds if saturated initially; expect some fading in orange/yellow over years. Avoid tiny scale dots that collapse into blurs. Ask to see healed neo-traditional work to judge saturation and line thickness.
Watercolor Galaxy Half Sleeve on Upper Arm
Style/Technique: Watercolor / Painterly
Pain Level: Low-Medium (3-4/10)
Session Time: 1–3 sessions
Best For: Dreamy, colorful statement

Watercolor looks fresh and airy. It works on upper arm where movement is modest. Colors can fade faster than blacks; artists often pair watercolor with black anchors to help composition stay readable. Healing requires careful moisturizing so washes don’t patch during peeling. Common mistake: too many pale pastels; ask for stronger underlying tones that survive healing.
Japanese Irezumi-Inspired Half Sleeve on Outer Bicep
Style/Technique: Traditional Japanese / Irezumi
Pain Level: Medium (4/10)
Session Time: Multiple long sessions
Best For: Cultural storytelling, symbolic depth

Irezumi patterns are designed to flow with the arm’s anatomy. Bold outlines and large color blocks age well. This style often needs experienced artists familiar with traditional motifs. Expect several sessions; healing is gradual with large fills. Mistake to avoid: mixing authentic Irezumi motifs with unrelated clip-art. Ask your artist about composition and cultural significance respectfully.
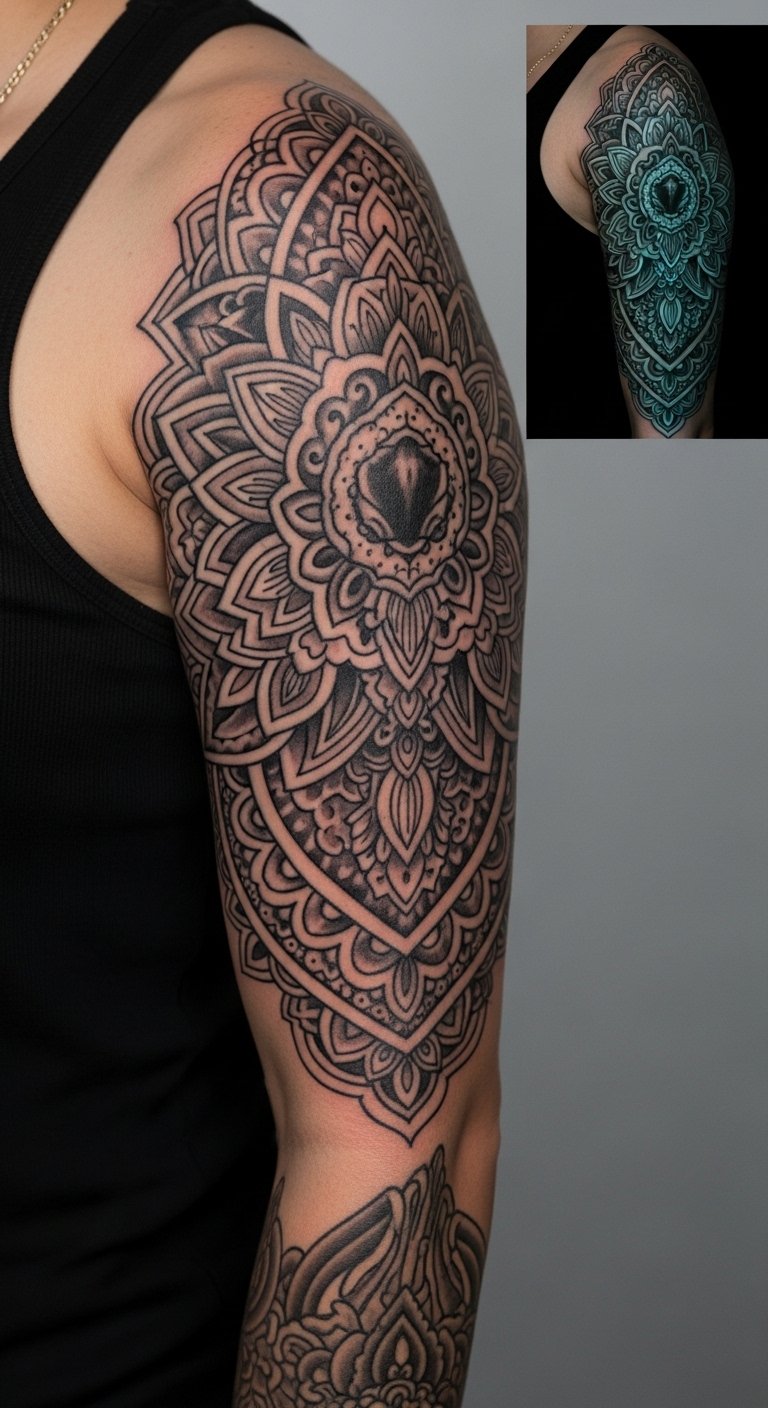
Dotwork Mandala Half Sleeve on Inner Arm
Style/Technique: Dotwork / Mandala
Pain Level: Medium-High (5/10)
Session Time: Multiple sessions
Best For: Meditative, intricate texture
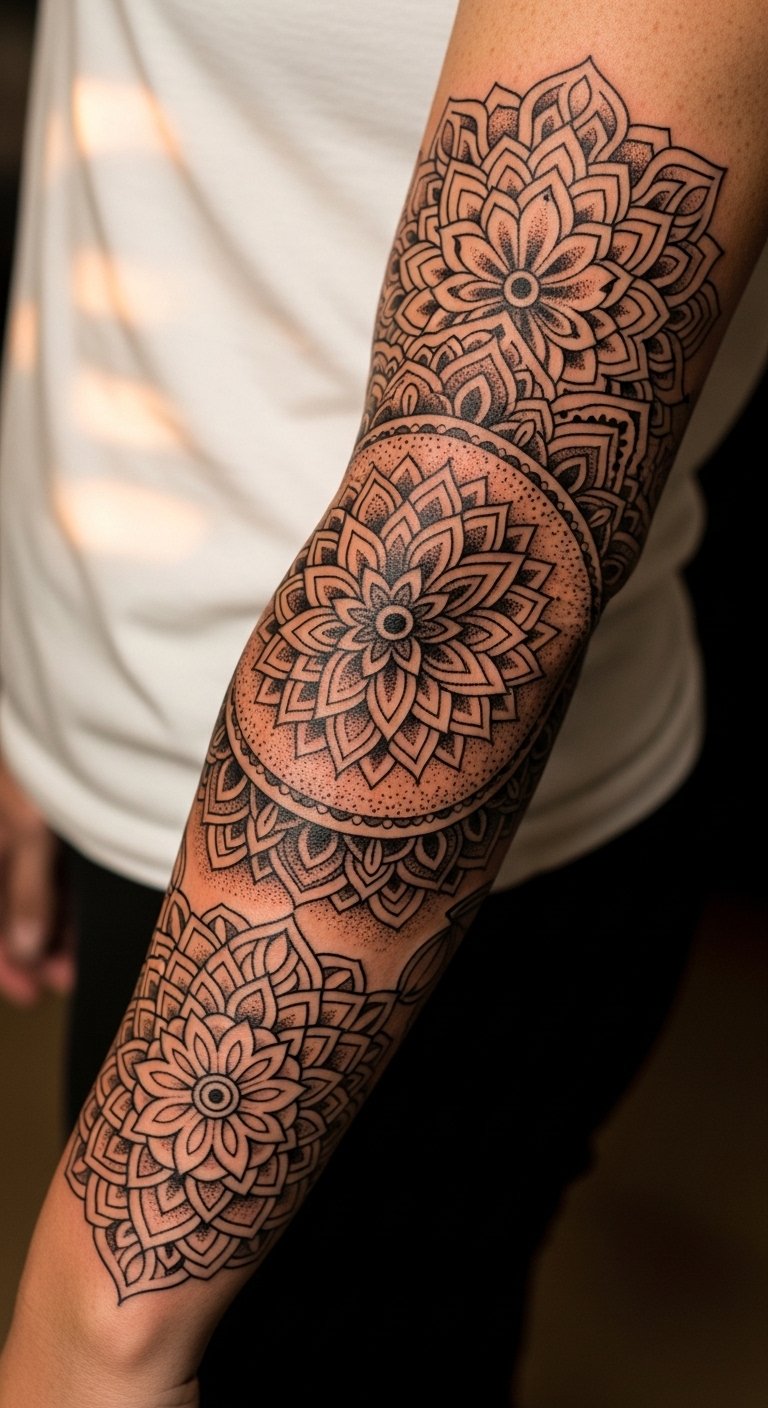
Dotwork builds tone through thousands of dots. It looks incredible healed, with a textured quality. Inner arm placement emphasizes symmetry but is sensitive — expect higher pain. Healing requires patience; scabs from dense dotting can alter inversion if not cared for. Common mistake: over-compressing dots too close, which later ink-blows. Ask for examples of healed dotwork on similar skin tone.
Minimalist Line Art Half Sleeve on Outer Arm
Style/Technique: Minimalist Line Art / Continuous Line
Pain Level: Low (2-3/10)
Session Time: 1–2 sessions
Best For: Sleek, modern half sleeve that reads from afar
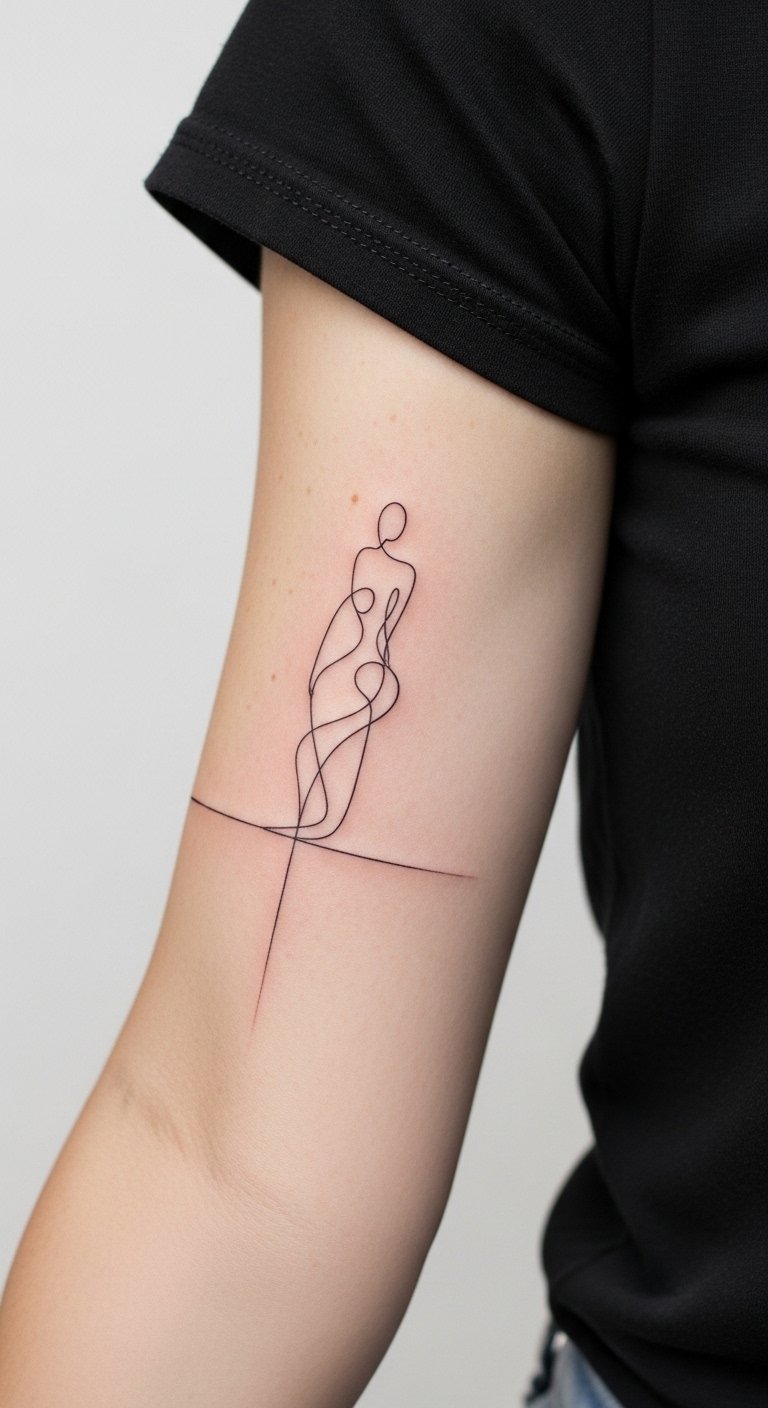
Minimalist linework can make a bold statement when scaled for a half sleeve. It’s lower pain and often quicker. Healed lines should remain crisp; avoid hairline lines that heal irregularly. The trick is smart negative space. Common mistake: overcomplicating the design — keep confident strokes. Ask your artist about line weight variation for long-term clarity.
Biomechanical Half Sleeve Around Elbow
Style/Technique: Biomechanical / 3D Illusion
Pain Level: High (6-7/10)
Session Time: Multiple long sessions
Best For: Dramatic, sculptural statement
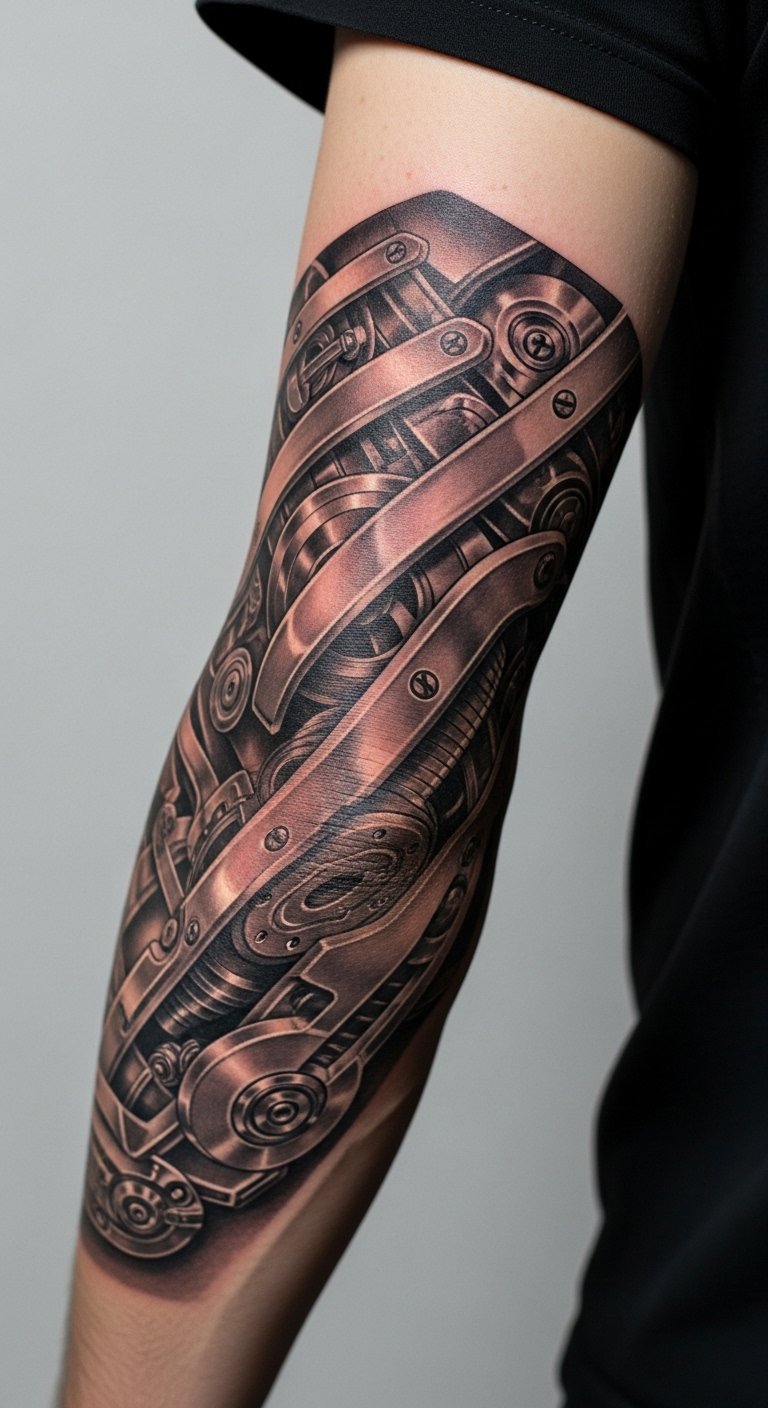
Biomechanical plays with depth and movement around joints. Elbow wraps look dramatic but are painful and require careful placement so motion doesn’t break illusion. Heavy black and shading age predictably, but tiny realistic textures can soften. Avoid overly small mechanical detail that blurs. Ask for healed photos of joint-area work.
Script Wrap Half Sleeve on Inner Bicep
Style/Technique: Script / Calligraphy
Pain Level: Medium (4/10)
Session Time: 1–2 sessions
Best For: Meaningful quotes, discreet statements
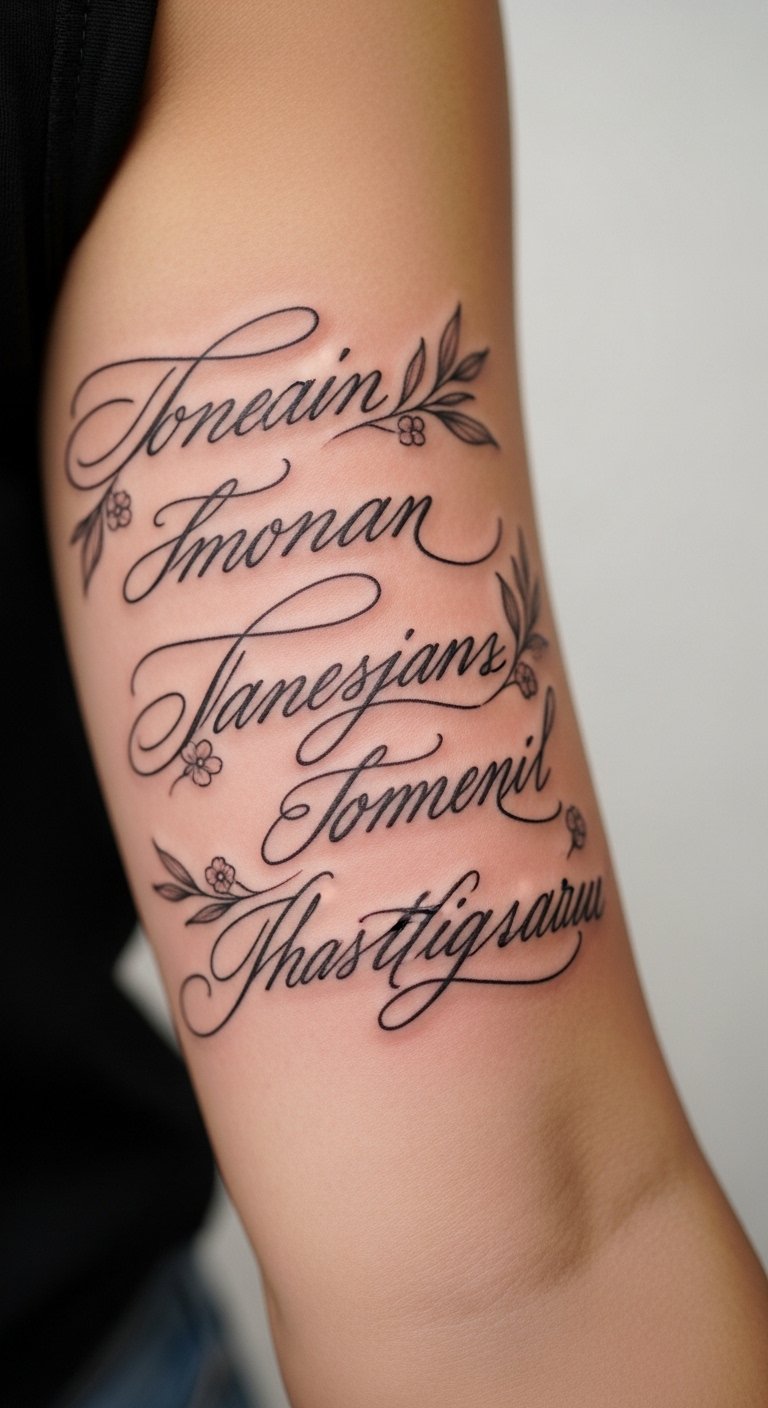
Script that wraps the arm looks intimate and personal. Inner bicep placement can be sensitive but reads beautifully when healed. Choose lettering that’s bold enough to survive slight blur. Common mistake: tiny, ornate script that becomes illegible. Ask your artist for mockups showing how spacing will change with healed skin.
Animal Totem Half Sleeve on Outer Upper Arm
Style/Technique: Illustrative / Realism
Pain Level: Medium (4/10)
Session Time: 2–4 sessions
Best For: Symbolic storytelling, portrait-style animals
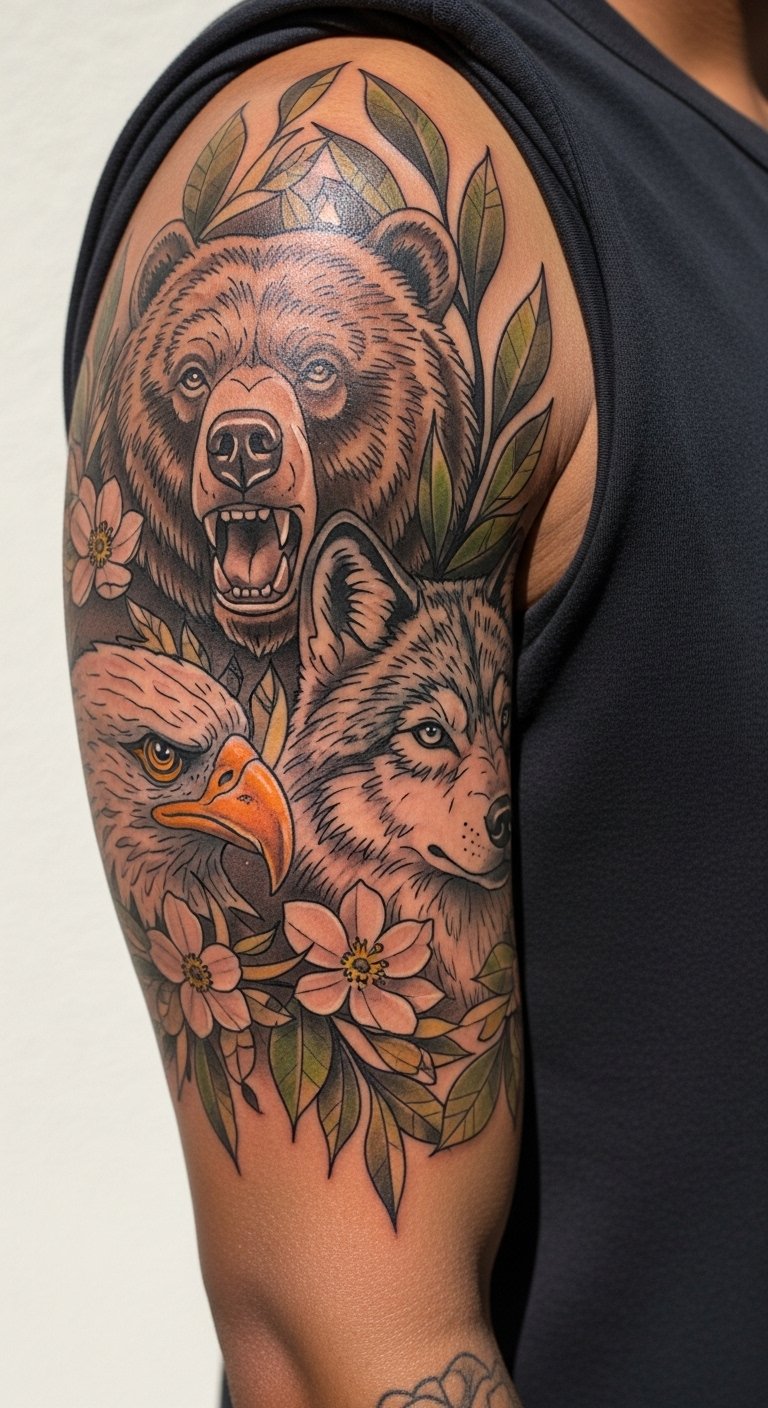
Animal motifs give character and narrative. On the outer upper arm you have space for scale and expression. Realistic textures require skilled shading; healed fur detail can soften so anchor major features. Avoid over-texturing small areas. Ask for contrast planning so eyes and key features remain focal points after healing.
Floral-Mandala Hybrid Half Sleeve on Outer Arm
Style/Technique: Botanical + Mandala / Hybrid
Pain Level: Low-Medium (3-4/10)
Session Time: 2–3 sessions
Best For: Feminine yet bold, versatile placement

Combining floral motifs and mandalas produces organic symmetry that wraps the arm well. It’s forgiving for healing if lines are consistent. This design stays readable with medium line weight. Common mistake: crowding the mandala center; leave breathing space for healing. Ask for healed shots of similar hybrid work.
Polynesian Tribal Half Sleeve on Upper Arm
Style/Technique: Polynesian / Tribal
Pain Level: Medium (4/10)
Session Time: Multiple sessions
Best For: Cultural patterns, strong graphic look

Polynesian work reads strongly and ages well due to heavy blackwork. It’s meaningful when rooted in cultural context — ask about symbolism. Lines need to be crisp and bold to avoid spread. Expect steady discomfort in dense black areas. Avoid copying motifs without understanding — discuss intent respectfully.
Celtic Knotwork Half Sleeve on Outer Arm
Style/Technique: Celtic / Knotwork
Pain Level: Low-Medium (3-4/10)
Session Time: 2–3 sessions
Best For: Interlocking patterns that flow with the arm
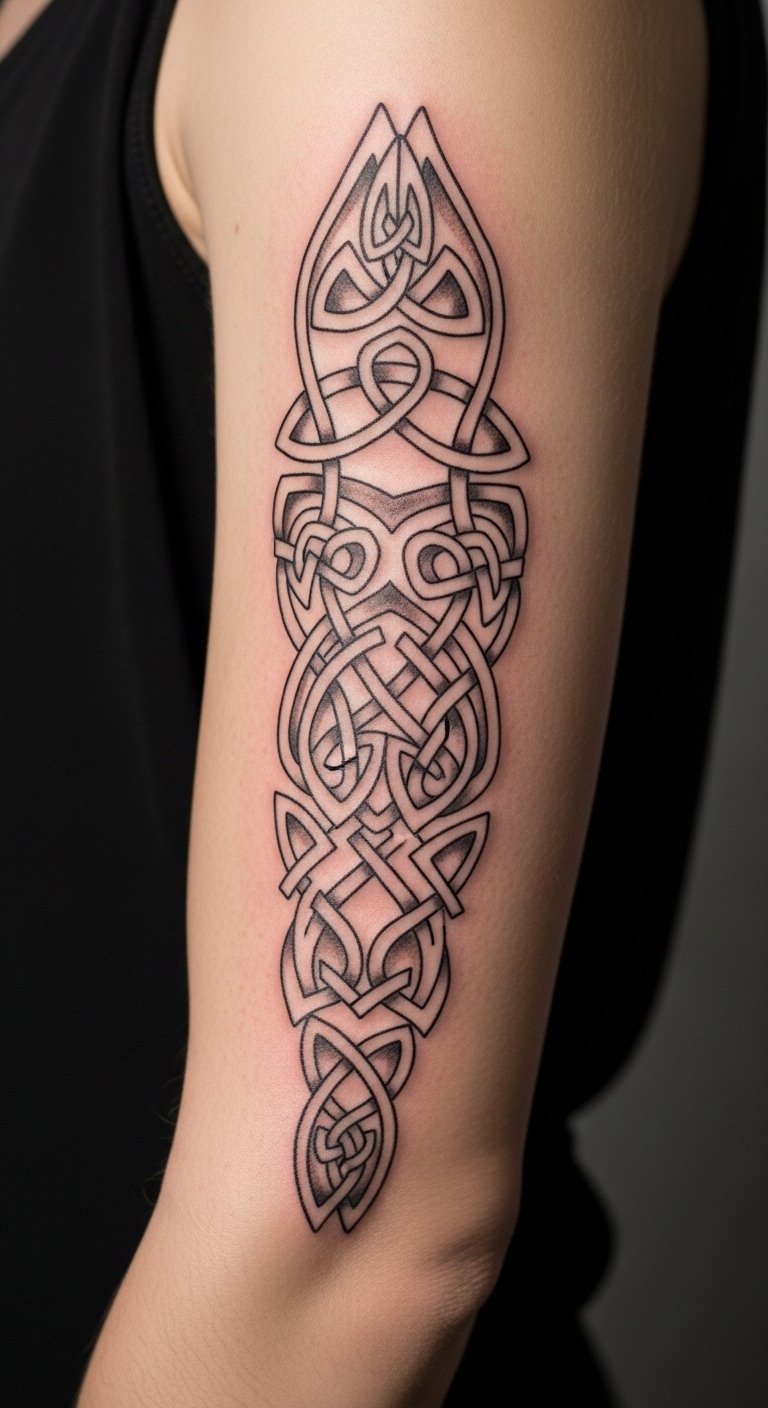
Celtic knots loop naturally around limbs. They look coherent healed if artist adjusts for muscle curvature. Tiny crossing lines can merge; ask for broader knots and clear negative space. Healing is straightforward but needs careful line spacing to preserve patterns.
Optical Illusion Half Sleeve on Outer Arm
Style/Technique: Optical / Op Art
Pain Level: Medium (4/10)
Session Time: 2–3 sessions
Best For: Eye-catching, conversation-starting sleeve

Optical designs pop from a distance and reveal complexity close-up. They can be high-maintenance if tiny elements become fuzzy; favor bold repeating units. Ask your artist to scale patterns so the effect survives healing. This is a design where healed examples matter most.
Selective Color Splash Half Sleeve on Upper Arm
Style/Technique: Selective Color / Black & Color Mix
Pain Level: Low-Medium (3-4/10)
Session Time: 2–3 sessions
Best For: Graphic contrast with color pops

Selective color adds focus. Use color sparingly on elements you want to emphasize. Bright colors can fade faster; plan for touch-ups down the line. A common misstep is overusing subtle shades that disappear on darker skin tones — discuss saturation and contrast with your artist.
Surreal Collage Half Sleeve on Outer Arm
Style/Technique: Surreal / Collage
Pain Level: Medium (4/10)
Session Time: Multiple sessions
Best For: Personal symbolism mixed with striking visuals
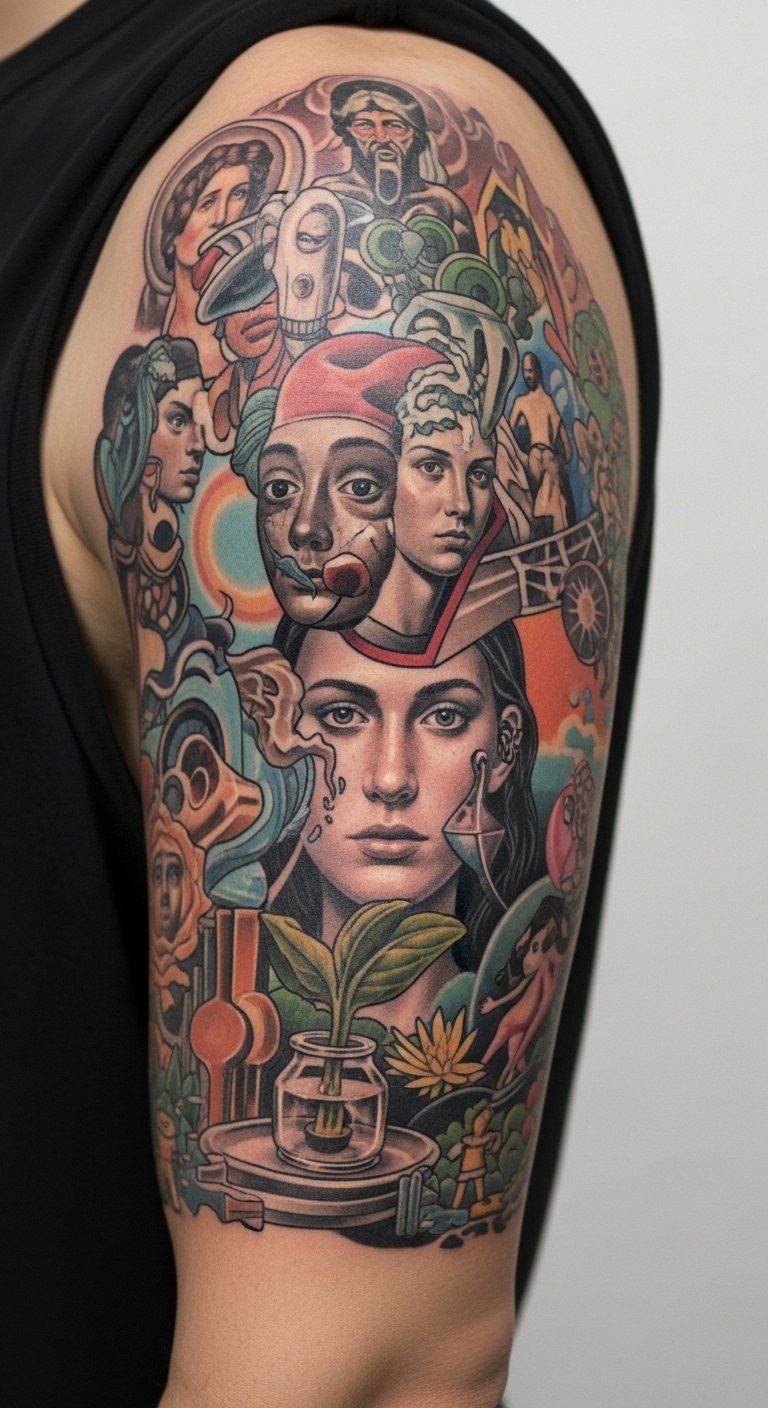
Surreal collages let you combine disparate elements into a cohesive arm narrative. They require strong composition to avoid clutter. Opt for clear focal points. Healing is typical but busy areas need strong contrast to remain legible. Ask the artist to map focal hierarchy.
Travel Map Compass Half Sleeve on Outer Arm
Style/Technique: Illustrative / Cartographic
Pain Level: Low-Medium (3/4)
Session Time: 1–3 sessions
Best For: Storytelling, meaningful travel marks
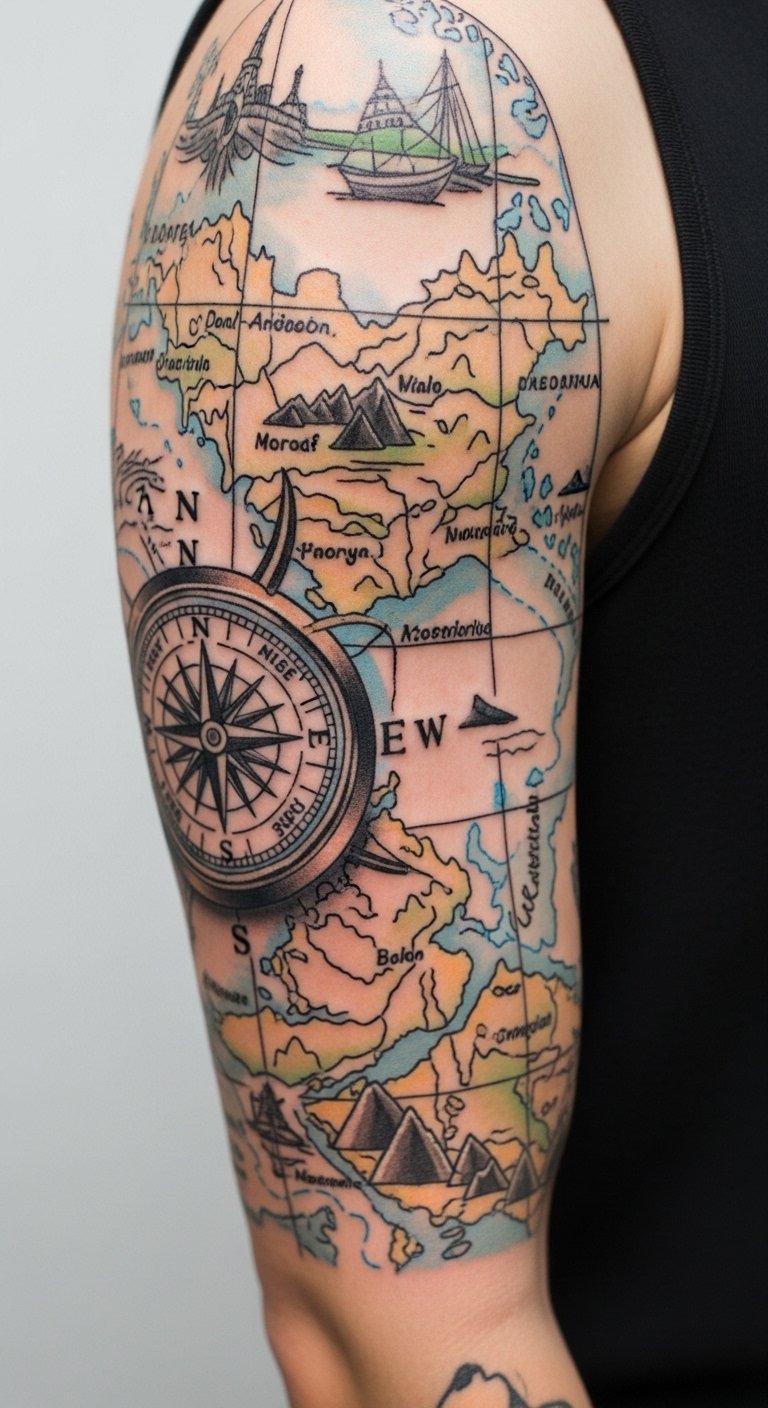
Maps and compasses form great wrap-around pieces. Keep map lines bold enough to avoid blurring. Small text can lose clarity; use symbols instead of tiny place names. Ask for mockups showing scale on your arm.
UV-Accent Half Sleeve With Hidden Details
Style/Technique: UV Ink Accents / Interactive
Pain Level: Medium (4/10)
Session Time: 2–3 sessions
Best For: Day-visible design with glow/hidden layers
UV accents add a layer of surprise. UV ink is best used sparingly as highlights — it can fade quicker. Ask about long-term phasing and see healed UV images. Common mistake: relying on UV for main lines — use it for accents only.
Pet Portrait Micro-Realism Half Sleeve on Outer Bicep
Style/Technique: Micro-Realism / Portrait
Pain Level: Medium (4-5/10)
Session Time: Multiple sessions
Best For: Lifelike pet memorials
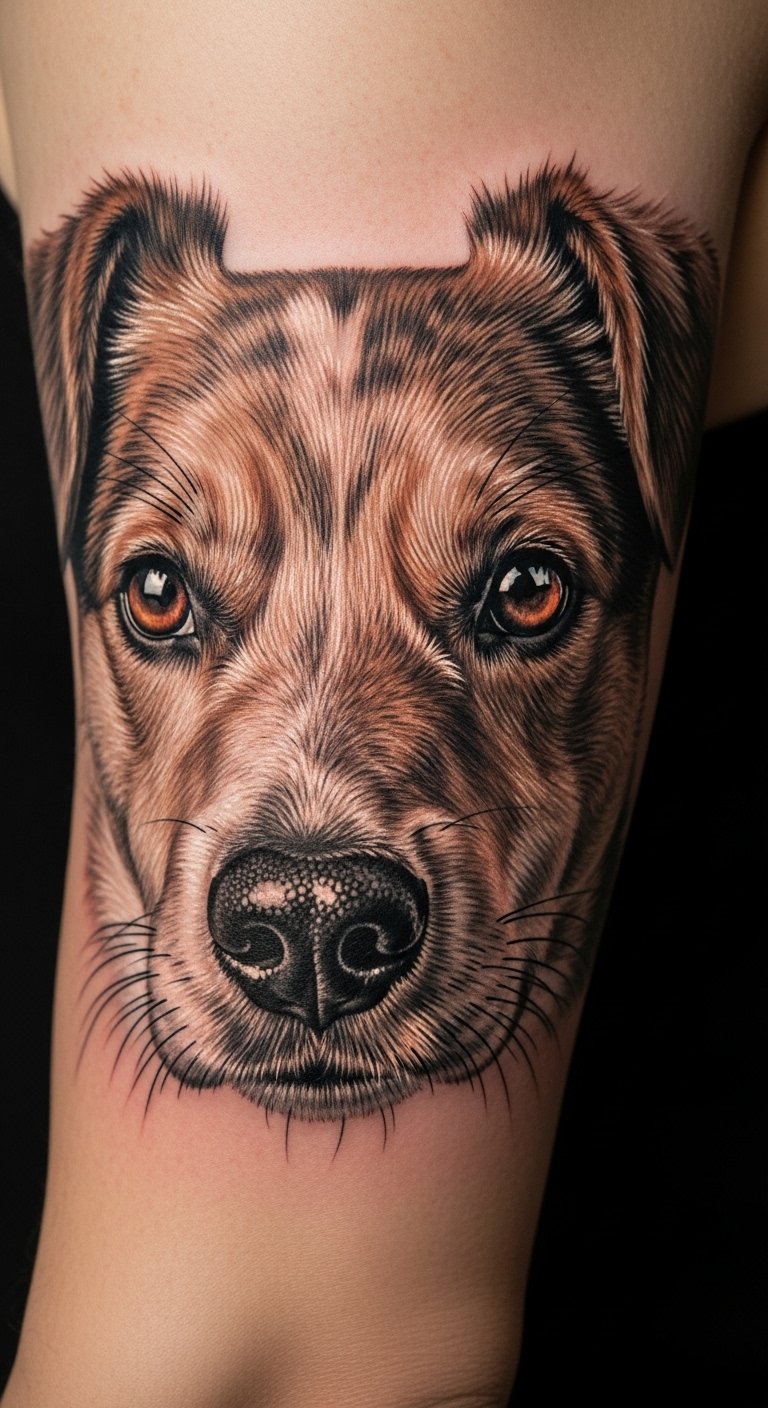
Pet portraits need an artist experienced in skin tones and fur texture. Outer bicep gives space for scale. Small highlight dots are important for life; ensure artist preserves contrast. Ask for healed pet portraits on similar skin tones.
Compass Rose Nautical Half Sleeve on Outer Arm
Style/Technique: Nautical / Illustrative
Pain Level: Low (3/10)
Session Time: 1–2 sessions
Best For: Classic, directional motifs

Nautical themes are classic and age well. Clean linework and solid anchors hold up. Avoid tiny map text. Healed look remains crisp if lines are bold.
Brushstroke Abstract Blackwork Half Sleeve
Style/Technique: Abstract / Brushstroke Blackwork
Pain Level: Low-Medium (3-4/10)
Session Time: 1–2 sessions
Best For: Modern, sculptural arm coverage

This is graphic and forgiving. Big strokes age predictably. Healing requires moisturization so thick fills don't scab heavily. Common mistake: too many thin strokes; favor fewer, larger marks.
Scar Camouflage Half Sleeve on Upper Arm
Style/Technique: Realistic Camouflage / Blended Textures
Pain Level: Medium (4/10)
Session Time: Multiple sessions
Best For: Concealing scars while creating art
Tattooing over scars needs conservative expectations; texture may not accept ink evenly. An experienced artist will design around texture, using contrasting styles like blackwork or botanical flows to distract. Healing is variable; plan consults for staged sessions.
Comic-Style Half Sleeve with Bold Panels
Style/Technique: Comic/Pop Art / Bold Panels
Pain Level: Low-Medium (3-4/10)
Session Time: 1–3 sessions
Best For: Graphic storytelling and fun visuals
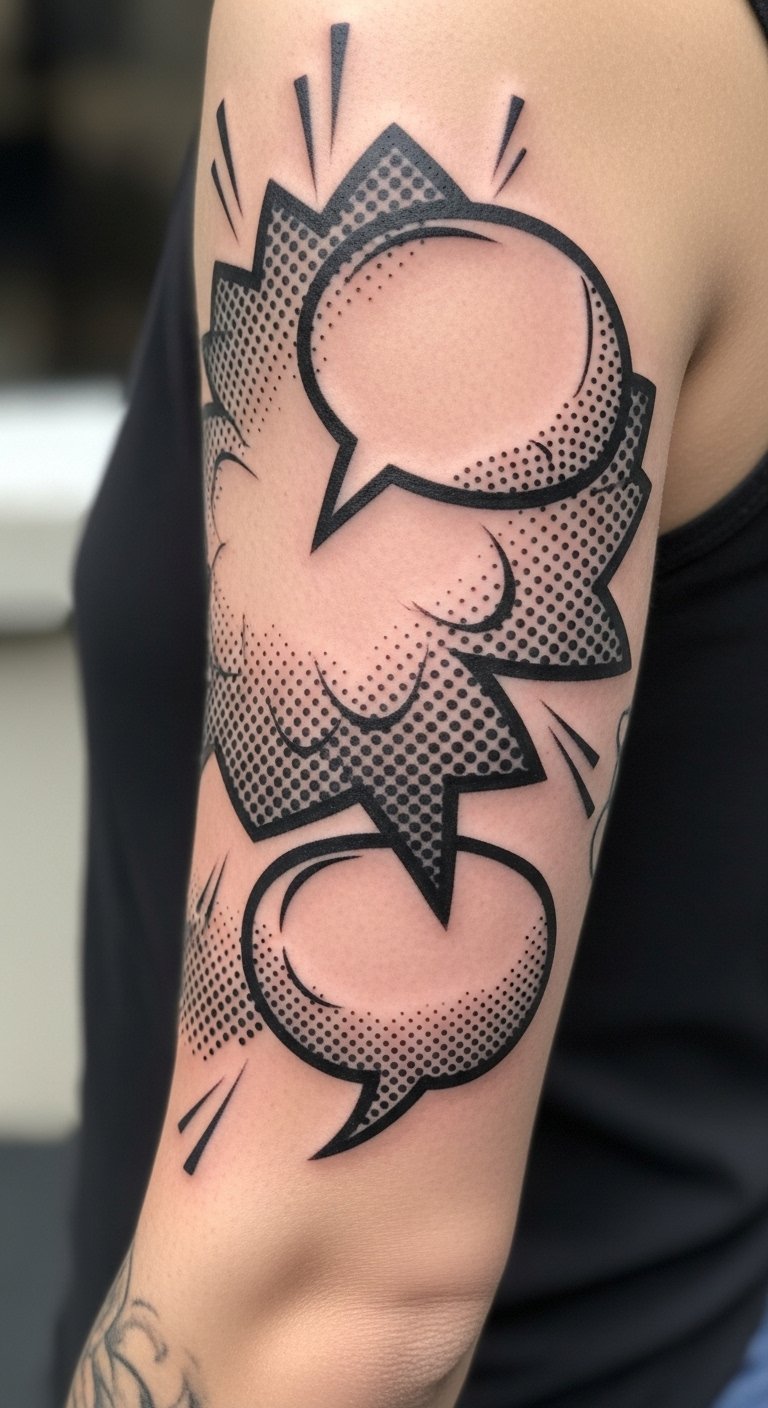
Comic panels read clearly and age well with strong outlines. Use solid blacks to frame panels. Avoid tiny halftone dots that can merge; prefer larger dot patterns or solid shading.
Constellation + Nightscape Half Sleeve on Outer Arm
Style/Technique: Illustrative / Nightscape
Pain Level: Low (3/10)
Session Time: 1–2 sessions
Best For: Atmospheric, subtle wrap
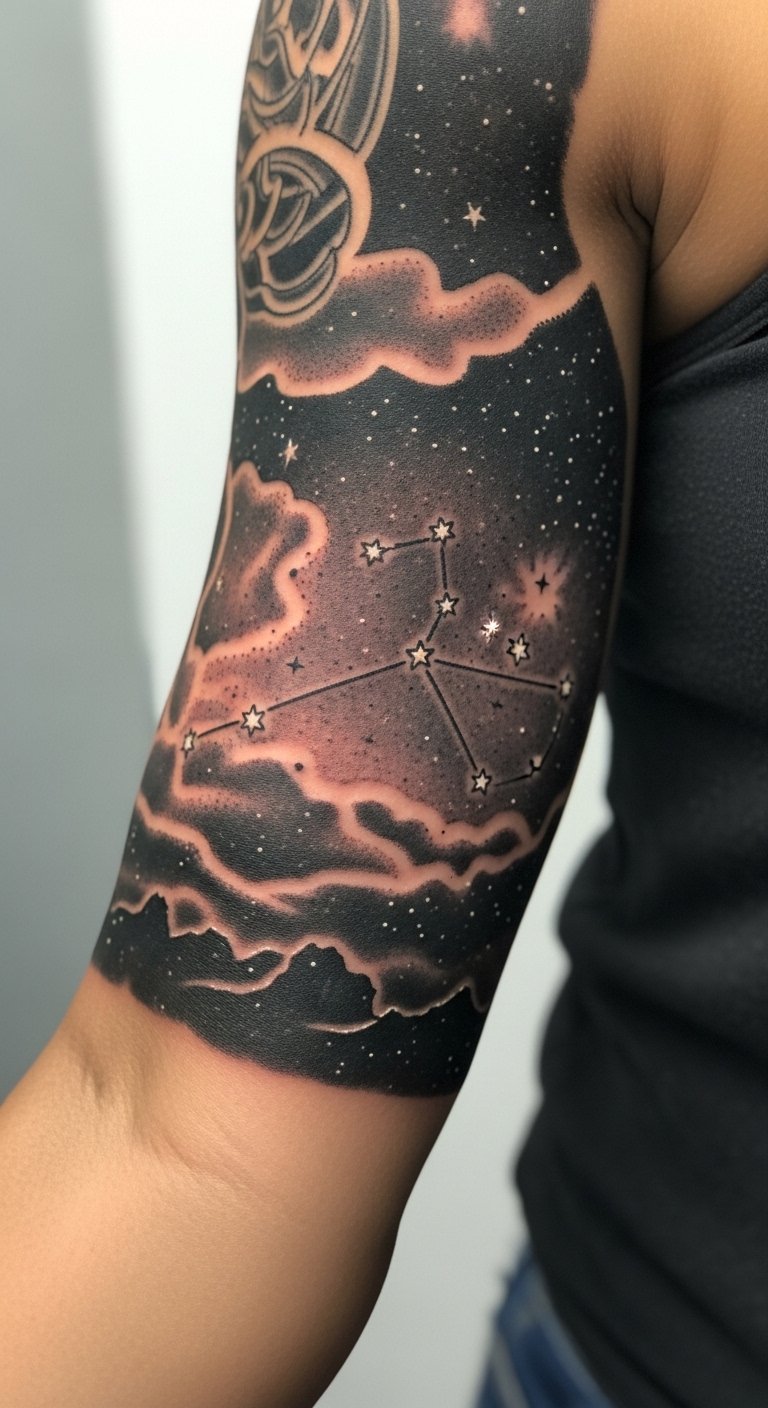
Night skies are mood-driven and subtle. Tiny stars can fade; consider small white highlights or tiny black dots for longevity. Heals cleanly with standard care.
Floral Sleeve With Negative Space Accents
Style/Technique: Botanical / Negative Space
Pain Level: Low-Medium (3-4/10)
Session Time: 2–3 sessions
Best For: Elegant flow and contrast

Negative space adds drama without heavy ink. It requires precise composition so skin shapes remain intentional. Ask for mockups showing how negative areas align with muscle movement.
Patchwork Cover-Up Half Sleeve Blending Old Ink
Style/Technique: Cover-Up / Patchwork Collage
Pain Level: Medium (4/10)
Session Time: Multiple sessions
Best For: Updating older tattoos into cohesive sleeve

Cover-ups work best with bolder blackwork or integrated composition. Half sleeves can mask older elements effectively. Expect staged sessions to layer and adjust. Avoid trying to hide very dark old ink with only pastel colors.
Urban Graffiti Half Sleeve on Outer Arm
Style/Technique: Graffiti / Street Art
Pain Level: Low-Medium (3-4/10)
Session Time: 1–3 sessions
Best For: Bold color, urban edge
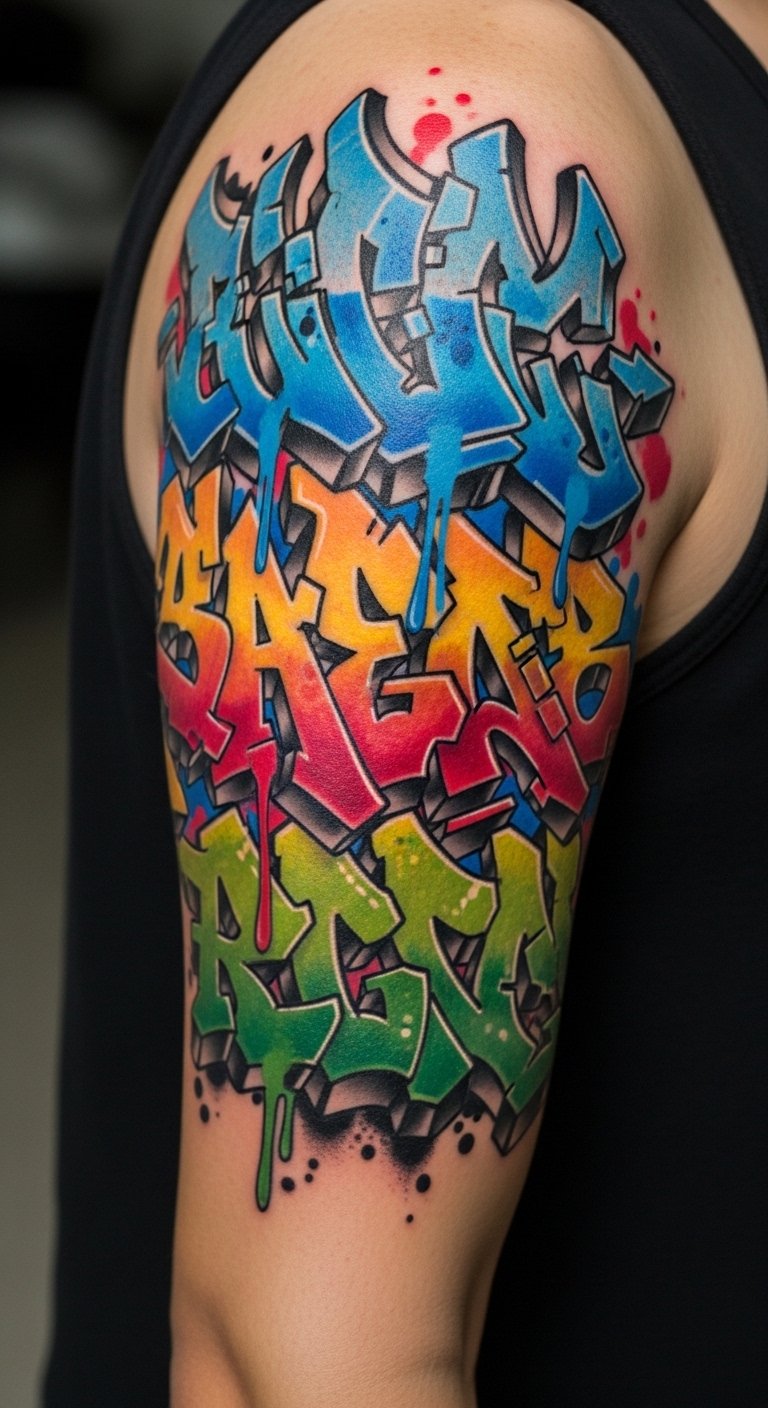
Graffiti-style sleeves are energetic and modern. Use saturated color blocks and bold outlines for longevity. Avoid tiny gradient spray dots that can fade unevenly.
Architectural Linework Half Sleeve on Outer Arm
Style/Technique: Architectural / Fine Line
Pain Level: Medium (4/10)
Session Time: Multiple sessions
Best For: Structural, crisp visual statements
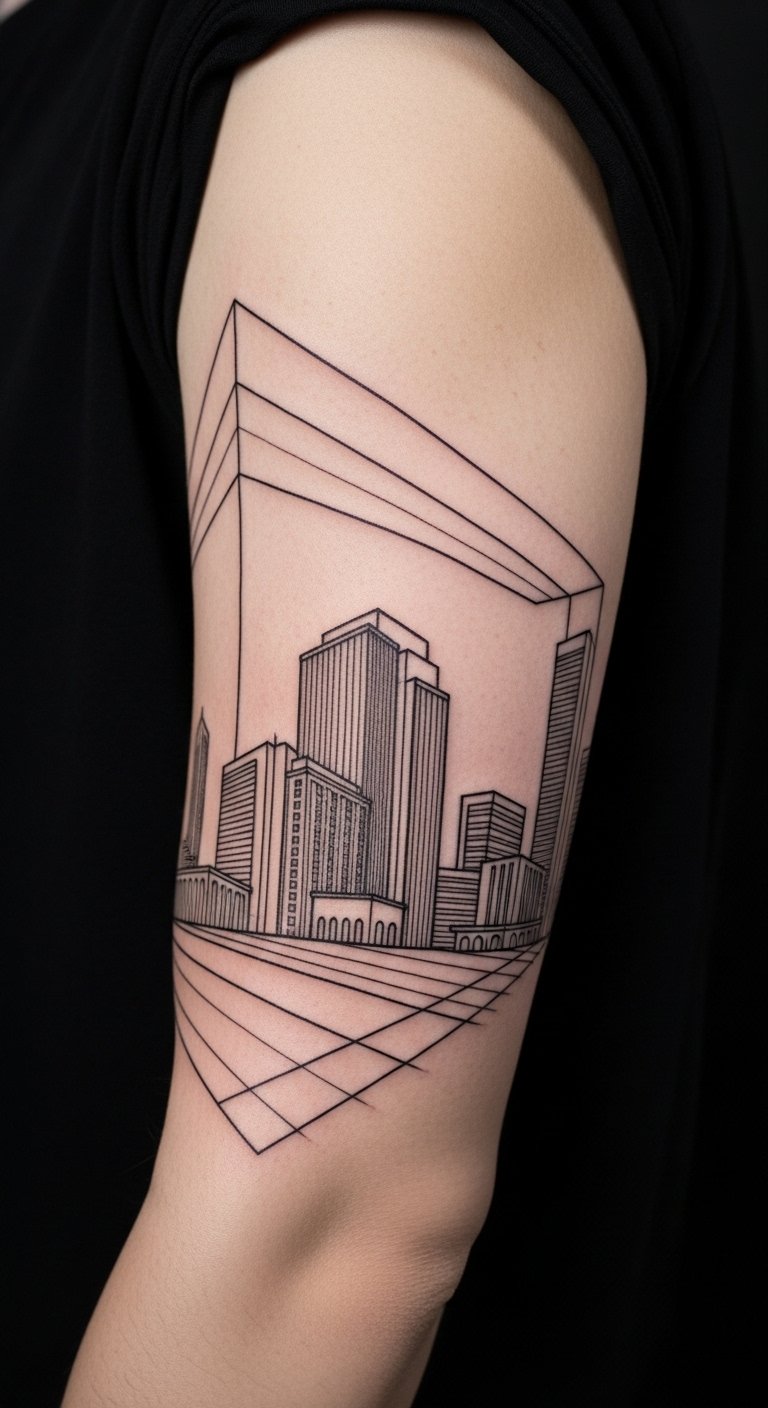
Architectural designs need precise, consistent lines to keep perspective after healing. Avoid ultra-thin lines that risk blowout. Ask to see healed building or linework pieces.
Tattoo Prep and Aftercare Essentials
Aftercare is everything. These are products I actually use or saw artists recommend.
Aftercare Essentials:
- Aquaphor Healing Ointment, 14oz tube — Industry standard first 3–5 days
- Saniderm Transparent Adhesive Bandage, 6-inch roll — Second-skin healing method
- CeraVe Fragrance-Free Moisturizing Lotion, 12oz — For days 4–21
Before Your Appointment:
- Numbing Cream with 5% Lidocaine — Use only if your artist approves
- Tattoo Stencil Transfer Paper — For at-home mockups
Long-Term Maintenance:
- SPF 50 Sunscreen Stick for Tattoos — Daily protection prevents fading
- Mad Rabbit Tattoo Balm, 3.4oz — Keeps healed ink vibrant
- Hustle Butter Deluxe, 8oz — Vegan aftercare option
Optional Comfort & Tools:
- Tattoo Numbing Spray — For sensitive areas or touch-ups
- Hydrocolloid Bandages, Large — Spot healing alternative to Saniderm
- Dr. Bronner's Unscented Castile Soap, 16oz — Gentle cleaning in the first week
Artists I trust often recommend Aquaphor, Saniderm, and SPF sticks over gimmicky creams. Sizes noted above are common options.
Frequently Asked Questions
Q: How bad does a tattoo actually hurt?
A: Pain depends on placement. Outer arm/upper bicep = 2–4/10. Inner arm/elbow = 5–7/10. It’s more of a focused burning or scratching. For sensitive zones consider a numbing cream with lidocaine but ask your artist first.
Q: How long until a half sleeve heals?
A: Surface healing: 2–3 weeks. Full healing: 2–3 months. The first week is critical — keep it clean and moisturized with Aquaphor or Saniderm.
Q: Will my half sleeve fade fast?
A: UV exposure is the main culprit. Use an SPF 50 stick daily. Black and gray holds best; bright yellows and pastels fade fastest.
Q: What if I regret the design?
A: Sit with ideas for months. If you want concealment, consider a staged cover-up or evolving the piece into a cohesive sleeve.
Q: Can I work out after getting inked?
A: Wait 48–72 hours at minimum. For heavy sweating or friction, skip training for 5–7 days, longer for elbow wraps. Sweat risks infection and ink loss.
Q: Do tattoos look different on different skin tones?
A: Yes. Black and gray reads reliably on all tones. Bright colors can appear muted on deeper skin. Ask artists for healed examples on your skin tone.
Q: How do I keep linework crisp long-term?
A: Avoid ultra-thin hairlines. Ask for slightly more substantial line weight and regular sunscreen to slow degradation.
Q: Are UV inks safe long-term?
A: UV inks are used for effects but can fade faster. Use them as accents, not primary lines.
Conclusion
Start with research and a clear idea. A short consultation will adjust size and flow for your anatomy. When you commit, protect the work: Aquaphor for the first days and an SPF 50 stick long-term. Which half sleeve style are you leaning toward?