
The shoulder cap is one of the easiest places to make a floral tattoo look like it belongs to your body instead of sitting on it. When blooms follow the deltoid curve the design moves with your shoulder, not against it, and that makes a surprisingly big difference for how a piece reads at six months and at five years. Below the first idea you will see the style image and a clear note on how to keep the work readable over time.
1. Elegant floral shoulder cap wrap
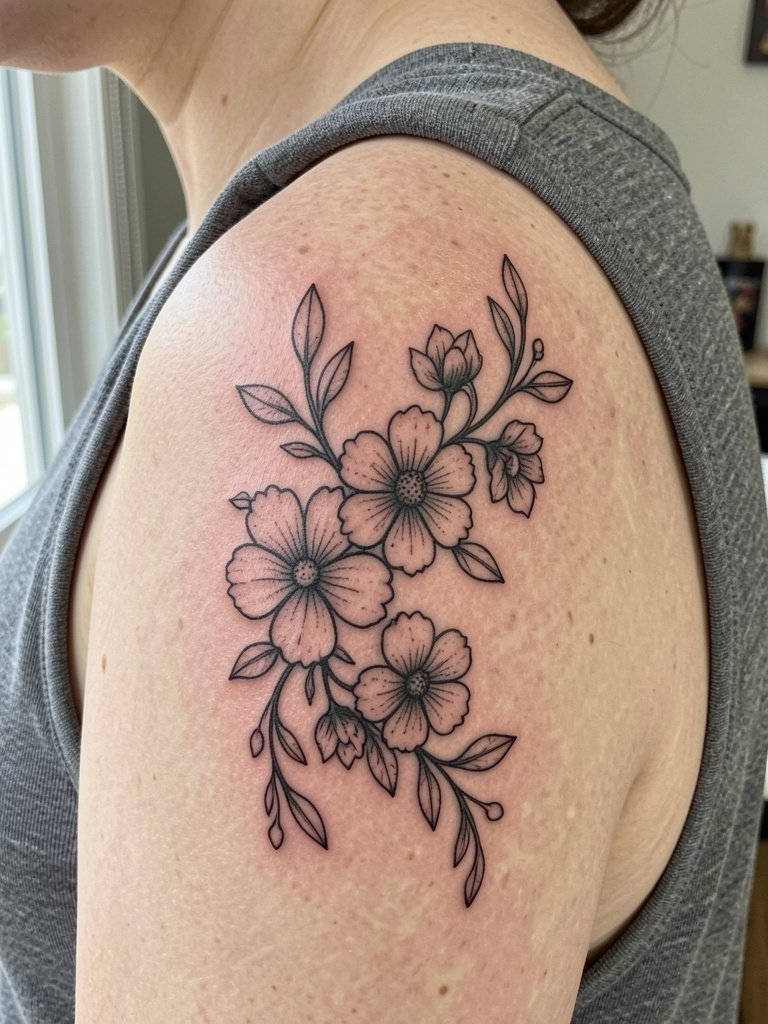
This wrap design is the default recommendation when you want the composition to read like it was shaped by the body. Plan the center of the cluster to sit on the rounded top of the shoulder so petals do not fold into the arm crease. For longevity, request slightly heavier single-needle outlines on petals and leave breathing room between each bloom so the lines do not merge as the tattoo ages. The session often feels like moderate discomfort because the artist works around bone and soft tissue, expect around one to two hours for a medium wrap. For showing it off, pair the piece with an off-shoulder top in a neutral color so the skin contrast highlights the linework.
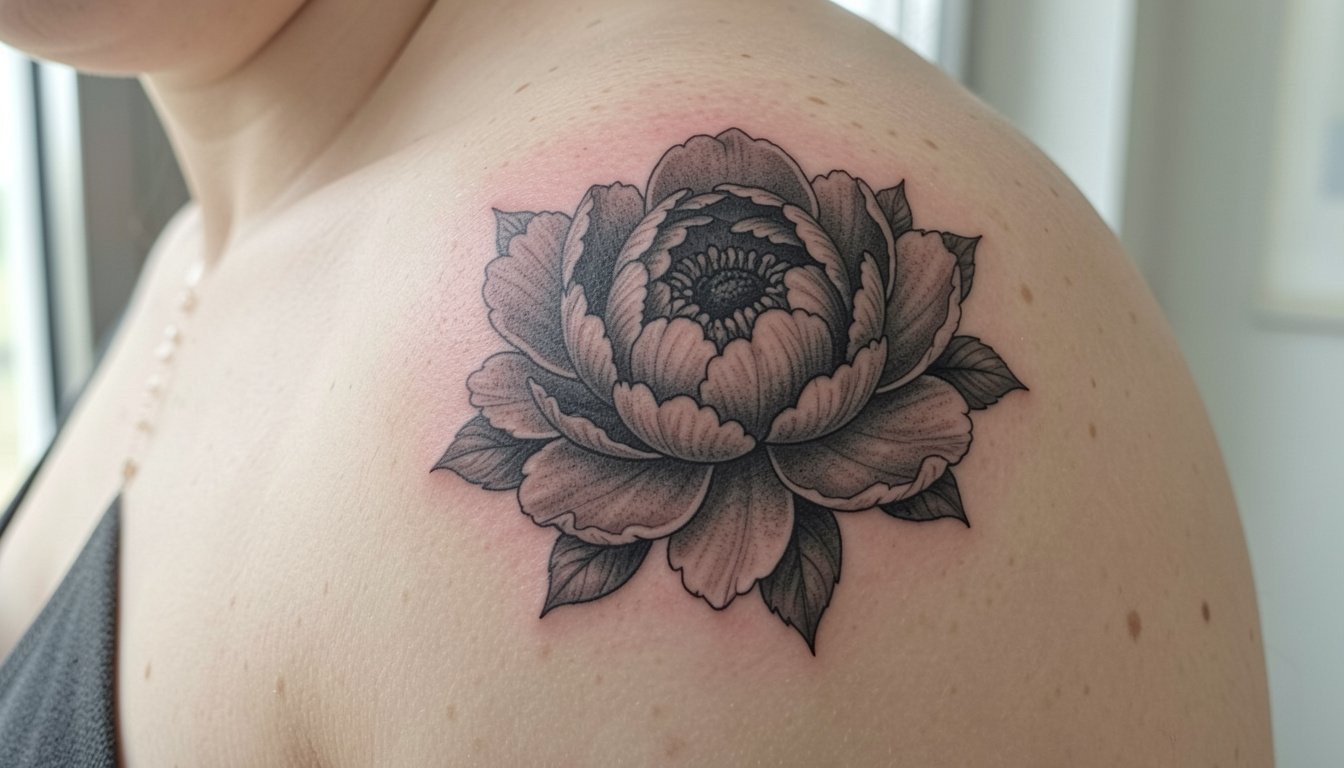
2. Lotus flower shoulder cap tattoo

A lotus on the shoulder cap reads decorative and symbolic while staying geometric enough to sit well with shoulder anatomy. If you want symmetry, bring a single reference that shows exactly how you want the petals layered because small shifts can make the design feel off-center when your arm moves. The common mistake is shrinking the lotus too small and packing the inner detailing, which blurs into gray over time. Expect a one- to two-hour session depending on stipple shading. When you want a quick show-off option for evenings, try a square-neck tank that frames the shoulder without cutting into the design.
3. Delicate floral shoulder cap cluster
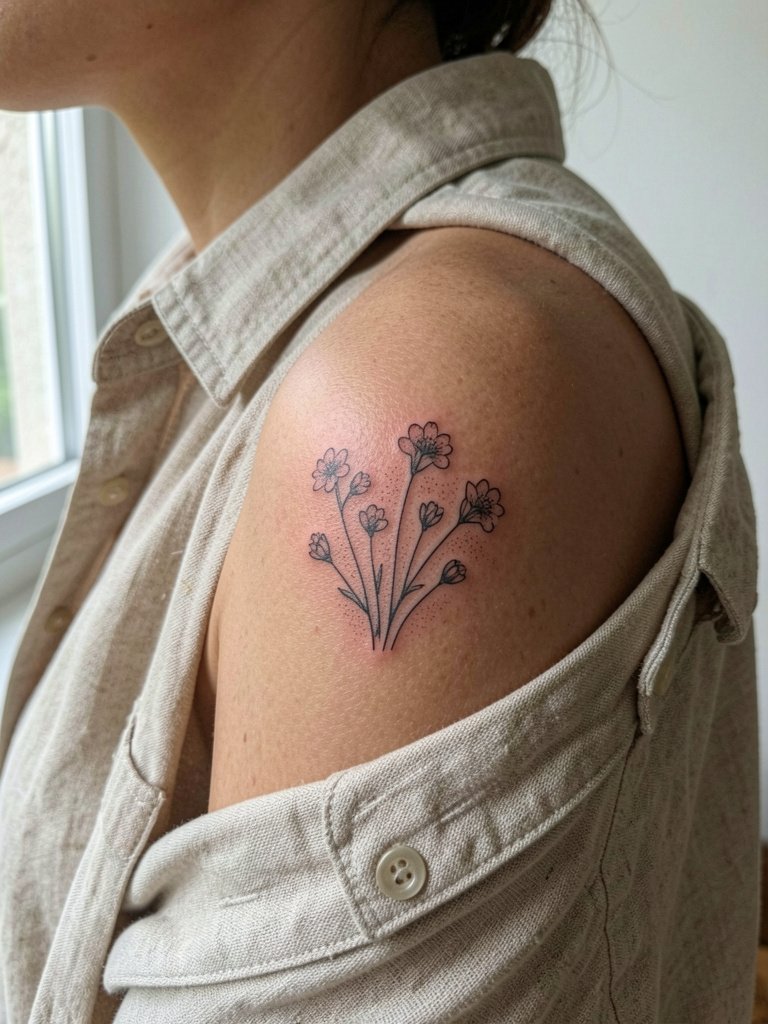
Small clustered blooms keep things subtle but readable when the spacing is right. The key is leaving negative space between petals and stems, and avoiding hairline stems that will disappear as the piece heals and the pigment settles. This version heals to a soft, textured cluster at six months and keeps becoming more blended by year three, so expect a touch-up window around year two to sharpen the smallest stems. The session is shorter and tolerable for first-timers. For an everyday look, layer a linen button-down worn open or slightly slipped off one shoulder to reveal the cluster naturally.
4. Peony shoulder cap tattoo
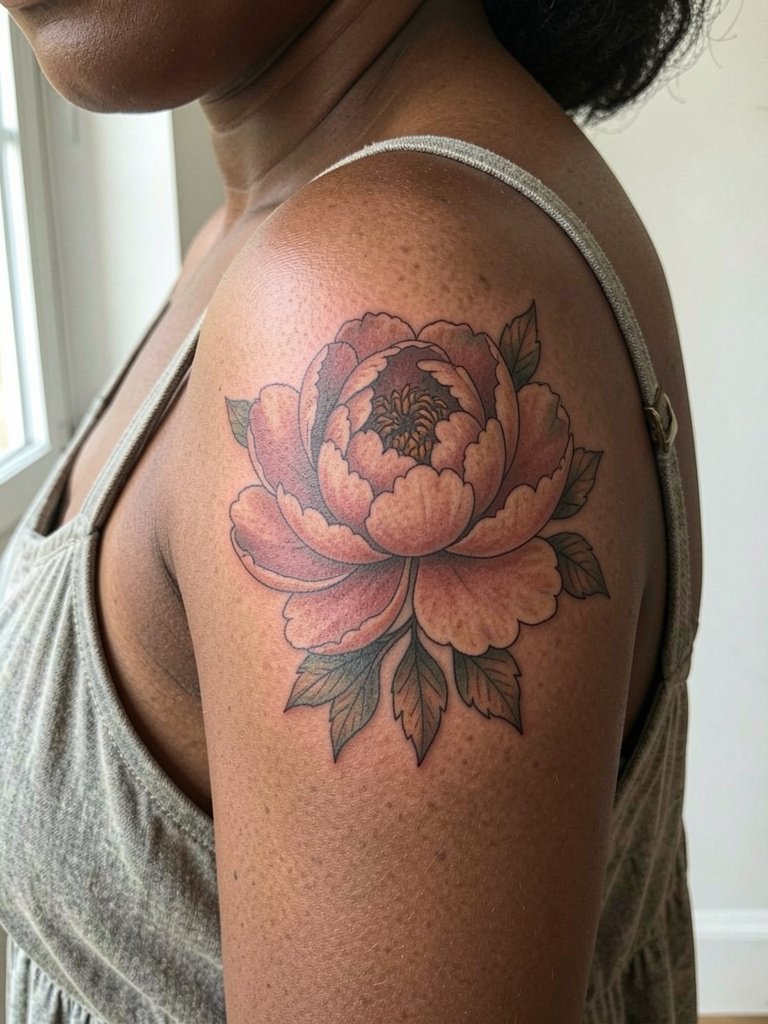
Peonies take up space and photograph luxuriously, which is why they are a favorite for shoulder caps. Color adds visual pop but there is a real debate in the community. One camp argues color florals look the most alive and readable from a distance. Another camp prefers black-and-gray because it ages more predictably. If you want color, plan for stronger outlines and saturated fills in key shadow areas so the petals keep contrast as the ink softens. Sessions often require two passes when rich color is layered. For outfits that let the peony do the talking, try a one-strap dress that leaves the cap exposed.
5. Cherry blossom shoulder cap design
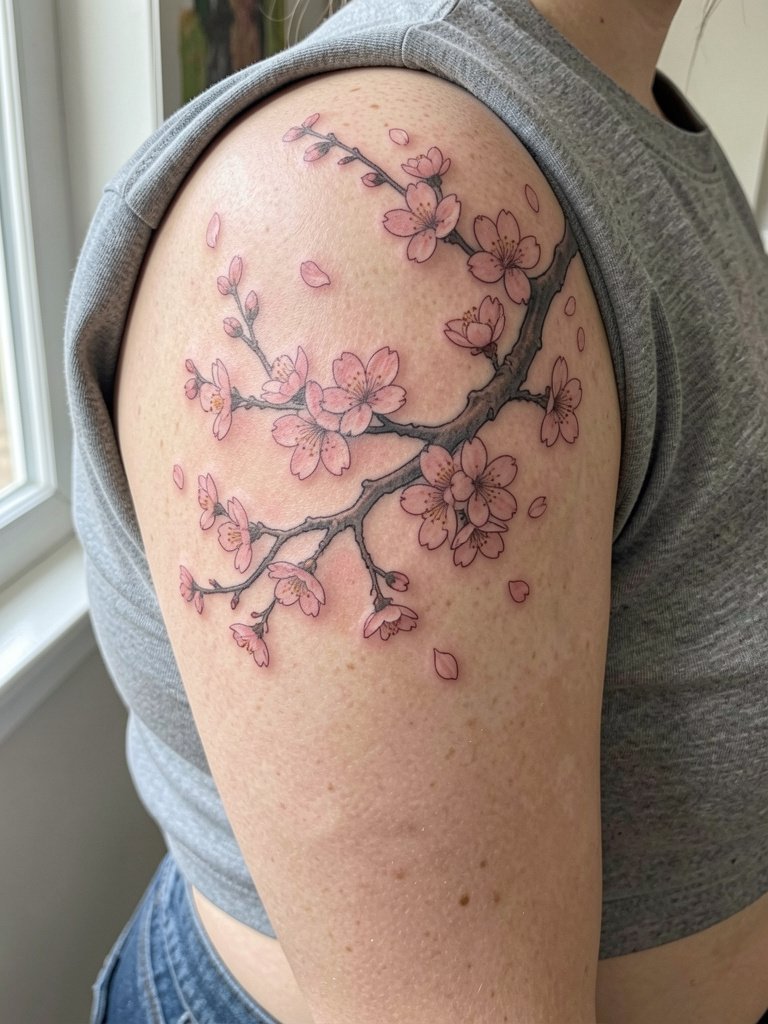
Cherry blossom branches are ideal if you want movement across the shoulder. They look best when the branch follows the deltoid so petals seem to float with the arm. Avoid cramming tiny blossoms together because small petal clusters can merge into smudged shading over time. The session is usually one medium-length appointment. For a casual show-off look that complements the branch flow, pair with a square-neck tee or a loose linen shirt worn open.
6. Sunflower shoulder cap tattoo
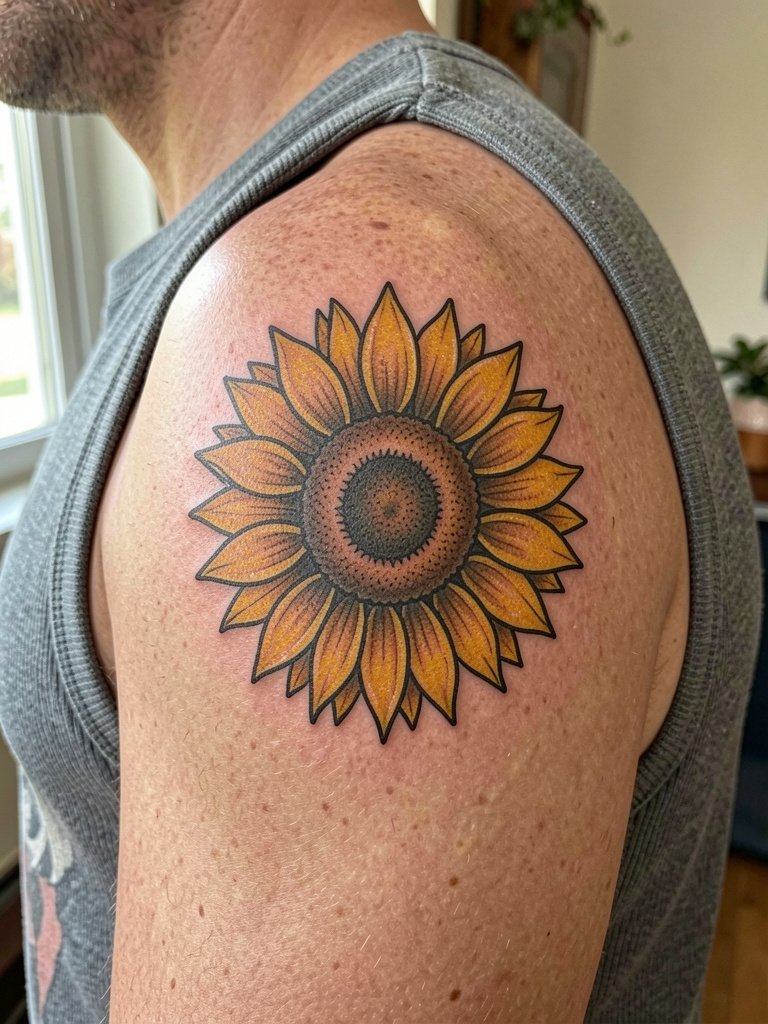
Sunflowers read instantly because of high contrast between center and petals. The visual trick is to use bold outlines and saturated yellows so the form reads at arm's length. Avoid ultra-thin outlines on the petals or the color will flatten into the skin with time. Sessions for a medium sunflower are typically one to two hours depending on color layering. For daytime outfits, a sleeveless rib tank keeps the shoulder open and lets the bright petals stand out.
Session Day Picks
A few small items smooth the session and the first week, especially for the wrap, lotus, and peony pieces above.
- Stencil transfer paper kit. Gives you a clearer preview of how a wrap or branch will sit on the deltoid before the needle hits skin.
- Topical numbing cream. Applied about 45 minutes before most shoulder sessions eases the edge during shading passes.
- Thin protective film roll. Useful the first day to shield the cap from clothing friction when you move.
- Fragrance-free gentle body wash. Cleanses healing skin without added irritants during the shower routine.
- Healing ointment search results. A thin layer for the first few days helps keep color and linework hydrated while pores close.
7. Rose shoulder cap tattoo
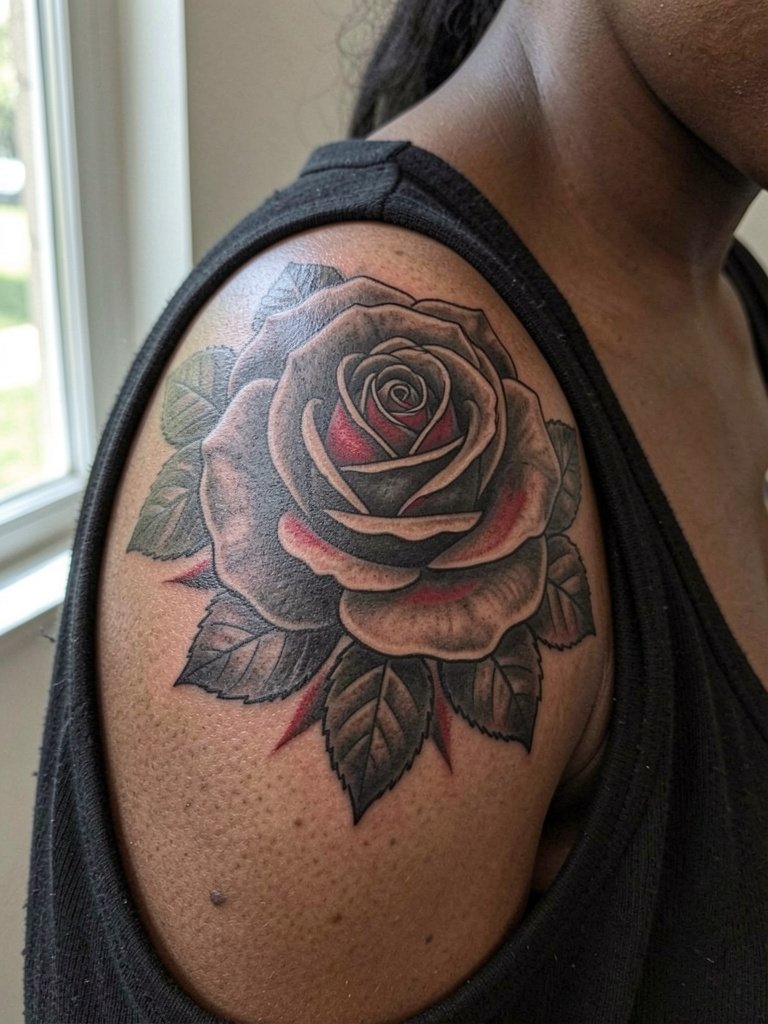
Roses are adaptable to many line weights and color choices. If you want the rose to last visibly, pick a modestly larger scale and insist on measured negative space around the petals. A common error is shrinking a rose to pocket size with dense inner shading, which blurs into a dark mass after a few years. The session feels like a steady buzzing across the rounded cap, and a medium rose usually finishes in a single visit. For styling, a loose linen button-down worn open highlights the silhouette without overwhelming the detail.
8. Ornamental floral shoulder cap with mandala geometry
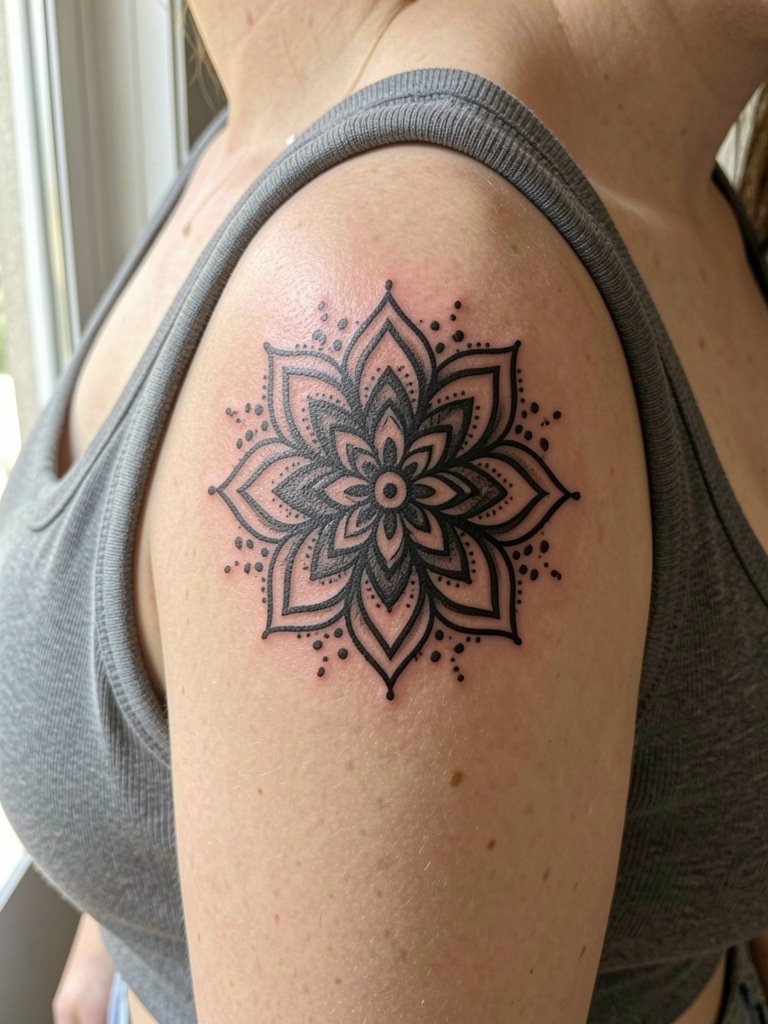
Symmetry gives the shoulder a structured, jewel-like look. There is a clear debate about ornamental symmetry versus organic bouquet flow. One group favors exact radial symmetry because it reads as intentional and balanced on the rounded cap. The other group prefers looser bouquets and vine flow because they feel more natural and less formal. Decide which camp you prefer visually and then show the artist multiple healed examples so they can calibrate spacing and dotwork density.
9. Blackwork floral shoulder piece
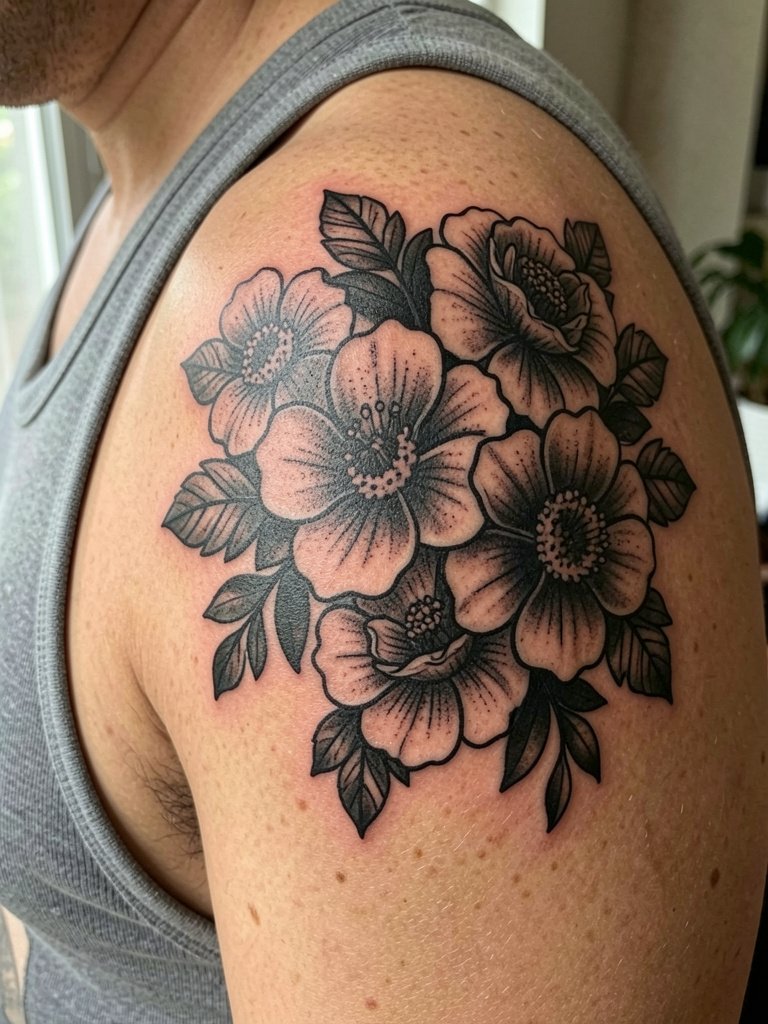
Blackwork is a longevity-first choice because the heavy fills keep the silhouette readable as the skin changes. It is not instantly appropriate for every client because it can feel visually heavy up close. A practical note is to plan filler shapes so they do not trap pigment in tiny islands that age badly. Sessions for a medium blackwork cap piece can be longer, sometimes split across sittings if the artist needs a rest between dense fills. For casual show-off, a sleeveless rib tank keeps the lines fully visible without collar distraction.
10. Fine line shoulder cap bouquet
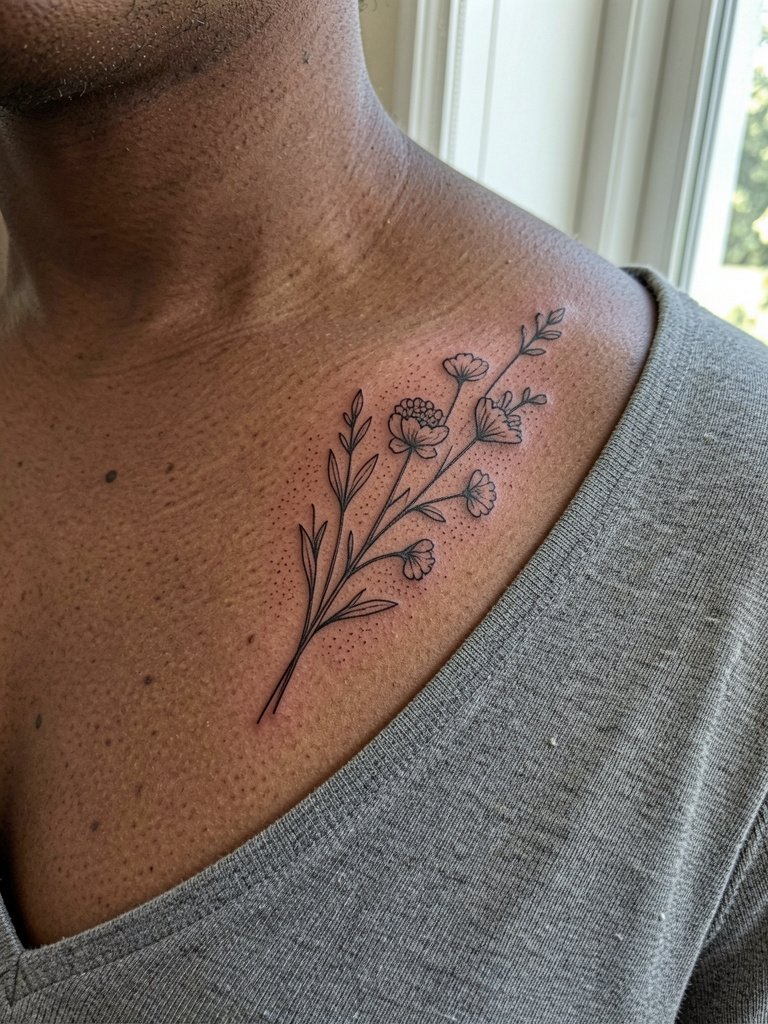
Fine line florals look elegant initially but there is a split in opinion about longevity. One camp argues fine line softens and blurs faster when stems and petals are too close, so they advise slightly heavier outlines for shoulder caps. The other camp believes the shoulder’s skin tolerates finer work better than high-movement zones, and with careful spacing fine line holds nicely for years. If you favor the fine line look, ask for slightly wider spacing between stems and a plan for a touch-up around year two so the smallest details can be reset.
11. Shoulder cap tattoo with trailing vines

Trailing vines are a smart choice if you imagine future expansion down the arm because they give the artist a clear path to continue. A frequent mistake is anchoring the vine too far back toward the shoulder blade which makes later extension awkward. Discuss where you want the vine to end on the upper arm so the composition has a natural finish if you stop after one session. For session comfort, wear a top with an easy strap or a button-down you can open so the artist can access the cap without you feeling exposed. Try a one-shoulder top to highlight the arc after healing.
12. Feminine floral shoulder art process piece
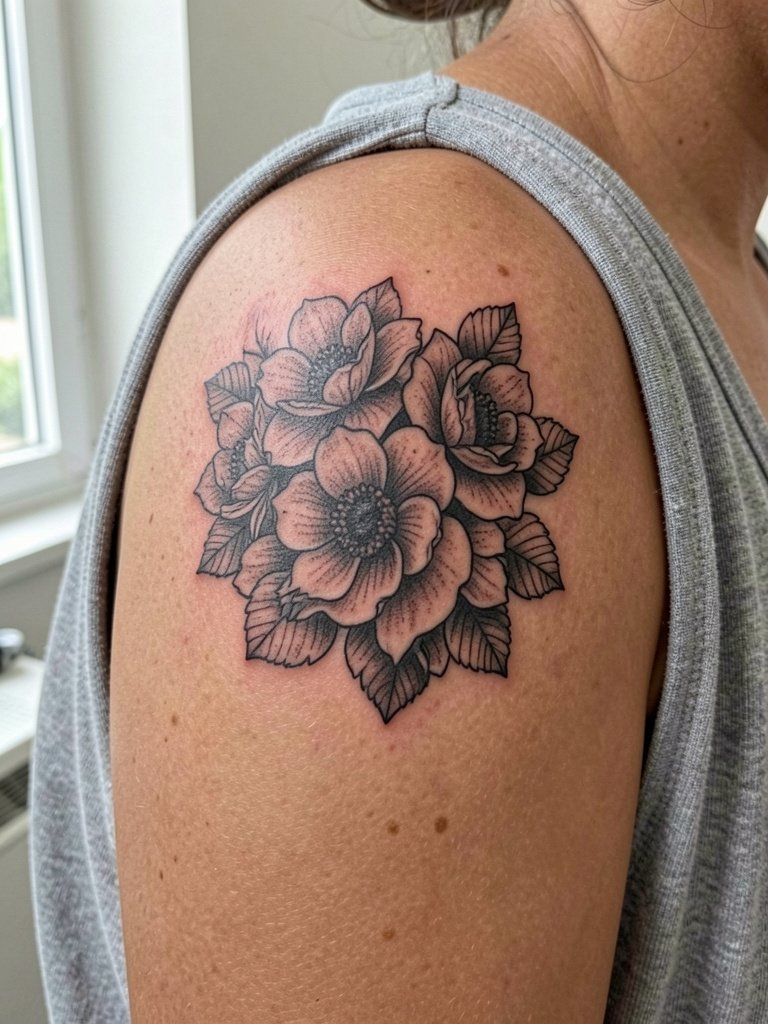
Process photos matter because they show how the stencil wraps and where the artist plans negative space. If you watch a process sequence you can see whether the center of mass sits on the deltoid or creeps forward into the arm. A common error is trusting a single flat photo for placement without asking to see a wrap preview. For the session, bring a top that the artist can adjust without being held during tattooing to avoid interrupting work. No need to plan show-off clothes for the same day because the area will be tender.
13. Large shoulder-to-upper-arm floral cap
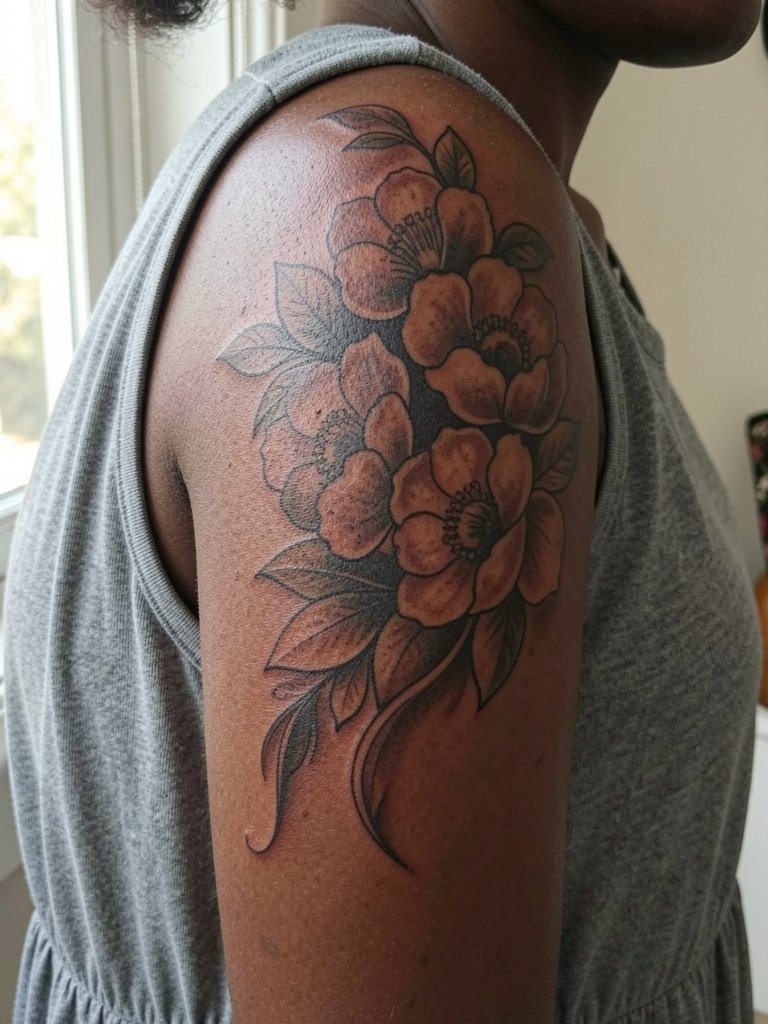
Turning the cap into an upper-arm anchor makes future sleeve work easier, but artists disagree about whether a cap should be standalone or built to expand. Some people want a self-contained cap that looks finished on its own. Others prefer an open-ended composition designed to grow into a sleeve. Each approach has trade-offs, and you should decide which you want before approving the stencil because the linework and spacing differ depending on the future plan. For sessions that cross into the upper arm plan on longer time in the chair and bring a comfortable layered top so the artist can work without repeatedly adjusting straps.
14. Healed floral shoulder cap comparison piece
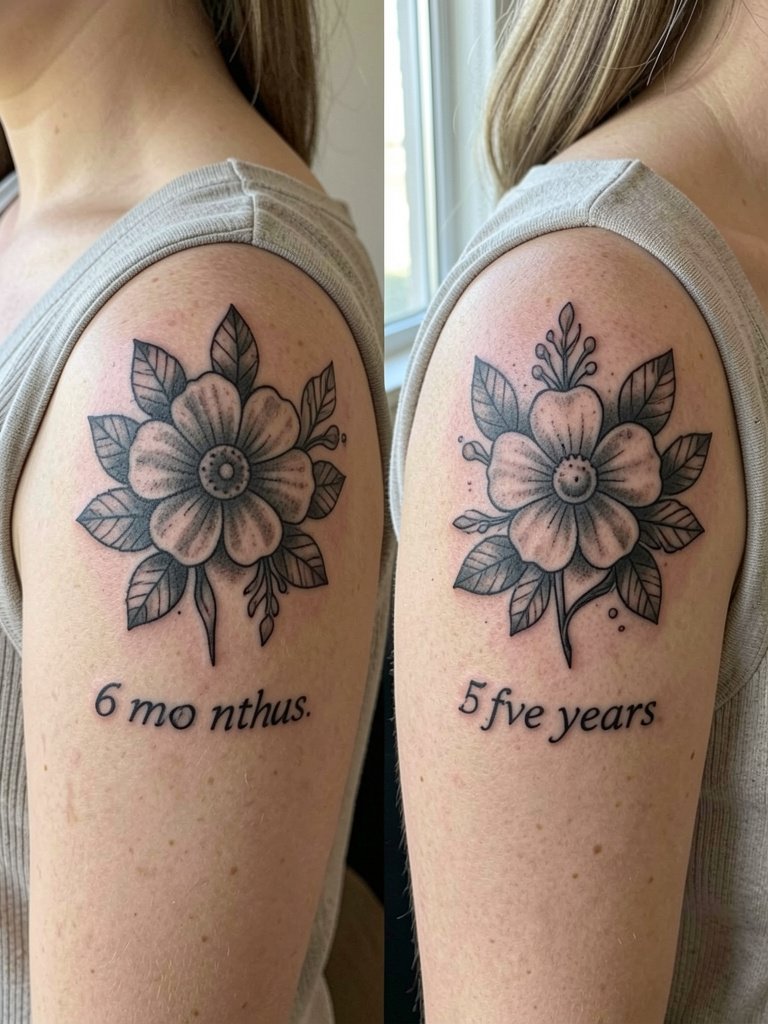
Healed comparisons are the clearest way to see how a style will age. Look closely at the same design at six months versus five years to spot line spread and color softening. If the reference photos you find are all fresh work, ask to see healed images of similar scale and line weight because that is what determines future legibility. A practical tip is to save healed photos that match your skin tone and bring them to the consultation so the artist can align line weight and negative space accordingly.
15. Small shoulder cap bloom for first-timers

A single small bloom is a friendly first tattoo because session time and discomfort are both limited. The main risk is making the bloom too tiny with dense inner detail. For first-timers, scale up the motif slightly so it can keep definition as the body settles. Expect a short session under an hour and plan to wear a loose top to the appointment so the artist can place the stencil easily. If you plan to show it off, a square-neck tank frames a single cap bloom tidily.
16. Neo-traditional colored shoulder cap bouquet
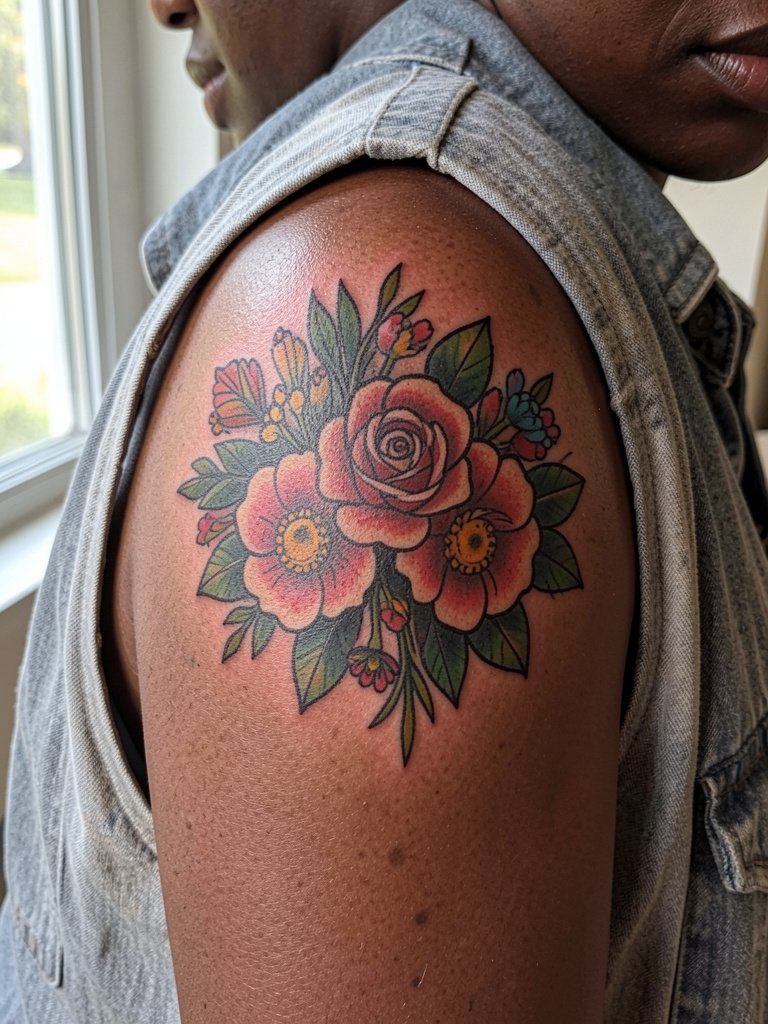
Neo-traditional color brings bold outlines and saturated fills that help a shoulder cap stay readable at distance. The color-versus-black debate is active here. Some people point to color for immediate visual life and photo impact. Others prefer black-and-gray for predictable aging. If you choose color, insist on clean outlines around key shapes and plan for a color refresh window around year three for the brightest tones. For evening wear, a one-strap dress showcases neo-traditional petals without covering them.
17. Botanical illustrative shoulder piece with herbs
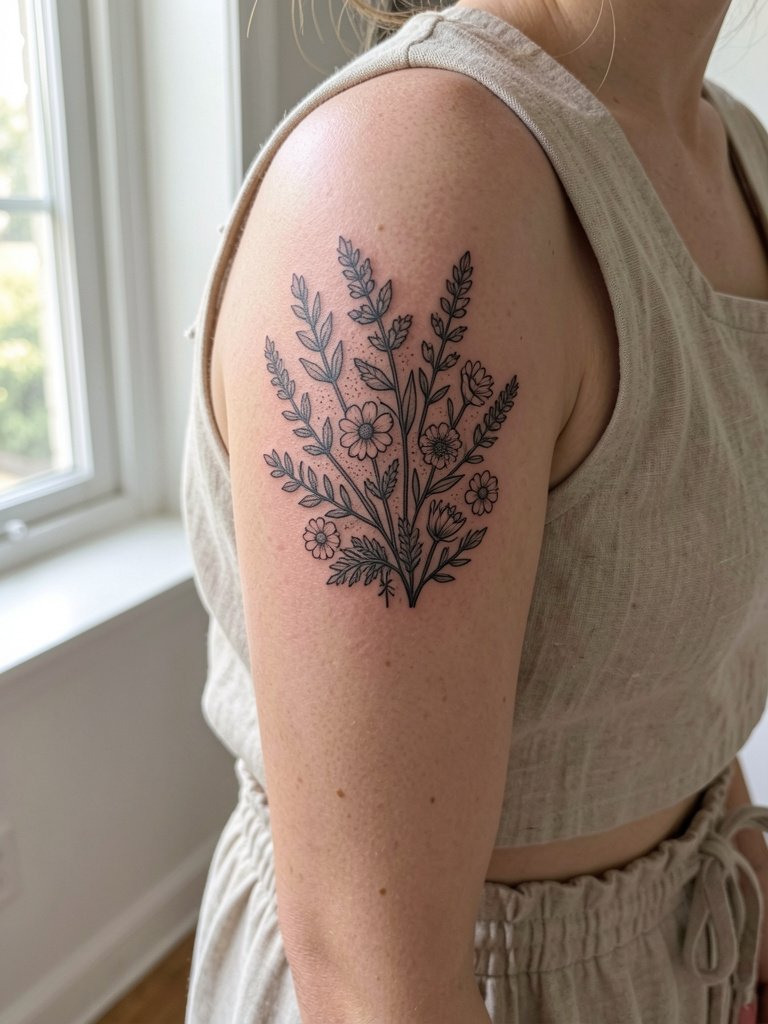
Herb and plant studies make for subtle shoulder caps that read like botanical sketches. A useful approach is to scale leaves and stems so they retain texture rather than compressing tiny veins into indistinct shading. If the piece includes labels or text be explicit about exact wording and font because healed script can lose thin serifs. Sessions are moderate and often enjoy stipple shading that gives a natural aged look from the start.
18. Watercolor-adjacent shoulder floral
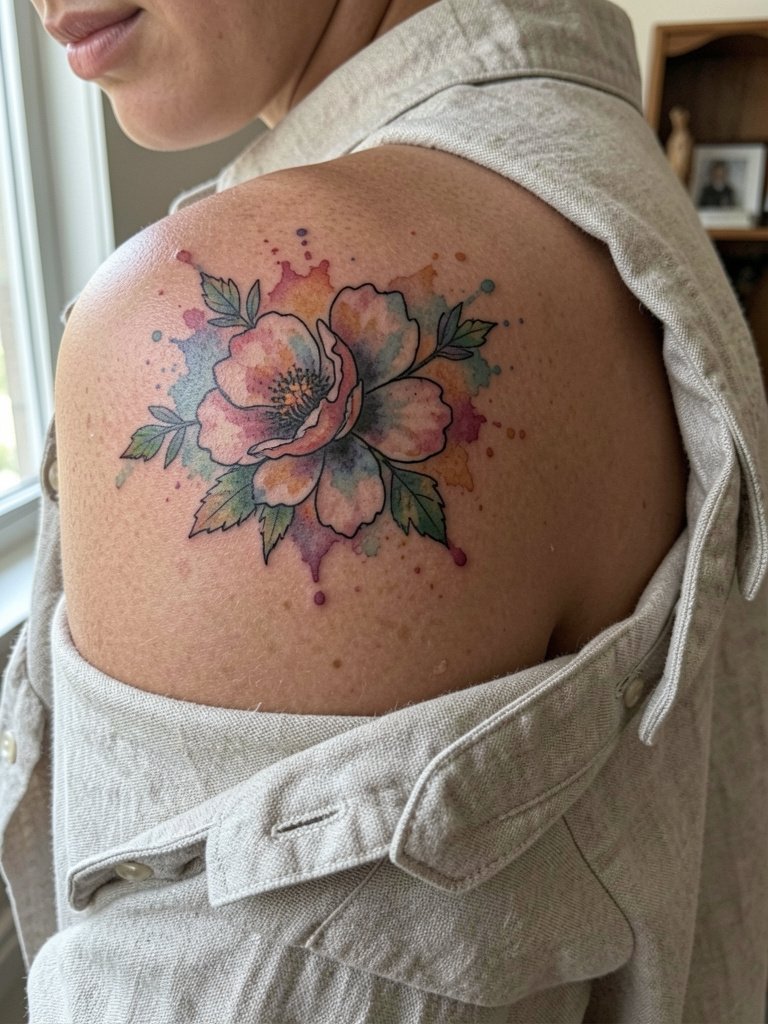
Watercolor effects can look ethereal but they are often the first style to lose crispness if placed too small. A compromise is to pair soft color washes with definitive black anchors so the composition keeps shape as the color diffuses. Ask the artist how they control saturation depth to avoid patchy healing. For wardrobe, a linen button-down worn open shows the flowing washes without tugging at the skin.
19. Negative-space floral shoulder cap
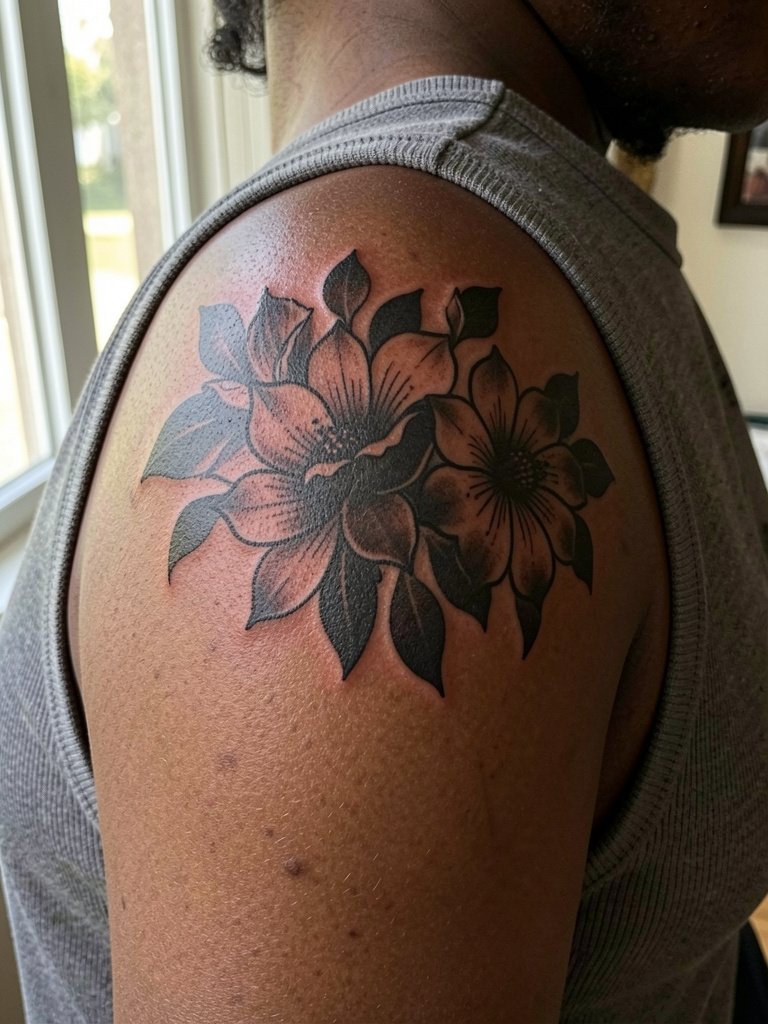
Negative-space floral work uses the skin as part of the design and can hold up well because the shapes are large and the edges are clear. The main mistake is creating tiny negative elements which are prone to merging as the skin remodels. This style often requires a longer session for careful fill and edge smoothing. For daily wear, a sleeveless rib tank keeps those silhouettes visible.
20. Stipple-shaded botanical shoulder cap

Stipple shading gives a delicate texture while keeping control over tonal transitions. It ages relatively predictably if dots are spaced to allow some spread. A common error is packing stippling too tightly in high-detail areas which causes the midtones to collapse into solid gray. Sessions can feel longer because of the dot work pacing. For outfits, a square-neck tank frames the textured shading without distracting.
21. Botanical badge-style shoulder cap
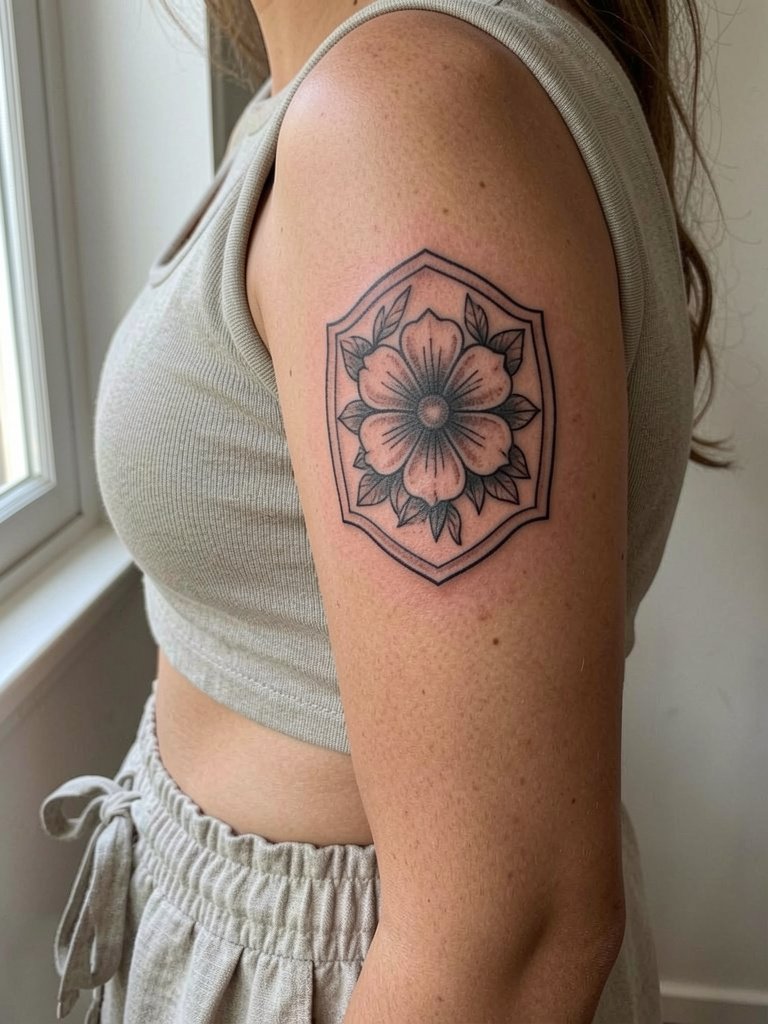
Framed or badge-style florals are a good choice when you prefer a clean edge that will not bleed into surrounding skin. The visual advantage is predictable negative space between the border and petals. Watch for borders placed too thinly because thin borders are the first element to lose definition. Sessions for a badge cap piece are straightforward and often finish in one appointment.
22. Asymmetrical bouquet that hugs the deltoid
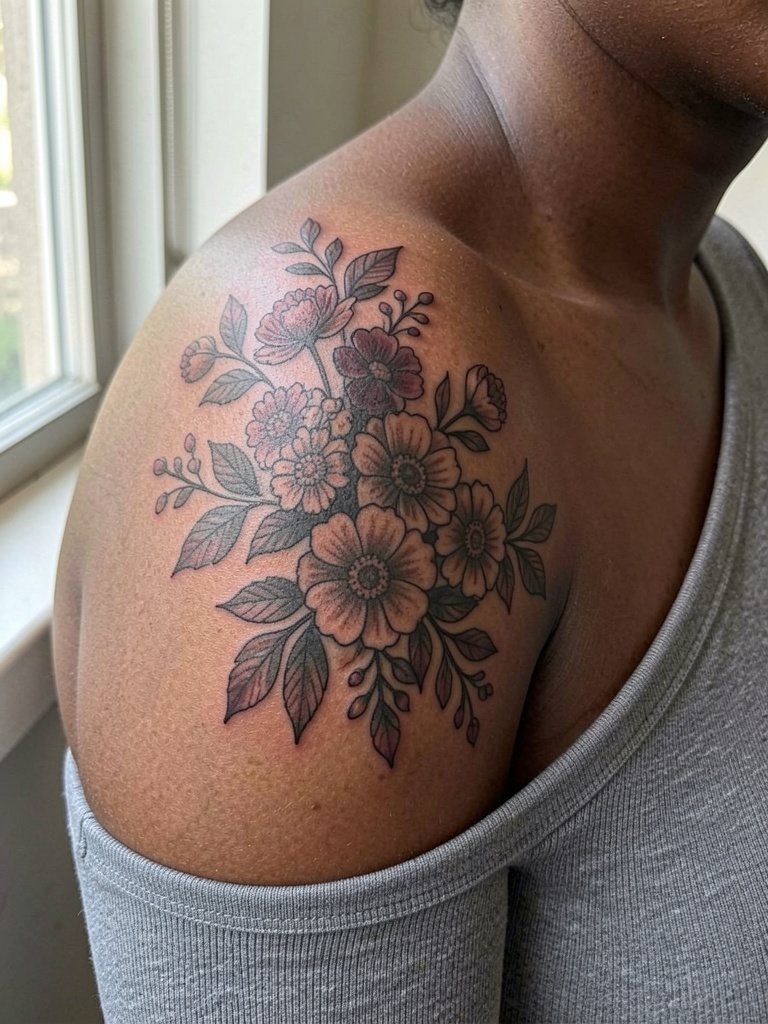
An asymmetrical bouquet reads softer and moves with shoulder motion in a flattering way. The debate about symmetry versus organic flow is real for shoulder caps. One side values symmetry for balance and formal structure. The other side favors organic flow for a natural, less rigid look. If you prefer organic, make sure the artist maps the composition across the deltoid so the largest bloom avoids folding when the arm is raised.
23. Whip-shaded tiny petal cluster for subtlety

Whip shading helps create soft gradients in small clusters without heavy saturation. For tiny petal clusters this technique works if the negative space is generous and key features have slightly firmer outlines. Expect the smallest details to require a touch-up within a couple of years if you choose very fine stems. For session wear and comfort, a loose top that the artist can lift slightly without being held is the easiest option.
Frequently Asked Questions
Q: How do I pick between fine line and bolder outlines for a shoulder cap floral?
A: Fine line looks refined but will soften sooner if details are cramped. Bolder outlines sacrifice some initial delicacy and gain readability over time. Decide based on how often you want to touch up the piece and bring healed photo examples at your consultation so the artist can match line weight to your skin tone and lifestyle.
Q: What should I wear to the appointment so the artist can reach the shoulder cap without fuss?
A: Wear a loose tank top, a button-down you can open, or a one-shoulder top that remains in normal worn state. Avoid tight bras with stiff straps because they will press on fresh ink. Bring a zip-up or button shirt for after the session so you can dress without pulling fabric across the cap.
Q: Where can I find healed shoulder cap portfolios and local artists without naming specific people?
A: Search hashtags like #shouldercaptattoo, #flowertattoo, #floraltattoo, and #finelinetattoo on TikTok and Instagram then add your city name to localize results. Use Pinterest searches such as "peony shoulder cap tattoo healed" for long-term examples. Reddit tattoo threads are especially useful for fresh-versus-healed comparisons and candid feedback about touch-ups.
Q: How often will a shoulder cap floral need a touch-up?
A: It depends on scale, line weight, and color. Very fine single-needle pieces may benefit from a touch-up around year two. Color refreshes are common around year three for saturated hues. Larger blackwork and well-spaced designs can stay readable longer with less maintenance.
Q: I have darker skin. What should I ask for so the floral reads well?
A: Prioritize contrast and slightly stronger outlines or higher saturation for color. Show the artist healed photos on similarly toned skin so they can calibrate line weight and shading. Ask about bold anchors in the design rather than ultra-thin details that can fade into the skin tone.
Q: Will a shoulder cap floral look awkward when I move my arm?
A: Properly designed shoulder cap florals follow the deltoid curve and should not look awkward in motion. Before the needle, request to view the stencil from multiple arm positions so you can see how the design wraps and settles when you raise and lower the arm.
