
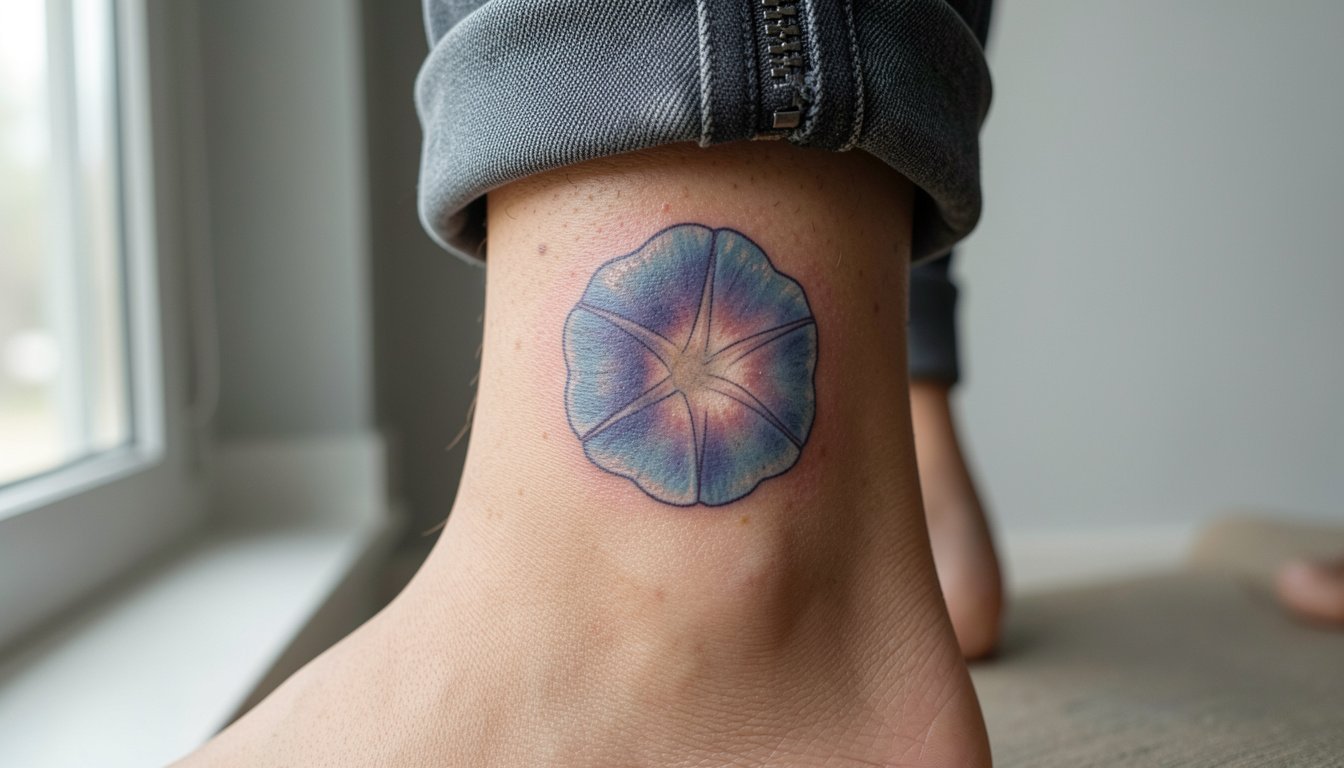
Delicate Morning Glory tattoos often look best when they balance fragile linework with a bit of presence. Trends on social feeds push single-needle filigree, but those tiny stems tend to blur sooner than people expect. I favor slightly firmer line weight and strategic negative space so petals keep their shape through touch-ups and everyday wear. Below, find 23 ways to treat the flower gently while keeping it readable for years.
1. Fine Line Morning Glory on Inner Forearm
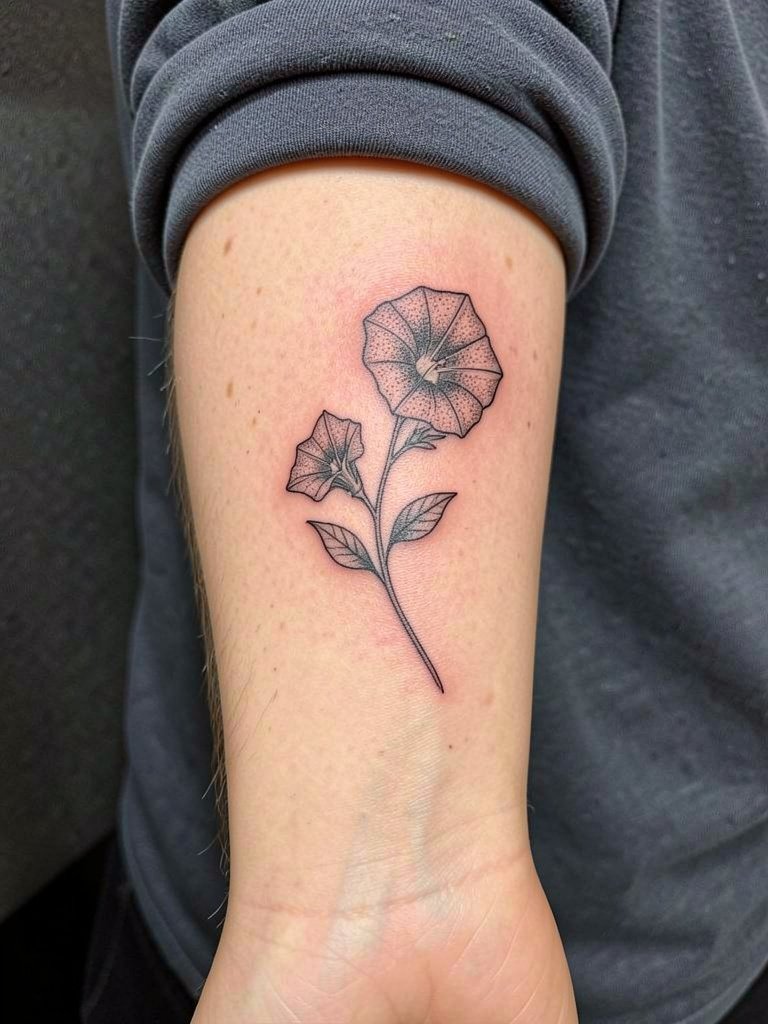
This is a go-to placement for visibility and layering into future work. Expect a one- to two-hour session depending on how many small leaves you add. For a design like this I recommend asking for the main contour lines to be a touch heavier than pure single-needle so the petals keep their edge after a year. Common mistake is making the vine too thin and winding sea‑grass close to the wrist where movement and washing accelerate softening. On light skin the black line holds crisp the longest, while on darker tones a touch of muted blue can read better after healing. Wear a loose sleeve during the session so the artist can work without fabric pressure.
2. Micro-Color Morning Glory Behind the Ear
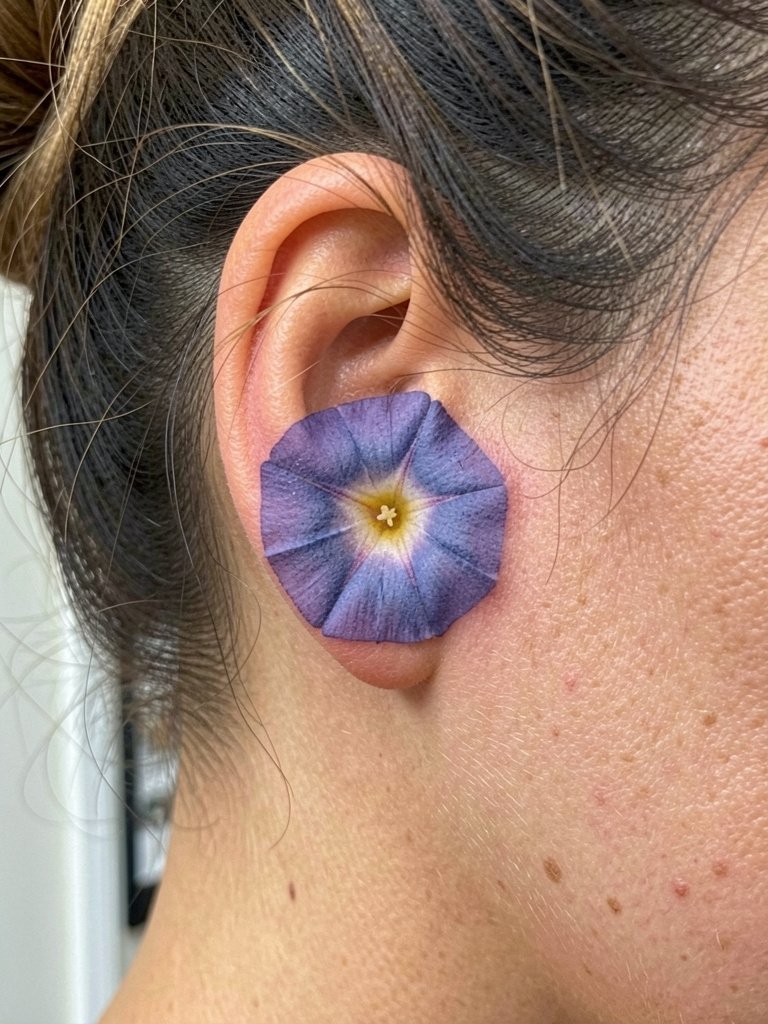
A behind-the-ear floral is subtle and easy to hide. Sessions run 20 to 40 minutes and the pain is low for most people. The main trade-off is scale. Too many tiny veins and the piece looks like a smudge over time. Bring a reference that shows the exact petal shape you want and ask the artist to map the negative space around the bloom. For after-session comfort wear your hair up and loose so sweat does not trap against the site. If you want it to peek with certain outfits try a low bun or half-up styling like thin claw clips and delicate stud earrings to frame the area. Sensitive placement note: behind-the-ear work benefits from an artist experienced with small-scale portraiture.
3. Watercolor-Wash Morning Glory on Shoulder Blade
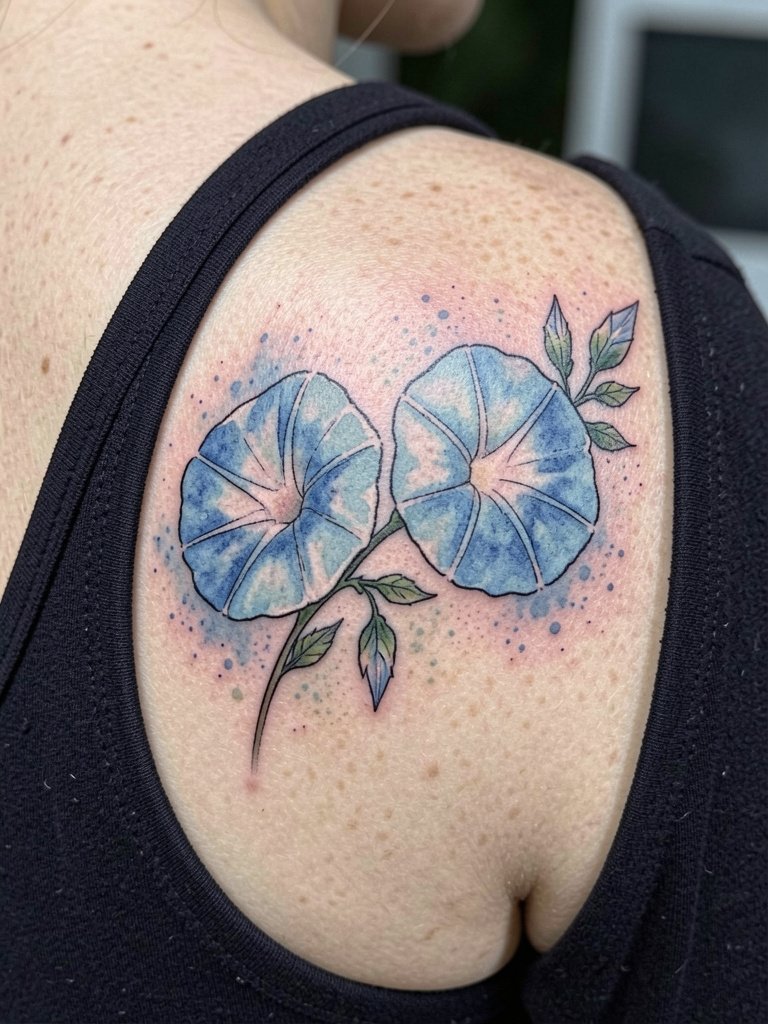
Shoulder-blade pieces read beautifully with motion from the shoulder and back. Pain is moderate and sessions can run from one to three hours for larger branches. The watercolor wash trend is pretty online, but pure wash without anchored line tends to feather with time. I suggest a fine black outline paired with stipple shading so the bloom keeps its silhouette. When showing it off in summer pair with thin-strap cami tops, and for a night out try a backless dress that highlights the sweep of the branch.
4. Tiny Morning Glory on the Side of a Finger
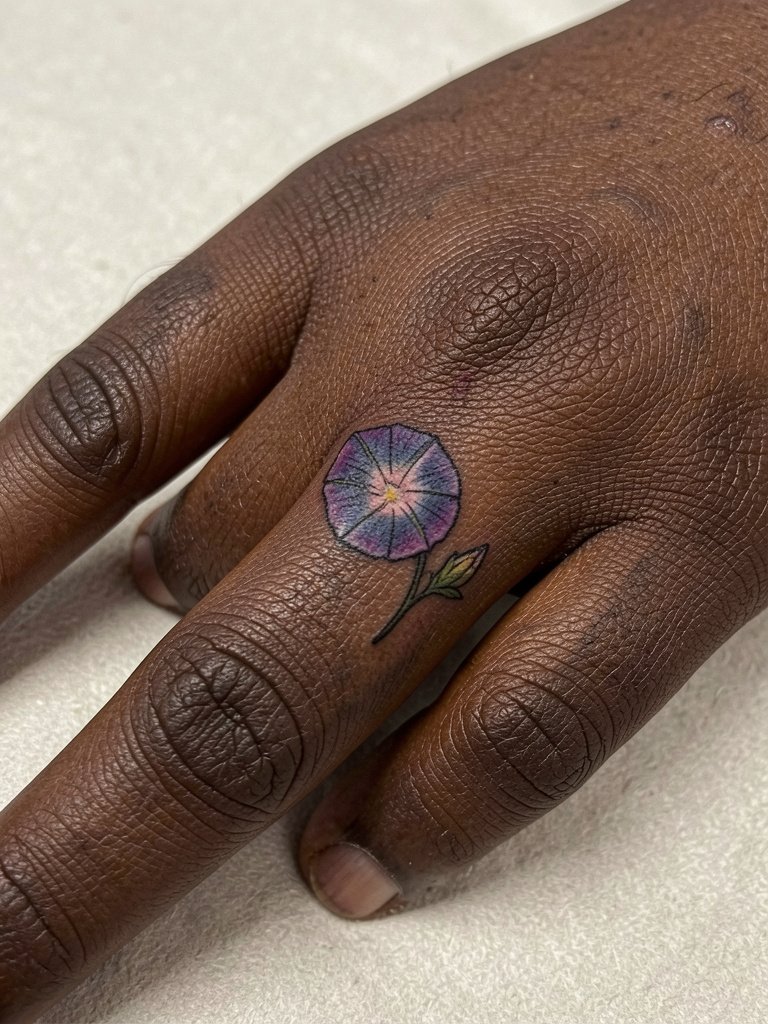
Finger tattoos are charming but high maintenance. Expect touch-ups in the first year because the skin there renews quickly and daily contact wears ink down. The main mistake is requesting ultra-fine petal detail that cannot survive constant hand use. Ask for slightly bolder edges and accept that this will likely need a light touch-up at 6 to 12 months. For session-day comfort wear short sleeves so the artist can work without fabric interference. Styling-wise, slim band rings or a delicate chain bracelet look intentional with a tiny floral side piece.
5. Clustered Morning Glory Wrist Band
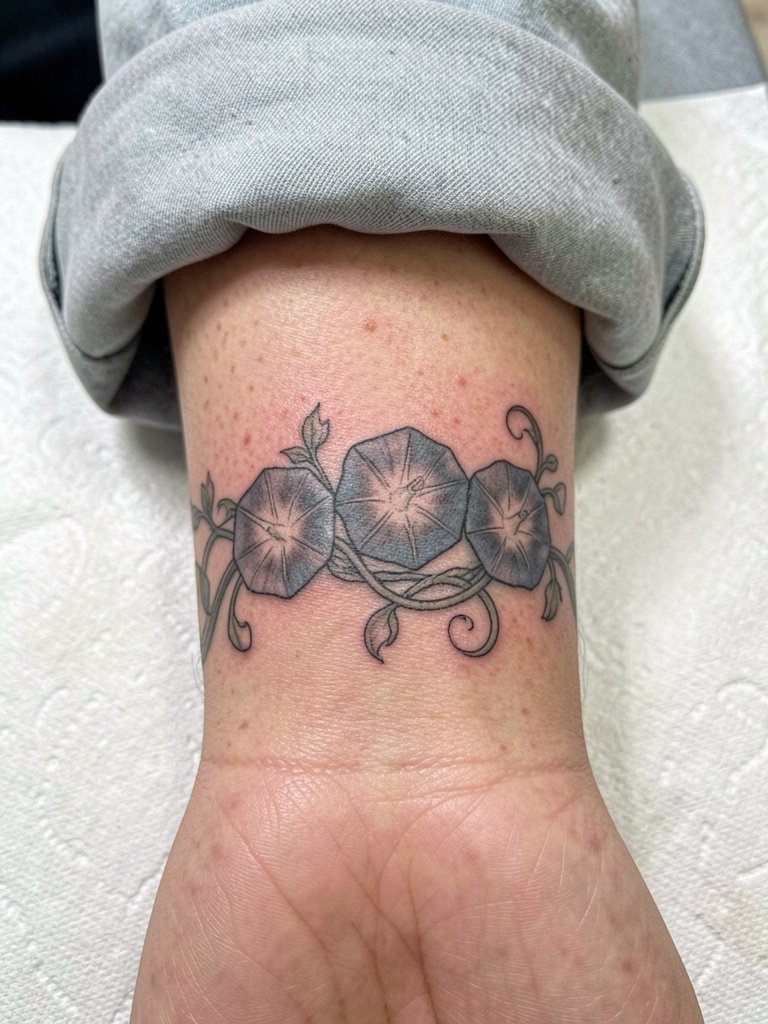
A wrist band with multiple blooms gives you the floral look without a single fragile focal point. Sessions are usually one to one and a half hours. Watch out for spacing too tight around the wrist because the rounded surface eats fine detail and lines can blur into each other. Tell your artist you want breathing room between petals so each bloom reads at arm length. For showing this off choose bracelets that do not rub the inner wrist regularly. Try a slim leather cuff on the opposite wrist or a delicate chain bracelet to frame rather than cover the ink.
6. Botanical Morning Glory Collarbone Sprig

Collarbones give a graceful line for a single sprig. Pain is higher toward the bone and sessions are often quick but sharp. The common error is cramming too much fine filigree along the clavicle where the skin moves against clothing. Specify slightly wider spacing between leaves and ask for a faint midline to keep the petal shapes visible as the skin settles. For outfit pairing, open-neck shirts and wide boatneck sweaters show the curve best. Wear a scoop-neck top on session day so the artist can stencil and place the design accurately.
Session Day Picks
The ankle, wrist, and collarbone pieces above need different session prep, so this small kit covers access, numbing, and first-week protection.
- Stencil transfer paper kit. Lets you preview how a vine or cluster will wrap the wrist or forearm before the needle starts, which is useful for the band and forearm pieces above.
- Topical numbing cream. Applied as directed eases short, sharp collarbone and ankle sessions without changing line quality.
- Thin protective film roll. Wraps small wrist and finger tattoos for the first night to reduce friction from bedding and accessories.
- Fragrance-free body wash. Gentle cleansing during the first week protects delicate linework on inner forearm and behind-the-ear pieces.
- Aquaphor healing ointment. Thin application in the first three days keeps micro-line work from drying into flakes that pull ink from the channels.
7. Half-Sleeve Morning Glory with Vine Flow
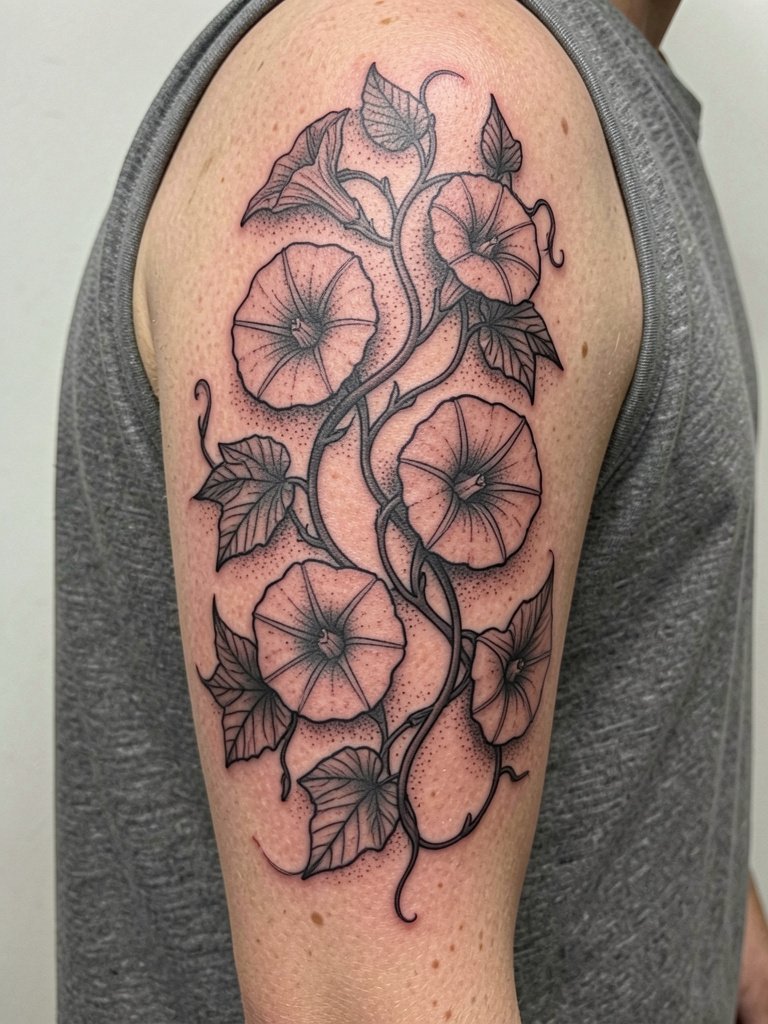
A half-sleeve is where morning glory motifs can really sing. Sessions vary by scale but expect multiple visits for saturation and flow. I usually recommend stronger main stems to anchor the composition and lighter interiors for the petals. One common mistake is mirroring a flat reference exactly without adjusting for arm curvature. Bring photos of arms with similar muscle and weights so the artist can plan wrap and flow. For showing off, roll sleeves or wear a sleeveless linen shirt. A loose linen tank works well to keep the arm accessible on session day.
8. Single Bloom on the Upper Thigh
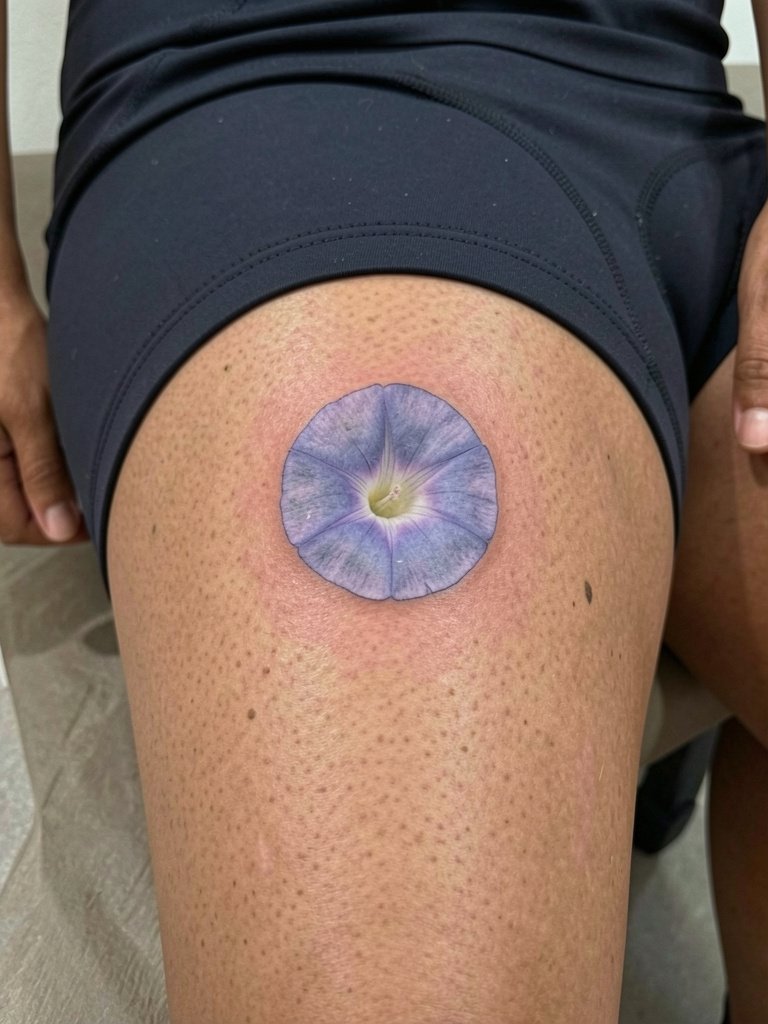
Thigh pieces tolerate detail and age well because they avoid daily abrasion. Session time is moderate and pain is usually manageable. Over-detailing is still a pitfall if you plan to stretch the design into a larger piece later. Ask how it will read at three inches and five inches so you know what to scale. For the appointment wear shorts that the artist can move aside without tugging fabric. As a show-off look, fitted skirts or midi dresses with a side slit highlight the placement and petal curve.
9. Single-Needle Vine Along the Rib
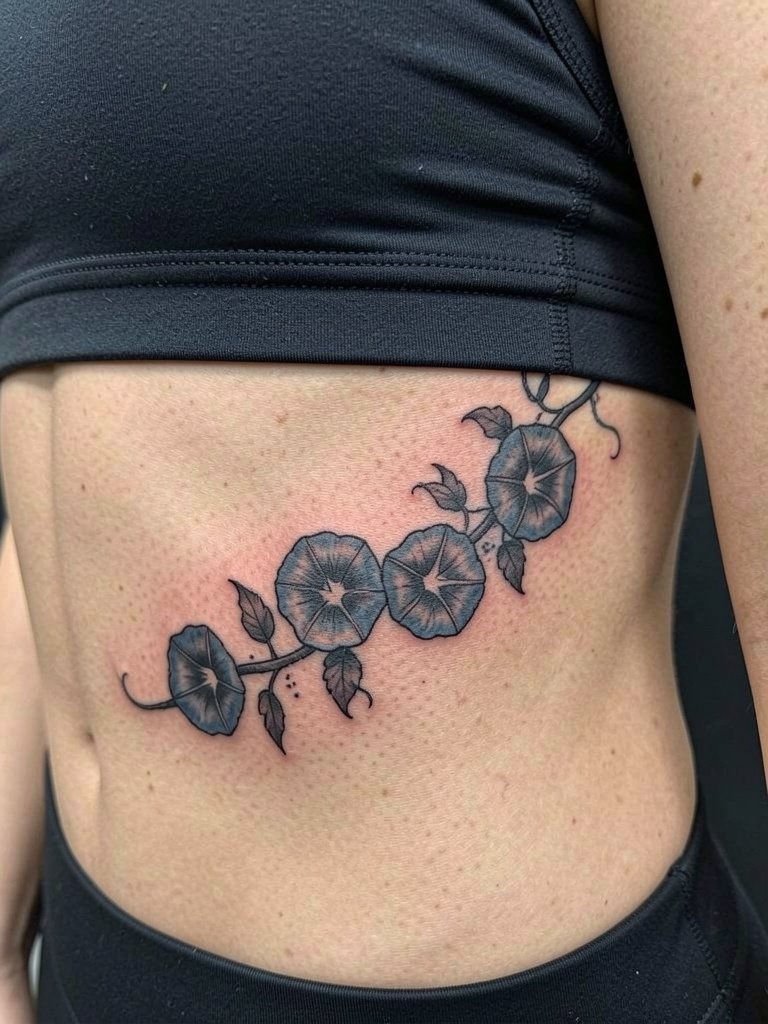
Rib work is a place where opinions split sharply. One camp argues that fine single-needle ribs blur within two years because the skin stretches and the needle lands too shallow. The other camp says careful depth and slightly wider spacing hold fine lines on ribs just fine and they show healed photos to support that view. If you prefer the finer approach, request a slightly wider spacing between veins and plan for a touch-up at 12 to 18 months. Expect higher pain and wear loose session clothing like a cropped tee that stays put. Sensitive placement note: ribs benefit from an artist with proven healed examples on the torso.
10. Geometric Morning Glory Medallion on Upper Back
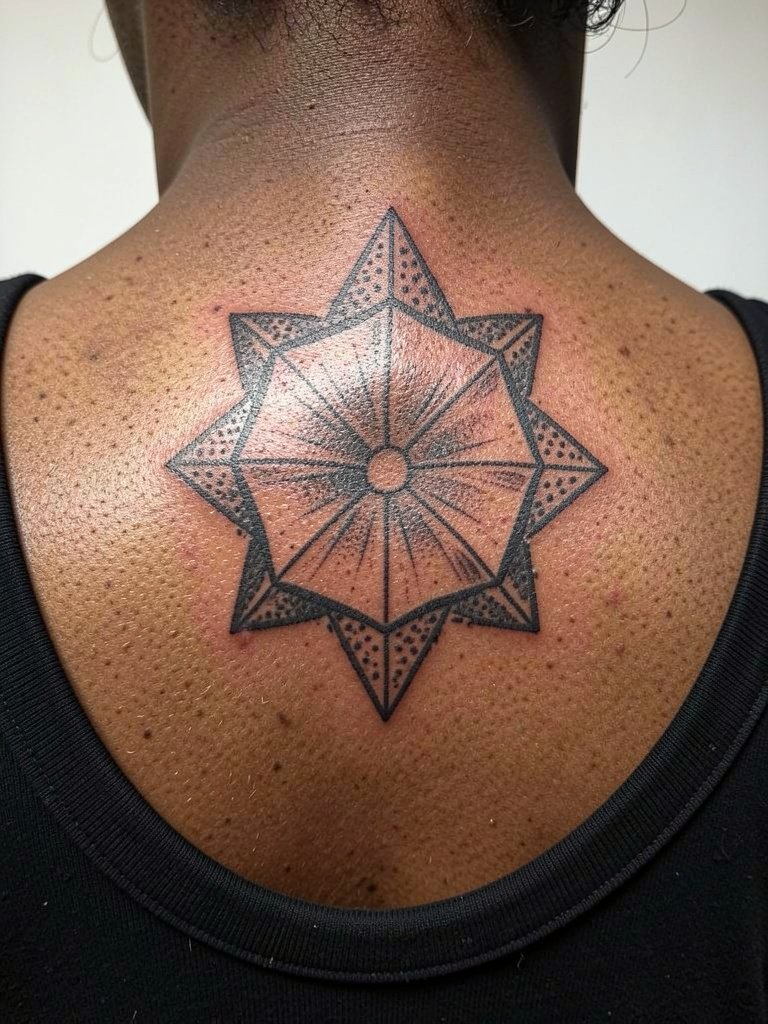
A centered medallion reads well on the upper back and translates across body types. Sessions run one to three hours depending on dot-work density. The risk is overdetail in the center where natural rounding softens crisp geometry. Request a step-back sight check during the session so the artist can keep radial balance. For wardrobe, open-back tops naturally showcase the medallion. If you want to hide it for work choose crew-neck shirts that cover the upper back.
11. Minimal Linework Bloom on Calf
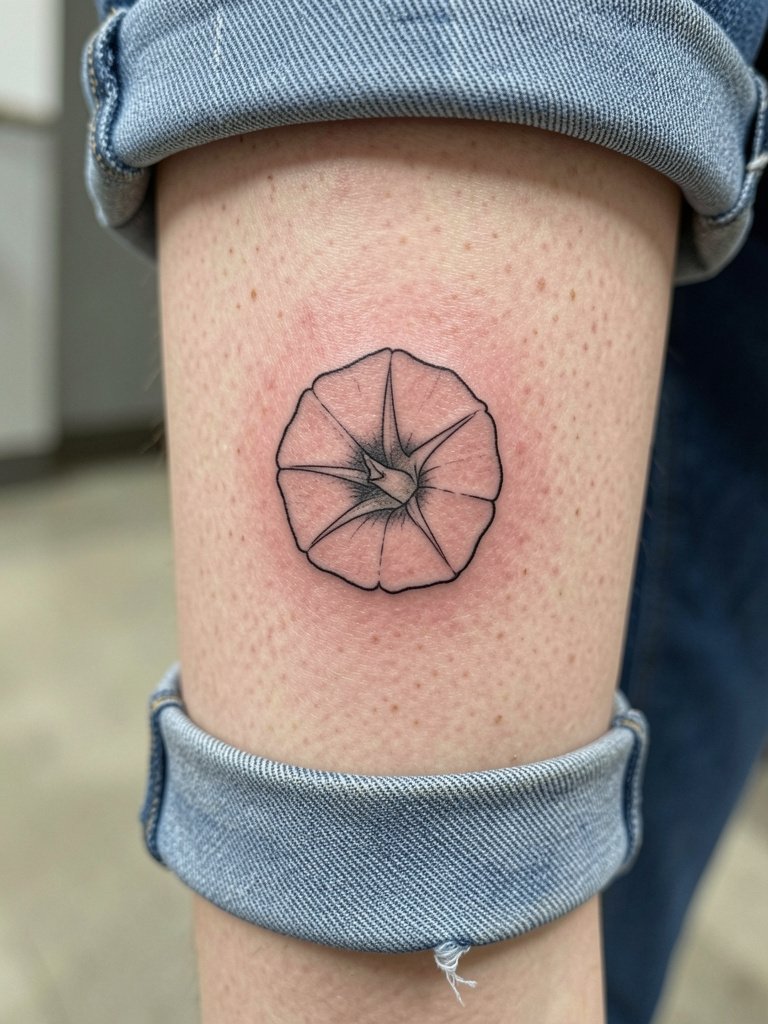
Calf placements are forgiving and show well with sneakers and skirts. Sessions are low to moderate in pain. The typical mistake is placing the bloom too low where shoes or socks rub during healing. Ask for the bloom to sit above the widest part of the calf to avoid that. For outfits try cropped jeans or midi skirts that reveal the outer calf. On session day wear loose bottoms that can be rolled without compressing the area.
12. Vintage Botanical Label on the Thigh
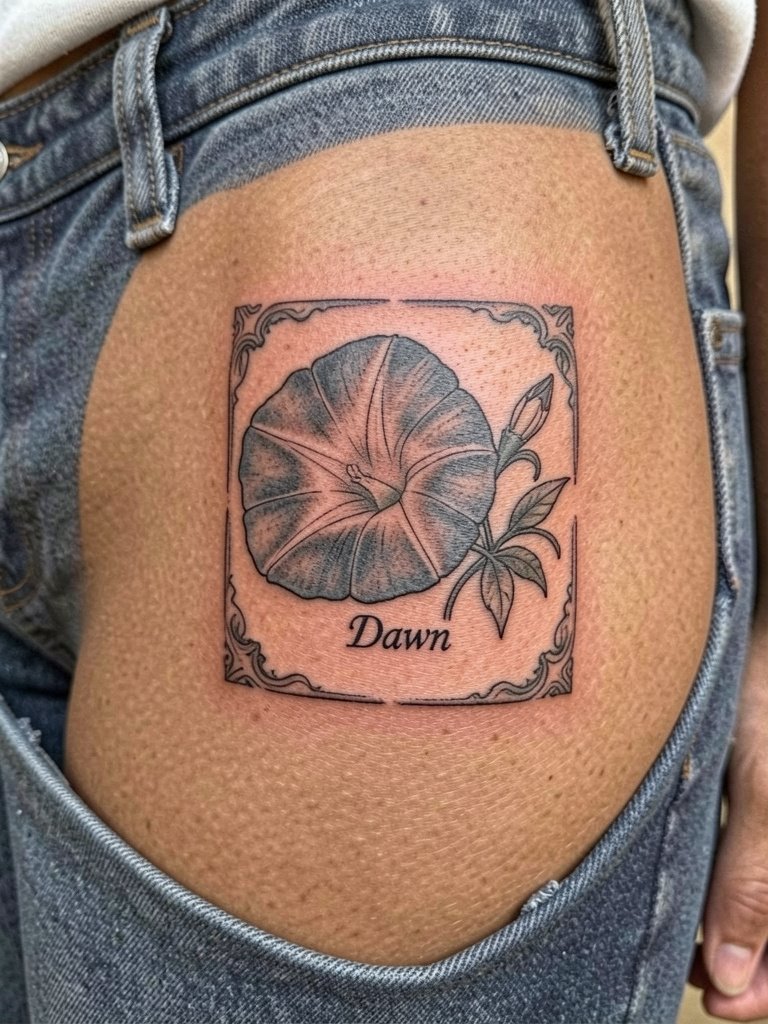
A labeled botanical piece gives a classic, slightly editorial look and holds up because the border defines the area. Session time is typically one to two hours. One detail to decide is font size for the small serif line so the letters do not blur into the border later. Bring a sample of the exact word and scale you want and ask the artist to show how legible it will be at two scale options. Wear low-rise jeans or a skirt to the consult so the artist can map the exact placement. For showing off choose high-waisted skirts with a tucked-in top so the label sits just above the waistband.
13. Single Stem Behind the Knee
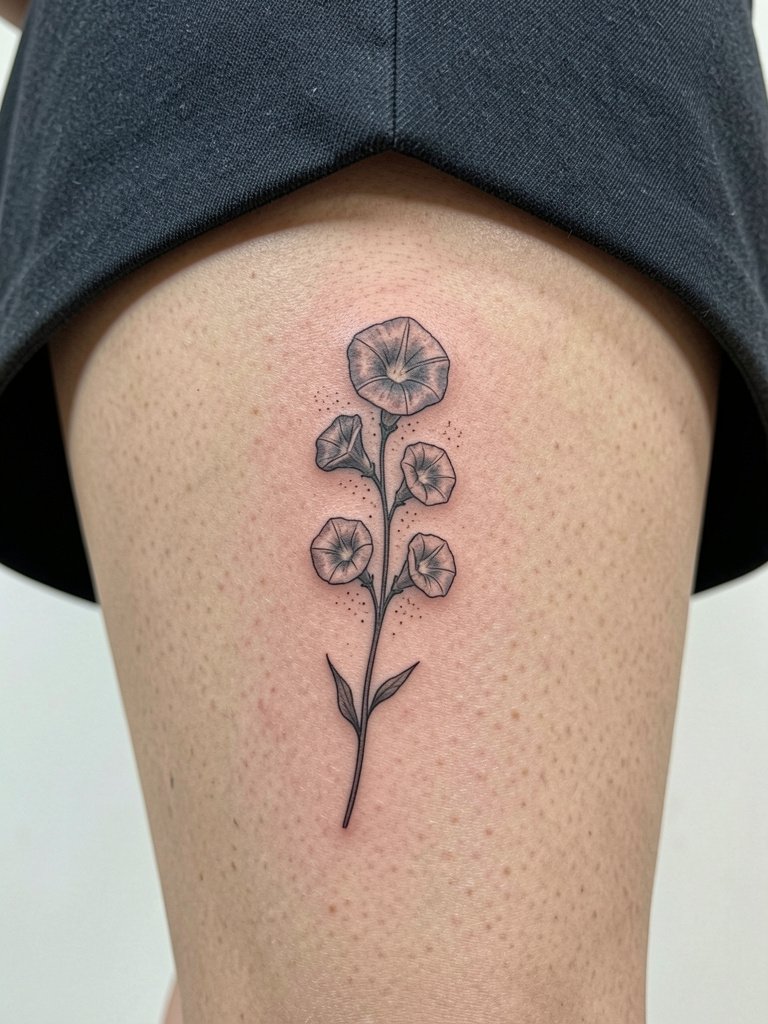
Back-of-knee placements look delicate but the skin there moves a lot, which can blur super-fine detail. Sessions tend to be quick but a little tender. Ask for slightly thicker main veins and lighter inner veining so petals remain defined after healing. Avoid putting too many tiny dots in the crease. Wear loose bottoms that do not press into the area during the first week. When styling, mid-length skirts and slip dresses pick up the vertical line beautifully.
14. Micro-Realism Morning Glory on the Wrist Side
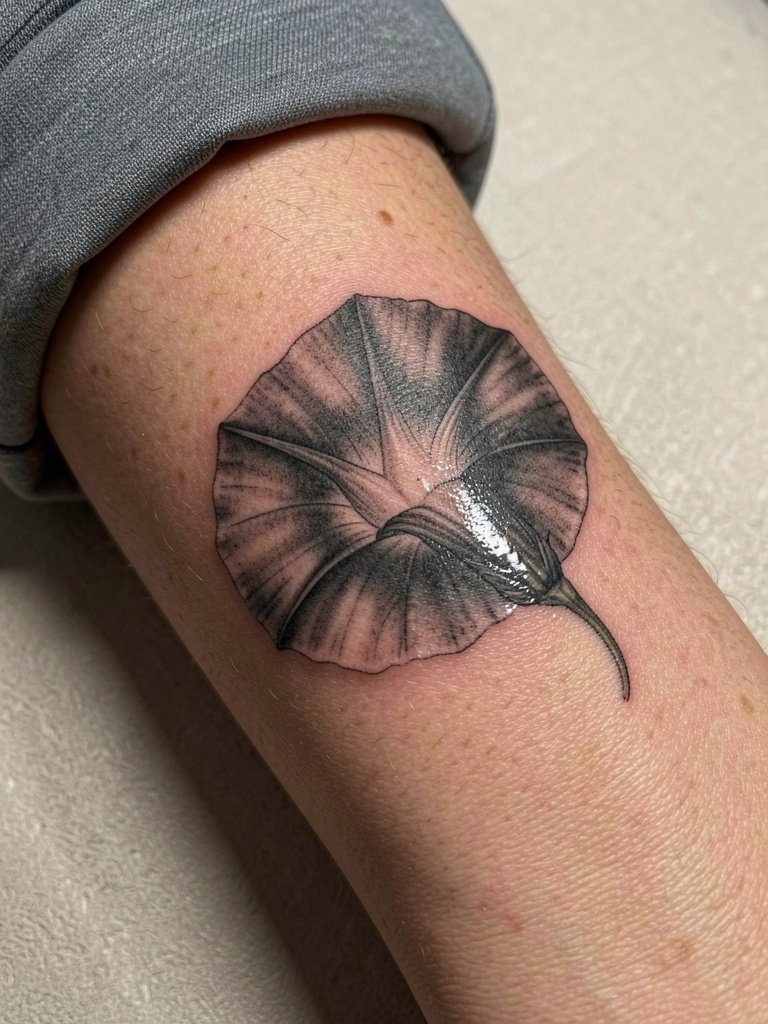
Micro-realism can render a petal almost photographic, but the wrist is a high-motion area so ultra-fine internal detail risks blurring. One camp of artists says micro-realism here is inappropriate because the skin surface and frequent washing will soften the highlights within a year. Another camp maintains that with slightly bolder micro-contours and careful saturation those highlights can persist on the wrist. If you prefer realism, request a touch-up plan in writing and plan for a six- to twelve-month follow-up. For showing the piece wear rolled sleeves and slim metallic bangles to catch light near the bud.
15. Script and Vine Along the Rib
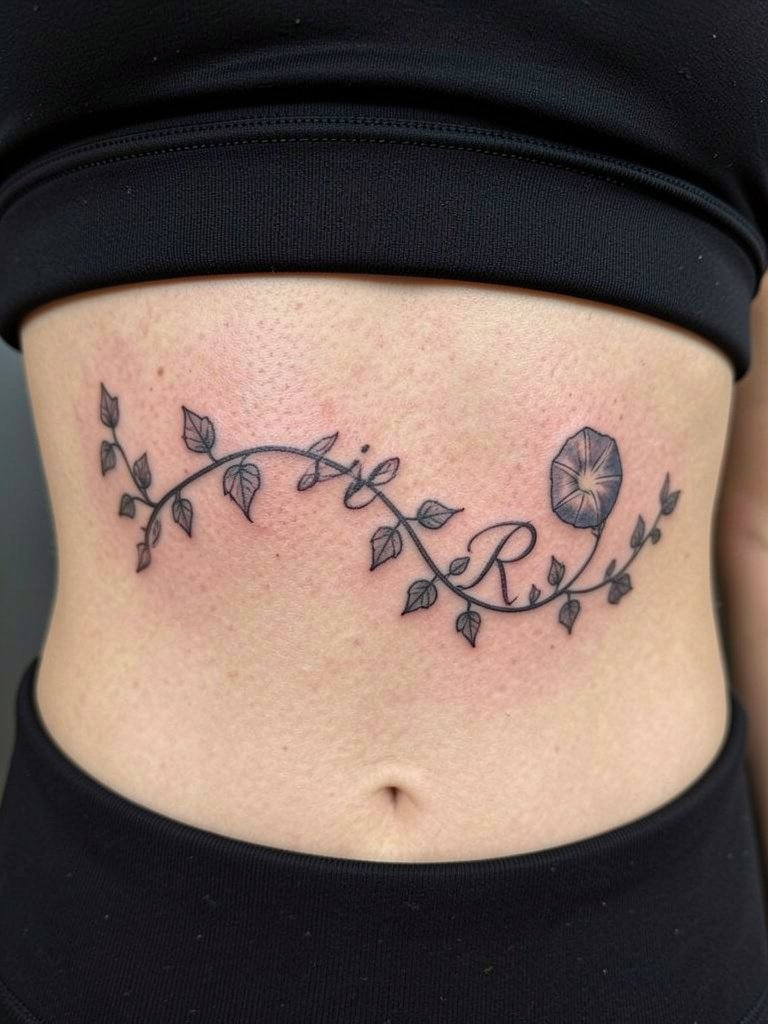
Combining script and vine creates a narrative feel but the ribs demand careful spacing. Too-tight script gets legibility problems as the skin shifts. Specify the exact word and font size using a printed sample and ask the artist to adjust spacing so the letters breathe with the vine. Sessions are higher on the pain scale. During the appointment wear a supportive crop that the artist can easily lift just a few inches without moving fabric around. Styling-wise, high-cut swimwear or open-side dresses let this placement peek subtly.
16. Bold Outline Morning Glory on the Upper Arm
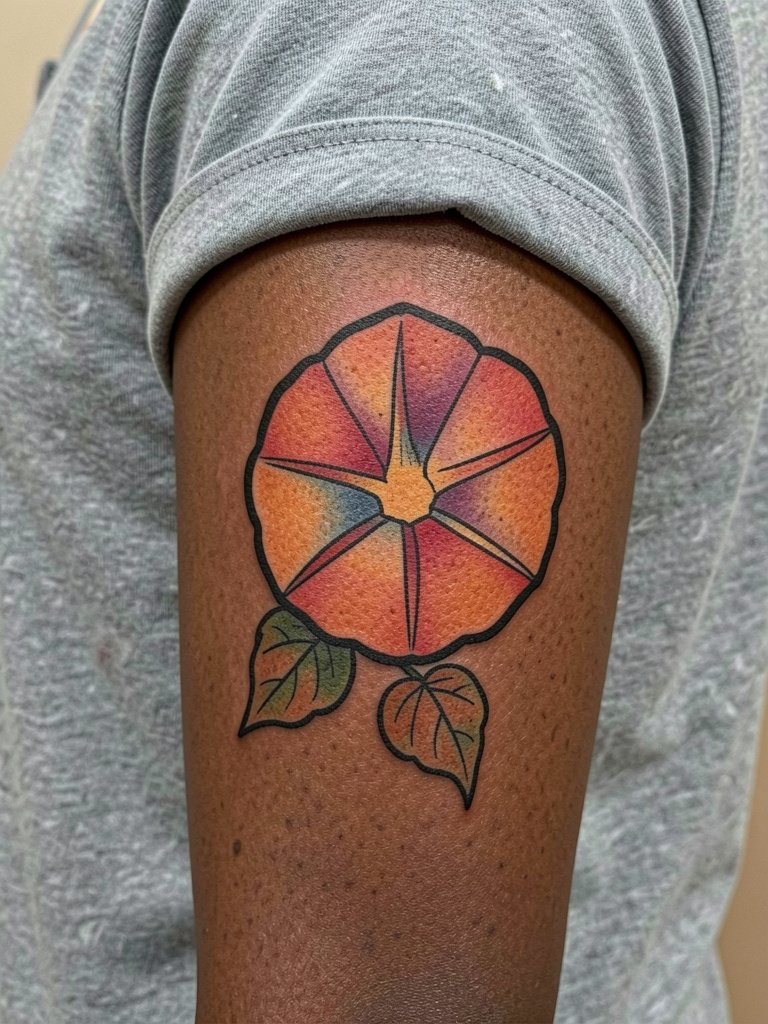
Bold outlines give longevity and contrast, especially on darker skin tones where crisp edges are key. Sessions can be short and the result holds well through years of sun and activity. The mistake is overloading the interior with too many tiny color transitions that fade unevenly. If longevity matters, ask for high-contrast fills and a slightly thicker outline. Short-sleeve shirts and rolled cuffs show the piece off. Session tip: wear a tee that you can remove without tugging over the shoulder to keep the area undisturbed.
17. Tiny Constellation of Mini Blooms on Sternum
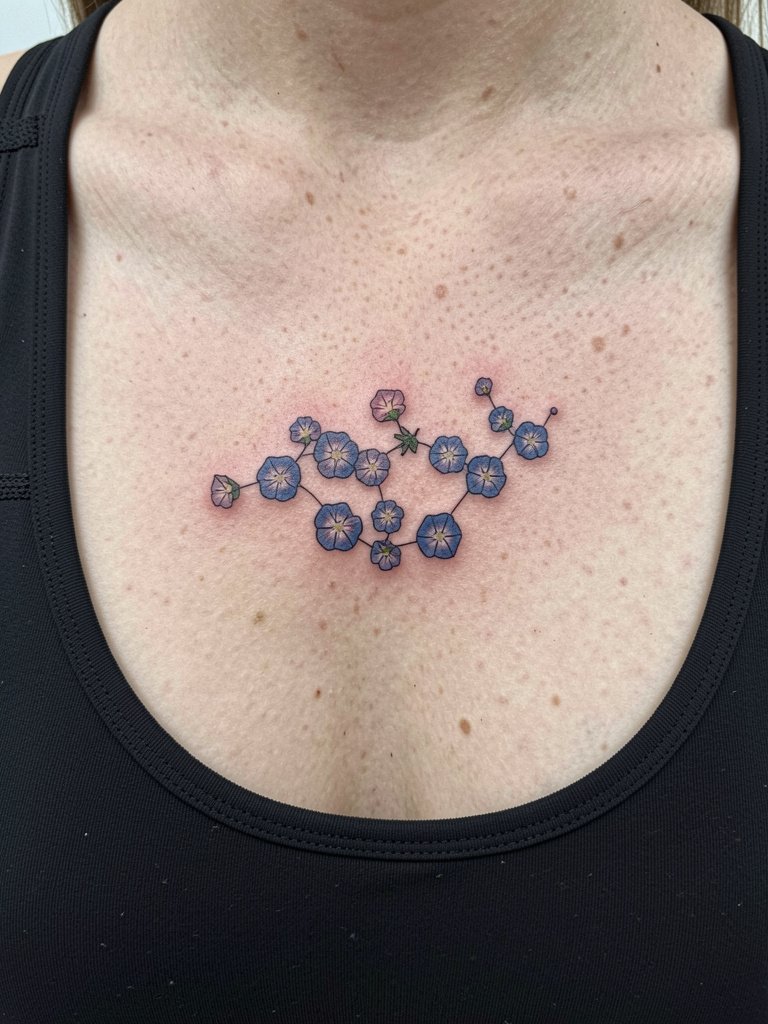
Sternum work is intimate and often more sensitive. The constant movement and occasional friction can soften the thinnest lines, so I advise slightly bolder anchors at the center of clusters. Sessions vary and may require breaks. Ask the artist for healed examples on the sternum so you can set expectations. Sensitive placement note: sternum pieces benefit from a practitioner experienced with central chest anatomy and aftercare guidance. For session wear a fitted sports bra that the artist can lift minimally without pulling.
18. Botanical Wrist Half-Moon with Accent Color
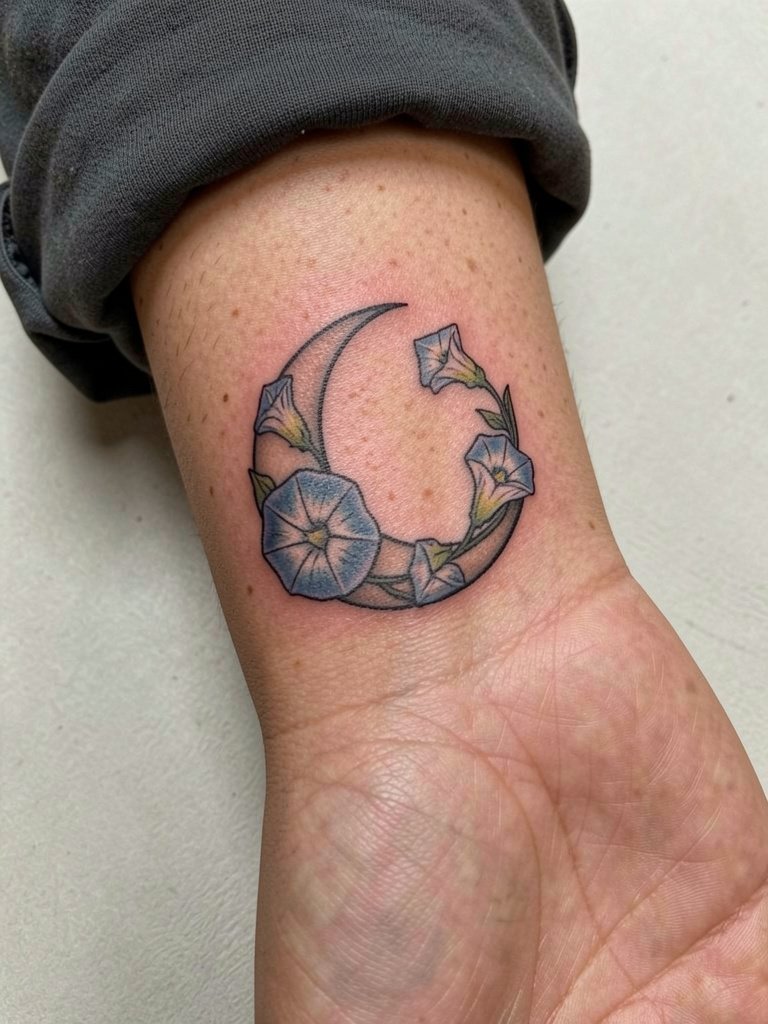
A wrist half-moon frames the area well and the small accent color adds dimension. The inner wrist can blur if hairline lines are used, so the trick is slightly more density in outer contour and delicate inner shading. Ask how the accent color will behave over time on your skin tone. For showing the piece, short-sleeve button-up shirts or cropped sweaters that hit the wrist draw attention. On session day bring a loose top that you can roll without compressing the wrist.
19. Line and Negative Space Morning Glory on the Hip
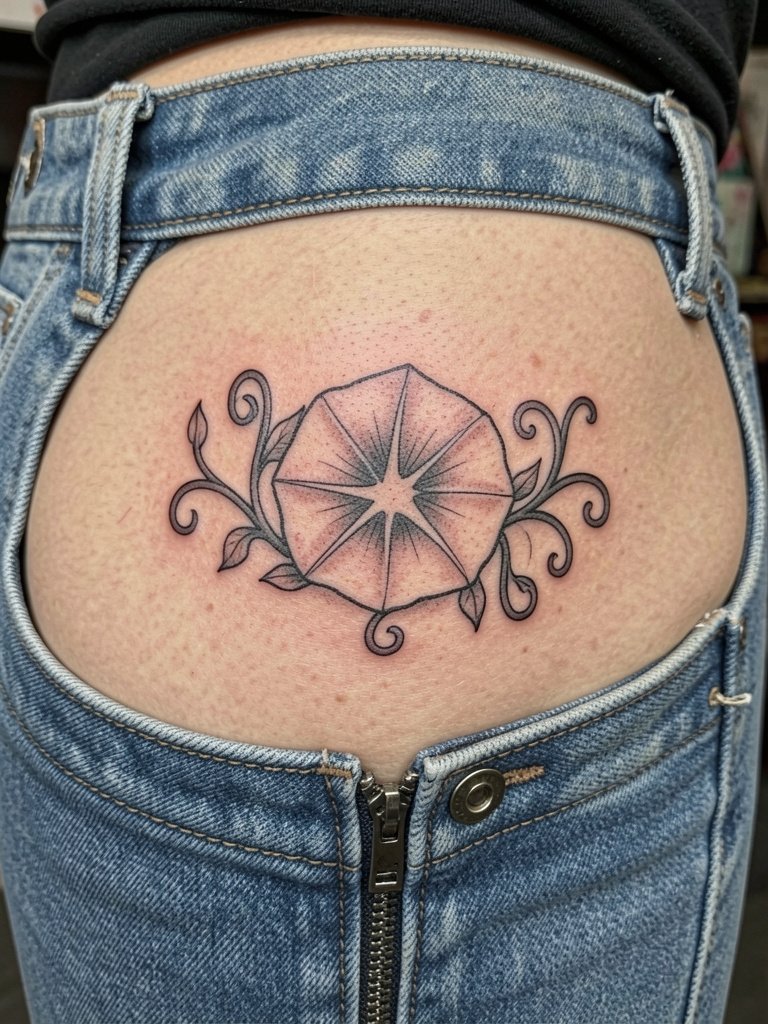
Hip placements show nicely with minimal clothing friction if placed above the waistband. The main mistake is lining a design too close to the jeans edge where rubbing will dull the ink during the first weeks. Tell the artist you want the tattoo to sit at least one to two finger widths above your waistband. For outfits, low-rise jeans and cropped tops reveal the placement well. Session wear should be bottoms you can pull slightly down without undoing normal fastenings so nothing feels pulled.
20. Small Cluster on the Side of the Hand
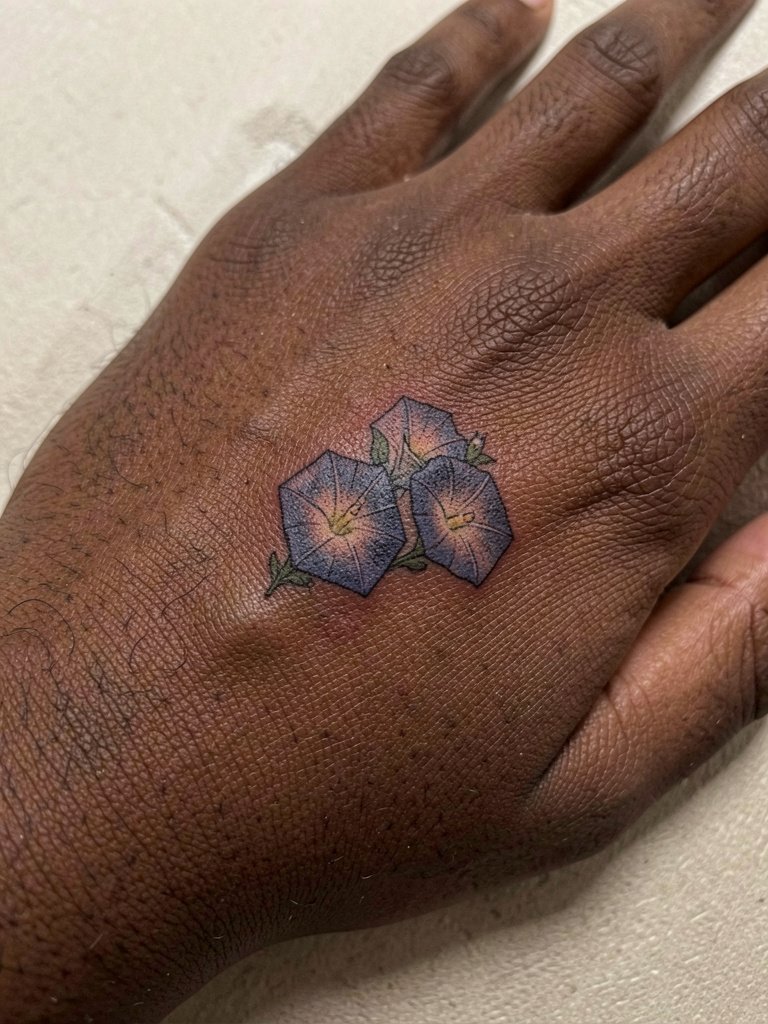
Hand placements face high wear from washing and sun exposure. Expect more frequent touch-ups than with limb or torso work. A frequent error is requesting ultra-fine internal detail; bold anchors and simplified interior values last longer. During the session keep the hand relaxed and rested on a flat surface. For styling, short sleeves and open-finger rings highlight side-of-hand tattoos nicely without constant rubbing.
21. Vintage Etching Style Bloom on the Rib Flank

Etching-style work reads beautifully if the artist uses a slightly bolder main contour so the hatch marks rest within a stable border. This placement shares the same controversy as other rib pieces. One group of artists warns that intricate etching on the ribs can wash out as the skin stretches. Another group says with measured spacing and a slightly deeper initial saturation those etching lines remain visible for years. If you want the etched look, ask for a written touch-up plan and a preview of how spacing will scale to your body. For sessions wear a cropped top you can leave in place so the artist can access the side torso without fabric movement.
22. Petite Morning Glory on the Back of the Arm Near Elbow
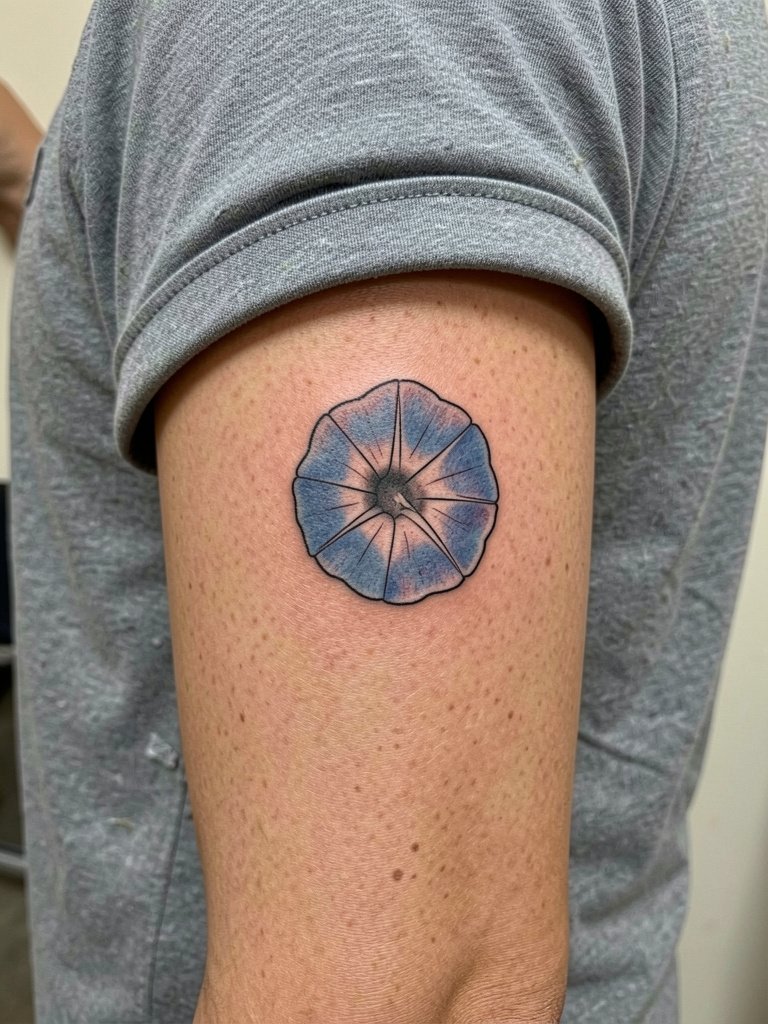
Back-of-arm placements are exposed to sun and arm movement, so choose lines that will not collapse into a soft blur. The typical mistake is putting too much micro detail in the throat area. Ask the artist to design with a clean outer contour and allow the inner work to be airy rather than dense. For outfits pick short sleeves that either cover completely or stop above the elbow to show the bloom intentionally. Session time is short and discomfort is usually mild.
23. Oversized Botanical Panel for the Back
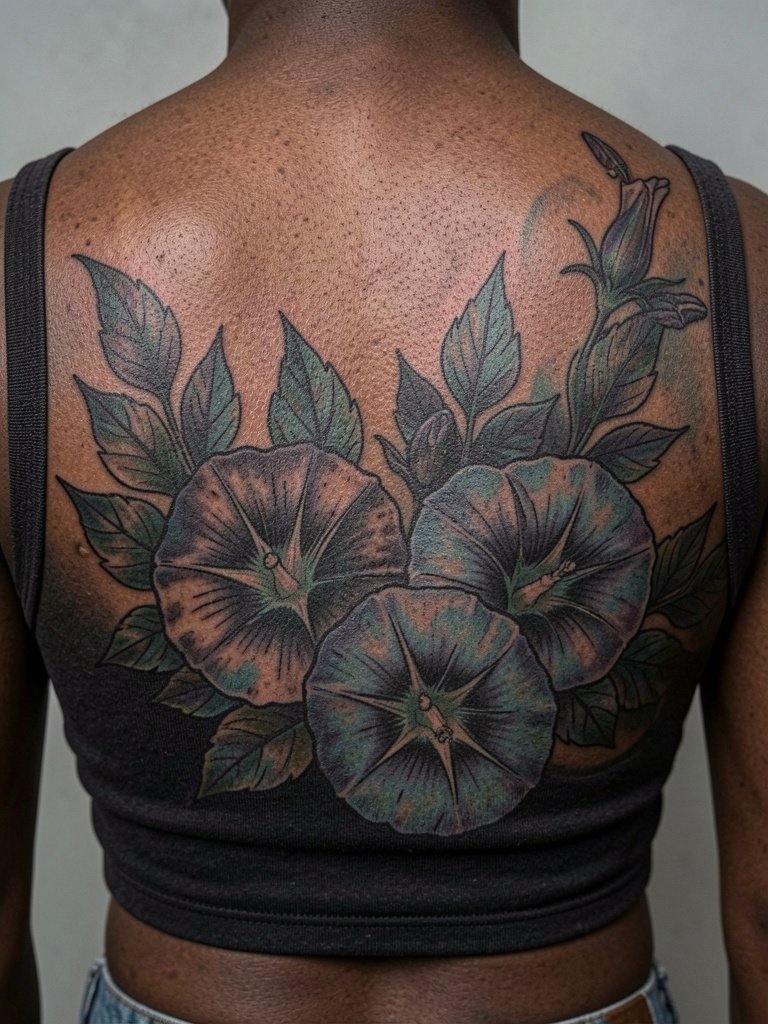
Large back panels let you mix scales so tiny blossoms sit next to broader petals and still read after years. These are multi-session projects and you should plan for at least two long sessions or three shorter ones depending on saturation and color. The biggest mistake is starting too small. For a panel like this I recommend moderate outlines and staged shading to allow touch-ups to harmonize across the piece if needed. For showing it off choose low-back dresses or tops with cutouts that match the curve of the composition. On session days bring loose, two-piece clothing so undressing does not abrade fresh work.
Frequently Asked Questions
Q: How do I know whether to pick single-needle fine line or a slightly bolder outline for a Morning Glory piece?
A: It depends on placement and lifestyle. For high-motion spots like wrists, hands, and fingers I lean toward a slightly bolder outline so the petal edges stay defined over time. For protected areas like the thigh or back a single-needle approach can keep delicate veins visible, provided you plan a touch-up after the first year.
Q: How should I prepare clothing for a session on the rib, hip, or thigh?
A: Wear fitted items that expose just the spot without tugging. For ribs a cropped athletic top in its normal worn position works well. For hips choose low-rise jeans fully zipped and fastened so the tattoo sits above the waistband. For thighs wear modest bike shorts that the artist can lift slightly without moving fabric.
Q: Where can I find healed examples and portfolios without naming specific artists?
A: Search platform filters and select hashtags that focus on the style and placement you want, for example tags that include "microflower ink" or "botanical healed." Use location filters on social apps to find shops near you and scan community threads for healed photos. Tattoo forums and portfolio collections can also point to healed sets in different skin tones.
Q: How long before a Morning Glory piece will need a touch-up?
A: Expect most delicate work to benefit from a light touch-up within 6 to 18 months, especially on hands, fingers, and wrists. Larger, bolder pieces often go longer between touch-ups. Plan a follow-up consult when booking so the artist can note expected timeline based on your chosen placement and skin.
Q: Any styling tips for showing off a collarbone or shoulder-blade Morning Glory for special events?
A: For collarbone sprigs choose wide V-necks or boatneck tops to lay flat and frame the bone. For shoulder-blade branches a backless or open-back dress highlights the sweep. A good choice for both is a backless midi dress when you want a more formal look with clean exposure.
