
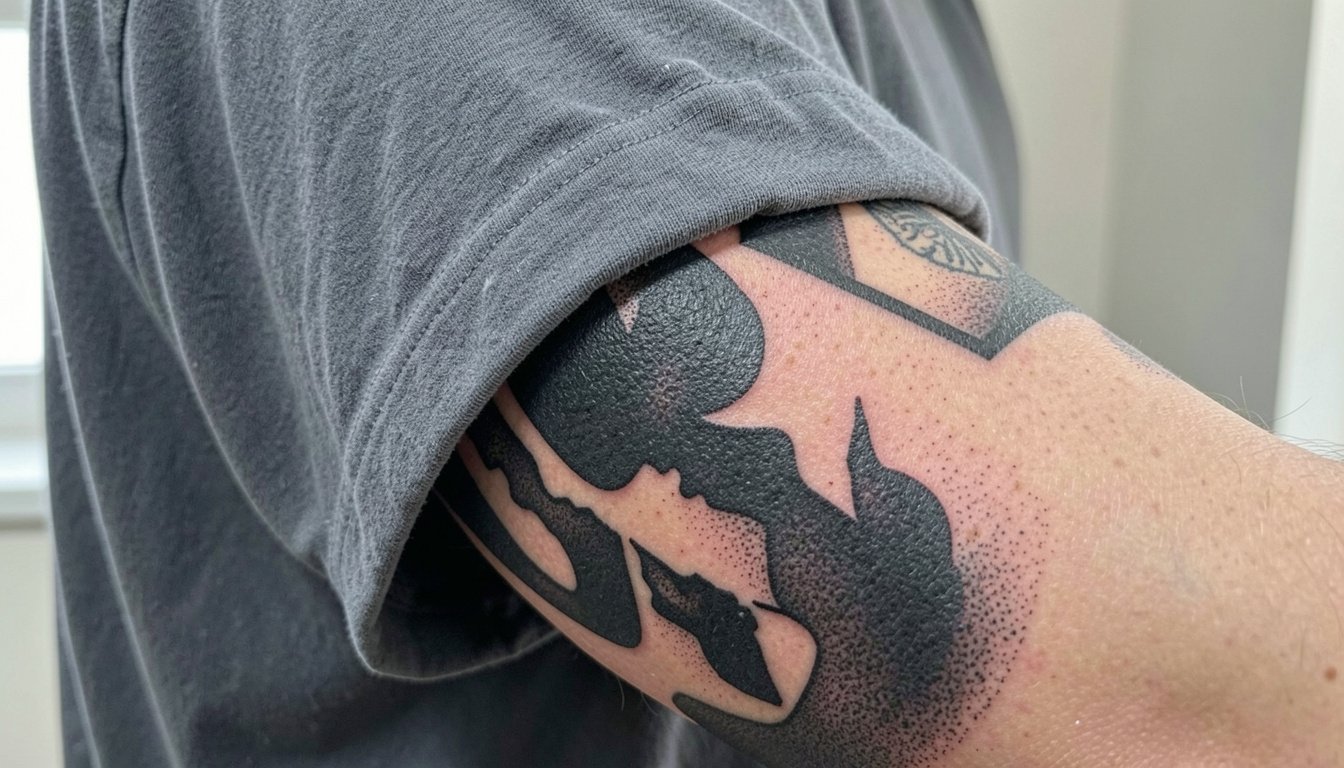
Dark Victorian Gothic sleeve work ages by contrast, not by whisper-thin detail. Heavy black silhouettes and thoughtful negative space hold up far longer than tiny filigree that disappears under everyday wear. If you want a sleeve that keeps its mood after a few touch-ups, plan spacing, saturation, and wardrobe around how the piece will live on your arm. Start with something that reads from across a room, then refine the filigree so it survives five years.
1. Victorian Cameo Panel on Inner Forearm
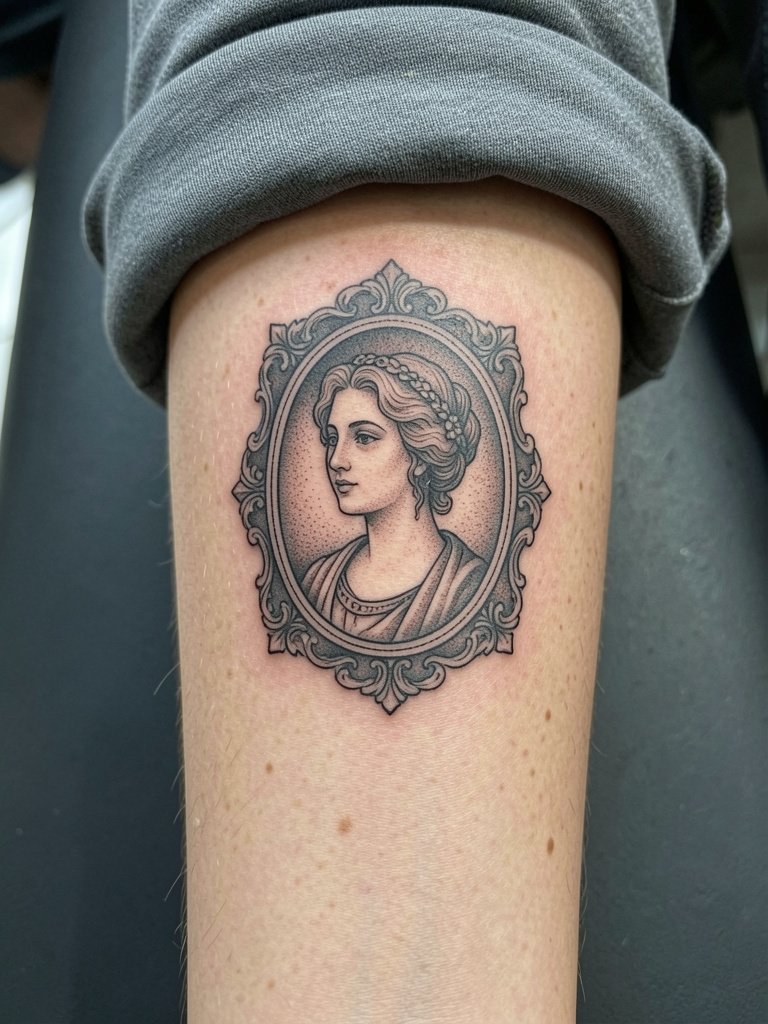
A narrow Victorian cameo reads best when the negative border is bold. I recommend increasing the frame line weight slightly from your reference so the silhouette holds against normal forearm wear. Bring two scale photos to your consultation and show the artist how the panel will sit when the arm is at rest. Tiny inner details tend to blur by year three on the inner forearm. Expect a two-hour session for the base lines and stipple fill. For showing it off, pair with rolled sleeve button-ups that expose the panel without crowding the wrist.
2. Black Lace Sleeve Border at Wrist
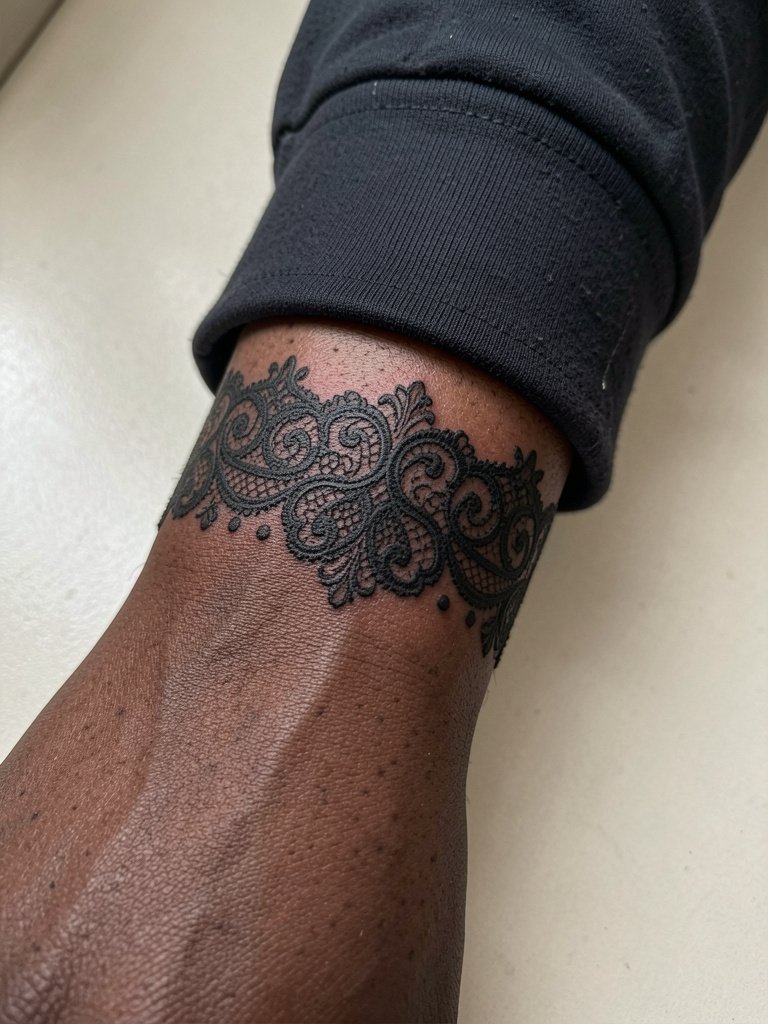
Wrist borders take a lot of friction from jewelry and washing. For this reason I suggest solid blacks in the main scrolls and slightly wider gaps in the lacework so the pattern keeps shape. Tell the artist you want bold primary outlines with delicate inner negative shapes, not single-needle lace across the entire circumference. Expect sensitivity on the inner wrist and a one to two hour session. Wear a loose long-sleeve that can be easily rolled up for the appointment and consider slim metal cuff bracelets after healing to frame the lace without rubbing.
3. Gothic Architectural Column Wrap on Upper Arm
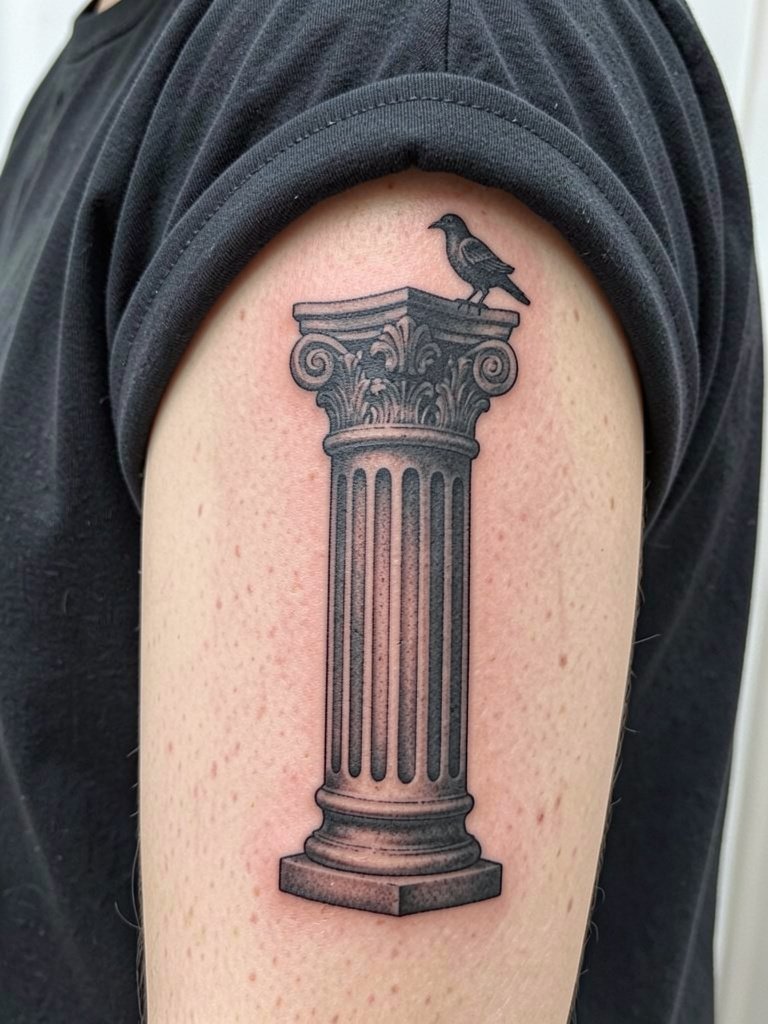
Architectural pieces survive well if you let the heavy anchor lines speak. One camp argues that single-needle filigree will blur and lose contrast quickly. The other camp says careful depth and slightly thicker filigree will settle fine and show detailed texture for years. Be explicit about how textured you want the capital to be, and have the artist show you a scale mock-up so the fluting spacing reads at arm length. This placement is moderate on pain and usually takes a three to four hour session. For evenings out pair the column with a sleeveless wool blazer that keeps the silhouette visible.
4. Stipple Shaded Mourning Portrait on Bicep
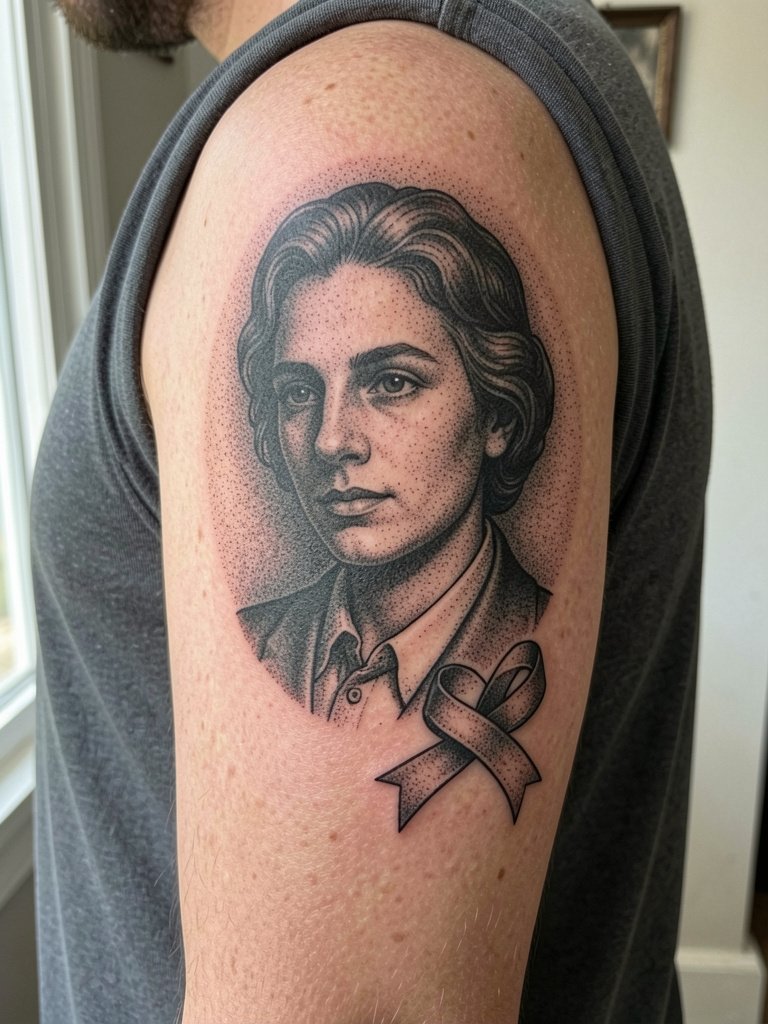
Portrait dotwork needs breathing room so the face does not muddle as the skin stretches. A common mistake is asking for too many tiny facial details within a small area. Instead, increase the portrait scale or simplify the features into stronger values. Discuss stipple density and portrait size in pixels versus inches with the artist so they can show how the piece reads at three distances. Expect moderate pain and a three hour session for a mid-sized portrait. For show-off outfits choose sleeveless knit tops that let the bicep sit visible without collar interference.
5. Blackwork Rose with Cobweb Backdrop on Elbow Sleeve

Elbow tattoos blur faster when key lines cross the joint. Plan composition so the most intricate elements sit on either side of the crease. During consultation ask the artist to map the pattern with the arm flexed and relaxed so you see how the cobweb moves. Elbow sessions can be painful and often require short breaks, so expect staggered passes and a touch-up at six to twelve months. For styling, pair the piece with three-quarter sleeve sweaters that hit just above the elbow to reveal the main rose without constant abrasion.
6. Baroque Skull with Clock Face on Outer Forearm
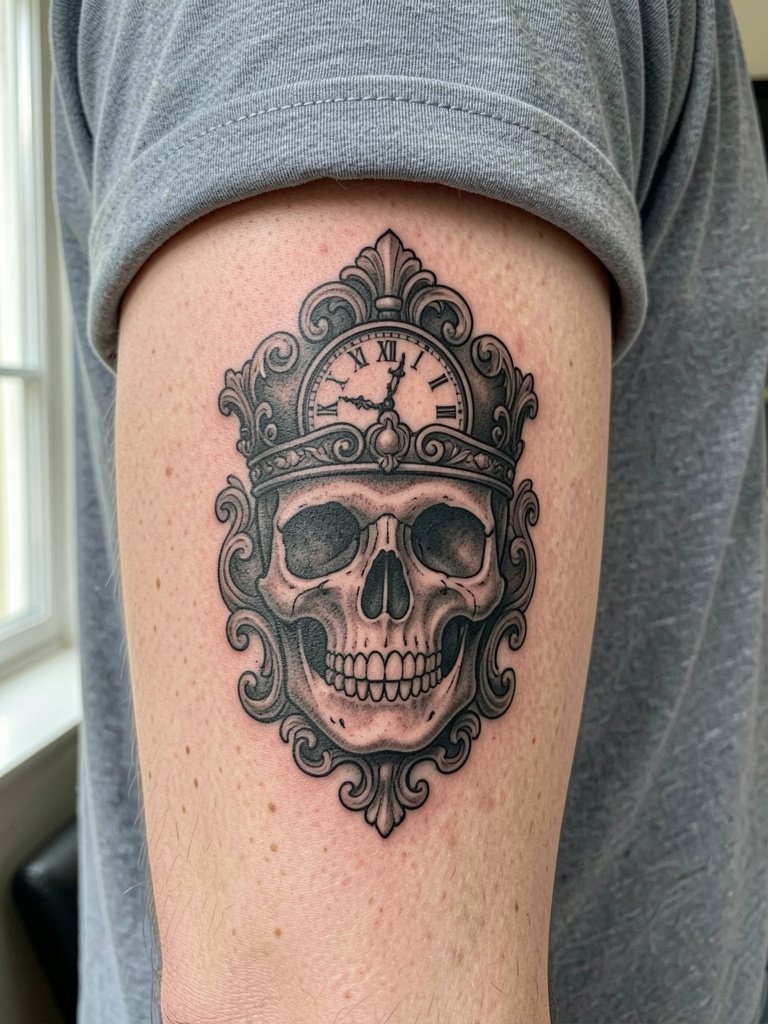
This outer forearm design benefits from heavy saturation in the skull shadows so the face reads with distance. A frequent mistake is relying on thin clock numerals that smear over time. Instead, ask for bolder numerals and softer background gradient so the skull keeps presence. The session is moderate in pain and usually runs three to four hours for the full shaded composition. For everyday wear choose rolled sleeve denim shirts that frame the outer forearm without rubbing the surface.
Session Day Picks
These first six sleeve concepts stress bold anchors and areas that see friction. The right prep kit and wardrobe choices make booking a longer forearm or bicep session smoother.
-
Stencil transfer paper kit. Lets you preview how panel designs and clock faces sit on curved forearm skin before lines are set, which matters for cameo and architectural pieces.
-
Cooling topical numbing cream. Applied as directed reduces edge pain during elbow and rib passes and can make multi-hour sessions more manageable.
-
Thin protective film roll. Useful for wrist and hand work to shield delicate filigree against moisture and everyday friction in the first week.
-
Fragrance-free gentle body wash. Cleanses the healing area without stripping newly deposited pigment on detailed dotwork and stipple shading.
-
Healing ointment stick. A mainstream gentle ointment helps protect small portrait and fine-line areas during the crucial first three days.
7. Victorian Script Ribbon Along Inner Wrist
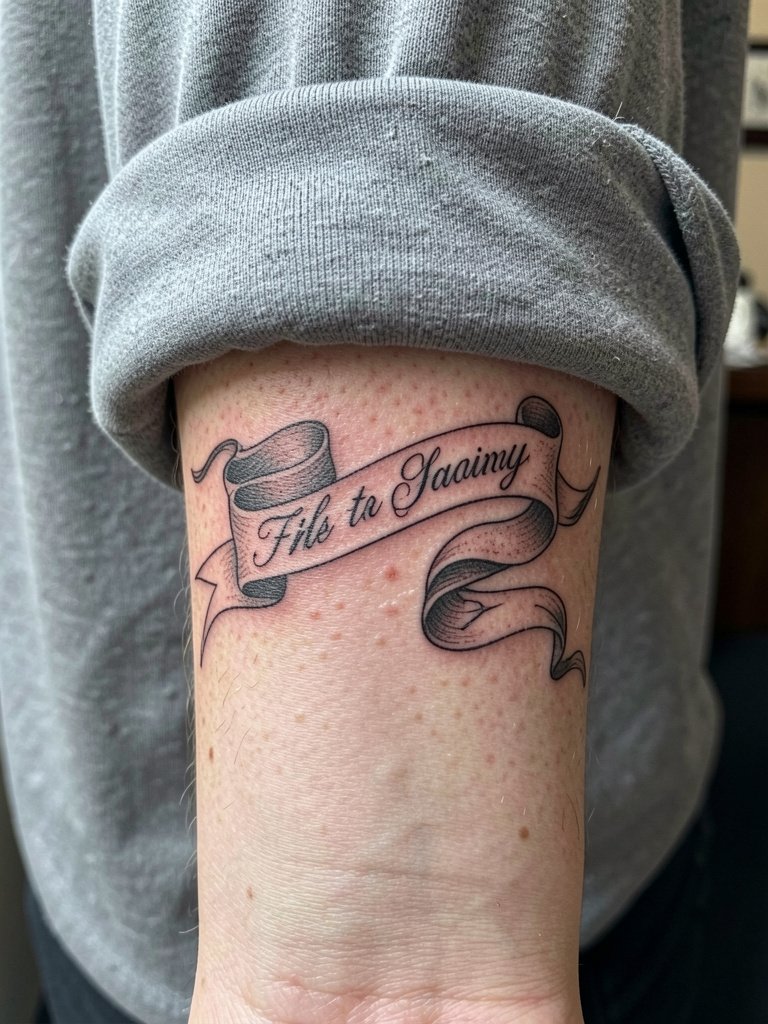
Delicate script at the inner wrist loses definition fast if the letters are too thin. Ask for a tiny increase in stroke weight and a slightly taller x-height in the lettering so the word remains legible after regular hand washing. Bring the exact word and preferred font sample so the artist can test spacing at three and five inches. Session time is short for a small ribbon, usually under an hour. For nights out pair with delicate leather wrap bracelets that accent the ribbon without continuous rubbing.
8. Mortuary Lantern with Hanging Chains on Inner Bicep
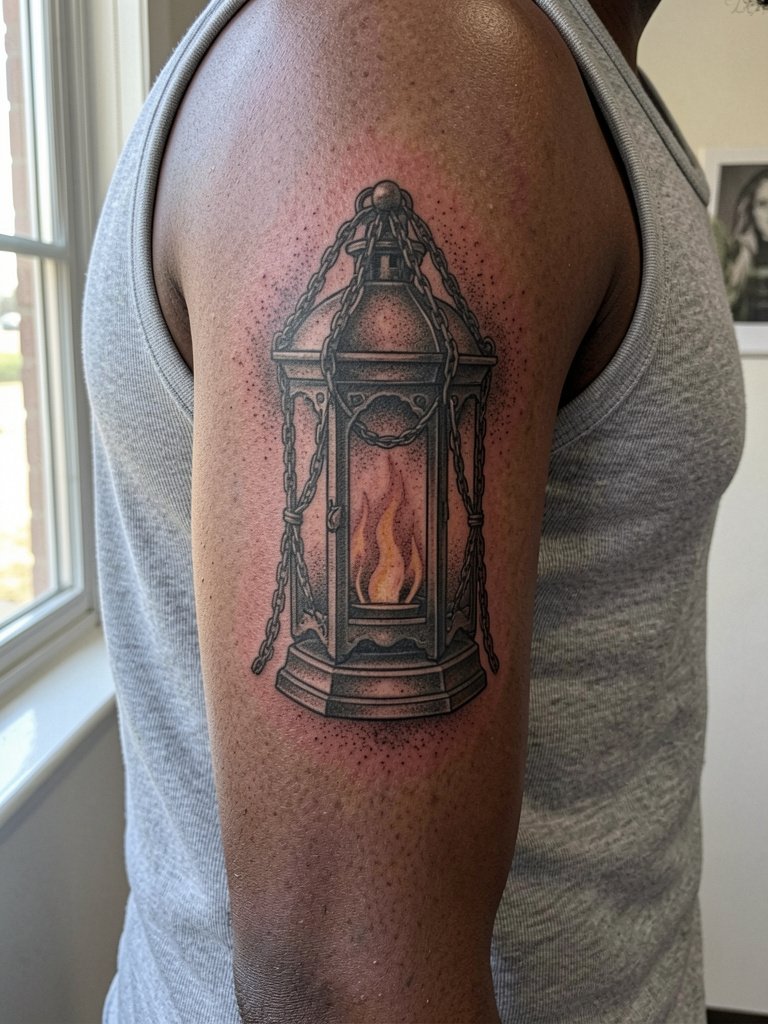
Inner bicep placements require special planning because the skin there moves and stretches. One group of artists warns that single-needle detail blurs in this spot. Another group says that with slight spacing adjustments and controlled stippling you can keep the lantern texture for years. Ask the artist to show the stencil on your arm while relaxed and while slightly flexing so you can see potential distortion. Expect medium pain and a two to three hour block. For session wear, bring a loose tank top to keep access clean and comfortable.
9. Ornate Pocket Watch with Chain on Inner Forearm

Pocket watches need solid numerals so they remain readable as the skin softens. A typical error is tiny Roman numerals that dissolve into shading. Ask for bolder numeral blocks and a softer antique wash around the edges. Touch-ups are common at the one-year mark for chain links that see friction. The session runs about two to three hours depending on chain detail. To display the piece, wear rolled sleeves or three-quarter cuff shirts that pause above the wrist.
10. Mourning Rose Garden Half-Sleeve on Outer Arm
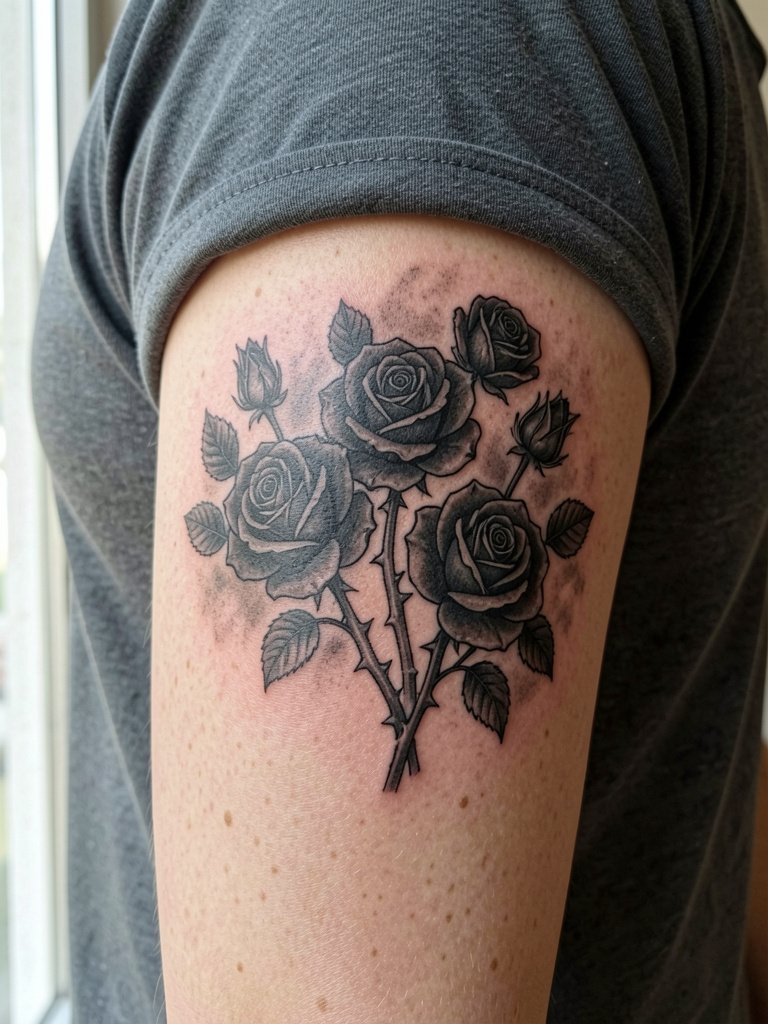
Half-sleeves need contrast rules so the main roses do not flatten into the background. I advise mapping the darkest planes first and leaving mid-value negative zones for petal separation. A common mistake is asking for uniform dark petals that lose shape by year two. Schedule the session as two passes to allow the skin to settle, and plan a touch-up at the six to twelve month window. For styling, pair with short sleeve linen shirts that keep the outer arm visible without constant sun exposure.
11. Victorian Keyhole with Hidden Script on Inner Wrist
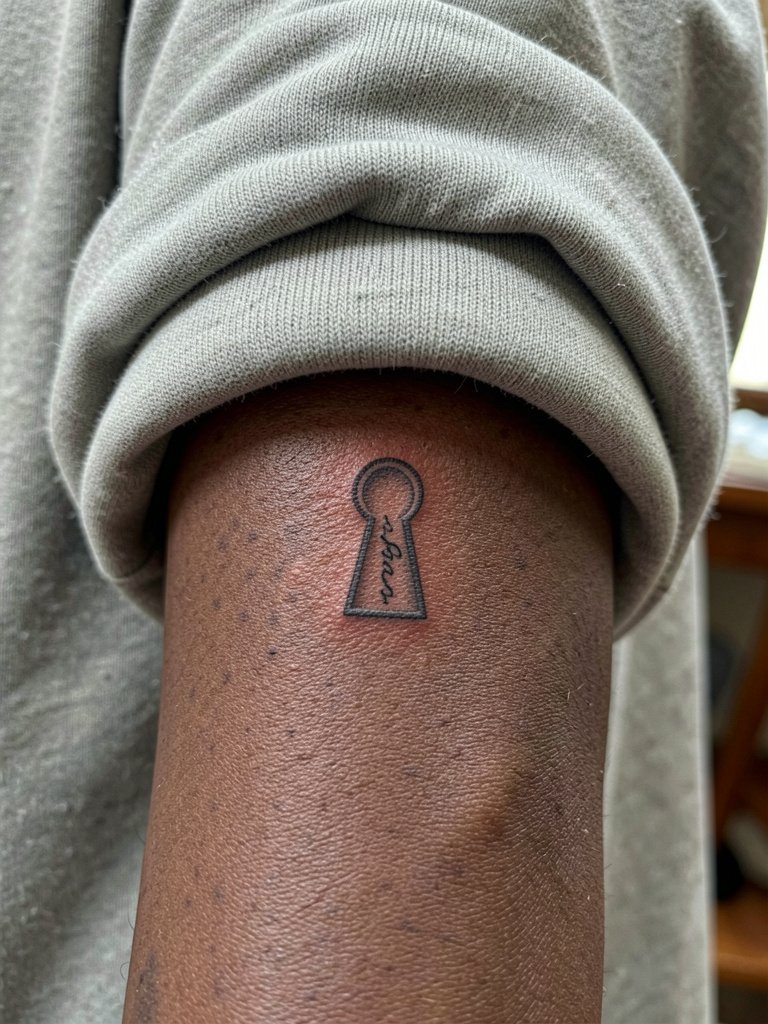
Hidden script needs exact lettering because tiny cursive often becomes unreadable. Provide the exact text and ask the artist to show how each letter scales to the final size. The inner wrist is high friction and may require a touch-up within the first year for fine scripts. Session time is short but sensitive. Show it off with thin chain bracelets that sit beside the keyhole rather than across it.
12. Neo-Victorian Map Fragment on Outer Forearm
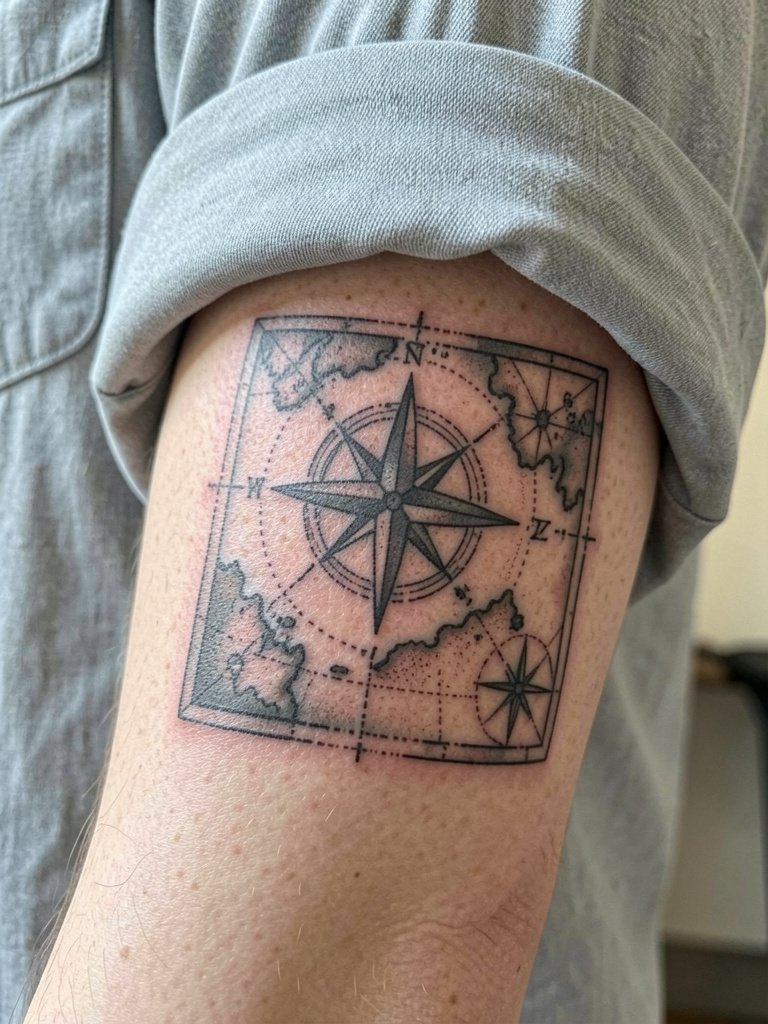
Map fragments work well when the lines are slightly heavier than you expect because the forearm sees sun and abrasion. A frequent error is packing contour lines too close. Instead, ask for bolder primary contours and reduced inner detail. The outer forearm is low to moderate pain and a two to three hour session typically covers the piece. For travel-friendly show-off outfits, choose rolled cuff denim jackets that let the map sit visible on the arm.
13. Stained Glass Window Panel with Dark Leadwork on Upper Arm
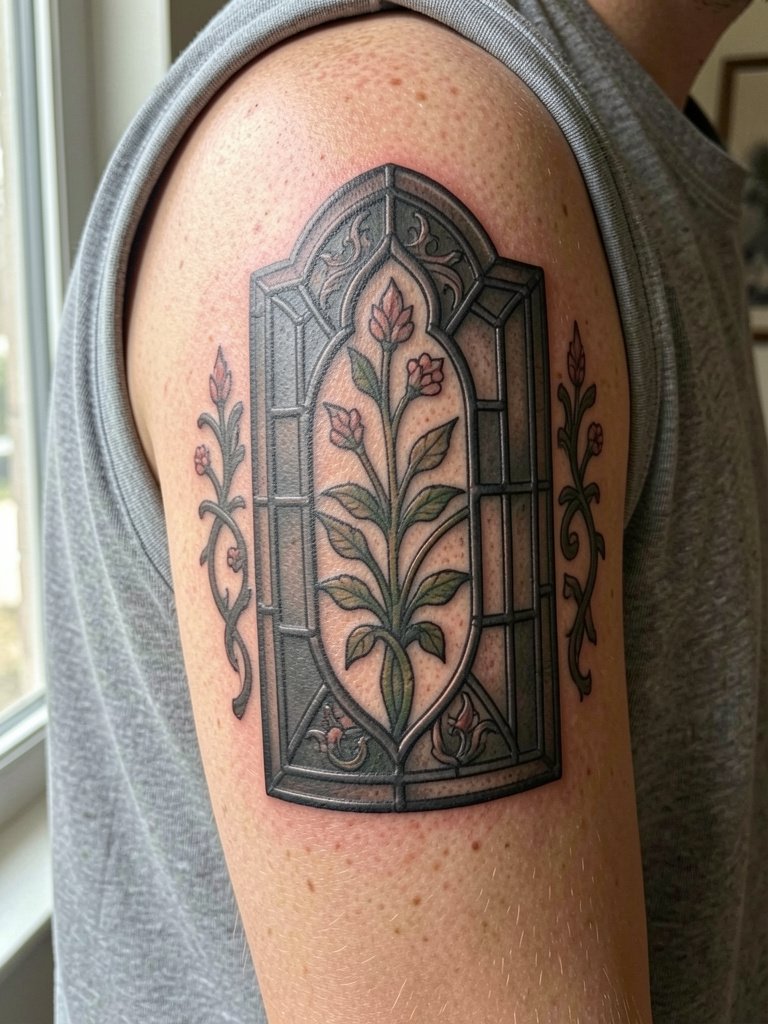
Stained glass motifs rely on lead-like outlines, so prioritize thicker leadwork for longevity. The common mistake is attempting watercolor fills without enough outline contrast, which makes panes bleed into each other. Discuss the pane sizes and how they align with muscle curvature during the consultation. Session time is moderate and often done in one long block if you tolerate sitting. For visibility, wear tank tops with wide straps that keep the shoulder framed.
14. Victorian Mourning Tree with Falling Leaves on Full Sleeve Transition
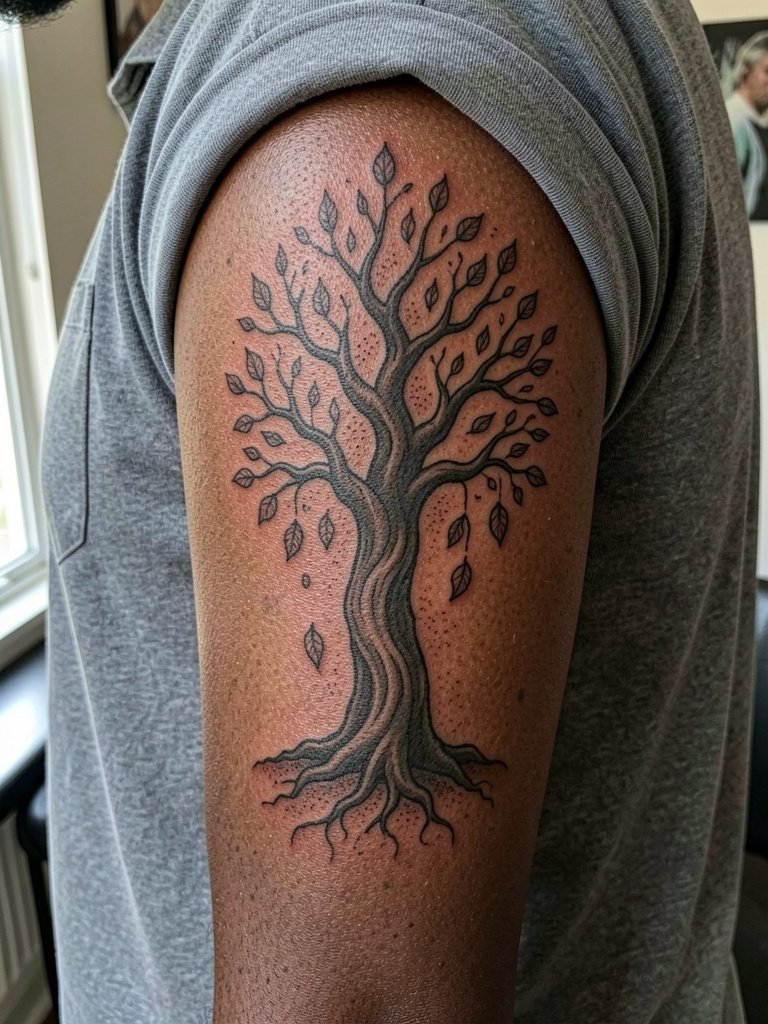
Sleeve transitions can split artists into camps. One group favors heavy black trunks and simplified leaves to ensure long-term readability. Another group layers fine leafwork and micro shading for texture and accepts that small touch-ups may be needed. Make your priorities clear in the consultation and have the artist mock the transition zones on your arm so you see how the piece reads at distance. Large sleeve passes are longer sessions and often scheduled across multiple appointments. For fitted looks pick long sleeve cotton shirts with slight stretch that sit comfortably over a healing sleeve.
15. Neo-Gothic Angel Wing Span on Upper Arm and Shoulder
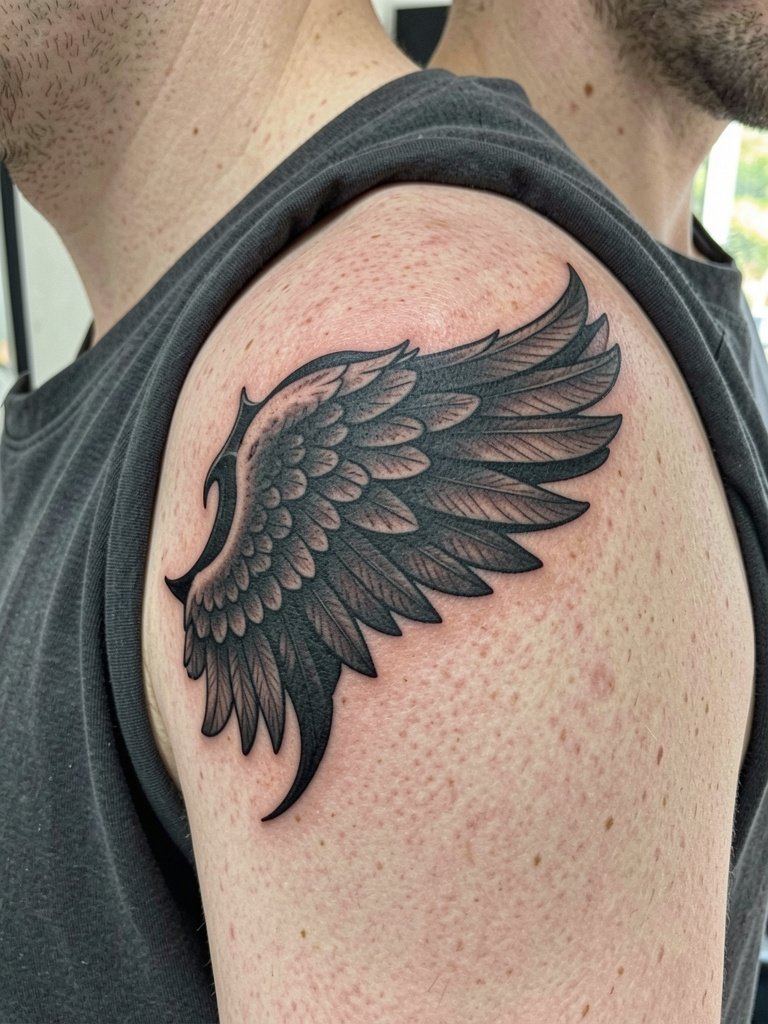
Feather textures need layered contrast so they do not collapse into one dark plane. A common error is keeping each feather too thin which makes the wing lose depth. Ask the artist to plan heavier quill anchors and softer feather tips, and to map how the wing meets the shoulder contour. Shoulder sessions often feel like low to moderate pain and can be completed in two to three hours per pass. For wardrobe pick wide neck tees that let the shoulder sit visible without rubbing.
16. Gothic Lantern Chandelier Down the Tricep
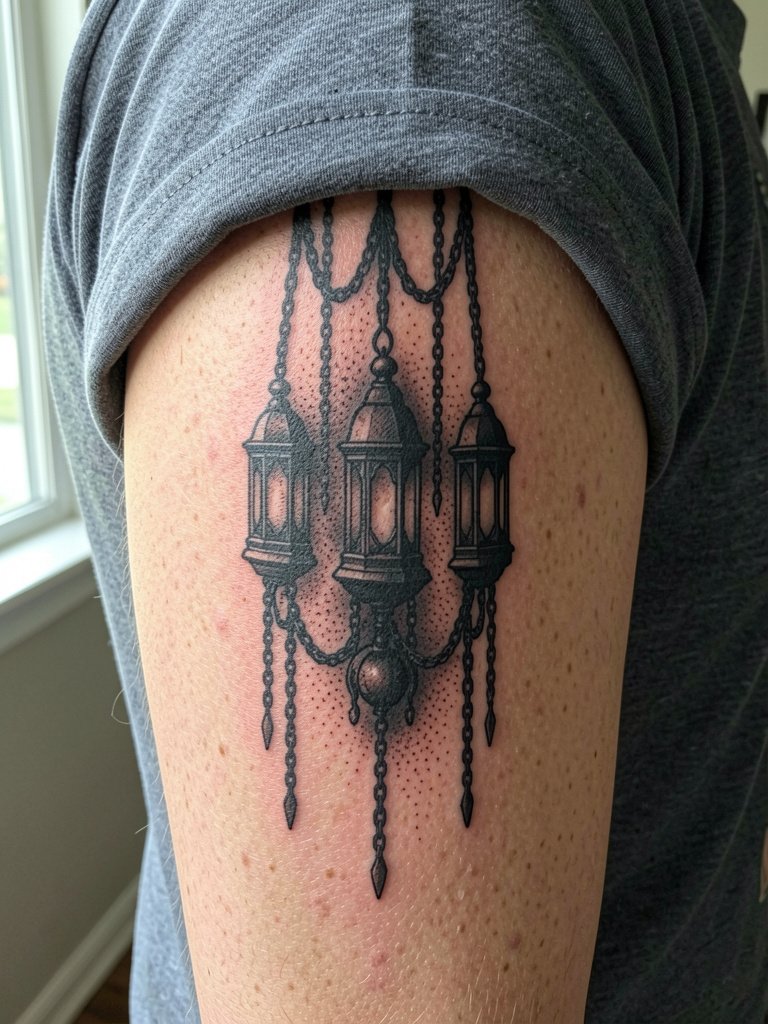
Vertical tricep work reads well if the lanterns are sized for distance. Mistakes happen when elements are too small and blend into muscle motion. Ask for clear scale mock-ups and a layout that keeps focal lanterns spaced at least two finger widths apart. Tricep sessions are moderate pain and can be stacked into a single long appointment. Show-off outfits like short sleeve button-downs let the chandelier remain visible.
17. Victorian Mirror Frame with Shadowed Reflection on Inner Arm
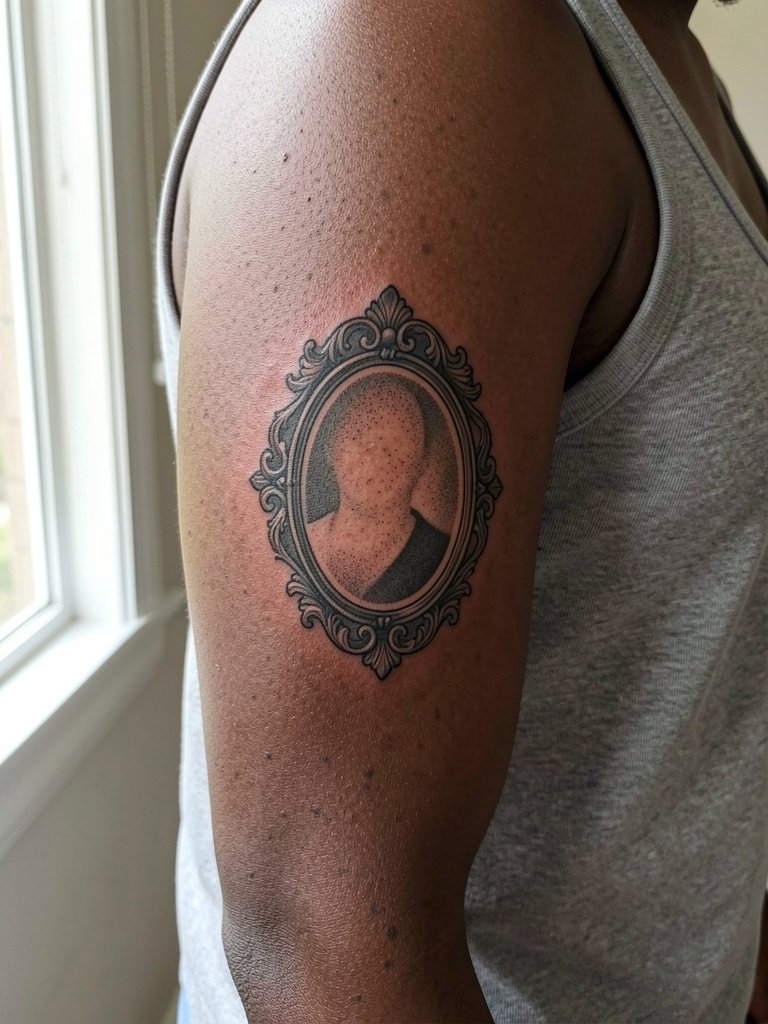
Inner arm mirror pieces need composition that avoids the armpit crease. A frequent problem is placing the reflective detail too close to the axilla, where motion distorts the image. During consultation have the artist place the stencil while your arm is relaxed and while slightly abducted so you can see the mirror orientation. Inner arm work is medium pain and benefits from two shorter passes. For evening wear use sleeveless dresses with modest straps that reveal the inner arm without friction.
18. Victorian Compass Rose with Barbed Frame on Outer Wrist
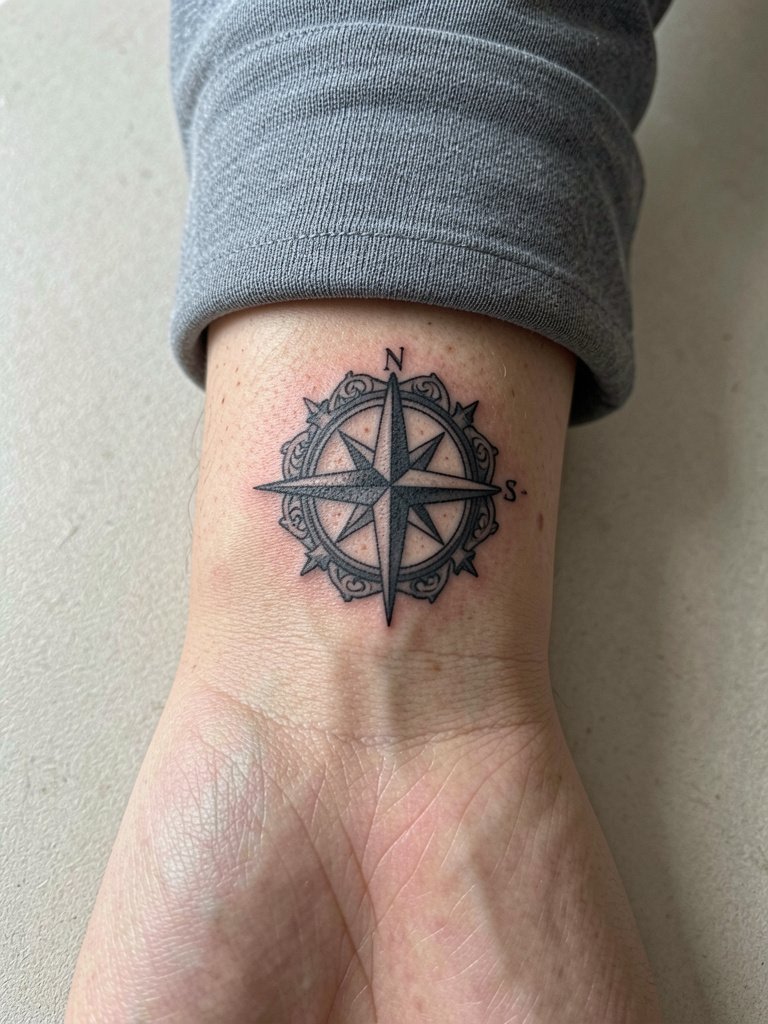
Wrist placements near bony landmarks need bold center anchors. Small needle compass points often lose crispness. Ask for a strong central dot and slightly thicker directional points, and ask to see the stencil alignment when your wrist is supinated. The wrist is sensitive and a short session may still feel sharp. For accessories choose minimal leather bands that rest beside the compass after healing.
19. Ornamental Gargoyle Bust on Upper Arm Cap
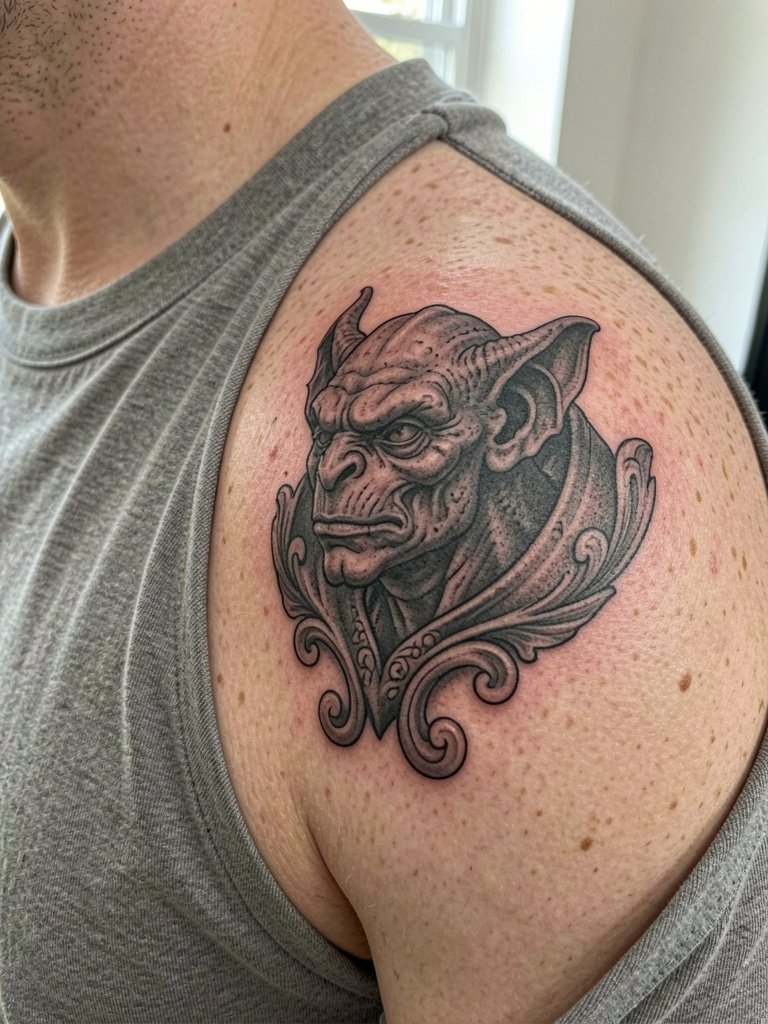
Deltoid caps hold heavy blackwork well if the composition respects muscle curvature. A common mistake is crowding detail too close to the shoulder seam where movement blurs texture. Ask the artist to plan negative zones near the seam for breathing room. Shoulder work is low to moderate pain and usually wrapped into a single session. For formal looks pair with wide neck blouses that expose the bust elegantly.
20. Victorian Botanical Sprig Sleeve Connector on Inner Elbow
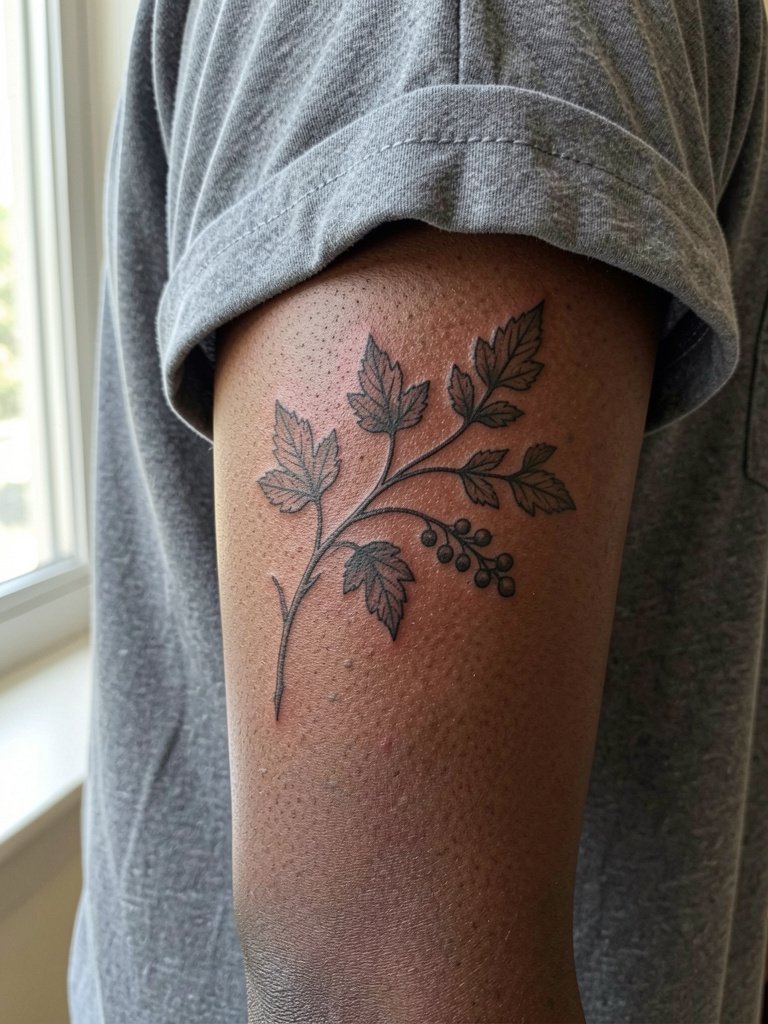
Connector pieces over the inner elbow must avoid placing focal lines across the crease. The typical error is aligning a stem exactly on the bend which causes distortion. Request that the artist map the sprig length on both flexed and relaxed poses so the berries sit off the crease. Inner elbow sessions are notably sensitive and benefit from short breaks. For comfort in the chair wear loose sleeves you can roll easily without pulling at the elbow area.
21. Victorian Rose Window Half-Sleeve With Negative Space
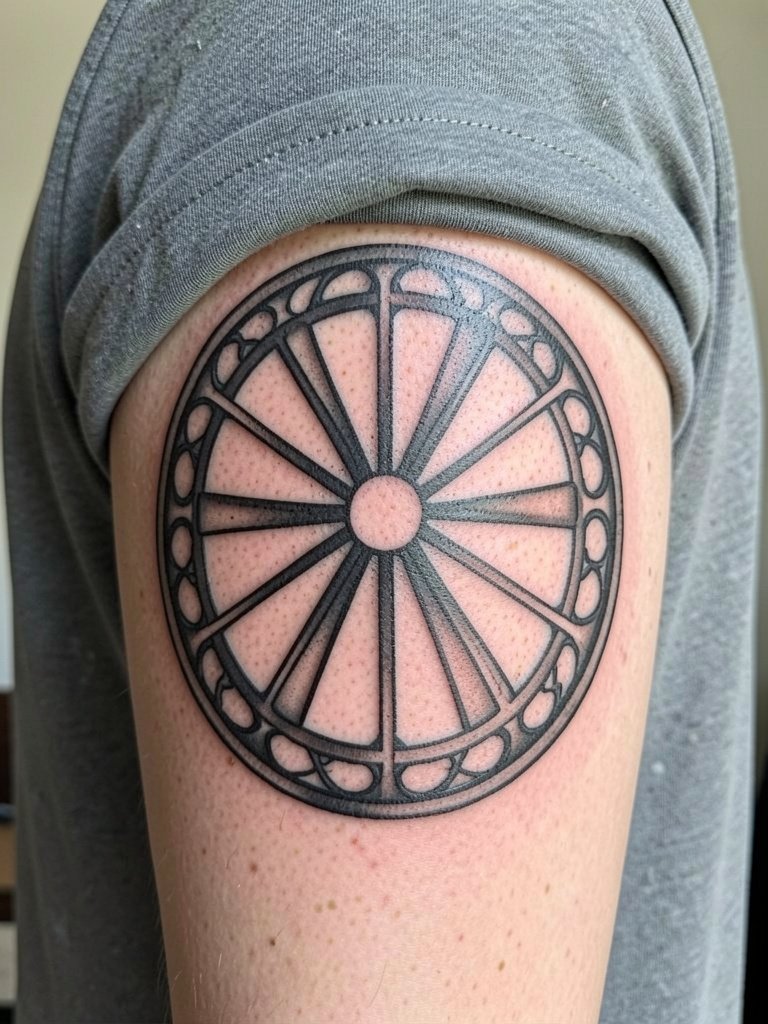
Negative space is your ally when you want the window effect to read from a distance. A mistake is over-filling panes which reduces the radial clarity. Ask for a mock stencil with the negative panes shown as skin tone placeholders so you can confirm balance. Sessions vary depending on coverage and may be split across appointments. For showing it off pick short sleeve fitted tees that poke a clean frame around the half-sleeve.
22. Victorian Heart Locket with Micro-Engraving on Forearm
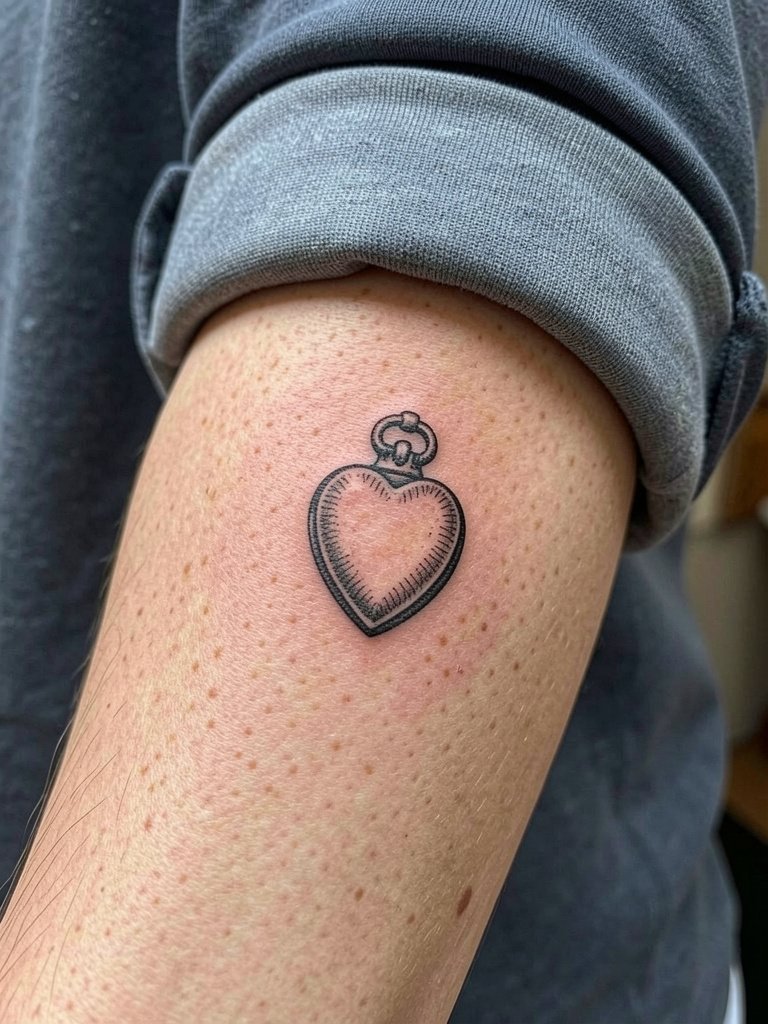
Micro-engraving looks elegant but it is fragile. To preserve the lettering ask the artist to thicken the key engraving strokes just enough to maintain clarity at arm distance. Small locket pieces often need a touch-up at the one year mark if you are hard on your hands. Session time is brief. To complement the piece choose thin pendant necklaces that sit above the forearm and balance the locket visual.
23. Full Sleeve Composition with Victorian Motif Bands and Anchors
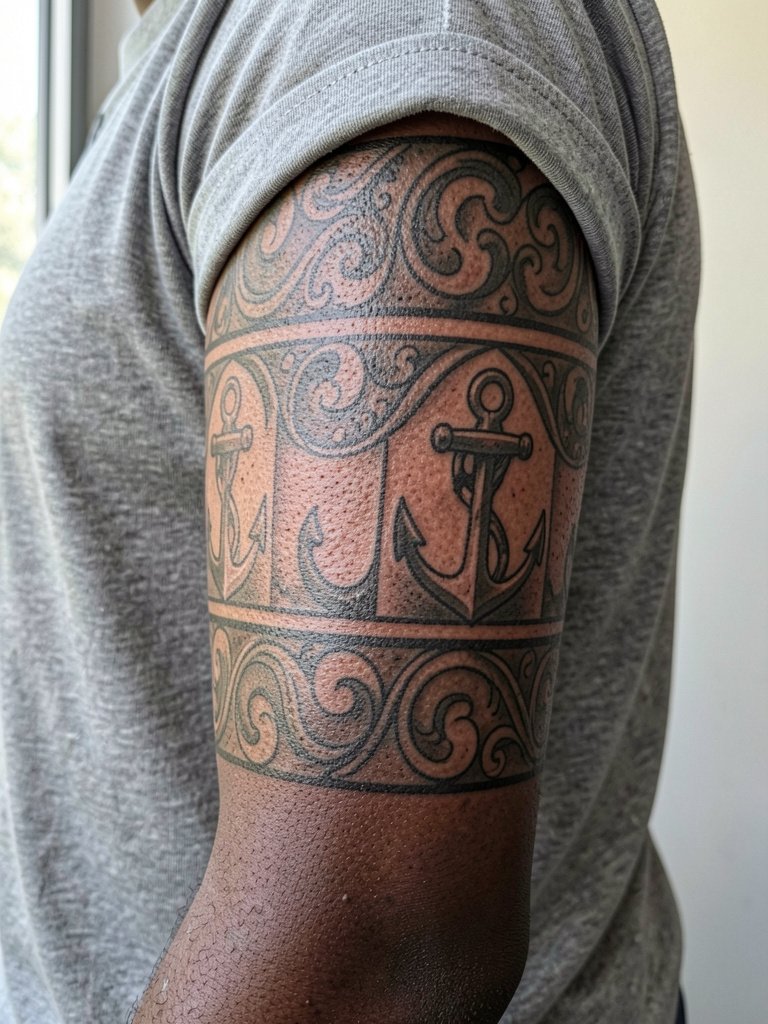
For a cohesive full sleeve, define strong anchor bands that carry the visual weight across the arm. A common mistake is stitching disparate small pieces together without heavier connectors which makes the sleeve read busy. During the consultation map the anchor bands and decide which panels will be bold and which will be textural. Expect multiple long sessions and plan for touch-ups at the one-year and three-year marks. For final reveals pick short sleeve tailored shirts that let the arm read as a single composition.
Frequently Asked Questions
Q: How do these Victorian gothic styles age compared to single-needle filigree?
A: From what I have seen, bold black anchors and deliberate negative space keep their character longer than ultra-fine single-needle filigree. Single-needle pieces can look fragile in year two and often need touch-ups. Plan thicker primary lines for anchor elements and keep filigree slightly simplified if longevity matters more than micro detail.
Q: Are there placement-specific pain and touch-up expectations for sleeve work?
A: Yes. Expect elbow and inner elbow areas to be the most sensitive and the outer shoulder to be least sensitive. Touch-ups are common at the one-year mark for high-friction zones like wrists and hands. Break larger sleeves into multiple sessions so the skin heals between passes and the artist can plan touch-ups where pigment settles unpredictably.
Q: How can I find portfolios and healed examples for dark Victorian gothic sleeves without naming artists?
A: Try searching social platforms with targeted hashtags and keywords such as #DarkVictorianTattoo and #GothicBlackwork, and use location filters to find nearby shops. Look for healed galleries and tagged posts that show work at least one year old. Reddit tattoo threads and portfolio aggregators often surface healed shots across skin tones.
Q: Do cultural or religious motifs in Victorian ornamentation require special sensitivity?
A: Yes. If your design borrows from cultural iconography, state that you want respectful adaptation and ask about provenance of motifs. Many artists will suggest alternatives or simplified motifs to avoid appropriation. Be prepared to adjust imagery to honor origin and context.
Q: What should I wear on session days for these placements?
A: Wear clothing that gives easy access to the exact placement without pulling or stretching fabric. For inner arm work use a loose tank top. For shoulder and outer arm work wear a wide neck tee. For lower arm and wrist work choose clothes that roll up easily. Bring layers in case the studio is cold.
