
The smallest, cutest tattoos that actually look like themselves five years later are rarely the wispiest, single-needle pieces you saved from Pinterest. Tiny florals, simple celestial clusters, and small black silhouettes read better when lines have a touch of structure and when placement avoids constant friction. Below you'll find expert-friendly ideas and the exact wardrobe and session tweaks that help each tiny design last and photograph well.
1. Tiny Fine-Line Flower Cluster on Inner Forearm
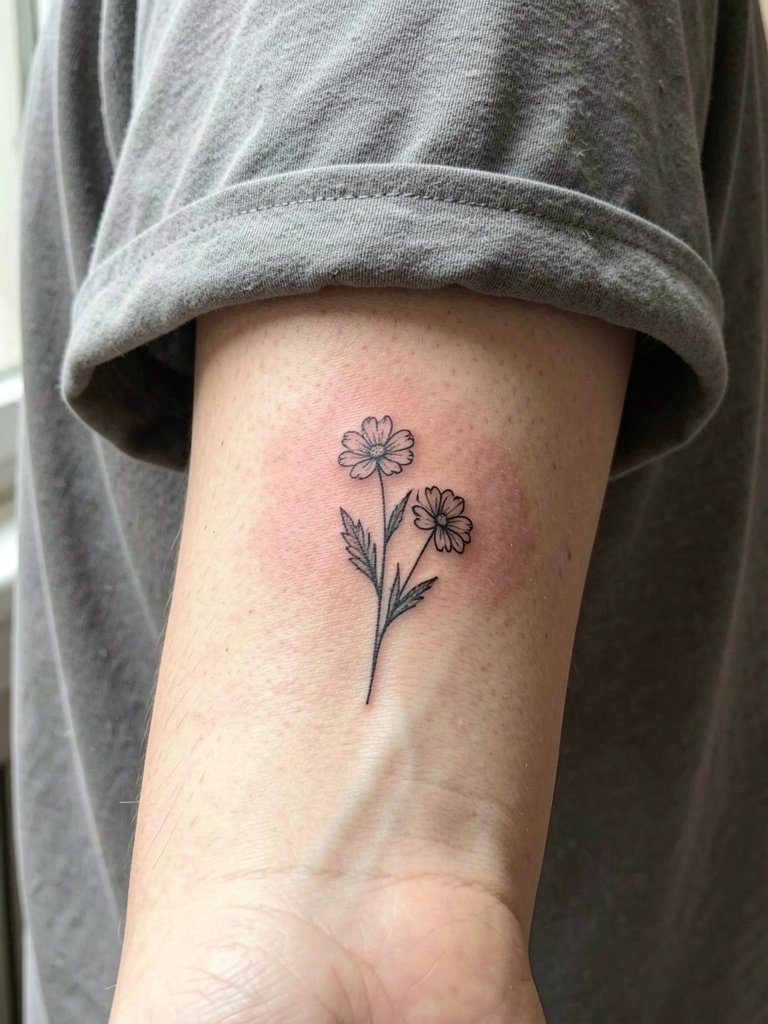
Fine-line flower clusters read soft but need enough space between petals to stay readable as the skin moves. Best for a single-session appointment of about 30 to 60 minutes on the inner forearm. Pain is low to moderate and most people are surprised by how fast the session flows. A common mistake is asking for lines that are too thin for the wrist or high-motion forearm, which causes blurring over time. For longevity, ask for slightly stronger primary stems and lighter interior detail so the silhouette holds up at six months, two years, and beyond. This placement pairs nicely with a rolled-cuff linen button down for show-off days and a loose sleeve for the session, try linen button down women.
2. Minimal Daisy or Wildflower on the Wrist
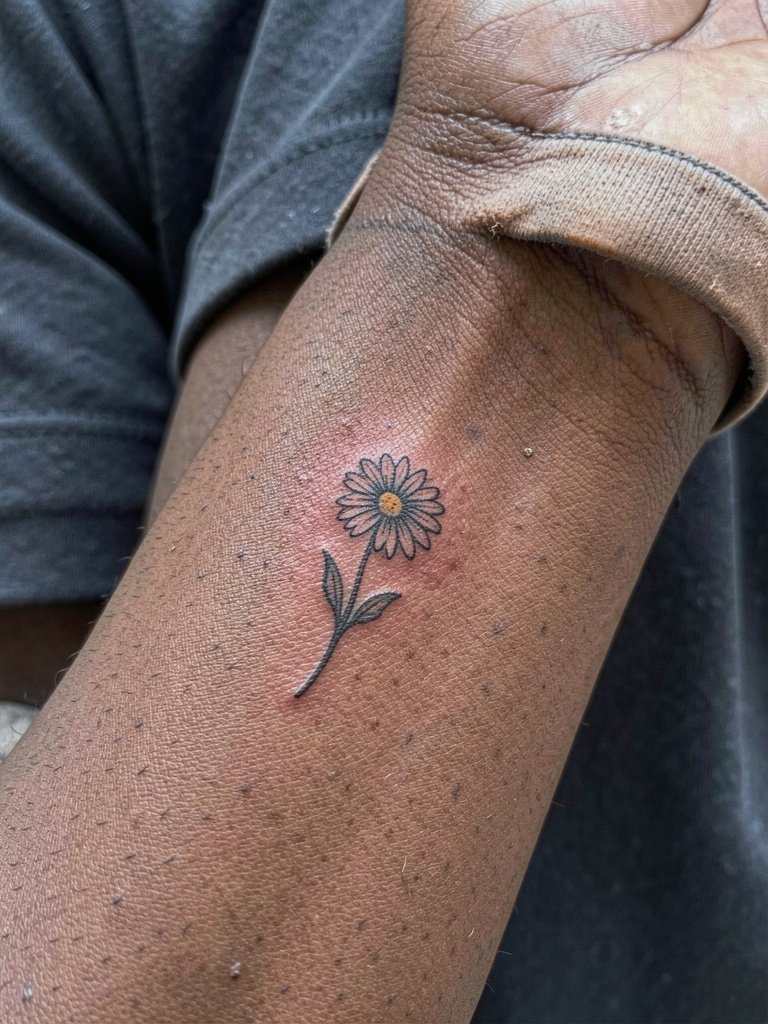
Wrist placements take friction from watches and bracelets, so a tiny daisy is a strong choice if it has a clear silhouette. Session time is short, under 45 minutes, but the area heals under movement so plan for a touch-up possibility after one year. One common error is requesting ultra-fine petals that disappear when jewelry rubs across the spot. For showing off, balance the wrist tattoo with a slim watch on the opposite wrist or a single dainty bracelet on the non-tattoo hand. For the appointment, wear a short-sleeve top so the artist has clear access and consider a dainty bracelet set on the other wrist.
3. Small Celestial Cluster on the Collarbone
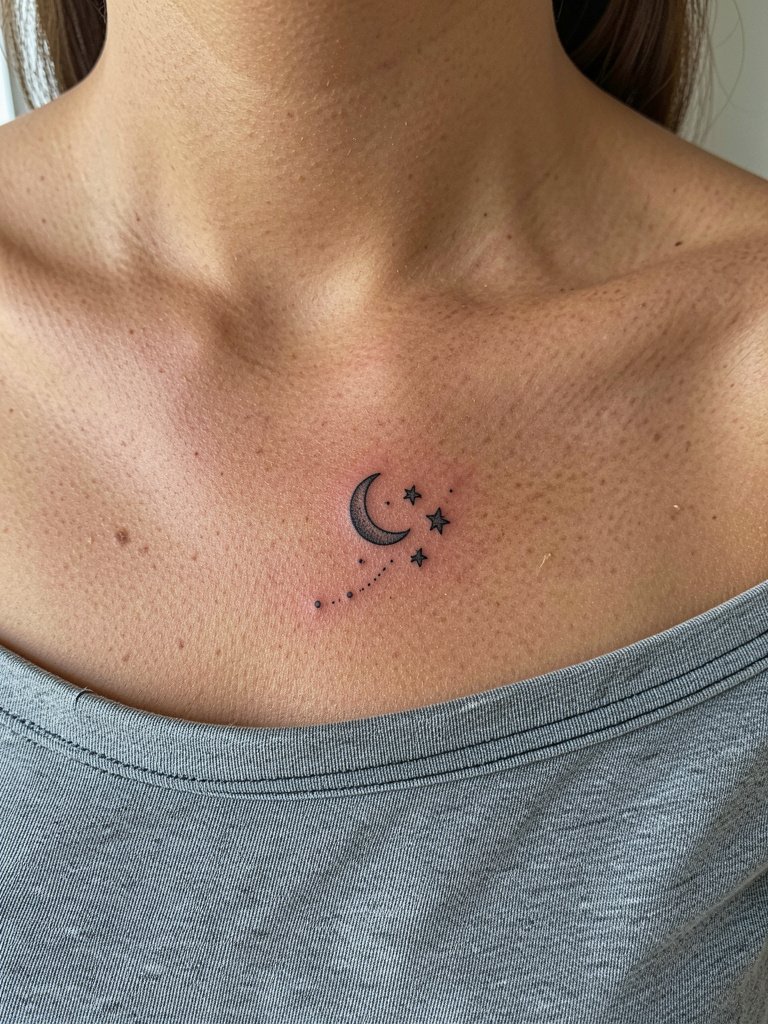
Collarbone clusters read as elegant and photograph well with off-shoulder or scoop-neck tops. Plan a short session under an hour. The area can be sensitive for some people because the bone sits close to the skin, but most clients rate it as tolerate-able. A typical mistake is packing too many tiny stars into a cramped space, which makes the motif look like freckles when it settles. For showing the piece, pair with layered chain necklaces that leave the tattoo clear, and wear a off shoulder top women when you want it visible.
4. Snake Wrapped into a Soft Curve on the Lateral Hip
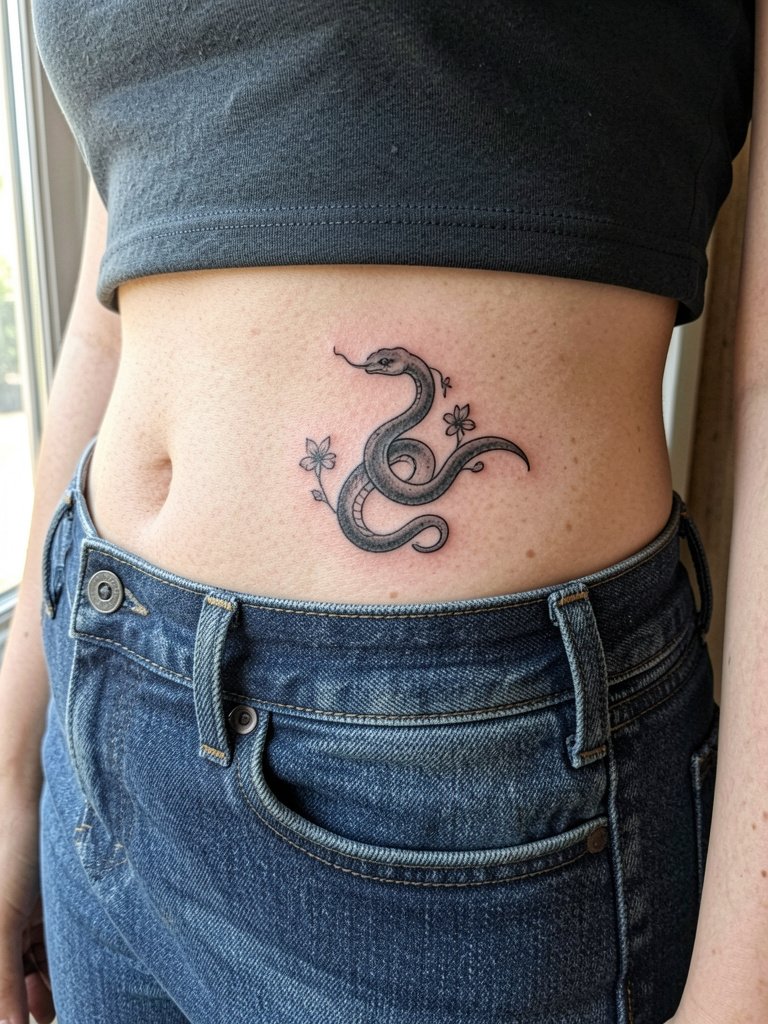
This shape flatters curves and moves with clothing, but the lateral hip faces friction from waistbands. Session time is typically one to two hours. Expect moderate pain at the hip bone edge and tender skin where the needle travels over bone. The most common error is placing ultra-thin detail right under the waistband, which leads to scabbing and blurred detail. For beach or pool showing after healing, high-waisted jeans and cropped tanks work well. For the session, wear loose-waist pants or soft shorts and test how the waistband sits so the artist can place the design just above the pressure line, try high waisted jeans women.
5. Micro-Heart Outline Behind the Ear
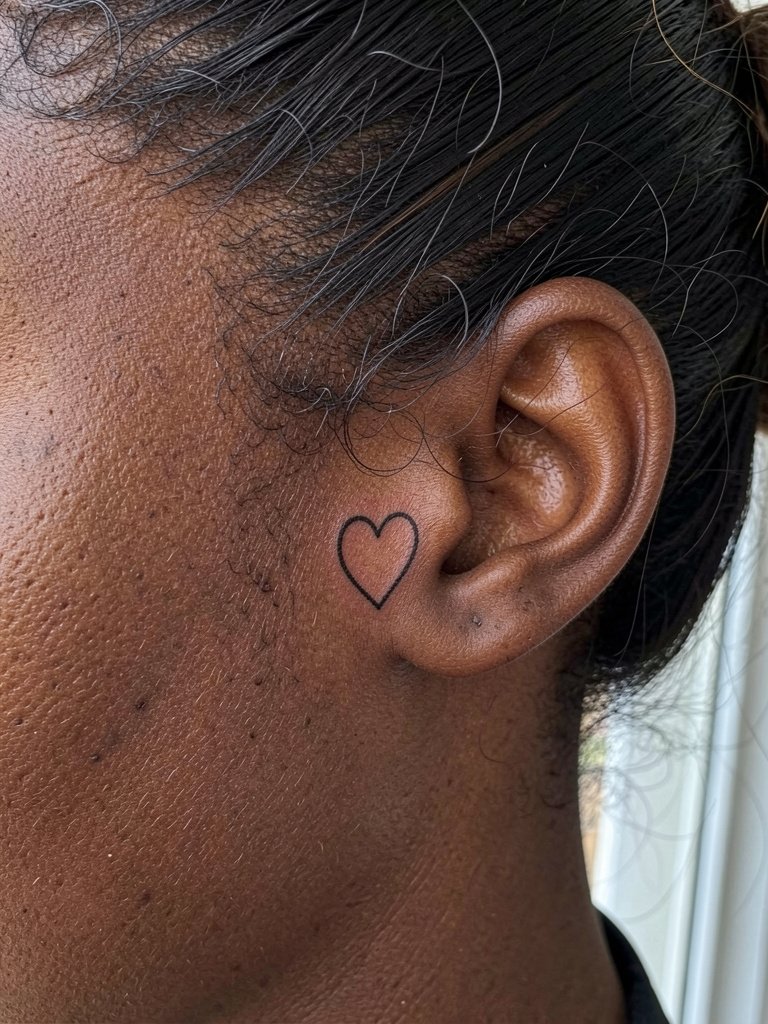
A behind-the-ear micro-heart is discreet and easy to conceal with hair down. The session is short, usually 15 to 30 minutes, and pain varies with how much subcutaneous tissue sits behind the ear. A key mistake is asking for letter-thin lines that vanish into hairline texture. This placement looks polished with hair tucked back and small hoop or stud earrings. For the appointment, pull hair away from the area and wear a top that does not rub the neck. Add small hoop earrings to frame the spot once healed.
6. Fine-Line Script Word or Date on the Inner Forearm
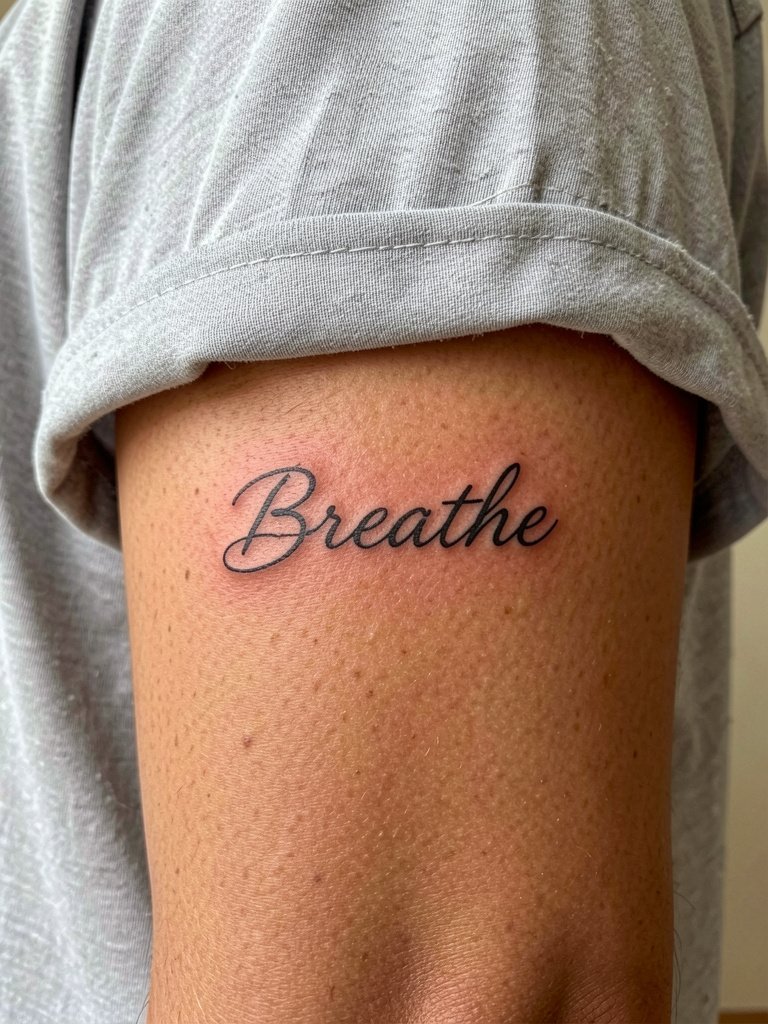
Script on the inner forearm reads well when letters are spaced and the main strokes are slightly bolder than a single-needle scribble. Plan a single session under an hour. Pain is usually low to moderate. There is a real debate on fine-line longevity. One camp says fine-line fades faster because very narrow strokes lose crispness with movement and sun. The other camp argues that slightly increased line weight and careful spacing lets script heal clean and readable for years. A common mistake is requesting minute handwriting size that looks unreadable after healing. Bring two reference sizes so you can see how the word will scale on the arm.
7. Tiny Butterfly on the Ankle
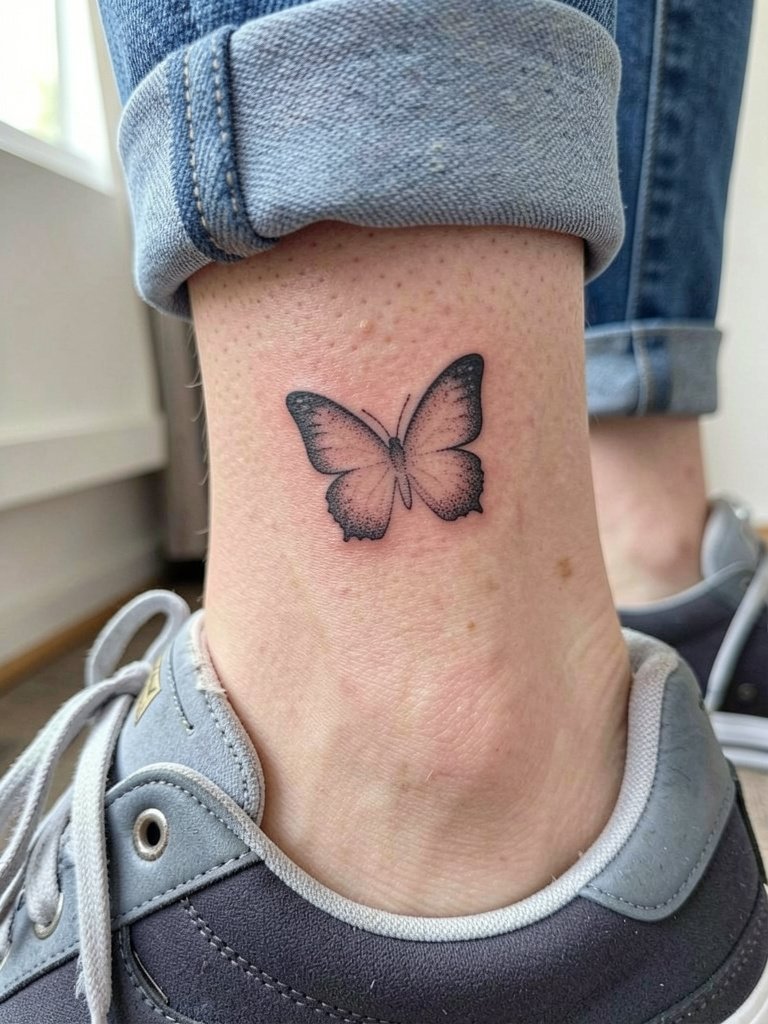
An ankle butterfly is a classic micro choice that can rub against socks and shoes while healing. Session time is brief, under 45 minutes, but expect higher touch-up rates because of constant ankle movement. The mistake many people make is placing the design on the inner ankle where shoe contact is frequent. Choosing the outer ankle or slightly above the bone reduces rubbing. For outfits, low-cut sneakers, sandals, or ballet flats show the design well. For the session, bring shoes that are easy to remove and avoid tight socks, consider low cut sneakers women.
8. Lavender Sprig on the Inner Upper Arm
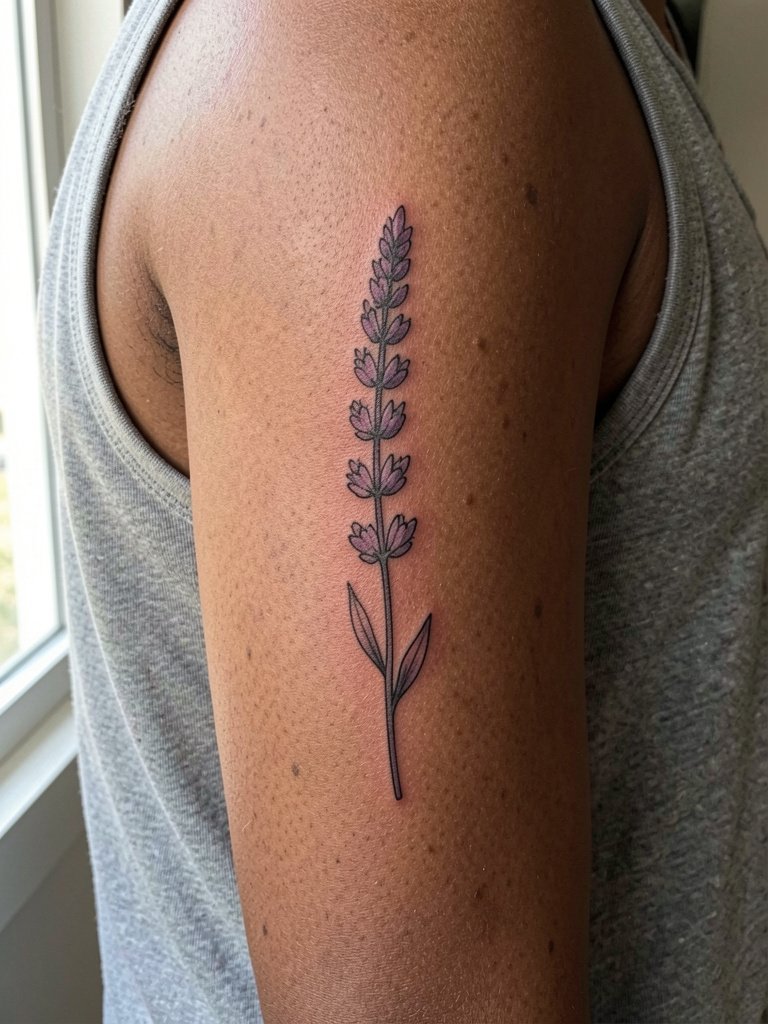
A lavender sprig reads elegantly on the inner upper arm because of its natural vertical shape. Session time is usually under an hour and pain is lower than ribs or hip. A mistake is requesting ultra-fine stems that vanish into the skin texture when you raise your arm. This spot photographs well with sleeveless ribbed tanks and pairs with muscle tees off-duty. For the appointment, wear a sleeveless top or a loose tee that lifts easily without rubbing the fresh tattoo and try ribbed tank top women.
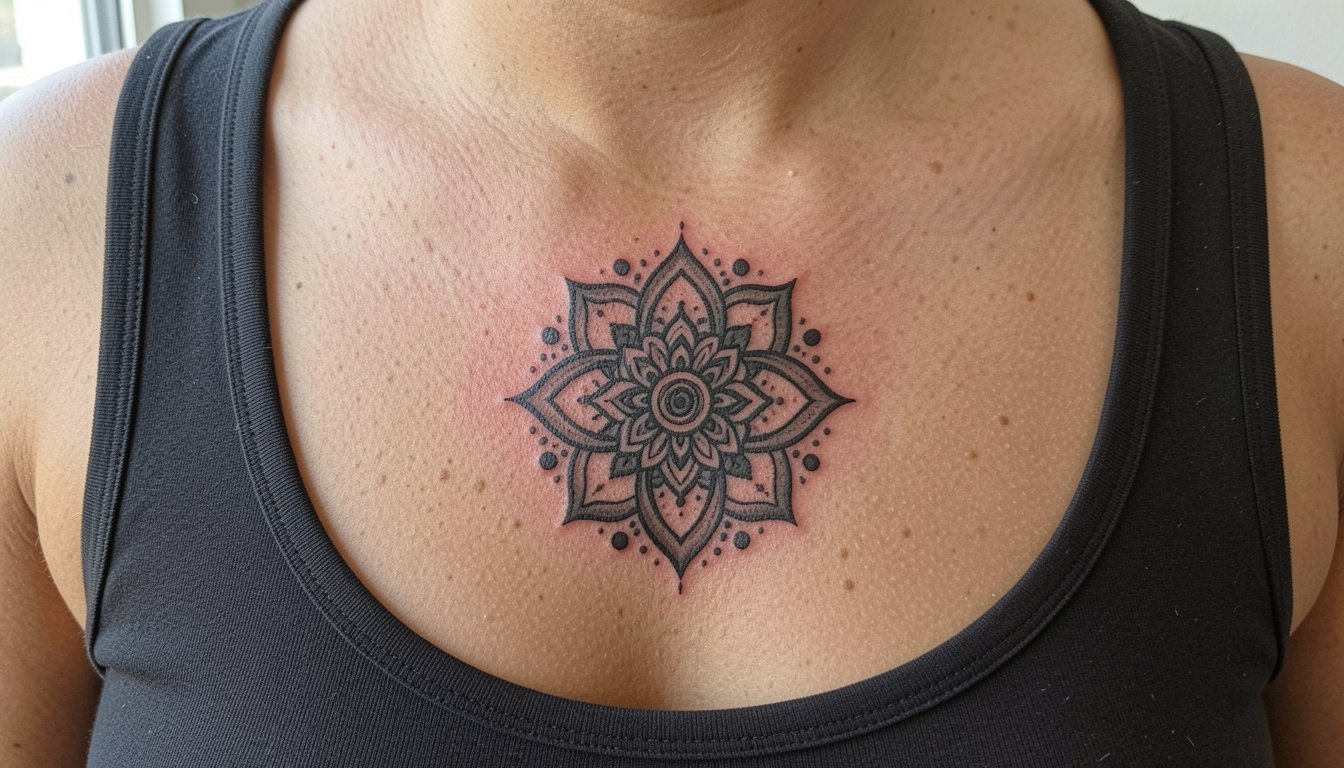
9. Ornamental Mandala Medallion Under the Collarbone
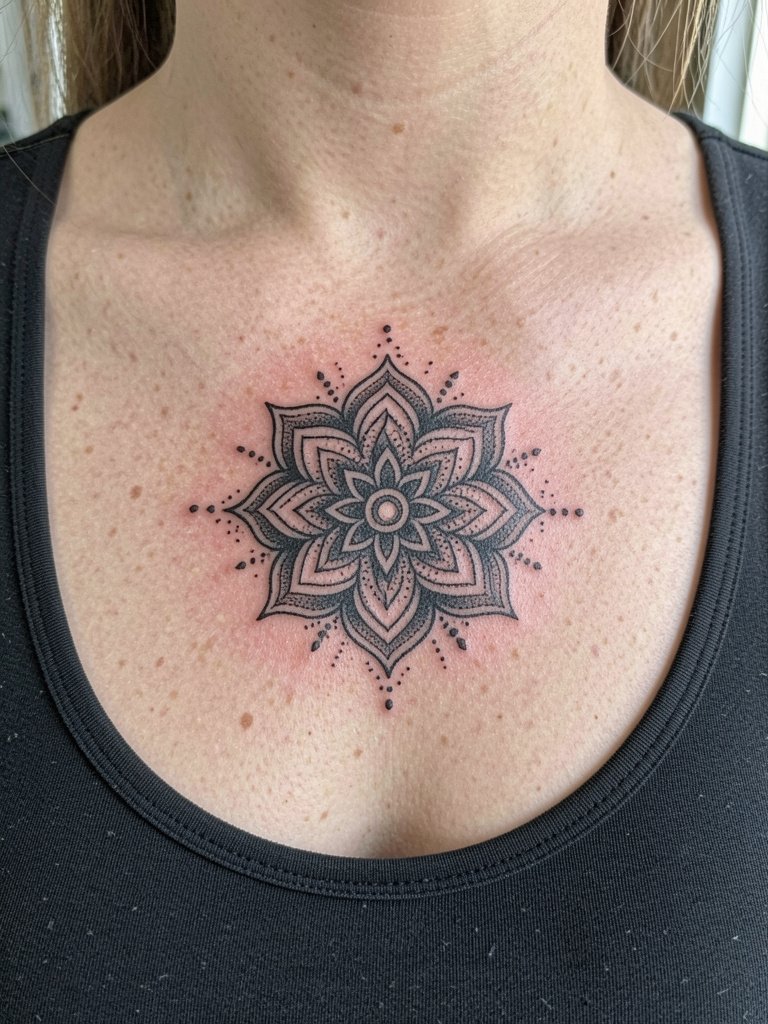
Mandala medallions scale beautifully when given room to breathe. This placement takes one to two sessions depending on detail and dotwork complexity. The sternum-adjacent skin can sting more than flat areas, and breathing control helps during shading passes. A frequent error is packing too many tiny dots into a small diameter, which muddies the pattern as it heals. For evening wear, off-shoulder tops and layered necklaces frame the piece well. For the booking day, wear a tank or strapless bra so the artist has clear access without fabric moving the area.
10. Tiny Bee or Moth on the Inner Forearm
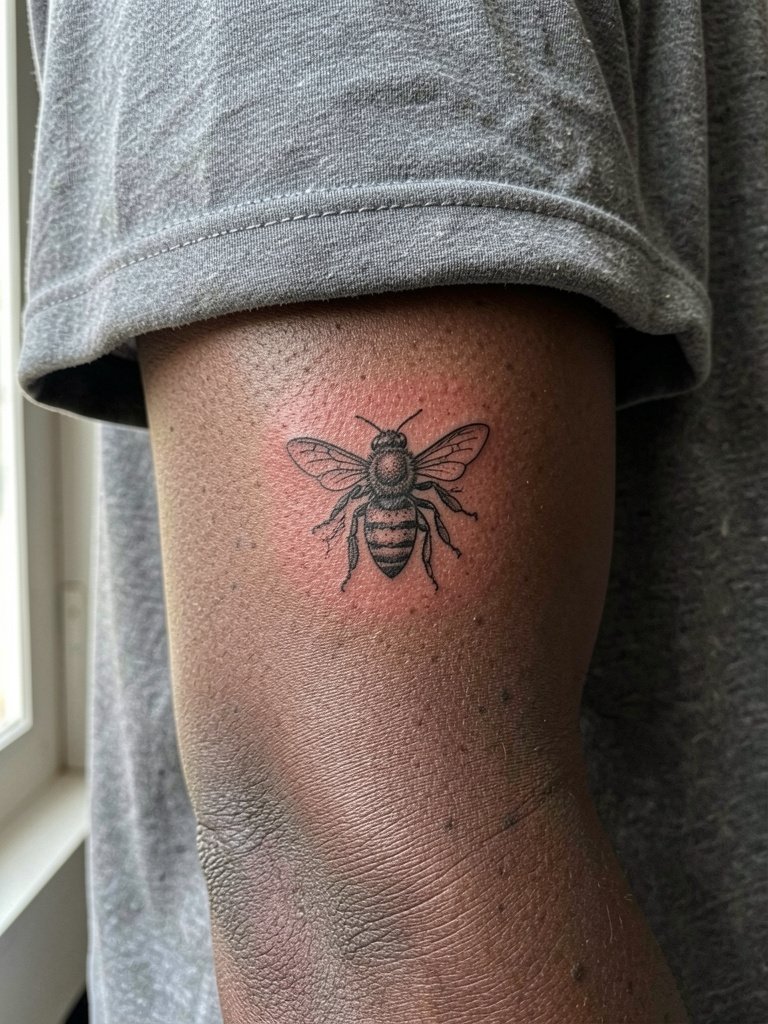
Micro insects are cute but demand crisp contour and a confident silhouette to avoid looking like a smudge later. Session time is short and the inner forearm handles the work well. There is a debate about protective bandages for tiny micro pieces. One side recommends second-skin bandages to keep friction and dirt off the fresh ink during the first few days. The other side favors light washing and air-dry approaches for clients who react to adhesive. The practical route is to know both approaches and plan with your artist based on your skin sensitivity. For styling, a thin gold bracelet on the opposite wrist balances the look, try gold bracelet stack.
11. Petite Rose on the Ribcage Side Torso
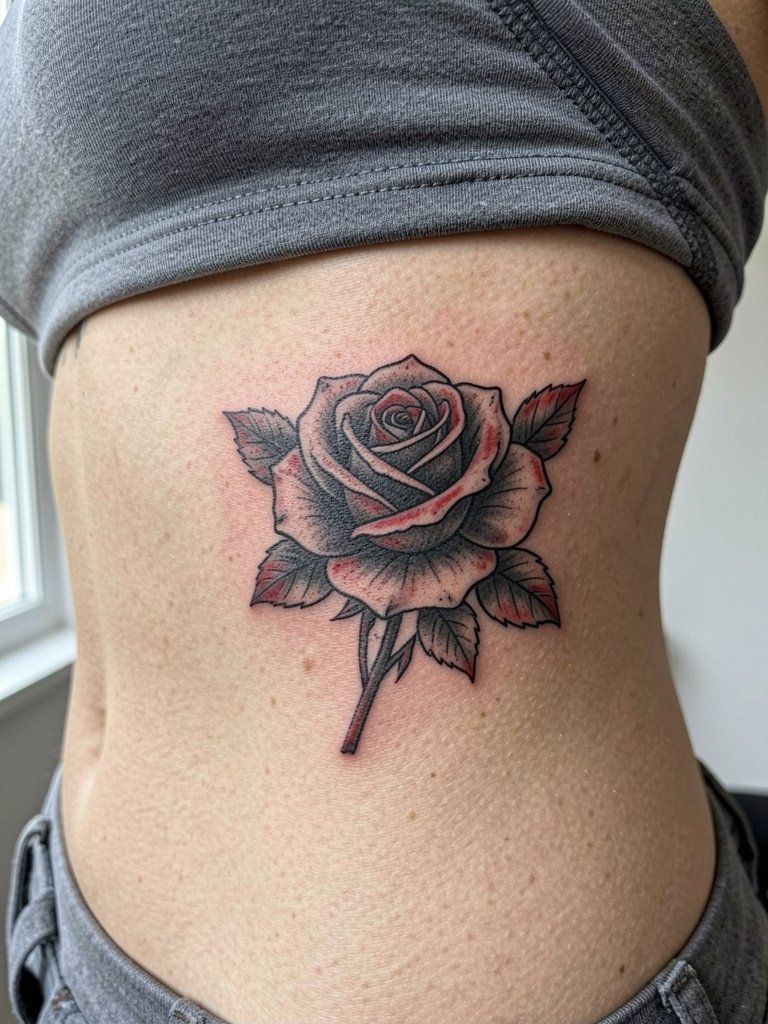
Ribcage roses can be gorgeous but ribs are one of the higher pain zones, so expect a longer session and plan breaks. The usual mistake is shrinking a detailed rose too small for the area, causing details to merge after healing. Fine-line fans need to accept slightly stronger outlines on the ribs so the flower keeps its structure. This placement pairs well with bralettes and side-cut tanks once healed. For the session, wear a loose bra or a top that does not press into the side torso.
12. Tiny Constellation or Star Trail on the Nape
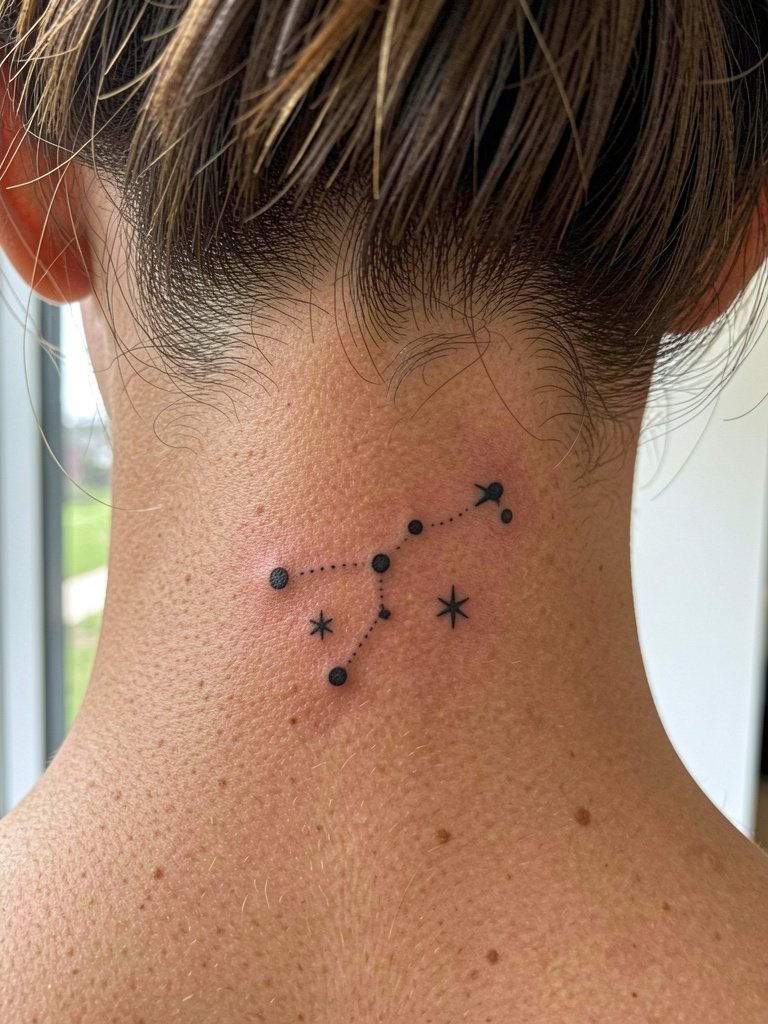
Nape tattoos are subtle and great for people who want control over when the ink is visible. The session is quick and pain is usually lower than ribs or hip. A common error is placing too many pinprick dots too close together, which reads like a faded patch after a year. For display, updos or claw clips show the motif cleanly. For the appointment, bring hair ties and clips so the artist can see the area, and consider claw clip women.
13. Minimal Vine or Olive Branch on the Outer Upper Thigh
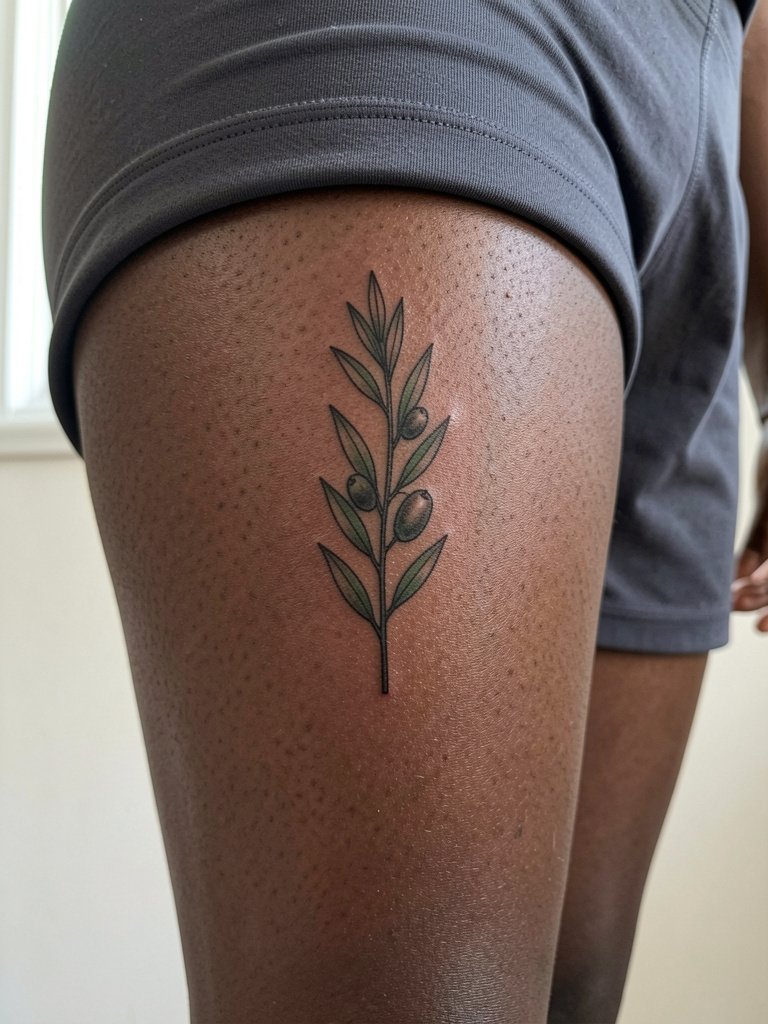
Outer thigh pieces let you choose privacy and scale. The shape follows the leg and looks great in longer, vertical compositions. Session time can be under an hour for a narrow branch. A common mistake is placing the branch across the hip crease, which causes movement distortion over time. For showing off, bike shorts and high-slit skirts frame the area well. For the booking day, wear loose shorts or something the artist can lift without pressure on the skin, try bike shorts women.
14. Medusa Portrait in a Simplified Feminine Style on Upper Arm
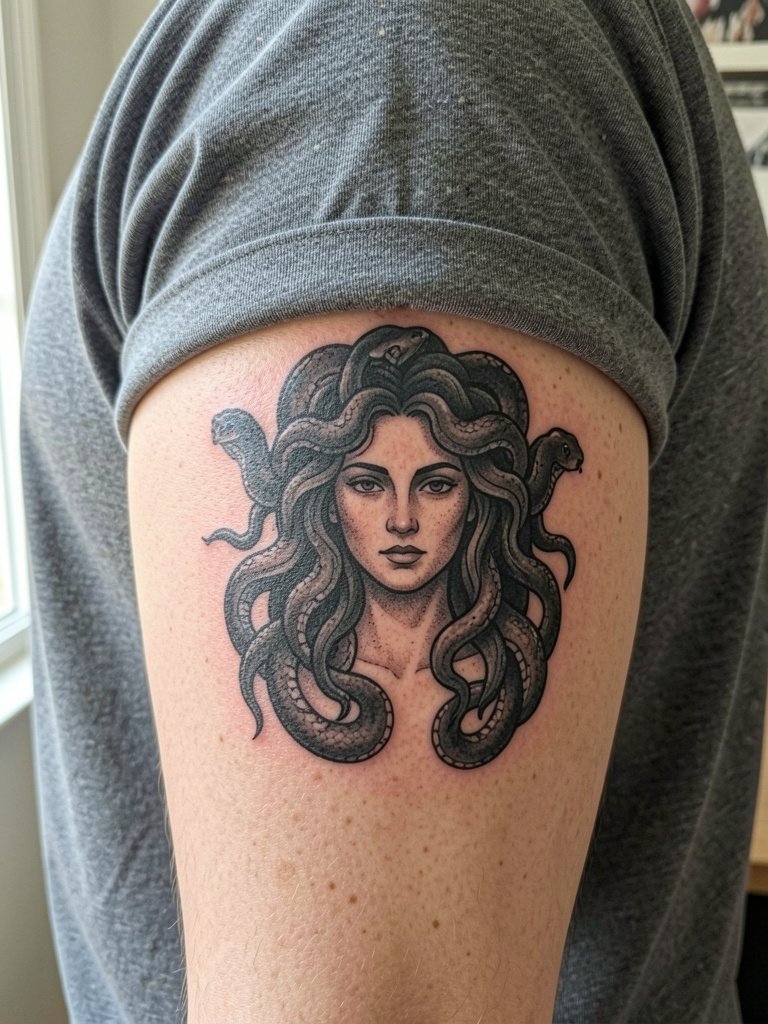
Medusa portrait pieces read as empowerment motifs and benefit from bold blackwork and clear facial planes to avoid muddiness over time. Sessions range from one to three hours depending on detail and shading. This subject sits in a space where style and symbolism meet, so bring reference images for facial angle and snake flow. Portraits that are too small will lose facial clarity within a year. For casual showing, rolled sleeves or sleeveless tops work best and the outer upper arm tolerates bold linework well.
15. Minimal Mountain Range on the Wrist or Forearm
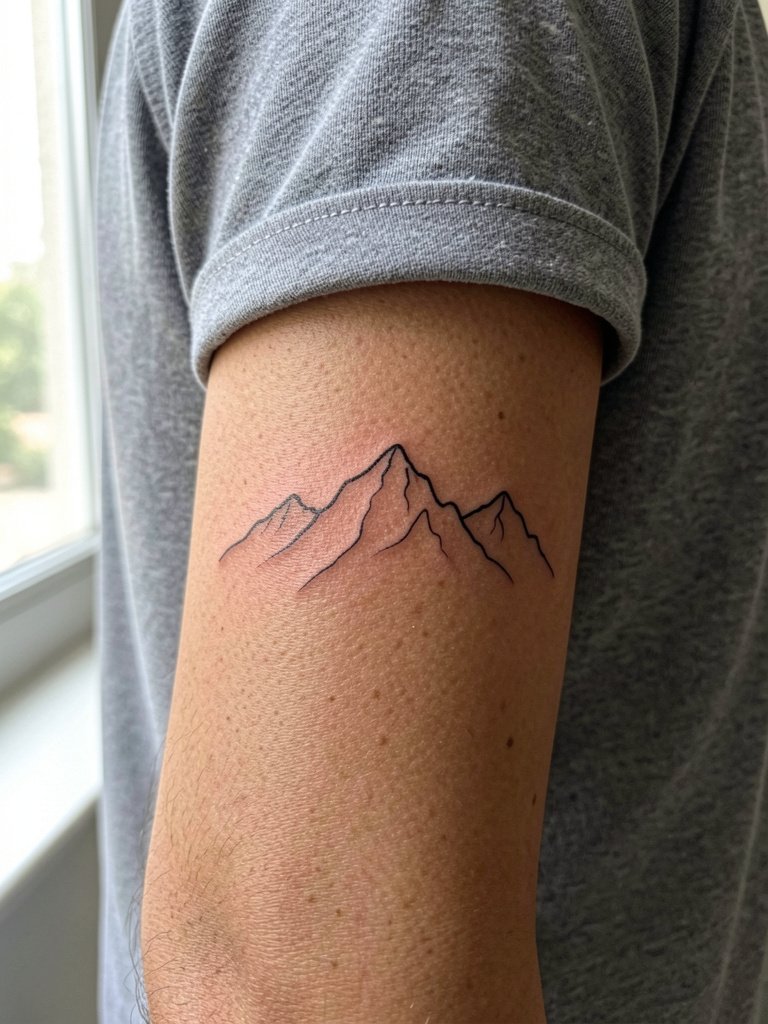
A single-line mountain range gives a subtle landscape vibe and works best when not scaled too small. Expect a short session under an hour and mild discomfort on the wrist. People often ask for hairline continuity that vanishes as the skin moves. Instead, choose a slightly bolder primary line and keep smaller peaks as negative space. This design looks great with rolled-cuff shirts or a casual watch on the opposite wrist.
16. Tiny Paw Print on the Ankle or Inner Wrist
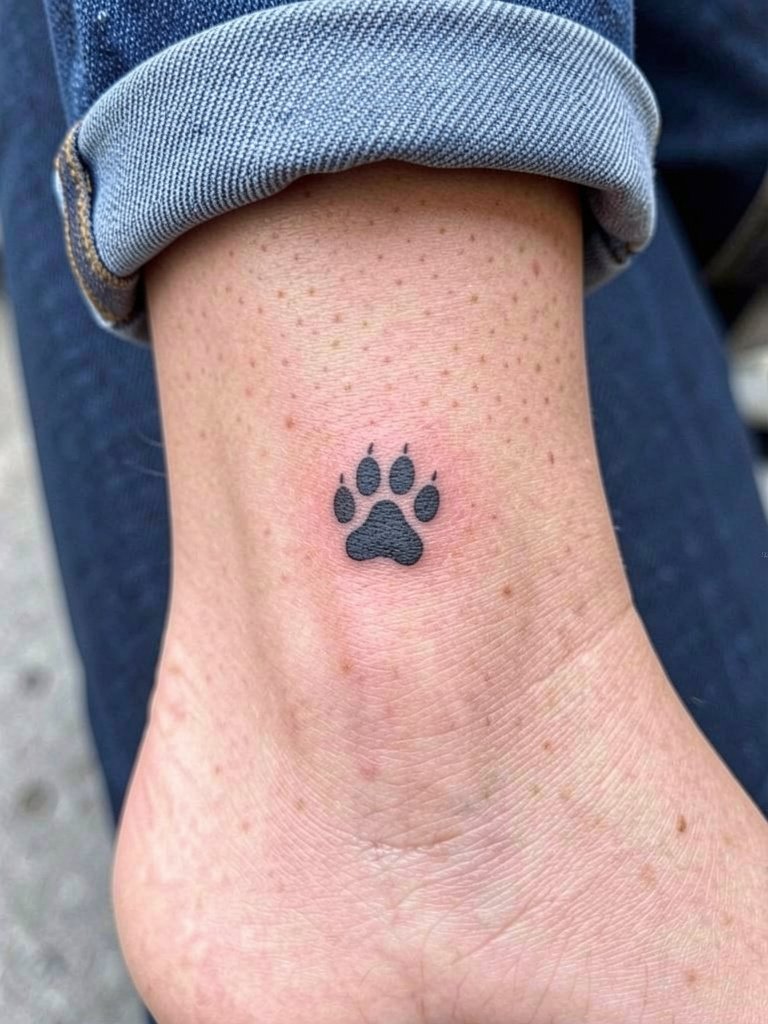
Paw prints are a timeless micro option for pet lovers and photograph well when sized for the chosen placement. Sessions are very short and pain depends on placement. The common error is making the print so small that detail disappears with time. For the ankle, expect more touch-up needs due to shoe rubbing. For showing, low-cut sneakers or sandals highlight the ankle print. For wrist placement, balance with a minimalist watch on the other wrist, try minimalist watch women.
17. Crescent Moon Behind the Ear or Near the Collarbone
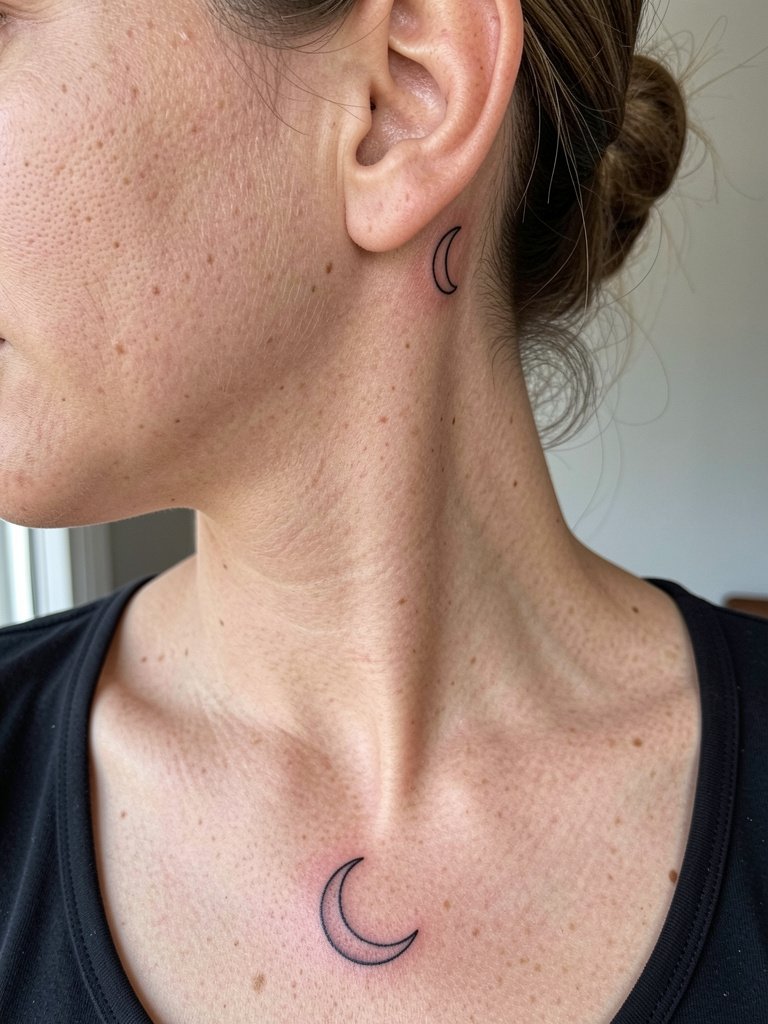
A crescent moon is versatile and small enough to be a secret or a show-off. The session is quick and pain varies with placement. The main mistake is asking for micro-thin crescents where hairline texture makes the curve look patchy later. Pick a slightly solid crescent for durability. Behind-ear moons pair with small studs and a tucked hairstyle, while collarbone moons look great with layered chains.
18. Tiny Stacked Dots or Minimalist Morse on the Finger or Side Wrist
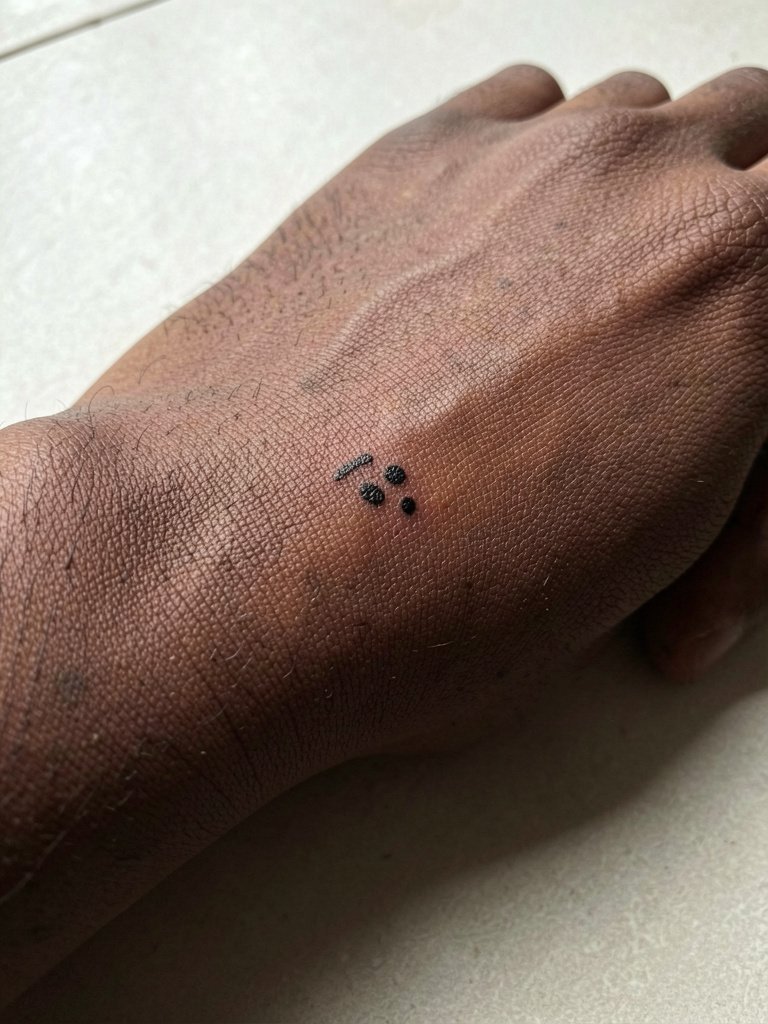
Finger and side-wrist micro marks are discreet but have higher fade and touch-up rates because of washing and sun exposure. Sessions are very short but clients should expect annual touch-ups. A common error is expecting the same longevity as forearm pieces. If you want minimalism and durability, place dots slightly larger and accept potential for yearly refresh. For styling, clean manicures and simple rings keep the focus on the tiny marks.
19. Single-Line Wave on the Ankle or Foot
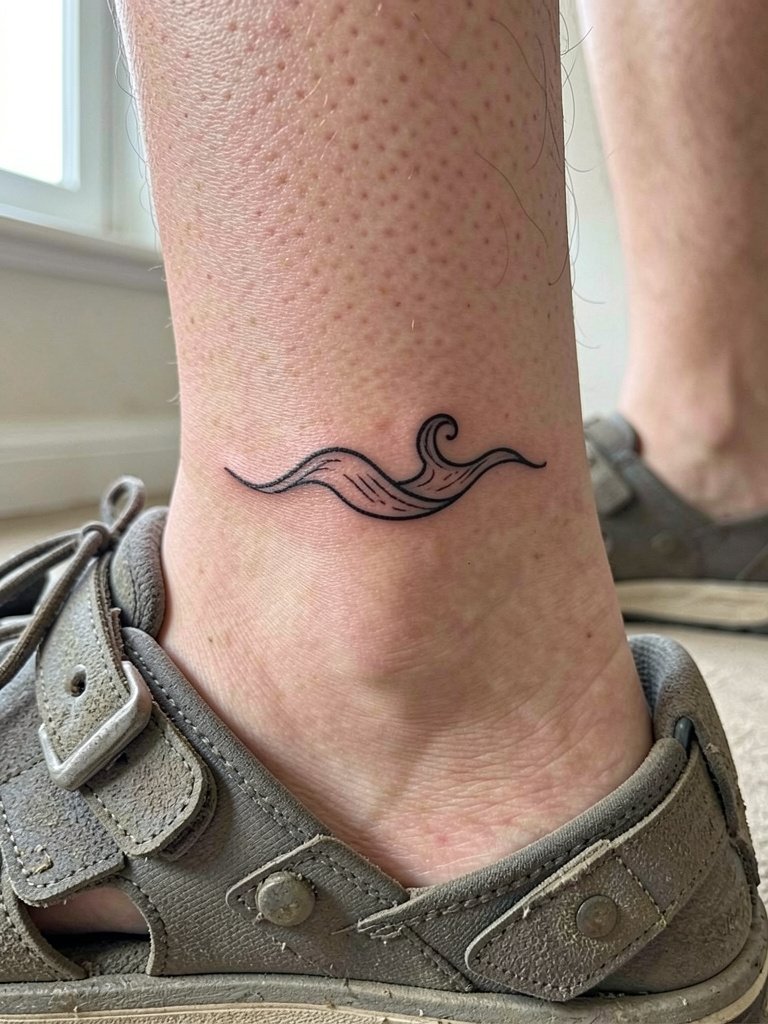
Wave lines look great on the ankle if positioned to avoid the shoe seam. Sessions are brief but the foot and ankle can demand touch-ups because of friction. People often place waves directly where shoe straps rub. Move the design slightly higher and consider sandals or low socks while healing. For summer styling, pair with sandals or ballet flats.
20. Stippled Geometric Stack on the Forearm
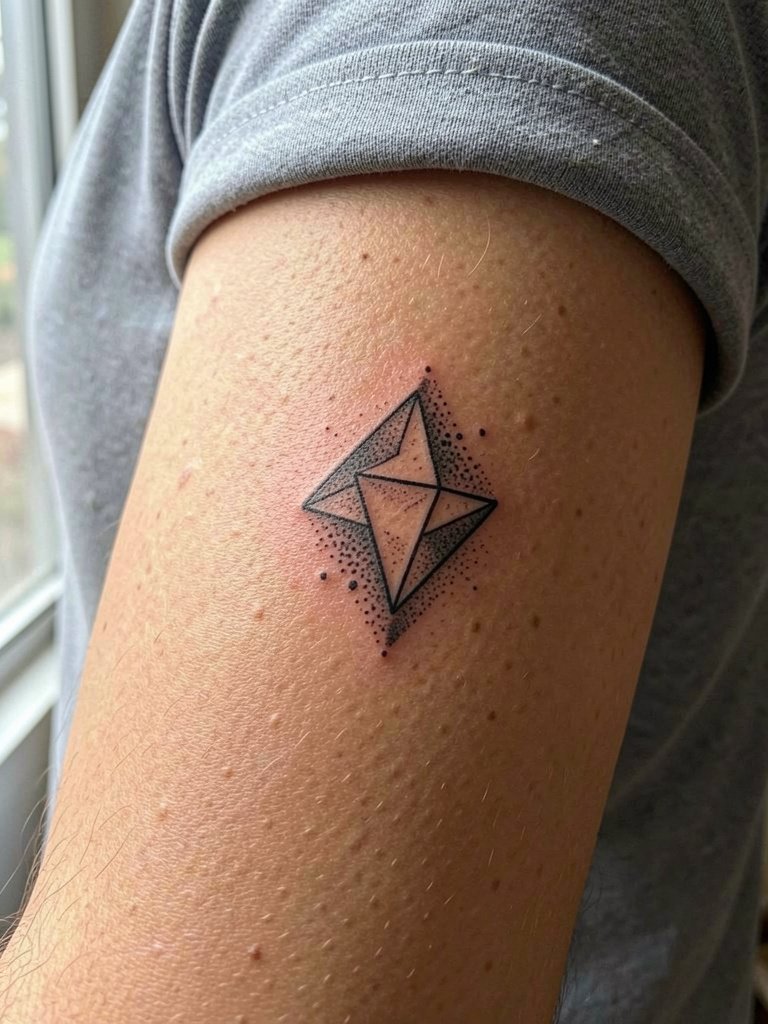
Geometric stacks benefit from steady negative space and a primary line weight that keeps shapes distinct. Expect a one-hour session for this scale and shading. The mistake is squeezing too many small facets into a two-inch circle, which blurs with healing. For showing, cuffed sleeves and neutral tops help the geometry read clearly.
21. Tiny Planet Saturn on the Collarbone or Wrist
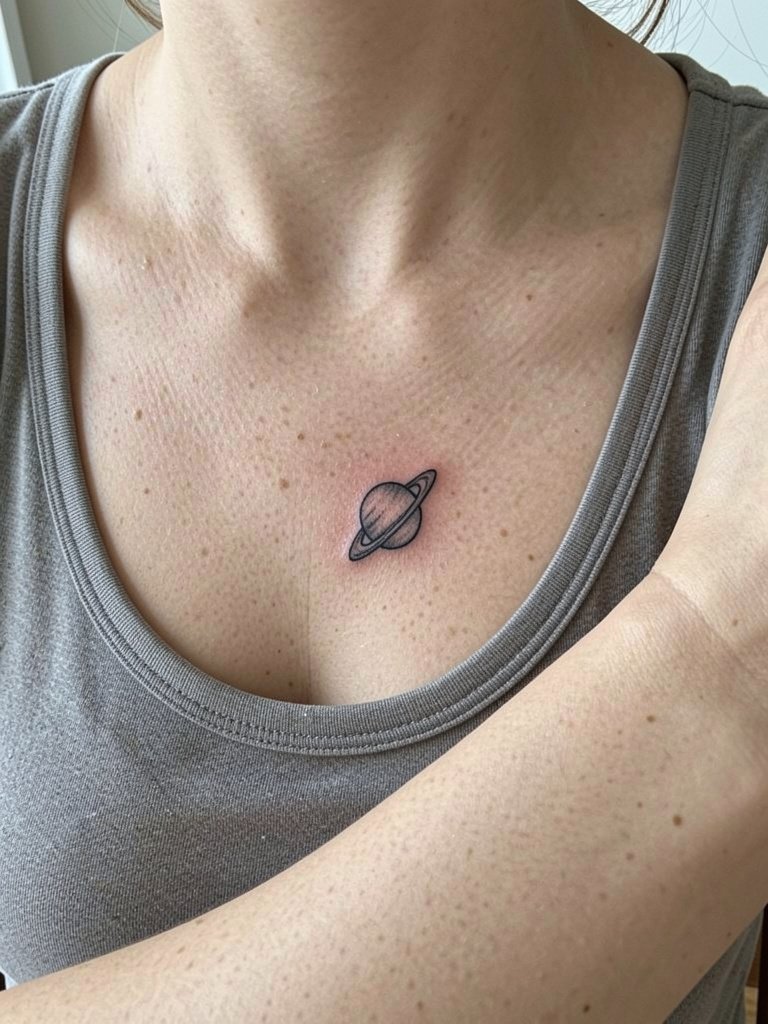
Small planetary icons read as little badges and handle light color washes if kept minimal. Sessions are short and pain is low on the wrist, moderate on the collarbone. The common mistake is rendering rings with hairline detail that fills in over time. Keep the ring solid with negative space inside to preserve clarity. Pair collarbone placements with layered necklaces and wrist placements with a slim bracelet or minimalist watch, try layered necklace set.
22. Tiny Lightning Bolt Behind the Ear or on the Wrist
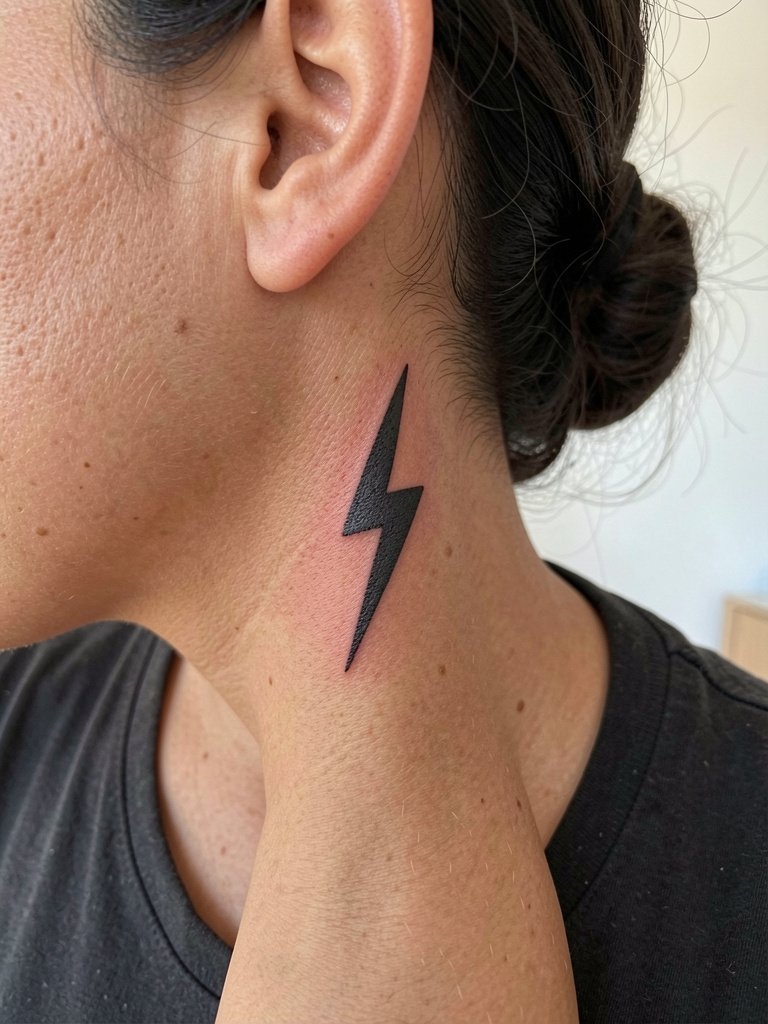
A lightning bolt is a micro icon that needs strong contour to avoid looking like a scratch later. Sessions are very brief. The frequent mistake is asking for a hairline bolt that fades into an indistinct mark. Choose a slightly thicker main stroke so the shape reads from a distance. Behind-ear bolts pair well with updos and studs.
23. Mini Lock and Key Pair on the Ribcage or Inner Wrist
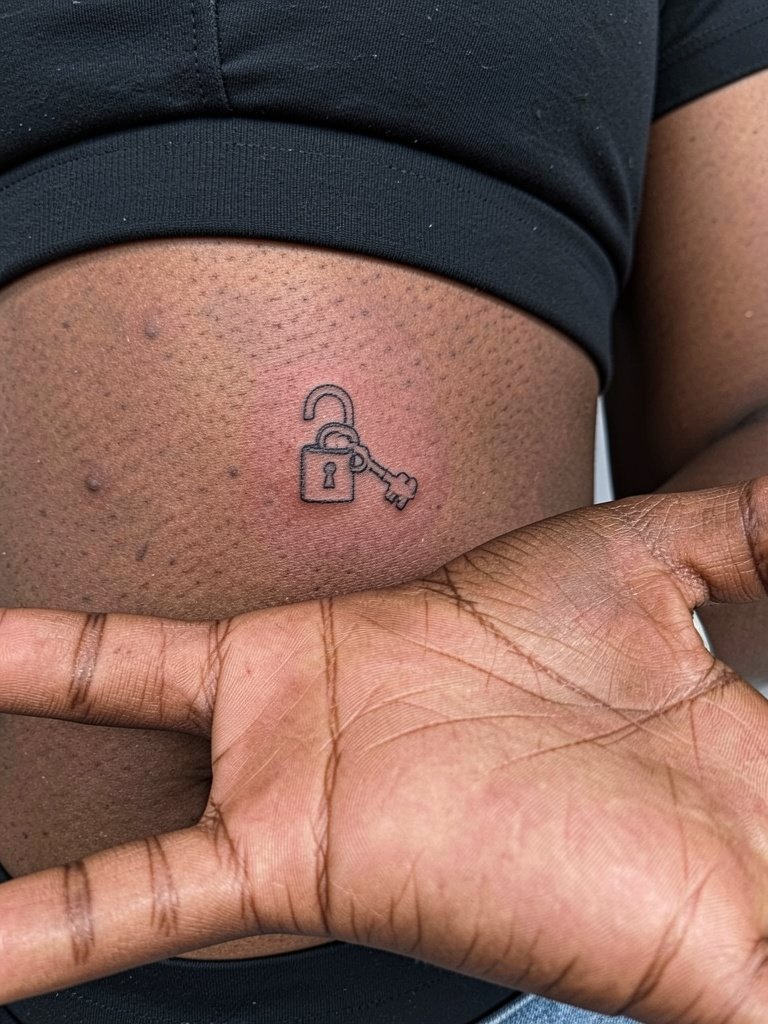
Lock-and-key micro tattoos look intentional when they have clear geometry. Expect a short session and mild to moderate pain if on the ribs. A common mistake is making both pieces too small for the key to keep its teeth readable. Make the key slightly longer so its form survives a few years. For the ribcage option, bralettes or side-cut tanks frame the look once healed.
24. Tiny Paper Plane on the Shoulder Blade
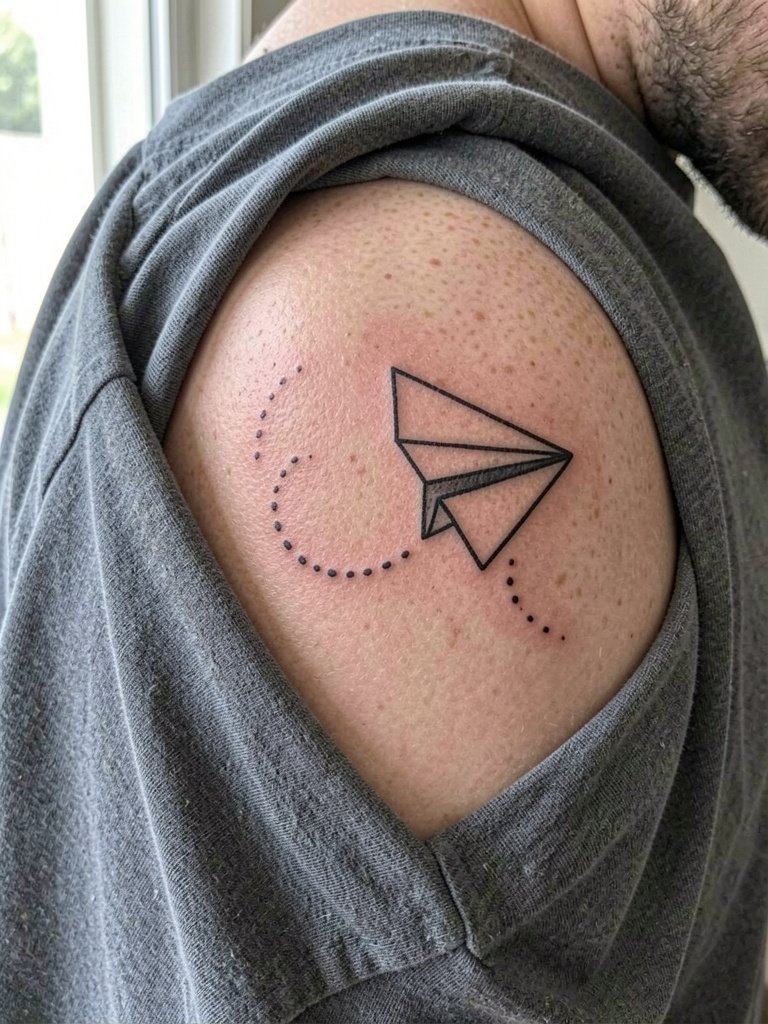
Shoulder blade motifs are easy to conceal with shirts and photograph well in backless tops. Sessions are short and pain is usually manageable. The mistake is shrinking the trail into a dotted smudge. Keep the flight trail spaced so the paper plane feels airborne after a year. For summer showing, open-back tops and halters present the tattoo nicely.
25. Tiny Umbrella or Raindrop Series on the Ankle or Forearm
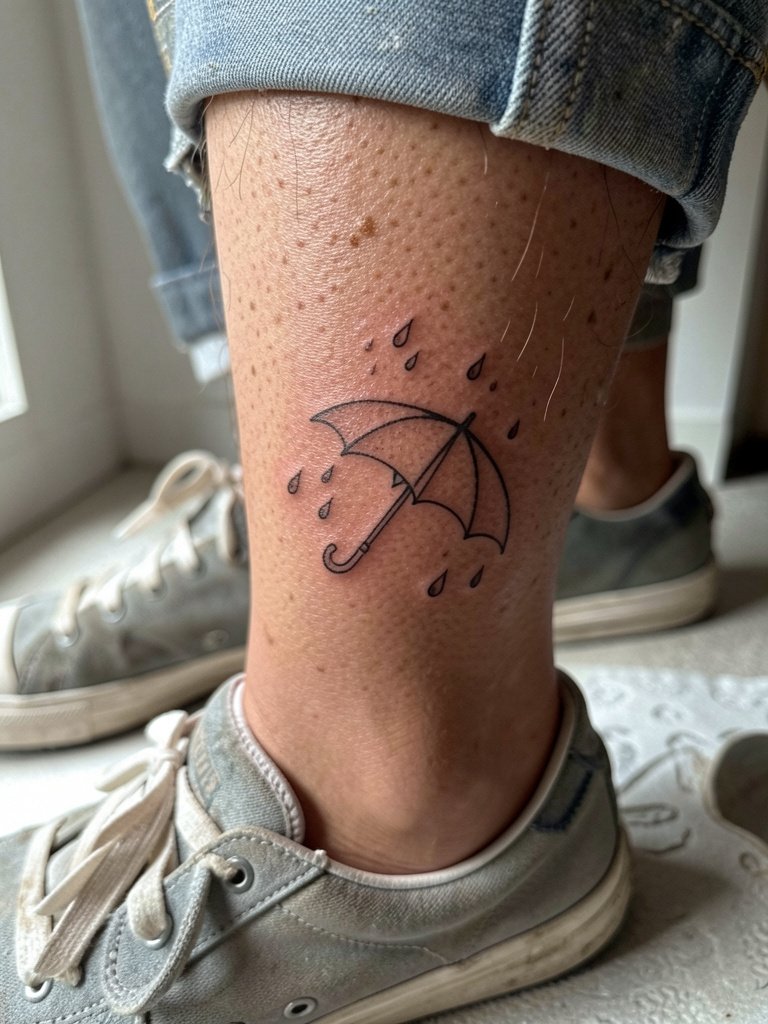
Weather motifs work as tiny clusters or single icons and are forgiving in scale. Sessions are quick. The common error is over-detailing the umbrella handle or raindrop texture in a space that is too small. Keep forms schematic and bold enough to survive frequent washing on the ankle. For styling, sandals or cropped pants let the ankle placement show.
26. Tiny Camera or Film Icon on the Collarbone or Wrist
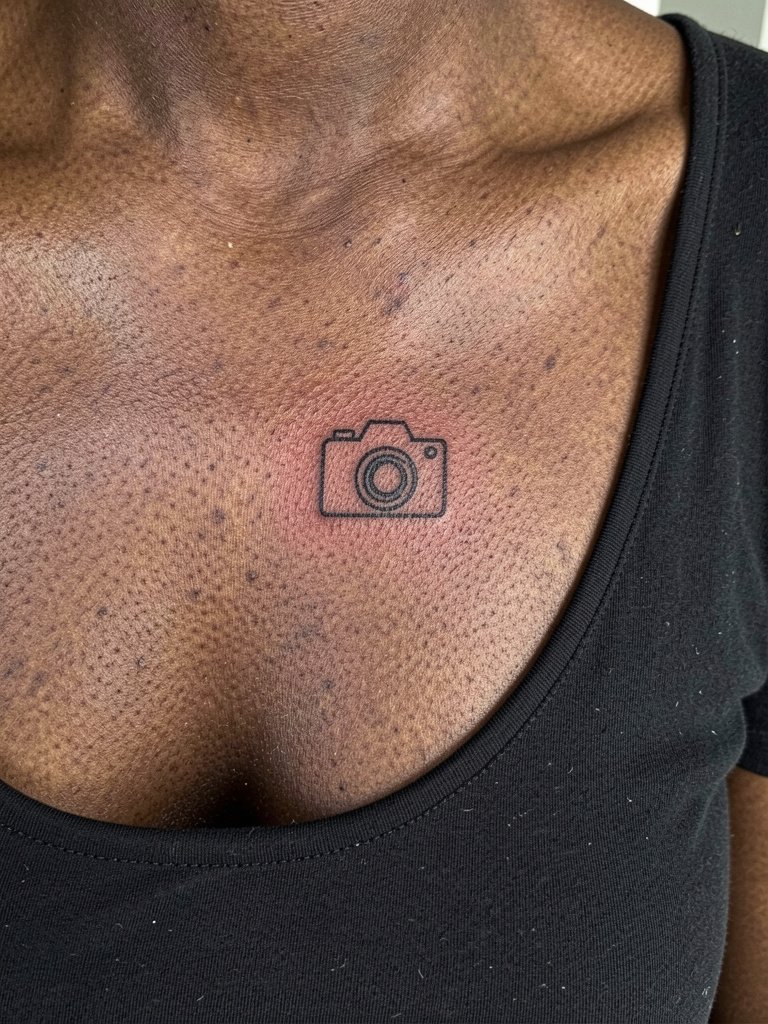
Camera icons suit creatives and read well when kept geometric and bold. Sessions are short and placement dictates pain. The common mistake is tiny lenses that become blobs after healing. Keep lens circles slightly larger and simplify shutters. For show-off looks, scoop-neck tops and simple necklaces balance collarbone icons.
27. Coordinates in Fine Script on the Inner Forearm or Ribcage
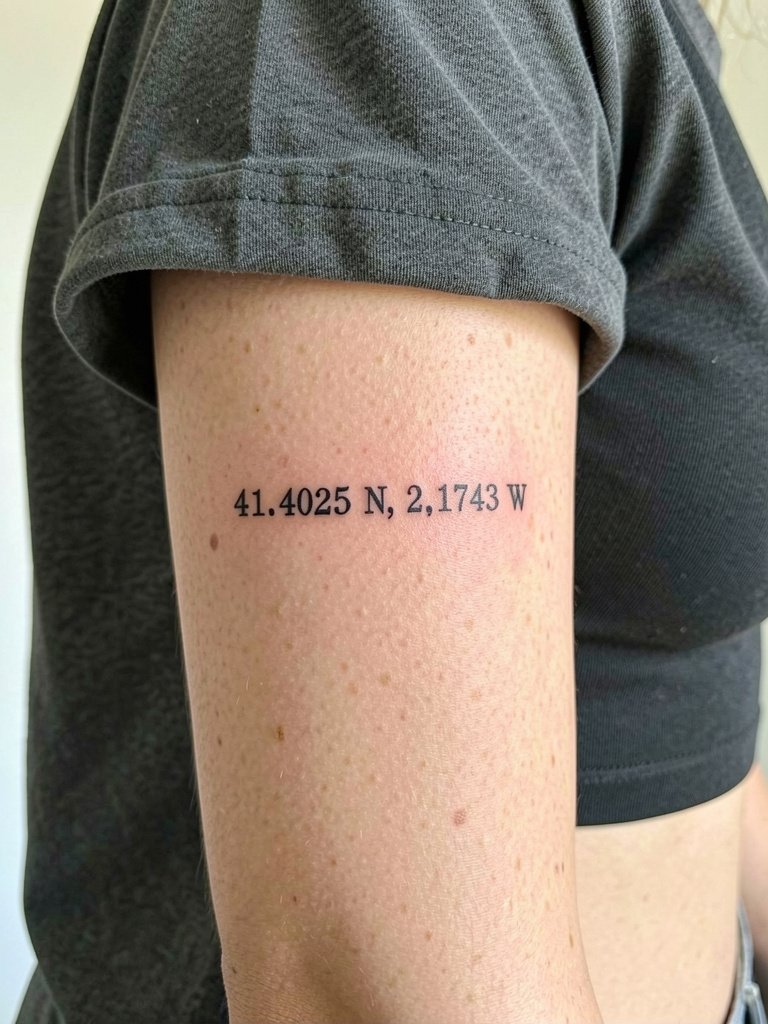
Coordinates make for personal but concise tattoos, and exact text prevents generator gibberish in mockups. Plan your font and size carefully because small serif details can fill in. Session time is short and pain varies by placement. A common error is selecting a script that looks elegant at one inch but smudges at smaller sizes. Ask for a proof stencil at life size before the needle goes down so you can confirm legibility.
Heal Smart
The inner forearm scripts and tiny wrist pieces above heal differently from foot and ankle work, so a few targeted items smooth the session and the first week.
- After Inked tattoo moisturizer. A lighter-feeling balm many people prefer during the later healing phase, helpful for small florals and fine-line pieces that need moisture without heavy greasiness.
- Bepanthen tattoo aftercare ointment. Often chosen for its thin barrier cream properties, useful if you react to heavier ointments and want a simple first-week layer.
- Tattoo Goo healing balm. A longstanding ointment some clients still like for consistent moisturizing during the first few days of scab management.
- Cetaphil gentle skin cleanser. An unscented wash recommended for low-irritation cleansing of fresh tattoos without stripping the area.
- Saniderm second skin bandage. For people who choose a protective film approach, this product reduces friction and keeps tiny wrist and finger tattoos cleaner during the most vulnerable early days.
Frequently Asked Questions
Q: How do I pick a cute tattoo that actually reads well on my skin tone?
A: Look for examples of healed work on skin tones similar to yours, and ask the artist to test contrast in the stencil phase. Thicker primary strokes and clean silhouettes usually show better on medium and dark tones, while very fine stipple can disappear. Bring photos of healed tattoos on comparable skin so the artist can adjust line weight.
Q: Where can I find healed portfolio examples and local artists without scrolling endless fresh photos?
A: Search hashtags like #smalltattoo, #finelinetattoo, and #tinytattoo on Instagram and TikTok and then use a location filter for your city. Tattoodo and booking platforms also let you search style keywords like "fine line floral" while Reddit threads often surface healed shots. Focus on portfolios that show healed images rather than only fresh pieces.
Q: Do tiny fine-line tattoos fade faster and what are the two main viewpoints?
A: One camp says very narrow single-needle work fades faster because thin strokes lose crispness with skin movement and sun exposure. The other camp says proper needle depth, slightly wider spacing, and smart line weight mean fine line can heal clean and readable for years. Both positions matter, so ask for a life-size stencil and a slightly stronger primary contour if you want long-term clarity.
Q: How should I dress for my appointment by placement?
A: Pick clothing that gives the artist easy access without rubbing the fresh tattoo. For inner forearm work wear a loose short sleeve or button-down, for hip pieces choose low-rise pants, and for collarbone or sternum tattoos bring a tank or strapless bra. If you want a quick option, a fitted scoop-neck tank is versatile and keeps the area exposed without shifting, try scoop neck tank women.
Q: What's the Saniderm versus dry healing debate and how should I choose?
A: One group recommends second-skin bandages like Saniderm because they keep fresh tattoos protected from friction and dirt during the first days. The other group prefers traditional light washing and air-drying routines, arguing adhesive can irritate sensitive skin. The best choice depends on your skin sensitivities and the artist's method, so plan for both options and follow the approach that fits your skin history.
