
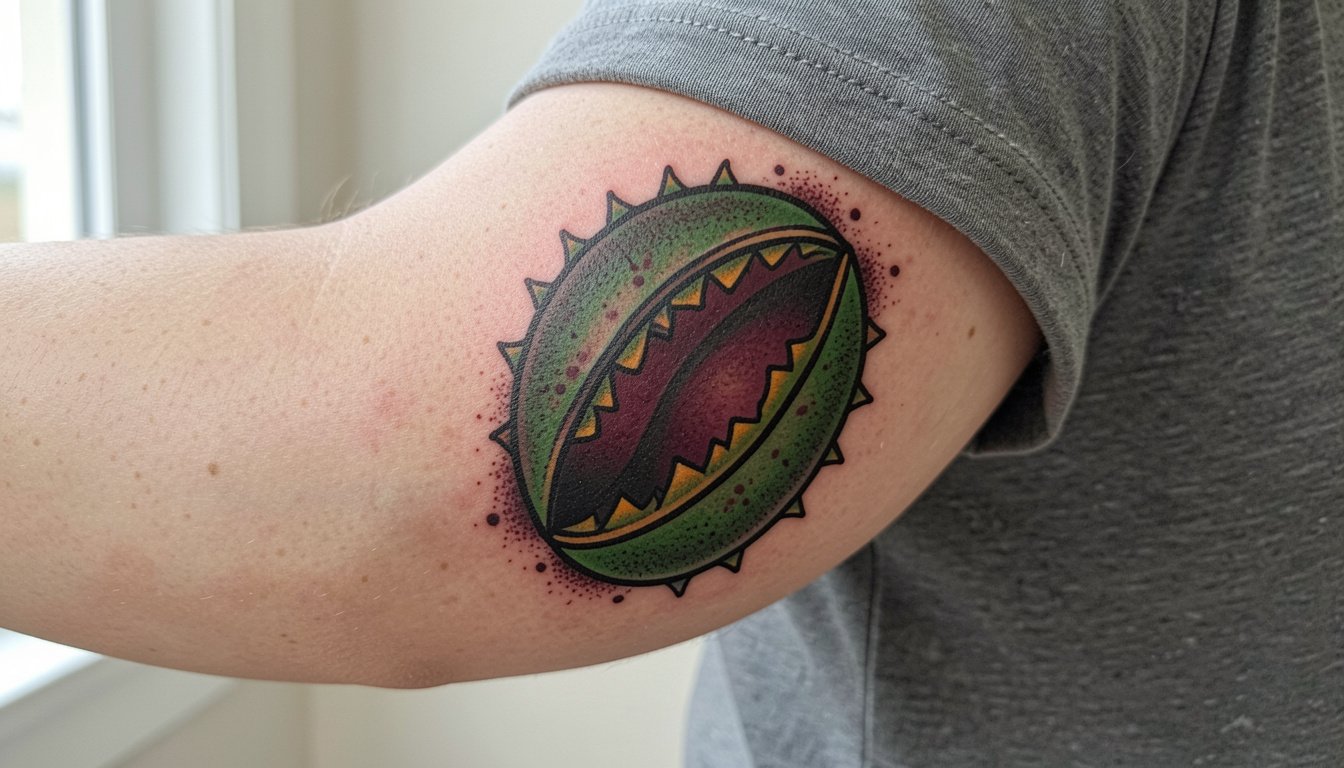
The quiet truth about Venus Fly Trap tattoos is that the versions people save and still admire years later are the ones planned around how the plant moves and how skin moves. Tiny single-needle traps can look ethereal at first and then blur into a gray smudge. The designs worth keeping give the jaws room to read, use bold anchor points, and think about what you will wear when you want the piece to show. Start with the inner wrist detail below to see what to specify at stencil stage.
1. Fine-Line Venus Fly Trap on the Inner Wrist
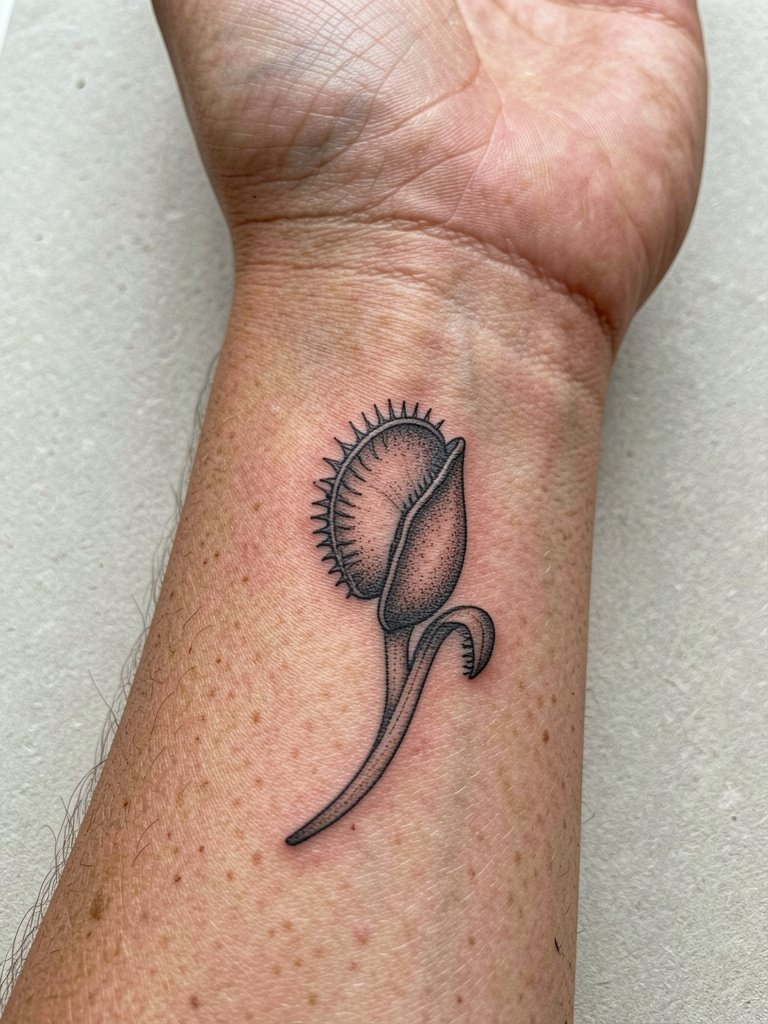
A fine-line Venus Fly Trap at the inner wrist reads intimate and precise on day one. Recommend a slightly heavier single-needle contour than the Pinterest reference so the jaws keep shape at year two and beyond. Discuss exact line weight during your consultation and bring two scale references so the artist can mock the stencil at two and three inches to show how the detail reads. The inner wrist is a moderate pain zone and a short session of 30 to 60 minutes is common. Expect touch-up at 12 to 18 months for crisp jaw edges. A common mistake is asking for micro filigree right against the wrist crease. That area gets friction from watches and sleeves, so add a half inch of margin. For showing this off, cuffed button-downs or rolled linen sleeves frame the wrist without rubbing the healing ink.
2. Neo-Traditional Trap Cluster on Outer Forearm
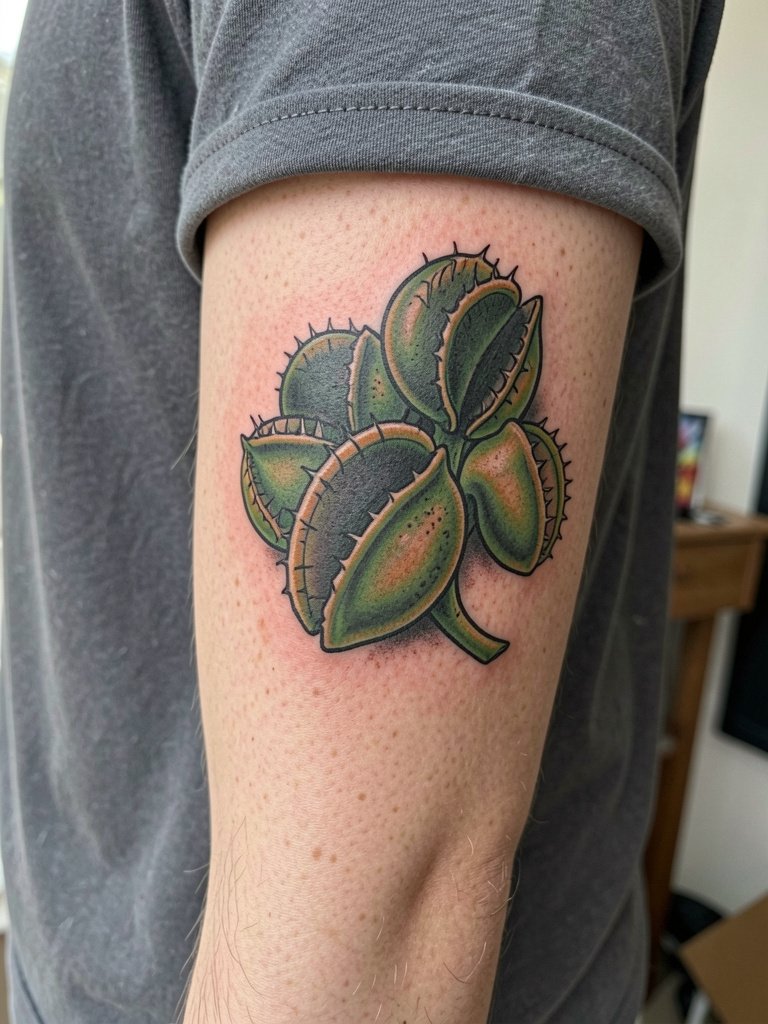
This outer forearm cluster uses scale to avoid a washed-out look as it heals. I recommend medium session blocks of two to three hours so the artist can saturate color without rushing. Specify that the trap mouths have paired anchor points in black, since that contrast keeps the silhouette clear at five years. The outer forearm tolerates heavier saturation with lower blowout risk than paler inner skin. A common mistake is trying to cram tiny stipple textures into a narrow band. Give the piece room along the forearm and plan a single touch-up after the initial three months. For outfits, this placement pairs with short-sleeve shirts and relaxed linen shirts that let you show the cluster without stretching the skin.
3. Micro-Realism Single Trap on the Ankle

Ankle micro-realism demands realistic shading and restraint. Because the area sees daily friction from socks and shoes, ask for deeper saturation within the shadow areas to prevent softening in the first year. Sessions are usually 45 to 90 minutes. Blowout risk is moderate because the skin is thin and mobile with footwear contact, and a common mistake is placing fine hairline roots too close to the ankle crease. Expect a touch-up around the six- to nine-month mark when you and the artist check for lost contrast. This spot looks great with low-profile footwear and summer sandals. Consider pairing it with strappy leather sandals when you want to show the detail.
4. Stipple-Shaded Trap Along the Sternum
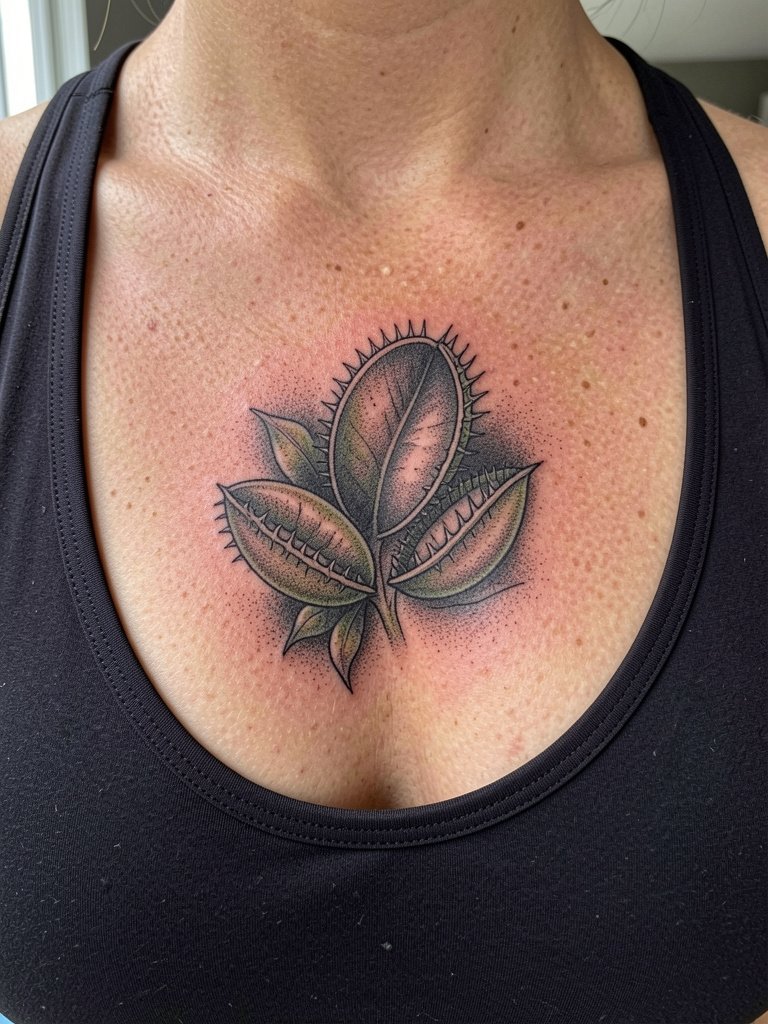
Sternum placements age differently because the skin stretches and moves with breathing and body weight change. Artists are divided on using fine stipple here. One camp argues stipple settles into an elegant gray as it heals and looks soft for years when spaced correctly. The other camp warns that stipple too close to the breast crease will blur into indistinct shading within two years. Both points matter for this placement. Sessions on the sternum are higher on the pain scale and often split into two passes. When you consult, specify anchor points or darker core elements that will retain structure through healing. If you plan to wear low-cut tops, discuss how the piece will sit relative to your bra and neckline so the composition is not partially hidden.
5. Botanical Half-Thigh Panel with Hanging Traps
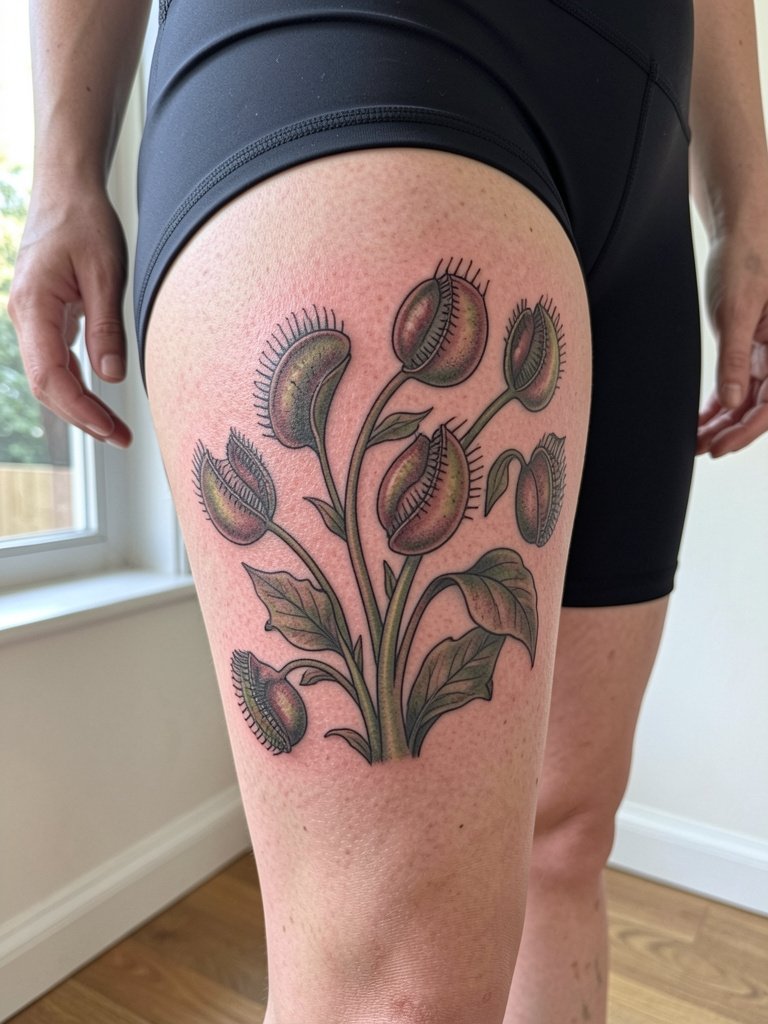
A half-thigh botanical gives scale and motion and can carry details that smaller placements cannot. Recommend a two- to four-hour session depending on color and complexity. For longevity, insist on clear negative-space separation between trap jaws and leaf veins so each element keeps its identity as skin ages. A common mistake is packing too many small dots into the composition; that texture can merge over time. Touch-ups at the one-year mark are normal if you want the greens to pop. For showing the piece, high-cut shorts or midi skirts that leave the mid-thigh exposed make the composition readable. Try pairing with high-waisted linen shorts for a balanced look.
6. Tiny Cluster Behind the Ear
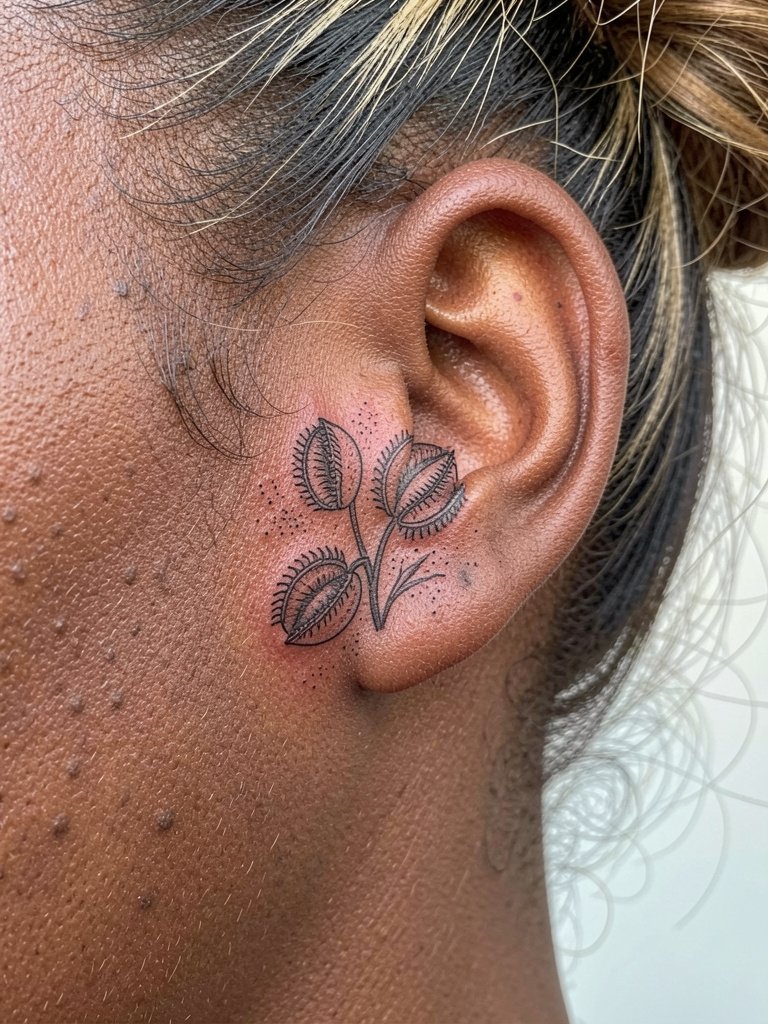
Behind-the-ear placements read like secret punctuation and need crisp execution because the area has small real estate and thin skin. These sessions are short, usually under 30 minutes, but the margin for blowout is tight. Discuss exact dot spacing and jaw thickness at the stencil stage so the small traps do not lose definition as they heal. A typical mistake is asking for colored highlights in this spot; color can fade unevenly here. For showing it off, hair-up styles are ideal. A simple accessory like a large claw hair clip keeps hair off the nape without rubbing the tattoo while it heals.
7. Architectural Geometric Trap Accent on the Upper Arm
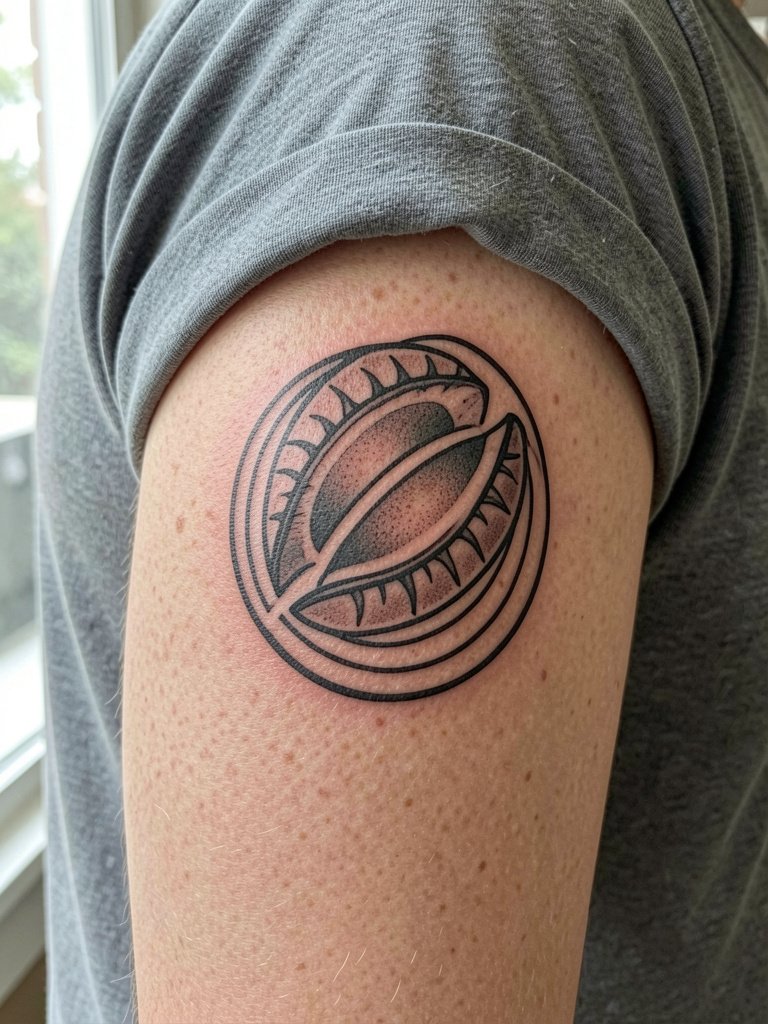
Geometric anchors let a botanical motif read from a distance while still holding delicate trap detail up close. This upper arm spot is lower on the pain scale and forgiving for linework. Suggest the artist show you full-scale stencils with the concentric rings so you can confirm spacing. One common error is shrinking the geometric field to save session time, which ruins the intended negative space. At six months expect the linework to soften slightly, and most people schedule a touch-up around nine to twelve months for perfect line clarity. Wearable show-off choices include sleeved shirts that stop above the bicep so the geometric frame sits cleanly against the skin.
8. Streamlined Trap Running Along the Ribs
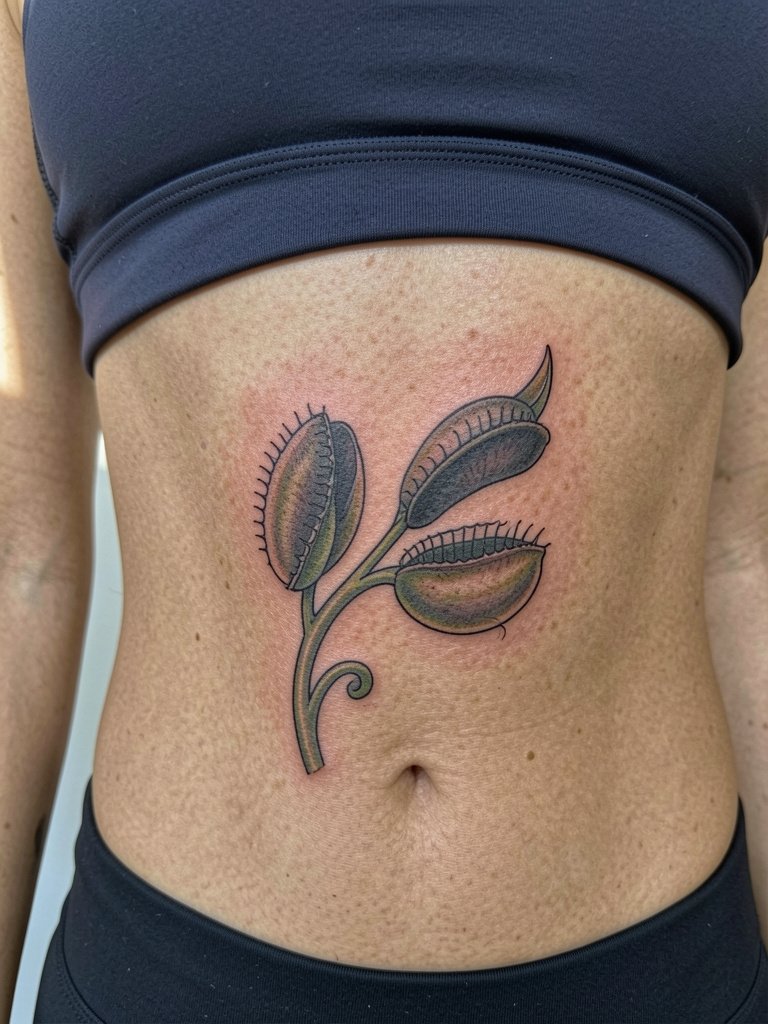
Rib placements are one of the classic controversy spots for fine work. One group of artists says fine-line ribs blur quickly because the skin is thin and stretches with movement. The opposing group maintains that with slightly wider line weight and careful depth control, fine details settle and hold for years. State which side of that debate your reference falls on when you consult. Rib sessions are often split and are among the higher pain zones, so plan for breaks and a two-session timeline. The common mistake is compressing too much detail into the breathing arc; leave room for expansion and schedule a review touch-up three to six months after healing.
9. Collarbone Vine with Single Trap Accent
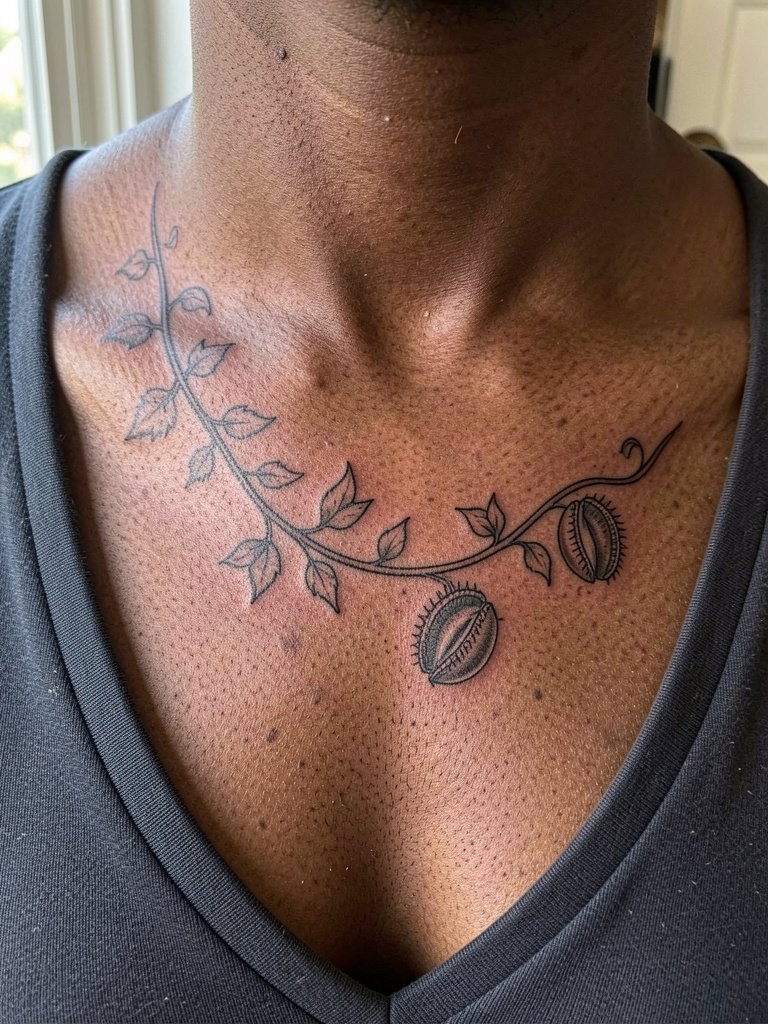
A collarbone vine reads strongly when the composition respects the bone line. Pain is moderate and sessions are often 45 to 90 minutes. Tell the artist the exact distance from the clavicle you want the vine to sit and bring photos of how tops you wear sit on your shoulders. A typical mistake is centering the main trap directly on the clavicle ridge where it will lose clarity as the skin moves. For showing the piece, scoop and V-neck tops highlight the vine. Try pairing with a wide V-neck blouse so the collarbone spacing is visible without stretching the skin.
10. Knuckle and Back-of-Hand Mini Trap
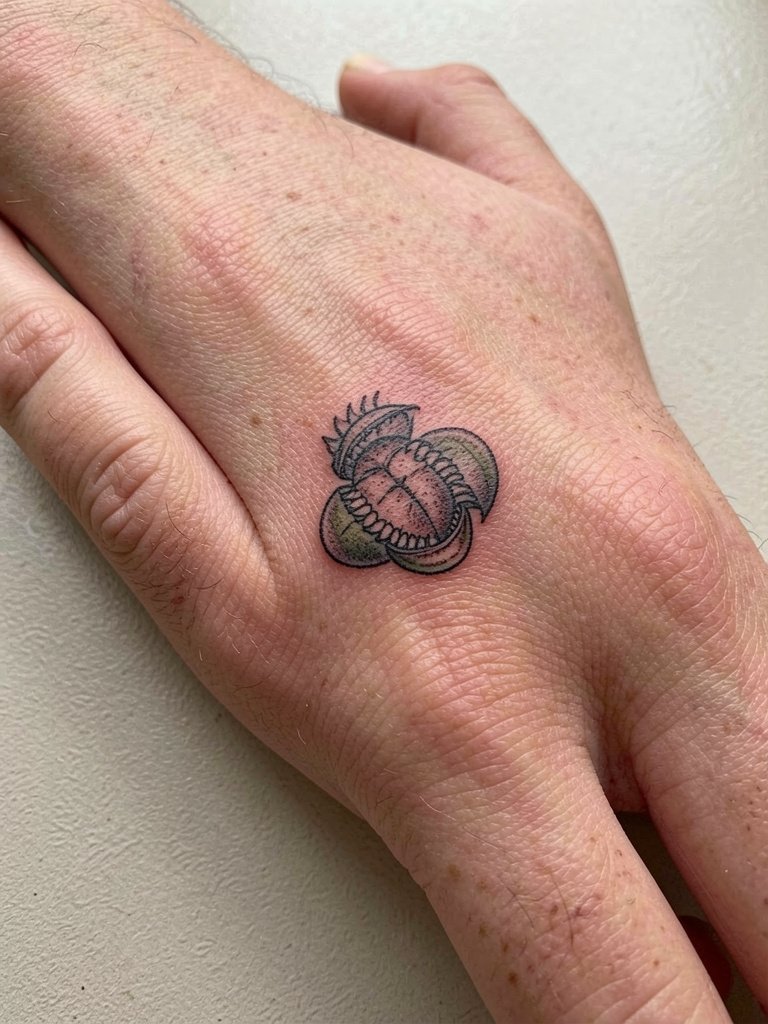
Hand and knuckle tattoos sit in high-movement zones with heavy wash and friction. This placement requires a professional who specializes in hands because the healing and retention pattern differs from other areas. Sessions are short but expect color to fade faster and touch-ups every year or two. Common mistakes include requesting tiny fine roots across knuckles; those often gap or blur. If you want longevity, ask for slightly bolder jaw outlines and reduced micro detail. For professional considerations, note that some shops require a dedicated portfolio review before booking hand work to ensure both you and the artist understand long-term maintenance.
11. Watercolor Shoulder Blade Panel
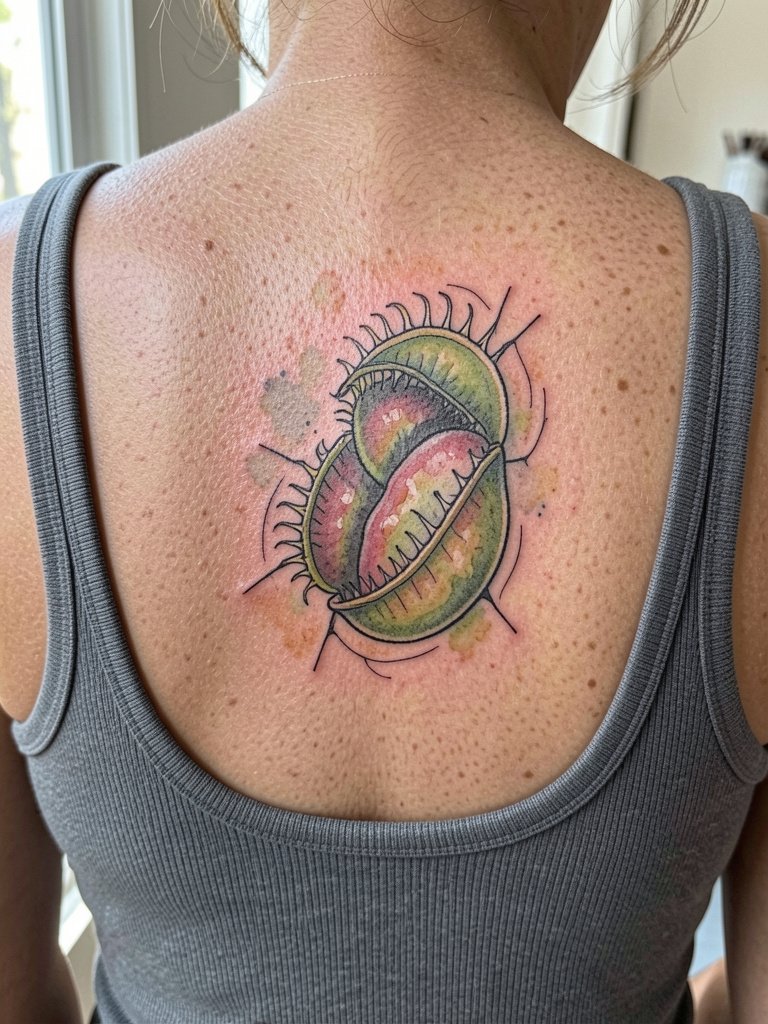
Shoulder blade watercolor pieces can look painterly for months and then settle into a softer haze. If you prefer longevity over transient brush effects, ask the artist to lock in a few crisp black anchor lines within the composition. Sessions for a shoulder blade panel run from one to three hours depending on scale. The usual slip-up is relying solely on diffuse watercolor without anchors; those areas tend to need earlier touch-ups. For outfits, tank tops and open-back dresses are ideal show-off choices. Pair this placement with an open-back summer dress when you want the panel visible.
12. Calf Column of Traps Running Vertically
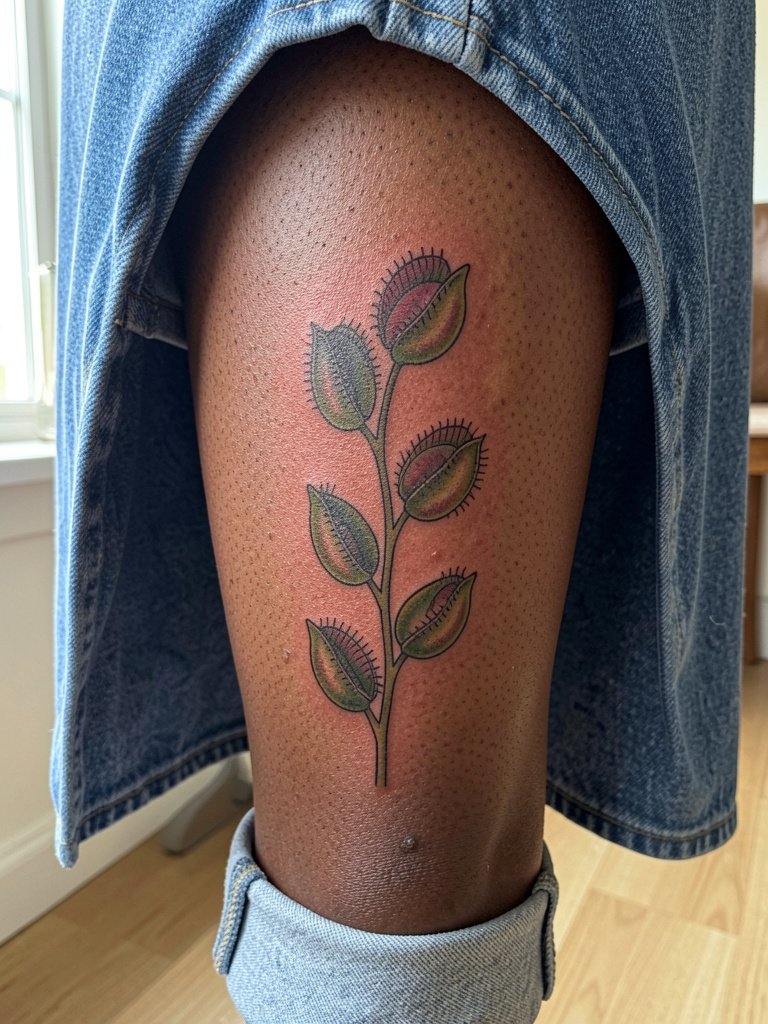
The calf is forgiving and a great place for vertical compositions that need breathing room. Pain is typically low and sessions can be longer so an artist can build graduated shading. A common mistake is compressing the traps into too short a column, which muddies the rhythm as skin stretches. Expect a single touch-up within the first year to refresh gradients. If you plan to wear it visible, mid-calf boots or rolled jeans show the line best without rubbing the area while it heals. For mobility during the session, wear loose drawstring linen pants so the leg can be exposed without pressure.
13. Low Back Twin Traps with Lace-Friendly Placement
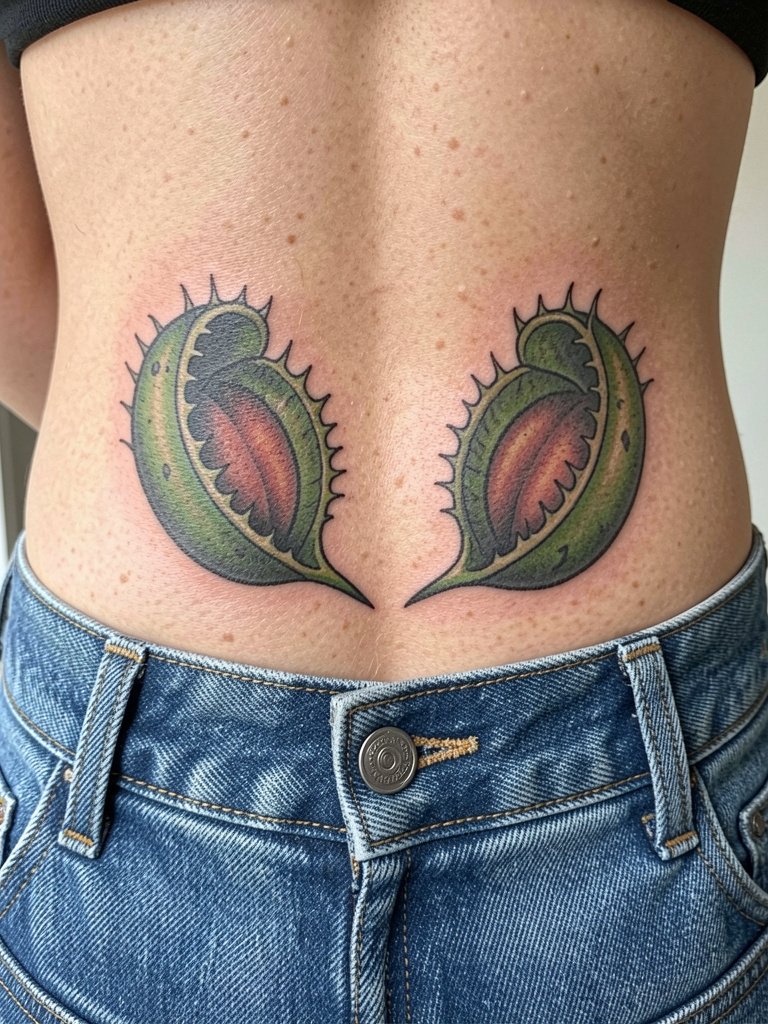
Low back twins read like jewelry when placed with the waistband in mind. Sessions are moderate and often split to allow precise mirroring. Tell the artist the exact height of your typical waistline so the design does not sit under clothing. A typical error is centering the traps too low so they disappear under low-rise waistbands. Expect a touch-up at the six- to twelve-month check. For showing the piece without strain on the healing skin, low-rise skirts or back-exposing tops are recommended. A low-rise jean style can help you preview how much of the piece will be visible in daily wear.
14. Inner Bicep Botanical Band
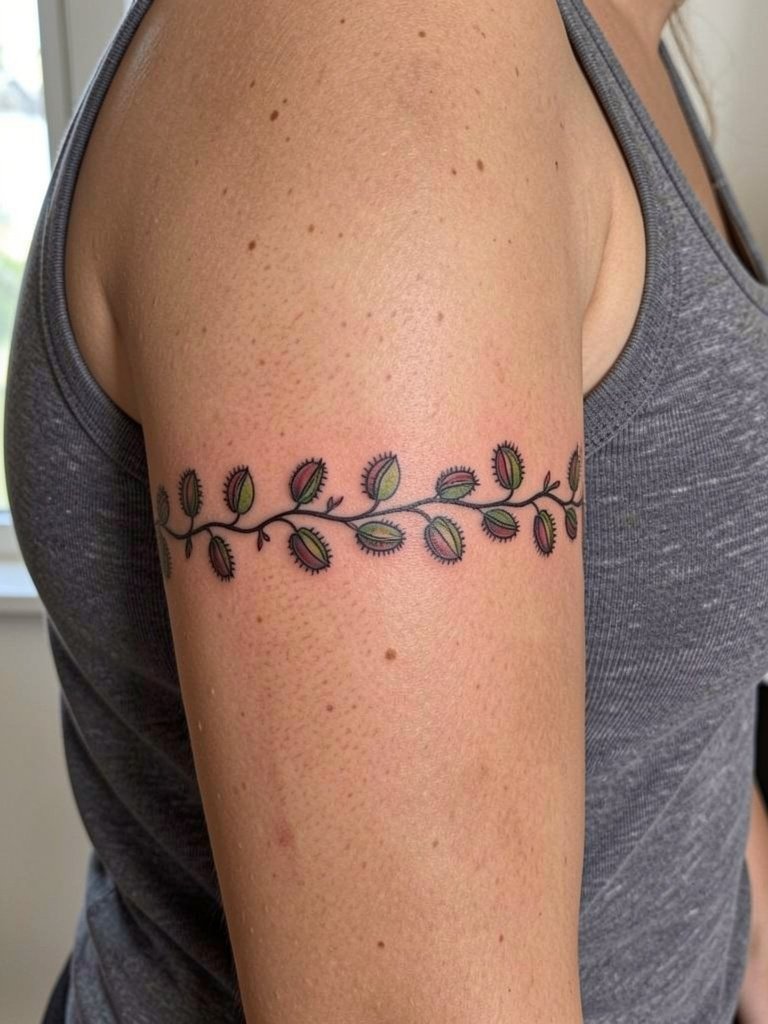
An inner bicep band reads intimate and sits where skin shifts with arm movement. Sessions are often 60 to 120 minutes depending on band width. Clarify exact vine thickness because thin filigree can disappear if the arm frequently rubs against clothing. A common mistake is centering too close to the axilla where friction and sweat accelerate softening. Plan a touch-up after the first healing cycle. For appointment comfort, wear a loose tank so the artist can access the site without you adjusting fabric. The band pairs with sleeveless layers that keep the inner arm exposed when you want to show it.
15. Nape Little Trap at the Hairline
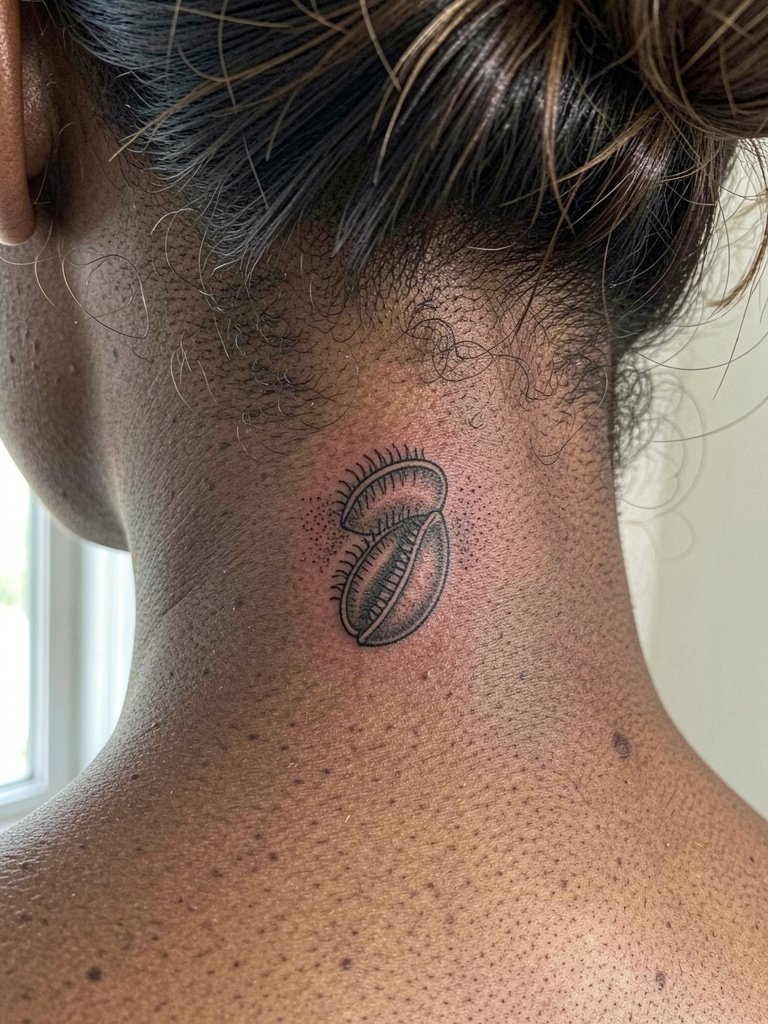
A nape placement reads like a secret mark and needs crisp stencil placement because hairlines change and the skin there can be bunched during sessions. Sessions are short but precise. When you consult, confirm exact clearance from your hairline so the reveal is where you expect it when your hair is up. A frequent mistake is placing the piece too close to the hairline where regrowth and styling hide it. Touch-ups are common if you wear high buns often. For showing the nape, simple hair clips or half-up styles keep the area visible without rubbing the fresh ink.
Pre-Session Picks
Those first six pieces include several small-area placements that benefit from a couple of practical items to ease the session and early healing.
-
Stencil transfer paper kit. Lets you preview how the trap jaws and vine spacing sit on your skin before the needle goes in, which is especially helpful for wrist and forearm designs above.
-
Topical numbing gel. Use as directed in the hour before a rib or sternum session to reduce pain spikes while preserving the artist's feedback on depth.
-
Thin protective film roll. Useful for ankle and hand placements that face friction in the first week from shoes and daily use.
-
Fragrance-free gentle body wash. Cleanses healing tattoos without irritating fine blackwork or watercolor areas in the early wash stage.
-
Aquaphor healing ointment. A thin layer for the initial 48 to 72 hours can protect fine-line edges while the skin forms its first protective barrier.
Frequently Asked Questions
Q: How do I decide between a fine-line trap and a bold blackwork version?
A: Match your daily wear and tolerance for maintenance to the design. Fine-line versions read intimate but often need touch-ups within a year, especially on high-friction spots. Bold blackwork holds contrast longer and is a better pick if you want lower maintenance.
Q: Where can I find healed examples and portfolio searches without naming specific artists?
A: Search platform tags that combine plant and placement keywords and check the healed tag threads. Use hashtags like #VenusFlyTrapTattooHealed and #BotanicalInkHealed and apply location filters on short-video platforms to see work from shops near you. Community threads on forum sites also surface healed photos in multiple skin tones so you can compare how a style ages.
Q: Are there placements that tend to require more frequent touch-ups for Venus Fly Trap designs?
A: Yes. Hands, fingers, ankles, and the ribcage usually need more refresh sessions. Expect a touch-up within the first year for hands and fingers. For ribs, plan a review at three to six months to decide if color or line density needs reinforcing.
Q: What should I wear to a shoulder blade or rib session for comfort and access?
A: Wear garments that expose the area without shifting during the session. For shoulder blade work, a fitted tank top is ideal. For ribs, a cropped sports bra in its normal worn state gives clear access while keeping you supported. A sample option is fitted scoop tank tops.
Q: How soon can I show off a new ankle or calf Venus Fly Trap after healing?
A: After the first two weeks the surface will look settled but full settling takes several months. Avoid harsh sun exposure for the first three months and schedule a color-boost touch-up if you want saturated greens to read at their brightest after the initial healing cycle.
Q: Should I be worried about cultural sensitivity when designing botanical trap tattoos?
A: Botanical motifs are broadly used, but if you borrow from a specific cultural style, research its origins and use respectful visual language. When a design references a traditional motif, ask for an explanation of intent and how the design honors the reference before booking.
