
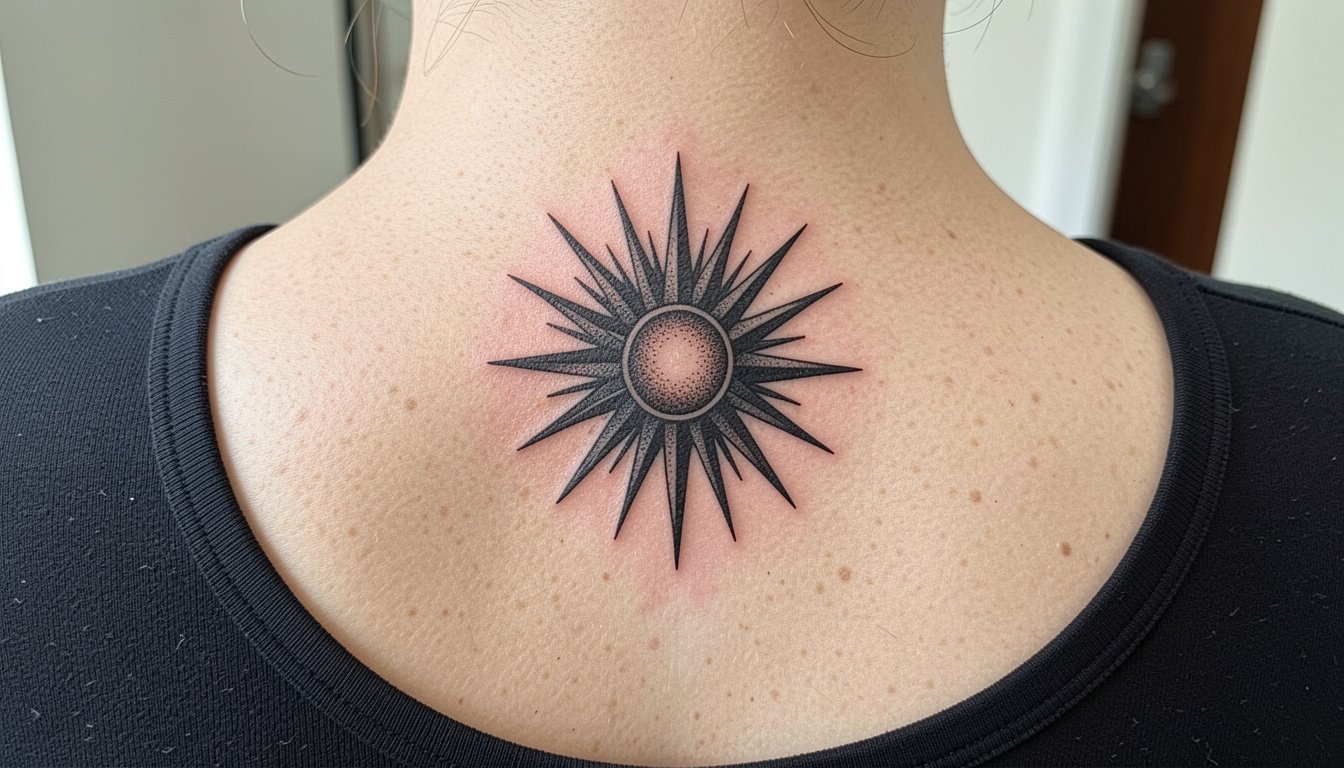
A fresh clipper line met the scalp and the stencil sat like a map under the light. The artist tapped, adjusted the depth, and the client relaxed into the chair. Scalp and head tattoos read differently than arm work, they demand boldness in spots and breathing room in others, and a small choice at the stencil stage can save a touch-up later. Read these ideas with an eye for what holds up and what looks best with short hair or a shaved look.
1. Crown Halo Blackwork
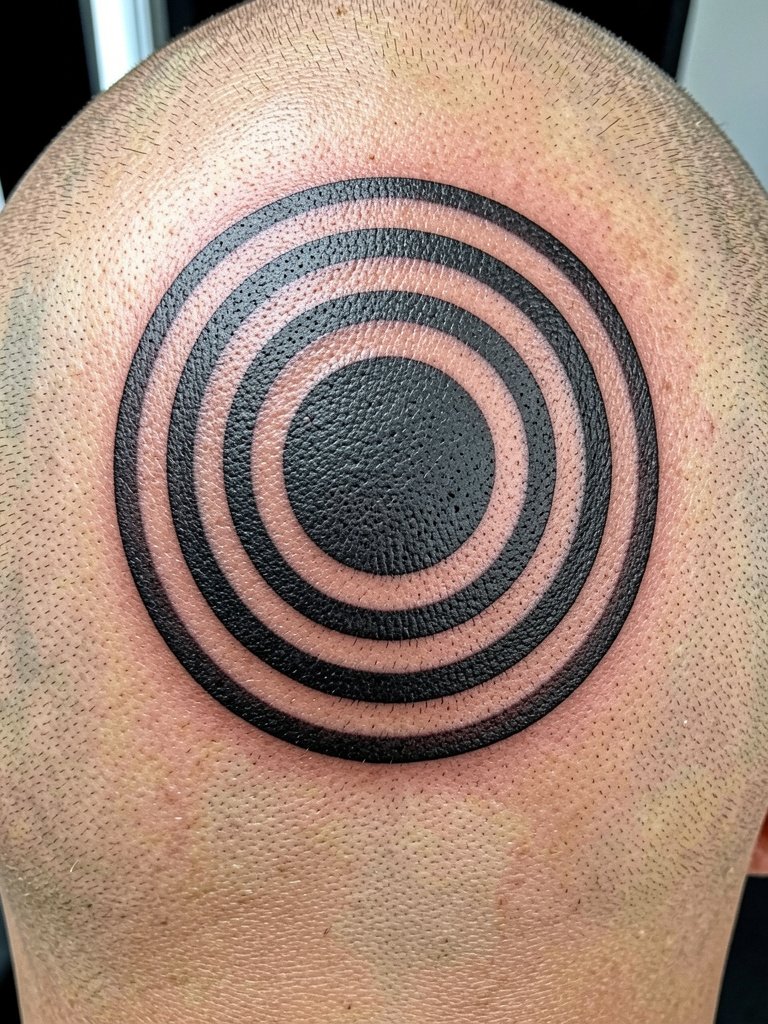
A crown halo reads bold on shaved crowns because the scalp does not hide saturation. I recommend solid black bands with negative-space breaks so the design keeps contrast as hair grows back. Discuss spacing with your artist so lines do not sit too close together and bleed into one another over time. The scalp can feel intense during sessions and may take two short passes rather than one marathon session. For show-off styling, a low-profile beanie pairs well with radial designs, try a slim ribbed beanie that leaves the crown visible when you want to reveal the work. Sensitive placement note: scalp work needs an artist experienced with skull curvature and scalp skin tension.
2. Temple Sigil Linework
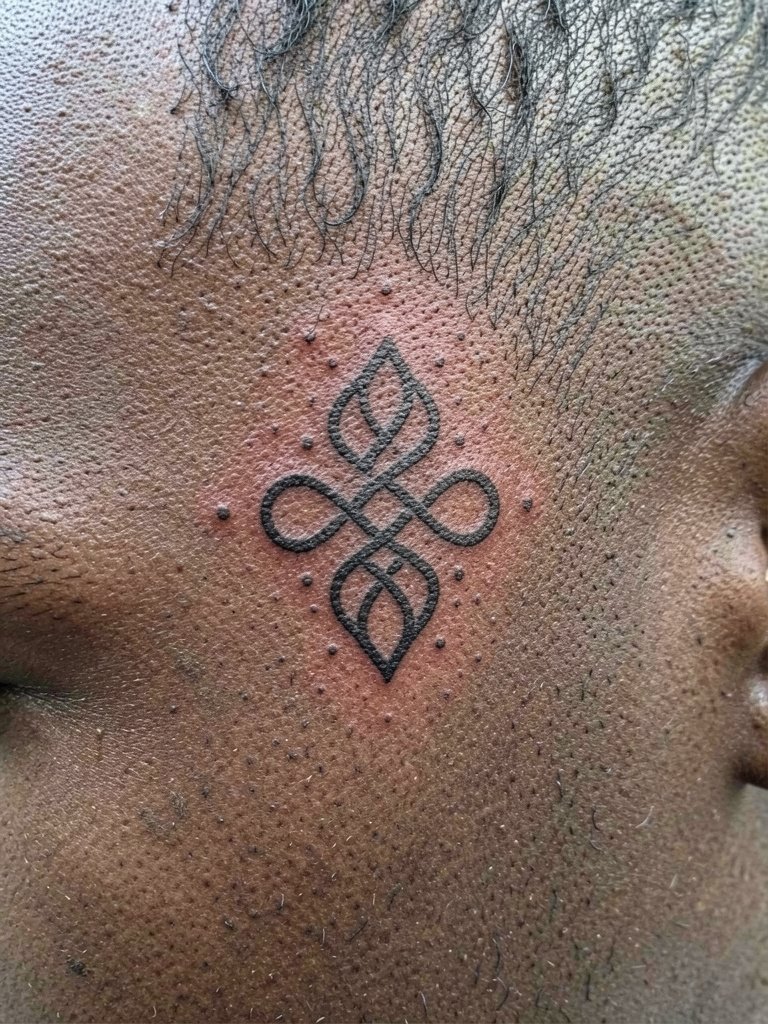
Temple placements reward clarity more than tiny detail. I suggest slightly heavier linework than you might choose for a forearm script because the temples can soften with time. Bring two scale references so the artist can show how the sigil looks at three inches versus five. A common mistake is asking for ultra-fine single-needle lines that vanish into scalp texture. Session feel: this area is sharp but short, expect tight spots rather than long endurance work. For styling, a pair of wrap sunglasses frames the temple art when you want to draw attention.
3. Nape Mandala Stipple
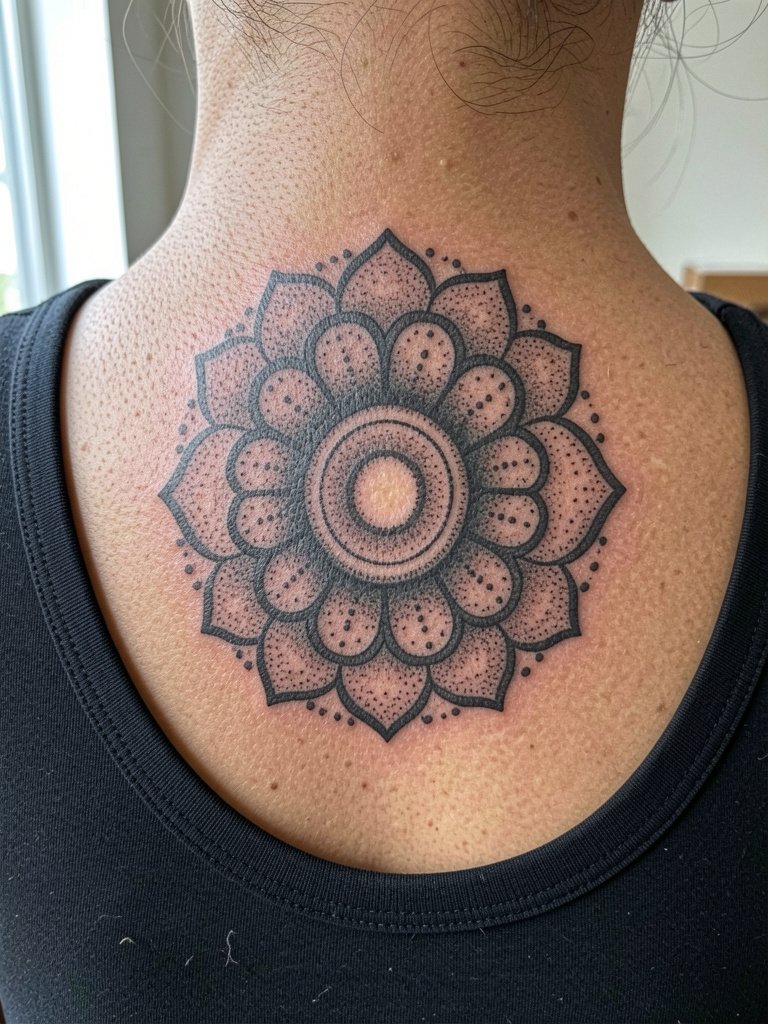
Mandala work at the nape benefits from stipple shading because shading ages into texture without muddying edges. I like mandalas built from a strong outer ring and inner dot work so the silhouette survives touch-ups. Ask for slightly bolder outer lines to prevent edge softening by year three. The nape is less painful than temples but demands careful aftercare because sweat collects near the hairline. For day-of comfort wear a loose crew or button shirt that slips over the head easily. To show the piece, a low bun or a cotton beanie keeps the neck visible when you want it on display. Sensitive placement note: nape tattoos may need a specialist used to working around the hairline.
4. Full Scalp Blackout Accent
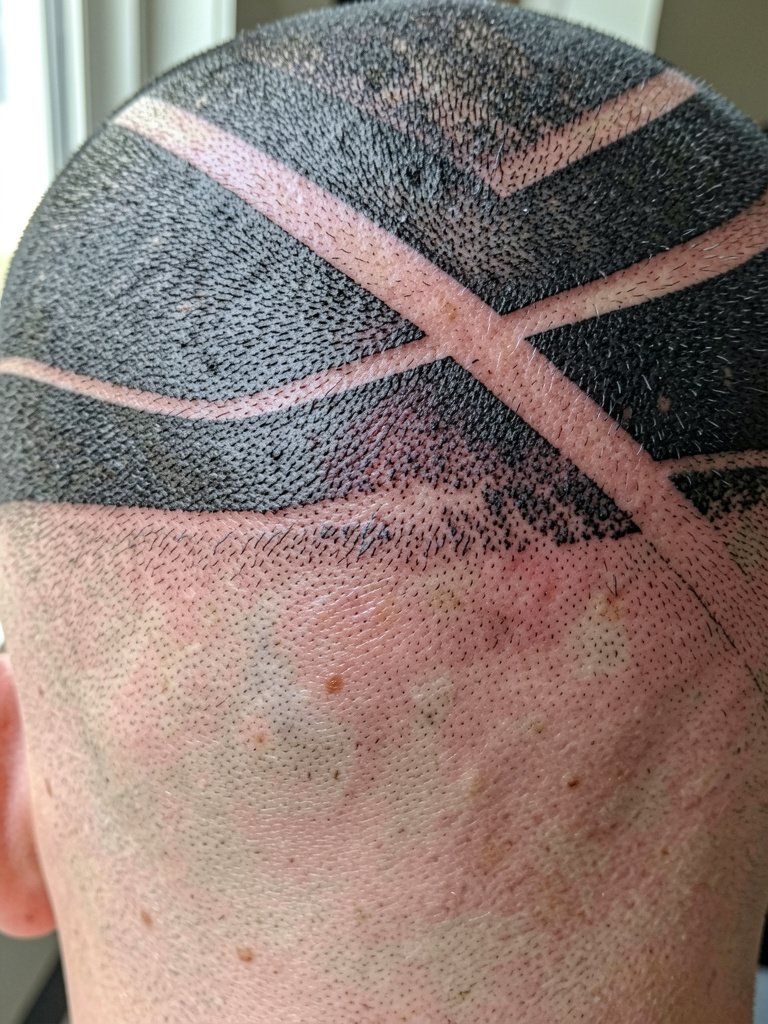
Blackout sections behave differently on the scalp than on other body areas. The procedure sits heavy in one session or across multiple sessions for saturation and comfort. A frequent mistake is underestimating healing time for a large black area, which can scab densely and need careful staging. Touch-ups are often needed at six to twelve months when tiny gaps appear. For session wear, bring a clean button-down or zip hoodie so you avoid pulling fabric over the head. To pair with the look, a structured black bomber cap complements blackout work while protecting the area between sessions. Sensitive placement note: full scalp blackout requires an artist experienced with heavy saturation to avoid uneven patches.
5. Ear-Frame Micro-Realism
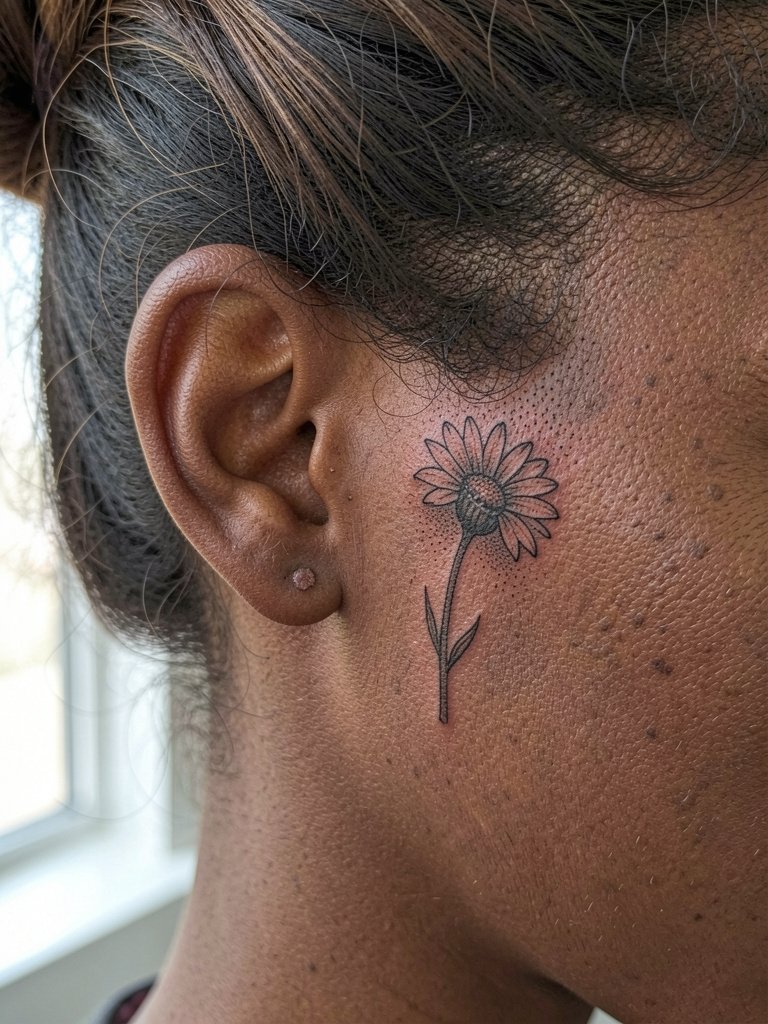
Behind-ear tattoos look delicate but the skin there is thin and mobile. I recommend micro-realism with careful negative-space highlights and a slightly heavier anchor line so it does not disappear. One common error is asking for photoreal tiny faces, which blur faster than shapes. Expect a quick, high-sensitivity session and a touch-up at year one. For display, short hair or a clipped undercut will reveal this area nicely, try pairing with a soft neck scarf when you want to keep attention close to the nape. Sensitive placement note: behind-ear work needs a light touch and an artist good with small scale.
6. Sideburn Frame Tattoo
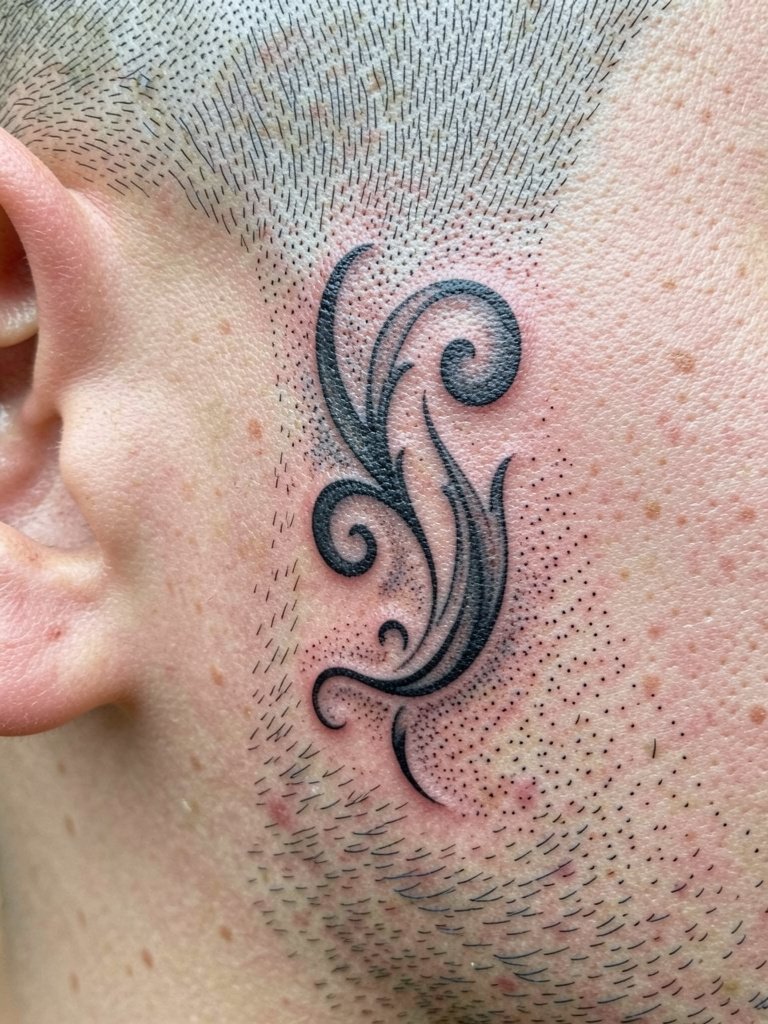
Sideburn tattoos are about contouring the face and working with hair growth patterns. I often tell people to choose a flow that follows their natural sideburn line so regrowth does not obscure key details. A mistake is forcing sharp right angles where the jaw curves, which creates odd negative gaps as hair comes in. Expect moderate pain in short bursts and a single-session layout that may require a quick touch-up. For show-off styling, a clean-lined barbered fade paired with a collared shirt frames the art. Sensitive placement note: facial-adjacent work often needs a permission conversation for visibility and artist experience.
Session Day Picks
The nape, temple, and ear work above heal differently and having the right small items makes the session smoother and the first week less fussy.
-
Disposable clipper guard kit. For scalp and crown pieces it's useful to bring a freshly buzzed area and these guards help maintain a consistent length during prep.
-
Lightweight zip hoodie. Easy to take off without tugging at the head or neck and comfortable for long sessions at the shop.
-
Microfiber head towel. Keeps sweat off the area between breaks and is gentle against fresh ink.
-
Breathable cotton tank top. Ideal when the artist needs shoulder, nape, or side-neck access without fabric interference.
-
A well-reviewed clipper set. Helpful if you plan staged scalp work and prefer consistent hair length during multi-session blackout or crown jobs.
7. Occipital Arc Script

Scripts across the occiput need heavier single-line weight than wrist scripts. One camp argues single-needle scripts here blur fast because scalp skin and hair follicles shift lines. The other camp contends that choosing a slightly bolder hand and increasing letter spacing preserves legibility for years. Discuss actual millimetre spacing and ask to see healed samples the artist has on scalps. Session time is short, but expect a touch-up if letters lose crispness at year two. For reveal styling, cropped back jackets and beanies work well, consider a low-profile beanie.
8. Geometric Temporal Panel
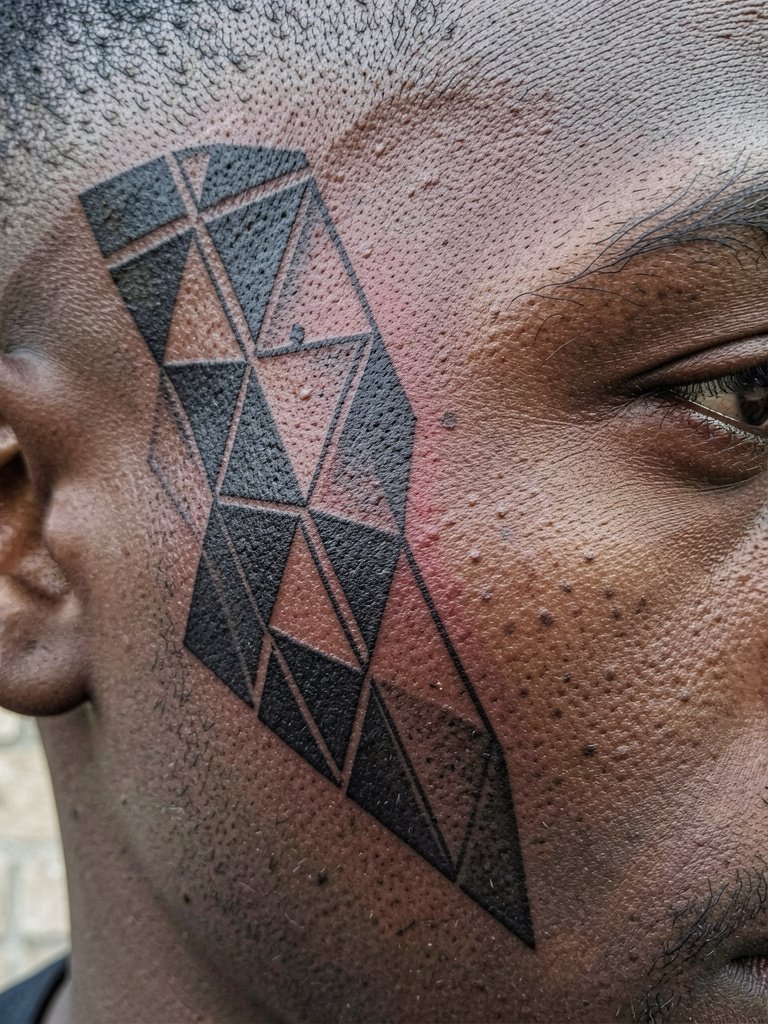
Geometric panels need room to breathe at the temple. A common error is crowding fine pattern into a tight zone where facial movement will soften intersections. Specify node points and a minimum triangle size so the work ages with form. Pain is moderate and the session can be broken into two short passes for comfort. For showing the piece off, pair with a tucked collar and a minimalist chain necklace that does not compete with the face lines. Sensitive placement note: anything crossing the cheek border requires an artist used to facial contours.
9. Polynesian-Inspired Scalp Band
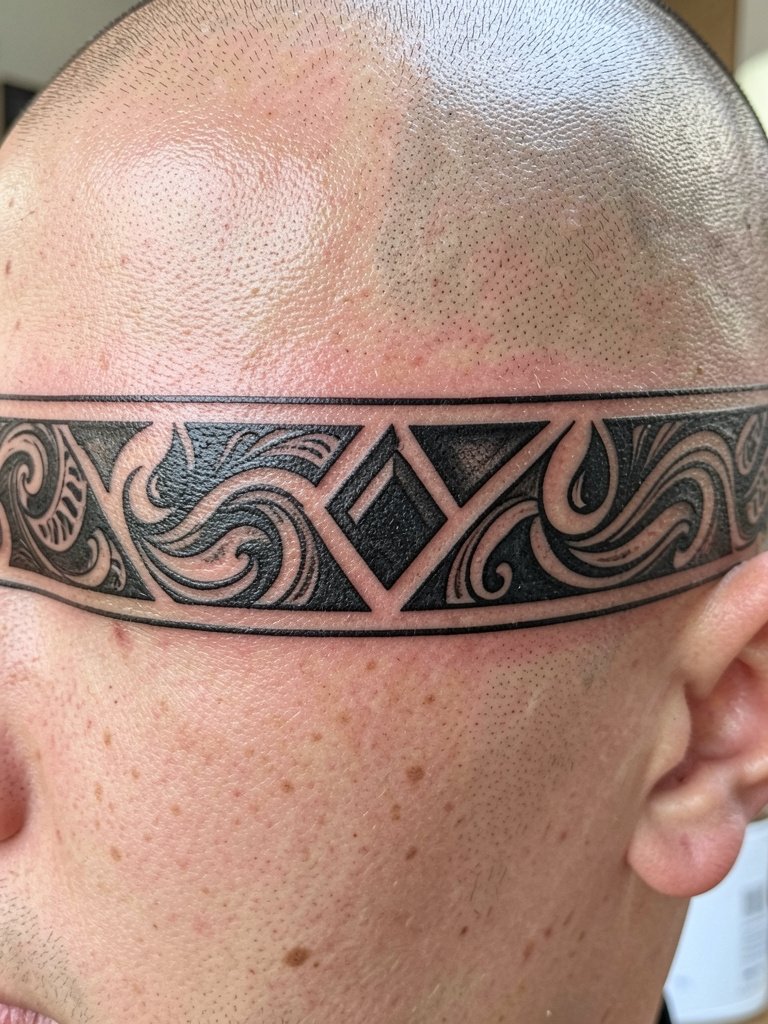
For designs with cultural origin, respect matters. One camp sees stylized Polynesian motifs as cultural appreciation when commissioned with permission and informed design. The other camp warns against casual appropriation and encourages studying meaning or hiring artists who share the heritage. If you choose this route, be explicit about symbolism and avoid copying sacred patterns wholesale. Expect medium session length and plan for a touch-up once the lines settle. For display pairings, a crisp white tee and an open shirt show the band when the hair is short, try a classic white tee.
10. Micro Skull Occipital Patch
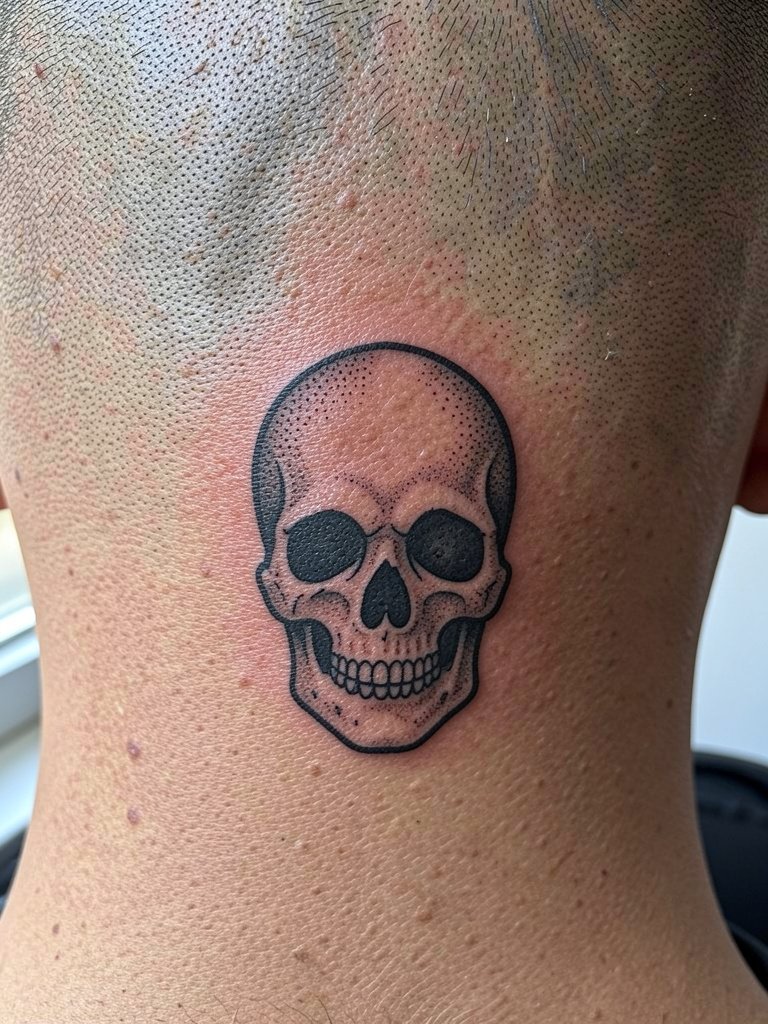
Small pictorial patches work best when they have a strong silhouette. I advise a clear outline and deeper black spots so the skull reads even as follicles grow back. A mistake is pushing too much internal detail into a two-inch piece on the scalp. Expect short, high-sensitivity sessions and a probable touch-up at six months. For styling, a tapered haircut that leaves the occiput exposed pairs well, consider a compact barber trimmer for maintaining the reveal. Sensitive placement note: scalp skin over the occiput can bruise easily, choose an artist experienced with the skull curve.
11. Hairline Script Arc
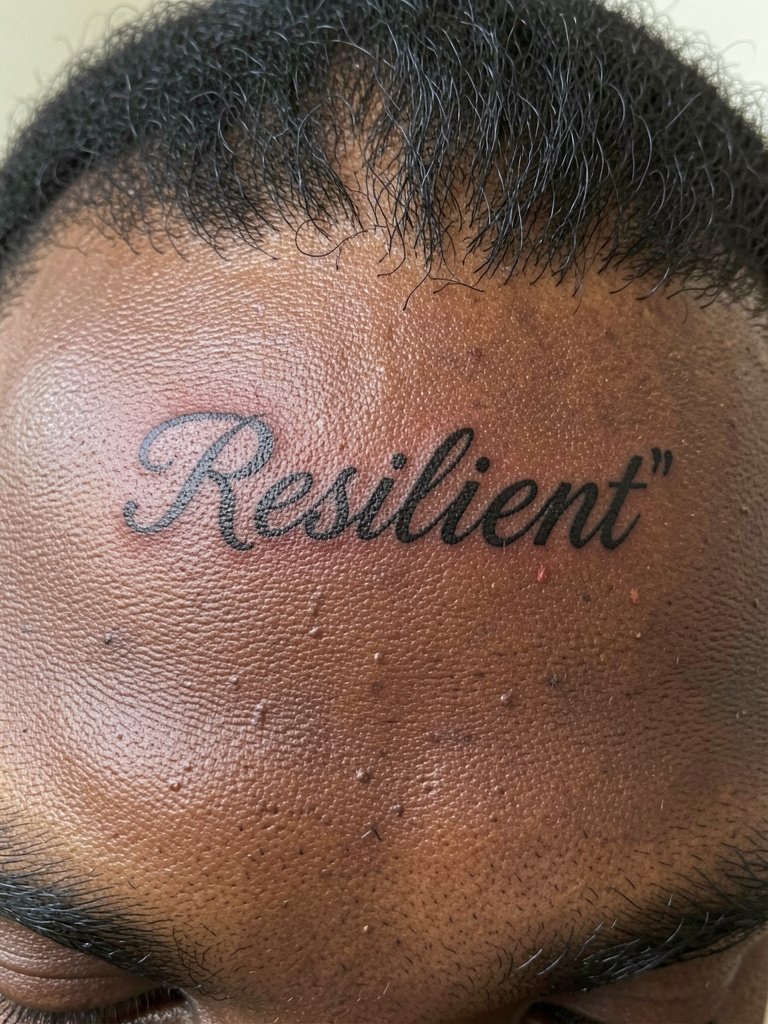
Hairline text must be planned with hair regrowth in mind. One group of artists avoids fine cursive at the hairline because follicles distort curves over time. The other group will do it if the lettering is slightly bolder and spaced more widely. I lean toward spacing and modest weight to give the script years of readability. A session here feels short but requires steady hands and precise stencil placement. For styling, a clean fade or a trimmed fringe shows the arc, try a matte pomade to style hair without heavy shine. Sensitive placement note: hairline work often involves micro-movements as skin and follicles shift.
12. Jawline Ornament
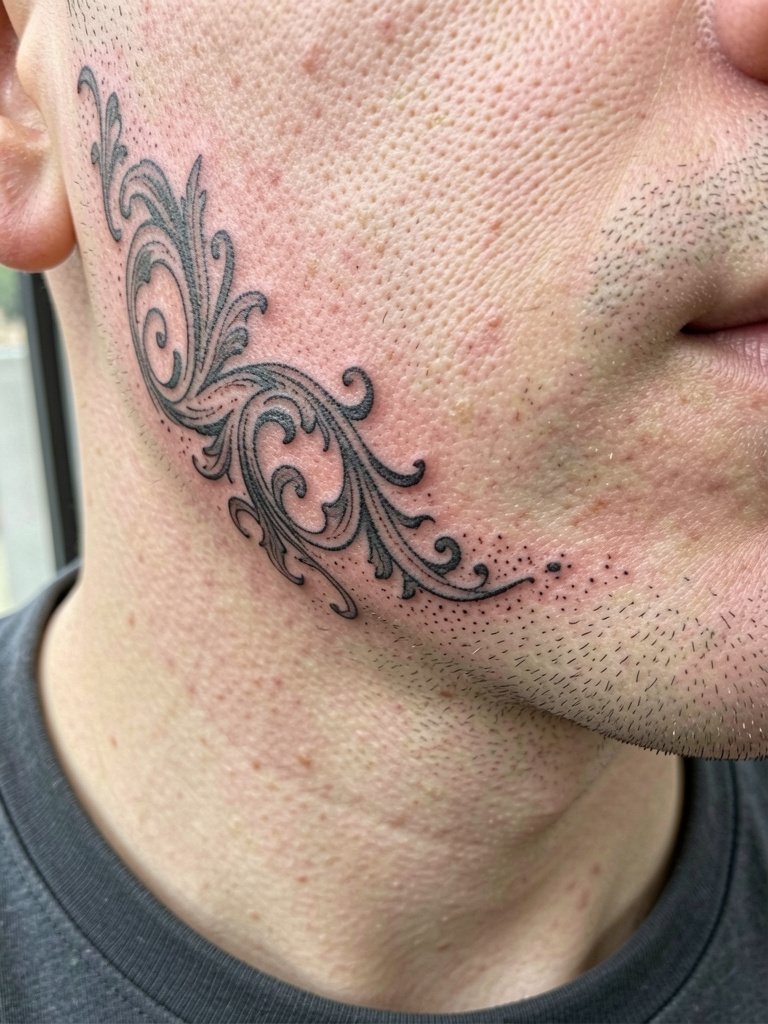
Jawline work needs to account for facial movement and shaving. I suggest connecting elements that follow the jaw curve rather than isolated tiny ticks that scatter as stubble grows. A common mistake is placing tiny dots right along where the razor passes, because daily shaving accelerates fade. Sessions are moderate and you should expect a one-year touch-up. For showing off the jawline piece, short collars and rolled sleeves keep the look focused, consider pairing with a crisp button-down shirt. Sensitive placement note: facial-border tattoos require an artist used to working beside shaving lines.
13. Topographic Scalp Map
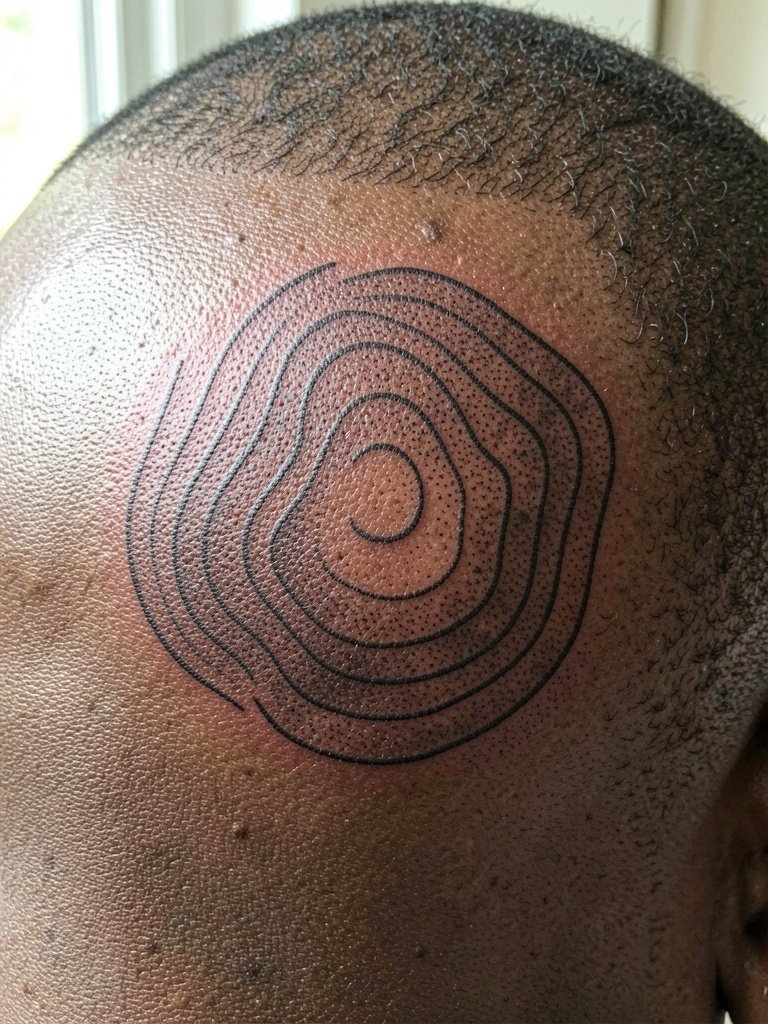
Topographic designs read well when contour lines are spaced deliberately. The biggest mistake is crowding too many lines in a tiny area which leads to muddiness as the skin settles. Discuss minimum line spacing and ask for a mock stencil sized to your scalp curvature. Pain is moderate and the piece often needs one follow-up to re-establish the crispest outer rings. For reveal styling, a fitted denim jacket and crew tee frame the top of the head, try a denim jacket for contrast.
14. Hairline Fretwork Bar
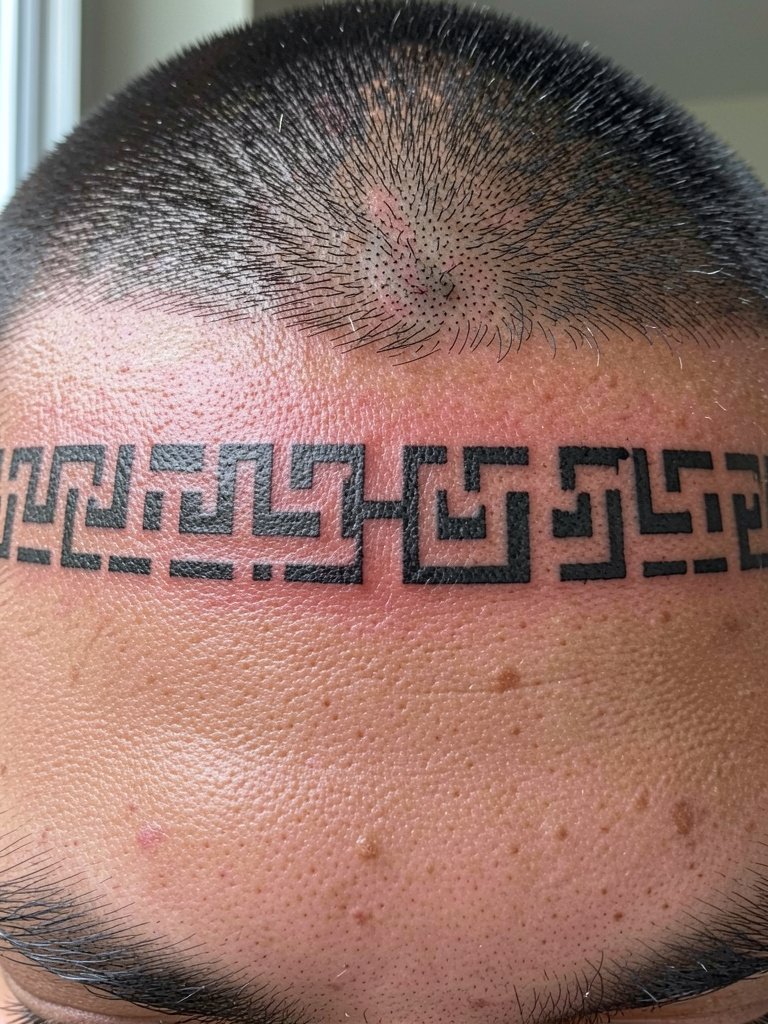
Fretwork across the hairline is bold visually and practical when you choose thicker block elements. People sometimes ask for micro-punch patterns that blur into the follicle map. Instead, plan blocks with at least one to two millimetres between them. The session is quick but sensitive because you are near the brow. For styling, cropped shirts and sunglasses highlight the band, try a pair of classic aviator sunglasses.
15. Scalp Negative-Space Portrait
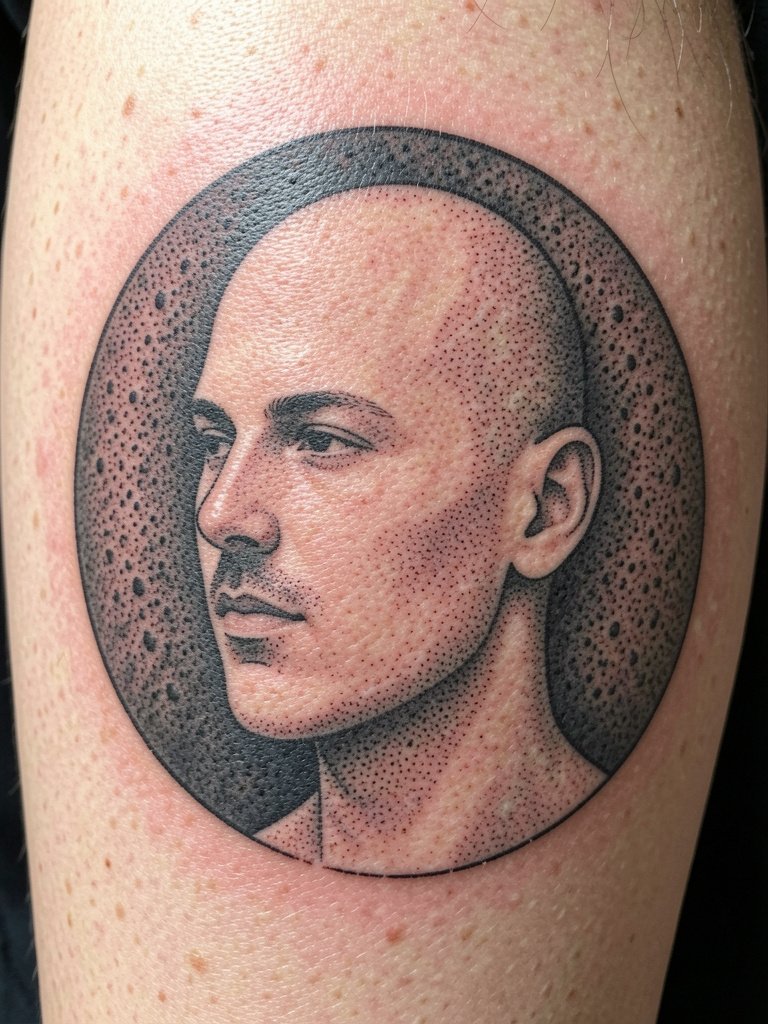
Negative-space portraits hold up better than dense micro detail on the scalp because the skin is uneven. I recommend a strong outer field and a few well-placed negative cutouts instead of trying to recreate a full photoreal face. A common mistake is packing too many small highlights that blur after a year. Session time can be longer if stipple fills are required. For styling, a fitted crew and textured jacket draw attention to the crown when you want to reveal the portrait, try a textured bomber jacket. Sensitive placement note: portraits near the hairline need careful stencil placement so the negative space reads correctly.
16. Temple-to-Jaw Script Band
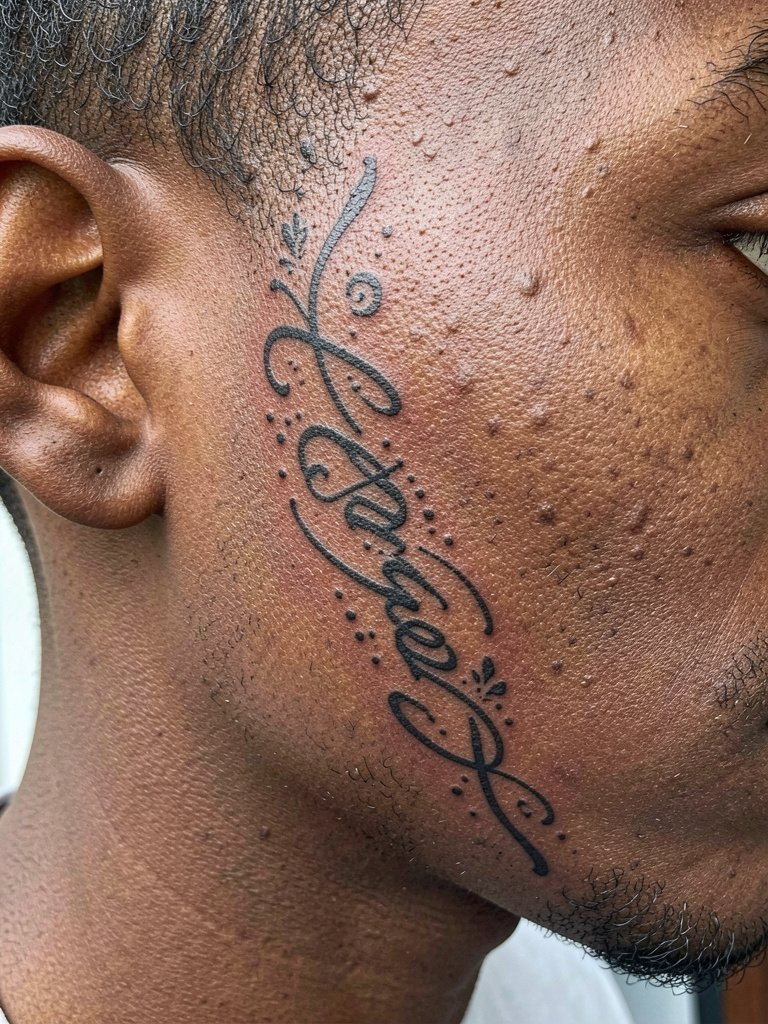
Long flowing bands that cross facial borders must follow muscle lines and hair growth. A common error is picking a font that looks good at a computer size but collapses on curved skin. Ask the artist to map the script while your head is tilted so letters do not distort when you move. Expect a medium-length session and potentially a touch-up in the first year. For display, short collared shirts and a trimmed beard help integrate the flow, try a beard grooming kit to keep edges sharp.
17. Scalp Circuitry Linework
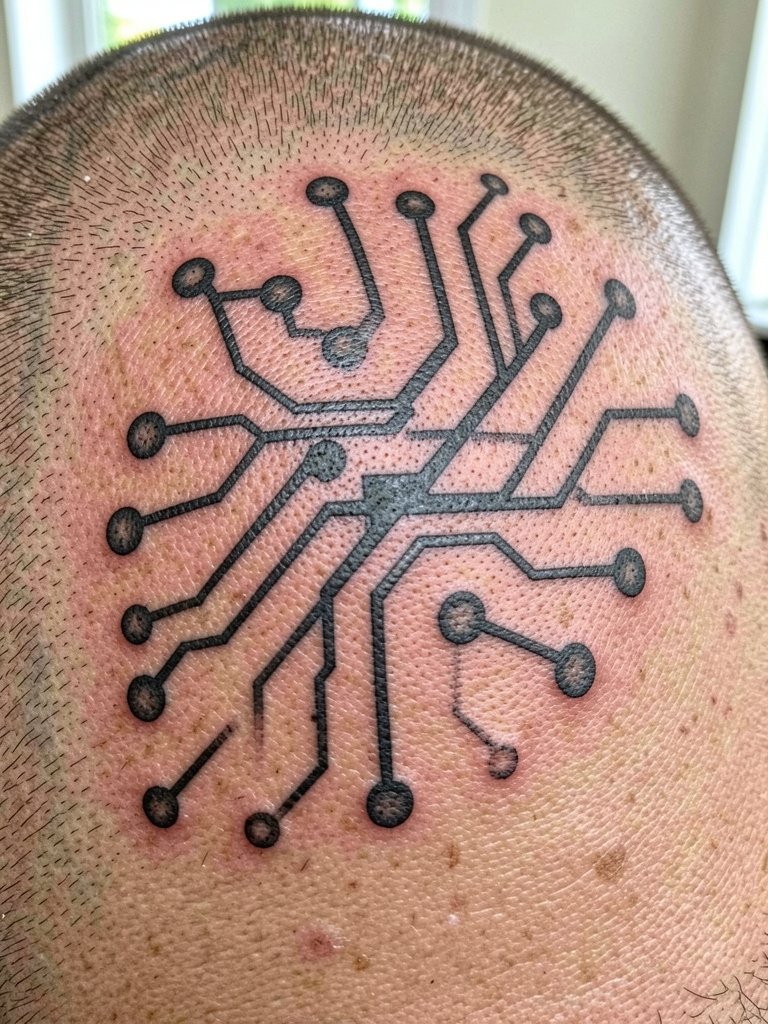
Circuit-style linework looks futuristic but suffers when you use tiny gaps between lines. I suggest anchoring nodes with heavier weight and keeping trace lines at a measured minimum width so they do not merge. A mistake is mapping too closely to a computer image without accounting for scalp curvature. Sessions are moderate and may be split to manage sensitivity. For outfit pairings, a techwear jacket and minimalist tee amplify the aesthetic, try a lightweight windbreaker.
18. Sunburst Forehead Accent
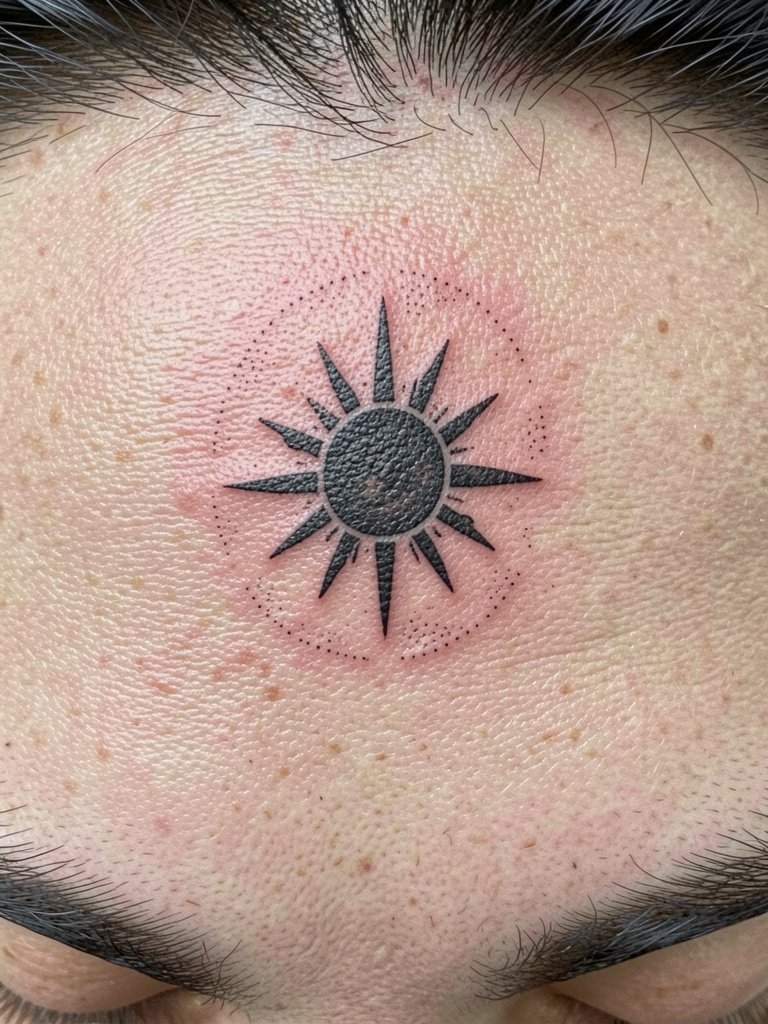
Forehead work is highly visible and polarizes opinion. One camp accepts bold forehead symbols as legitimate self-expression and part of identity. The other camp cautions that highly visible marks can impact first impressions professionally and socially. If you proceed, choose a scale that lets the design breathe on the brow and avoid micro-detail. Expect a painful but short session and a likely touch-up at one year. For presentation, clean tailoring and neutral tones keep attention balanced, try a lightweight blazer. Sensitive placement note: forehead tattoos need a specialist used to very visible placements and public perception concerns.
19. Cheekbone Minimal Dot Cluster
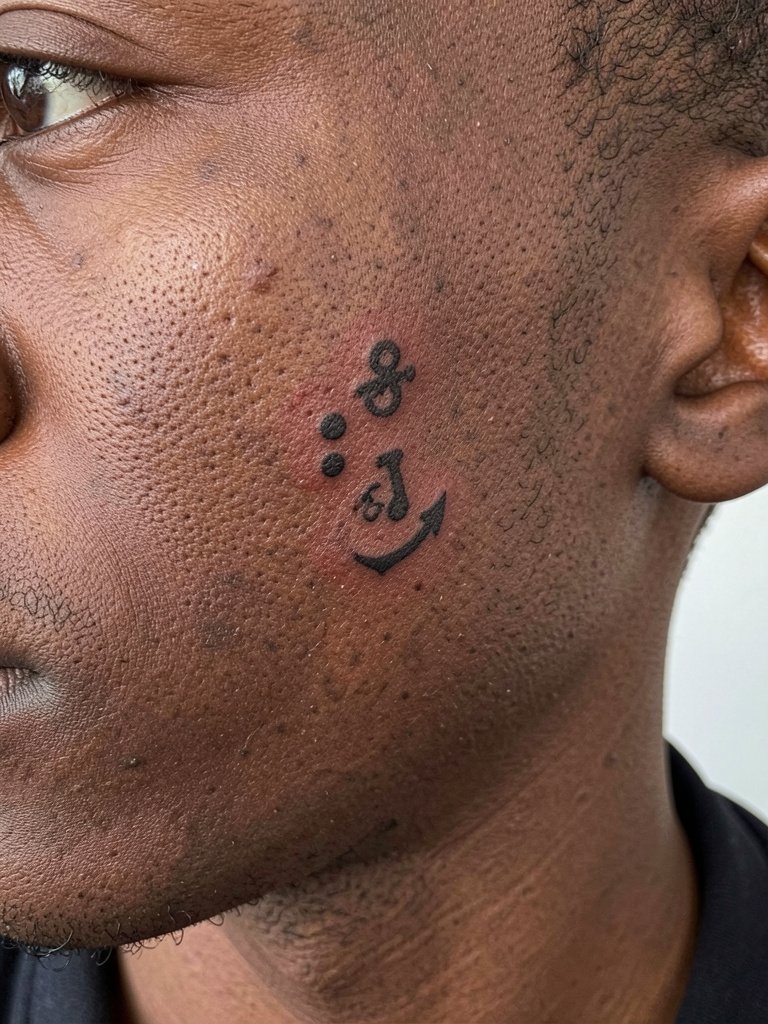
Tiny dot clusters are deceptively fragile on facial skin. I recommend a slightly larger anchor dot so the pattern retains presence through shaving and time. A common mistake is wanting micro pinpoints that fade to light freckles within months. The session is quick but the doctoring must be precise. For styling, a well-cut crew neck and simple accessories keep the emphasis subtle, try a thin silver chain.
20. Interlocking Hex Scalp Sleeve
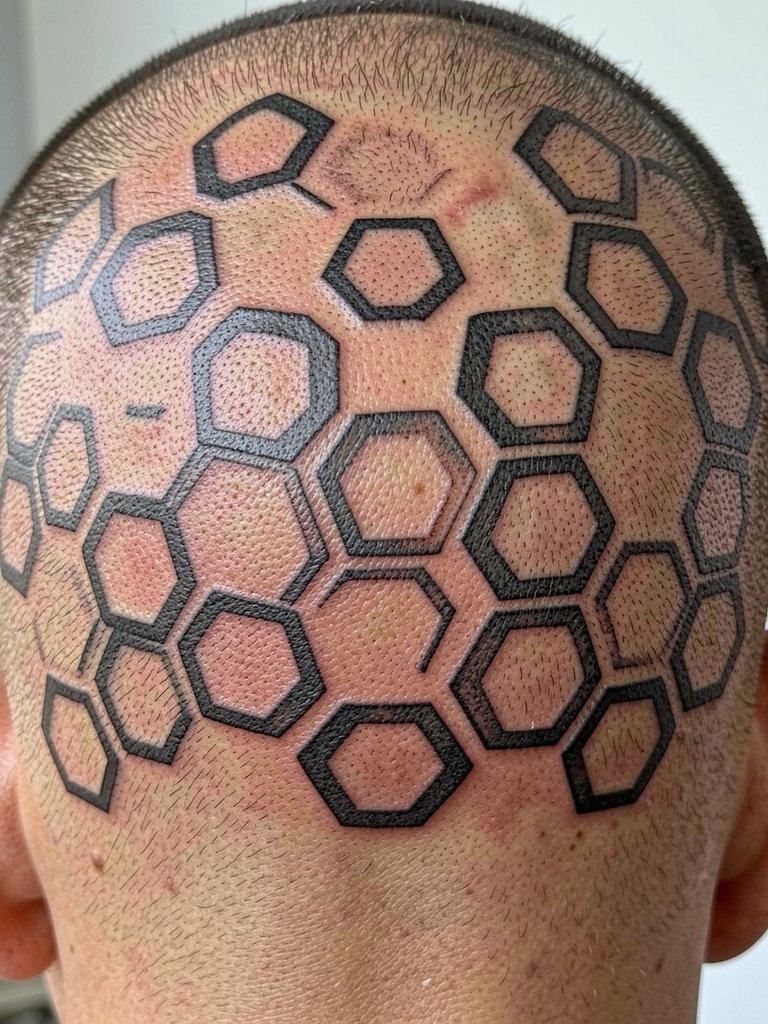
Large repeating patterns need planning for natural head shape. The error I see most often is starting a repeated grid without compensating for the crown bulge, which skews symmetry. Map a key grid point and build outward. Sessions can be longer if you want full coverage. To display this work, a short-sleeve shirt with an open collar keeps attention upward, try a linen short sleeve shirt.
21. Scalp Barcode Stripe
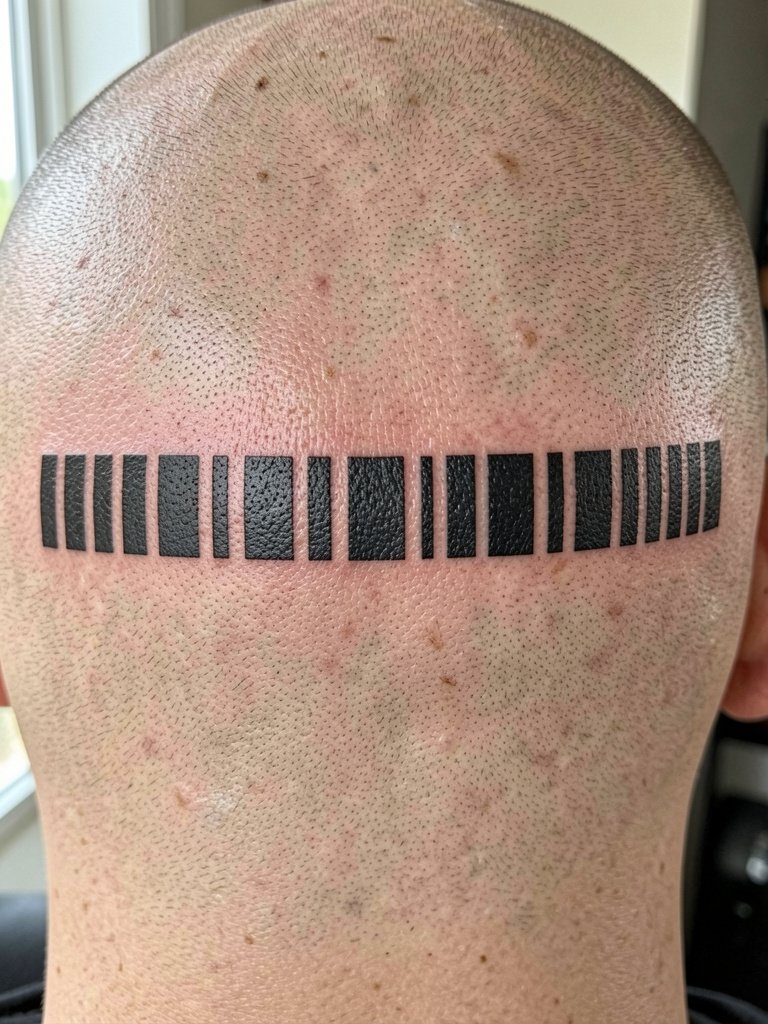
Bar tattoos read well when spacing and bar width are generous. The common problem is trying to fit narrow bars with small gaps that merge every time the scalp swells. Decide on a minimum bar width with your artist and check healed examples. This is a quick session but expect a touch-up if lines soften. For styling, a minimalist tee and an over-shirt make the barcode a distinctive accent, try a minimalist white tee.
22. Scalp Constellation Map
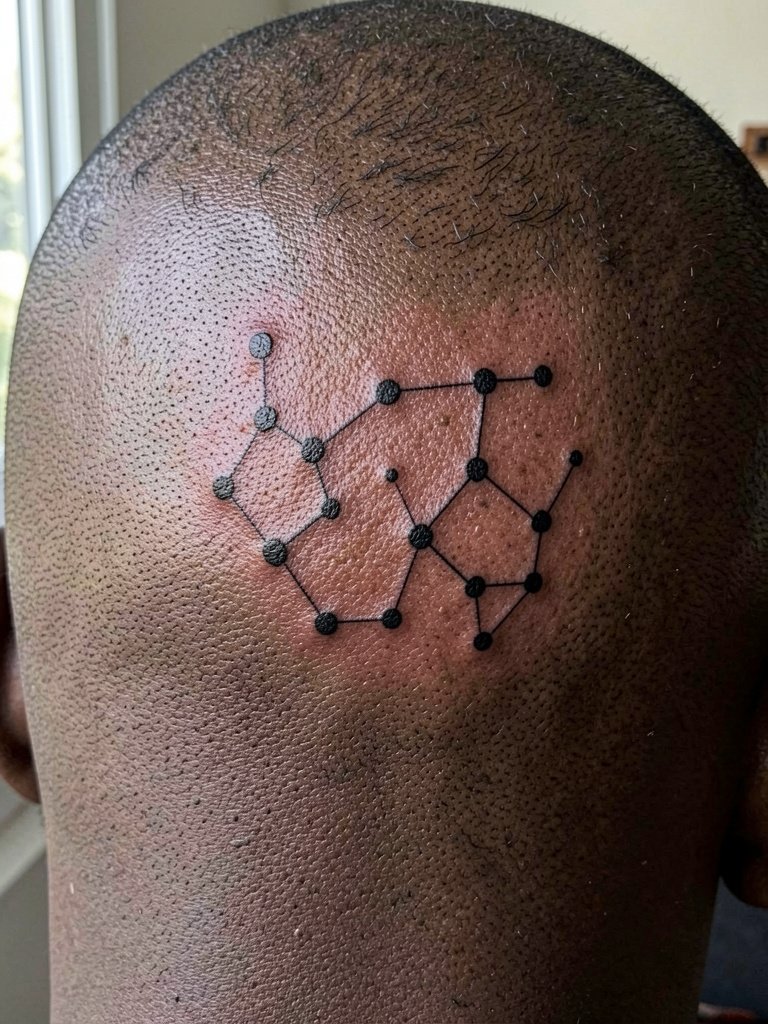
Constellation tattoos look great when dots are varied and not all identical. A mistake is using identical microdots that become indistinguishable as the skin ages. Ask your artist to plan hierarchy between major and minor nodes so the map reads at a glance. Sessions are short and the scalp tolerates small clusters well. For display, cropped athletic tops and a textured jacket help center attention, try an athletic tank top.
23. Temporal Knotwork Band
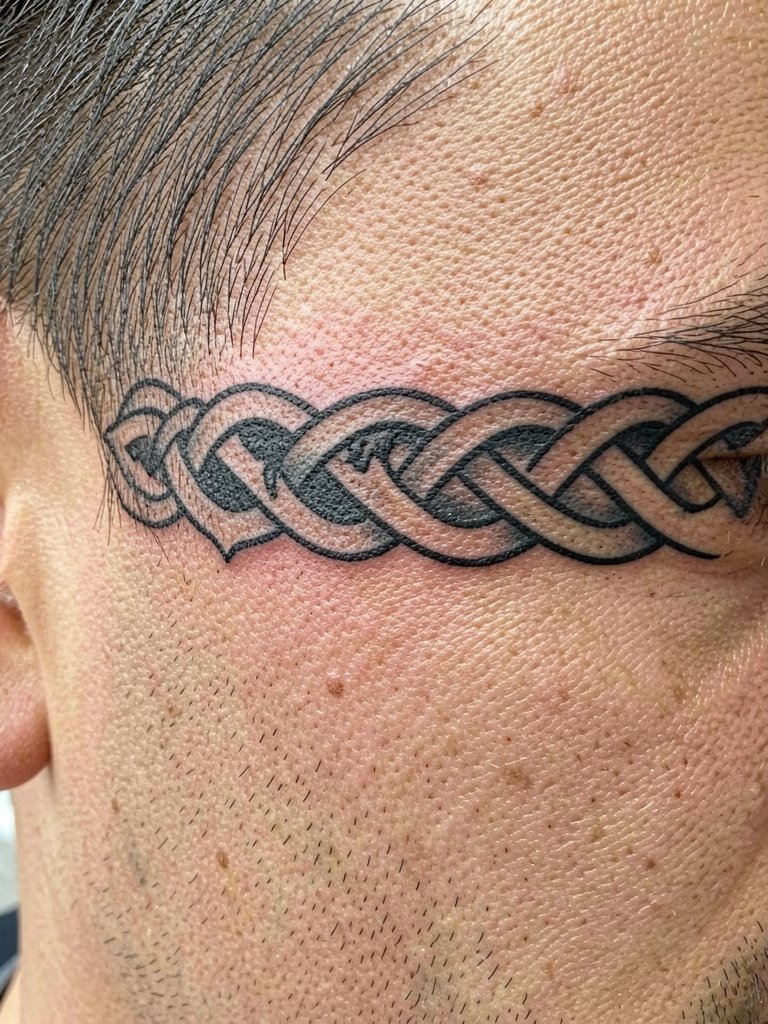
Knotwork needs conservative spacing at the temple. The usual error is too many crossovers in a tight band which later blurs into a dark mass. Request a simplified knot with open negative channels. Session feel: short but exacting. For styling, a neat collared jacket and a scarf draw the eye, try a light scarf.
24. Side Skull Half-Mask
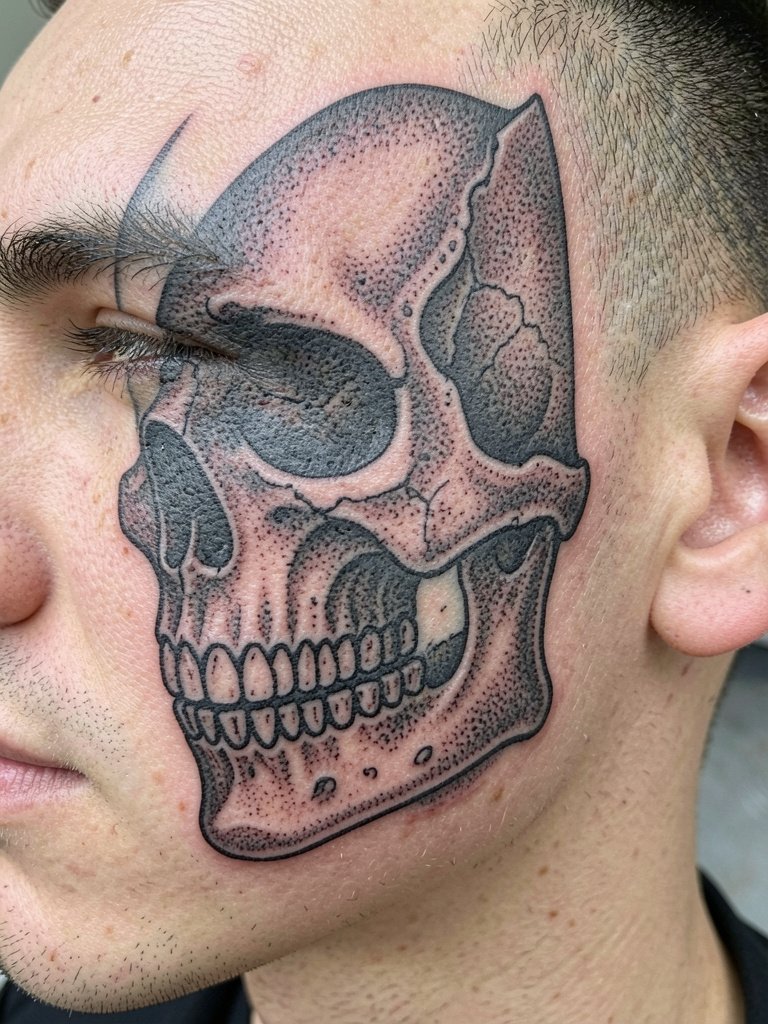
A side skull that behaves like a mask needs strong outer edges and minimal interior fuss. People sometimes ask for micro teeth or tiny eye details that do not last on facial-adjacent skin. Discuss where the mask should read from three feet away so the silhouette is prioritized. Expect a moderate session and a likely touch-up at the one-year mark. For presentation, a dark tee and open jacket keep the mask integrated, consider a black tee. Sensitive placement note: anything crossing cheekbones requires an artist experienced with facial curvature.
25. Hairline Chevron Row
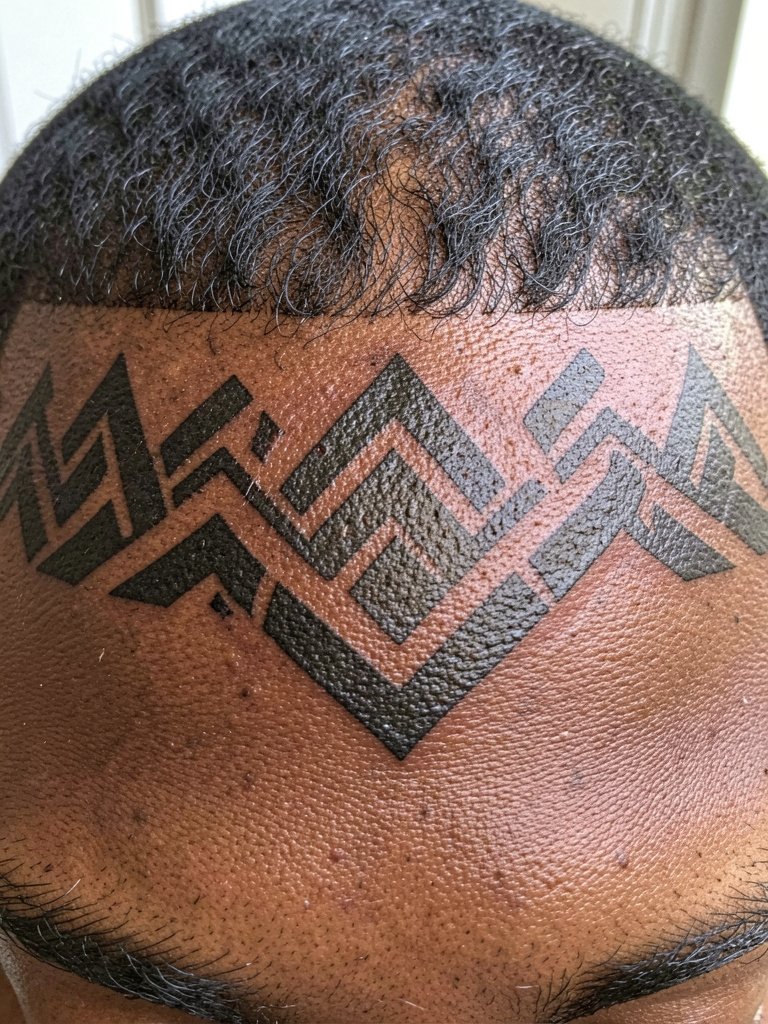
Chevron rows are visually striking when the pattern steps are large enough to survive follicle growth. Avoid very thin chevrons because the points will soften. Tell the artist you want at least a two-millimetre minimum between points to preserve geometry. Sessions are short and pain is moderate. For styling, cropped jackets and textured hair product help define the hairline, try a texturizing paste.
26. Minimal Morse Code Strip
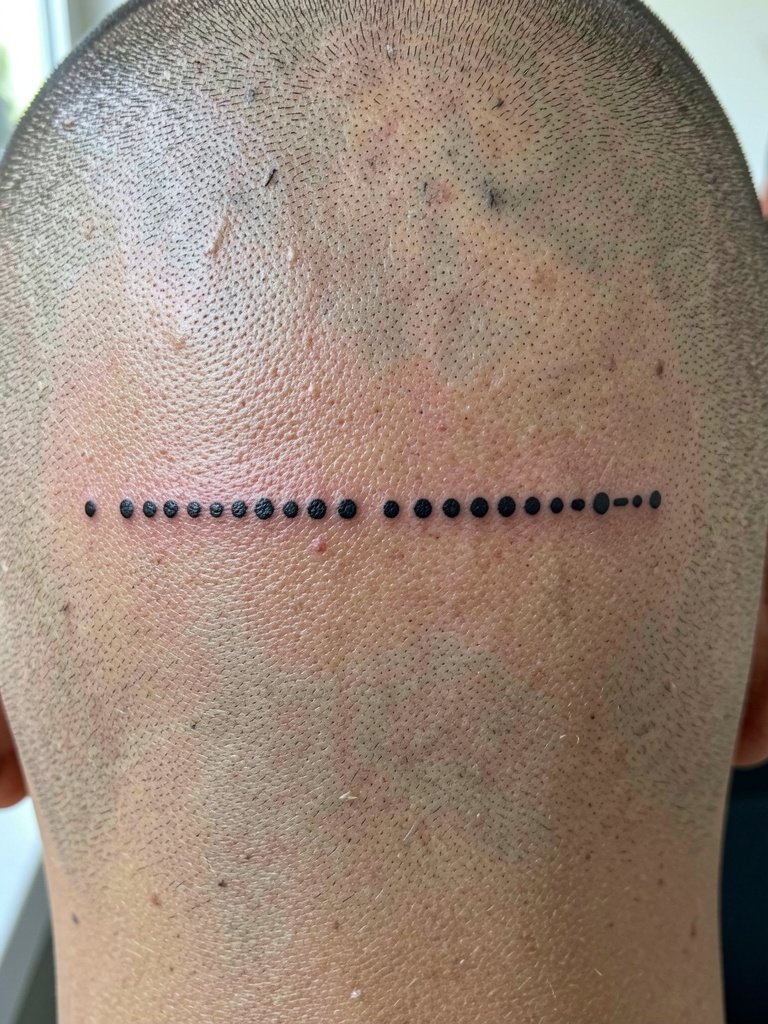
Morse strip designs are meaningful but fragile when built from tiny dots. I suggest increasing the length of dashes and the diameter of dots so they avoid merging. A frequent mistake is expecting single-millimetre dots to last on scalp texture. The session is quick and you will probably want a one-year check. For styling, understated layers and a minimalist chain keep the focus, try a minimalist chain.
27. Bold Spiral Vertex
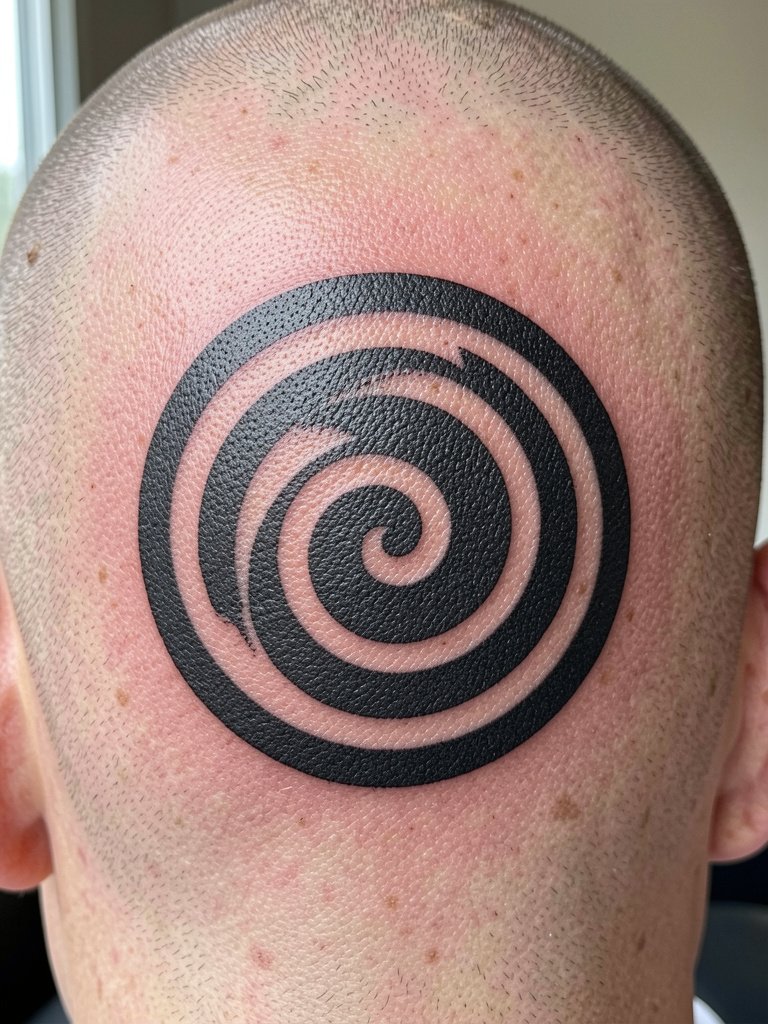
Spiral designs work well when the outer rings are bold enough to resist diffusion. The biggest error is making inner rings too close together which leads to a muddy center with time. Plan ring widths from the center outward and ask the artist to mark the key anchors before puncturing skin. Sessions are moderate and the scalp tolerates radial work in short bursts. For display, cropped jackets and low hats accentuate the spiral, try a canvas cap. Sensitive placement note: vertex work needs an artist who understands symmetry on the skull.
Frequently Asked Questions
Q: How painful are head and scalp tattoos compared with other placements?
A: The scalp and face are generally higher on the sensitivity scale because the skin is thin and there is less fatty tissue. Pain varies by exact spot, with temples and forehead feeling sharper and the nape or parietal areas often feeling like an intense but shorter discomfort. Numbing options and planning short passes reduce the strain and most people manage with breaks.
Q: Will fine-line scripts and tiny details hold up on the scalp?
A: Fine single-needle scripts on the scalp often soften faster than on the arm because of follicle texture and curvature of the skull. Some artists say you must avoid ultra-fine lettering here, and others say slightly heavier weight and wider spacing will keep the letters readable. My practical advice is to increase letter spacing and minimal weight in the stencil so the work survives two to five years.
Q: How should I prepare for a scalp or nape session, and what should I wear?
A: For scalp and nape work wear a loose zip hoodie or a button shirt that slips off without pulling at the head. Bring a recently buzzed area if you prefer short hair for the stencil. A lightweight zip hoodie or a breathable tank top makes session changes easy and keeps fabric from sliding over fresh ink.
Q: Where can I find healed examples and portfolio work without naming specific artists?
A: Search platform hashtags filtered by location and keywords like "head tattoo healed," explore portfolio pages on visual platforms using tags for scalp placements, and browse dedicated tattoo forums for photo threads labeled "healed head tattoos." That approach surfaces multiple healed shots in different skin tones without relying on single artist accounts.
Q: Are there special cultural or legal issues I should consider for tribal or heritage designs?
A: Yes, designs with cultural origin require sensitivity and clear intent. Some people commission respectful interpretations and will work with artists who can explain symbolism. Others believe certain motifs should only be worn by those from the culture; if you are outside the tradition, spend extra time learning the meaning and consider collaborative design that honors origin.
Q: How often do head tattoos need touch-ups compared with other areas?
A: Head tattoos commonly need an initial touch-up within six to twelve months because the scalp can heal unevenly and follicles affect ink distribution. After that, touch-up frequency depends on your hair growth and sun exposure, but many people see stability for several years if the original line weights and spacing were planned for longevity.
