
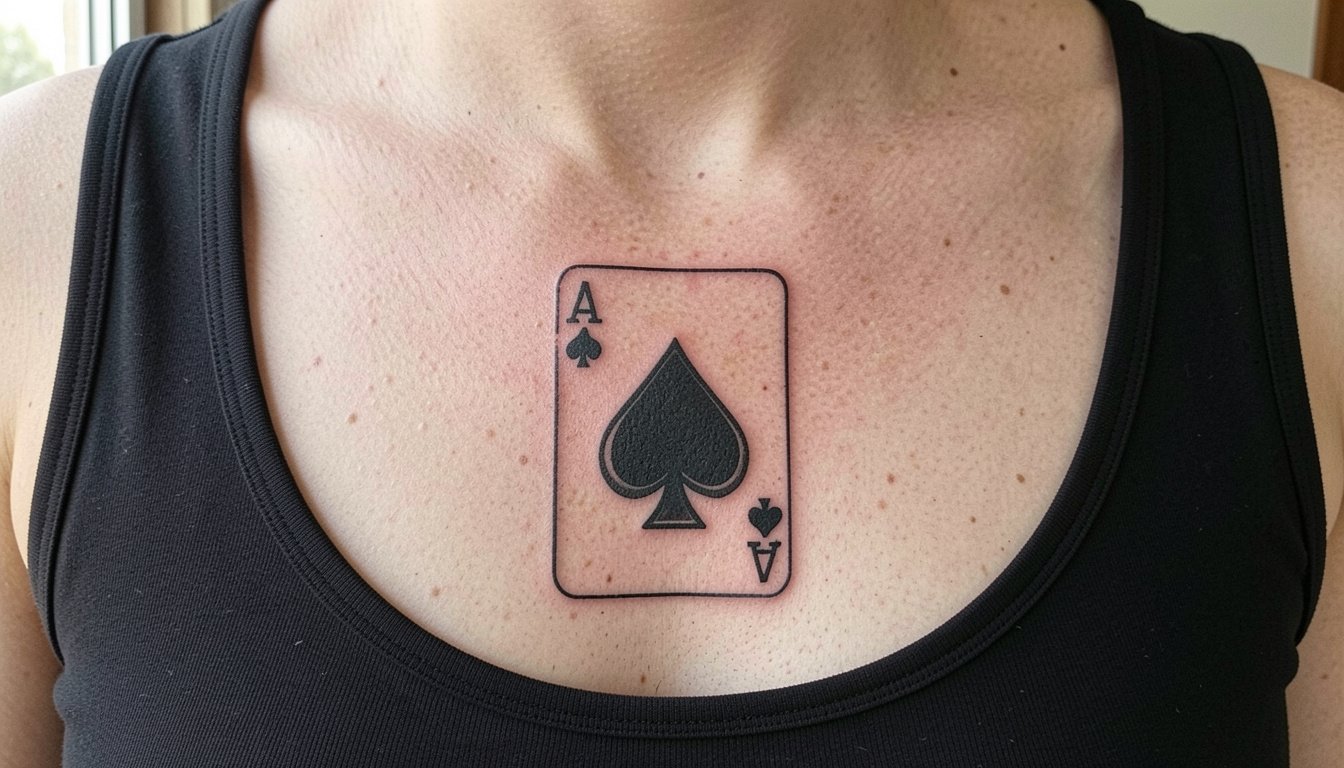
Ace aces are more than deck props, they are tiny narratives that live on skin, and the choices you make at the stencil stage determine whether that little black spade still reads crisp in five years. Expect common pain spots, fine-detail fading, and blowout on soft, mobile skin to be part of the decision. Pick a scale, plan for touch-up windows, and choose line weight that survives daily wear.
1. Fine-Line Ace Card on the Inner Forearm
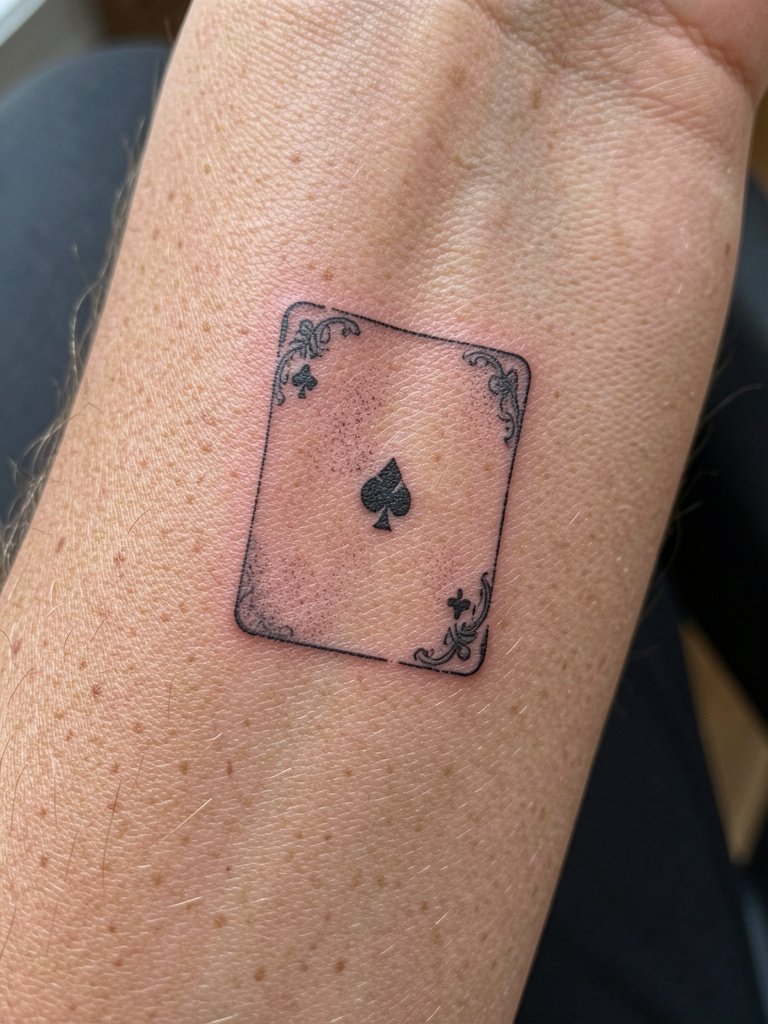
Pick this when you want a subtler, readable ace that can be shown or covered. The inner forearm moves a lot but tolerates long clean strokes, so request slightly heavier single-needle linework than your Instagram reference to avoid the most common fading at the three-year mark. Talk specifics about spacing and lineweight during the consultation so the corner fleurons do not compress into a dark knot. Expect a one- to two-hour session at a calm pain level and a likely touch-up window around year two. For showing it off, try a rolled-sleeve linen shirt that lifts to the mid-forearm.
2. Neo-Traditional Ace on the Outer Bicep
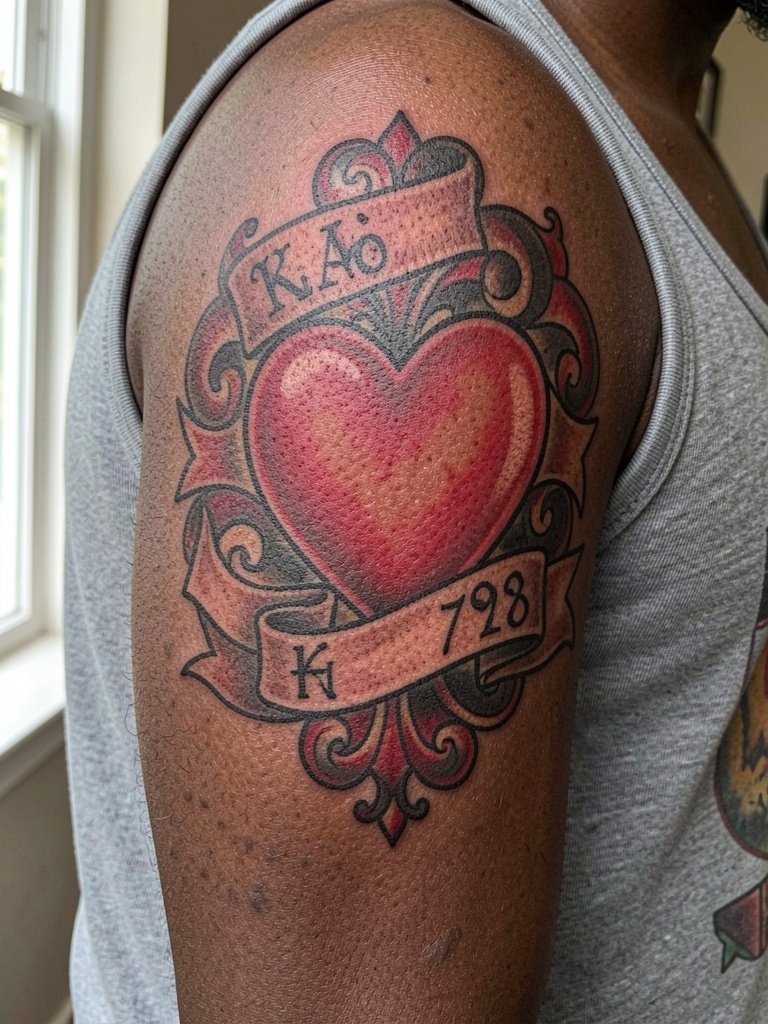
This style uses heavy outlines and saturation, so it ages into a bold badge rather than a smudge. Choose it if you want the ace to read from a distance and survive moderate sun exposure. Discuss exact color saturation and contrast with your artist so the red in the heart keeps density without feathering. Outer bicep sessions feel moderate on pain and usually take one to three hours depending on color layers. Avoid asking for too many tiny ornamental lines inside the heart, that is the typical mistake that causes muddle after a touch-up. Pair this with a fitted muscle tee or a sleeveless denim jacket to frame the piece.
3. Minimalist Single Ace on the Wrist
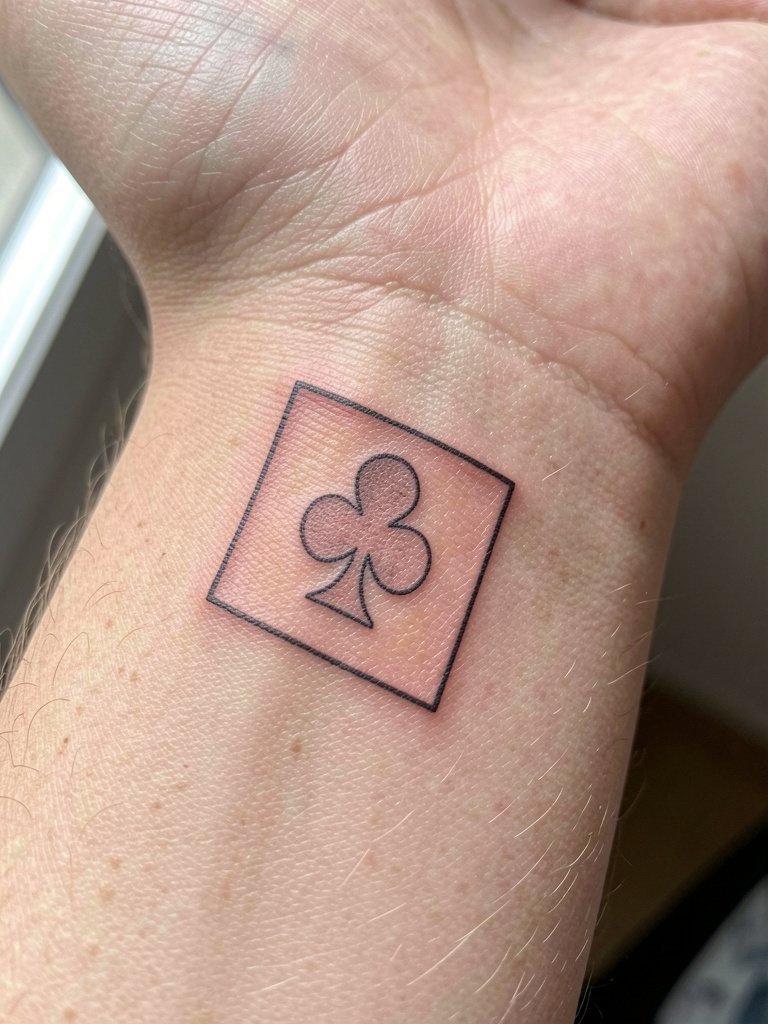
Wrist pieces look delicate but can blur if you go too thin. If you want a minimalist ace, ask for a hair heavier single-needle linework than your reference and a slightly increased border gap so the shape keeps negative space at year three. The wrist is high on friction from bracelets and washing, so expect faster fading and a likely touch-up at 12 to 18 months. The session is short and sharp, pain is moderate, and a common mistake is shrinking the design too small. For evenings out, show this with a thin cuff bracelet and a delicate chain watch that draws the eye without rubbing the ink.
4. Blackwork Ace of Spades on the Ribcage
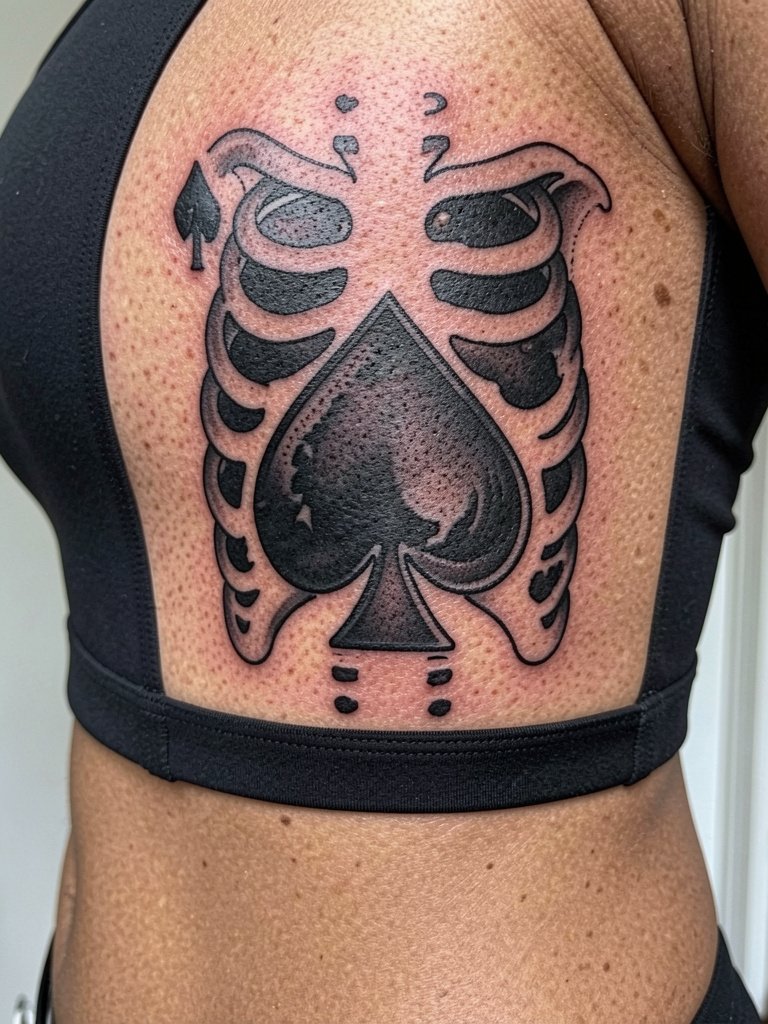
Ribcage placements are painful and the skin moves with breathing, so bold blackwork often outperforms fragile fine-line here. One camp worries fine line on the ribs blurs within two years because of skin stretch and friction. The other camp argues that slightly wider spacing and careful depth let fine line settle clean on the ribs. If you prefer a high-contrast ace, plan for a longer session and a two-stage approach so saturation can be layered without overworking the skin. Expect a touch-up at year two for solid black pieces. Wear a fitted sports bra to the session for access and minimal shifting.
5. Geometric Ace Cluster Along the Collarbone
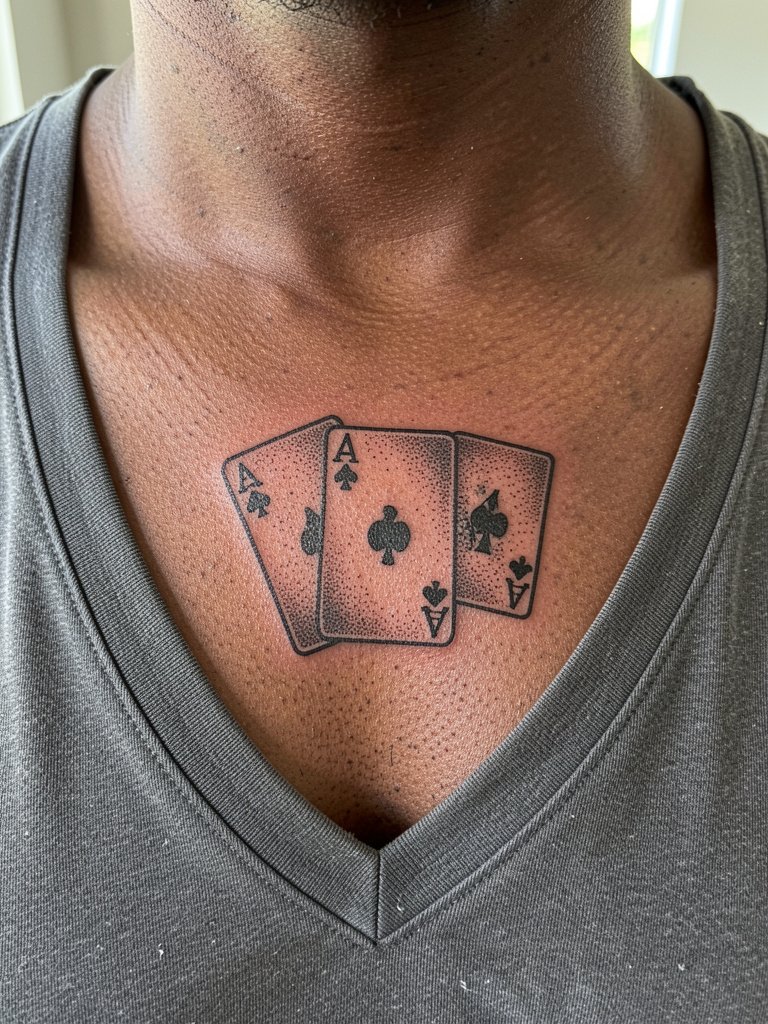
Geometric ace clusters work well where the flat plane of the collarbone gives a steady canvas. Ask for diagrams showing how the cluster reads at three inches versus five so spacing stays crisp. The biggest mistake is cramming too many micro-elements into a small collarbone band, which leads to loss of dot work and muddled negative space. Sessions feel moderate and may be split to protect the delicate area. For show-off outfits, this area pairs with open-back tops and delicate ladder-back dresses that expose the collarbone.
6. Ornamental Ace Sternum Piece
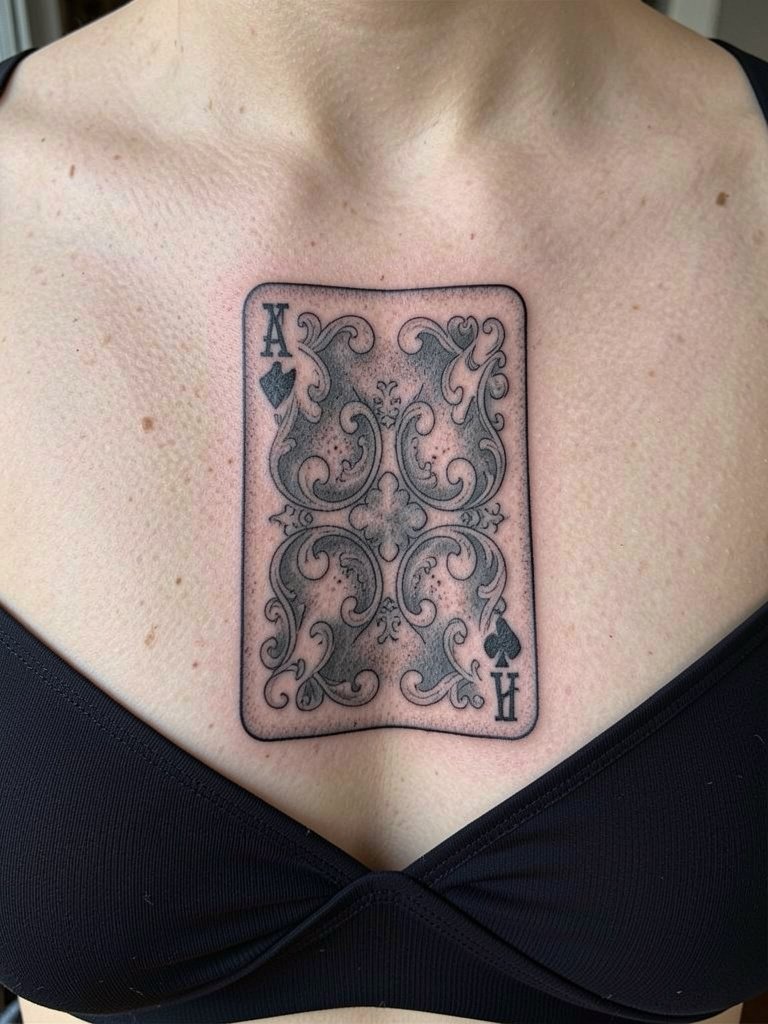
Sternum work collects movement from breathing and chest expansion, so plan for deeper spacing between filigree lines. One camp says fine line on the sternum blurs quickly because of constant flex and thin subcutaneous tissue. The other camp maintains that with slightly bolder contour lines and staged shading sessions the piece will hold fine. Choose a staged session plan if you want shaded detail, and expect higher pain and a longer heal with potential touch-up at 18 months. Specialized experience in chest anatomy is important for the artist you book.
7. Micro-Realism Ace Portrait on the Thigh
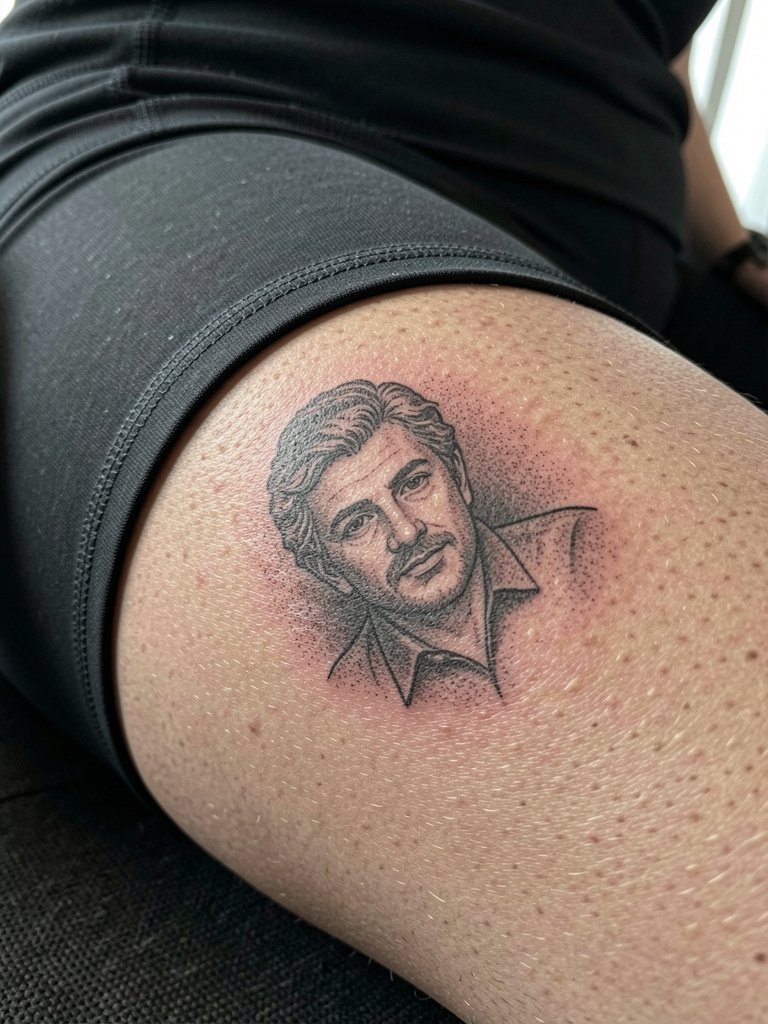
Thigh pieces let micro-realism breathe because the surface is broad and stable. If you want tiny engraved details, tell the artist you prefer negative-space highlights rather than extra stipple density to prevent muddle. A typical session runs two to four hours depending on detail and pain is low to moderate. A common mistake is requesting the same scale as a forearm piece, which loses detail once reduced. Wear loose shorts to your appointment and consider pairing the healed art with mid-thigh wrap skirts during warm weather for a tasteful reveal.
8. Traditional Playing Card Sleeve Accent
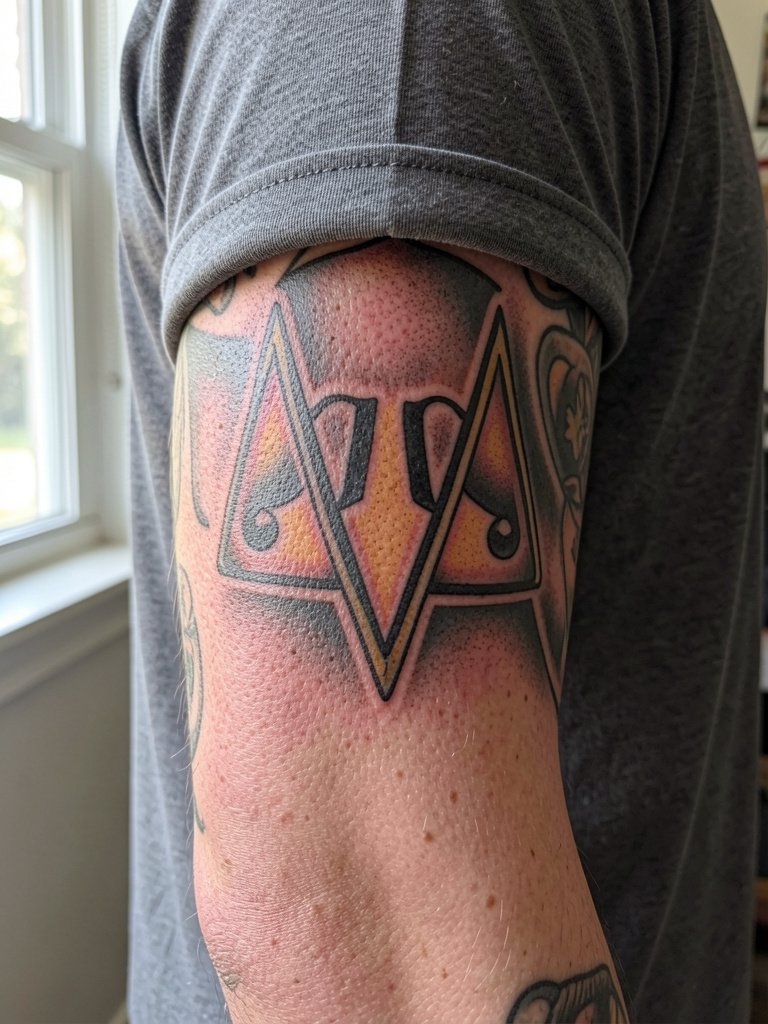
Use traditional ace motifs as sleeve connectors when you want bold anchors that age predictably. Request color blocking maps in your consult so the artist knows which sections need heavy saturation and which are transitional. Sleeve sessions can be long and you may opt to split them into multiple appointments to protect saturation and reduce cuffing pain. Traditional work rarely needs early touch-ups if healed correctly, but do expect occasional color refreshes at year three. Avoid asking for ultra-fine details inside the flat color blocks as that will be the first area to soften.
9. Watercolor Ace With Negative Space on the Calf
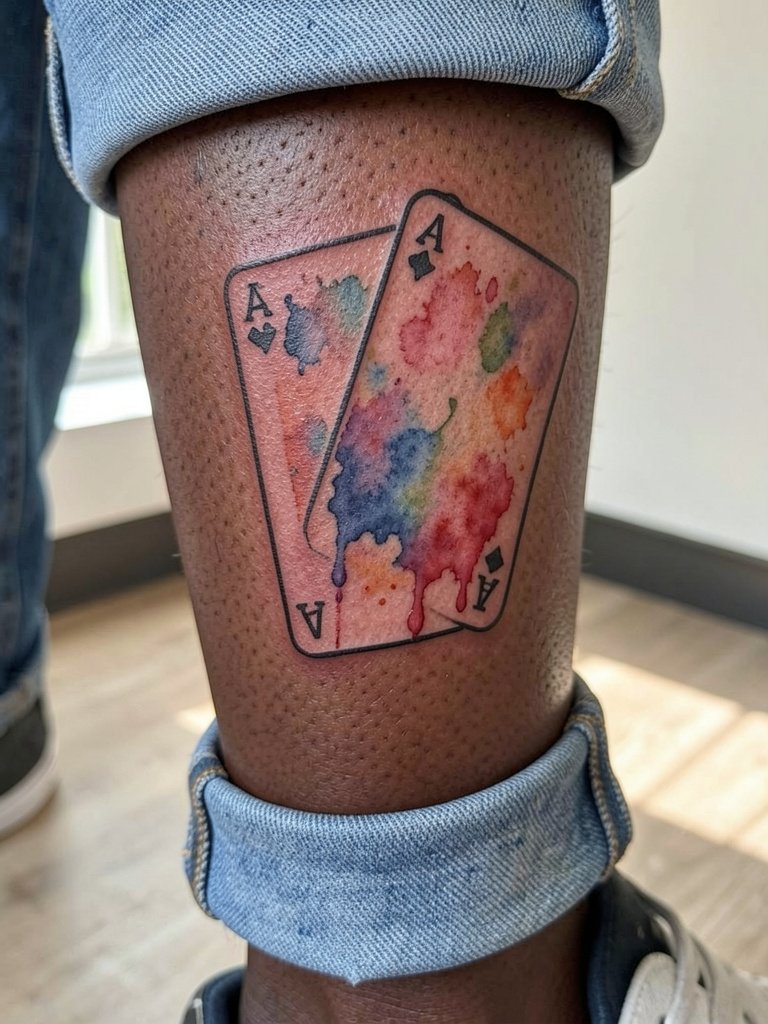
Watercolor aces read beautifully on the calf where color movement matches leg contours. Ask the artist how they plan to balance color density with linework so the washes do not obliterate the card shape after a year. The typical calf session is moderate in pain and can be completed in one sitting for small pieces. A common mistake is relying on watercolor alone without a crisp contour, which causes the motif to dissolve under frequent sun exposure. Pair the healed calf art with cropped denim or mid-calf leather boots to show off the sweep.
10. Micro Ace on the Finger
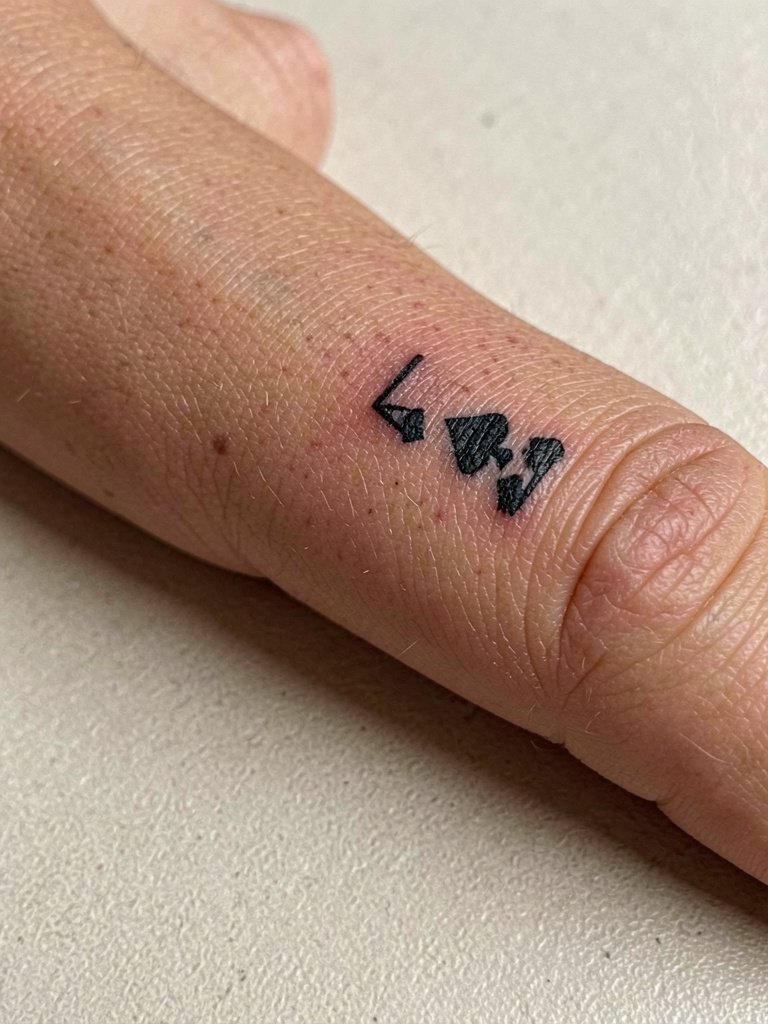
Fingers are a high-fade zone because of washing, friction, and thin skin, so many artists split into two camps regarding micro-detail here. One camp says micro work on fingers fades and fragments within a year due to constant abrasion. The other camp argues that using bolder tiny pips and strategic placement on the side of the finger preserves the symbol longer. If you still want a finger ace, specify the exact finger surface and accept a touch-up plan at six to twelve months. Sessions are short but painful and require an experienced hand-piercing approach.
11. Irezumi-Inspired Ace With Wave Motifs on the Shoulder Blade
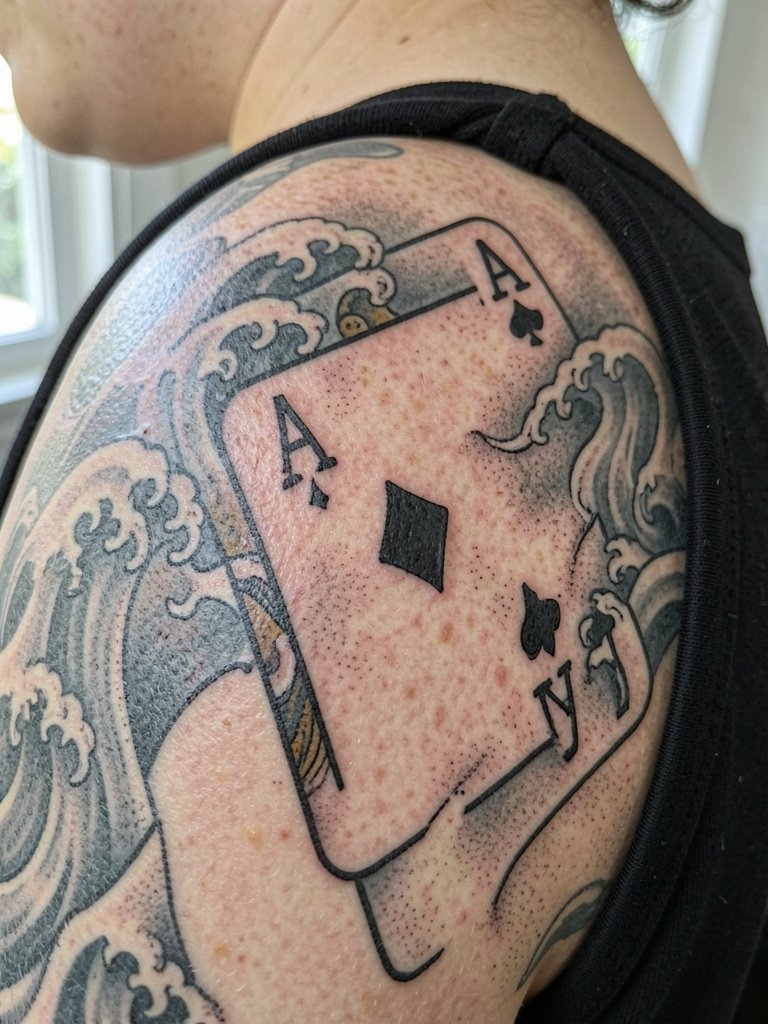
When borrowing elements from cultural styles, state respect for origin and ask the artist about appropriate motifs and placement. Large, directional wave patterns anchor an ace on the shoulder blade and help the composition survive shifts in musculature and posture. Sessions are moderate with possible multiple sittings if you add grey wash. A typical misstep is combining many cultural motifs without cohesive intent. For outfits that showcase the area, try an open-back top and a button-back linen dress to let the shoulder blade artwork read.
12. Split-Card Design Across the Sternum and Rib

Split-card work requires careful symmetry mapping so the halves read as one when the torso is at rest. Plan the stencil placement while standing and supine so movement from breathing does not misalign focal points. Because this touches the rib controversy, one camp says split fine-line across sternum and ribs blurs quickly with frequent motion. The other camp insists that bolder contouring and staged fills allow a split composition to hold. Expect longer sessions and higher pain; schedule recovery time and a realistic touch-up at year two.
13. Black and Grey Ace With Botanical Frame on the Calf

A botanical frame stabilizes the ace visually and helps separate shadow from silhouette as the piece ages. Ask the artist for a contrast map showing dark anchor points and lighter fills to avoid muddling after a few years. Calf skin tolerates saturation well and sessions are usually moderate in length. Avoid excessive fine leaf veins in tiny areas, since those tend to blur first. For styling, pair the healed calf art with cropped trousers or ankle-strap sandals to keep the composition visible.
14. Ornate Ace on the Ankle With Chain Accent
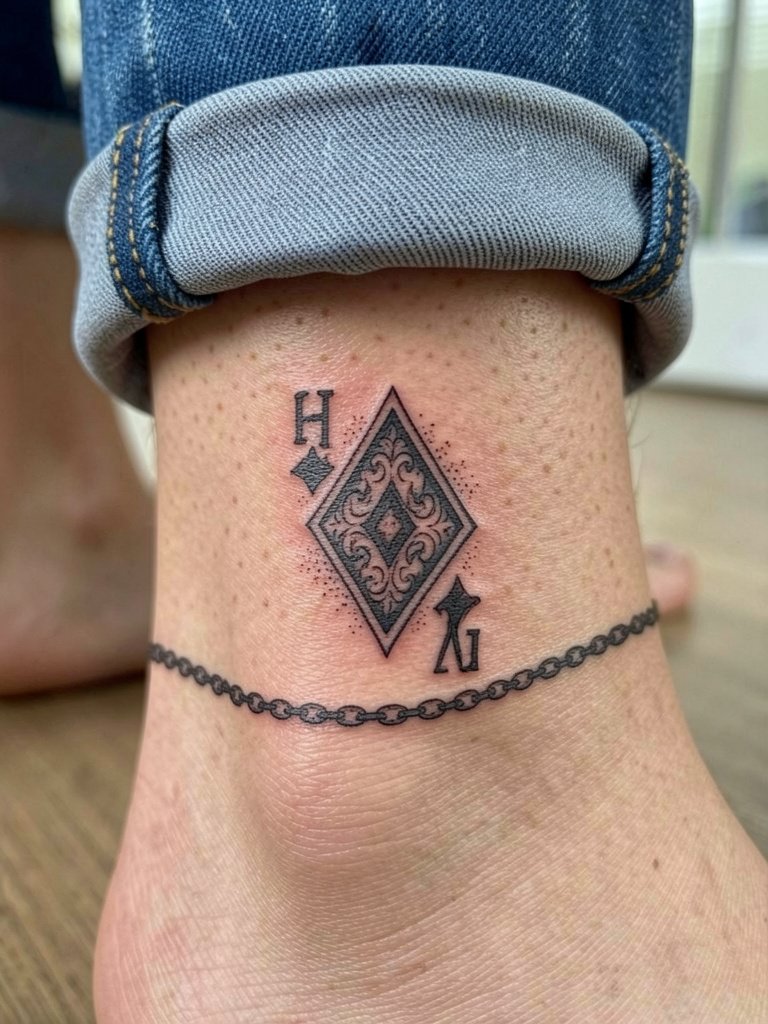
Ankle placements see a lot of friction from socks and shoes, so a clear silhouette and slightly bolder links help the chain accent remain readable. Discuss exact placement relative to the ankle bone to avoid distortion from footwear seams. Sessions are relatively short but the area is sensitive. A common mistake is underestimating contact points with shoes; expect a touch-up window in the first year. For showing the design, pair it with cropped trousers or a linen ankle pant so the anklet reads without rubbing the ink.
15. Playing Card Sleeve Focal Ace on the Back of the Hand
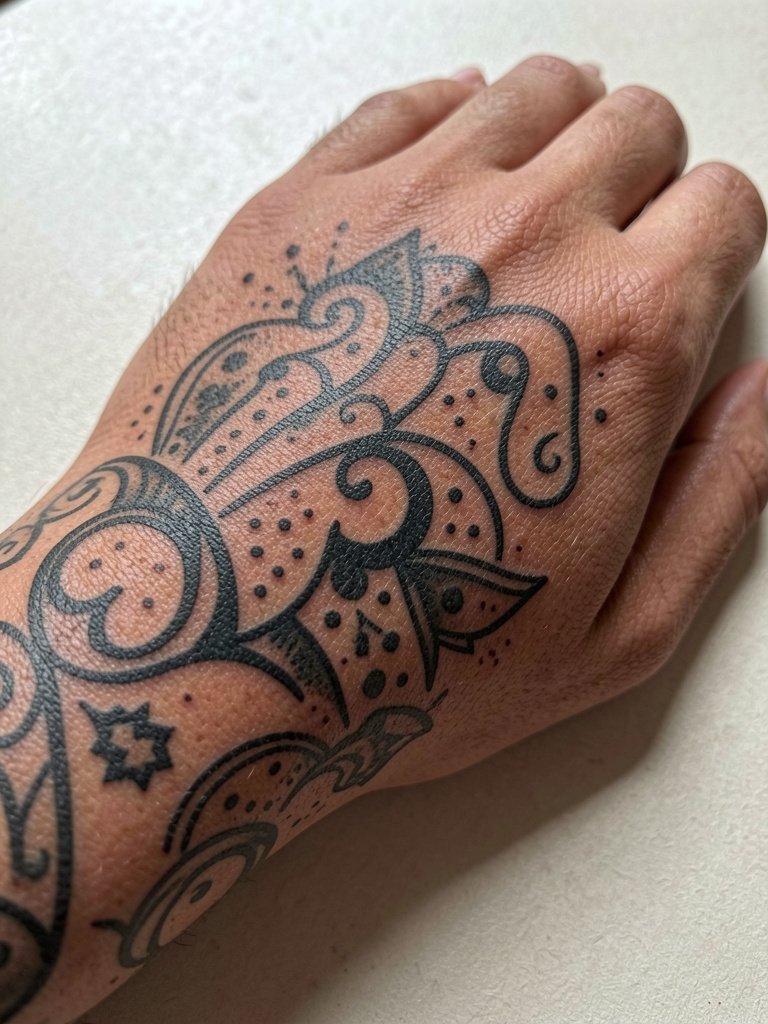
Hands are high-risk for early fading and blowout because of thin skin and constant use, so plan a realistic maintenance schedule. Tell the artist precisely which knuckle planes the design should avoid to reduce feathering and to minimize early touch-ups. Sessions feel sharp and may require breaks; common mistakes include packing in too much micro detail that disappears after regular washing. If you want the hand piece to last, expect annual refreshes and keep heavy moisturization in the early months.
Pre-Session Essentials
These small items smooth out the sessions and the first week for the chest, wrist, and finger pieces above.
-
Stencil transfer paper kit. Lets you preview exact placement on skin before committing, which matters for the split-card and collarbone cluster layouts discussed above.
-
Topical numbing cream. Applied as directed before the session eases sternum and rib discomfort and helps with longer calf or thigh appointments.
-
Thin protective film roll. Useful for finger and wrist placements where friction is high during the first week.
-
Fragrance-free gentle body wash. Cleans the healing skin without irritating fine-line pieces.
-
Aquaphor healing ointment. Thinly applied in the first days helps lock in moisture for delicate linework without suffocating the needle channels.
Frequently Asked Questions
Q: How should I size an ace playing card tattoo so it still reads in five years?
A: Scale up lineweight and spacing relative to what looks delicate on-screen. Ask for mockups at actual dimensions and request that your artist show you how negative space will age. For tiny placements like fingers and wrists, plan a touch-up at the one-year mark.
Q: Where can I find healed examples and discovery pathways without naming artists directly?
A: Try searching targeted hashtags and keywords on image-forward platforms using location filters and portfolio tags, then filter for "healed" photos and multi-year posts to see aging. Reddit tattoo threads and niche portfolio sites also surface before-and-after shots across different skin tones.
Q: I want a fine-line ace on my ribs, is that a bad idea?
A: The ribs are a contested area. One group of artists cautions that fine line on ribs blurs within two years because of stretch and motion. Another group contends that slightly bolder spacing and staged shading let fine line settle well. If you proceed, plan for a staged session and accept a realistic touch-up timeline.
Q: What should I wear to my session for a collarbone or sternum ace?
A: Wear a top that exposes the area without needing to be moved, such as a scoop-neck or fitted bandeau in its normal worn state. This keeps the fabric from shifting and reduces prep time, especially for sternum work.
Q: How often do playing card tattoos require touch-ups depending on placement?
A: High-friction spots like fingers and wrists usually need a touch-up within 6 to 18 months. Forearms, biceps, and calves often go longer between touch-ups, commonly two to three years. Expect to refresh saturated blackwork less often than delicate single-needle pieces.
Q: Are there specialist considerations for chest and sternum placements?
A: Yes. Chest and sternum pieces benefit from an artist experienced with torso anatomy and staged sessions to manage saturation and healing. Ask about how they handle breathing movement during the stencil and how they plan touch-ups across sessions.
