
I spent months thinking about a memorial piece before I realized the real choice was about feeling, not just the image. I wanted something that would still feel right years from now. These 27 memorial tattoo ideas focus on styles that age well and placements that carry private meaning or public tribute.
This list leans toward fine line, traditional, micro-realism, and blackwork. These ideas work well on arms, chest, ribs, and legs. From what I've seen in 2026 trends, subtle scripts and micro-realism photos are still popular, but I also include a few under-covered angles like fingerprint hearts and waveform tattoos.
1. Fine Line Botanical Sleeve on Inner Forearm
Style/Technique: Fine Line / Illustrative
Pain Level: Medium (3-4/10)
Session Time: 3–5 sessions, 2–4 hours each
Best For: Statement piece, sentimental imagery
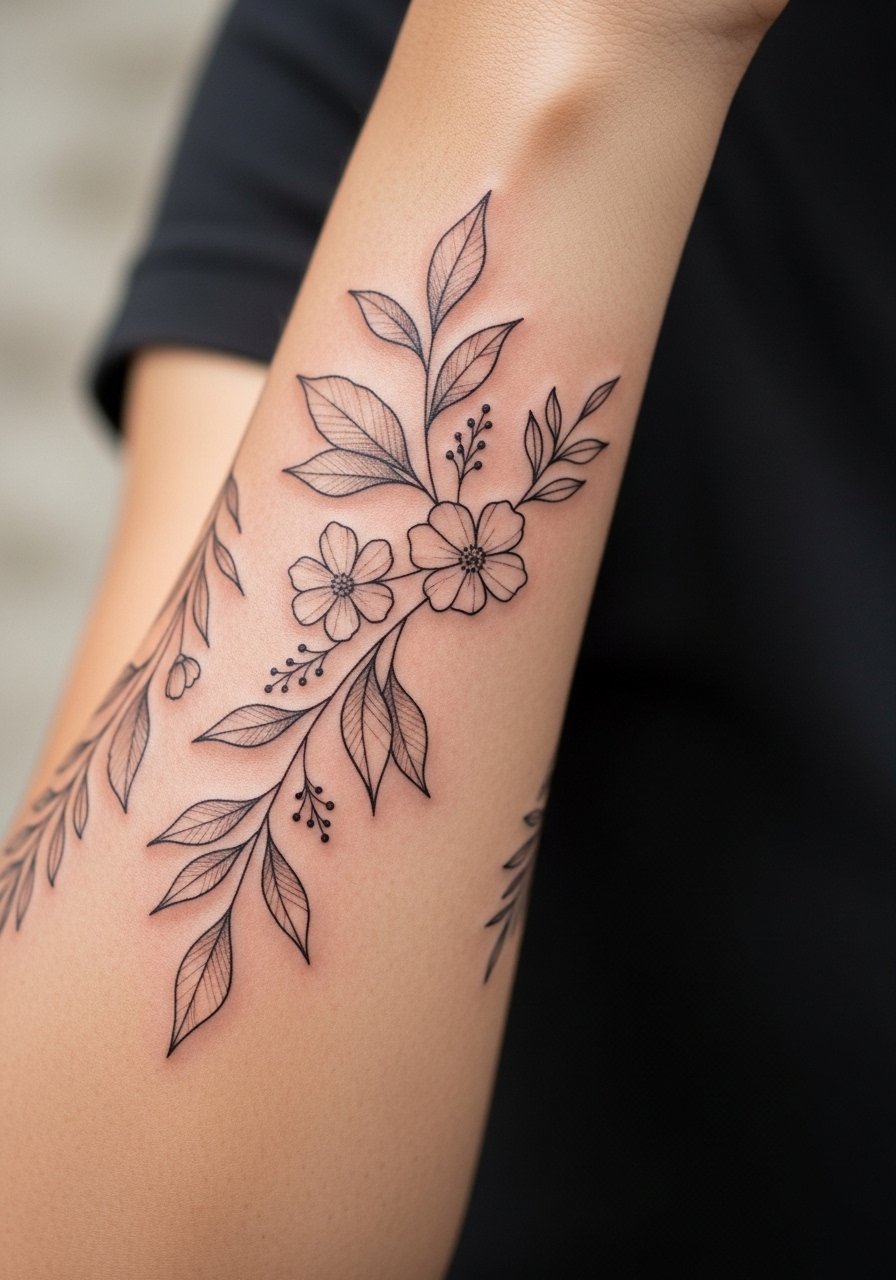
I used botanical motifs to represent growth and remembrance. Fine line keeps it intimate. Inner forearm is visible for quiet moments. Expect medium pain and layered sessions for density. Healing is steady—lines settle and soften in months. Avoid tiny, single lines that can blur; ask an artist experienced in fine-line realism. I’ve noticed artists recommend slightly thicker lines in areas that rub often so the piece remains readable over years.
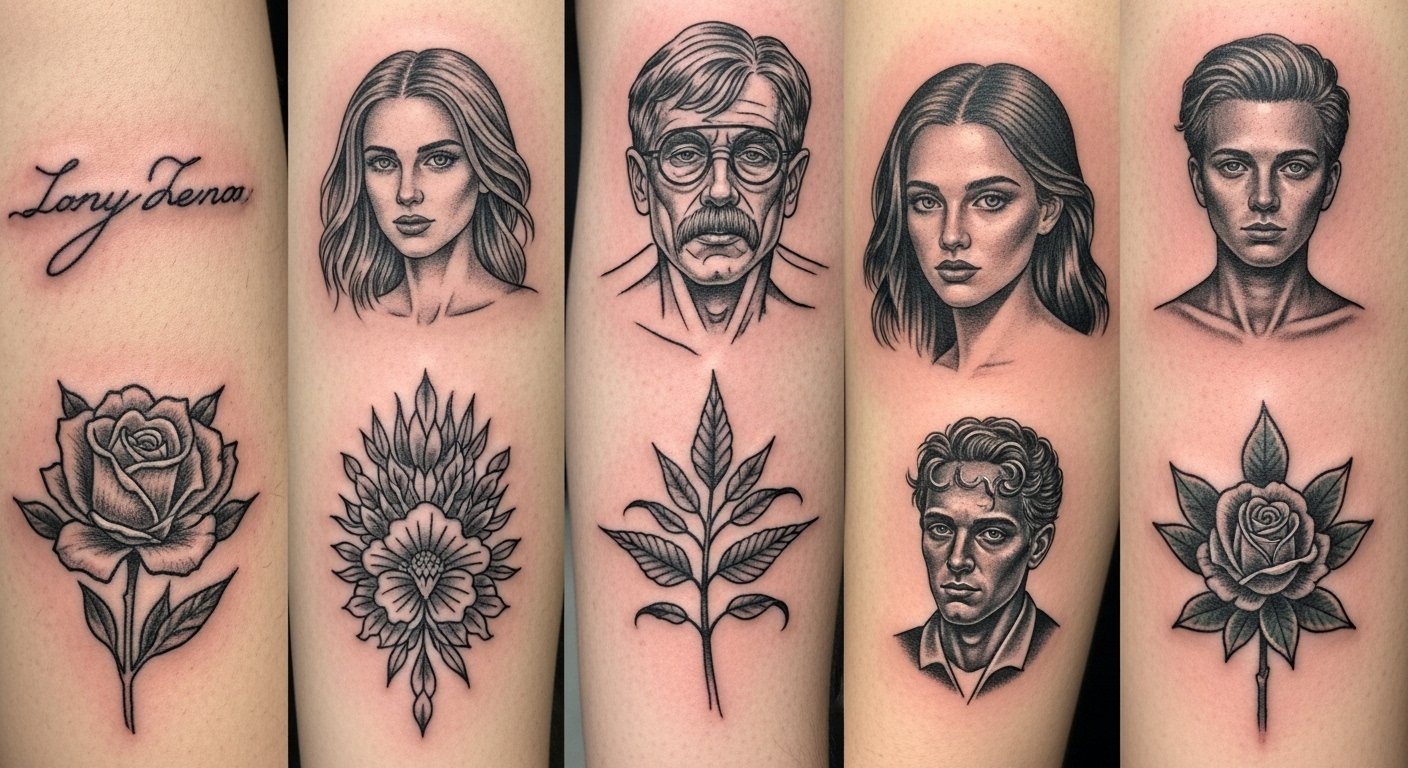
2. Micro-Realism Portrait on Upper Arm
Style/Technique: Micro-Realism / Portraiture
Pain Level: Low-Medium (3/10)
Session Time: 3–6 hours or multiple sessions
Best For: Photo-accurate tribute
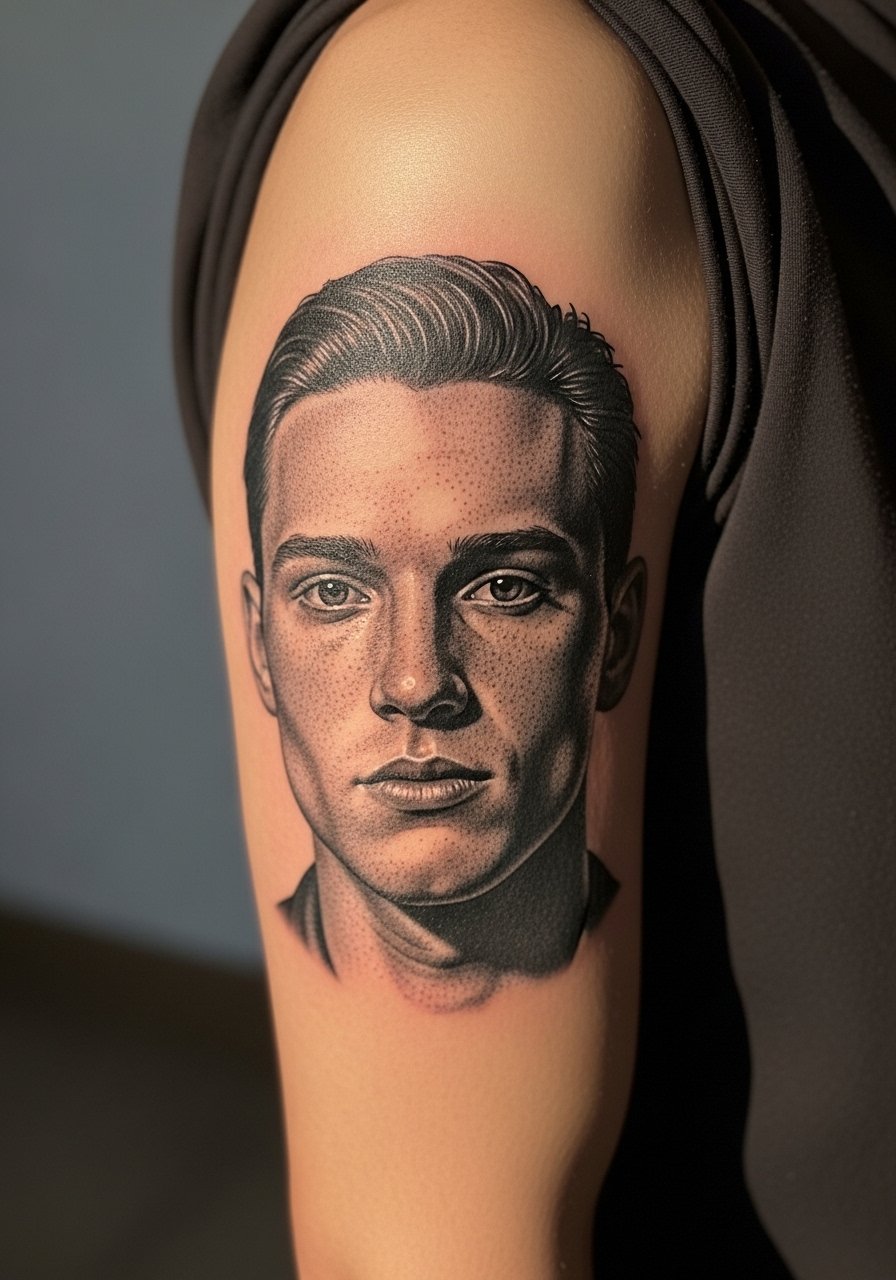
I got a small portrait of a loved one on my upper arm. Micro-realism captures expression but needs an artist who shows healed photos. Upper arm hurts less and hides easily. Healing takes several weeks for skin to settle; contrast softens slightly as it heals. A common mistake is choosing a reference photo with poor lighting—bring a high-res, well-lit image. Ask to see healed portraits on similar skin tones before booking.
3. Minimalist Script Name Behind Ear
Style/Technique: Minimalist / Script
Pain Level: High (6-7/10)
Session Time: 30–60 minutes
Best For: Subtle, private tribute
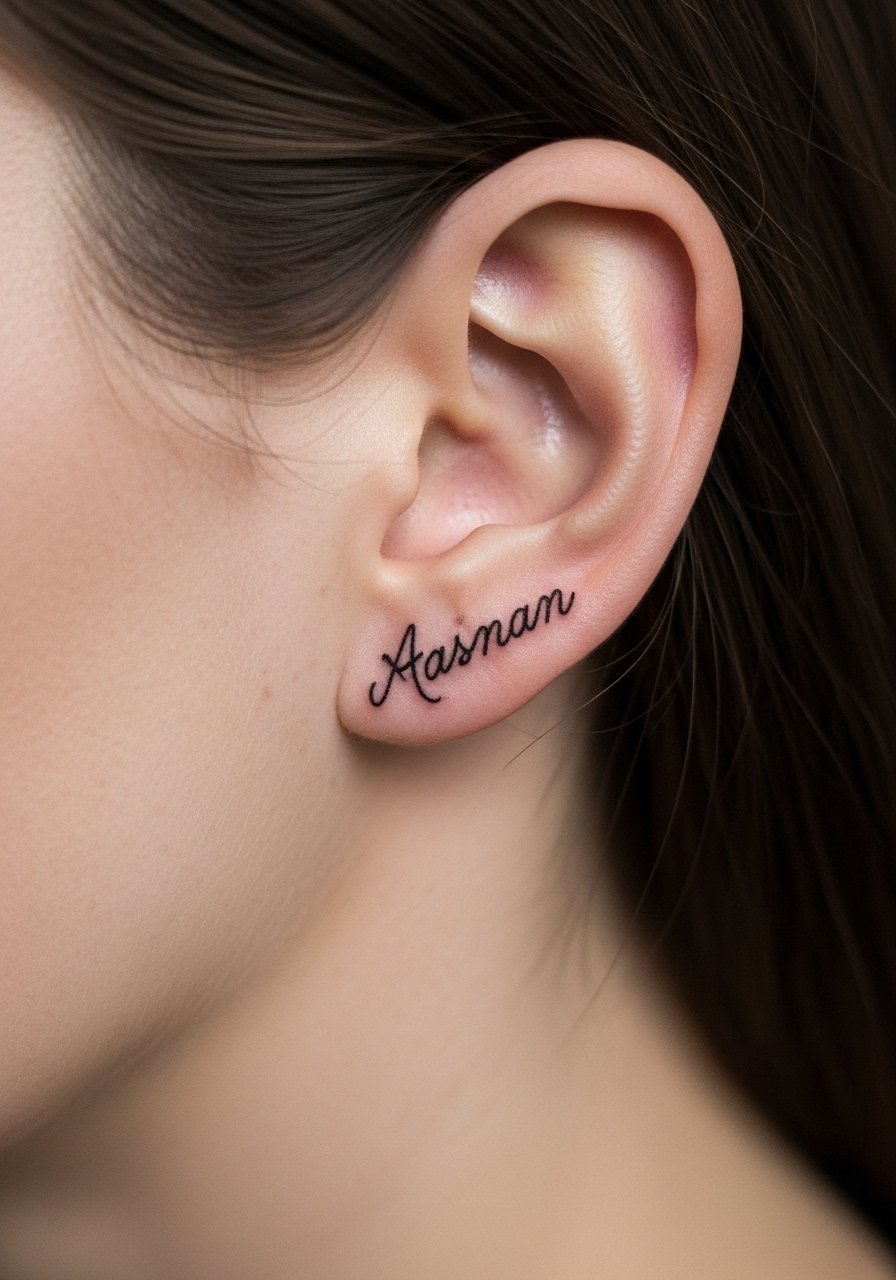
I chose a behind-ear script for a quiet memorial. It’s tiny and personal, but placement is sensitive—expect higher pain. Heals fast on surface but scabbing can affect thin strokes. Avoid overly thin letters; they may blur. Ask for slightly bolder script lines and a consultation on spacing so the name remains legible when healed.
4. Blackwork Silhouette on Sternum
Style/Technique: Blackwork / Silhouette
Pain Level: High (7-8/10)
Session Time: 1–3 hours
Best For: Bold, private statement
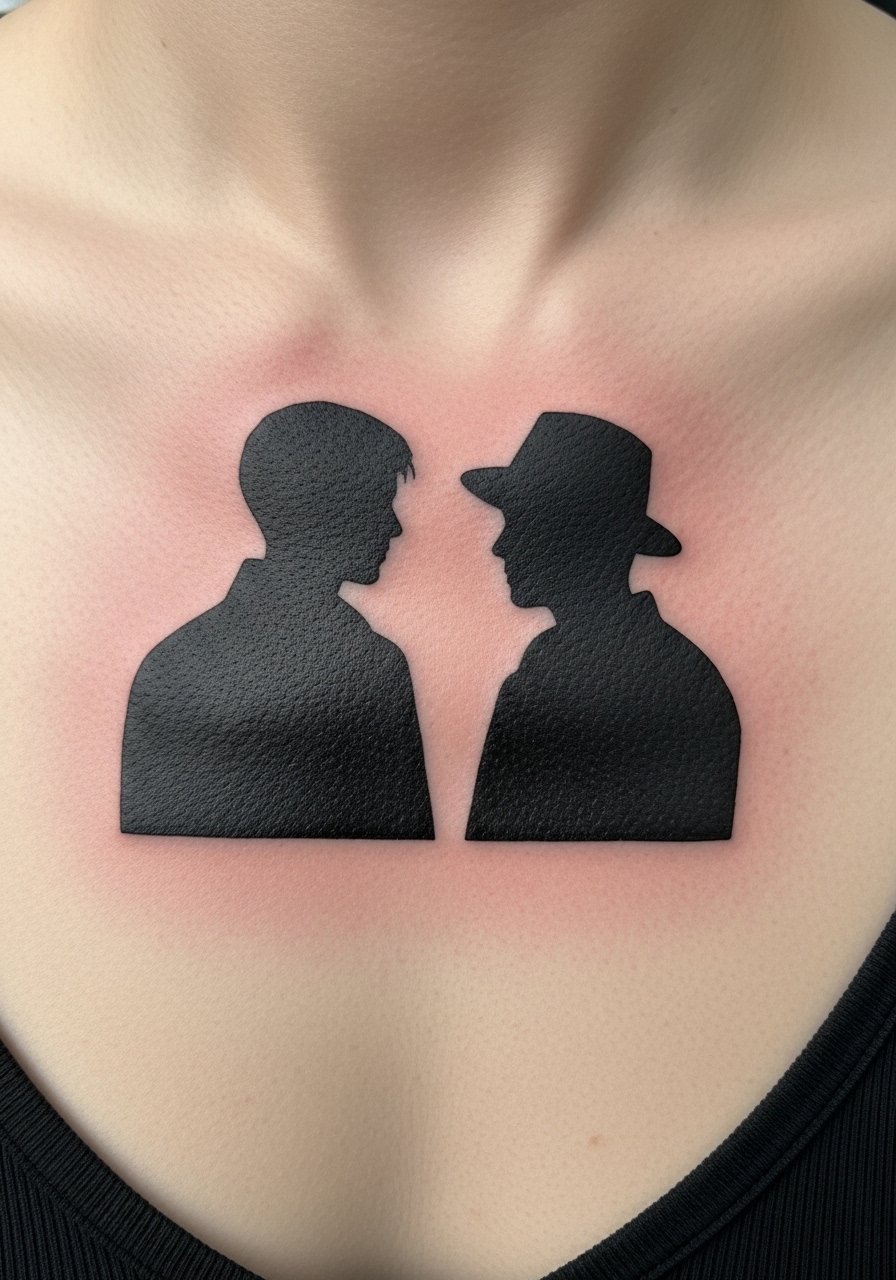
A black silhouette over the sternum reads like a heartbeat memory. Sternum is tender; expect significant discomfort. Healed blackwork holds very well if the fills are consistent. The usual error is uneven fill—pick an artist known for solid black pieces. I’ve seen tight lines blur less when artists slightly widen edges in high-motion areas.
5. ECG Heartbeat with Date on Inner Wrist
Style/Technique: Minimalist / Linework
Pain Level: Medium (4/10)
Session Time: 30–90 minutes
Best For: First tattoo, daily reminder
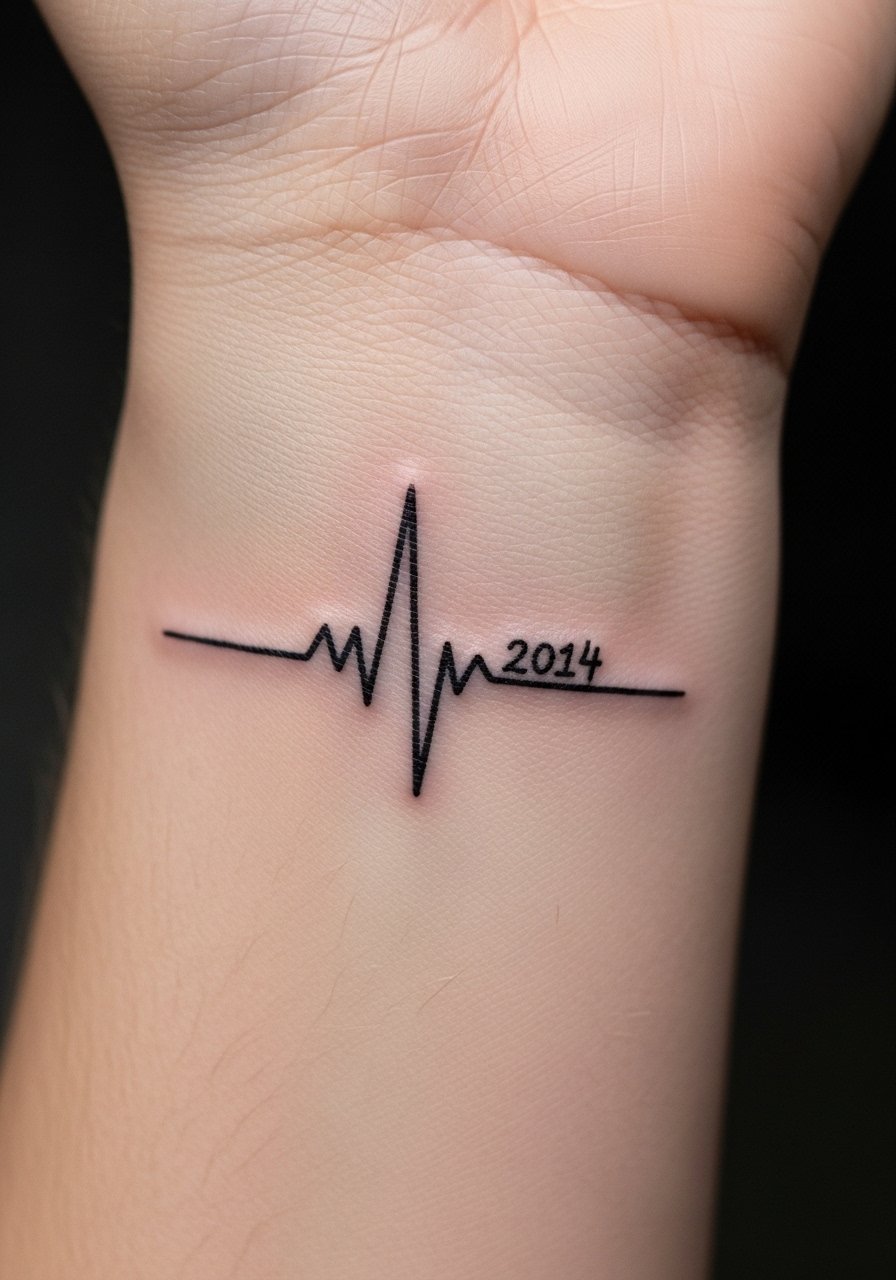
I like ECG lines for memorial tattoos because they’re personal and readable. Inner wrist is visible, so it’s a constant reminder. Pain is moderate, and skin there heals in 2–3 weeks. Small script dates can blur—ask for slightly larger numerals and spacing. From what I’ve seen, keeping the line spacing open helps longevity.
6. Infinity Name Band on Ring Finger
Style/Technique: Minimalist / Single Needle
Pain Level: Medium-High (5–6/10)
Session Time: 30–60 minutes
Best For: Symbolic, subtle tribute
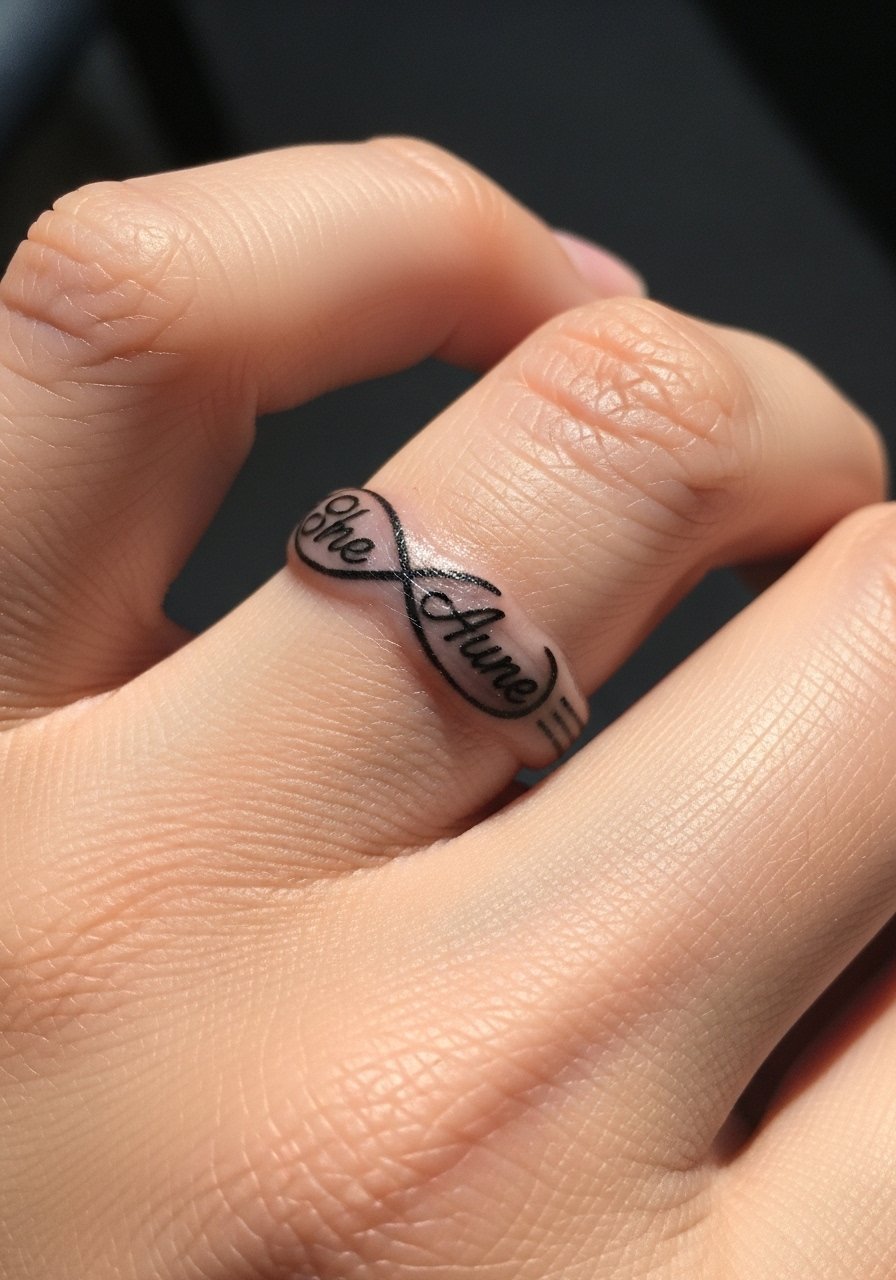
A name looped into an infinity symbol feels timeless. Fingers are tricky; the skin sheds and ink can fade faster. Expect touch-ups. Keep the design simple—tiny detail blurs quickly. I’d ask an artist who does many finger tattoos and suggest a slightly bolder line to compensate for future fading.
7. Roman Numeral Date on Collarbone
Style/Technique: Classic Script / Minimalist
Pain Level: Medium (4/10)
Session Time: 30–90 minutes
Best For: Elegant, visible tribute
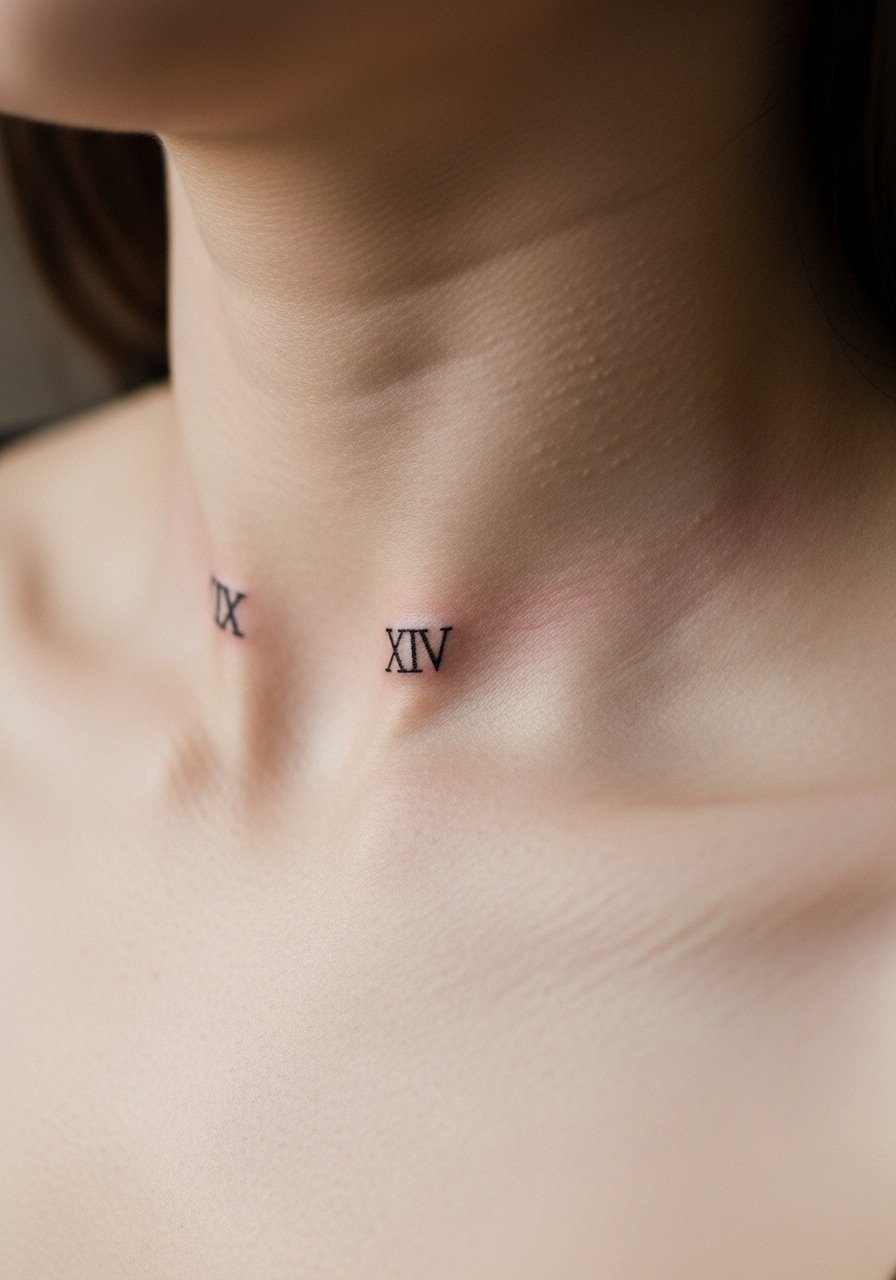
I put a significant date in Roman numerals along my collarbone. It reads like a keepsake. Collarbone has a bony feel; expect moderate discomfort. Thin numerals heal cleanly but can lose crispness—ask for balanced weight. Artists I follow recommend spacing numerals so they don’t merge as they age.
8. Angel Wing Behind Shoulder Blade
Style/Technique: Neo-Traditional / Blackwork
Pain Level: Medium (4-5/10)
Session Time: 2–4 hours
Best For: Medium-sized tributes, coverable
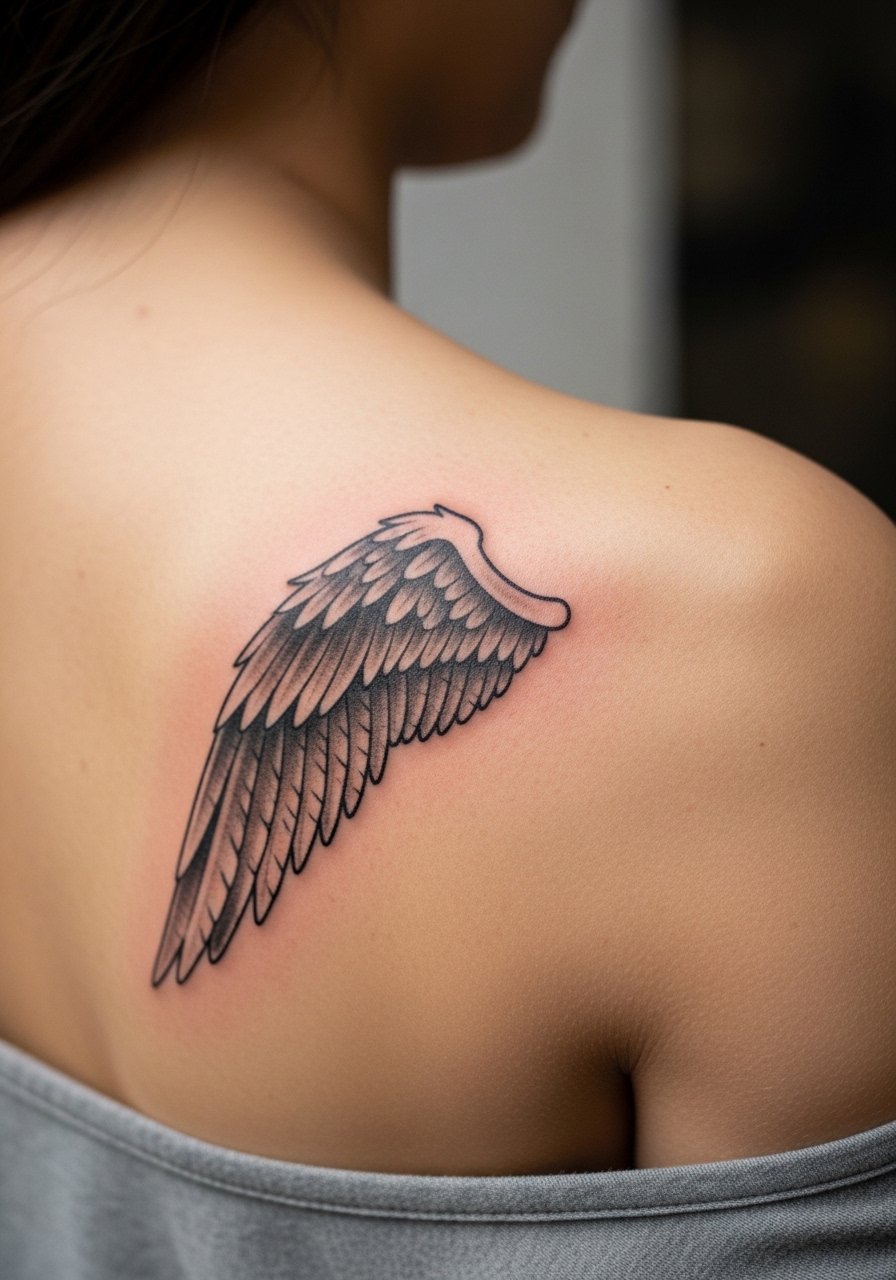
A wing on the shoulder blade reads as protective. Placement is low on the pain scale but needs proper shading for dimension. Heals well under clothing—avoid tight straps while healing. A common mistake is too-small wing detail; scale it to the shoulder blade for clarity. Ask your artist for shading samples on healed skin.
9. Bird Flight Collarbone to Chest
Style/Technique: Fine Line / Minimalist
Pain Level: Medium (4/10)
Session Time: 1–2 hours
Best For: Movement, freedom symbolism
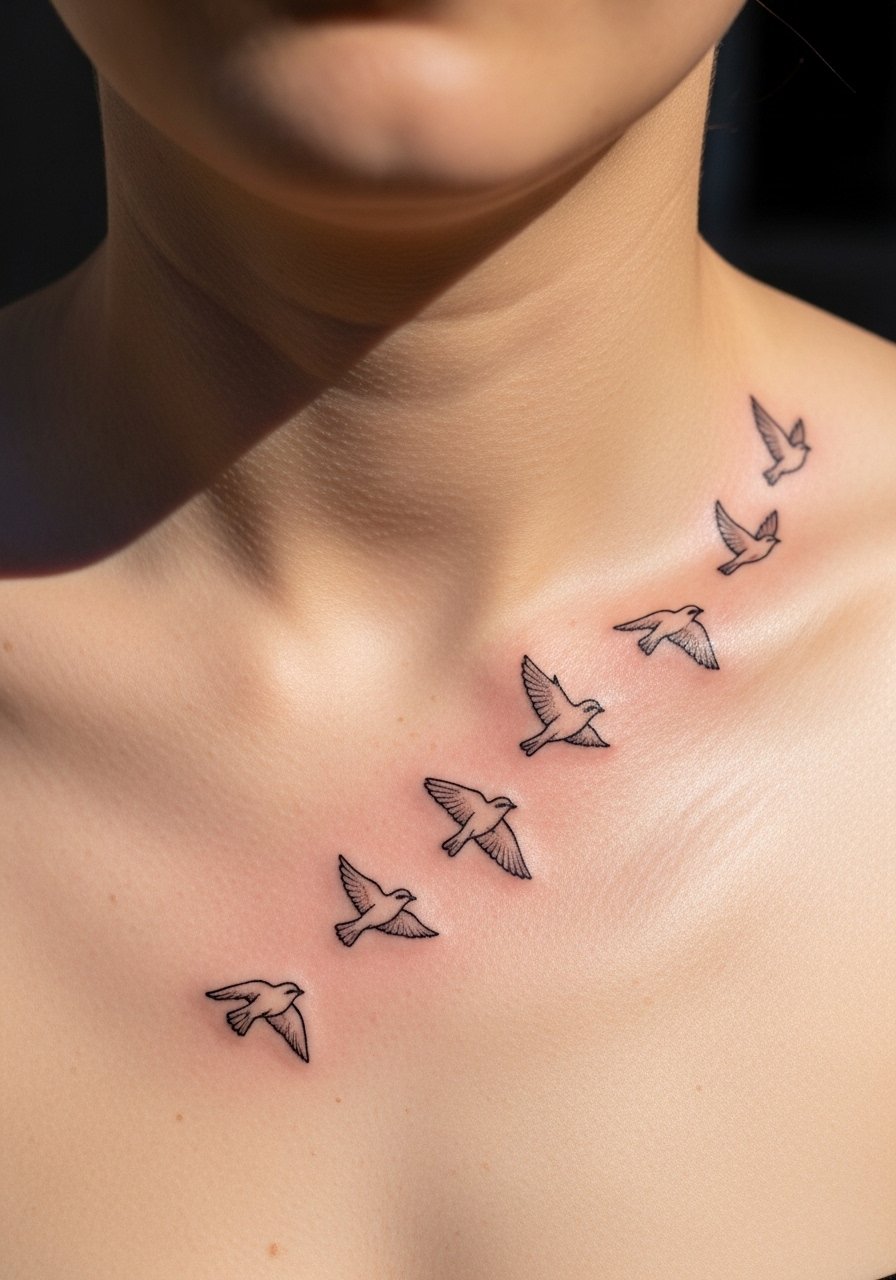
I used small birds to show a journey. The flow across collarbone and chest looks dynamic and personal. Pain is moderate near bone. Tiny bird details can merge; choose slightly varied sizes to keep each bird distinct as it heals. Artists often recommend spacing and soft shading for depth.
10. Baby Footprint on Wrist
Style/Technique: Micro-Realism / Small Realistic
Pain Level: Medium (4/10)
Session Time: 1–2 hours
Best For: Parent memorial, small visible tribute
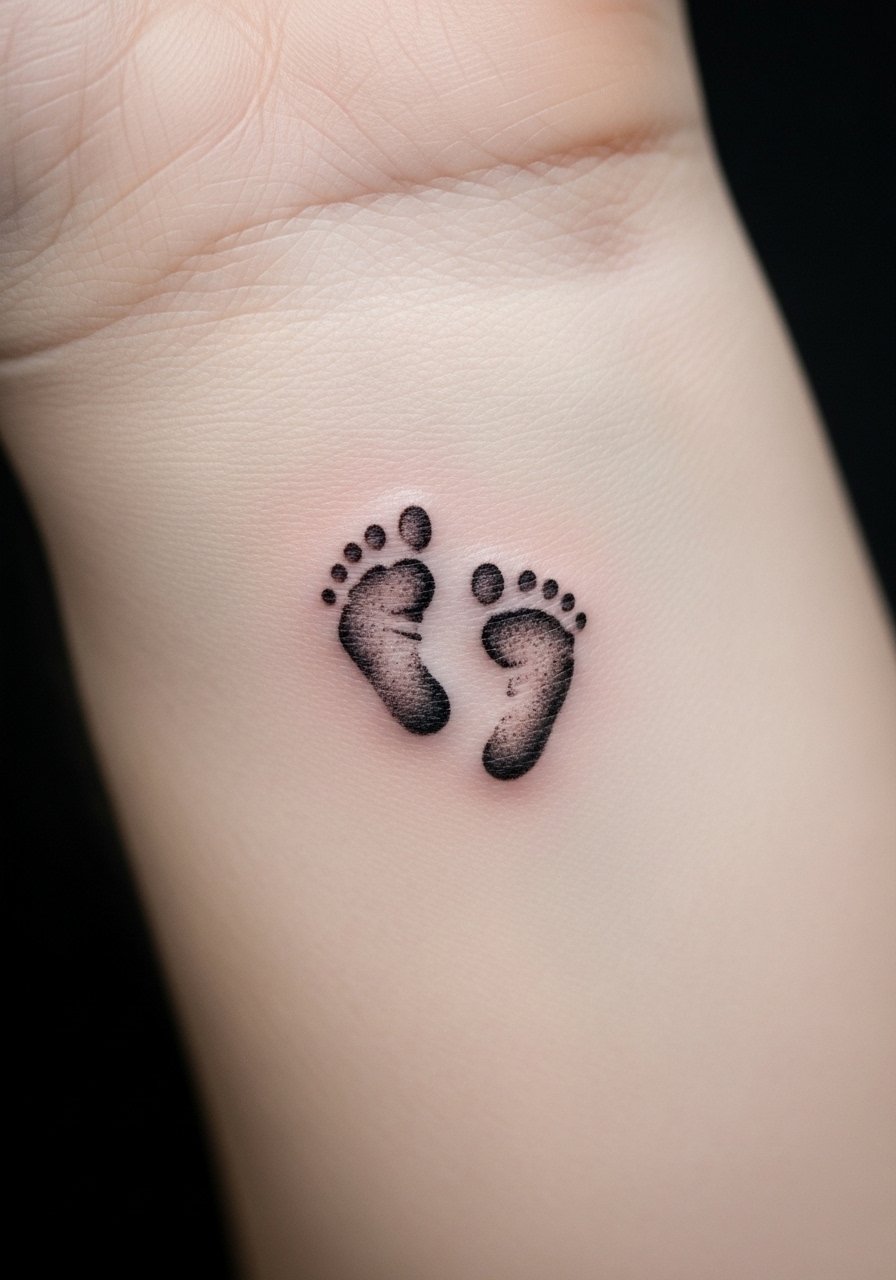
A footprint is intensely personal. I had a stamped footprint photo turned into micro-realism. Wrist placement is visible and meaningful but requires care; ink here softens faster. Bring a high-res imprint to your artist. Avoid overly faint shading—opt for clear contrast so the print stays readable.
11. Handwriting Script on Ribcage
Style/Technique: Script / Handwriting Replica
Pain Level: High (7/10)
Session Time: 1–3 hours
Best For: Intimate, faithful replication
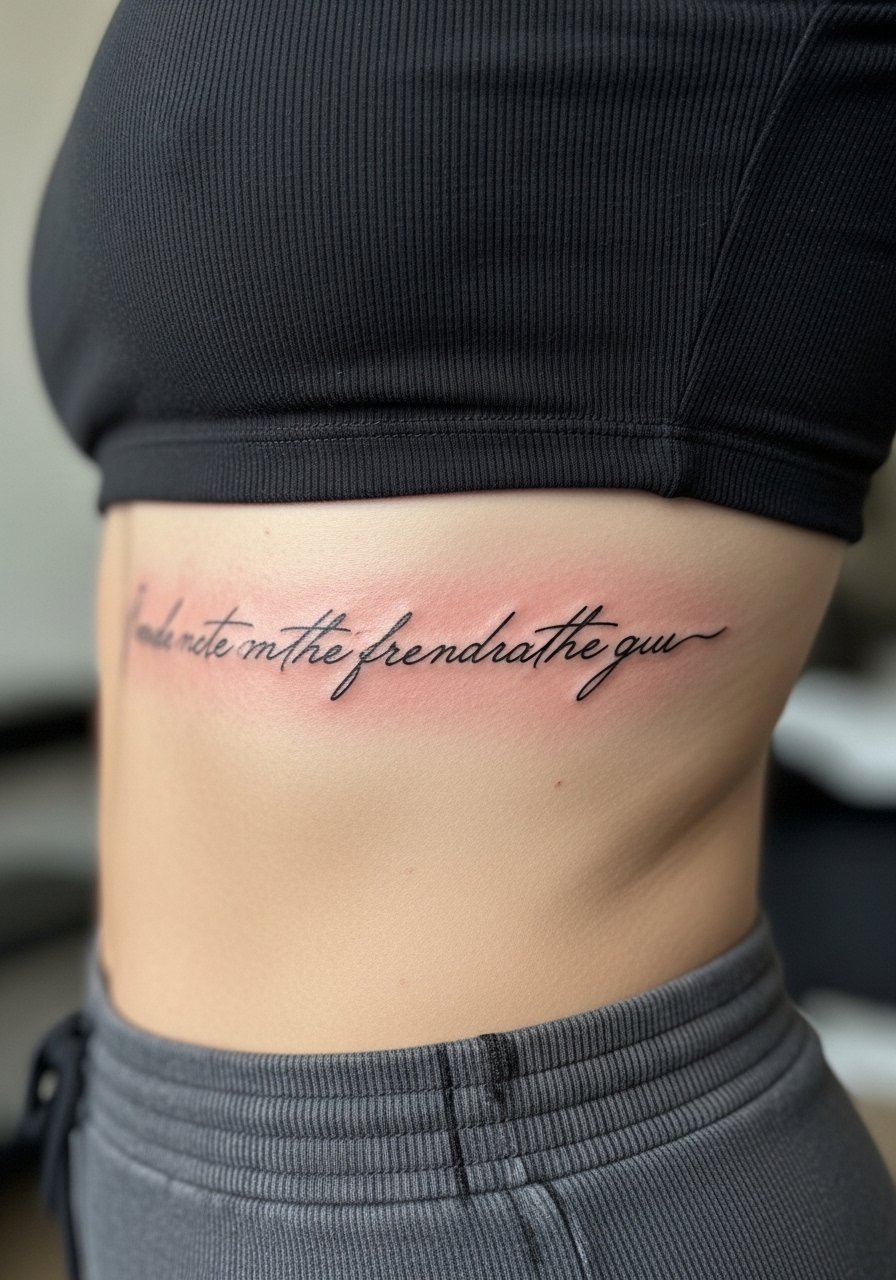
I had a loved one’s handwriting tattooed on my ribcage. It’s deeply personal but ribs are painful. Healing takes longer due to movement and clothing friction. The biggest mistake is poor contrast in the reference—choose a sample with clear strokes. Artists who do script replication will provide stencil checks so spacing looks right when you move.
12. Fingerprint Heart on Chest
Style/Technique: Micro-Realism / Unique Mark
Pain Level: Medium (5/10)
Session Time: 1–2 hours
Best For: One-of-a-kind memorial
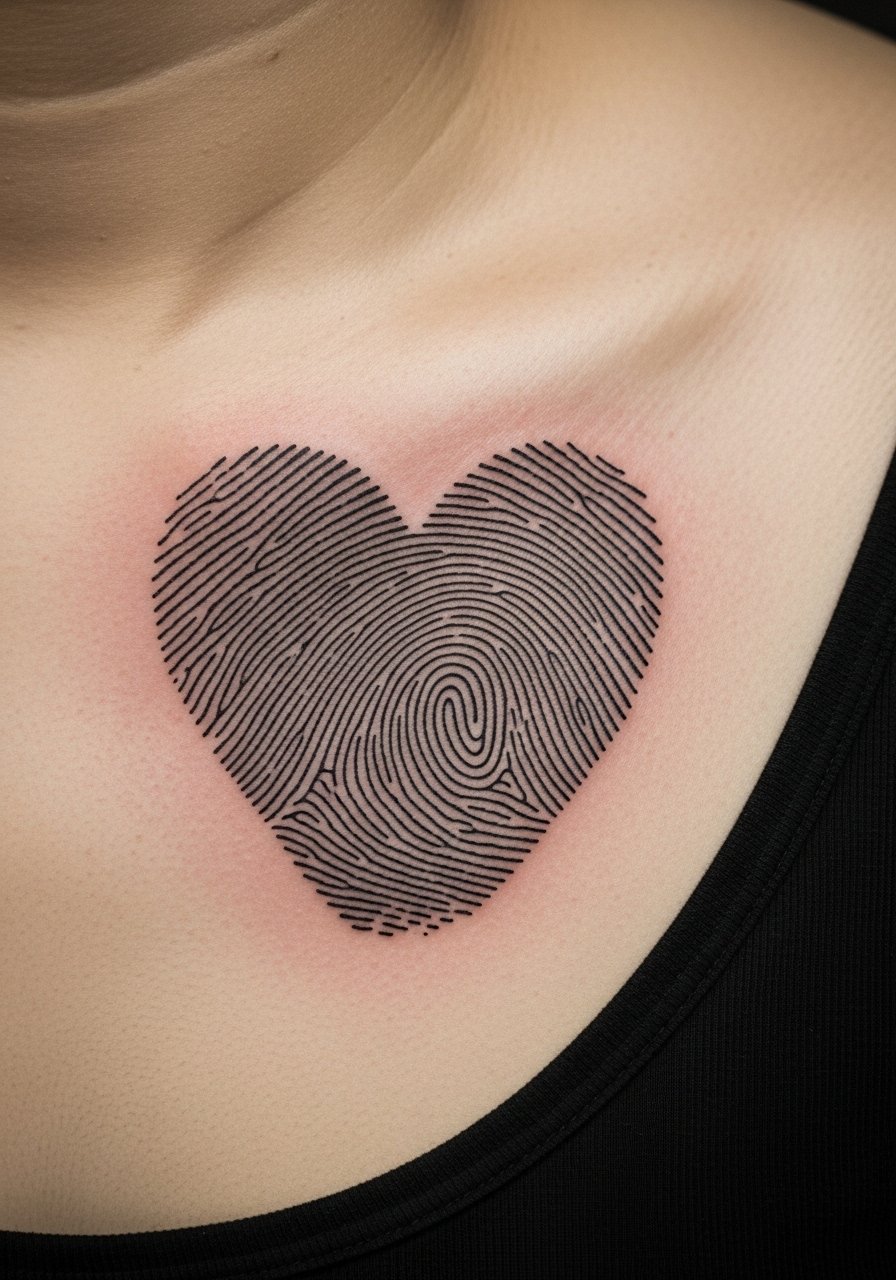
I turned a fingerprint into a heart on my chest. It’s unique and tactile. Chest skin handles detail well but expect movement during healing. Common mistakes: low-res fingerprints or tiny scale—scale the image so ridge details remain legible. Ask the artist to show a gel-stencil on your skin before inking.
13. Locket Pendant on Sternum
Style/Technique: Neo-Traditional / Jewelry Motif
Pain Level: High (7-8/10)
Session Time: 2–4 hours
Best For: Symbolic chest pieces
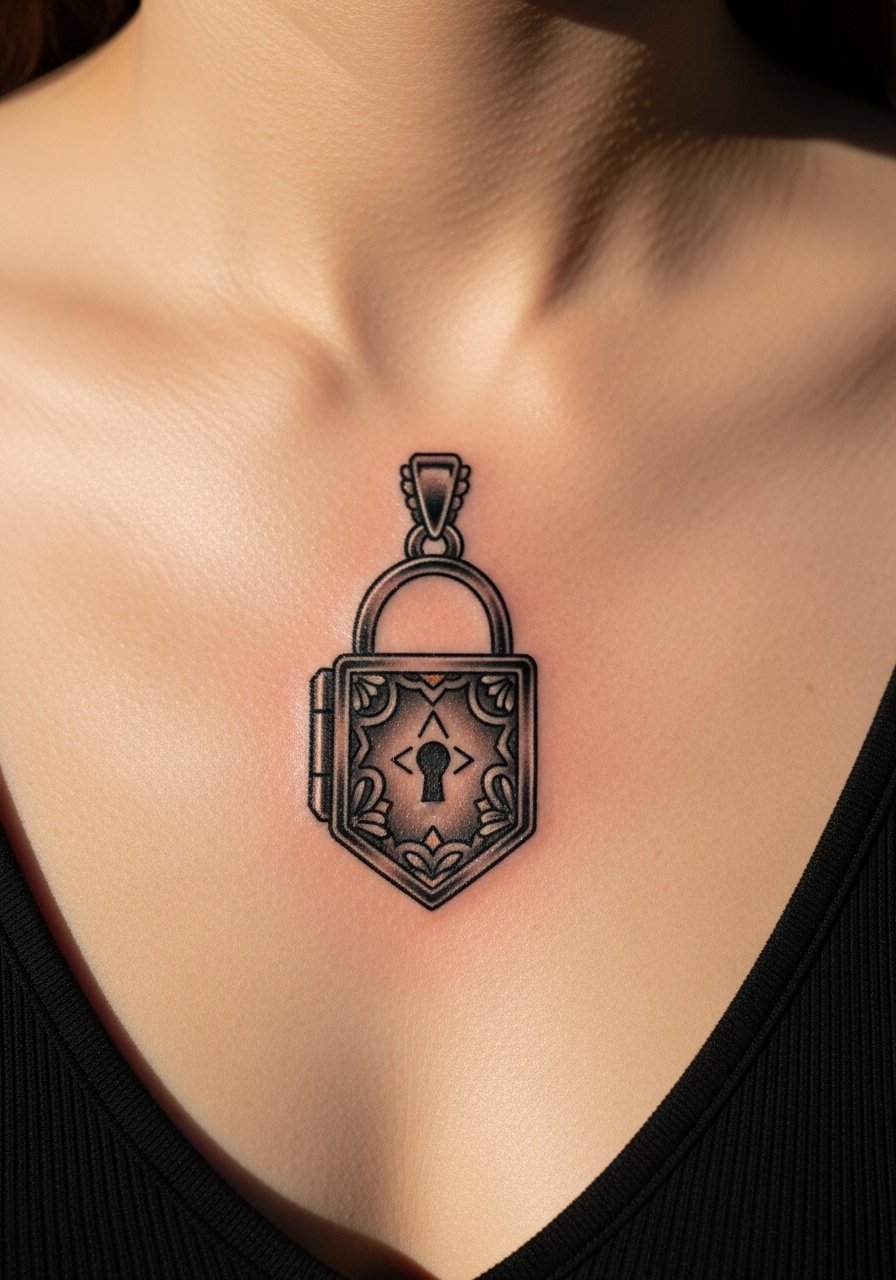
A locket tattoo centers memories. Sternum placement is intense, but it looks striking. Solid blacks and careful highlights make the metallic effect readable as it heals. Avoid ultra-fine filigree that can lose structure; opt for bolder lines and well-placed white highlights if your artist uses white ink.
14. Withered Rose and Thorns on Upper Arm
Style/Technique: Traditional / Neo-Traditional
Pain Level: Low-Medium (3-4/10)
Session Time: 1–3 hours
Best For: Bold, classic memorial
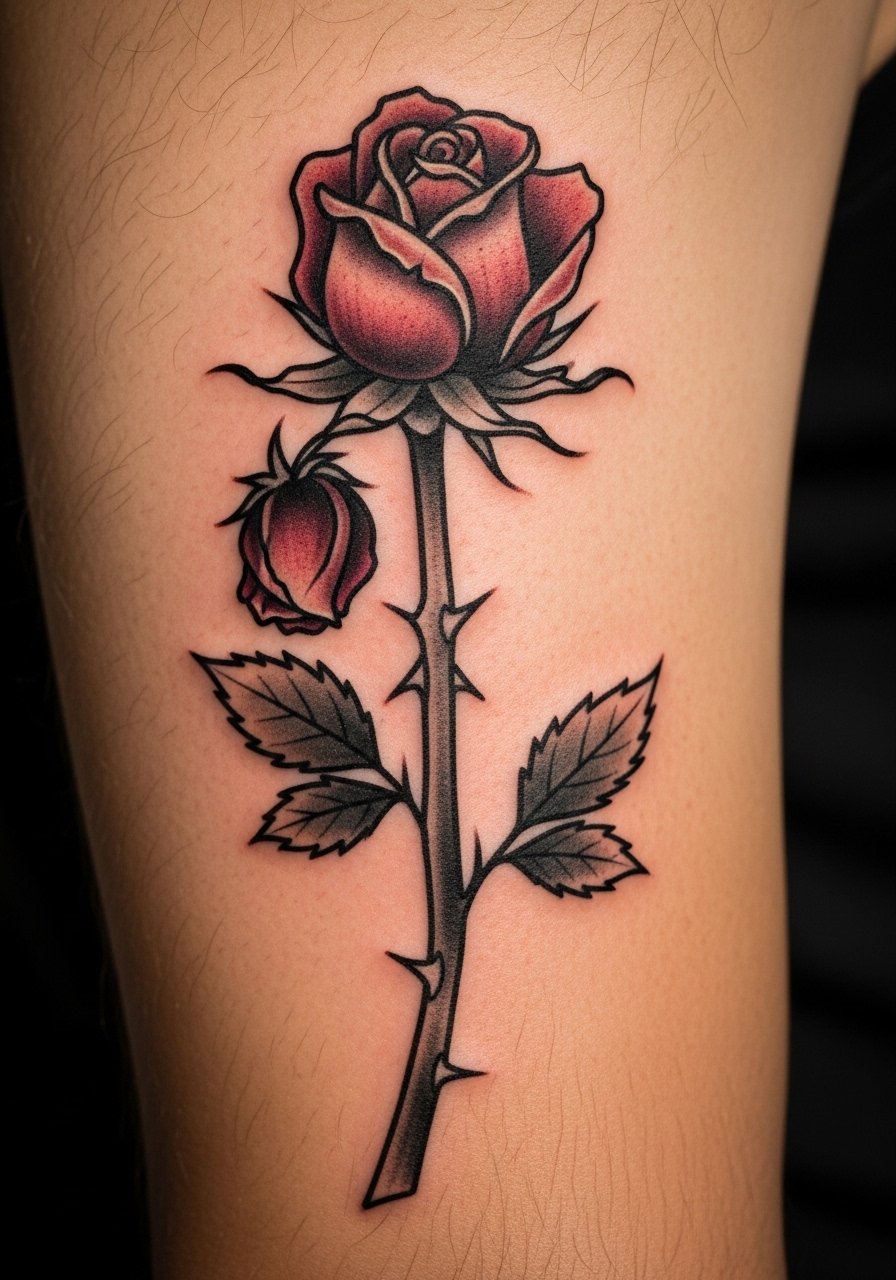
A withered rose says both love and loss. Upper arm is forgiving for pain. Traditional linework holds well over years. I’ve seen color fade in reds—talk to your artist about saturation and healed color examples. The common mistake is tiny petals with heavy detail—choose a design that reads from arm’s distance.
15. Watercolor Background Portrait on Thigh
Style/Technique: Micro-Realism + Watercolor
Pain Level: Medium (4-5/10)
Session Time: Multiple sessions
Best For: Artistic, colorful tribute
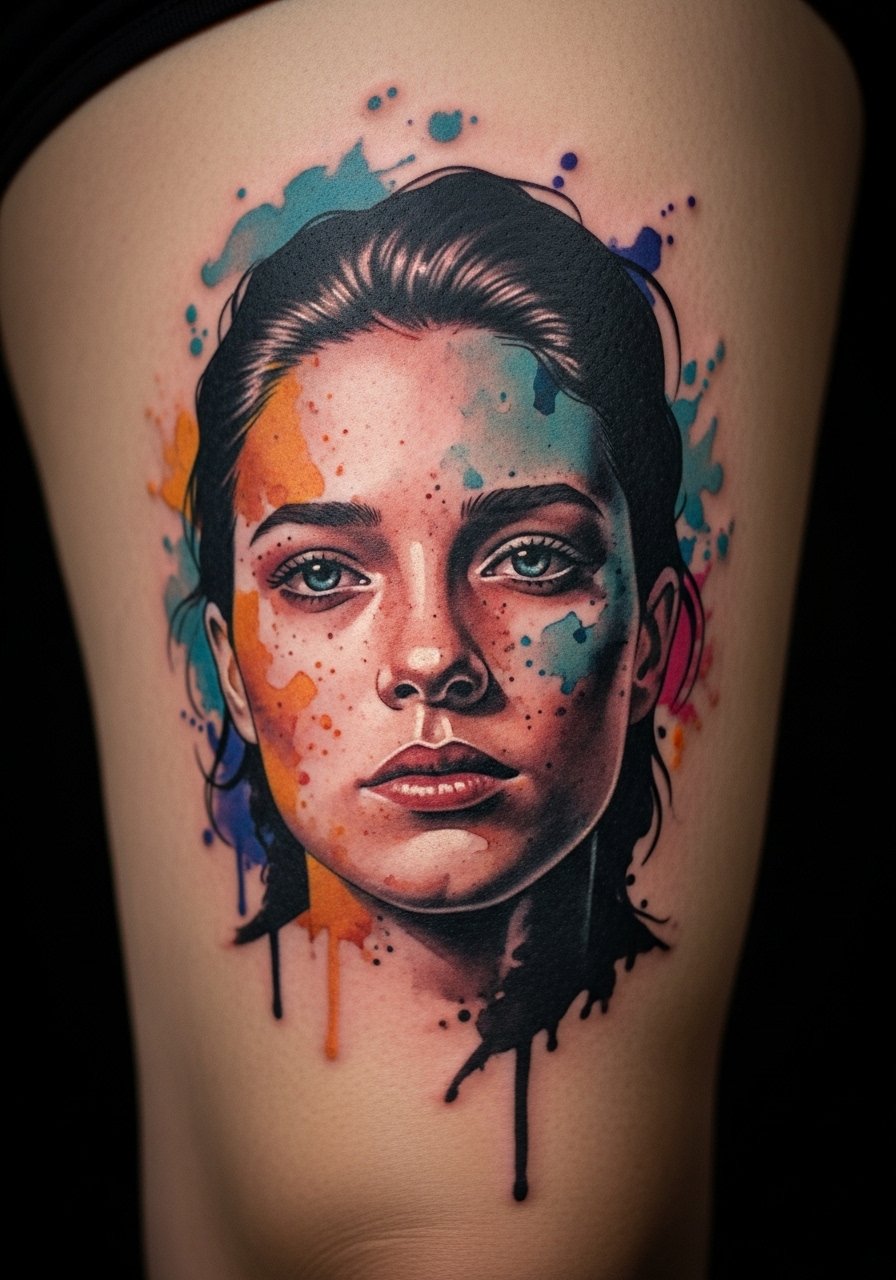
I combine a small portrait with a watercolor splash for softness. Thigh offers room and lower pain. Watercolor heals differently—colors often mute and edges soften. Ask for stronger initial saturation and healed examples. Avoid extremely delicate watercolor strokes near high-friction areas to reduce early blur.
16. Stacked Coordinates on Ribs
Style/Technique: Minimalist / Fine Line
Pain Level: High (6-7/10)
Session Time: 30–90 minutes
Best For: Private, specific-location tribute
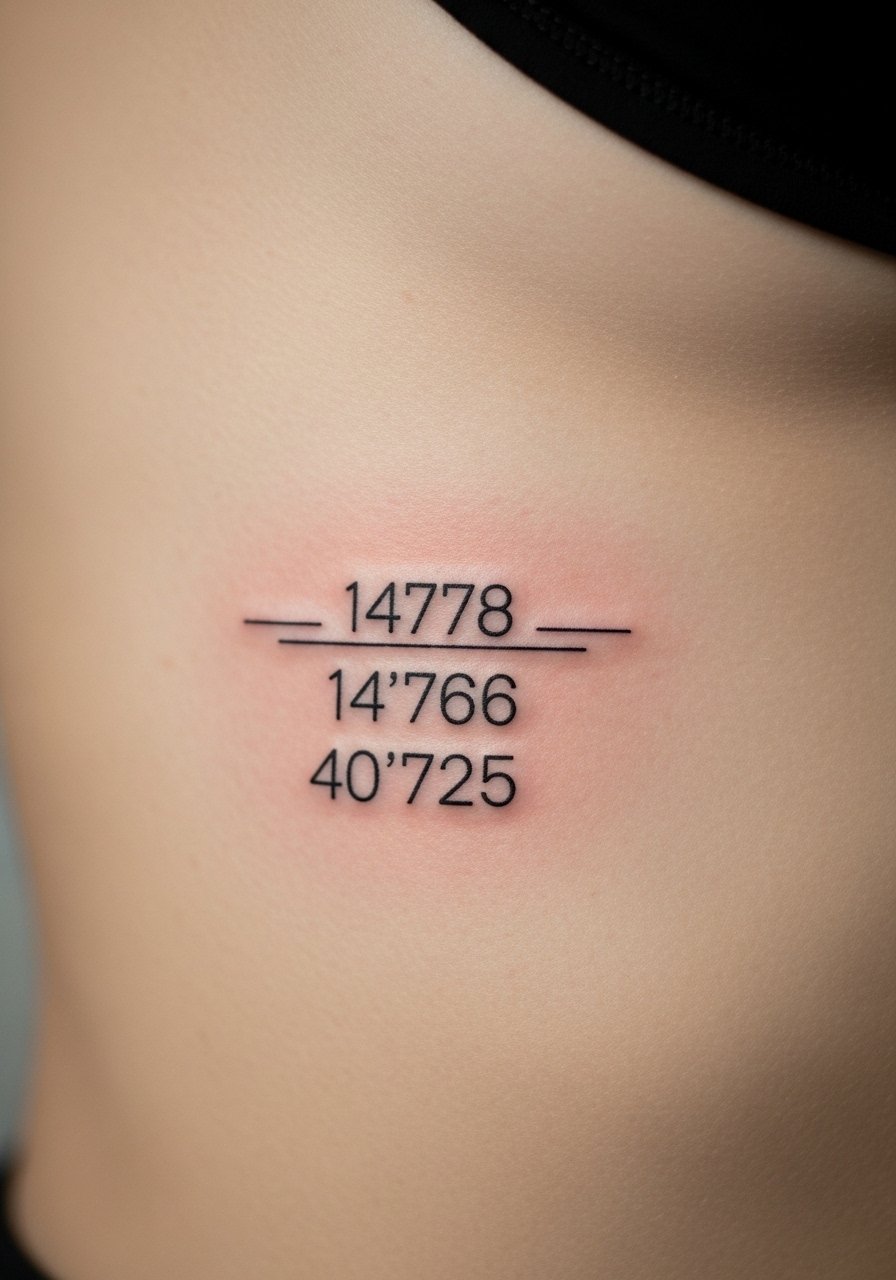
Coordinates point to a place that matters. I put mine on the ribs for privacy. Ribs are painful, but the result is subtle. Keep numerals spaced and slightly bolder than you think—they remain clearer as skin stretches. Artists often advise testing font size on your skin with a stencil.
17. Traditional Rose with Banner on Upper Arm
Style/Technique: American Traditional
Pain Level: Low (2–3/10)
Session Time: 2–3 hours
Best For: Timeless memorial, name banners
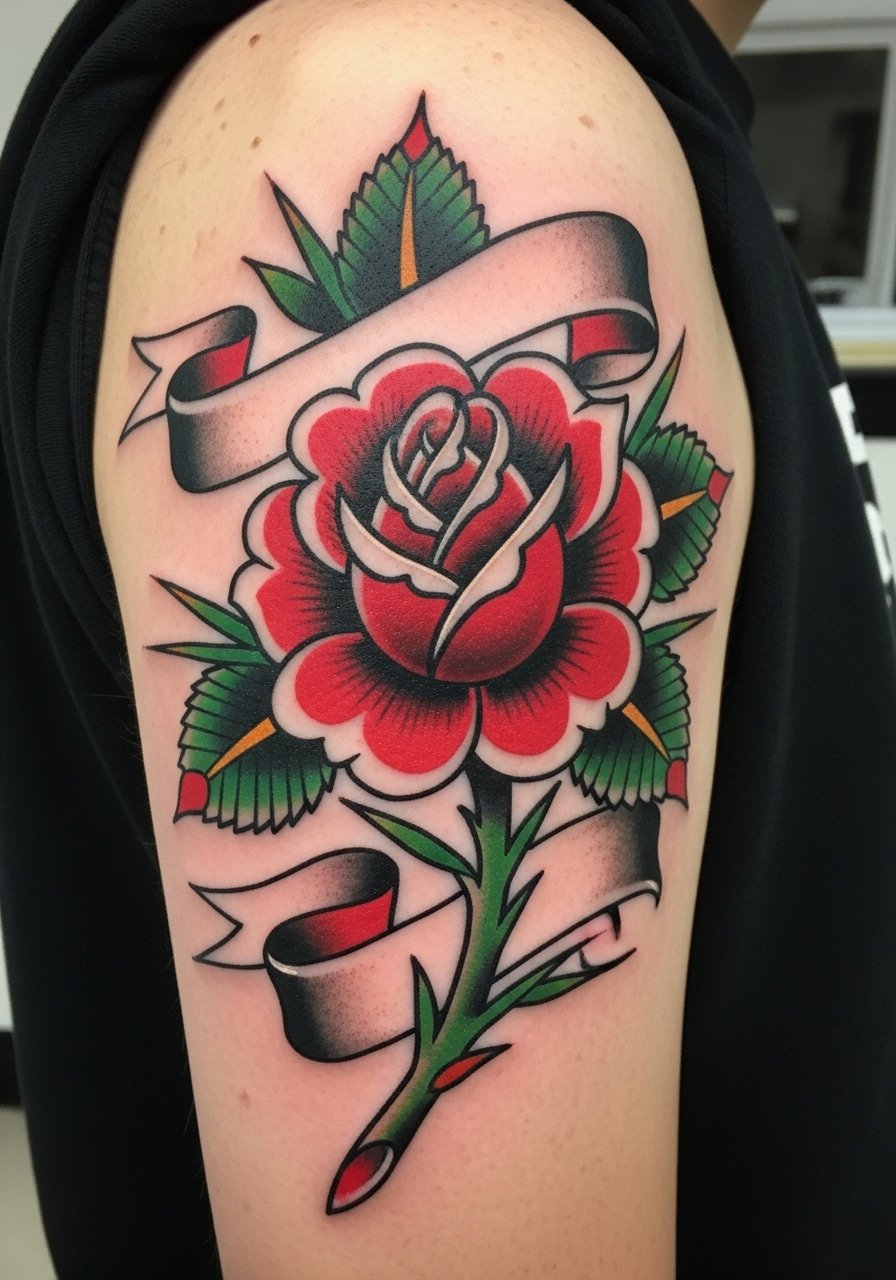
The banner rose is classic for names or dates. Upper arm placement is forgiving and ages well. Traditional ink holds up; outlines stay crisp. Avoid tiny script inside the banner—keep lettering bold and legible. Look for artists who specialize in traditional pieces and show healed examples.
18. Saint Icon Small on Sternum or Chest
Style/Technique: Iconography / Small Realistic
Pain Level: Medium-High (6/10)
Session Time: 1–2 hours
Best For: Spiritual memorials
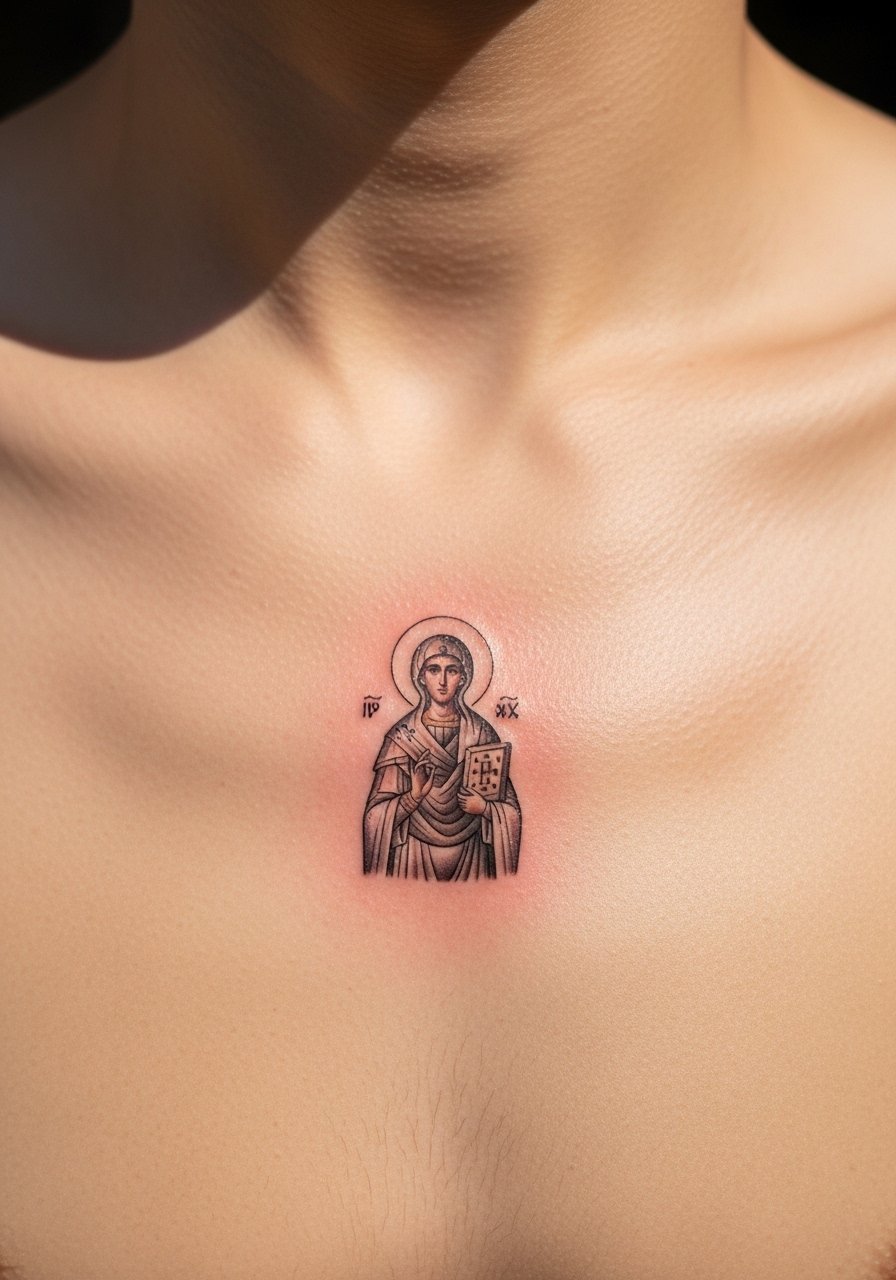
Religious icons can be a steady comfort. Chest placement keeps it close to the heart. The detail level should match your skin’s ability to hold fine work—slightly larger icons age better. I recommend artists who show healed iconography on similar skin tones.
19. Geometric Mountain Memorial on Ankle
Style/Technique: Minimalist / Geometric
Pain Level: High (6–7/10)
Session Time: 1–2 hours
Best For: Small, travel-related tributes
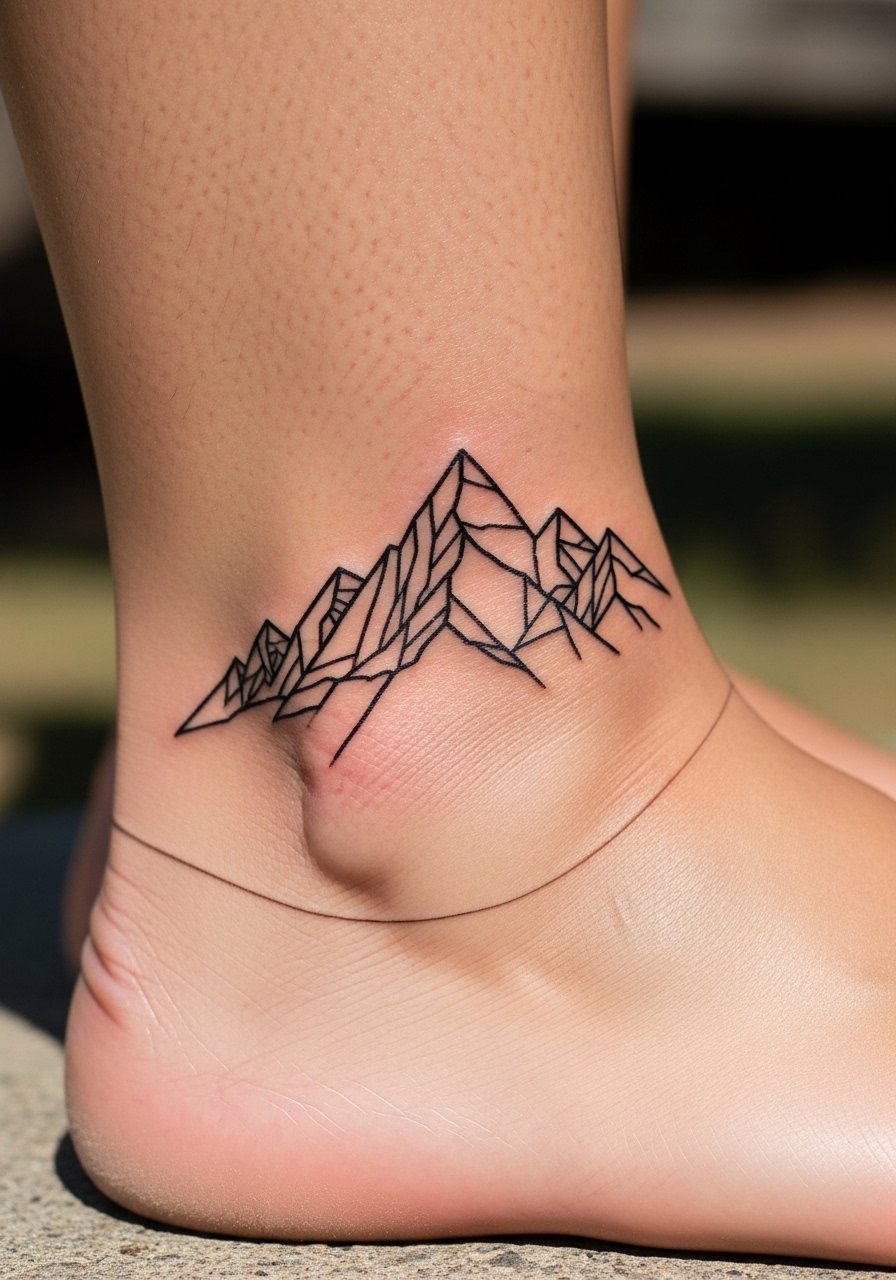
Mountains can mark a favorite place or memory. Ankle tattoos look great but fade faster due to shoes and socks rubbing. Expect touch-ups. Keep shapes bold and avoid tiny triangles that can blur. Artists I follow recommend keeping line weight a touch heavier than you think for ankles.
20. Music Waveform and Notes on Forearm
Style/Technique: Micro-Realism / Soundwave
Pain Level: Low-Medium (3-4/10)
Session Time: 1–2 hours
Best For: Memorial songs or voices
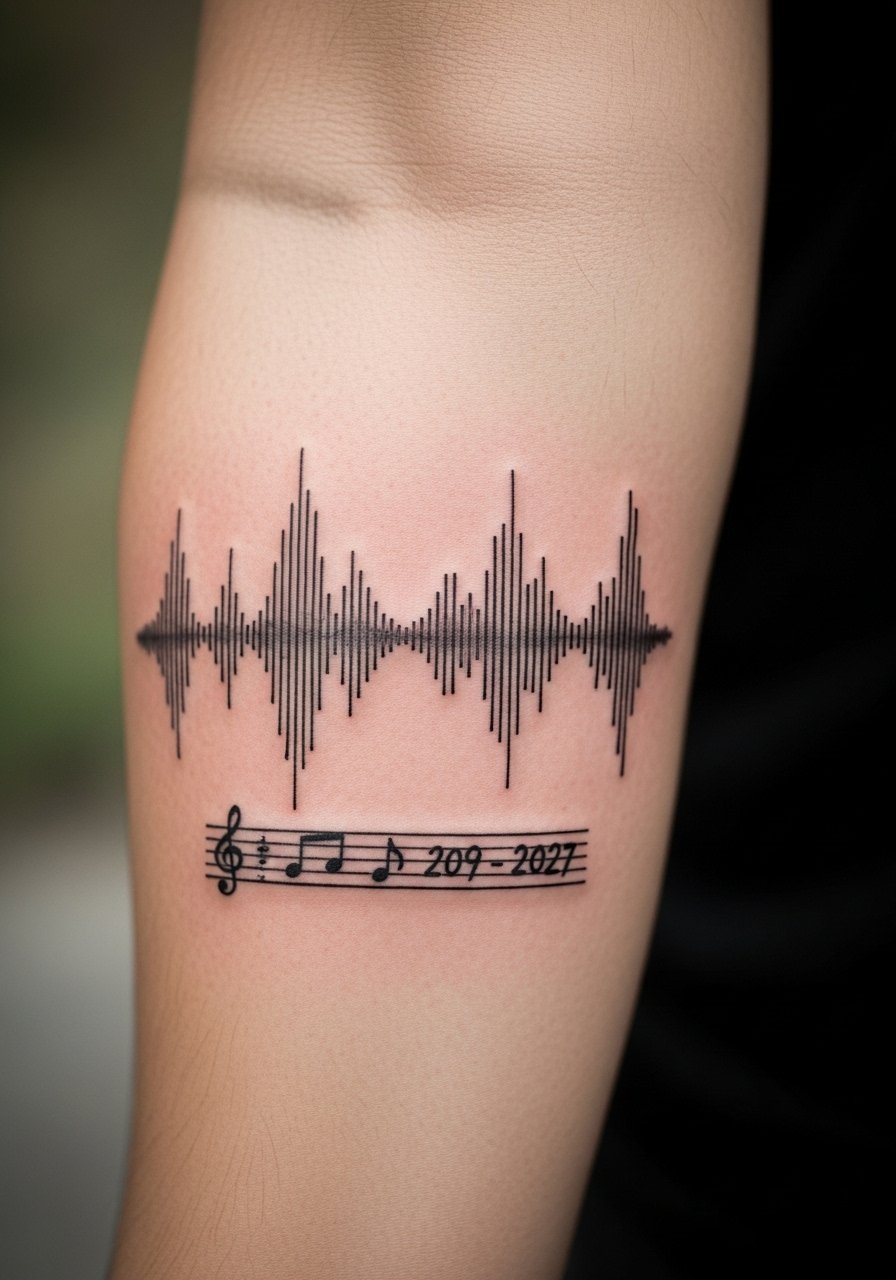
I tattooed a waveform of a loved one’s voice saying “I love you.” Forearm placement is readable and comforting. Waveforms need crisp contrast—bring a clean audio file and ask for bold lines. Mistakes happen when artists shrink the waveform too much; keep scale adequate for future clarity.
21. Awareness Ribbon with Name on Wrist
Style/Technique: Minimalist / Symbolic
Pain Level: Medium (4/10)
Session Time: 30–60 minutes
Best For: Cause-specific memorials
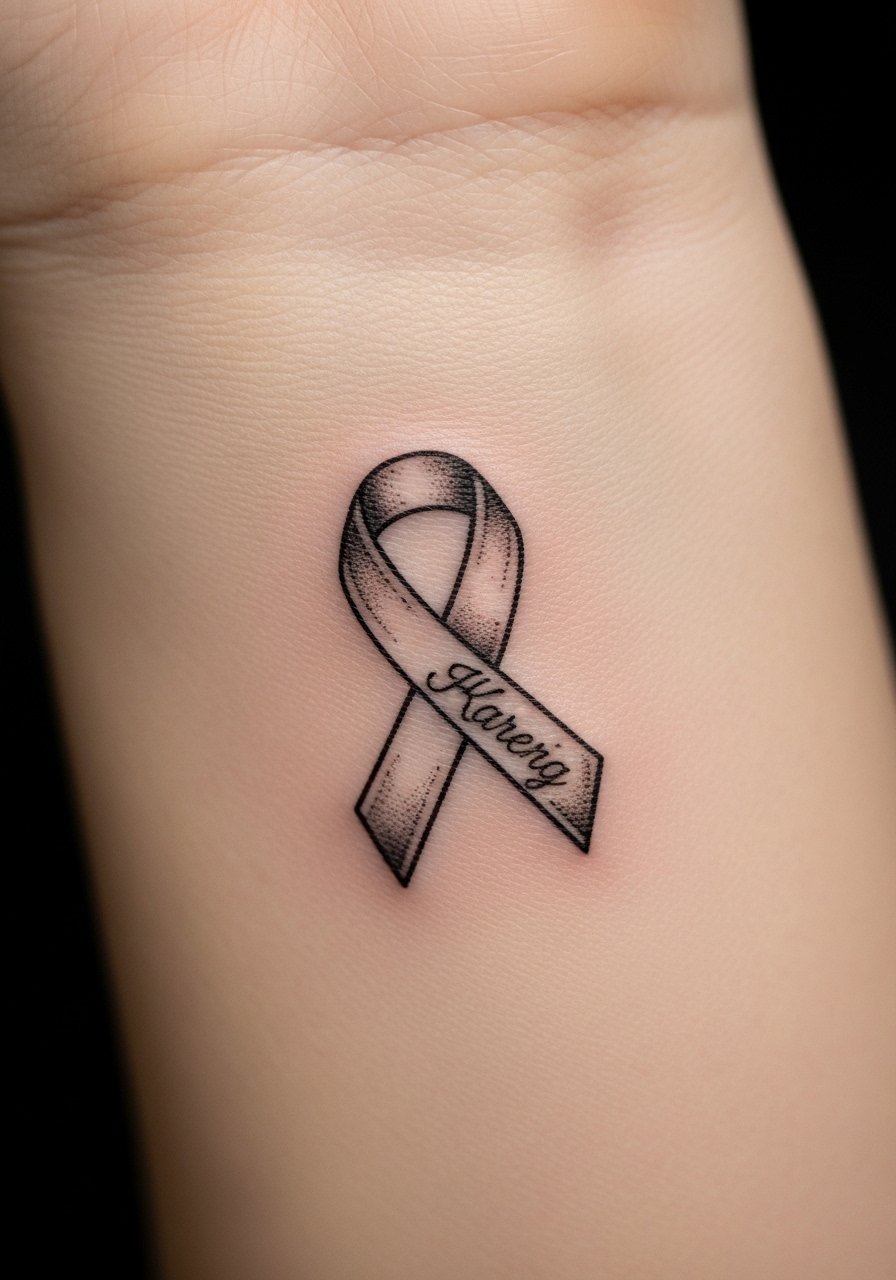
I chose a ribbon for a cause my loved one fought. Wrist placement is visible and keeps the cause front-of-mind. Thin ribbons can fade—ask for a slightly heavier ribbon outline and clear script. Artists often recommend leaving small negative space so color and line remain distinct.
22. Paw Print Micro-Realism on Thigh
Style/Technique: Micro-Realism / Pet Tribute
Pain Level: Low (3/10)
Session Time: 1–2 hours
Best For: Pet memorials
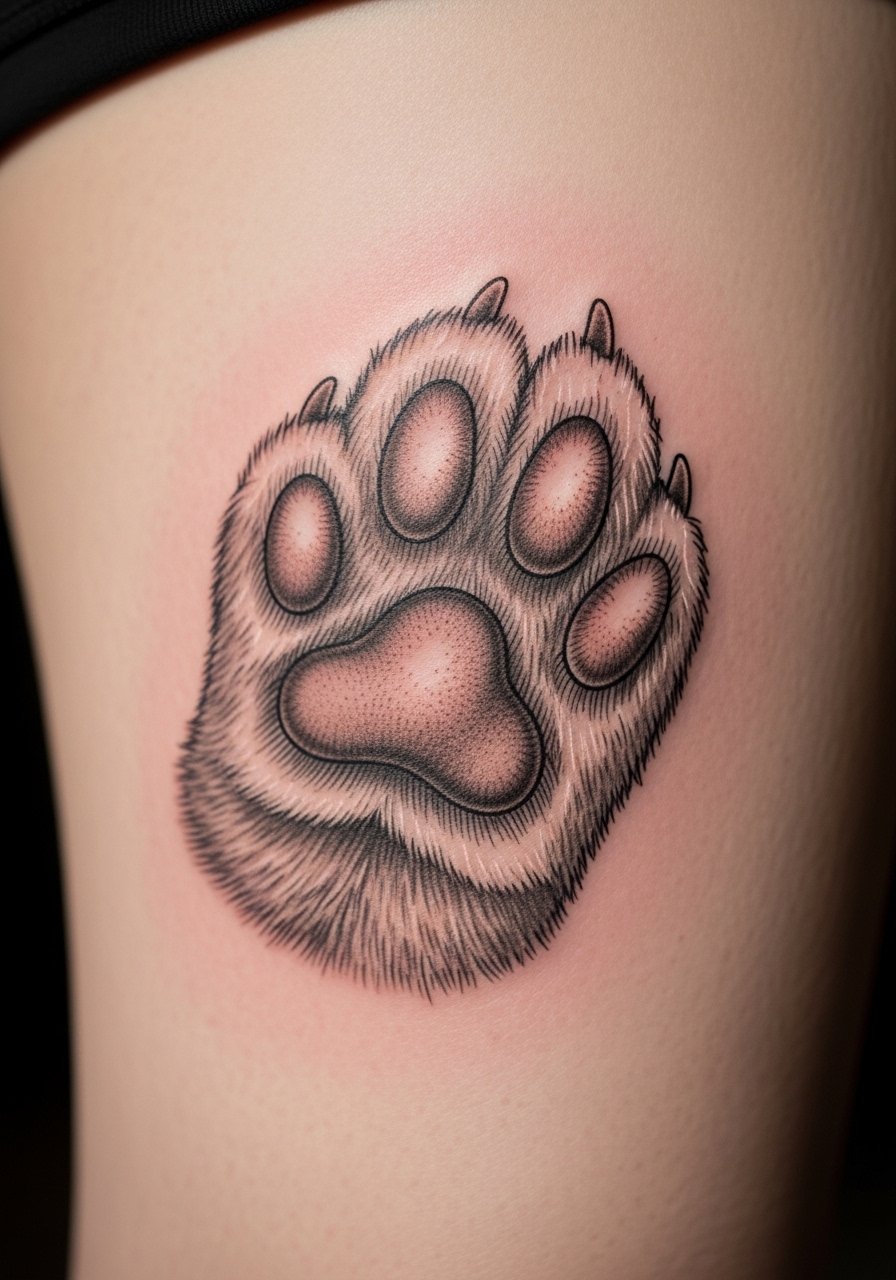
My pet paw print sits on my thigh. Thigh heals well and holds detail. Micro-realism captures pad creases. Avoid overly tiny prints; scale for ridge definition. Ask your artist for a stencil and to compare healed paw prints they’ve done.
23. Tree of Life Small Back Piece
Style/Technique: Blackwork / Fine Line
Pain Level: Medium (4-5/10)
Session Time: 2–4 hours
Best For: Family lineage memorials
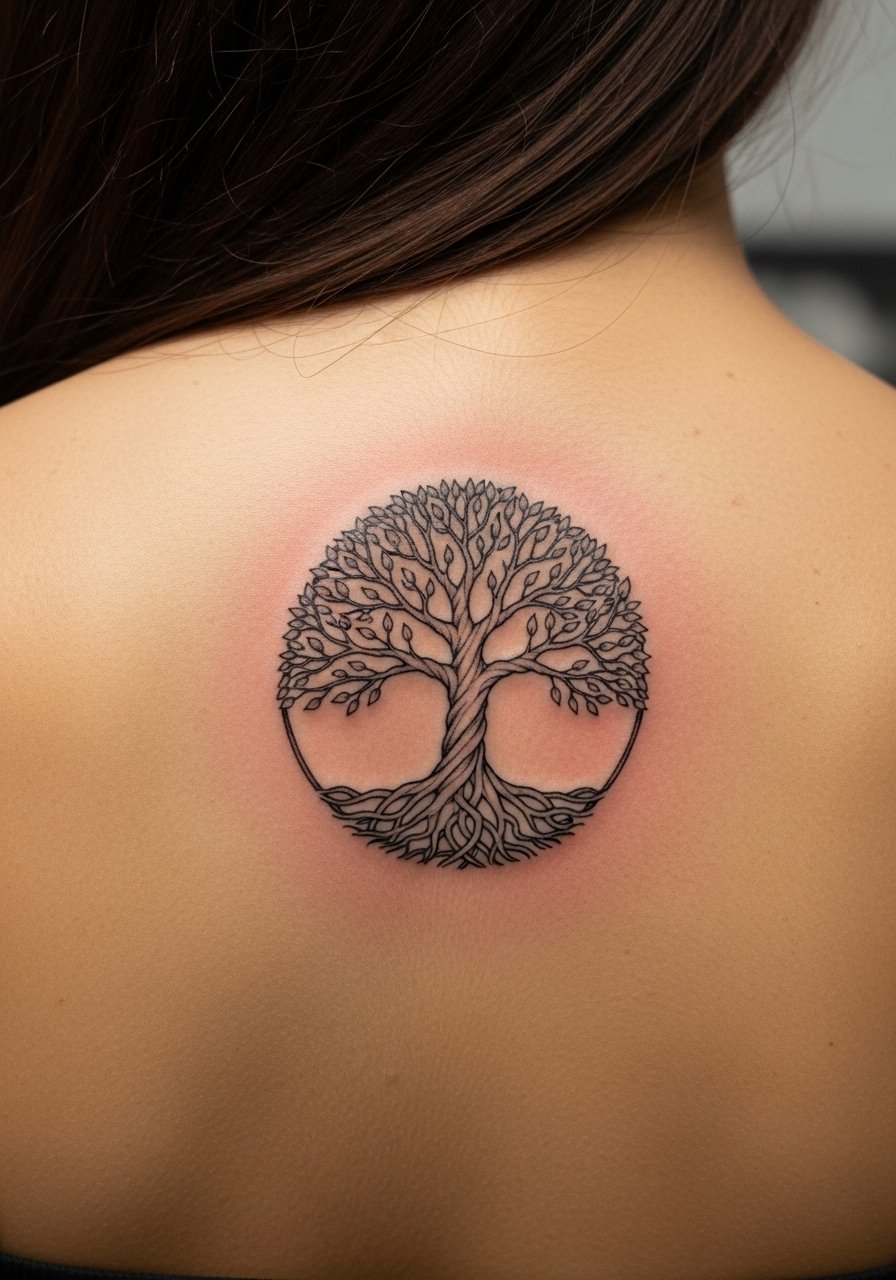
A compact tree symbolizes roots and family. Upper back placement lets it breathe under clothing. Fine roots need clear negative space to stay distinct. I’ve heard artists say to keep major branch lines bolder so the overall shape endures.
24. Lantern or Candle in Jar on Calf
Style/Technique: Neo-Traditional / Illustrative
Pain Level: Low-Medium (3–4/10)
Session Time: 1–3 hours
Best For: Light-in-darkness memorials
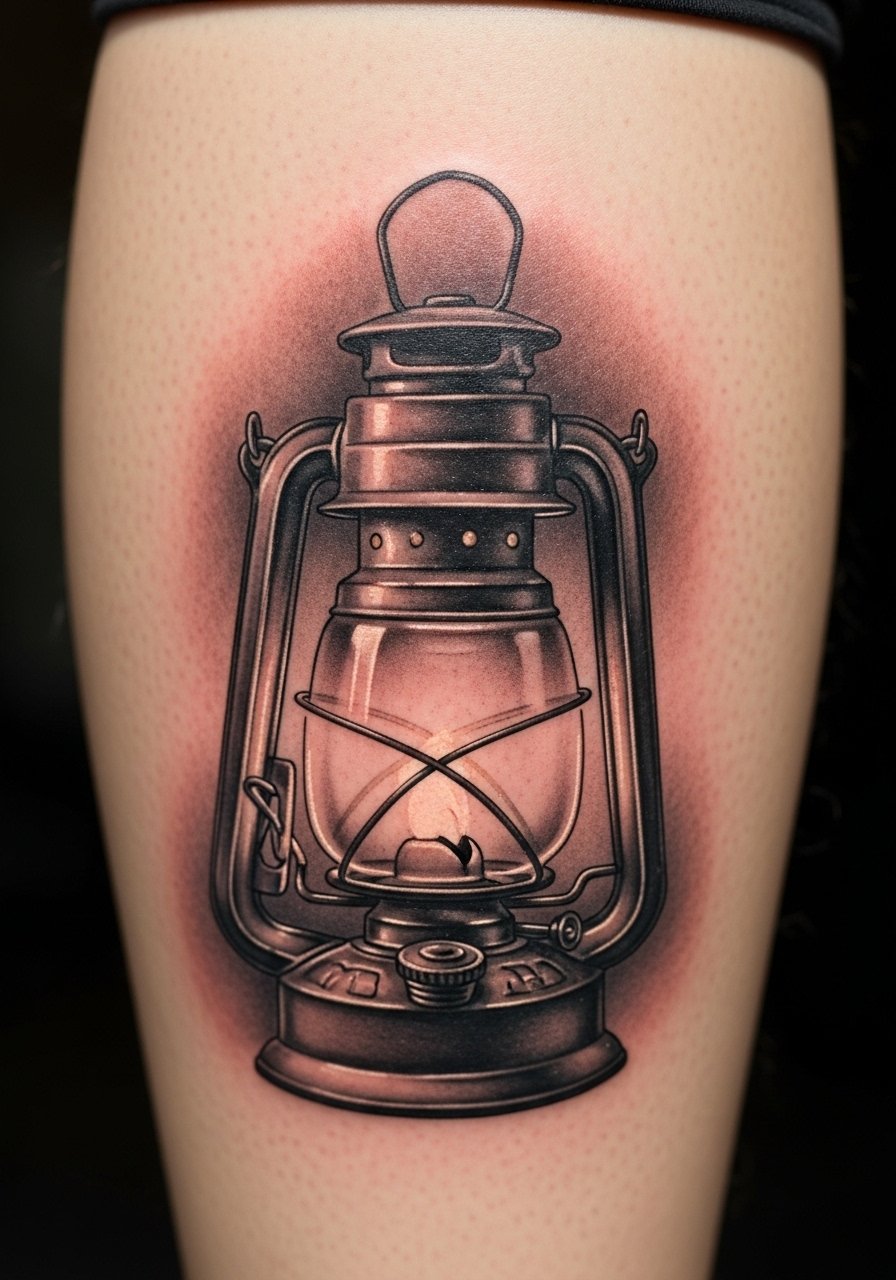
A candle in a jar reads as a guiding light. Calf placement is low-pain and visible when wanted. Shade edges well so the glow reads healed. Avoid tiny flame details that vanish; ask for clear contrast and healed examples.
25. Jar of Letters on Inner Forearm
Style/Technique: Illustrative / Fine Line
Pain Level: Medium (3–4/10)
Session Time: 1–2 hours
Best For: Keepsake emblems and notes
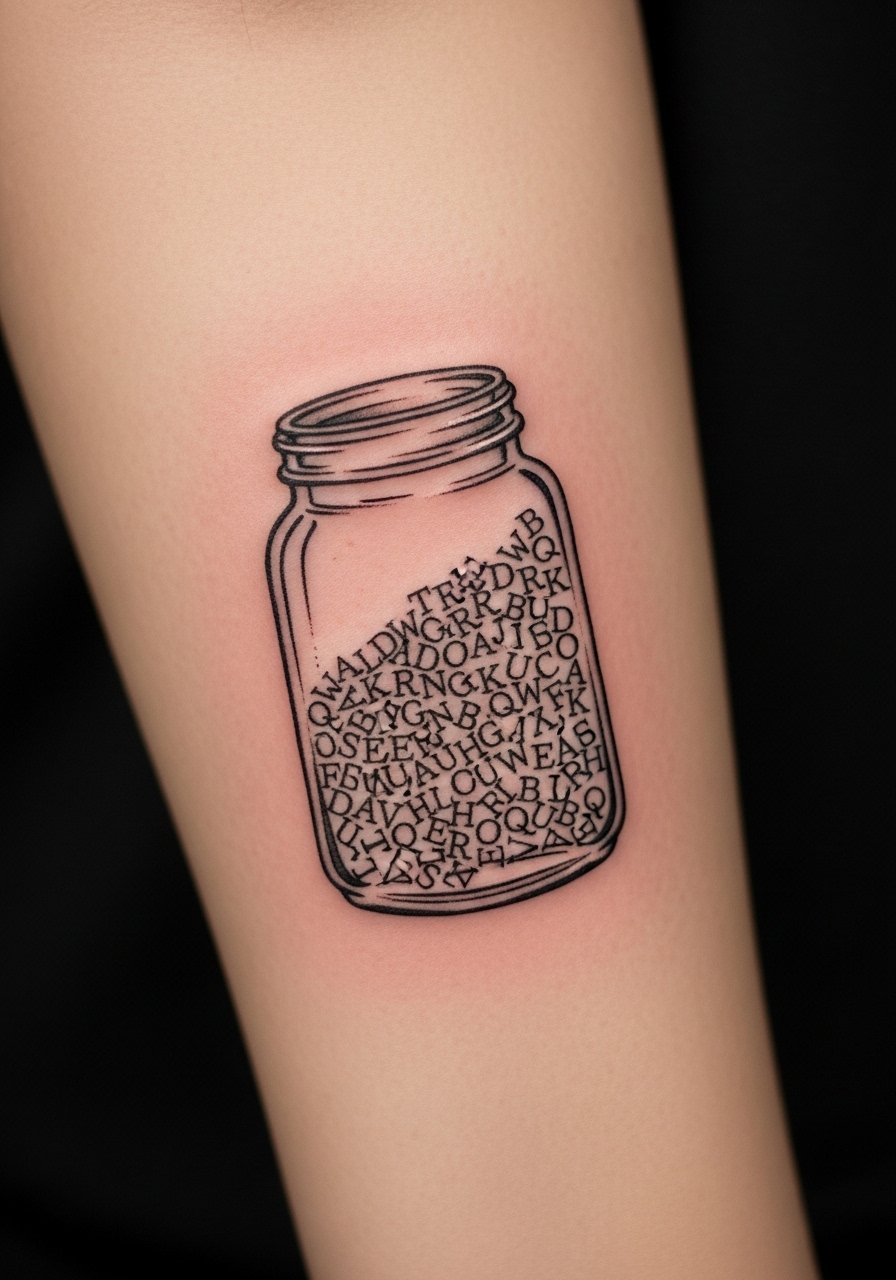
I had small letters in a jar inked to symbolize saved notes. Inner forearm placement keeps it private yet visible. Tiny letters can blur—use symbolic shapes for letters or slightly enlarge them. Artists I trust suggested strong outlines for the jar to protect the interior detail.
26. Star Map of Night Sky on Shoulder Blade
Style/Technique: Minimalist / Dotwork
Pain Level: Medium (4/10)
Session Time: 1–3 hours
Best For: Date/location sky mapping
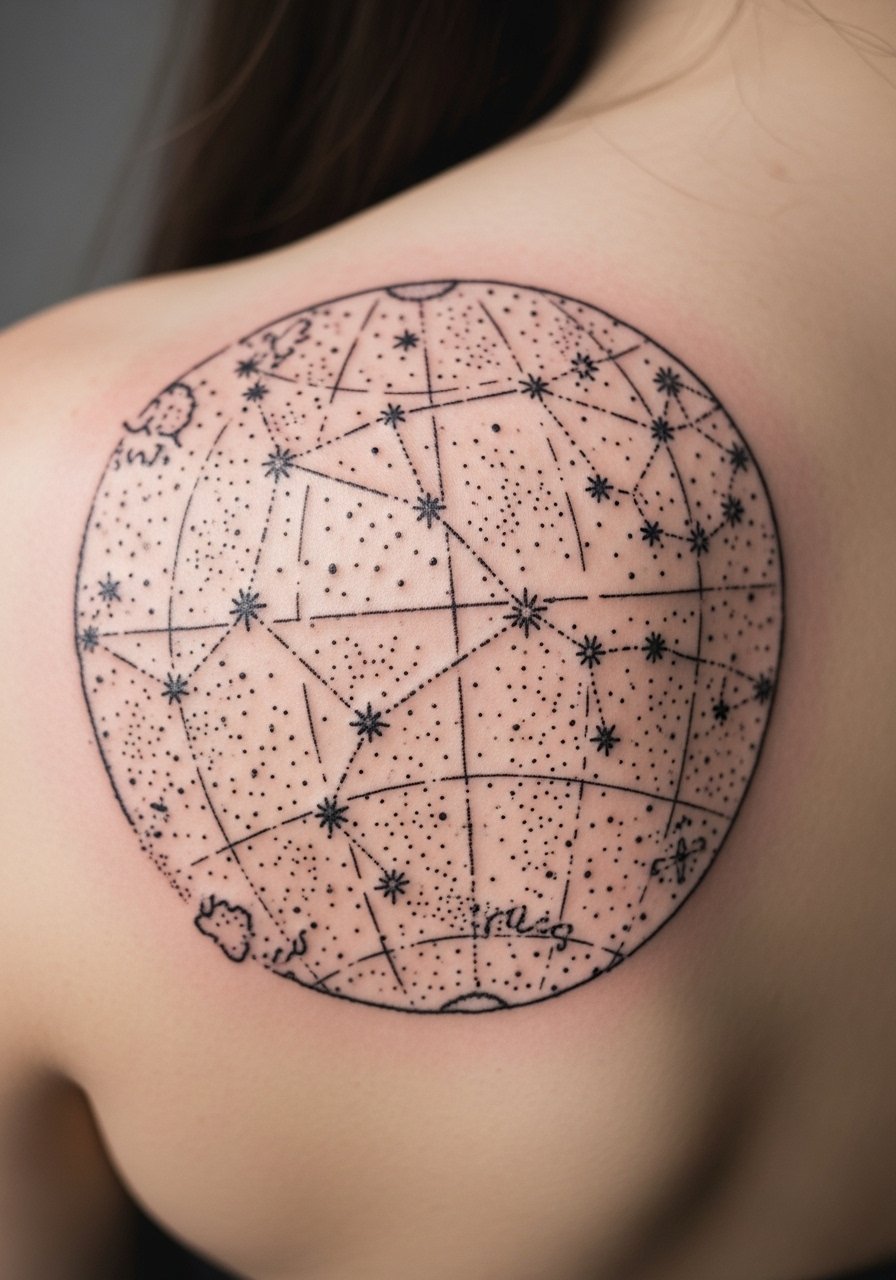
I mapped the stars from a meaningful night above my shoulder blade. Dotwork reads beautifully healed but needs precision during application. Avoid tiny dots too close together; spacing ensures the map stays readable. Artists usually recommend seeing healed dotwork samples on similar skin tones.
27. Crescent Moon and Name on Ribcage
Style/Technique: Fine Line / Minimalist
Pain Level: High (6–7/10)
Session Time: 1–2 hours
Best For: Intimate, celestial memorials

I finished with a crescent moon and a name tucked on the ribs. The curve feels protective near the heart. Ribs hurt more but the placement reads intimate. Keep lines a touch thicker than imagined to prevent blurring. Ask for a stencil to check curvature against your body movement.
Tattoo Prep and Aftercare Essentials
Aftercare Essentials:
- Aquaphor Healing Ointment, 14oz tube — For the first 3–5 days
- Saniderm Transparent Adhesive Bandage, 6-inch roll — Second-skin healing method
- CeraVe Fragrance-Free Moisturizing Lotion, 12oz — For days 4–14
- Dr. Bronner's Unscented Castile Soap, 32oz — Gentle cleaning
Before Your Appointment:
- Tattoo Numbing Cream 5% Lidocaine — Use only if your artist approves
- Tattoo Stencil Transfer Paper — For at-home mockups
Long-Term Maintenance:
- SPF 50 Sunscreen Stick For Tattoos — Daily protection
- Mad Rabbit Tattoo Balm 2oz — Keeps healed ink vibrant
- Hustle Butter Deluxe 4oz — Vegan aftercare option
Optional Comfort Items:
- Tattoo Numbing Spray — For touch-ups or sensitive areas
- Hydrocolloid Bandages (Large) — Alternative to Saniderm for smaller spots
Frequently Asked Questions
Q: How bad does a tattoo actually hurt?
A: Pain is placement-dependent. Upper arm or thigh = low (2–4/10). Ribcage, sternum, ankle = higher (6–8/10). It’s more a steady vibration or burning than sudden sharp pain. I used a numbing cream once for ribs after asking my artist; it helped but didn’t remove all sensation.
Q: What if I regret the design later?
A: Sit with the idea for months. I waited and redrew my concept twice. If you later want changes, cover-up or revision is possible but needs planning. Small, trendy scripts are the ones I’ve seen people change most often—choose something personally meaningful.
Q: How do I keep my memorial tattoo from fading?
A: Sunscreen is essential. From what I’ve seen, UV exposure kills ink color faster than anything else. Use an SPF 50 stick on tattoos in sun-exposed areas and moisturize regularly with a fragrance-free lotion like CeraVe.
Q: When can I work out after getting a tattoo?
A: Wait 48–72 hours at minimum, longer if it’s in a flex area. Sweat can irritate and introduce bacteria. I skipped intense workouts for a week after my ribcage piece and kept it covered lightly while healing.
Q: Should I get a small tattoo first to test pain?
A: Only if you actually want a small tattoo. Pain varies more by placement than size. I recommend choosing a less sensitive spot like the outer upper arm if you want a gentle intro.
Q: How long does a tattoo take to heal fully?
A: Surface healing is around 2–3 weeks; full dermal settling can be 2–3 months. The first week is the most delicate—keep cleaning with gentle soap like Dr. Bronner’s Unscented and moisturize with Aquaphor.
Q: Do tattoos look different on different skin tones?
A: Yes. Black and gray tends to show well across tones. Bright colors can appear muted on deeper skin. I always ask artists to show healed photos on similar skin tones so I know what to expect.
Q: What are common mistakes people make with memorial tattoos?
A: Rushing design decisions, using low-res photos for portraits, and picking ultra-fine script for high-friction spots. I personally waited, refined my references, and asked to see healed work from my artist before committing.
