
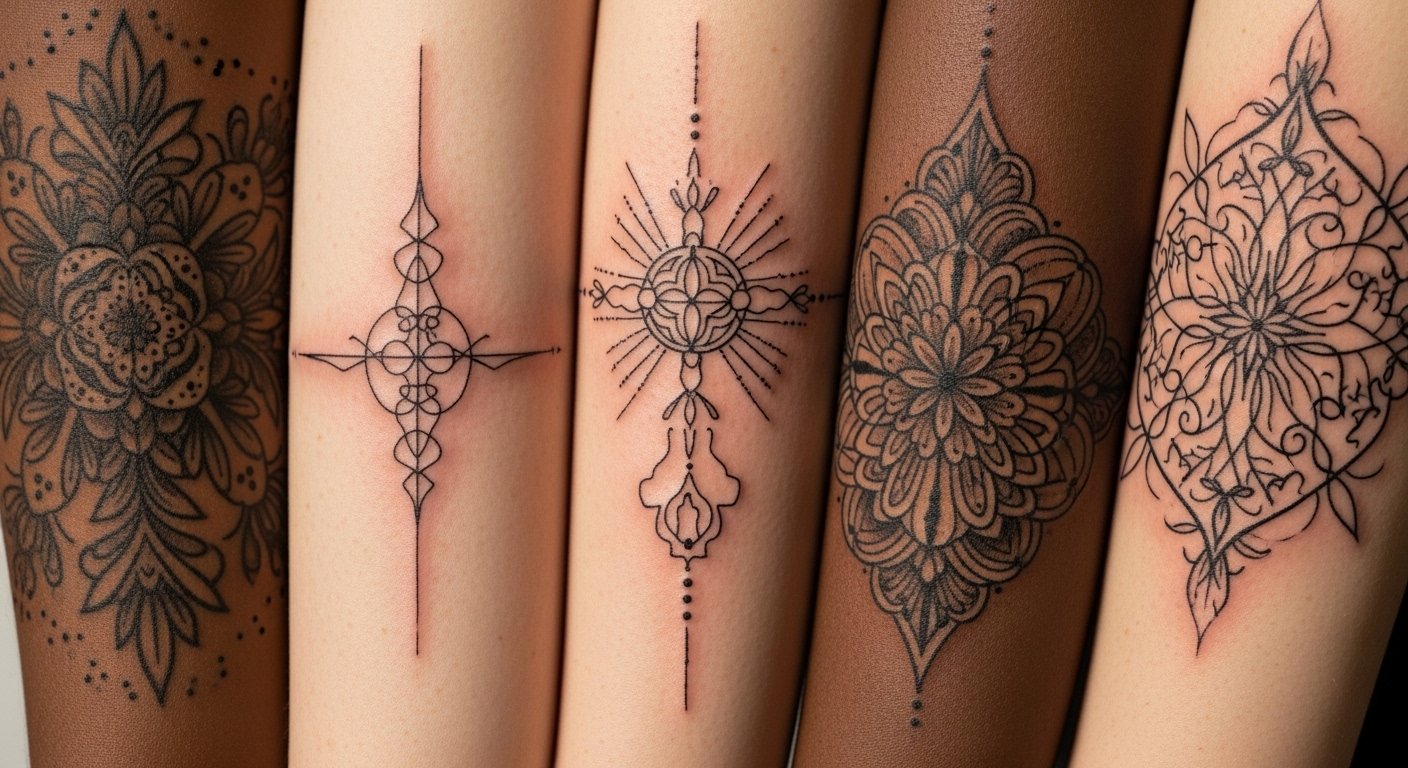
I spent months staring at dotwork pieces before I understood why I kept returning to them: the detail reads like texture, not just ink. Dotwork tattoos hold up well when done right. Below are 22 intricate dotwork ideas I researched and sketched out after visiting studios and healed portfolios. Each one notes pain, healing, and what to avoid.
Quick context: This piece focuses on dotwork and blackwork styles, with fine-line hybrids and micro-realism touches. These ideas suit arms, ribs, back, and thighs. I leaned on 2025 trends: geometric symmetry, negative space, and scar-friendly dot shading. Stat: ~30% of U.S. adults report having a tattoo (Statista). Source: https://www.statista.com/statistics/721415/share-of-us-adults-with-tattoos/ . Another trend stat: tattoos are increasingly accepted in the workplace (Pew/industry summaries, ongoing surveys).
Geometric Mandala Down Spine
Style/Technique: Blackwork / Geometric
Pain Level: High (7/10)
Session Time: Multiple sessions
Best For: Statement, symmetry lovers
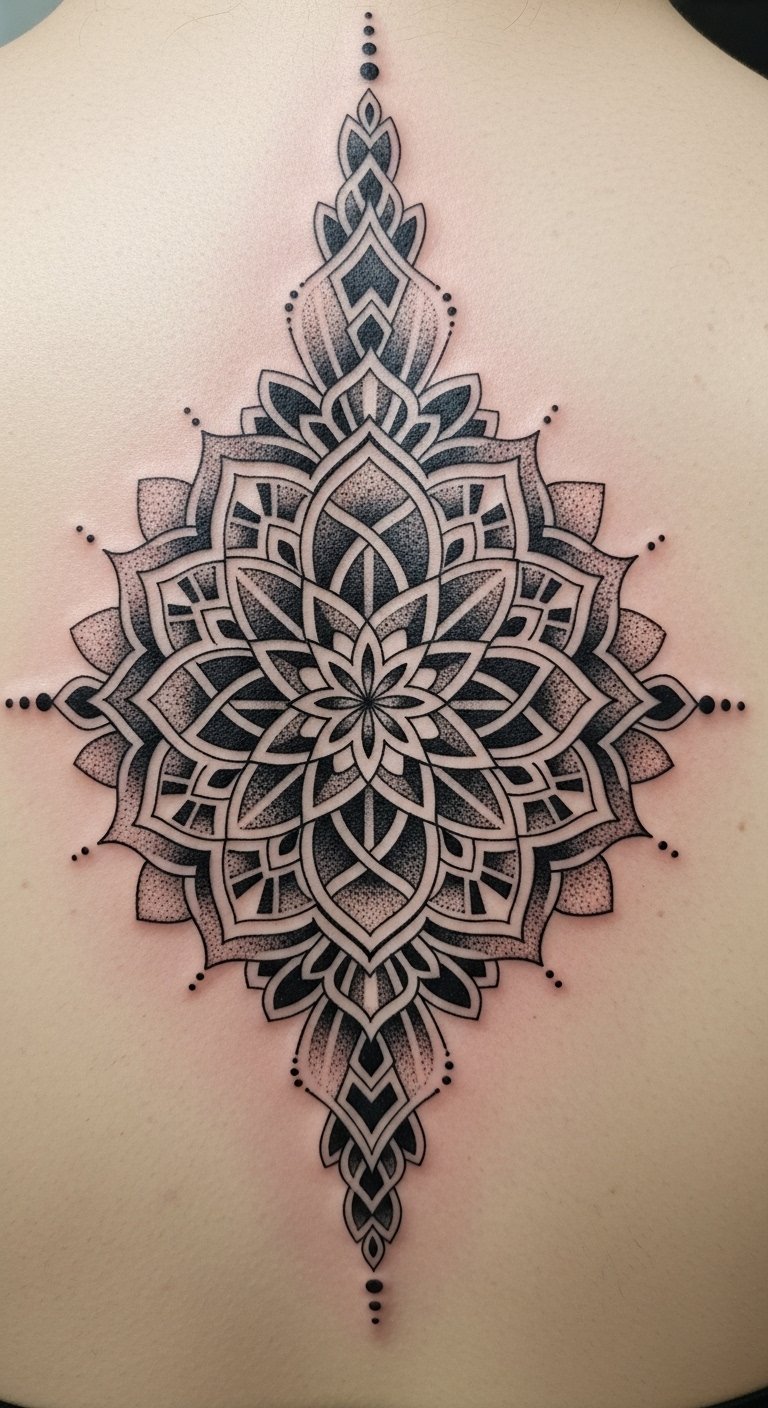
I first saw this at a convention. The spine amplifies the symmetry. Dotwork creates soft gradients that read like shadow without heavy linework. Expect sharp discomfort along vertebrae. Healing takes longer because movement stretches the skin; plan for 2-3 months to fully settle. Dotwork ages well if dots are spaced properly—too close and the tattoo can blur. Common mistake: asking for too-thin dots across the whole mandala; ask for varied dot density. Look for artists skilled in blackwork and mandalas.
Crescent Moon Phases on Forearm
Style/Technique: Fine Line + Dotwork
Pain Level: Low-Medium (3/10)
Session Time: 1-2 hours
Best For: First tattoo, visible but easy to hide
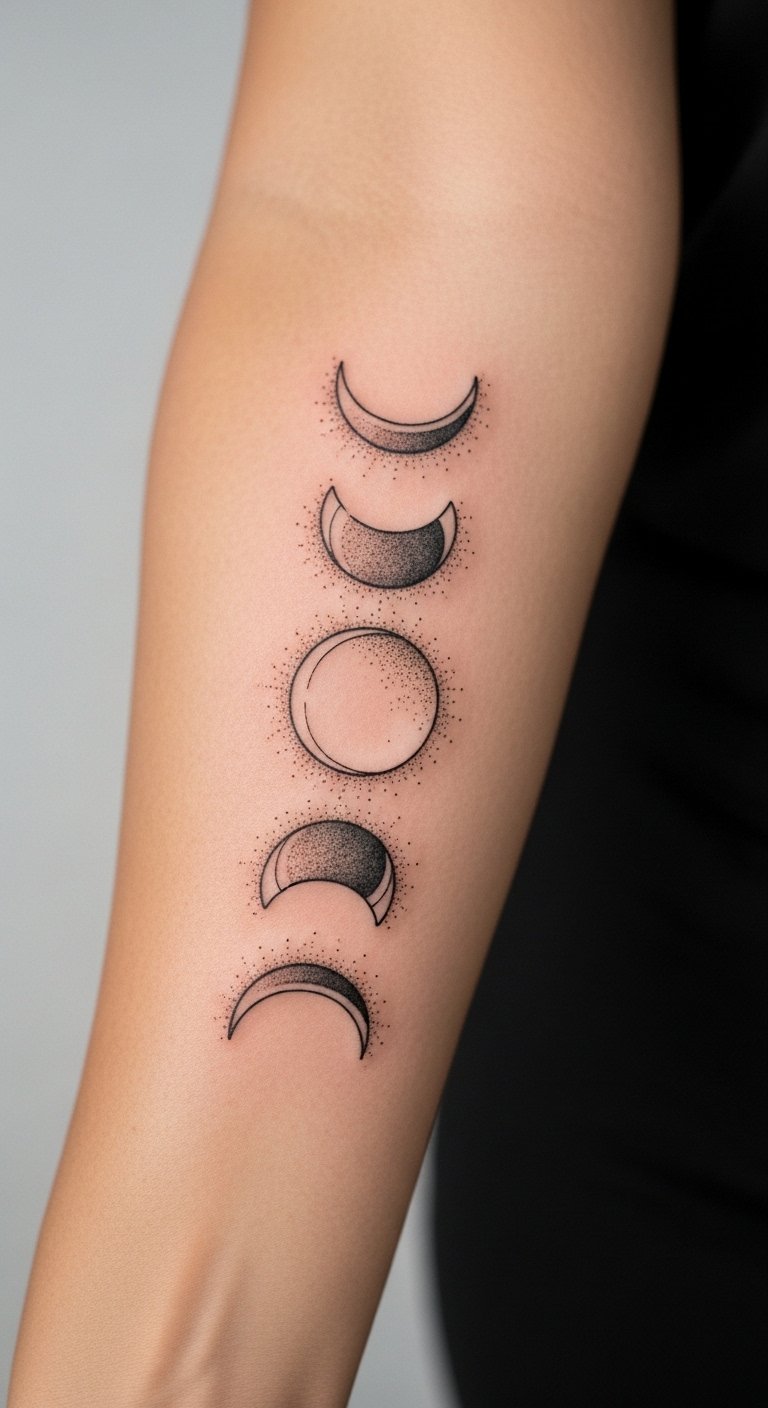
I liked how the phases read like a timeline. Dot shading fills moons without heavy blacks. Forearm pain is manageable. Healing is quick—surface healed in 2-3 weeks. Dotwork here softens as skin settles; the moons keep contrast if artist staggers dot size. Common mistake: oversaturating early; it looks crisp fresh but can merge. Ask for healed photos from the artist.
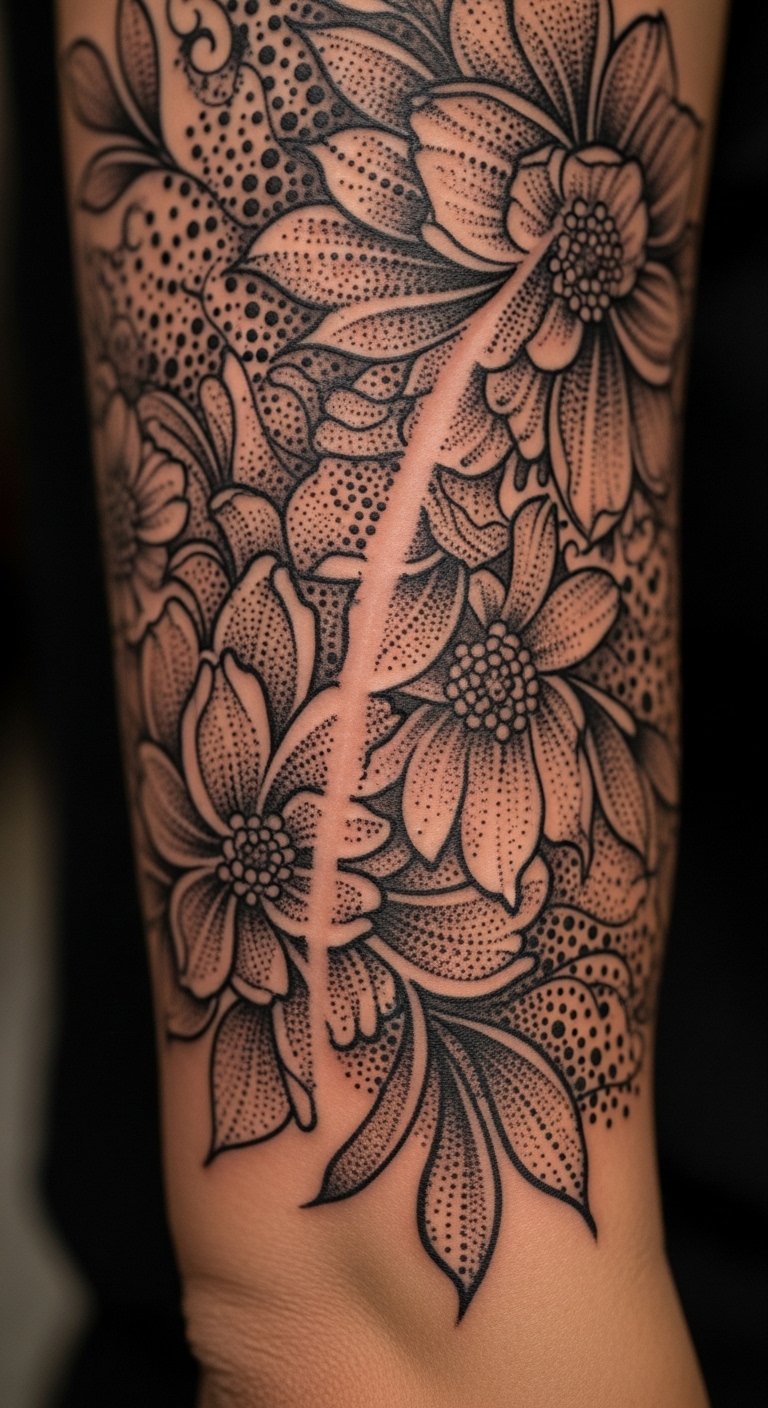
Floral Dotwork Thigh Panel
Style/Technique: Neo-Traditional + Dotwork
Pain Level: Medium (4/10)
Session Time: 2-4 hours
Best For: Large, concealable pieces

Thighs are forgiving. Dotwork gives petals texture and depth without heavy color. Pain is mild and easy to sit through. Healing is steady; avoid tight clothing during first week. Dot shading ages nicely—black holds well, while fine dots soften. Mistake: too many tiny details in small areas. Ask the artist to scale details for the distance people will view the tattoo.
Stippled Portrait on Upper Arm
Style/Technique: Micro-Realism Stipple
Pain Level: Low-Medium (3-4/10)
Session Time: 2-5 hours
Best For: Meaningful portrait, durable placement
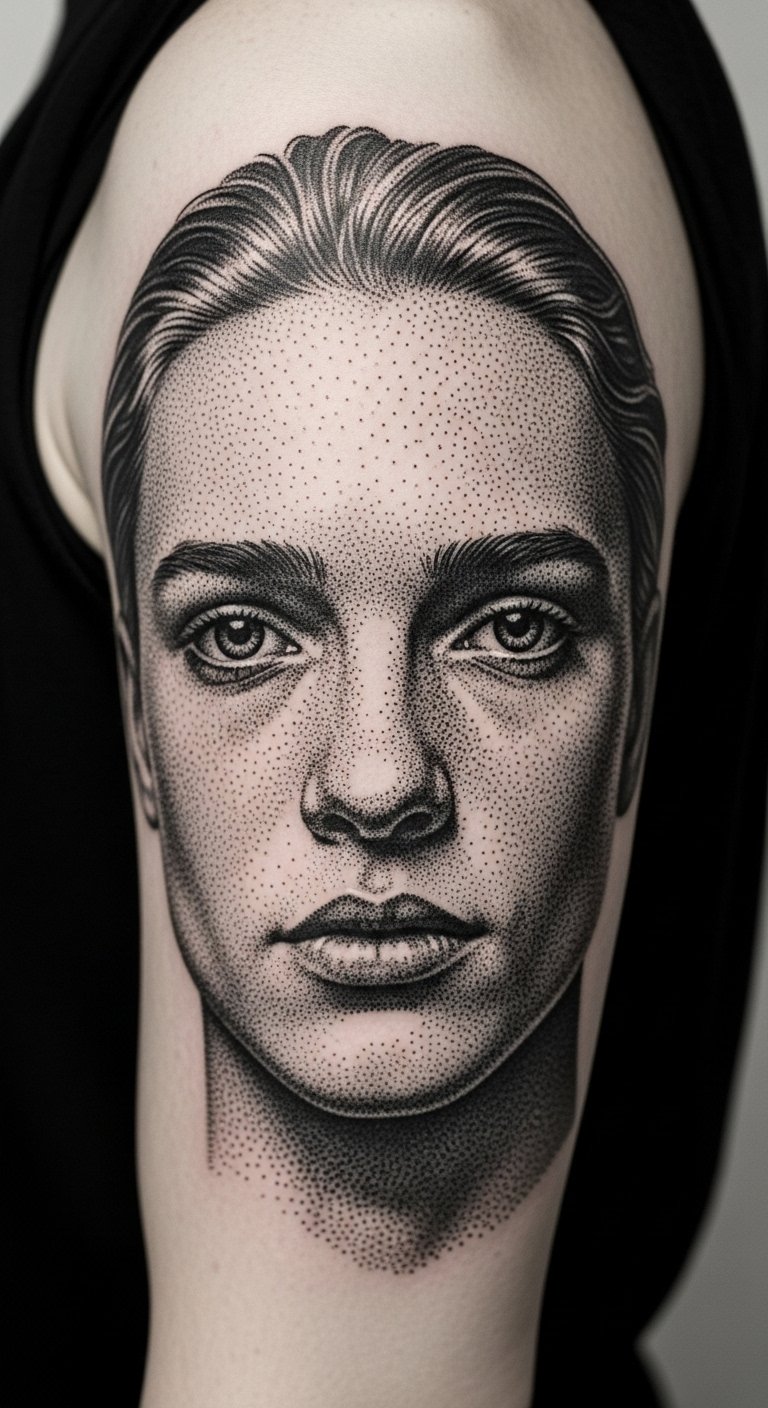
I saw a photographer get one to honor a pet. Dotwork portraits read like grainy film. Upper arm gives space and is lower pain. Healing is straightforward; expect surface peeling in week one. Dot density must reflect shadow, or features will blur. Common mistake: requesting extreme photo detail at small scale. Ask to size up for clarity.
Constellation Wrist Band
Style/Technique: Minimalist Dotwork
Pain Level: Low (2-3/10)
Session Time: 1 hour
Best For: Subtle, symbolic pieces
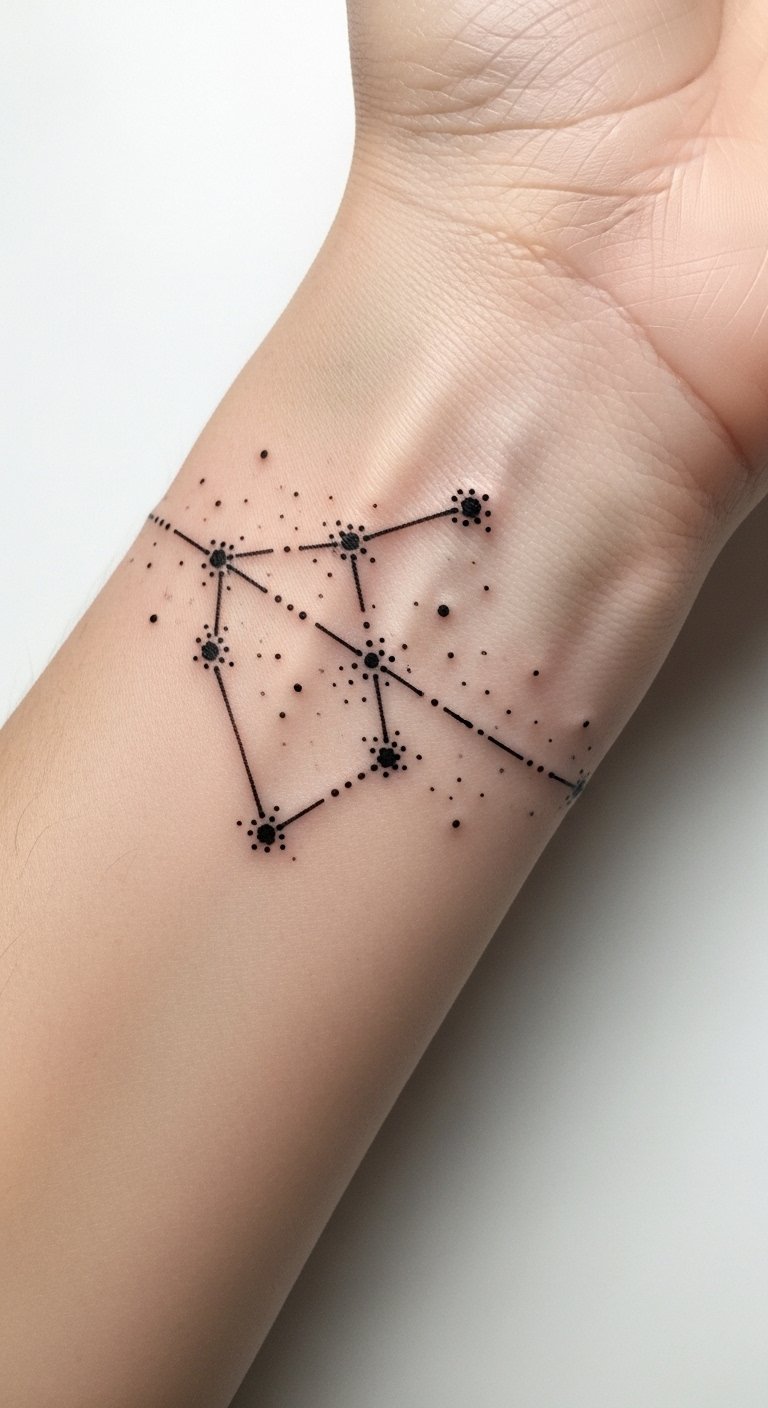
This was my go-to recommendation for first-timers wanting dotwork. It’s delicate, meaningful, and easy to cover. Wrist heals in 2-3 weeks but can be fussy due to movement. Dotwork maintains crispness if spaced; avoid single tiny dots as they can fade into skin texture. Ask for slightly stronger dots than you imagine so the piece stays visible after healing.
Sacred Geometry Chest Panel
Style/Technique: Blackwork Dotwork
Pain Level: High (7/10)
Session Time: Multiple sessions
Best For: Bold chest statement, spiritual motifs

I noticed these in studio walls. Dot gradients create a 3D look without color. Chest placement is painful near sternum and ribs. Healing needs care—sleep positions matter. If dots are spaced well, the design keeps its crisp geometry; if oversaturated it can blob. Artist tip: ask for reference healed photos of chest work.
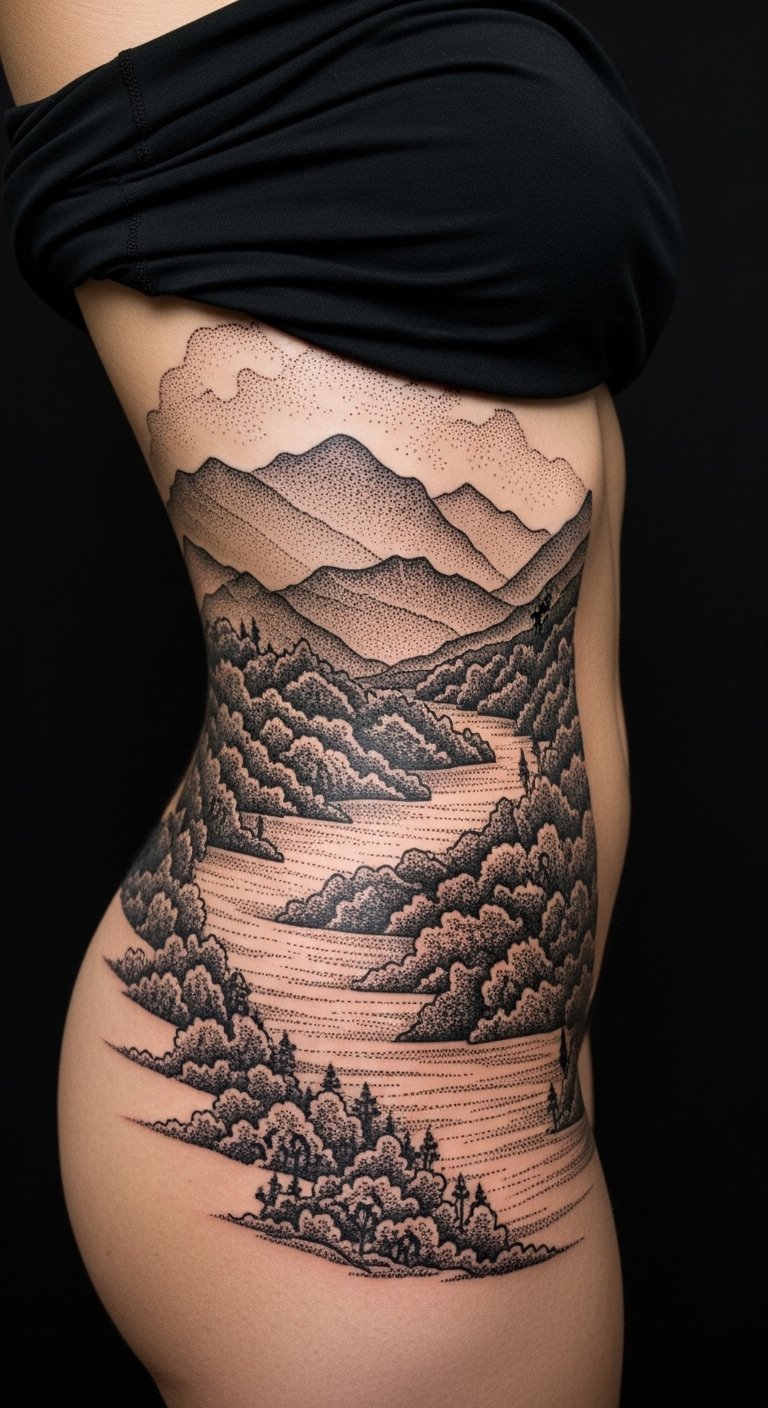
Dotwork Ribcage Landscape
Style/Technique: Fine Line + Dotwork Landscape
Pain Level: Very High (8/10)
Session Time: Multiple sessions
Best For: Personal, private canvases
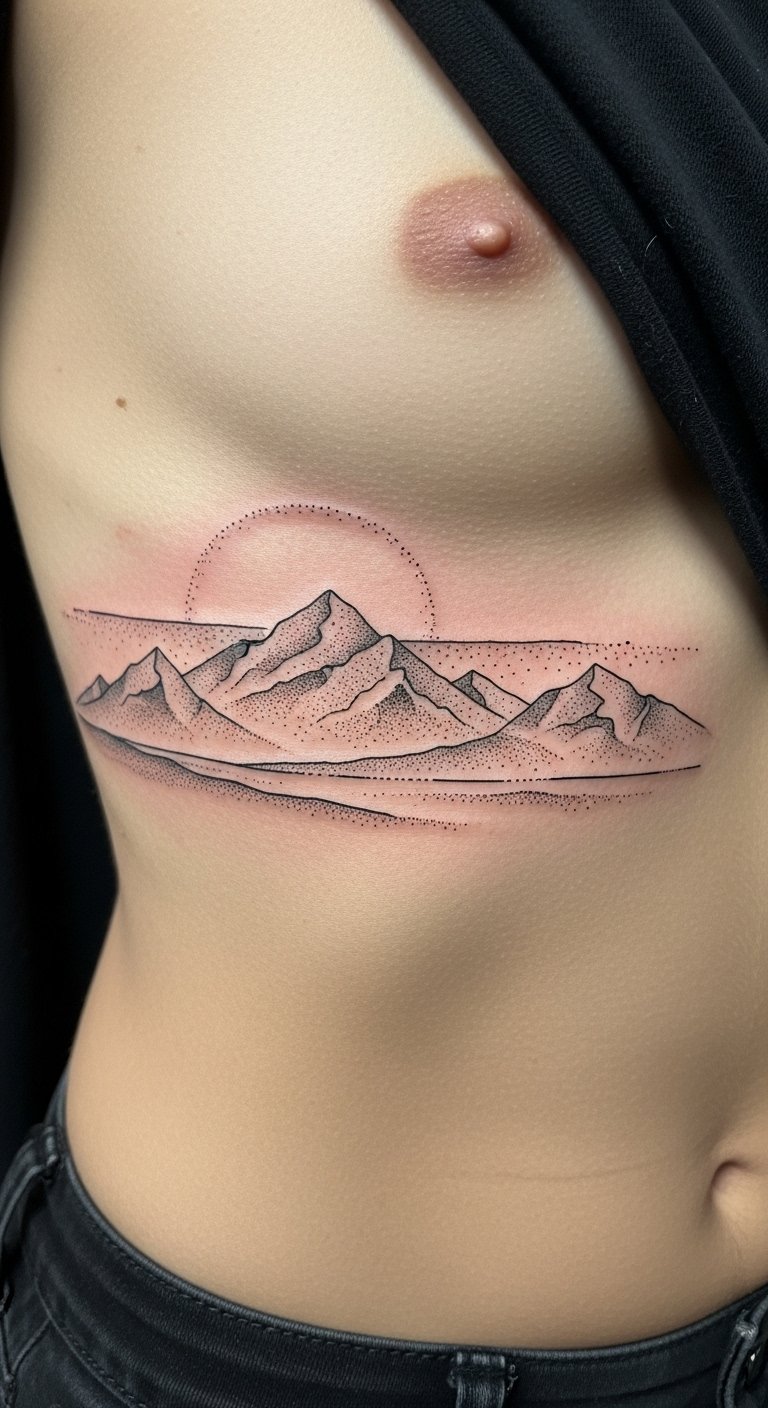
Ribs are painful but rewarding. Dotwork lets you render fog and distance with subtlety. Healing is slower; avoid heavy movement and tight clothes for two weeks. Dots can blur if too dense; keep negative space for breathability. Mistake: squeezing too many elements into a narrow band. Simpler compositions age better.
Botanical Ankle Wrap
Style/Technique: Fine Line + Dotwork
Pain Level: High (6-7/10)
Session Time: 1-2 hours
Best For: Feminine, ankle-focused statements
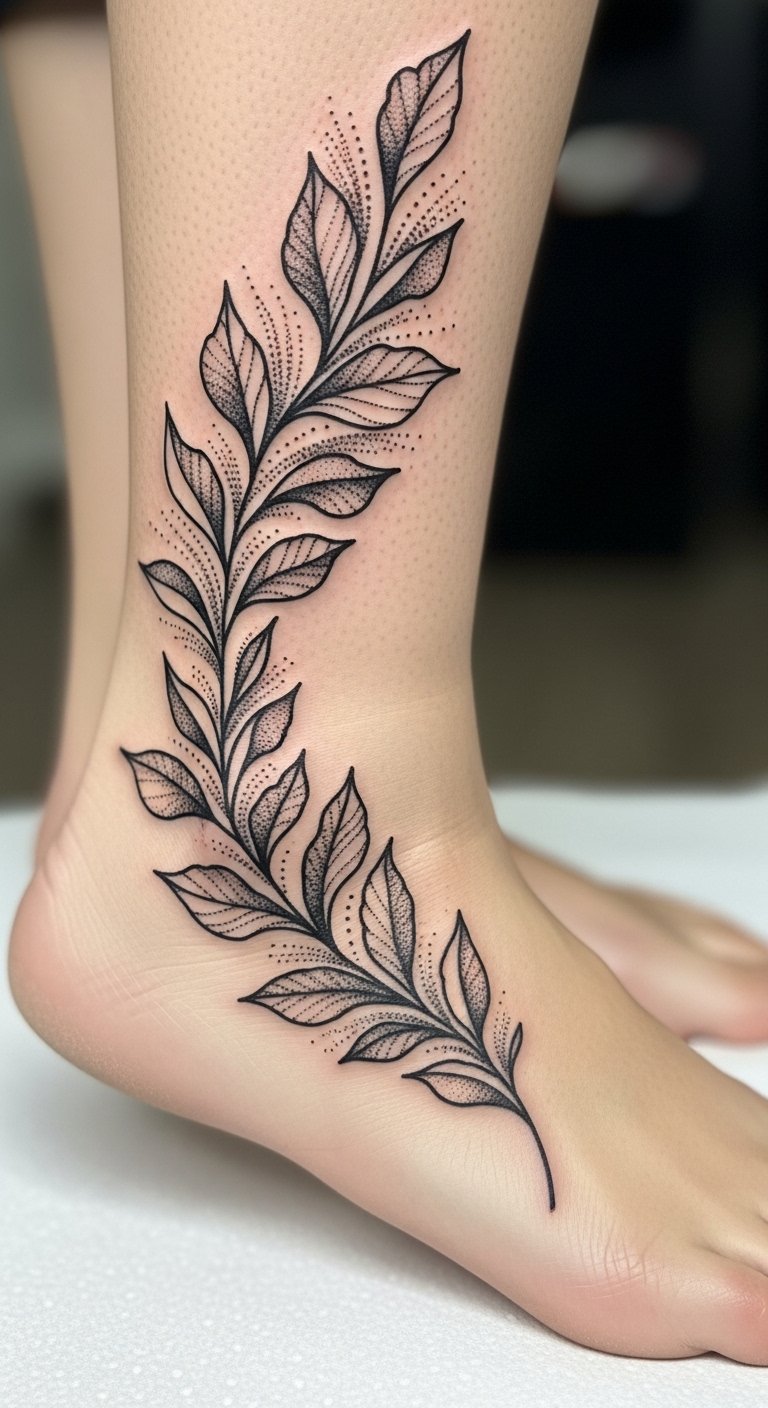
Ankle tattoos look delicate but sting due to thin skin. Dotwork softens the look and holds well if artist adjusts dot size. Healing requires minimal footwear friction. Expect touch-ups sometimes because ankle movement shifts ink. Common mistake: tiny text or details that blur; prioritize bold dot patterns.
Dotwork Sleeve Accent With Negative Space
Style/Technique: Blackwork + Negative Space
Pain Level: Medium-High (5-7/10)
Session Time: Multiple sessions
Best For: Sleeve blends, in-progress coverage

I watched an artist integrate dotwork to transition styles. Negative space lets the skin breathe and prevents muddying. Pain varies across forearm and elbow. Healing across a sleeve needs staged sessions. Mistake: filling everything; keep gaps to prevent future blur. Ask for a map of dot density during consult.
Sacred Eye Behind Ear
Style/Technique: Micro Dotwork
Pain Level: High (6-7/10)
Session Time: Under 1 hour
Best For: Tiny, hidden symbolism
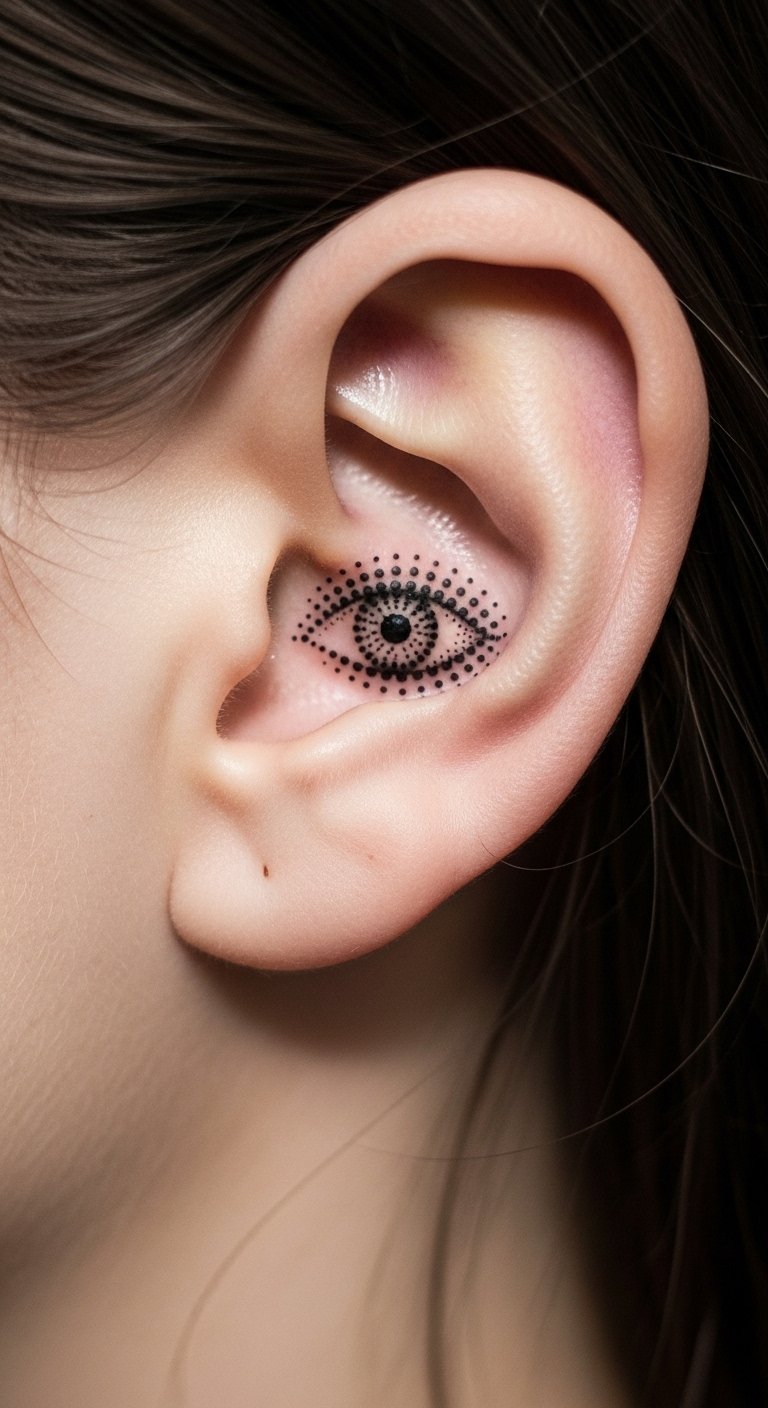
Behind-ear tattoos are intimate and discreet. Dotwork here reads like texture, not a bold mark. Pain is sharp but brief. Healing needs gentle care due to hair and sweat. Dots can fade faster in this spot; ask for slightly larger dot scale. Mistake: expecting extreme detail in tiny areas.
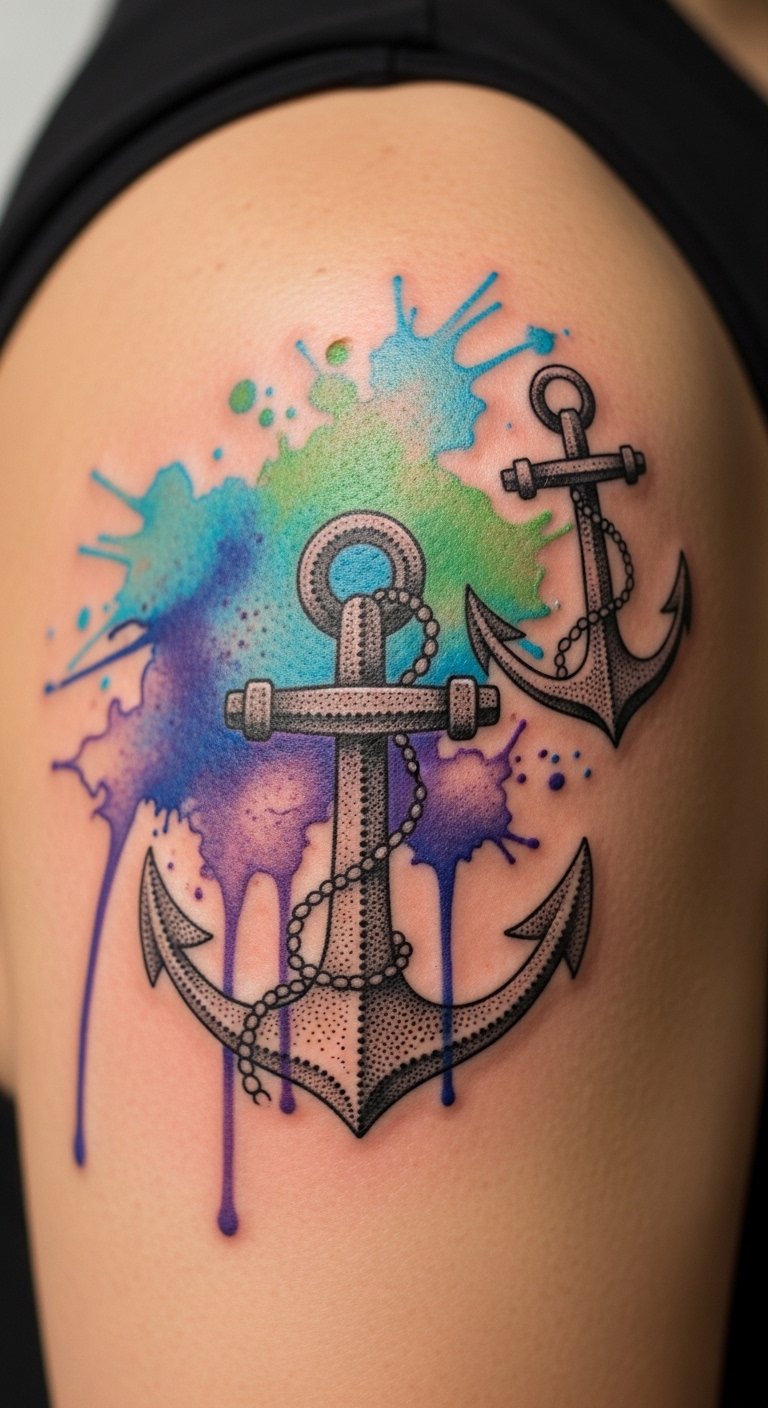
Circular Compass On Sternum
Style/Technique: Blackwork Dot Compass
Pain Level: Very High (8/10)
Session Time: Multiple short sessions
Best For: Centered statement, meaningful symbol

Sternum work is intense. Dot gradients create depth without heavy lines. Healing requires patience; movement and chest expansion can affect settling. If dot spacing is off, the circle can soften unevenly. Common mistake: too many micro-dots near sternum; opt for varied dot sizes.
Scar Camouflage Dot Shading on Arm
Style/Technique: Dotwork Scar Blending
Pain Level: Medium (4/10)
Session Time: 1-3 sessions
Best For: Concealing or transforming scars
I researched dotwork for scar coverage. Stippling can mask texture without covering the scar entirely, which helps healing. Pain is similar to surrounding skin. Healing is gentle; avoid aggressive saturation. Mistake: trying full cover-up with heavy black—dot gradients work better. Look for artists experienced in scar work.
Celestial Back Panel With Dot Halos
Style/Technique: Blackwork + Dot Halos
Pain Level: High (6-8/10)
Session Time: Multiple sessions
Best For: Large back compositions
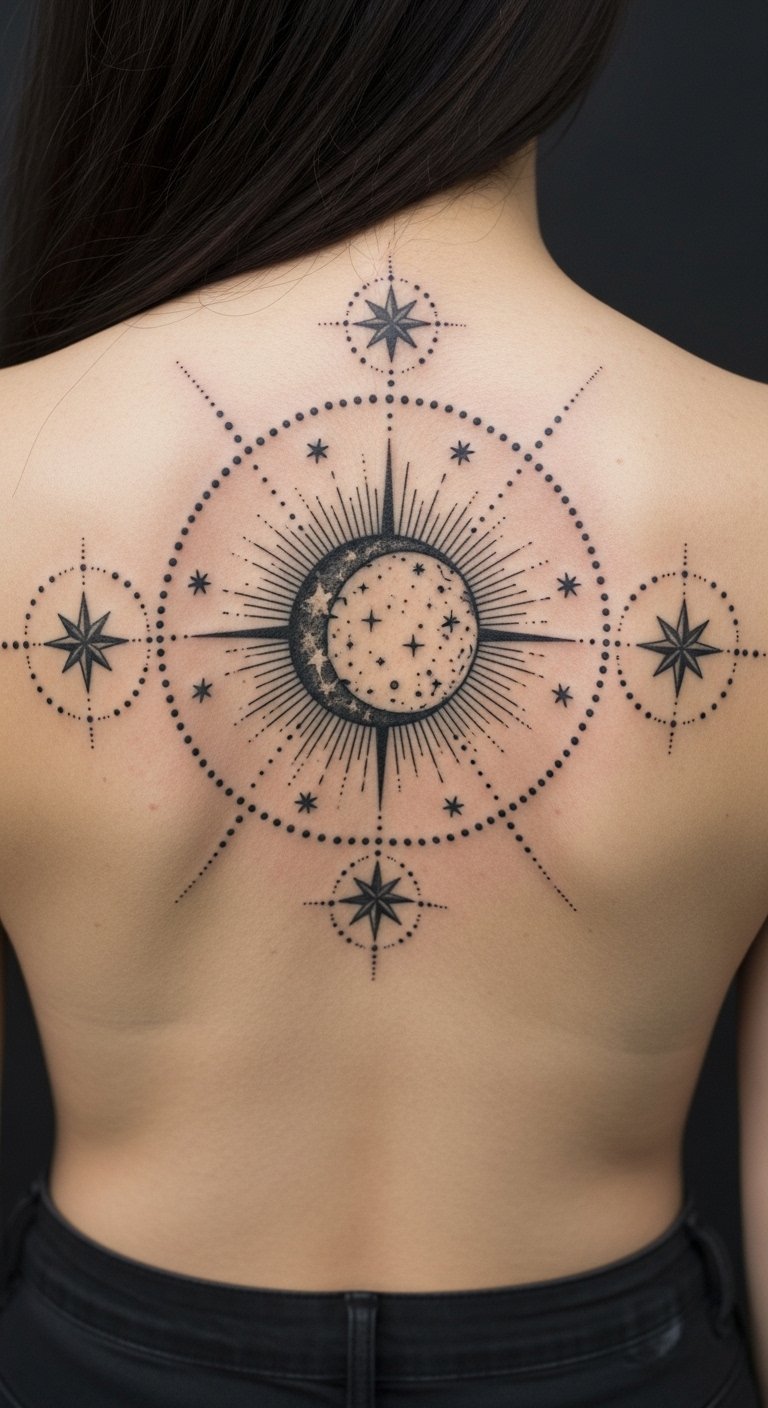
Back canvases let you play with scale. Dotwork halos give a soft glow effect. Pain spikes near spine and shoulder blades. Healing is usually straightforward but requires sleeping adjustments. Dot spacing matters; too dense and the glow vanishes. Mistake: overcrowded stars—leave breathing room.
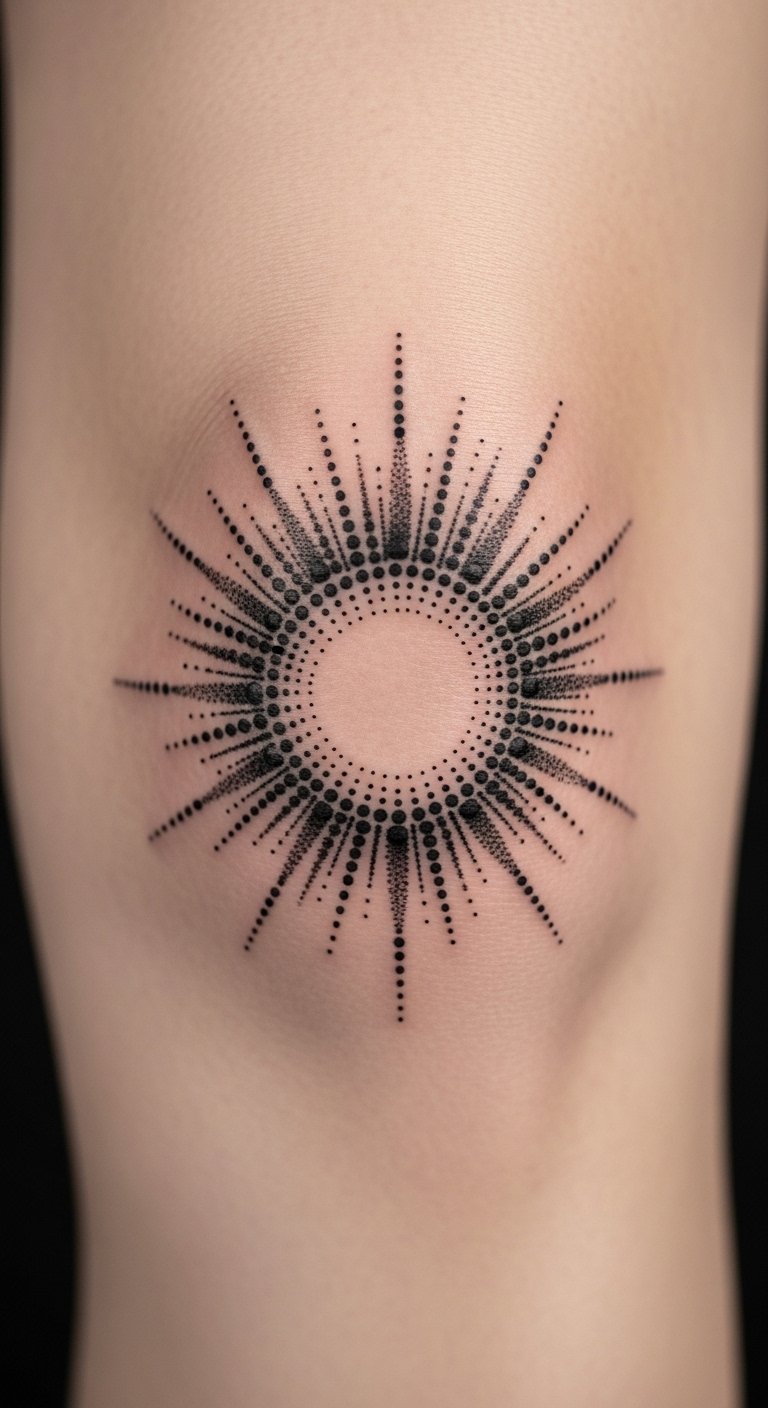
Inverted Dotwork Triangle Forearm
Style/Technique: Blackwork Inverted Geometry
Pain Level: Medium (4/10)
Session Time: 1-2 hours
Best For: Modern, minimalist geometry

This style is ultra-modern. Dense center dots create a focal weight. Forearm pain is moderate. Heals cleanly; contrast stays if dots are sized properly. Mistake: tiny center dots that disappear—ask for solid mid-density. Works well with minimalist wardrobes.
Dotwork Mandrake Root on Calf
Style/Technique: Botanical Dotwork
Pain Level: Medium (4/10)
Session Time: 1-3 hours
Best For: Narrative, mythic pieces
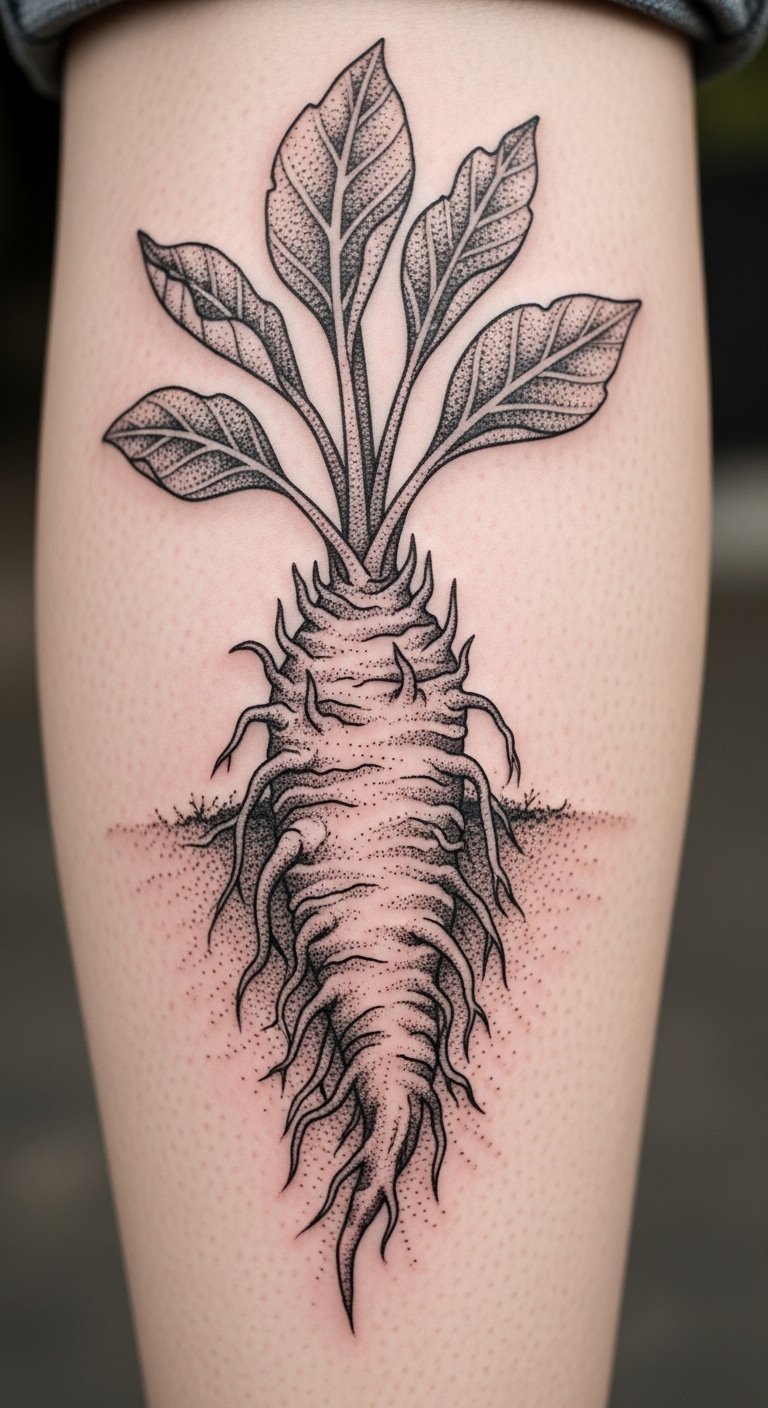
I liked the story this one tells. Calf skin tolerates long sessions. Dotwork adds antique engraving vibes. Healing is steady; avoid tight socks for the first week. Mistake: over-detailing tiny root hairs. Ask for stylized lines balanced with dots.
Micro Dot Constellation Behind Shoulder
Style/Technique: Minimal Dotwork
Pain Level: Medium (4/10)
Session Time: 1 hour
Best For: Subtle placement, concealability
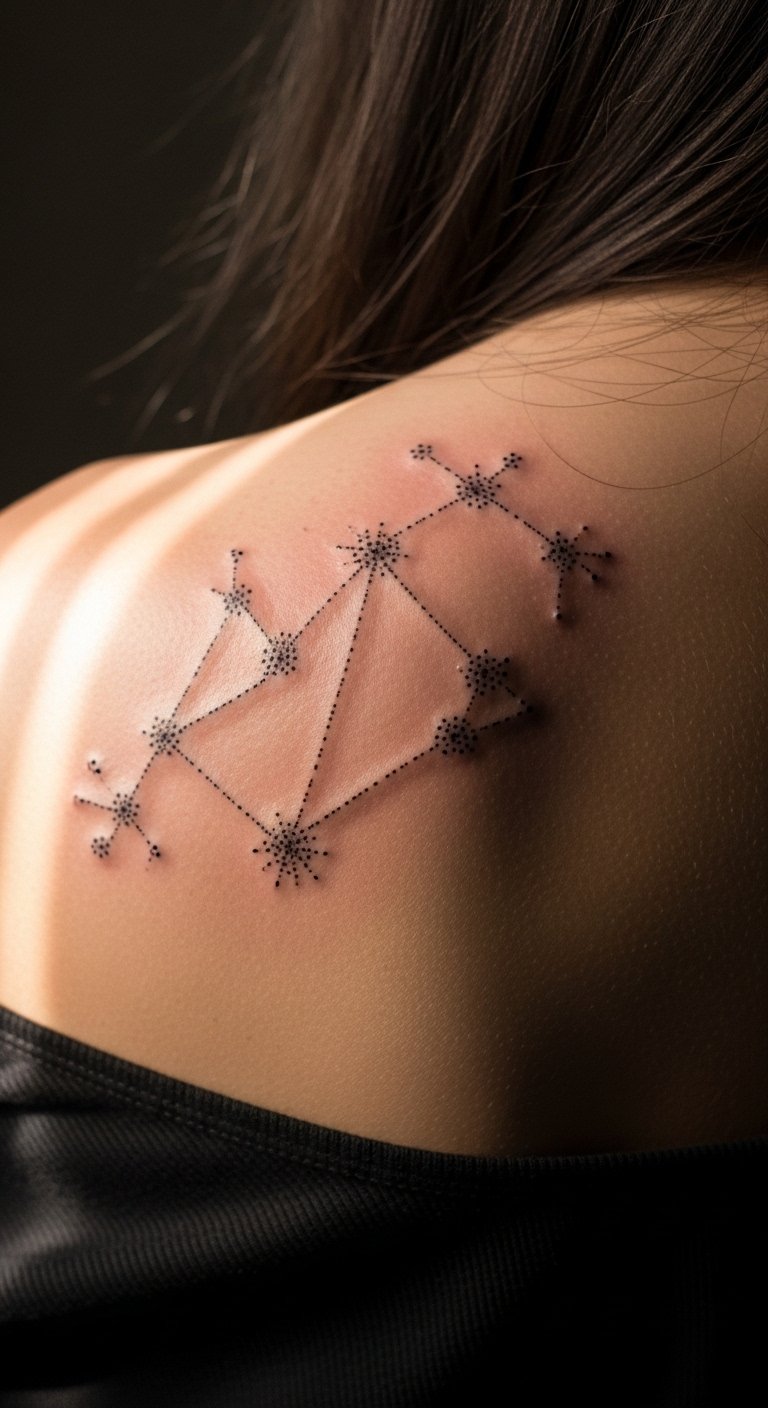
This placement is discreet under hair or clothing. Dotwork allows tiny precision. Pain is manageable. Heals quickly. Dots may blur if too small; ask for slightly larger points to maintain longevity.
Layered Dotwork Landscape on Rib-to-Hip
Style/Technique: Dotwork Layering
Pain Level: Very High (8/10)
Session Time: Multiple sessions
Best For: Panoramic, private art
A sweeping composition reads like a print. Pain varies across rib and hip. Healing needs staged aftercare because area flexes. Dot layers must be spaced to preserve depth; avoid uniform stippling. Mistake: cramming unrelated elements—keep a single visual theme.
Dotwork Sunburst Behind Knee
Style/Technique: Blackwork + Dotburst
Pain Level: High (7/10)
Session Time: 1-2 hours
Best For: Unexpected placement, dynamic motion
Behind-knee placement is tricky and painful. The dotburst reads dynamic when you walk. Healing requires limited bending early on. Dots can fade faster here; ask for durable dot sizes. Mistake: expecting heavy black—dotwork provides the effect with less risk of blowout.
Interlaced Dotwork Band On Finger
Style/Technique: Micro Dotwork Ring
Pain Level: High (6-7/10)
Session Time: Under 1 hour
Best For: Tiny, symbolic bands

Finger tattoos are notorious for fading. Dotwork can look elegant but may need touch-ups. Pain is sharp due to thin skin. Healing needs careful washing. Mistake: tiny script inside—ink migrates. Ask for simplified patterns and durable dot spacing.
Dotwork Owl On Upper Back
Style/Technique: Illustrative Dotwork
Pain Level: Medium (5/10)
Session Time: 2-4 hours
Best For: Storytelling, animal portraiture

Owls gain depth with stippling. Upper back is less painful and holds detail. Healing is smooth if you avoid backpacks and tight straps. Dots must be layered to retain feather texture. Mistake: flat outlines without dot gradients—ask for layered stippling.
Watercolor-Dotwork Hybrid on Shoulder
Style/Technique: Watercolor + Dotwork
Pain Level: Medium (4-5/10)
Session Time: 2-3 hours
Best For: Color accents with structure
Combining watercolor and dotwork gives color movement with structured texture. Shoulder placement is forgiving. Healing: colors may dull slightly then brighten as skin settles. Mistake: too-sparse dot anchors—ask for clear anchors to keep color from bleeding visually.
Minimalist Dot Compass on Inner Bicep
Style/Technique: Minimal Dotwork
Pain Level: Medium (4/10)
Session Time: Under 1 hour
Best For: Private, meaningful marks

Inner bicep hides the piece well. Pain is moderate. Dotwork keeps the compass subtle. Healing needs gentle movement to avoid scabbing in fold areas. Mistake: overly small dots that vanish; scale up slightly.
Mandala Calf With Graduated Stippling
Style/Technique: Blackwork Mandala Dotwork
Pain Level: Medium (5/10)
Session Time: 2-4 hours
Best For: Balanced, visible art
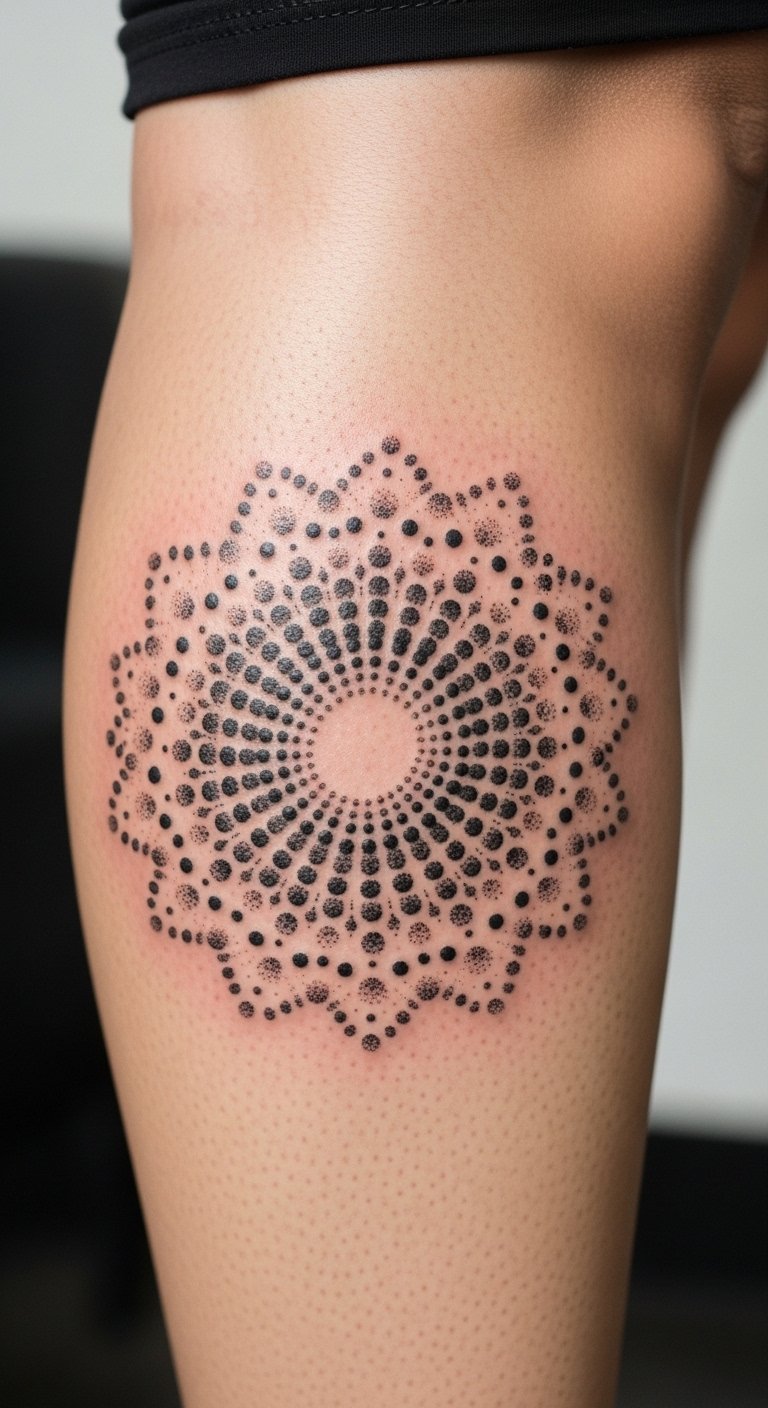
Calf gives distance for mandalas. Gradated dots create a halo effect. Pain is moderate. Healing is straightforward unless you wear tight clothing. Mistake: uniform dot size across the mandala—ask for gradation.
Tattoo Prep and Aftercare Essentials
Aftercare Essentials:
- Aquaphor Healing Ointment, 14oz tube — Recommended first 3-5 days for heavy ointment method
- Saniderm Transparent Adhesive Bandage, 6-inch roll — Second-skin option for 24-72 hours
- CeraVe Fragrance-Free Moisturizing Lotion, 12oz — Daily moisturizer during weeks 2-6
- Dr. Bronner's Unscented Castile Soap, 32oz — Gentle cleaning first month
Before Your Appointment:
- Tattoo Numbing Cream 5% Lidocaine — Use only if your artist approves
- Stencil Transfer Paper — For personal mock-ups
Long-Term Maintenance:
- SPF 50 Sunscreen Stick for Tattoos — Daily protection
- Mad Rabbit Tattoo Balm, 2oz — Keeps healed ink vibrant
- Hustle Butter Deluxe, 4oz — Vegan aftercare option
Optional Comfort Items:
- Tattoo Numbing Spray — For touch-ups or sensitive areas
- Hydrocolloid Bandages Large Pack — Small spot protection during healing
Notes: Artists often recommend Saniderm or Aquaphor depending on technique. Use fragrance-free lotions. Sunscreen is non-negotiable for longevity.
Frequently Asked Questions
Q: How bad does a tattoo actually hurt?
A: Pain depends on placement and your tolerance. Outer arm/forearm = lower (2-4/10). Ribs, sternum, behind knee = higher (7-8/10). It’s more sustained discomfort than sudden agony. For sensitive spots, consider numbing cream with lidocaine only if your artist approves.
Q: How long to heal for dotwork?
A: Surface healing: 2-3 weeks. Full settling: 2-3 months. Dotwork can look dull while skin regenerates; stippled gradients usually appear stronger after full healing. Keep it moisturized with CeraVe lotion.
Q: Will dotwork fade faster than solid black?
A: Small dots can blur if too close. Solid black holds longer, but properly spaced dotwork retains contrast. Daily SPF 50 sunscreen prevents UV fading.
Q: Can dotwork cover scars?
A: Yes, when done thoughtfully. Stippling can mask texture without aggressive saturation. Look for artists experienced in scar blending and ask to see healed examples.
Q: Can I exercise after getting a dotwork tattoo?
A: Wait 48-72 hours at minimum. For placements that move a lot (ribs, knee), wait longer to avoid heavy sweating and friction.
Q: What if I regret placement?
A: Sit with your idea for months and consider a concealable spot if unsure. Removal exists but is a long process; choosing a meaningful design helps limit regret.
Q: Do tattoos look different on dark skin?
A: Yes. Black and gray dotwork shows best across tones. Bright colors can appear muted on deeper skin. Ask to see healed work on similar skin tones.
Conclusion
Do your research. Talk through dot density, healed photos, and placement with your artist. Protect your work daily with Aquaphor for first days and SPF after healing. If you’re leaning into dotwork, which of these ideas feels most like you?
