
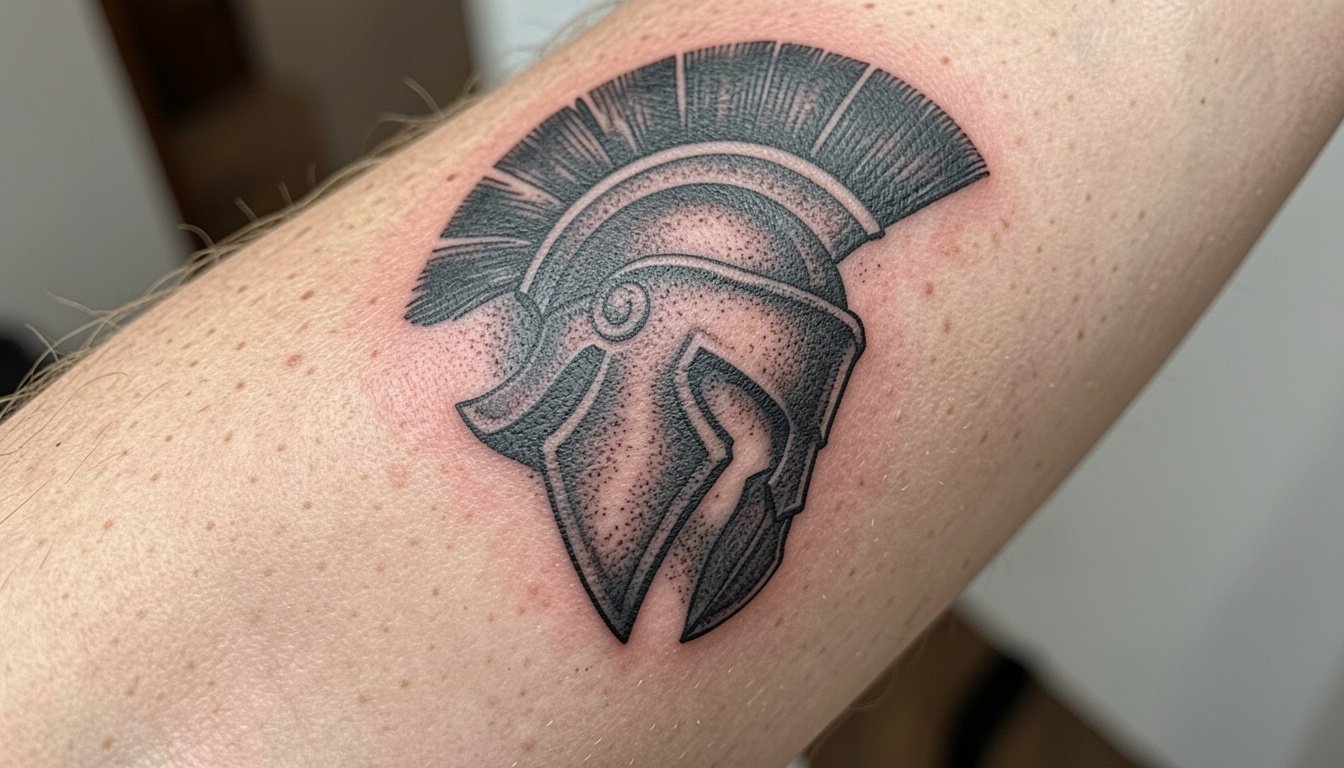
Bold blackwork often outlives fine single-needle detail in sleeves that see sun, sweat, and daily abrasion, and Spartan themes are no exception. Pick heavier linework for shields and helmets if you want the silhouettes to stay crisp, or plan for denser shading if you prefer a weathered, battle-worn look. Below you will find a wide range of sleeve treatments and practical notes to bring to your consultation so your Spartan ink still reads clean years from now.
1. Full Spartan Sleeve in Bold Blackwork
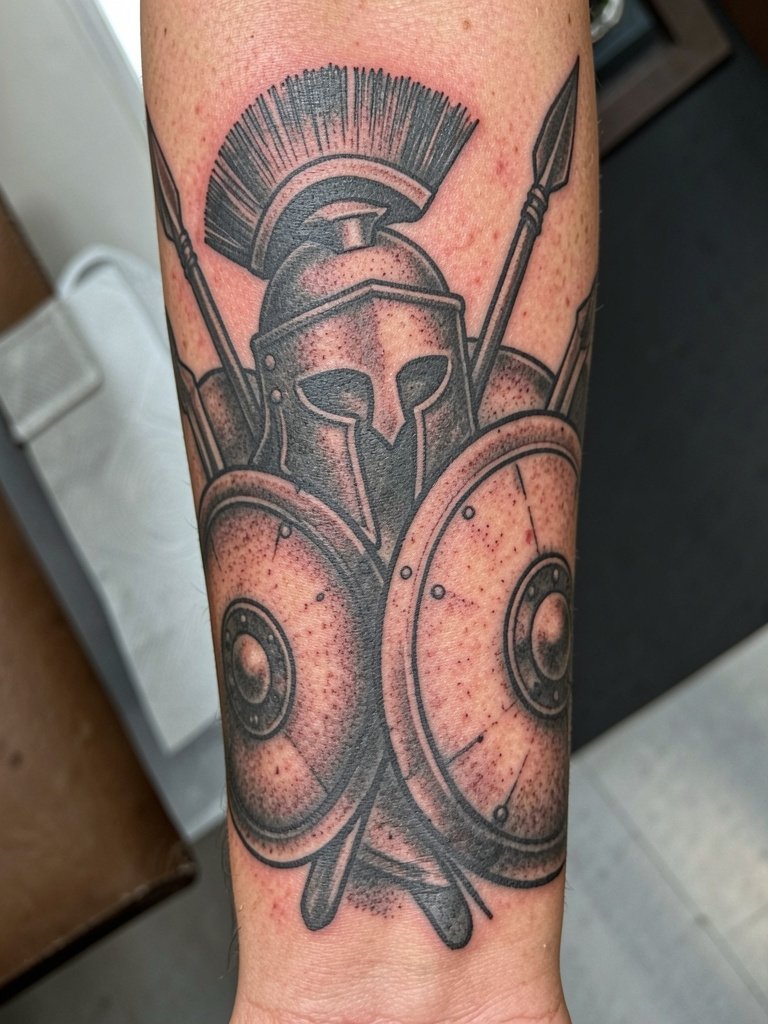
A full-arm Spartan sleeve reads best when the artist designs a single flow that wraps the arm, not a stack of separate images. For a sleeve that ages well, ask for a range of linework weights and strong negative space between shields so the composition keeps its silhouette as saturation softens. Expect multiple sessions totaling several hours depending on coverage. Pain is moderate across the outer arm, higher near the inner elbow. A common mistake is packing detail too small, which becomes muddled after a few years. For showing it off, pair with rolled sleeve linen shirts that expose the cuff and let the negative space read.
2. Helmet-Focused Upper Arm Panel with Stipple Shading
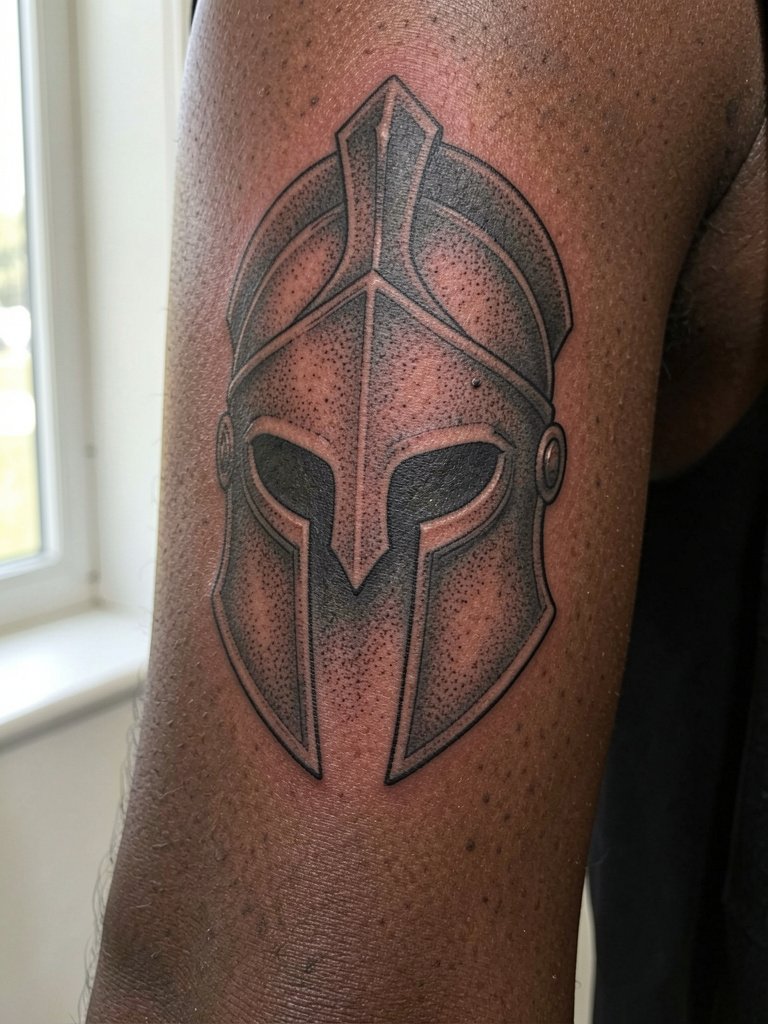
A helmet panel works as an anchor near the shoulder or bicep and gives the sleeve a focal point. Recommend stipple shading for a textured, carved-metal look and ask for slightly heavier outer linework so the helmet silhouette survives touch-ups and everyday wear. Session time is typically a two to four hour block for a large well-shaded panel. The biggest mistake is insisting on ultra-fine internal detail that will blur against textured skin. For evenings out, this placement pairs with short-sleeve muscle tees that frame the top of the helmet.
3. Forearm Spartan Story Strip with Dot Work Accents
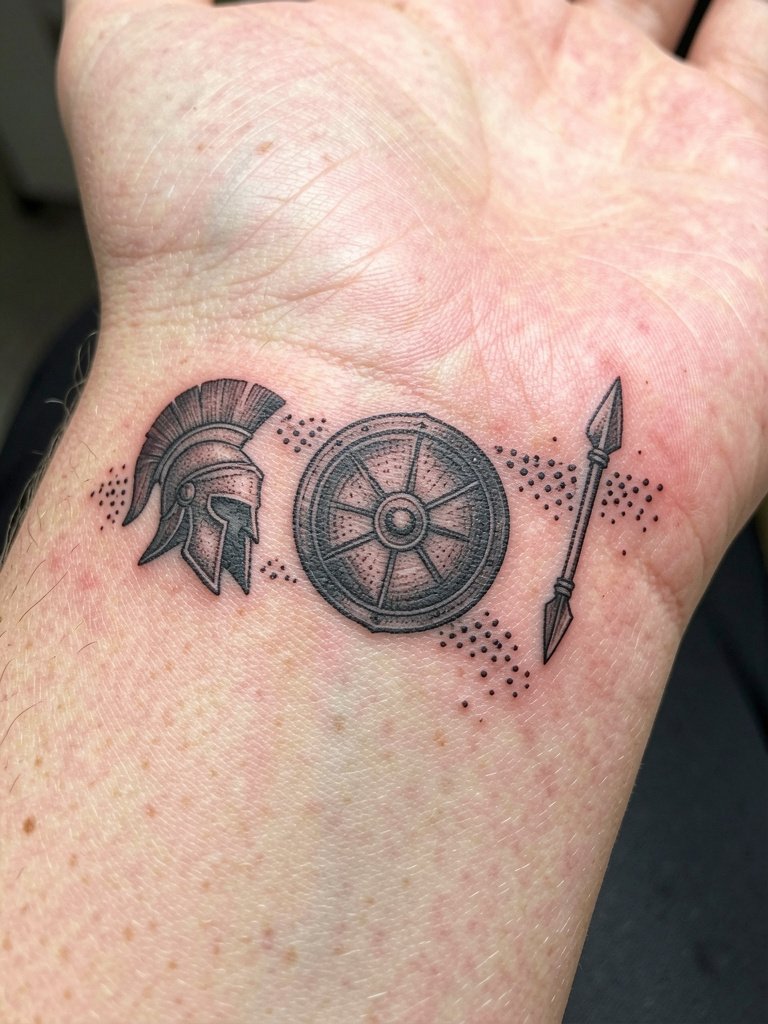
A forearm strip reads like a timeline and keeps elements readable at arm length if you balance spacing. Plan the sequence so larger icons sit closer to the elbow and smaller accents by the wrist. Bring two reference images showing scale so the artist can show how the strip reads at three inches versus five. At six months the dot work will look sharp, and by year three the dots may soften into a textured wash if placed too closely. For session comfort, wear a loose button-up so the artist can roll the sleeve without pressure, like this overshirt.
4. Shield Mosaic on Outer Bicep with Geometric Border
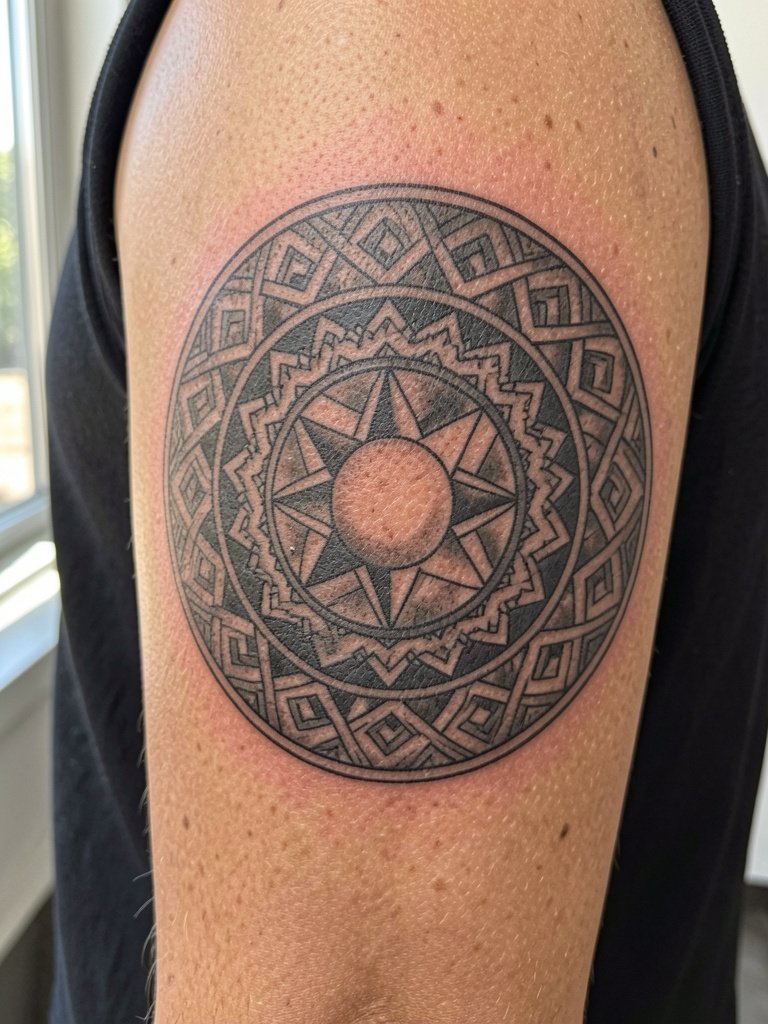
A shield mosaic makes a bold mid-arm statement and tolerates heavier linework. Ask the artist to map the border so it follows muscle curves, otherwise the mosaic can warp when the arm moves. Expect a two-hour sitting for a medium-sized shield. A common mistake is centering the circle without testing how it looks when the bicep is relaxed versus flexed. This placement pairs well with sleeveless hoodies for casual wear that frames the upper arm.
5. Elbow Wrap with Spear and Knot Motif
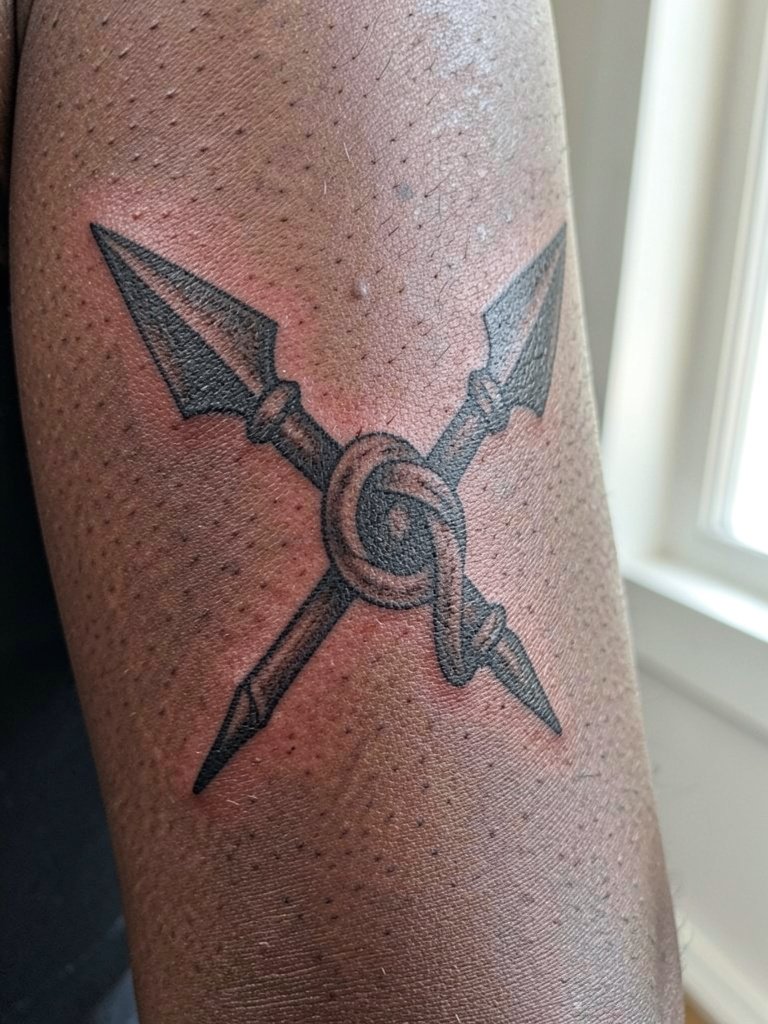
Elbow wraps demand careful placement because the joint stretches and heals differently than flat areas. Ask the artist to stencil the design with the elbow bent and straight so the knot reads in both positions. Expect higher pain at the joint and a longer session for careful layering. The common error is too much tight detail over the point of flexion, which leads to cracking and uneven healing. For the appointment, wear drawstring track pants so you can sit comfortably without fabric pressing against the elbow.
6. Spartan Gauntlet Sleeve with Negative Space Plates
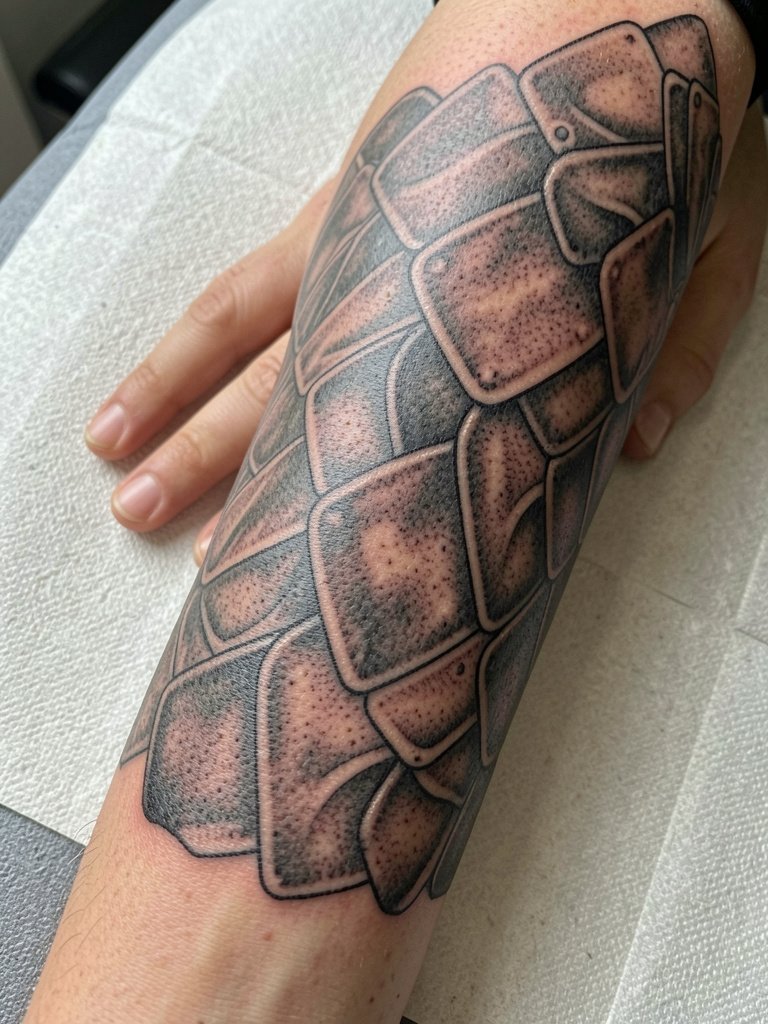
A gauntlet sleeve uses hard edges and negative space to mimic armor plates. Recommend slightly heavier outer linework so plates keep their separation as saturation loses contrast. Plan two sessions for wrapping and a short touch-up at six months to refine edges. A real mistake is asking for tiny filigree inside each plate. Those details will merge over time unless given room. For showing the gauntlet, cuffed short jackets or rolled linen sleeves let the plate edges read cleanly.
Session Day Essentials
The products above figure into both small and large arm work, especially for sleeves that need staged sessions.
-
Stencil transfer paper kit. Lets you preview line placement on skin and is useful when composing complex helmet and shield connections discussed above.
-
Topical numbing cream. Applied forty to sixty minutes before can make longer sleeve blocks more manageable for sensitive forearm and rib areas.
-
Thin protective film roll. Helps protect lower-arm work from friction in the first days, especially useful for gauntlet and forearm pieces.
-
Fragrance-free gentle body wash. Keeps healing skin clean without irritating saturated blackwork lines in the initial cleanings.
-
Aquaphor healing ointment. A mainstream option for the first short-term moisture lock that many artists recommend for dense blackwork.
7. Weathered Shield Collage with Light Grey Washes
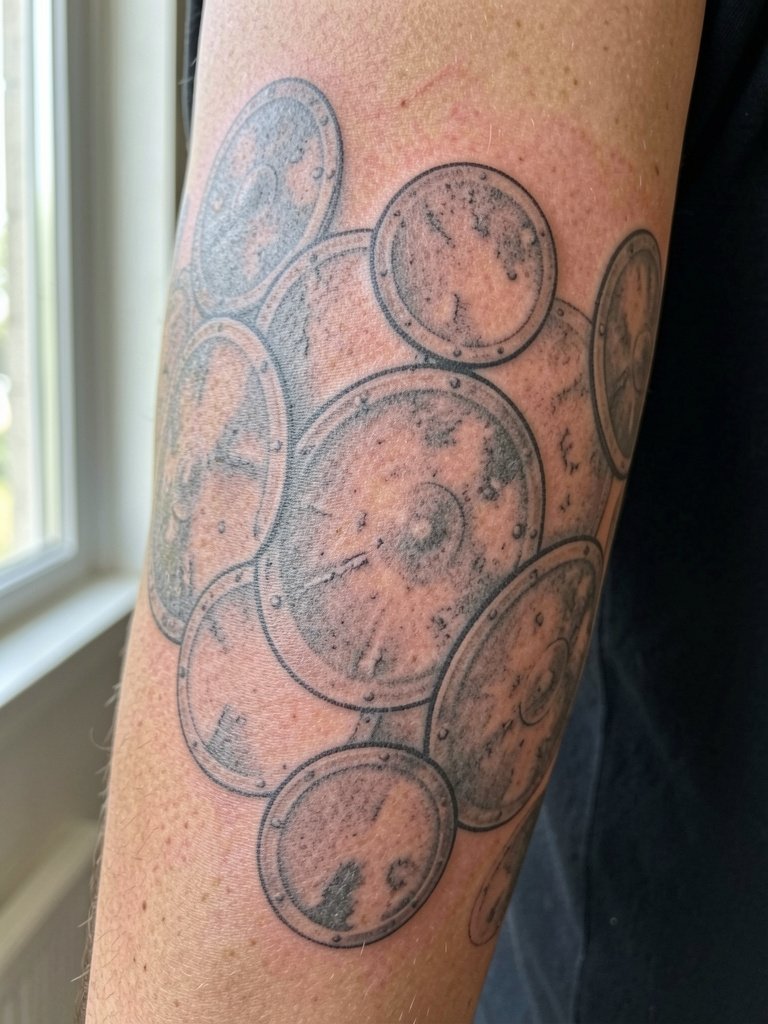
The weathered shield collage reads like armor after battle when you use soft grey washes and worn edges. Specify that the artist should age the metal with stipple and whip shading so the look is intentional instead of the result of fading. A two-session build lets saturation sit between passes. The common mistake is over-contrasting the chips, which creates visual noise when the skin moves. For public settings, short-sleeve button-downs with a slightly open cuff like this casual short-sleeve shirt display the transition from forearm to bicep.
8. Spartan Chest-Connector with Shoulder Cap
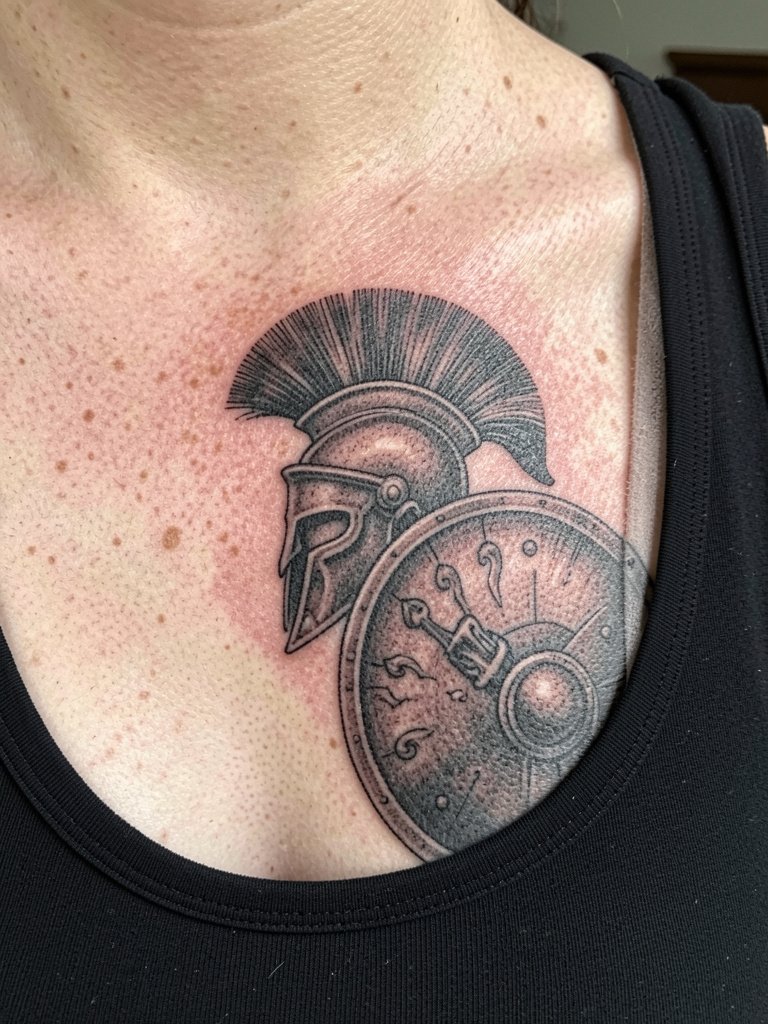
When a sleeve connects onto the chest, the transition must follow natural muscle flows. Have the artist map the collarbone line so the shoulder cap does not look like an afterthought. Pain increases near the collarbone and sternum area, and sessions should be split accordingly. A common oversight is forgetting to plan the neckline exposure, which can make the piece look awkward under shirts. For showing off the shoulder and chest join, wide-neck tops like this scoop-neck tank expose the connection cleanly.
9. Minimalist Spartan Line Sleeve with Negative Space
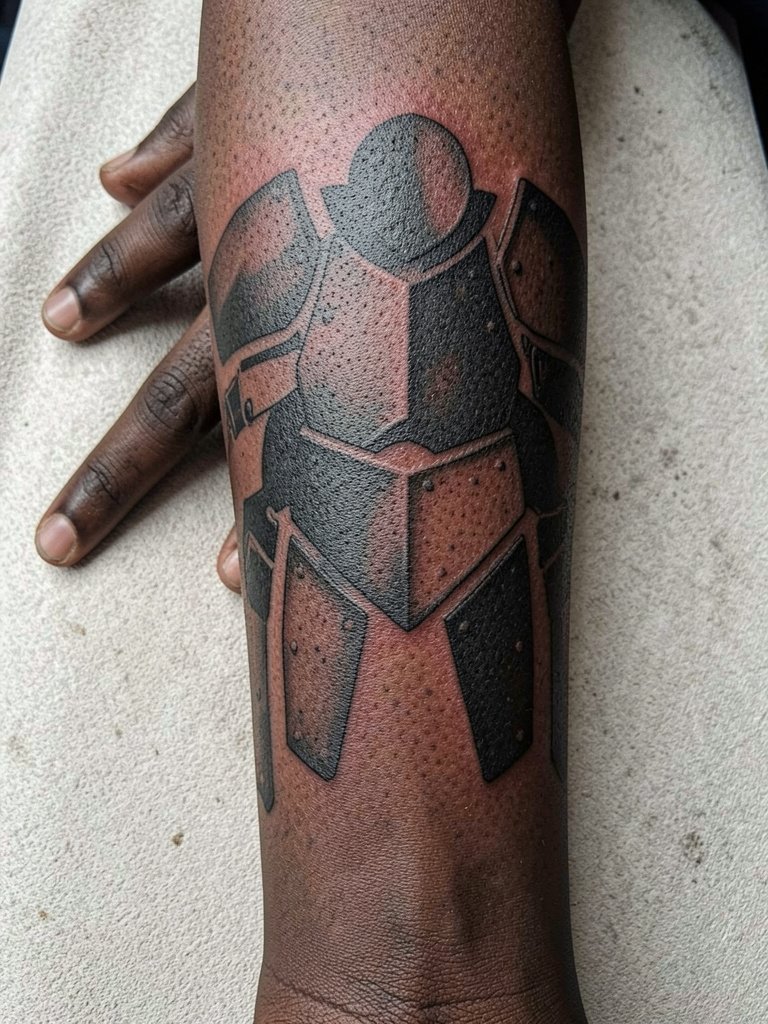
A minimalist sleeve uses icons and large voids to keep the arm readable from a distance. The technique reduces blowout risk when compared to dense tiny detail, and touch-up needs are usually minimal. Discuss the spacing precisely so the negative stripes do not converge over time. Session time can be shorter because of limited shading. This style pairs well with fitted long-sleeve tees that can be rolled to reveal the negative space confidently.
10. Spartan Laurel Wreath Banding with Scripted Dates
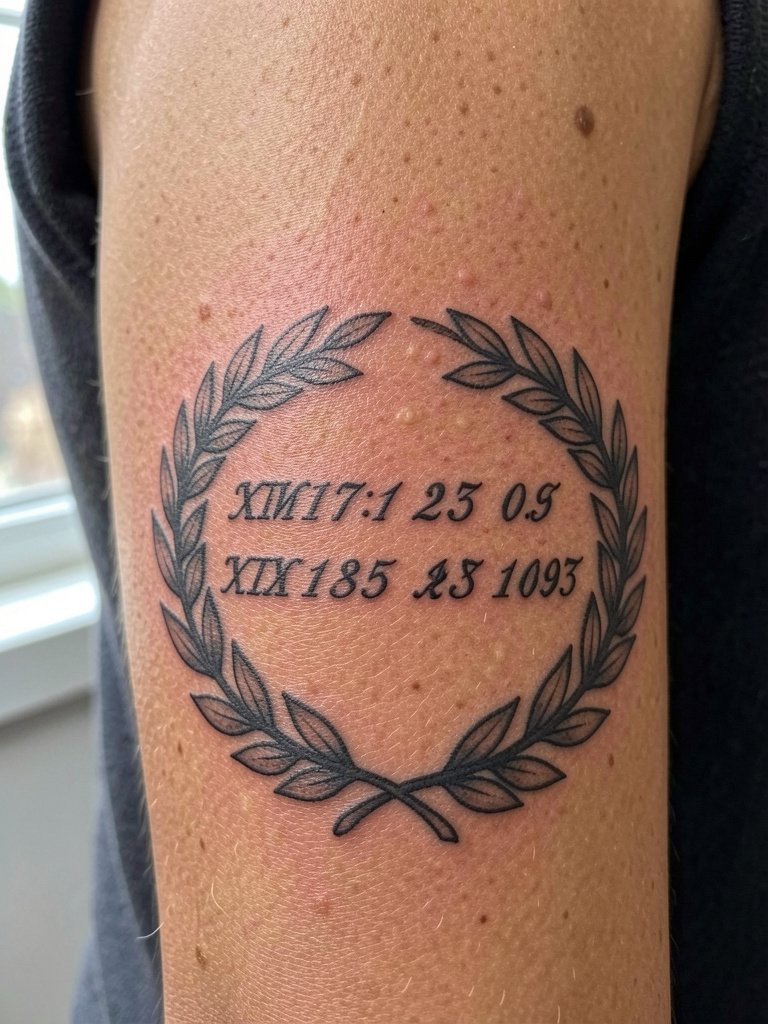
A laurel band makes a classic Spartan accent that wraps cleanly if the script and wreath have room to breathe. Specify exact text for dates or words in the stencil so the lettering renders correctly. This placement is low pain for many people and sessions can be a single mid-length appointment. A common error is squeezing script into tight curls, which blurs with motion. Pair this band with short sleeves and open-collar shirts so the wreath remains visible.
11. Spartan Back-of-Arm Spear Line with Negative Fill
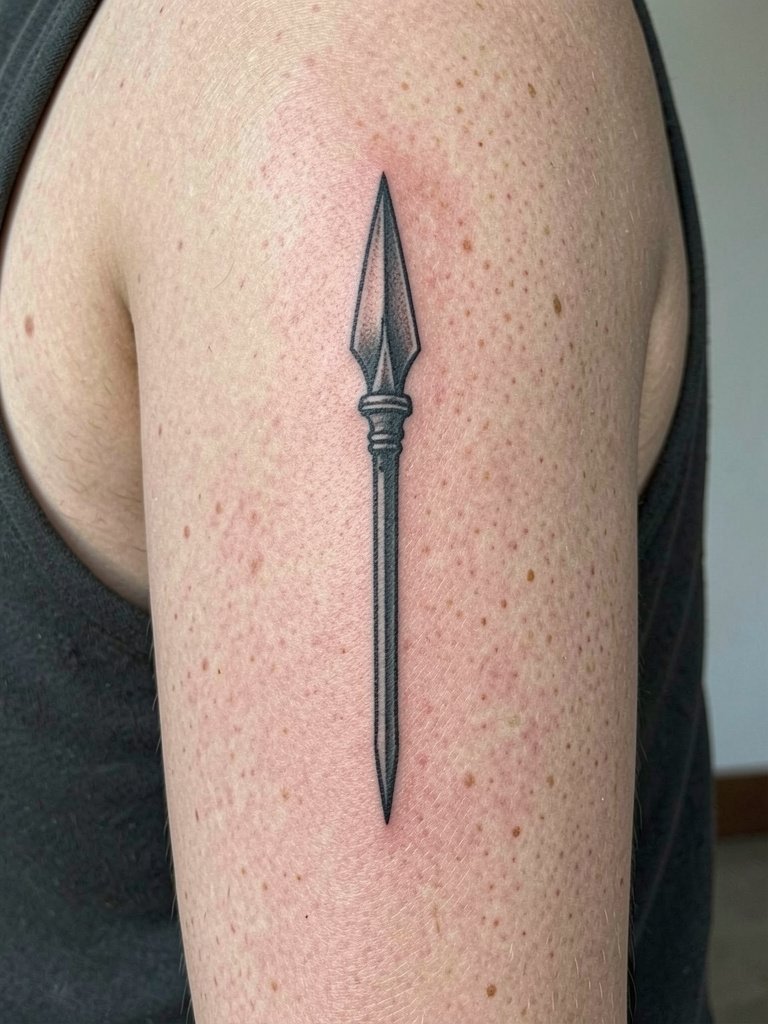
A spear along the back of the arm reads as a vertical anchor and benefits from slightly heavier shaft lines to avoid blowout. Discuss how the negative fill will recede visually over time and plan a touch-up window near the one-year mark. Pain is moderate on the posterior arm. The mistake is treating this area like flat forearm space, ignoring the muscle curvature. For events, short-sleeve layers or lightweight bomber jackets make the spear peek out when you move.
12. Spartan Crest with Heraldic Animals and Textures
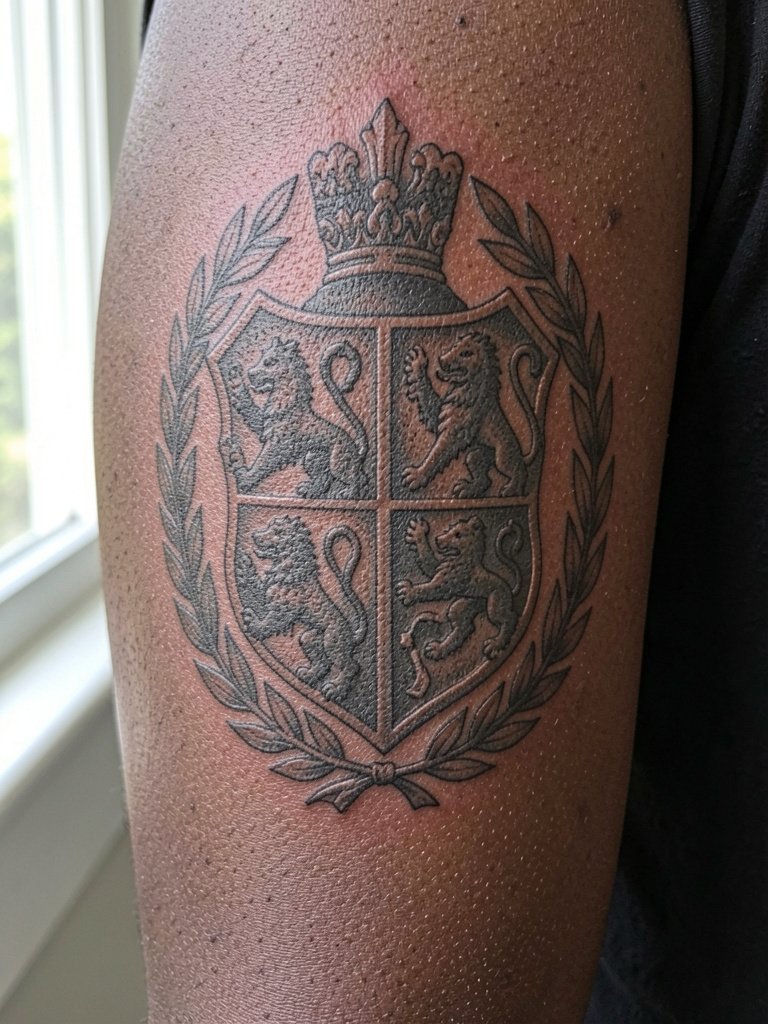
A crest allows for complex iconography but needs clear hierarchy so the main symbol does not get lost. Ask the artist to simplify interior texture into blocks of value rather than tiny hatch marks. Sessions vary by detail, expect two or three passes. The common slip is cramming multiple tiny motifs that fight for attention. For showcasing the crest, short-sleeve dress shirts with rolled sleeves like this button-down shirt let the upper-arm heraldry show when you flex.
13. Spartan Full Sleeve in Neo-Traditional Color Accents
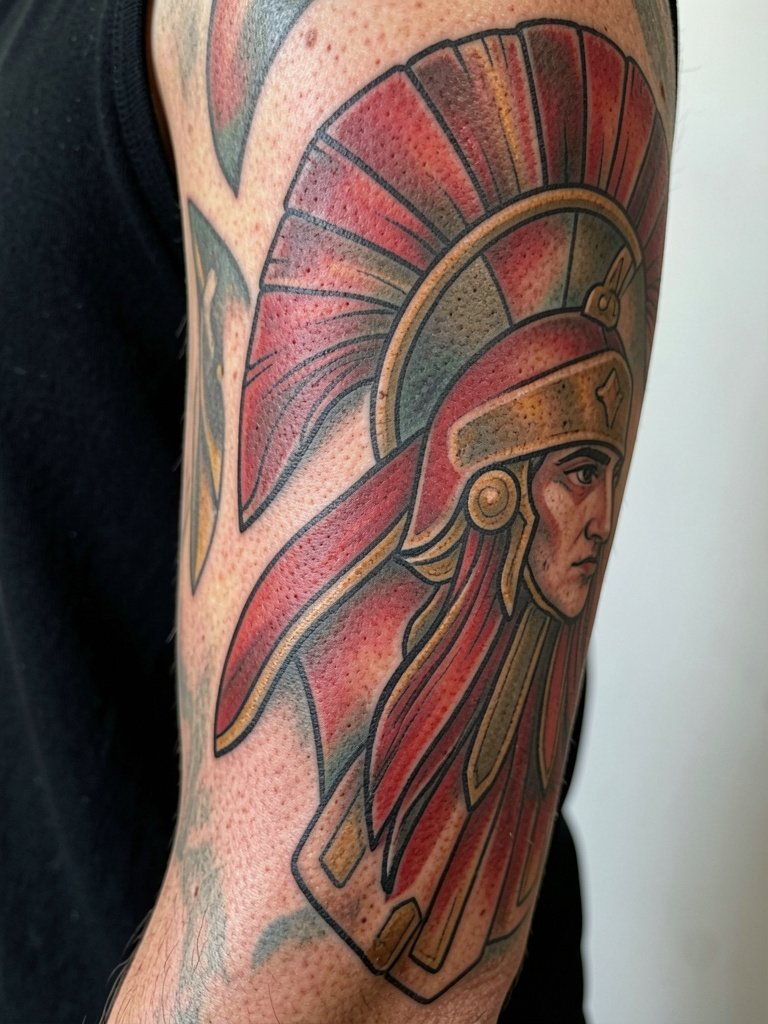
Color accents add a heroic palette, but color saturation ages differently than black. Plan for deeper saturation in red and gold areas to offset fading. Expect more sessions for color layering and a touch-up six to twelve months after initial saturation. A frequent mistake is choosing colors that clash with skin undertone, which can dull the effect over time. For evening wear, open-collar shirts or v-neck sweaters frame color blocks without hiding the artwork.
14. Inner Forearm Spartan Quote with Small Icon
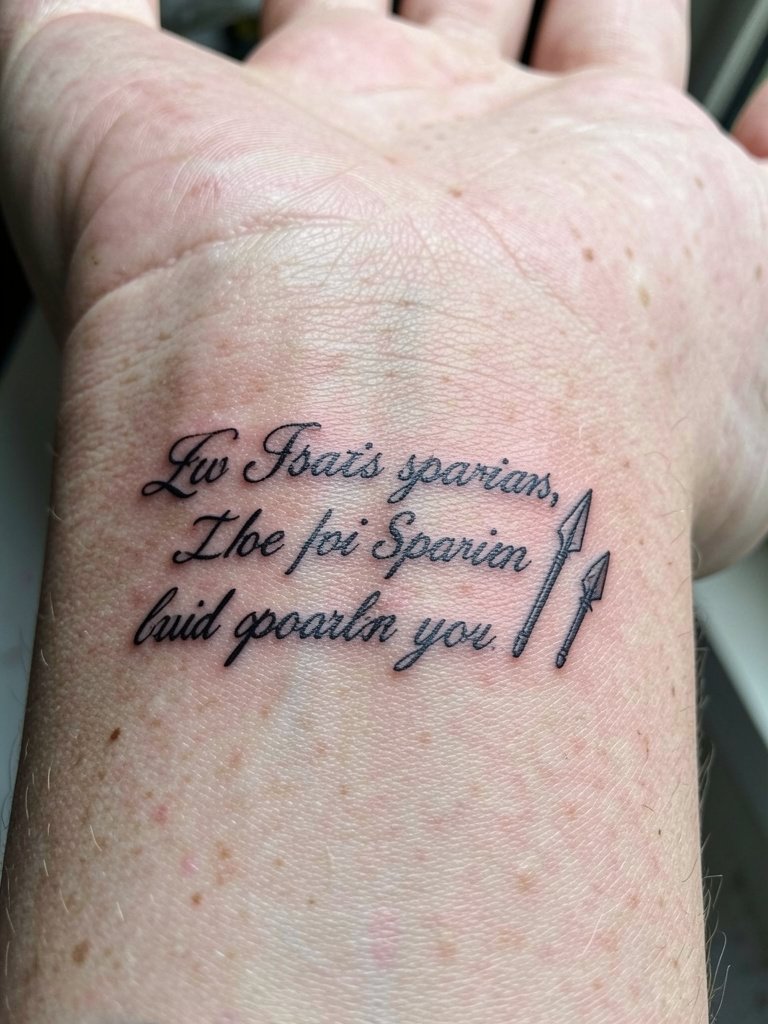
Fine script on the inner forearm can look elegant but will soften over time. Provide the exact text in writing so there is no misinterpretation. Smaller scripts often need a slightly heavier line weight than someone initially requests so they still read at year three. Healing is straightforward but expect faint feathering if the letters are too close. For daily visibility, short-sleeve shirts or rolled cuffs like this casual cuffed shirt work well.
15. Spartan Shoulder Cap in Ornate Blackwork
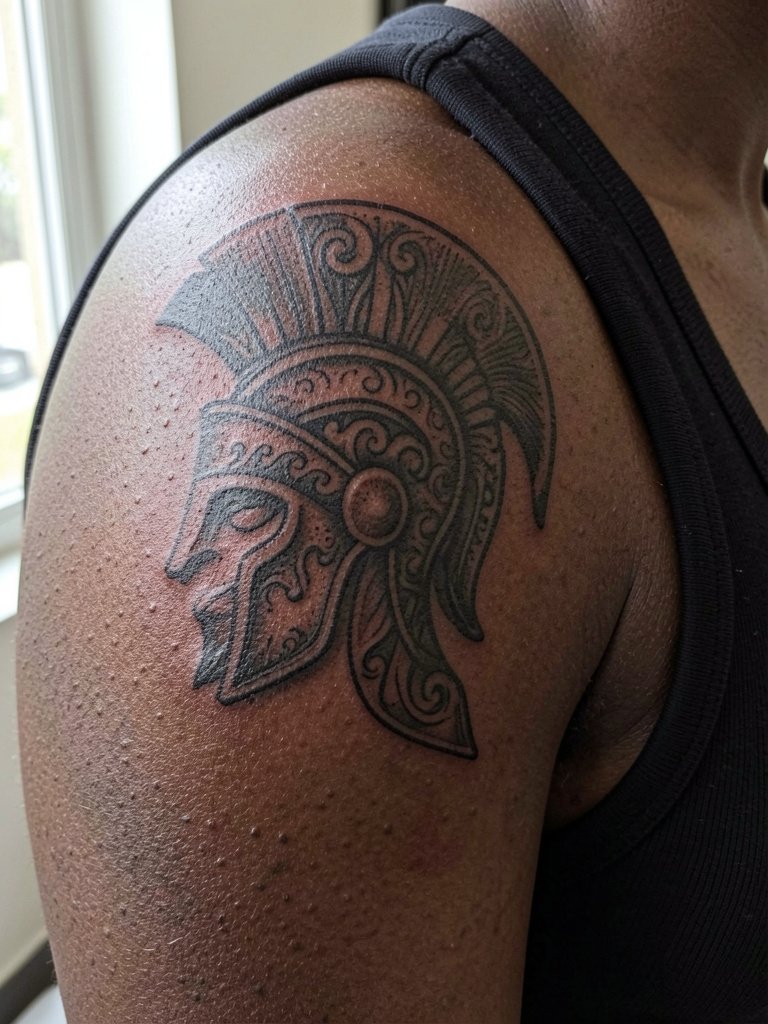
A shoulder cap needs to account for how shirts and straps sit. Ask the artist to stencil with the exact top you plan to wear most often so the edges sit naturally against fabric lines. Pain here is often lower than on the chest, and one long session can complete the cap. The mistake is stopping the design abruptly at the shoulder seam without a soft transition. For show-off outfits, wide-strap tops like this tank top let the cap read without distraction.
16. Sleeve That Mirrors Bronze Patina with Layered Wash
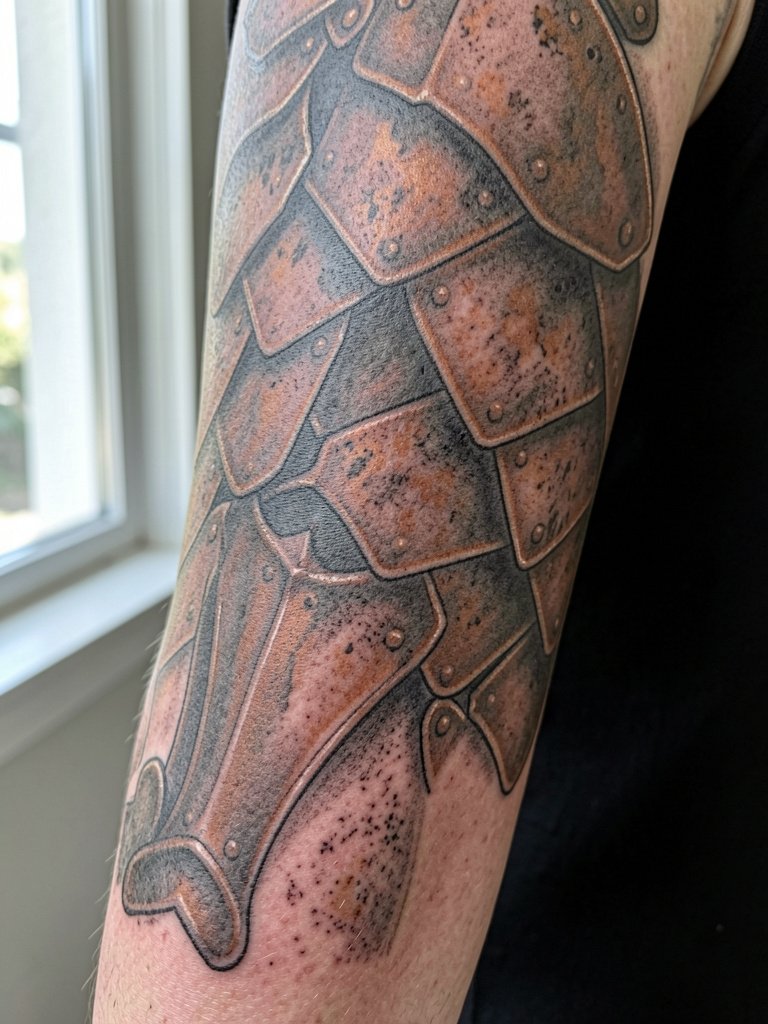
Patina-style shading gives armor depth while avoiding tight microdetail that fades. Ask for layered washes so the colors sit in bands rather than in tiny stipples. Sessions for this look are staged to allow saturation to settle between passes. The usual mistake is over-using brown tones on darker skin without checking contrast. For daytime wear, rollable sleeves or casual jackets display the gradations.
17. Spartan Sleeve with Integrated Geometric Maze
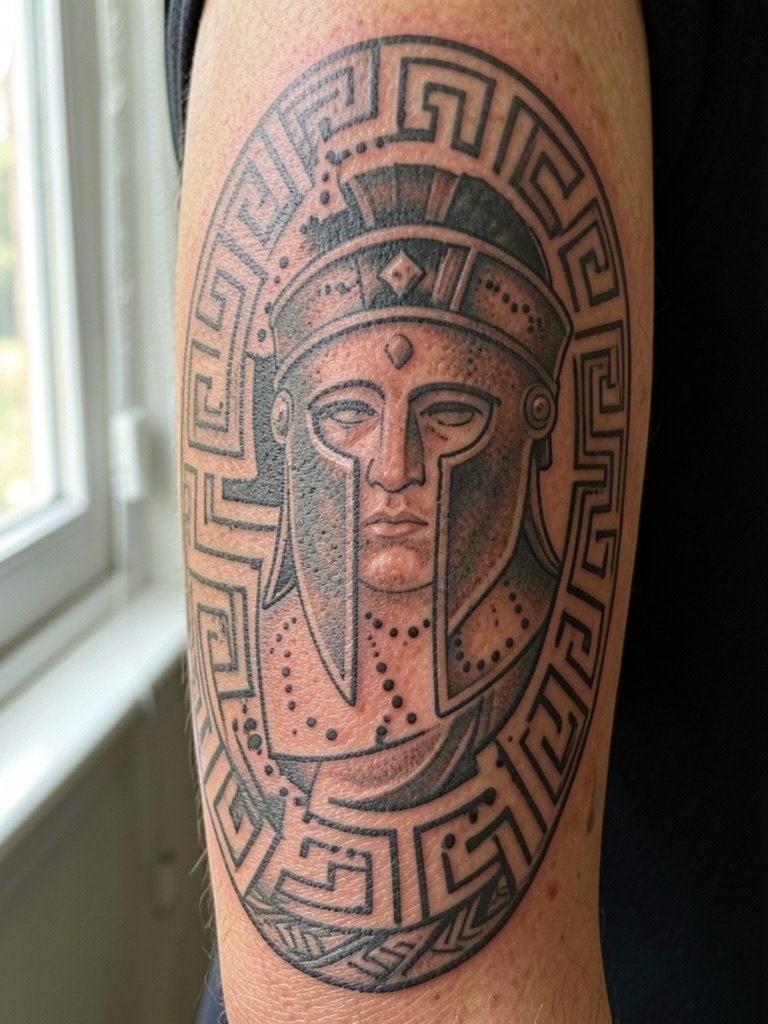
Combining geometry with figurative Spartan elements can modernize the sleeve while keeping readability. Discuss line spacing for the maze so the negative corridors do not collapse over time. This approach can be higher risk for blowout if lines are too close. Sessions are medium-length with planned pauses. For a clean reveal, wear short sleeves or rolled cuffs on button-up shirts.
18. Half-Sleeve Spartan Relief with Raised-Edge Shading

Relief-style shading creates a three-dimensional armor look without relying on color. Ask the artist to demonstrate how raised edges read with your arm movement before inking. A half-sleeve usually spans two to three sessions. The common error is trying to force hyperreal texture into a small space. For casual outfits, rolled sleeves and lightweight tees such as this basic tee keep the relief visible.
19. Spartan Wrist Cuff with Tiny Shield Details
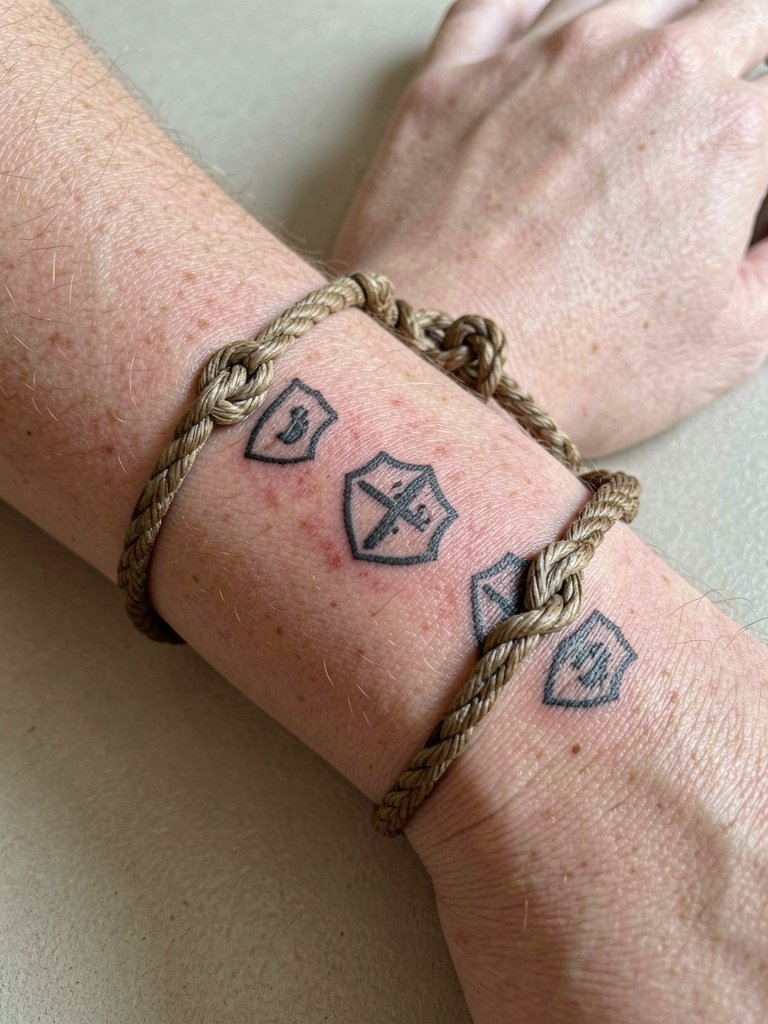
Wrist cuffs have high friction and risk for early softening. Keep icons slightly larger than you might expect and ask for a bold outer edge to preserve the cuff's shape. Sessions are short but healing needs attention because of frequent hand washing. The usual mistake is demanding microdetail that disappears. For daily visibility, pair with rolled shirt sleeves and minimalist bracelets like pieces found with a mens bracelet search.
20. Spartan Forearm Band with Wave Patterning
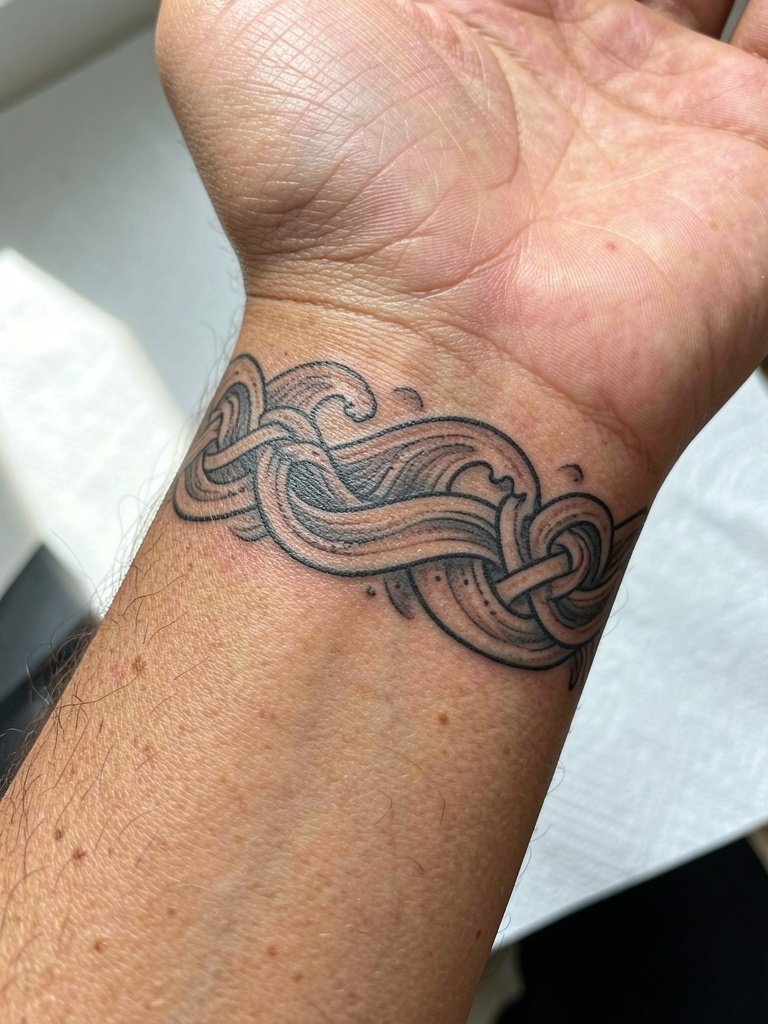
Band work benefits from symmetry and deliberate spacing so it wraps cleanly without appearing to drift. Discuss how the knot points align at the inner arm crease and request a slight increase in line weight for durability. This area is low to moderate pain and often completed in a single appointment. The common error is misaligning ends where the wrist meets the band. For a casual reveal, roll the sleeves or pick shirts with shorter sleeve hems like this casual short-sleeve tee.
21. Spartan Thigh-to-Arm Continuation with Connecting Spear
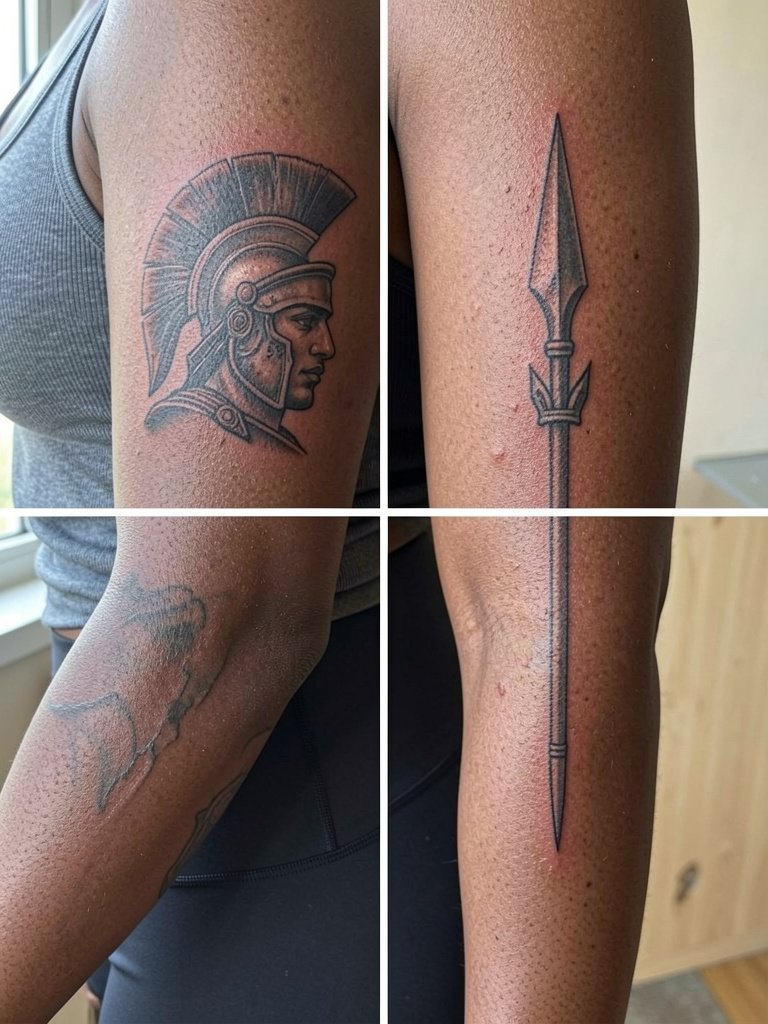
Linking arm and thigh elements is dramatic but requires planning for movement and clothing coverage. Ask the artist to map out how the spear visually connects when standing and seated. This is a cross-body project that often needs several sessions on separate days. A mistake is assuming the same line spacing works on both muscle groups. For appointments, wear bike shorts and a loose tank top so each area is accessible without fabric shifting.
22. Spartan Mixed Media Sleeve with Etched Textures
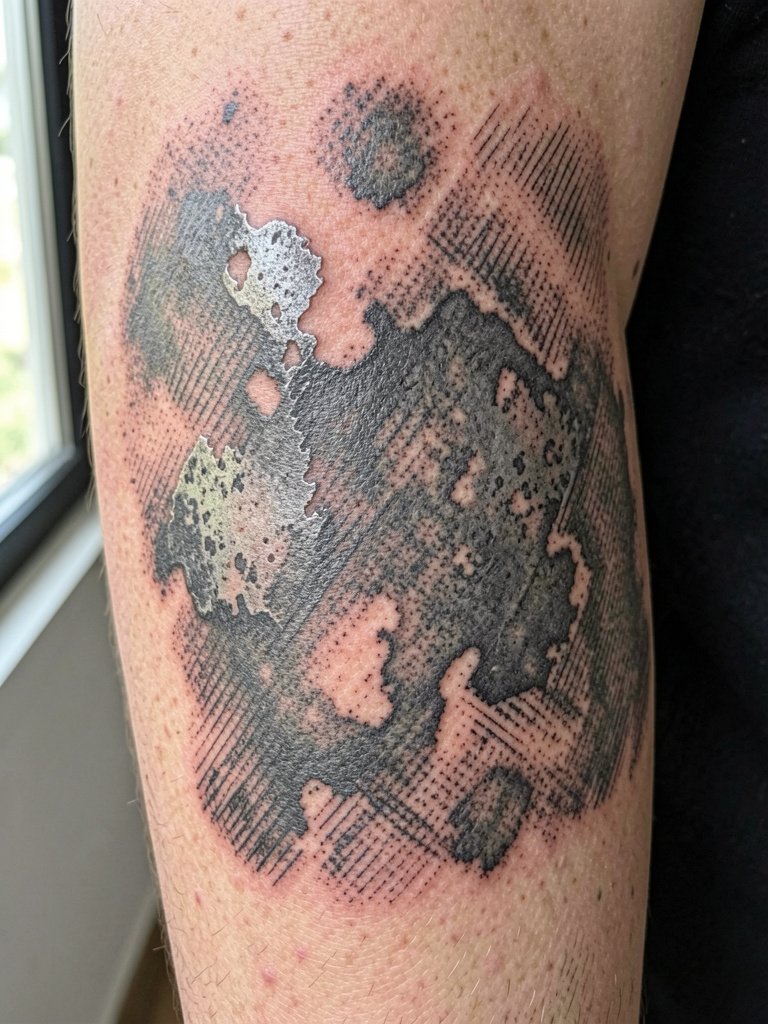
Etched textures create a handcrafted feel but can be high maintenance if you push too fine a hatch. Suggest the artist convert some hatch into value blocks so the pattern still reads after a few years. Sessions are iterative to build texture. A common mistake is layering too many micro lines that coalesce. For outfit pairing, fitted short sleeves or rolled cuffs on denim shirts showcase texture without overwhelming the eye.
23. Spartan Comic-Book Inspired Panel Sleeve
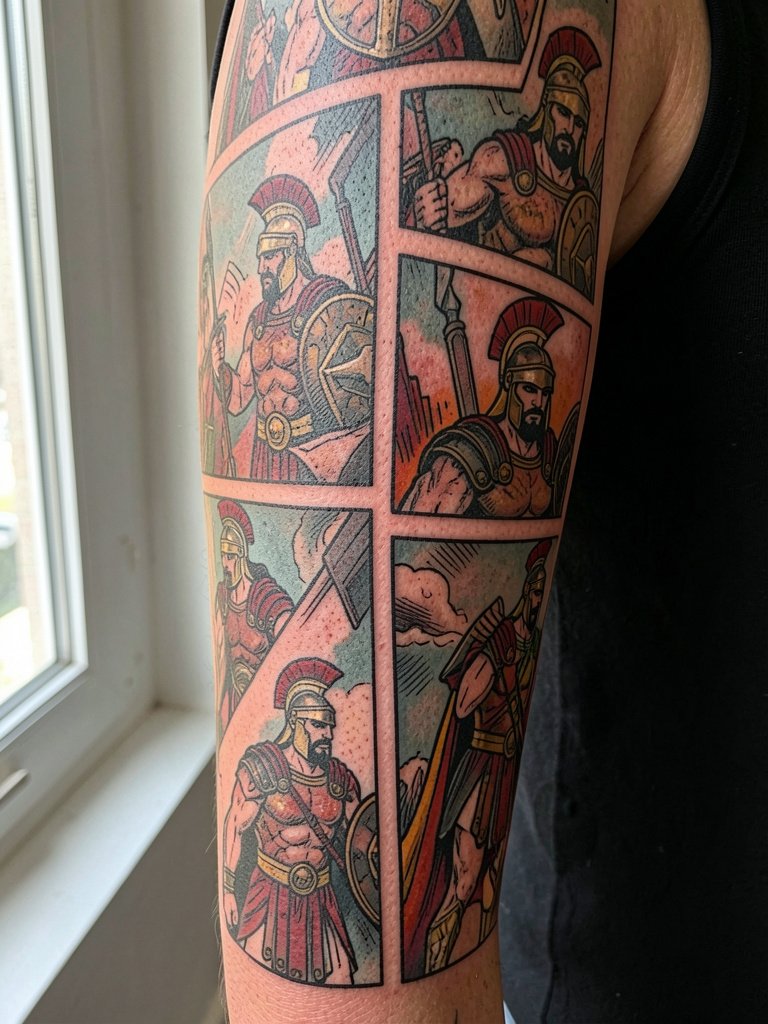
Comic-panel sleeves are high-contrast and read loud, which helps longevity. Ask the artist to plan gutters and borders so panels do not blur into each other. Color panels often need more saturation passes. The main mistake is squeezing too many panels into limited arm space. For bold nights out, short-sleeve jackets or graphic tees let the panels pop.
24. Spartan Micro-Icon Sleeve with Repeating Emblems
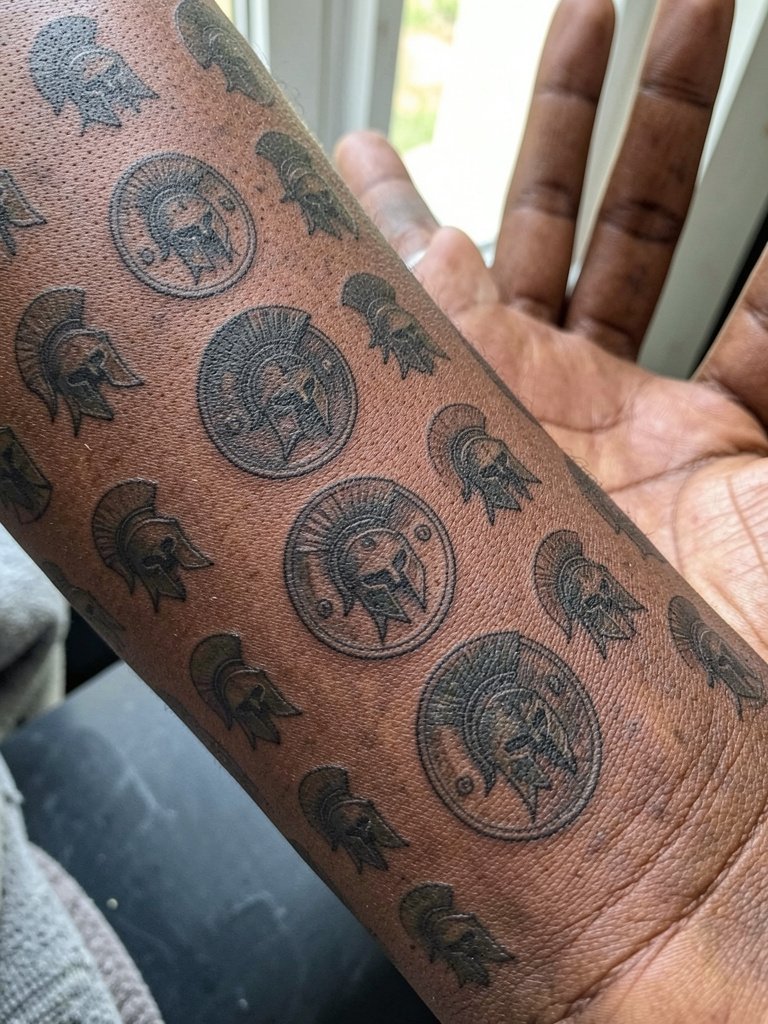
Micro-icon sleeves are playful but demand deliberate scaling. Request slightly larger icons than pinned references to avoid early blurring. Sessions are modular and can be spaced over months. A common error is clustering identical icons without a rhythm, which reads cluttered. For everyday style, short-sleeve shirts or rolled cuffs reveal the pattern without showing the whole arm.
25. Spartan Black and Grey Photoreal Helmet Accent
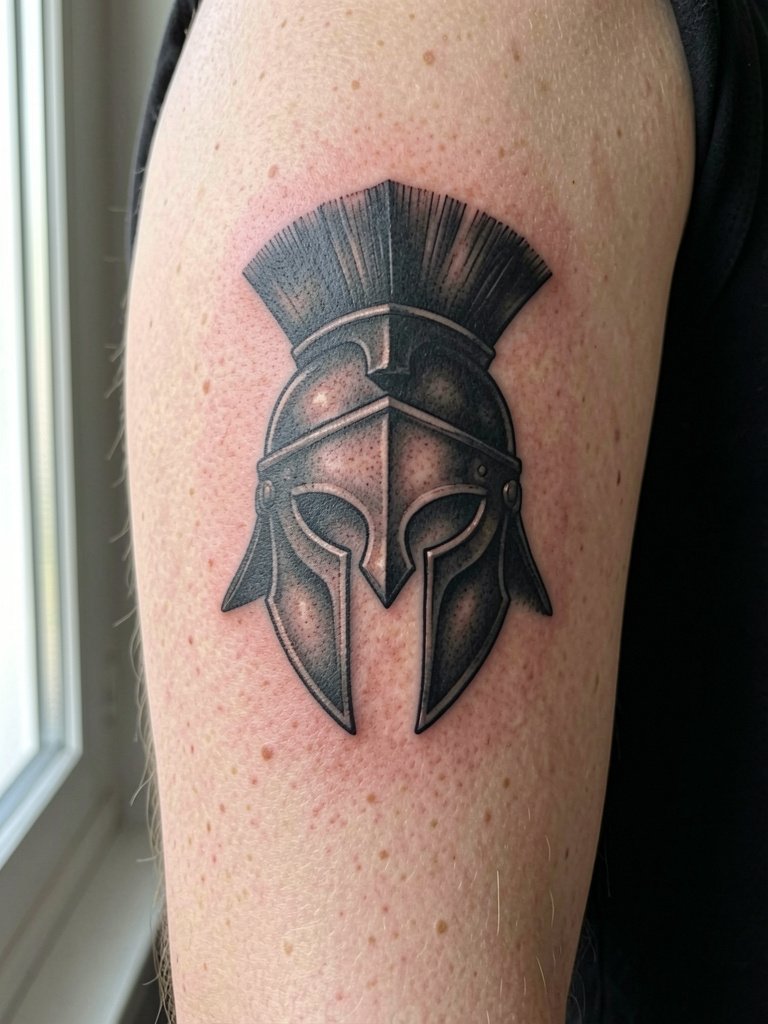
Photoreal accents need exceptional planning because skin texture affects tonal transitions. Ask the artist to show a healed sample on similar skin tone so you can judge contrast. Sessions are long and may require breaks. The mistake is asking for photoreal detail across the entire sleeve rather than a reserved accent, which becomes visually muddy over time. For formal occasions, rolled sleeves and dress shirts with open cuffs let a photoreal accent peek through.
26. Spartan Negative-Space Portrait with Halo Glow
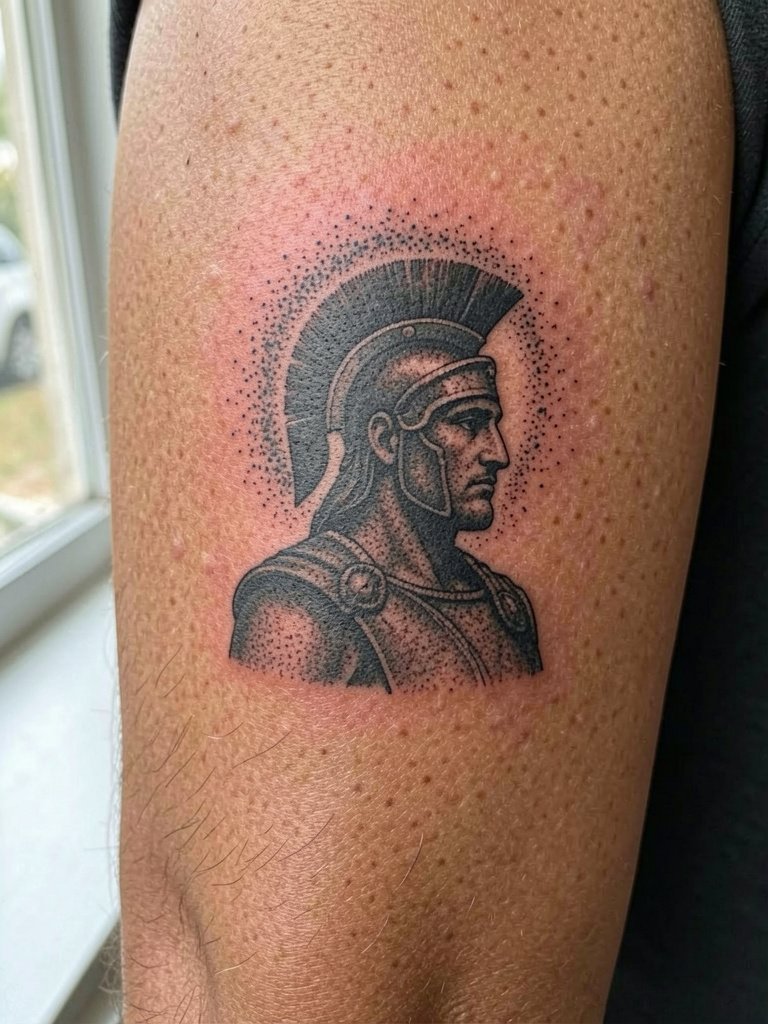
Negative-space portraits lean heavily on silhouette clarity, so demand bold outer edges and plan halo spacing to avoid collapse. This placement is moderate pain and benefits from a single long session for consistent saturation. A common error is overfilling the halo with dot work that loses crispness. For casual display, short-sleeve or sleeveless tops like a muscle tee frame the portrait.
27. Spartan Full-Arm Timeline with Weathering and Touch-Up Plan
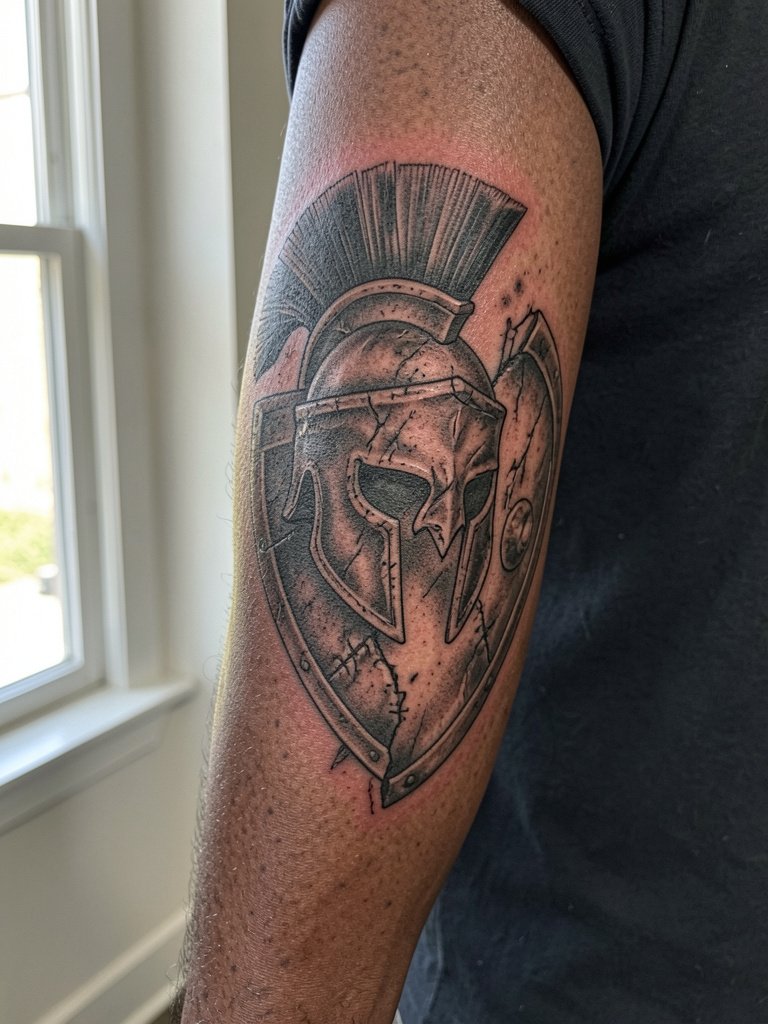
A timeline sleeve that intentionally weathers creates narrative space and helps justify later touch-ups. Plan a formal touch-up schedule with the artist: a six-month session for edge refinement and a two-year pass for saturation refresh keeps the weathering controlled. This approach is forgiving because aging is part of the design, but do not confuse deliberate weathering with accidental fading. For public settings, cuffed sleeves and light jackets help present the timeline in segments.
Frequently Asked Questions
Q: How should I decide between bold blackwork and fine-line Spartan elements for a sleeve?
A: Think about long-term readability and sun exposure. One camp prefers bold blackwork because it preserves silhouette and handles friction and UV over time. The other camp believes fine-line work can hold if given wider spacing and slightly heavier single-needle weights, and they point to healed portfolios to support that. Weigh your daily wear, skin type, and how much time you want for future touch-ups.
Q: What pain levels and session lengths should I expect for a Spartan sleeve?
A: Outer arm panels and shoulder caps are lower pain and can be done in two to four sessions. Inner bicep, elbow, and sternum-adjacent work is higher pain and benefits from shorter sessions or numbing strategies. Most full sleeves take multiple long sittings across months. Plan breaks and recovery days in between sessions.
Q: Where can I find healed Spartan-style portfolios without naming artists directly?
A: Search targeted hashtags and keywords on social platforms and portfolio sites. Try hashtag searches like #SpartanTattoo, #HopliteInk, and #WarriorSleeve on Instagram and TikTok, use location filters to find nearby portfolios, and browse tattoo community threads on Reddit for healed examples in different skin tones.
Q: How do clothing choices affect session comfort and the healed presentation?
A: For shoulder and chest connectors, wear wide-neck or scoop-neck tops in their normal worn position so the artist can access the area without the fabric moving. For thigh or hip work, choose fitted bike shorts or low-rise jeans that are fully zipped and buttoned so nothing is being pulled during the session. For showing sleeves, rolled sleeves and short-sleeve shirts highlight the design. A good session outfit is one that gives clear access while remaining comfortable.
Q: Do I need to plan touch-ups for Spartan sleeves and when?
A: Yes. Dense blackwork may need a modest touch-up at six to twelve months and a light refresh at two to three years, depending on sun exposure and how your skin heals. Color accents often require an extra saturation pass early on. Planning touch-ups when you commission a sleeve makes scheduling and budget easier.
Q: Are there cultural or symbolic considerations for Spartan imagery?
A: Spartan imagery draws from ancient Greek martial traditions and classical motifs, so be mindful about symbolic use and historical respect. If a design borrows from specific cultural or religious iconography outside that context, discuss appropriate references and respectful adaptation with your artist.
