

Tiny tattoos are having a moment—and for good reason. They’re discreet, cute, and loaded with meaning, all within 1–2 inches of skin. But making a micro design stand out (and actually last) takes more thought than simply shrinking a big tattoo.

This guide walks you through how to design tiny tattoos that look clean, stay readable, and still feel special—whether you’re sketching ideas at home or getting ready for a professional appointment.
Understand What Makes Tiny Tattoos Work
When tattoos are under about 3 cm (around 1–1.2 inches), every line counts. Small designs blur faster, especially on hands and fingers, so the goal is simple, strong shapes.
Tiny tattoos stand out when they’re:
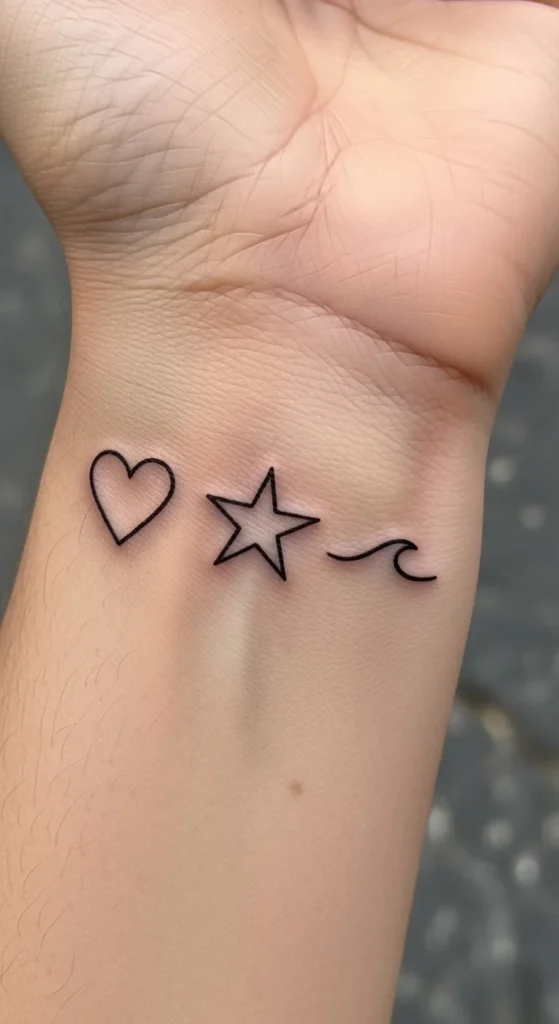
- Minimal but clear: hearts, stars, moons, tiny florals, single-line waves.
- Fine-line but not too fragile: lines thin, yet solid enough to age well.
- Sized wisely: often closer to 3 cm rather than ultra-micro dots.
- Placed smartly: on skin that doesn’t rub constantly or stretch too much.
Think of them as tiny icons rather than shrunk-down illustrations.

Step 1: Start With a Simple, Strong Idea
The best tiny tattoos begin with a super clear concept. Ask yourself:
- What’s the feeling? Love, calm, strength, gratitude, faith?
- Can you show that in one symbol, not a whole scene?
Great starting ideas:
- Hearts: single outline, three-dot heart clusters, twin hearts for couples.
- Stars and constellations: tiny points connected by very short lines.
- Floral sprigs: a single stem with two or three leaves or a tiny daisy.
- Micro butterflies: simple wing shapes, no heavy patterning inside.
- Symbols: sun, wave, crescent moon, tiny smiley, arrow, lock, key.
If you can’t recognize the design instantly when it’s shrunk on paper, it’s too busy for a micro tattoo.
Step 2: Design for Size and Longevity
Tiny tattoos fade and blur faster if they’re overloaded with detail. The trick is to balance fine-line aesthetics with lines that will still look good in a few years.
Keep your design readable by:
- Avoiding super dense shading in a tiny area.
- Leaving enough space between lines so they don’t merge.
- Skipping tiny text unless it’s ultra-short and in clear cursive or print.
- Designing for 2–3 cm rather than ultra-micro dots when possible.
You can also think in “line weight” layers:
- Use slightly bolder lines for the outer shape.
- Keep inner details very light or skip them altogether.
This kind of “hybrid line” approach helps the tattoo stay visible instead of turning into a fuzzy dot over time.
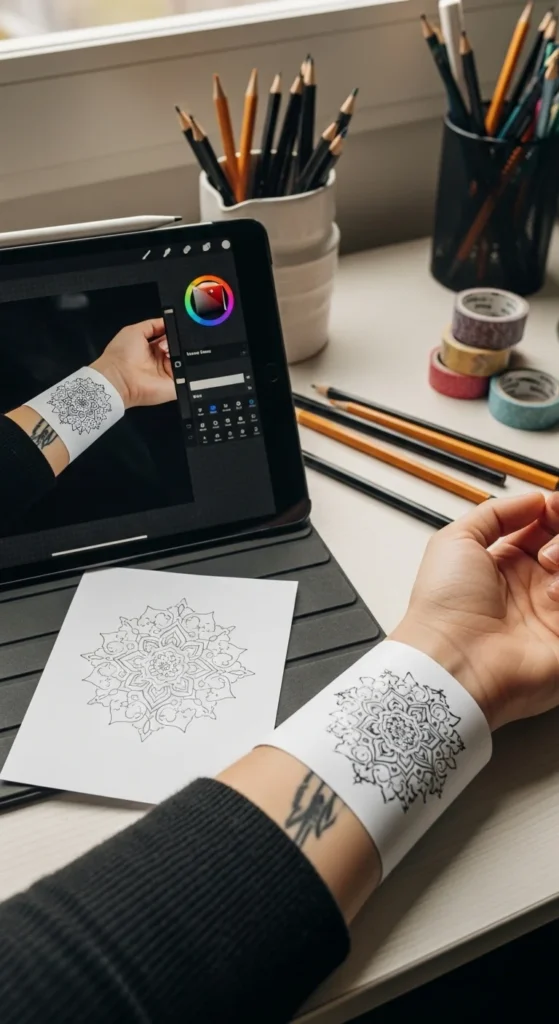
Step 3: Use Digital Tools to Preview Your Tiny Design
You don’t need to freehand everything. Digital tools help you test symmetry and size before you ever step into a studio.
Helpful options:
- Procreate or other drawing apps to sketch and mirror designs.
- AI tattoo generators (like BlackInk or Canva’s tools) for idea prompts and variations.
- Simple photo-editing apps where you:
- Import a photo of your wrist or finger.
- Drop your tiny design on top.
- Resize it to see how it actually looks on your body.
Quick process:
- Draw your design digitally at a larger size.
- Scale it down to 2–3 cm.
- Zoom out—if you can still tell what it is, you’re on the right track.
- Print it or display it on your phone and hold it against your skin.
This step saves a lot of regret and helps you communicate clearly with your artist.
Step 4: Choose Smart Placement for Tiny Tattoos
Placement can make or break a micro design. Areas that bend, rub, or see a ton of sun tend to fade quicker.
Tiny tattoos often do well on:
- Inner wrist (away from watch straps).
- Side of the forearm.
- Back of the arm, just above the elbow.
- Behind the ear.
- Upper rib area (if you’re okay with pain).
- Ankle or top of the foot—though these may fade faster if shoes rub.
Trickier spots:
- The sides of fingers.
- Inner sides of hands.
- Areas that constantly bump into things.
You can still choose those places, but talk with your artist about realistic expectations. Some people are happy to touch up a favorite tiny piece every few years.

Step 5: Collaborate With the Right Artist and Care for Your Ink
Even the best design idea can fail if the execution isn’t there. Tiny tattoos require a steady hand and a lot of control.
When choosing an artist, look for:
- A strong portfolio of fine-line and micro tattoos.
- Clear, crisp healed photos, not just fresh ones.
- Reviews mentioning line quality and longevity.
Bring:
- Your printed sketches or digital mockups.
- A clear size range (e.g., “around 2–3 cm”).
- Notes about placement and style (single-line, small shading, etc.).
Aftercare matters just as much:
- Follow your artist’s cleaning instructions.
- Keep the tattoo moisturized but not soaked.
- Avoid soaking pools and long baths during healing.
- Use high SPF on your tattoo once healed—tiny designs fade quicker in the sun.
A well-designed small tattoo, done by an experienced artist and cared for daily, can look lovely for many years.

Tiny Tattoos, Big Personality
Tiny tattoo designs don’t have to disappear into your skin or turn into little smudges. With a simple, bold idea, smart sizing, thoughtful placement, and the right artist, your micro ink can stay cute, meaningful, and readable.
Save your favorite concepts, pin them to a board, and refine them digitally. When you’re ready, bring your best version to a professional and turn your tiny design into something you’ll be happy to see every day.
💾 Save this guide for later so you can revisit it before your next tiny tattoo appointment!