
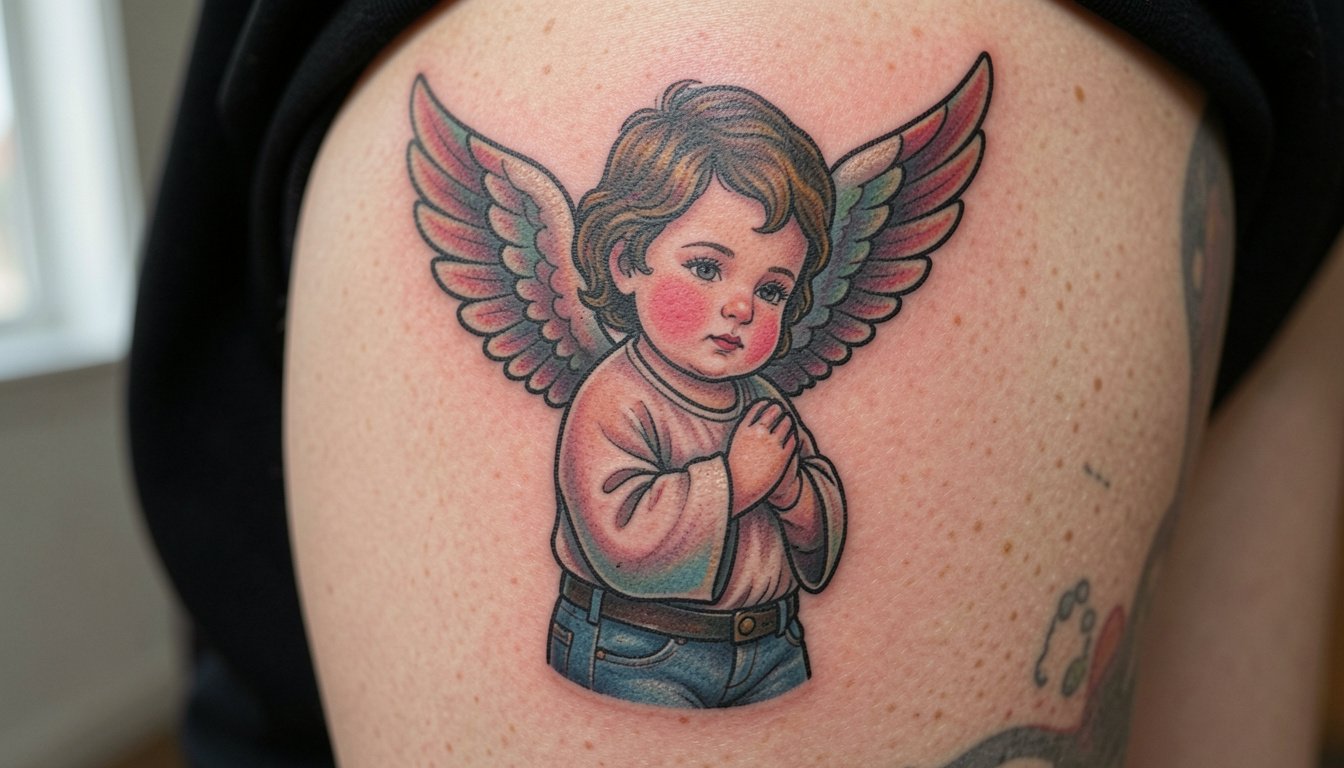
A lot of tiny baby angel tattoos on Instagram look delicate the day they are done and soft into a smudge a few years later. Bold silhouettes, simplified shading, and slightly heavier linework often keep those cherub features readable longer, while ultra-fine single-needle curls tend to feather on the wrist and fingers. Read through these ideas and you will see versions that hold up and the specific choices that make them last.
1. Fine Line Cherub on Inner Forearm
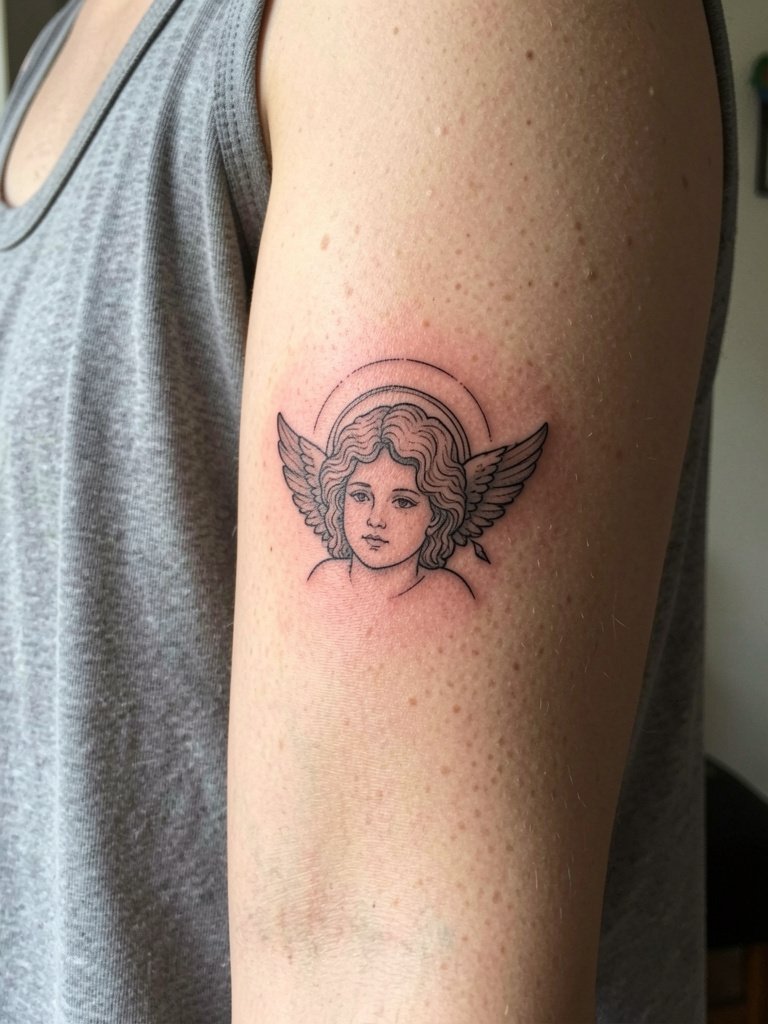
This tiny inner forearm cherub reads as a delicate accent when line weight is raised just a touch. I recommend a session of about 45 minutes for a three-inch piece so the artist can keep a slightly heavier single-needle contour that resists early blur. The inner forearm is medium pain and has low blowout risk if the stencil placement avoids the wrist crease. Bring two scale references so the artist can show how the face reads at three inches versus five. For showing it off, roll up sleeves and pair with a loose linen tank top that keeps the forearm visible.
2. Little Angel Outline on the Ankle
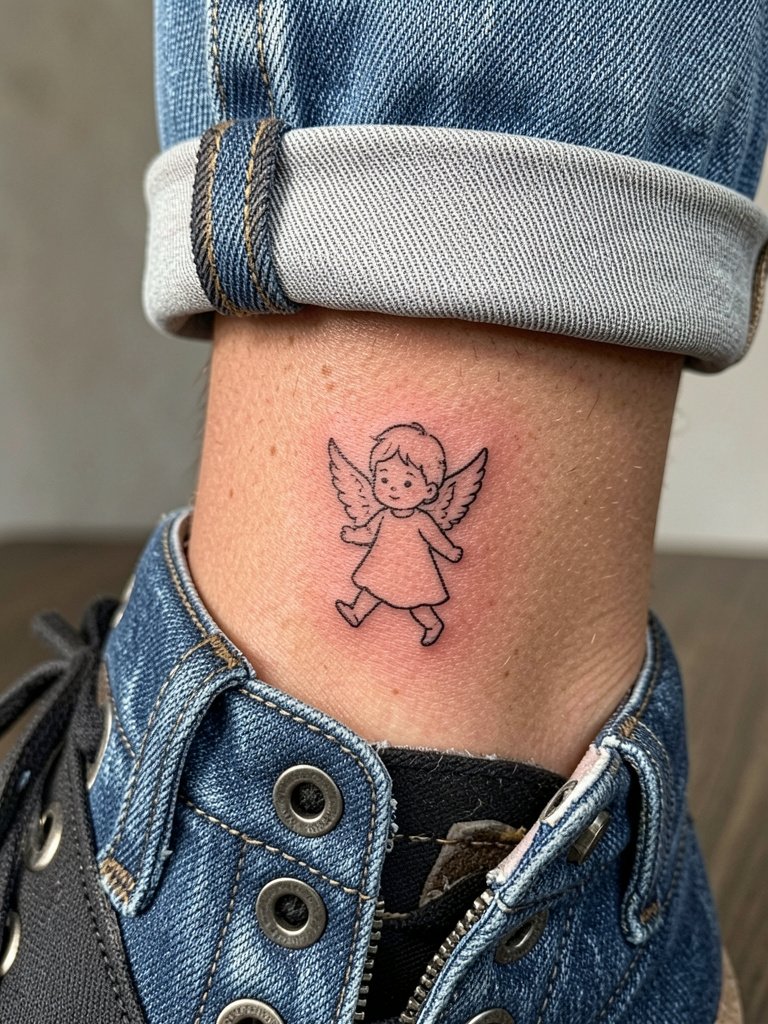
Ankle tattoos take friction from socks and shoe collars, so keep the silhouette simple to avoid early edge wear. Session time is typically 30 to 60 minutes depending on size, and the area is on the lower end of the pain scale. A common mistake is packing tiny interior detail into the ankle curve. Ask the artist to test the outline at the exact size on your skin so the wings keep negative space. Pair this placement with rolled cuff denim for warm-weather visibility.
3. Tiny Halo Behind the Ear
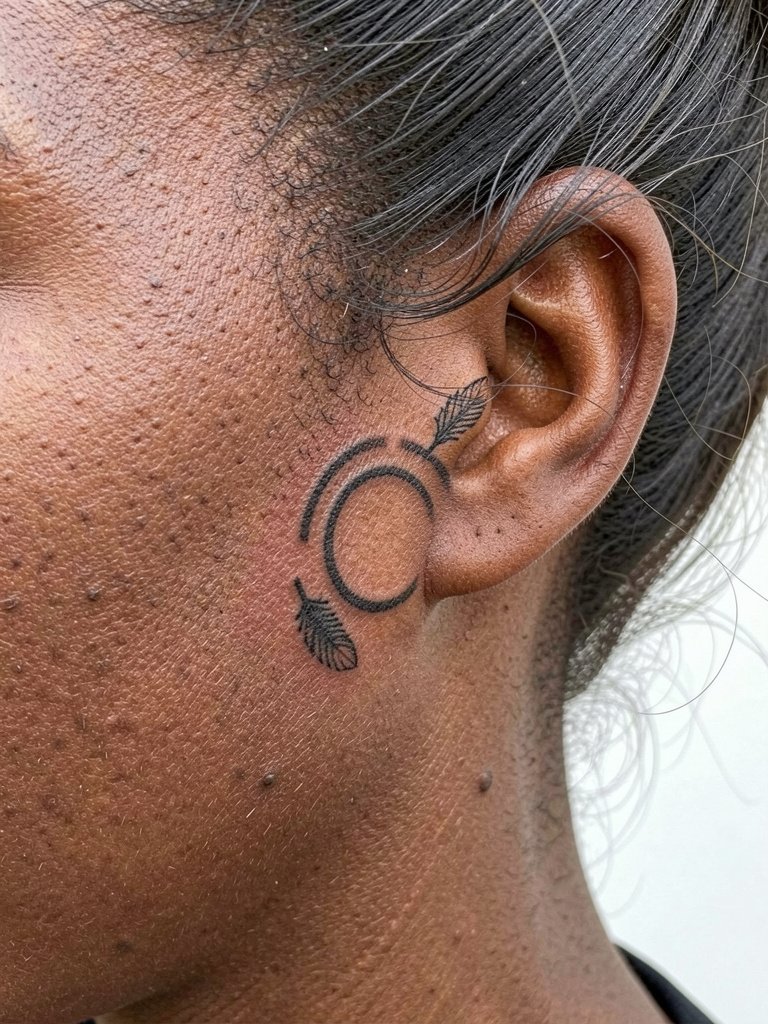
Behind-the-ear placements are discreet and heal quickly, but they demand a skilled hand because skin there is thin and the area receives lots of motion from hair and collars. Expect a 20 to 40 minute session for this micro halo. A frequent error is asking for needle-thin circles that vanish as the skin stretches. Request slightly bolder linework so the halo stays readable. Because this is a visible neck area, choose a shop comfortable with small portraiture in delicate zones.
4. Praying Baby Angel on the Sternum
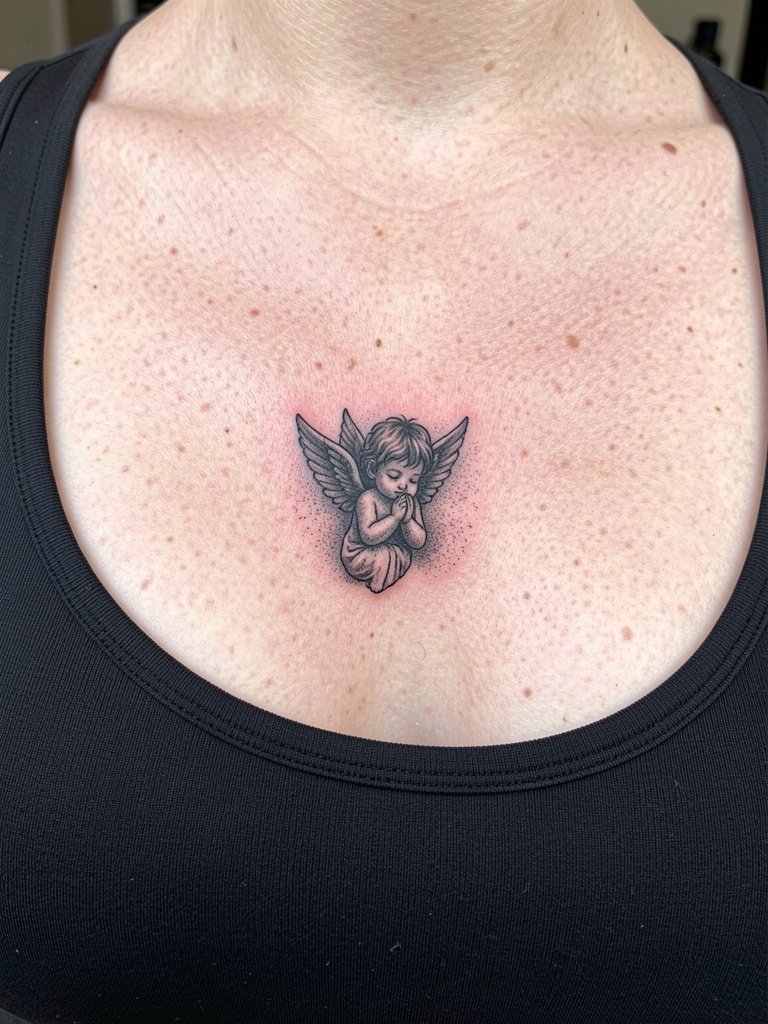
Sternum pieces are sensitive and split artists into two camps. One camp argues the chest stretches and fine line detail in the sternum loses crispness within the first few years, and they favor slightly larger, bolder contours for longevity. The other camp will say that with careful needle depth and gradual stipple shading the sternum can hold fine detail, and they will show healed portfolios to support that claim. If you want this placement for religious or devotional reasons, note that sacred imagery carries cultural weight and should be approached respectfully. For the session wear, bring a fitted sports bra that you can remove or keep on depending on stencil placement.
5. Floating Angel Silhouette on Collarbone
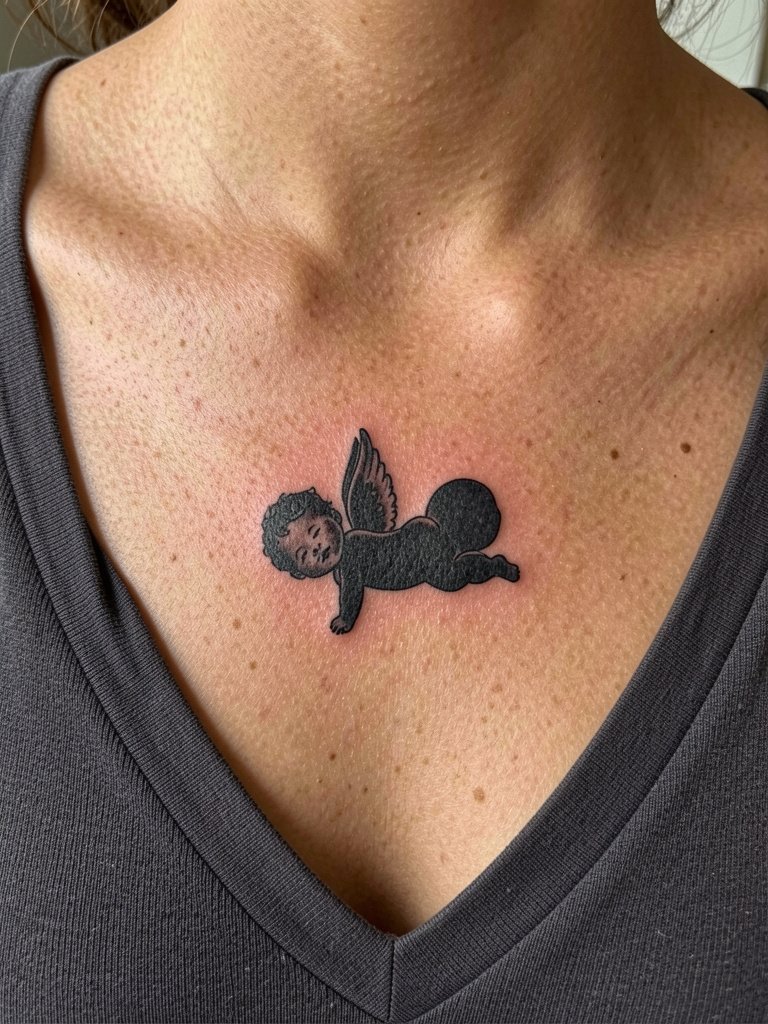
Collarbones are show-off placements that look great with bold simplified shapes rather than tiny filigree. Expect a 45 minute session and moderate pain near the bone. The most common mistake is placing the piece too close to the clavicle end where movement blurs edges. Tell the artist the exact horizontal distance from the midline so the silhouette sits where shirts naturally reveal it. Pair with open-neck blouses to let the shape read in evening outfits.
6. Dot Work Angel on the Upper Arm
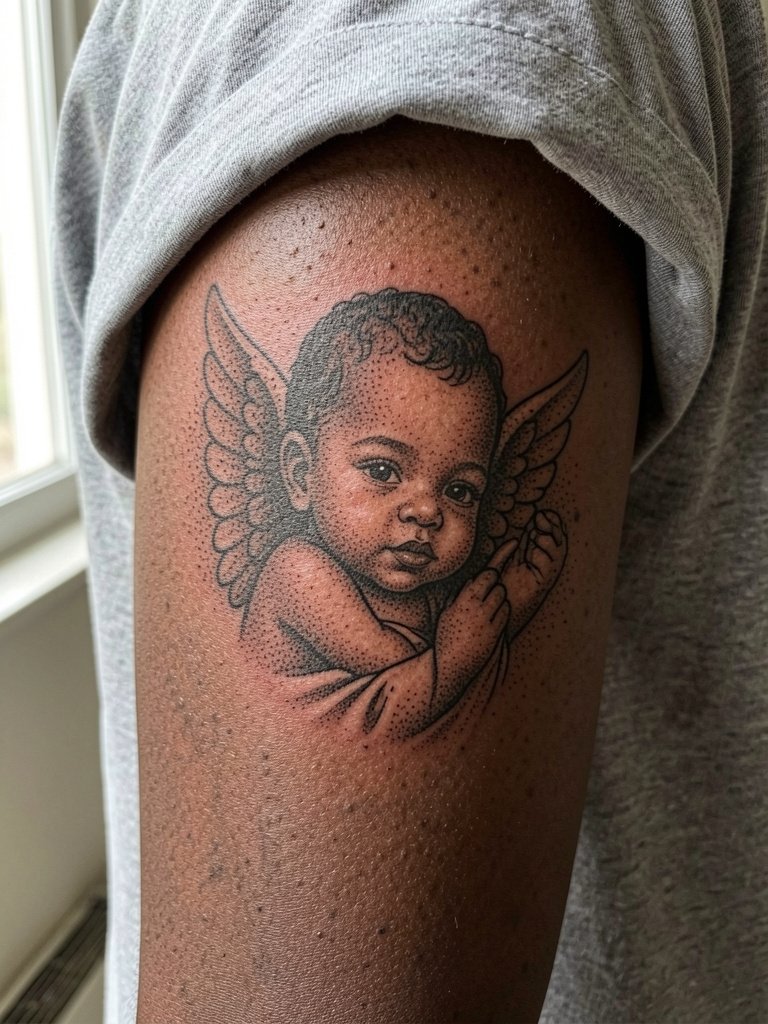
Dot work brings a soft tonal quality that suits angel faces without heavy black outlines. The outer upper arm is forgiving with low blowout risk and sessions often run one to two hours for a three to five inch piece. A typical issue is over-detailing the face in small scale, which causes loss of facial definition with time. Ask the artist to map the stipple density at full size so you can see how light and shadow will read. For casual wear, a short-sleeve cotton tee keeps the arm visible.
Session Day Picks
These first six placements cover a range of exposure and sensitivity, so a few small items smooth the session and the first week.
-
Thermal stencil transfer kit. Use this to preview exactly how the cherub outline will sit on curved areas like the forearm and ankle.
-
Topical numbing cream. Applied about 45 minutes beforehand it can ease sternum and rib sessions without affecting the artist's shading work.
-
Thin protective film roll. Helpful for ankle and hand placements where friction threatens the first few days of healing.
-
Fragrance-free gentle body wash. Keeps healing skin clean without added dyes or scents that irritate fresh ink.
-
Aquaphor Healing Ointment. A thin layer during the initial 48 hours helps lock moisture for fine line and dot work without clogging the channels.
7. Sleeping Angel Micro on Finger
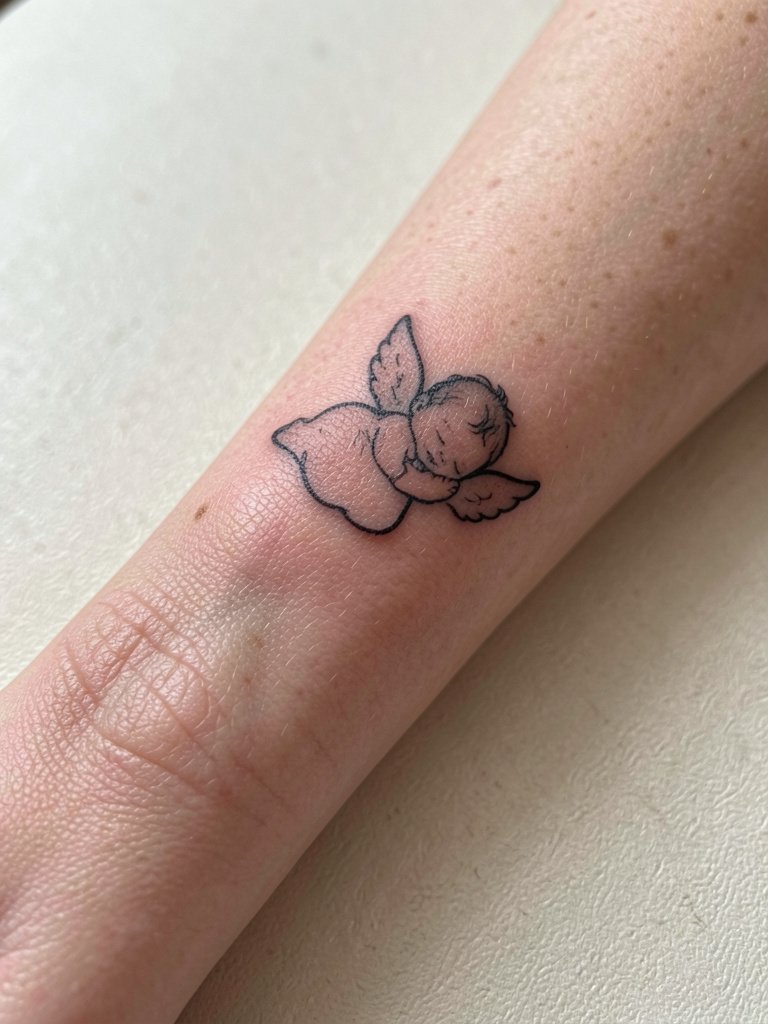
Finger tattoos are charming but they fade faster because of constant hand washing and friction. Expect a short 20 to 40 minute session and plan for touch-ups after the first year. A regular mistake is asking for too much interior detail on a narrow surface. Request a bold outline and minimal interior to keep the sleeping cherub readable. For everyday styling choose thin rings that sit above the knuckle and try a delicate stacking ring set to frame the piece.
8. Baby Angel Holding a Star on the Calf

Calf placements allow slightly larger compositions and hold detail well. Sessions often run one to two hours for a medium-sized piece and the area is moderately painful depending on muscle tension. The biggest blunder is compressing the pose into too small a footprint, which loses the star detail over time. Voice your preferred contrast level so the artist knows how much saturation to lay down. When you want to show off, a mid-length skirt or rolled pant cuff puts the calf on display.
9. Watercolor Baby Angel on the Thigh
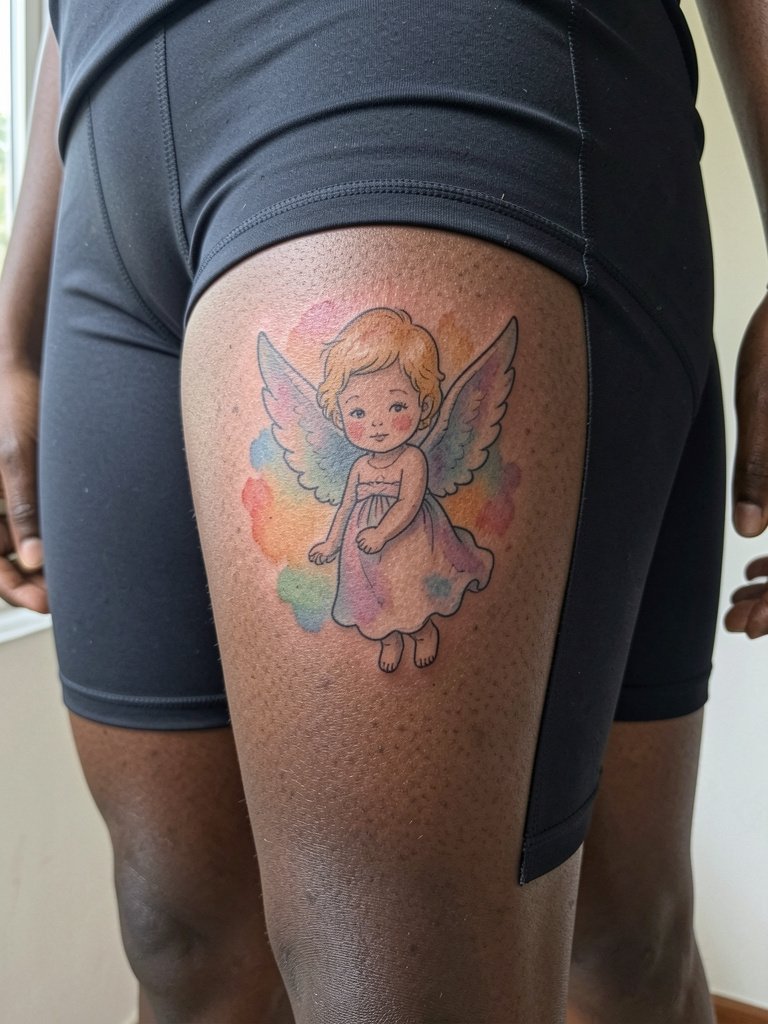
Watercolor techniques look ethereal on thighs but they fade faster than saturated blackwork, especially where clothing rubs the area. Plan for a two-hour session for layered color and expect lower touch-up longevity than black outlines. A common error is choosing pastel washes with no anchor lines, which can blur into a wash. Ask for a faint contour line or dot work anchor to preserve the shape. For sessions wear fitted bike shorts so the artist can access the upper thigh easily, and consider modest bike shorts for comfort.
10. Neo-Traditional Angel on the Shoulder Blade
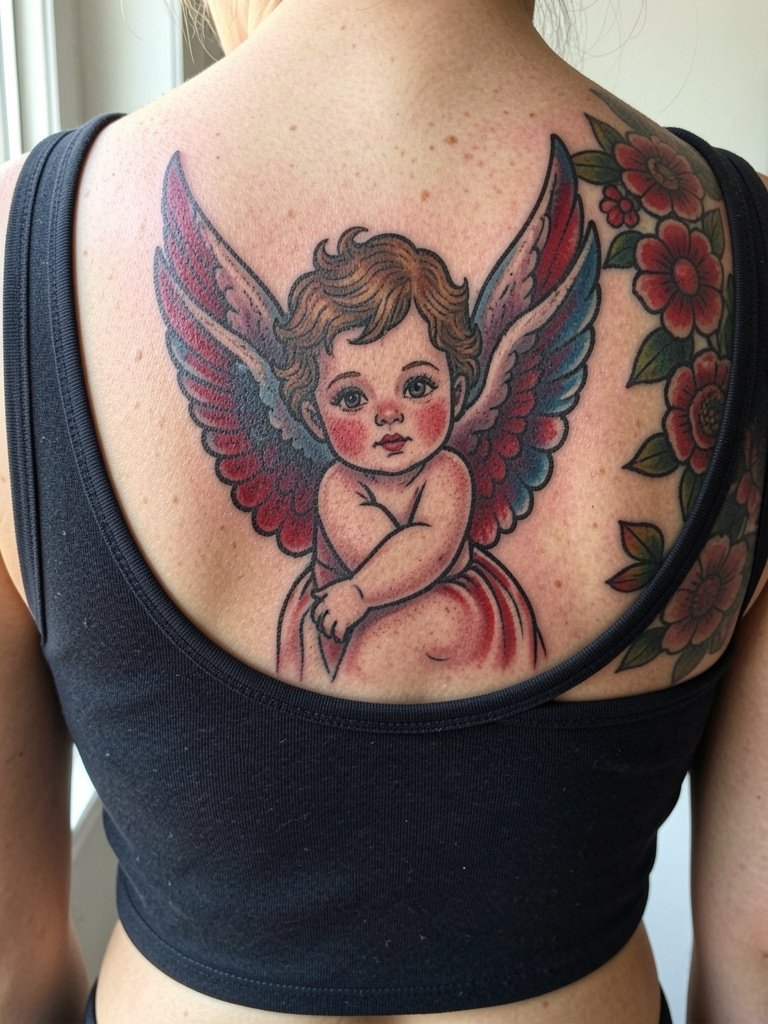
The shoulder blade is low on the pain scale and excellent for pieces that need room for decorative elements. Expect two to three hour sessions for medium-sized neo-traditional work. Artists often warn against crowding the angel with too many props which makes the composition feel cramped when healed. Specify which accents you want saturated and which should be subdued so the color balance survives sun exposure. Pair with open-back tops to show the motif during warm months.
11. Tiny Angel Footprint on Instep
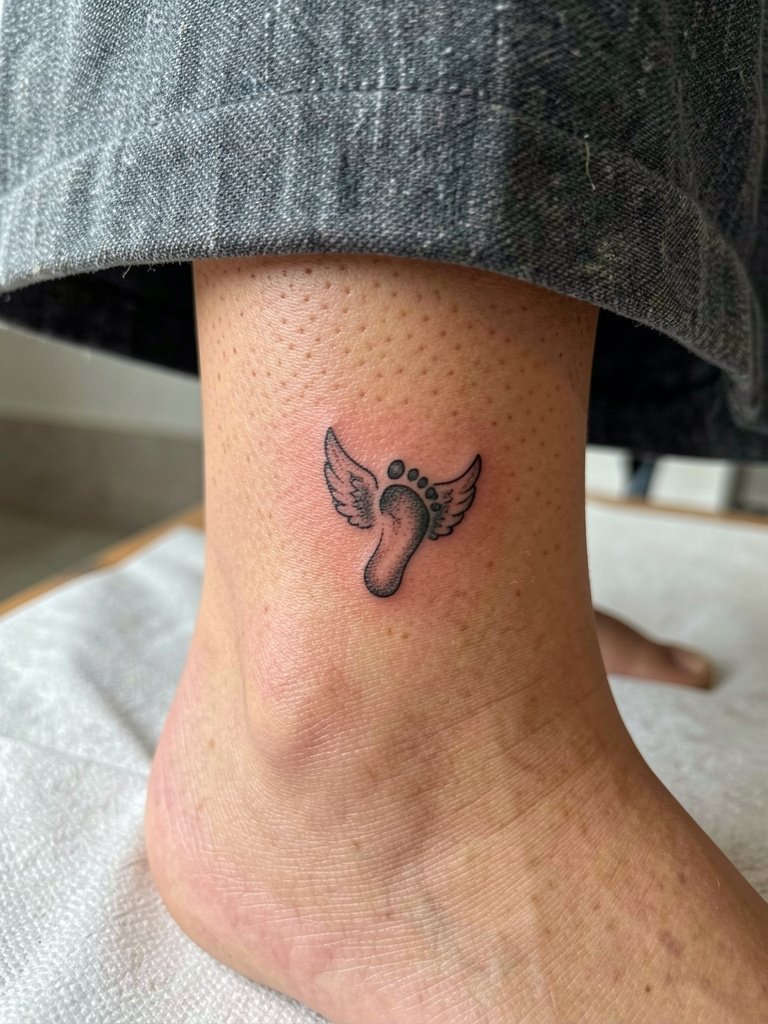
The top of the foot is a high-motion area that tends to fade due to friction with shoes. Sessions are short but you should plan for yearly touch-ups. A typical mistake is cramming names or numbers into the small footprint. Ask the artist to show healed examples on the foot so you can gauge scale. For visibility choose sandals or low sneakers and accessorize with an ankle chain that complements the print.
12. Minimalist Angel on the Ribcage
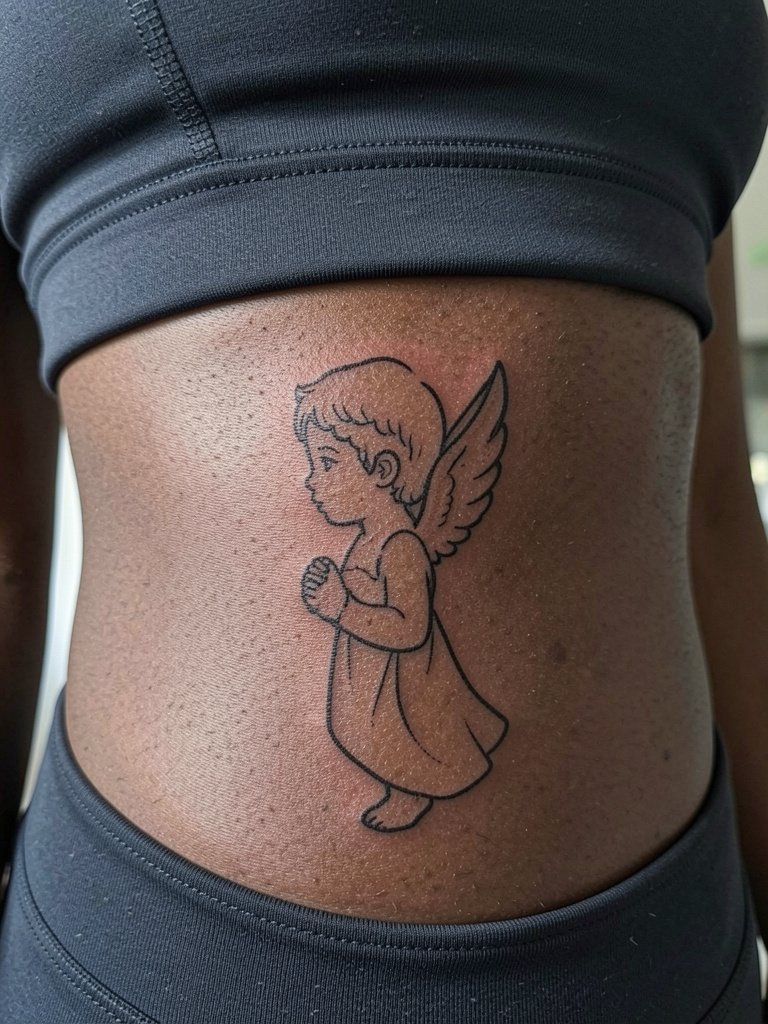
Fine line on the ribs splits artists into two camps. One group says the skin there moves and stretches enough that tiny contours blur within a couple of years, and they prefer slightly wider spacing and bolder anchor lines. The other group maintains that with steady needle depth and careful placement the ribs can hold crisp single-needle work, and they will point to three-year healed photos as evidence. Rib sessions are higher on the pain scale and usually require breaks, so plan for two short passes rather than one long sitting. For session comfort, wear a fitted cropped top that can be adjusted without shifting the stencil.
13. Cartoon-Style Angel on the Outer Thigh
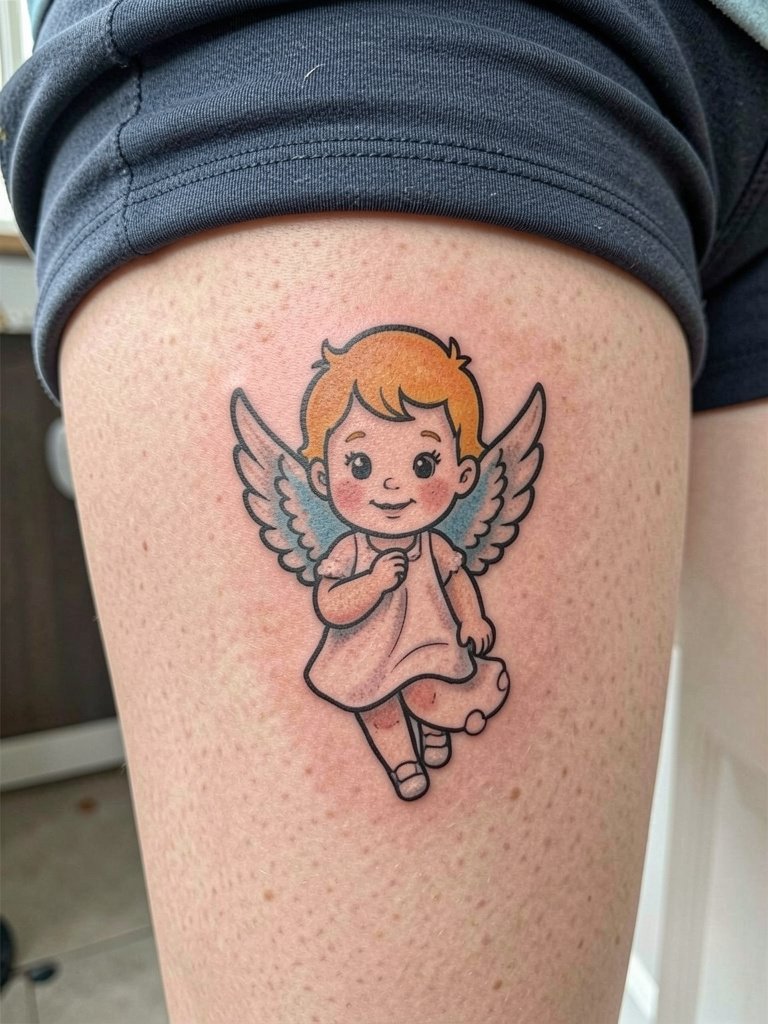
Outer thigh pieces are forgiving and ideal for playful, cartoon-inspired angels that rely on strong outlines. A two-hour block typically covers a modest piece and pain is low. The error I see most is designers who add subtle shading that gets lost against saturated flats. Tell the artist you want bold fills and one contrast shadow to make the figure pop. For evenings out, an A-line mini skirt frames the placement well.
14. Angel with Ribbon Banner on the Wrist
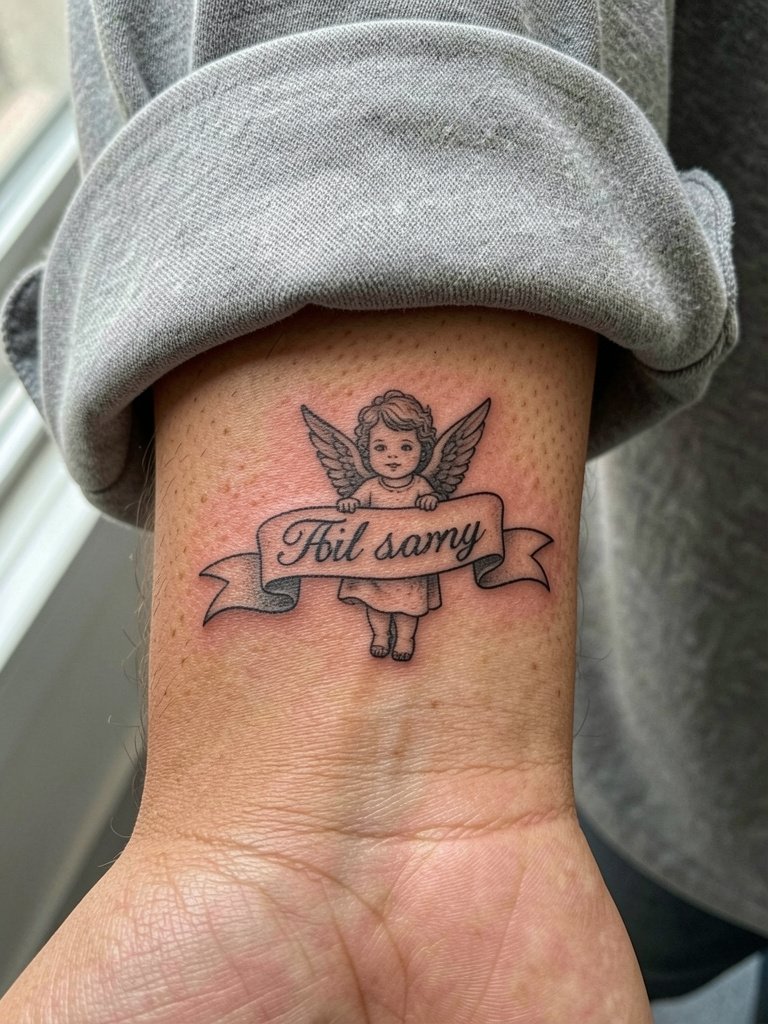
Wrist tattoos are very visible and face steady use that weakens thin script over time. For readability pick a slightly heavier script and keep the banner short. Typical session time is 30 to 60 minutes and touch-ups may be needed at 2 to 3 years. A common mistake is asking for long sentences that wrap the wrist twice. Instead pick one strong word and ask the artist to test its legibility at the target size. Pair with a sleek cuff bracelet that sits above the piece when you want to frame it.
15. Baby Angel Peeking from a Cloud on the Back of the Neck
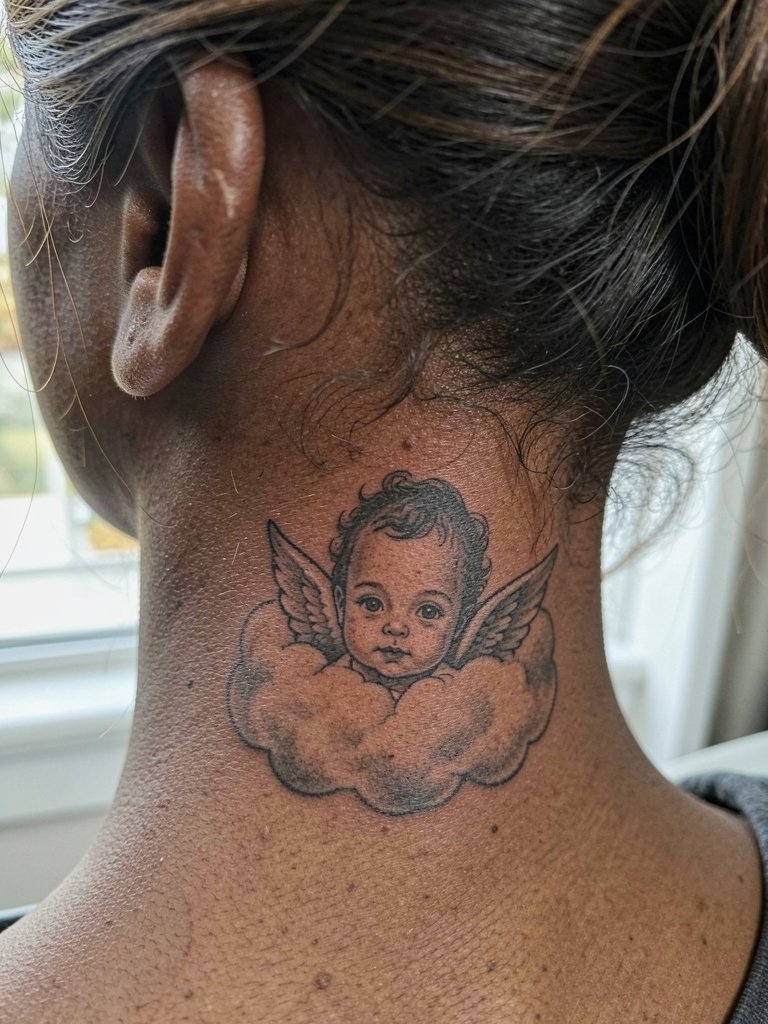
The nape is a flirtatious spot that handles small portraits well if placed correctly. Sessions are short to moderate and pain varies with sensitivity under the hairline. People often request ultra-fine hairline strokes that disappear into regrowth and cradle lines. Ask the artist to anchor the face with subtle stipple or a thin shadow so it reads when your hair is up. This placement may require a specialized portfolio review, so find a shop experienced with neck work.
16. Baby Angel in a Vintage Frame on the Back

Lower back canvases allow framed designs that have room to breathe and age predictably. A two to three hour session handles ornate frames and moderate shading. The usual misstep is cramming tiny facial detail into a frame smaller than three inches, which loses definition with time. Specify the minimum finished diameter so the artist keeps the portrait distinct from the ornamental edge. For showing it off wear low-rise jeans and a cropped top or backless bodysuit.
17. Micro-Realism Sleeping Cherub on the Rib Side
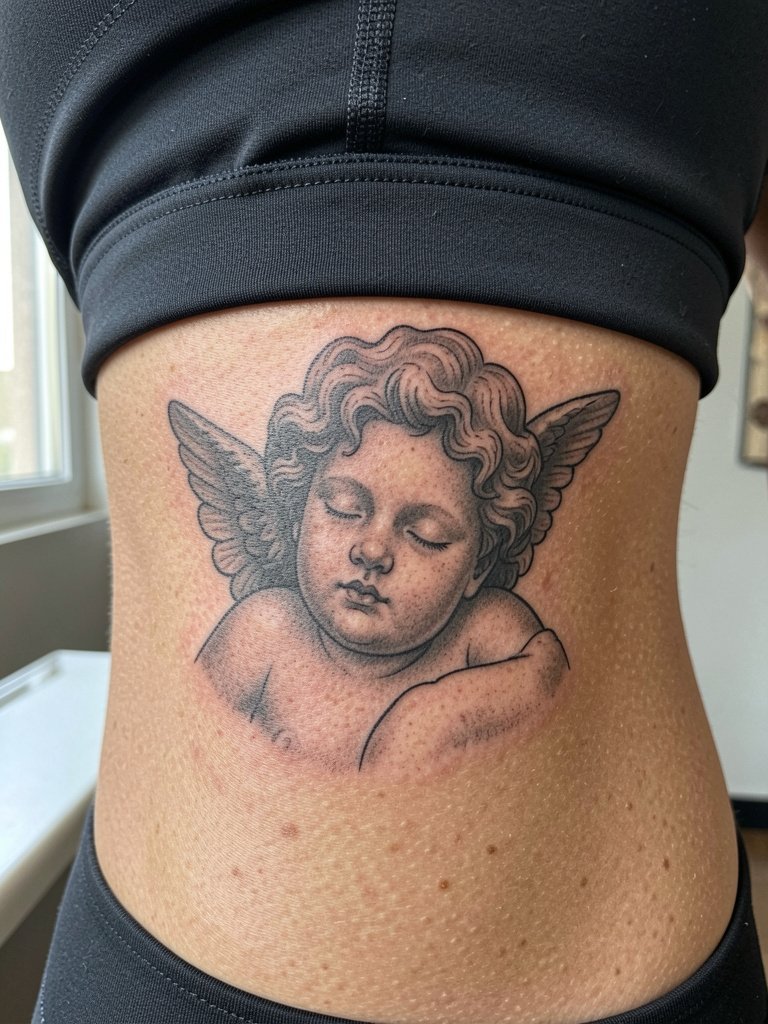
Micro-realism shines when artists scale features carefully, but tiny faces on the ribs are high risk for blur if placed too small. Expect a longer session to layer subtle shading, and plan for the possibility of a touch-up once healed. A typical mistake is copying a portrait reference that reads only at much larger sizes. Bring a scaled reference and ask the artist to mark the precise millimeter dimensions they recommend. Wear a fitted crop so the stencil can be set without shifting.
18. Blackwork Angel Emblem on the Bicep
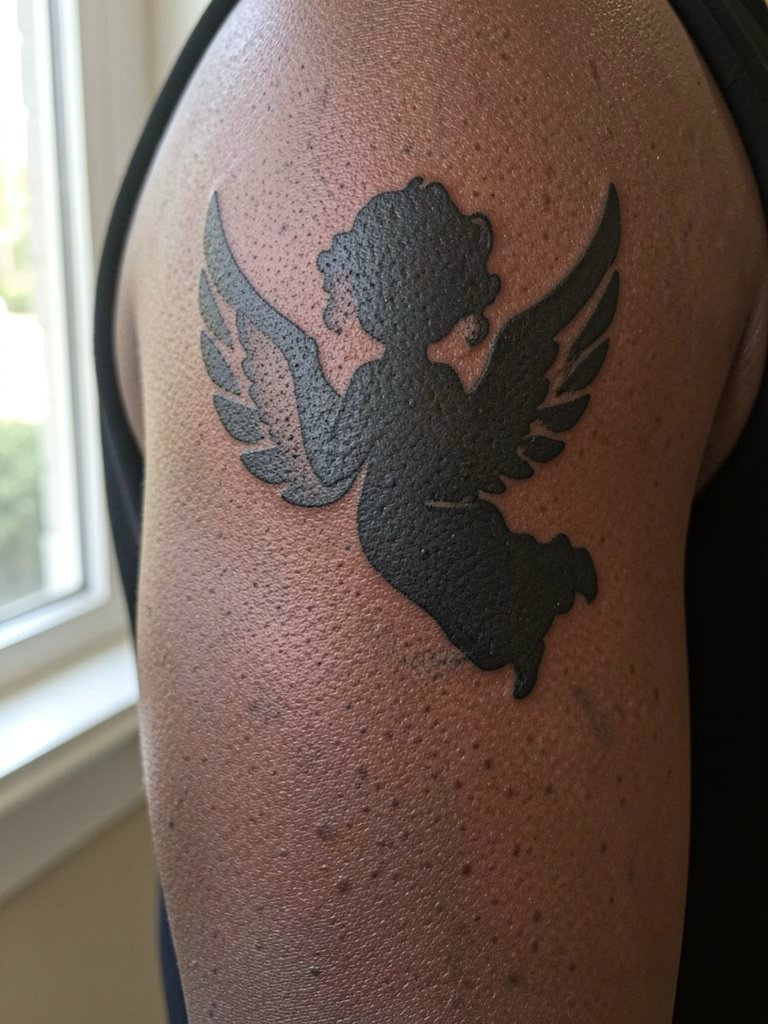
Blackwork holds up better than micro lines in high-movement areas, which is why emblematic angels in saturated black are a smart choice for biceps. Sessions are usually one to two hours, and pain is moderate. The mistake to avoid is combining dense black fills with tiny inner detail that disappears. Tell the artist which sections should remain negative space to preserve wing shape. For everyday style, short sleeves and a v-neck tee show the bicep shape without hiding it.
19. Cherub Holding Flowers on the Hip
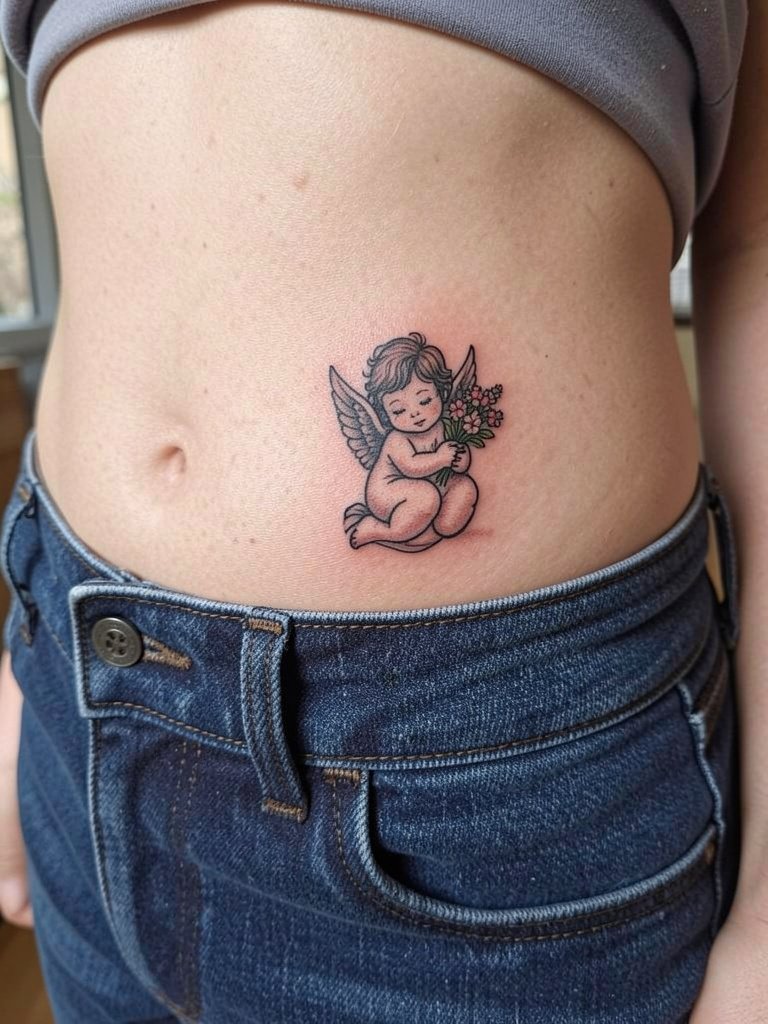
Hip placements look intimate and photograph beautifully, but they need to sit above the waistband to avoid constant rubbing. Sessions are often under two hours for a small composition and the area rates as low to moderate pain. A common error is placing the piece too low where jeans chafe the ink. Confirm the vertical clearance from your waistline with the artist so the bouquet and wings stay untouched. When dressing to reveal, low-rise jeans and a cropped tee work best and pair well with low-rise denim.
20. Angel Silhouette Inside a Geometric Halo on the Chest
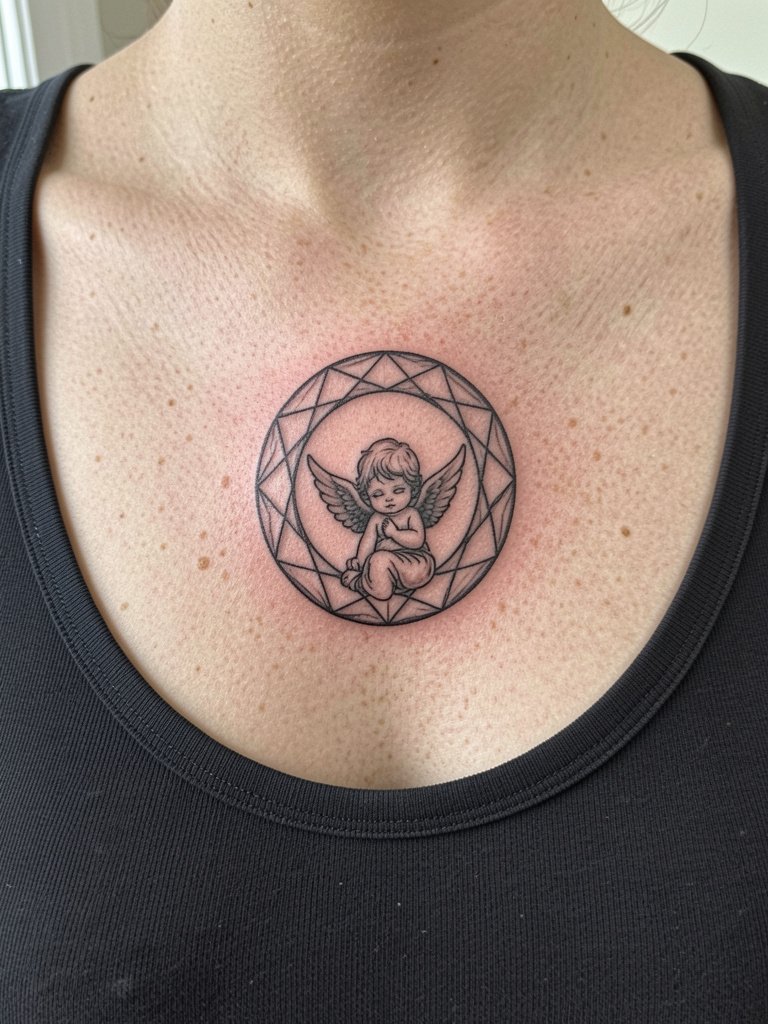
A chest-focused geometric halo gives structure to a tiny angel and helps lines age predictably. Expect a one to two hour session and moderate pain near the bone. The typical mistake is choosing a halo with spacing too tight to survive natural skin settling. Ask the artist to space the geometry so negative space remains visible at three years healed. For outfits that reveal the piece try a scoop-neck bodysuit.
21. Angel with Baby Wings on the Shoulder Cap
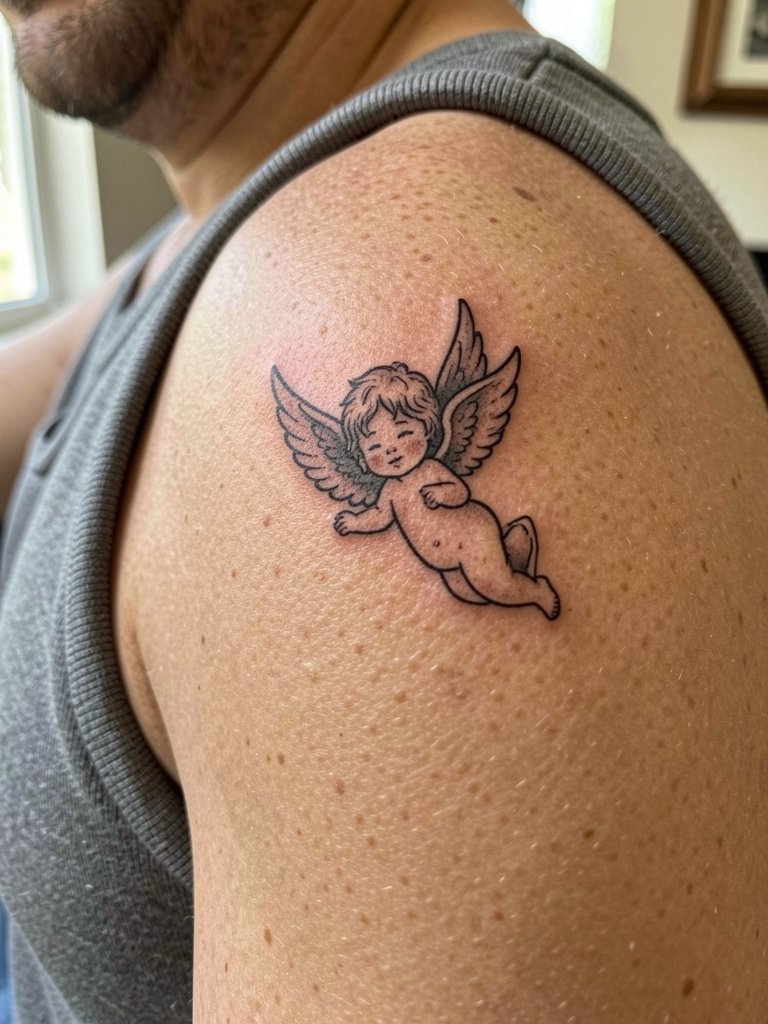
The shoulder cap is a classic for small motifs that need to read from multiple angles and it tolerates moderate shading well. Sessions are short and pain is minimal for most people. A common misstep is asking for too much micro-detail on the rounded surface which softens with movement. Specify the viewing angle you prefer so the artist places the face to read from that side. Pair with sleeveless tops or a muscle tank for warm-weather display.
22. Tiny Angel Outline on the Side of the Finger
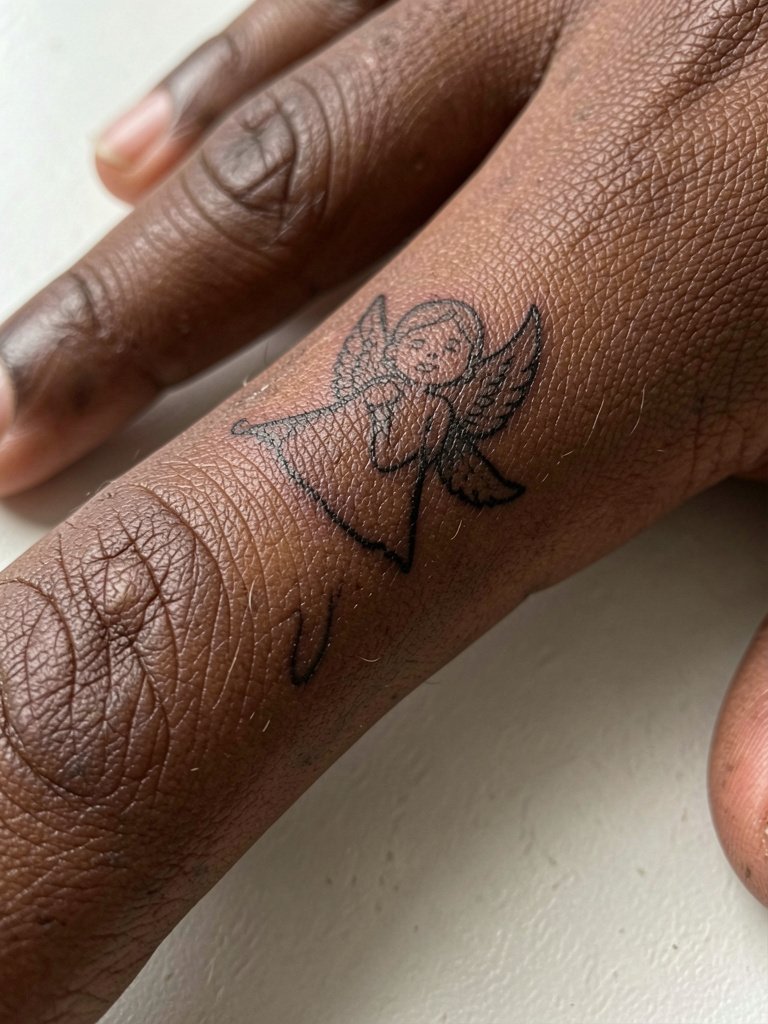
Side-of-finger placements are playful but they face constant friction that can erase thin outlines. Expect a quick session and a realistic plan for touch-ups. The most frequent issue is wanting single-needle curls that disappear after months. Ask the artist to reinforce the outline with a hairline increase in thickness so the wing tip remains visible. When accessorizing choose open rings and hardware-free bands to avoid rubbing.
23. Angel Foot Tattoo with Roman Numerals
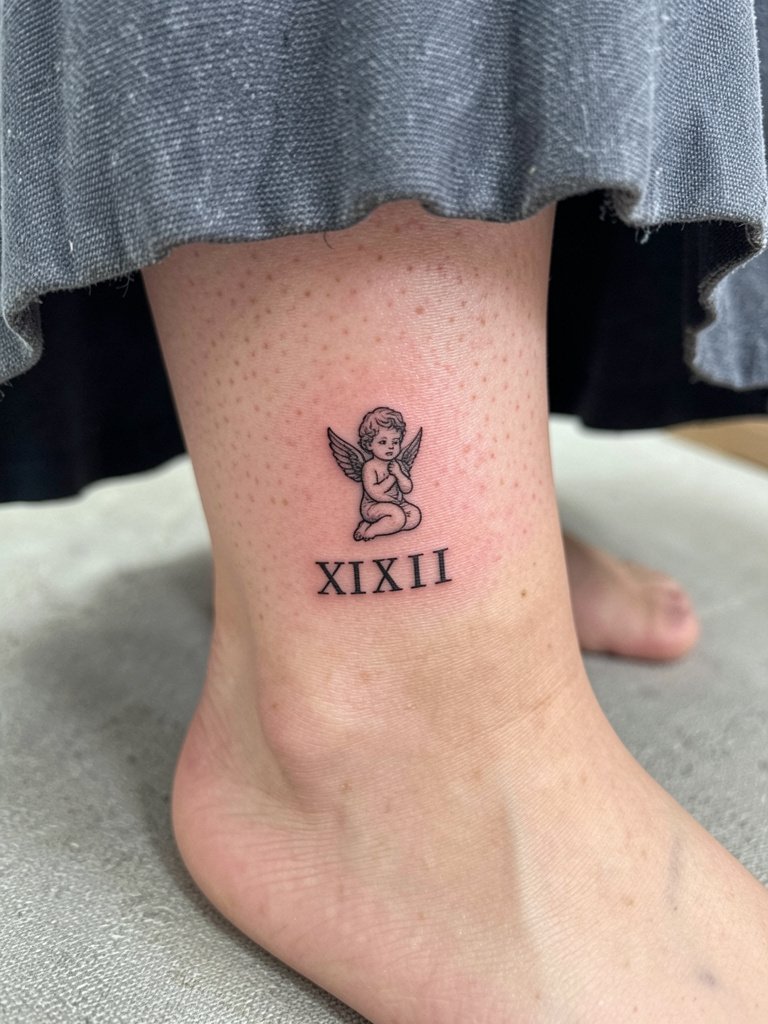
Including text like Roman numerals requires precise sizing so the numbers do not blur into lines. The top of the foot is a high-wear area and usually needs touch-ups sooner than other spots. A practical mistake is choosing tiny numerals with ornate serifs that become unreadable. Specify the exact font size and ask to see a stencil test at full scale. For shoes and sandals, minimalist slip-ons keep the piece visible while reducing abrasion.
Frequently Asked Questions
Q: How do I pick between fine line and blackwork for a baby angel design on visible spots like the wrist or forearm?
A: Fine line looks delicate at first but can feather on wrists and fingers. Blackwork or slightly heavier linework keeps the silhouette readable for longer. Consider the expected daily friction for that placement and ask the artist to show healed examples in similar sizes.
Q: I want a chest or religious angel motif, is there a cultural or religious sensitivity I should consider?
A: Yes, religious iconography carries cultural meaning for many people, so treat it thoughtfully. One camp prefers literal devotional imagery when the piece is meant as a faith expression. Another camp urges stylistic abstraction to avoid appropriation or misrepresentation. If the design draws from a tradition, mention you want respectful representation and share context with the artist.
Q: Where can I find healed examples and portfolios without naming artists directly?
A: Search platform tags and keywords like #babyangeltattoo, #angelinked, and #smalltattoos on Instagram and TikTok, and use location filters to see nearby portfolios. Reddit tattoo threads and portfolio sections on tattoo booking sites are also helpful for healed photos in different skin tones.
Q: What should I wear to my session for a sternum or rib tattoo and can I bring clothing changes?
A: Wear fitted, layered clothing that gives the artist access without shifting the stencil, such as a fitted sports bra or a crop top that you can remove easily. Bring a loose hoodie or button-up to put on after the session for comfort. If you prefer modesty consider bringing a spare fitted top to change into for travel.
Q: How long before I should expect a touch-up for fine-line baby angel tattoos on hands or feet?
A: Hands and feet commonly need a touch-up within 12 to 18 months because of constant washing and friction. Outer arm and shoulder pieces often hold longer, sometimes three to five years before a touch-up is useful. Plan your first follow-up at six to twelve months so the artist can evaluate settled saturation.
Q: Can I get a micro-realism angel on dark skin and expect the same level of detail?
A: Micro-realism works on dark skin but it requires an artist experienced with contrast calibration and ink choices for deeper tones. One approach uses slightly bolder anchors and stipple shading to retain facial detail while respecting natural pigmentation. Ask to see healed work on similar skin tones during your consultation.
