
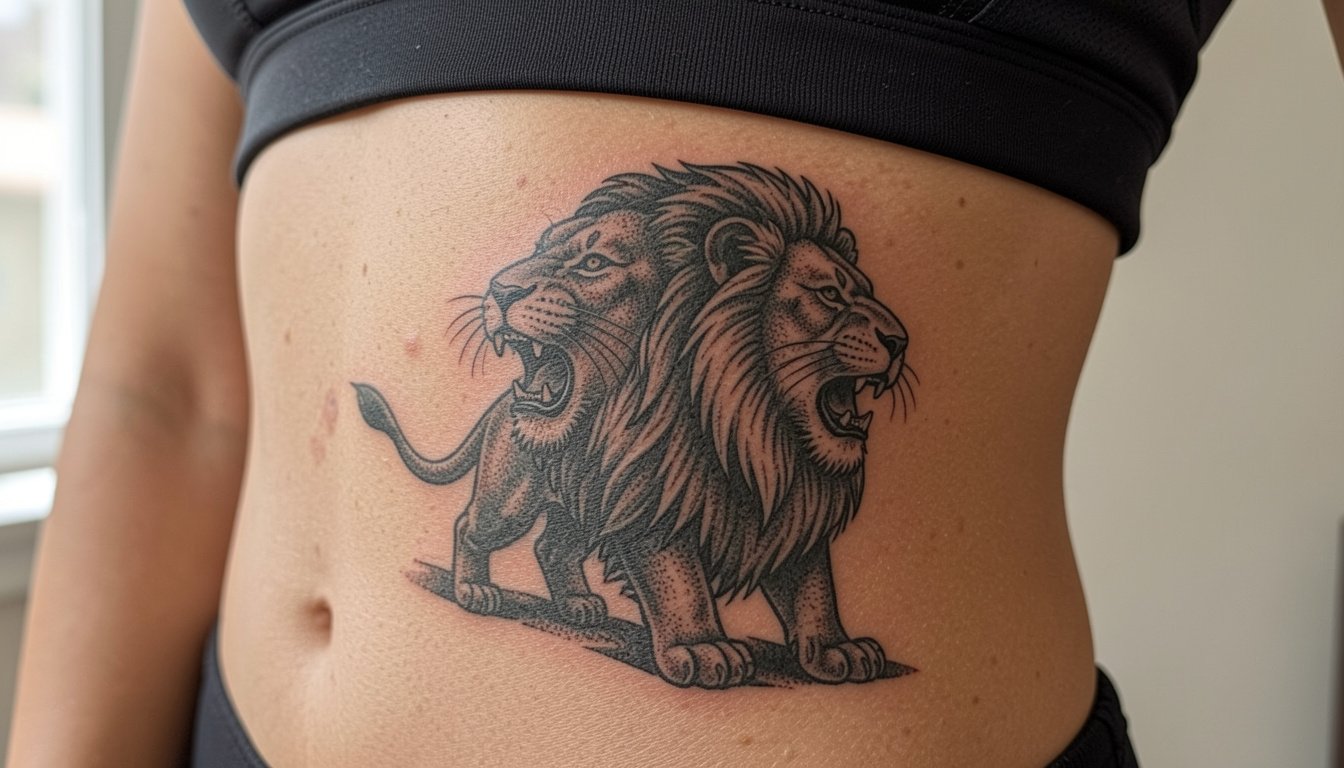
The side torso ribcage skin is unforgiving and flattering at once, so a good rib tattoo is as much about flow and spacing as it is about imagery. Expect sharp sessions, honest pain, and decisions that affect how a piece looks at year one and year five. Read these 27 ideas with notes on longevity, what to bring to your consultation, and wardrobe tips that actually make the ink look like it belongs to your body.
1. Fine Line Quote Along the Side Torso
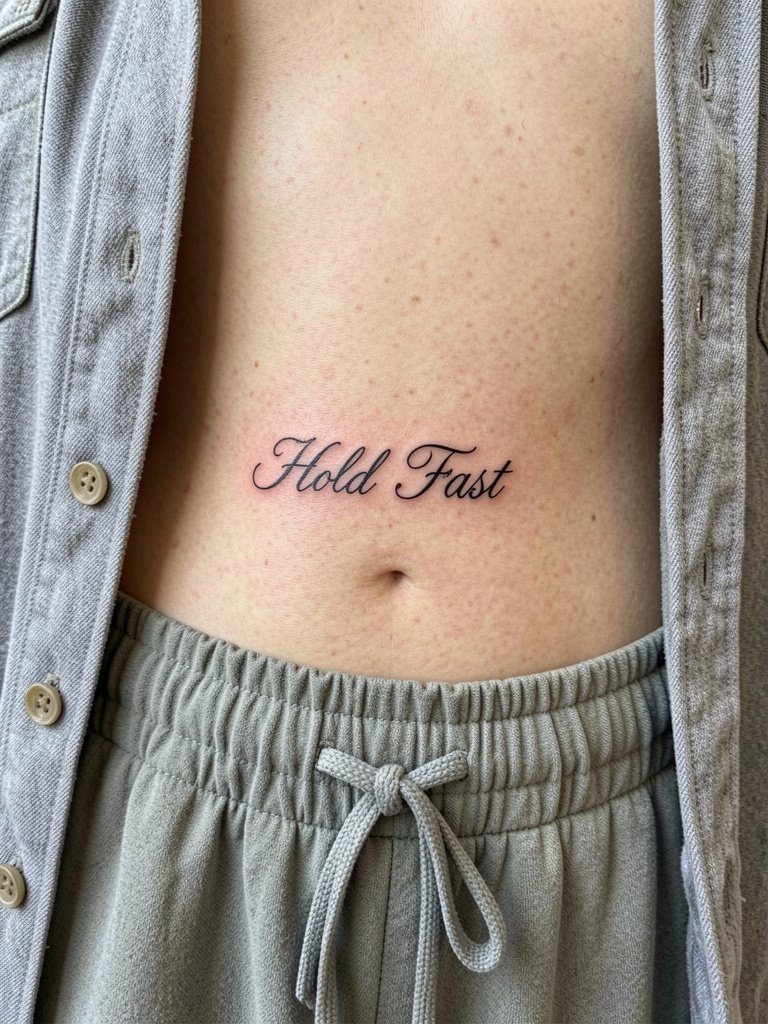
A slim script takes advantage of the long side torso ribcage skin, but fine line here is controversial. One camp says fine line blurs on the ribs because the skin flexes and the lines are too close together. The other camp says if you slightly widen spacing and use confident needle depth the script will read clean for years. If you want this look bring two reference photos at different scales so you can compare how spacing reads at three inches versus five. For the session, wear a button-front shirt you can lift without tugging the fresh work. Expect a 45 to 90 minute appointment depending on length, and a touch-up is common around year two.
2. Roaring Lion Blackwork Across the Side Torso
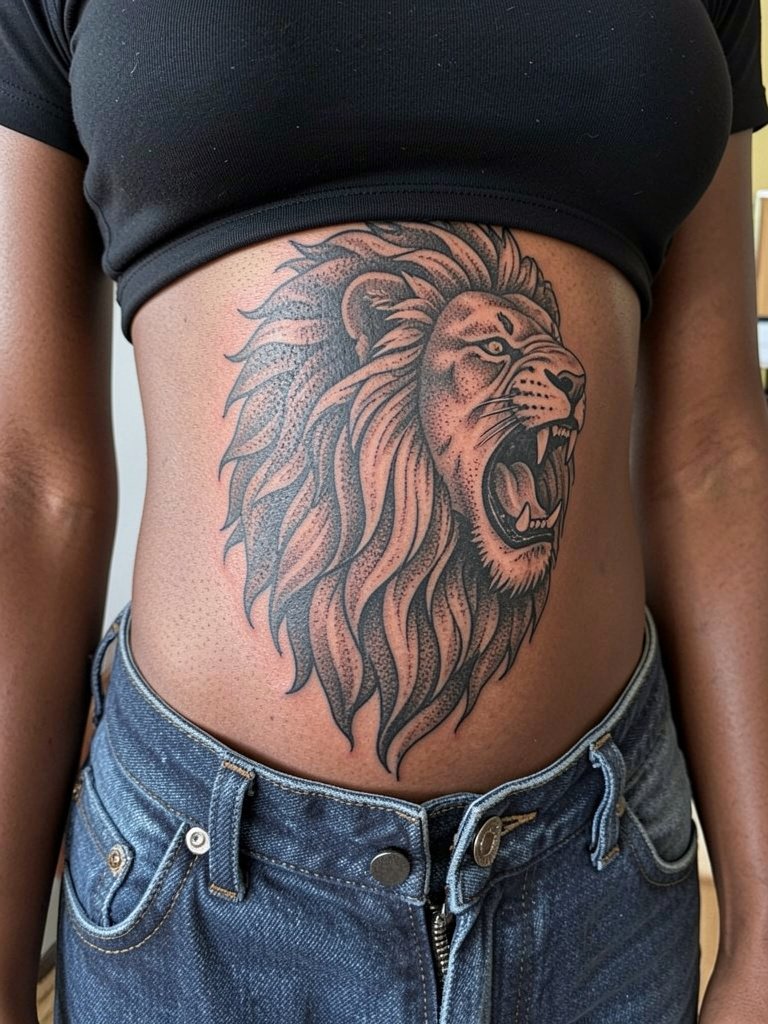
A roaring lion reads as a bold side-torso statement because the mane can follow the torso curve. Ask for strong linework and a touch of stipple shading rather than tiny interior detail, because crammed detail on this placement tends to age into muddiness. Session time is typically two to three hours for a medium composition, and heavier saturation helps the piece stay readable after the initial settle. Pair this with a fitted black tee to show contrast in casual settings. Blowout risk is moderate if lines are placed too close to the rib fold, so the stencil should be mapped to the curve with the body relaxed.
3. Snake Wrapping from Upper Ribs Toward the Waist
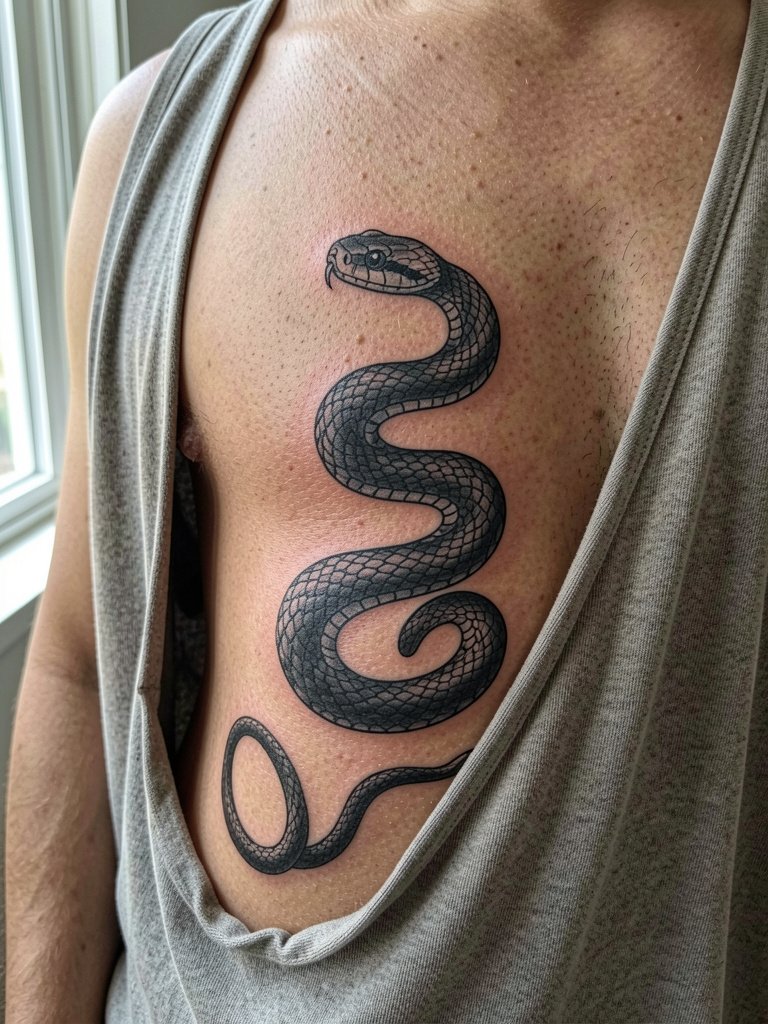
A wrapping snake makes natural use of the side torso ribcage skin because its curve mimics your silhouette. Tell your artist you want deliberate scale patterning and a slightly heavier outline where the skin creases to prevent blowout. The usual mistake is forcing too many tiny scales into a narrow band. At six months the linework looks crisp, by two years lighter internal shading may need a touch-up, and heavy saturation reduces that fade. For showing it off, wear an open flannel or a sleeveless muscle tee. If you are sensitive to pain, plan two shorter sessions rather than one long grinding pass.
4. Koi Fish Swimming Up the Side Torso
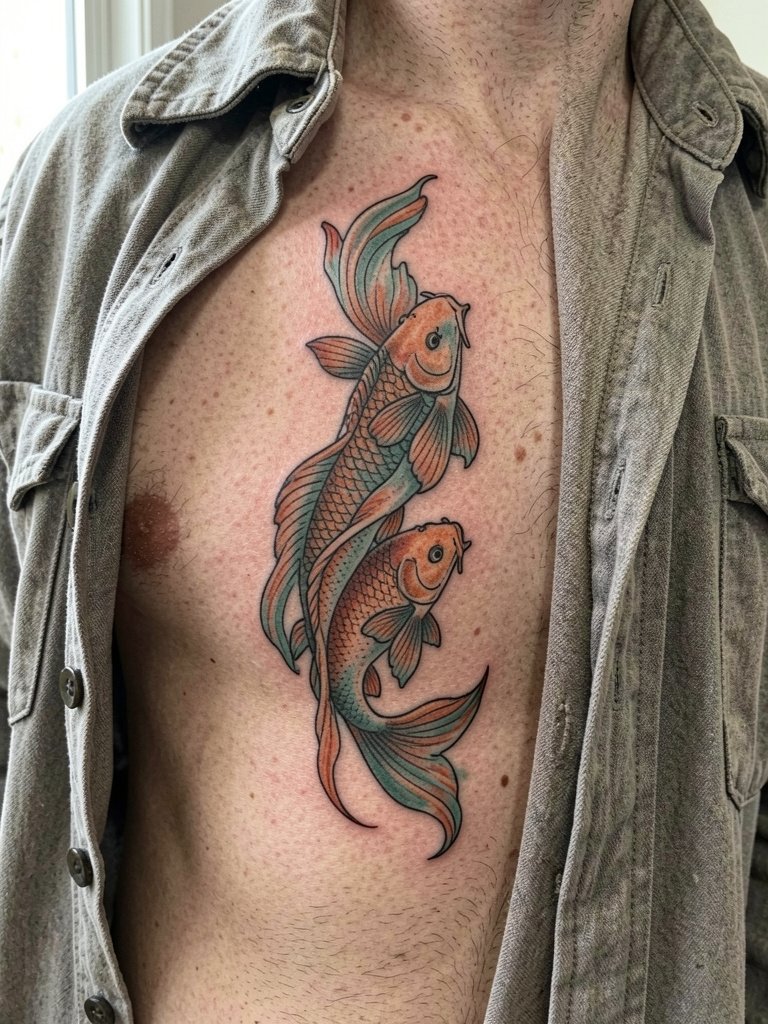
Koi work suits a longer vertical on side torso ribcage skin because scales and water flow follow the body. Color brings life but also a maintenance conversation, because saturated color sometimes needs periodic touch-ups where sun and friction hit. Specify mid-range saturation rather than neon fills to balance longevity with the visual pop. For session wear, choose an easy-open button-down so the artist can access both upper and lower ribs without tugging fabric. If you want the koi to look like it is moving, keep negative space around fins rather than packing every inch with detail.
5. Dragon Spine-to-Rib Extension
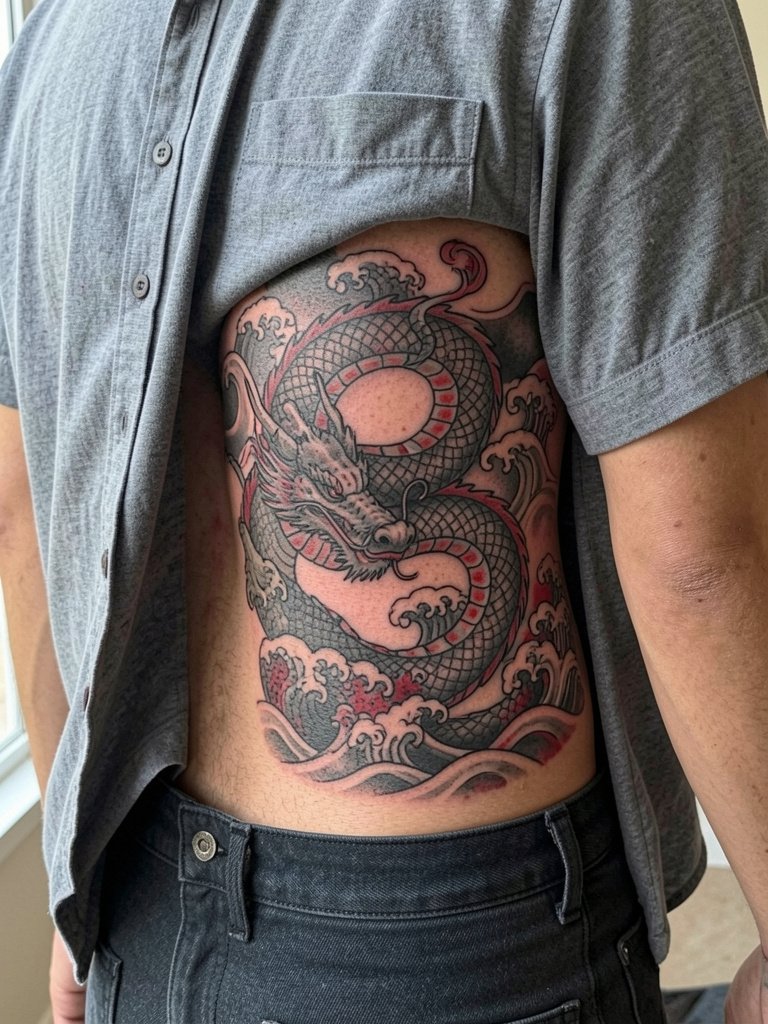
Japanese-style dragons are dramatic on side torso ribcage skin, but they spark a color debate. One camp recommends black and gray for predictable aging on this stretch-prone area. The other camp argues that carefully saturated color is fine when the artist uses contrast and strong outlines. If you want color, ask for punchy contrast around scales so the piece keeps shape as color settles. Large dragons usually take multiple sessions. For show-off outfits, an open camp-collar shirt keeps the composition visible and lets the piece breathe visually.
6. Geometric Panel That Follows the Torso Curve
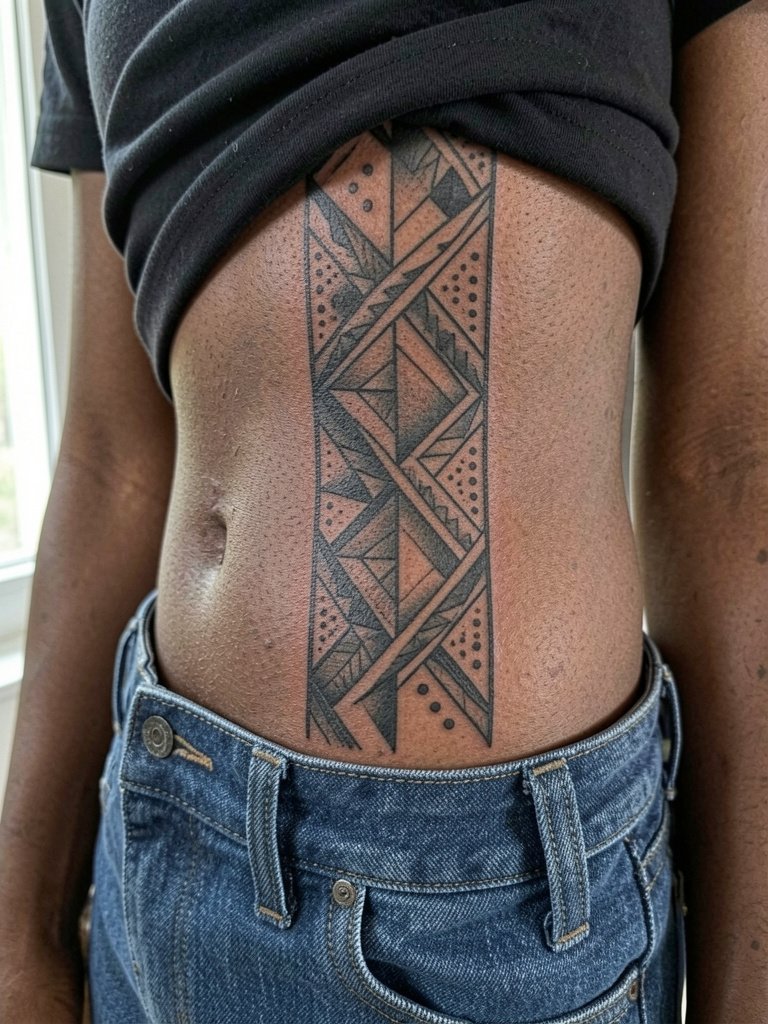
Geometric blackwork reads modern on the side torso because the vertical repeat complements the torso shape. The common mistake is making lines too thin in a tight area. Ask for slightly heavier linework up front, and for the artist to test a one-inch mock stencil on your skin so the spacing reads well when you breathe. Dot work fills age reasonably if placed with breathing room. For outfits, clean monochrome layers highlight the symmetry, so pair the piece with a plain tee or structured overshirt to keep the geometry as the focal point.
Pre-Session Essentials
These first half designs put varied pressure on the ribs, so a few small items smooth the session and the first week.
-
Tattoo-specific healing wraps. Breathable wraps reduce friction from waistbands and can be a cleaner alternative to thick ointments for the first 48 hours on side torso work.
-
Breathable adhesive recovery sheets. Sheets designed for body panels hold without trapping excess sweat, which helps on the side torso where movement is constant.
-
Light unscented body lotion. A thin, fragrance-free lotion can be more comfortable than heavy balms under shirts as the tattoo moves and the skin stretches.
-
Thin protective second-skin sheets. A low-profile second-skin option is handy for the first day if you expect a lot of fabric contact at the waistband.
-
Fragrance-free gentle body wash. Cleanses without irritation during showers in the healing window, which matters for pieces that sit low near pant bands.
7. Minimal Mountain Range Horizon Line
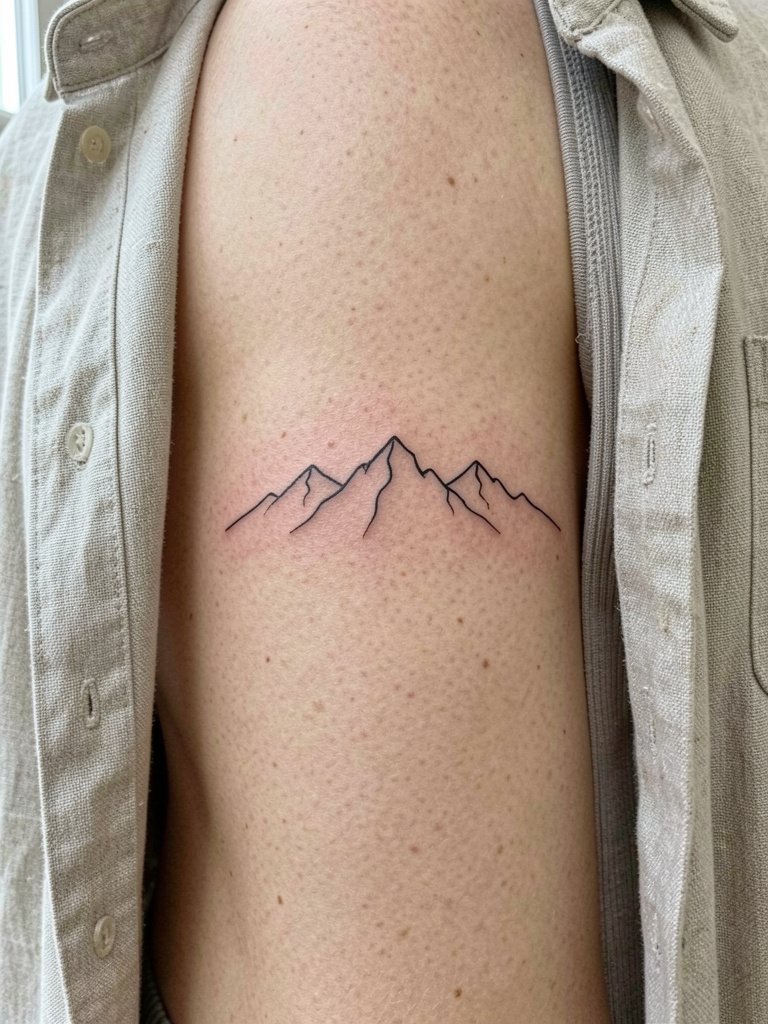
A slim horizon line is subtle and masculine on the side torso. The main mistake is making the line so thin it disappears after healing. Ask for a fractionally heavier outline and reserve needle single-needle only for the lettering or tiny accents. At six months the line will soften slightly, and by five years a light touch-up can restore crispness. For casual show-off looks, pair with an open linen overshirt in cream or olive to let the simple silhouette peek through.
8. Crescent Moon and Star Cluster Compact Piece
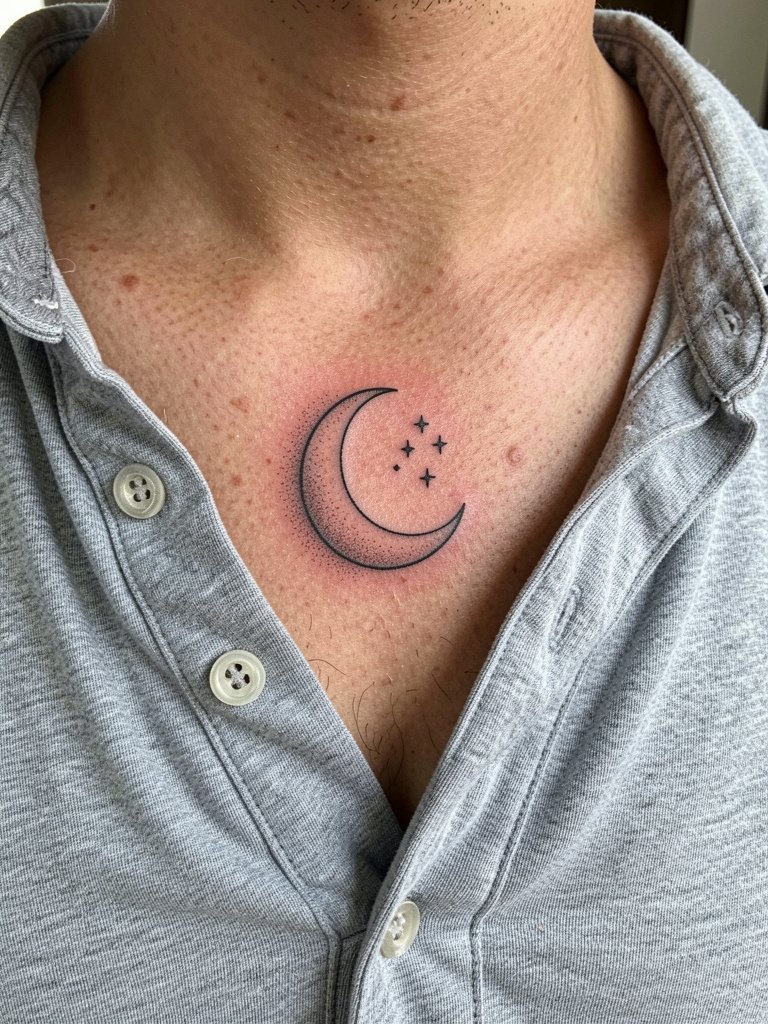
Compact celestial symbols sit higher on the side torso where visibility is easier and pain is often slightly lower. Tiny dot clusters are charming, but if dots are too close they can coalesce over time. Request a sampling stencil showing negative space around each star so you can see how it will age. For a show-off pairing, try a relaxed henley or an open shirt that exposes the upper rib area. Session time is short, often under an hour, and touch-ups depend on how the dots settle after the initial month.
9. Ornamental Mandala Vertical Panel
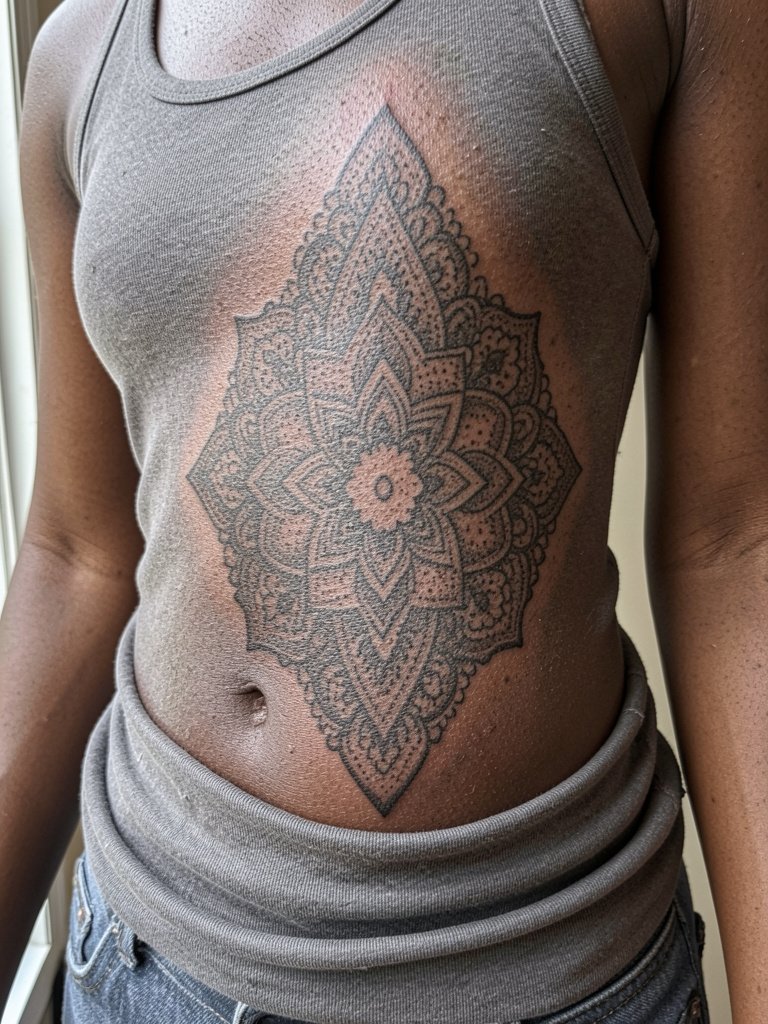
Mandala panels work vertically because symmetry reads well when it follows the side torso contour. The usual mistake is shrinking the pattern too much. Mandalas need breathing room between elements to avoid muddiness at year three. Ask the artist to space petals a touch wider than your reference to account for skin shift. Pair with monochrome layers and minimal accessories so the detail is the focal point. Larger mandalas may need two sessions to preserve crisp stipple shading.
10. Baby Elephant with Dotwork Accents
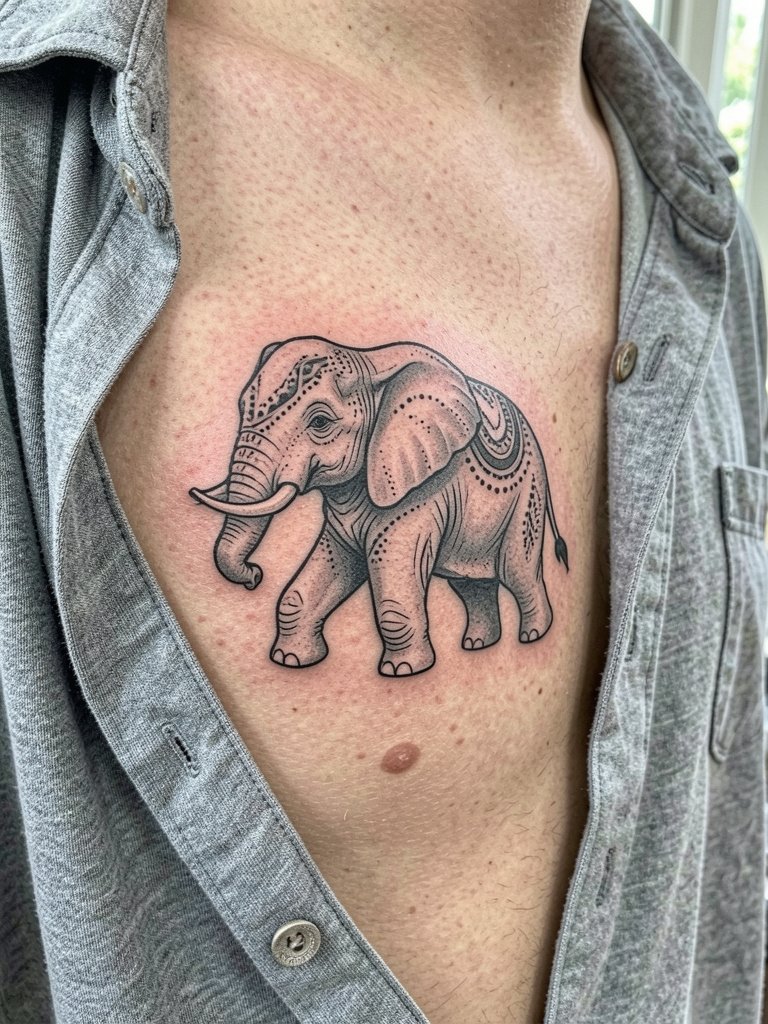
An animal motif with softer features translates well on side torso ribcage skin and reads as personality without needing a giant composition. Dotwork accents can add texture, but too many tiny dots in tight curves can fill in as the tattoo ages. Ask for balanced negative space around the trunk and feet so the silhouette remains readable. Session time is typically one to two hours. Pair the finished piece with a fitted tank and a clean chain for a relaxed, masculine look.
11. Bird Mid-Flight Spanning Hip to Upper Ribs
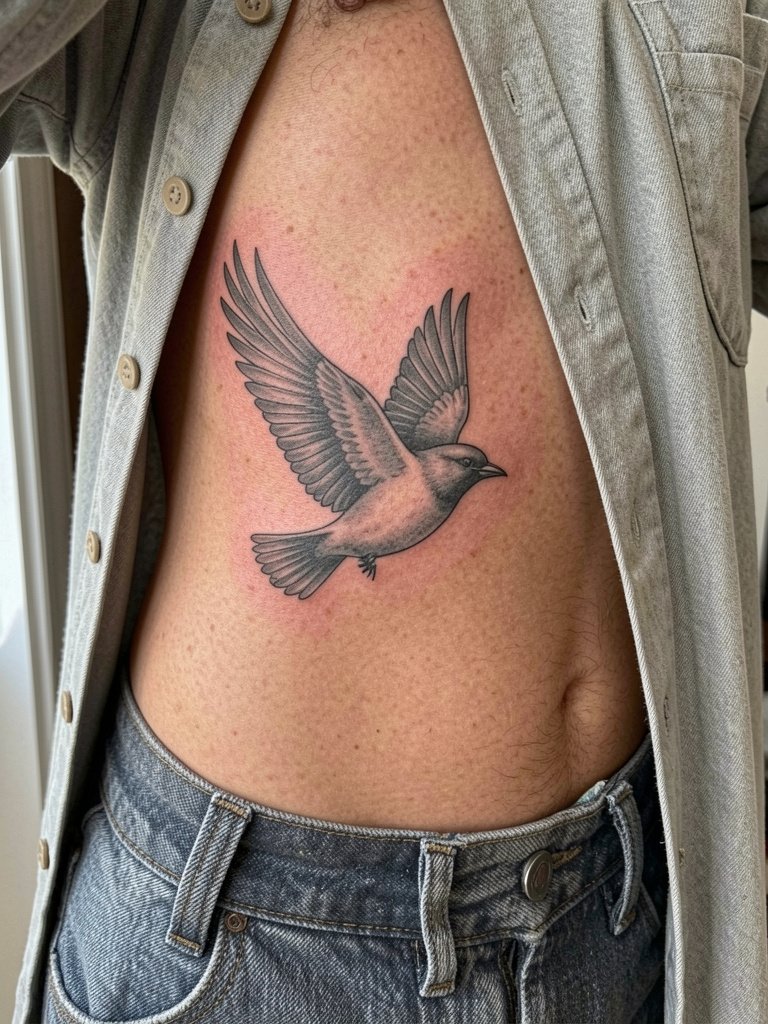
When a bird stretches along the ribs it creates movement and a sense of lift. The mistake is putting too much tiny feather detail close to the waistline where creasing and waistband friction will blur it. Ask for bold primary contours on the wings with softer internal shading for motion. For showing it off, an open camp-collar shirt or a relaxed short-sleeve button-up frames the wing spread without hiding it. Plan for one to two sessions, and expect lighter shading to need a touch-up by year three if you sunbathe frequently.
12. Bold Traditional Flag or Emblem
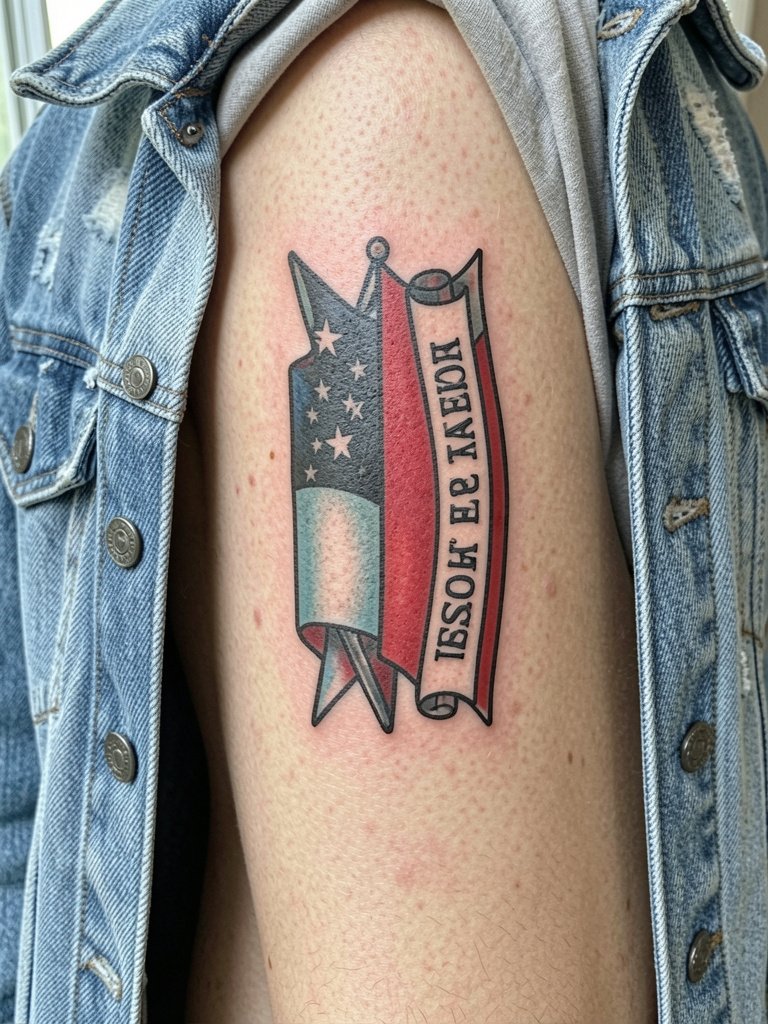
Traditional emblems with bold black outlines are durable on side torso ribcage skin because the design reads from a distance. The common error is adding excessive fine script inside a small banner. Keep lettering chunky and legible. This style pairs well with heavier fabrics and workwear looks, such as a denim jacket worn open. A medium-sized emblem often completes in one session, and color saturation helps the piece survive years of sun and friction.
13. Classical Bust in Micro-Realism
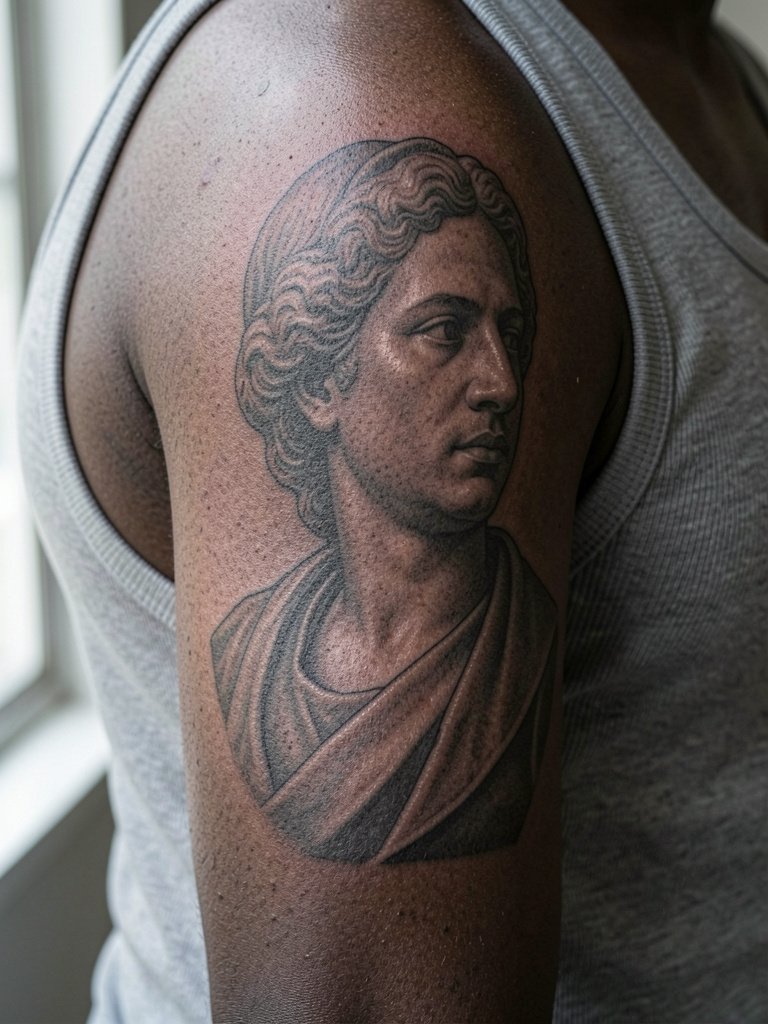
A classical bust brings a refined, unexpected edge to the side torso. Micro-realism requires wider spacing and bold contour where the skin moves to avoid smudging. Bring scaled reference images that show the bust at the intended final size so the artist can judge detail density. These pieces often need two sessions for depth and tone. For a gallery-style reveal, monochrome layers and a fitted tank let the portrait read clearly without competing accessories.
14. Abstract Linework Gallery Composition
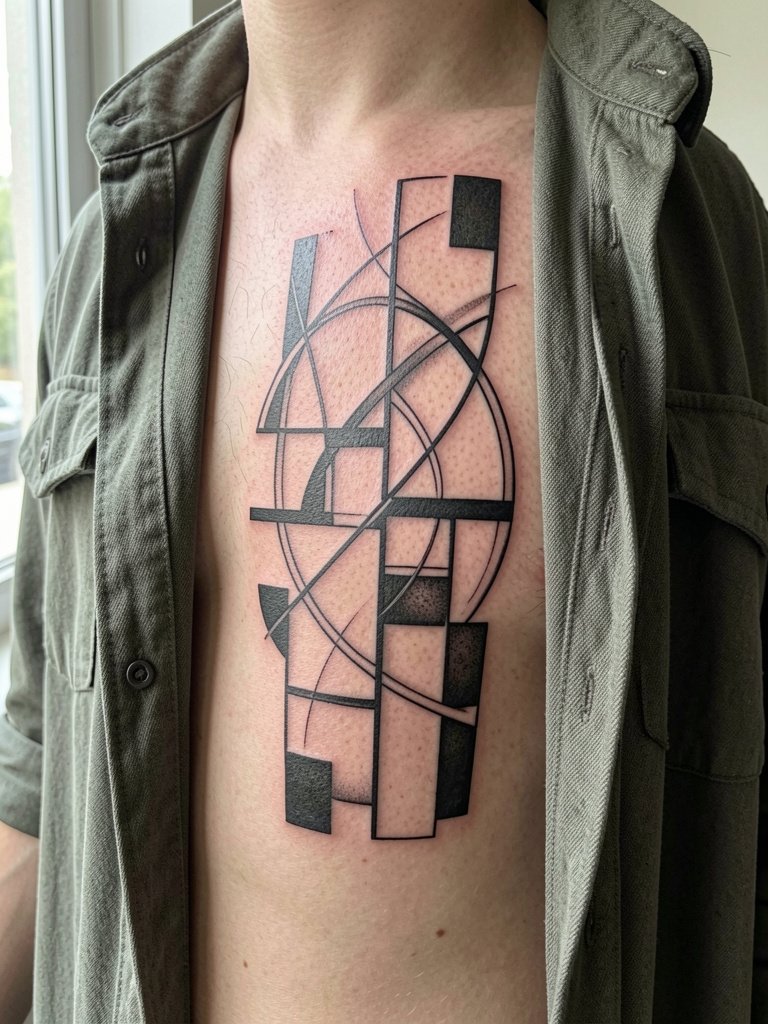
Abstract gallery pieces avoid cliché imagery and suit the rib curve when lines are mapped to the body. The frequent mistake is forcing symmetry where the torso has natural asymmetry. Ask the artist to draw the composition on you and move while breathing so the shapes sit with your anatomy. Pair the piece with crisp plain tees or a structured overshirt for a modern look. This style often finishes in one session if kept medium in scale, and touch-ups are usually light.
15. Coordinate Line with Fine Script
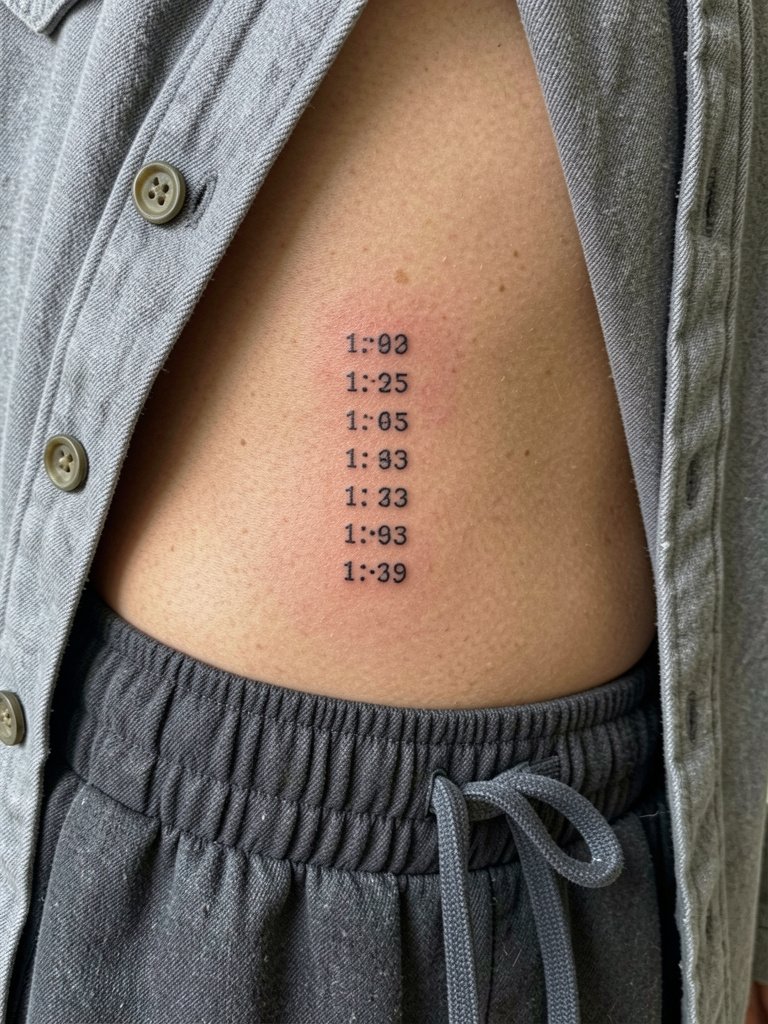
Coordinates read as compact but deliberate on the ribs. The main mistake is using ultra-thin type without spacing, which can blur over time. Choose a slightly heavier monospaced font and be specific about exact characters and punctuation so the stencil is exact. Session time is short, and the piece is easy to conceal or show. Wear low-rise pants and a button-front shirt to the appointment so the artist can access the area without a tight waistband rubbing the fresh ink.
16. Single Needle Compass with Subtle Shading
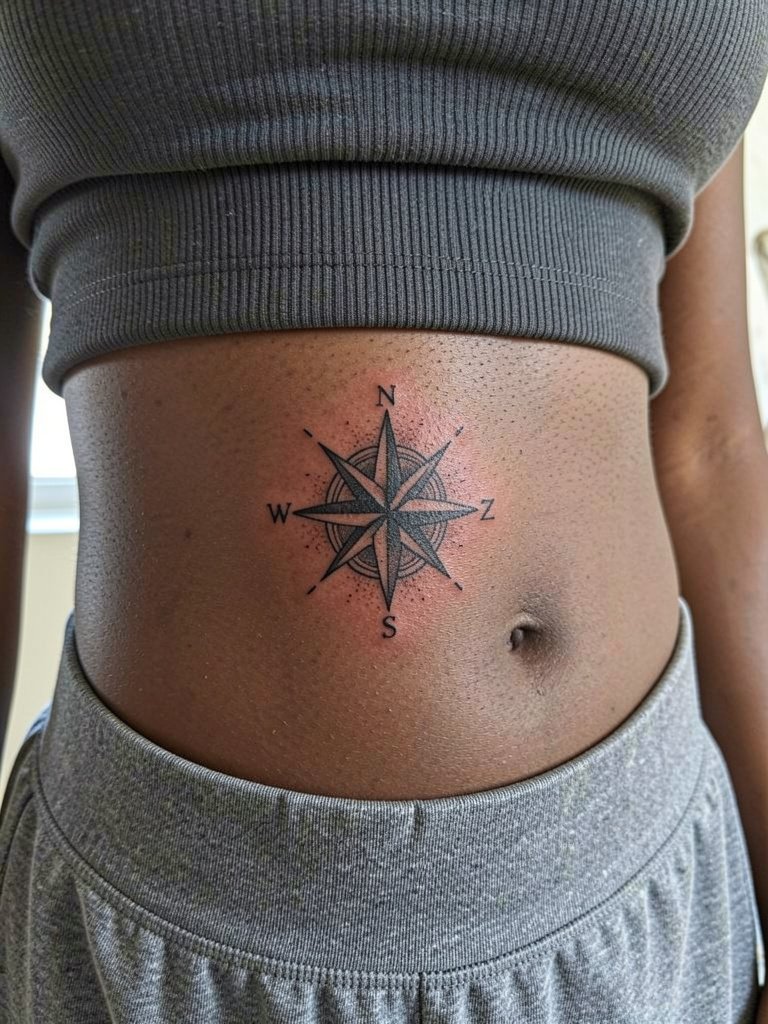
A precise compass works well on the side torso when line weight is adjusted for movement. Single-needle detail is attractive but risky on the ribcage, so ask for slightly bolder primary lines and delicate internal detail. For the session, a loose tank makes access simple without fabric rubbing the new ink. This piece usually takes under two hours and often needs a small touch-up after the first healing cycle to keep points crisp.
17. Minimalist Wave Band Along the Rib Curve
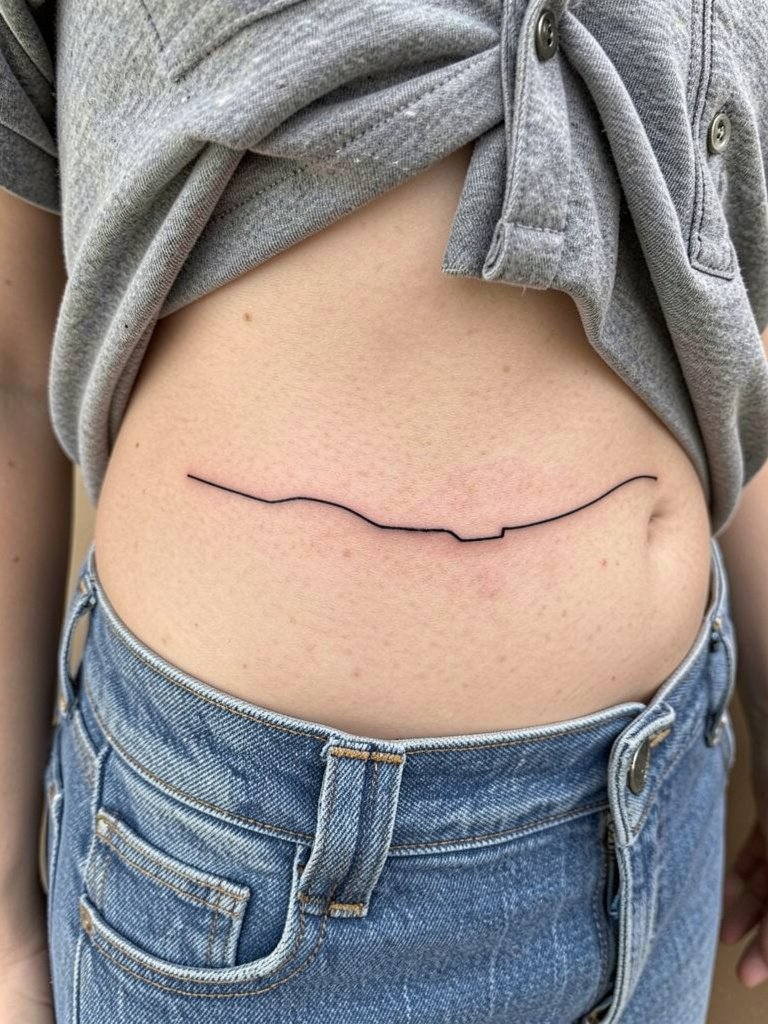
A minimalist wave band is subtle and masculine when it hugs the rib curve. The error people make is making it too thin and too close to the waistband. Place the band slightly higher than the waistband and choose a line weight that survives normal settling. For the session, wear low-rise jeans that fasten comfortably below the area so no metal hardware presses on the fresh tattoo. Expect a short appointment and minimal touch-up needs if spacing is respected.
18. Stipple-Shaded Anchor with Rope Detail
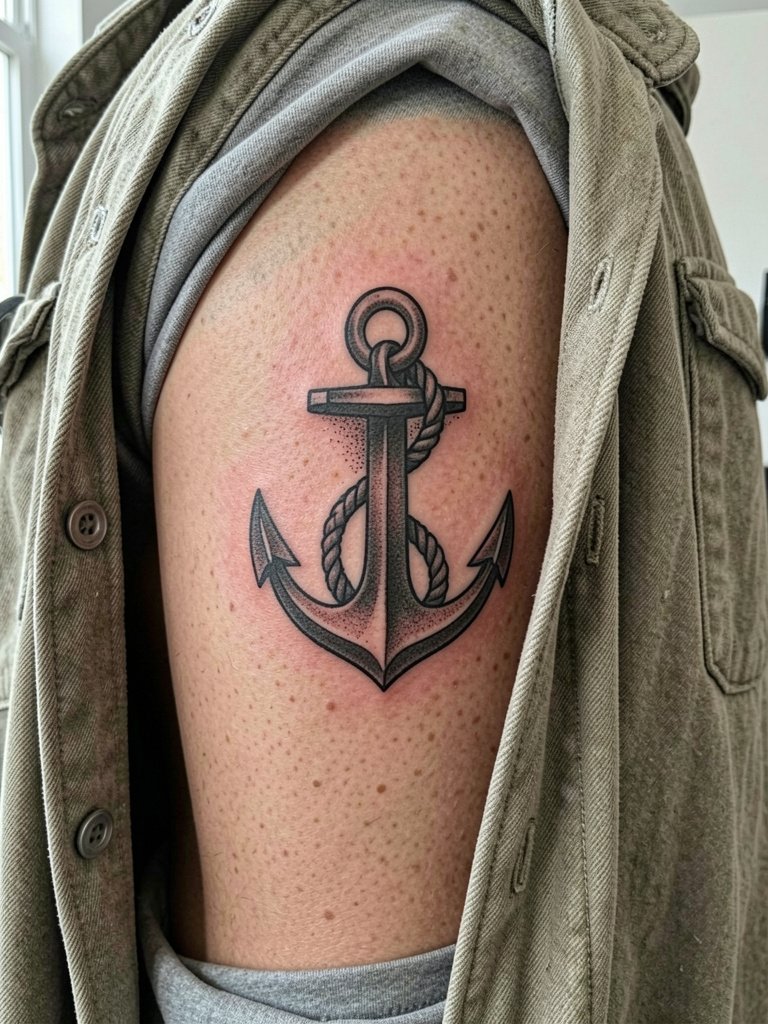
An anchor reads rugged and pairs with rope texture for visual interest. The common mistake is over-detailing the rope in a tight band. Keep rope segments larger and allow negative space between twists. For a session, wear a loose tee that can be lifted without pulling across the area. This piece often finishes in one session and holds up well with bold outlines and stipple interior shading.
19. Phoenix Rising Along Side Torso
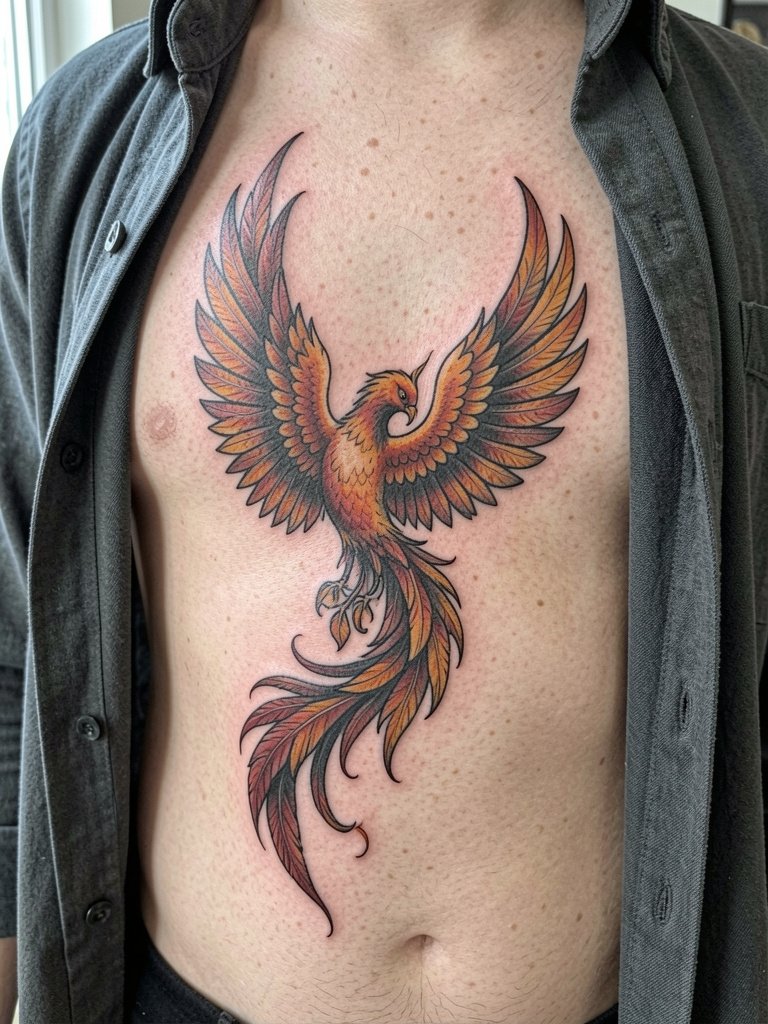
A phoenix needs vertical space and benefits from strong contrast to survive the first years. If you want color, ask the artist to anchor the wings with black outlines so the composition keeps shape as color softens. Large pieces often need multiple sessions and careful sunscreen after healing. For outfits, a clean monochrome top or open shirt shows the upward motion best. Discuss realistic touch-up timelines so you are not surprised if a second session is suggested after the first year.
20. Geometric Snake Hybrid Panel
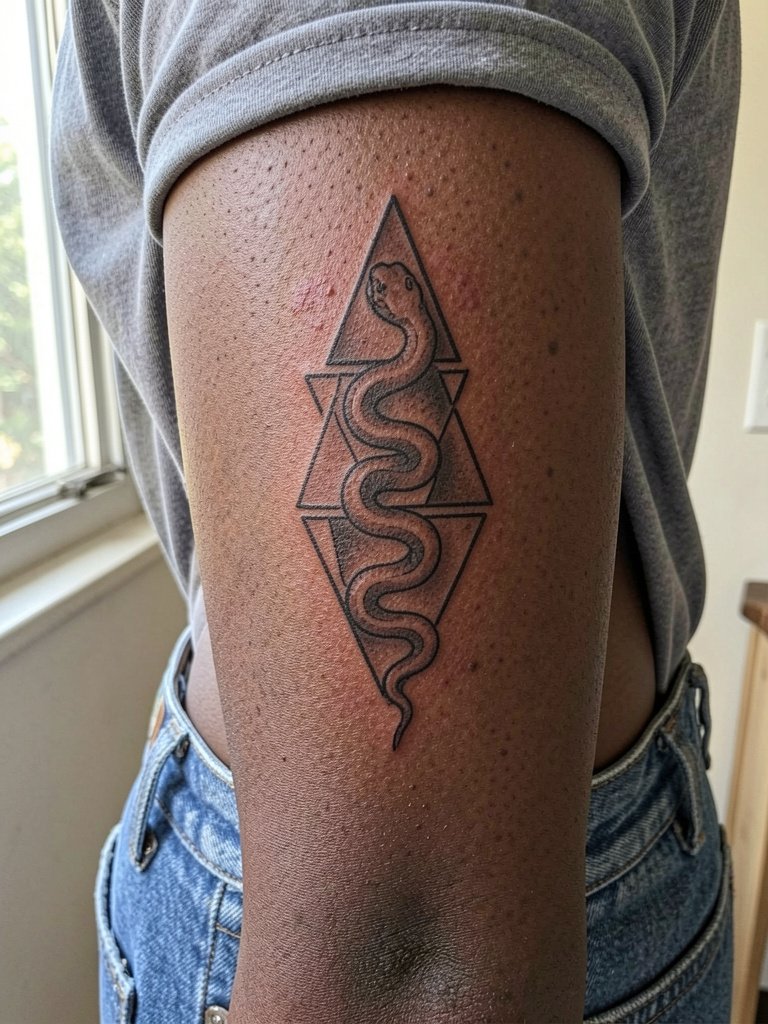
Mixing geometric shapes with an animal silhouette gives modern contrast while following the body curve. The typical mistake is overcomplicating the geometry so the eye has nowhere to rest. Keep a dominant shape and let the snake weave through negative space. For the session, wear a plain tee or structured overshirt that moves easily. This hybrid often finishes in a single longer session if not overscaled.
21. Small Portrait Silhouette in Black and Gray
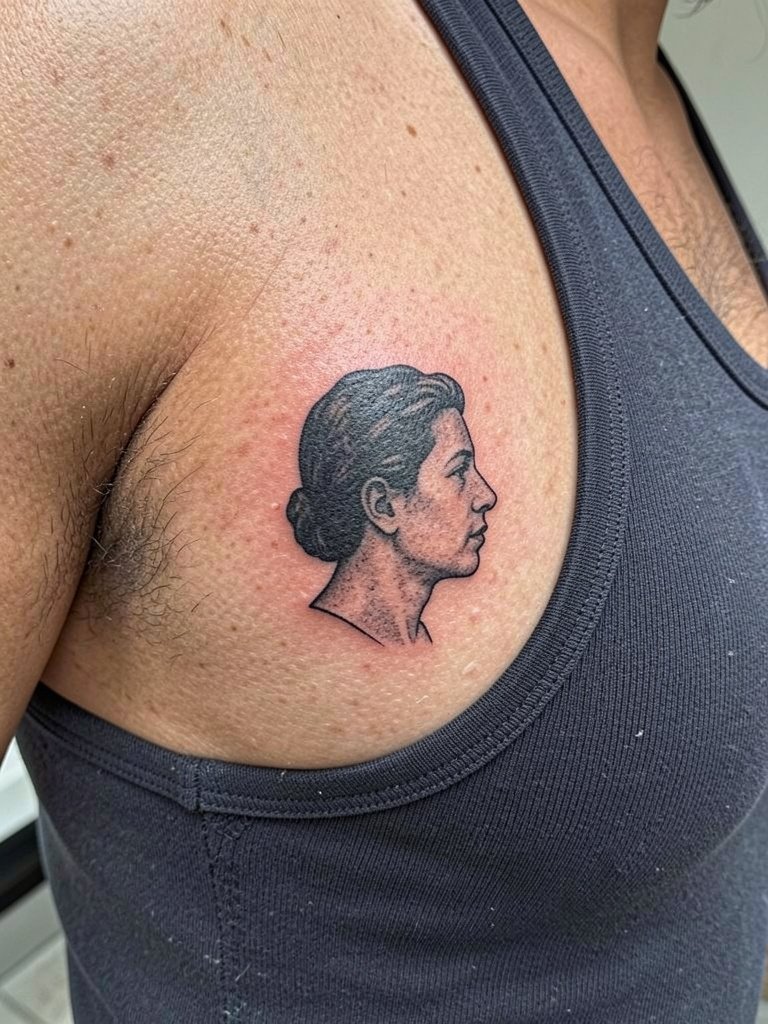
Portrait silhouettes avoid the detail trap while offering a personal marker on the ribs. The mistake is asking for full photorealism at a tiny size. Reduce detail and emphasize bold contour instead. Bring a cropped reference that represents the final scale so the artist can judge line weight. Plan for a single session and expect a small touch-up window after healing if edges soften.
22. Baroque Ornamental Scrollwork Panel
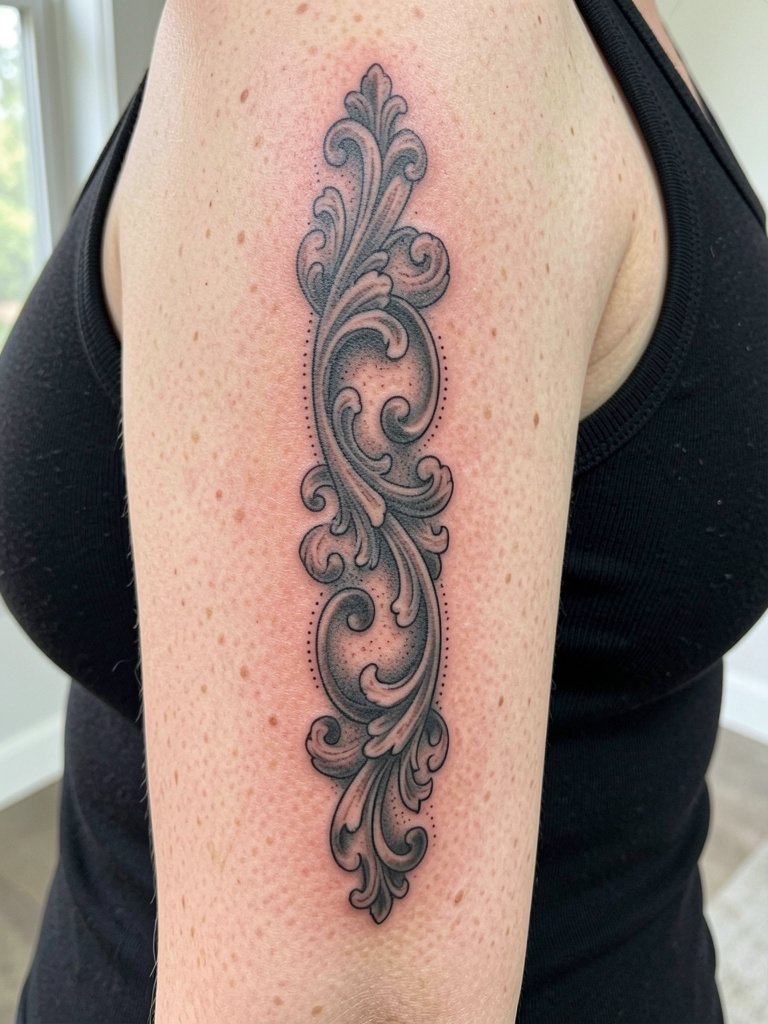
Baroque scrollwork fills vertical space elegantly but needs breathing room. Ask for simplified negative space in the inner curls to prevent fill-in. For showing off, a monochrome layered outfit and fitted tank keep attention on the ornate pattern. Large ornamentals often require two sessions to let the artist build depth without overworking skin. Touch-ups after the first healing cycle are common to restore crisp filigree.
23. Negative-Space Triangle Cluster
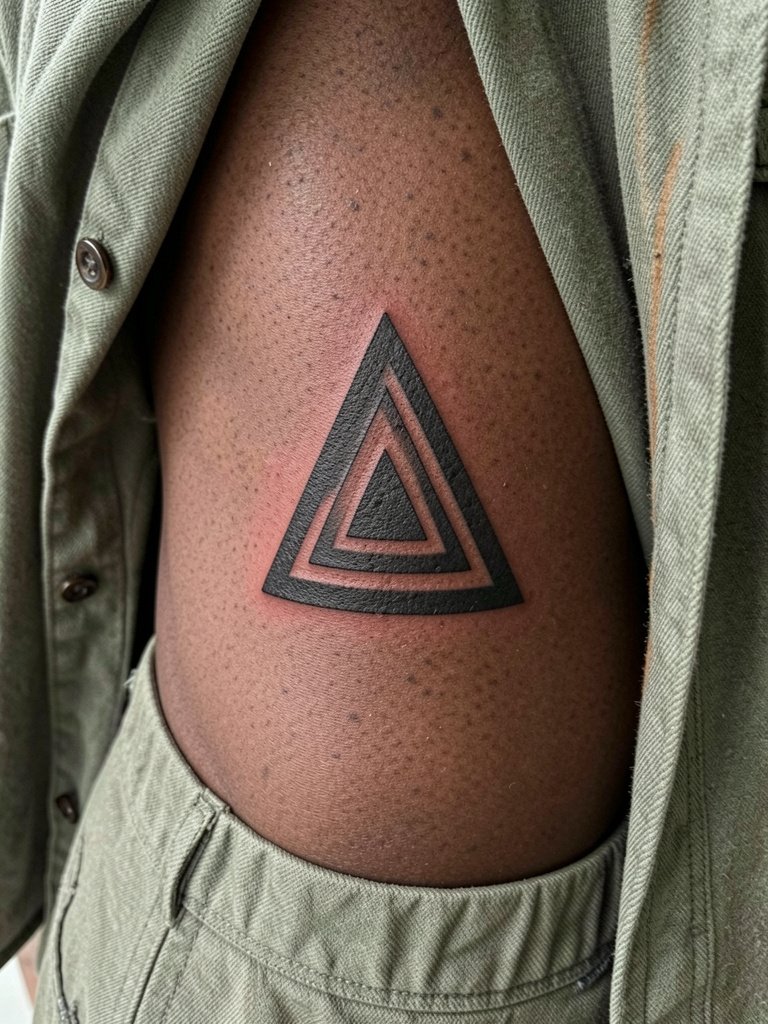
Negative-space compositions rely on crisp edges to read well. The common error is using thin negative margins that fill in over time. Request a test stencil and ask the artist to leave a buffer around each triangle. This piece is low-pain and quick, and it pairs cleanly with fitted tanks or overshirts. Expect a small touch-up once healed to maintain the black-to-skin contrast.
24. Roman Numeral Column Down the Rib
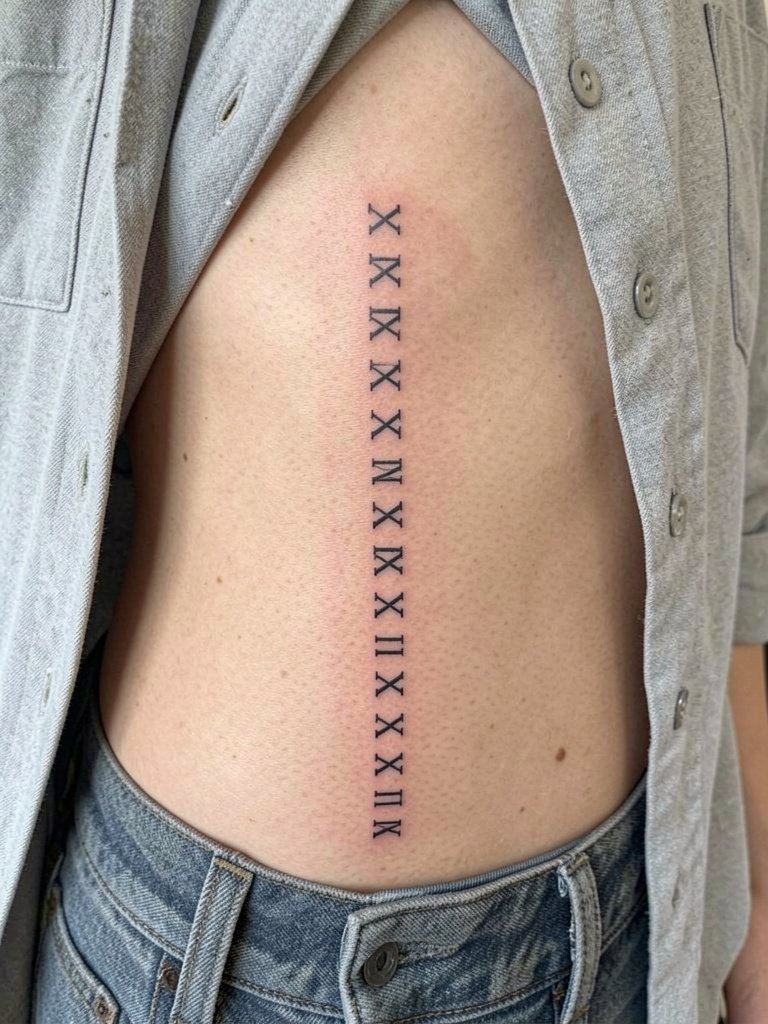
Roman numerals work when spacing is deliberate. Avoid ultrafine type and request slightly larger gaps between numerals because the side torso shifts with breathing and motion. Bring exact characters and formatting to the appointment to prevent transcription errors. For the session, wear a button-front shirt you can open without tugging the tattoo area. Touch-ups are common if numerals sit near high-friction areas like waistbands.
25. Thin Key and Lock Illustration
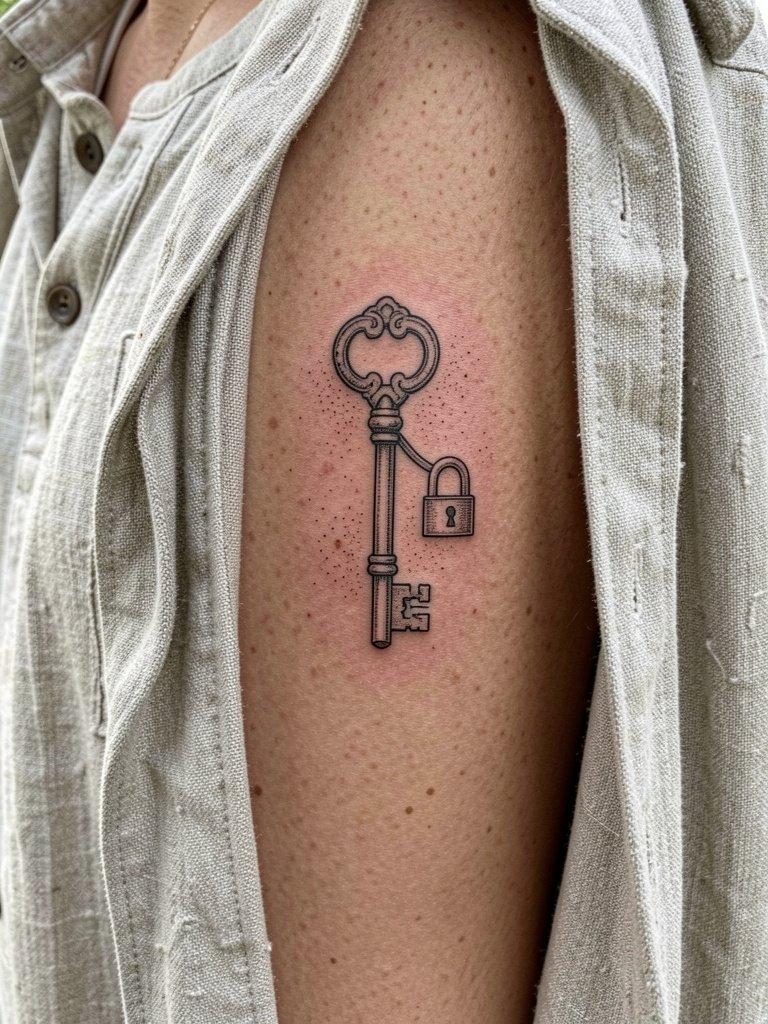
Keys and locks read small and personal on the ribs, but fine filigree must be scaled up slightly to survive. Ask for bolder primary lines around the key shaft and avoid tiny notches that will blur. For the session, wear a loose shirt that opens easily. This piece is friendly to a single shorter session and pairs nicely with an open linen overshirt when you want to show it without loud contrast.
26. Single-Needle Feather Falling Along the Ribs
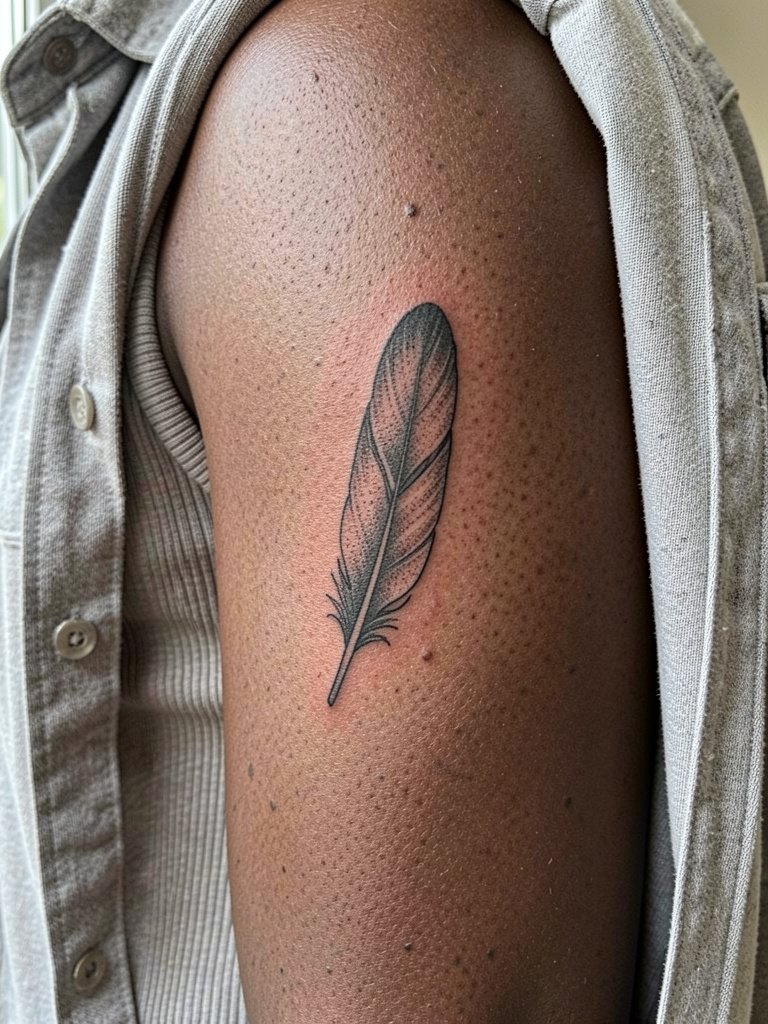
Feathers look delicate but are prone to blur on ribs if drawn too fine. The safer route is to request slightly heavier central shaft lines with softer barbs. Single-needle detail requires a very steady hand and may need a dedicated touch-up down the line. For showing it off, try a ribbed tank or open shirt to let the feather fall naturally. Session time is moderate and the piece often needs a small follow-up to keep the split shaft crisp.
27. Broken Chain Link Band Wrapping Low on the Ribs
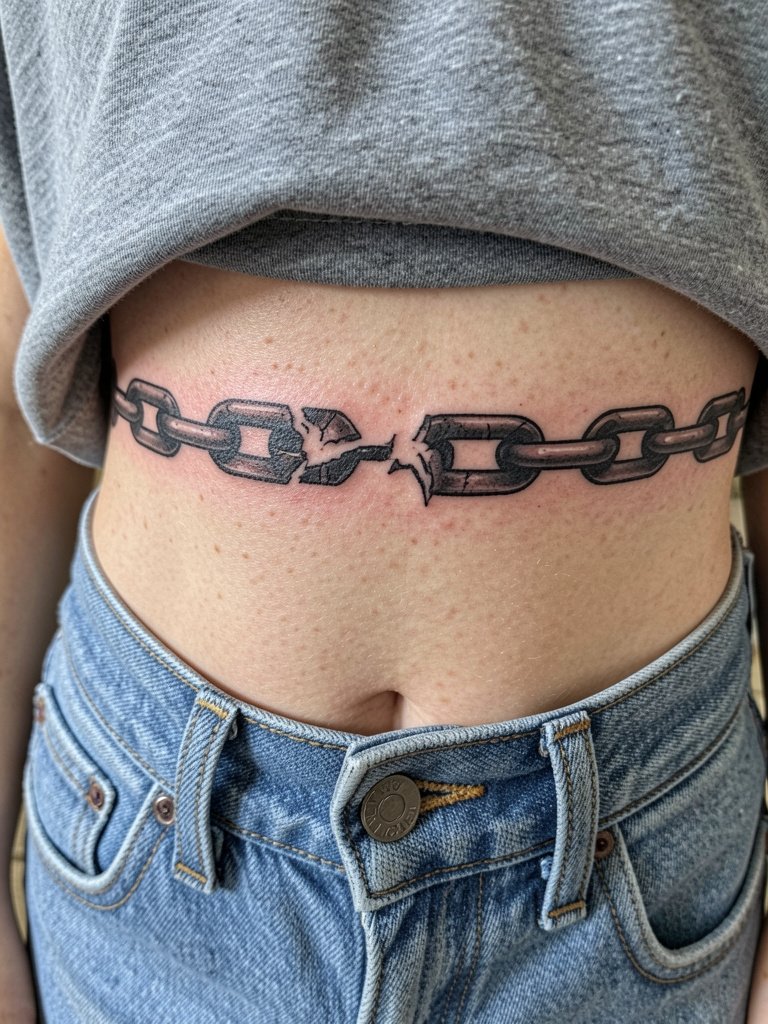
A chain band across the low ribs is graphic and masculine, but place it carefully relative to your waistband. If it sits under heavy fabric or right on the pant band it will receive constant friction. Have the artist map the band while you are standing and sitting so it does not disappear into a fold. For the session wear pants that fasten comfortably below the area with no metal pressing on fresh ink. This design is one session for a medium band and holds well when outlines are bold.
Frequently Asked Questions
Q: How much does a side torso ribcage skin tattoo usually cost and why can small pieces still be pricey?
A: Expect shop minimums and placement difficulty to drive prices up even for small visuals. The rib area requires extra patience from the artist and often a "pain premium" or longer set-up, so a compact quote can still reflect time and care. Think of cost as time plus skill rather than ink area alone.
Q: Will fine line script on the ribs last, or will it blur fast?
A: Artists are divided on this. One group says the rib skin stretches and fine single-needle lines tend to blur within a couple of years. Another group says fine lines hold up when the artist leaves wider spacing and intentionally adjusts needle depth. If you want to reduce risk, ask for slightly heavier primary strokes and plan a possible touch-up around year two.
Q: Should I pick black and gray or color for a large Japanese or neo-traditional rib piece?
A: There are two clear approaches. Some people prefer black and gray because it typically ages predictably on moving skin. Others choose color because the concept needs it and bold saturation with solid outlines can last well. If you pick color, prioritize contrast and stronger outlines so the image keeps form as pigments soften.
Q: Where can I find artists who actually post healed side torso ribcage skin portfolios and not just fresh flash?
A: Search placement-plus-style tags and filter by location on image platforms. Use hashtags like #ribtattoo, #sidetattoo, #blackworktattoo and add your city name to narrow local results. Browse booking platforms and read Reddit threads for healed photos rather than reposted flash. Prioritize portfolios that show the same artist's healed work at multiple time points.
Q: What should I wear to the appointment so the artist can work the side torso easily?
A: Bring loose drawstring pants or joggers and a button-front shirt or tank that opens without pulling fabric across the rib area. For low rib placements, low-rise pants with the waistband sitting below the planned design are best. A simple linen overshirt is a good session coverup because it opens and layers without pressure.
