
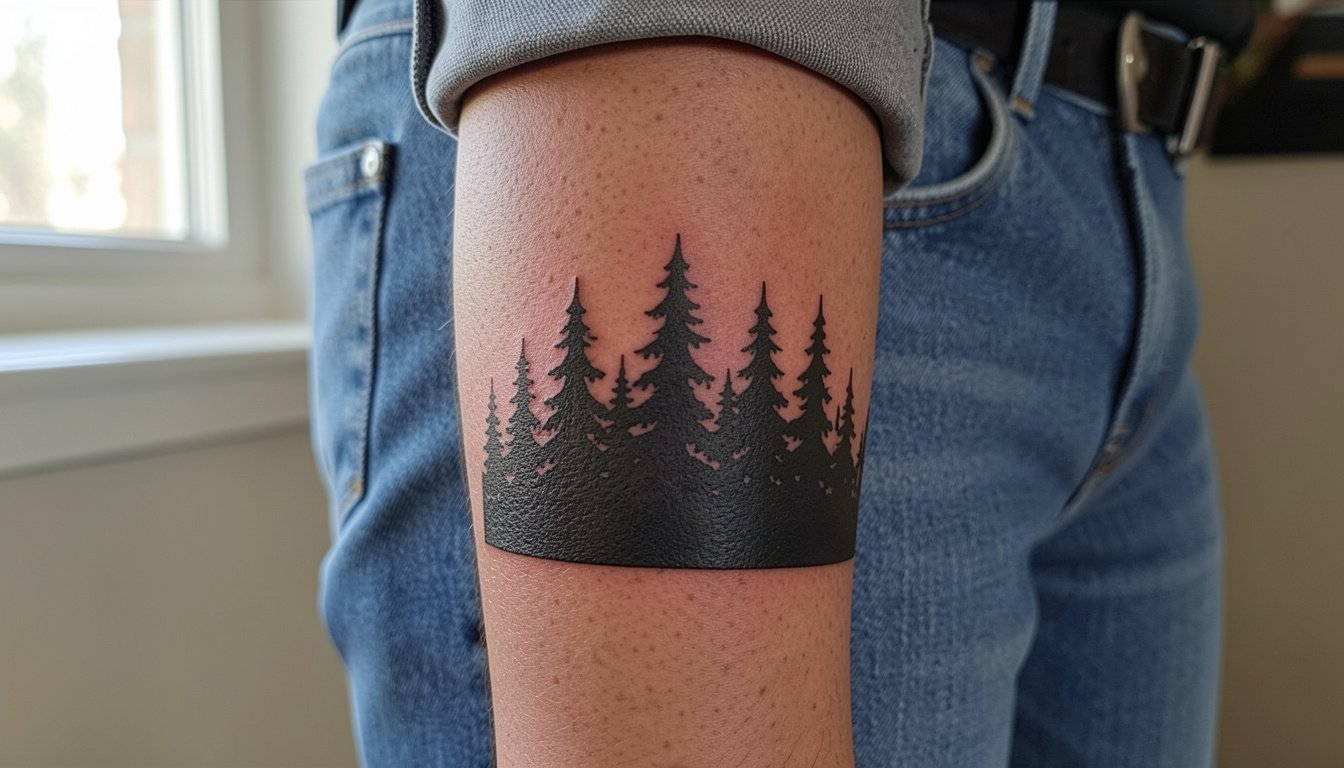
Pine motifs keep coming back because they pair simple geometry with a lot of meaning about place and endurance. Trends online push micro single-needle pines, but those choices change how a piece ages and how visible it will be on darker skin. Read this selection with an eye toward how each approach heals and what to wear to show it off, so you pick a pine that still reads like you years from now.
1. Fine line single pine on inner forearm
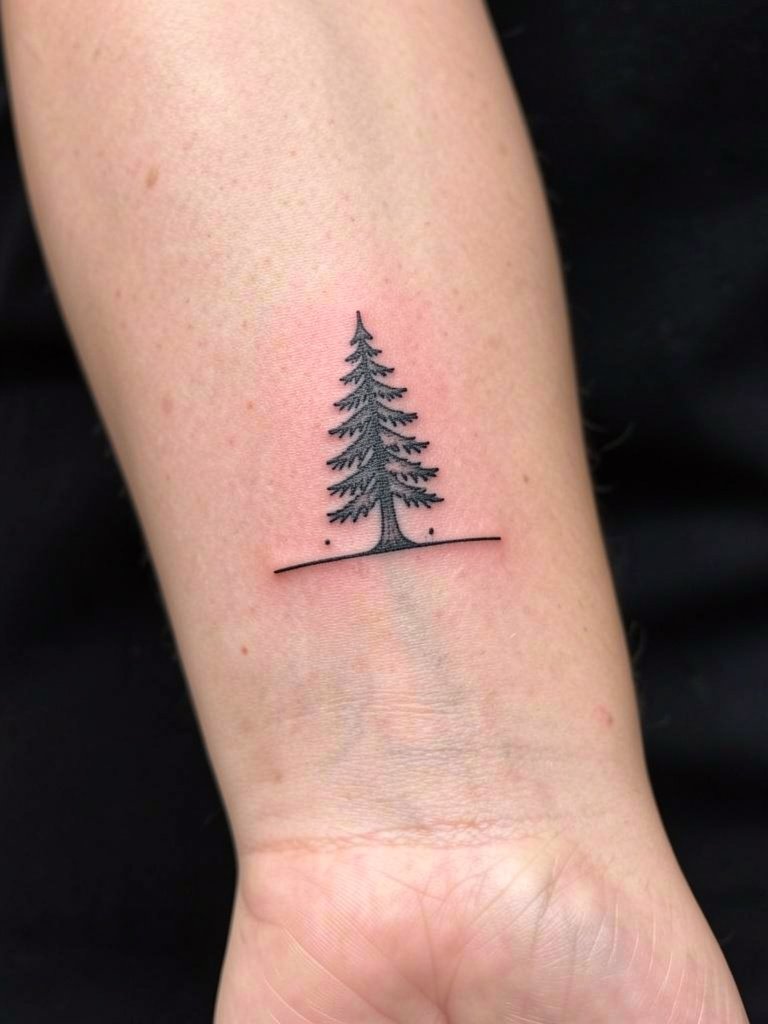
This is the default pine for someone who wants something subtle that reads in offices and outdoors. Choose a slightly heavier trunk line than your reference image so the trunk stays crisp at two years and beyond. One common mistake is requesting ultra-micro needles for every needle in the crown, which ends up blurring into a dark patch on textured skin. One camp argues that fine single-needle work holds up on stable placements if spacing is kept minimal. Another camp says that any single-needle detail on pine needles will soften into smudge faster than people expect. For showing off, wear a rolled-sleeve linen button down shirt in neutral tones that keeps the inner forearm visible without competing with the linework.
2. Tiny pine at the ankle
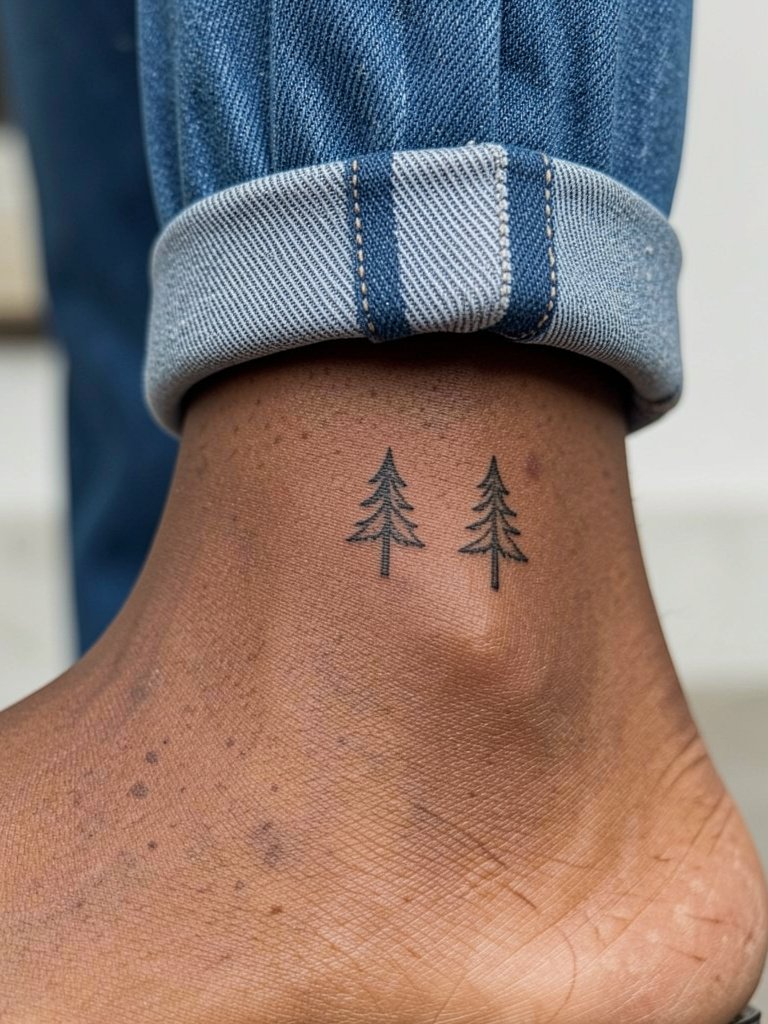
An ankle pine is a great beginner option because it hides easily for work and shows in sandals. The biggest real-world problem is friction from socks and shoes during healing. If you pick this placement, plan session clothes like shorts or cuffed jeans and avoid tall socks for the first week. Expect the piece to soften faster than the same size on an inner forearm, so give the trunk a touch bolder weight and avoid super-fine needle clusters. For outfits, cropped straight-leg pants and low-profile sneakers pair naturally, try them with cropped straight leg pants when you want to show it.
3. Pine branch on the outer forearm

A branch reads more botanical than a silhouette and gives you texture without committing to a whole tree. When you want a piece that scales into a sleeve later, ask for a version with clear negative-space between needle clusters so additions can sit around the branch. The session usually takes under an hour for a small branch and hurts about a three out of ten on most pain charts. People often ask for leaf-level detail that vanishes; instead bring two reference photos that show the branch at scale and at a distance so the artist can advise on spacing. For outing looks, pair it with open-cuff shirts and stacked rings, try an open cuff shirt to frame the piece.
4. Traditional pine flash on outer forearm
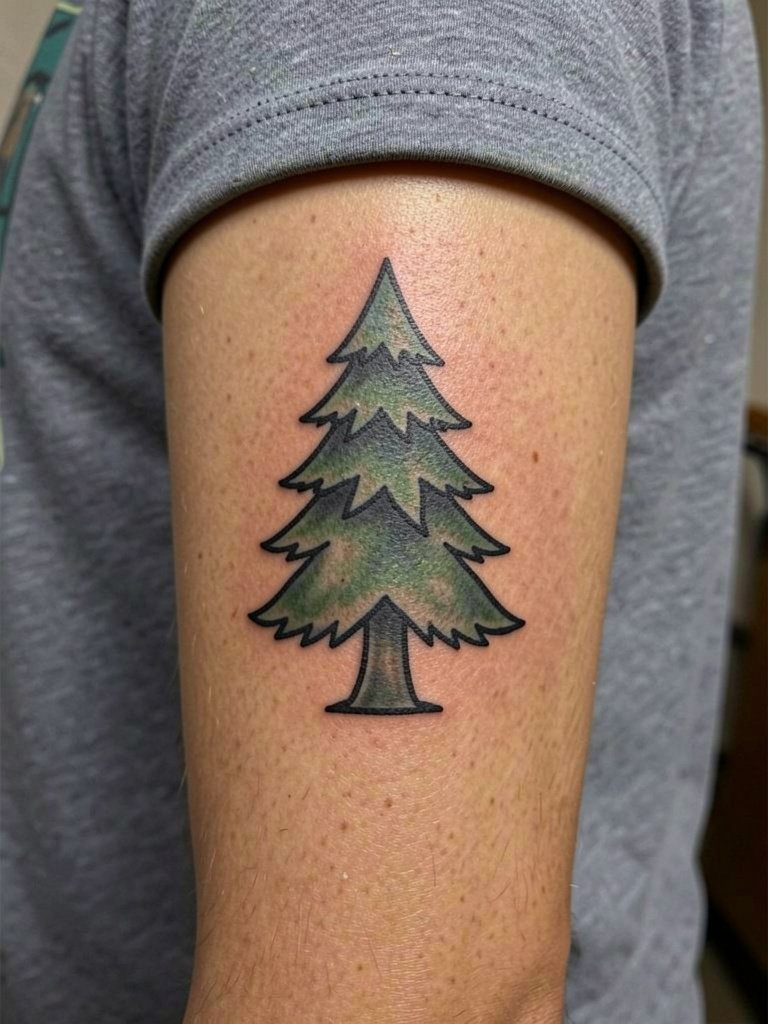
Traditional flash uses bolder outlines and heavier fills so the piece stays legible from a distance and through years of wear. It ages into a classic look because saturation and contrast beat micro detail for longevity. If you like the old-school feel, ask for flattened fills and slightly larger negative spaces inside the crown so the green does not pool into a muddy mass. These pieces pair neatly with black tees and vintage denim jackets. For showing it off, try a denim jacket that keeps focus on the arm.
5. Blackwork pine forest on the calf
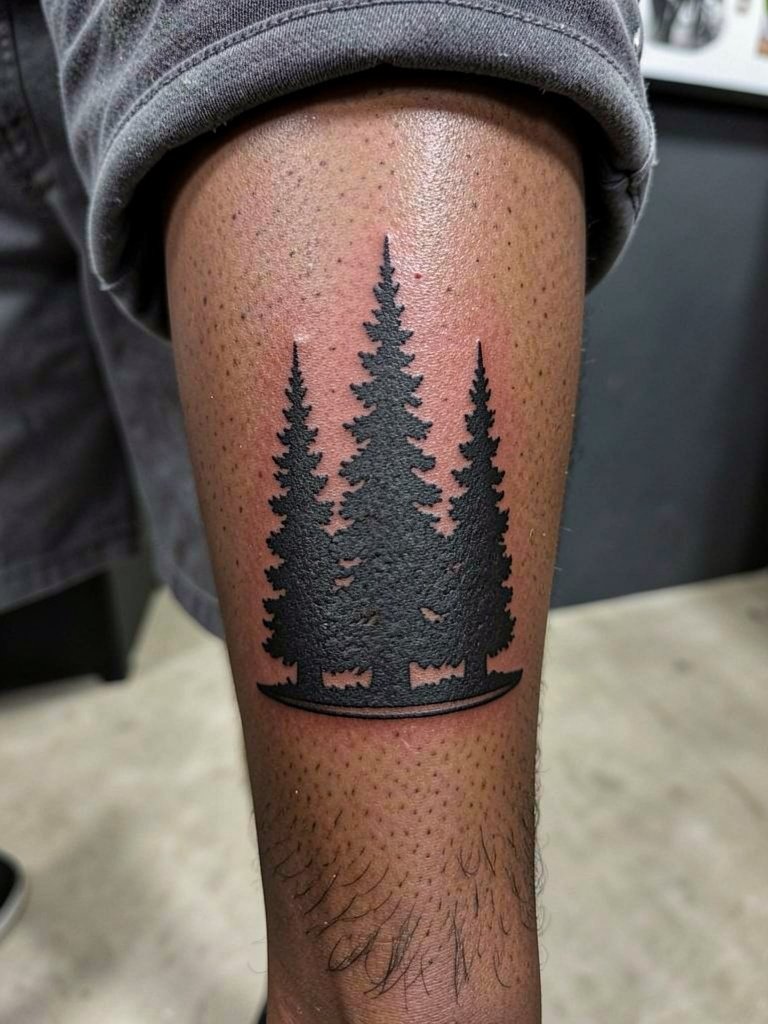
Blackwork forests are the choice when you want a moody, meditative statement that reads at a distance. They can be scaled to wrap the calf or sit as a band above the ankle. Blowout risk is low on the calf, so you can get sharper negative shapes and dense fills that still look good after five years. A common mistake is trying to cram tiny branches into the negative space inside a solid fill. For summer weartime, cuffed jeans or midi skirts pair well. Try cuffed jeans to show the silhouette cleanly.
6. Ponderosa pine with desert context on upper arm
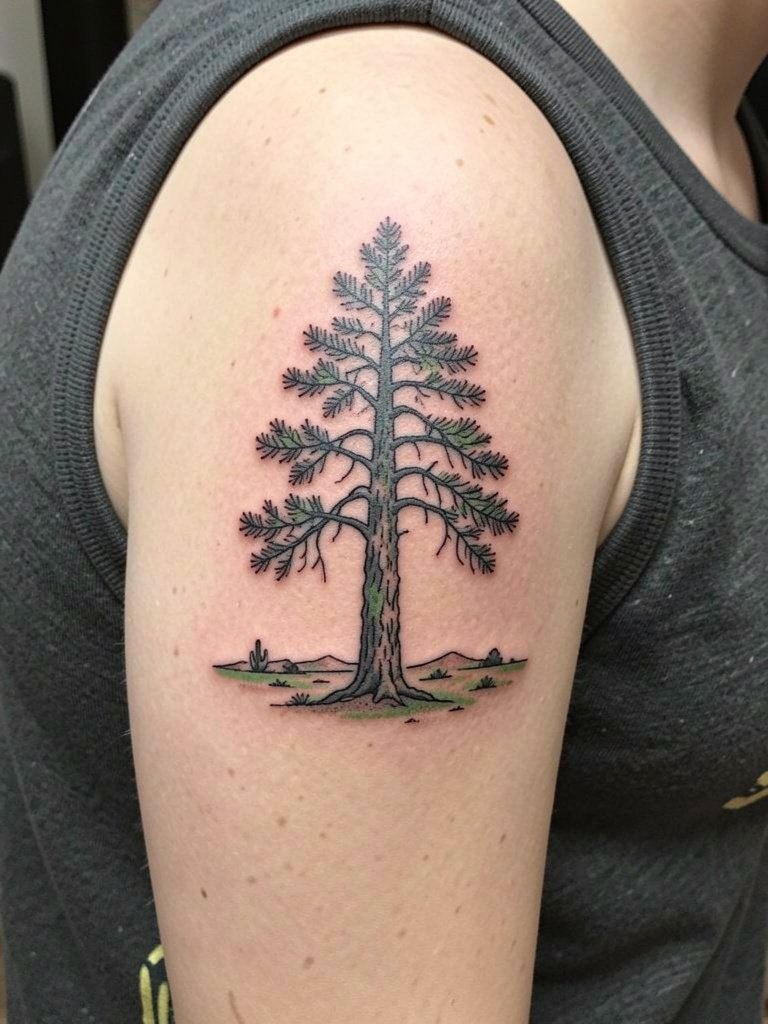
Species-specific pines make a piece feel anchored to a place. If you grew up near Ponderosa country or hiked a specific trail, bring a photo of that tree and point out features you want emphasized. This style benefits from slightly wider needle marks for bark texture so the character survives a few years of wear. Sessions hit about one to two hours depending on color. For show, wear racerback tanks or boxy cropped tees that keep the shoulder visible. Pack a racerback tank top for the session.
Pre-Session Essentials
The pieces above include small forearm and ankle work that face different first-week challenges, so a few targeted items make the session and healing window easier.
- Tattoo-specific unscented soap bar. Gentle cleansing for the first week helps avoid stripping the ink while removing excess ointment.
- Japanese-style lightweight healing balm alternative. A thinner finish can feel less clogged on flat forearm work and reduce clogged pores.
- Barrier film wipes. Useful for people who cannot tolerate adhesive sheets but still want a protective surface on day one.
- Tattoo-specific unscented soap bars (alt). Another gentle wash option that users report liking during showers.
- Saniderm second-skin wrap. Protects small ankle and forearm placements from fabric friction and keeps the first 24 hours cleaner.
7. Mountain-and-pine inner forearm landscape

Pines plus mountains is the shorthand for outdoors identity. If you want the piece to age gracefully, keep the mountain line simple and avoid stacked micro textures inside the tree crowns. A useful consultation note is to show scale with a coin or ruler so the artist can redraw the composition at a size that reads at one and three inches. Healed at six months this will have soft edges, and at two years the silhouettes should remain distinct if spacing was respected. For everyday looks, pair with a neutral tote and open-cuff shirts. Try a neutral tote bag when you want an editorial frame.
8. Micro pine behind the ear
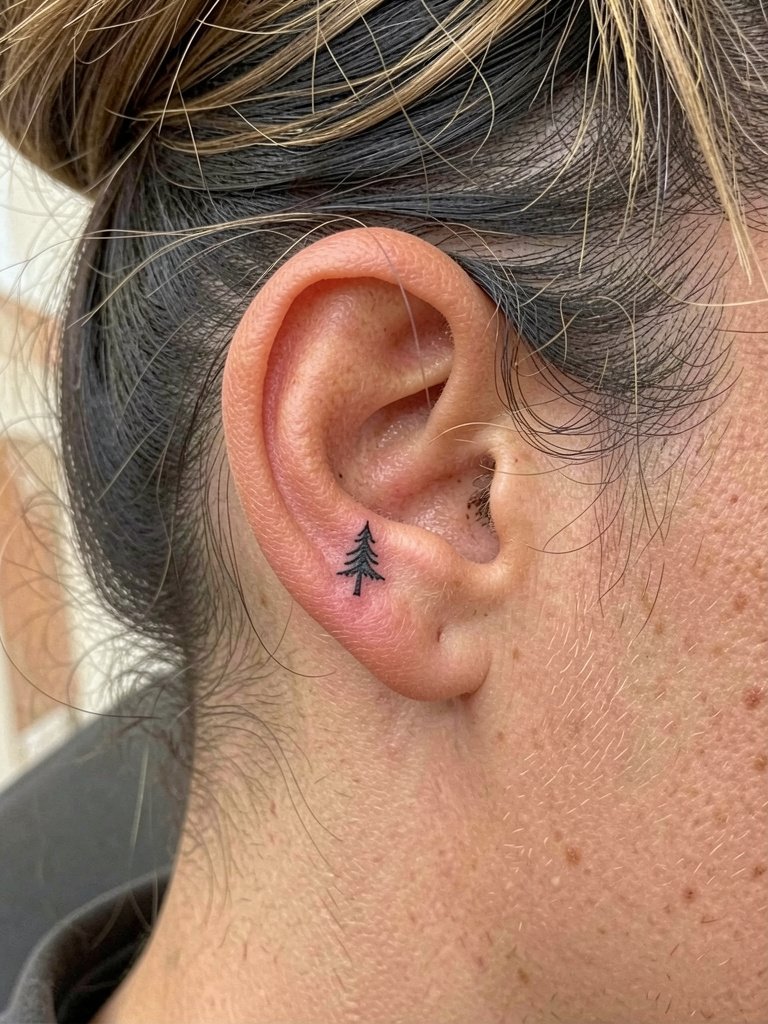
Behind-the-ear micros are discreet and private. Because the area is small and the skin thin, keep the design to a single simple trunk and three to five symmetrical needle clusters. Expect a quick session under thirty minutes and low but sharp tenderness while the needle passes. The trade-off is scale versus longevity; if you want the pine to still look crisp in five years, increase the trunk and primary branch thickness slightly. For wearing, put hair up with a soft hair tie during the session and for a few days of healing.
9. Pine tree and crescent moon on upper arm
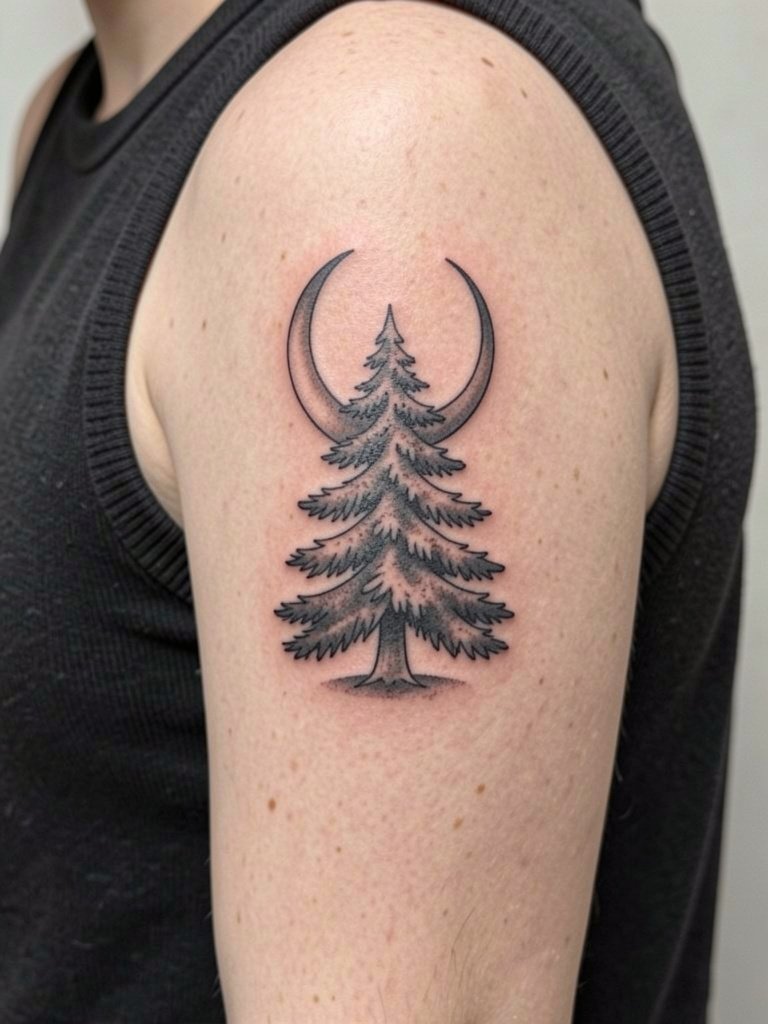
A moon softens the outdoors motif and adds a reflective mood. If you want that nocturnal tone without color, keep the moon as an open crescent with gentle stipple shading rather than solid fill so the pine silhouette still reads. Ask for a healed shot of a similar composition from the studio so you see how stippling ages on triceps skin. For sessions, bring a sleeveless top and consider a loose top for aftercare. For evenings out, a boxy crop tee keeps this area visible without looking overdone.
10. Geometric-framed ornamental pine on outer forearm
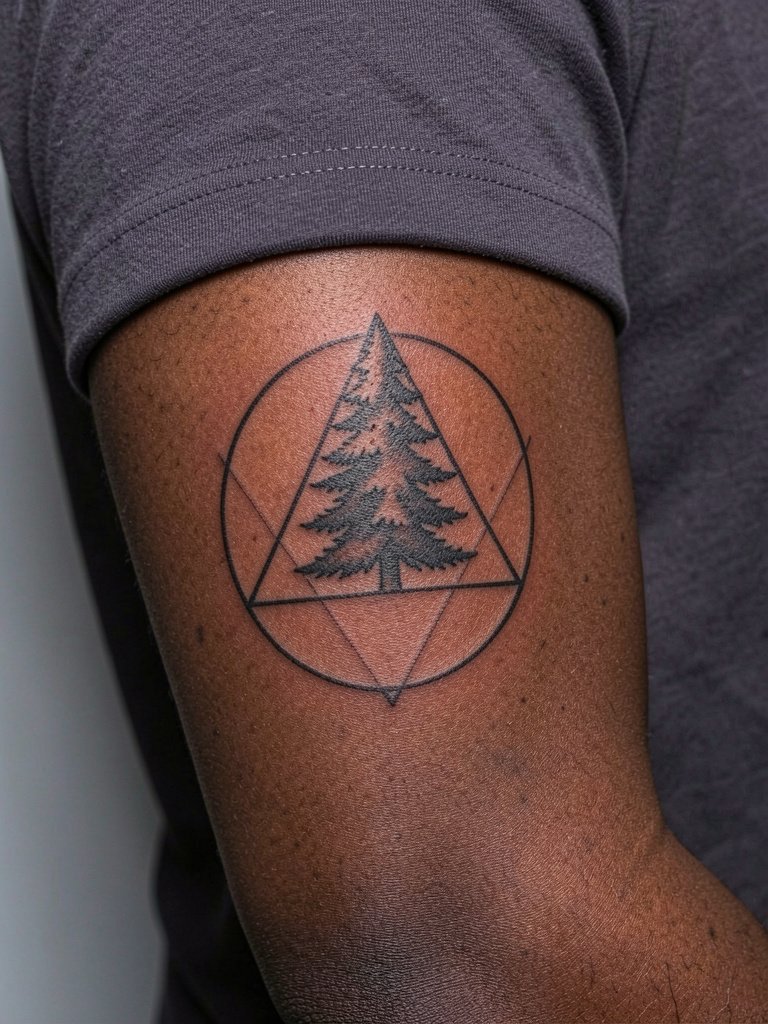
Ornamental framing modernizes a pine without flattening it into a trend piece. The key is leaving breathing room between the tree and the geometric border so the frame does not swallow the design after healing. A common mistake is asking for the frame and tree at the same line weight. Ask the artist to treat the frame as a second element and make it thinner than the trunk so the composition keeps hierarchy over time. Wear a black oversized tee to let the framed piece pop.
11. Pine cone and branch botanical on collarbone
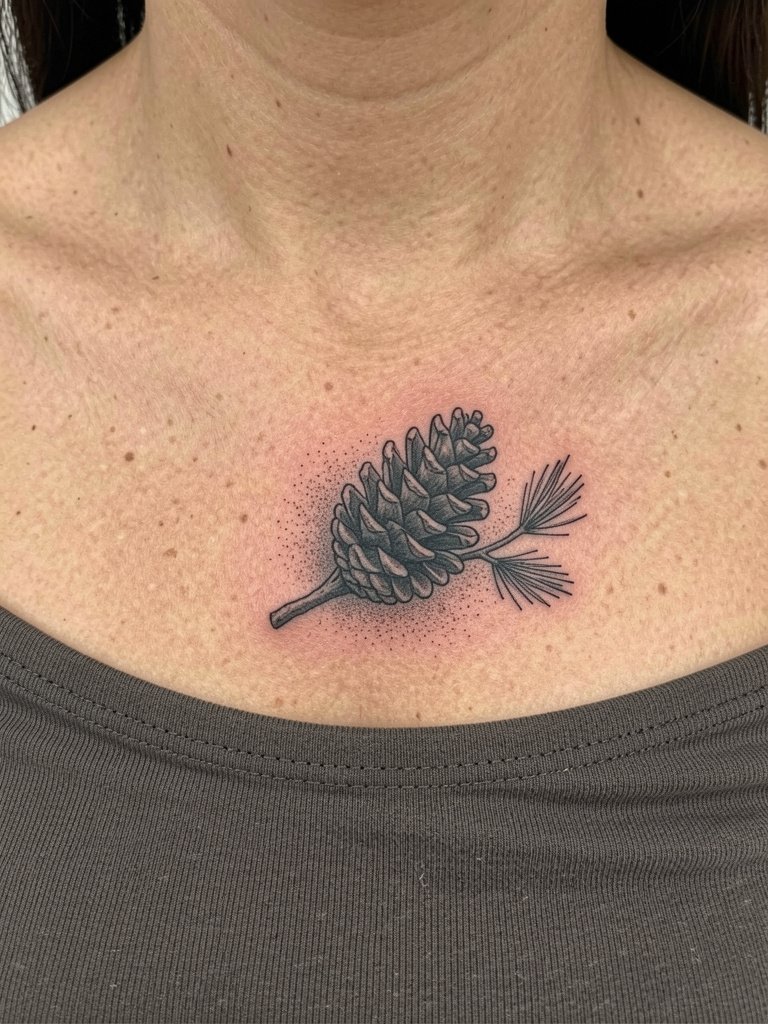
A pine cone offers botanical texture without committing to a whole tree. The collarbone placement works as a small anchor for a quote or script if you want text later, but keep the cone size large enough to retain detail. The sternum and chest move with breathing so avoid extreme micro cross-hatching there. For sessions, choose a loose neckline top and avoid heavy straps digging into the clavicle during healing. For show, try an off shoulder top that frames the area.
12. Sleeve-start pine cluster on outer forearm
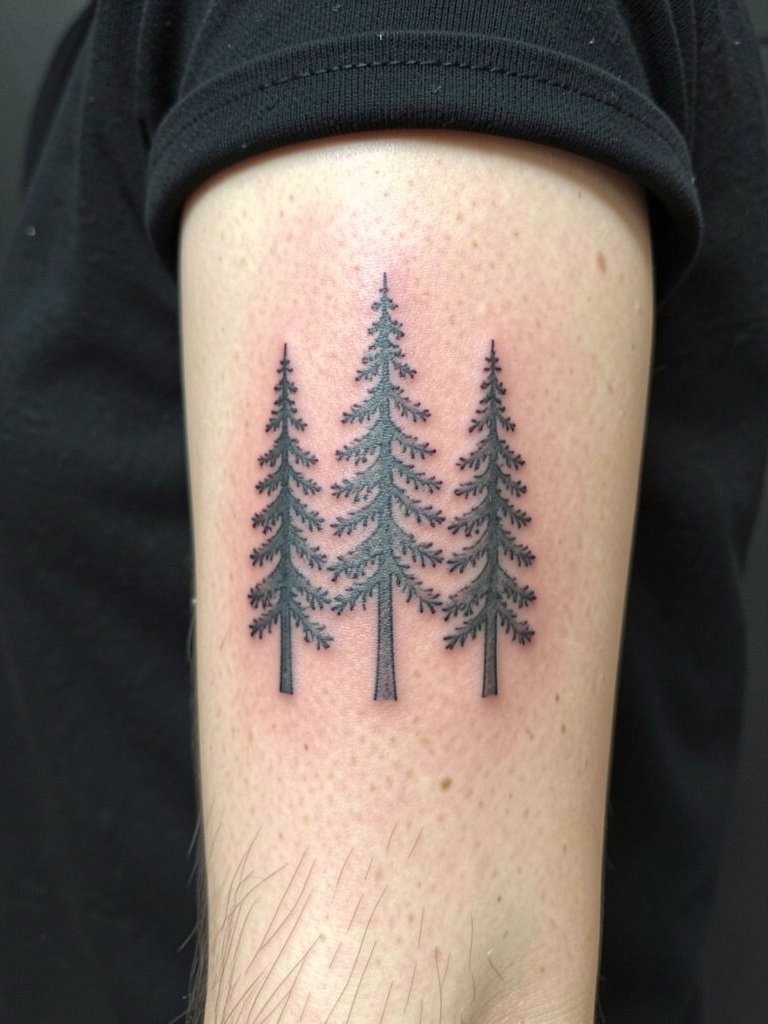
A sleeve start should be designed to accept future elements like mountains, animals, or sky. Ask the artist to leave intentional negative space for future pieces and to prioritize clear silhouette edges over tiny bark detail. A common session reality is that the first block sets the visual language for everything that follows, so bring a simple mood board rather than a dozen conflicting references. For clothing, rock a neutral tote and open cuffs during reveals. A neutral tote bag pairs well during and after sessions.
13. Script-anchored pine at the clavicle
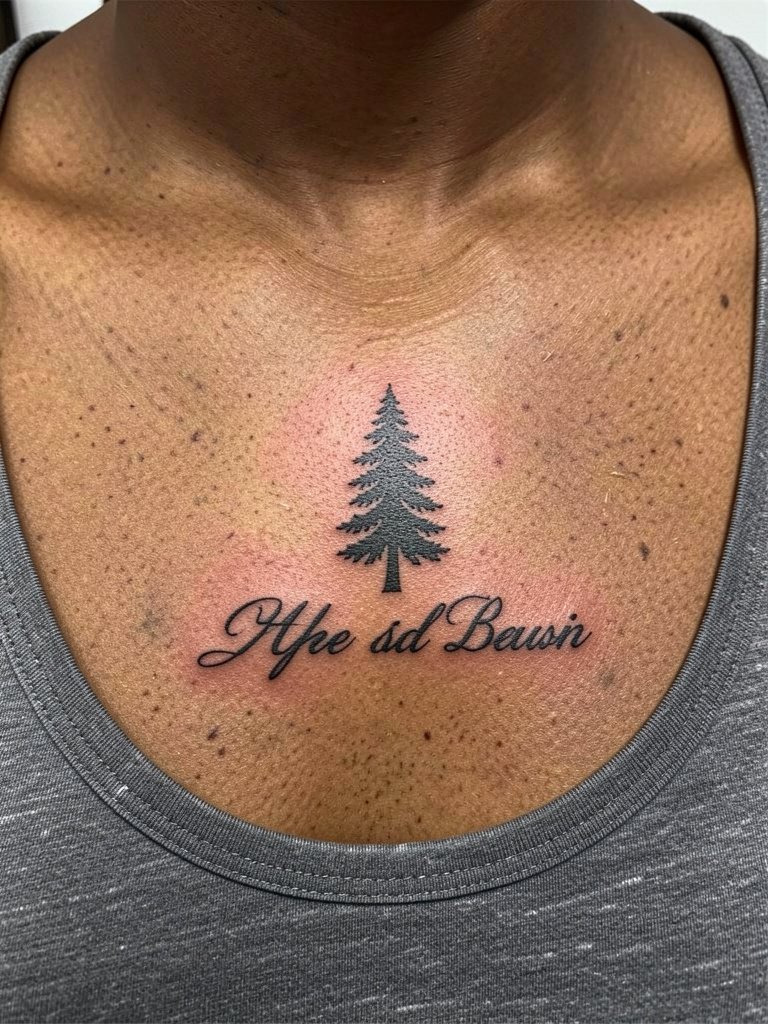
When a pine is coupled with script, scale is everything. Tiny script can smear into the pine silhouette unless you give each element breathing space. A mistake people make is asking for three elements to fit within two inches; ask the artist to show how the same phrase reads at three inches versus five. For clothing, scoop neck tees and layered delicate chains frame a clavicle piece well. Try a layered chain necklace for a finished look.
14. Black ink only versus green accents debate
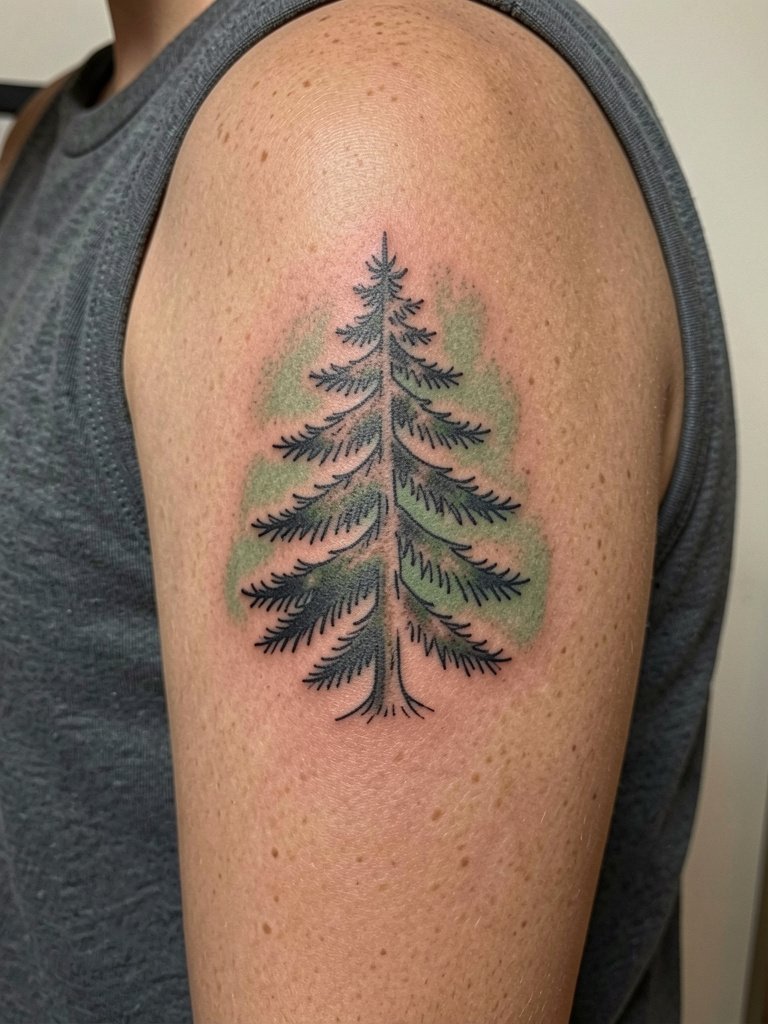
There is an active debate about whether to keep pine tattoos strictly black or add green accents. One camp argues black-only ages better and photographs cleanly, with crisp linework that stays legible over years. The other camp says green tones help the motif read immediately as a pine and add a living quality that black alone can feel like a silhouette. Both positions are valid, so decide whether long-term contrast or immediate color reading matters more to you. If you try color, request muted, low-saturation green and ask how it heals on your skin tone. For casual wear, a racerback tank top keeps upper-arm color visible without overexposure.
15. Watercolor wash behind a pine
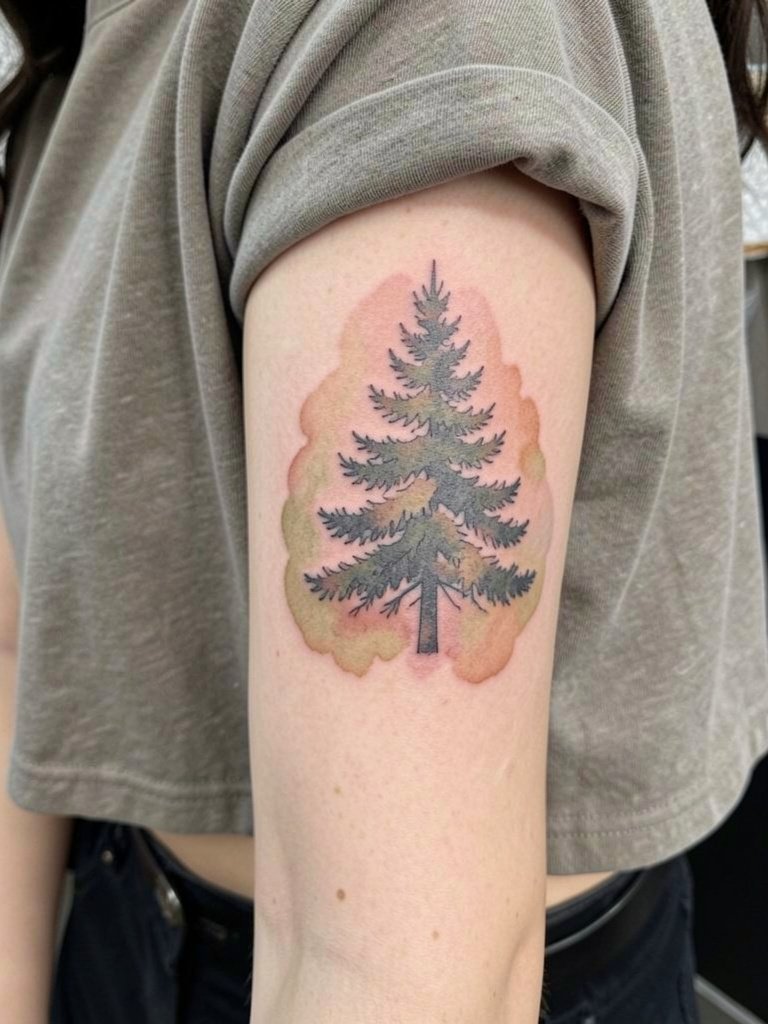
Watercolor accents make a pine look painterly but require more maintenance. Color fades faster than black and can change hue on darker skin. If you want pigment, pick muted washes and ask for placement away from high-sun areas so the color lasts longer. The session usually runs an hour to two depending on color layering. For outfit pairing, try sleeveless tanks and lightweight layers. A boxy crop tee keeps the wash visible without overexposure.
16. Vertical pine on the ribcage
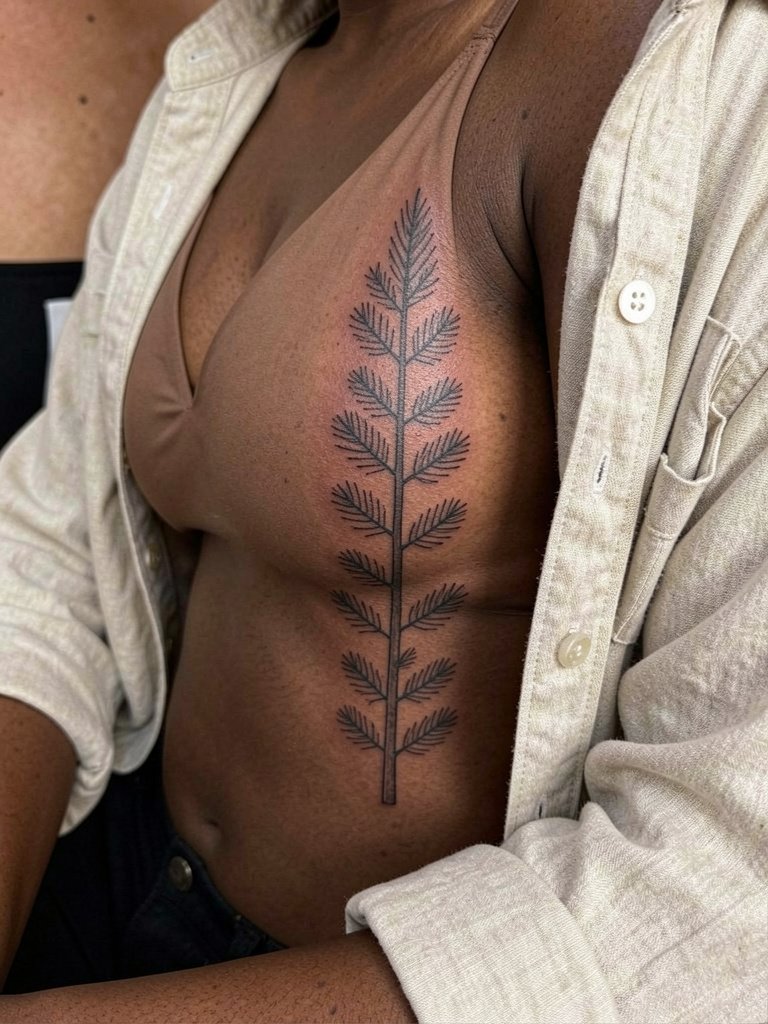
The ribcage makes a graceful vertical canvas, but movement and sensitivity matter. One camp says ribs work beautifully for vertical compositions because the body line complements the trunk. Another camp argues that breathing motion and tender skin make fine needlework blur faster on ribs. If you choose ribs, increase line weight slightly and plan for a two-stage session with breaks. The pain is commonly higher than forearm work, so wear a soft bralette and a loose button-up for the appointment.
17. Minimalist pine on the lateral hip

Hip pines are intimate and discrete, visible in swimwear or high-waisted looks. This placement is good if you want something private with occasional reveal. Plan session wear like low-rise jeans or sweatpants and avoid tight waistbands while the area heals. Because the hip sees less daily abrasion, small details hold up better here than at ankles. For beach-ready looks, pair with high-waisted bikini bottoms and a cropped tank for reveals. Consider packing high waisted bikini pieces if you plan to show it off.
18. Stipple shaded pine branch on the forearm
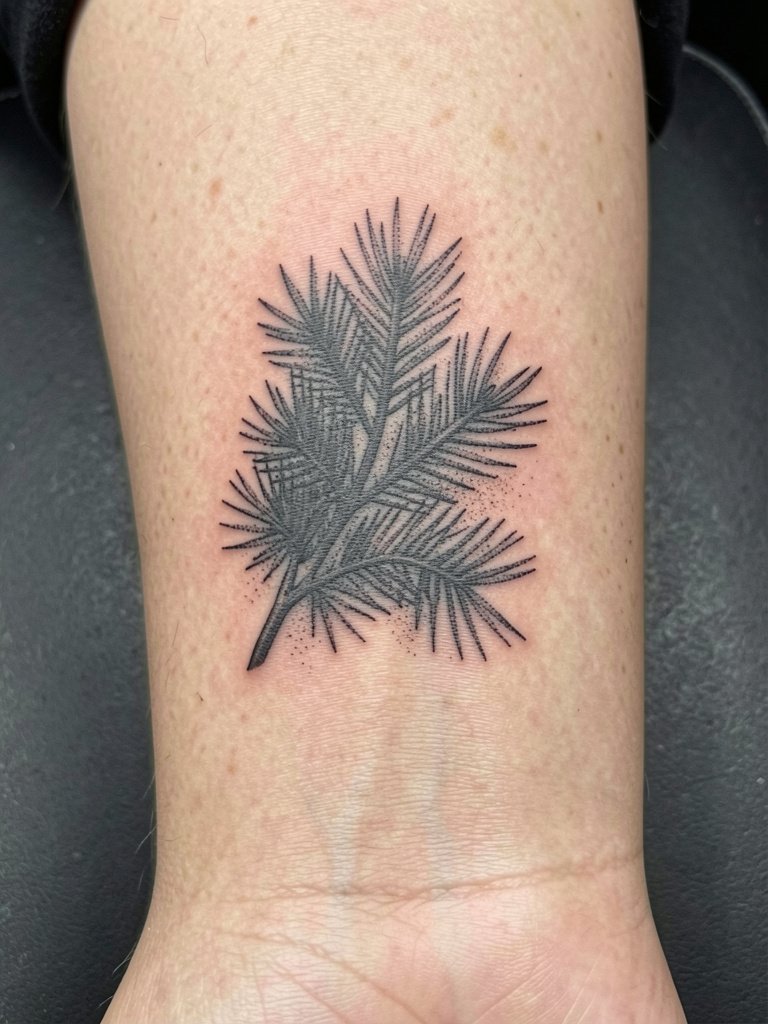
Stipple and whip shading give a softer botanical texture that can feel more illustrative than silhouette. The technique reads well on forearm flesh because the skin there keeps detail clean for longer than high-friction zones. One common mistake is overloading stipple density in a small area, which can look muddy after healing. Ask your artist to show healed stipple examples of similar scale. For outfits, open-cuff shirts and a neutral tote work well. Pack an open cuff shirt for the session.
19. Forest band around the calf
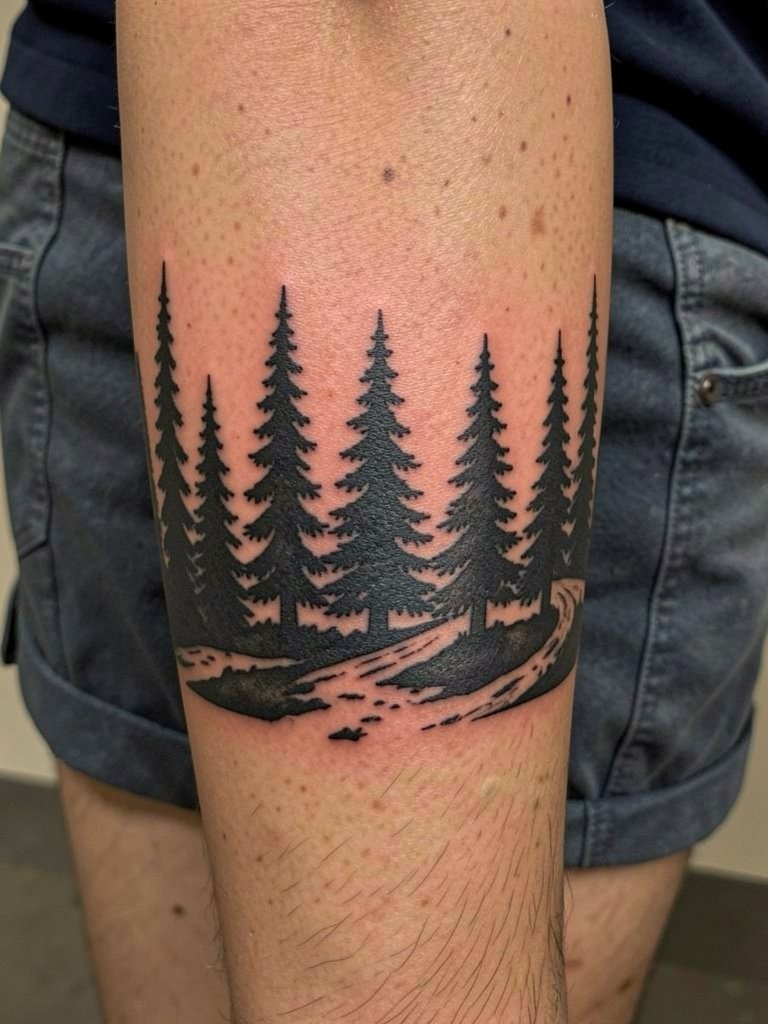
A banded forest reads like a single dark horizon and makes a clear seasonal statement. Because calves tolerate dense fills well, you can go heavier on black and still get good longevity. If you want to extend the band over time, request the initial session include clear spacing and a flow plan so additions mesh. Boots or tall socks can hide it during colder months. For warm-weather styling, wear midi skirts or shorts.
20. Micro-realism pine portrait on the shoulder cap
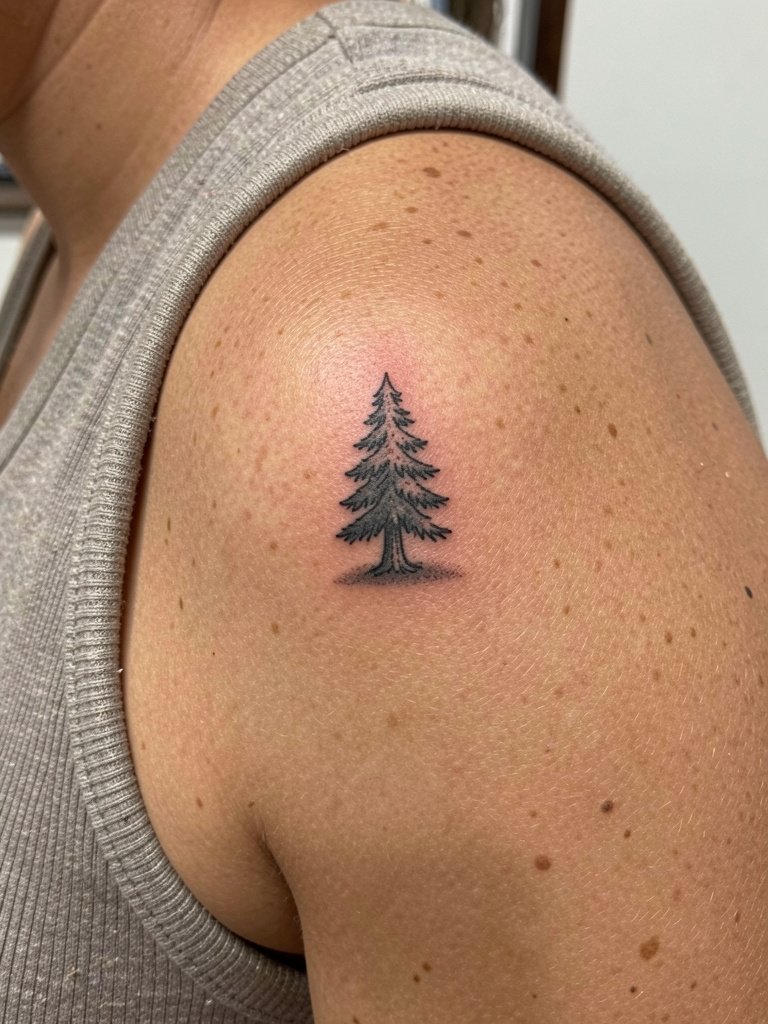
Micro-realism asks for concentrated detail in a small area, which is doable on the shoulder cap because skin is stable and not highly mobile. The trick is asking for selective realism instead of full photorealism at micro scale. Request the artist show healed micro-realism examples on similar placements so you understand longevity. For wardrobe, racerback tanks and sleeveless tanks keep the shoulder visible without distortion. Bring a racerback tank top for the session.
21. Single-line continuous pine tattoo
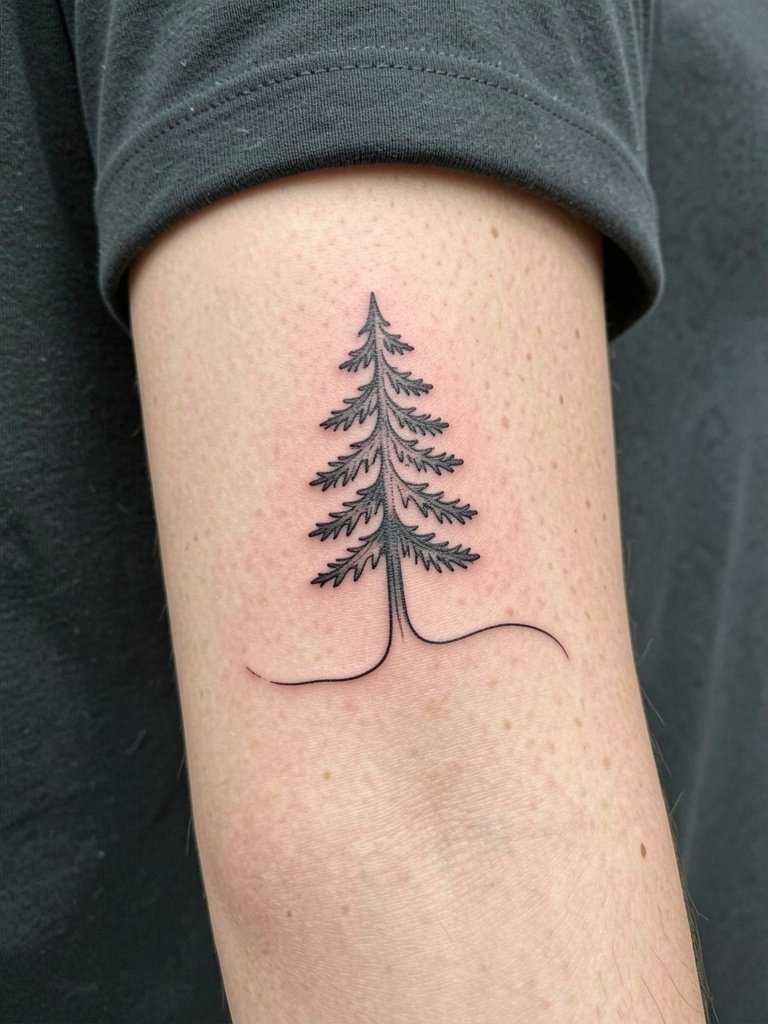
A one-line approach is modern and graphic, relying on confident stroke and negative space. Because the motif depends on visual clarity, line thickness must be adjusted upward from a pure single-needle to ensure the single stroke still reads after healing. This style is low-session time and shows well with rolled sleeves or thin bracelets. Try a thin bracelet set if you want subtle accessorizing that complements the line.
22. Pine silhouette with horizon line on inner forearm
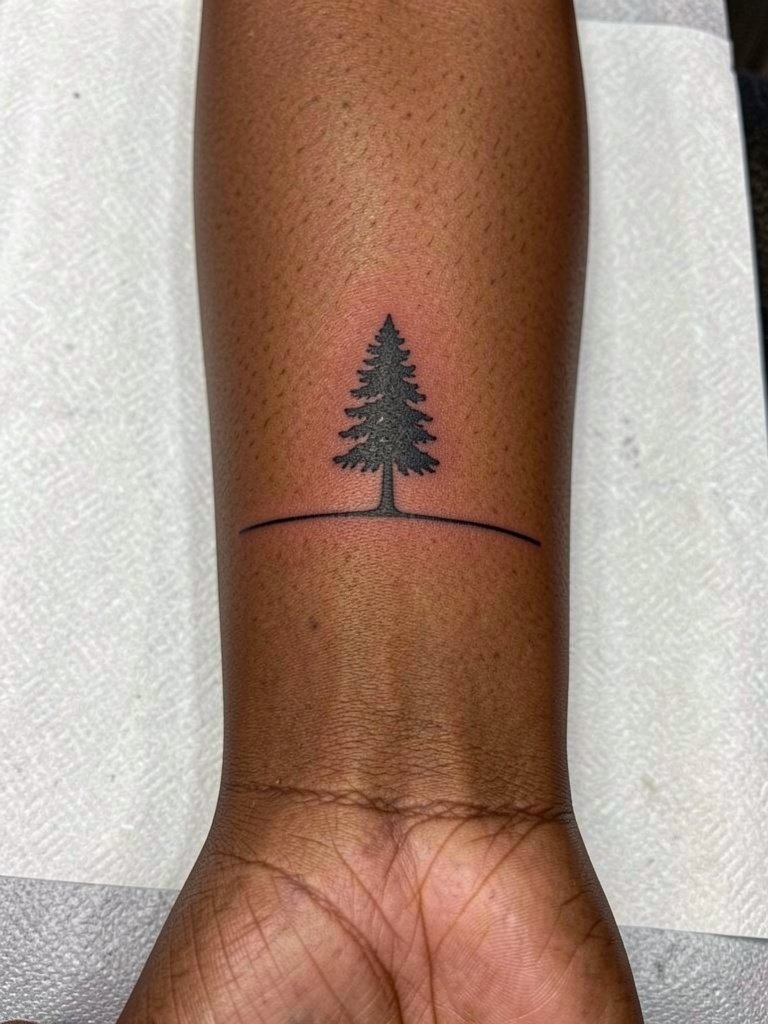
Adding a horizon line grounds the pine and reads like a small framed scene. Keep the horizon thin but continuous and have the trunk slightly bolder to avoid the silhouette blending into the line after a couple of years. A mistake is putting too many small landscape elements in a narrow band. For showing it off, an open-cuff shirt and neutral tote look tidy. Consider a neutral tote bag for styling.
23. Pine tree with script arc on the rib side
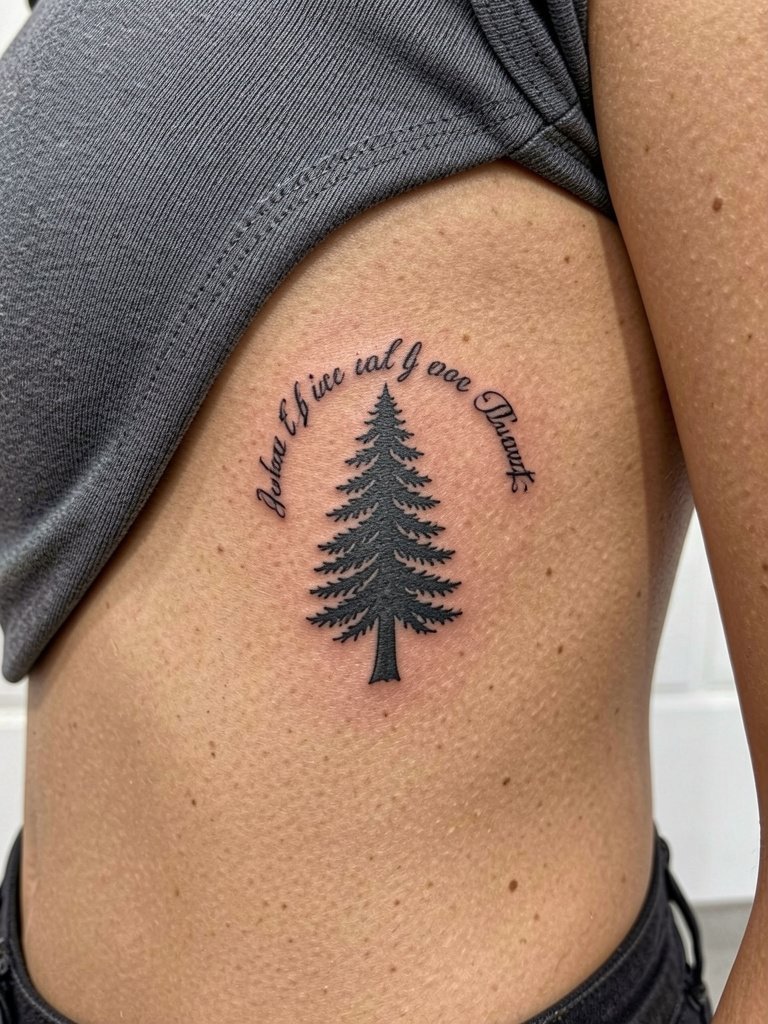
Pairing script with ribs is dramatic but risky because breathing stretches the area. Keep script size generous and avoid tiny cursive loops that will blur. Tell the artist the exact word and have them show a stencil scaled at the final size so you can visualize movement. For session comfort, wear a soft bralette and a zip-front or button-up top that does not apply pressure to the ribs while you sit. Pack a soft bralette to stay comfortable.
24. Negative-space pine band on the wrist

Using negative space inside a black band flips the visual weight and creates a crisp palm-up wrist motif. Wrist skin gets a lot of motion and hand-washing abrasion, so the negative shapes must be bold to keep their form long term. A common mistake is tiny gaps that close into a single dark ring after healing. For session wear and show-off looks, avoid tight wrist cuffs and try slim bracelets on the opposite wrist. A thin bracelet set pairs nicely.
25. Pine and animal silhouette combo on the calf
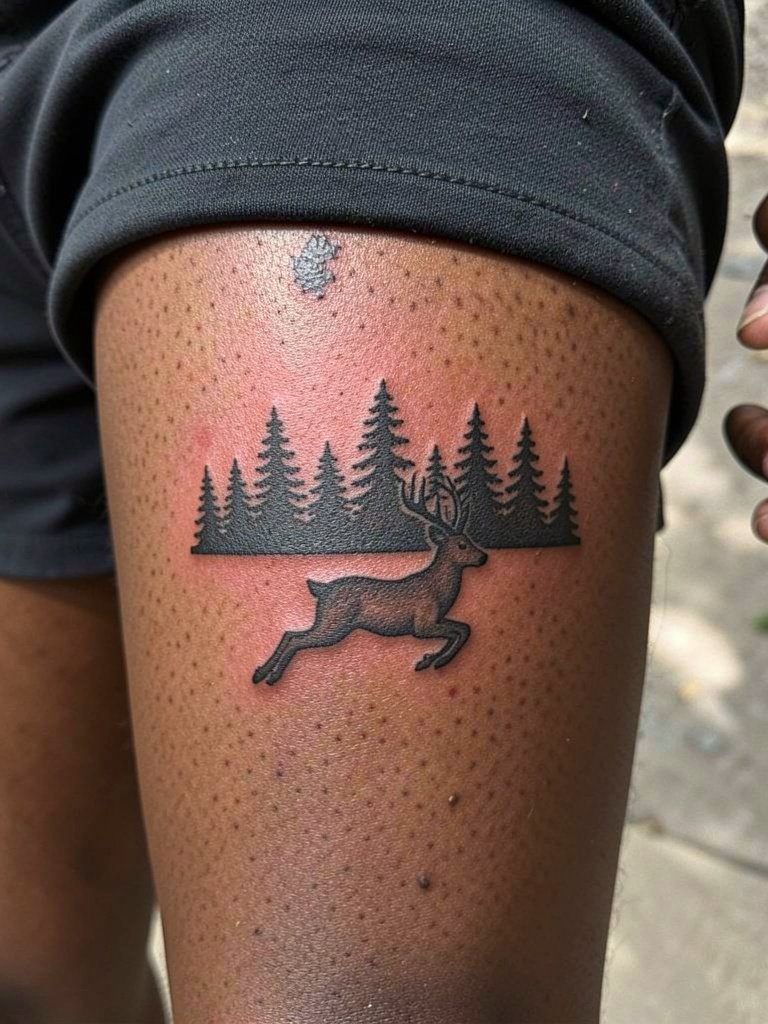
Adding an animal silhouette can anchor the pine to a specific memory or place without being overly literal. Keep the animal simple and slightly smaller than the trees so it does not compete with negative-space reading. Because the calf allows for larger shapes, you can place the animal as a focal point without cramming detail. For warm months, pair with midi skirts and shorts. A midi skirt casual works well for reveals.
26. Micro pine on the lateral finger
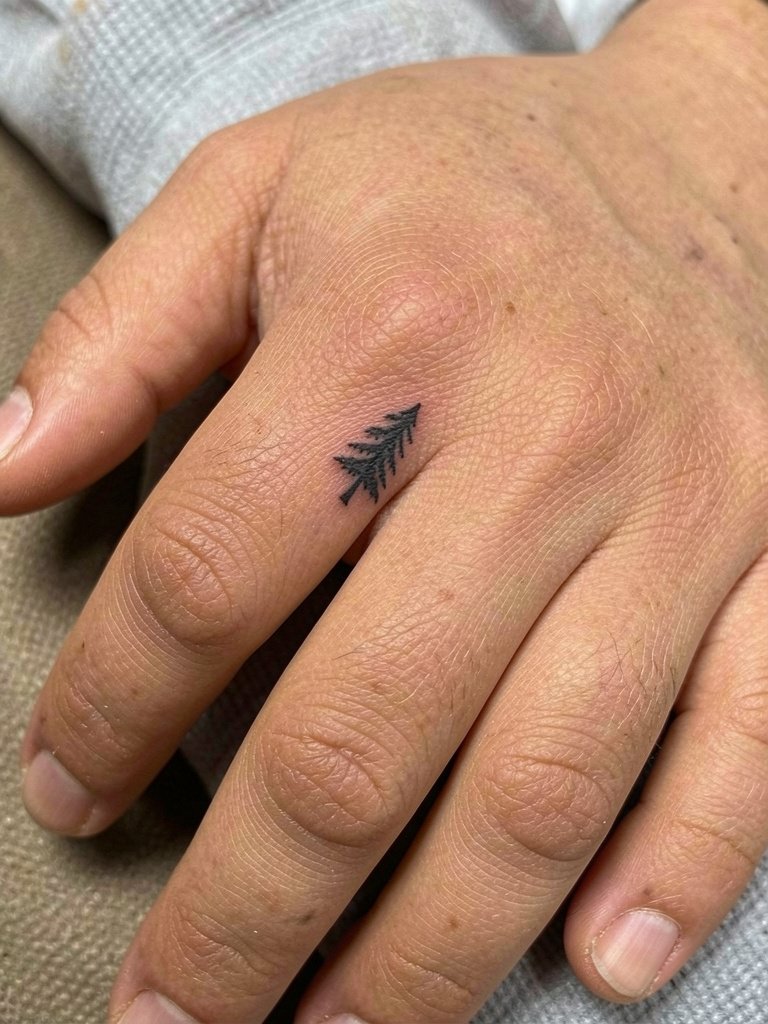
Finger placements are intimate but high-maintenance because frequent washing and friction cause faster fading. If you pick a finger pine, keep the design as a bold icon rather than trying for tiny needle clusters. Expect touch-ups sooner than on the forearm, and consider a placement on the lateral finger rather than the pad to extend longevity. For daily wear, low-profile rings that do not rub the tattoo help early healing.
27. Ribcage blackwork silhouette as statement piece
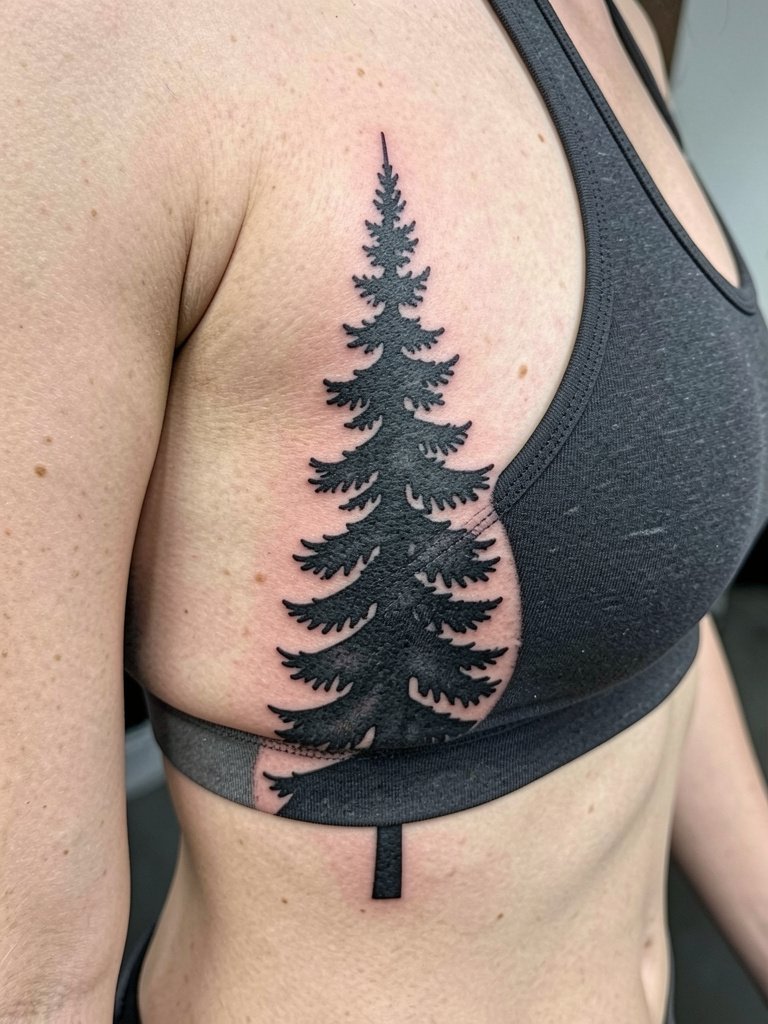
A ribcage blackwork pine is bold and graphic, and it benefits from being scaled large enough to avoid micro detail loss. Because the area moves with breathing, solid silhouettes often outperform fine-lined trunks with tiny branches. If you lean hard into blackwork, ask for a staged plan and realistic touch-up expectations. For session comfort, wear a fitted sports bra and loose button-up to avoid pressure on the rib line during travel home. A fitted bandeau or sports bra is a good session choice.
Frequently Asked Questions
Q: How much does a pine tree tattoo usually cost?
A: Expect broad ranges depending on size, style, and city. Tiny micro pieces typically fall around 100 to 300, small forearm or upper arm work often ranges from 200 to 700, and medium blackwork or sleeve-start work can be 500 to 1,500 or more. Shops also have minimums that affect small pieces, and tip expectations are commonly 15 to 25 percent. Always confirm the studio minimum and what that fee covers.
Q: Will a tiny pine blur into a blob over time and how long before touch-ups are needed?
A: Tiny pines on high-friction zones like the finger or ankle are the most at risk of blurring, especially if the design uses single-needle clusters for needles. On stable skin like the inner forearm or shoulder cap, a slightly bolder trunk and spaced needle clusters usually hold a clear shape for two to five years before most people consider a touch-up. Plan for a realistic touch-up window and ask to see healed examples in similar placements when you consult.
Q: How do I find local portfolios and healed examples without naming artists directly?
A: Use hashtags such as #pinetreetattoo, #finelinetattoo, and #blackworktattoo on Instagram and TikTok and filter results by location. Pinterest is useful for composition narrowing but watch for fresh-only images. Reddit threads in r/tattooadvice and r/tattoos often link to healed shots and real experiences. For studio searches, include your city plus terms like "fine line tattoo studio" or "blackwork tattoo studio" and look for portfolios that show healed photos rather than only fresh ink.
Q: Which placements work best on darker skin tones and how should I adjust line weight?
A: Contrast matters more than intricate detail on darker skin tones. Choose bolder trunk lines and clearer negative shapes rather than ultra-fine needle clusters. Blackwork silhouettes and slightly thicker single lines read best; muted color washes can shift hue on darker skin so test patches or low-saturation choices are safer. Ask the studio for healed photos on similar skin tones and prefer denser contrast for long-term visibility.
Q: Are ribs much more painful than forearm placements and how should I dress for the session?
A: Ribs commonly register higher on pain scales than forearm or calf placements because the skin is thinner and rests over bone. If you plan rib work, expect longer breaks and a higher discomfort level for many people. For session wear, choose soft, loose clothing such as a zip-front top or a fitted sports bra with an open button-up over it so the artist can access the area without fabric pressure.
