
Trends and saved boards push a lot of tiny, single-needle floral pieces right now, but the way a tattoo ages depends more on spacing and placement than on how pretty the stencil looks on screen. I prefer designs that give the line room to breathe and match the body curve. First up is an inner forearm botanical that shows what I mean and what to ask for in the consult.
1. Fine Line Botanical on Inner Forearm
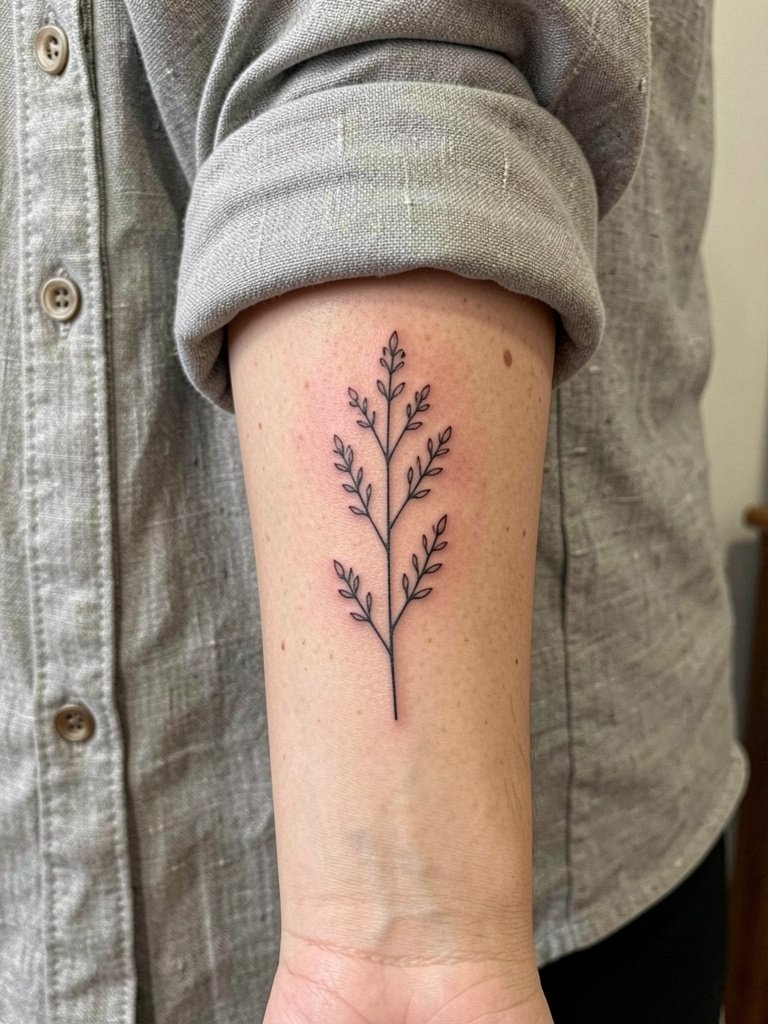
A light botanical on the inner forearm makes sense when you want visibility and low session time. I recommend this over an ultra-tiny sprig because the extra millimeters of spacing keep the single-needle stems from merging in year two. Be specific in the consult about line weight and final width, for example say "use a slightly heavier single-needle or two tight lines instead of one razor hairline" so the artist can show a scaled mockup. Common mistakes are asking for too-small leaves and assuming the forearm will preserve fine detail forever. Plan for a 30 to 60 minute session, expect a touch-up window around the one-year mark, and wear a rolled-cuff linen shirt to show it off once healed.
2. Moon-Phase Necklace Along the Collarbone
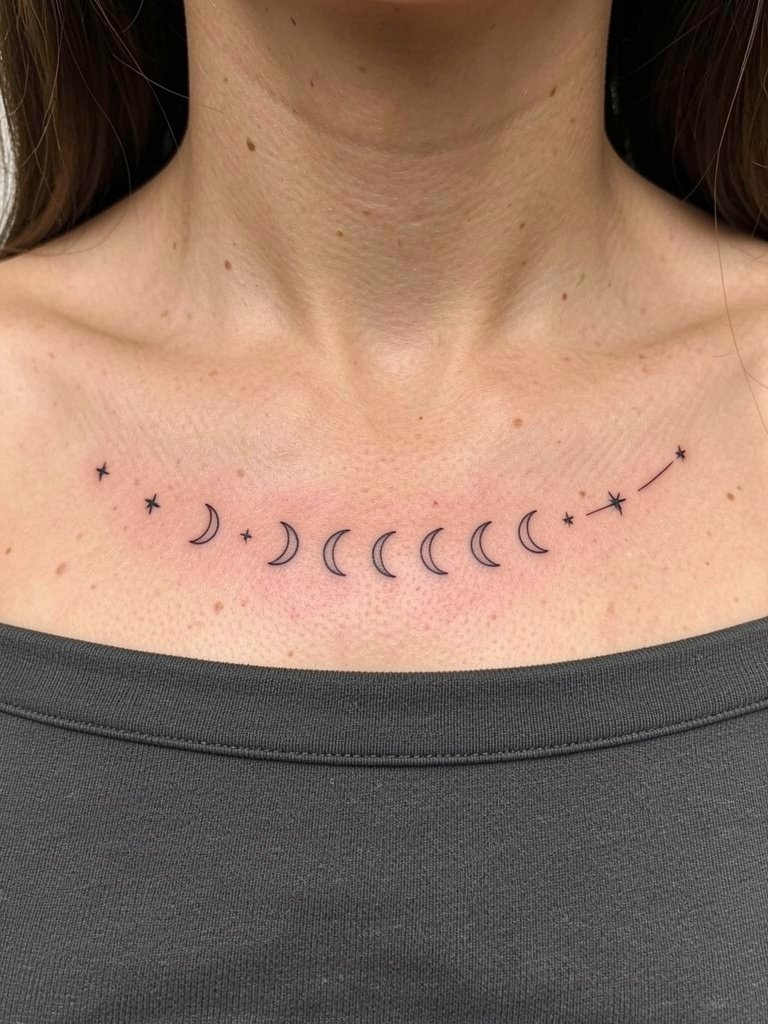
A collarbone row of moon phases reads like jewelry and follows the horizontal bone line. I recommend spacing the phases across three to four inches rather than compressing them into one inch so the crescents keep their shape. Ask for reference photos at actual size so you can preview the spacing against your collarbone. The main aging issue here is sun exposure because this area often sits outside clothing, so plan for occasional touch-ups. Wear an off-shoulder top when you want to frame the sequence.
3. Snake Curving Along the Ribcage
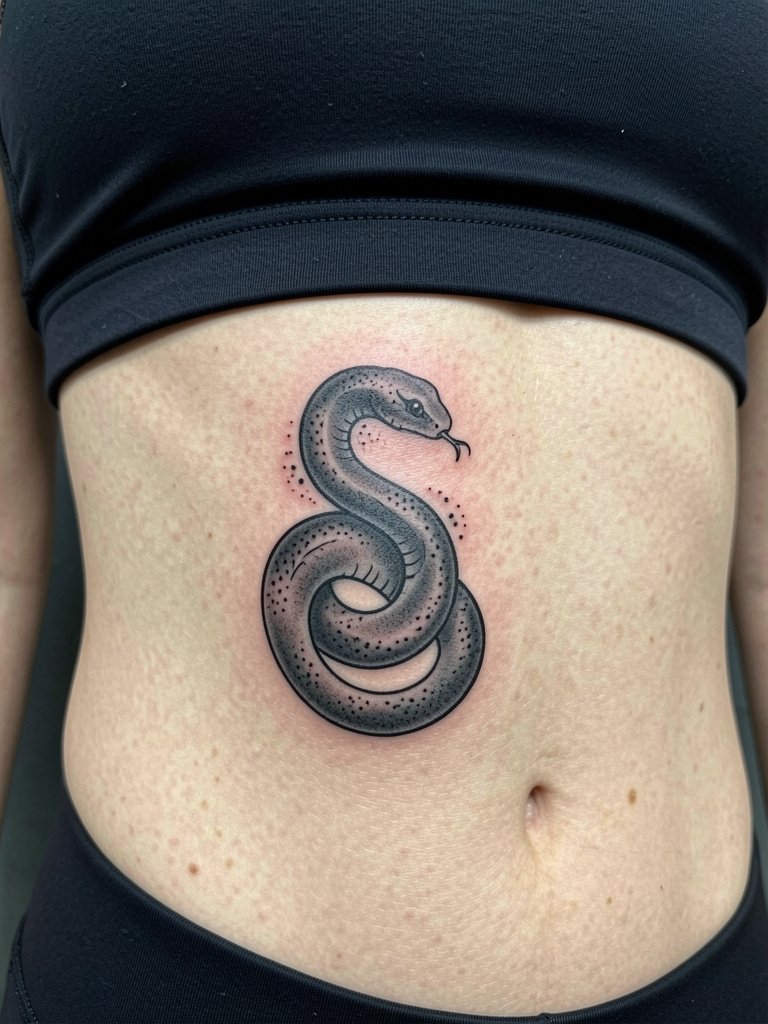
A ribcage snake is dramatic because the body curve gives movement to the coil. This is for someone who can handle a longer session and wants an elongated composition rather than a compact motif. The rib area has higher sensitivity and more skin movement, so request slightly bolder outline weight and planned spacing in the consult to avoid over-finesse. Artists disagree on fine-line rib work. One camp says tiny single-needle ribs blur within a couple of years because the skin stretches and sits near bone. The other camp says a slightly heavier line and conservative detail will settle nicely, and they can show healed photos to back that up. Expect a multi-hour session and a two-year touch-up is not unusual.
4. Single-Word Script on the Inner Wrist
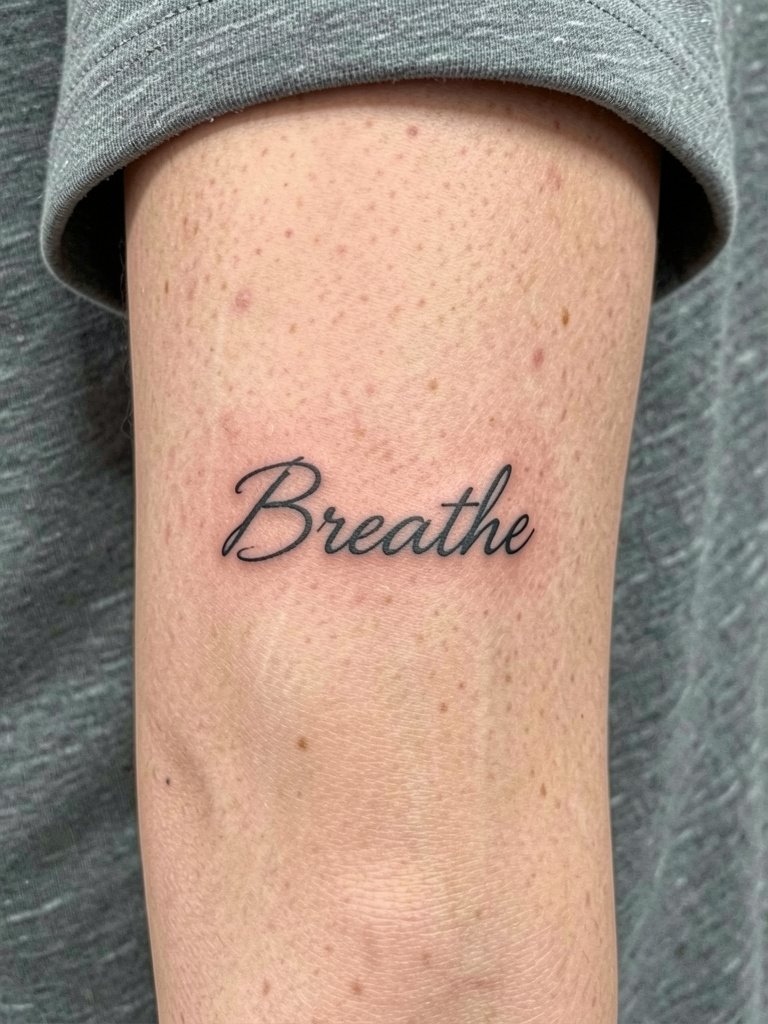
A one-word wrist script is an easy first tattoo if you size it for readability. I suggest at least two inches of horizontal length for letter spacing so descenders and loops do not merge. Bring two reference fonts and ask to see the design printed at the exact size you want. The wrist faces a lot of hand washing and friction, so plan for the first week to be protective and expect a possible one-year softening that may need a touch-up. For showing it off, stack a thin bracelet set on the opposite wrist instead of layering over the ink. For the session, avoid tight long sleeves so the artist has clear access.
5. Micro-Realism Flower on the Ankle
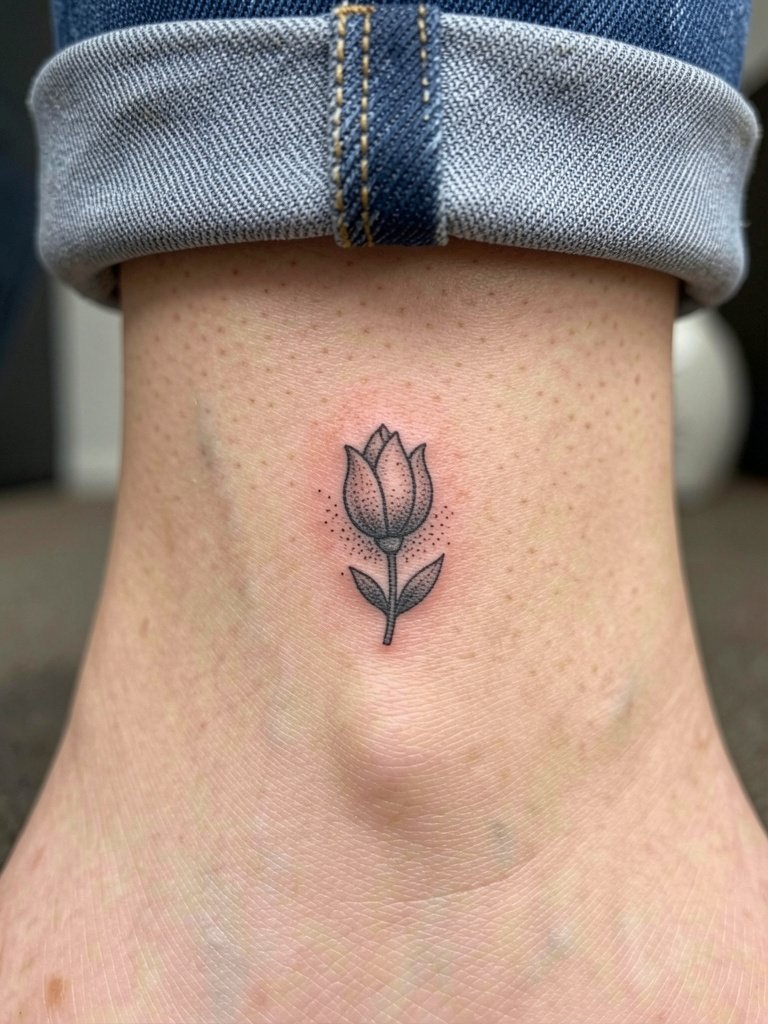
Micro-realism at the ankle looks crisp when the artist keeps shadowing minimal and the motif sits on clean skin with no swelling. I recommend a single-flower bud no smaller than one inch across to preserve petal detail. The ankle gets rubbed by socks and shoes, so pick low-rise footwear or sandals when you want it visible. Bring the exact shoe types you wear so the artist can place the piece out of constant friction. Expect a 30 to 45 minute session and plan to avoid tight socks for the first week. Pair healed work with cropped jeans to reveal the placement.
6. Classic Rose on the Shoulder Blade
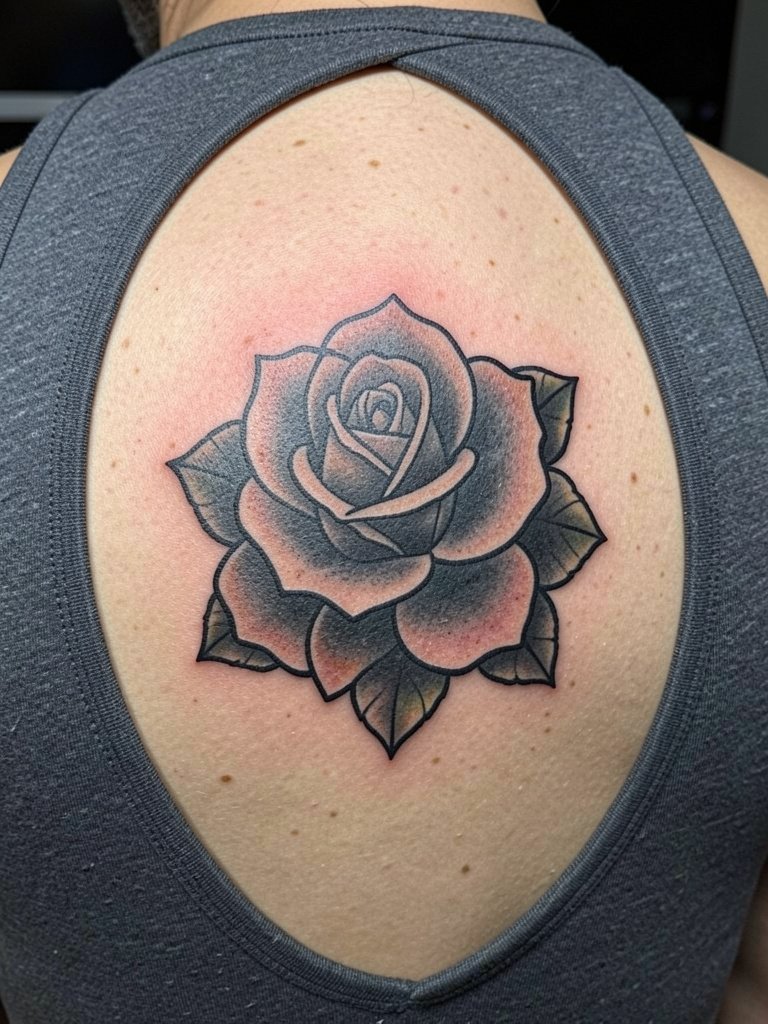
A shoulder blade rose can expand into a larger back piece later, so treat it like a starting panel. I recommend a medium size that gives petals room and avoids tiny internal lines that trap ink over time. During the consult bring a healed photo showing the same curvature and ask for reference spacing from the spine. The shoulder blade is lower on the pain scale but sits under clothing that can rub while sleeping, so wear a loose racerback or open-back top to bed if needed. To show it off with outfits, try a racerback tank. Expect a 60 to 90 minute session depending on saturation.
Pre-Session Essentials
The inner wrist, ankle, and ribcage ideas above heal under different stresses, so these five items smooth the session day and the first week.
-
Stencil transfer paper kit. Lets you preview the exact placement on the skin, which matters for collarbone and forearm pieces where bone lines change the composition.
-
Topical numbing cream. Applied per directions about 45 minutes ahead it helps with rib and sternum sessions while still allowing clear linework.
-
Thin protective film roll. Useful for ankle and wrist tattoos that face friction from socks and jewelry during the first 48 hours.
-
Fragrance-free gentle body wash. Cleanses healing skin without perfumes that can irritate fresh ink on sensitive areas like the inner thigh.
-
Aquaphor healing ointment. A mainstream balm for the first few days that locks in moisture for tight linework without clogging the area.
7. Medusa-Inspired Portrait on Upper Arm
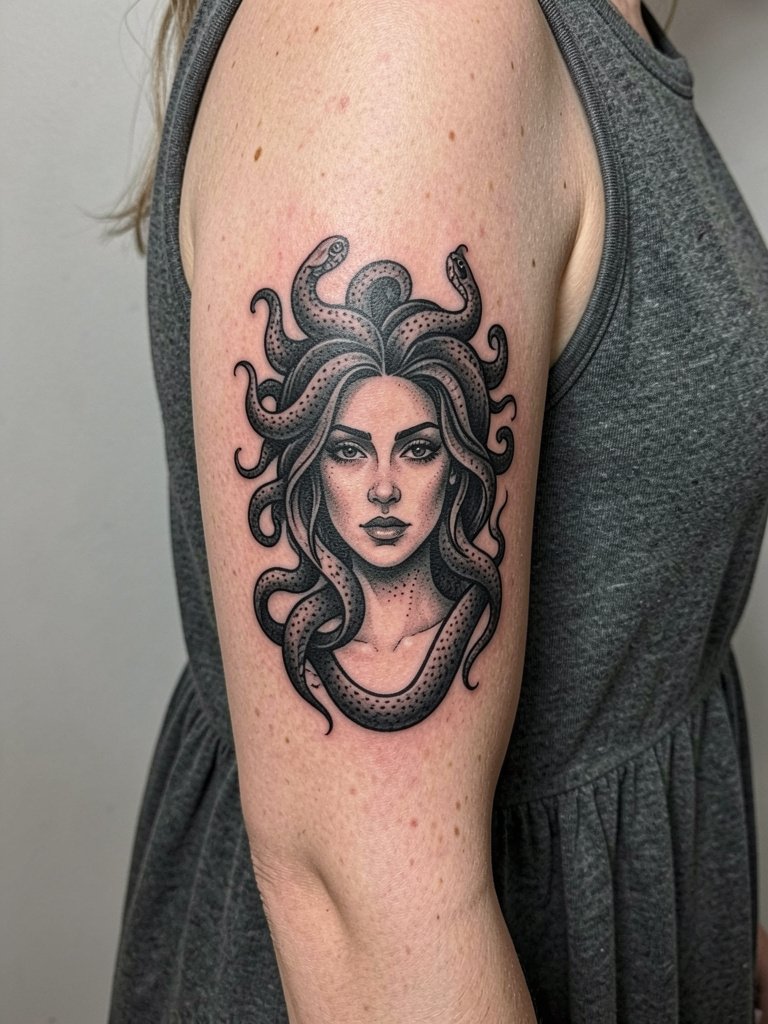
A portrait with ornamental snakes reads as empowerment for some clients and as mythic iconography for others. This style benefits from bold contrast and careful saturation to keep facial detail from blurring. Artists split on color versus black-and-gray for this scale. One camp says black-and-gray ages more predictably because saturation and contrast hold up on curved arms. The other camp says color can be durable when saturation is strong and the client commits to sun protection. If you want color, request healed portfolio examples from the artist showing similar skin tones and saturation. Expect multiple sessions for larger portraits and plan clothing that gives full arm access.
8. Geometric Mandala Centered on the Sternum
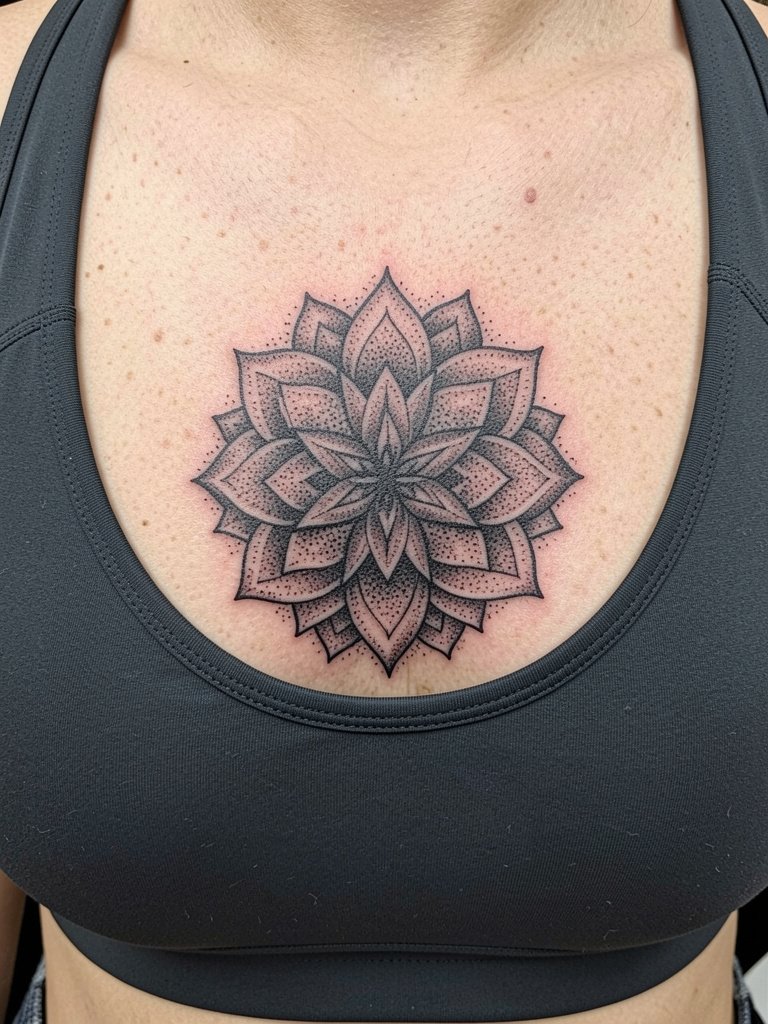
A sternum mandala sits at a high-movement zone and needs deliberate spacing. Because many mandala patterns have cultural origins, mention source inspiration respectfully and avoid copying sacred symbols without context. Ask the artist for symmetry mockups and for them to place the center on your sternum midline. The sternum can be painful and sessions often split into shorter appointments. Plan to wear a comfortable, supportive top that the artist can work around, and expect a touch-up at the six- to twelve-month mark for fine dot work.
9. Minimal Mountain Range on the Shoulder Cap
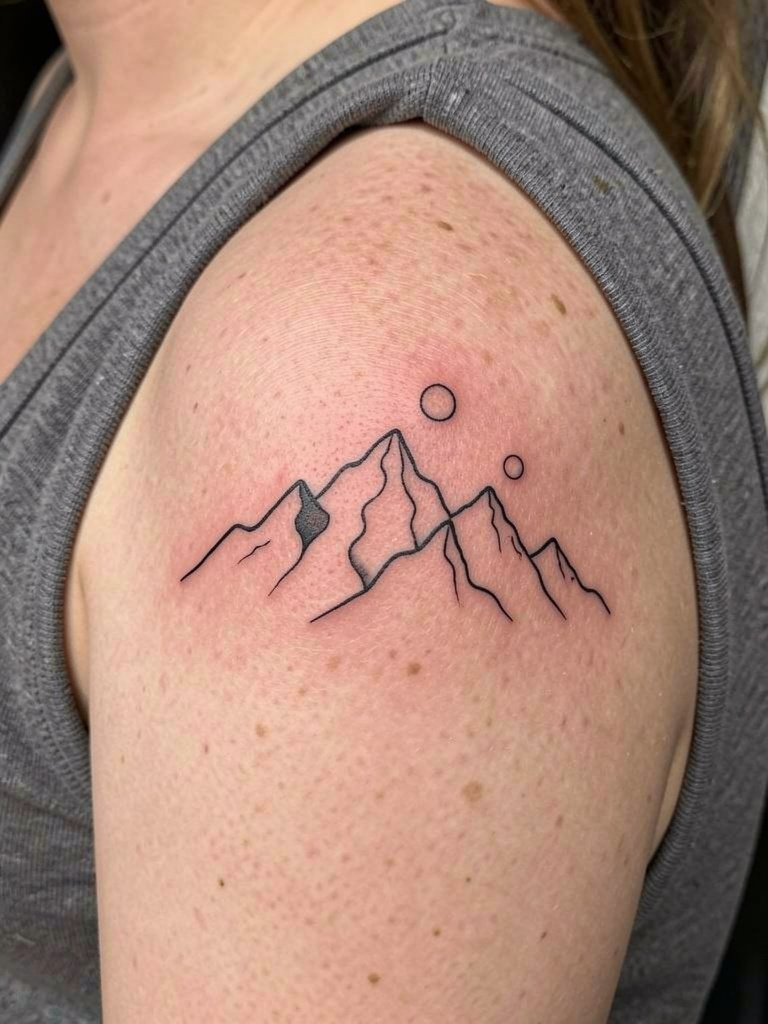
A tiny mountain range is a low-commitment option that works well on the shoulder cap because the natural curve enhances the silhouettes. I recommend a slightly bolder contour than you think you need to avoid softening. For the session wear a loose tank top so the shoulder is reachable and the artist can angle lines to the shoulder curve. For showing it off try an off-shoulder sweater or sleeveless top. Expect a 30 to 45 minute session with minimal aftercare.
10. Gothic Ornamental Thigh Panel
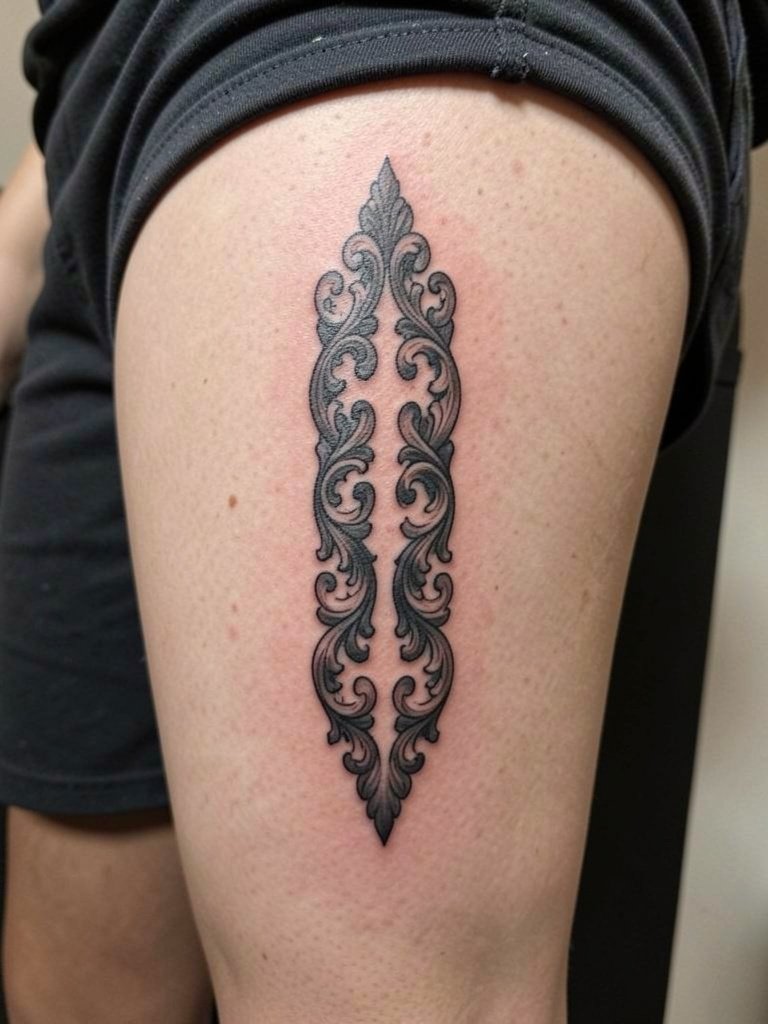
A thigh panel gives space for ornate blackwork that reads from a distance. I recommend avoiding overly dense micro-detail in the first pass so the fill has room when the skin settles. The thigh is forgiving on pain and ideal for a multi-session build. Make sure the artist shows scaled sketches that respect your leg contours. During the session wear loose shorts or sweatpants that can be pulled down and fastened below the area without pressure on fresh ink.
11. Flowing Script Along the Lateral Hip
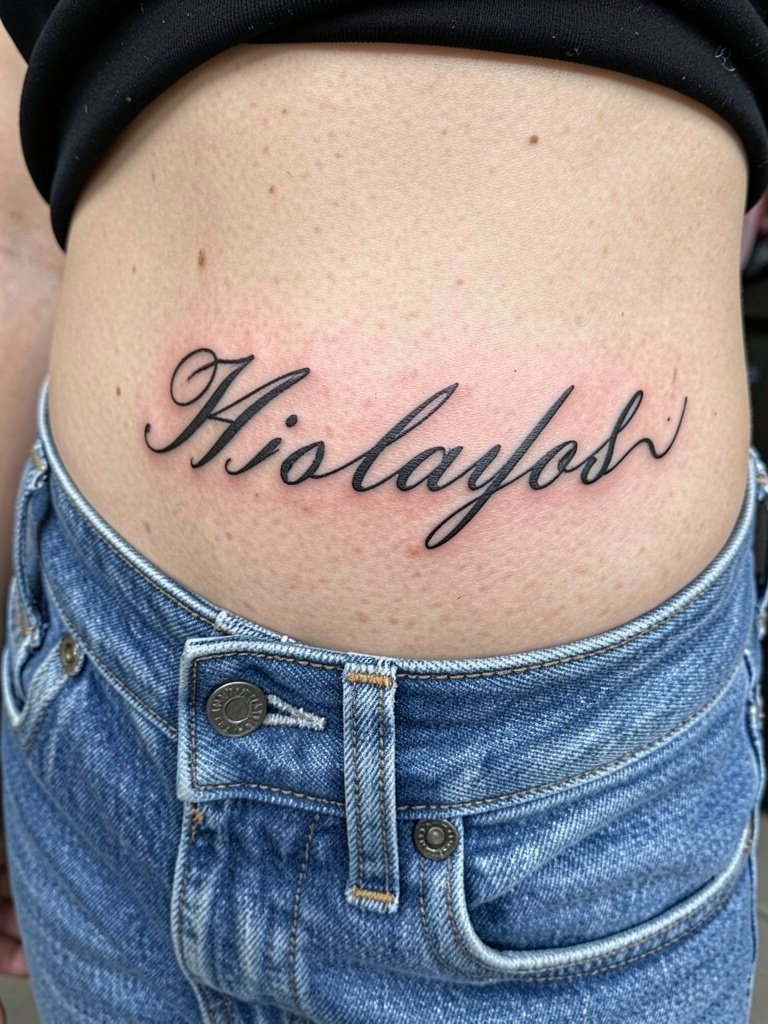
The lateral hip lets a script follow a natural curve, which can be flattering when the lettering flows with the body shape. Request a full-size printed mockup so you can see how each letter sits over the hip bone. Avoid tiny narrow lettering that disappears into skin folds. For the session wear low-rise pants you can easily shift down to give the artist access without tugging fabric. Pair healed work with high-cut swimwear to reveal the line.
12. Micro Star Cluster Behind the Ear
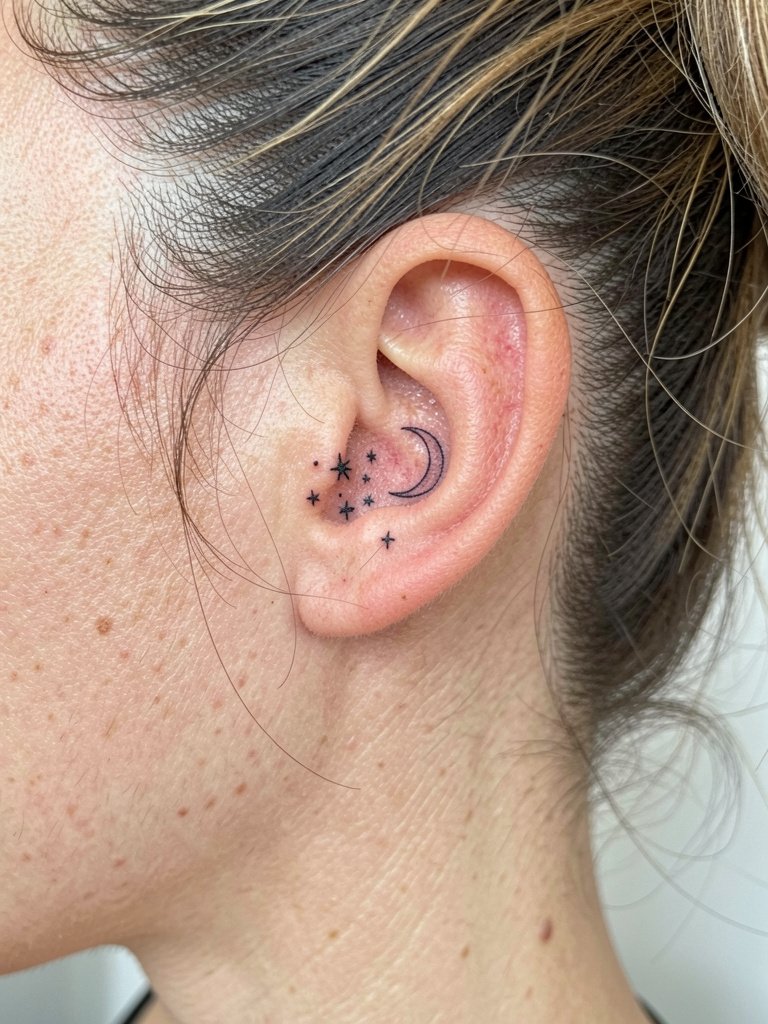
Behind-ear micro work reads as a discreet accent. Because the area is tiny and sits close to hair, ask the artist to avoid micro-shading and keep to solid dots and short strokes. The skin there heals quickly but can be tender, so a short single-session visit is typical. When you want it visible, pin your hair with simple hair clips or an updo. Mention to the artist that you sleep on your side so they can position the cluster where sleeping friction is minimal.
13. Traditional Swallow Near the Ankle
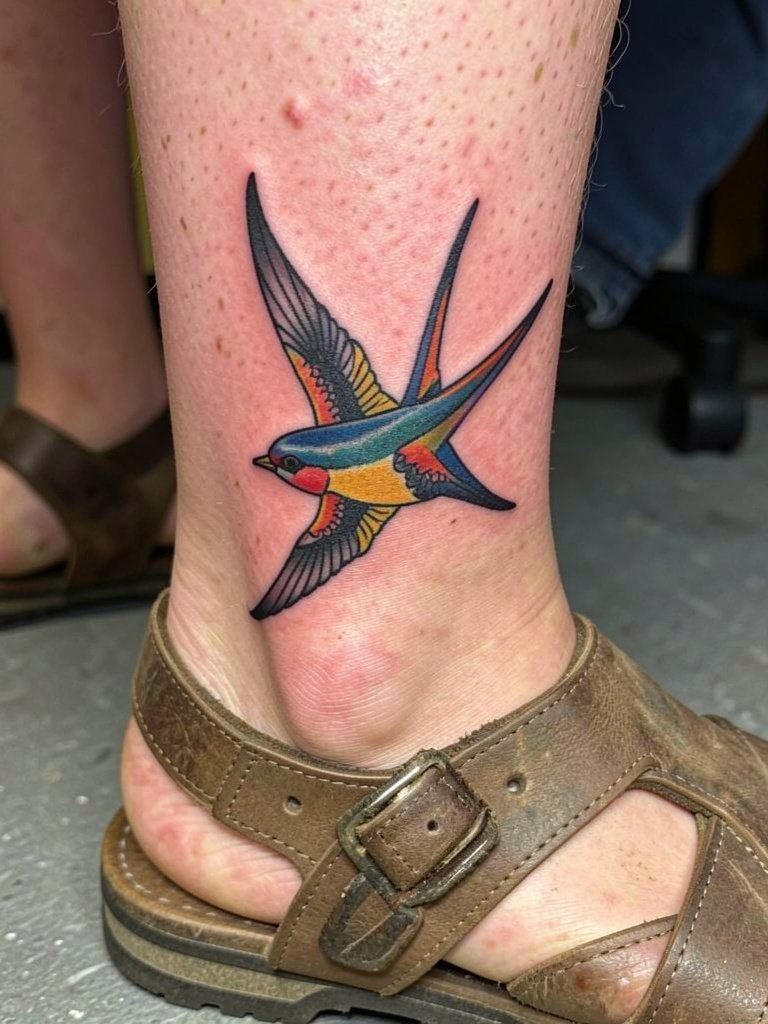
Traditional pieces like a swallow age reliably when the outlines are bold and the color saturation is solid. For small traditional motifs avoid requesting ultra-fine lines inside the wings. Ask the artist to show healed examples of small traditional work so you can confirm how color held up. The ankle can scuff from shoes and socks, so plan to wear sandals for a few days after getting ink to minimize rubbing and blisters.
14. Blackwork Armband for Upper Arm
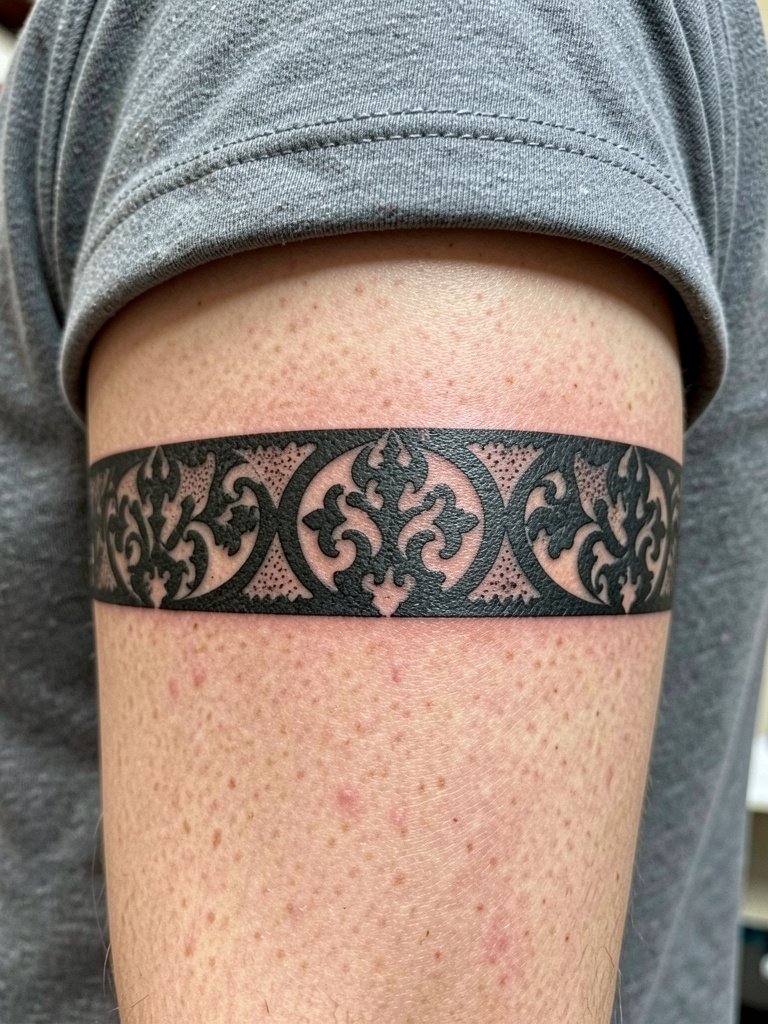
A dense black armband makes a bold graphic accent that requires solid saturation to avoid patchiness. For best longevity ask the artist to plan a single-session packing approach with a scheduled second pass if saturation needs reinforcement. The upper arm tolerates heavy blackwork well, but avoid overly tight bands that cut circulation visually. For the session wear a loose short-sleeve tee you can roll up easily so the artist has clear access. This placement ages predictably because muscle area has less thin skin than the wrist or ribs.
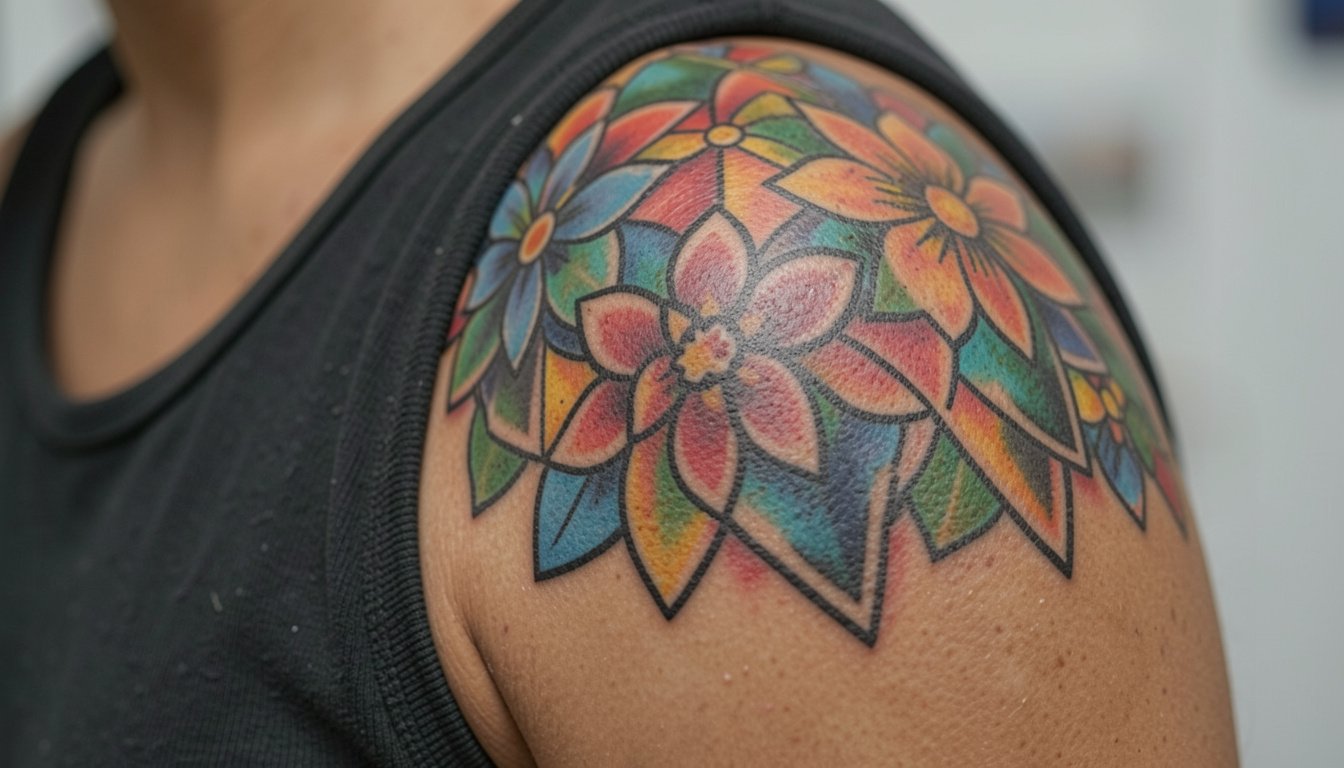
15. Colorful Neo-Traditional Half Sleeve

A half-sleeve is a commitment that pays off when the artist plans negative space and color gradients for the long term. If you are choosing color, request healed portfolio photos from similar skin tones so you can judge saturation expectations. Larger projects usually spread across sessions for detail and saturation, and most sleeves see at least one planned touch-up after the first healing cycle. For session comfort wear a loose tank top so the artist can work the arm from multiple angles and you can relax between passes.
Frequently Asked Questions
Q: How do fine line tattoos really hold up on different parts of the body?
A: Fine line longevity depends on skin movement and spacing. One group of artists says single-needle work on high-movement zones like ribs and fingers blurs faster. The other group says slightly heavier line weight and careful spacing lets fine line settle well, and they will show healed photos to illustrate. Choose placement and scale with those trade-offs in mind.
Q: Should I pick color or black-and-gray for small feminine pieces?
A: Black-and-gray typically reads longer on small details because contrast endures on most skin tones. Color can last too but requires stronger saturation and consistent sun protection. If you prefer color, request healed examples from the artist at similar size and skin tone before booking.
Q: Where can I find healed examples and local artists without relying on single accounts?
A: Search platform hashtags that combine style and placement like #finelinetattoo + your city or #collarbonetattoo + your city, then filter for posts labeled healed. Use TikTok for process videos and Instagram for portfolios, and read community threads for healed pictures and booking experiences. Reddit tattoo communities also surface long-term shots and honest touch-up notes.
Q: What should I wear to the studio for these placements?
A: Wear clothing that gives direct, comfortable access to the area. For shoulder and arm work a loose tank is best. For ribcage pick a soft cropped top that the waistband will not press into the fresh ink. For hip or thigh pieces choose loose bottoms that can shift without tugging on the skin.
Q: How often do small tattoos need touch-ups?
A: Small tattoos that are well-spaced and properly saturated often need a touch-up within one to three years, depending on placement, sun exposure, and friction. Healed photos from the artist are the best indicator of how their work ages, so ask to see examples at one year and three years when possible.
