
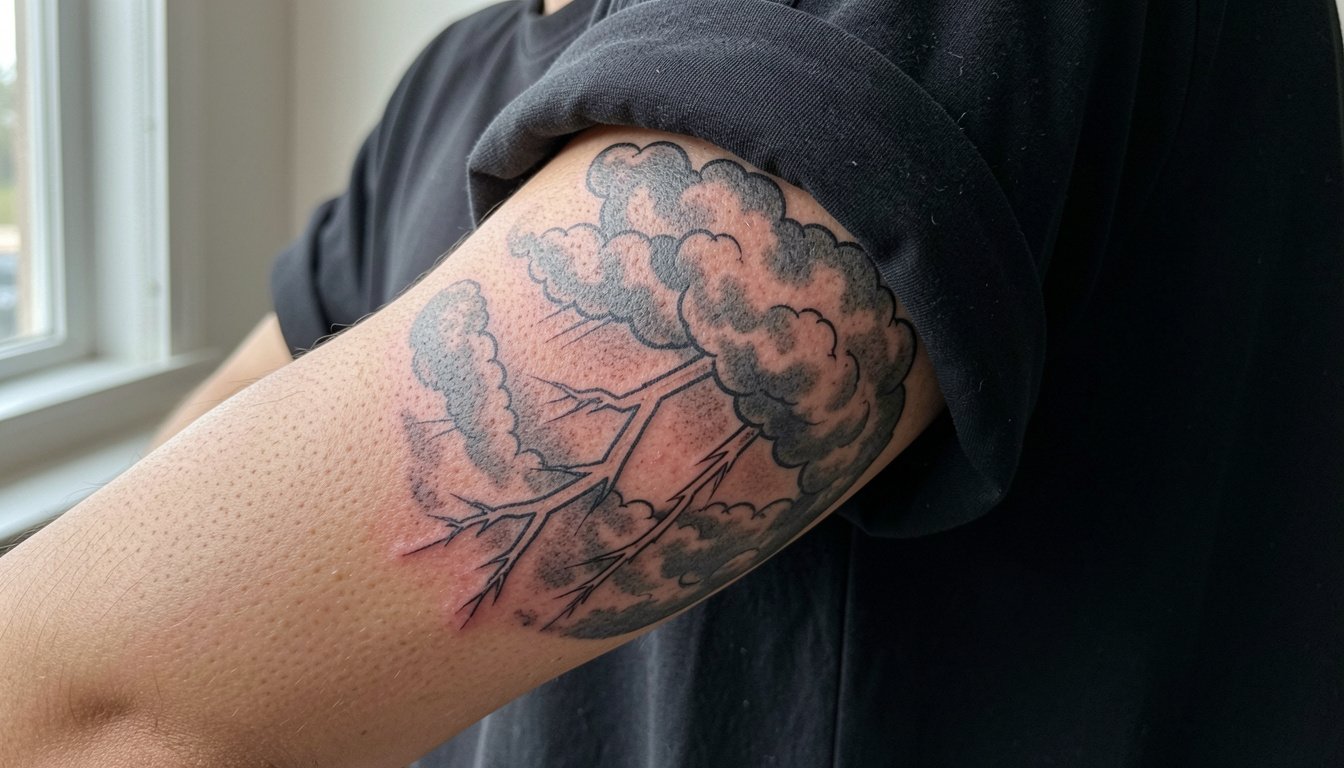
Zeus sleeves that still read decently at year five are often the opposite of what shows up on trend feeds. High-contrast black and gray portraits and storm textures keep facial planes and lightning bolts readable as skin moves, while tiny ornamental details fade into cloud noise. Expect real talk about session flow, where to start the composition, and the wardrobe choices that actually help the artist work clean.
1. Zeus portrait with lightning bolt and storm clouds on shoulder cap
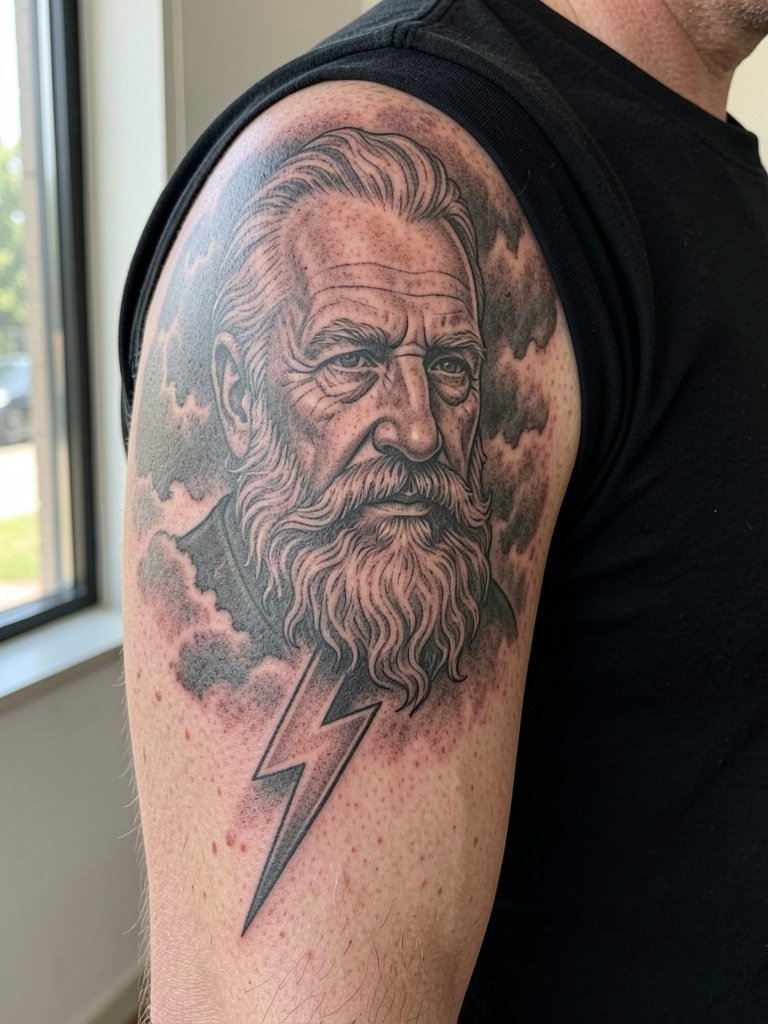
A large portrait anchored on the shoulder cap reads like the centerpiece of a sleeve and gives the artist room to plan flow. I recommend this when you want a clear king-of-the-gods read and plan to add background clouds later. During your consultation bring a close-up portrait reference plus a full-arm photo so the artist can show how the face sits near the deltoid. Common error is asking for ultra-fine hairlines on the beard, which soften into mush in high-motion spots. Expect two to four sessions for a clean black and gray portrait, and plan a touch-up at year two if you want the beard texture crisp.
2. Seated Zeus on a throne wrapping into the chest
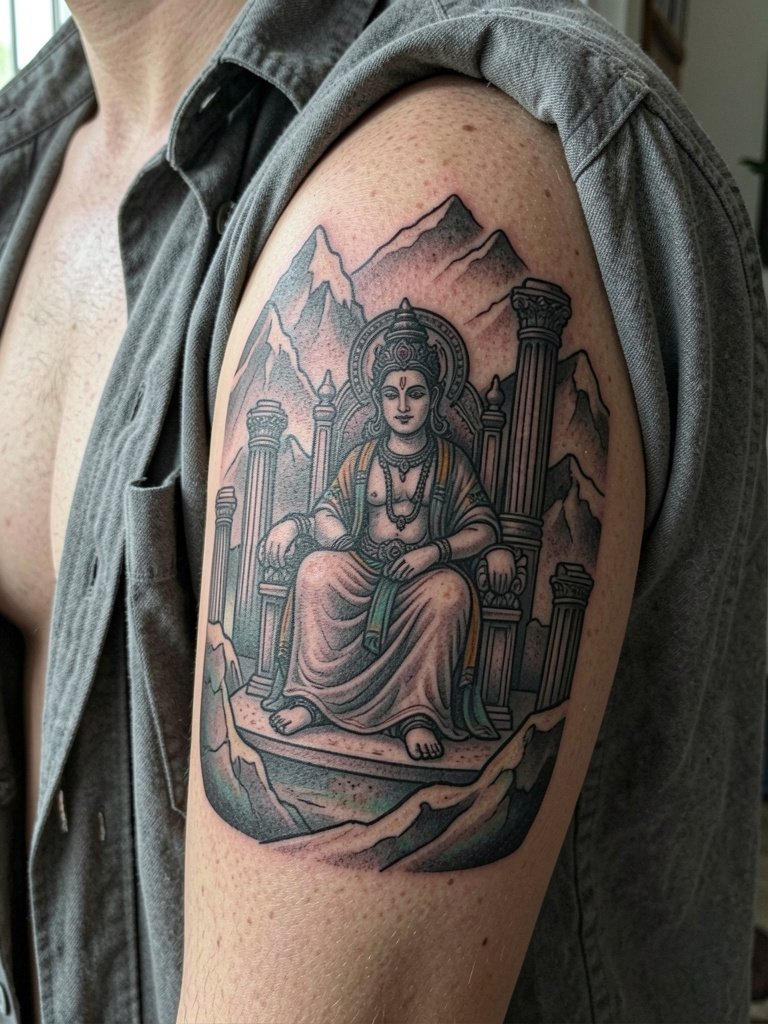
The throne composition is perfect if you want hierarchy and narrative in a single panel. One camp prefers black and gray here because the architecture and shadows keep a sculptural feel that ages predictably. Another camp favors muted color for cinematic highlights and gold accents on scepters. Name which outcome you want and let the artist plan saturation accordingly. A frequent mistake is overloading the chest transition with tiny column detail, which can distort when the torso moves. For session day wear bring an overshirt you can slip off and show the shoulder without compressing the chest area. A relaxed linen overshirt works well for both access and comfort. [https://www.amazon.com/s?k=relaxed+fit+button+up&tag=tattooengineer-20]
3. Action-pose Zeus with thunderbolt across the bicep
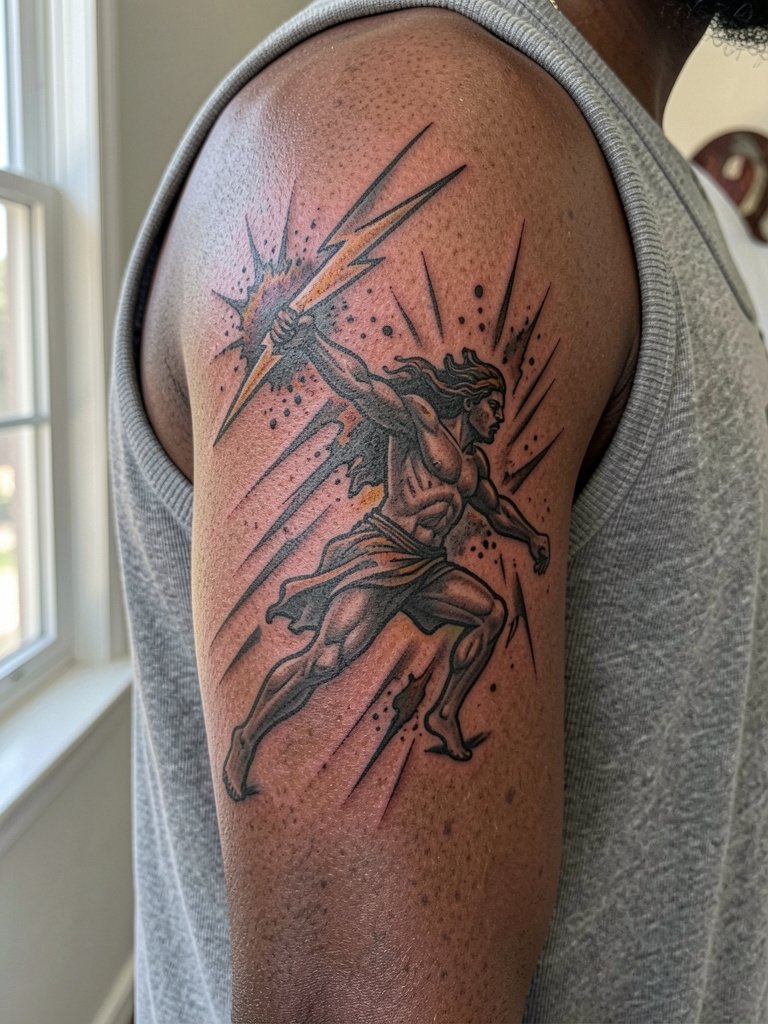
Choose this panel when you want motion to break up the sleeve and draw the eye down the arm. It reads better than a static bust on a long forearm because the action aligns with natural body lines. Discuss outline weight with your artist so the thunderbolt keeps presence as the arm flexes. A common mistake is too many small accents around the elbow crease, which get lost and can make the pose seem busy. Expect a one to two session panel and moderate pain on the outer bicep. For showing this off later, sleeveless gym tanks emphasize motion and arm anatomy. [https://www.amazon.com/s?k=mens+gym+tank&tag=tattooengineer-20]
4. Zeus emerging from storm clouds with temple backdrop down the sleeve
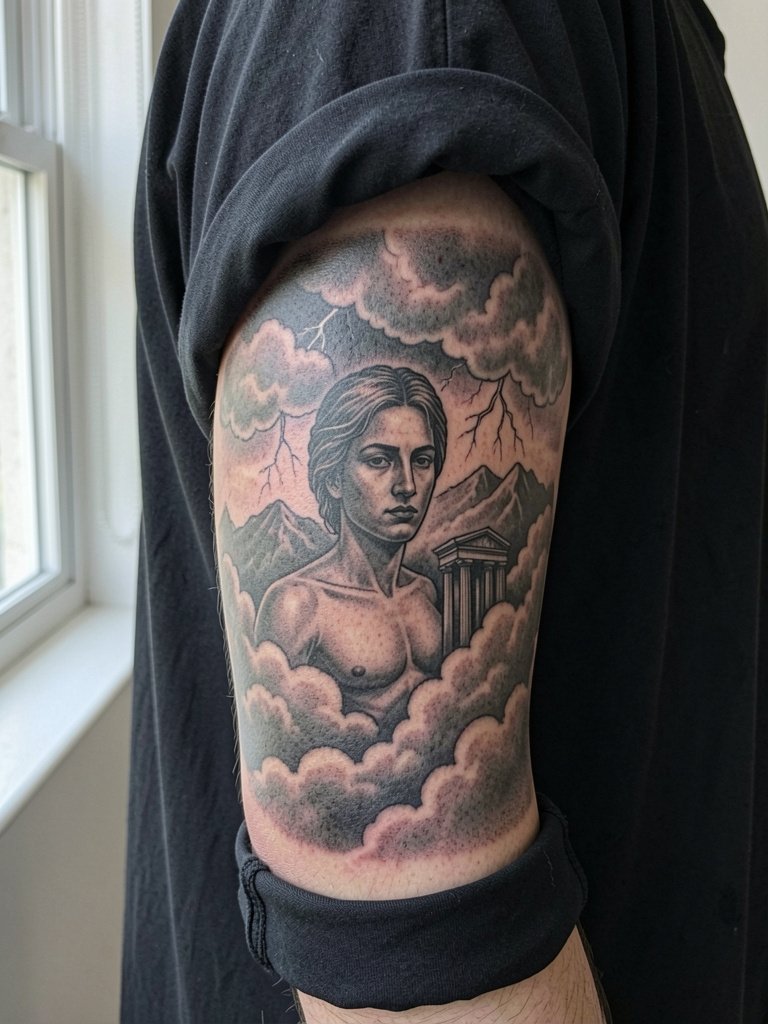
This option solves the filler problem by letting clouds and architecture connect panels across joints. When you want a cinematic sleeve, ask the artist to block large darks and leave negative-space lightning forks so the composition doesn't sink into a single gray mass. A common aging issue is overdoing micro-cloud texture near the elbow crease, where movement accelerates softening. Plan the first session to map the primary lights and darks, then schedule follow-ups to refine facial detail. For session wear choose a very loose top so the artist can repeatedly move fabric without sticking to fresh ink.
5. Zeus head close-up with intense beard detail on outer forearm
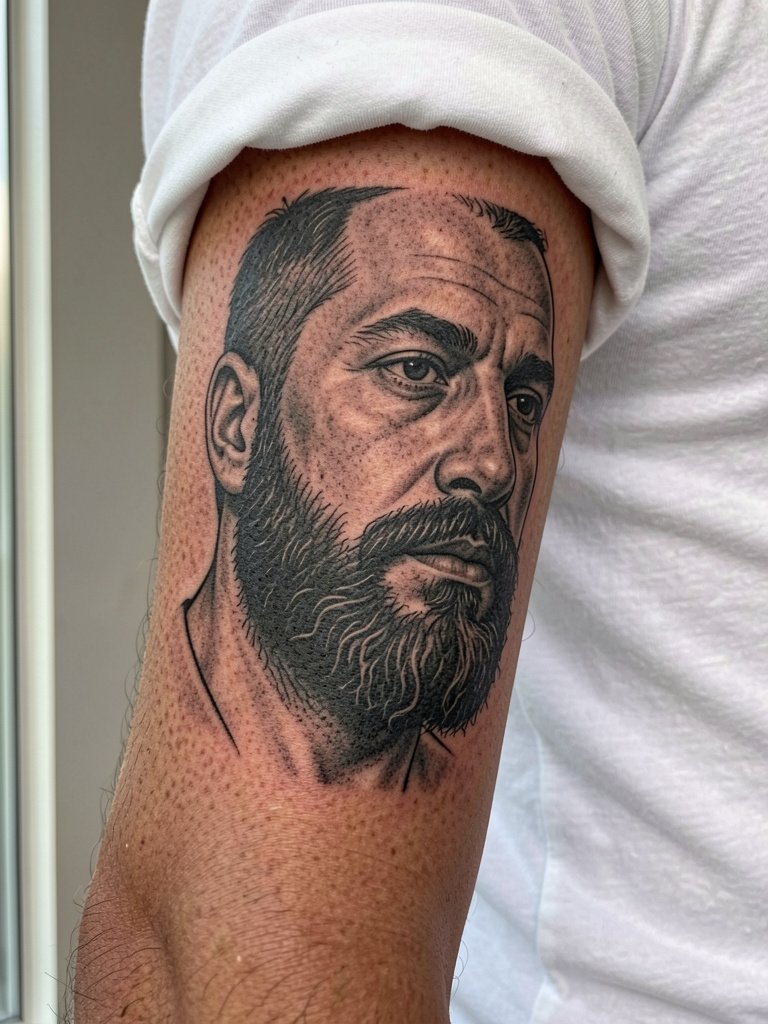
A close-up portrait on the outer forearm gives intense facial detail without requiring a full sleeve. This placement exposes the panel to sunlight more than the shoulder, so stronger contrast is critical. Tell the artist to avoid tiny whisker lines in the beard and to favour slightly bolder stipple shading for longevity. Healed at six months the face will look softer, and by year three the beard needs higher initial saturation to retain texture. Keep a basic fitted tee for show-off wear that frames the forearm against neutral fabric.
6. Zeus with companion eagle on the shoulder seam
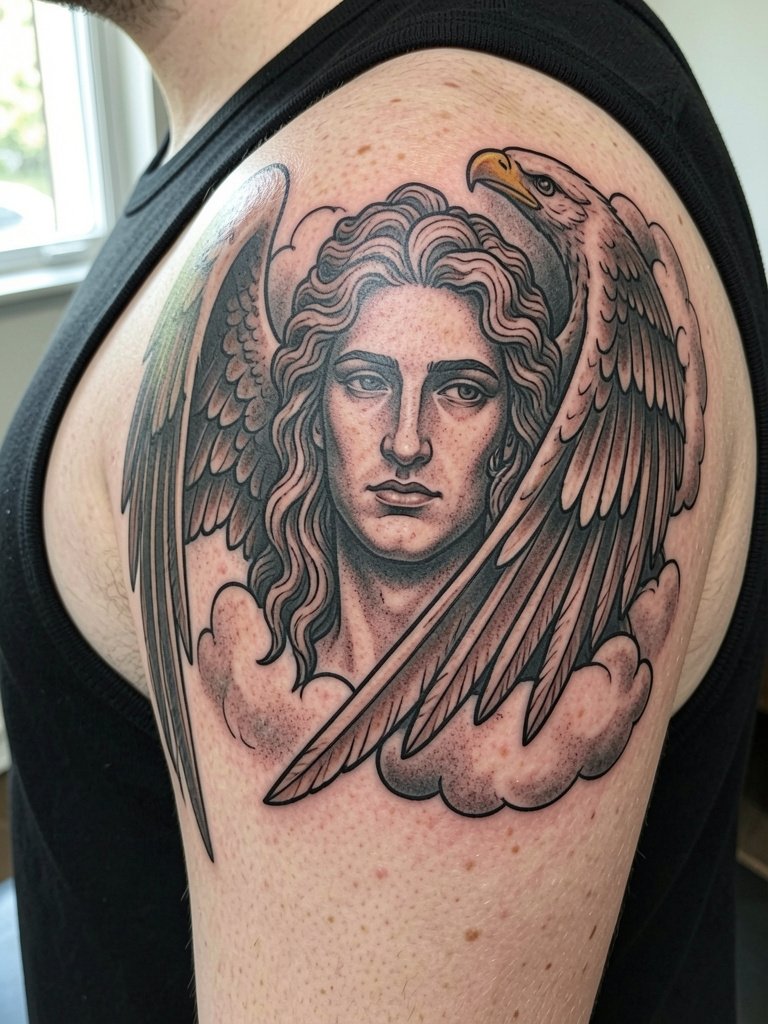
Adding an eagle solves two problems: it lends mythic symbolism and creates directional lines that carry the sleeve. If you want the eagle to anchor the shoulder, ask for wing feathers to overlap the deltoid so the transition reads from the front. A mistake is leaving the talon detail too small where the shoulder skin creases. Session feel is moderate and often split across two passes because the shoulder cap can be stubborn. For showing this off, wide-neck shirts and tank tops keep the shoulder-to-arm flow visible. [https://www.amazon.com/s?k=wide+armhole+tank&tag=tattooengineer-20]
Pack Smart
Those first six designs lean heavily on shoulder and upper arm work, so a few session-day essentials make the appointments smoother.
-
Tattoo-specific unscented lotion. A lighter alternative to heavy ointments helps during the dry-flake stage without clogging the skin, which matters for detailed beard and feather work above.
-
Second-skin alternatives for sensitive skin. Useful if you react to standard adhesive dressings, especially for shoulder caps that rub against straps.
-
Fragrance-free bar cleanser. Gentle bar cleansers keep large sleeves clean during repeated showers without irritating fresh ink.
-
High-zinc mineral sunscreen. Essential for healed black and gray panels that need contrast preservation when exposed.
-
Saniderm second-skin bandages. The sealed healing environment is handy for large shoulder-to-arm panels that otherwise catch on clothing in the first 48 hours.
7. Greek column and laurel motif on the inner upper arm
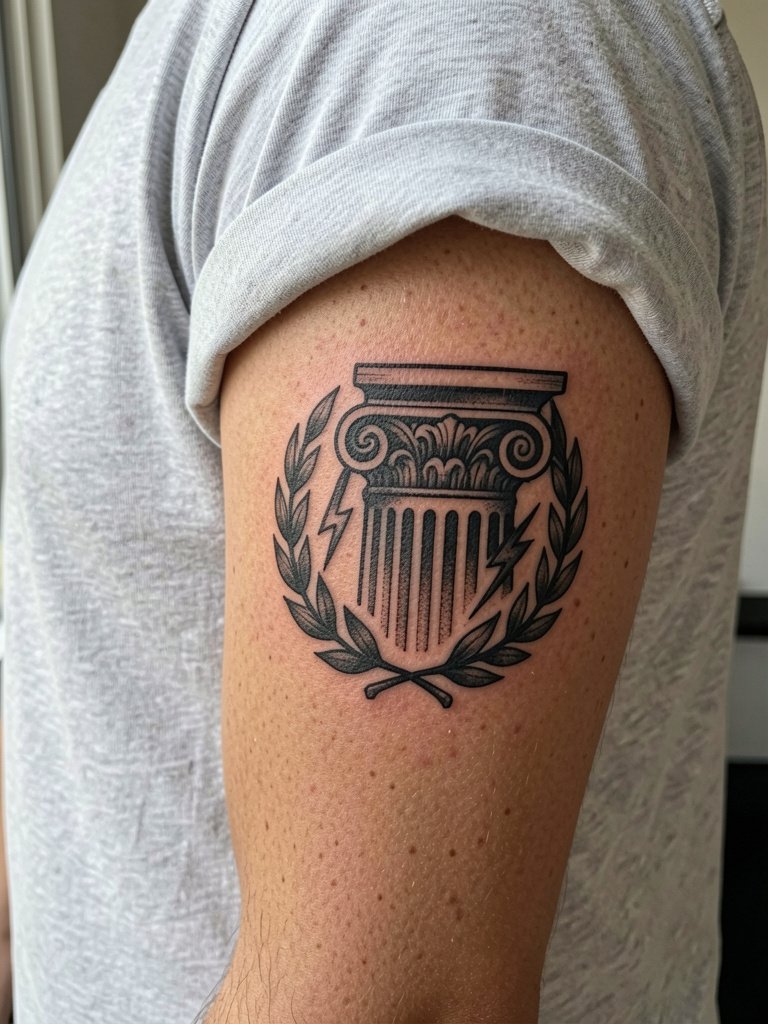
An inner-arm column piece reads as a subtle mythology panel without a full portrait. This placement sees less sun than the outer arm, so thinner blackwork holds well if you avoid micro-detail. A common mistake is stacking too many tiny laurel leaves which blur after a year. Tell the artist to favor bolder leaf shapes and a slightly higher contrast between column edges and surrounding skin. For session wear choose a loose short-sleeve shirt that can be lifted without compression on the arm. Expect mild pain due to thin skin and occasional touch-ups for edge crispness.
8. Black and gray full sleeve with heavy storm shading
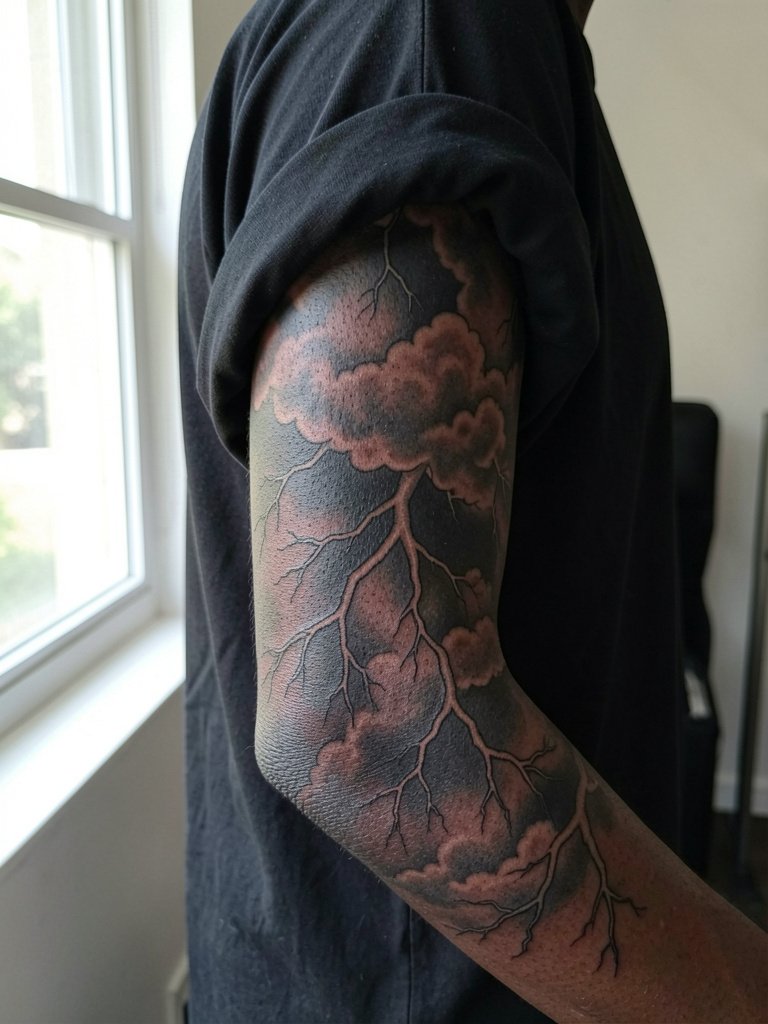
This is the collector route for people committed to a dramatic, unified arm. The advantage is an immediate cinematic presence and easier touch-up planning across large darks. The downside is that too much midtone clouding can flatten facial panels. One camp prefers dense backgrounds because they frame portraits, another camp warns that heavy fill around joints accelerates softening. If you go this route, stage the work across three to six sessions and ask for staged healed photos of similar skin tone. For wardrobe, simple monochrome outfits let the sleeve be the visual anchor. [https://www.amazon.com/s?k=loose+black+t+shirt&tag=tattooengineer-20]
9. Classical Greek statue texture, cracked marble look on upper arm
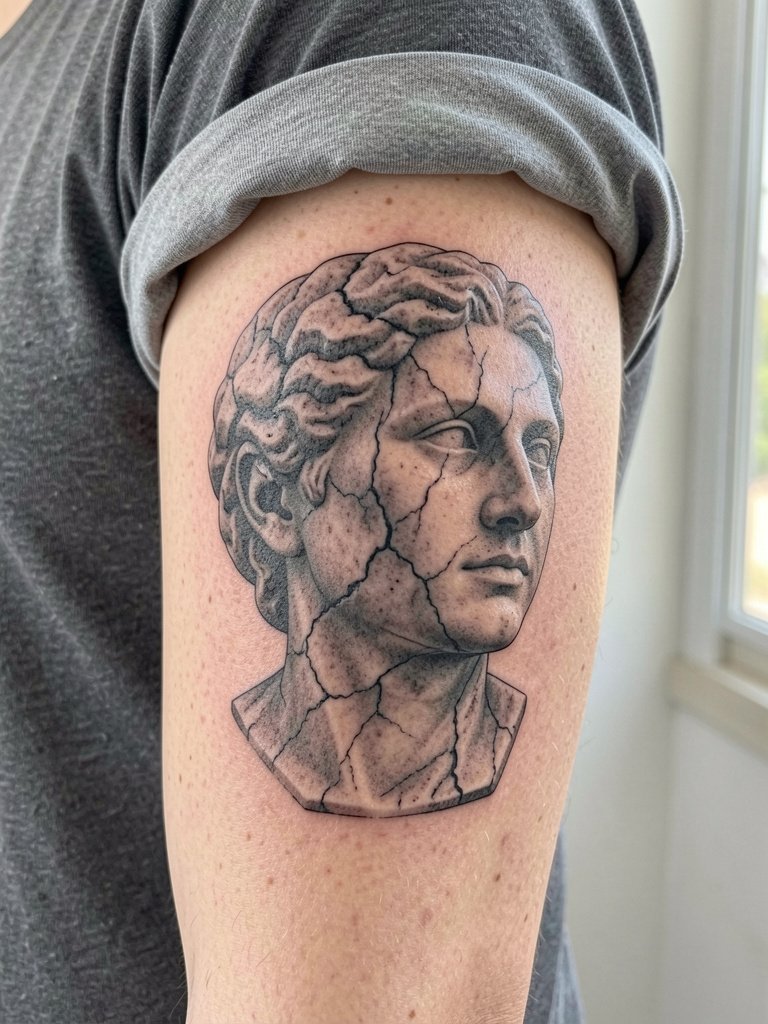
The marble finish gives a museum-like aesthetic and often ages better because it avoids tiny hairs and filigree. Realism advocates say sculptural shading is the strongest read for Zeus portraits. Neo-traditional advocates say bold outlines handle sleeve composition better. Name which side you prefer and the artist will plan for either softer sculptural grading or defined contour lines. The frequent mistake is insisting on micro hairline cracks across joints. Ask for larger stone fissures so the texture survives movement. For session day, a plain fitted tee keeps the arm accessible and frames the portrait.
10. Zeus with oak crown and scepter on the upper arm

Symbol-driven pieces like the oak crown let you lean into original iconography rather than a stock portrait. If you want symbolic clarity, ask the artist to simplify crown leaves and keep the scepter silhouette bold. Mistakes occur when the crown becomes a wreath of tiny leaves, which lose shape over time. Pain is moderate and session time is typically a single long pass for an upper-arm emblem. For showing this off stick to crew neck tees and open overshirts that frame the shoulder and chest area.
11. Storm-only sleeve implying Zeus through lightning and clouds
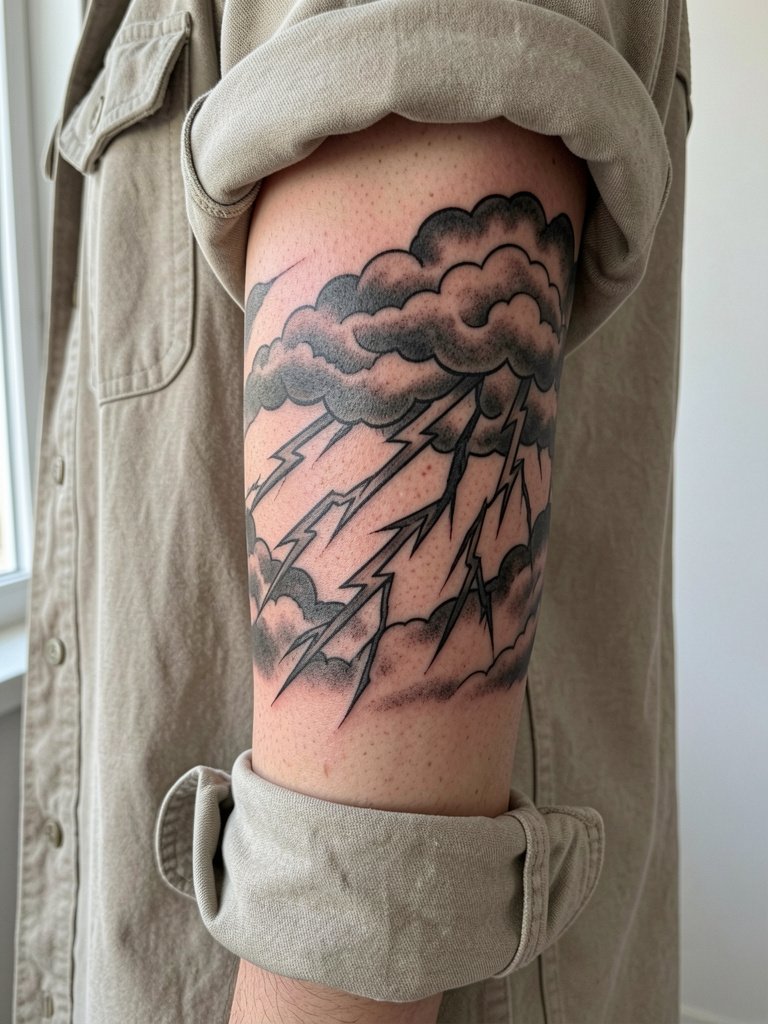
If you want mythology without a literal face, this minimal-symbol approach gives longevity. The advantage is clear contrast and fewer facial details to blur. The trade-off is people may not instantly read "Zeus" the way a portrait communicates it. A common mistake is over-texturing the clouds, which looks great fresh and then muddies. For wardrobe, monochrome basics keep the sleeve as the focal point. [https://www.amazon.com/s?k=black+denim+jacket&tag=tattooengineer-20]
12. Zeus and Hera composition crossing the chest
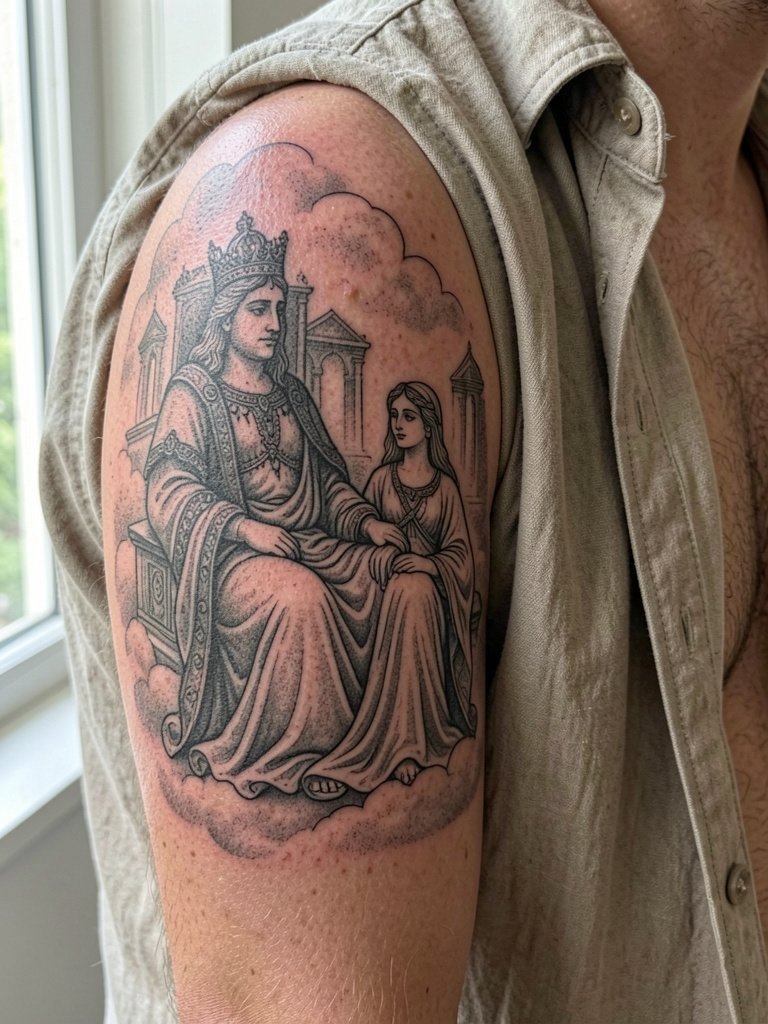
Multi-figure panels are more complex but rewarding when planned in stages. Start with the focal face first, then map the secondary figure so both have breathing room. The common error is starting both at once and ending with cramped proportions. Expect multiple sessions and an inter-session plan for chest expansion. Wear a shirt that can open at the front on session days so the artist can access both arm and chest without compression. For showing off, layered streetwear that exposes the chest seam works well with cross-chest extensions.
13. Aegis shield motif on the outer upper arm or shoulder blade
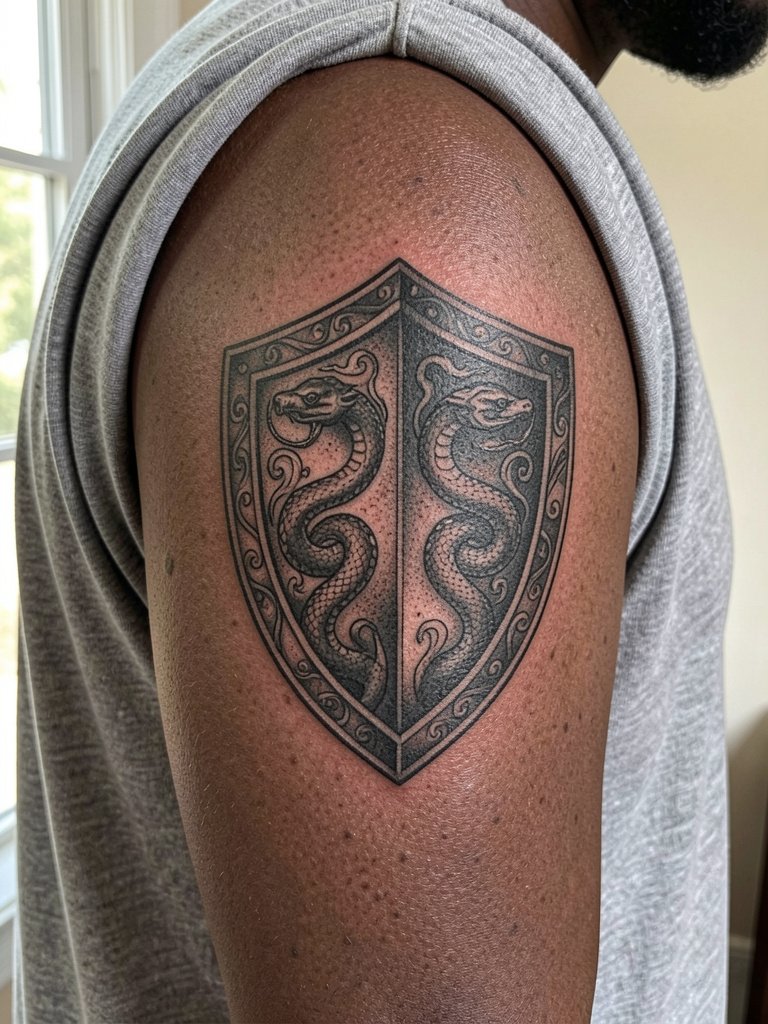
Aegis shields bring classical depth with graphic clarity, ideal for a strong central motif. Ask the artist to scale the shield so the ornamental pattern reads from arm distance and does not reduce into tiny omega shapes. The typical mistake is over-detailing the inner ornament, which does not hold well on the shoulder blade over time. Session is moderate and often performed with the client lying on their stomach for blade access. For show-off pairing, vintage-inspired jackets or open backs frame the shoulder blade art well. [https://www.amazon.com/s?k=vintage+style+jacket&tag=tattooengineer-20]
14. Patchwork Greek mythology collage with Zeus as the centerpiece
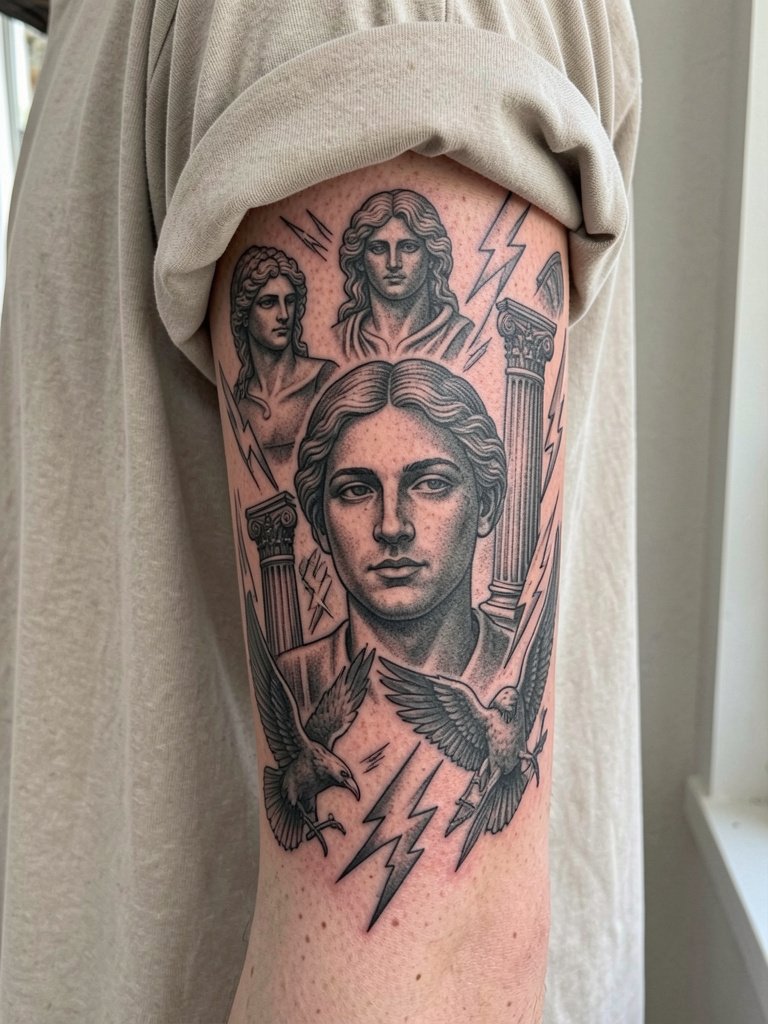
Collage sleeves are flexible if you plan long-term additions. Start the project by mapping the central Zeus portrait and reserving negative-space corridors for future panels. A mistake is doing many full-scale elements at once without planning flow, which makes later additions look pasted on. Ask for a staged layout plan that shows where later gods or symbols can plug in. For session wear pick a very loose top you can move repeatedly without sticking to fresh ointment.
15. Minimalist arc and single-bolt forearm band

If you want subtle mythology cues without heavy portraiture, this is the most understated option. The main risk is sizing the bolt too fine so it softens into a thin line. A real mistake is requesting single-needle width at a scale smaller than three inches for the bolt. For session comfort wear a short sleeve that can be rolled up and removed easily without compressing the fresh ink. Minimal wrist or forearm bands often need a small touch-up at one year depending on sun exposure.
16. Zeus portrait in motion across the inner forearm
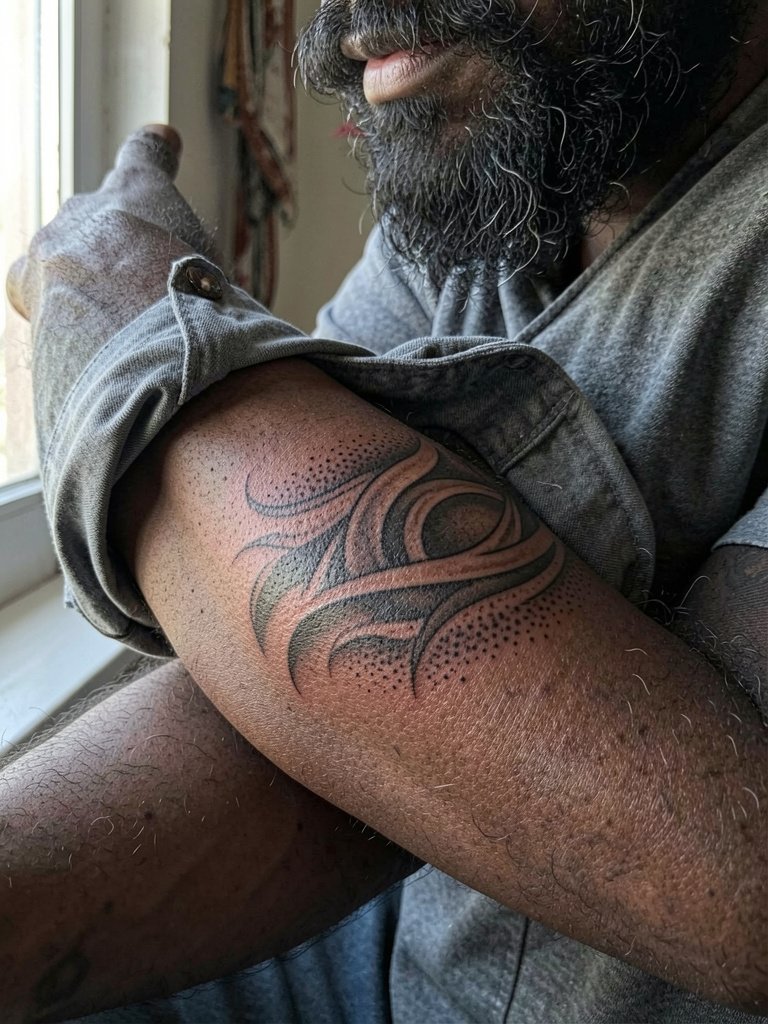
Inner-forearm portraits can be very readable because the surface stays flat and away from heavy sun. The trade-off is visibility and workplace considerations for some people. Ask for slightly stronger linework in shadowed areas and stipple beard texture so the motion holds up. The inner forearm is forgiving for detail, but micro hairlines still risk softening if placed too close together. For showing off, fitted basics in white or black keep the portrait as the focal point and create a clean backdrop for the art. [https://www.amazon.com/s?k=plain+white+tee&tag=tattooengineer-20]
17. Low-contrast atmospheric sleeve with selective color accents
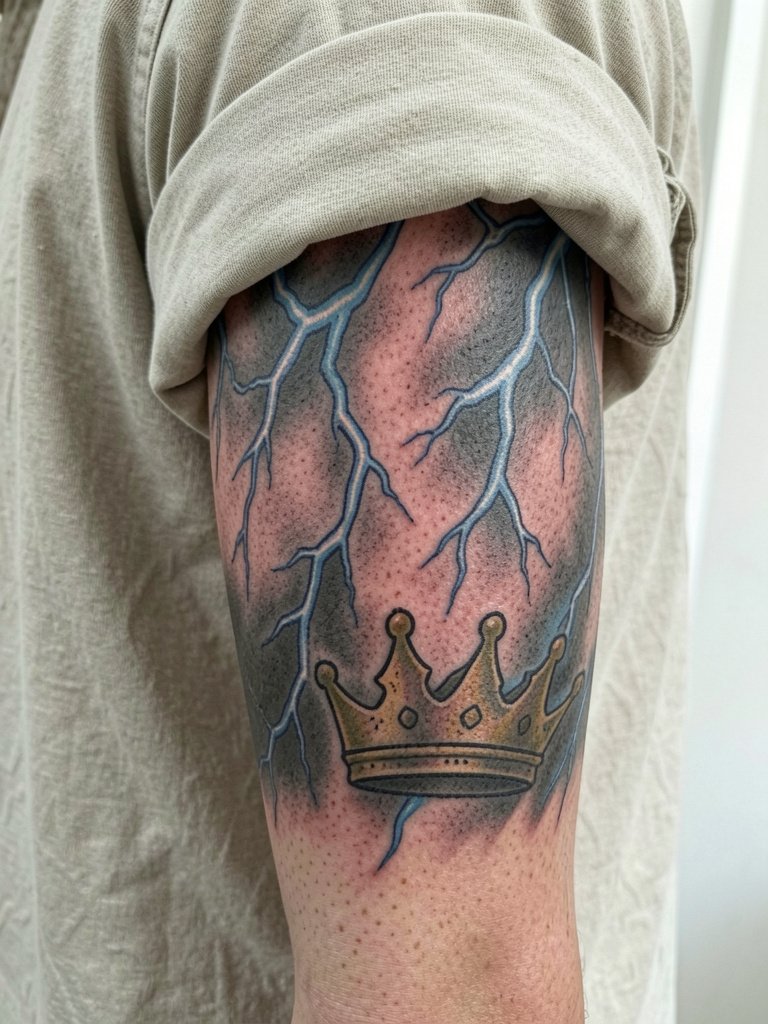
If you want cinematic color without committing to saturation across the sleeve, pick strategic accents like blue lightning or gold crown leaves. Color advocates say accents make Zeus feel divine, black and gray advocates warn that color can desaturate over time. Be explicit about which elements receive color and ask for healed samples on similar skin tones. The mistake is adding too many small color dots which fade unevenly. For wardrobe, neutral overshirts keep the colored accents readable without visual competition.
18. Small Zeus medallion over the bicep with laurel border
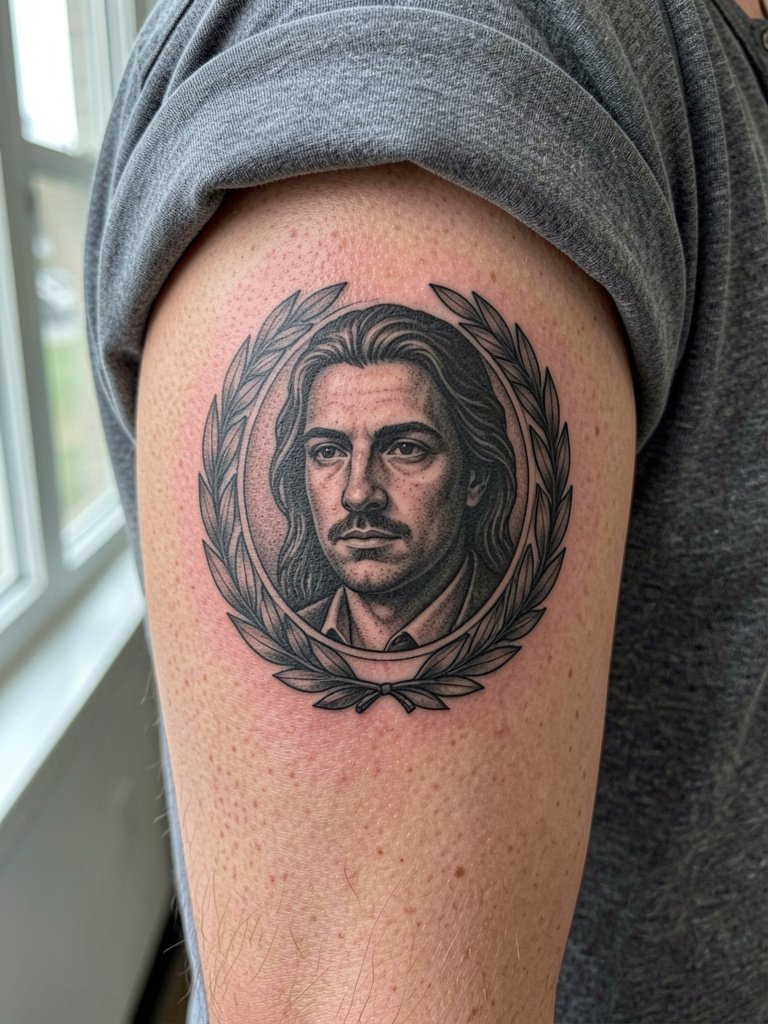
A medallion gives a badge-like look that is easier to place into future sleeves. The trick is leaving a clean halo of skin around the circle so it reads independently from adjacent panels. A mistake is jamming the medallion too close to the elbow or armpit where curvature distorts the circular form. Session time is short and pain is mild, making this a good starter piece if you plan a sleeve later. For showing it off, a henley or rolled-sleeve tee frames the bicep attractively. [https://www.amazon.com/s?k=charcoal+henley+shirt&tag=tattooengineer-20]
19. Fragmented temple ruins with Zeus symbols on the outer forearm
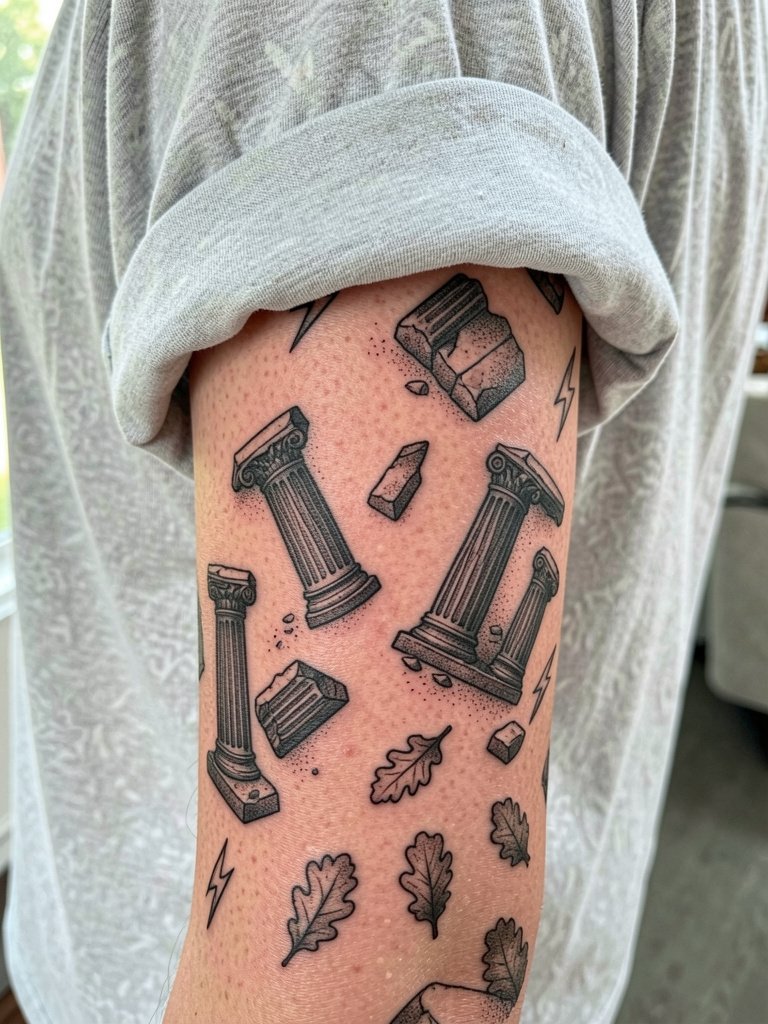
Using architectural fragments is a low-risk way to get mythology without a full portrait. It also helps stage a sleeve because fragments can be connected later. The common error is over-detailing stone texture in narrow strips, which makes flow work harder during expansion. Tell the artist which symbols are primary so filler doesn't compete. For session comfort wear a loose top that can be moved easily during multiple forearm passes.
20. Zeus bust with halo lighting across the wrist and hand transition
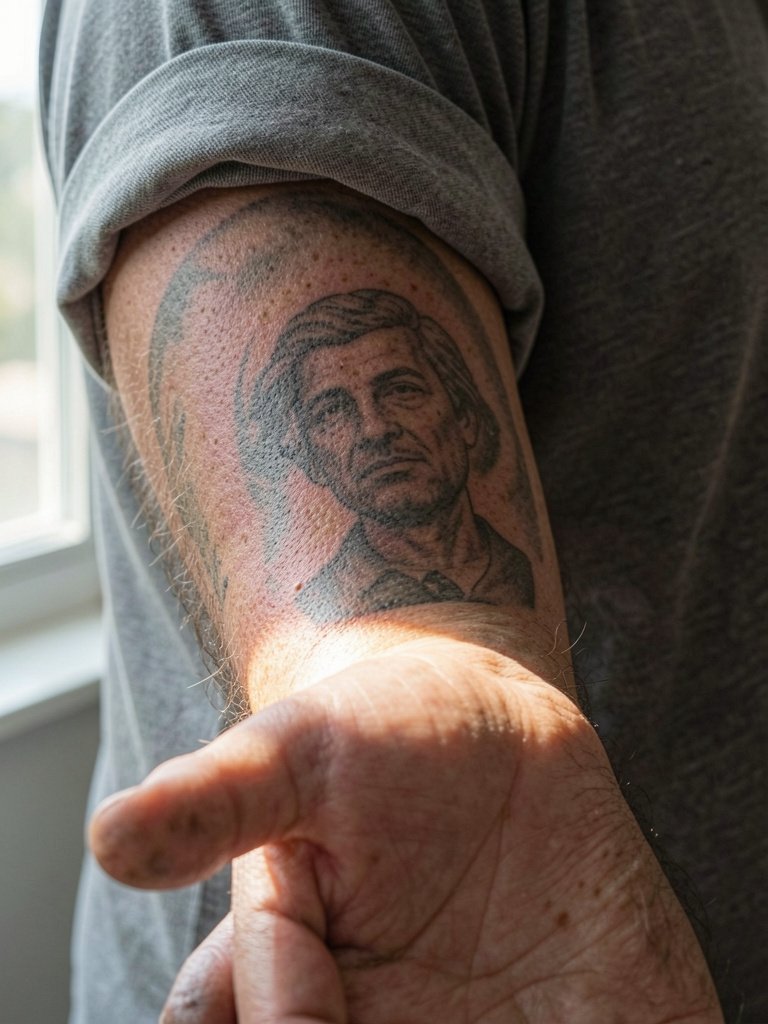
Extending a Zeus bust into the wrist and hand looks striking but requires planning because the hand ages differently. The mistake is carrying tiny beard detail over the knuckles, which can blur with frequent washing and friction. Ask the artist to simplify transitions across the wrist and to leave bold negative-space lines on the hand. Expect a tougher session due to sensitivity near the wrist and higher chance of needing a touch-up on hand segments. For session wear avoid watches and bracelets that compress the area.
21. Stipple shading Zeus portrait on the outer calf
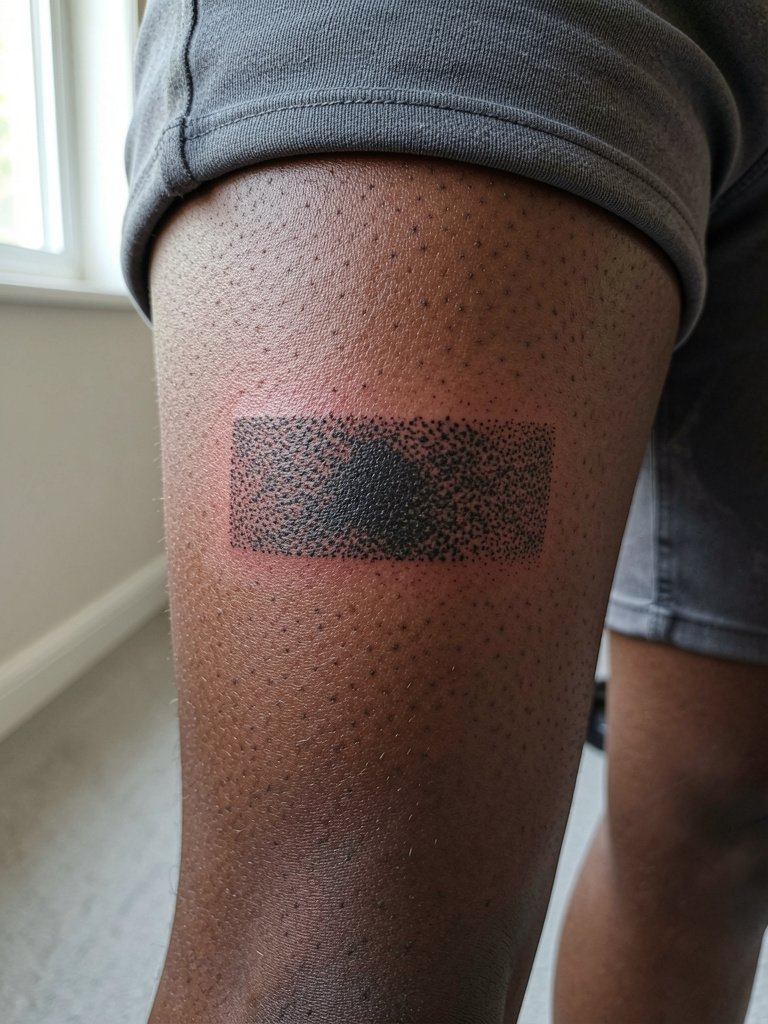
The calf is an underrated place for Zeus work if you want a vertical portrait that is easy to hide. Stipple shading can read beautifully on the lower leg and tends to age cleanly when dot spacing is planned. A common error is packing stipple too tightly, which creates a muddy look after healing. Session feel is moderate and sitting positions are comfortable, making longer single-session work feasible. For showing off, shorts or denim with rolled cuffs do the job.
22. Negative-space lightning sleeve with bold black panels
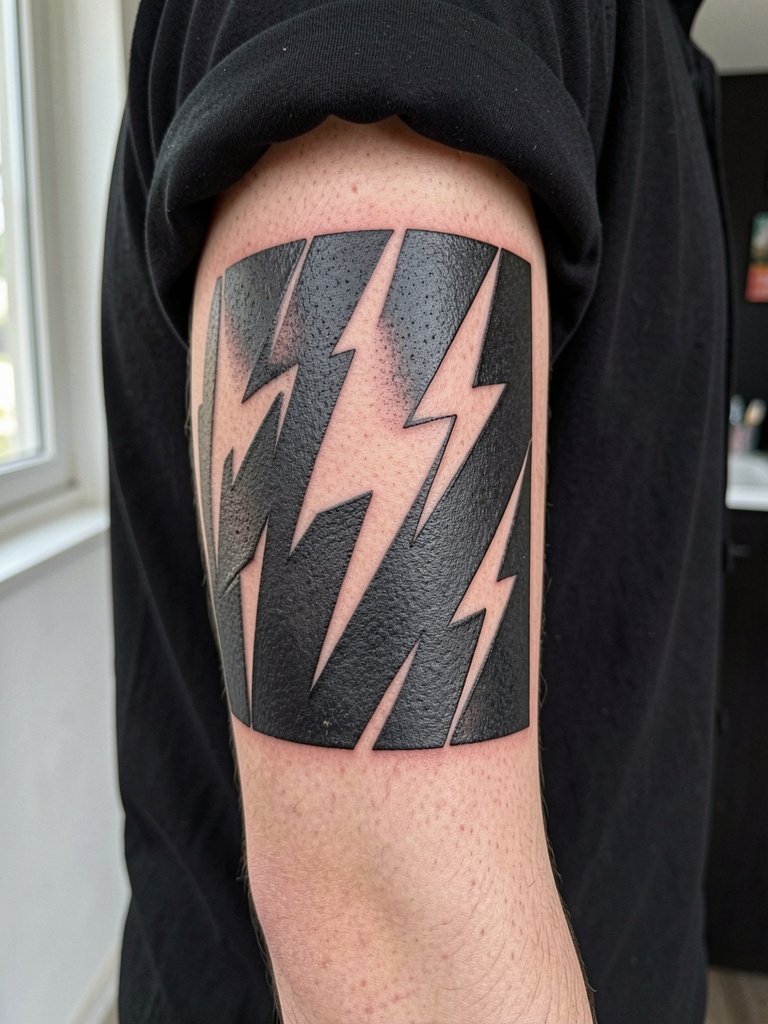
This modern blackwork approach relies on clean negative shapes rather than fine portrait detail. The benefit is long-term legibility and bold silhouette. The pitfall is uneven black saturation across panels; ask the artist about saturation passes and how they avoid patchiness. For wardrobe, minimal, monochrome choices let the negative-space shapes dominate the look. [https://www.amazon.com/s?k=loose+cotton+tee&tag=tattooengineer-20]
23. Sleeve starter plan: anchor-first Zeus portrait with mapped cloud corridors
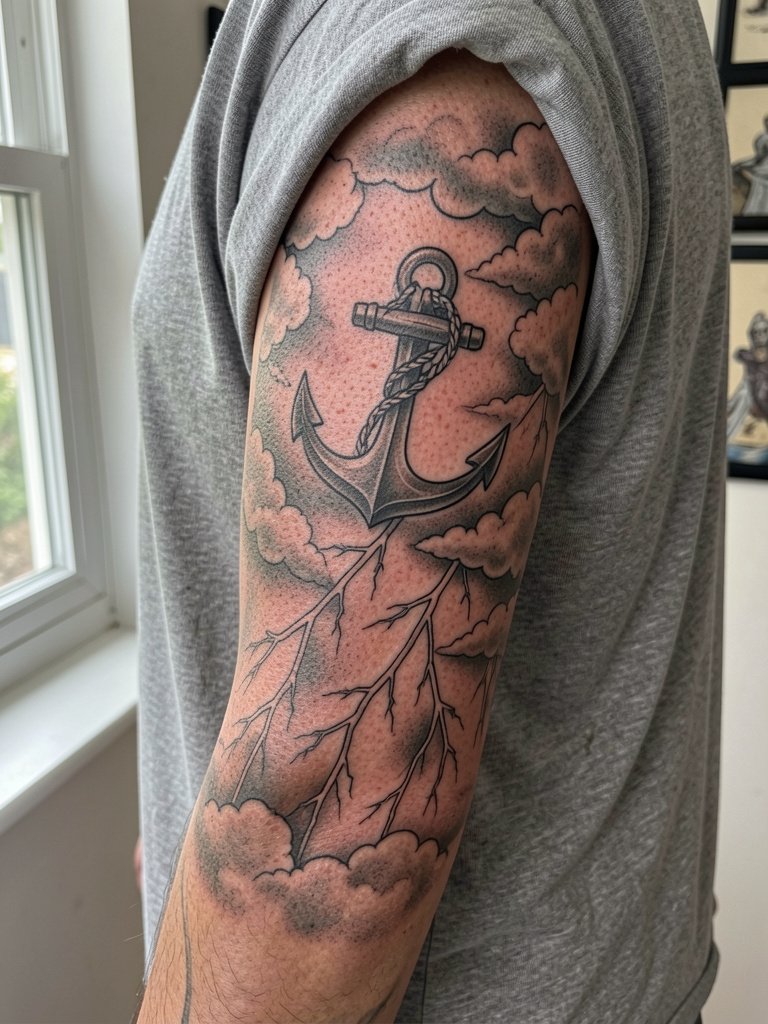
If you plan a full sleeve, start with an anchor portrait and ask the artist to map cloud corridors and negative-space pathways for future additions. A common mistake is getting the portrait without the surrounding flow, which forces awkward filler later. On the first appointment wear a loose short-sleeve top so the artist can trace and mark connectors without trapping adhesive. Expect the anchor session to take several hours and to leave you with a clear roadmap for the next two to four sessions.
Frequently Asked Questions
Q: How do I choose between black and gray or color for a Zeus sleeve?
A: There are two clear positions. One says black and gray keeps storm shading, facial planes, and beard texture readable as the piece ages. The other favors color for cinematic highlights like blue lightning and gold accents that make Zeus look more divine. Decide which visual priority matters more to you and ask the artist to show healed examples in that approach before booking.
Q: What should I bring or wear to my first sleeve session?
A: Bring loose, easy-to-remove clothing that exposes the placement without compressing it during the session. For shoulder-to-arm work a button-up or loose tank is convenient and protects fresh wrap, while long sessions on the forearm are easier if you wear a shirt that can be repeatedly rolled up. Consider a spare clean tee for after the session in case dressings stick.
Q: How many sessions does a full Zeus sleeve usually need and how should I stage them?
A: Plan for multiple sessions depending on complexity. A portrait anchor often takes one long initial session, followed by two to five sessions for background, filler, and tonal refinement. Stage the work so the artist blocks primary darks first, then returns for midtones and facial detail. That approach reduces the risk of ending with crowded backgrounds that obscure the main face.
Q: Where can I find healed Zeus sleeve portfolios and local artists who do this style?
A: Search hashtags like #zeustattoo, #greekmythologytattoo, #blackandgreytattoo, and #sleevetattoo on Instagram and TikTok and filter by your city to find portfolios in your area. Pinterest boards are useful for comparing portrait versus storm-only layouts, and Reddit threads in r/tattoos and r/tattooadvice are where people post healed photos and realistic cost breakdowns. For local studio searches use “[your city] + black and gray tattoo studio” or “[your city] + realism tattoo studio” as keywords in your city search.
Q: Are there special considerations for darker skin tones with Zeus sleeves?
A: Yes, stronger contrast and simplified backgrounds help ensure the portrait and lightning read on deeper tones. Ask to see healed examples on similar skin tones and request bolder lineweight in critical areas. Avoid tiny filigree in high-motion zones and prefer larger shapes for crowns, eagles, and columns so they hold over time.
